Everyday Greetings with Candace Perkins

Hello Elle’s Studio friends! It’s Candace here to share a few fun, everyday themed cards to add to your stash. With everything going on in the world it is especially important to find ways to connect with and support one another. Handmade cards are a wonderful way to do this and let others know that you are thinking about them. 

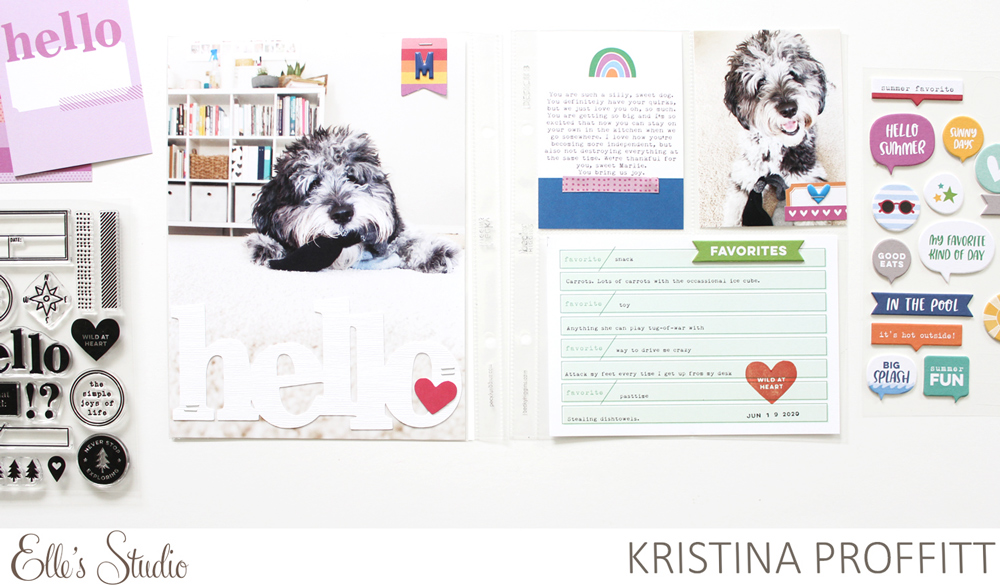
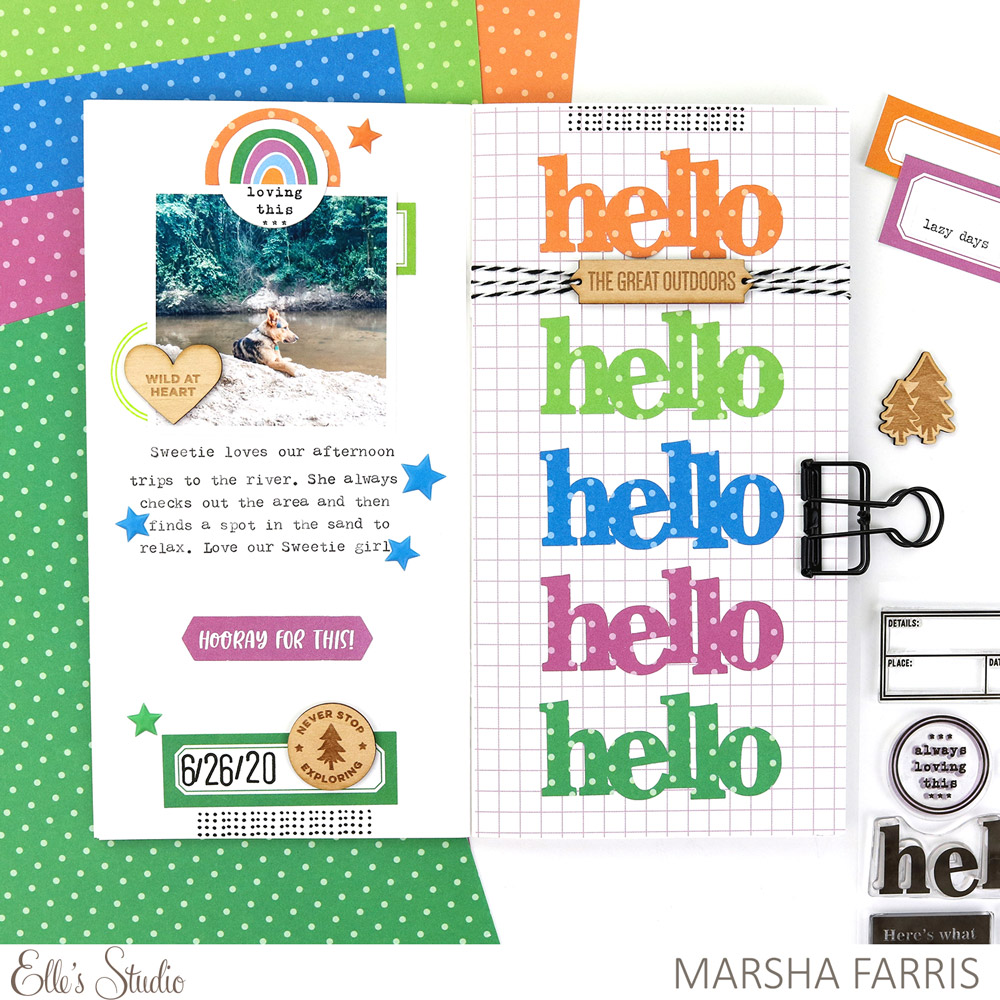
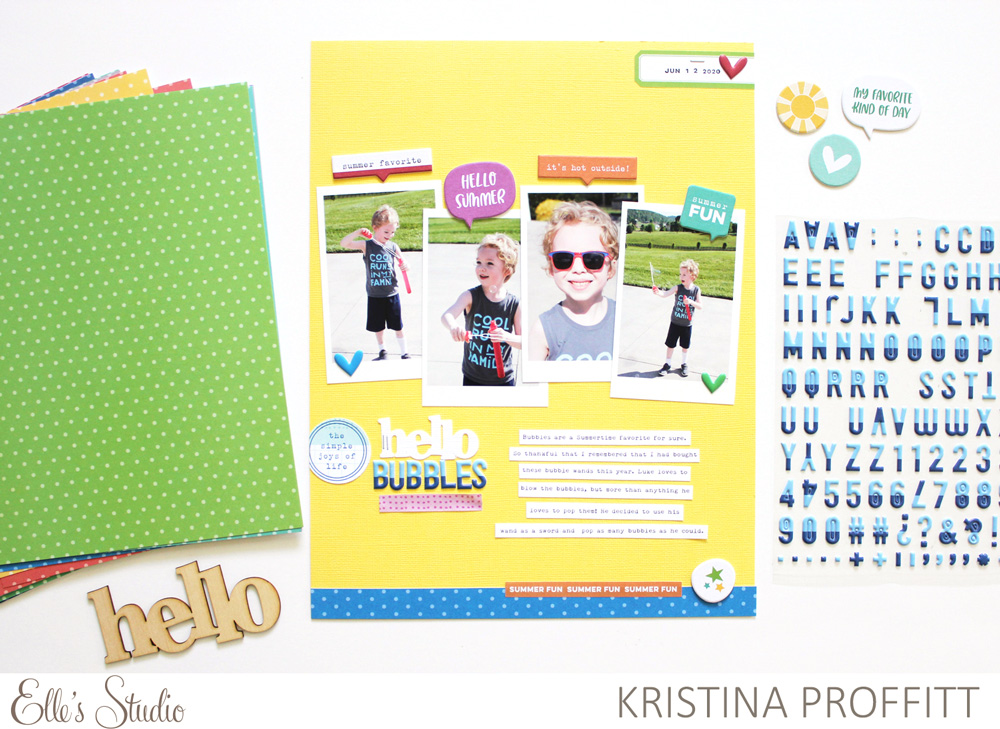
Supplies | July 2020 Kit, Summer Chipboard Stickers, Hello Wood VeneerBright Polka Dot 6.5 x 8 Inch Paper Stack

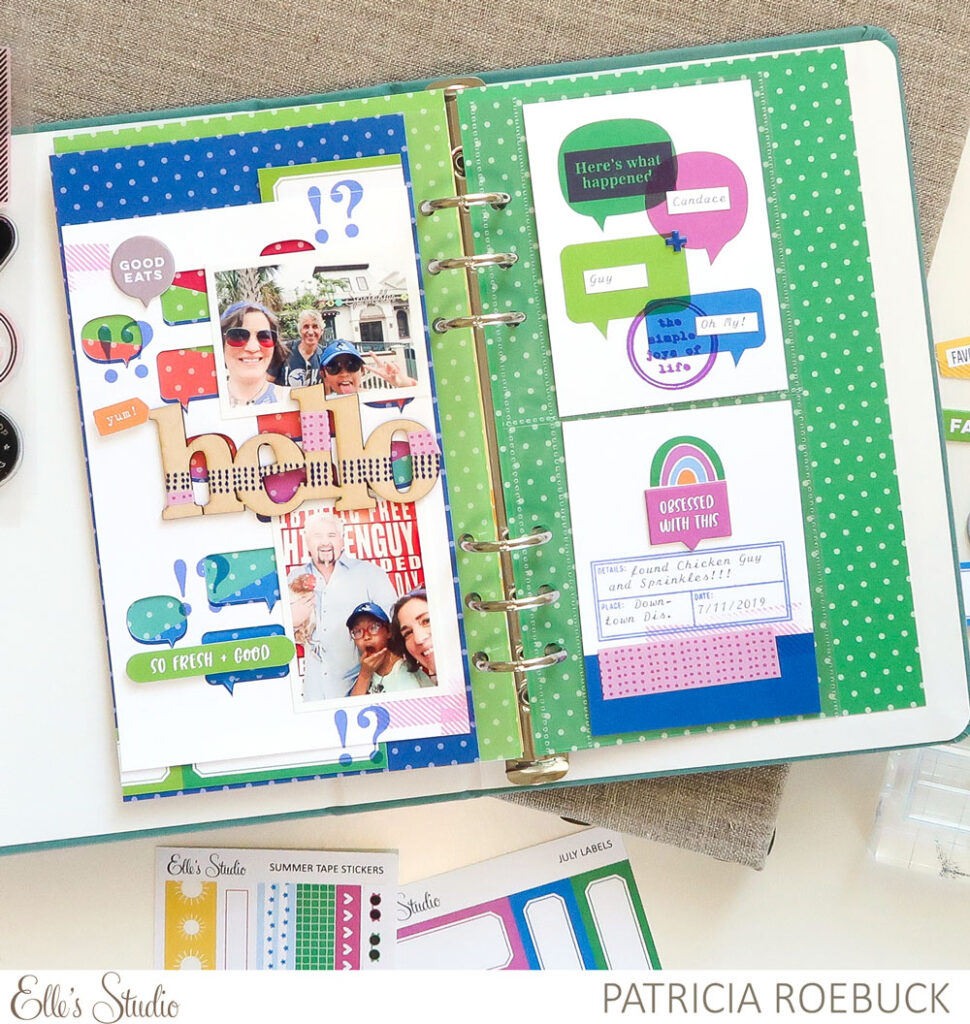
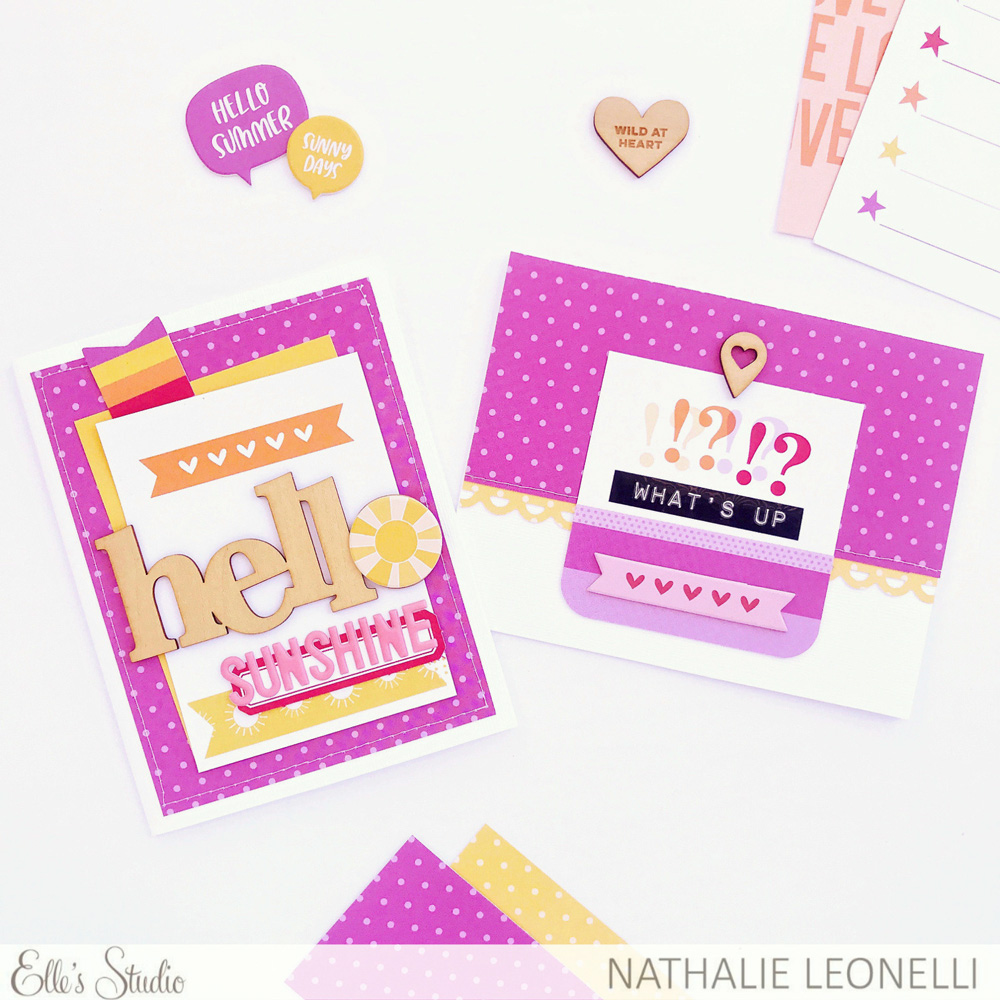
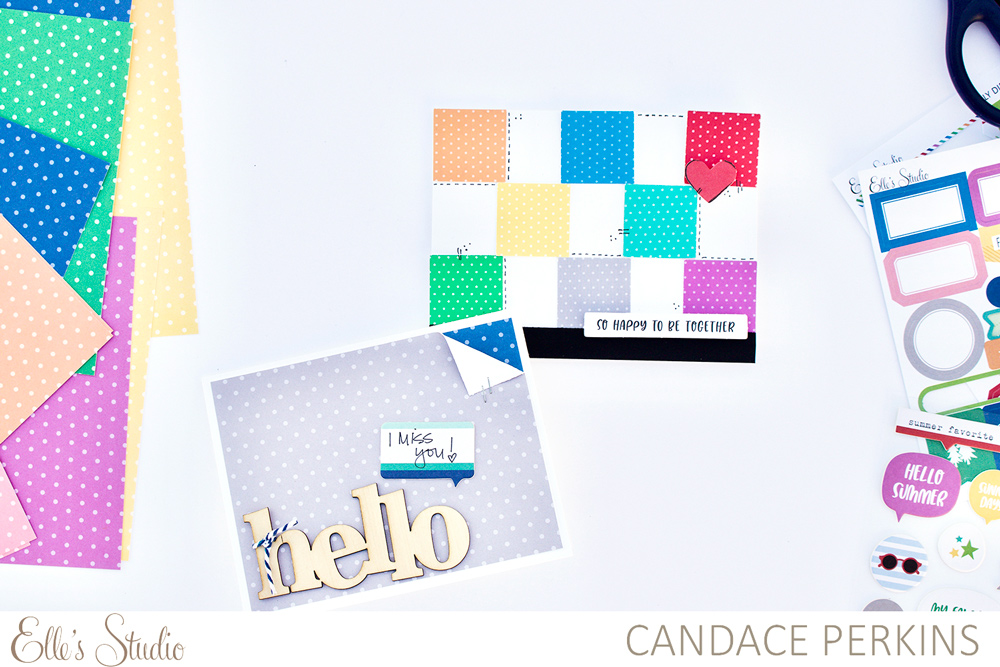
For the first card I started with a white cardstock base, cut to 4.25″ x 5.50″. Next I cut a piece of the gray Bright Polka Dot patterned paper to 4″ x 5.25″ allowing a bit of the white boarder to show along the edges of the card. To add a bit more color, I tucked a coordinating piece of blue Bright Polka Dot paper behind the upper right hand corner of the card. To ensure the blue paper was visible I flipped down the corner of the gray paper and attached it with two small staples. Sometimes it is just the littlest of details that add so much to a card!

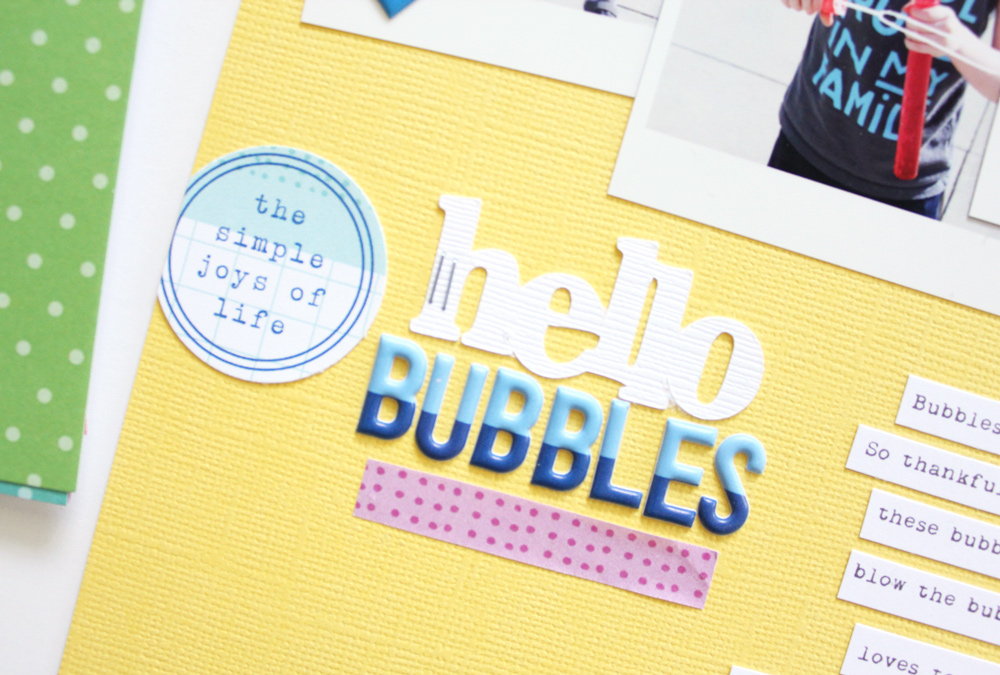
For the sentiment I tied a bit of twine around the Hello Wood Veneer and added the speech bubble sticker from the Summer Chipboard Stickers with a little handwritten sentiment. 

For my second card I wanted to mimic the look of a patchwork quilt. I thought the card design would go well with the “So Happy To Be Together” die cut from the July 2020 Kit.

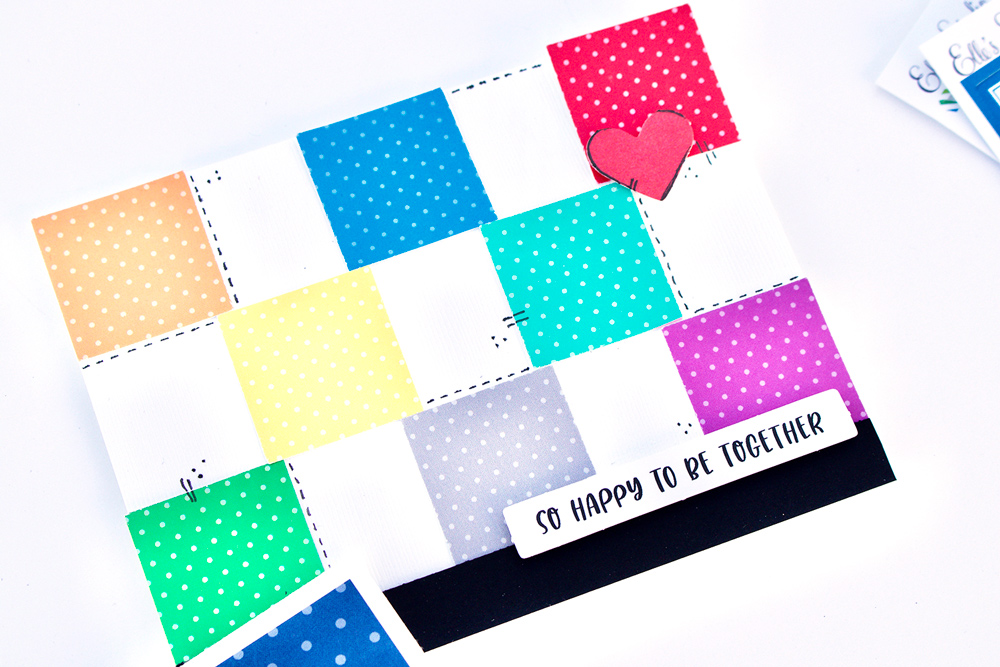
I started by using a 1.25 square punch to punch out various colors from the Bright Polka Dot Paper Stack. I arranged the punched squares on white card stock base 4.25 x 5.50. To add a bit more contrast and bring attention to the sentiment, I added a black border along the bottom edge of the card. Finally, to tie the whole card together I added a bit of faux stitching and other accents along the edges of the colored squares.  

I hope this inspires you to take a bit of time and create some handmade cards for the special people in your life. I know that every little thought and special act at this hard time is recognized, needed and makes a difference. Hang in there friends!

Pocket Page Colour Pop with Jess Forster

Happy July, friends! It’s summer here in Toronto, which means sunshine and warmer weather are here to stay for a few months. Using the hot temperatures as inspiration, I made a pocket page using journaling tags with warmer tones from the July 2020 Kit. The results are lots of pops of colour around my page! Have a look: 

Supplies | July 2020 Kit, Summer Stickers, Yellow Puffy Alphabet Stickers, Puffy Star Stickers

In this 9″ x 12″ double pocket page layout, I recorded my family stories from June 2020. This year, I am documenting my everyday life in a monthly format and using the monthly kit is a nice reminder to get the details of my life documented. 

I really loved the warmer hues found on the the 3″ x 4″ inch star tag and used that as inspiration for selecting the other tags. As you can see, all of the tags that I included in my pockets had red, orange, yellow or purple on them. One of my favourite go-to design decisions is to incorporate cards using similar colours. 

In order to make the products pop off the page, I converted all my photos to black and white. This is a simple technique that creates a timeless look. By having all your photos in a uniform neutral colour, the eye is then drawn to the colour on the page. After printing my photos, I embellished them with the Yellow Puffy Alphabet Stickers, Puffy Star Stickers and Summer Stickers. Super simple but effective, this pocket page is complete!

Next time you receive your monthly kit, challenge yourself to use warmer hues on the colour wheel in your pockets. Get inspired to document your summer stories and try to make your pocket pages pop! Happy summer, and thanks for looking! 

Show us what color combinations you are using in your projects! Share on Instagram using the hashtag #EllesStudio, or share with fellow ES fans in our Elle’s Studio Facebook Group!

Summer Chipboard Stickers in Pockets with Nathalie

Hello, this is Nathalie and I am here today sharing my latest pocket pages created with the awesome July release, using the fun and colorful Summer Chipboard Stickers as my main embellishment.

Supplies | July 2020 Kit, Summer Tape Stickers, Jane Alphabet Stickers — WhiteSummer Chipboard Stickers, August Wood Veneer, Bright Polka Dot 6.5 x 8 Inch Paper Stack

I have always loved chipboard stickers. They are a great embellishment because they clearly make a statement, add color and dimension to your pages without adding bulk. I also like the fact that they can be layered on pretty much anything. 

The Summer Chipboard Stickers coordinate perfectly with the July Kit and the Bright Polka Dot 6.5 x 8 Inch Paper Stack which I used to create my pockets. I used six of these stickers on my spread making them the most used embellishment on these pages. I think they are a must have!

As you might have noticed, I particularly enjoyed the speech bubble ones and by spreading them around, I brought a certain continuity throughout my page. In addition, speech bubbles appear in one of the tags from the July Kit, placed at the top of my second page. That tag was also the inspiration for my color combination!

Have fun with the Summer Chipboard Stickers and your July Kit, then share the projects you make with them by using the hashtag #ellesstudio on Instagram! I can’t wait to see them!

Happy crafting!

Meet From Sketch to Finish Vol. 5 Contributor Tegan Skwiat!

We are so excited to welcome our guest to the Elle’s Studio blog, and contributor to our latest class, From Sketch to Finish Vol. 5, Tegan Skwiat to the blog today! Tegan’s designs are colorful, well-designed and timeless. We can always spot a layout created by Tegan in our social media feed! She has created some amazing artwork for our class, and today she is here to share what she created with one of our bonus sketches! Let’s take a look:

Hi there. It’s Tegan Skwiat with you today! I had a blast working with Elle’s Studio prodcuts for the From Sketch to Finish Vol. 5 class! It was so much fun using sketches for a jumping off point. For today’s layout, I was inspired by bonus sketch #30 from the class to create my favorite kind of project: a 12″x12″ page. I usually like to get creative and rotate a sketch when I use it, but this one spoke to me as is. I had envisioned a colorful stamped star background using the stamp from the class, so I wanted to keep the rest of the layout true to the sketch. 

Supplies | Beautiful Day Die Cuts, Life Right Now Stickers, Lovely Puffy Stickers, Wood Veneer Adventure Tags, Love Is 6 x 8.5 Inch Paper Stack, From Sketch to Finish Vol. 5 Stamp, Large Jane Alphabet Stamp — Solid, Large Jane Alphabet Metal Die

I was inspired by the sideways title to create a bold, colorful title using the awesome Large Jane Alphabet Stamp. I love it! I just made sure to use smooth cardstock and all of the stamped images turned out great.  

I hope you love this stamped star background as much as I do! I created it by using two star stamps from the From Sketch to Finish Vol. 5 Stamp. I first stamped the background using the larger open star stamp and multiple colors of ink. I then went back and added the little solid star stamp to the middle in coordinating ink colors. I embellished this corner with a Life Right Now Sticker and an adorable Wood Veneer Adventure Tag.

I am obsessed with the rainbow stripe patterned paper from the Love Is Paper Stack. I love that it adds even more color to the page. I also added a couple of sweet little puffy flowers from the Lovely Puffy Stickers.

I love that this sketch helped me easily create an awesome page! And I love that it includes four photos and got me out of my rut of single photo layouts. The From Sketch to Finish Vol. 5 class could definitely help you quickly document all of your summer and vacation memories, and you will have so much fun doing so!

Thanks for joining me today! I hope I have inspired you to grab the From Sketch to Finish Vol. 5 class and your favorite Elle’s Studio goodies for your next project! 

Residing in: LaPorte, Indiana
Living with: My sweet senior pup, a Cairn Terrier named Pixie
Scrapbooking since: 2001 (Oh my gosh, I feel old now! Ha!)
Favorite type of memory keeping: 12″x12″ layouts, followed by mini albums
Favorite technique: Creating a background with stamps or cut file cutouts 
Favorite layout or project: Please don’t make me choose only one!
Crafty essential I could not live without: Foam Adhesive. I love adding dimension to my layouts!

Blog: https://craftytegan.blogspot.com/
Instagram: https://www.instagram.com/craftytegan/

Thanks so much for inspiring us with your colorful and FUN layout, Tegan! Be sure to grab the From Sketch to Finish Vol. 5 class now while the stamp + class bundle is still available in the shop, and have fun recording all of your summer memories with our sketches!

July Design Team Inspiration: Volume Two

We hope that you’ve been loving the inspiration that our design team has been sharing here on our blog, and today we have a full post of new projects using the July 2020 monthly kit and add-ons for you! If your box has arrived, grab your newest products and start creating with this inspiration! If you’re still patiently waiting, “pin” the layouts, pocket pages or TN spreads that get your creative juices flowing for when your new goodies arrive!

Always Our Champ by Suzanna Lee – supplies used | July 2020 Kit, July 2020 Cut Files, Wild at Heart Printables, Summer Tape Stickers, Navy Dipped Puffy Alphabet Stickers, White Puffy Alphabet Stickers, Summer Chipboard StickersBright Polka Dot 6.5 x 8 Inch Paper StackWild at Heart Stamp

Hello Vacation by Steph Grimes – supplies used | July 2020 Kit, Navy Dipped Puffy Alphabet StickersNavy Puffy Alphabet Stickers, Adventure Wood VeneersBright Polka Dot 6.5 x 8 Inch Paper Stack

The Journey by Jennifer McMurtrey – supplies used | July 2020 Kit, Black Typewriter Cardstock Alphabet Stickers, Lime Green Puffy Alphabet StickersPuffy Heart Stickers, Adventure Wood VeneersBright Polka Dot 6.5 x 8 Inch Paper StackWild at Heart Stamp, Good Times Stamp

Pegasus pocket page spread by Amy Jo Vanden Brink – supplies used | July 2020 Kit, On This Day Monthly Journaling Tags, Summer Tape StickersSummer Chipboard Stickers, Teal Puffy Alphabet Stickers, Adventure Wood Veneers, Wild at Heart Stamp

Vacation traveler’s notebook spread by Patricia Roebuck – supplies used | July 2020 Kit, July 2020 Cut Files, July LabelsSummer Tape Stickers, Summer Chipboard StickersHello Wood Veneer, Bright Polka Dot 6.5 x 8 Inch Paper Stack, Wild at Heart StampMini Dated Stamp

Ice Cream Afternoons by Katarina Prevendarova – supplies used | July 2020 Kit, Summer Chipboard Stickers, Puffy Alphabet Banners, Bright Polka Dot 6.5 x 8 Inch Paper Stack, Large Jane Alphabet Metal Die

May 2020 pocket page spread by Jess Forster – supplies used | July 2020 Kit, Summer StickersSummer Chipboard StickersNavy Puffy Alphabet StickersPuffy Star StickersAdventure Wood VeneersHello Wood VeneerBright Polka Dot 6.5 x 8 Inch Paper Stack

Outdoor Fun by Daniela – supplies used | July 2020 Kit, Summer Chipboard StickersNavy Dipped Puffy Alphabet StickersNavy Puffy Alphabet StickersAdventure Wood VeneersBright Polka Dot 6.5 x 8 Inch Paper Stack, Summer Fun 6 x 8.5 Inch Paper StackWild at Heart Stamp

Marlie Favorites pocket page spread by Kristina Proffitt – supplies used | July 2020 Kit, July 2020 Cut FilesJuly Label StickersSummer Tape StickersSummer Chipboard Stickers, Navy Puffy Alphabet StickersPuffy Heart Stickers, Wild at Heart Stamp

Show us what you’re creating yourself! Join our Elle’s Studio Facebook Group and post your projects there for fellow ES fans to enjoy! Or, post on Instagram and use the hashtag #EllesStudio!

A Bright Hello with Marsha Farris

Hey, Elle’s Studio friends!  It’s Marsha here today, and I’m sharing a traveler’s notebook layout using the July 2020 Kit and add-ons! One of my favorite parts of the Elle’s Studio release each month is the coordinating cut files. I chose to pair one of these digital cut files with another favorite from this month, the Bright Polka Dot 6.5 x 8 Inch Paper Stack, to create a colorful and fun traveler’s notebook spread.

Supplies | July 2020 KitJuly 2020 Cut Files, July Labels, Puffy Star Stickers, Adventure Wood Veneers, Bright Polka Dot 6.5 x 8 Inch Paper StackSummer Fun 6 x 8.5 Inch Paper Stack, Wild at Heart Stamp, Mini Dated Stamp

To begin the layout, I trimmed a graph patterned paper from the Summer Fun Paper Stack to use as a background for the right side of my spread.  Next, I resized the word “hello” from the July 2020 Cut Files to approximately 2.75 x 1.25 inches. I cut out five of the “hello” words with a variety of papers from the Bright Polka Dot Paper Stack and adhered them in a column down the page.  I love the way the bright colors pop against the neutral background!

I added some twine to a wood veneer from the Adventure Wood Veneers and then wrapped the twine around the page a few times for added interest and texture.  To complete this side of the spread, I added some stamping to the top of the page with the Wild at Heart Stamp and black ink.

On the left side of the layout, I chose to use a photo of our puppy, Sweetie, enjoying the outdoors. She loves being outside and is always excited for a new adventure! For the page design, I chose to keep the colors I used in the same order as the right side of the layout, with orange at the top and dark green at the bottom. Using some circle punches, I punched out a rainbow from one of the journaling tags found in the July Kit and backed it with another circle punched from the orange dot paper in the Bright Polka Dot Paper Stack. I stamped a sentiment with the Wild at Heart Stamp, masking off a portion of the stamp so that it would fit onto the circular piece. I added another wood veneer from the Adventure Wood Veneers, along with a stamped circle from the Wild at Heart Stamp using green ink. I tucked a green label die cut from the July Kit under the edge of the photo. 

I typed my journaling and added a purple sentiment tag from the July Kit below it. Using the Mini Dated Stamp and black ink, I stamped the date onto a label from the July Labels. I did a bit more stamping at the bottom of the page with a stamp from the Wild at Heart Stamp and added another wood veneer from the Adventure Wood Veneers. For the finishing details, I added some Puffy Star Stickers around the page. This layout was so fun to put together, focusing on the amazing colors from this month’s release!

I hope I have inspired you to use your July Kit and add-ons to create a bright and colorful layout!  Thank you so much for stopping by today!

Make it Yours with Stamps and Suzanna Lee

Hiya, scrappy peeps! It’s Suzanna with you today! What are your thoughts on stamping on your memory keeping projects: yea or nay? Do you buy the stamps every month and then struggle with how to use them? That was me until a year ago. I LOVED the look of them—in the packaging. On my layout, not so much. Never mind the fear of ruining my page! Last month, I showed you how to make the Elle’s Studio printables your own, customize them and make them work for you. Today, I would like to show you how to use this month’s stamp set, Wild At Heart, to make the whole kit your own! Diversify the kit like never before!

Supplies | July 2020 Kit, July 2020 Cut FilesAdventure Wood Veneers, Bright Polka Dot 6.5 x 8 Inch Paper Stack, Wild at Heart Stamp

I have used 6 of the stamps on this layout in 4 different spots! If you look at the supply list, it’s minimal because the stamps have done so much of work for me! Let’s take a look at the four different parts of the layout where I have used the Wild at Heart stamp set on this layout:

1.     Compass to create the background

2.     Repeated dots to provide pattern to the “adventure” digital cut file banner

3.     “Never Stop Exploring” to add contrast color and repeated circle to the tag topper

4.     Journaling/date spot with embellishment for the bottom tag

You can use stamps on repeat to create your own background paper! For this layout, I wanted a subtle pattern. Using a VersaMark ink with the compass stamp afforded me the ability to get that tone on tone pattern.

While the Bright Polka Dot Paper Stack this month is AMAZING and I will need about 5 of these, it didn’t have exactly what I wanted for a patterned paper. No worries—I made it myself. I used the repeated dots stamp and just layered it up, as you can see above, to provide the repeated pattern across the white cardstock. I do this A LOT, using these edge stamps on a bigger scale.

Here is a closer look of the finished banner:

To the right of the large photo is a double layer tag (inspired by a product tag from clothing!) 

The top layer of the double tag is a 3″ x 4″ tag that I cut down to size with a stamped circle on top. It looks like an Elle’s Studio sticker, doesn’t it? But it’s not! It’s stamped—made by me to coordinate perfectly with this very layout! Just stamp, use a 1 inch circle punch and voila! Your very own embellishment in the very color you need to coordinate with your page! Simple!

Last but not least, for the fourth and final spot where I used the Wild at Heart Stamp on this page was the bottom layer of the tag. Three stamps were used here. The “Details” stamp is pretty self-explanatory. The diagonal strip edge stamp overlaps the top border for some color. I polished it off with a row of trees to compliment the wood veneer and fussy cuts trees in the title cluster.

I hope I have inspired you to get out your Elle’s Studio stamps and USE THEM! They really do look better used then sitting all pretty in the packaging where nobody else can admire them.

Thanks for stopping in today!

Show us how you have used this month’s Wild at Heart Stamp on your projects! Post on Instagram using the hashtag #EllesStudio or share in our Elle’s Studio Facebook Group!

Pool Fun Recorded with Jen McMurtry

Our newest products just released last week include the perfect assortment of supplies to record your best summer moments, but be sure not to hoard your pretty, new supplies! Today, we have Jen McMurtrey sharing how she’s using up every last piece of her kit, and getting creative and pulling out tools to help in the process! Let’s take a look!

Hello friends! It’s Jen today with a new project using the amazing, new July kit and add-ons! I don’t know about you, but I make it my goal each month to use as much, if not all, of the kit as possible. Sometimes accomplishing this means I have to be a bit more creative in how I’m using the product, as well as utilizing tools and supplies I have on hand.

Let’s take a look at what I created.

Supplies | July 2020 KitSummer Tape StickersSummer Chipboard Stickers, Navy Dipped Puffy Alphabet StickersNavy Puffy Alphabet Stickers, Bright Polka Dot 6.5 x 8 Inch Paper StackWild at Heart Stamp, Mini Dated Stamp, Mini Dated Extras Stamp

I absolutely love, love, love the new Bright Polka Dot Paper Stack and have kept every single scrap. In order to use those bits of paper, I pulled out a couple of circle punches to create a bubble effect on the background. 

To create custom “bubbles”, I used Distress Oxide Inks on white cardstock then spritzed the paper with water to get a light blue and teal splotchy effect. After punching out some of my custom paper with circle punches again, I used the “always loving this” sentiment from Wild at Heart Stamp. I love the effect of the inks and the black contrast from the stamp!

Along the left edge of the layout, I used more scraps of paper to create contrast and added some of the Summer Tape Stickers in coordinating colors. Even though this side of the project is not a straight edge, it still fits in a page protector perfectly.

Using the same blue polka dot paper, I backed both photos and adhered them to the page. Next, I added a few of the Summer Chipboard Stickers—they go with the photos so well!

When I am creating a layout, I generally have a plan in mind but inevitably decide to add to it after the fact. After placing the title and die cut below the photos, I decided to add doodled borders to the circles, around the photos, and around the edge of the white cardstock background. This gave everything more weight and added some much-needed contrast.

Lastly, I used the Mini Dated Extras and Mini Dated Stamp using the same Distress Oxide Ink. The overall effect on this layout is so fun and really captures the energy of the photos.

Thank you so much for stopping by! Remember to use the #EllesStudio hashtag when posting your projects to social media so we are sure to see what you create. You never know… you just might be featured on the Elle’s Studio blog!

Have a great day!

Jen’s right! You could be featured here on the Elle’s Studio blog and win a gift certificate to the shop just for sharing on Instagram using the #EllesStudio hashtag! Or, you could join our Facebook Group, where scrappy Elle’s Studio fans share their creations! Either way, we’d love to see what you create with our July products!

Sketch Day with Kristina Proffitt!

Hi friends! It’s Kristina here, and this month I had SO much fun using a sketch as inspiration for my layout. Boy, do I love a good sketch! Let me walk you through how I took this awesome sketch below and let it inspire me to put my own, simple spin on it. 

Sketches can be adapted to just about anything and even though I’m not a 12″ x 12″ scrapbooker, I took this sketch and created an 8.5″ x 11″ layout very easily. I let the sketch be my starting off point and then I became inspired and went from there!

SuppliesJuly 2020 Kit, July 2020 Cut Files, July Label Stickers, Summer Tape Stickers, Summer Chipboard Stickers, Navy Dipped Puffy Alphabet Stickers, Puffy Heart Stickers, Bright Polka Dot 6.5 x 8 Inch Paper Stack

The first thing that I did was print out four 2″ x 3″ photos of my son, Luke, playing bubbles. I loved how the photos in the sketch look like polaroid photos, so when I trimmed my photos, I made sure to leave some of the white from the photo paper around my photos. Mine look more like Instax photos, but I love the look of it and I did include one more photo than the sketch. It’s okay to add more or less photos to a sketch! 

The “hello” words found throughout the July release inspired me as well, and I used the “hello” from the July 2020 Cut Files and cut it out on my Silhouette. Instead of scattering them on my layout, I was inspired to use the “hello” as part of my title for the layout. I love how the cut out “hello” on white cardstock pops off of the bright yellow cardstock and it just looks so great with the word “BUBBLES” below using the Navy Dipped Puffy Alphabet Stickers. I love how you can take one element from a sketch and then use it however you want on your project! Remember: a sketch is a starting off point! You don’t HAVE to copy it element by element, but let it inspire you! 

I loved all of the elements that were placed around and on the tops of the photographs in the layout, so I chose to use the Summer Chipboard Stickers to give my layout more pops of color and to tell a little bit more of the story, too!  These chipboard stickers are SO fun to use and they really add some great dimension to the layout! 

I also loved “the simple joys of life” stamp that was throughout the layout. I decided to take the 3″ x 4″ journaling tag found in the July 2020 Kit and cut out the same sentiment using a circle punch and adhere it right next to my title. I love how it hangs off the page and the sentiment is so great! I knew that I wanted to include it somewhere on the layout. I was a bit nervous to stamp all around my layout at this point because 1) I’m not the best stamper and 2) I didn’t want to mess it up! Ha! See, you don’t have to use the same element that you see on a sketch. Just allow yourself the creativity to be inspired by it and then translate that into your own style and what you’re comfortable with. The versatility of sketches are amazing! 

The heart elements on the sketch are great and so simply done and I knew that I wanted to include some of them here and there on my layout as well. My advice: you can never go wrong with a Puffy Heart Sticker!

Lastly, I added a strip of the Bright Polka Dot 6.5 x 8 Inch Paper Stack in dark blue to the bottom of my layout. I love how the blue pulls out the blue in the title and just gives a bit of pop to the bottom of my layout. I’m not one to stitch on my layout and so I didn’t do any stitching around the border like the sketch, but I did take some embellishments and use them here and there along the bottom strip. I also added a July Label Sticker to the top corner, stapled it and then added the date. Then, I simply cut my journaling out on strips of white cardstock and adhered it to the layout. 

I love how great a sketch can be at guiding you and inspiring you to be creative, then allowing you to run with that inspiration and come up with our own take on it that fits the story you want to tell and your own scrapbooking style! It’s always a good time to pull out a sketch and create a project with it. I highly recommend that you take some time this week and create your own layout using this sketch. I know that you’ll be super happy with what you create, not to mention you’ll have lots of fun along the way. Have a great day, friends!

What will you create with our newest sketch? Share your creation with us by posting to Instagram using the hashtag #EllesStudio, or by joining our Elle’s Studio Facebook group and posting in the discussion board!

July Reveal Design Team Inspiration

Hello, Elle’s Studio fans! We’re here to share inspiration from our brand new release with you today, featuring our amazing new July 2020 monthly kit and add-ons! Below you’ll find ideas for documenting adventures, celebrating summer moments, and a lot of “hellos!” Let’s take a look at the wonderful projects that our design team created to inspire us!

Hello Favorite Summer Eats by Jennifer McMurtrey – supplies used | July 2020 Kit, Puffy Star Stickers, Adventure Wood Veneers, Hello Wood Veneer, Bright Polka Dot 6.5 x 8 Inch Paper Stack, Wild at Heart Stamp

Love pocket page spread by Stacie Watson – supplies used | July 2020 Kit, Summer Tape Stickers, Summer Chipboard Stickers, Adventure Wood Veneers, Wild at Heart Stamp

Hello, I Love You by Melissa Mann – supplies used | July 2020 Kit, July 2020 Cut Files, Summer Tape Stickers, Summer Chipboard Stickers, Bright Polka Dot 6.5 x 8 Inch Paper Stack, Wild at Heart Stamp, Title Builder Stamp, Title Builder Vol. 3 Stamp, Typewriter Alphabet Stamp

Hello Adventure traveler’s notebook spread by Marsha Farris – supplies used | July 2020 Kit, July 2020 Cut Files, July Label Stickers, Summer Tape Stickers, Summer Chipboard Stickers, Navy Dipped Puffy Alphabet Stickers, Navy Puffy Alphabet Stickers, Adventure Wood Veneers, Bright Polka Dot 6.5 x 8 Inch Paper Stack, Wild at Heart Stamp

Sunny Memories by Meghann Andrew – supplies used | July 2020 Kit, Wild at Heart Printables, July Labels, Summer Tape Stickers, Summer Chipboard Stickers, Navy Puffy Alphabet Stickers, Title Builder Vol. 4 Puffy Stickers, Puffy Heart Stickers, Bright Polka Dot 6.5 x 8 Inch Paper Stack, Summer Fun 6 x 8.5 Inch Paper Stack, Wild at Heart Stamp, Title Builder Vol. 4 Stamp

June pocket page spread by Kristina Proffitt – supplies used | July 2020 Kit, July Label Stickers, Summer Tape Stickers, Summer Chipboard Stickers, Puffy Heart Stickers

Hello Wedding Day by Tracey Fox – supplies used | July 2020 Kit, Summer Tape Stickers, Summer Chipboard Stickers, Navy Dipped Puffy Alphabet Stickers, Puffy Alphabet Banners, Bright Polka Dot 6.5 x 8 Inch Paper Stack, Wild at Heart Stamp

Beach Day pocket page spread by Amy Jo Vanden Brink – supplies used | July 2020 Kit, Wild at Heart Printables, Summer Chipboard Stickers, Navy Puffy Alphabet Stickers,

Summer Dreaming by Amanda-jayne Baldwin – supplies used | July 2020 Kit, July Label Stickers, Summer Tape Stickers, Summer Chipboard Stickers, Navy Dipped Puffy Alphabet Stickers, Summer Fun 6 x 8.5 Inch Paper Stack

Adventure pocket page spread by Patricia Roebuck – supplies used | July 2020 Kit, Summer Chipboard Stickers, Navy Dipped Puffy Alphabet Stickers, Navy Puffy Alphabet Stickers, Adventure Wood Veneers, Wild at Heart Stamp, Mini Dated Stamp

Ice Cream Truck by Steph Grimes – supplies used | July 2020 Kit, Summer Tape Stickers, Navy Puffy Alphabet Stickers, Bright Polka Dot 6.5 x 8 Inch Paper Stack, Wild at Heart Stamp, Mini Dated Extras Stamp

Camping with Dad pocket page by Candace Perkins – supplies used | July 2020 Kit, Navy Puffy Alphabet Stickers, Adventure Wood Veneers, Wild at Heart Stamp

Hello by Daniela – supplies used | July 2020 Kit, Summer Chipboard Stickers, Navy Dipped Puffy Alphabet Stickers, Navy Puffy Alphabet Stickers, Adventure Wood Veneers, Hello Wood Veneer, Bright Polka Dot 6.5 x 8 Inch Paper Stack, Wild at Heart Stamp

Kayak pocket page spread by Jess Forster – supplies used | July 2020 Kit, Wild at Heart PrintablesSummer Tape Stickers, Summer Chipboard Stickers, Navy Puffy Alphabet Stickers, Puffy Star StickersAdventure Wood VeneersHello Wood VeneerBright Polka Dot 6.5 x 8 Inch Paper Stack

Summer Cards by Nathalie Leonelli – supplies used | July 2020 Kit, July Label Stickers, Summer Tape Stickers, Summer Chipboard Stickers, Fuchsia Puffy Alphabet Stickers, Adventure Wood Veneers, Hello Wood Veneer, Bright Polka Dot 6.5 x 8 Inch Paper Stack

Hello Taft Point by Suzanna Lee – supplies used | July 2020 Kit, July 2020 Print and Cut Labels, Summer Tape Stickers, Fuchsia Puffy Alphabet Stickers, Adventure Wood Veneers, Hello Wood Veneer, Bright Polka Dot 6.5 x 8 Inch Paper Stack, Wild at Heart Stamp, Large Jane Alphabet Metal Die

We hope these projects have inspired you to open your July 2020 monthly kit and add-ons box and create as soon as it hits your desktop! Be sure to “pin” these projects to your inspiration boards for quick and easy creating, and stay tuned here for more projects featuring our newest products!