Our digital files are perfect for printing, cutting and manipulating to customize any project that you wish to create, and today, Suzanna Lee is showing us how to recolor them to make them fit whatever project we’re creating! Use her tips below along with our latest digitals available in the shop to try something new today!
Hiya, scrappy peeps! For those of you who celebrate Independence Day, there are some great red, white and blues in the June 2020 Kit and add-ons to go along with it—perfect for those 4th of July memories. I’ve been known to manipulate the digital files each month to further supplement my kit and thought that I would teach you how to do the same! I love that I can stretch the kit a little further AND personalize it! Did you know that if you are a kit subscriber, you get the digital and printable files FREE with your subscription, in addition to the discounts on other goodies and bundled shipping? It’s definitely a great value for money! Learn this recoloring trick I am about to teach you and you have even more possibility to explore!
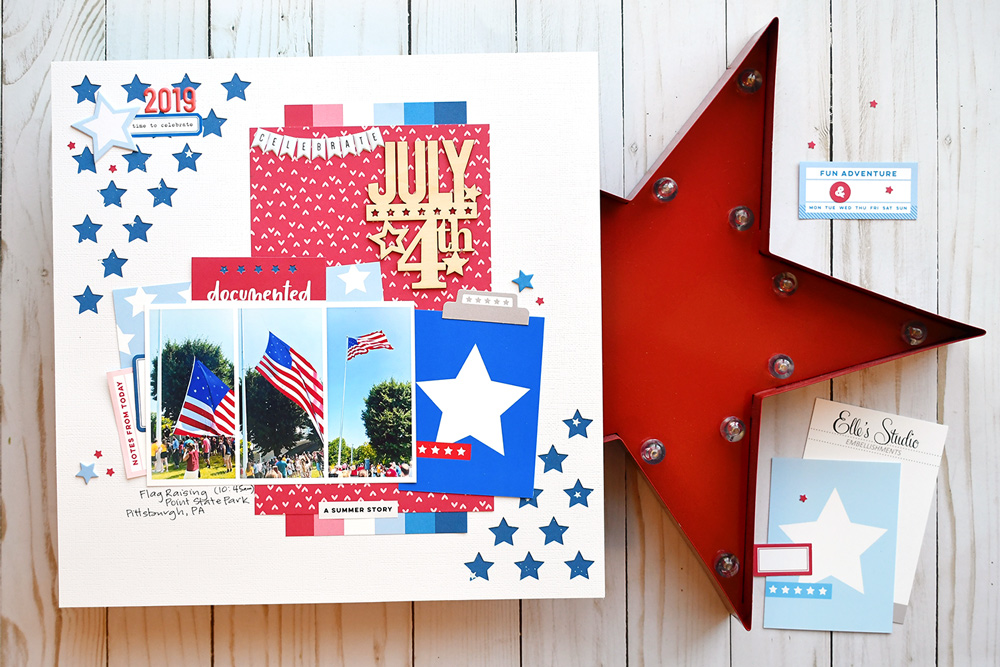
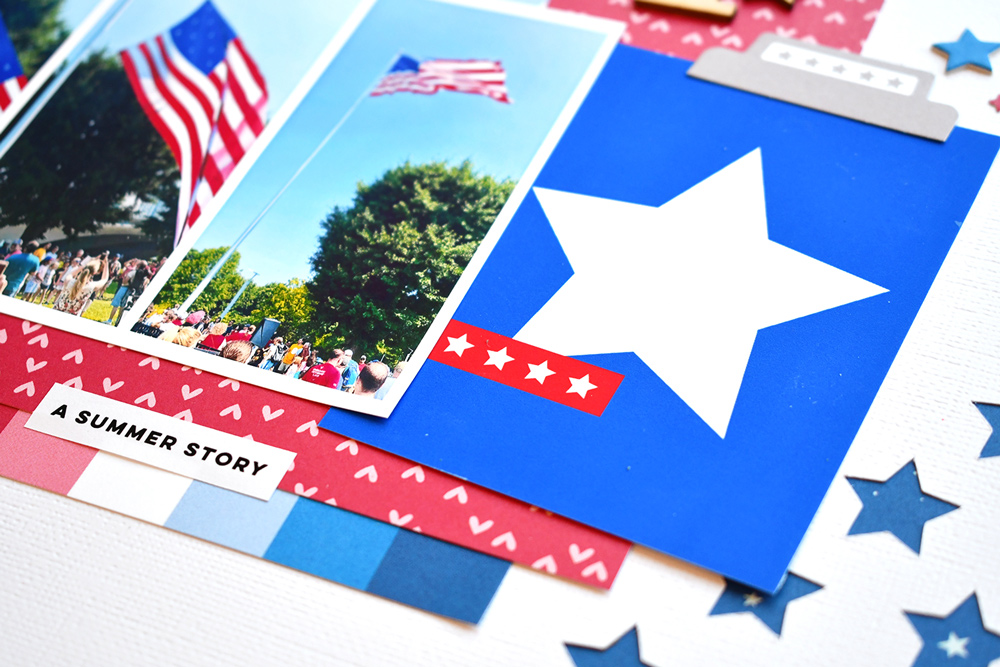
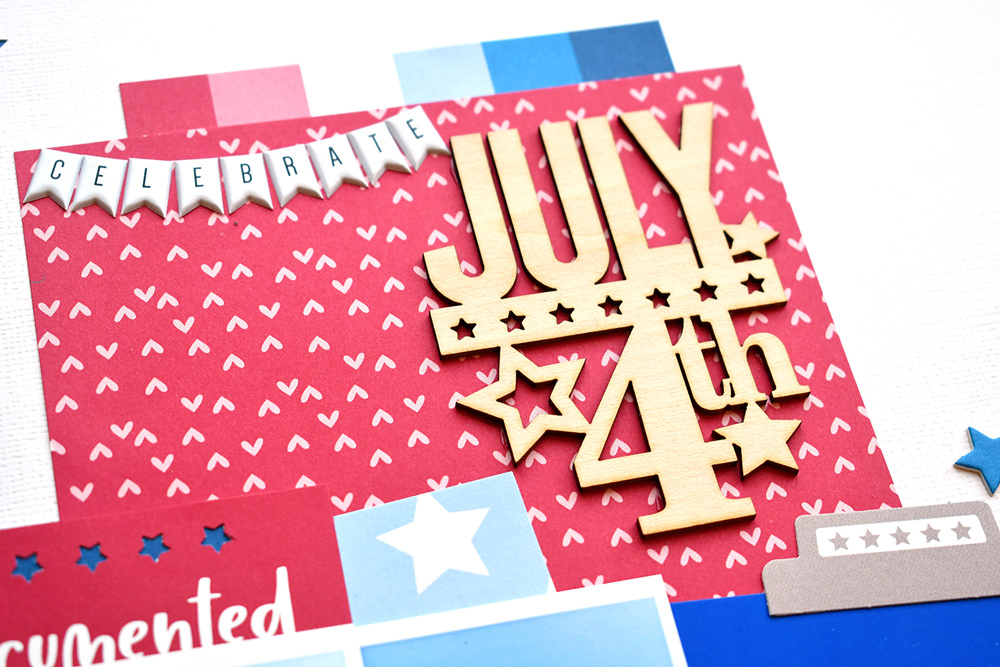
Supplies | June 2020 Kit, June 2020 Cut Files, Summer Snapshots Printables, Summer Stickers, Chipboard Star Stickers, Puffy Alphabet Banners, 4th of July Wood Veneer, Summer Fun 6 x 8.5 Inch Paper Stack
How To Recolor a Digital File in Photoshop:
1. Open the Elle’s Studio digital file that you want to re-color.
2. Open the Elle’s Studio digital file that contains the color(s) you want.
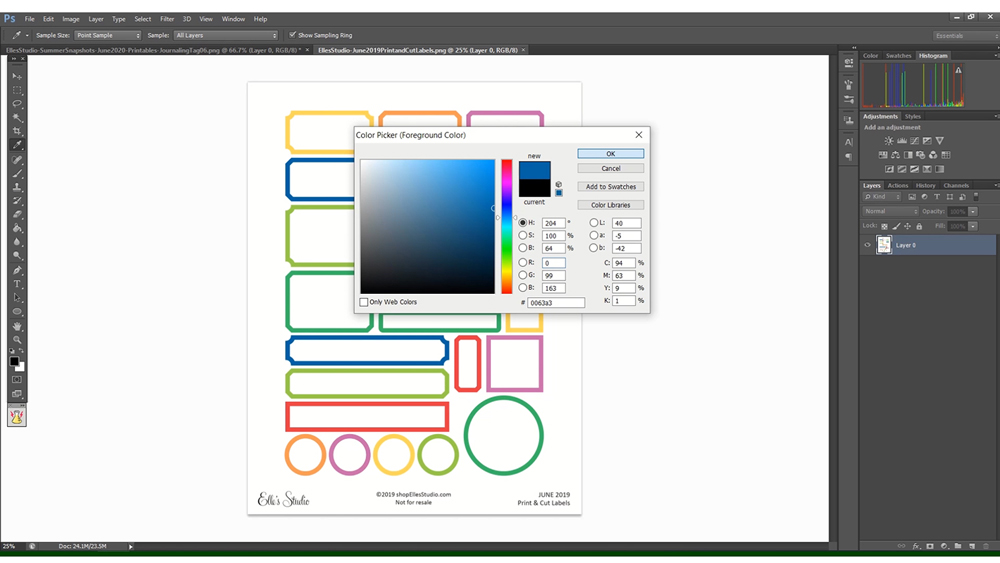
3. Select the Eye Dropper tool from the toolbar and hover over the desired color, then click. This should make the top square (the foreground color) in the tool bar this color.
4. Return to the tag or image you want to recolor. Select the Paint Bucket tool from the toolbar. If you can’t find the Paint Bucket tool, click and hold the Gradient tool to access it. Specify to fill the selection with the foreground color.
5. Click the part of the image you want to fill.
6. Repeat this with the different parts of the image that you wish to recolor.
This is the VERY simple way of recoloring. You can get more complex by adjusting Blending Mode, Opacity and a few other options. For basic recoloring, you don’t need to adjust any of these settings. I do recommend, however, that you make sure “anti-aliased” is selected as this allows for smooth edges of the filled selection.
For the star tag above, I took color samples from the June 2020 Print and Cut Labels and used those colors (blue and red) to recolor the star tag in this month’s Summer Snapshots Printables. I love the ability to further customize the digital files to work with colors already contained in the kit which I would like more of. Earlier this month, I did the same thing with the same tag using the yellow and orange found in the plaid tag in the Printables.
Here is the layout I created using my recolored tag, the June Kit, Summer Snapshots Printables and other June add ons:

The ability to manipulate digital files, including the cut files, opens a whole new world of options for your memory keeping, don’t you think?
Are there any particular tips or tutorials you would like to see here on the blog? Be sure to leave a comment on this post to let us know!
Thanks for stopping in today!

Did you learn something new from Suzanna’s post? Share how you recolored one of our digital files to fit your project by posting on Instagram using the hashtag #EllesStudio , or in our Elle’s Studio Facebook Group! We can’t wait to see how you maximize the use of your digital files!