Layered Stamps Technique + Video Tutorial with Patricia Roebuck

You’re never too old to learn a new trick, and today to continue our Back to School week of learning and inspiration here on the blog, Patricia Roebuck has some amazing stamp techniques to share with using the new Back to School Stamp! Don’t miss out on her exclusive video tutorial at the end of the post, and we can’t wait to see how her amazing stamped ideas inspire YOU!

Hello, Elle’s Studio fans, and especially Elle’s Studio stamp fans! Today, I am sharing fun stamping techniques using the new Back to School Stamp. You will learn how to create and use masks to build stamp layers, how to stamp in more than one color to create shading, how to combine ink colors, and how and where I found my inspiration for my project today. Let’s get started!

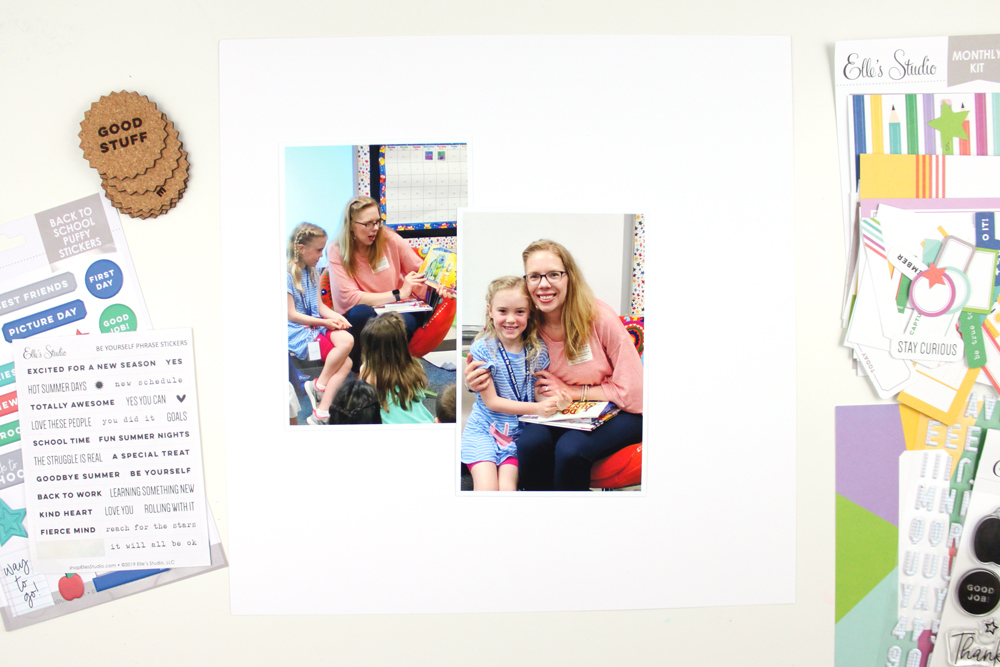
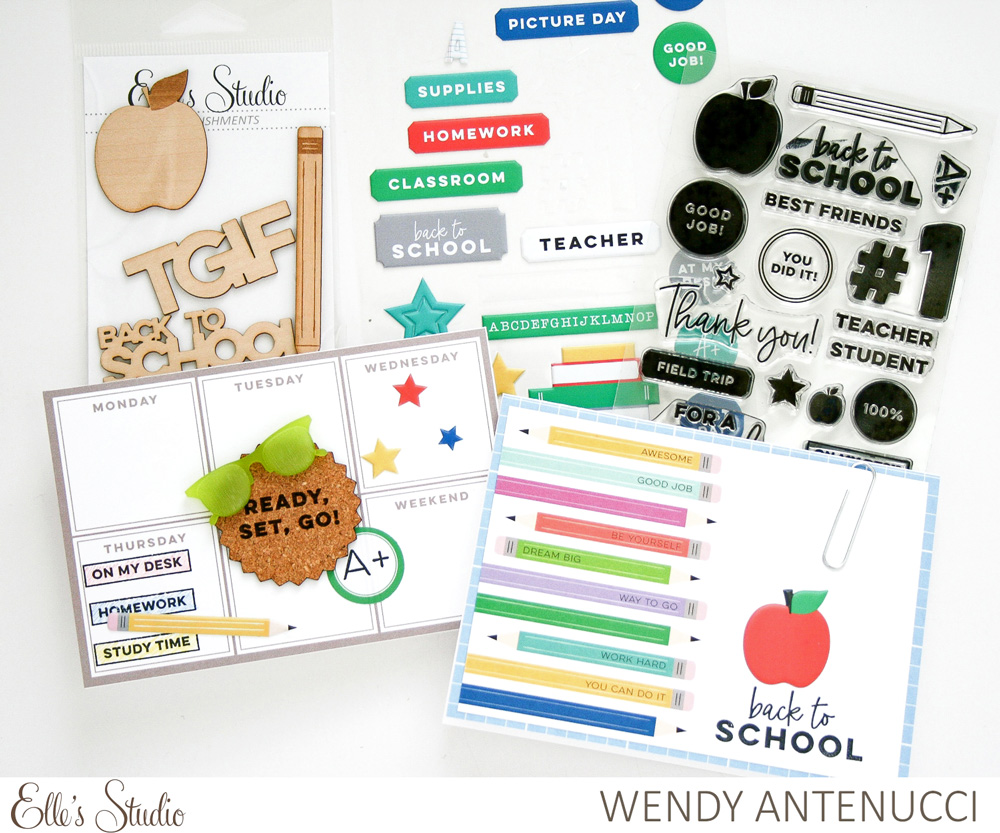
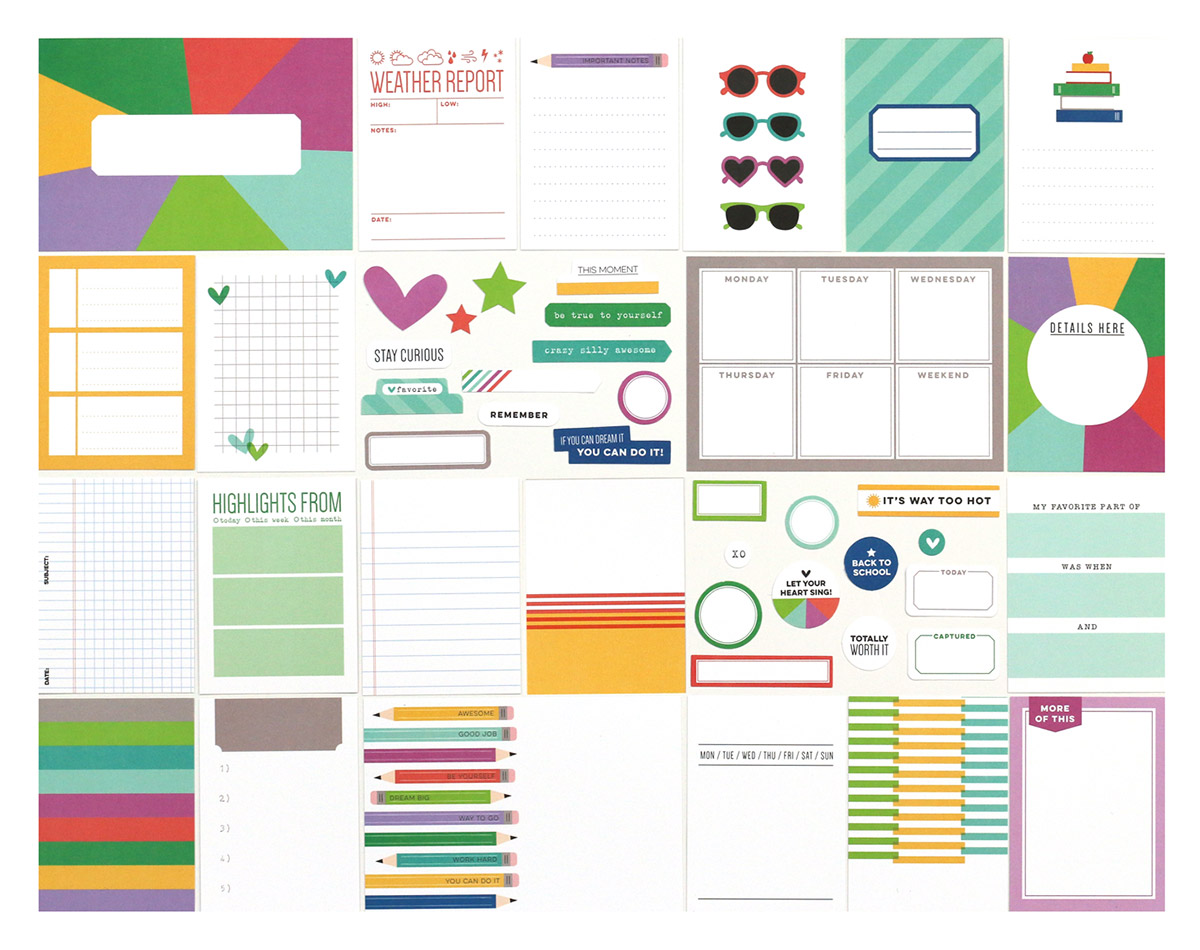
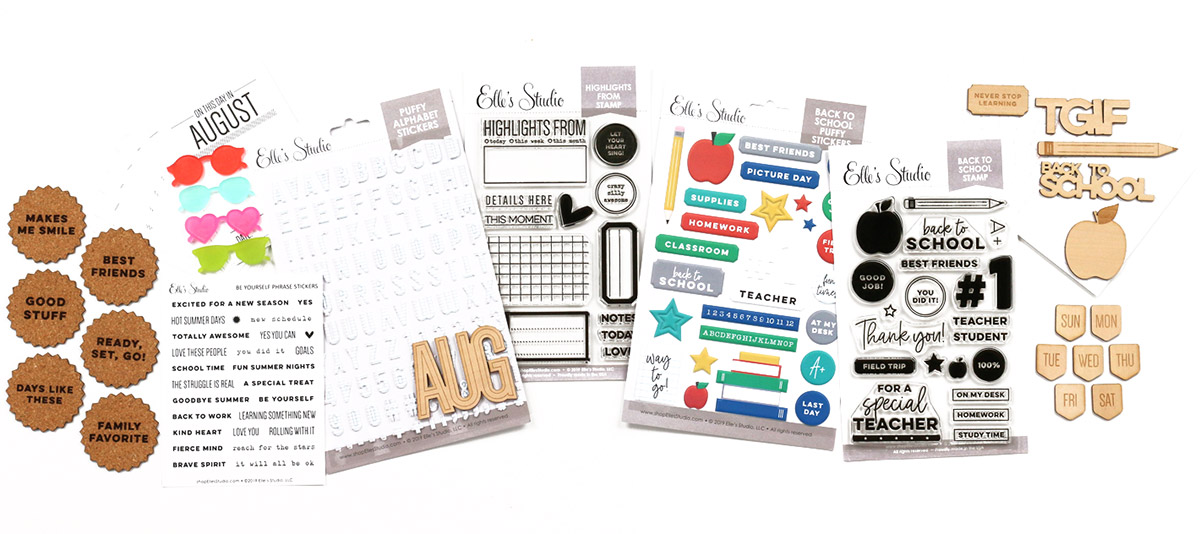
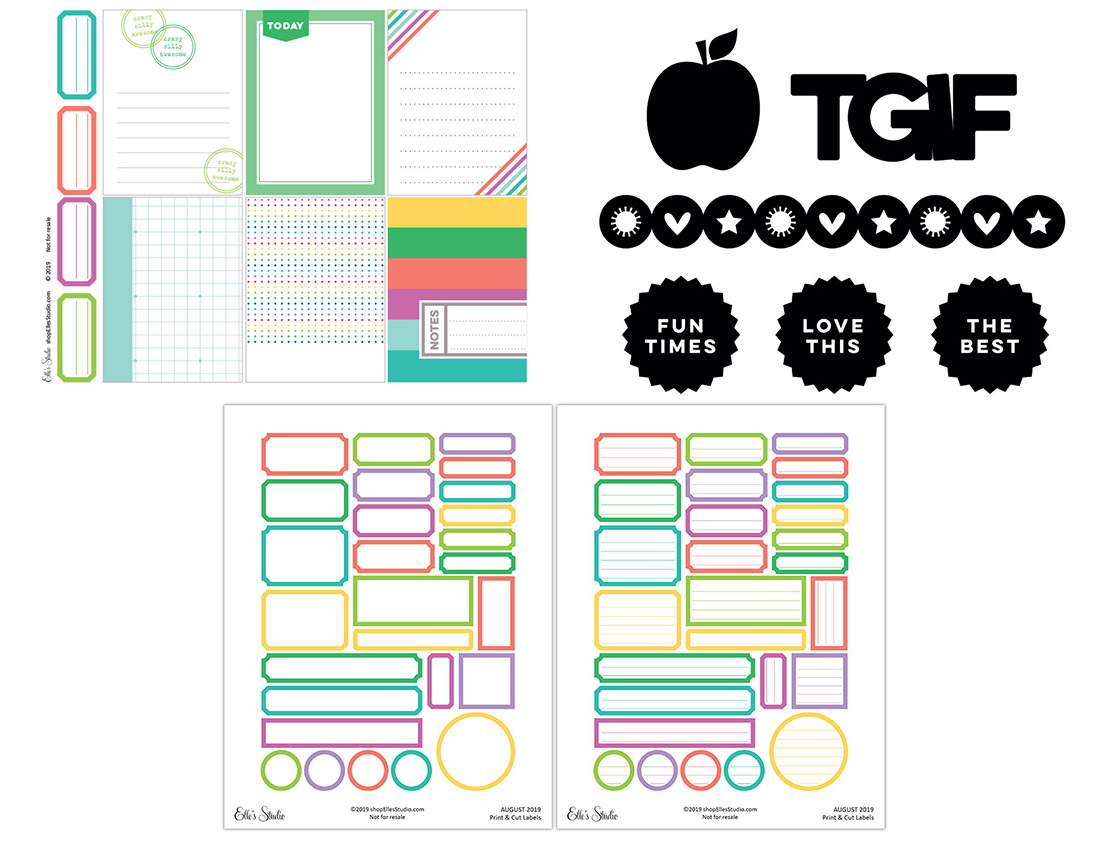
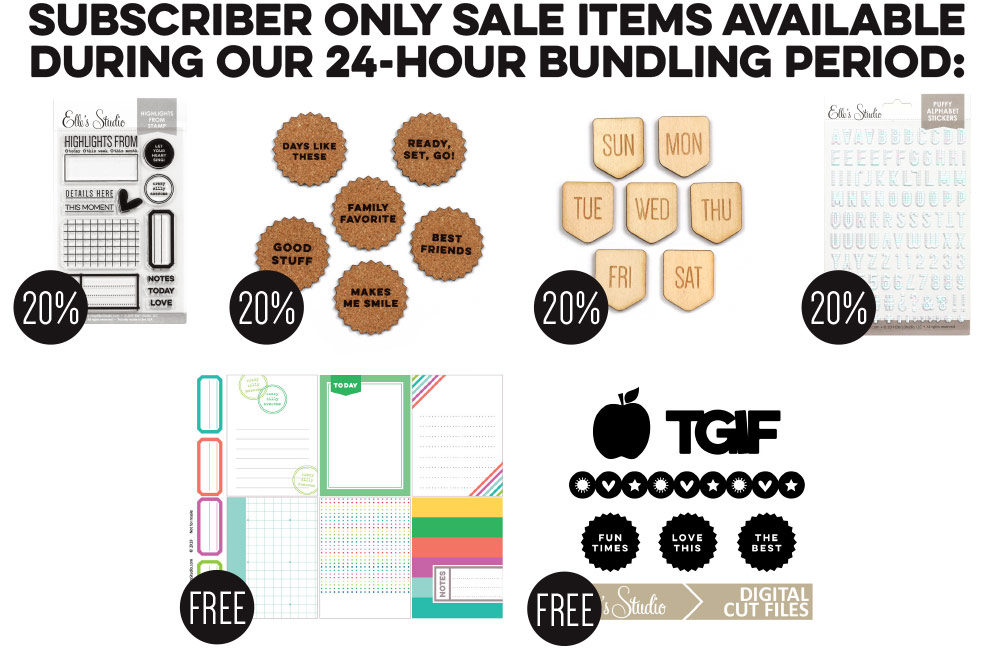
Supplies | August 2019 Kit, Be Yourself Phrase Stickers, Notebook Puffy Alphabet Stickers, Back to School Puffy Stickers, Acrylic Sunglasses, Back to School Stamp, Mini Dated Stamp

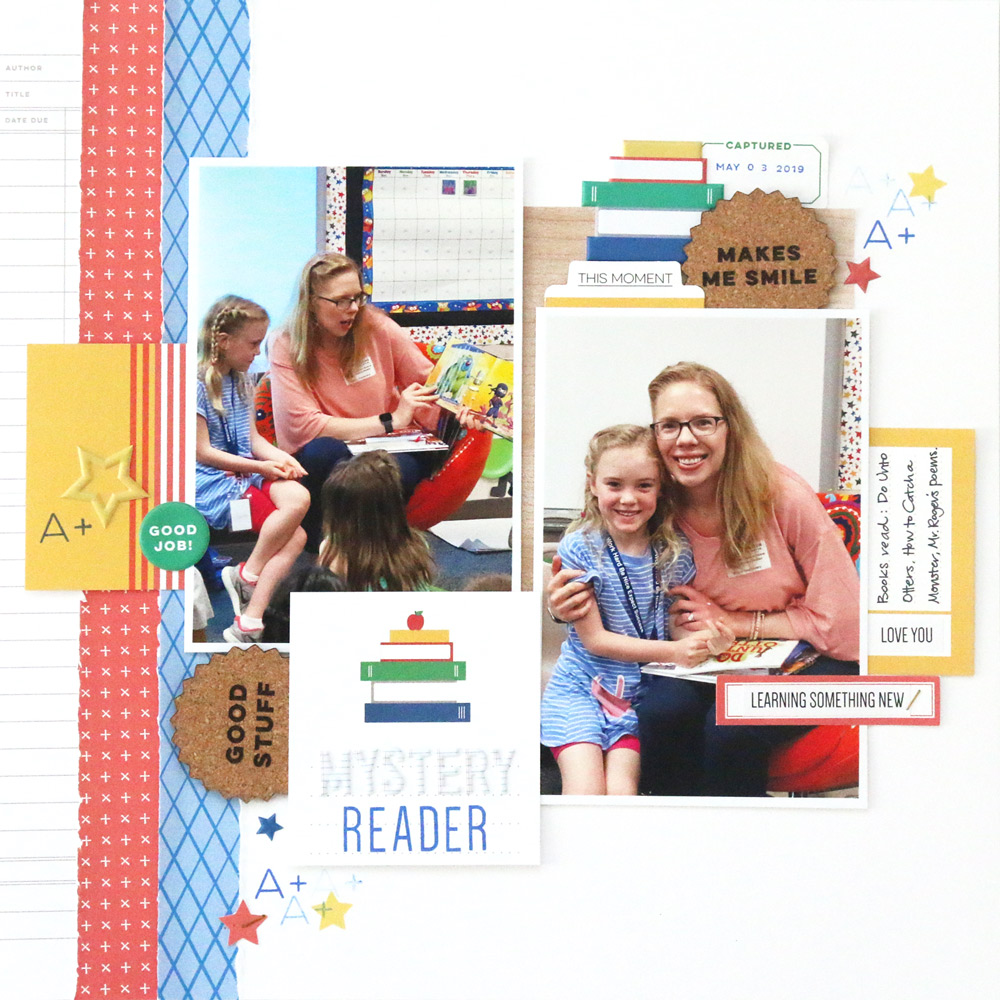
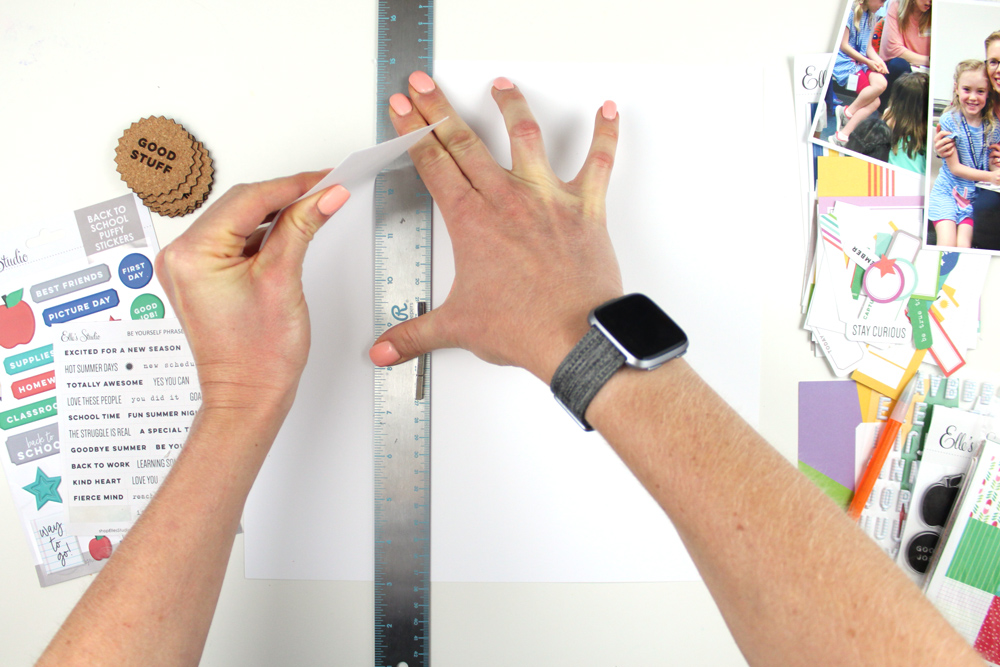
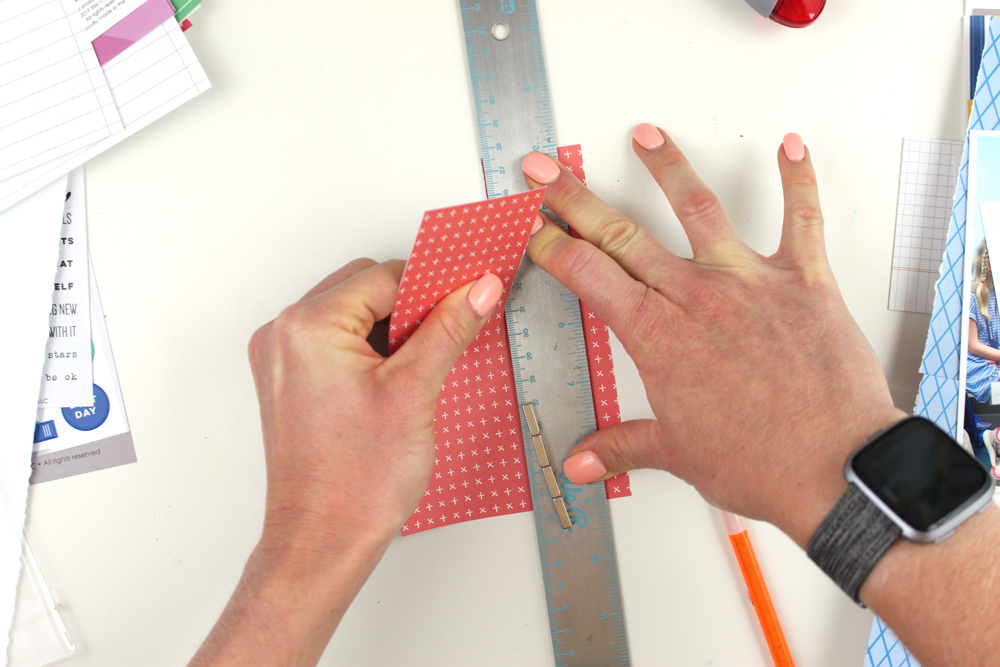
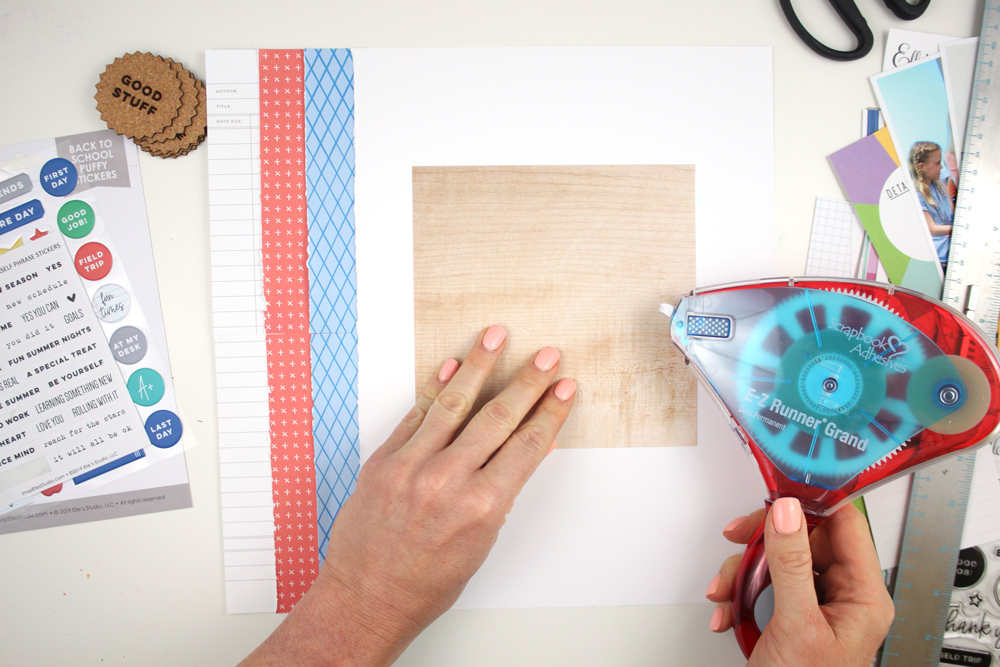
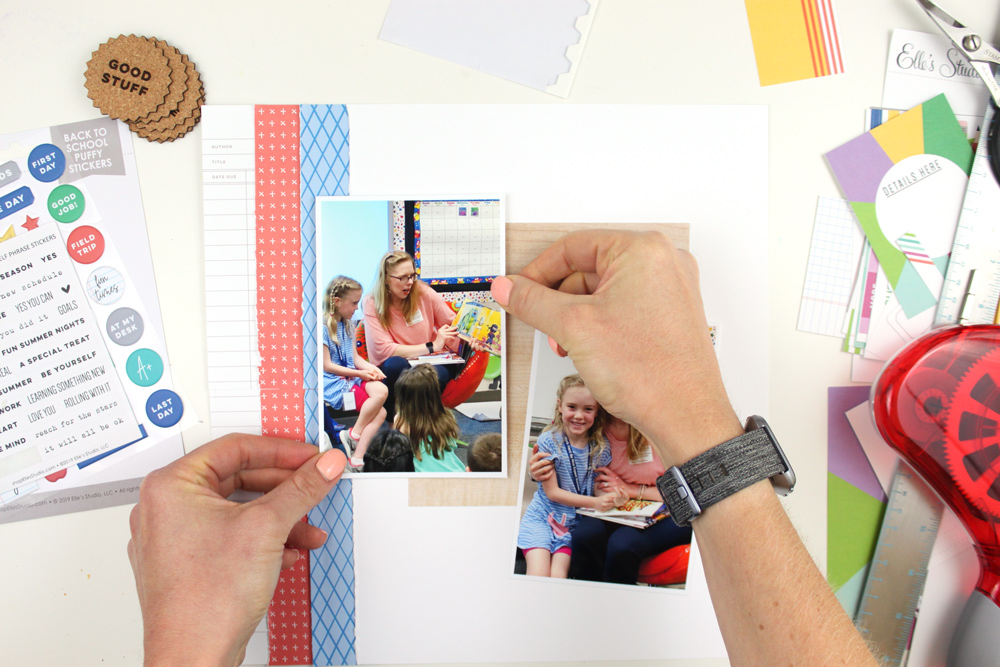
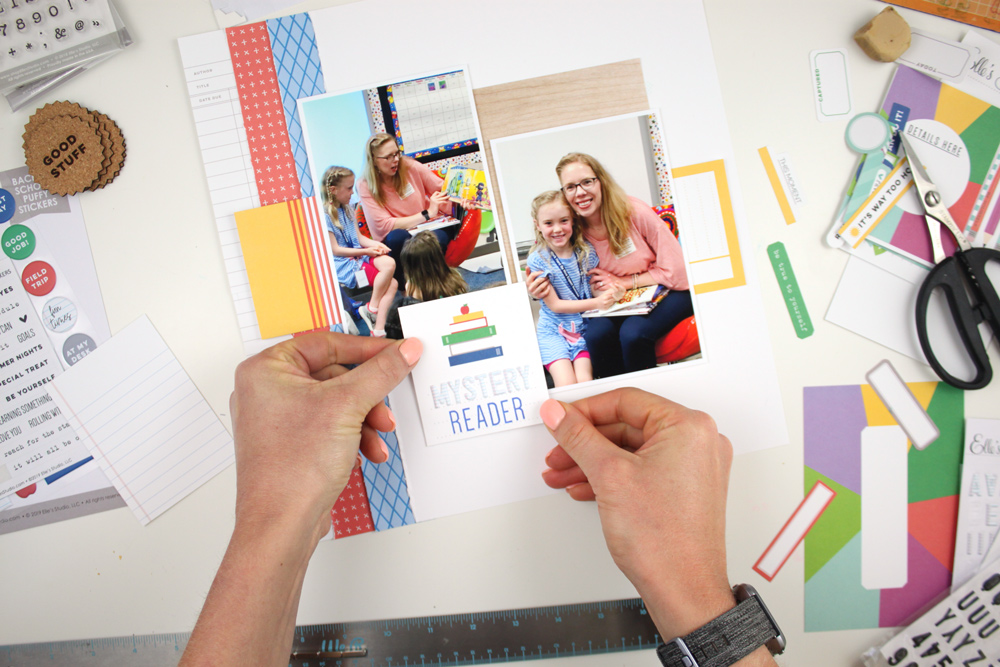
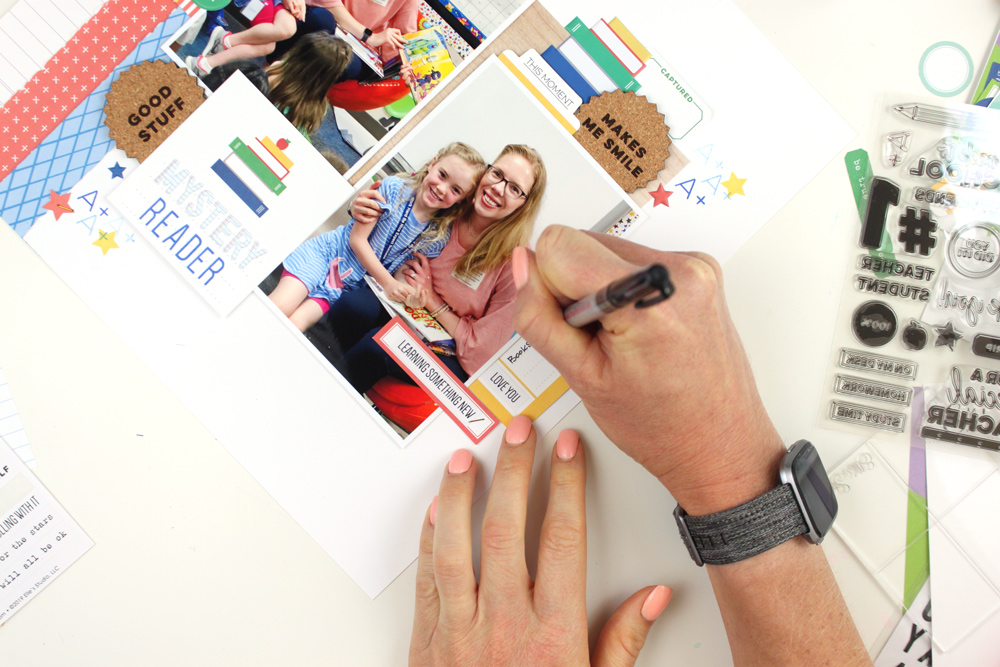
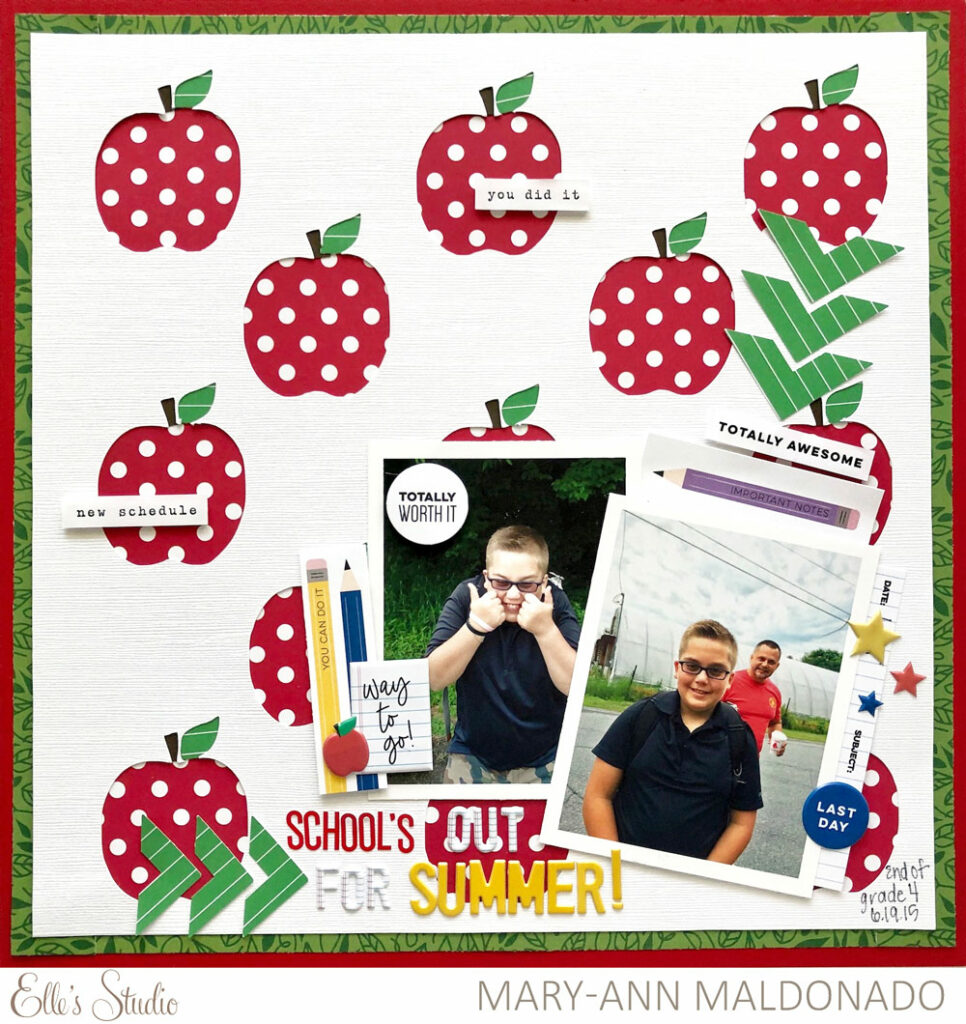
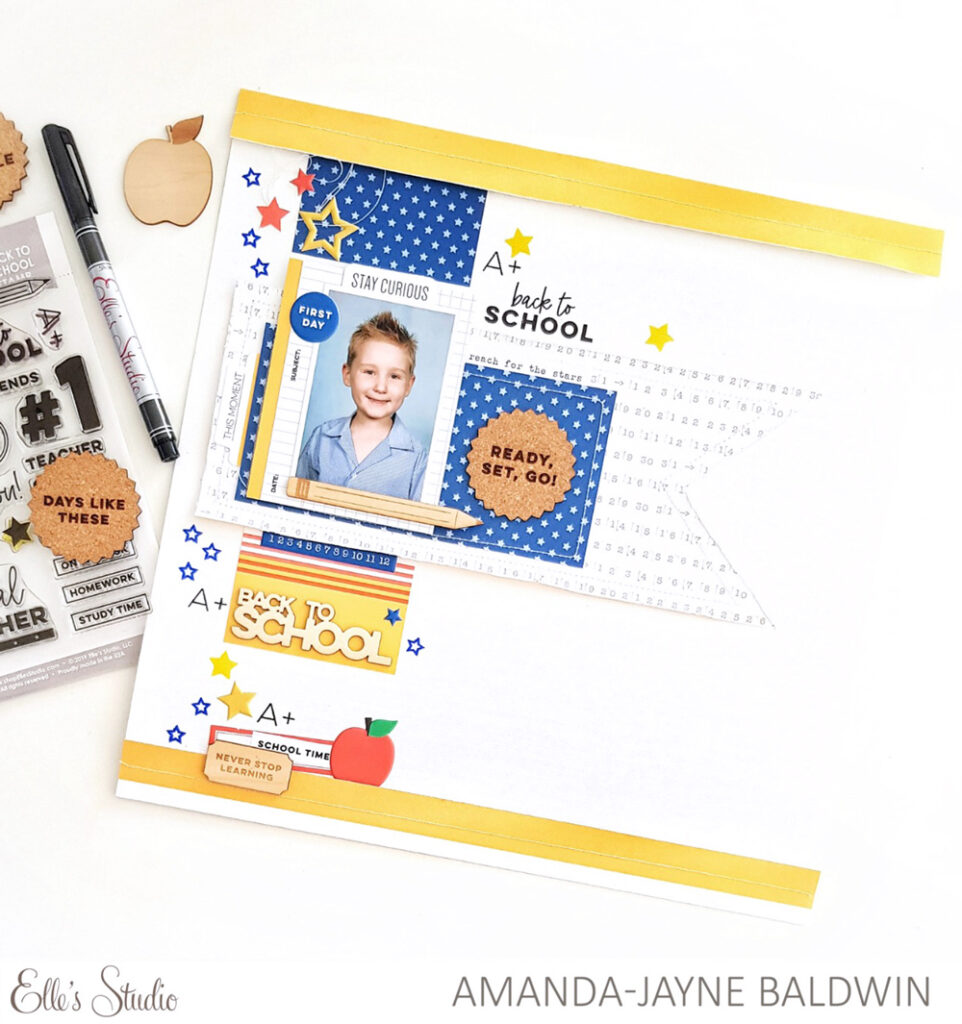
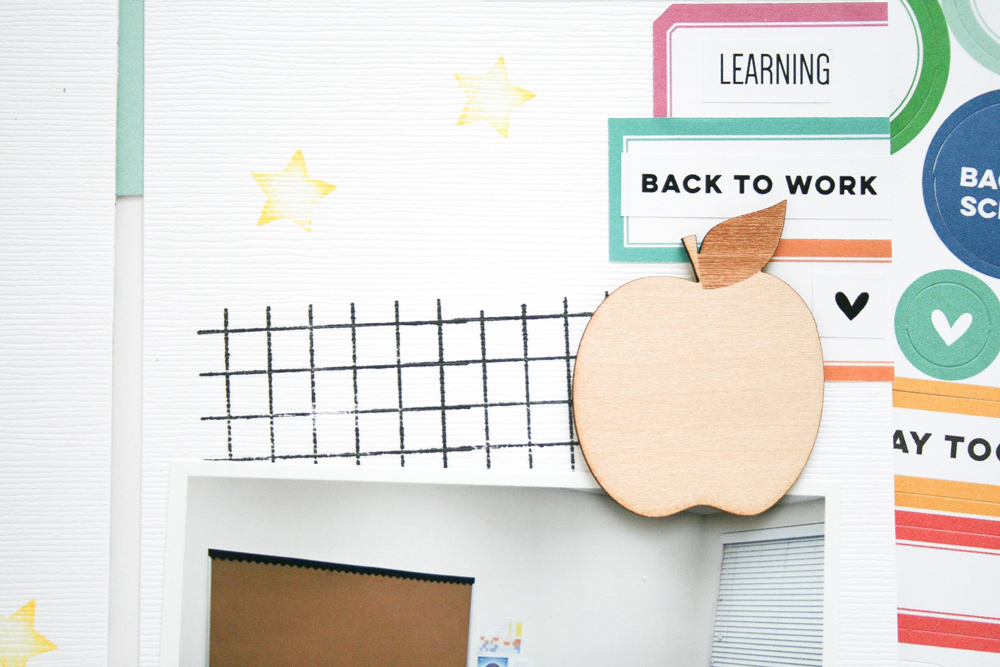
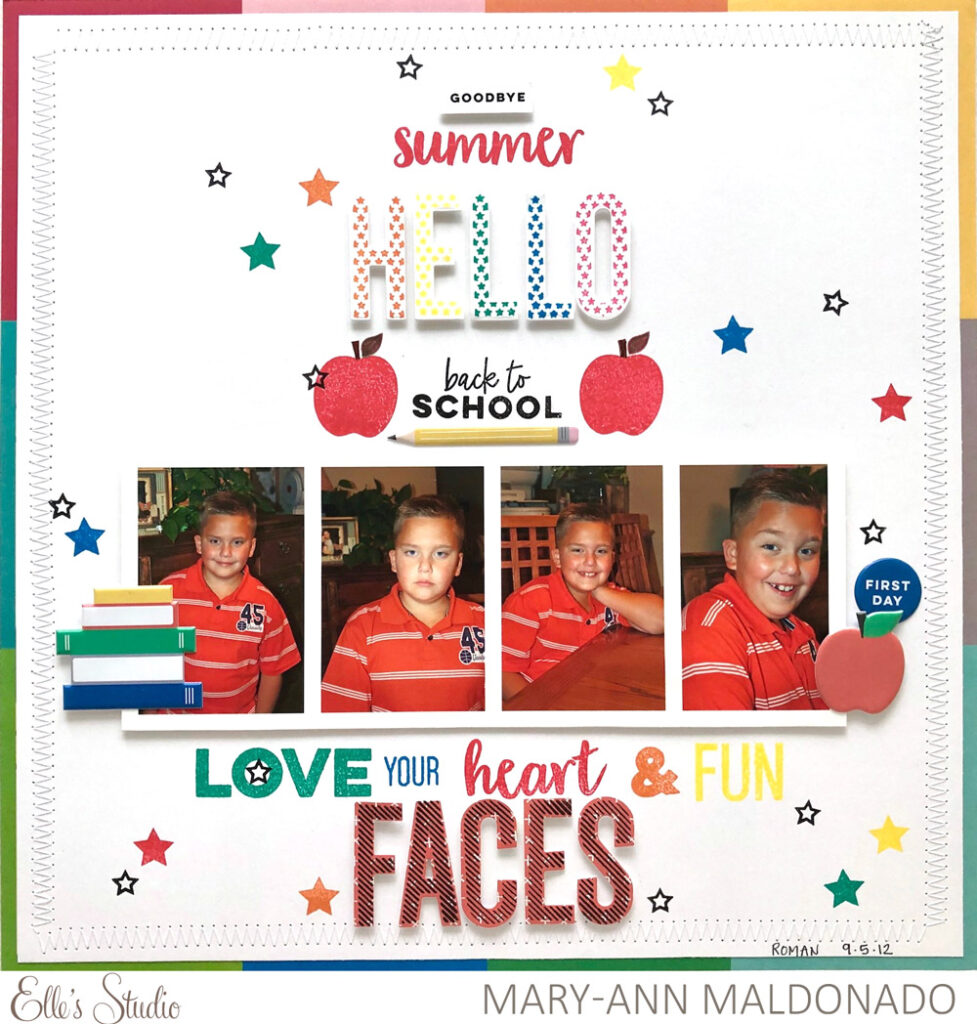
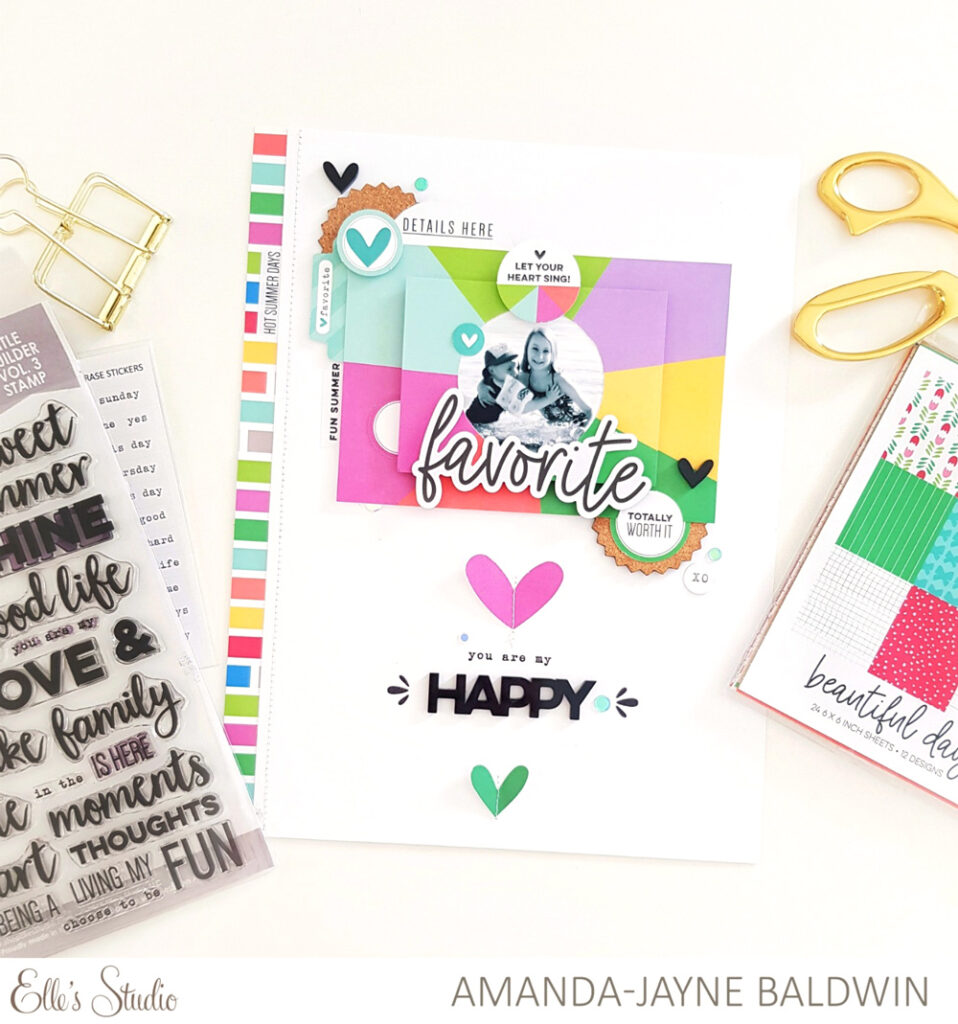
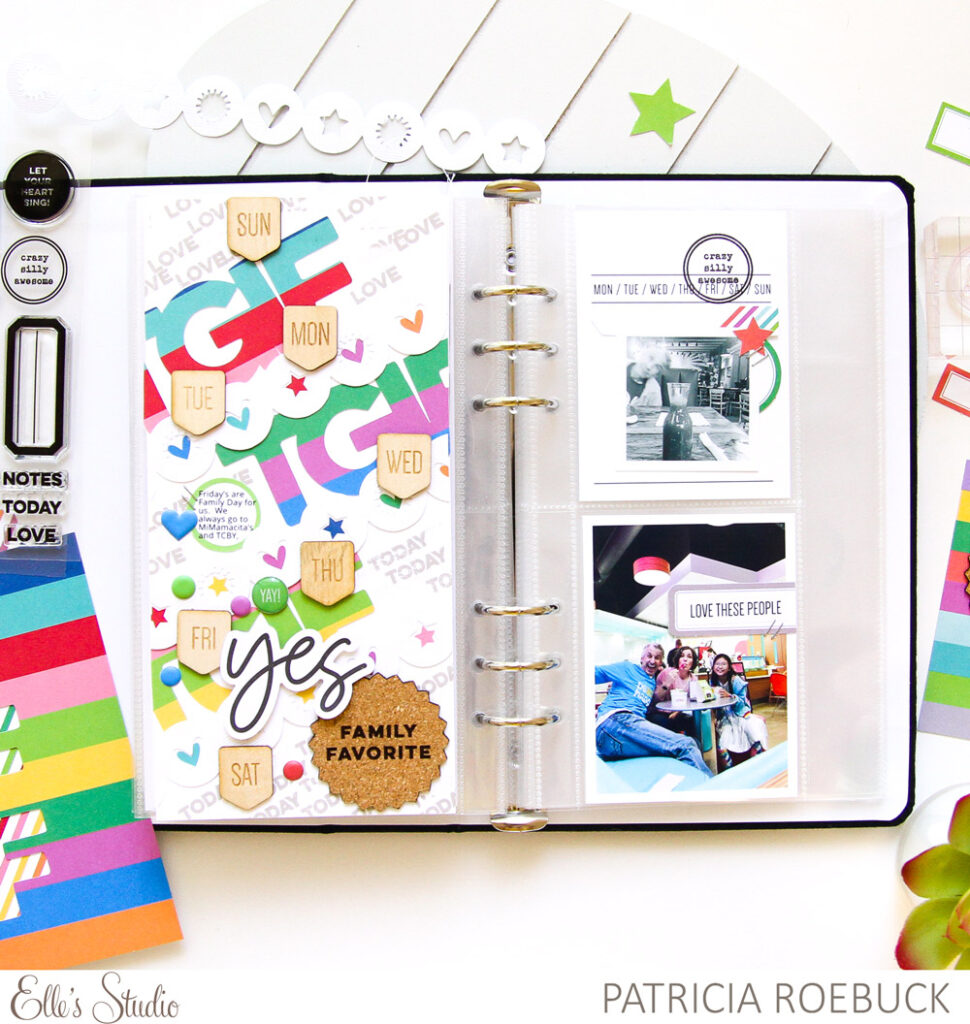
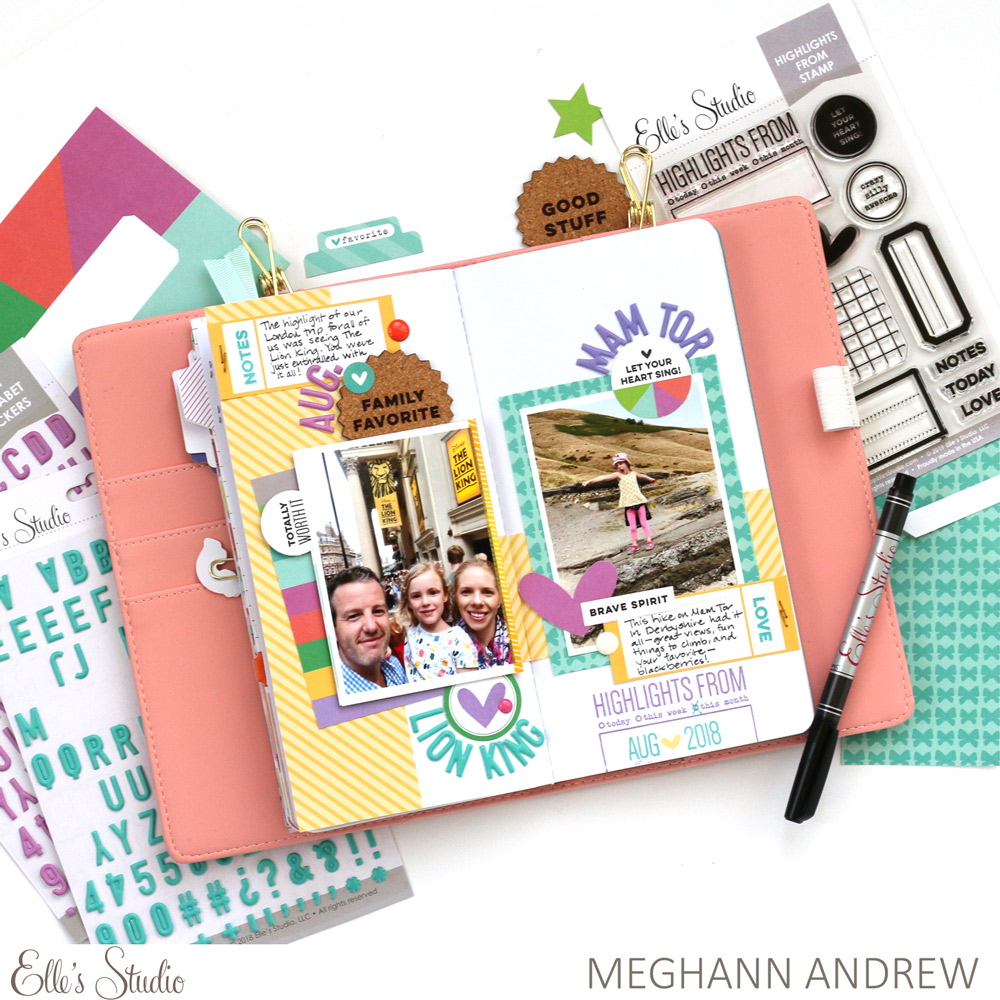
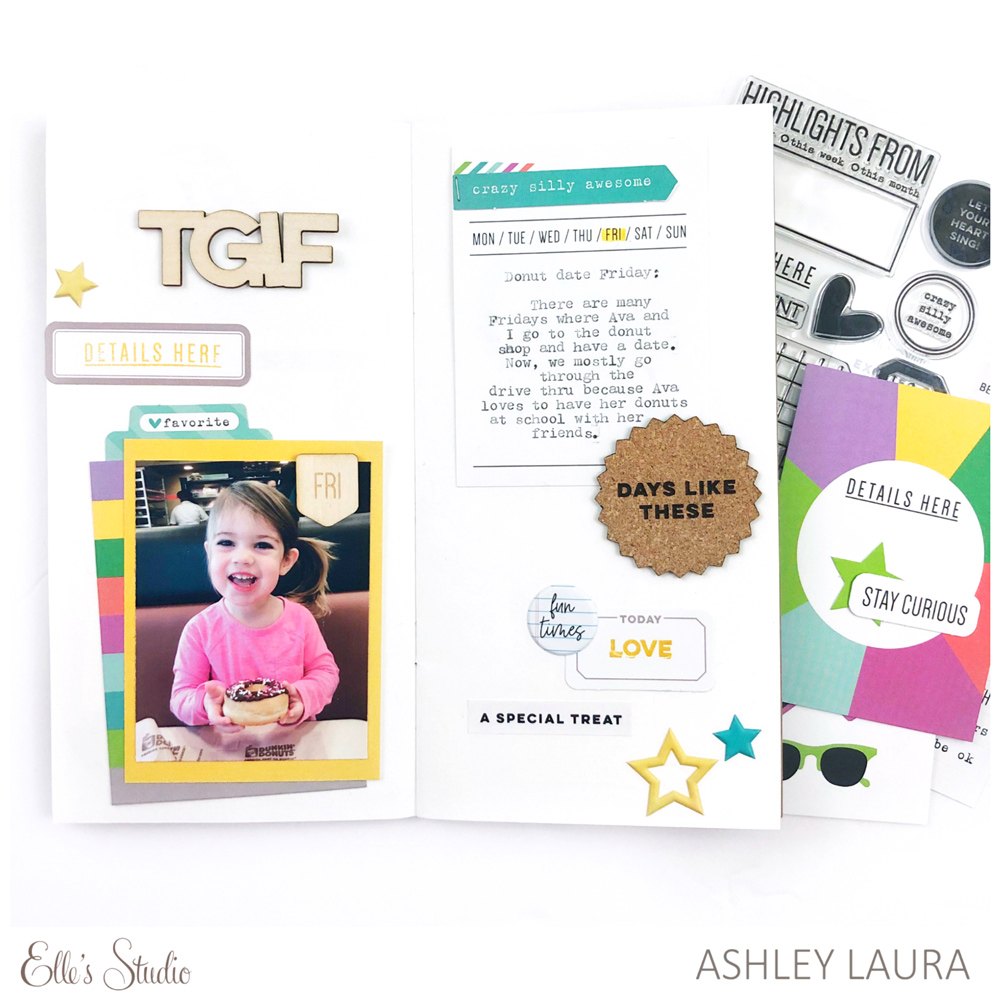
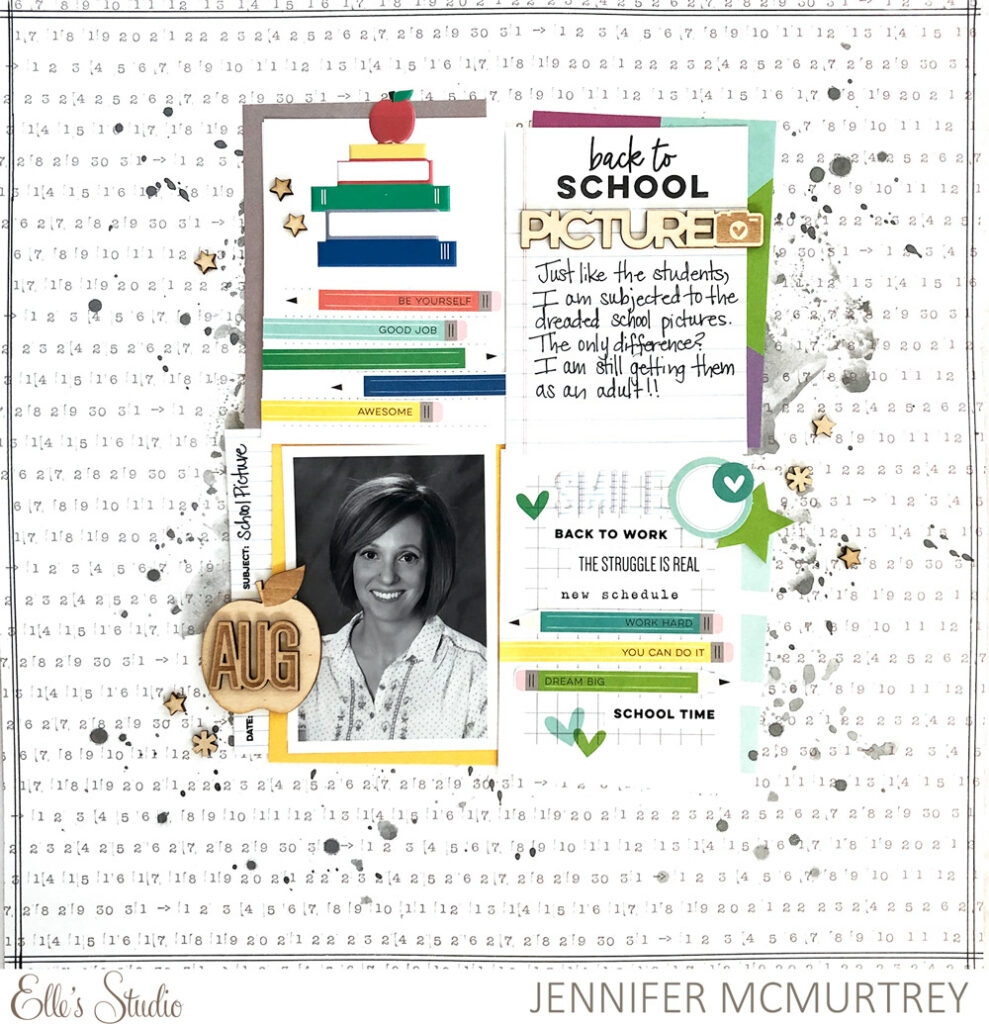
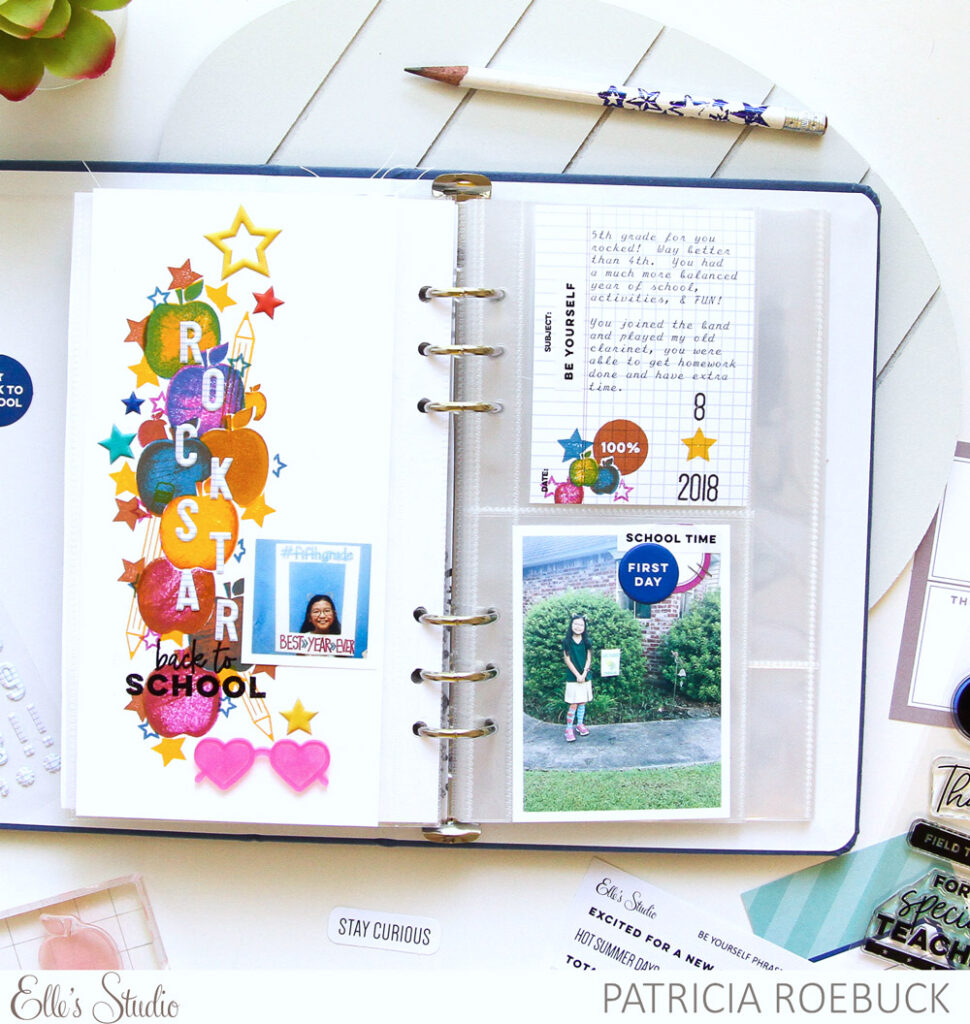
I created a traveler’s notebook spread with one full page on the left and two 3″ x 4″ pockets on the right.  I had the idea of using a tag from the August 2019 Kit at the top right and one large photo at the bottom, but I want to focus first on creating a dynamic design on the full left side using the Back to School Stamp. I first began stamping several of the large and small apples onto post-it notes, concentrating my stamping on the reverse side of the sticky end of the post-it note, so when I trim it, it will lightly adhere to my project, creating masks.

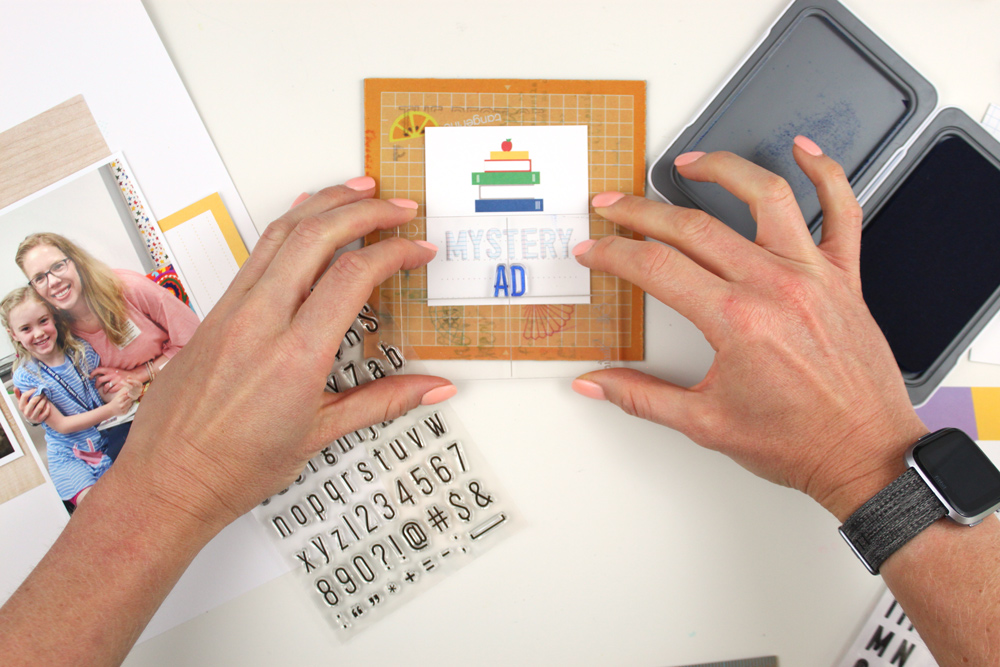
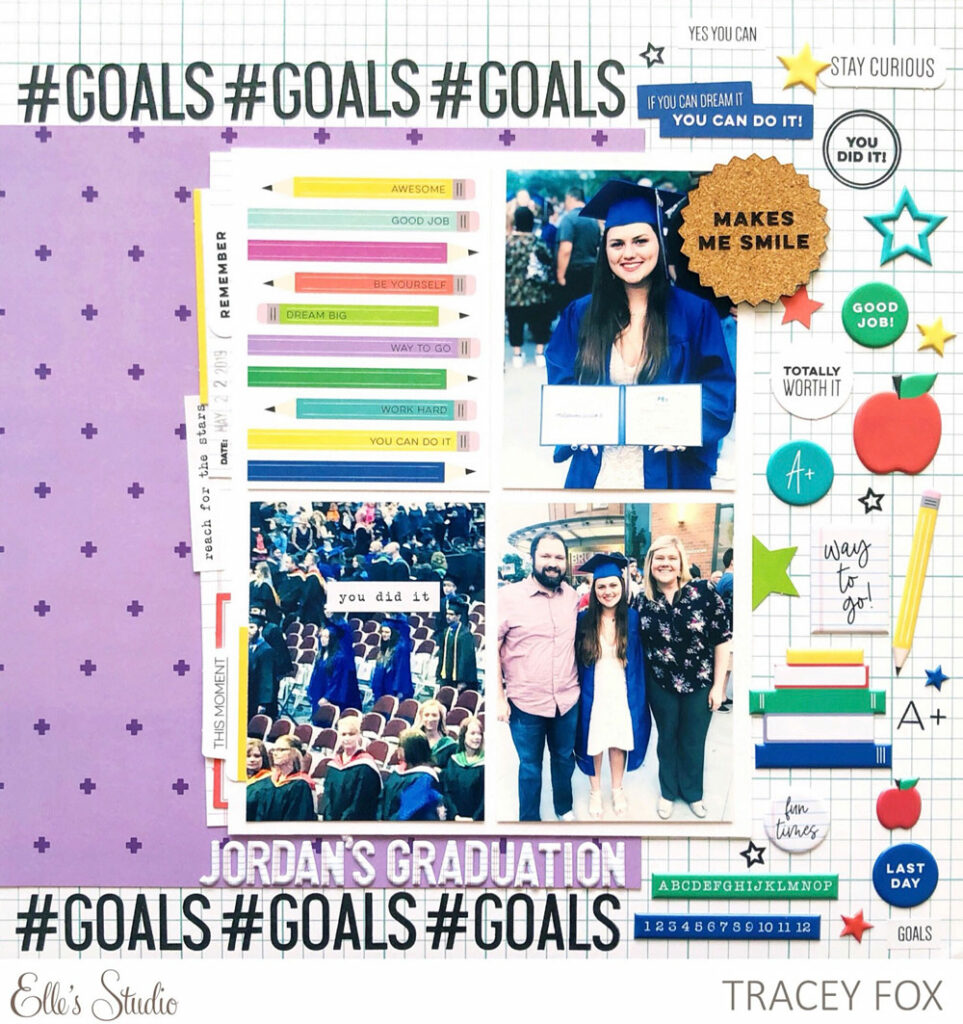
When using a masking technique, usually one of the images will be in the forefront and everything else behind.  I started with a bright yellow apple towards the middle of my page. I then cleaned the image off, then tapped just the edges of the apple into an orange ink and stamped again.  The shadow creates dimension to the stamped apple. This first apple will be in the forefront.

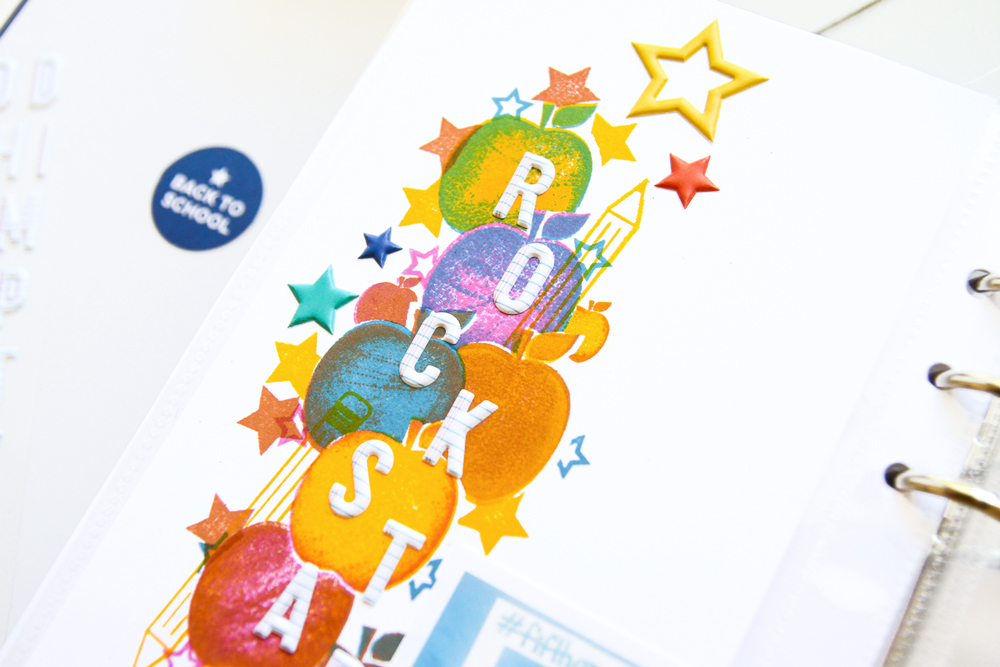
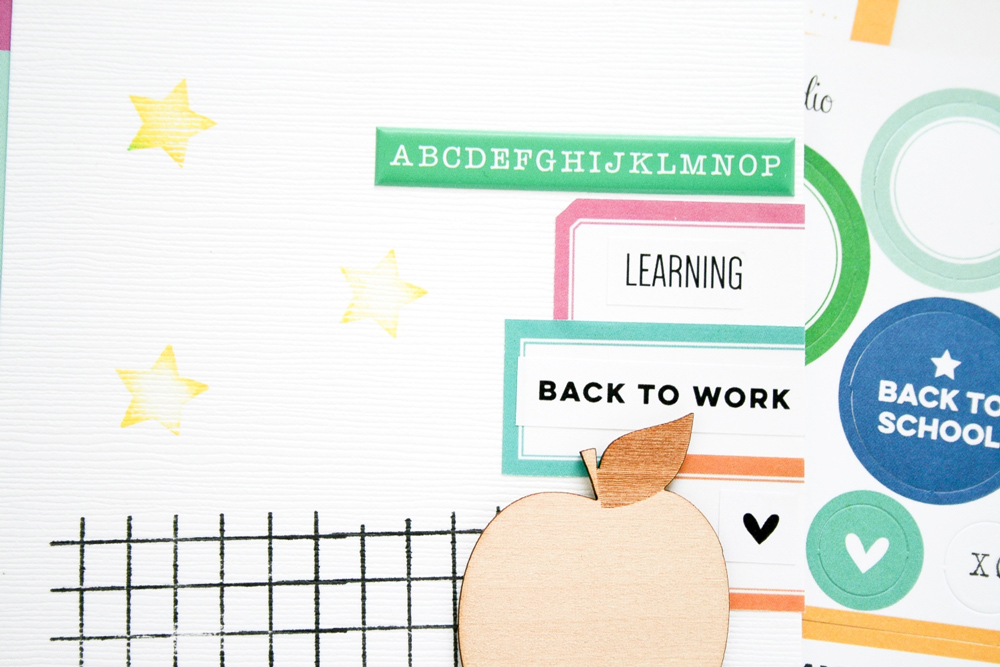
I continued this technique to create a vertical design of the apples on top of each other, creating a vertical design to be the base for my title and sub-title.  I had so much fun and loved how the design came out so much that I began using other images from the stamp set along with the masks so they would appear behind and partially in front of some of my apples. My inspiration for the colors and the clean graphic look came from an Old Navy flier I received in the mail, but I did add a touch of green to balance the photo I used on the right. However, I did not use green ink.  Instead, I first stamped in yellow, then in blue—yellow and blue make green! Color-layering is a great technique if you are short on ink colors or need to stretch your supplies.

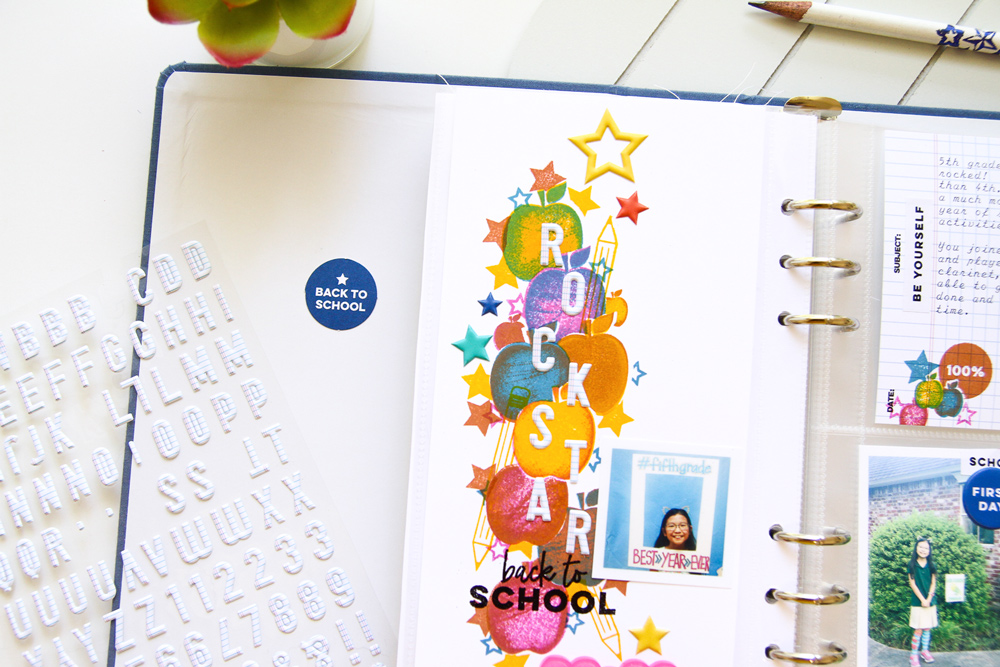
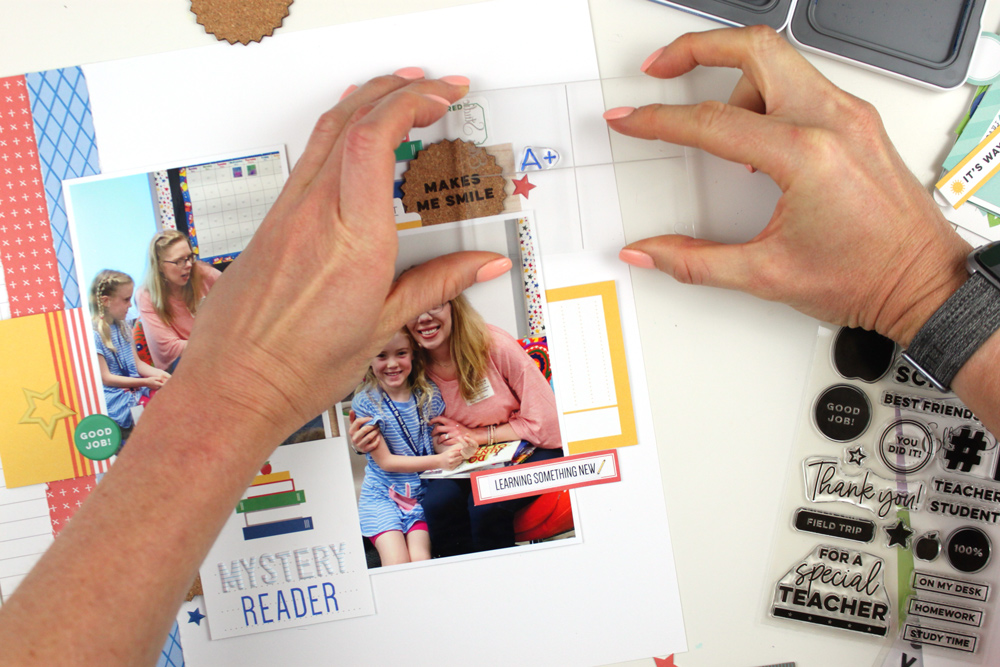
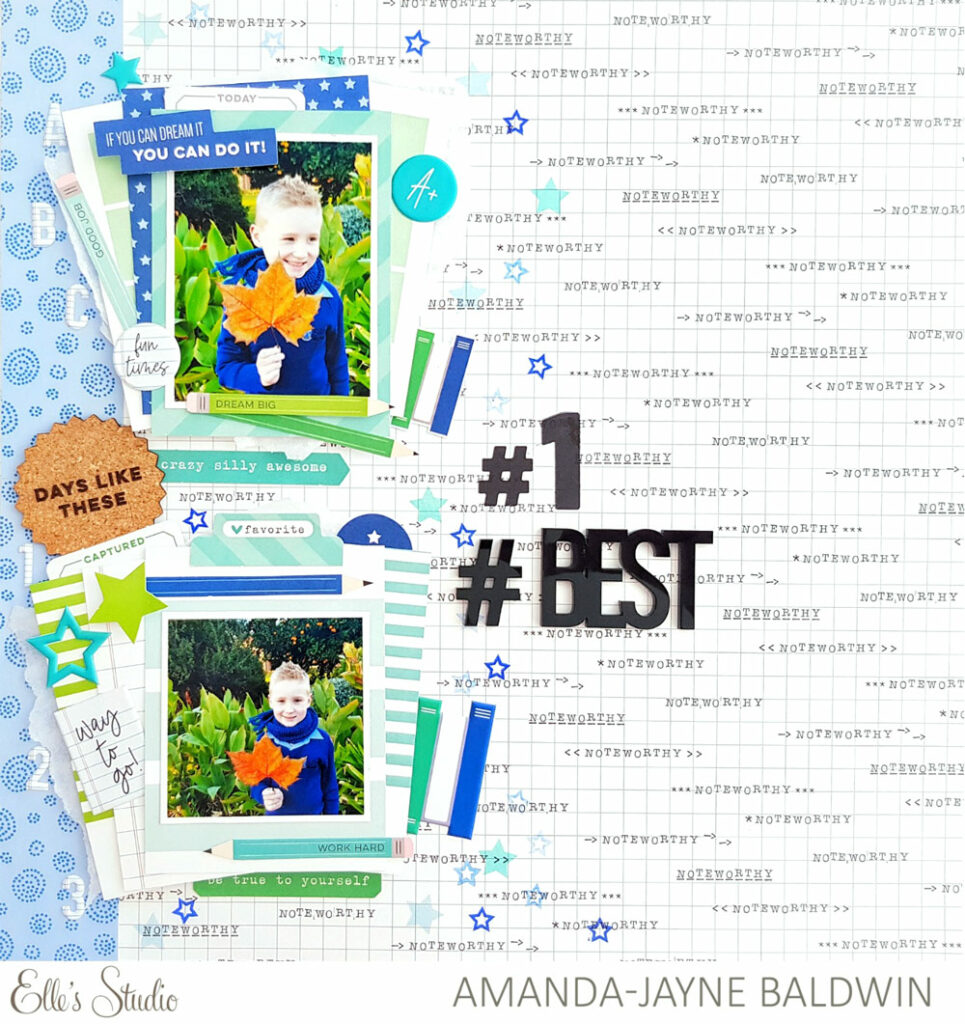
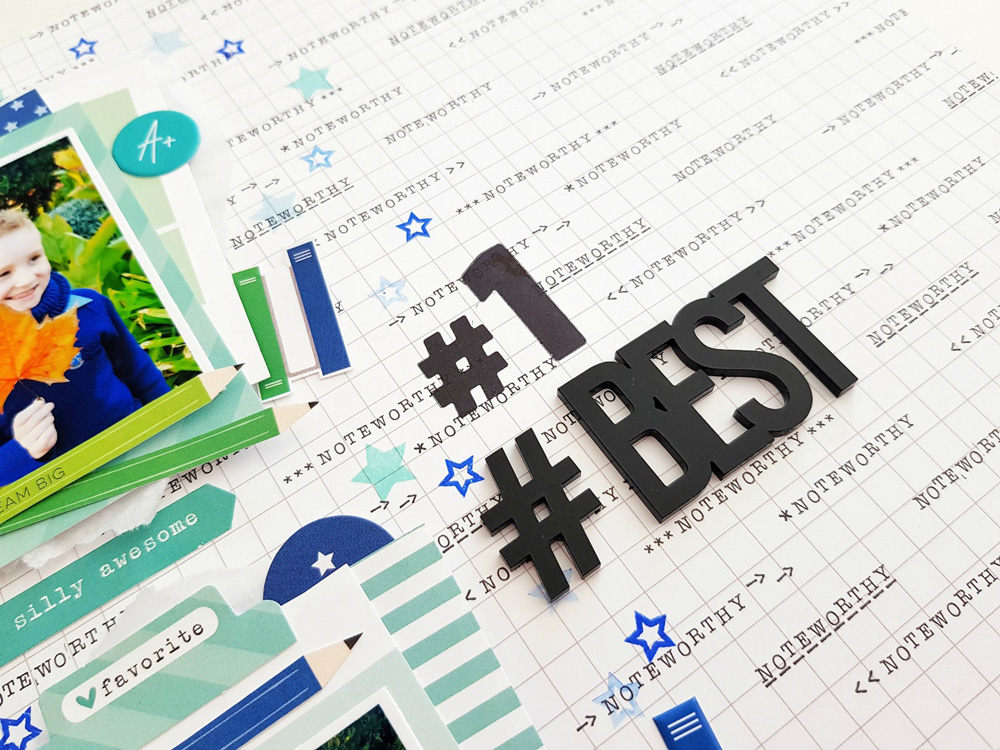
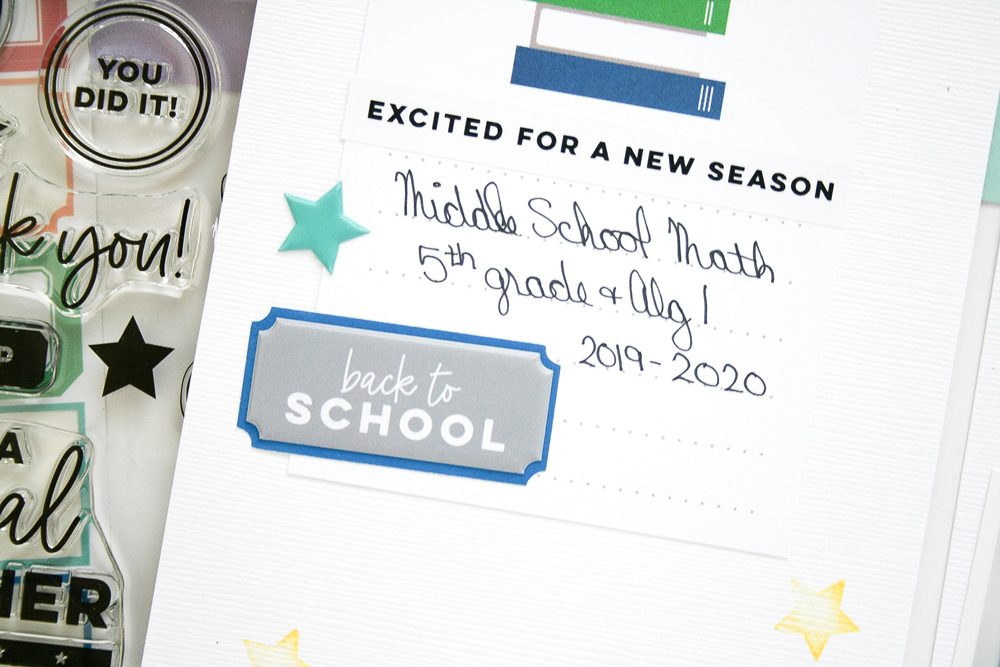
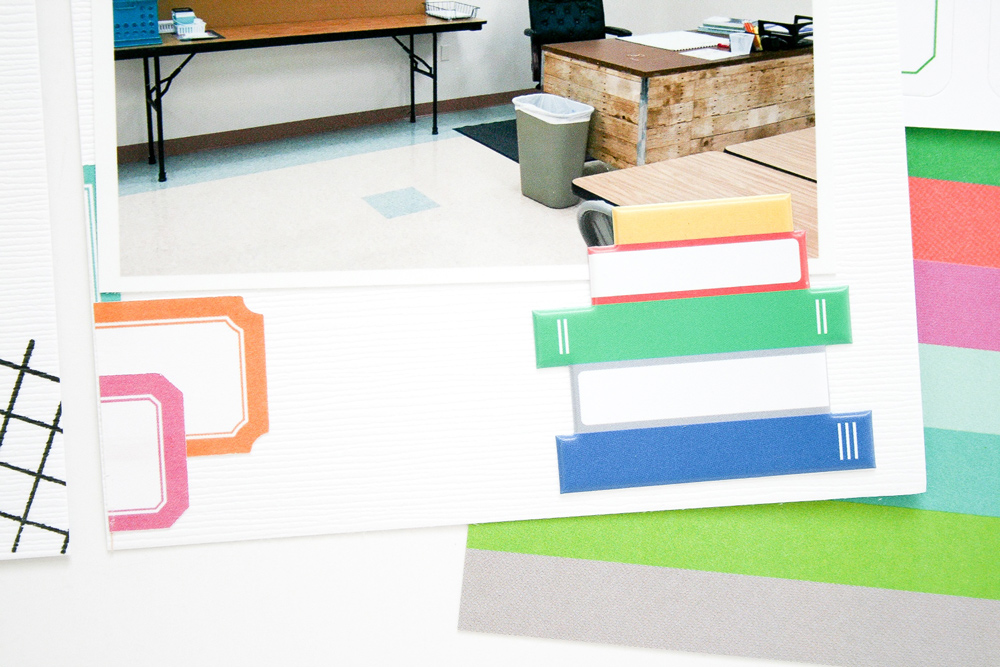
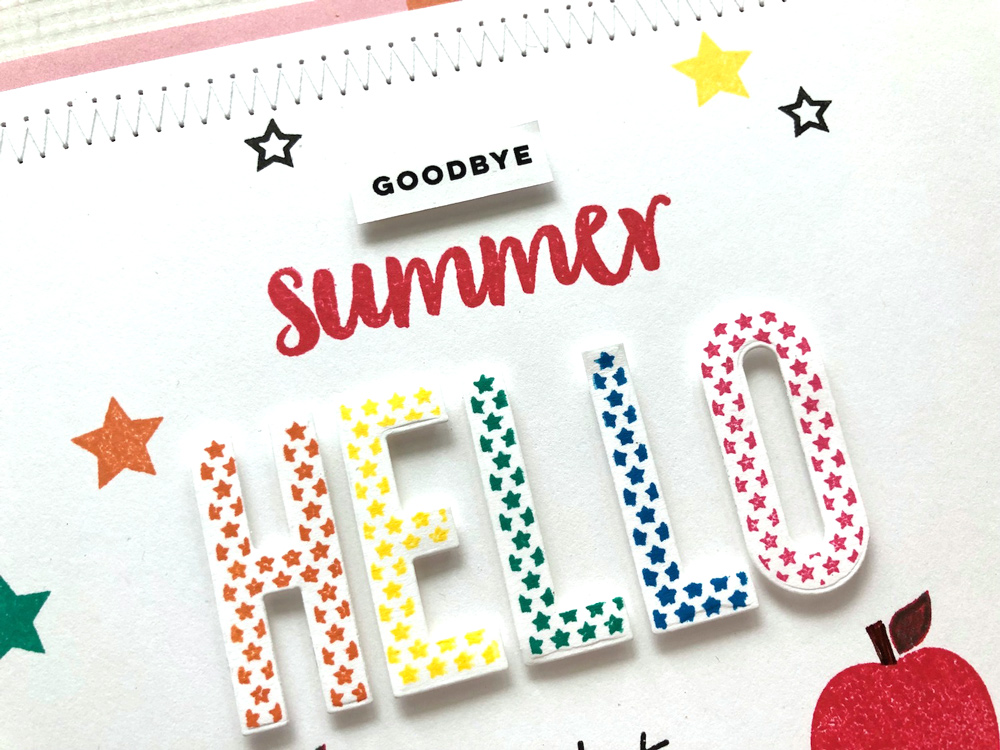
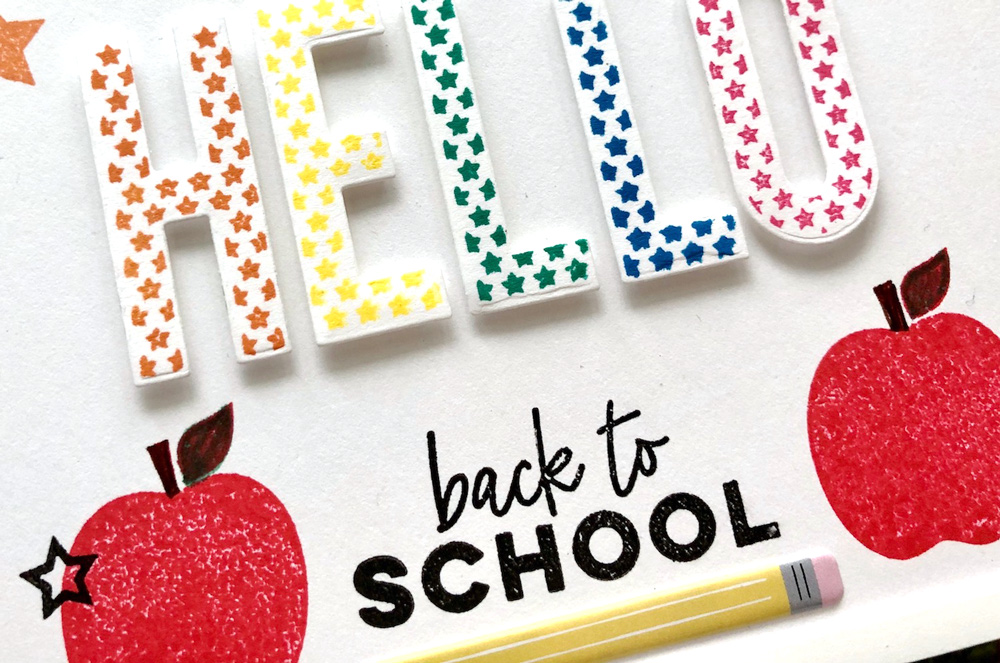
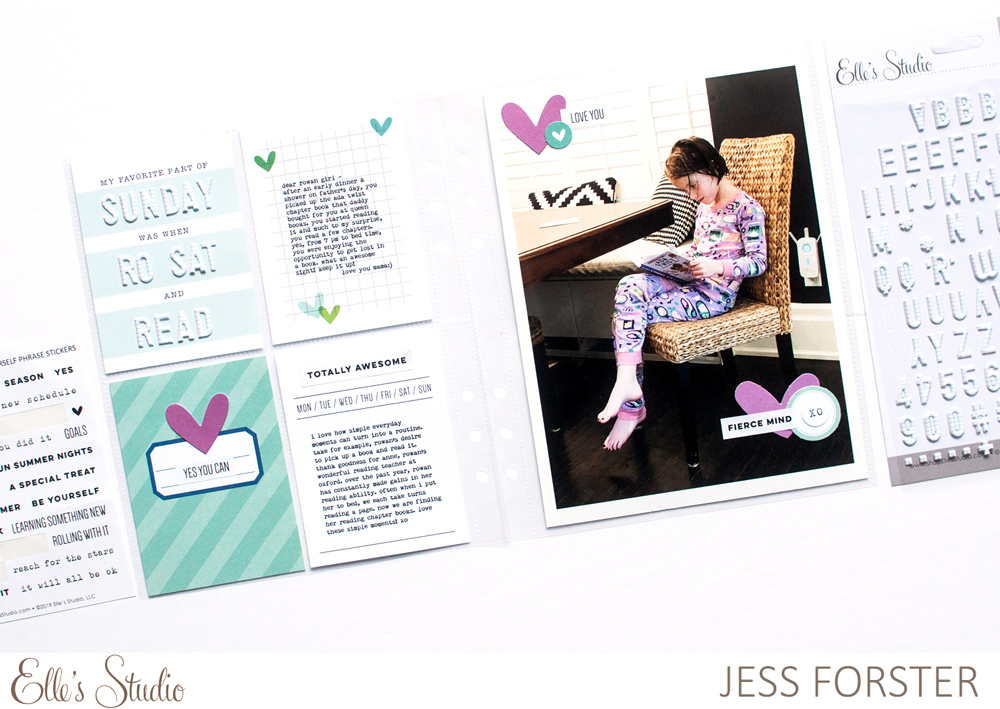
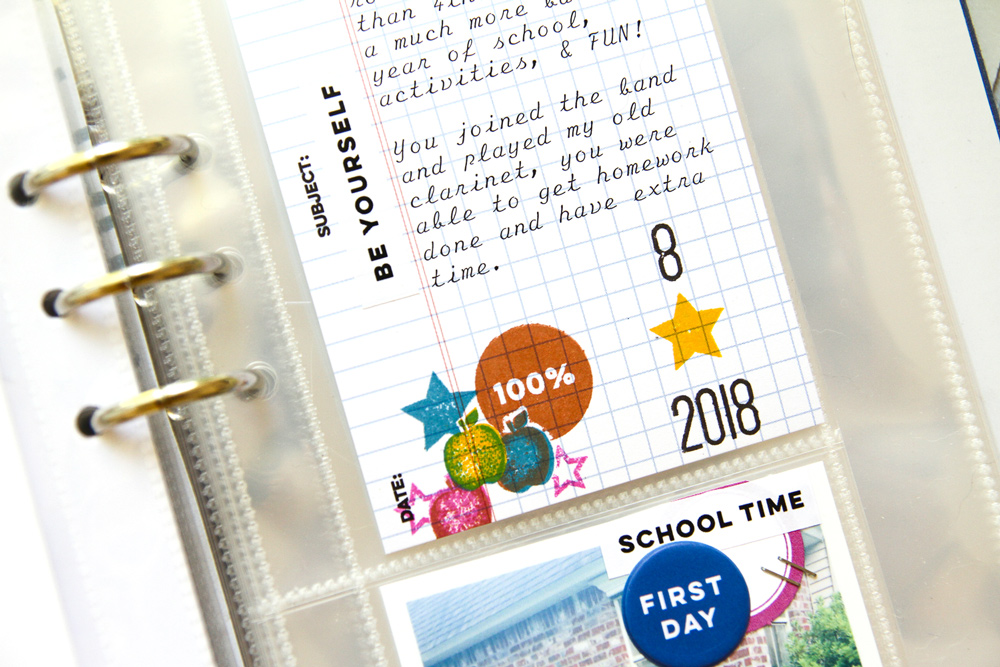
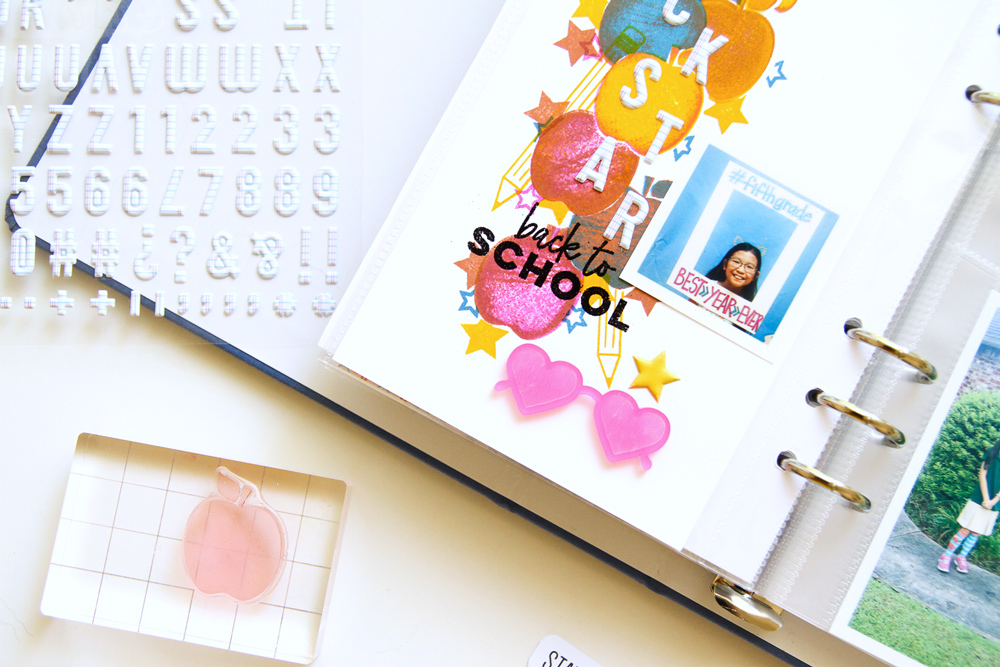
Once I had all of the stamping completed, I added my title and sub-title using the new Notebook Puffy Alphabet Stickers and heat embossed “Back To School” in black from the Back to School Stamp so it would stand out against my colorful apples. Next, I worked on the right side to balance the complete spread before finishing this left side. Like my left side with lots of white space, my right side uses the 3″ x 4″ grid tag from the August Kit.  Using the same techniques as I used on the left side, I created a cluster of stamping in the corner of my tag, adding the date to the right with the Mini Dated Stamp before adding my journaling. 

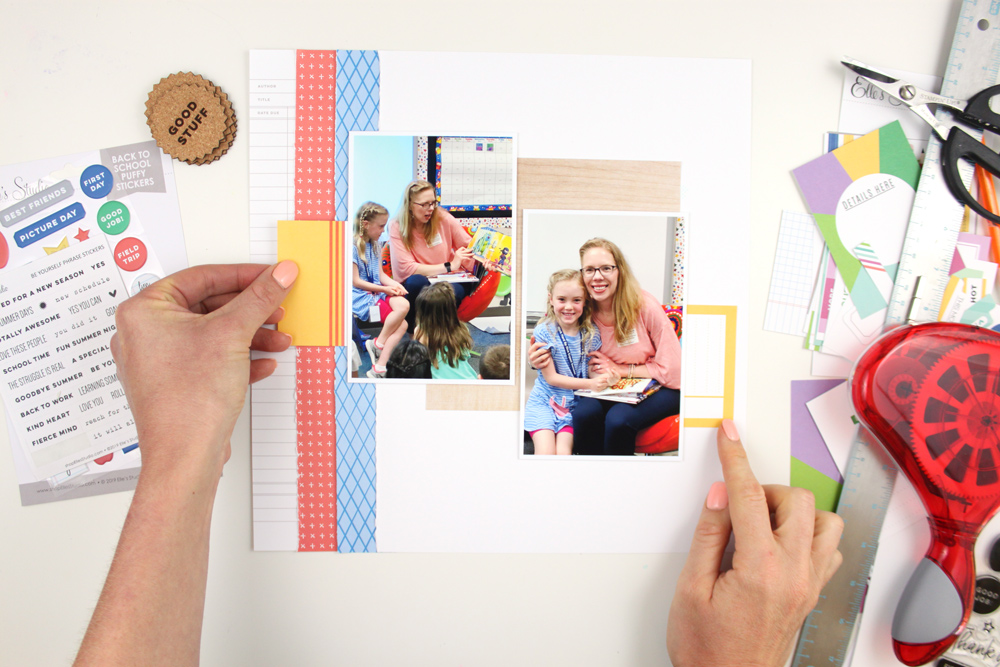
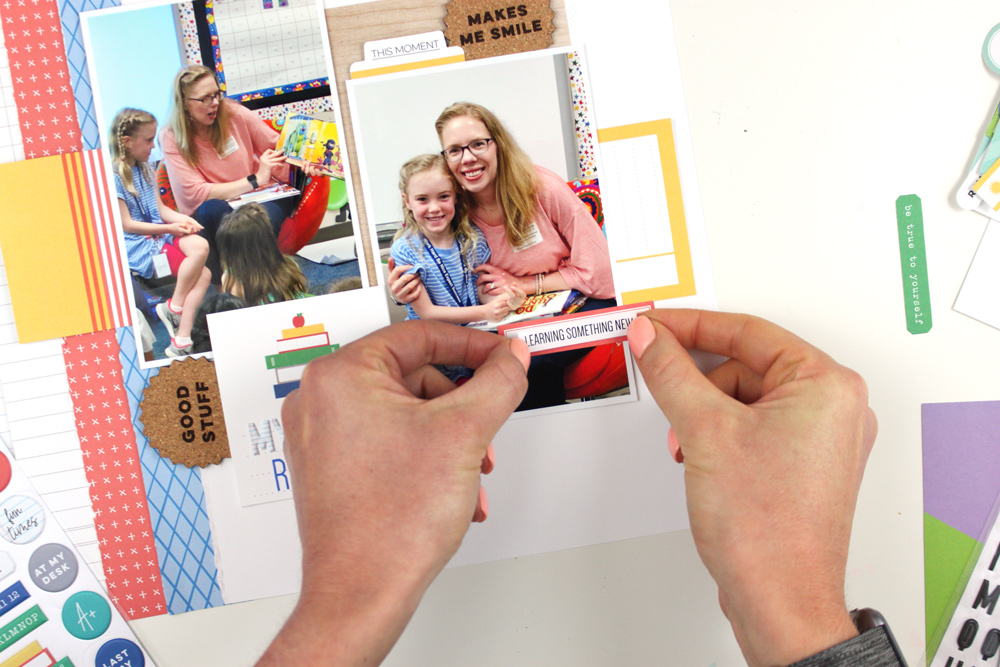
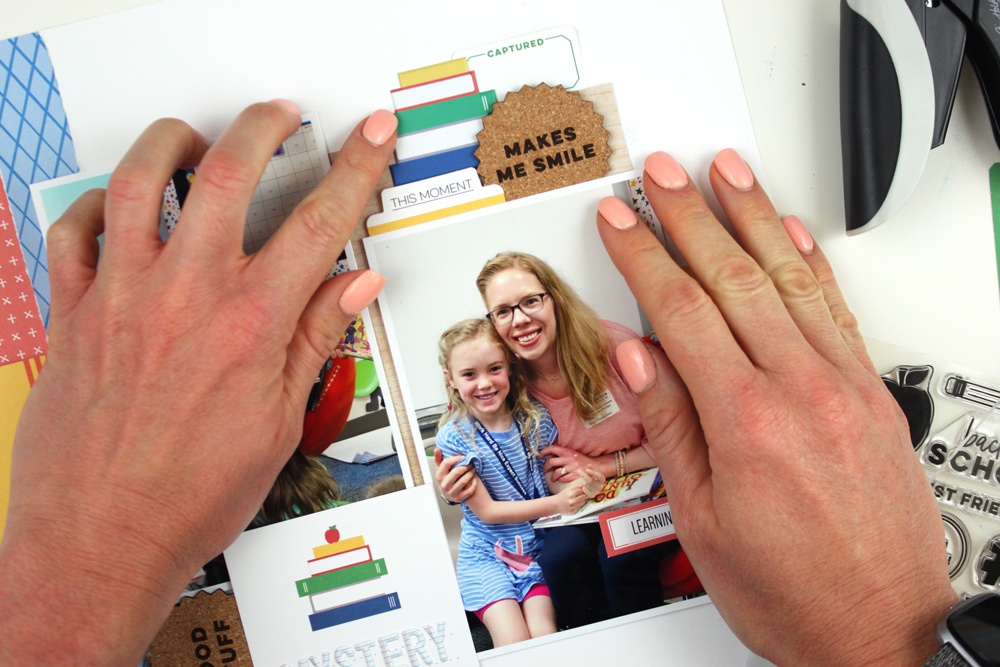
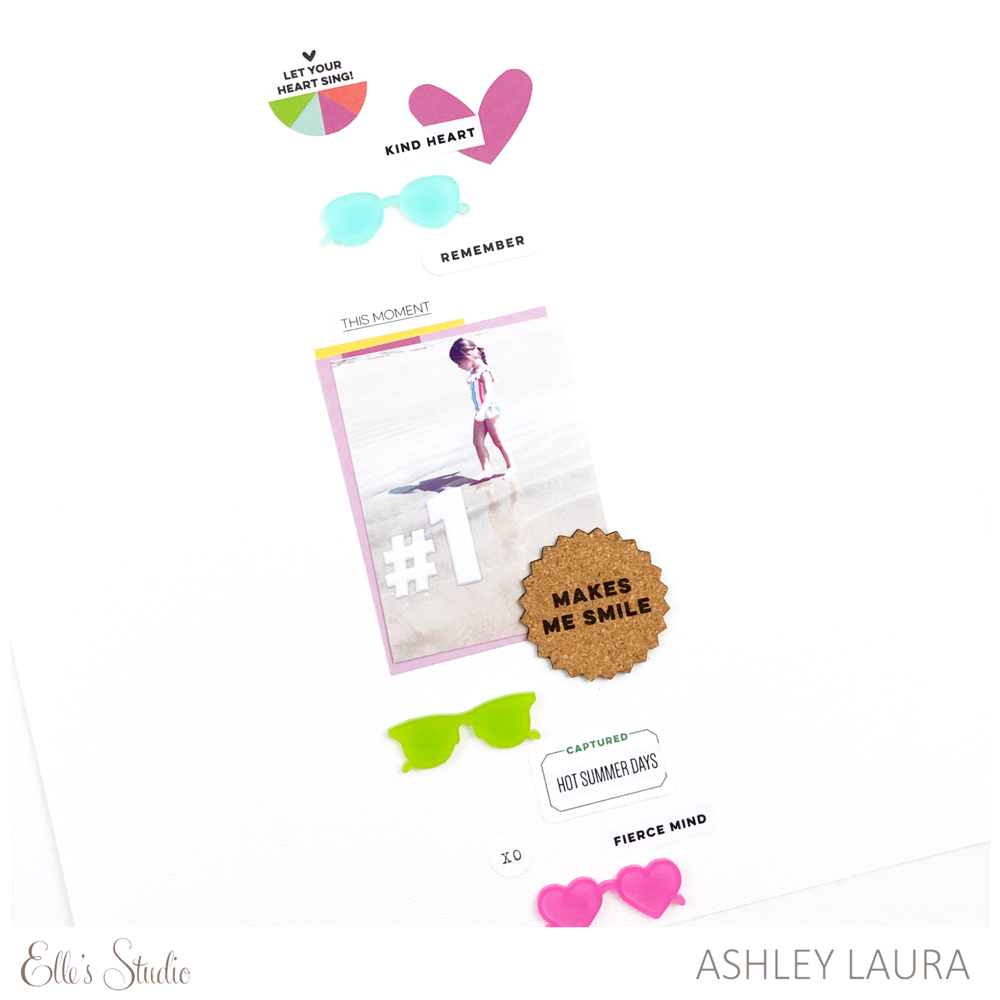
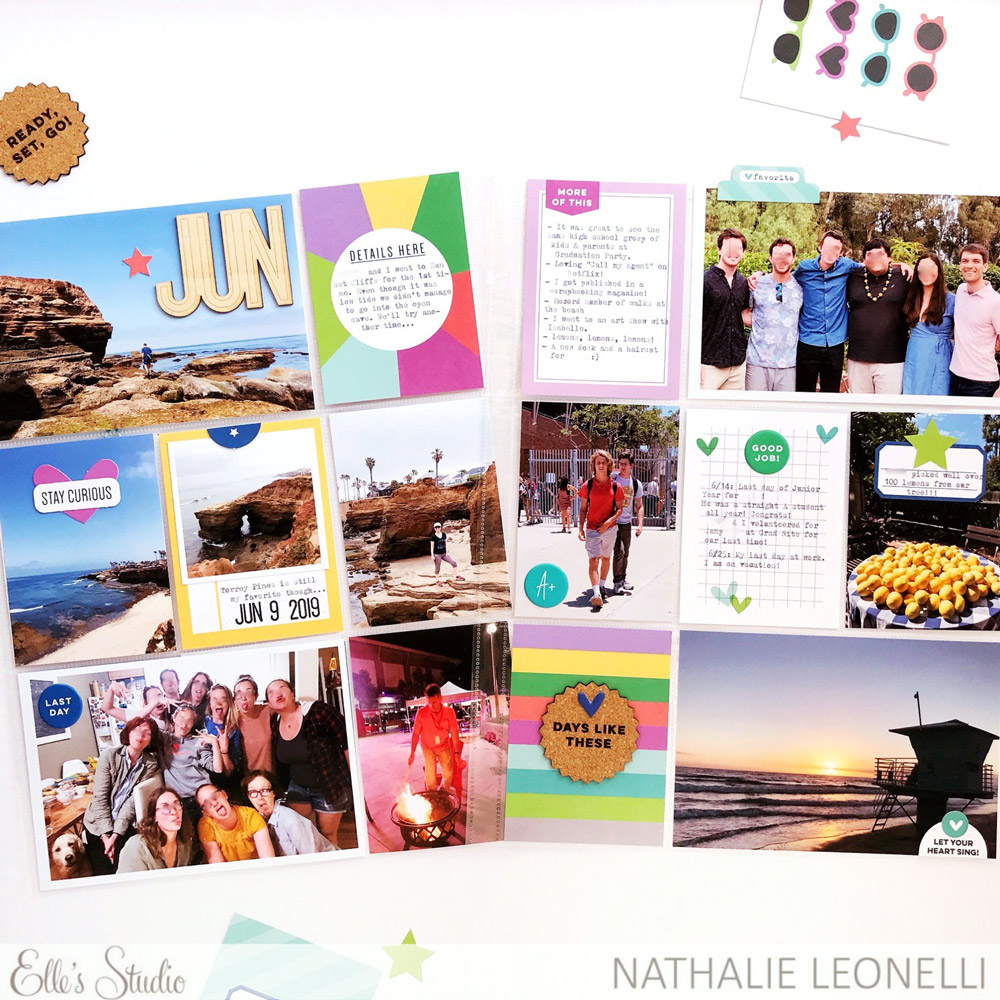
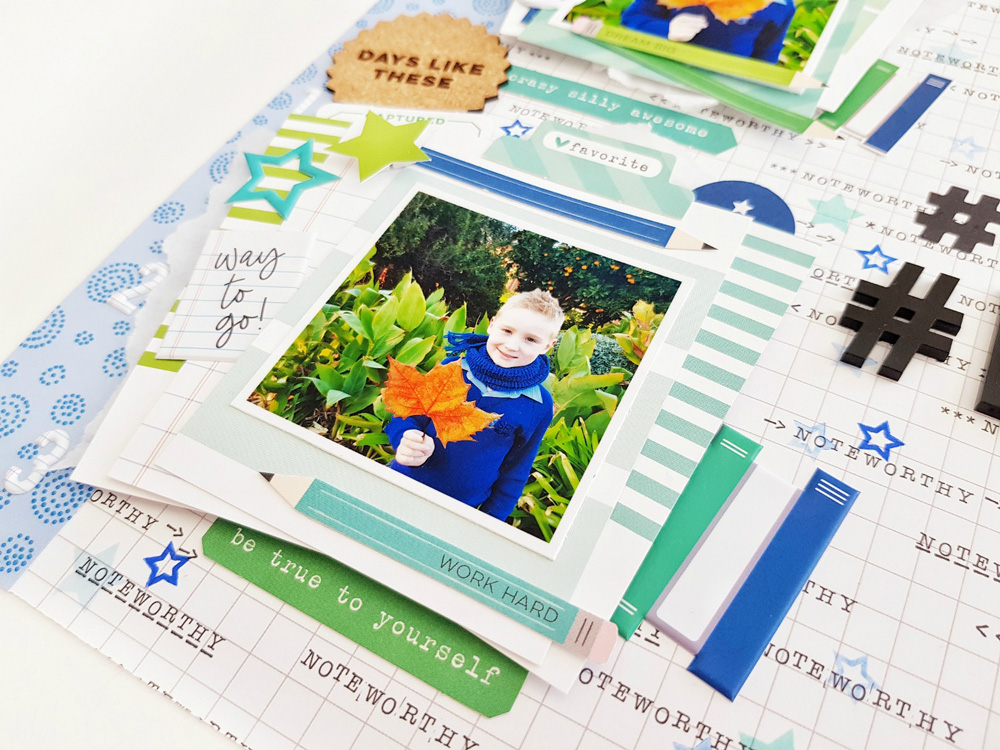
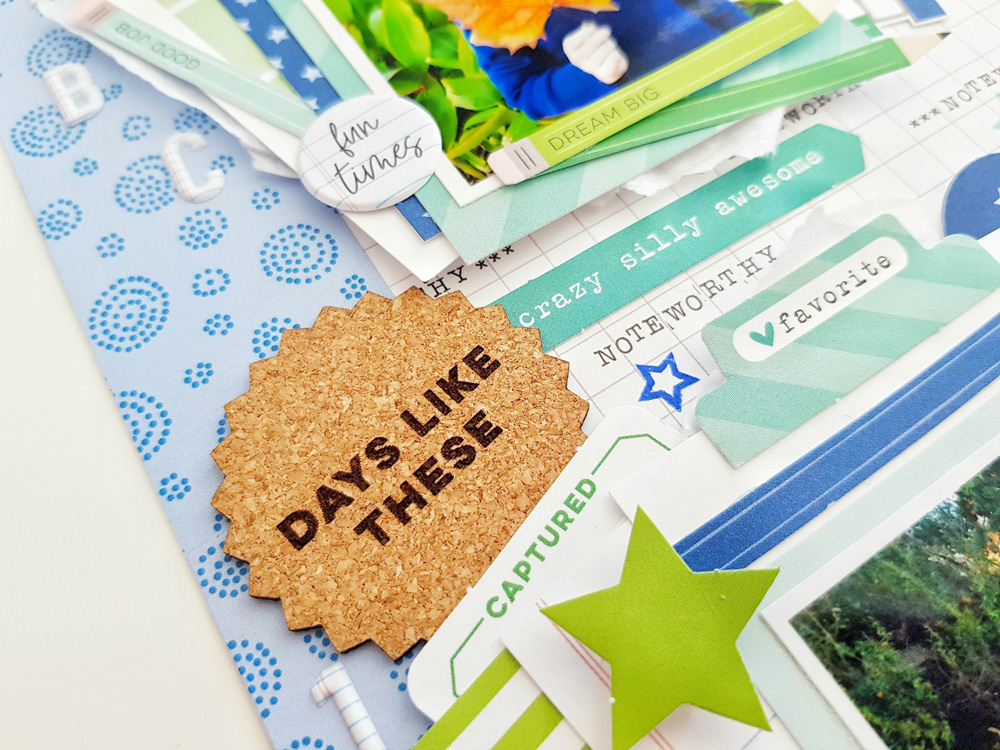
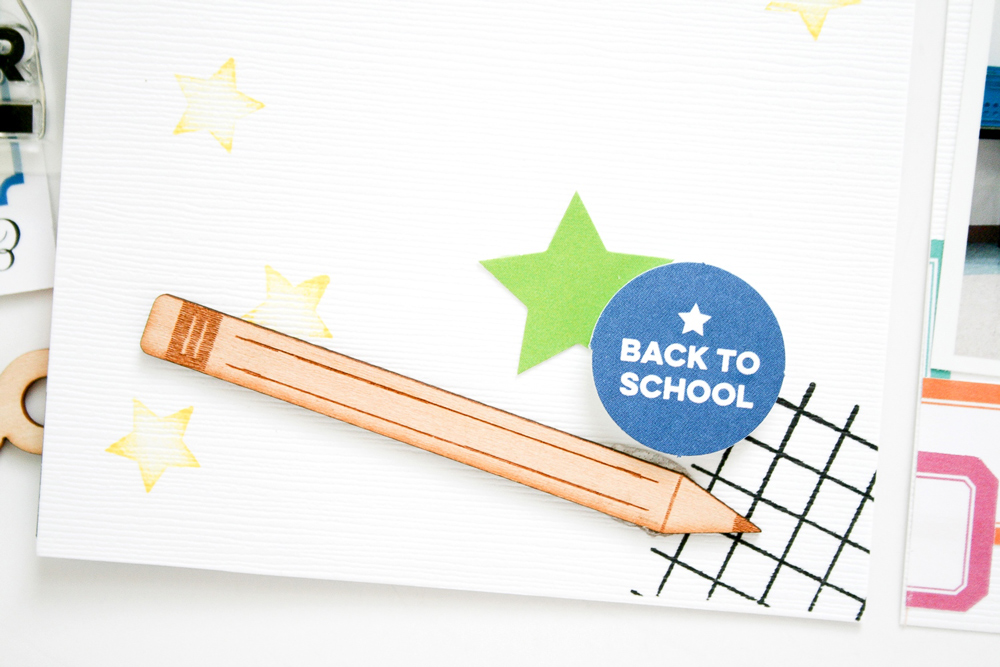
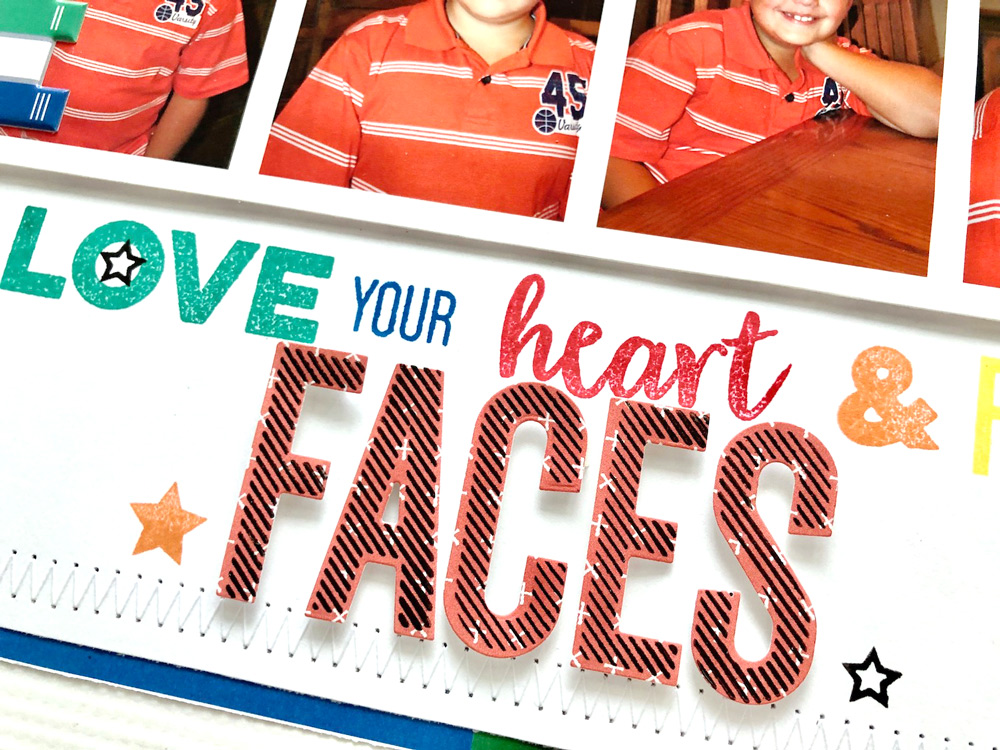
Once that was done, I started filling in my spread with die cuts from the August Kit, Be Yourself Phrase Stickers, and Back to School Puffy Stickers. Lastly, I decided on the pink Acrylic Sunglasses to finish the complete spread.

My video is a little longer than what I normally do, but I wanted to show the steps to create these layered apples, as well as how the complete spread came together. I hope you enjoy, and get inspired to try this on your next project! Happy stamping and please share what you create on Instagram using our hashtag #EllesStudio, or in our Elle’s Studio Facebook group!

Back to School Week Kickoff with Meghann Andrew

We are so excited to welcome you to Back to School Week on the Elle’s Studio blog! This week is all about inspiring you to get back to your love of memory-keeping after a busy summer, and teaching you new techniques and ways to use your Elle’s Studio product!

Today, we’re starting this week of learning off by easing you back into your hobby with a step-by-step layout tutorial by Meghann Andrew. She’s using our school-themed August kit and extras to document fun times in the classroom, and we know that her tutorial will help you to re-create her page in no time! Let’s take a look!

Hey there, friends! It’s Meghann, and I’m excited to be with you today to start the fun Back to School week here on the blog! I just loved all of the school-themed product in the August kit and extras, and decided that it was important to have my volunteer time recorded in my daughter’s school memories, as well as her milestones. I created this 12″ x 12″ layout to document my day as the Mystery Reader in my daughter’s classroom.

Supplies | August 2019 Kit, Be Yourself Phrase StickersMakes Me Smile Cork Circles, Back to School Puffy Stickers, Notebook Puffy Alphabet Stickers, Beautiful Day 6 x 6 Paper Stack, Back to School Stamp, Jane Alphabet Stamp

I’m going to show you how to create this layout quickly in 12 easy steps! In less than 30 minutes, you’ll have a brand new layout in your album!

01. Start by gathering your August Elle’s Studio supplies, a 12″ x 12″ piece of smooth white cardstock and two 4″ x 6″ vertical photos!

02. Make small pencil marks 3″ from the left edge of your cardstock base. Place a long, metal ruler along your marks, hold down the ruler and tear the paper along the edge of the ruler.

03. Choose three different patterned papers. I selected patterns from the Beautiful Day 6 x 6 Paper Stack. Tear down the length of two of the papers, using the same technique as above, so that your paper strips are 1.25″ wide. For the third pattern, simply cut a 1.25″ wide strip with a straight edge. If you are using the 6″ papers like me, you will need two strips of each pattern to run the length of your layout. Adhere the two torn patterned papers to the torn, left edge of the white cardstock, so that 1″ of each pattern is showing. Finish the background with the straight edged pattern on the left. You background should measure 12″ x 12″ again at this point.

04. Adhere the 6″ x 6″ woodgrain pattern to the cardstock background, 1.75″ from the right edge, and 2.5″ from the top edge of the cardstock background paper.

05. Adhere your photos using dimensional adhesive: the left photo 2.5″ from the left edge and 2″ from the top edge, and the right photo 1.5″ from the right edge and 3.75″ from the top edge.

06. Trim the two yellow 3″ x 4″ tags from the August 2019 Kit to slide beneath your photo edges and adhere. This adds another pop of color and balance on the page.

07. Create your title tag! Grab the book stack 3″ x 4″ tag from the August 2019 Kit, trim off the bottom half inch, and add the Notebook Puffy Alphabet Stickers to create your first word. For the second word, grab the awesome Jane Alphabet Stamp to stamp the word in blue ink. I always begin with the middle letter/s of the word, to be sure my word is centered on the tag.

08. Adhere your title tag using dimensional adhesive at the base of the left photo. Adhere the “good stuff” Makes Me Smile Cork Circle just underneath of your title tag on the left side.

09. Using the Be Yourself Phrase Stickers, adhere “learning something new” or a different phrase to the coral label from the August 2019 Kit. Adhere this overlapping the photo on the right, just underneath the yellow tag.

10. Create an embellishment grouping above the photo on the right of the “captured” and “this moment” die cuts from the August 2019 Kit, along with the Makes Me Smile Cork Circle and the Back to School Puffy Sticker book stack. Tip: If you use dimensional adhesive on the “this moment” tab and Makes Me Smile Cork Circle, it’s easy to slide the book puffy stickers behind.

11. Pull out your blue ink and the Back to School Stamp to add the “A+” stamp three times, without re-inking, around your three embellishment groupings: at the top right corner, around the title tag, and on the yellow tag on the center left. Around your stamping, add the Back to School Puffy Sticker stars and “good job” circle.

12. Add the “love you” Be Yourself Phrase Sticker to the bottom of the journaling tag on the right, then add your typed or handwritten journaling to finish off the page!

This page is so easy and quick to put together, and contains so much color and texture. I just love it! I can’t wait to see what you create this week! Stay tuned here on the blog for so much more inspiration and ideas from our design team for Back to School week! Happy creating!

Share your layout created with Meghann’s instructions in our Elle’s Studio Facebook group, or on Instagram using the hashtag #EllesStudio! We’d love to see how her instructions helped you to make the most of your crafty time this week!

August Design Team Inspiration: Volume Two

Didn’t you just love the inspiration our design team had to share with you last week? From summer moments to back-to-school mornings, each team member documented some precious memories with our August kit and add-ons! Today, we have the second round of projects to show you, and we know that you will love the versatility of their subjects and projects! Let’s take a look!

June pocket page spread by Jess Forster – supplies used | August 2019 KitBe Yourself Phrase StickersNotebook Puffy Alphabet Stickers, Back to School Puffy Stickers, Large Months of the Year Wood Veneers, Days of the Week Wood Veneers, Acrylic Sunglasses

Cannonball by Jennifer McMurtrey – supplies used | August 2019 KitBe Yourself Phrase StickersBack to School Puffy Stickers, Teal Puffy Alphabet Stickers, Makes Me Smile Cork CirclesMagical Memories Wood Veneer ConfettiTitle Builder Vol. 3 Wood Veneers, Acrylic SunglassesTitle Builder Vol. 3 Stamp, Noteworthy 12″ x 12″ Paper Collection

Back to School cards by Wendy Antenucci – supplies used | August 2019 KitBack to School Puffy StickersMake Me Smile Cork Circles, Acrylic Sunglasses, Back to School Stamp, Noteworthy 12″ x 12″ Paper Collection

Smile by Ashley Laura – supplies used | August 2019 KitBe Yourself Phrase Stickers, Back to School Puffy StickersMakes Me Smile Cork CirclesAcrylic Sunglasses

Week 25 pocket page spread by Steph Grimes – supplies used | August 2019 KitBe Yourself Phrase Stickers, Notebook Puffy Alphabet Stickers, Puffy Heart Stickers — Spring MixMakes Me Smile Cork Circles

School’s Out by Mary-Ann Maldonado – supplies used | August 2019 Kit, August 2019 Digital Cut Files, Be Yourself Phrase Stickers, Jane Alphabet Stickers — RedBack to School Puffy StickersNotebook Puffy Alphabet Stickers, Magical Memories 6 x 6 Paper Stack, Beautiful Day 6 x 6 Paper Stack

June 2019 pocket page spread by Nathalie Leonelli – supplies used | August 2019 KitBack to School Puffy Stickers, 4th of July Puffy Stickers, Makes Me Smile Cork Circles, Large Months of the Year Wood VeneersMini Dated Stamp

Back to School by Amanda-jayne Baldwin – supplies used | August 2019 KitBe Yourself Phrase Stickers, Back to School Puffy Stickers, Make Me Smile Cork Circles, TGIF Wood VeneersMagical Memories 6 x 6 Paper StackBack to School Stamp, Noteworthy 12″ x 12″ Paper Collection

We can’t wait to see what YOU create with our August kit and extras! Post your creation to Instagram using the hashtag #EllesStudio, or to our Elle’s Studio Facebook group, where ES fans just like you inspire each other!

Documenting School Days with Amanda-jayne Baldwin

Even if you may not have back-to-school photos to document this month, there is still a lot to learn in life, and a lot to document with our August kit and extras, which have a school-themed, start of autumn feel! Let’s take a look at how design team member Amanda-jayne scrapped some gorgeous photos that were not from the first day walk to school!

Hi, friends! Welcome back to the Elle’s Studio blog! It’s Amanda here, and today I am sharing some more inspiration with the fabulous August 2019 Kit and new release items! There are SO many awesome new elements and add-ons to this month’s kit, and I challenged myself to incorporate most of them into my layout! Here’s what I created with them:

Supplies | August 2019 Kit, Makes Me Smile Cork Circles, Back to School Puffy Stickers, Notebook Puffy Alphabet Stickers, Title Builder Vol. 3 Acrylic, Back to School Stamp, Sunshine 6 x 6 Paper Stack, Noteworthy 12″ x 12″ Paper Collection

Whoa! What a fun school-themed page! It may not be back-to-school time in Australia where I live, but this theme in the August Kit works perfectly for any school occasion. It is really versatile, and ideal for my sweet boy’s photos. 

I started my layout with the Noteworthy repeat print 12″ paper and 1 1/2″ strips of the blue pattern in the Sunshine 6 x 6 Paper Stack. I butted these two strips together on the left hand side to create a feature point and anchor for my design. 

Next, I stamped up a mix of blue and teal stars with the Back to School Stamp. I used both types of stars, and positioned them to the right of the Sunshine paper strips. As I had planned to only use the left hand side of my page, I was to careful to avoid stamping further than the center of the page. I love the pop of color the stars add to the background! 

Design tip: The use of tiny stamped icons, and or shapes, is a great alternative to enamel dots or sequins, especially for masculine pages.

The next step in creating my layout was to form the photo clusters and layers. For this, I used a mix of 3″ x 4″ journaling tags and die cuts from the August Kit, 3″ x 4″ cuts from the Sunshine 6 x 6 Paper Stack papers, and the Back to School Puffy Stickers. The pencils and book stack embellishments were fussy-cut from the tags included in the August Kit. At the base of the photo layers, I added a torn sheet of tissue wrap, followed by some foam tape. This added both texture and dimension to the clusters.  

To unify the two photo clusters, I used one of the Makes Me Smile Cork Circles as focal embellishment between them. This draws attention to both photos, and in turn, connects the images. 

You’ll also spy the Notebook Puffy Alphabet Stickers travelling down the left side of both clusters too. The use of the “A, B, C” and “1, 2, 3” stickers is not only a fun way to incorporate more of the school theme, but it also an orderly pattern that subtly encourages further connection between both photos. 

For a finished look, I stamped the “#1” from the Back to School Stamp and followed it with the “#BEST” word from the Title Builder Vol. 3 Acrylic

And there you have it: a really effective layout from such a relatively simple design! I hope I have inspired you to get creating with the fabulous August Kit and extras today!

Back to School Traveler’s Notebook with Wendy Antenucci

Maybe you have a child who is ready to go back to school, or like our design team member Wendy Antenucci, you’re headed back to school yourself! Whatever the case, our August kit and add-ons are here to help you record the best parts of the school year, and as Wendy shows us today, it can take a smaller format than you may have used before. Let’s see what she created!

Hello everyone! It’s Wendy here today with a traveler’s notebook spread in my back-to-school notebook. I used to teach before having kids, but I have been home for 17 years homeschooling. I never had a reason for back to school items—until now!

Supplies | August 2019 Kit, August LabelsBe Yourself Phrase Stickers, Back to School Puffy Stickers, TGIF Wood Veneers, Highlights From Today Stamp, Back to School Stamp

My students arrive Monday and I’ve got so much to do, but I want to tell my story. I grabbed white cardstock which I cut down to 8.25″ x 4.375” and I began to create. I started with the colorful August Labels on my two pages to tie them both together as one seamless spread.

I decided I wanted to add in a grid from the Highlights From Today Stamp, as I am a math teacher and it added to my theme. Again, I used the stamp on both sides to tie everything together.

The 3″ x 4″ book stack tag from the August 2019 Kit was the perfect addition to my left side, as well as a few stars—stamped using the Back to School Stamp and die cuts from the August Kit—added the perfect touch.  Did you notice that the “Back to School” puffy sticker from the Back to School Puffy Stickers fit right onto the label?!  How cool!

A few more Back to School Puffy Stickers made their way onto the right side of the page to balance things out along with the labels.

Finally, it was time to add the finishing touches with wood veneer.  I usually wait until last to add these pieces as they can easily be layered over top of stamps and die cuts.

I left some empty room on my TN page so that I can add in my thoughts and feelings of starting my career again after so many years.  I loved using the Be Yourself Phrase Stickers to add some of my thoughts onto the labels to add to what I will write someday soon.

What is something that you’d really like to document, but maybe you don’t have the time for a full-blown layout? Grab some cardstock, make yourself a traveler’s notebook, and have fun both telling your story and getting creative—it always makes me feel better!

Show us how you’re documenting the return of school days with our latest products! Post on Instagram using the hashtag #EllesStudio, or in our Elle’s Studio Facebook group!

Back To School with Title Builder Vol. 3 and Mary-Ann Maldonado

If you have kiddos who are headed back to school, you’ll soon have first day photos that need to be documented, and today Mary-Ann Maldonado is showing us how perfectly our new Title Builder Vol. 3 Stamp can pair with our August add-ons to create the perfect layout! Let’s take a look at what she’s sharing with us today!

Have you seen the Title Builder Vol. 3 Stamp, acrylics and wood veneers? They are pretty amazing! I combined this new stamp with the Back to School Stamp, and the Large Jane Alphabet stamps and dies to create the perfect title for my page.

Supplies |  Be Yourself Phrase Stickers, Back to School Puffy Stickers, Back to School Stamp, Title Builder Vol. 3 Stamp, Large Jane Alphabet Stamp — Stars, Large Jane Alphabet Stamp — Stripes, Large Jane Alphabet Metal Die, Beautiful Day 6 x 6 Paper Stack, Noteworthy 12″ x 12″ Paper Collection

My title makes up pretty much my entire layout.  Combining different mediums to create exactly the perfect title for my photos was super easy.  I spaced out my title using a ruler across my layout, which helped determine the spacing was even going down my page. I used rainbow inks and the Large Jane Alphabet Star Stamp for the word “HELLO” and foam adhesive for added dimension.

I followed the Large Jane Alphas with stamps from the Back to School Stamp, using the pencil from the Back to School Puffy Stickers to underline my stamping.  Adding an apple or two brings more attention to the back to school theme.  

I actually feel that I have two titles on my page. They blend together, but the bottom sentiment is more about my boys personality and the top about returning to school.  Instead of leaving a lot of white space around my title, I used the small star stamps from the Back to School Stamp randomly over my layout.

The title possibilities are endless with the Title Builder products, and the creative possibilities double when combined with the Large Jane Alphabet Stamps! Thanks so much for stopping by the blog today!

Pocket Page Style: Dressing Up Your Pockets with Stamps with Jess Forster

Every month, we release stamps with our monthly kit and add-ons to help you embellish your projects, tell your story and get creative! This month, our Highlights From Today Stamp is the perfect product to help you get extra words on your projects, or even create your own custom products for a special holiday, as Jess Forster is sharing with us today! Let’s take a look!

Okay, okay. I must admit something. When it comes to stamping I am a little intimidated. Hands up if you can relate? Yes, it’s true I have tried to avoid stamping like the plague, but ever so often I get the urge to move outside my creative comfort zone and try something new. Enter in the “Highlights From” stamp from the Elle’s July release. And Ta-Da! A pocket page with unique journaling cards made made from stamps. No new techniques here, folks. This blog post will not solve world hunger or establish world peace; but it did make me happy and help me finish my layout. Have a look below!

Supplies | August 2019 Kit, Highlights From Today Stamp

In this 9″ x 12″ pocket page layout, I documented the trip to the farm from Canada Day 2016. Fun fact: there are not a lot of Canada Day themed products out there so, the Highlights From Today Stamp include a lot of simple prompts to recount the details from day which included the trip to visit baby calves. As you can see from above I stamped the label icon to add the date and time to the 3″ x 4″ photos. 

I also used the checked lines to create a border at the top and bottom of two of the 3″ x 4″ journaling cards; while I used the heart icon to create a 3″ x 4″ filler card. By simply stamping the heart in various ink colors around the white journaling card, I was able to tie in the colours from the photo. I always love incorporating hearts in my layouts, and with this stamp I will never run out of my favourite heart die cut. In order to get over my fear of “messing up,” I did a few practice stamps on a scrap pieces of paper to ensure that I got a clear inked image. I’ve also hear that using a gum eraser on a new stamp will also help to get a clearer image.

Full disclosure, there are no new techniques in the layout. In fact, for those who consider themselves “experts” at stamping in your pockets, you may say, “What’s the big deal, Jess? I do this all the time!” To that I say, “You’re awesome! Teach me all your ways!” For those who are on the fence of trying to dress up your pockets, I encourage you to give stamping a try! It can be fun way to make unique journaling cards and a new crafty technique to add to your pocket page repertoire! The Highlights From Today Stamp includes some classic icons as well as sayings which can be a great set to start your stamping collection. Happy stamping and thanks for reading!

Show us how you’re using the Highlights From Today Stamp in your projects on Instagram using the hashtag #EllesStudio, or in our Elle’s Studio Facebook group! We’d love to be inspired by YOUR ideas!

Pop-Up Teacher Cards with Nathalie Leonelli

While all of the other kids may gift a store-bought treat to their teacher, help yours stand out with a handmade card! Your kiddo will get a A+ for presenting their teacher with the cards that Nathalie Leonelli has to share with us today, using colorful new products from our August Kit and add-ons. Let’s take a look!

It’s while I was looking at my new Back to School Puffy Stickers and the new Back to School Stamp that I had the idea to create slide pop-up cards to combine them. It allowed me to use lots of both on each card!

Supplies | August 2019 Kit, Back to School Puffy Stickers, Magical Memories 6 x 6 Paper Stack, Back to School Stamp

Since I had never made them before, I found a tutorial on Jennifer McGuire’s You Tube channel and adapted it to my liking and to the size of Elle’s Studio tags. I used two of them from the August 2019 Kit for each and added patterned papers from the Magical Memories 6 x 6 Paper Stack, plus basic black and white cardstock from my stash. I used an apple puffy sticker as the pull tab for both cards. Let’s take a closer look at the first one:

I covered the text on the tag with a black circle so that the “#1 Teacher” sentiment from the Back to School Puffy Stickers would pop, and for a fun touch I actually used white chalk to make it “dirty,” as a reference to the old blackboards! When you pop it up by pulling the tab on top, it reveals the sentiment stamped on another tag from the kit.

For this first one, I adhered everything on top of a folded card so that it can be opened to write a note inside. The second one is a bit different:

I stamped the sentiment on a notebook grid tag from the August 2019 Kit which I trimmed and placed on top of the pencil tag, which was originally 4″ x 6″, cut to 3″ x 4″. The insert is wider so it leaves a large space for a note that you can read when you pull it and, it reveals a gift card on the inside:

I love how these turned out! They are colorful thanks to the tags from the kit, they have dimension thanks to the Back to School Puffy Stickers and they have great sentiments thanks to the Back to School Stamp. The interactive part makes them fun and unique!

Have you made interactive cards with your Elle’s Studio kit before? Be sure to share them with us using the hashtag #ellesstudio on Instagram!

August Reveal Design Team Inspiration

We are so excited about our newest products included in the August 2019 Kit and add-ons that released today! Whether you’ve already completed your cart and look forward to creating, or you need to see how the products are used before you check out, our design team has you covered with these amazing projects below! Let’s take a look!

Happy by Amanda-jayne Baldwin – supplies used | August 2019 Kit, Shine Die Cuts, Be Yourself Phrase Stickers, Make Me Smile Cork Circles, Title Builder Vol. 3 Acrylic, Beautiful Day 6 x 6 Paper Stack, Highlights From Today Stamp, Title Builder Vol. 3 Stamp

TGIF traveler’s notebook spread by Patricia Roebuck – supplies used | August 2019 Kit, August 2019 Digital Cut Files, Shine Die Cuts, Be Yourself Phrase Stickers, Make Me Smile Cork Circles, Days of the Week Wood Veneers, Shapes and Dots Puffy Stickers, Everyday Goodness Epoxy Stickers, Magical Memories 6 x 6 Paper Stack, Highlights From Today Stamp

The Good Life by Melissa Mann – supplies used | August 2019 Kit, Be Yourself Phrase Stickers, Notebook Puffy Alphabet Stickers, Acrylic Sunglasses, Beautiful Day 6 x 6 Paper Stack, Magical Memories 6 x 6 Paper Stack, Title Builder Vol. 3 Stamp, Highlights From Today Stamp, Noteworthy 12″ x 12″ Paper Collection

Back to School pocket page spread by Nathalie Leonelli – supplies used | August 2019 Kit, Be Yourself Phrase Stickers, TGIF Wood Veneers, Back to School Puffy Stickers, Teal Puffy Alphabet Stickers, Green Puffy Alphabet Stickers, Lime Green Puffy Alphabet Stickers, Highlights From Today Stamp, Mini Dated Stamp

Good Times by Mary-Ann Maldonado – supplies used | August 2019 Kit, Back to School Puffy Stickers, Make Me Smile Cork Circles, Acrylic Sunglasses, Highlights From Today Stamp, Back to School Stamp

August 2018 traveler’s notebook spread by Meghann Andrew – supplies used | August 2019 Kit, Be Yourself Phrase Stickers, Make Me Smile Cork Circles, Fuchsia Puffy Alphabet StickersTeal Puffy Alphabet Stickers, Light Purple Puffy Alphabet Stickers, Beautiful Day 6 x 6 Paper Stack, Highlights From Today Stamp, Mini Dated Stamp

Zones Team by Suzanna Lee – supplies used | August 2019 Kit, August 2019 Digital Cut Files, Be Yourself Phrase Stickers, Puffy Heart Stickers — Summer Mix, Teal Puffy Alphabet Stickers, Lime Green Puffy Alphabet StickersMake Me Smile Cork CirclesAcrylic Sunglasses, Beautiful Day 6 x 6 Paper Stack, Large Jane Alphabet Stamp – StripesLarge Jane Alphabet Stamp – Outline, Mini Dated Stamp, Noteworthy 12″ x 12″ Paper Collection

May Thursday 3 pocket page spread by Sabrina Poole – supplies used | August 2019 Kit, Be Yourself Phrase Stickers, Shapes and Dots Puffy Stickers, Make Me Smile Cork Circles, Days of the Week Wood Veneers, Highlights From Today Stamp, Back to School Stamp, Mini Dated Stamp

March 2019 pocket page spread by Wendy Antenucci – supplies used | August 2019 Kit, Back to School Puffy Stickers, Make Me Smile Cork Circles, TGIF Wood Veneers, Title Builder Vol. 3 Wood Veneers, Large Months of the Year Wood Veneers

Shine by Daniela – supplies used | August 2019 Kit, Shine Die Cuts, Be Yourself Phrase Stickers, Back to School Puffy Stickers, Make Me Smile Cork Circles, Acrylic Sunglasses, Magical Memories Acetate Die CutsMagical Memories 6 x 6 Paper StackHighlights From Today StampNoteworthy 12″ x 12″ Paper Collection

TGIF by Ashley Laura – supplies used | August 2019 Kit, Be Yourself Phrase Stickers, Back to School Puffy Stickers, Make Me Smile Cork Circles, TGIF Wood Veneers, Days of the Week Wood Veneers, Highlights From Today Stamp

Goals by Tracey Fox – supplies used | August 2019 Kit, Be Yourself Phrase Stickers, Back to School Puffy Stickers, Notebook Puffy Alphabet Stickers, Make Me Smile Cork Circles, Back to School Stamp, Title Builder Vol. 3 Stamp, Noteworthy 12″ x 12″ Paper Collection

Read pocket page spread by Jess Forster – supplies used | August 2019 Kit, Be Yourself Phrase Stickers, Notebook Puffy Alphabet Stickers

Best Summer by Candace Perkins – supplies used | August 2019 Kit, Be Yourself Phrase Stickers, Days of the Week Wood Veneers, Title Builder Vol. 3 Acrylic, Highlights From Today Stamp

You Make Summer Fun by Steph Grimes – supplies used | August 2019 Kit, Be Yourself Phrase Stickers, Shapes and Dots Puffy Stickers, Title Builder Vol. 3 Wood Veneers, Highlights From Today Stamp, Title Builder Vol. 3 Stamp

Back to School Pictures by Jennifer McMurtrey – supplies used | August 2019 Kit, Be Yourself Phrase Stickers, Back to School Puffy Stickers, TGIF Wood Veneers, Magical Memories Wood Veneer Confetti, Small Months of the Year Wood Veneers, Title Builder Vol. 3 Wood Veneers, Notebook Puffy Alphabet Stickers, Back to School Stamp, Noteworthy 12″ x 12″ Paper Collection

Best Friends by Kristina Proffitt – supplies used | August 2019 Kit, Be Yourself Phrase Stickers, Back to School Puffy Stickers, Make Me Smile Cork Circles, Title Builder Vol. 3 Acrylic, Back to School Stamp

Be sure to grab our new August 2019 kit and add-ons while supplies last, and pin your favorite projects to inspire you to create when your box arrives!

Our August kit + add-ons have arrived!

Our August reveal is here and we can’t wait for you to see all of the brand new and exclusive products that are now available in our shop today! Our August kit includes 3 – 4 x 6 inch tags, 18 – 3 x 4 inch tags, and 25 die cuts, that will work great on your scrapbooking layouts, pocket pages, traveler’s notebooks, cards, planners, and more! When designing our kits, we love to think of tags that can be used as prompts to help make it easier for you to get your story started and documented, and this kit is full of those and so much more!

Here’s the first look at all of the fun tags and die cuts included in this kit:

Our monthly kits are limited and once they sell out we will not be restocking! Look for a new kit each month on the 10th at 8:00 am PST, and as a special bonus to celebrate launch day, kits will be on sale for $9.99 for today only, regular price after that will be $11.99. Or, you can lock in our $9.99 price and receive FREE (USA) or reduced (International) shipping each month, on products added to your order with a subscription! If you haven’t started a subscription yet, you’ll want to read below for details!

Check out all of the new and exclusive add-ons we have available this month! All of our coordinating add-ons can be purchased separately, so you have a chance to pick the products that work for your stash and what you’re documenting now, and if you need more than one, you can purchase multiples, too! The new items added to the shop for August are: stamps (Highlight from Today and Back to School), wood veneer (TGIF, Days of the Week, and AUG), Makes Me Smile cork circles, acrylic sunglasses, Be Yourself phrase stickers, puffy stickers (Notebook alphabet and Back to School), Notebook journaling tags, August labels, and On This Day in August journaling tags.

We also have coordinating printables, August cut files, and print and cut labels that coordinate with our kit – once you download these files, you can use/print them over and over again!

Surprise! All of our classes are 50% off now until August 15th and no coupon code is needed!

Subscribers, you can start bundling now! Not a subscriber? Don’t wait any longer to sign up – Today is the perfect day to sign up and save on shipping! With a subscription, you will be guaranteed a kit each month, lock in our launch day special price of $9.99 + shipping, and receive FREE (USA) or reduced (International) shipping on anything added to your box each month during our 24-hour bundling period (starting on the 10th at 8:00 am PST and ending on the 11th at 8:00 am PST). Along with more time to shop, our subscribers will also have access to special discounts on select items during the 24-hour bundling period! These discounted items can be found in our SALE section during bundling, and you must be logged into your kit subscriber account to see them. Our subscriptions are risk free and can be cancelled at any time, too! Quick note: Our kits and add-ons are available without a subscription each month, too.

Please note: When starting a new subscription on the 10th, please allow up to 2 hours (during daytime hours from 8:00 am PST to 4:00 pm PST) for us to switch your account to a subscriber account. You will receive an email with directions on how to access the discounted items and bundle products with your kit subscription.

Here’s a look at the items on sale for our subscribers only this month:

Subscribers: Pick up these six items for FREE to 20% off during our 24 hour bundling period that is going on now and ends on Sunday, August 11th at 8:00 am PST! Please make sure you are logged into your subscriber account, then click on the SALE section to see these items on sale! Once you are logged in, you’ll see your special discounted product listing that specifies Sub Discount.

Looking for more inspiration? Our design team is ready to inspire you with brand new, fresh inspiration using the new products this month! You’ll be able to find our their amazing inspiration in our product listings so you can see their projects while you shop! You’ll want to click on the magnifying glass for a large view of the projects our team has created with all these new items. We will also be showcasing our team’s projects on the blog later today, and throughout the entire month!

Thank you so much for joining us today and for all of your support! We are excited to see how you use these new products! You can share your projects with us in our Facebook group and make sure you use the #EllesStudio hashtag when posting on Instagram for a chance to be featured on our feed and win a gift certificate to our shop!