We are so excited to welcome you to Back to School Week on the Elle’s Studio blog! This week is all about inspiring you to get back to your love of memory-keeping after a busy summer, and teaching you new techniques and ways to use your Elle’s Studio product!
Today, we’re starting this week of learning off by easing you back into your hobby with a step-by-step layout tutorial by Meghann Andrew. She’s using our school-themed August kit and extras to document fun times in the classroom, and we know that her tutorial will help you to re-create her page in no time! Let’s take a look!
Hey there, friends! It’s Meghann, and I’m excited to be with you today to start the fun Back to School week here on the blog! I just loved all of the school-themed product in the August kit and extras, and decided that it was important to have my volunteer time recorded in my daughter’s school memories, as well as her milestones. I created this 12″ x 12″ layout to document my day as the Mystery Reader in my daughter’s classroom.
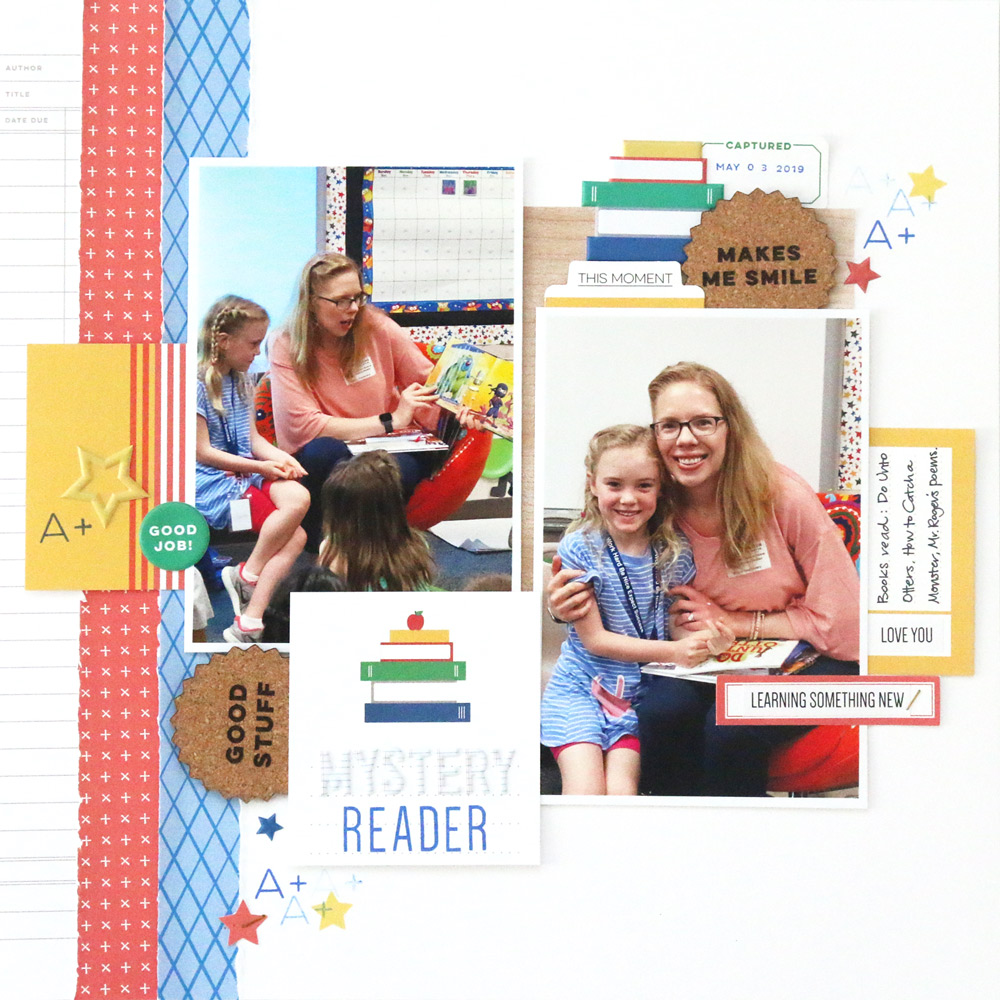
Supplies | August 2019 Kit, Be Yourself Phrase Stickers, Makes Me Smile Cork Circles, Back to School Puffy Stickers, Notebook Puffy Alphabet Stickers, Beautiful Day 6 x 6 Paper Stack, Back to School Stamp, Jane Alphabet Stamp
I’m going to show you how to create this layout quickly in 12 easy steps! In less than 30 minutes, you’ll have a brand new layout in your album!
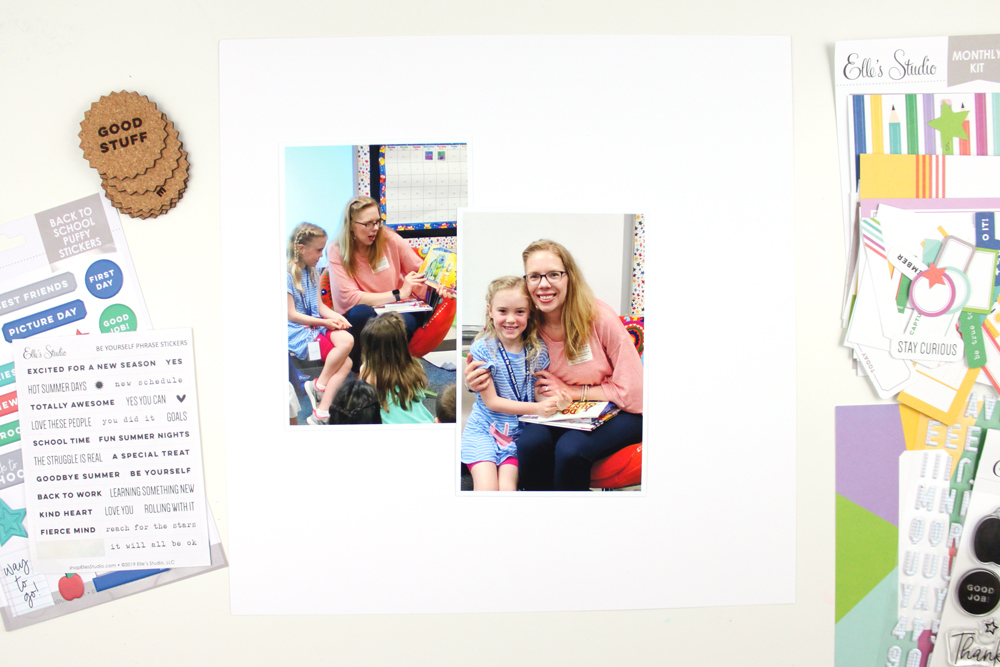
01. Start by gathering your August Elle’s Studio supplies, a 12″ x 12″ piece of smooth white cardstock and two 4″ x 6″ vertical photos!
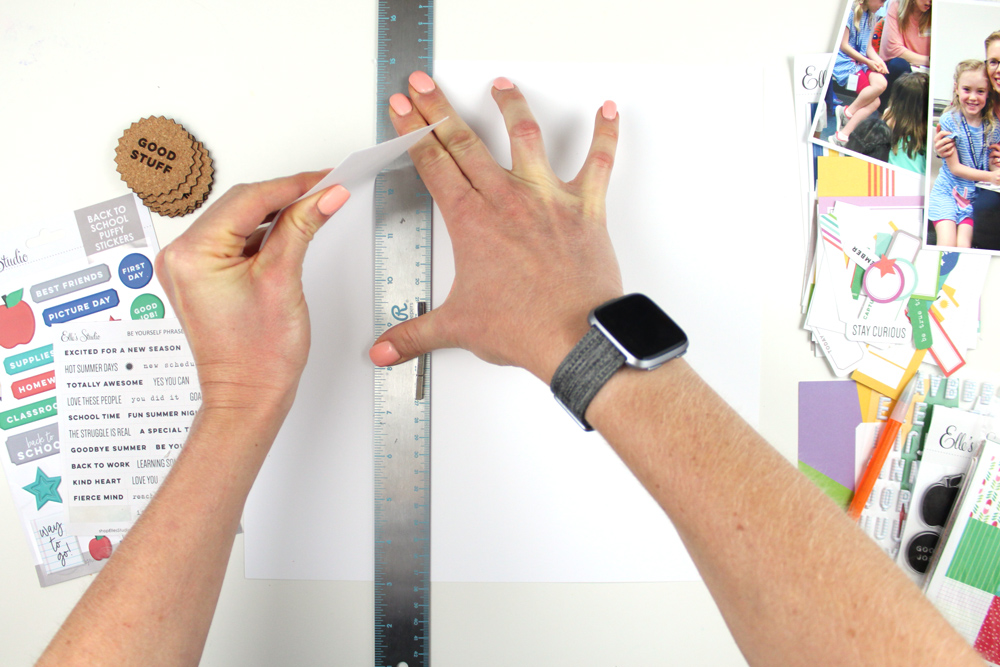
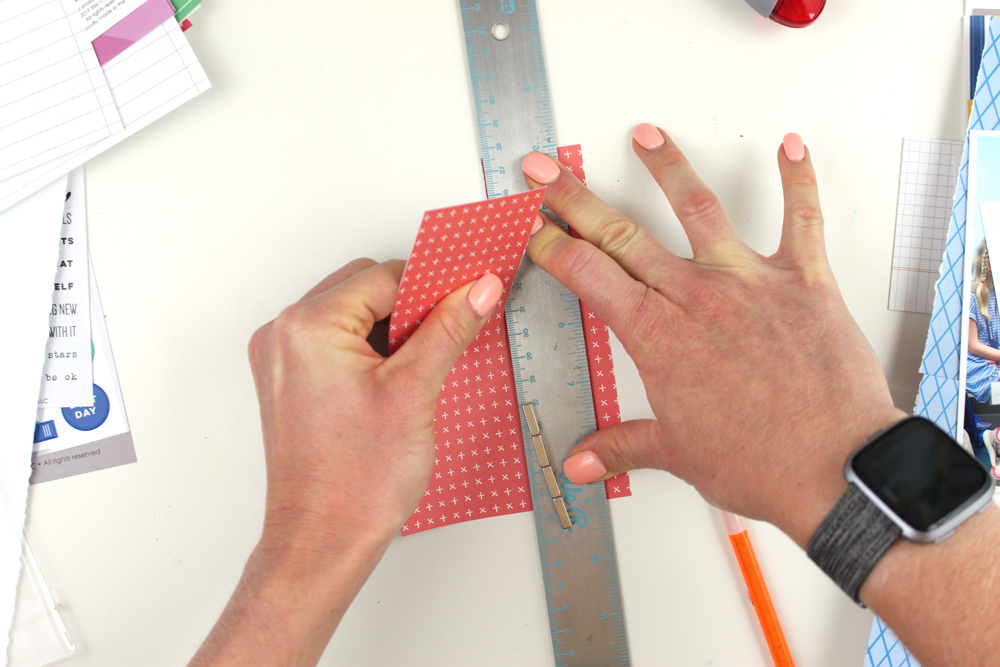
02. Make small pencil marks 3″ from the left edge of your cardstock base. Place a long, metal ruler along your marks, hold down the ruler and tear the paper along the edge of the ruler.
03. Choose three different patterned papers. I selected patterns from the Beautiful Day 6 x 6 Paper Stack. Tear down the length of two of the papers, using the same technique as above, so that your paper strips are 1.25″ wide. For the third pattern, simply cut a 1.25″ wide strip with a straight edge. If you are using the 6″ papers like me, you will need two strips of each pattern to run the length of your layout. Adhere the two torn patterned papers to the torn, left edge of the white cardstock, so that 1″ of each pattern is showing. Finish the background with the straight edged pattern on the left. You background should measure 12″ x 12″ again at this point.
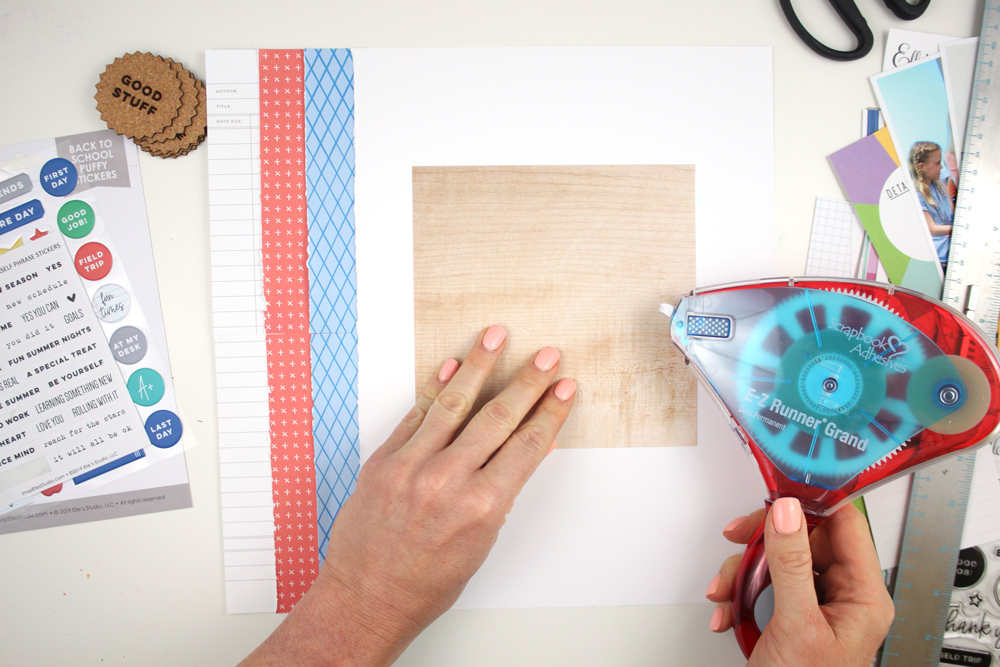
04. Adhere the 6″ x 6″ woodgrain pattern to the cardstock background, 1.75″ from the right edge, and 2.5″ from the top edge of the cardstock background paper.
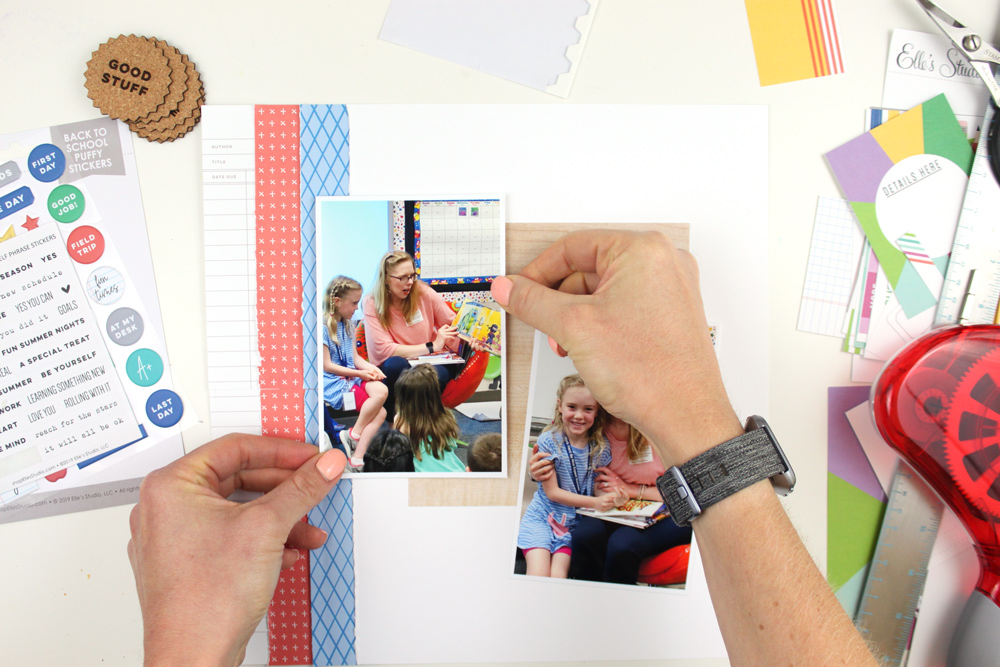
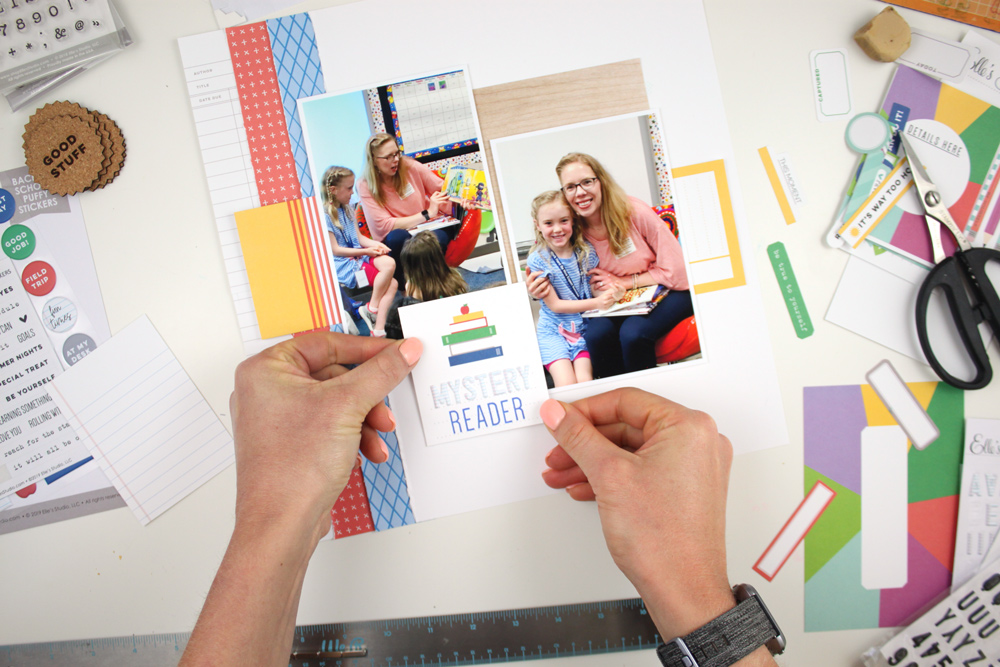
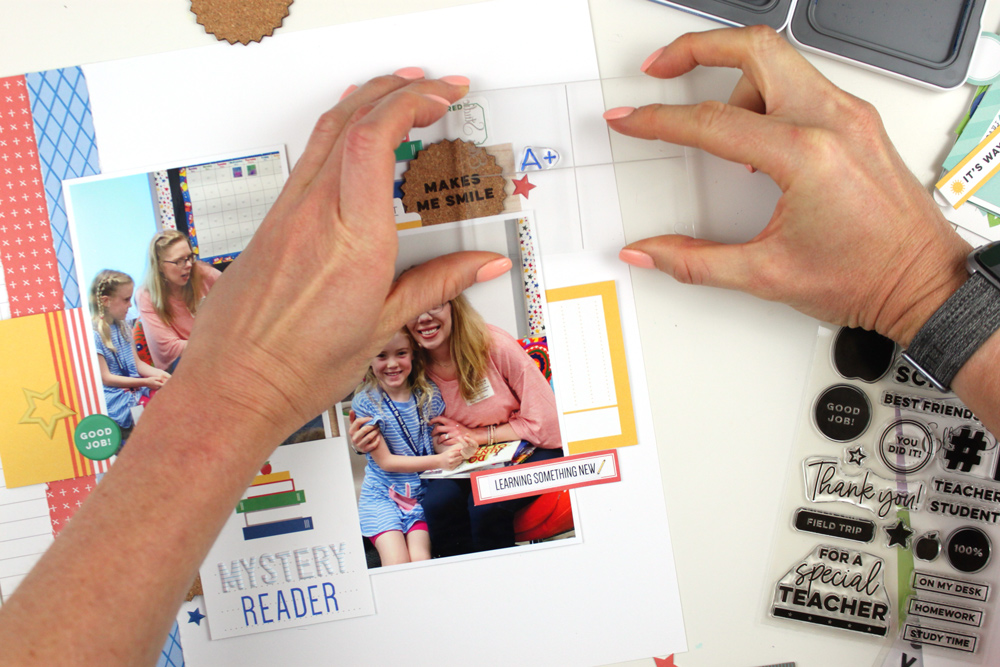
05. Adhere your photos using dimensional adhesive: the left photo 2.5″ from the left edge and 2″ from the top edge, and the right photo 1.5″ from the right edge and 3.75″ from the top edge.
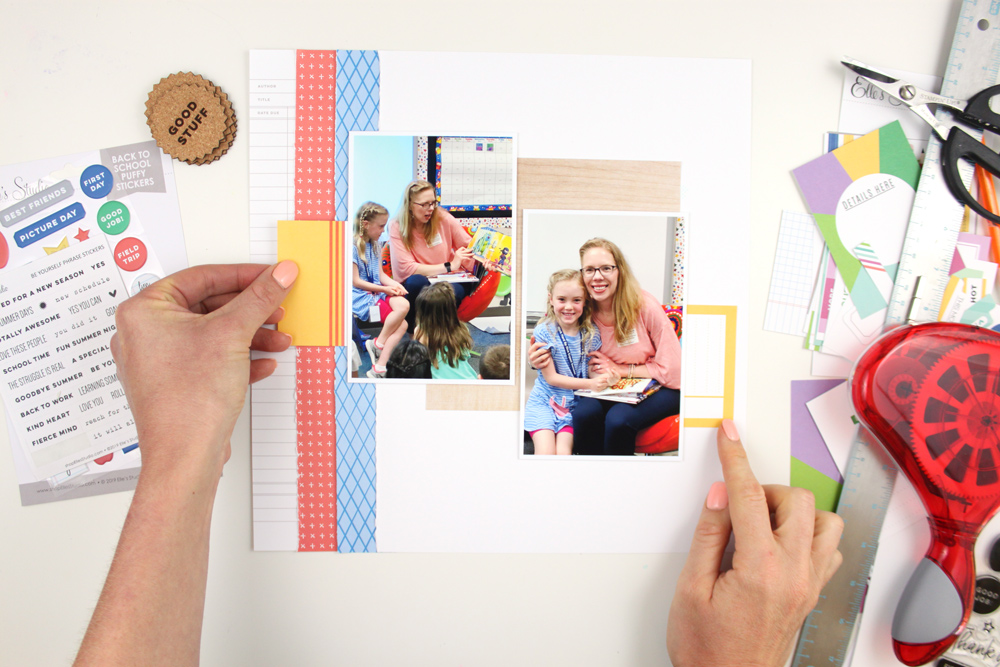
06. Trim the two yellow 3″ x 4″ tags from the August 2019 Kit to slide beneath your photo edges and adhere. This adds another pop of color and balance on the page.
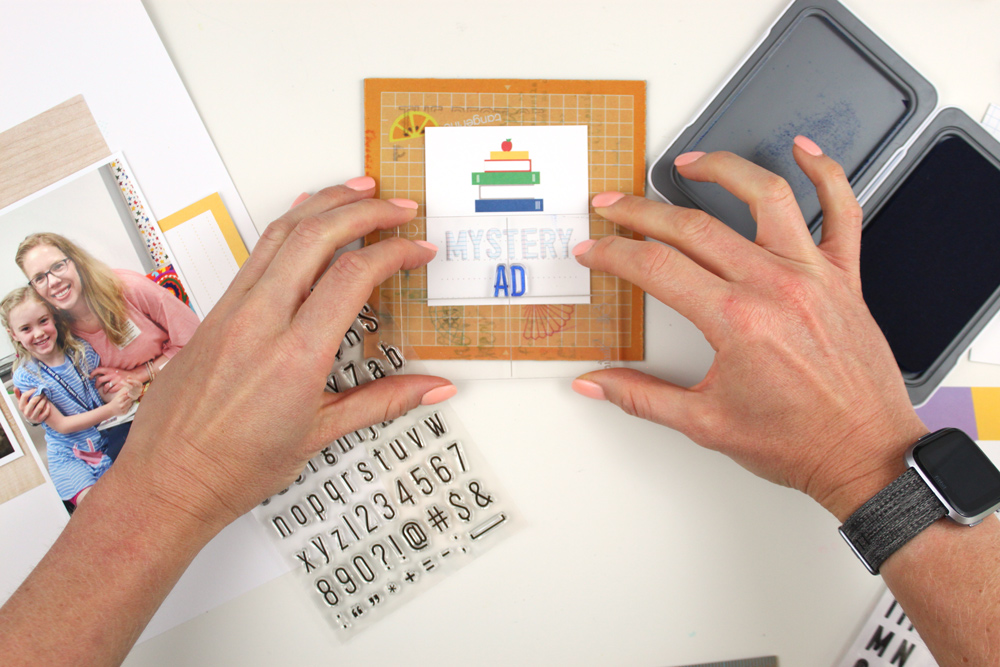
07. Create your title tag! Grab the book stack 3″ x 4″ tag from the August 2019 Kit, trim off the bottom half inch, and add the Notebook Puffy Alphabet Stickers to create your first word. For the second word, grab the awesome Jane Alphabet Stamp to stamp the word in blue ink. I always begin with the middle letter/s of the word, to be sure my word is centered on the tag.
08. Adhere your title tag using dimensional adhesive at the base of the left photo. Adhere the “good stuff” Makes Me Smile Cork Circle just underneath of your title tag on the left side.
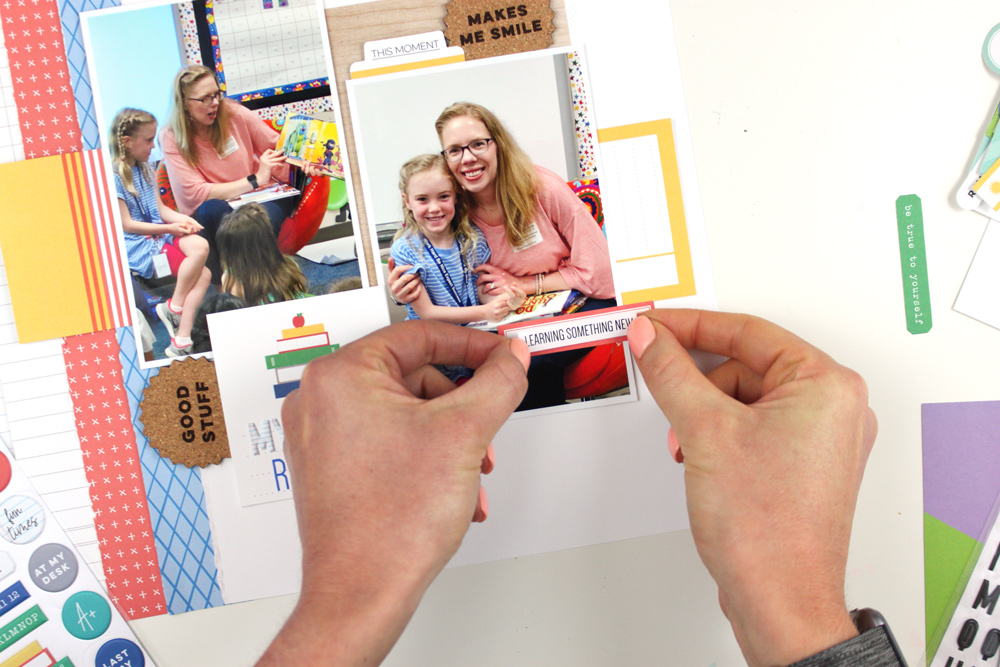
09. Using the Be Yourself Phrase Stickers, adhere “learning something new” or a different phrase to the coral label from the August 2019 Kit. Adhere this overlapping the photo on the right, just underneath the yellow tag.
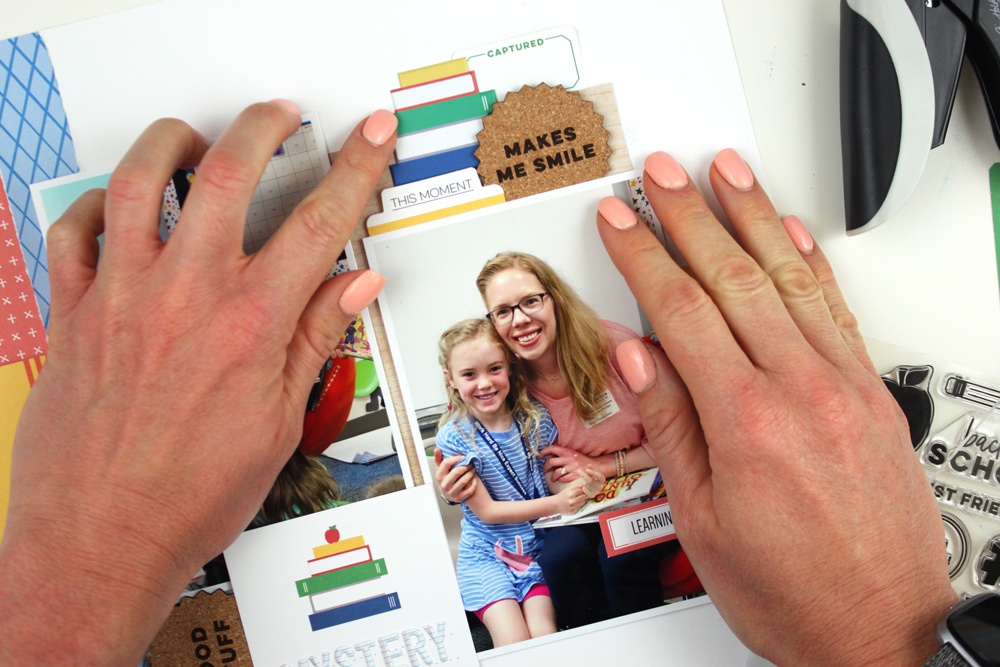
10. Create an embellishment grouping above the photo on the right of the “captured” and “this moment” die cuts from the August 2019 Kit, along with the Makes Me Smile Cork Circle and the Back to School Puffy Sticker book stack. Tip: If you use dimensional adhesive on the “this moment” tab and Makes Me Smile Cork Circle, it’s easy to slide the book puffy stickers behind.
11. Pull out your blue ink and the Back to School Stamp to add the “A+” stamp three times, without re-inking, around your three embellishment groupings: at the top right corner, around the title tag, and on the yellow tag on the center left. Around your stamping, add the Back to School Puffy Sticker stars and “good job” circle.
12. Add the “love you” Be Yourself Phrase Sticker to the bottom of the journaling tag on the right, then add your typed or handwritten journaling to finish off the page!
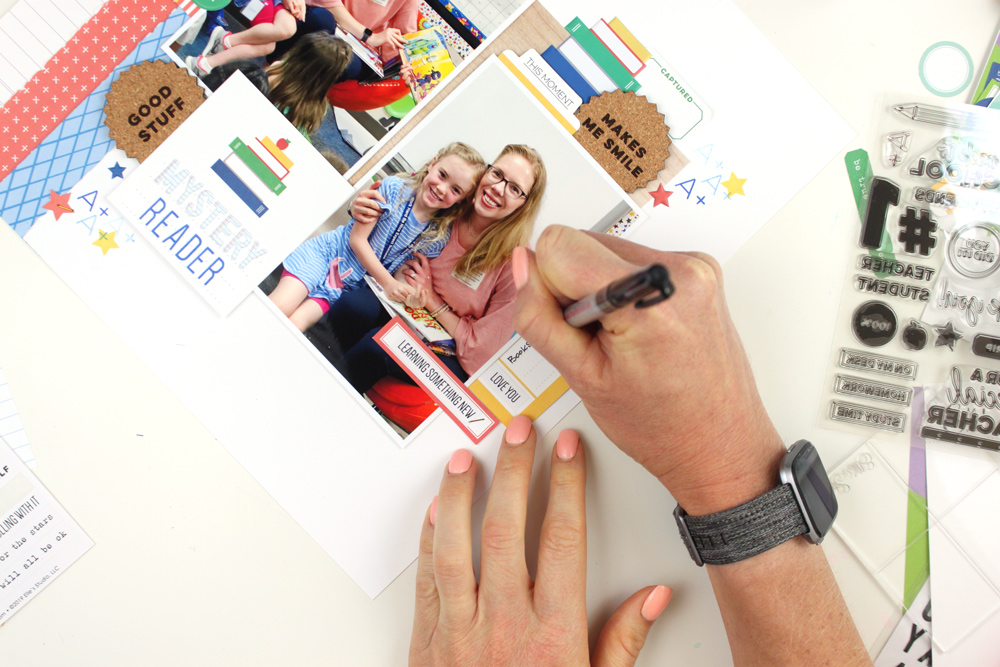
This page is so easy and quick to put together, and contains so much color and texture. I just love it! I can’t wait to see what you create this week! Stay tuned here on the blog for so much more inspiration and ideas from our design team for Back to School week! Happy creating!

Share your layout created with Meghann’s instructions in our Elle’s Studio Facebook group, or on Instagram using the hashtag #EllesStudio! We’d love to see how her instructions helped you to make the most of your crafty time this week!