Adventures Recorded in a Traveler’s Notebook with Marsha Farris

Summer is officially here, and with outdoor adventures in full swing, your creative time may be lacking. Maybe it’s time to try a smaller format for your memory keeping? Today, design team member Marsha Farris is with us to share her latest, summery TN spread, that we know will inspire you!

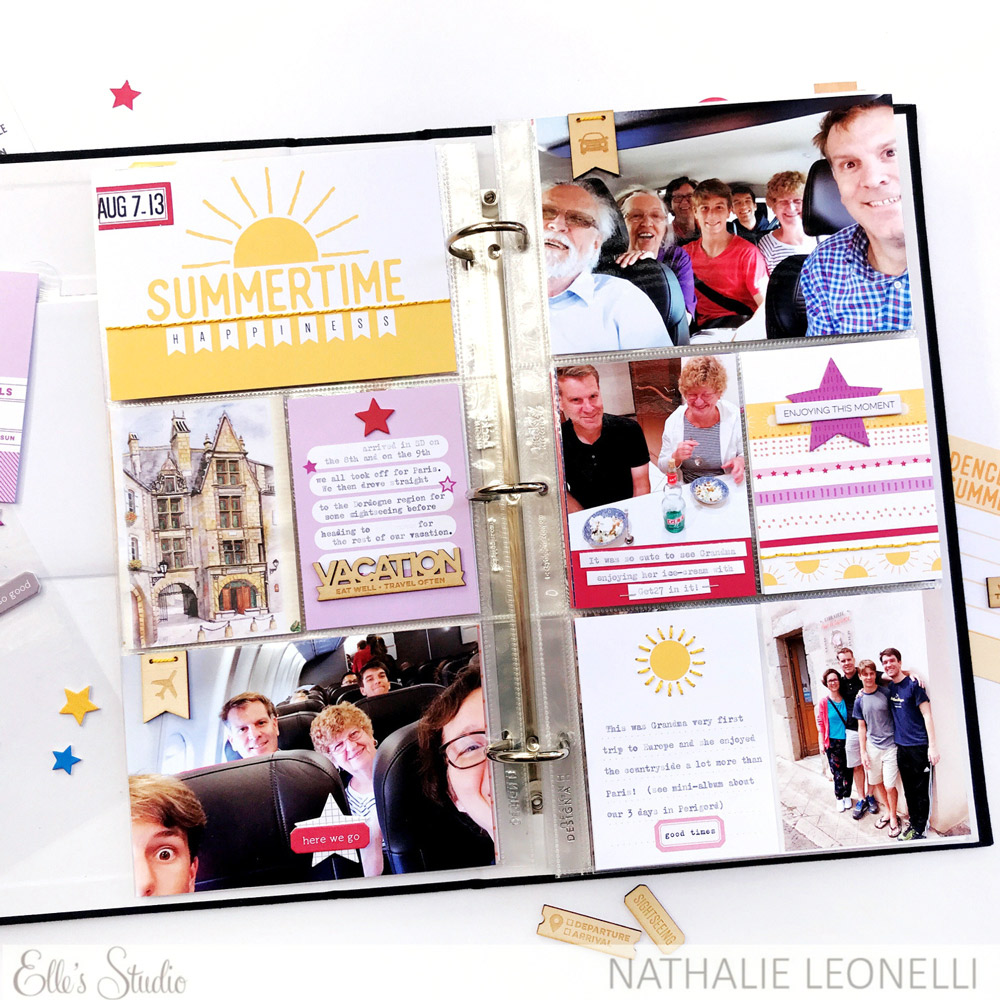
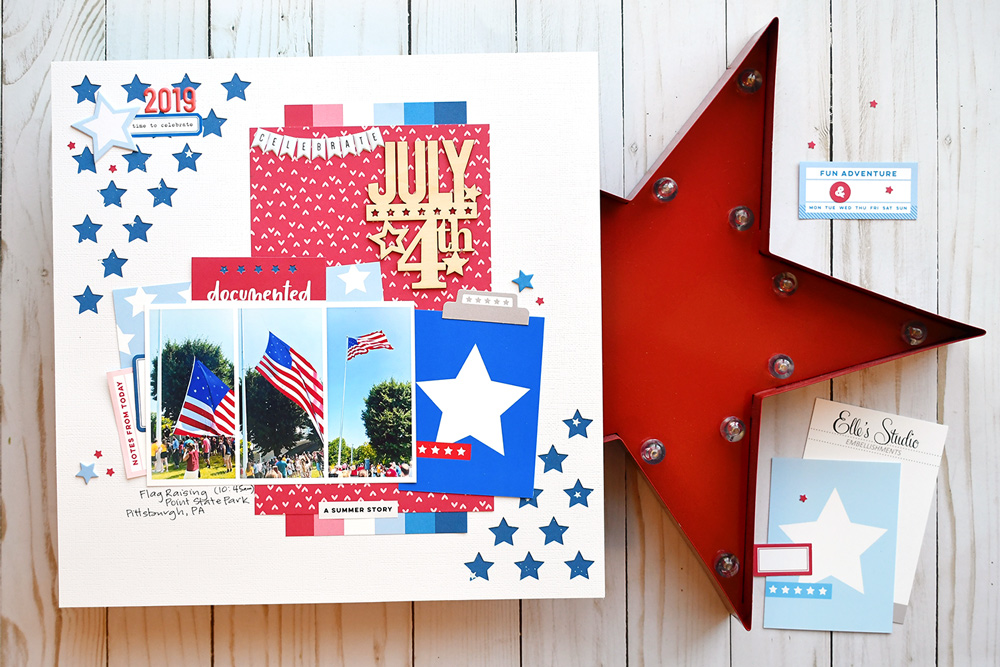
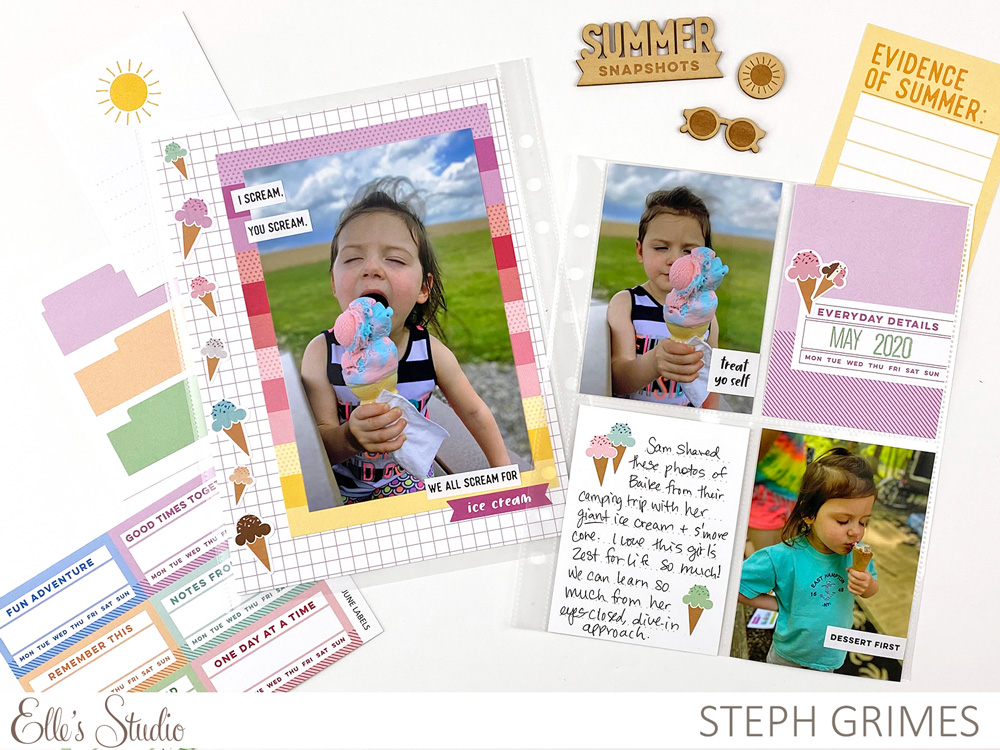
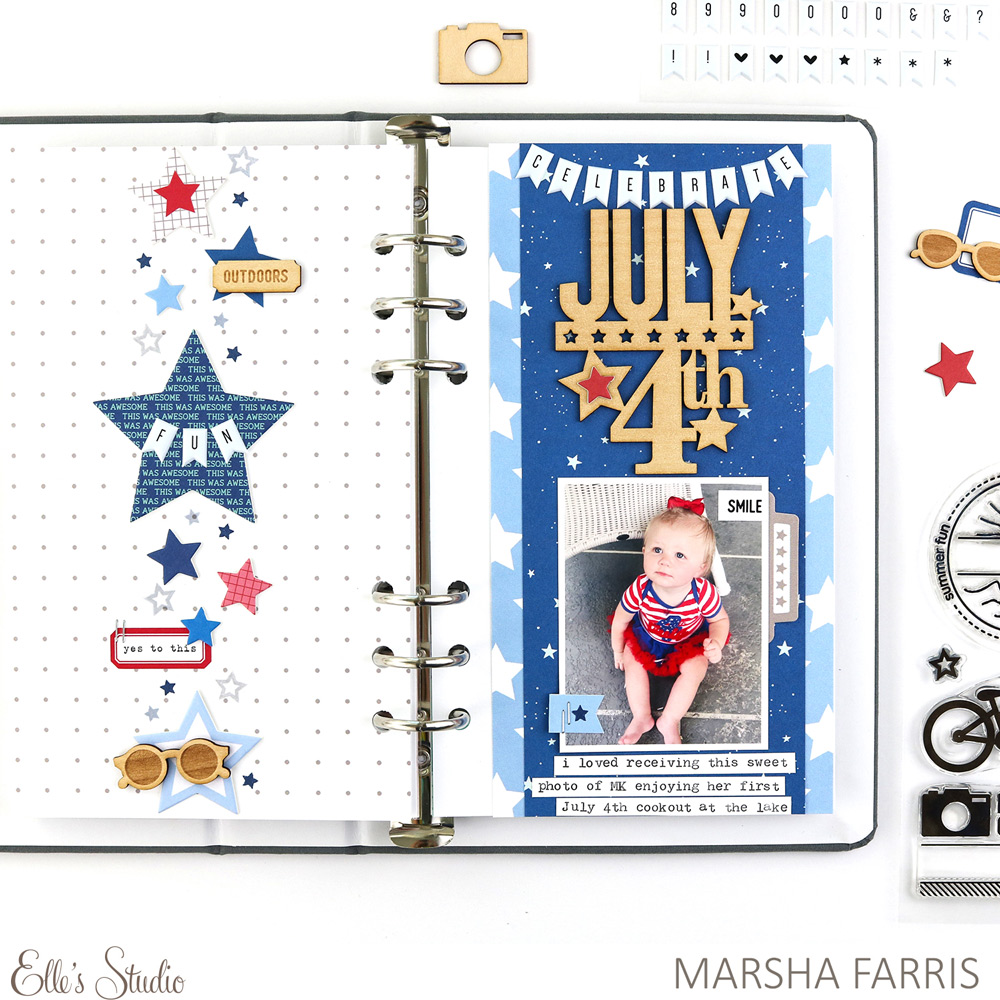
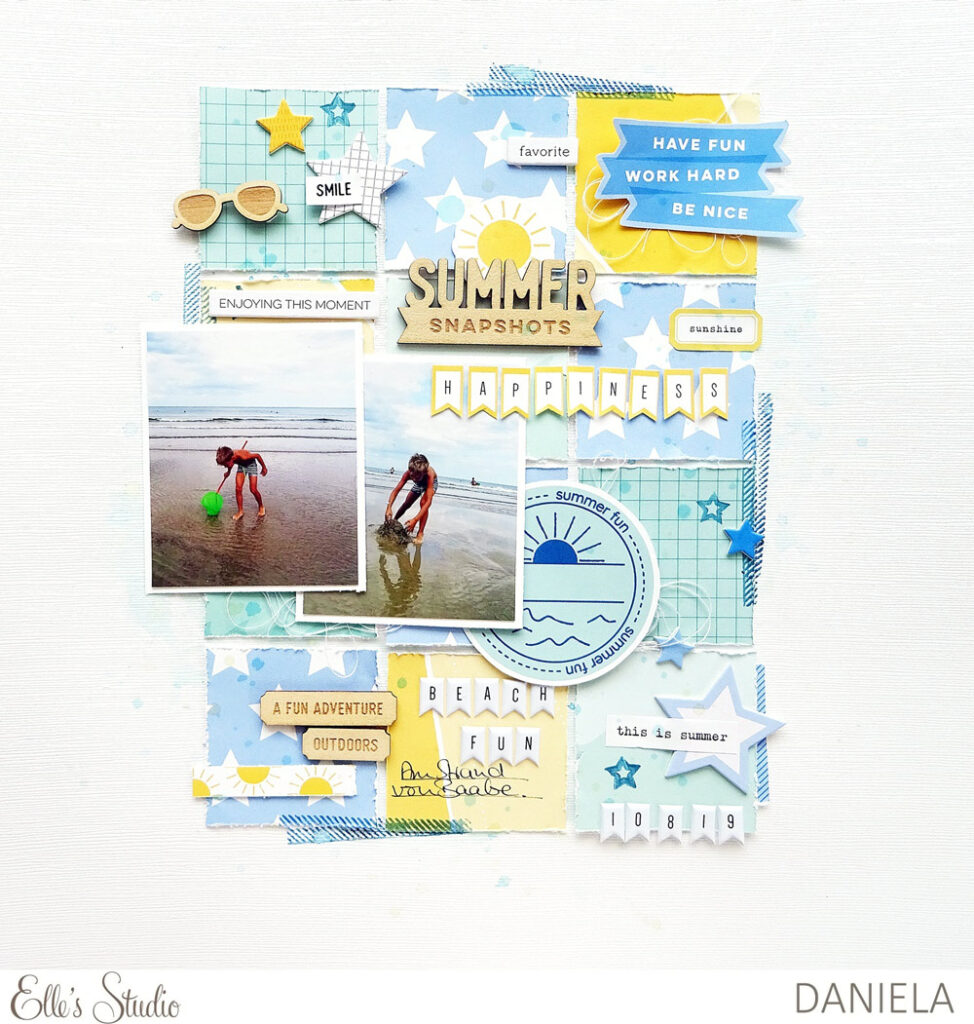
Hey, Elle’s Studio friends! It’s Marsha, and I’m sharing a traveler’s notebook layout using the June 2020 Kit and add-ons. I love creating in a traveler’s notebooks, and Elle’s Studio products are perfect to use in this format! For my layout today, I was inspired by the awesome Puffy Alphabet Banners and one of the June Cut Files to create a fun summer layout featuring a large title banner!
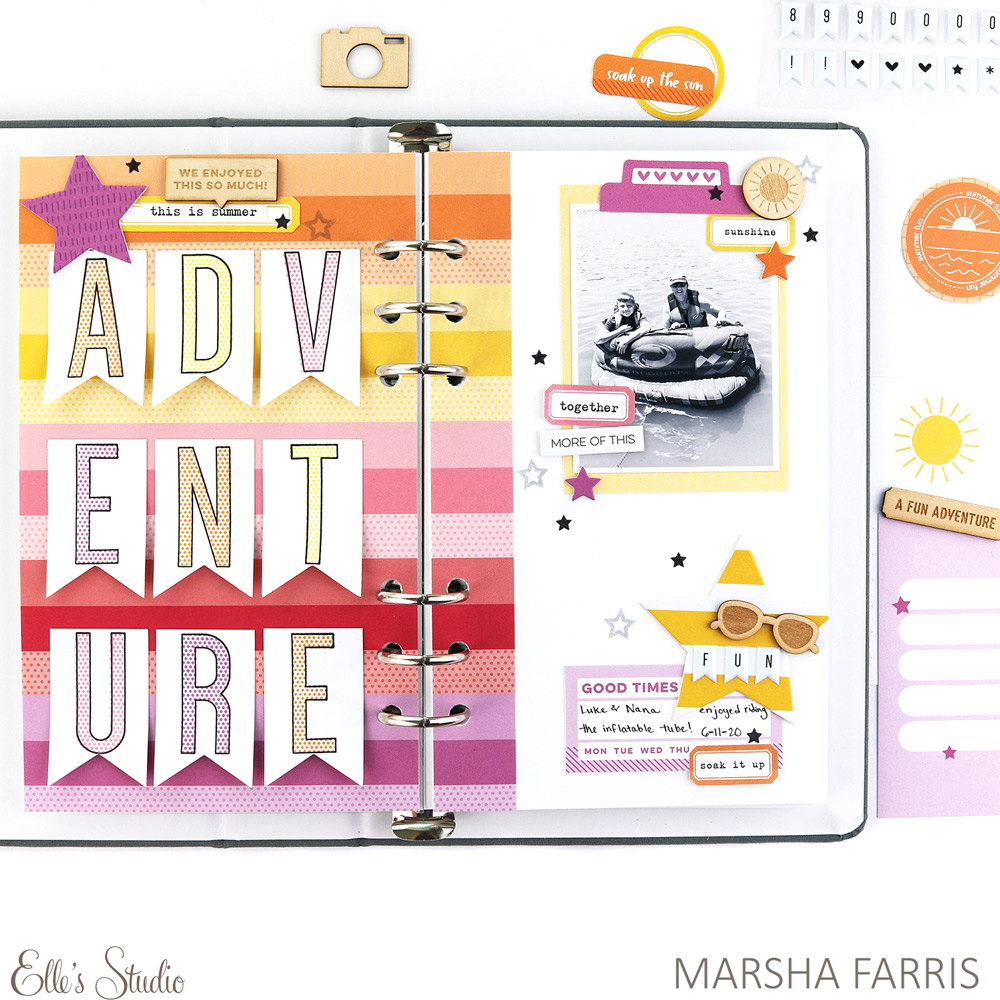
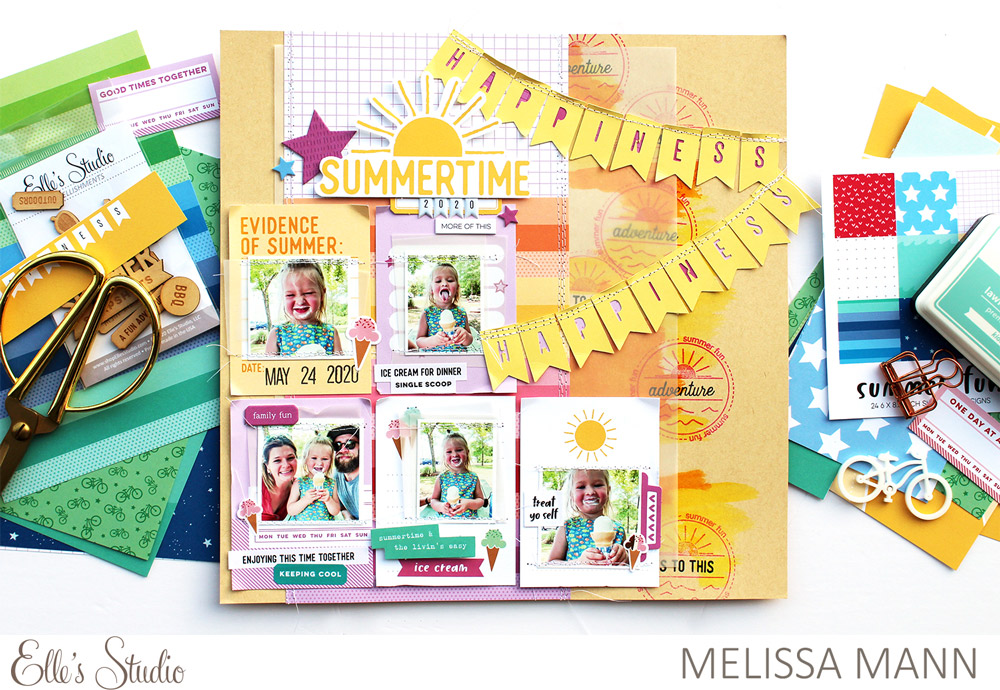
Supplies | June 2020 KitJune 2020 Cut Files, June Labels, Summer StickersChipboard Star Stickers, Puffy Alphabet Banners, Summer Wood Veneers, Vacation Wood VeneersSummer Fun 6 x 8.5 Inch Paper StackSummer Fun Stamp, Large Jane Alphabet Stamp — Polka Dot, Large Jane Alphabet Stamp — Outline

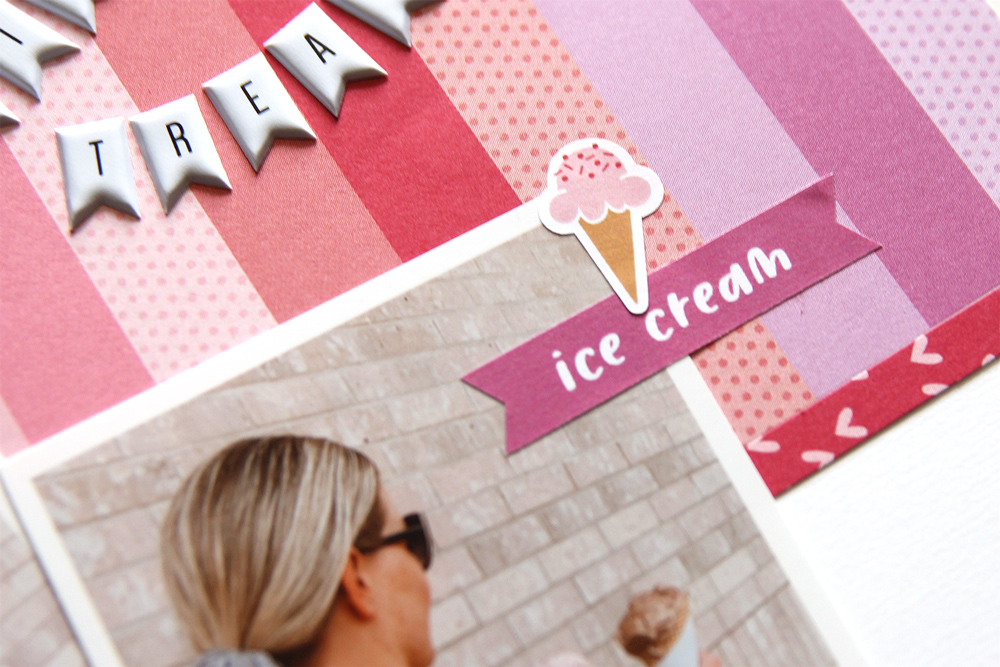
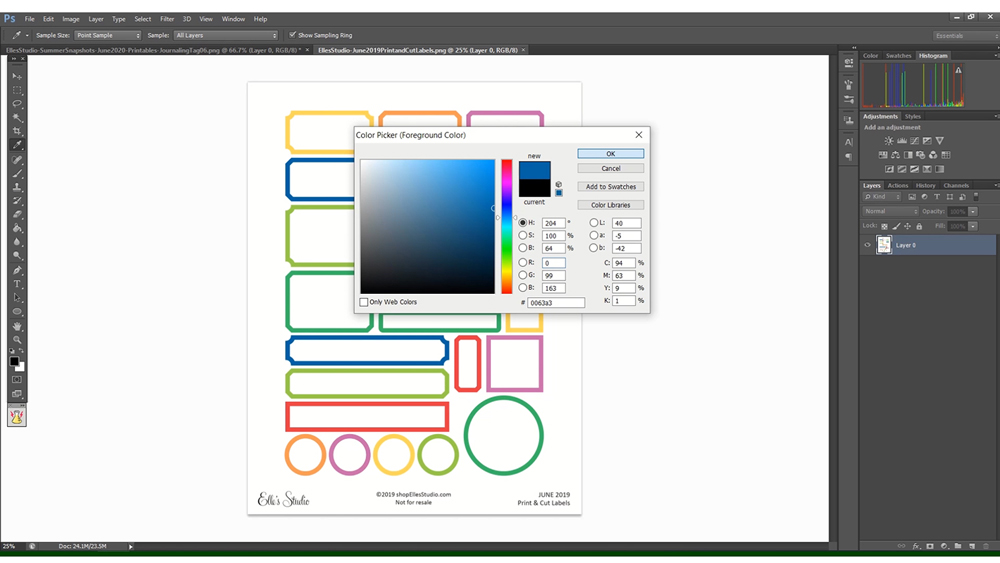
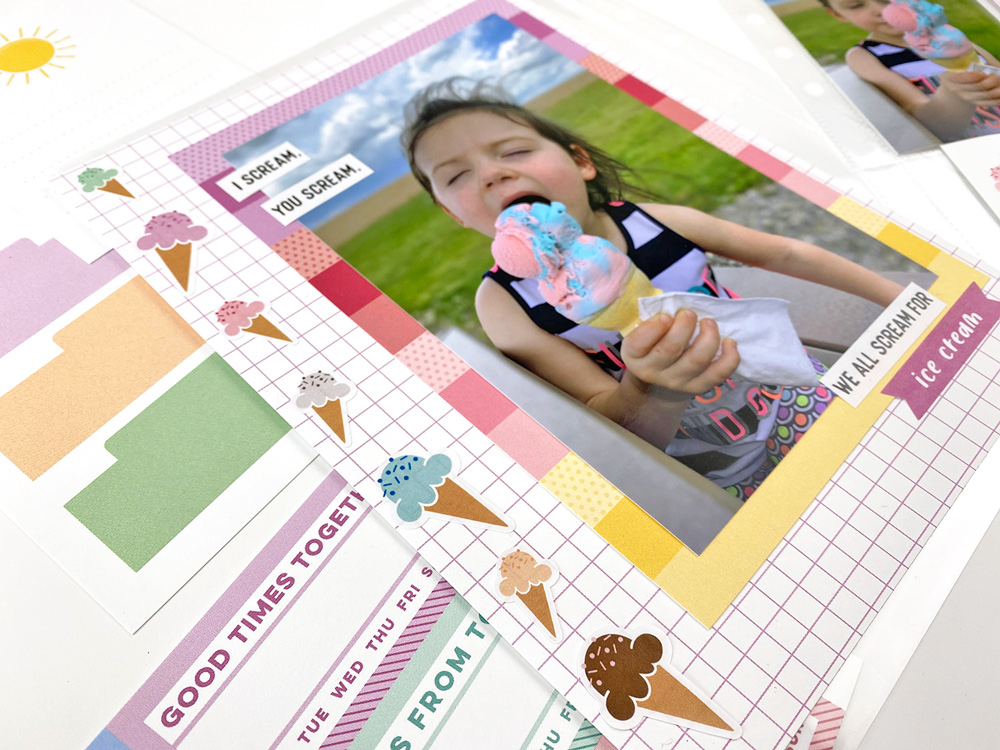
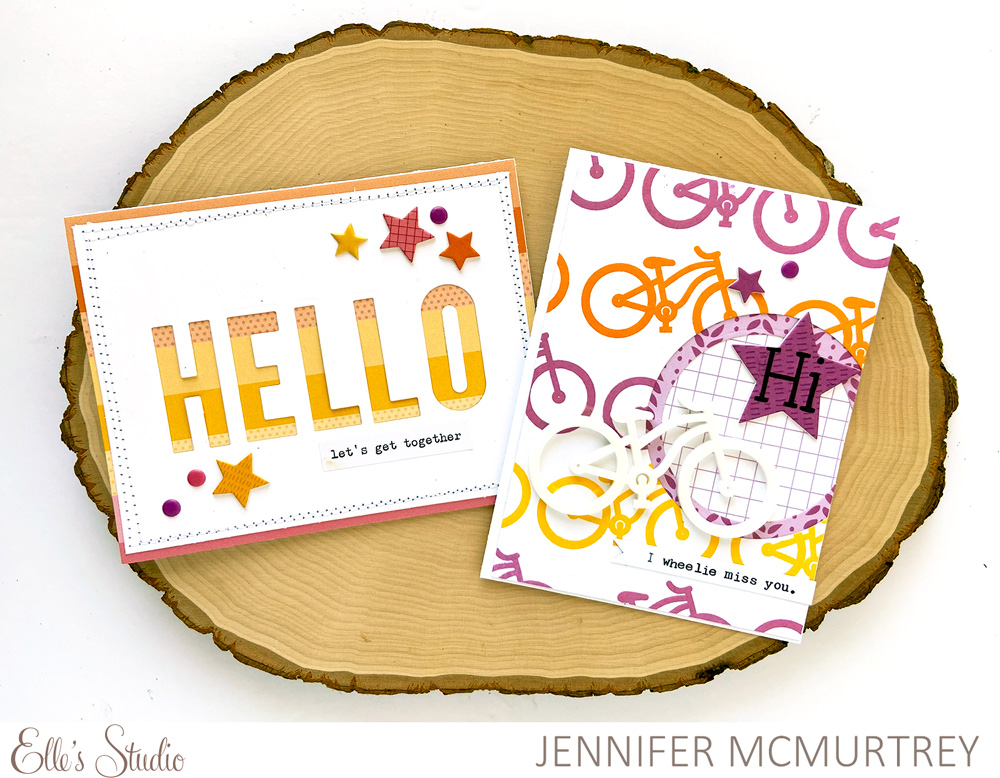
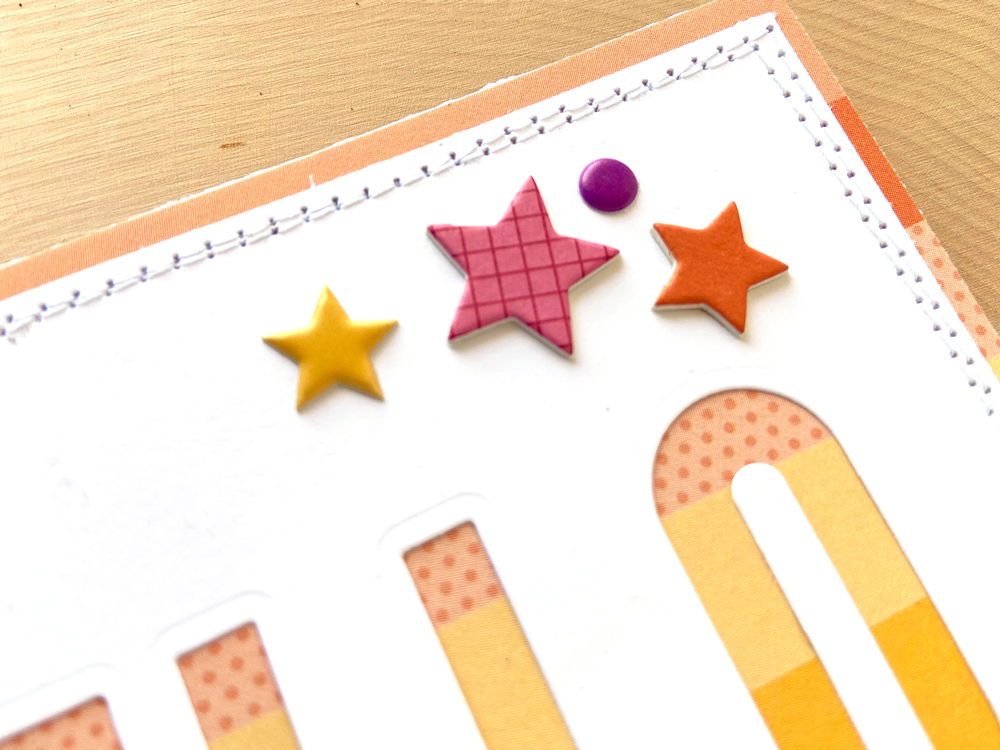
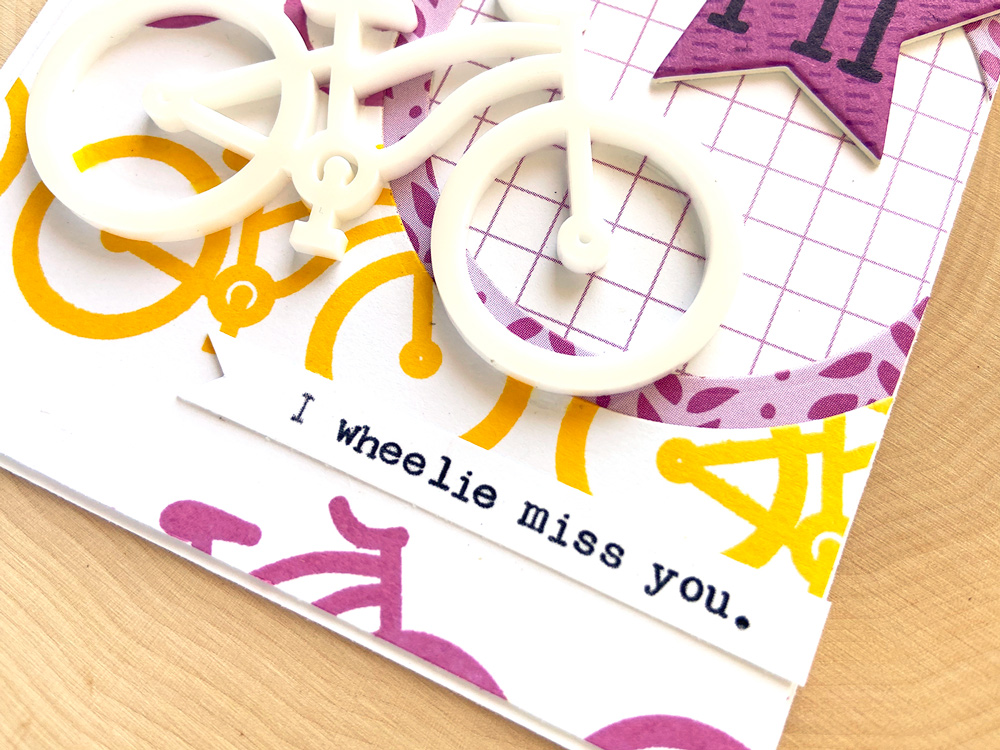
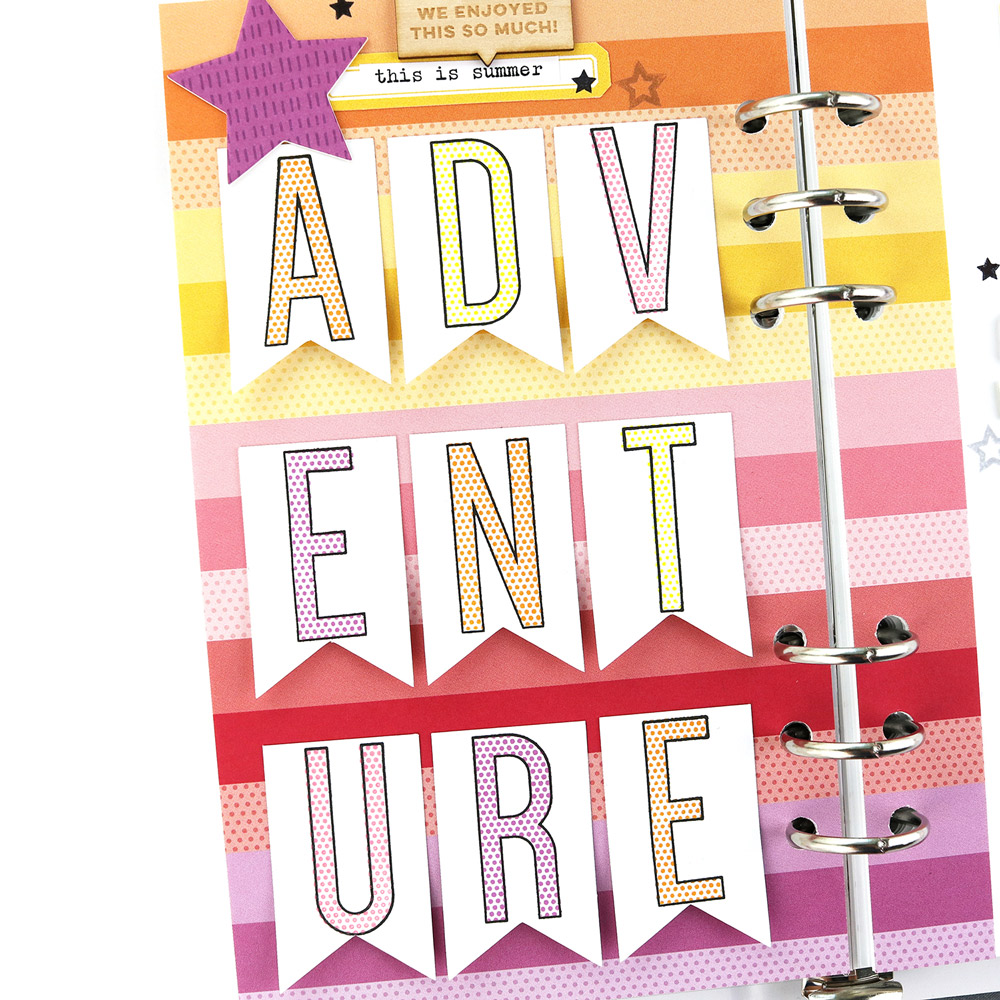
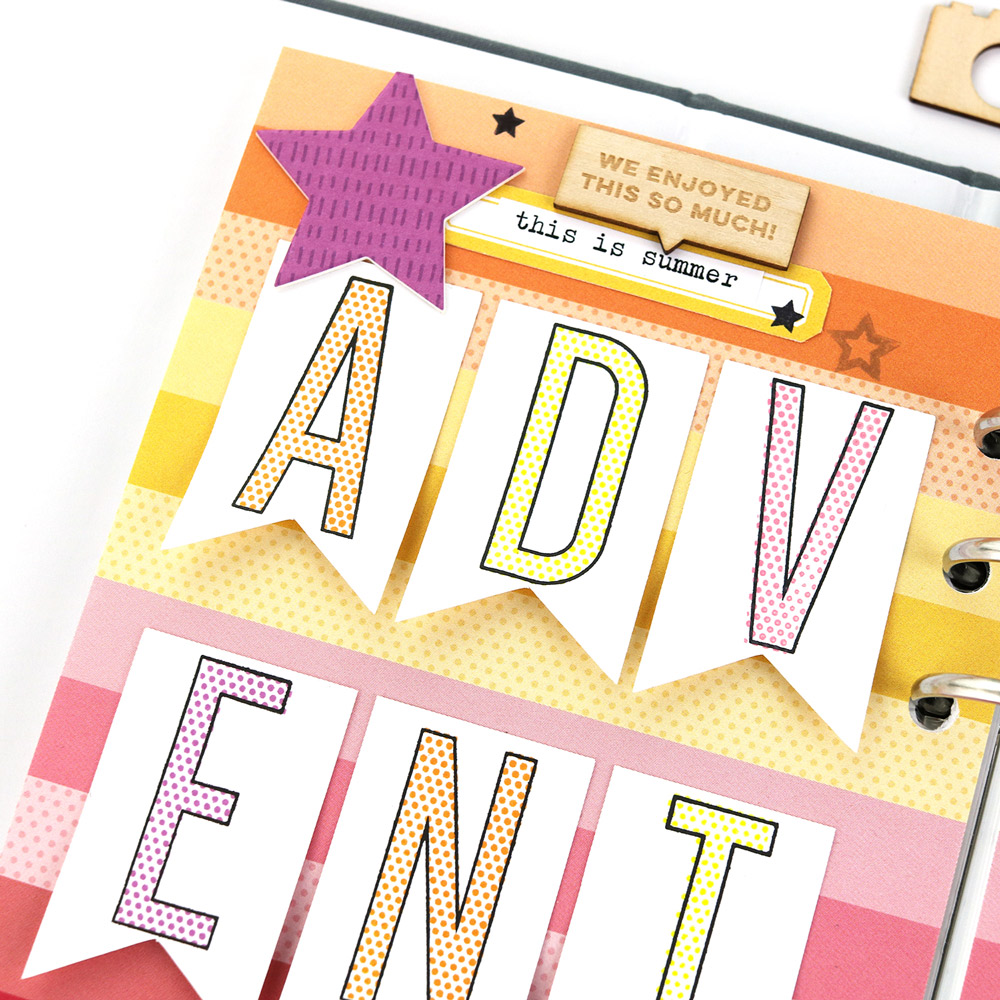
To begin my layout, I resized each banner piece from the June 2020 Cut Files to 1.25″ x 2″ and cut them out using white cardstock. I also chose to only cut out the banner shapes without the letters, so that I could add my own stamped title. Using alternating colors of orange, yellow, pink, and purple, I stamped the letters of the word “adventure” using the polka dot Large Jane Alphabet Stamp.  I liked how this repeated the dot pattern from the striped paper in the Summer Fun Paper Stack that I planned to use on the spread. Next, I stamped the outline of each letter with the outline Large Jane Alphabet Stamp using black ink. I love the way the banner title turned out using the stamps! I adhered the banner pieces onto a striped patterned paper from the Summer Fun Paper Stack, adding them in three rows down the page.  

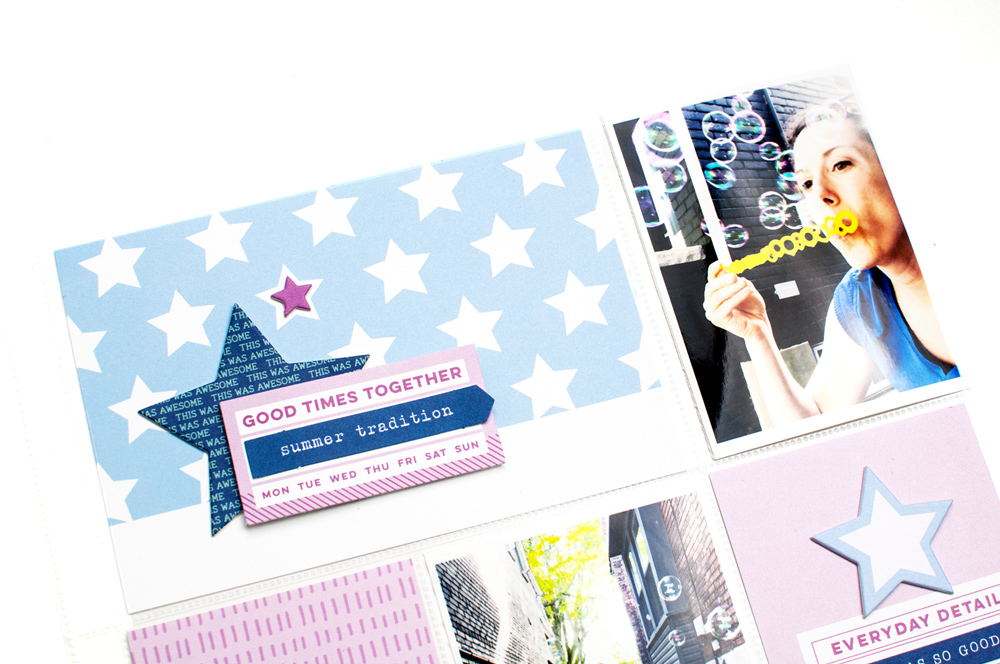
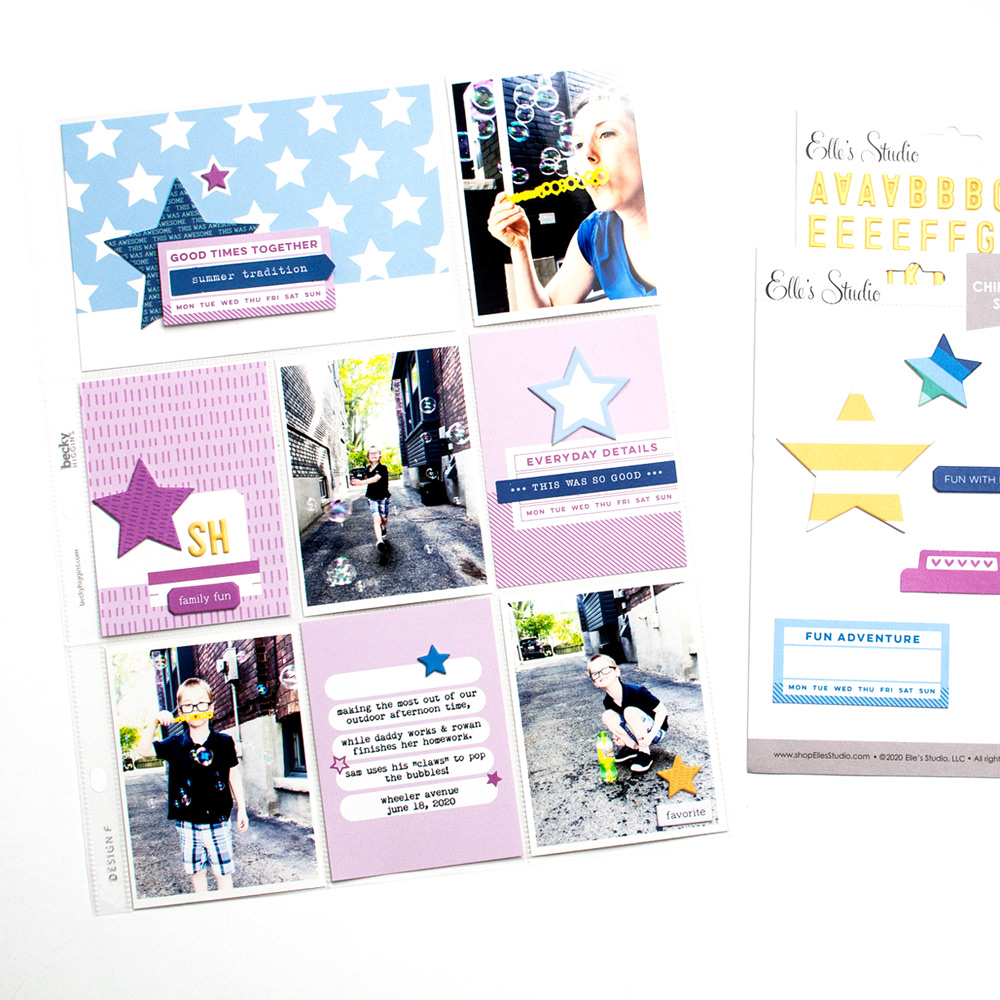
To complete this side of the spread, I added a star from the Chipboard Star Stickers along with a label from the June 2020 Kit, a phrase sticker from the Summer Stickers, and a wood veneer piece from the Vacation Wood Veneers.  I also stamped some stars from the Summer Fun Stamp using light gray and black ink. 

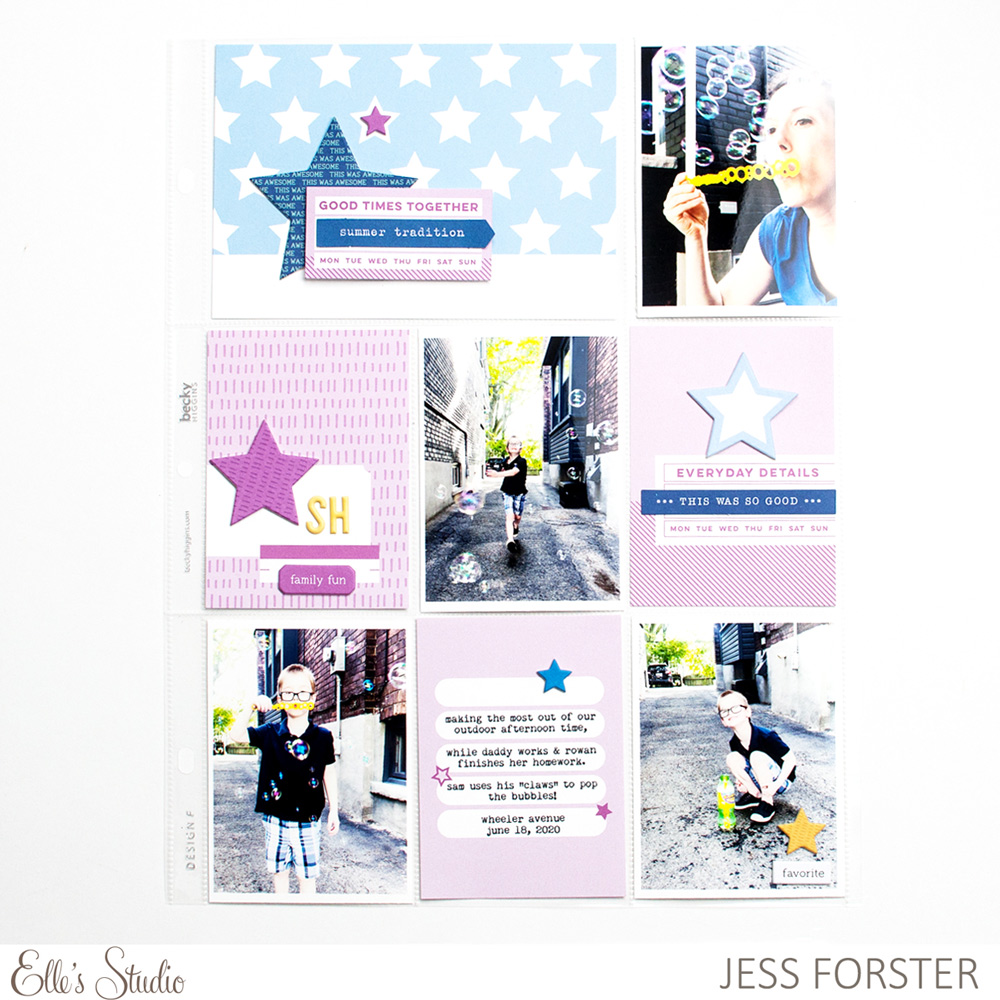
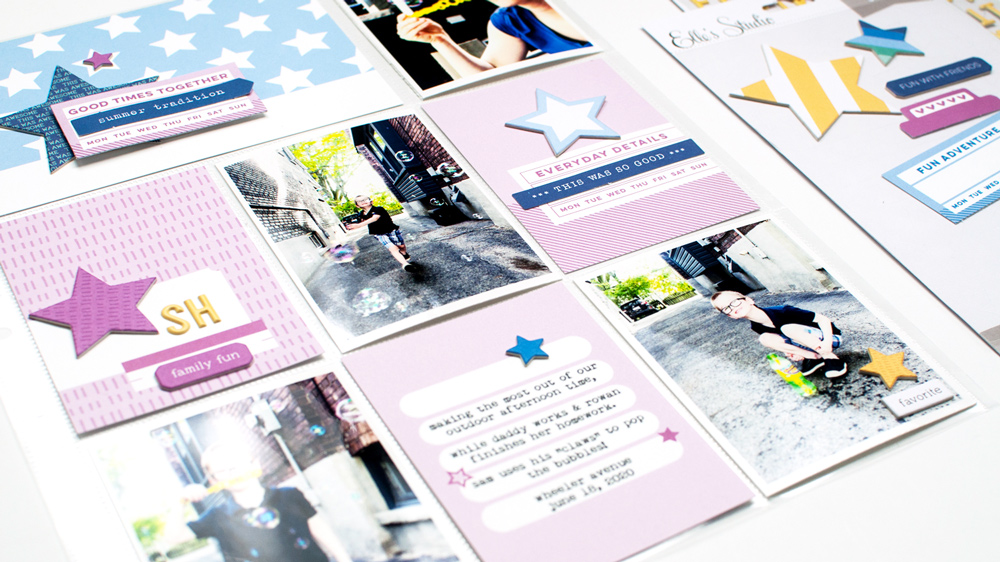
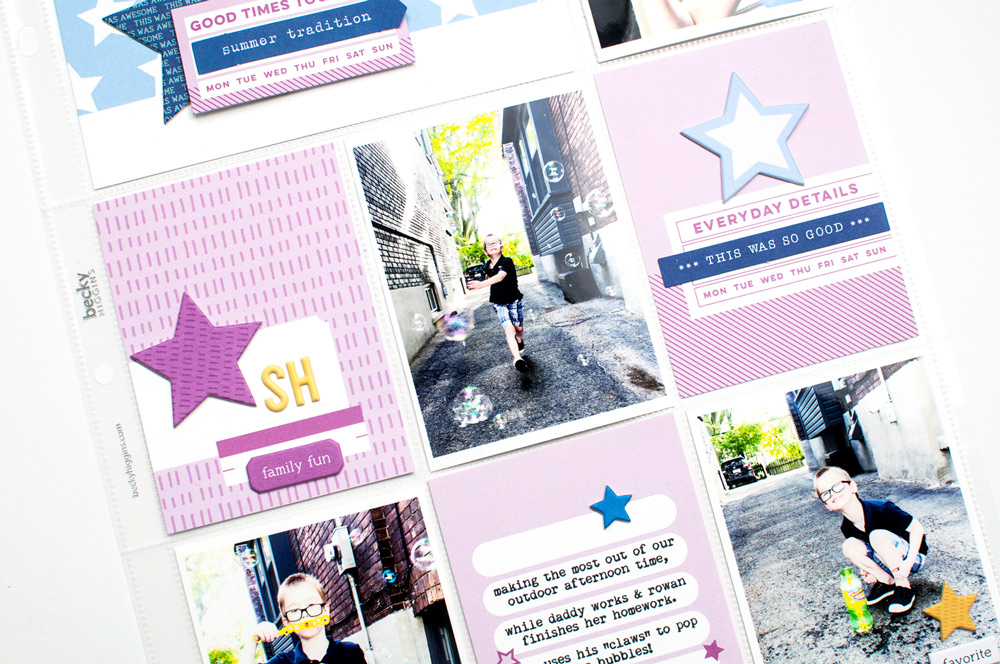
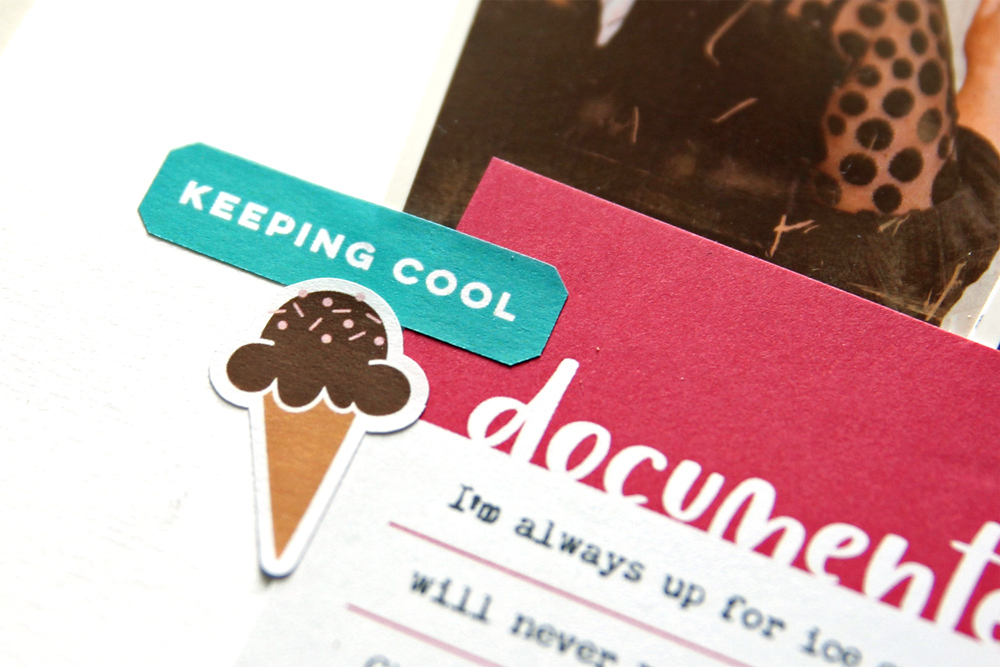
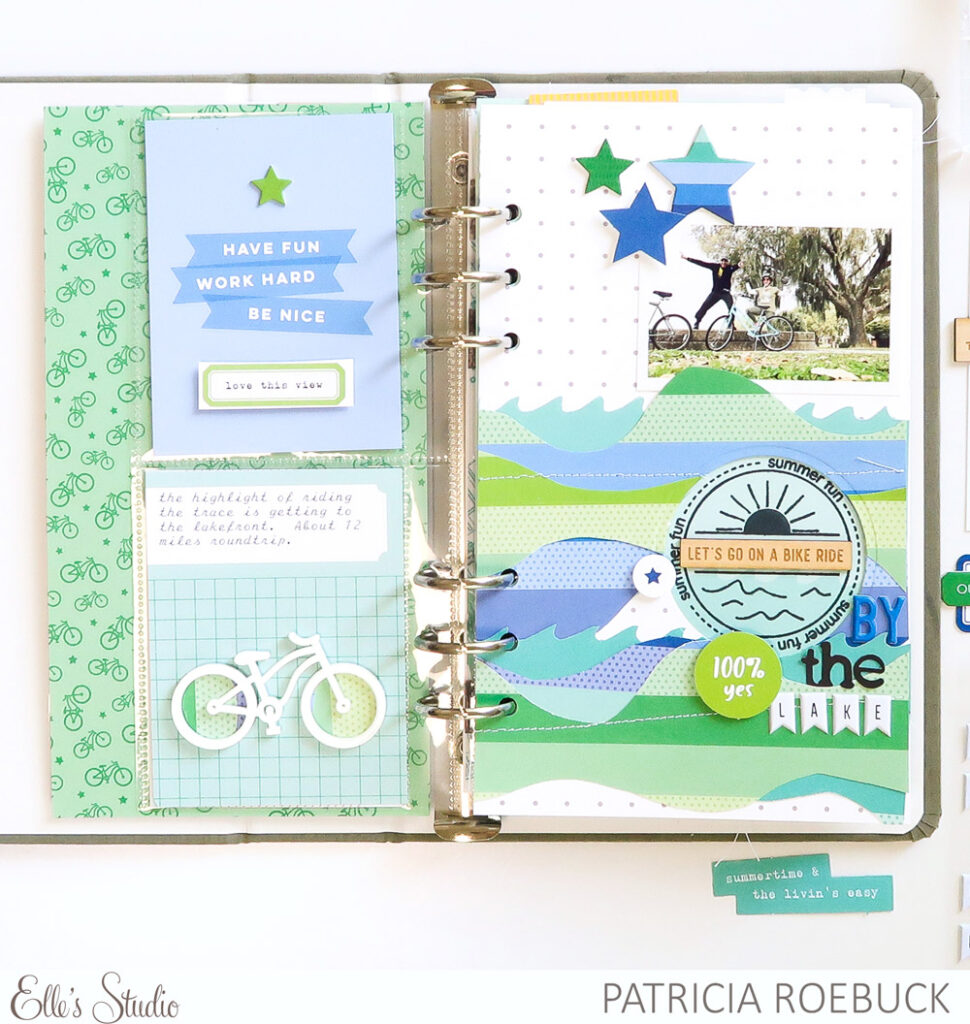
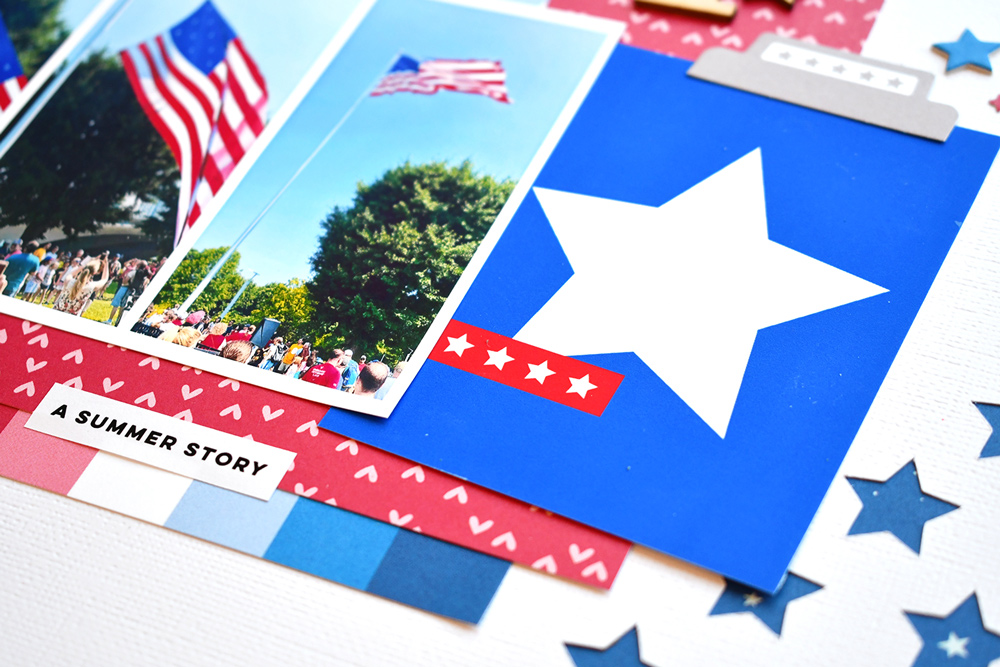
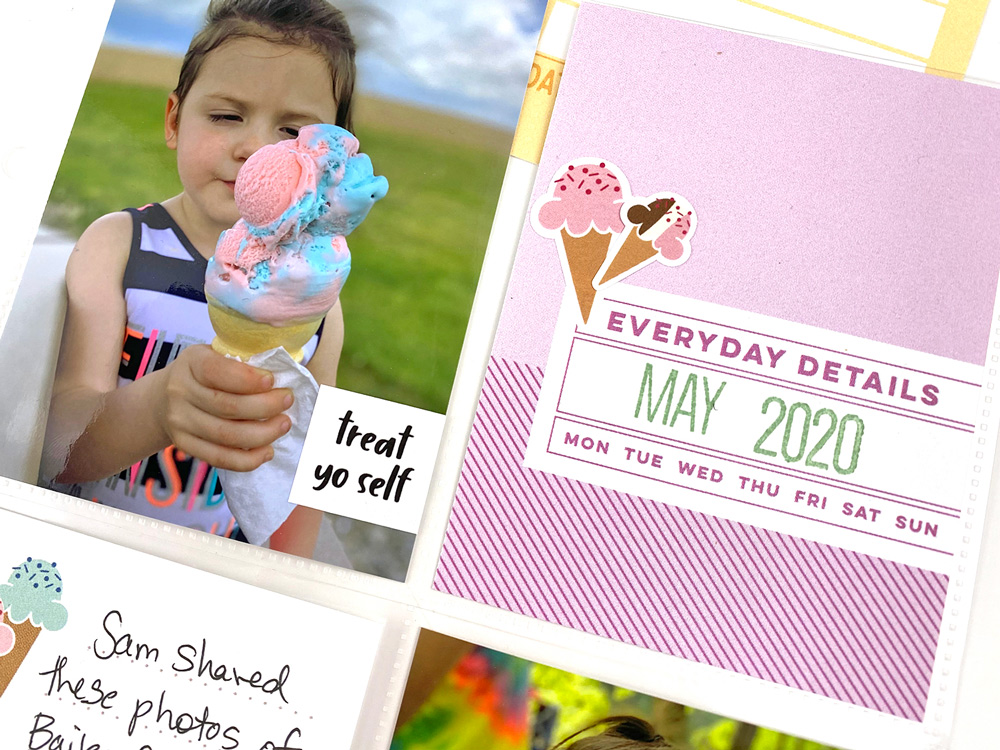
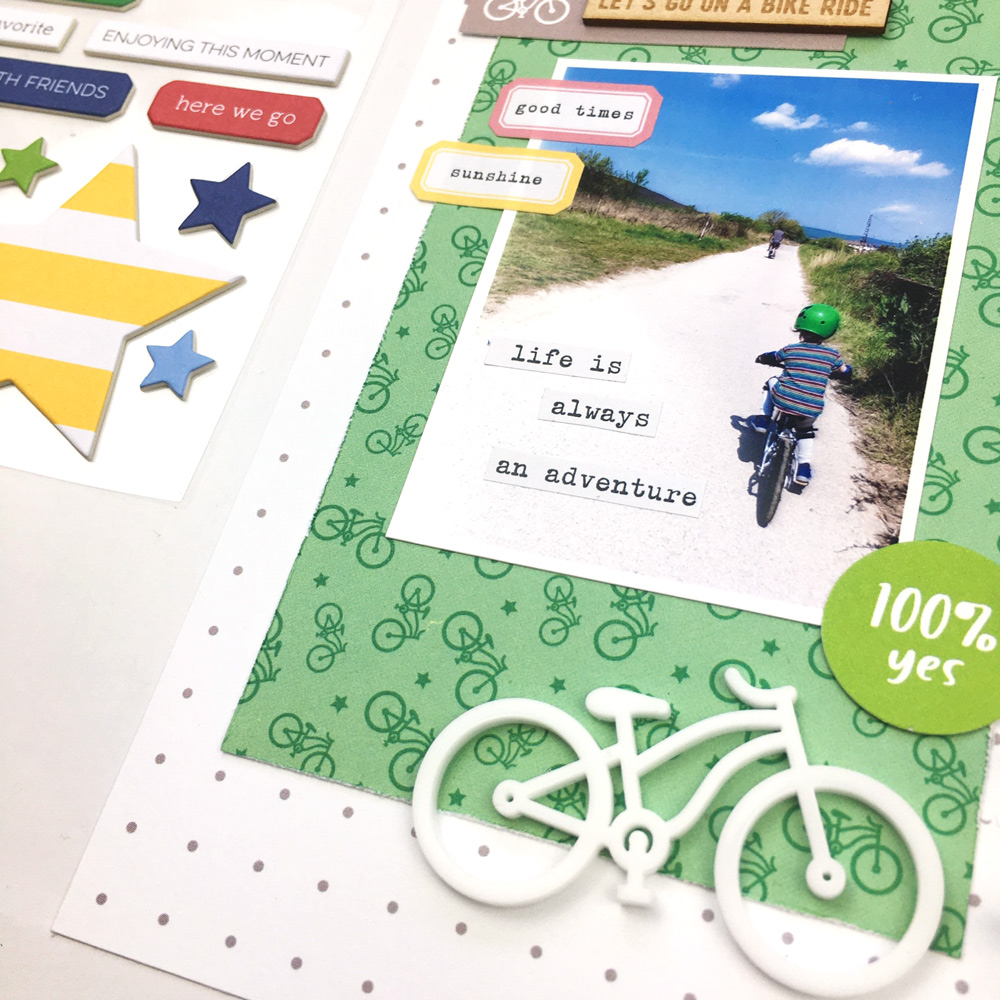
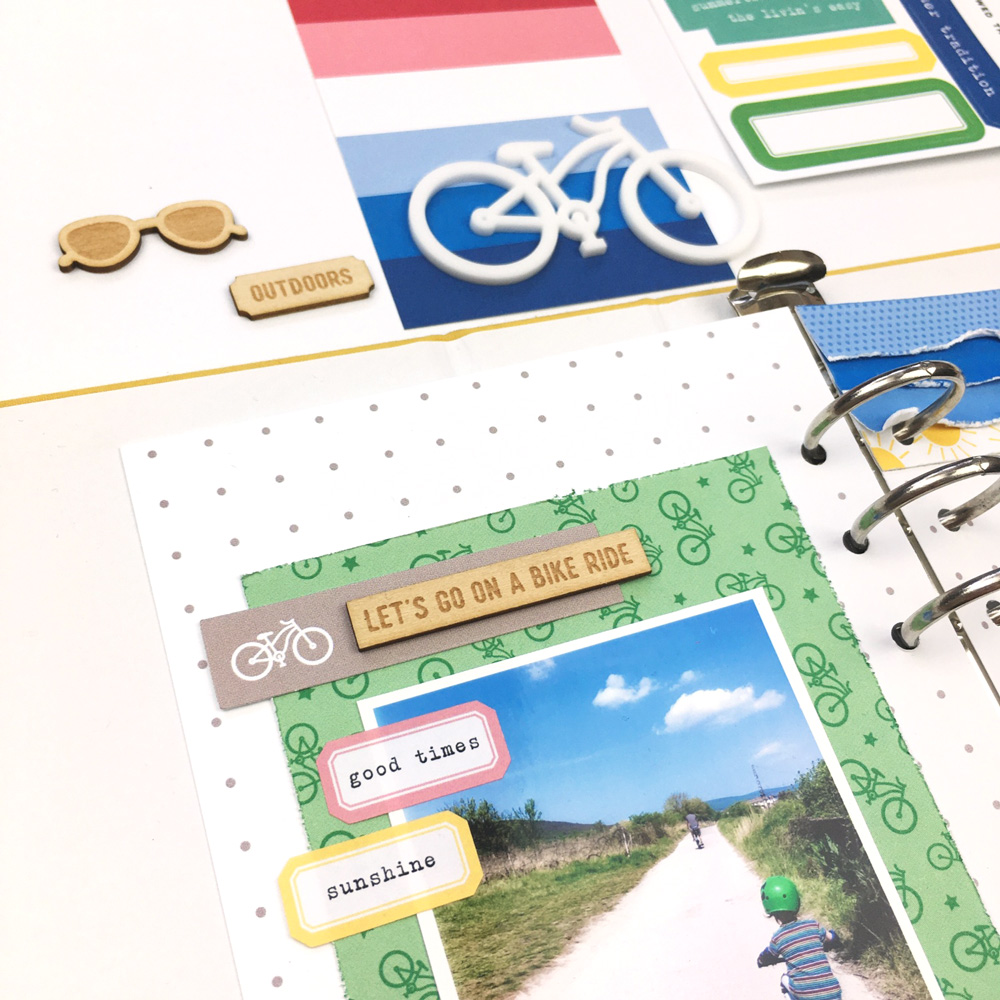
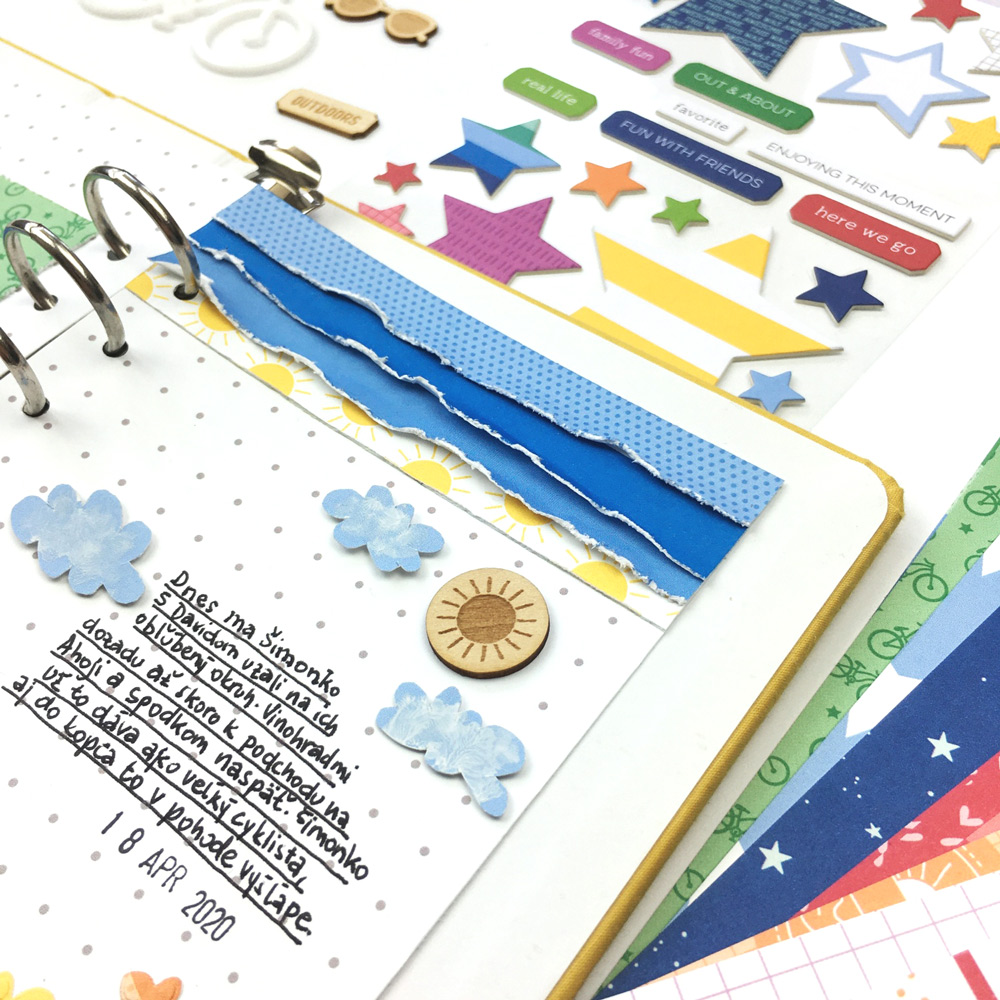
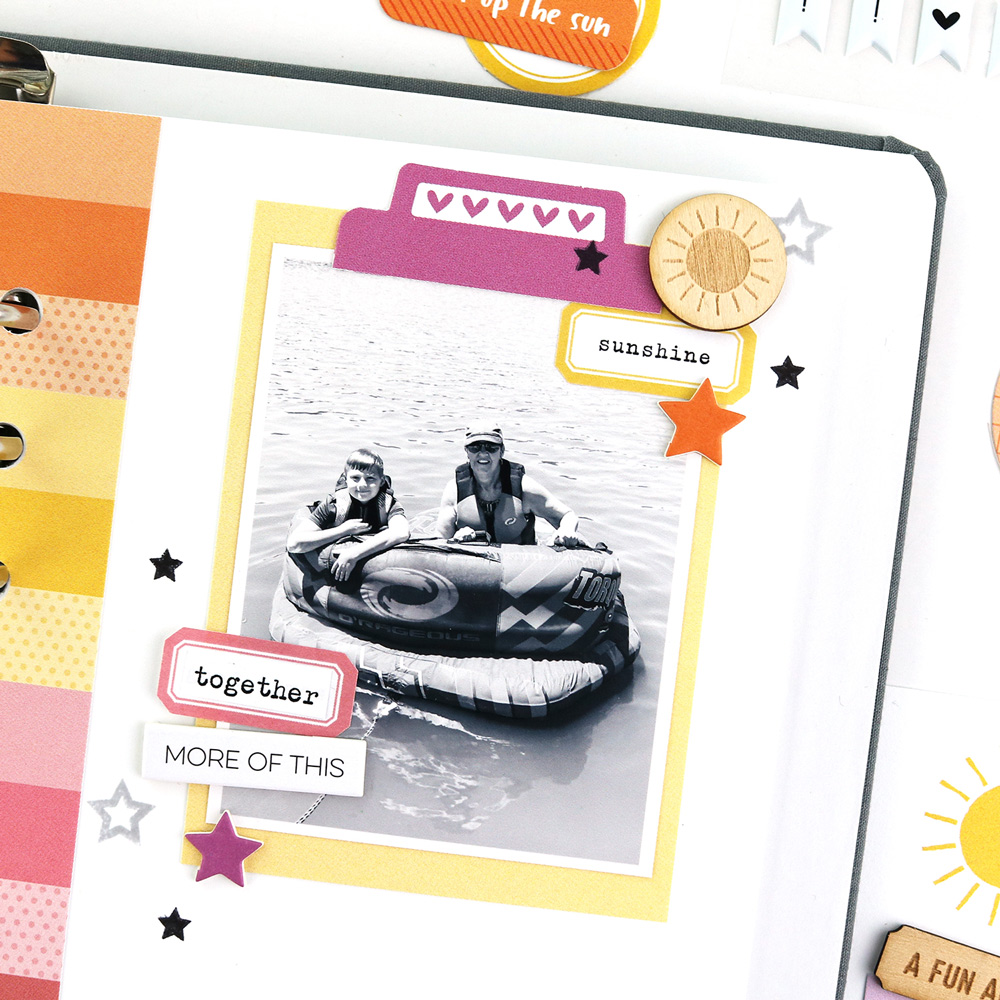
For the other side of the layout, I used a white cardstock background and a column of the same striped paper to the inside edge of the page, helping to make the pages feel more cohesive. I added my photo to one of the journaling tags from the June 2020 Kit and embellished using labels from the Summer Stickers, a tab from the June 2020 Kit, and phrase and star stickers from the Chipboard Star Stickers. I also added the sun wood veneer from the Summer Wood Veneers.

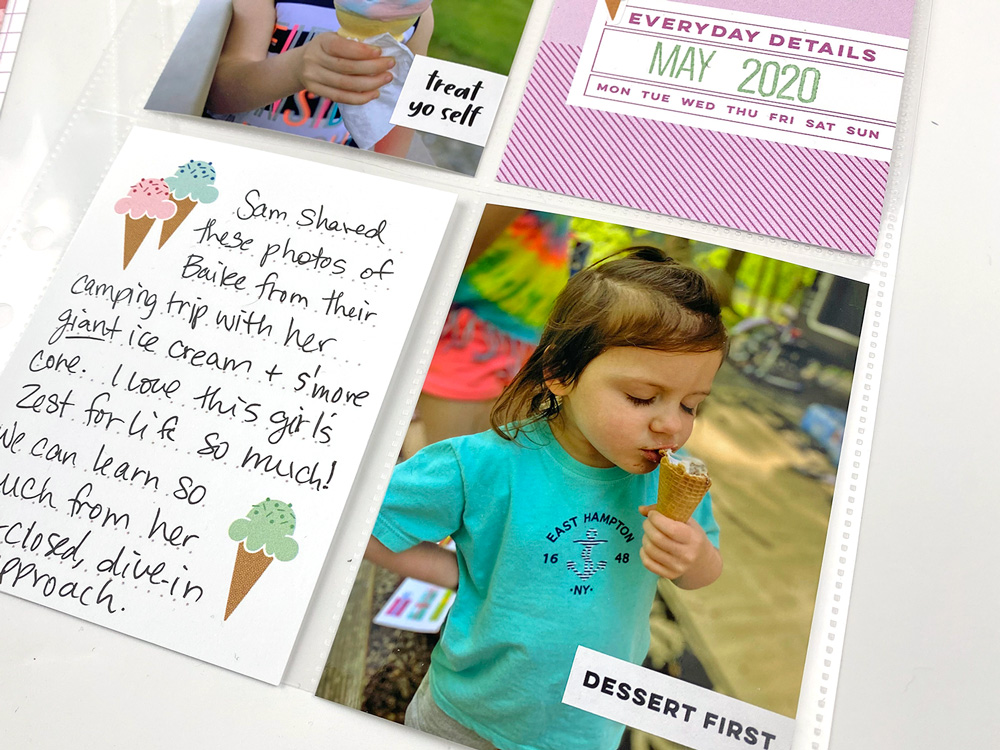
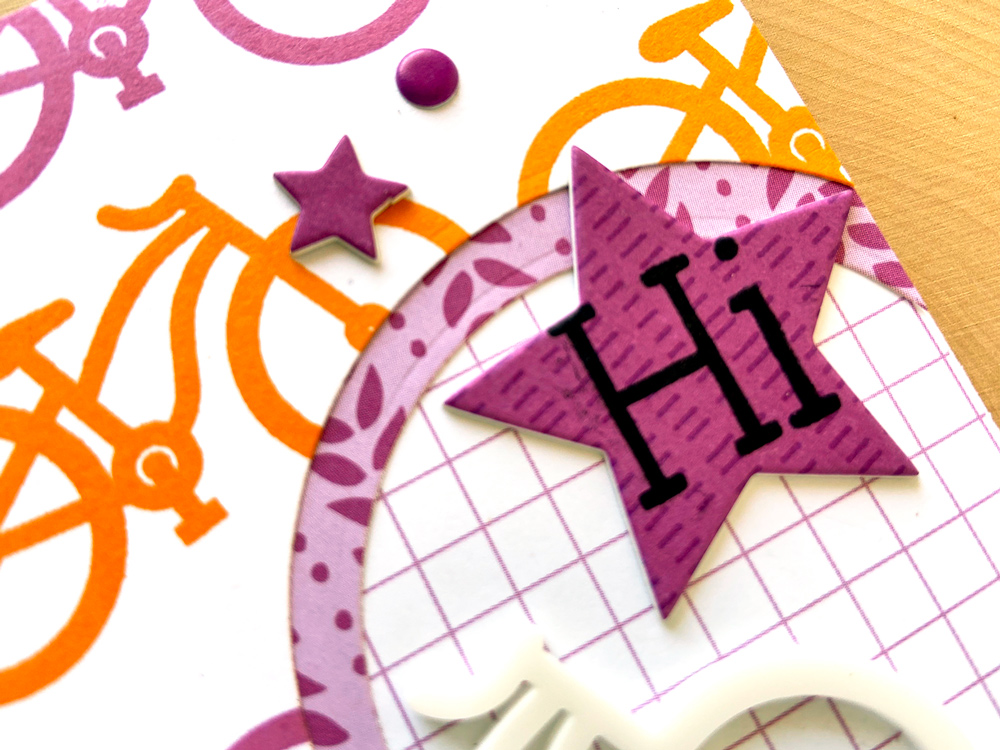
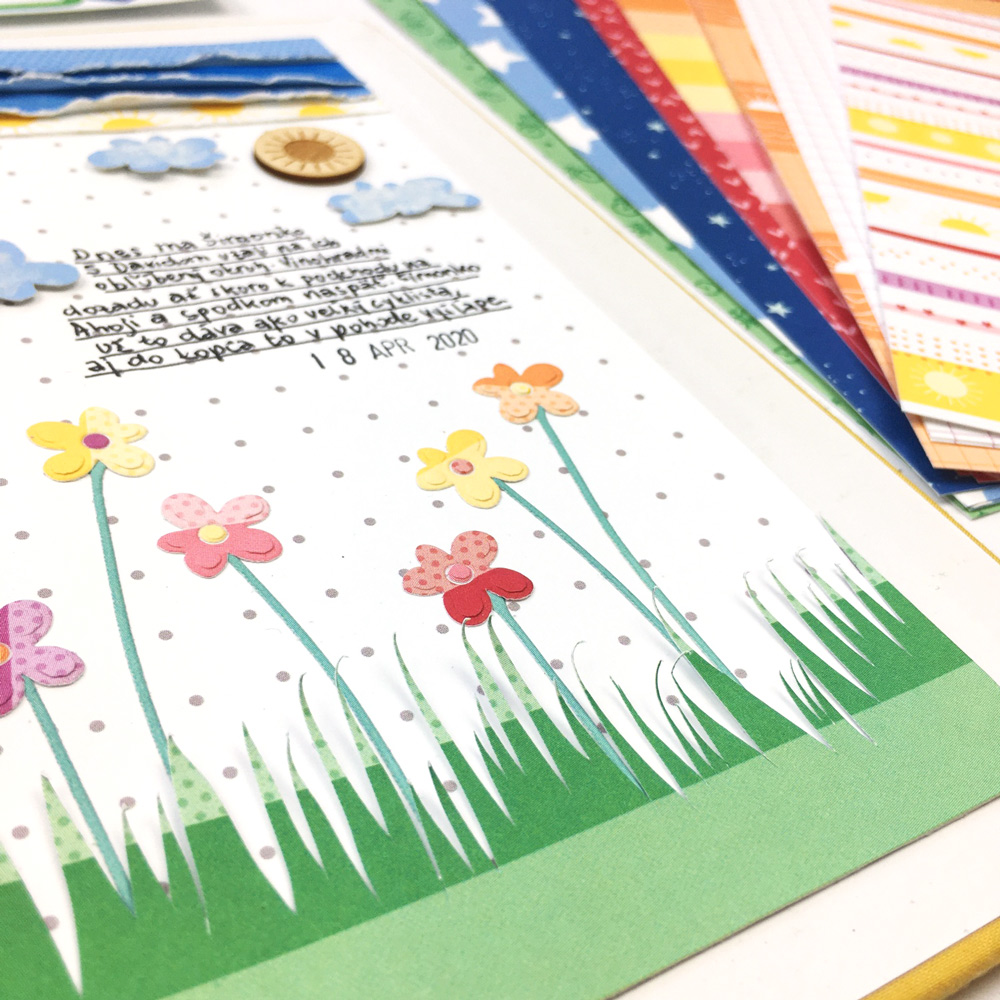
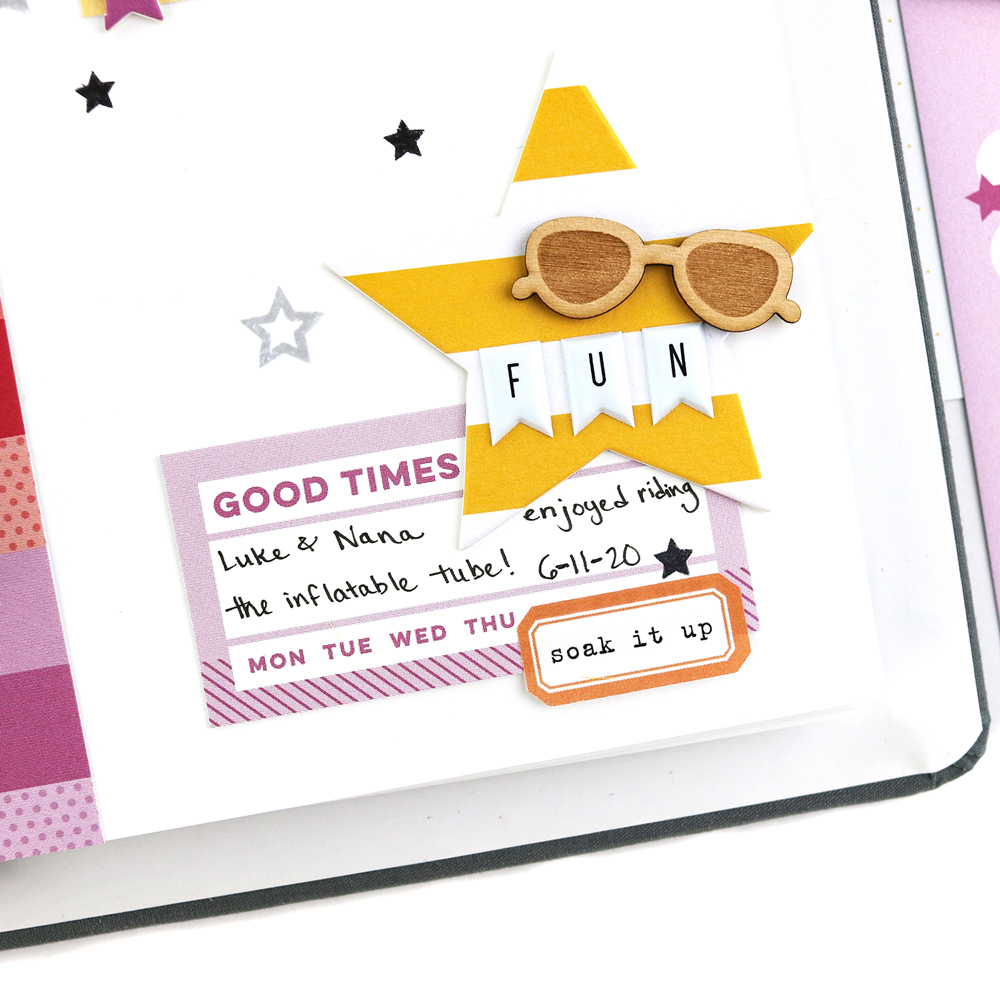
I added handwritten journaling onto a June Label, and I layered another one of the star stickers from the Chipboard Star Stickers and a label from the Summer Stickers. I used the Puffy Alphabet Banners to add the word “fun” onto the star sticker, along with wood veneer sunglasses from the Summer Wood Veneers. To complete the page, I stamped more stars from the Summer Fun Stamp.  

I love the way my traveler’s notebook layout turned out using the June 2020 Cut Files, paired with the amazing June 2020 kit and add-ons! Thank you so much for stopping by, and I can’t wait to see how you use this month’s products in your traveler’s notebook!

Show us what you’re creating using our June 2020 kit and add-ons! Post your projects to Instagram and use the hashtag #EllesStudio, or share in our Elle’s Studio Facebook Group with crafty fans of our brand! We can’t wait to see what you’re creating!

Documenting Simple Summertime Moments with Jess Forster

Don’t underestimate the everyday moments in your life! Today, design team member Jess Forster is sharing how she has recorded a simple, summer activity using our June 2020 kit and add-ons, which we know she will look back on and be thankful that she documented it! Jess is showing us that the little details of life are just as important as the bigger moments, and can be recorded in a beautiful way. Let’s take a look!

Hands up if you are excited for summer? I know I am, for sure! Although our family plans have been slightly altered thanks to the worldwide pandemic, I am trying to enjoy and celebrate the smaller summer moments with my family in the hot weather. Below is one example of how I am documenting “the everyday” this season. 

Supplies | June 2020 Kit, April 2020 Kit June LabelsChipboard Star Stickers, Yellow Puffy Alphabet Stickers

In this 9″ x 12″ pocket page layout, I recorded the story of my son’s recent favourite afternoon past time: blowing bubbles! Although some days feel the same, he has enjoyed spending time in our driveway, blowing and chasing these floating round spheres this month. After taking too many photos during one of our afternoon outdoor sessions, I selected my favourite pictures that I took on my iPhone. My only criteria for the photos that were included on my layout, was that they had to show lots of bubbles! Ha! Yes, I really wanted to emphasize the activity we were enjoying.

Using the blue and purple hues from the bubbles in my photos, I chose a matching 4″ x 6″ blue star tag and the various purple 3″ x 4″ colours from the June 2020 Kit. Specifically, I placed them in a checkerboard pattern to add visual interest. Seriously, I have never met a checkerboard design pattern I didn’t like! 

From there, I added some “lumps & bumps,” or texture, to the page by incorporating the amazing Chipboard Star Stickers and some of the June Labels. Again, I kept my colour scheme consistent, using navy and purple stars and placing them in a visual triangle on my journaling cards. I also incorporated little bits of yellow using the Yellow Puffy Alphabet Stickers, spelling out my son’s initials. 

Simple and chic, focusing on smaller moments through bold photos and strong embellishments can be one way to document the smaller everyday experiences this season! Thanks for reading and I hope you and your family have a wonderful summer filled with fun moments—big and small!

Show us how you’re recording your summer memories! Post your projects on Instagram using the hashtag #EllesStudio or in our Elle’s Studio Facebook Group, where ES fans chat and inspire each other!

Sketch Day with Stacie Watson!

Hey, hey scrappy friends! It’s Stacie here with you today and it’s sketch day! I love using sketches to help get your creative juices flowing. There’s just something about looking at a sketch and being able to see the end result. Of course sketches always leave a lot of room for interpretation—another great reason to use them. Here is today’s sketch:

You can use a sketch exactly like it is, or you can change it up. With sketches you are able to increase or decrease the size of your project, you can flip or rotate the sketch to fit your needs, and you can keep all of the “parts” in the same places or move them around. Here’s my take on this sketch:

Supplies | June 2020 Kit, Ice Cream Stickers, Puffy Alphabet Banners, Summer Fun 6 x 8.5 Inch Paper Stack

When I looked at this sketch, I knew that I wanted to create a smaller, 8.5″ x 11″ layout. I also knew that I wanted to keep the background patterned paper at the top, but I decided instead of keeping exactly with the sketch and adding one large band and two smaller ones under that I wanted to add one of the small ones at the top. I started by cutting the sun piece off the striped pattern paper from the Summer Fun Paper Stack and adhered it to the top of the page. Then, I added the biggest piece of patterned paper with the colorful striped paper from the paper stack. To finish off the top of the layout, I cut a thin piece of the heart paper from the same Summer of Fun paper stack to add to the bottom of this mix of patterns.

Keeping with the sketch, I adhered my two photos on top of the patterned papers. Following that, using the Puffy Alphabet Banners, I added my title to the middle of the layout. For my journaling, I decided to move the journaling tag from the right of the photos and added it on top of them. I used the documented journaling tag from the June 2020 Kit and printed my journaling out on it. 

Keeping with the sketch, I added my embellishments in the same place they were located on the sketch. To finish off the layout and because the layout was about ice cream, I had to add some of the Ice Cream Stickers. I love how this layout came together so quickly by using the sketch as a jumping off point!

Thank you so much for stopping by today to see how I used this sketch to create my layout. I encourage you to use your Elle’s Studio kit and add-ons and give this sketch a try. Make the sketch work for you! 

Want more sketches to help you create this summer!? We have you covered with our latest sketch class, From Sketch to Finish Vol. 5!

Be sure to add the class to your cart today while it is still available with an exclusive 6″ x 8″ stamp that will help you add to your projects with titles, journaling, embellishments and more!

Meet From Sketch to Finish Vol. 5 Contributor Lorilei Murphy!

Today we welcome the talented Lorilei Murphy, also known as @roseyposey_studio , to the ES blog! Lorilei is one of our amazing contributors to the new From Sketch to Finish Vol. 5 class, and we know you’ll love what she has to share here on the blog today, as well as what she created for the class! Let’s take a look at what she made with one of our class bonus sketches!

Hello there! It’s Lorilei Murphy here with you today! I am excited to share a layout I made using the From Sketch to Finish Vol. 5 class that I was lucky enough to contribute to! Sketch 14 really caught my eye and I knew it would be perfect to use the gorgeous From Sketch to Finish Vol. 5 exclusive 6″ x 8″ stamp! You can see a small peek at the sketch at the bottom of the photo!

Supplies | January 2020 Cut Files, Beautiful Day Die Cuts, Lovely Puffy Stickers, Love Is 6 x 8.5 Inch Paper Stack, From Sketch to Finish Vol. 5 Stamp

I made myself a large tag with white cardstock and stamped a big sentiment using the From Sketch to Finish Vol. 5 Stamp.  I went through the Beautiful Day Die Cuts and chose the sweet flowers as an accent.

The sketch has a spot for an embellishment cluster at the bottom of the page, which I love! It was an awesome place to use the big “remember” die cut, also from the Beautiful Day Die Cuts.

I love the impact that is achieved with the use of Elle’s colourful and vibrant products. Paired with a sketch, it seems to be fail proof in creating pages! It is a little bit difficult to see, but I cut the hearts from the January 2020 Cut Files to place below my photo cluster for added texture.

I love how my project turned out! I stuck pretty close to the sketch, but I have learned not to follow a sketch exactly—making it much easier for me to use what I have on hand and import my own style into the project!

A little bit about Lorilei:

I live in rural Alberta, Canada about an hour north of Calgary. We (husband + 16yr old daughter) live on a 1/4 section in a house that took us 5 years to build!  I have been actively scrapbooking for the last 3.5 years but have always been crafty or artsy in some way. I have dabbled with scrapbooking over the years and my first go was with wavy scissors and colored cardstock! I love color, but it took me awhile and a lot of practice to learn how to use it, so that I didn’t make a big mess!  

I try to keep up with my blog and I love to post my projects on Instagram.  Thank you so much for having me and my project!

Be sure to join us in From Sketch to Finish Vol. 5, available with or without the exclusive stamp, so that you can see what Lorilei created for the class!

June Design Team Inspiration: Volume Three

Our third and final round of design team inspiration using the new  June 2020 kit and extras is sure to inspire you with the beautiful and well-designed pocket pages, traveler’s notebook spreads and layouts from our amazing design team. Just take a look!

Summertime pocket page spread by Nathalie Leonelli – supplies used | June 2020 KitSummer StickersChipboard Star StickersVacation Wood Veneers,  Summer Fun 6 x 8.5 Inch Paper Stack, Summer Fun Stamp, Mini Dated Stamp

Sweet Dreams by Amanda-jayne Baldwin – supplies used | June 2020 KitChipboard Star StickersPuffy Alphabet BannersSummer Fun 6 x 8.5 Inch Paper Stack, Summer Fun Stamp

Evidence of Summer pocket page by Amy Jo Vanden Brink – supplies used | June 2020 Kit, June LabelsChipboard Star StickersSummer Wood Veneers, Mini Dated Stamp 

4th of July by Jennifer McMurtrey – supplies used | June 2020 KitJune 2020 Cut Files, Summer Stickers, Chipboard Star Stickers, Puffy Alphabet Banners4th of July Wood Veneer, Summer Fun 6 x 8.5 Inch Paper StackSummer Fun Stamp

Let’s Go on a Bike Ride traveler’s notebook spread by Patricia Roebuck – supplies used | June 2020 KitSummer StickersBlack Typewriter Cardstock Alphabet Stickers, Chipboard Star StickersPuffy Alphabet BannersCerulean Blue Puffy Alphabet Stickers, Summer Wood Veneers, Acrylic BicyclesSummer Fun 6 x 8.5 Inch Paper StackSummer Fun Stamp

Four Square by Kristina Proffitt – supplies used | June 2020 Kit, June Labels, Summer StickersChipboard Star StickersSummer Fun 6 x 8.5 Inch Paper Stack

Grossglockner Trip by Katarina Prevendarova – supplies used | June 2020 KitSummer Stickers, Jane Alphabet Stickers — Navy, Jane Alphabet Stickers — Teal, Jane Alphabet Stickers — WhiteChipboard Star Stickers, Tiny Shapes and Dots Puffy StickersVacation Wood VeneersSummer Fun Stamp

Bike Ride by Candace Perkins – supplies used | June 2020 KitChipboard Star StickersSummer Wood Veneers, Acrylic BicyclesSummer Fun 6 x 8.5 Inch Paper Stack

Locals Night by Tracey Fox – supplies used | June 2020 Kit, June LabelsIce Cream Stickers, Summer StickersChipboard Star Stickers, Puffy Alphabet BannersVacation Wood VeneersSummer Fun 6 x 8.5 Inch Paper Stack,  Large Jane Alphabet Stamp — OutlineDated Stamp

Don’t worry—this isn’t where the inspiration stops! Come back to the blog each day until our next reveal to find new ideas, tips and tricks for how to make the most of your June 2020 kit and add-ons! Then share with us on Instagram using the hashtag #EllesStudio and our Elle’s Studio Facebook Group!  

Teach Me Tutorial: Customizing Your Digital Files with Suzanna Lee

Our digital files are perfect for printing, cutting and manipulating to customize any project that you wish to create, and today, Suzanna Lee is showing us how to recolor them to make them fit whatever project we’re creating! Use her tips below along with our latest digitals available in the shop to try something new today!

Hiya, scrappy peeps! For those of you who celebrate Independence Day, there are some great red, white and blues in the June 2020 Kit and add-ons to go along with it—perfect for those 4th of July memories. I’ve been known to manipulate the digital files each month to further supplement my kit and thought that I would teach you how to do the same! I love that I can stretch the kit a little further AND personalize it! Did you know that if you are a kit subscriber, you get the digital and printable files FREE with your subscription, in addition to the discounts on other goodies and bundled shipping? It’s definitely a great value for money! Learn this recoloring trick I am about to teach you and you have even more possibility to explore!

Supplies | June 2020 KitJune 2020 Cut Files, Summer Snapshots Printables, Summer StickersChipboard Star Stickers, Puffy Alphabet Banners4th of July Wood Veneer, Summer Fun 6 x 8.5 Inch Paper Stack

How To Recolor a Digital File in Photoshop:

1.     Open the Elle’s Studio digital file that you want to re-color.

2.     Open the Elle’s Studio digital file that contains the color(s) you want.

3.     Select the Eye Dropper tool from the toolbar and hover over the desired color, then click. This should make the top square (the foreground color) in the tool bar this color.

4.     Return to the tag or image you want to recolor. Select the Paint Bucket tool from the toolbar. If you can’t find the Paint Bucket tool, click and hold the Gradient tool to access it. Specify to fill the selection with the foreground color.

5.     Click the part of the image you want to fill. 

6.     Repeat this with the different parts of the image that you wish to recolor.

This is the VERY simple way of recoloring. You can get more complex by adjusting Blending Mode, Opacity and a few other options. For basic recoloring, you don’t need to adjust any of these settings. I do recommend, however, that you make sure “anti-aliased” is selected as this allows for smooth edges of the filled selection.

For the star tag above, I took color samples from the June 2020 Print and Cut Labels and used those colors (blue and red) to recolor the star tag in this month’s Summer Snapshots Printables. I love the ability to further customize the digital files to work with colors already contained in the kit which I would like more of. Earlier this month, I did the same thing with the same tag using the yellow and orange found in the plaid tag in the Printables.

Here is the layout I created using my recolored tag, the June Kit, Summer Snapshots Printables and other June add ons:

The ability to manipulate digital files, including the cut files, opens a whole new world of options for your memory keeping, don’t you think?

Are there any particular tips or tutorials you would like to see here on the blog? Be sure to leave a comment on this post to let us know!

Thanks for stopping in today!

Did you learn something new from Suzanna’s post? Share how you recolored one of our digital files to fit your project by posting on Instagram using the hashtag #EllesStudio , or in our Elle’s Studio Facebook Group! We can’t wait to see how you maximize the use of your digital files!

Simple, Sweet Summer Memories in Pockets with Steph Grimes

Hi everyone! The June 2020 Kit and extras are perfect for documenting your sweet summer memories, and today I’m happy to share a new pocket page spread featuring some of our latest release to tell a fun summer story about my niece. 

Supplies | June 2020 KitIce Cream StickersSummer StickersSummer Fun 6 x 8.5 Inch Paper Stack, Mini Dated Stamp

I was inspired to make this layout after receiving these photos of my niece enjoying some summer treats and knew they’d go perfectly with this month’s products, especially the Ice Cream Stickers! I started by creating a full 6” x 8” page using paper from the Summer Fun Paper Stack as my background. Then, I layered one of the striped papers from the stack behind my 5” x7” photo of my niece eating a giant ice cream cone. Since my goal was to use the Ice Cream Stickers, I decided to go big with them and create a border on my page featuring most of the ice cream cone stickers from the sheet.

In the June Kit is a perfect 3” x 4” journaling tag featuring an ice cream design that I used to hold my handwritten journaling and added that to one of the 3” x 4” pockets on the opposite page. I rounded out that page with two more photos and another tag from the June Kit

I wanted to keep my embellishments simple and coordinate with the ice cream theme, so I decided to use some of the word phrase stickers from the Ice Cream Stickers and Summer Stickers to add to my photos. For my full page, I cut apart the “I Scream. You Scream. We All Scream for…” phrase stickers and combined them with the “ice cream” banner sticker included in the set to finish out the phrase. 

To finish it up, I stamped the month and year on the “Everyday Details” card from the kit using the Mini Dated Stamp. I had two leftover ice cream stickers, so I added those to this card as well to tie it all together. 

This spread came together so quickly and this month’s products were perfect for capturing this story. It’s one of the things I love most about pocket pages: they can be so simple and come together so quickly—perfect for this time of year when I’d rather be outside enjoying the beautiful weather than sitting at my crafting table!
 
Share your sweet, summer stories documented using this month’s kit on Instagram using #ellesstudio or in the Elle’s Studio Facebook Group. Happy summer!

Happy Handmade Greetings with Jen McMurtrey

When did you last send a card, just for the sake of saying hello? Design team member Jennifer McMurtrey did that using our June add-ons to send to people that she’s missing, and got to play with some fun products to create gorgeous, bold card designs! Let’s take a look at what she created!

Hey everyone! I don’t know about you, but I am missing my friends and family something fierce because of the quarantine. Since I can’t say hello in person, I decided to create fun greeting cards to pop in the mail and brighten the day for those I love.

This month’s bright, cheery colors are perfect for building everyday cards to send now or keep on-hand and use later.

Supplies | Summer StickersChipboard Star Stickers, Tiny Shapes & Dots Puffy Stickers, Acrylic BicyclesSummer Fun 6 x 8.5 Inch Paper Stack, Flourish 6 x 8.5 Inch Paper Stack, Summer Fun Stamp, Typewriter Alphabet Stamp, Large Jane Alphabet Metal Die

The first card uses one of my faves: the Large Jane Alphabet Metal Die. Creating the “Hello” sentiment was super easy, yet it carries a large impact. For added contrast, I backed the sentiment with paper from the new Summer Fun 6 x 8.5 Inch Paper Stack.

After centering the sentiment on the patterned paper, I machine-stitched the white cardstock in place and added a sticker below from the Summer Stickers. Last, I added the Chipboard Star Stickers and Tiny Shapes & Dots Puffy Stickers in coordinating colors. It is so cute!

My family is not big on biking, but I wanted to use the Acrylic Bicycles on a project. When creating any card or layout, I will often peruse Pinterest for title and/or sentiment ideas. I came across “I wheelie miss you” and knew I had to use it!

To begin, I pulled papers from the Flourish and Summer Fun Paper Stack to layer behind white cardstock. Next, I used the bicycle from the Summer Fun Stamp to add purple, orange, and yellow bicycles on the background. Originally, I planned on using another patterned paper that included these three colors; however, I opted for the purple hues after putting everything together!

After using dies for the circle cutouts, I layered and adhered the papers to the card base. I stamped “Hi” with the Typewriter Alphabet Stamp on a large Chipboard Star Sticker before placing it on the card and adding a smaller chipboard star and puffy dot sticker above it.

Last, I typed the sentiment with my manual typewriter and placed it below the Acrylic Bicycle.

I can’t wait to pop these cards in the mail this week!

Thank you for stopping by today, and I hope you’ve been inspired to create. Remember to use the hashtag #EllesStudio when posting your projects online so we are sure to see them!

Share your cards with us! Use the hashtag #EllesStudio on Instagram, or in our Elle’s Studio Facebook Group so that we can be inspired by YOUR designs!

Summer Fun in a Traveler’s Notebook with Katarina Prevendarova

What activities do you love to participate in during the summer? Document them in a colorful and fun with with our June 2020 kit and add-ons! DT member Katarina Prevendarova did that in her traveler’s notebook, which she is sharing with us today! We just love the clever and creative ways that she used our newest products, and we think you will, too!

Hi friends! It’s Katarina here and today I’m going to share my new traveler’s notebook spread created using the June 2020 kit and add-ons. Oh gosh, how I love all the products this month! All the bright colors and cute embellishments! My son is a huge fan of bike rides and the bike-related goodies are so amazing I just had to scrap a photo of our family bike ride.

Supplies | June 2020 KitSummer Stickers, Summer Wood VeneersAcrylic BicyclesSummer Fun 6 x 8.5 Inch Paper Stack

Have I mentioned how gorgeous the new Summer Fun Paper Stack is? Those bright colors really make my heart happy. For this project I used five different papers. I started with the dotted paper as a base for both sides of the spread. On the left, I framed my photo with the green bicycle paper and embellished it using the colorful Summer Stickers, a circle die cut from the June Kit and that gorgeous Acrylic Bicycle.

For my title I used the “let’s go on a bike ride” Summer Wood Veneer piece. It was too good to be left out! I backed it with the grey label with a bike from the June Kit.

Here’s where I decided to create my own little landscape on the right side as a nice place for my journaling. I used the beautiful blue and green striped paper from the Summer Fun Paper Stack again; using the green stripes for grass and flower stems and blue stripes cut separately and distressed to create an impression of blue skies. The warm-hued stripes were great for flowers!

I drew and fussy cut three little clouds using a blue tag from the June Kit. To add a little depth, I used my finger to smudge a little bit of white gesso on the paper. My jouraling came right in the middle of the clouds and as a finishing touch I added the lovely sun from the Summer Wood Veneers

That’s it from me today, friends. I love how this spread turned out and hope I inspired you to play with your June Kit and extras. They’re just perfect for any summer project!

Show us how you’re recording summer moments using our June Kit! Post on Instagram using the hashtag #EllesStudio, or in our Facebook Group!

June Design Team Inspiration: Volume Two

Today we have a fresh, new round of inspiration from our talented design team using the June 2020 kit and add-ons—a colorful and summer selection of products that we know will inspire you! Save any of these layouts, pocket pages or traveler’s notebook spreads for your own creative time to help inspire you to create!

Summer Swim by Suzanna Lee – supplies used | June 2020 KitSummer StickersHazel Alphabet Stickers — White, Chipboard Star Stickers, Puffy Alphabet BannersSummer Fun 6 x 8.5 Inch Paper StackSummer Fun Stamp

Soccer Camp Summer Snapshots by Meghann Andrew – supplies used | June 2020 KitJune LabelsSummer StickersChipboard Star Stickers, Puffy Alphabet Banners, Cerulean Blue Puffy Alphabet Stickers, Summer Wood VeneersVacation Wood VeneersSummer Fun 6 x 8.5 Inch Paper StackSummer Fun StampMini Dated Stamp

Summertime Happiness by Melissa Mann – supplies used | June 2020 KitJune 2020 Cut Files, Ice Cream Stickers, Summer StickersChipboard Star StickersPuffy Alphabet BannersSummer Fun 6 x 8.5 Inch Paper StackSummer Fun Stamp, Mini Dated Stamp

Celebrate July 4th traveler’s notebook spread by Marsha Farris – supplies used | June 2020 KitSummer StickersChipboard Star StickersPuffy Alphabet BannersSummer Wood Veneers4th of July Wood VeneerSummer Fun 6 x 8.5 Inch Paper StackSummer Fun Stamp

Summer Snapshots by Daniela – supplies used | June 2020 KitSummer StickersChipboard Star StickersPuffy Alphabet BannersSummer Wood VeneersSummer Fun 6 x 8.5 Inch Paper StackSummer Fun Stamp

This Week pocket page by Steph Grimes – supplies used | June 2020 KitSummer StickersChipboard Star StickersPuffy Alphabet BannersTypewriter Alphabet StampStanley Jr. Alphabet StampMini Dated Stamp

Sweet Summer by Stacie Watson – supplies used | June 2020 Kit, Summer Stickers, Summer Wood VeneersSummer Fun 6 x 8.5 Inch Paper StackTitle Builder Vol. 3 Stamp

The First Ride pocket page spread by Jess Forster – supplies used | June 2020 KitJune LabelsBlack Typewriter Cardstock Alphabet StickersChipboard Star Stickers, Acrylic BicyclesSummer Fun 6 x 8.5 Inch Paper Stack

We can’t wait to see how YOU use our newest products! Share on Instagram using the #EllesStudio hashtag, or in our Elle’s Studio Facebook Group!