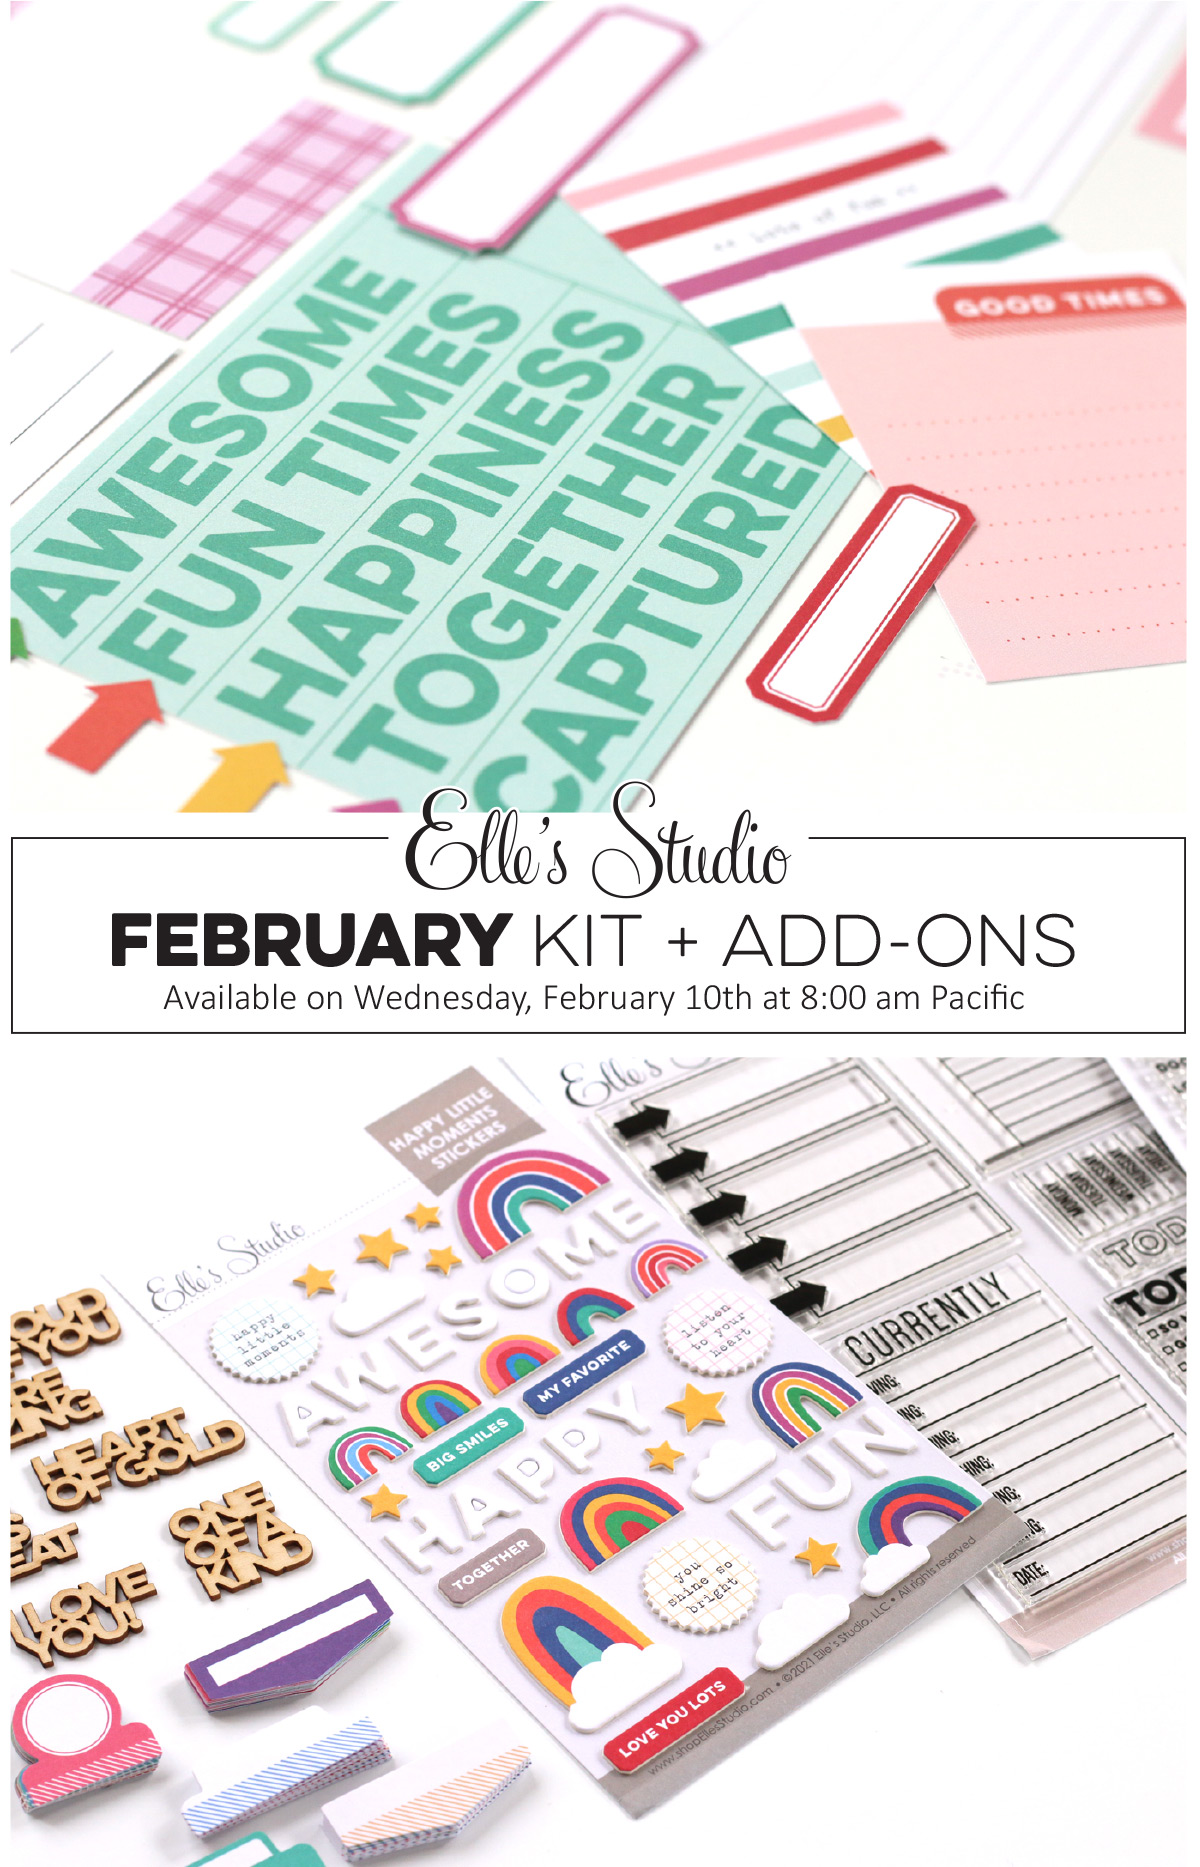
Our February kit + coordinating add-ons reveal is almost here and we can’t wait to share with you all the new and exclusive products that will be available soon! Our reveal will be full of the perfect products to document your February stories and take you right into the month of March! This month, our February kit will include 3 – 4 x 6 inch tags, 18 – 3 x 4 inch tags, and 26 die cuts!
Not a subscriber? You can pre-order our February kit now and lock in our $9.99 kit price by starting a subscription today! You’ll want to choose our SUBSCRIBE & SAVE option to get signed up and start your subscription with our February kit. We will then hold your kit and you’ll be ready to bundle and save at our February 10th reveal! Details on how to bundle with your subscription order will be emailed to you once you have purchased this product.
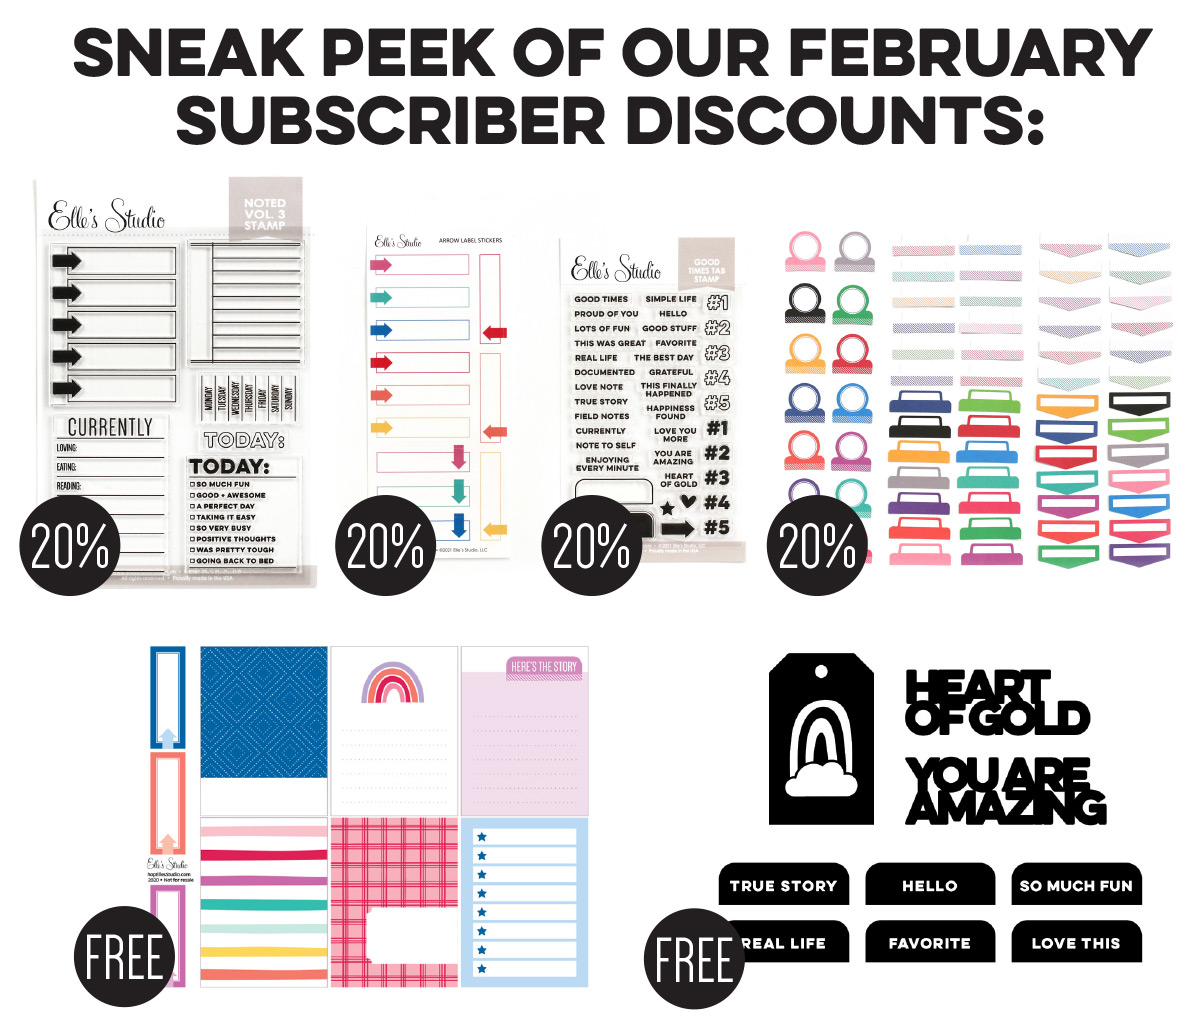
Kit subscribers, don’t forget! Along with being able to bundle any products from our shop that will ship for FREE with your kit during our 24-hour bundling period, starting on the 10th at 8:00 am Pacific each month, our subscribers will also have access to special discounts on select items! These discounted items can be found in our SALE section during our 24-hour bundling period, and you must be logged into your kit subscriber account to see them. Quick note: Our kits and add-ons are available without a subscription each month, too
We are so excited to share all of these new products with you and see how you use them on your projects! Make sure you set your alarm and mark your calendar for Wednesday, February 10th at 8:00 am Pacific! We hope to see you there!
Comments Off on A sneak peek of our February 10th reveal! | Share This
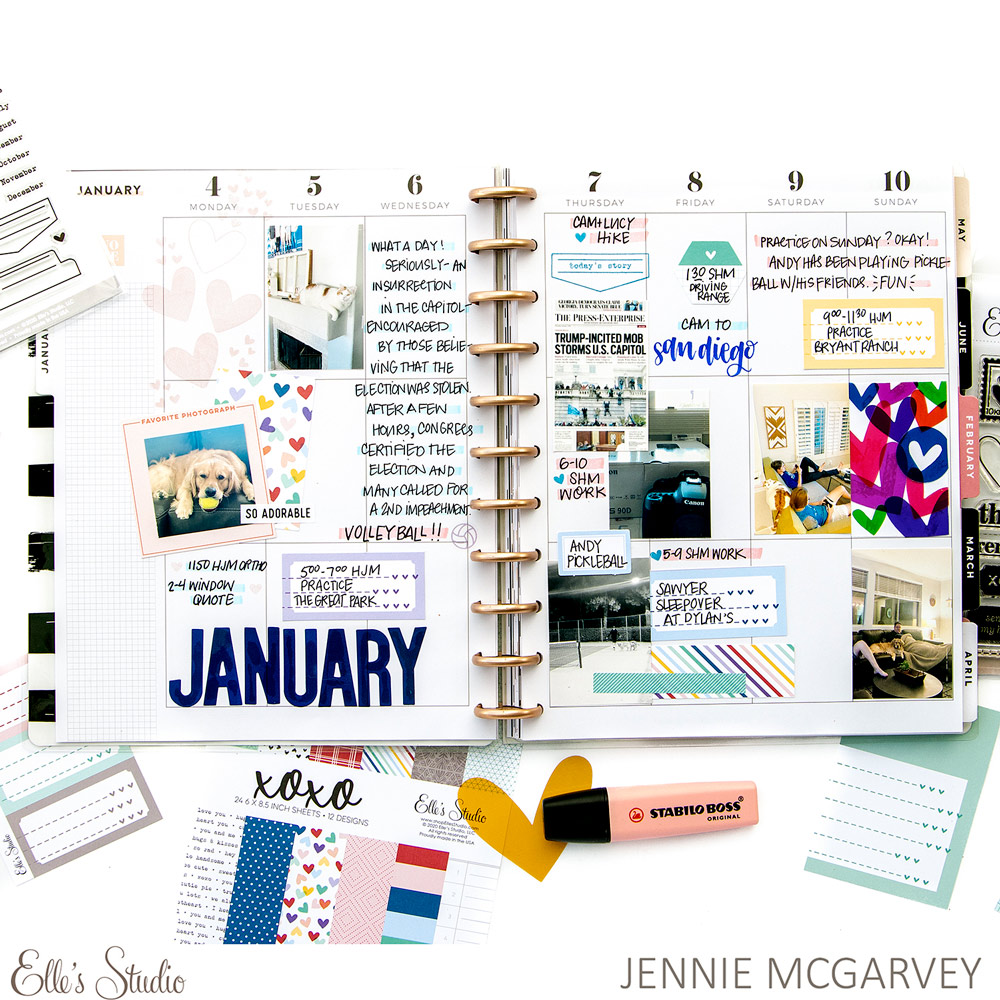
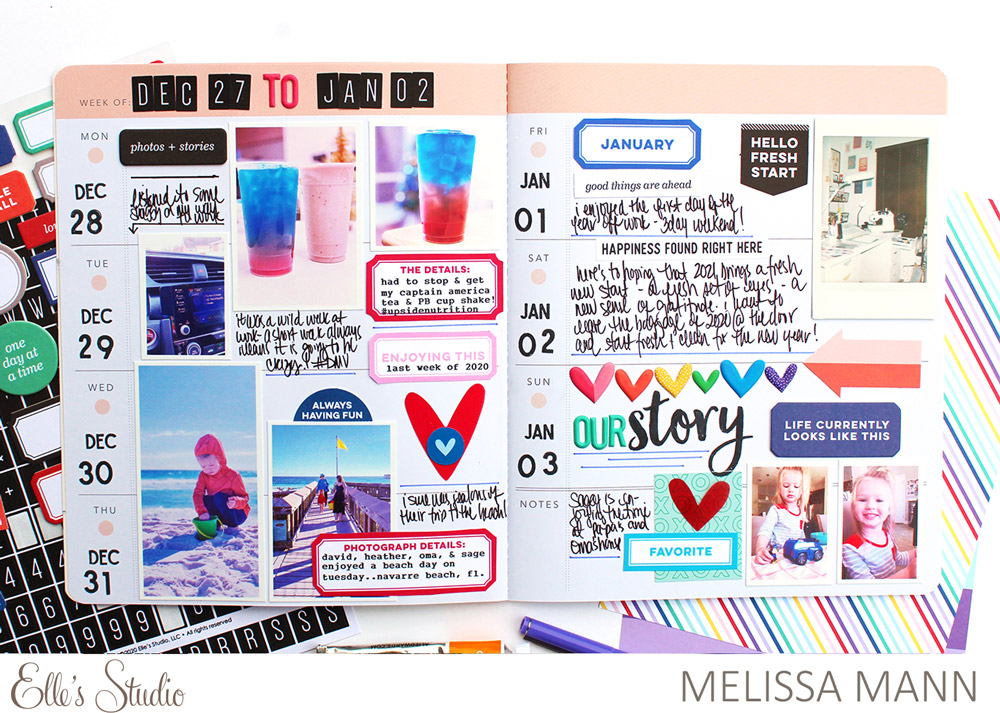
Hello! It’s Jennie McGarvey and I am so excited to introduce you to my memory planner. I’ve been using it for five years before starting this one for 2021! It’s genuinely my favorite project because it helps me document in a really easy way each week.
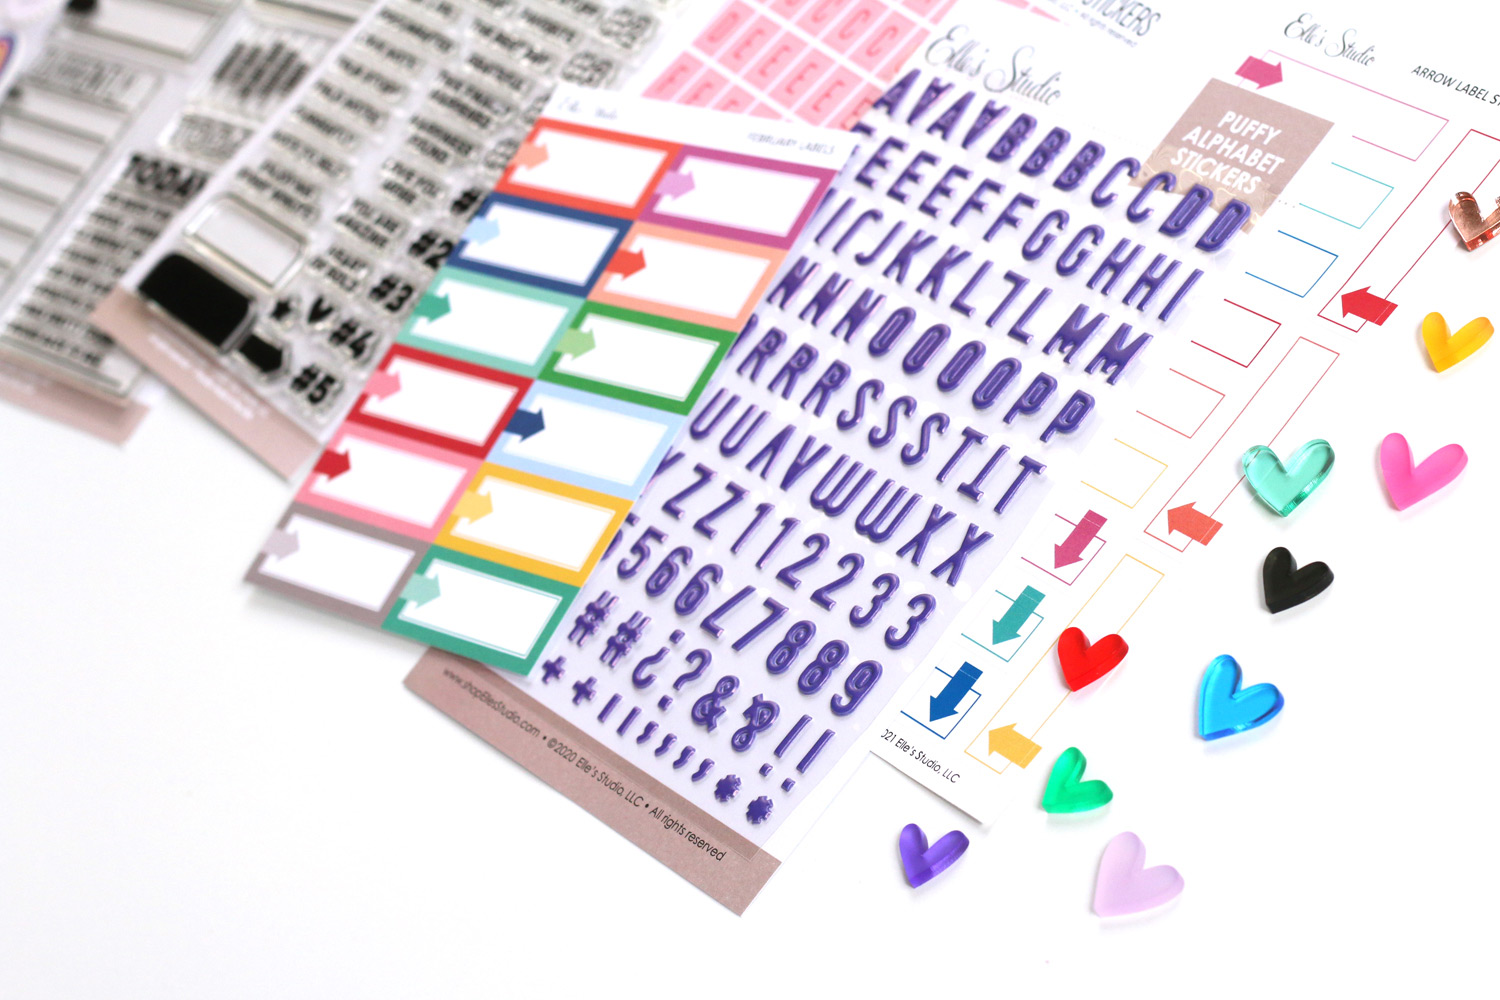
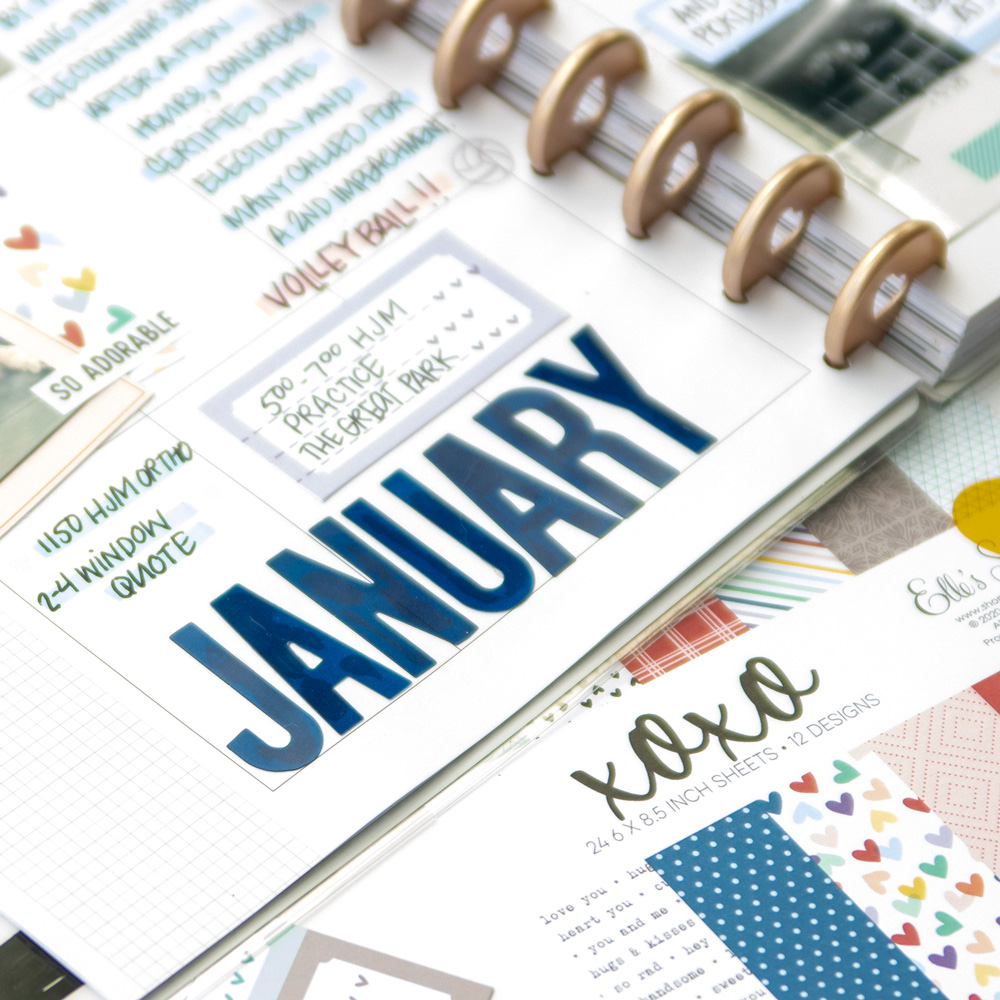
When I create a memory planner layout, I start with my BIG Happy Planner®, photos and supplies. For this week in January I’m using the January 2021 kit and add-ons and they are a perfect fit. Not only does the January kit look great here, but so do the rest of the products. They are beautiful and fit the everyday storytelling wonderfully.
I start each week by placing my photos on the page, as I believe them to be the most important part of the week. Then, I embellish around the photos leaving room for the plans and journaling, as well.
Each week varies by how many photos and plans there will be. Because of this, it varies how much journaling I will add as well. The beauty of this is that all of these elements, plus embellishing, work together. Some weeks I fill the space with lots of beautiful products and some weeks I have so many photos I am really limited where to add those supplies!
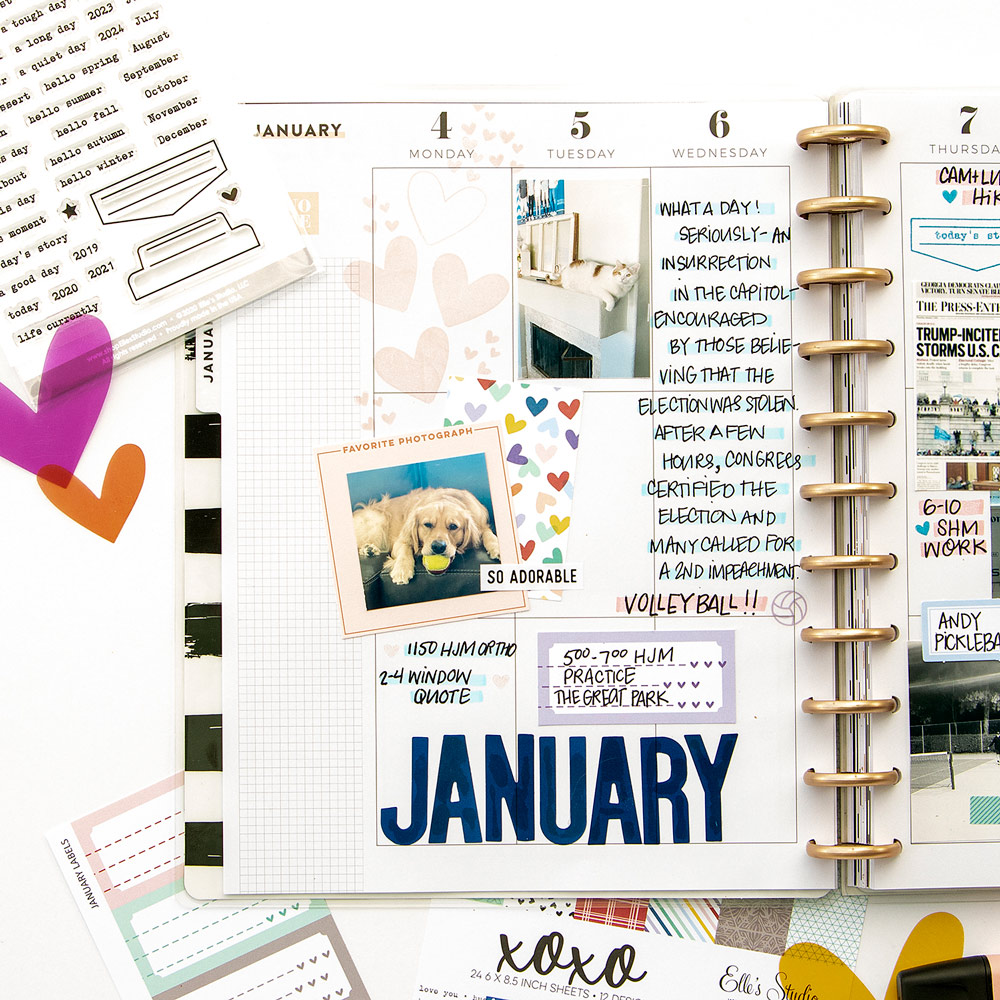
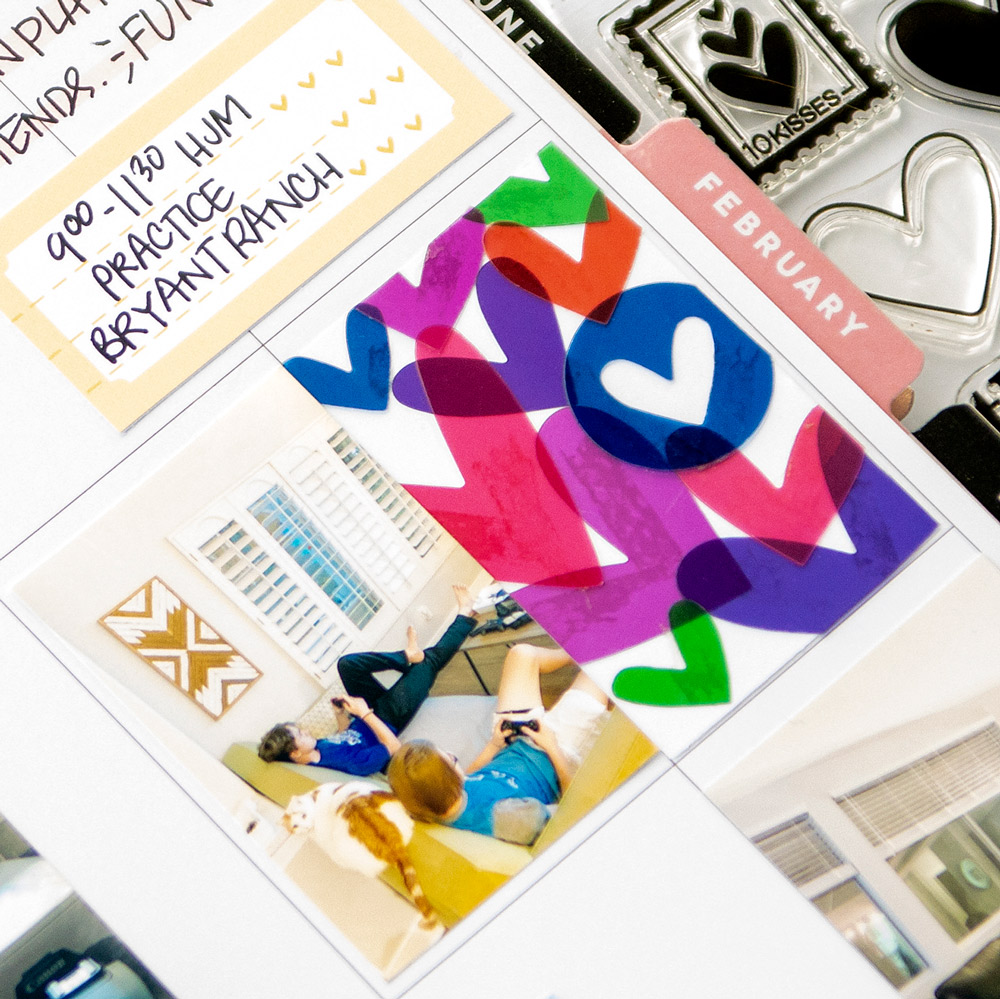
I truly cannot get enough of the Acetate Hearts! I didn’t realize before using them that I would love them as much as I do. However, the variety of sizes and colors makes them basically the perfect embellishment. They are also amazing in my planner as they do not add the bulk to the pages that puffy or chipboard stickers do. However, when placed together, they look wonderful. As you can see, I layered a few together to fill one of the planner boxes!
Now, other embellishments, and stamps, too, are fantastic in my planner as well. I will often take a 3″x4″ tag, like this one from the January Kit, and trim them to work better in my planner. I don’t often leave them full size, but find creative ways to modify them and add them to the pages that way. The same is true for patterned papers. I love the sheets included in the paper packs, like the XOXO Paper Stack. However, such large pieces don’t work for the way that I use my memory planner. Instead, adding punched rectangles (and other shapes!) work so much better and add just enough pattern and color to the pages.
One of my most favorite ways to add the day-to-day plans that I include is to use labels. I was so excited when I saw the January Labels because they are just so cute, yet will leave enough room for me to write the appointments and activities for the various members of our family.
Memory planning can be whatever YOU want it to be. It’s a really fun and easy way to document each week throughout the year, and it’s even better when there are bright and cheerful supplies that help make the process even more fun! Why not try using your Elle’s Studio supplies in your planner like I have here? I think you’ll see what a good time you can have by documenting the ordinary in this way!
Are you using our products in your planner? Show us your weeks by posting into our Elle’s Studio Facebook Group, or on Instagram using the hashtag #EllesStudio!
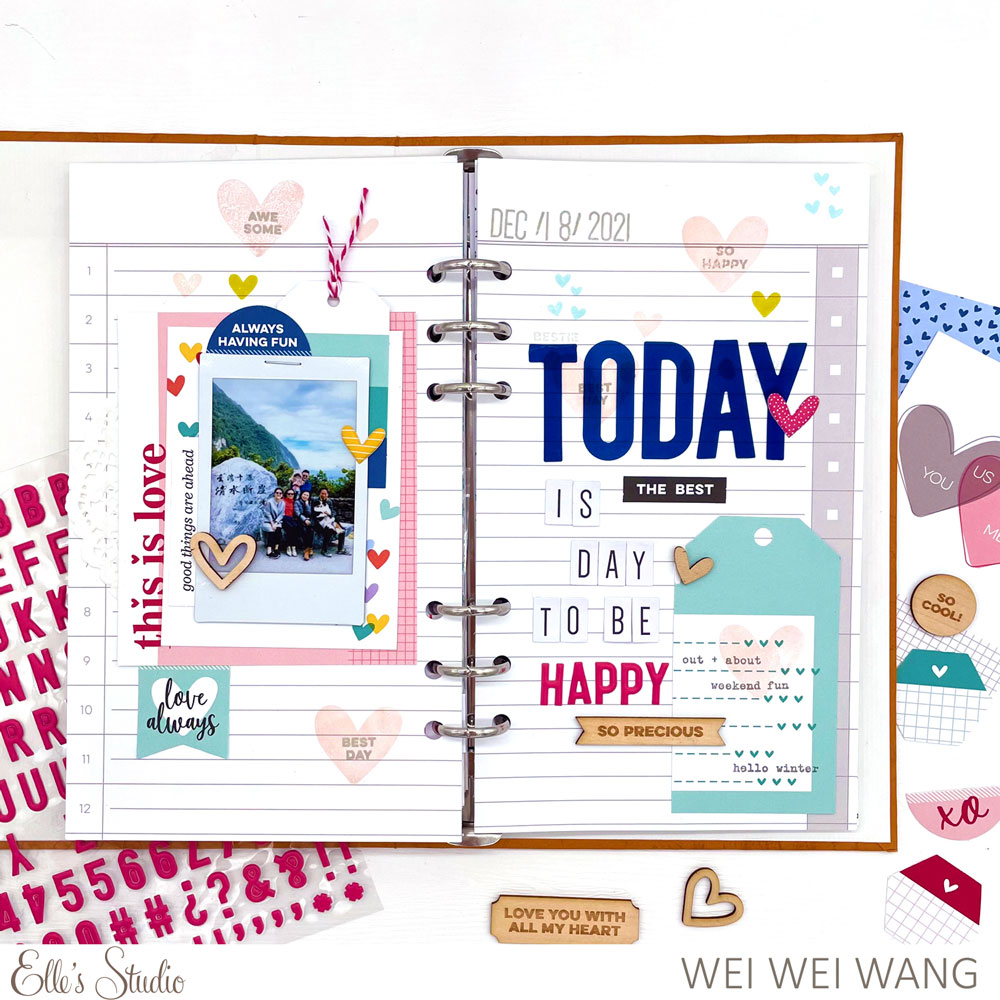
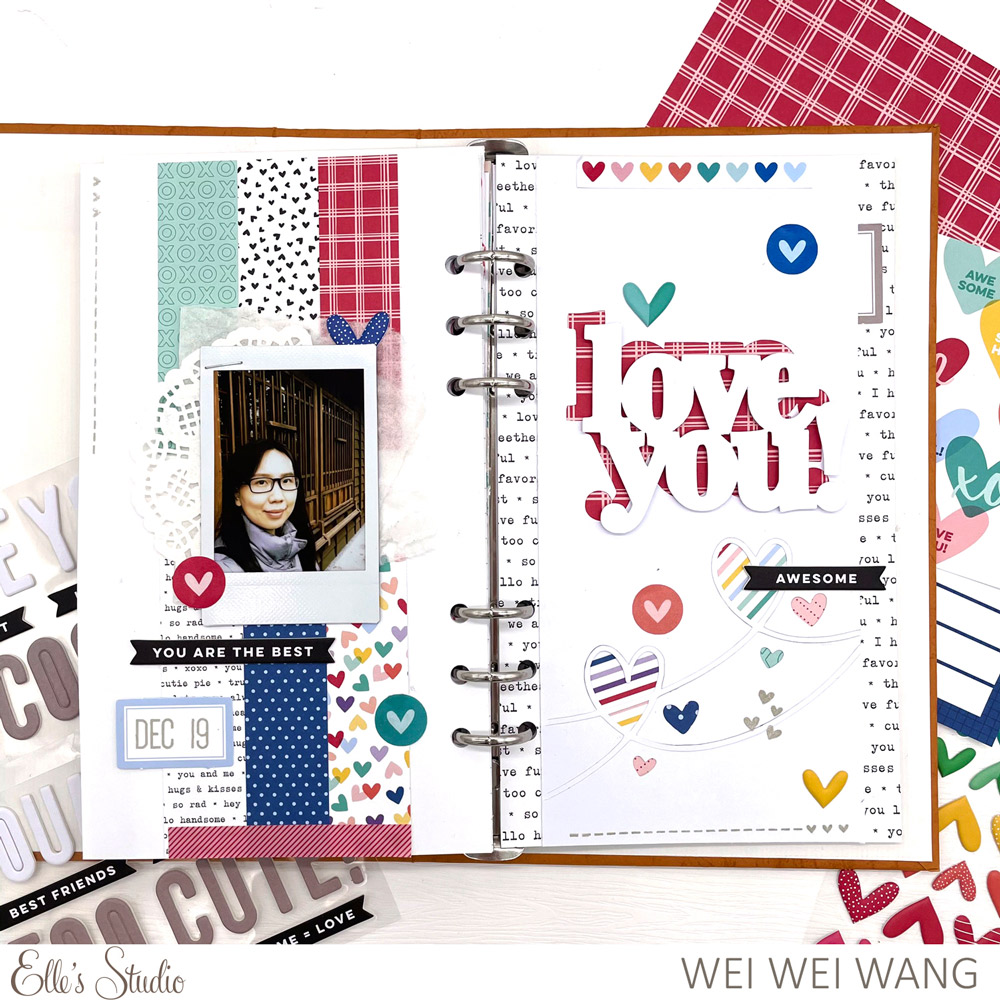
Hey, friends! It’s Wei Wei here. I’m so happy to be here with you today for the first time in 2021 to share a traveler’s notebook layout using the beautiful January kit and add-ons.
I loved the light gray color and the blank lined pattern paper from the XOXO Paper Stack and decided to use it as my background.
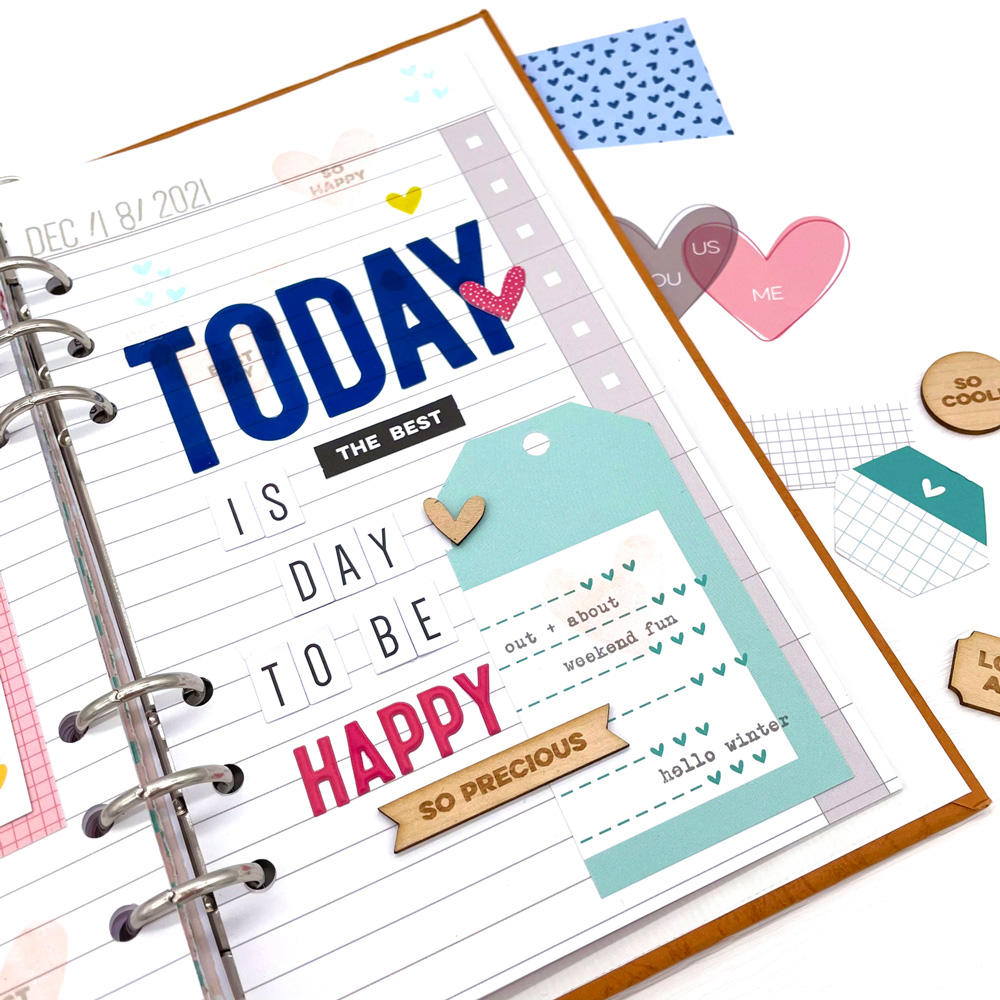
I really adore the January Kit and I thought the pink and heart patterned 3″ x 4″ tags would work perfectly in my traveler’s notebook to document my family travel, so I used them to layer behind my photo and also added some of the kit die cuts, stapling them for extra texture.
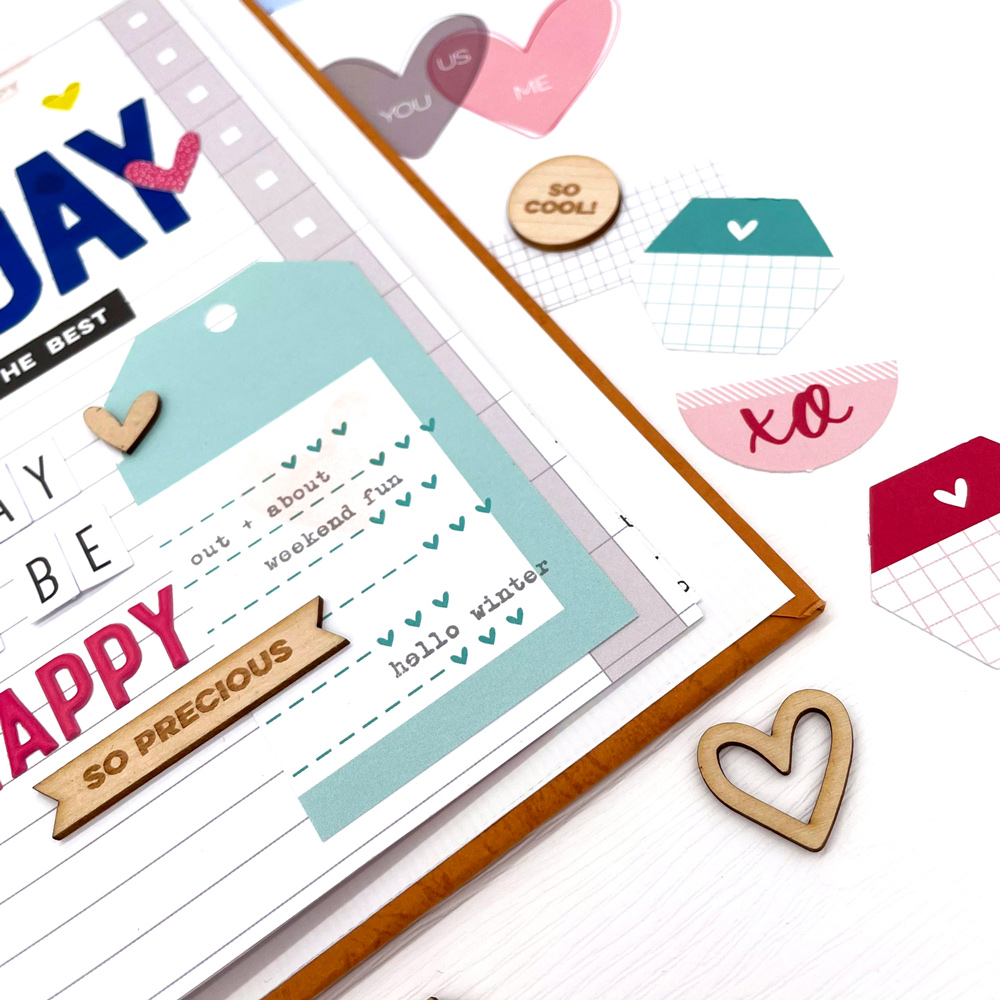
The light green tag is also from the January Kit. I thought its color matched with the left side of the page, but there was not enough space on the right side to put the whole 3″ x 4″ journaling tag, so I trimmed it into a shipping tag shape. Then, I stamped some words from Daily Tabs Stamp onto it. This stamp set is perfect for adding journaling on layouts, traveler’s notebooks and pocket pages!
I really wanted to add some stamping to my background, so I stamped some hearts and little words from the Hugs and Kisses Stamp randomly on both pages to get more texture and bring the whole layout together.
Just love how this traveler’s notebook layout turned out. I hope this has inspired you to use the January kit and add-ons to document your memories, in any format!
Are you inspired by Wei Wei’s project to create something of your own? Share it with us in our Elle’s Studio Facebook Group, or on Instagram, using the hashtag #EllesStudio!
Comments Off on A Happy Traveler’s Notebook Spread with Wei Wei Wang | Share This
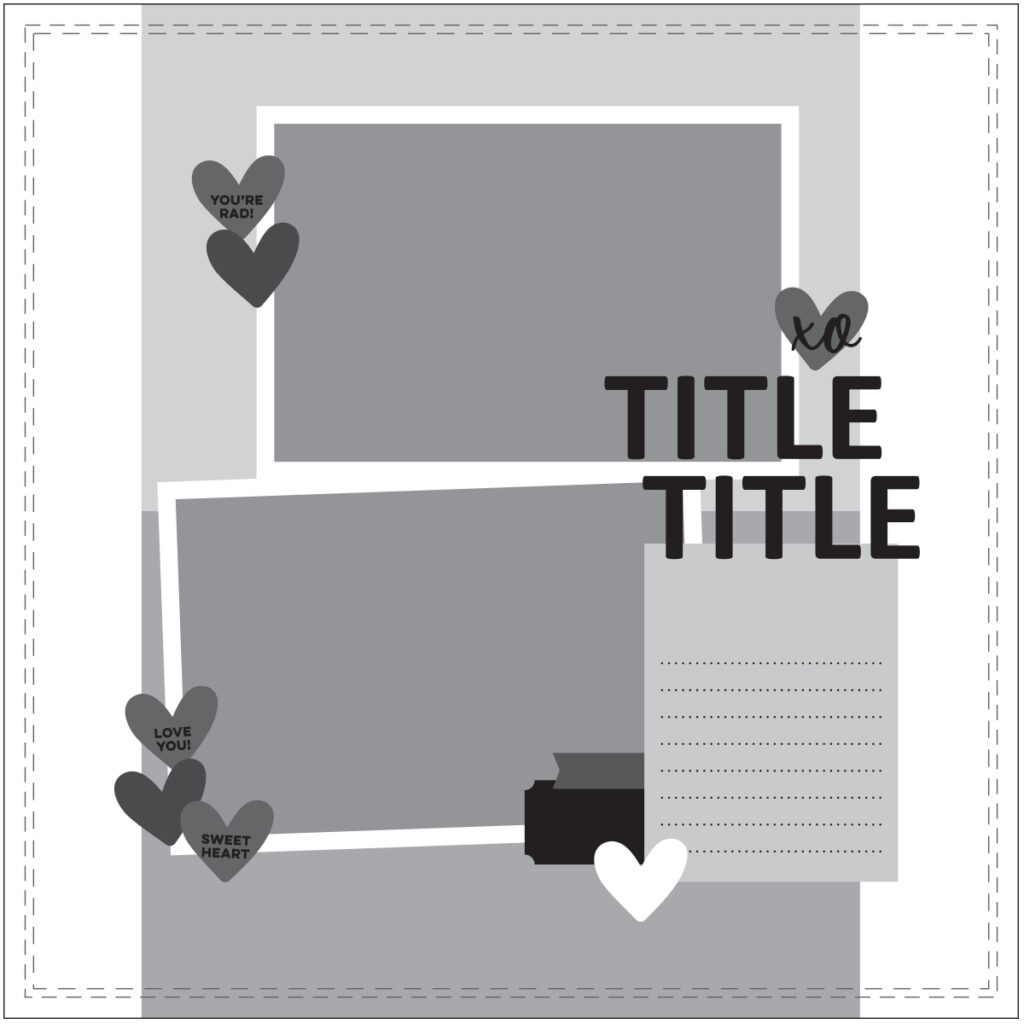
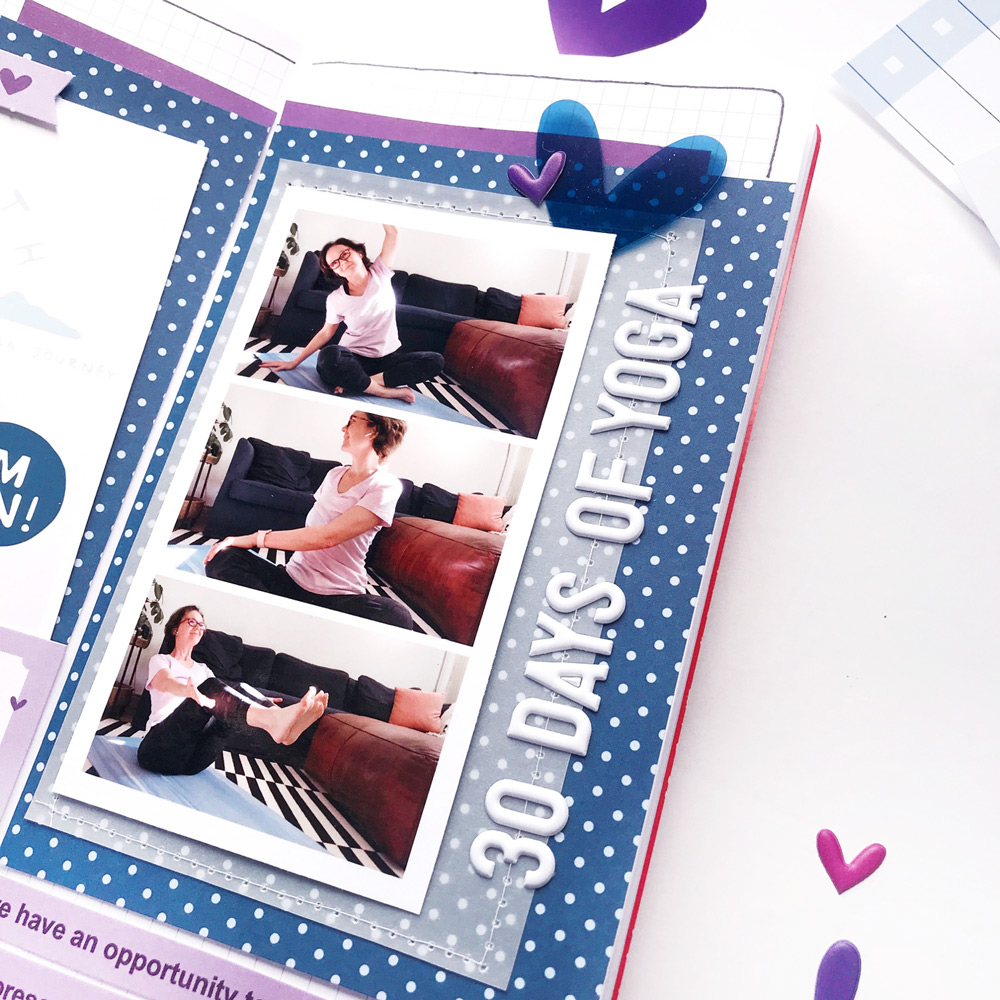
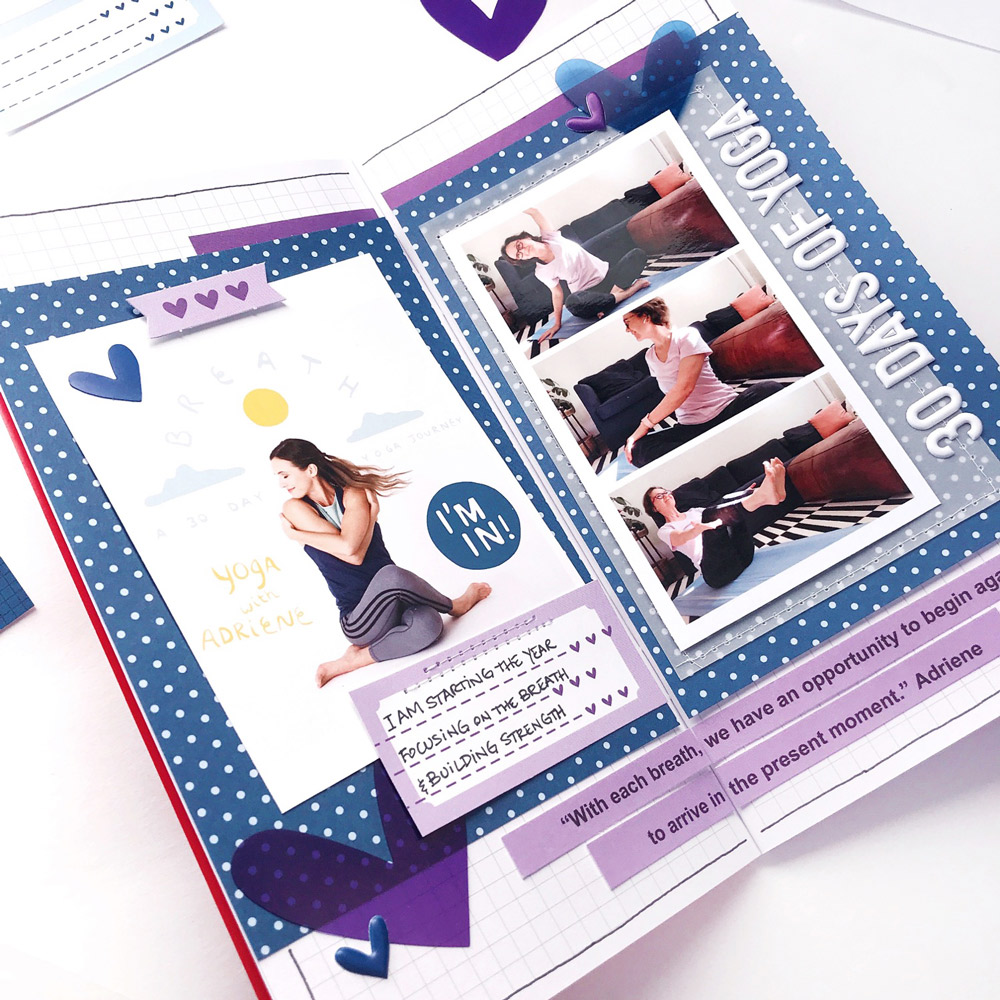
Happy Friday! How about playing with a new sketch this weekend? It’s Nathalie here to share a layout in my traveler’s notebook created with the January 2021 kit and add-ons, based on this Elle’s Studio exclusive new sketch:
As you can see, not only did I adapt a 12″ x 12″ sketch to create a traveler’s notebook layout, but I also turned it on its side, rotating it 90 degrees to the right. There is a natural split in the middle that way, matching the split in the pages of a notebook.
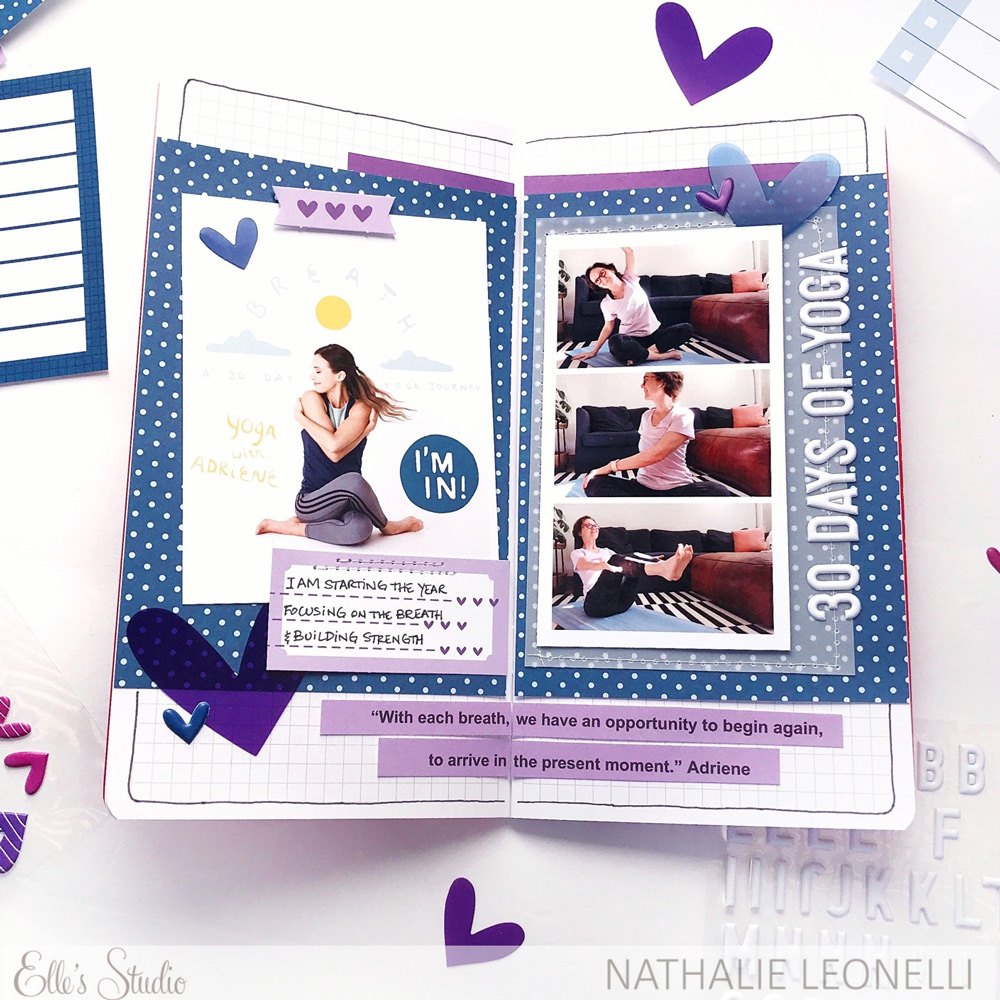
In my adaptation, I scaled down some design elements, like the journaling spot which would fit a 3″ x 4″ tag on a 12″ x 12′ layout became a January Label in my TN sized page. Bonus: a single sheet of paper from the XOXO Paper Stack was just the right size to cover both pages!
I preferred to move the location of my long title created with some White Puffy Alphabet Stickers to the side and used a collage to include more photos.
I love working with all kind of sketches. They help me with the big elements to start a project, but they can also inspire some of the details, like the black marker line around the page or the use of vellum to make the right side lighter. Beyond that, make the sketch work for you!
We would love to see what you create with this sketch so please share your projects in our Elle’s Studio Facebook Group or on Instagram using the hashtag #ellesstudio.
Namaste!
Comments Off on Sketch Day with Nathalie Leonelli | Share This
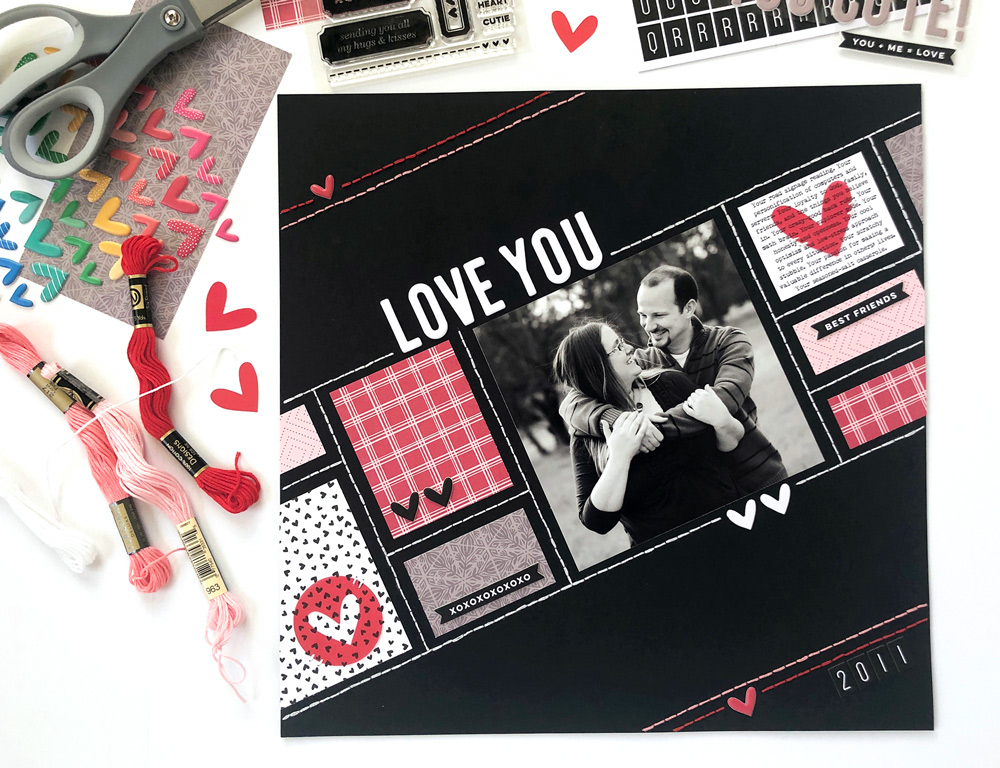
We are so excited to welcome January guest LeeAnne Jones back for her second post with us today, and we think you’ll absolutely love the striking, graphic design that she’s sharing with us. If you have black cardstock on hand, pull it out, because you’re going to want to re-create this page using our January products! Let’s take a look!
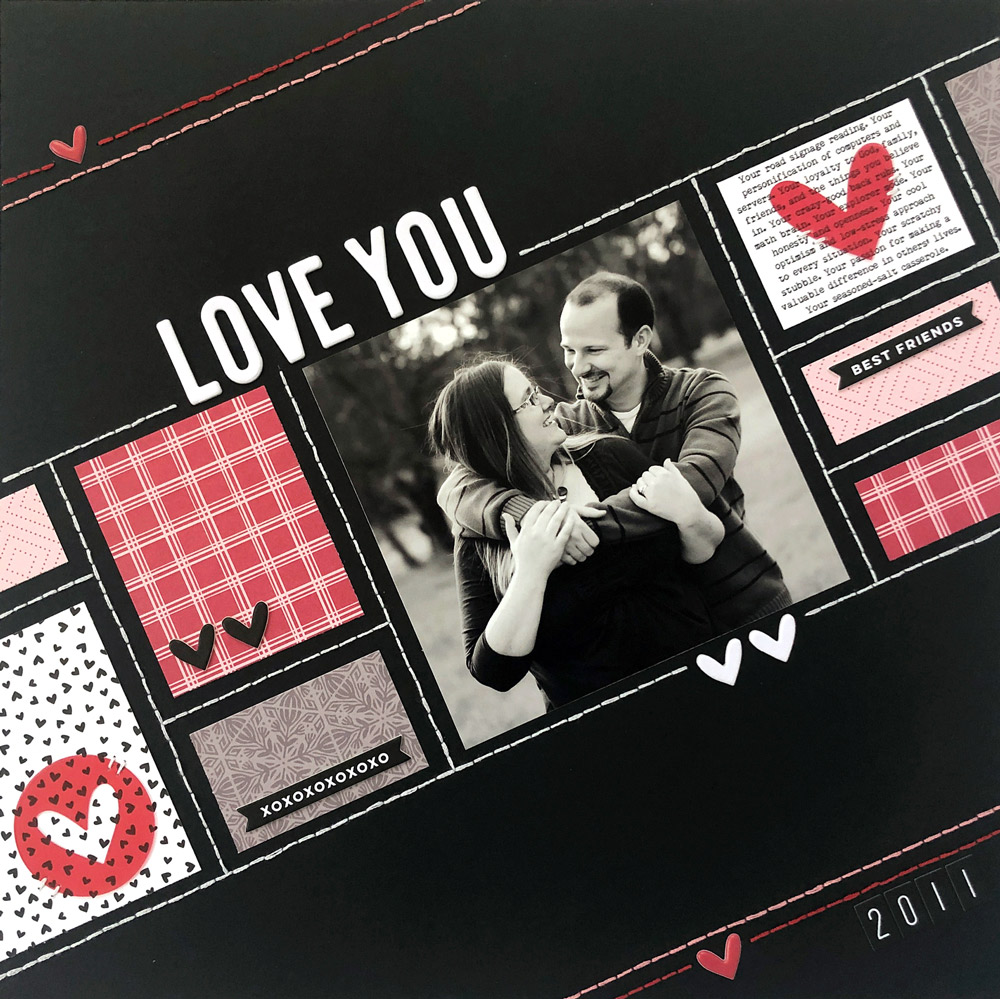
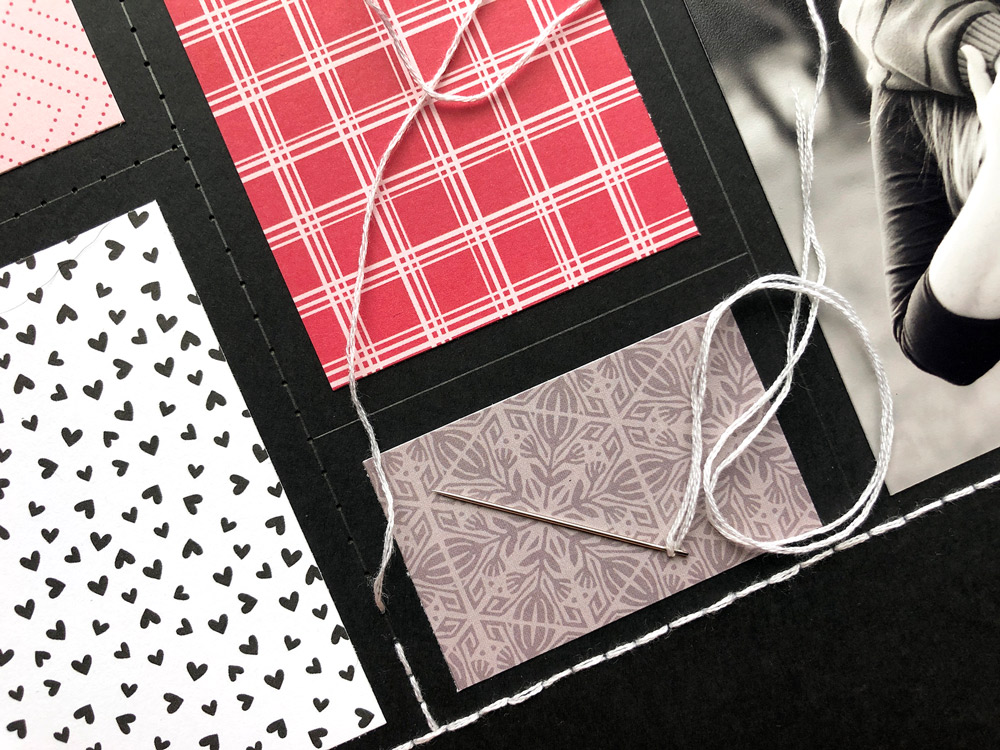
While I didn’t use the Hugs and Kisses Stamp on this layout, one of the stamps in the set inspired it! The line of dashes leading to three hearts resembles sewing stitches, and it made me think of quilting. So I flipped through the XOXO Paper Stack to find sheets to create a patchwork, choosing variations of red, black, and white. I knew a black and white photo would go well with such a stark color combo—and it needed to be romantic. This one of me and my husband, Paul, taken back in 2011 by Jennifer Chaney, but never documented in a scrapbook, was just right. I chose plain black cardstock for the base, to make the patterned paper pop, and then embellished with the Love You Chipboard Stickers and Acetate Hearts to bring it all together.
I love the look of thread on paper, but I’ve never met a sewing machine that loved me back. That’s OK, though. It’s easy to hand-stitch, and it lends a bolder, chunkier design element. When stitching on paper, I always begin by drawing lightly in pencil where I want the thread to go. Then, using a piercing mat (mine is from We R Memory Keepers), a large needle, and a thimble, I poke holes along the pencil line roughly 1/6th of an inch apart. I don’t worry too much about perfect spacing, embracing the wabi-sabi of handmade. Then, I separate embroidery floss into two sets of three strands, thread the needle with one three-strand set, and back-stitch away—preferably with music, a podcast, or an audiobook in my ear.
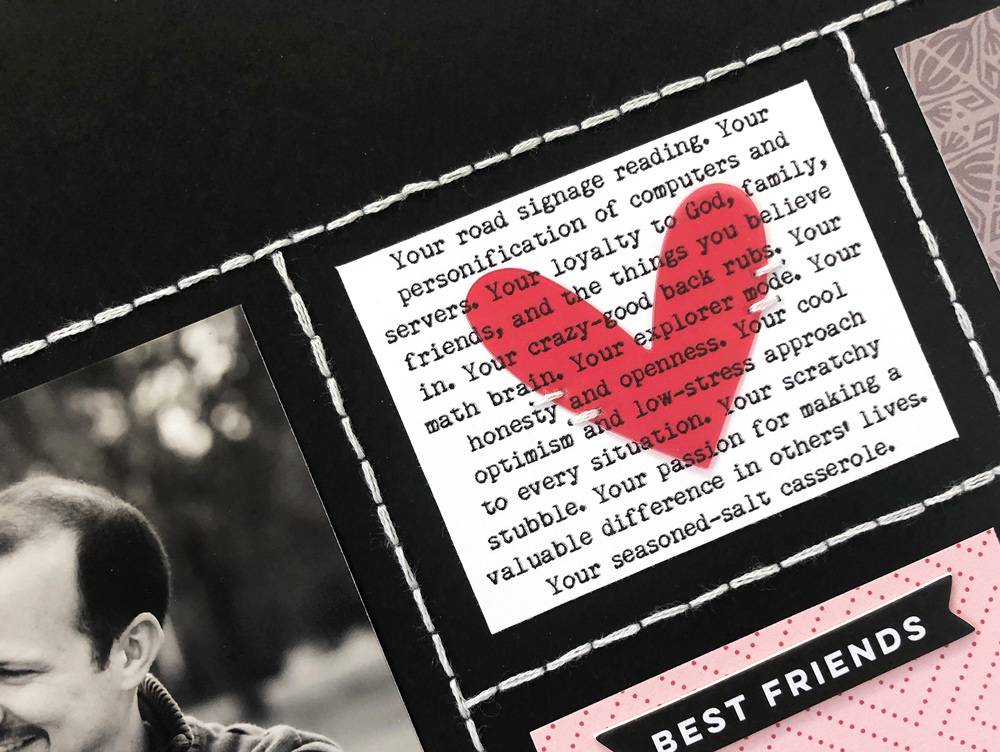
When scrapbooking older photos or events, it can be challenging to incorporate journaling. The passing of time often makes the details hazy. I suggest looking through personal journals, letters, text messages, emails, and social media posts from that time to help construct something more personal than who, what, where, when, and why. In my saved emails (hooray for Gmail’s starred feature), I found a string of “things I like about you” messages that I sent Paul during our engagement and early years of marriage—including 2011! For my journaling here, I used several of the old “things” that still resonate today. They are both serious and silly, and I think they capture him well. The red Acetate Heart over the top helps balance the overall design without obstructing the words.
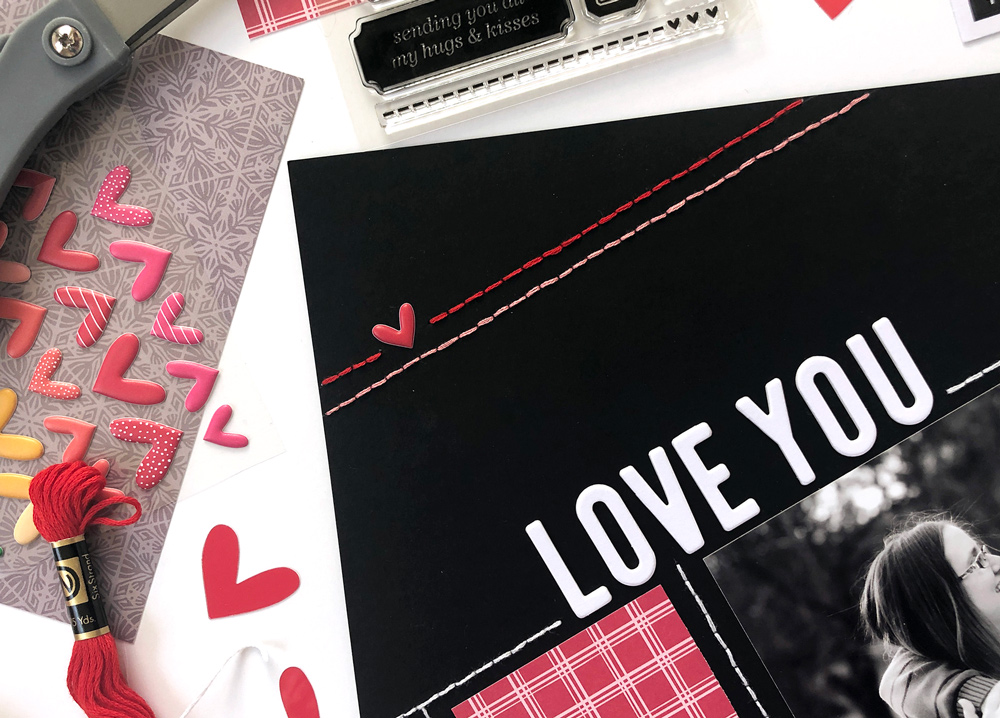
Once I created the patchwork element across the page (diagonally for visual fun and to maximize the space for patterned paper), I’ll admit I was temporarily stumped on how to handle the corners. I wanted something there to help anchor the design in the 12″ x 12″ space, but I worried a single object or cluster of embellishments would look disconnected. Eventually, I decided to repeat the angled embroidery of the patchwork but use darker red and pink hues to keep the “volume” lower. It also gave me a place to incorporate the date with the Jane Tile Alphabet Cardstock Stickers and to repeat the hearts—this time using red Puffy Heart Stickers.
That’s it! It was an honor and delight to be a guest designer for Elle’s Studio this month. I had so much fun playing with the products, and I hope I have given you some ideas for your own documenting. Be well.
LeeAnne Jones is a writer and editor for lifestyle and travel magazines—although she has pivoted to cookbook editing and social-media marketing during the Covid-19 pandemic. She lives in the San Francisco Bay Area with her husband and two young daughters and has been scrapbooking off and on since attending a Creative Memories party 20 years ago.
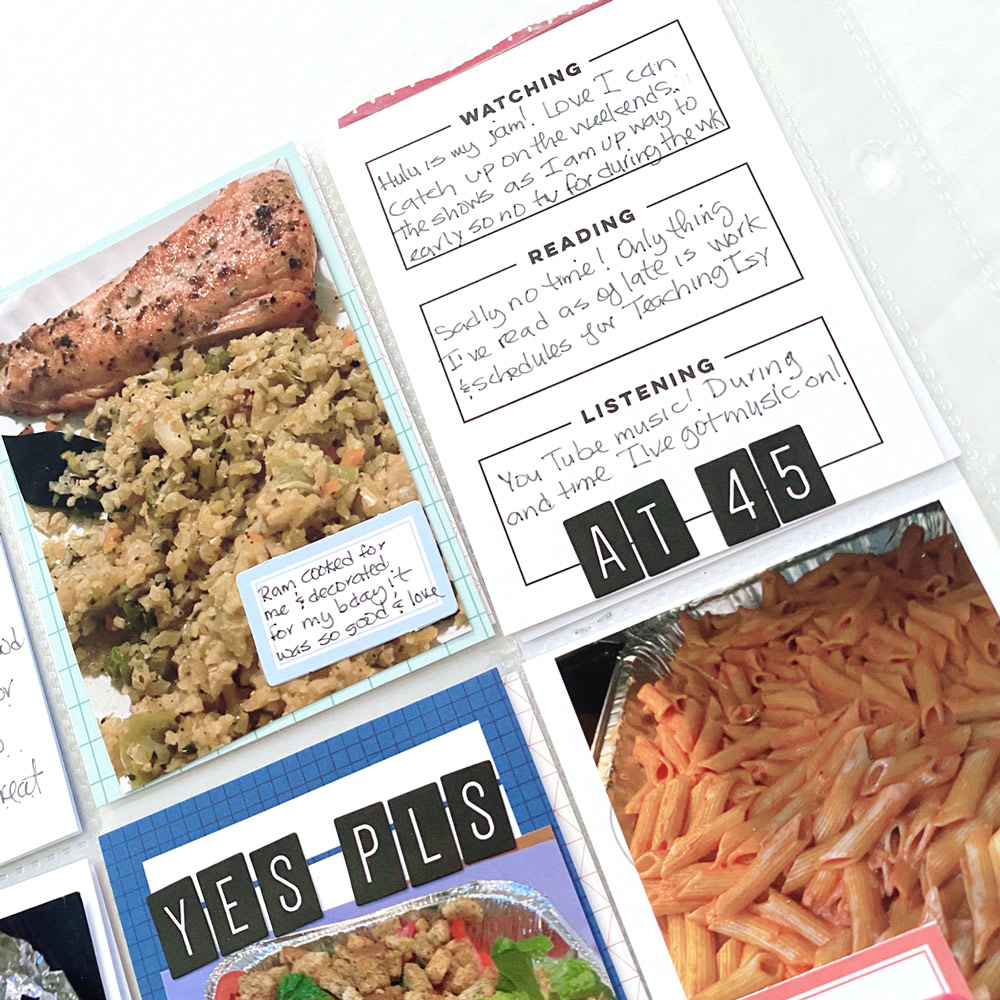
Hello, all it’s Ellie here! Today I wanted to share how I document birthdays in my family and it just happened that I turned 45 in November. The moment I saw the January 2021 kit and add-ons, I knew it was just what I needed to tell the surprise fun I had. Having the option to add coordinating alphabet stickers is a great way to add words that stand out when you want to call attention to the smaller details.
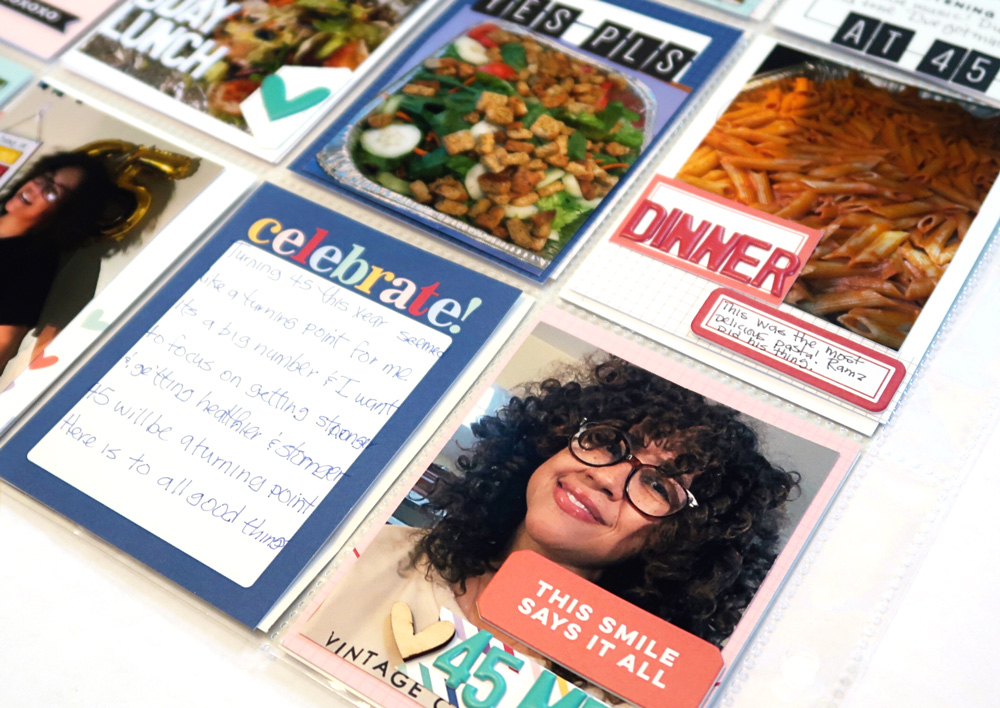
Documenting and using our words is something that I love to be able to do. Although truth be told, when we are documenting we sometimes forget about ourselves. That is why each time there is a birthday I try to do at least one full page spread on the person (in this case it was me!) to tell the story of how we celebrated.
Thank you so much for stopping by, and I hope that I was able to inspire you to document those special days. Remember to include yourself in your stories, and use your own handwriting—one thing my family has said that they enjoy seeing in our albums! Happy documenting, friends!
Show us how you are getting your story in your albums! Share your projects in our Elle’s Studio Facebook Group or on Instagram using the hashtag #EllesStudio, and be sure to get your story told, as Ellie reminds us today!
Comments Off on Sharing Your Story with Ellie Augustin | Share This
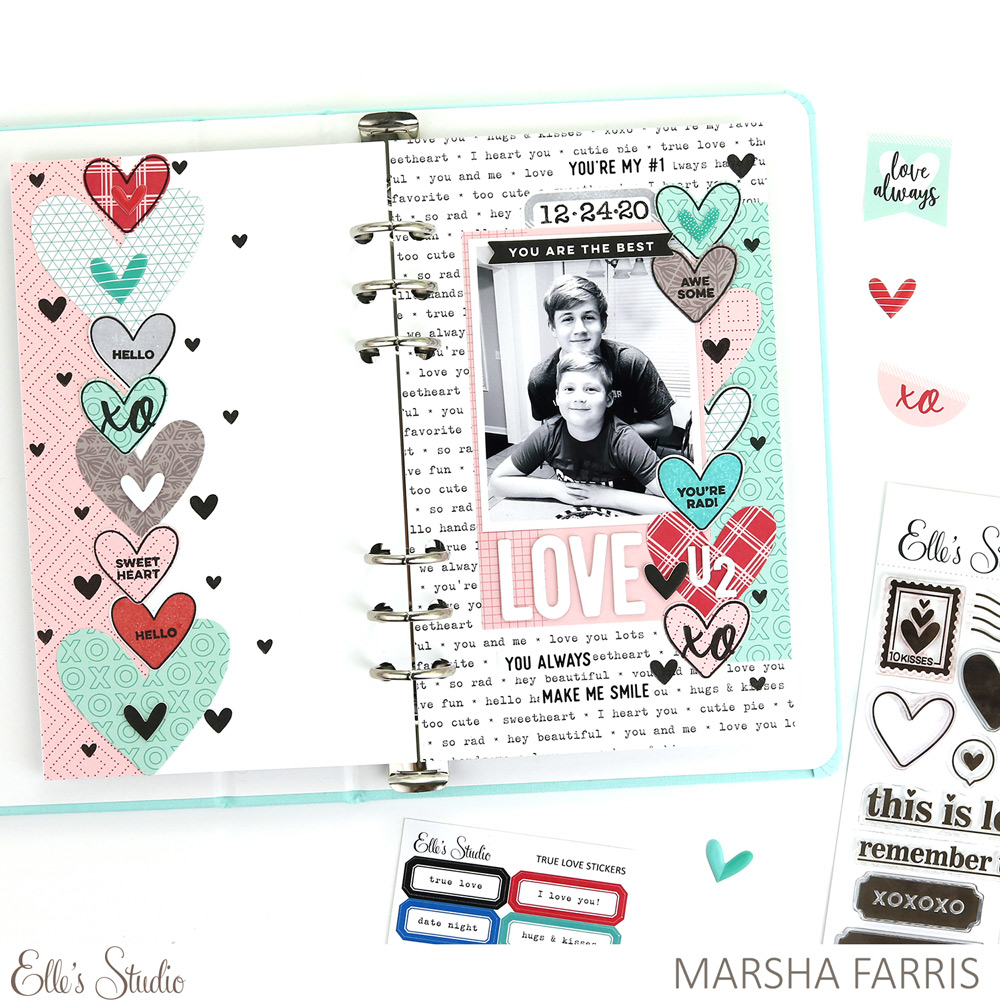
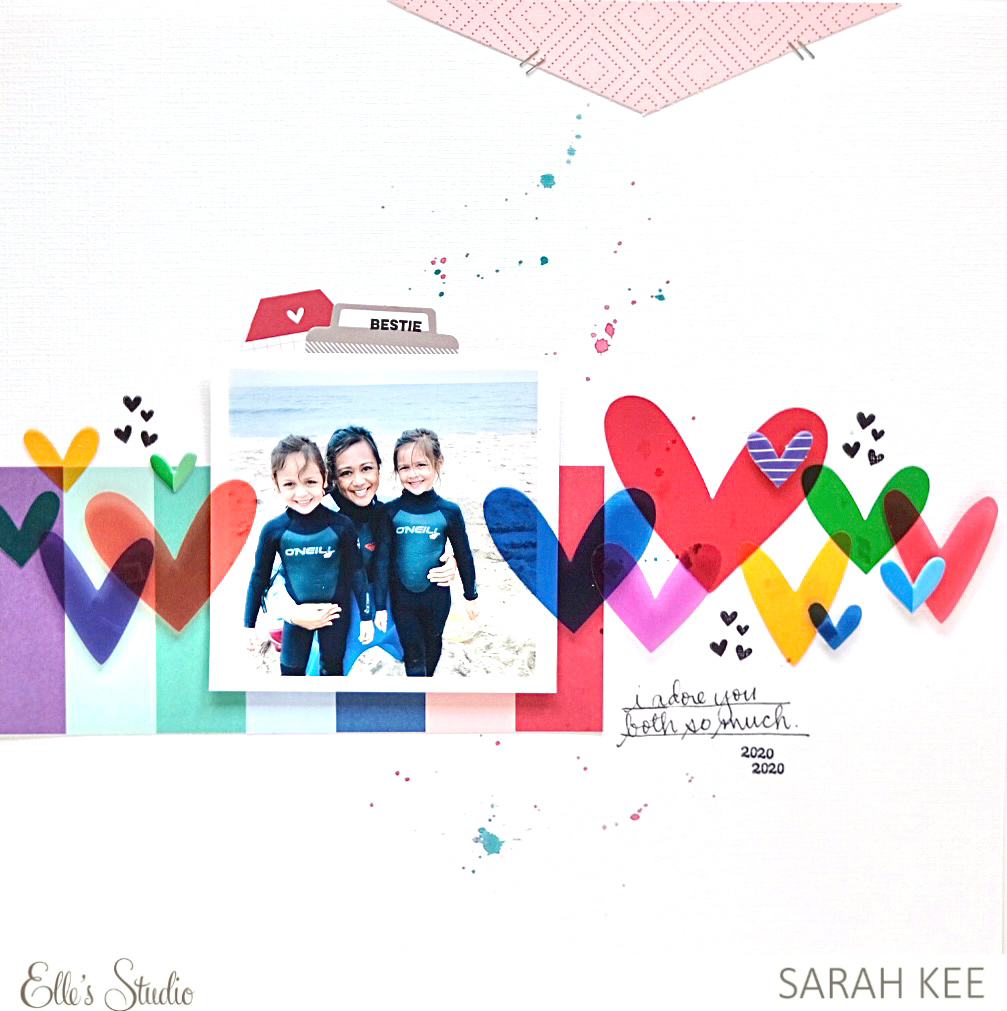
Hey, Elle’s Studio friends! This is Marsha, and I’m excited to be sharing my first post in the new year using the beautiful January 2021 kit and add-ons! I love all of the love-themed products in this month’s release and wanted to use them on a spread documenting a photo of my sons.
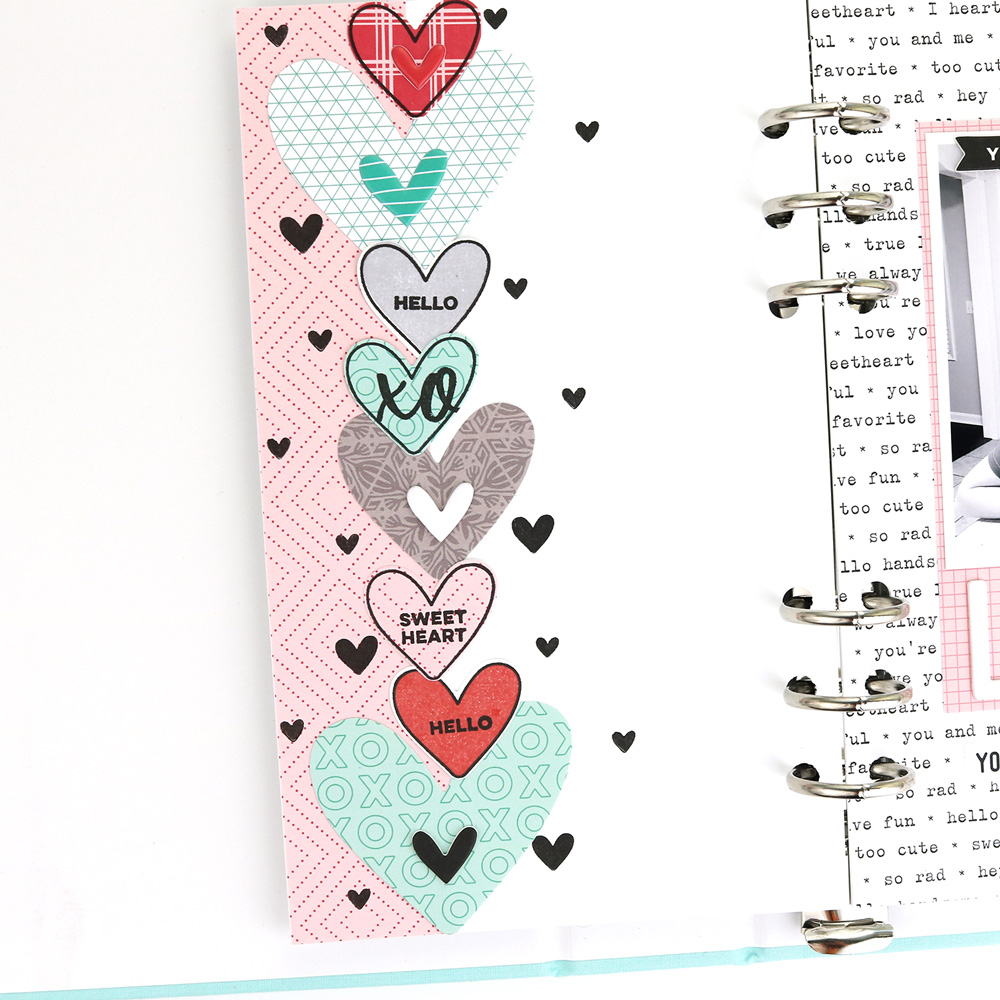
The Hugs and Kisses Stamp was a favorite from this release, because it includes such a great mix of icons, words, and phrases. I also love that it coordinates with the My Heart Metal Die, making it really easy to create your own embellishments. To begin the layout, I stamped a few of the heart outlines from the Hugs and Kisses Stamp onto cardstock and filled them in with the solid heart stamp using different ink colors. I stamped more of the heart outlines onto papers from the XOXO Paper Stack. Next, I stamped a variety of words and phrases onto each heart using black ink. To complete these embellishments, I cut out all of the hearts using the My Heart Metal Die, also cutting out a few larger hearts from the patterned paper to give more variation in heart size on the spread. Then, I trimmed a strip of pink patterned paper from the XOXO Paper Stack and adhered it to the edge of my white cardstock background. I arranged the die cut hearts along the strip of patterned paper, creating a fun column of hearts. To add a little more detail to the page, I stamped some of the smaller hearts from the set onto the background with black ink. I added stickers to the center of a few of the hearts using the Love You Chipboard Stickers and Puffy Heart Stickers.
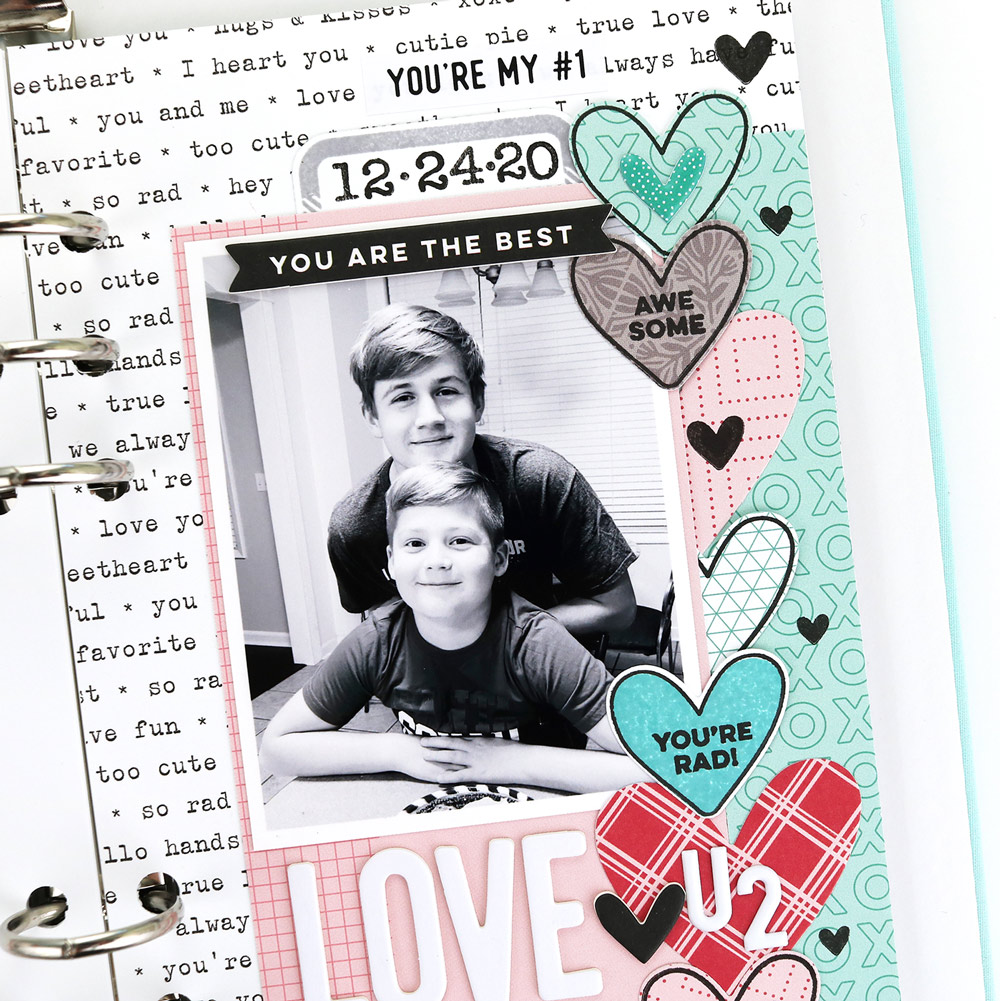
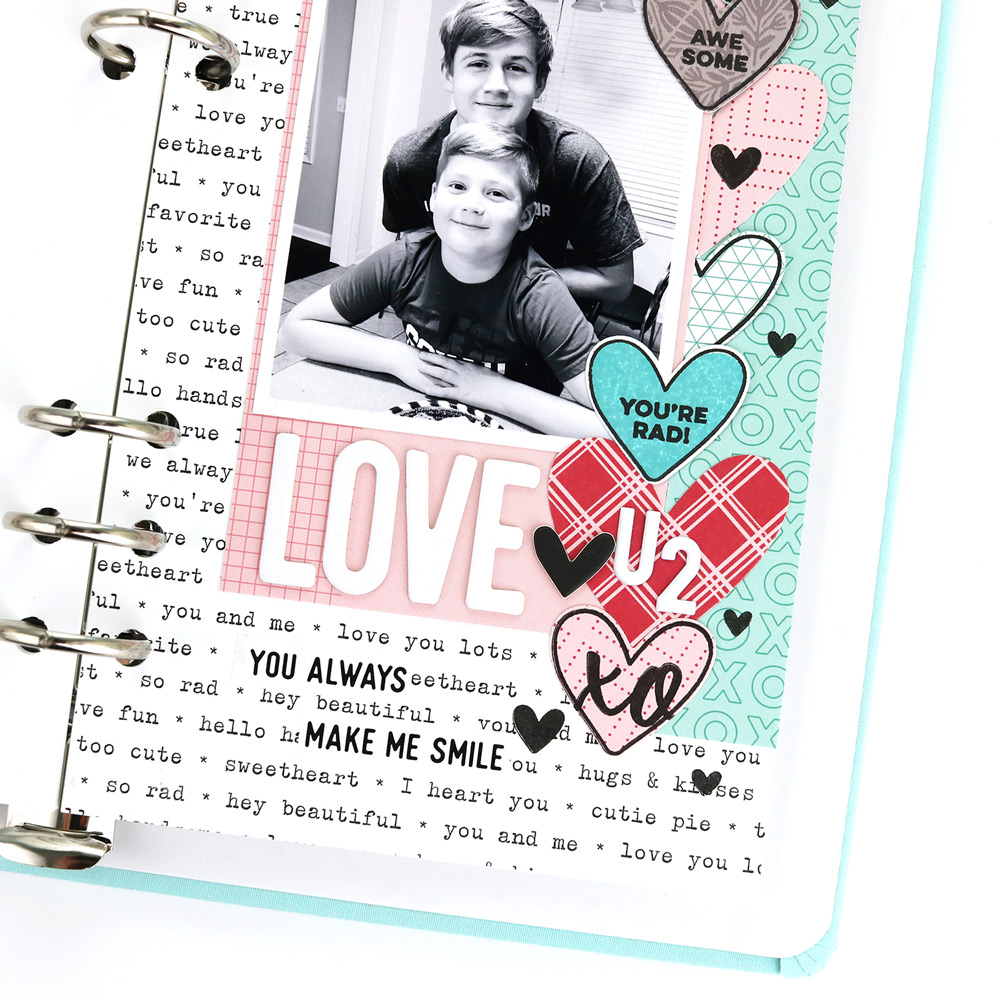
On the right side of the spread, I chose to use a patterned paper from the XOXO Paper Stack as my background and added a small strip of another paper from the stack along the edge of the page. I layered my photo onto a trimmed journaling tag from the January Kit. I stamped a tab and the date using the Collected Stamp and Hazel Alphabet Stamp, then cut out the tab with the Everyday Tabs Vol. 2 Metal Die and adhered it above my photo.
This layout came together beautifully using the January kit and add-ons. I hope I’ve given you some ideas for using the Hugs and Kisses Stamp to create some projects featuring your loved ones or some lovely moments! Thanks so much for stopping by today!
Show us how you are using our new Hugs and Kisses Stamp on your projects! Post to the Elle’s Studio Facebook Group, a great space to get inspiration from other Elle’s Studio fans, or on Instagram using the hashtag #EllesStudio!
Comments Off on Stamping Hugs and Kisses with Marsha Farris | Share This
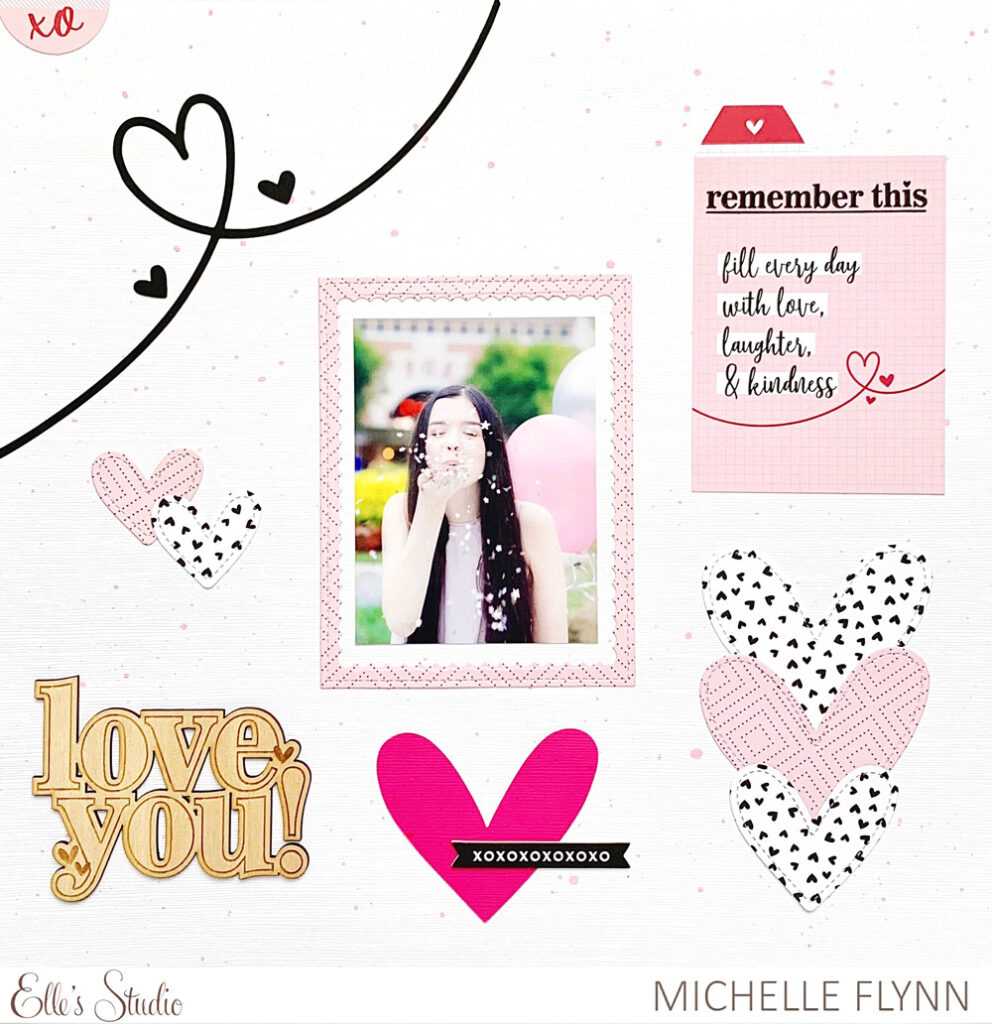
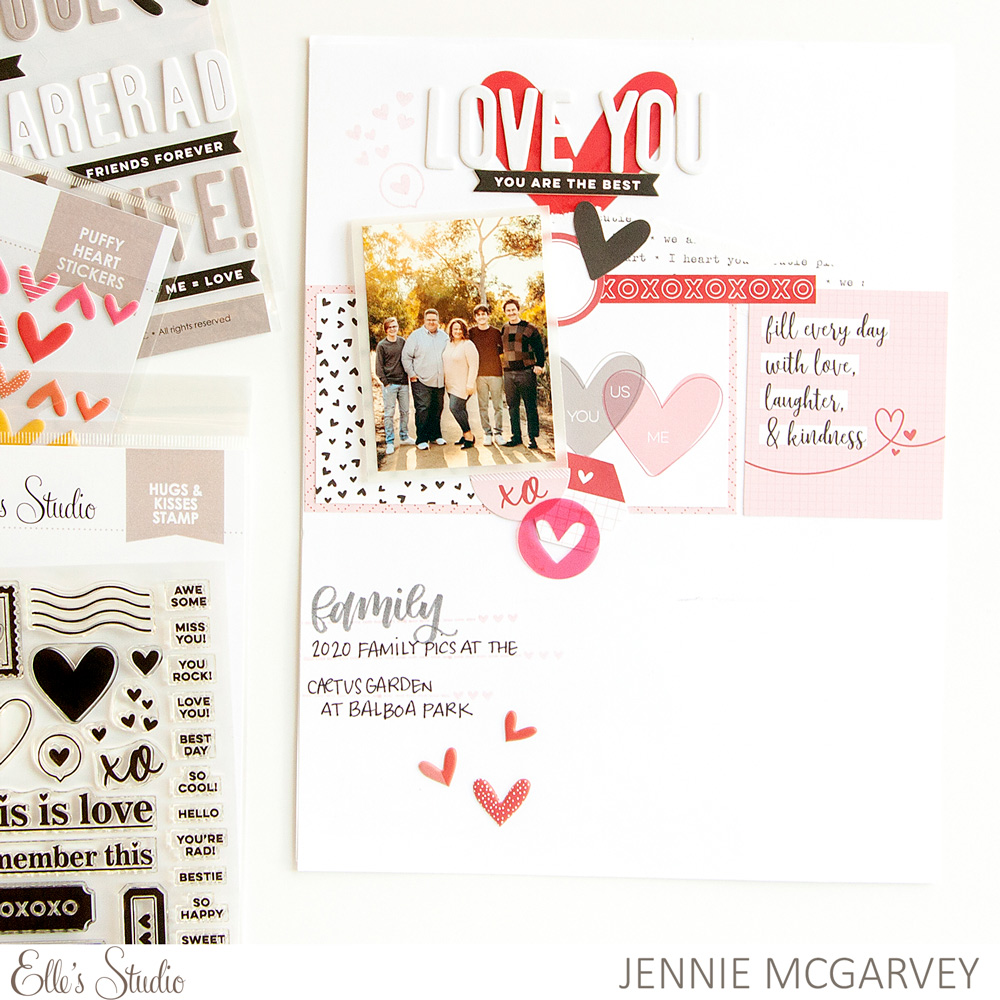
Hello friends and happy new year! It’s Michelle here, I am so thrilled to share my very first Elle’s Studio blog project with you today! I have been a scrapbooker for as long as I can remember and I sometimes find while creating that I get lost in the memory and feeling of a photo. Combine that with incredible product inspiration & you get pure “magic” that can bring a photo and a blank sheet of paper to life! I like to believe that my family can feel my love for them through every page I make regardless of whether it is a pocket page, a 12″ x 12″ layout, mini book or a traveler’s notebook layout. Today’s layout is simply named “Love You” and I used the delightful and colorful January 2021 kit and add-ons to create it.
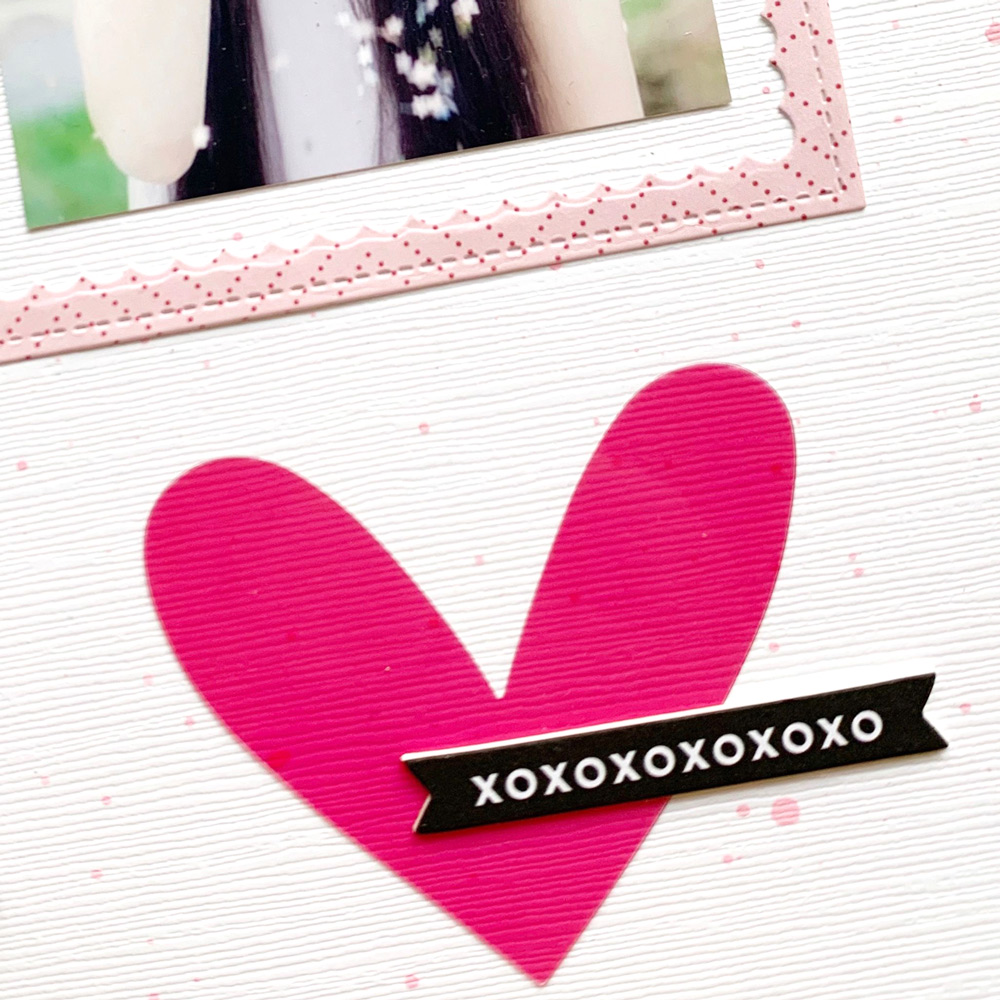
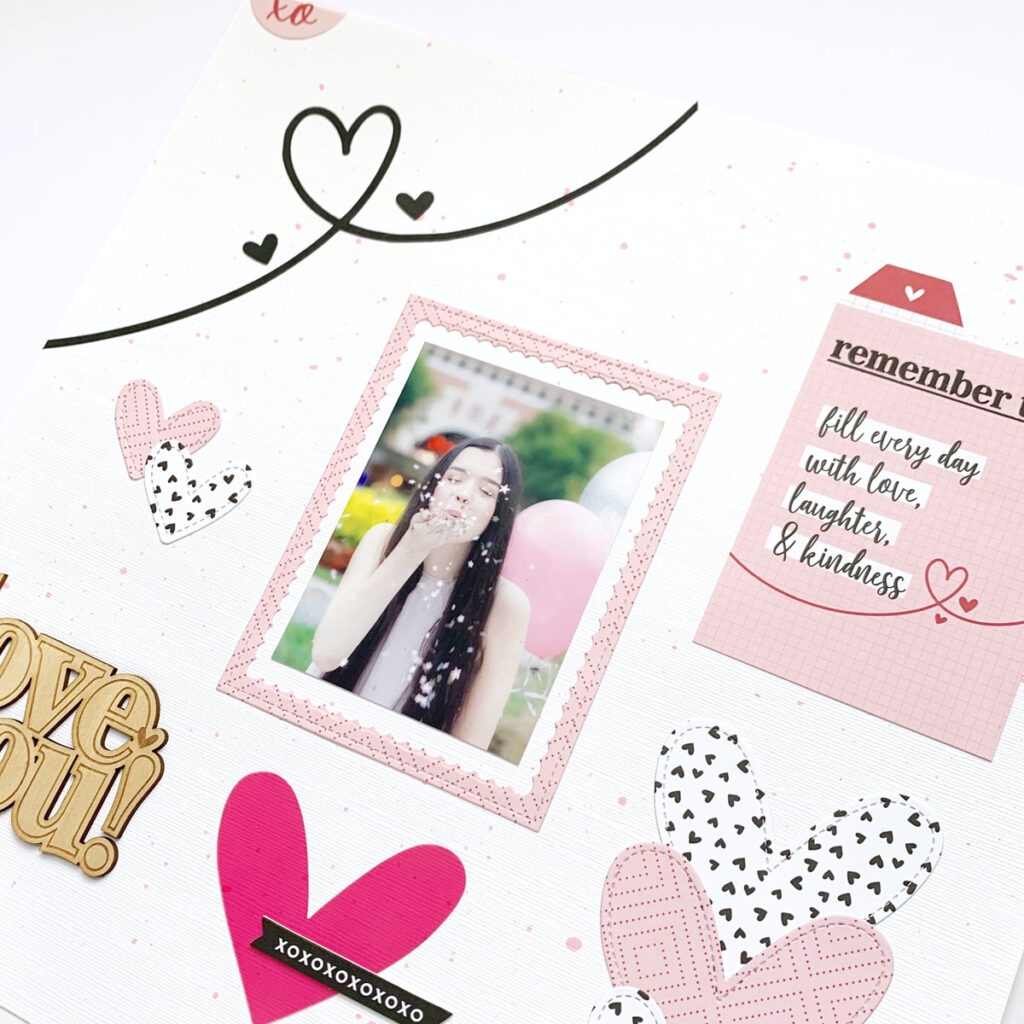
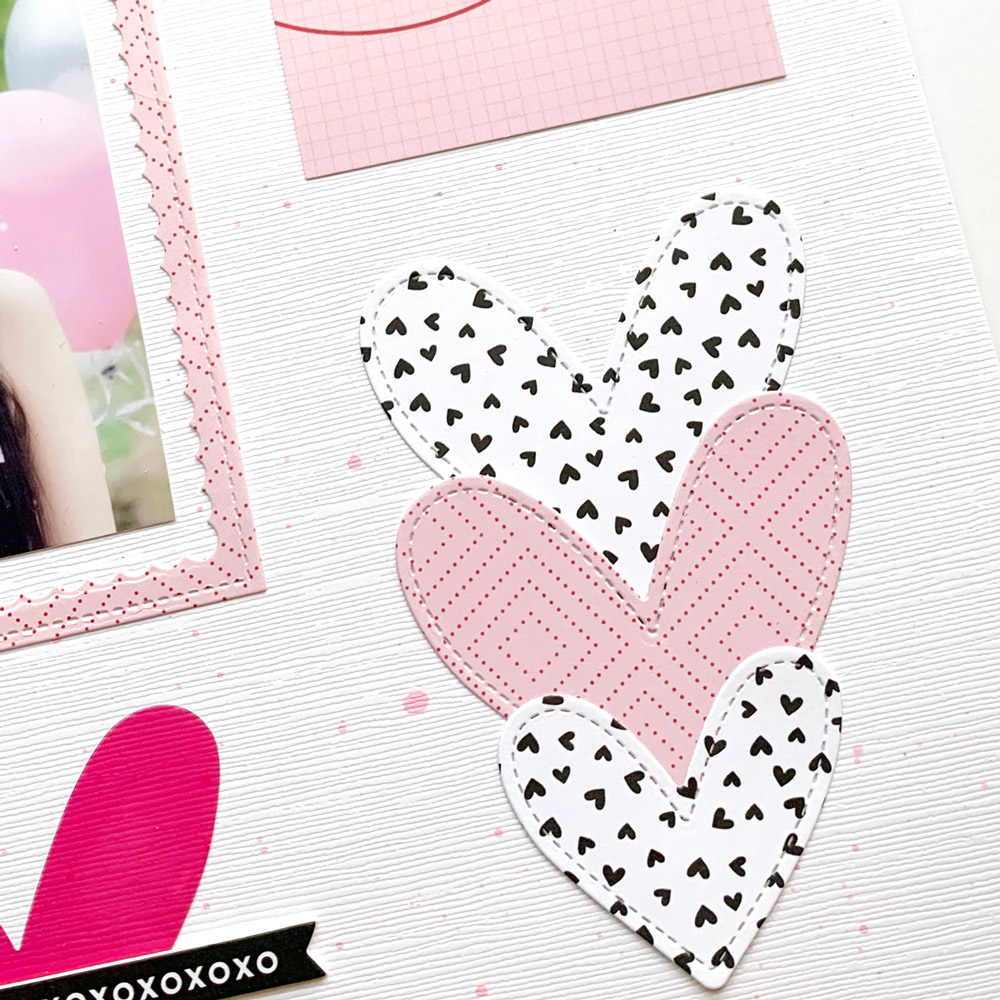
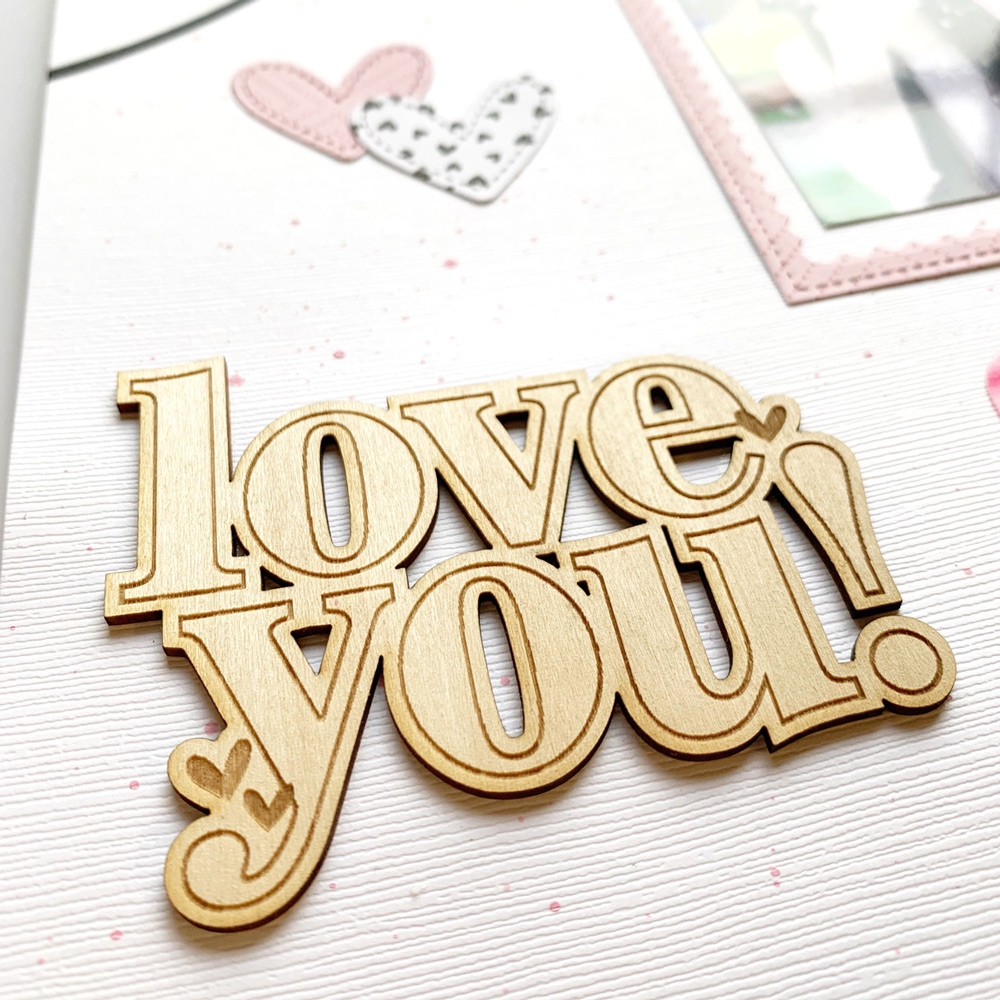
I was immediately inspired by all the LOVE in the new January 2021 Kit and the pink 3″ x 4″ quote tag you see in this layout quickly became my foundation for this layout. Once I have a product-inspired idea I then like to select a few different embellishment elements to coordinate with it. This practice really helps keep me organized and prevents me from getting overwhelmed with too many choices. I selected a few of the adorable die cuts from the January Kit, as well as the fabulous Love You Wood Veneer and the sweet black “XO” chipboard sticker. I couldn’t end my embellishment wrap up selection without diving into those Acetate Hearts. I truly had to stop myself while creating this layout as I wanted to use them all, In the end, I decided one was just perfectly enough!
Once my embellishment selections were sorted I then took some Bazzill textured cardstock and grabbed my mini paint brush along with some barely pink acrylic paint to give it a few splatters throughout. As you can see, the photo of my daughter is of her blowing confetti & I wanted to create the same effect with some lightly scattered acrylic paint. As the layout was drying, I used that time to download and cut out the heart banner from the January 2021 Cut Files. I will absolutely be using this cut file for months and years to come! As I was working with it, I had so many different ideas on how to use it in the future and went ahead and jotted down a few ideas for some other layouts. I love to keep a notebook next to me on my craft table as it comes in handy when you have those super quick fleeting ideas!
Once I had the die cut, I dived into the new XOXO 6 x 8.5 Inch Paper Stack and selected a few of these beautiful patterns to embrace the feeling of this layout using the My Heart Metal Die. I ran those through my die cutting machine to create those precious hearts. I wanted a mixture of black & white hearts combined with pink to give a simple but fresh feel. I wasn’t ready to put my die cutting machine away just yet, as I then had an idea to frame my daughters photo using the Layered Card Metal Die. I wasn’t sure at the time if I would go with it but I am so pleased with how the pink frame accented her photo.
Now that the creative prep time was done it was time to bring it all together! It was truly a small labor of love putting this together & truly captures what I wanted to say to my daughter using such beautiful products from Elle’s Studio.
I started out this blog post by mentioning that the 3″ x 4″ quote tag from the January Kit quickly became my foundation idea for this layout and it truly did because I actually started and ended this layout with the inspiration from that card! The very last thing I did on this layout was to use the new Hugs and Kisses Stamp to add “remember this” at the top of the tag. I want her to always remember what that sweet little tag says. The die cut from the January Kit adhered to the top corner functions as a tab for hidden journaling just for my girl to read and always remember how truly loved she is.
It is so wonderful that such sweet and creative products can inspire an entire layout to be cherished for years to come! I cannot wait to see what you create with this month’s kit and add ons using the #ellesstudio hashtag! I hope you found even just one little thing here to inspire you in your memory keeping from start to finish! Happy creating my friends!
Comments Off on January Kit Inspired with Michelle Flynn | Share This
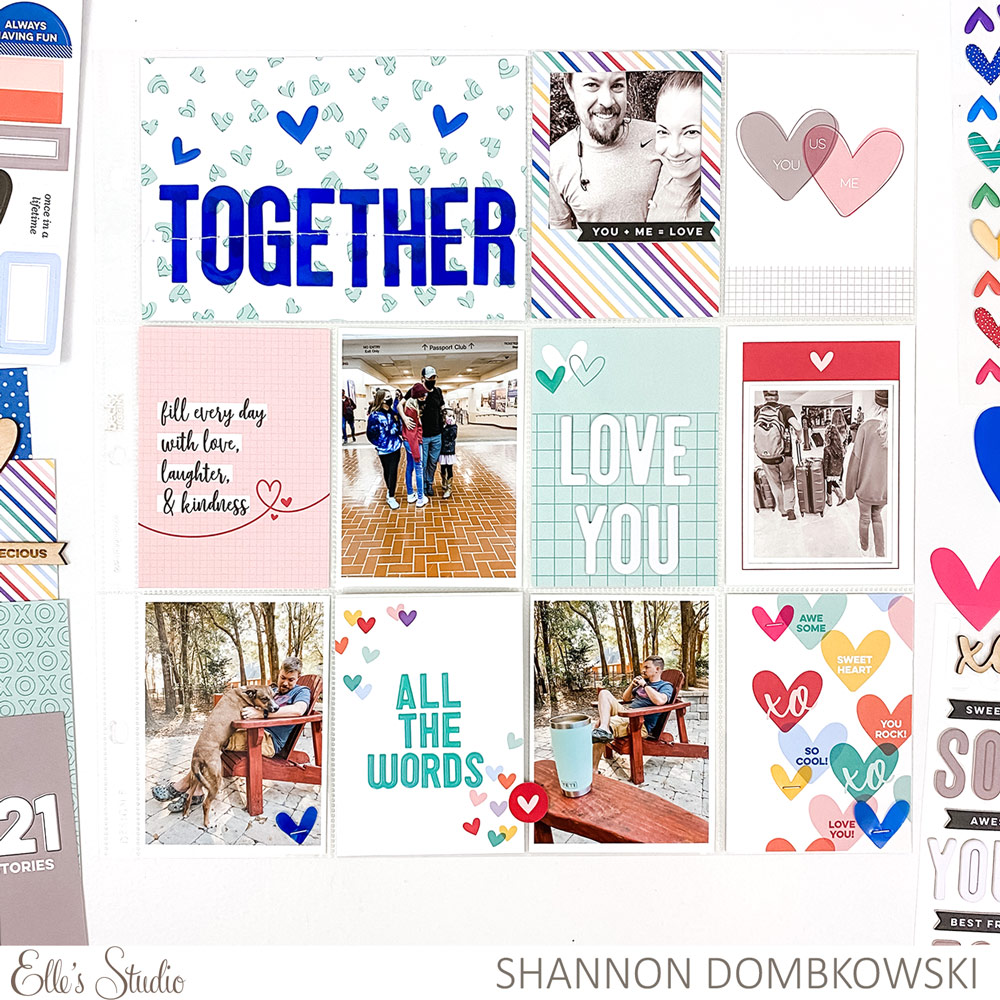
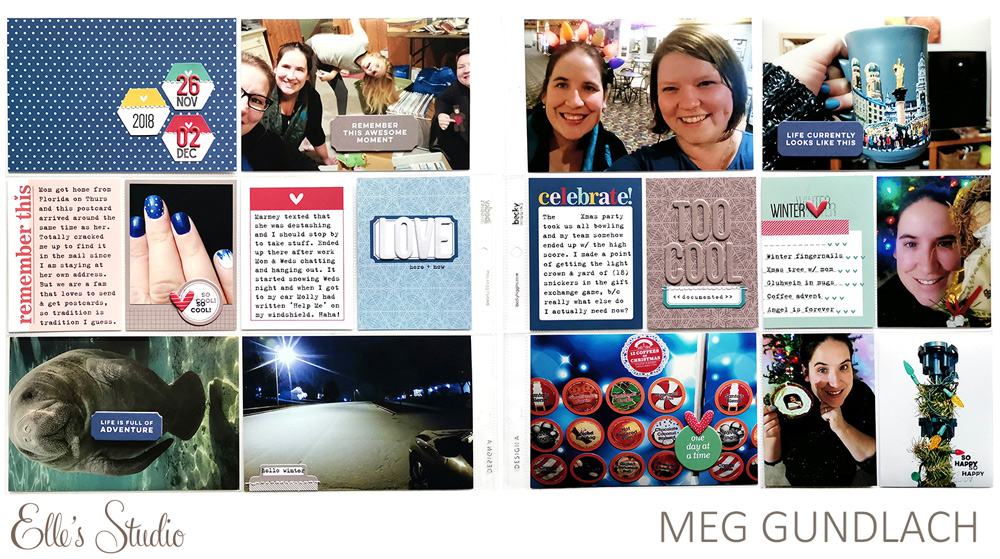
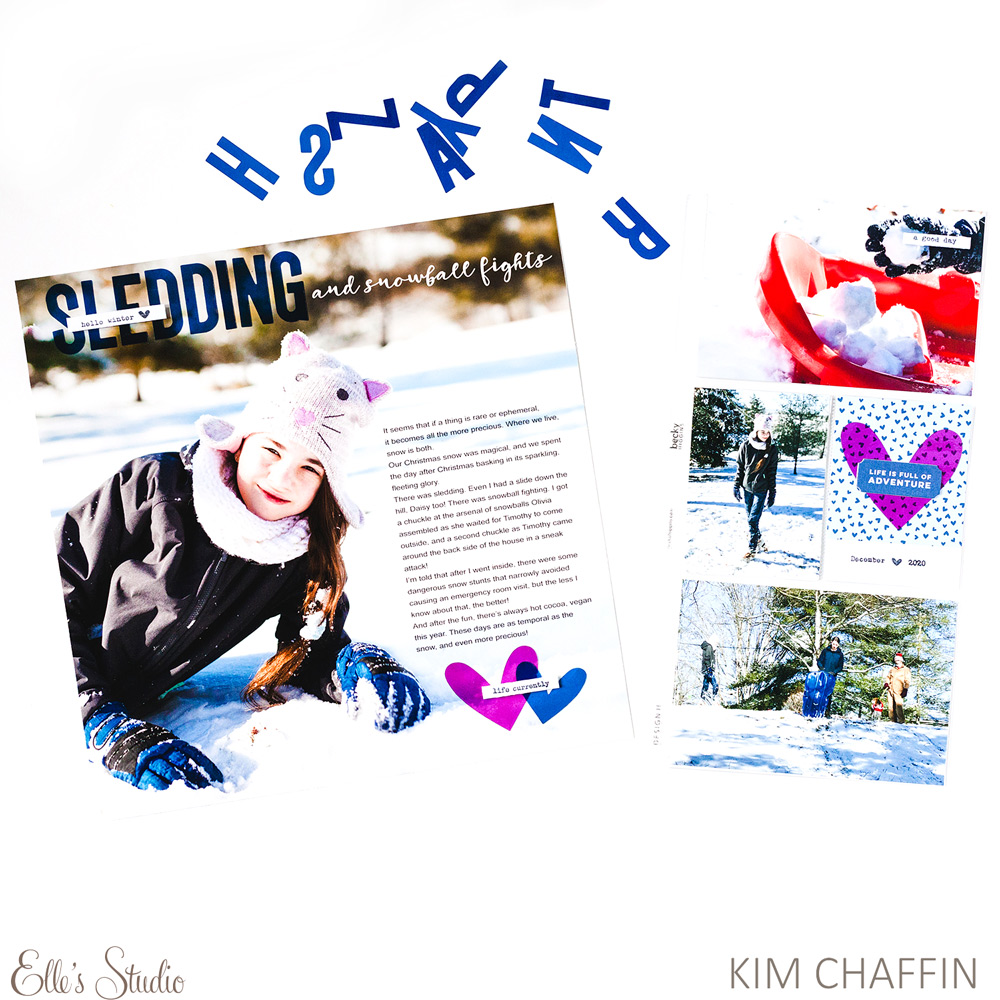
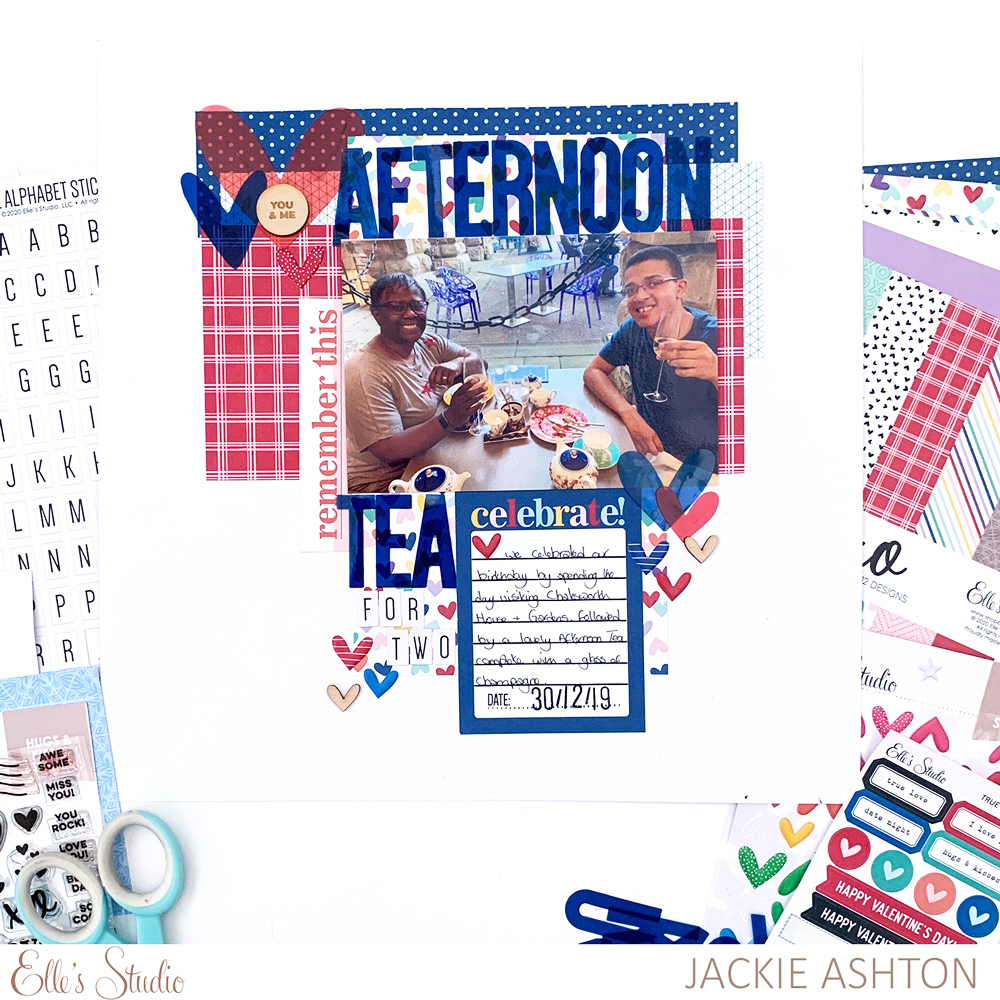
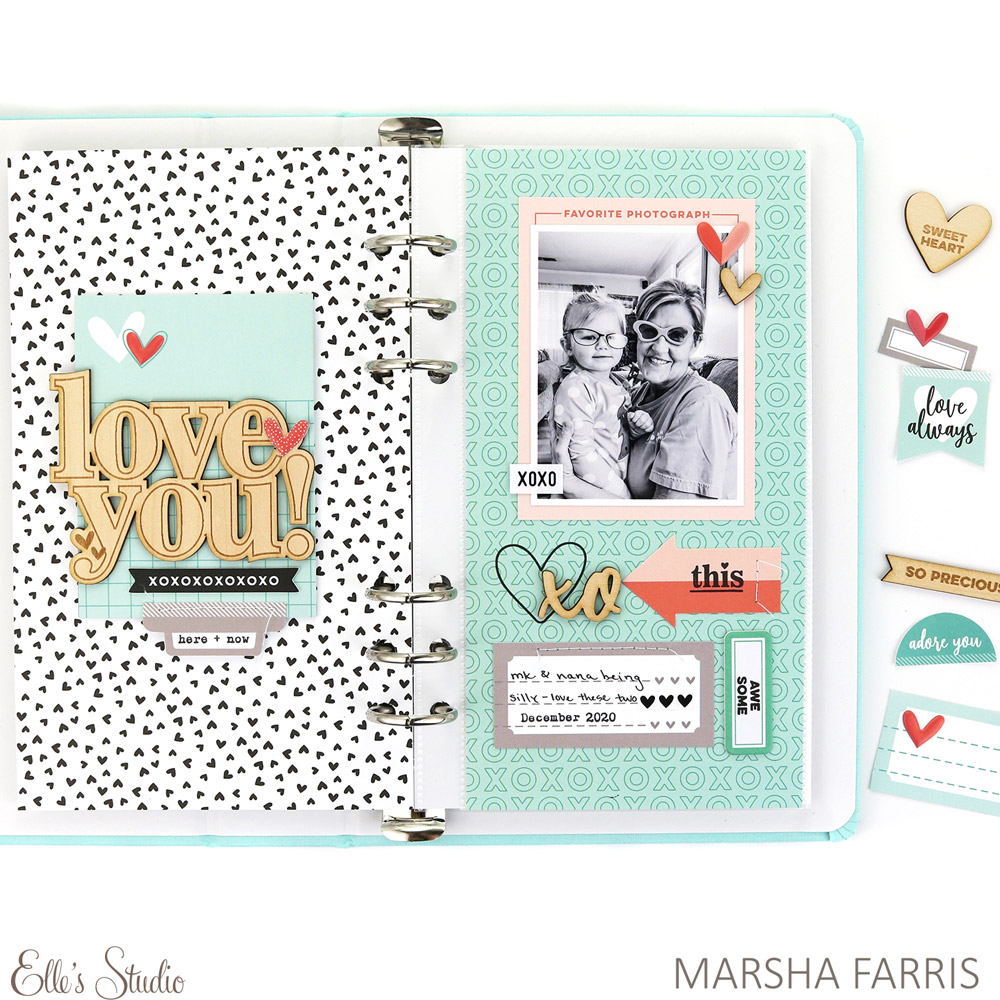
It’s time for our final design team inspiration post for this month, and we’ve saved some pretty amazing projects to share with you! Take a look at these pocket pages, scrapbook layouts and traveler’s notebook spreads created by our design team using the January 2021 kit and add-ons to get ideas on how to record the things and people that you love the most!
Stay tuned for more inspiration using our January 2021 kit and add-ons to come, and be sure to save the images from this post that inspire you the most to create! We’d love to see what you’re making—share with us in our Elle’s Studio Facebook Group, or on Instagram using the hashtag #EllesStudio!
Comments Off on January Design Team Inspiration: Volume Three | Share This
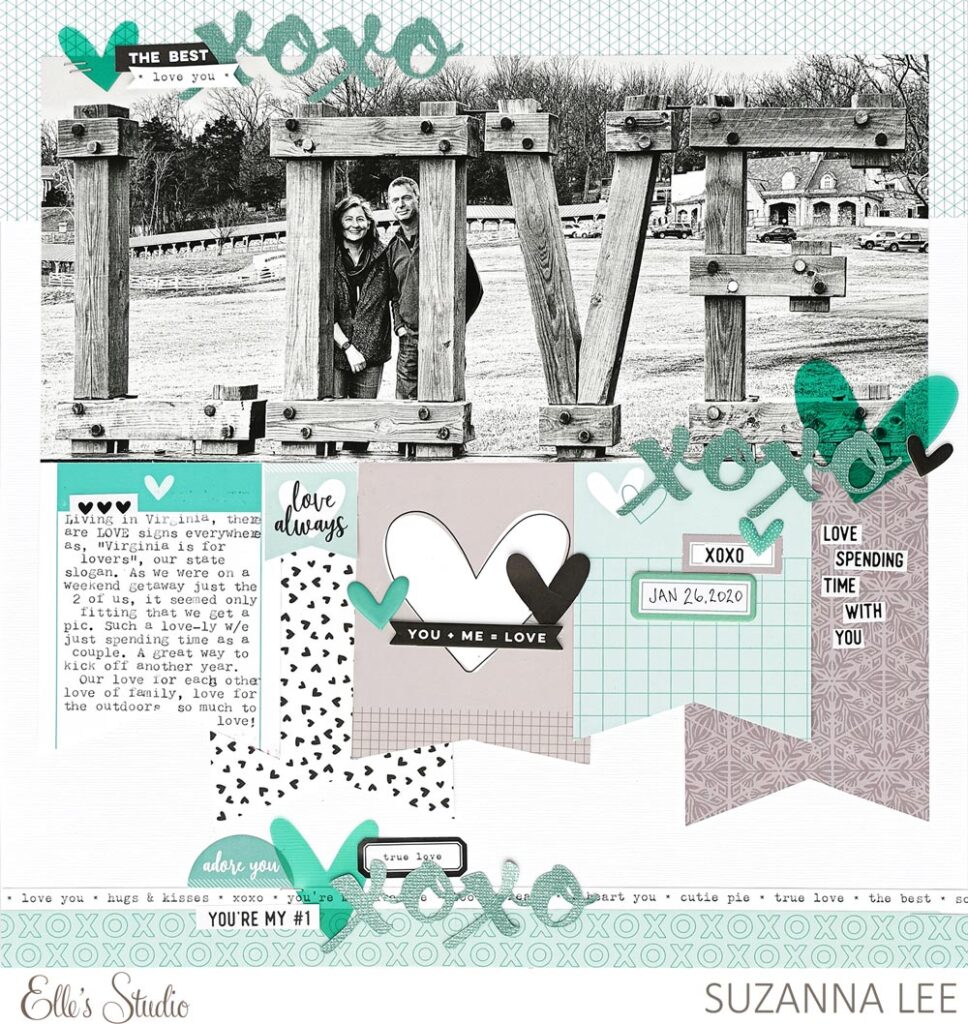
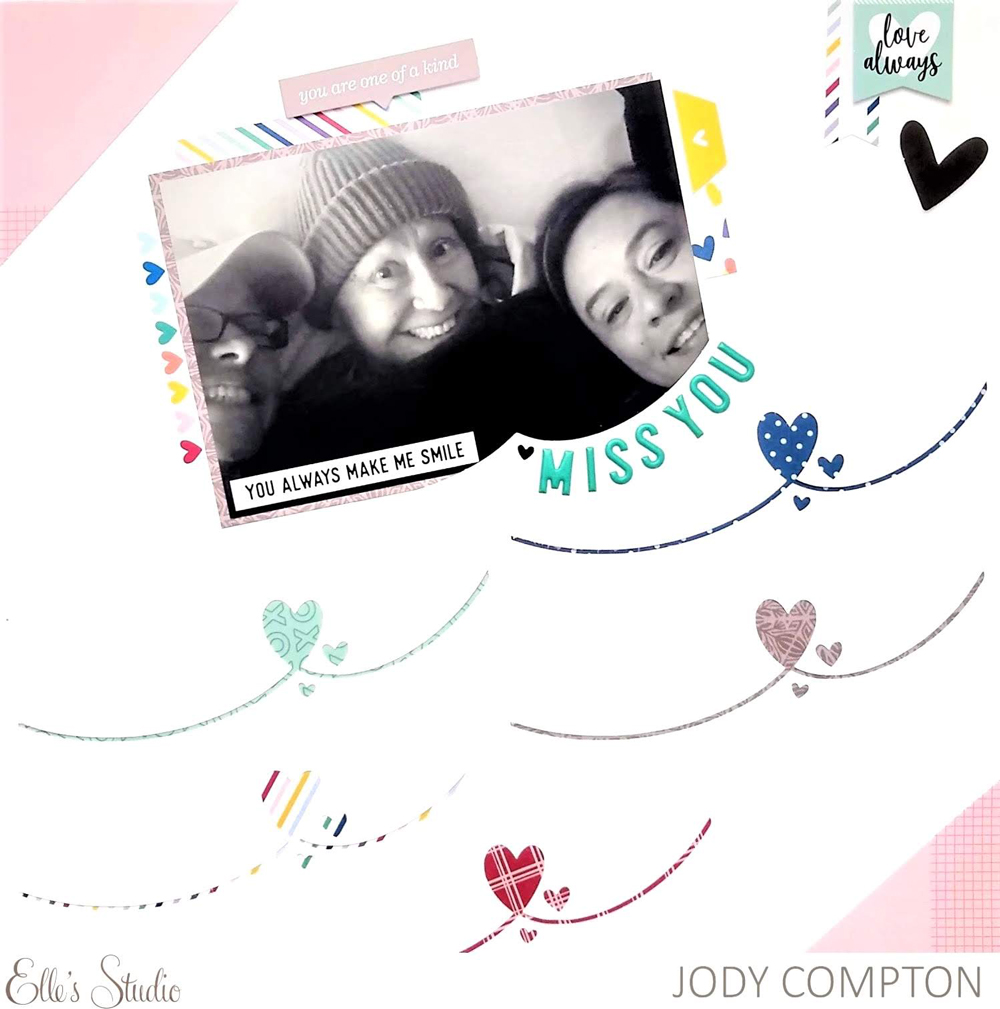
Hello, Elle’s Studio friends! It’s Jody today, sharing a project created with the new January 2021 kit and add-ons . I love the colors in the kit this month, especially the pink and teal!
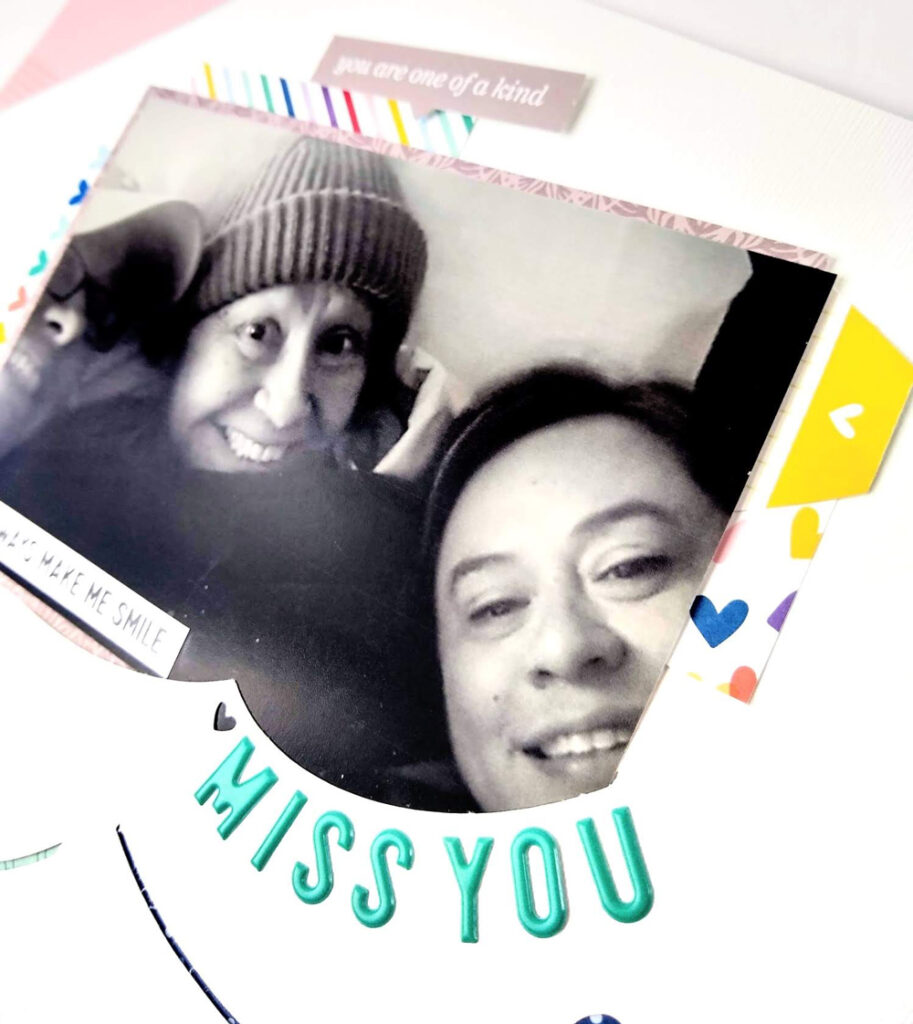
I wanted to document a quick snapshot of my best friend, her sister and mother who has passed. This helps me to remember to document all the pictures no matter how small a moment may be.
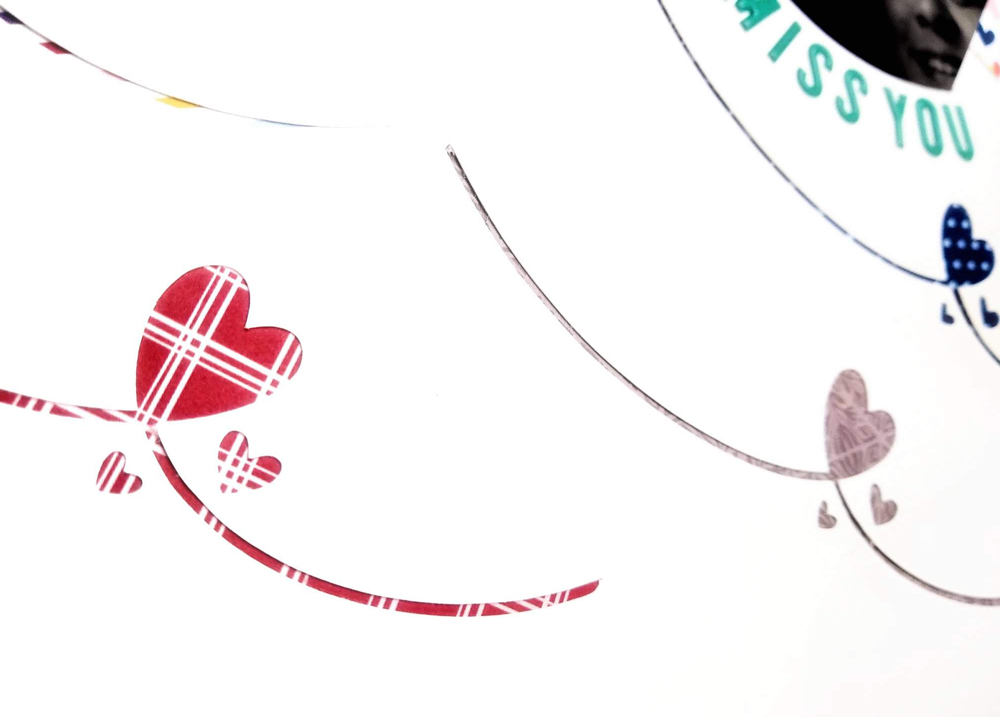
I started out my project by adding texture to the background—white cardstock that I sent through my cutting machine, cutting the January 2021 Cut Files heart six times. My picture nicely tucked into the corner of the top cut file. I backed each of the openings with the XOXO Paper Stack, making sure to use a mix of solids and prints.
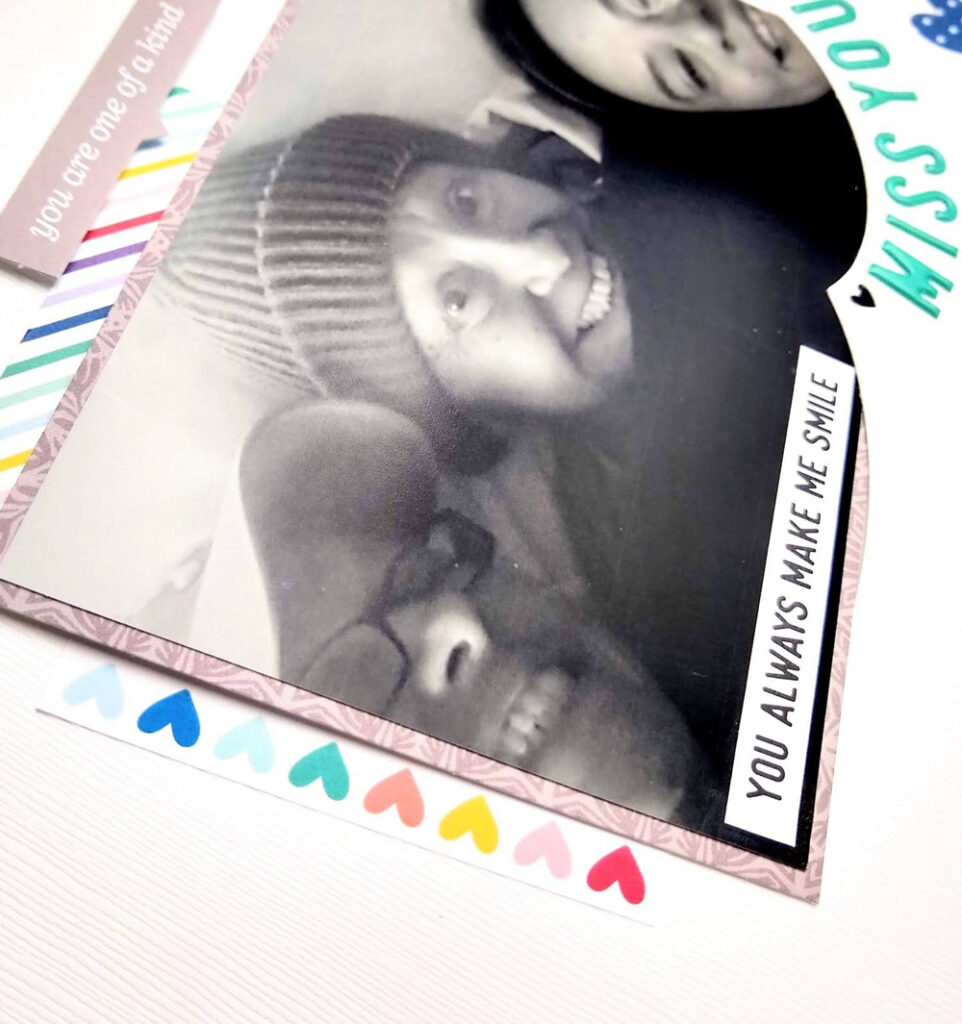
I used the lovely grey patterned paper from the XOXO Paper Stack to add a simple layer behind my photo. I also added the rainbow heart sticker from the True Love Stickers as a layer along with a yellow heart from the January Kit and two scraps of patterned paper.
I wanted to fill in some of the black space in the photo. I decided to use one of the phrase stickers from the True Love Stickers on the bottom left. I also added a few more die cuts from this month’s kit.
Next, I used the Teal Puffy Alphabet Stickers for my title. A simple “Miss You” was all it needed. Curving it to match the cut file is a fun way to make your eyes move across the page.
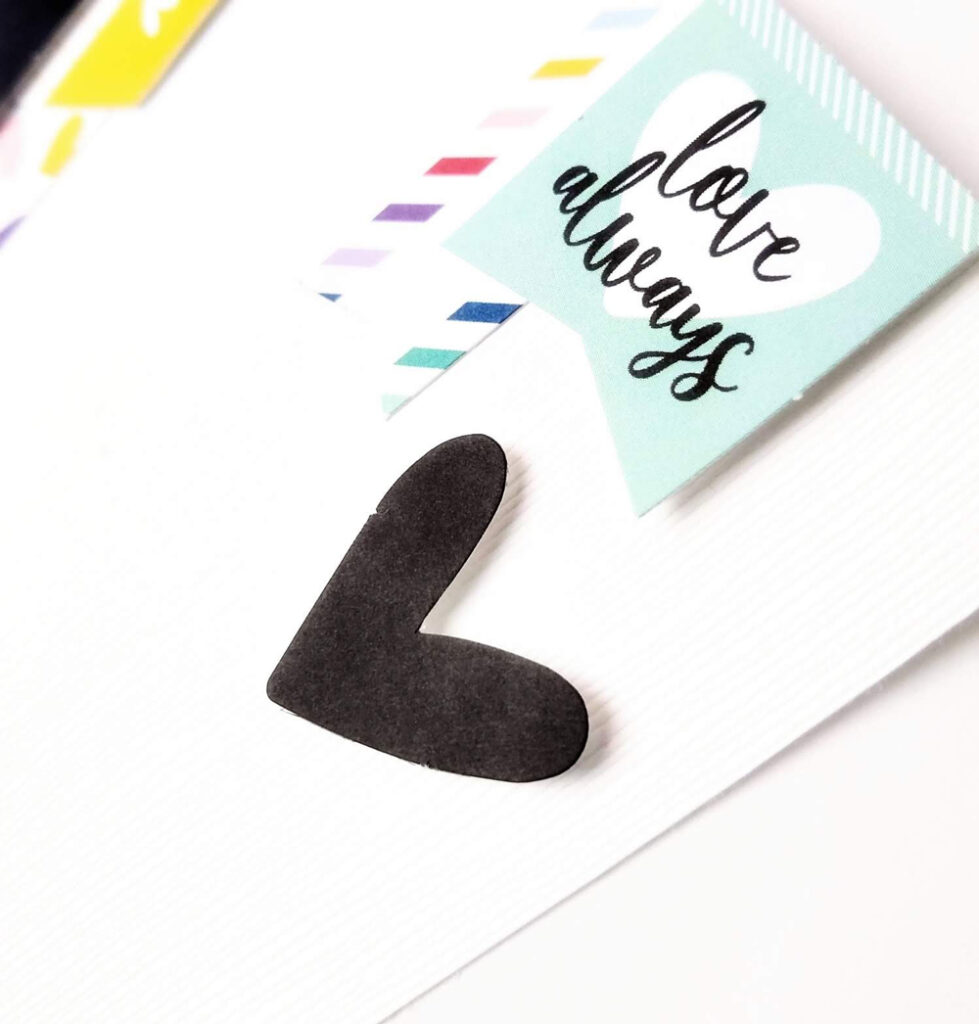
The layout had a little too much white space, so I decided to use one of the 4″ x 6″ tags to add to the corners of the layout to give it more color. Lastly, I added a small cluster of die cuts. I added foam to the back of the teal banner and black heart for dimension.
Thank you so much for stopping by today, and I hope you’ve been inspired to create! Remember when using Elle’s Studio products to use the hashtag #EllesStudio when posting to social media so we are sure to see your amazing work!
Comments Off on Small Moments Remembered with Jody Compton | Share This