Creativity with Patricia Roebuck and the Good Times Tab Stamp

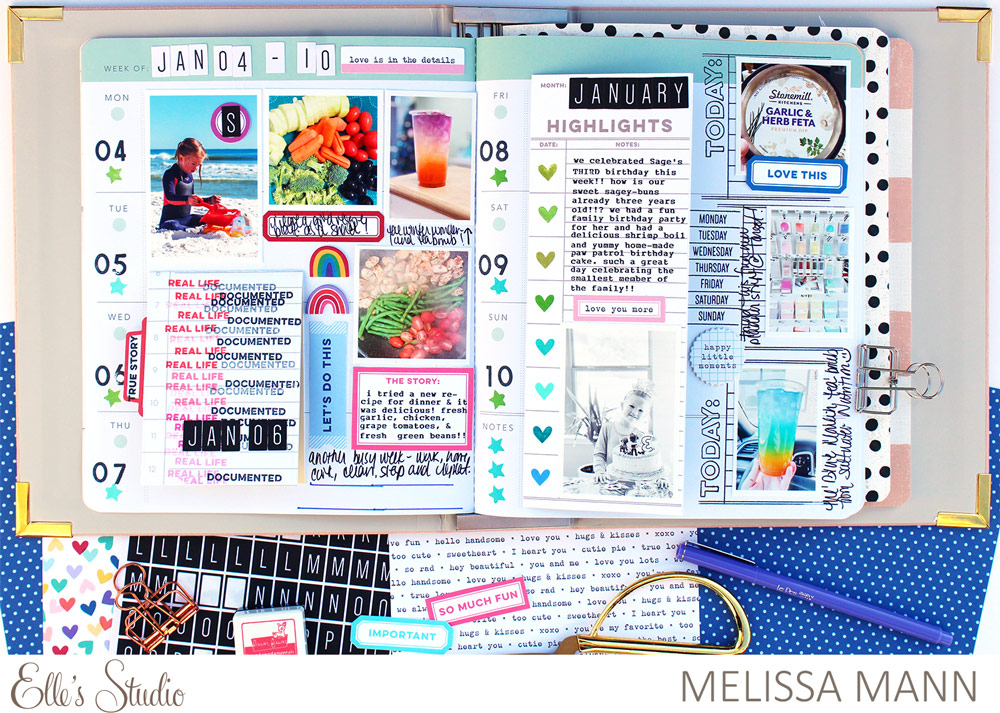
Hi, Elle’s Studio friends! Today I want to walk you through two unexpected ways to use the new Good Times Tab Stamp in a traveler’s notebook. This stamp set is so useable and practical for documenting, giving you the options of phrases as well as tabs to create, but let’s give a more creative perspective in using this stamp set today!

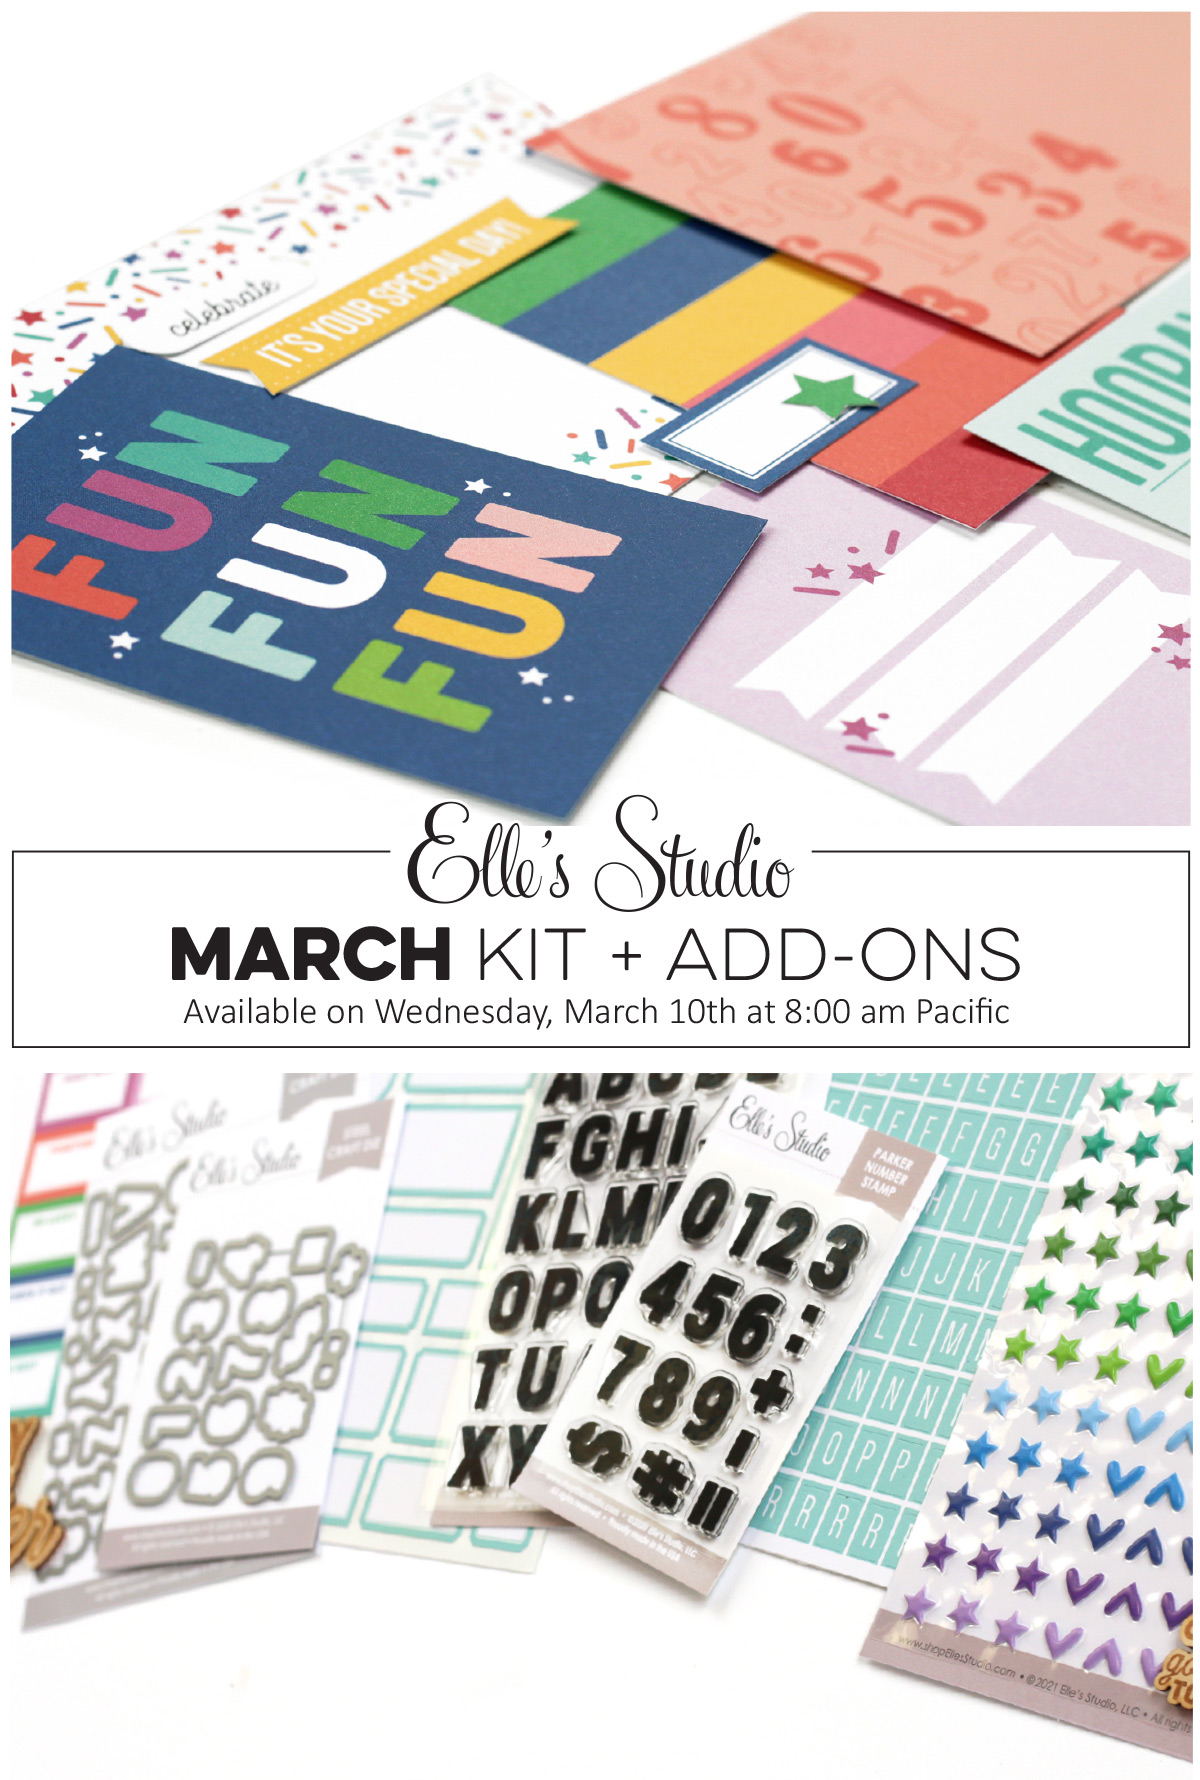
Supplies | February 2021 Kit, Happy Little Moments Chipboard Stickers, Puffy Heart Stickers, XOXO 6 x 8.5 Inch Paper StackGood Times Tab Stamp, Mini Dated Stamp, Everyday Tabs Vol. 2 Metal Die

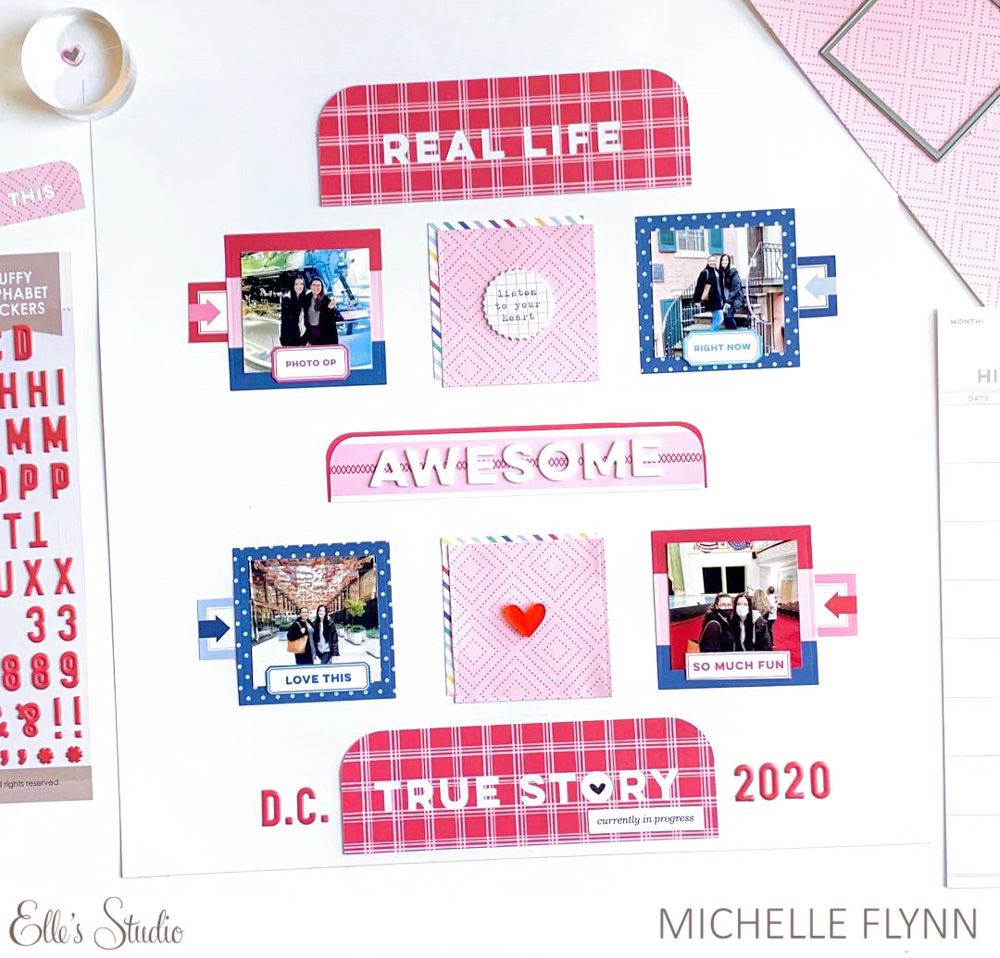
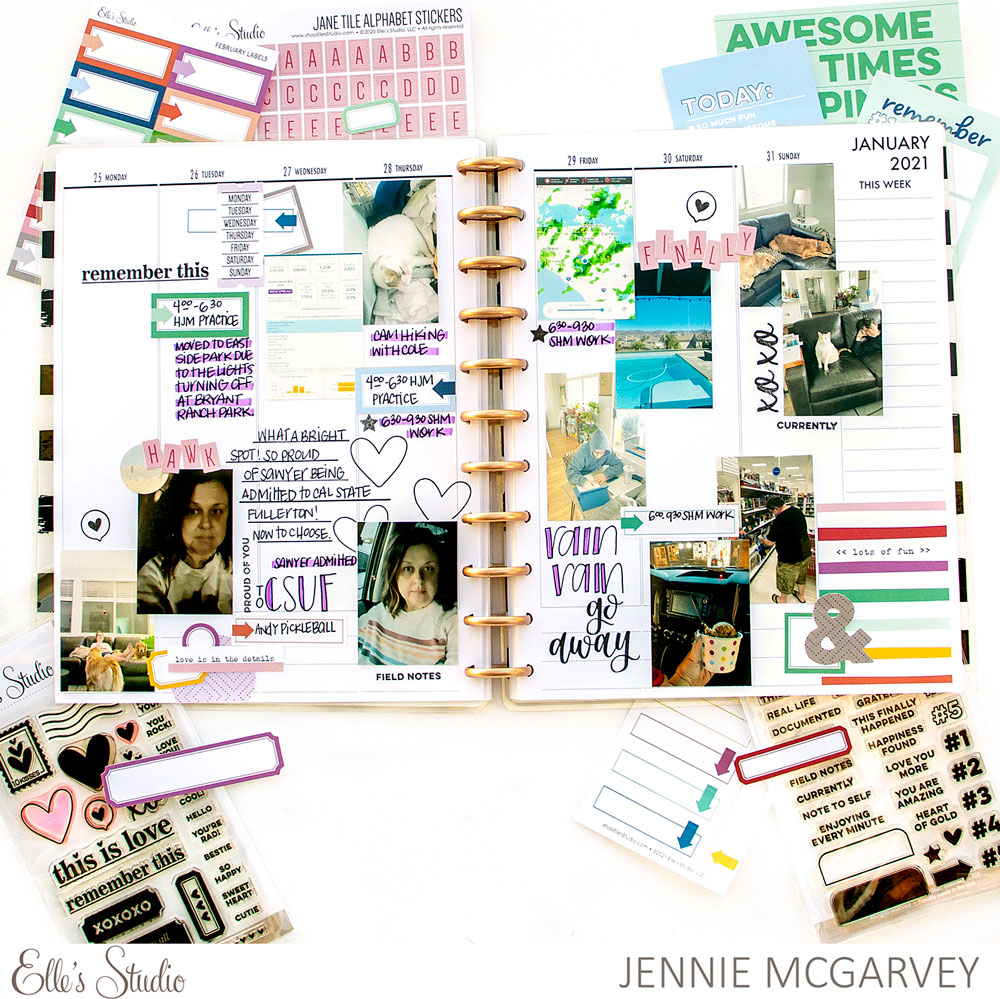
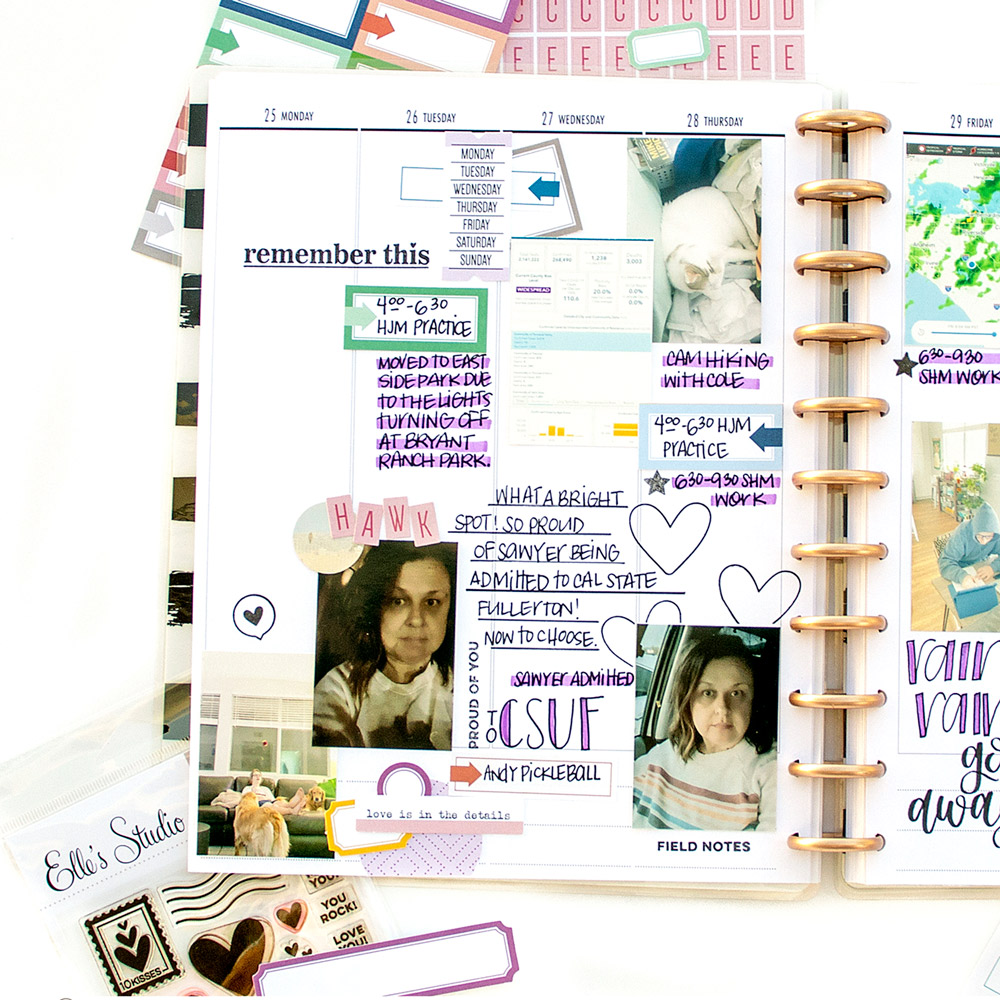
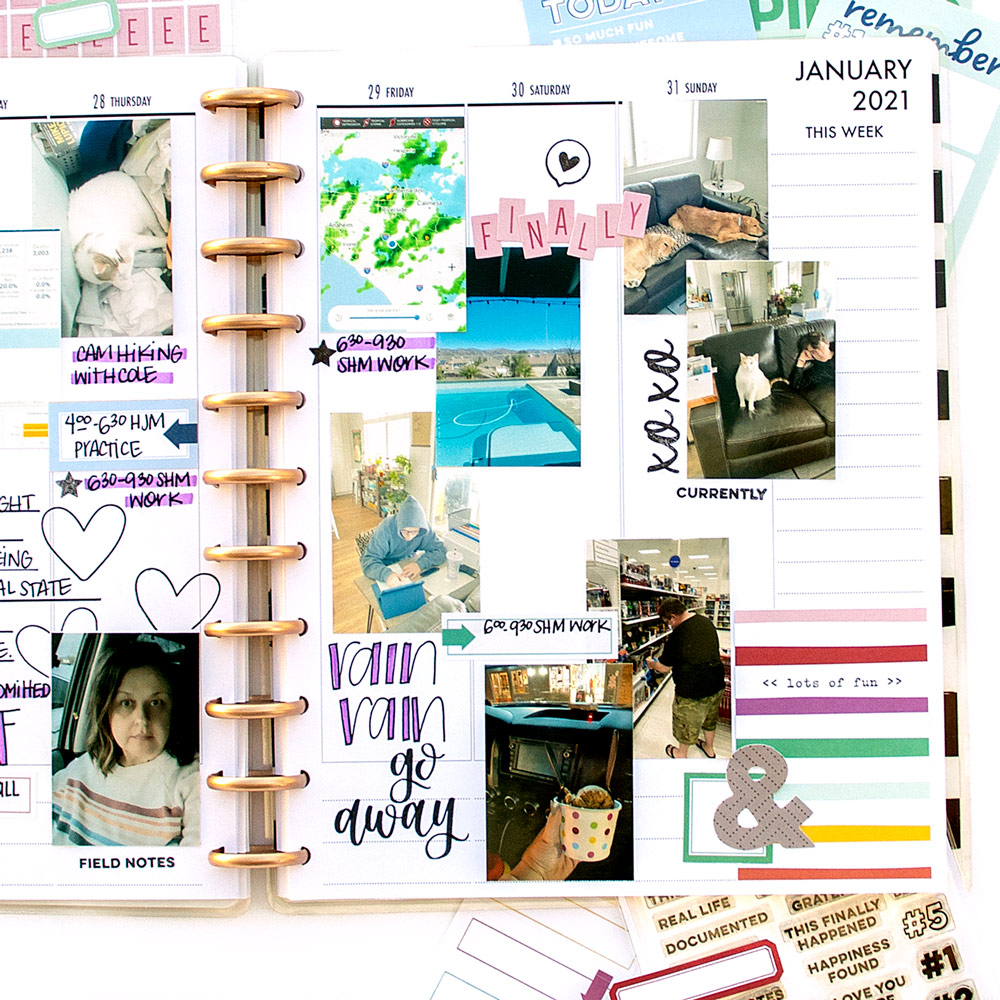
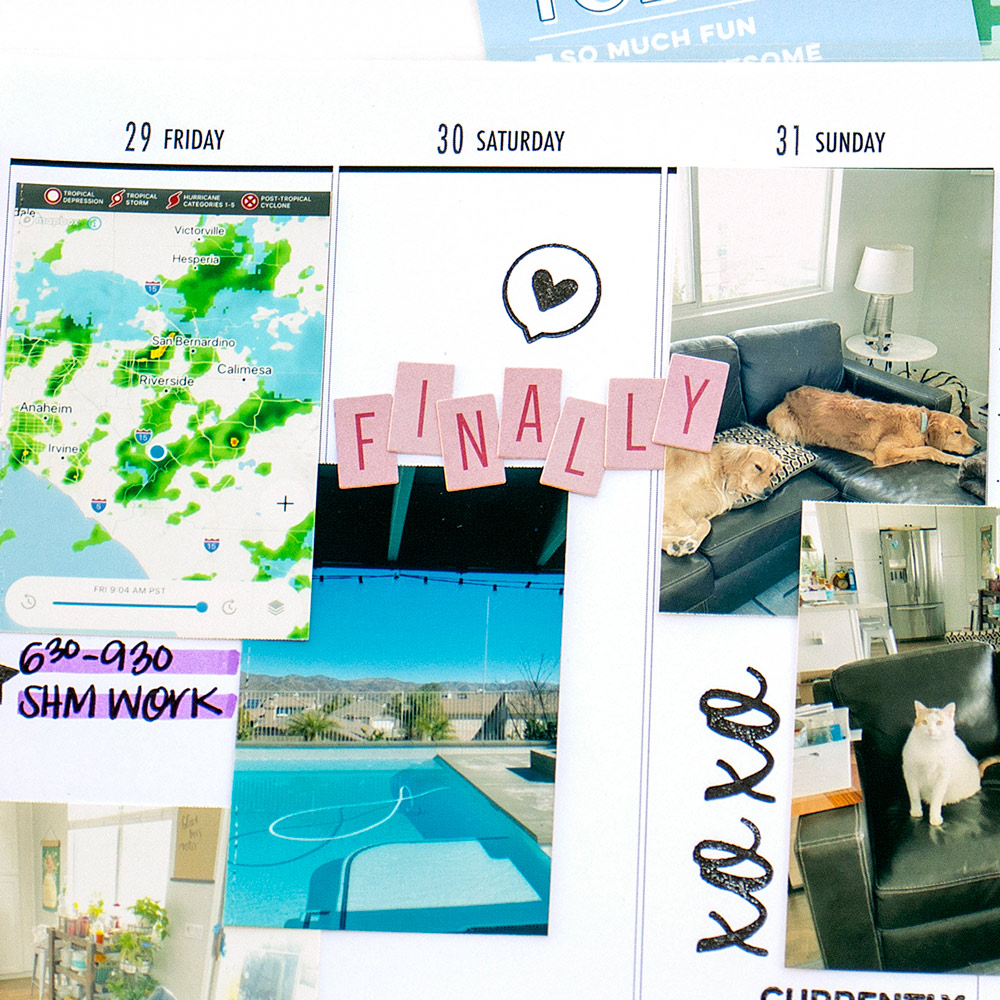
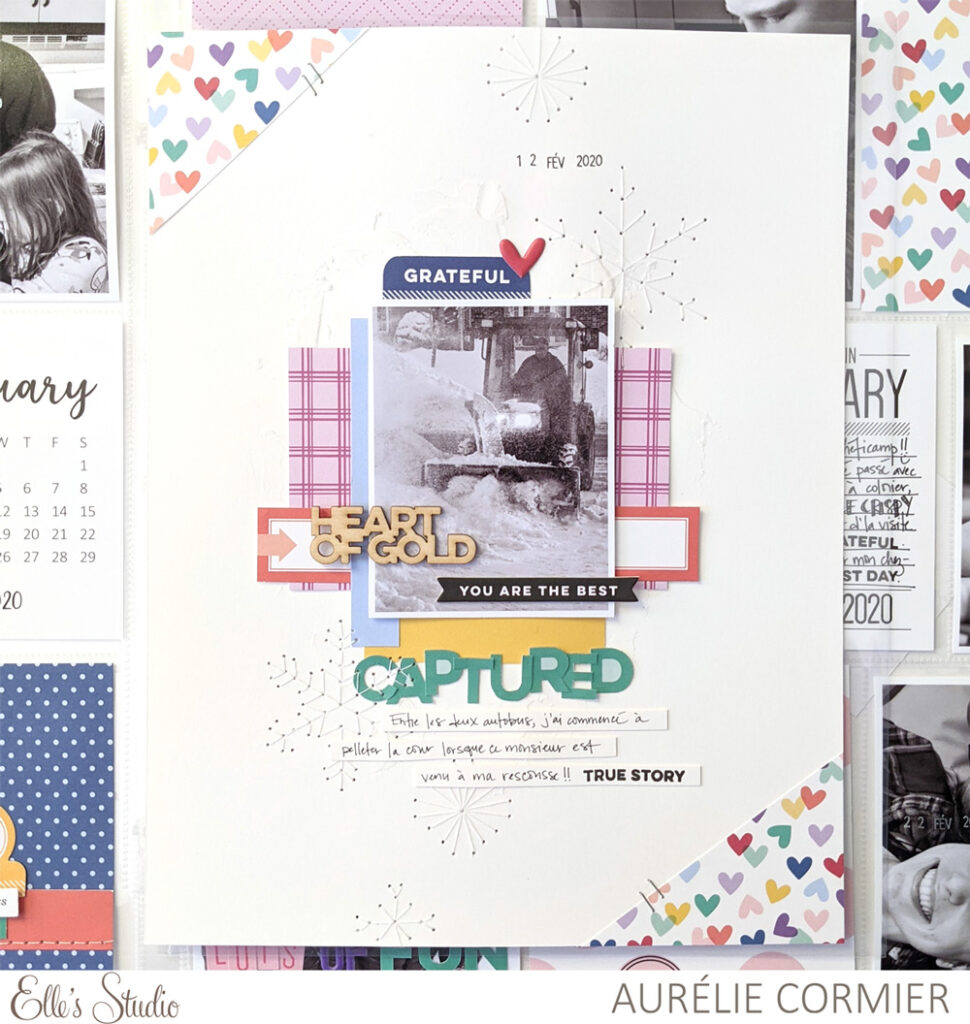
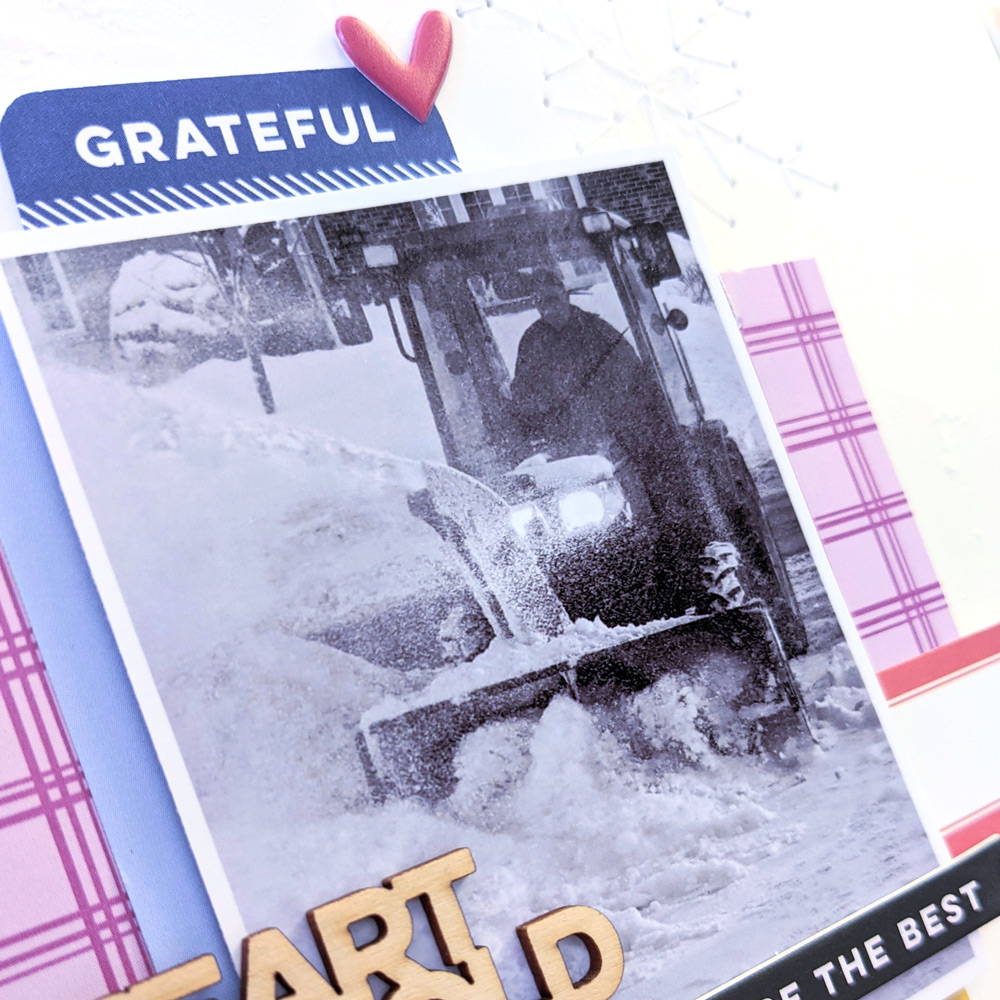
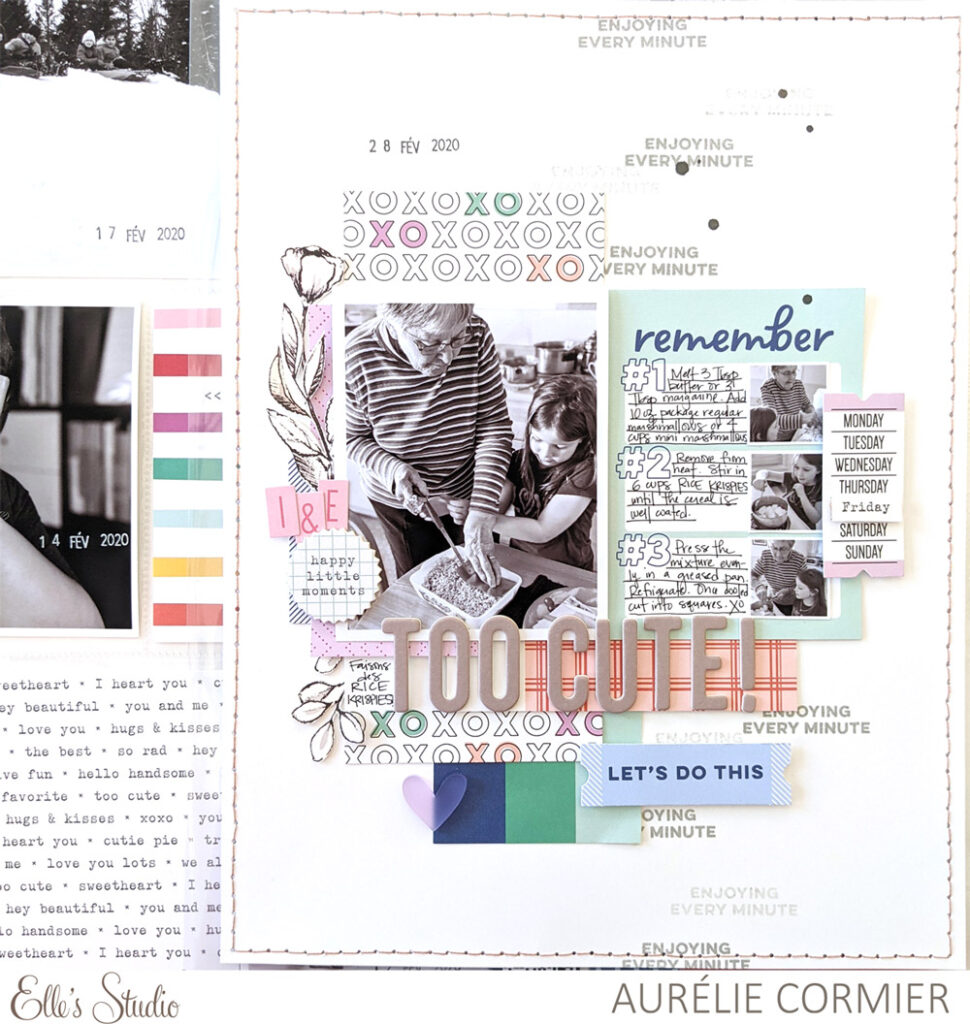
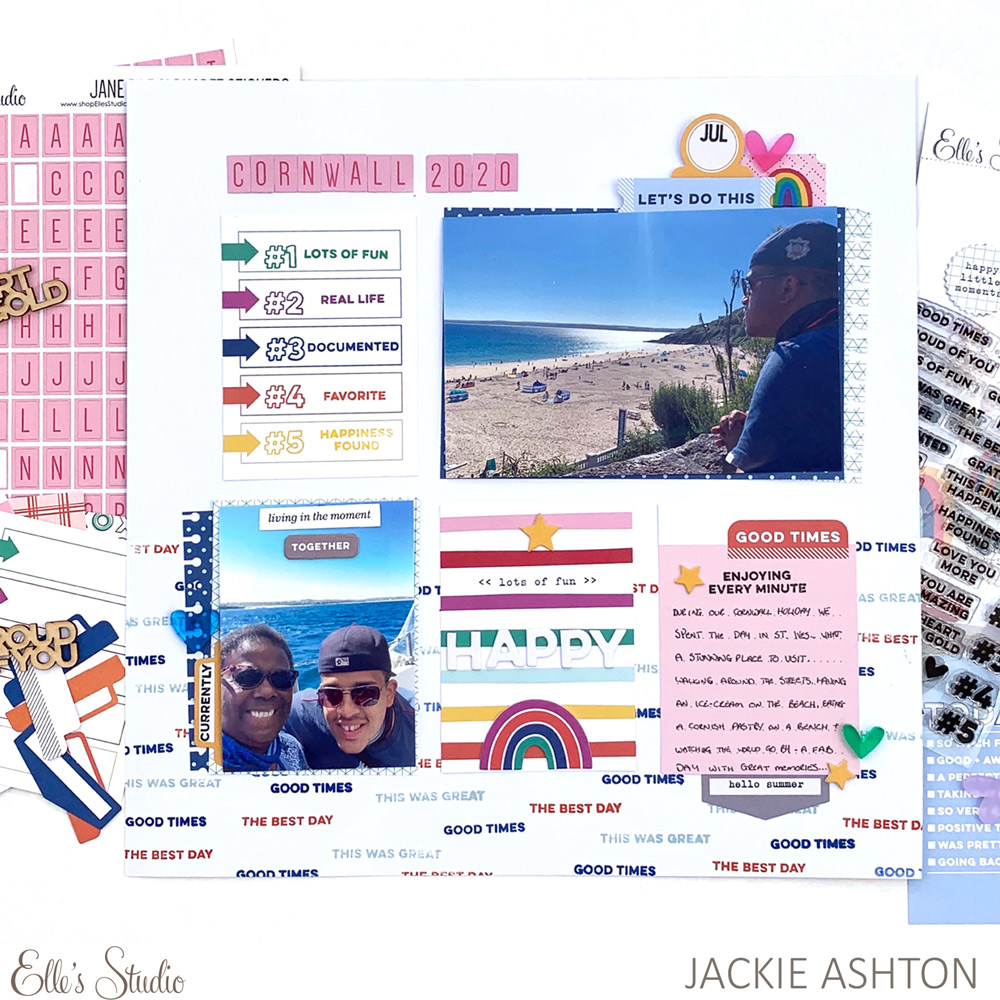
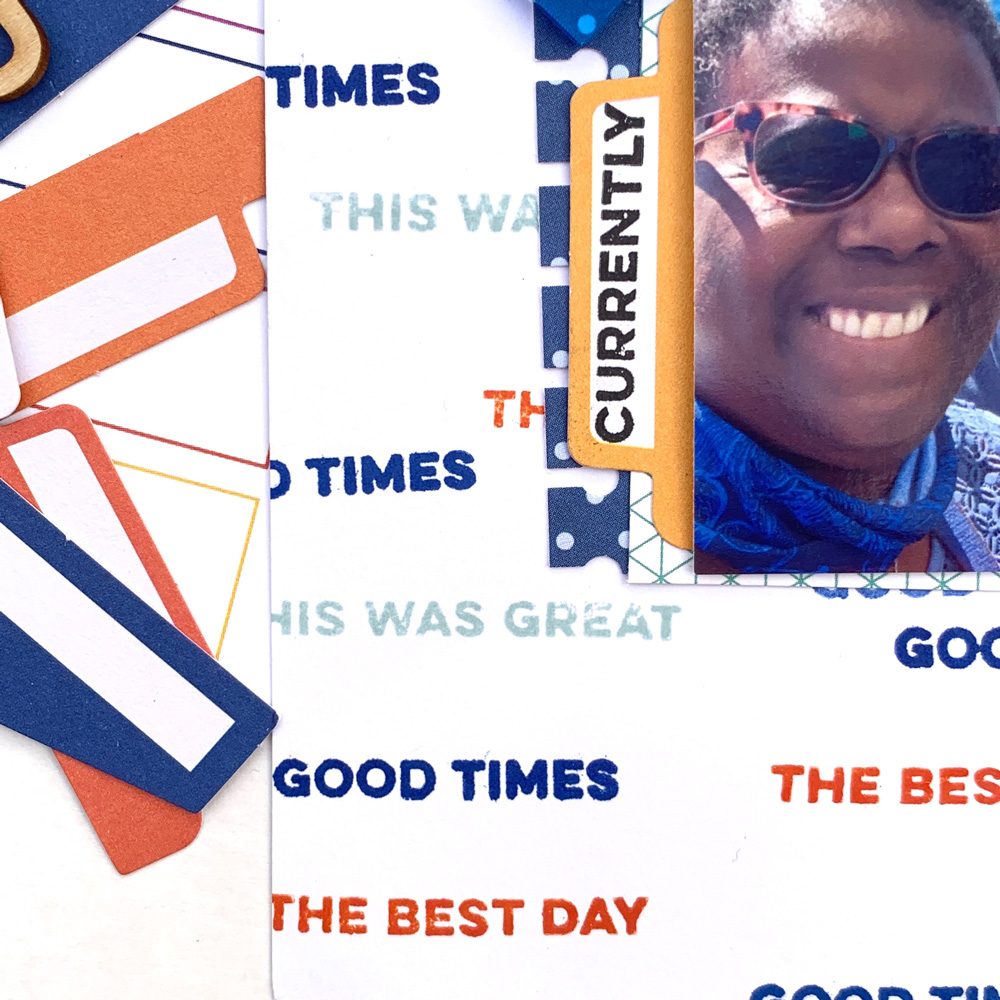
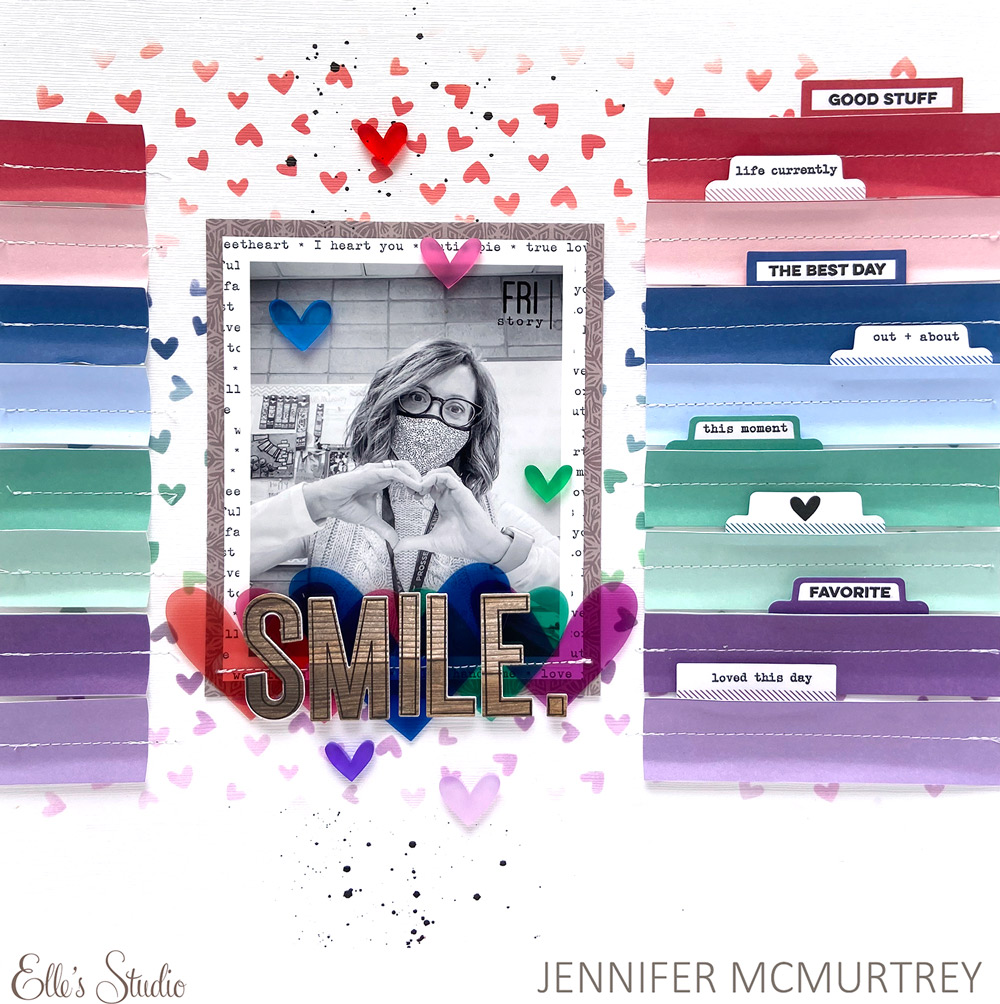
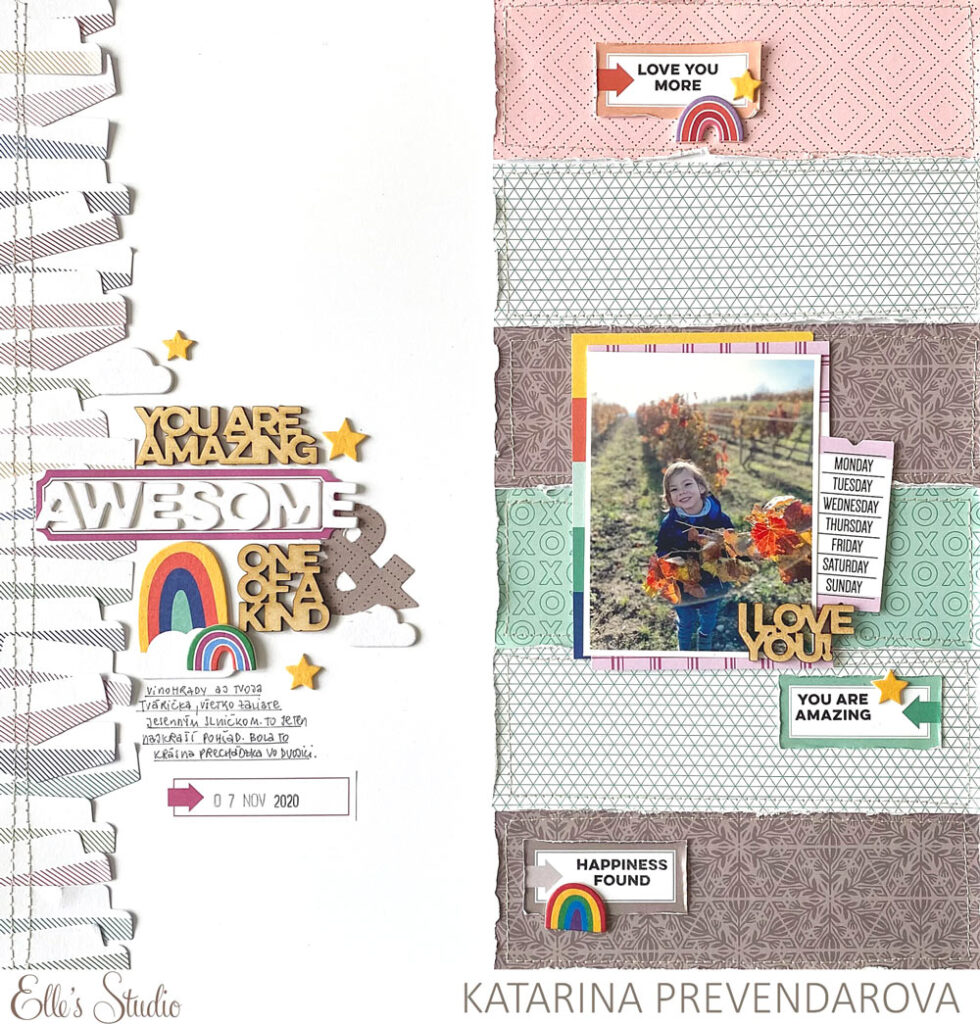
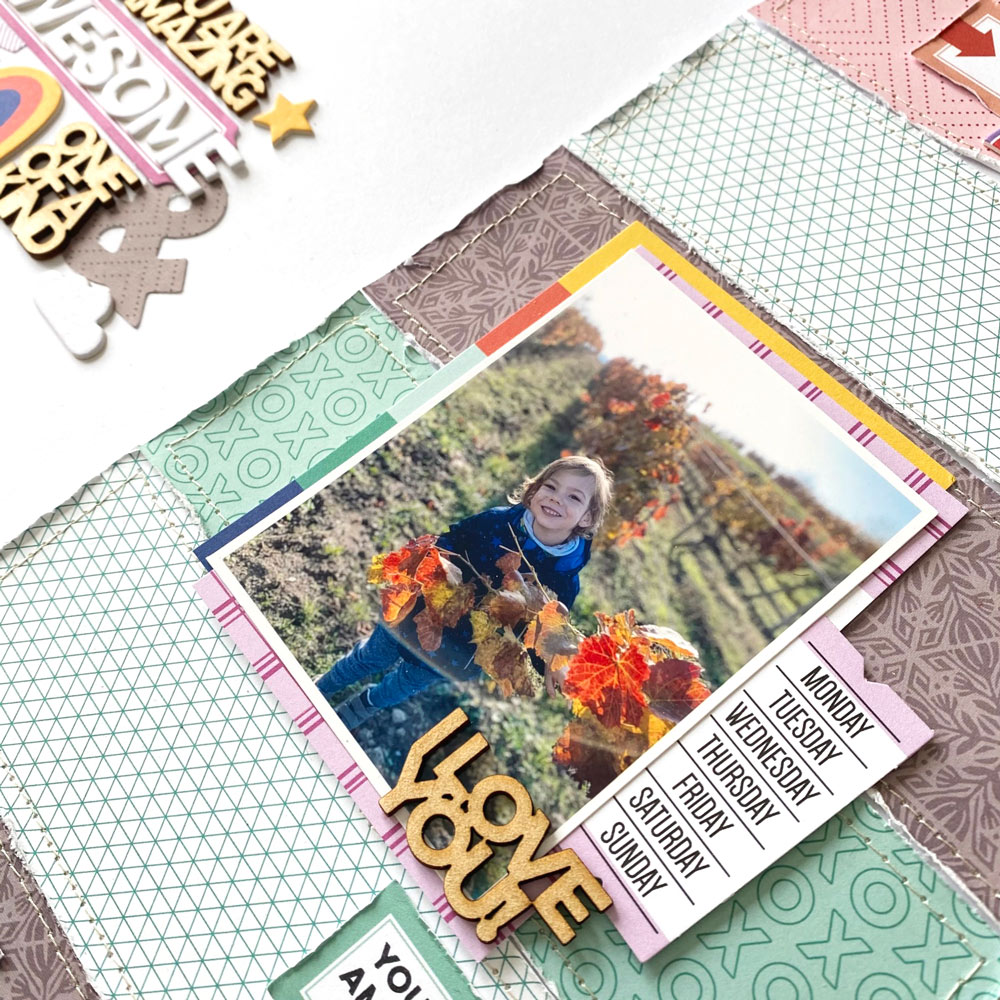
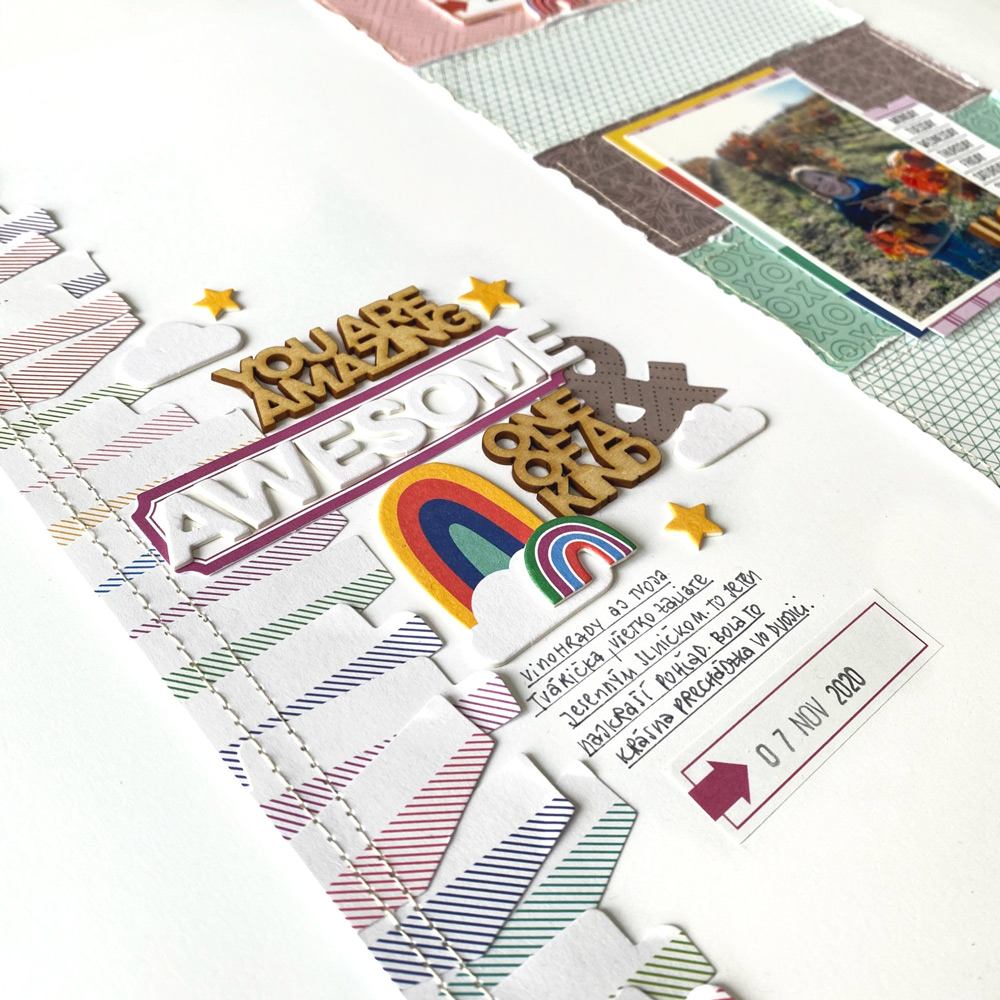
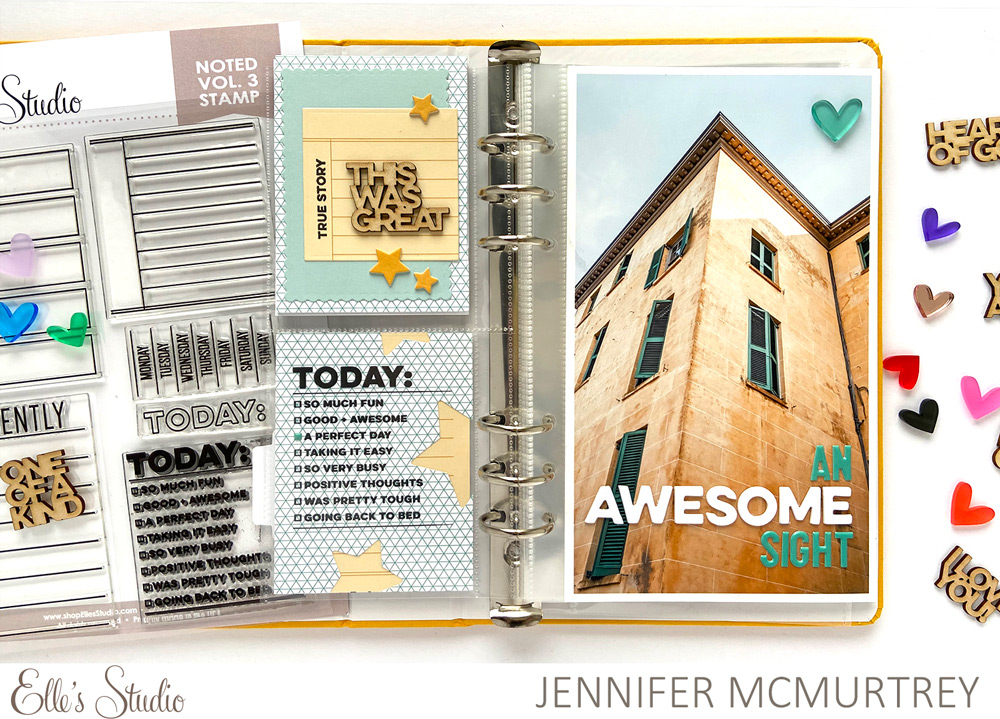
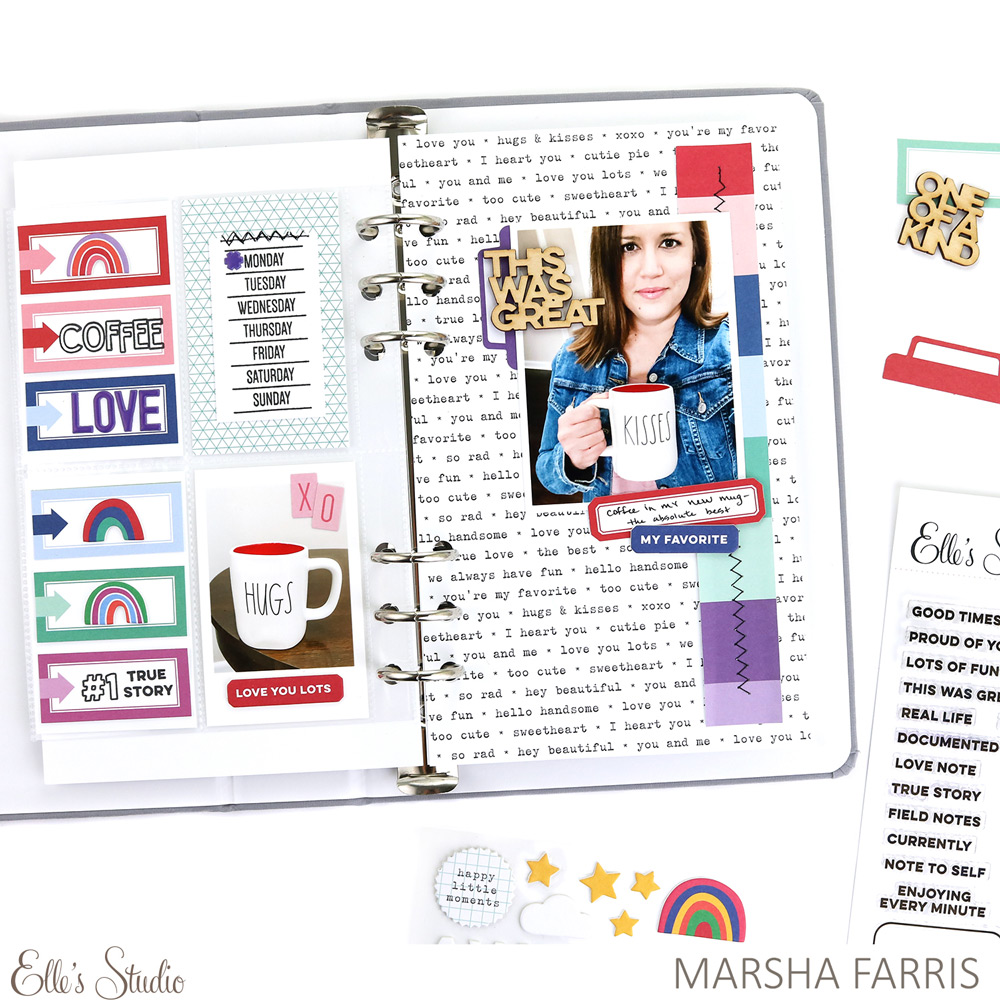
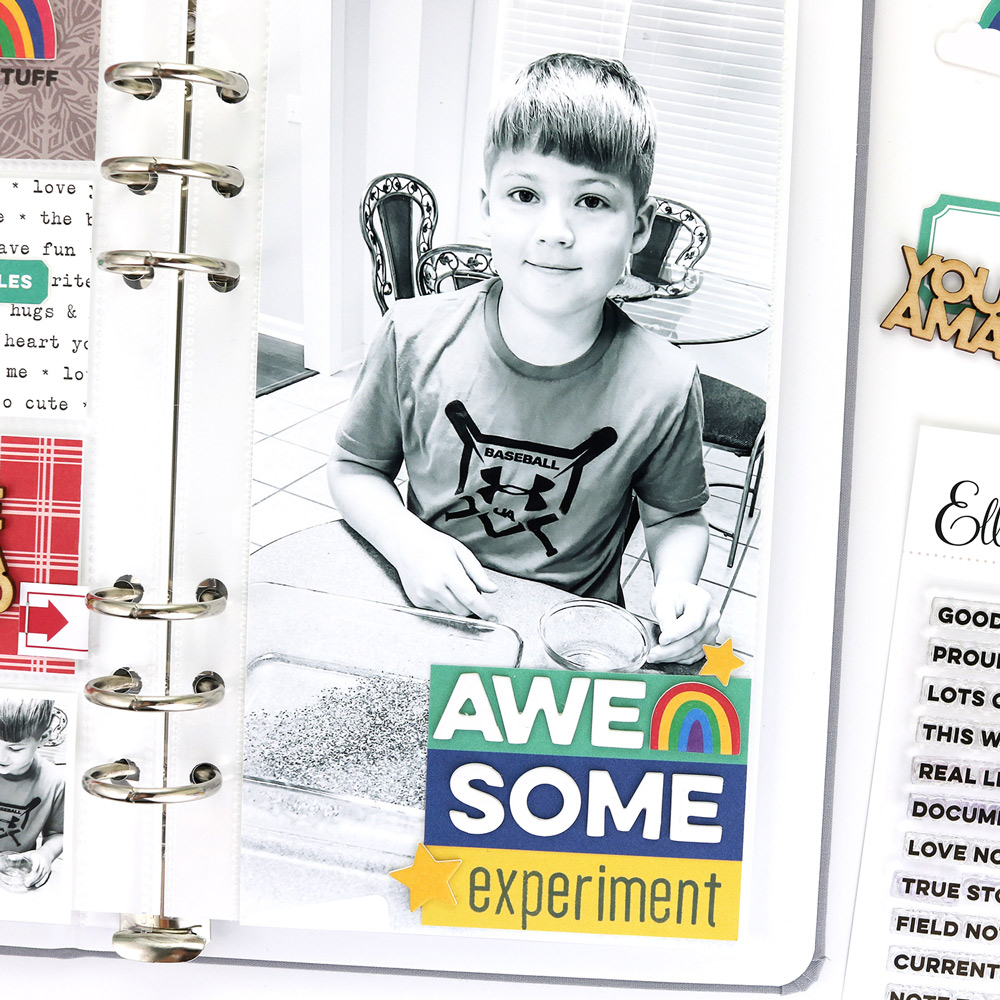
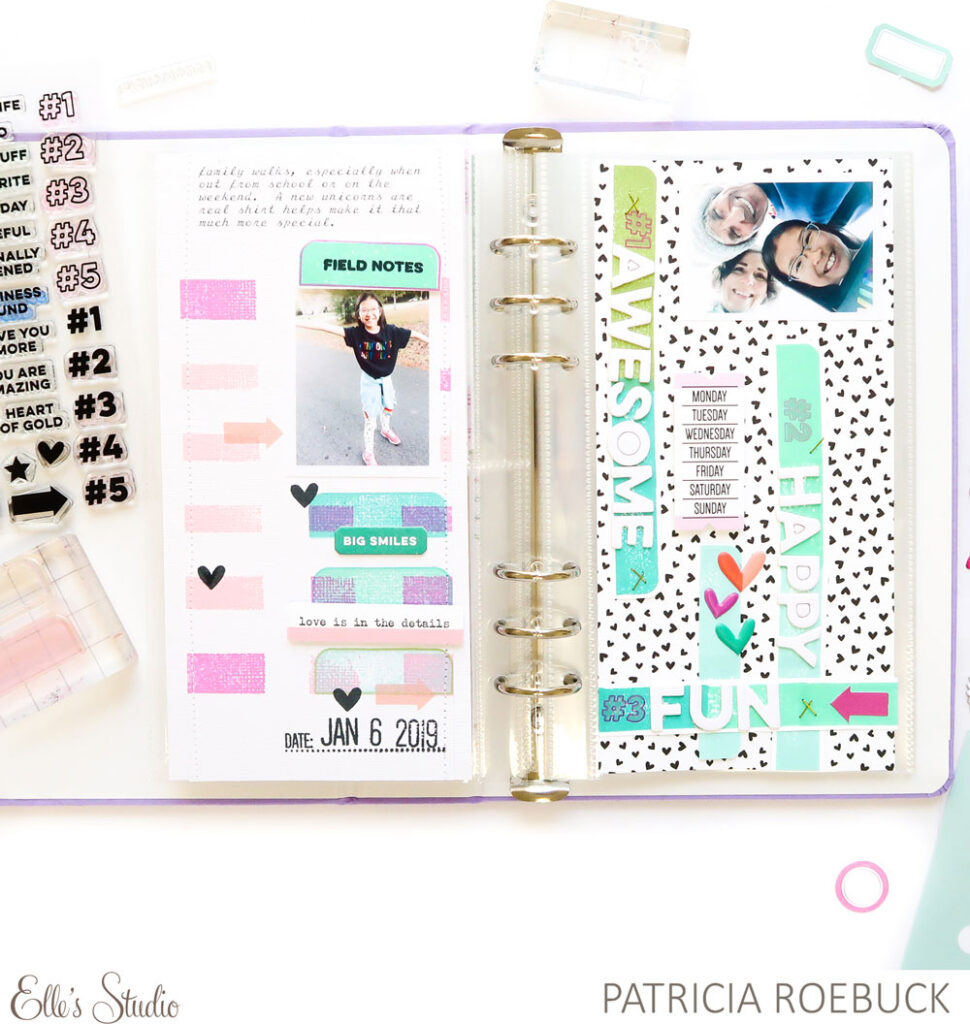
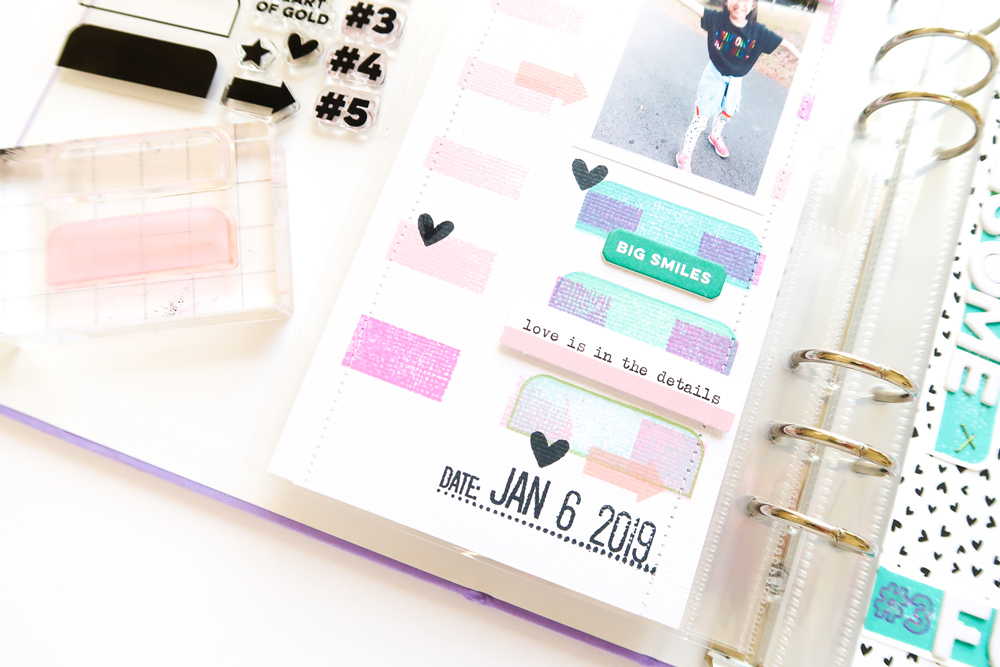
I love the solid and outline version of the tab images in this set, and as you can see, I’ve used it as intended with the phrase ‘field notes’ above my main photo, using the Everyday Tabs Vol. 2 Metal Die to cut it out. I’ve also used both of these tab images under my photo which happens to be layered over the same stamp. That first layer on my textured white cardstock is from color blocking using the solid tab image.  How I got this look was by using washi tape to create a grid and a mask on my cardstock background, and then used three different shades of pinks. Between the textured background of the cardstock and the washi tape mask, my stamping is imperfect and exactly the look I want. Once that was finished, I added the arrow image in a peach color to add another color to break up the pink inks and add another layer, next, I stamped the heart image in black ink to balance and coordinate with the XOXO Paper Stack, adding contrast to my background.

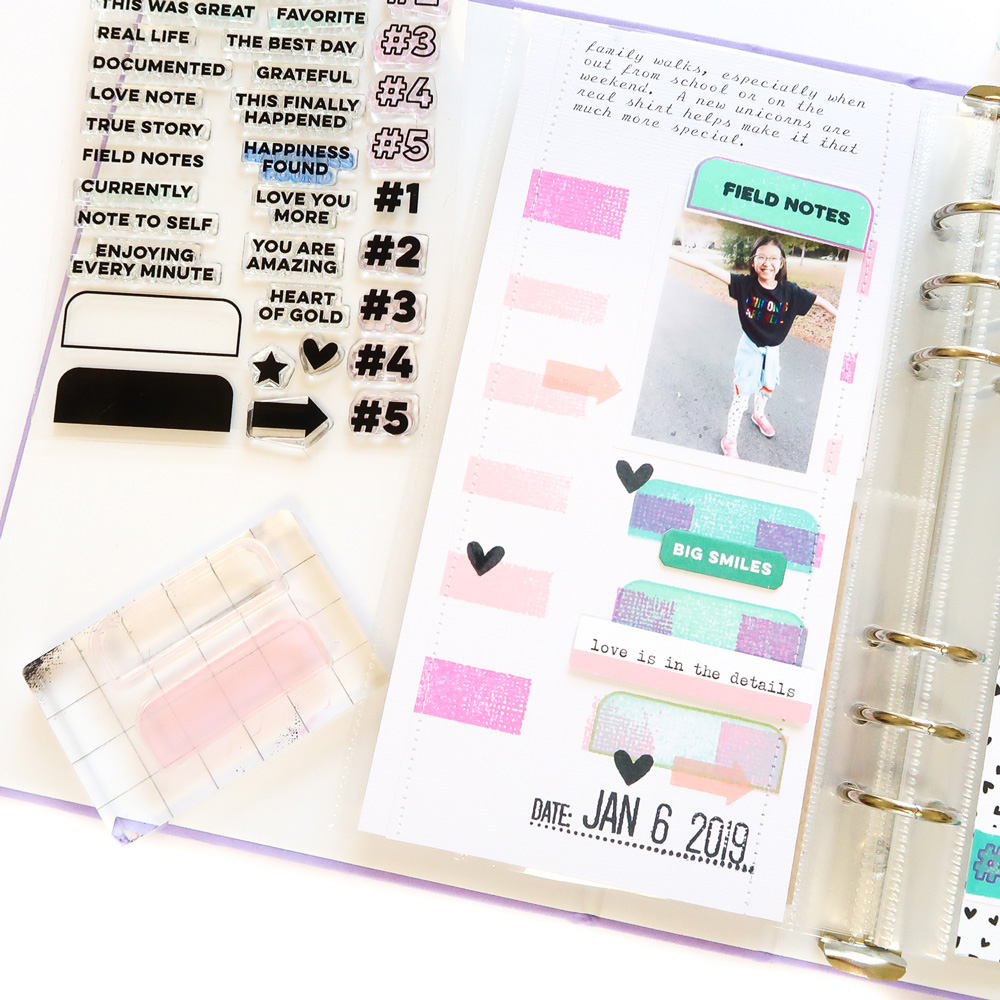
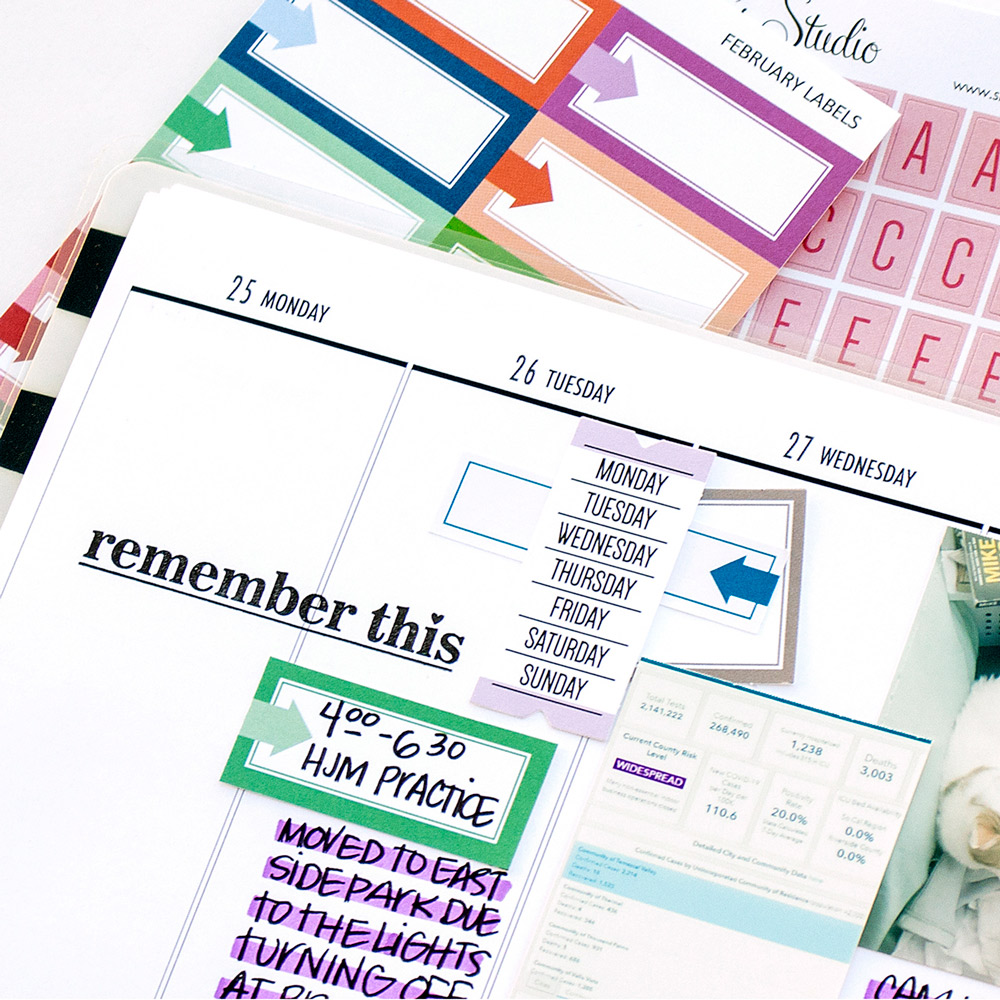
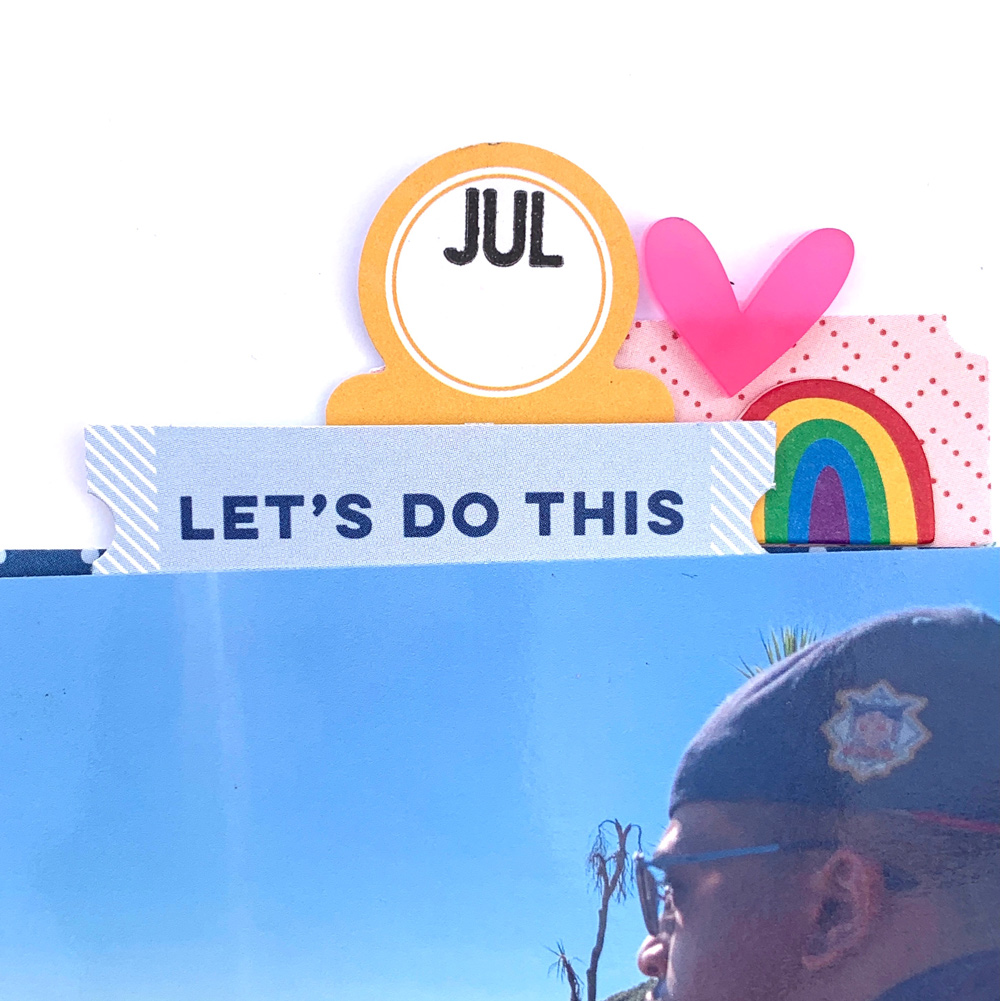
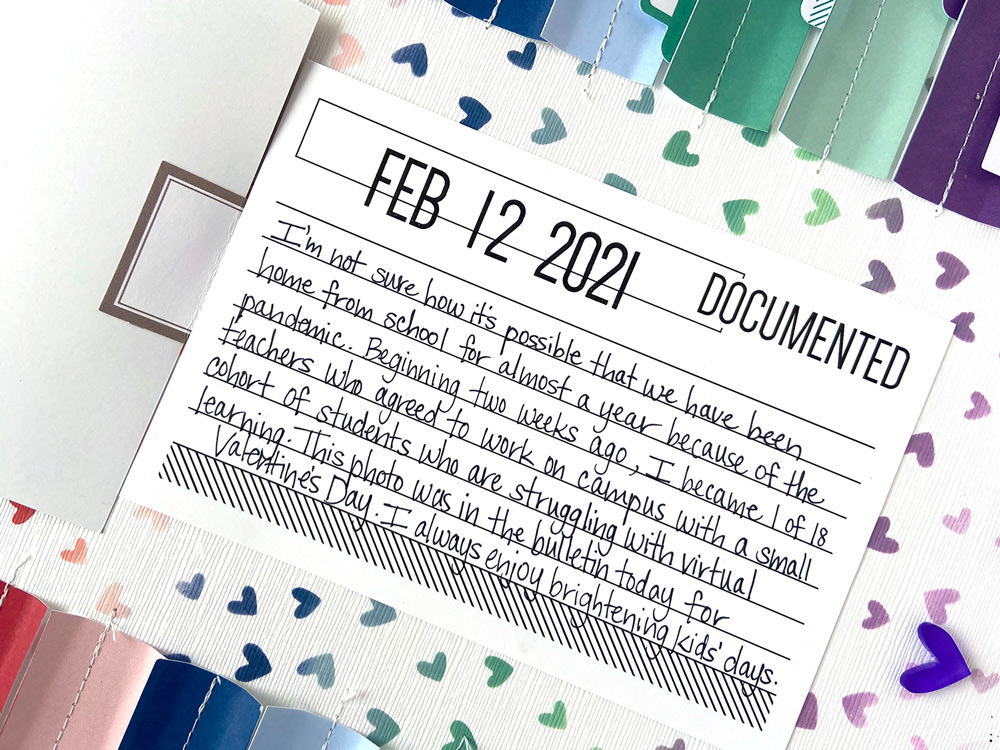
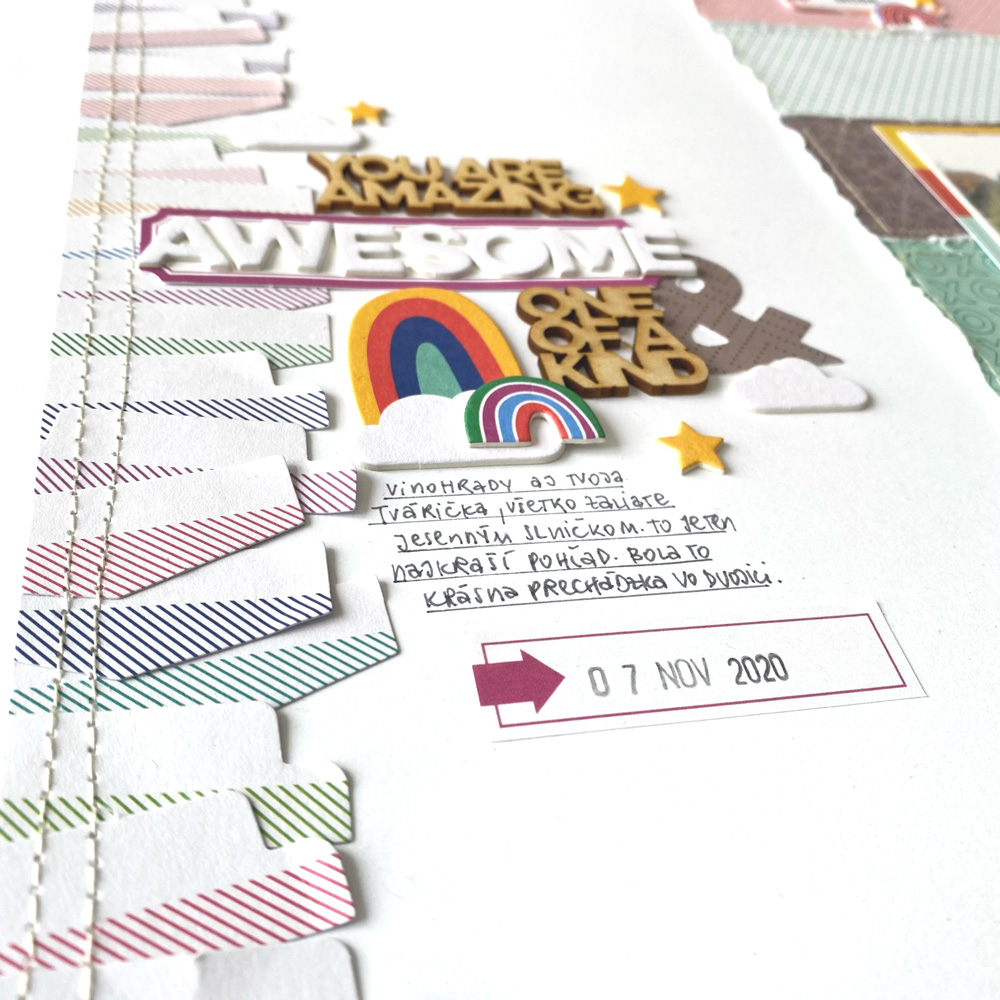
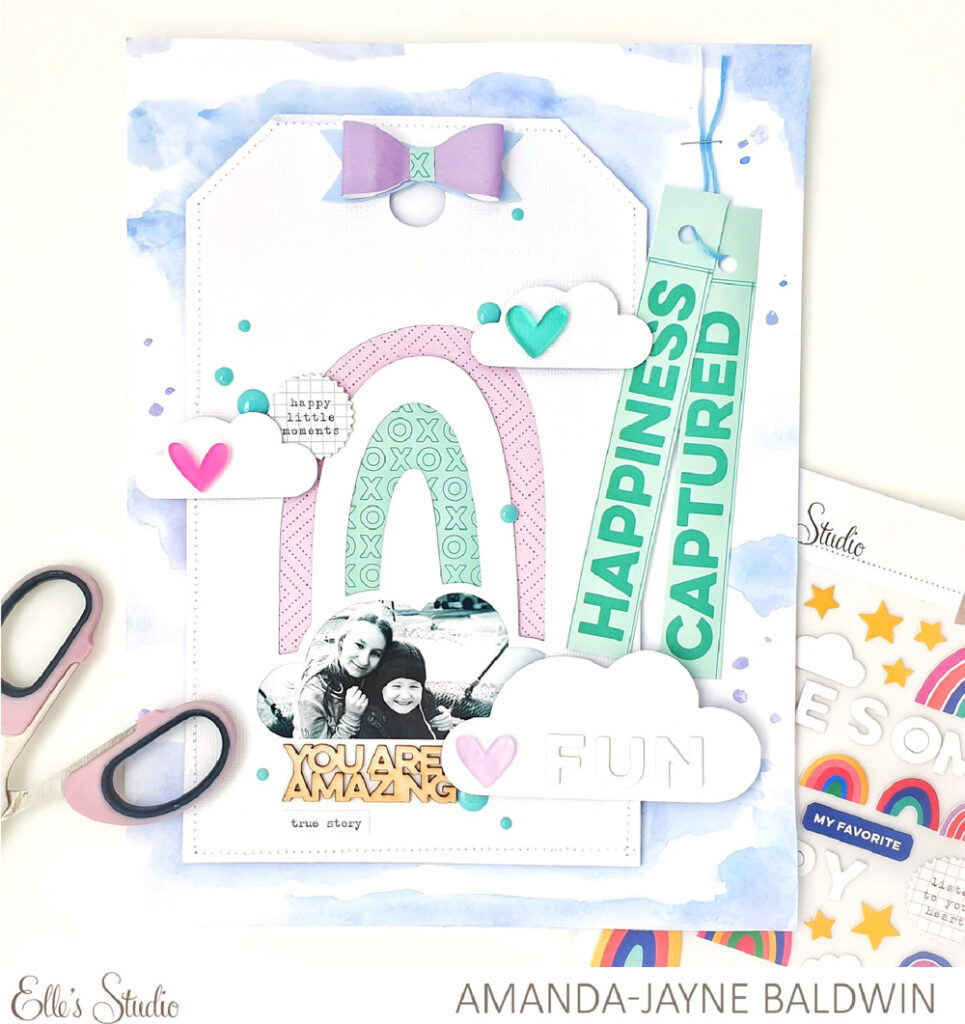
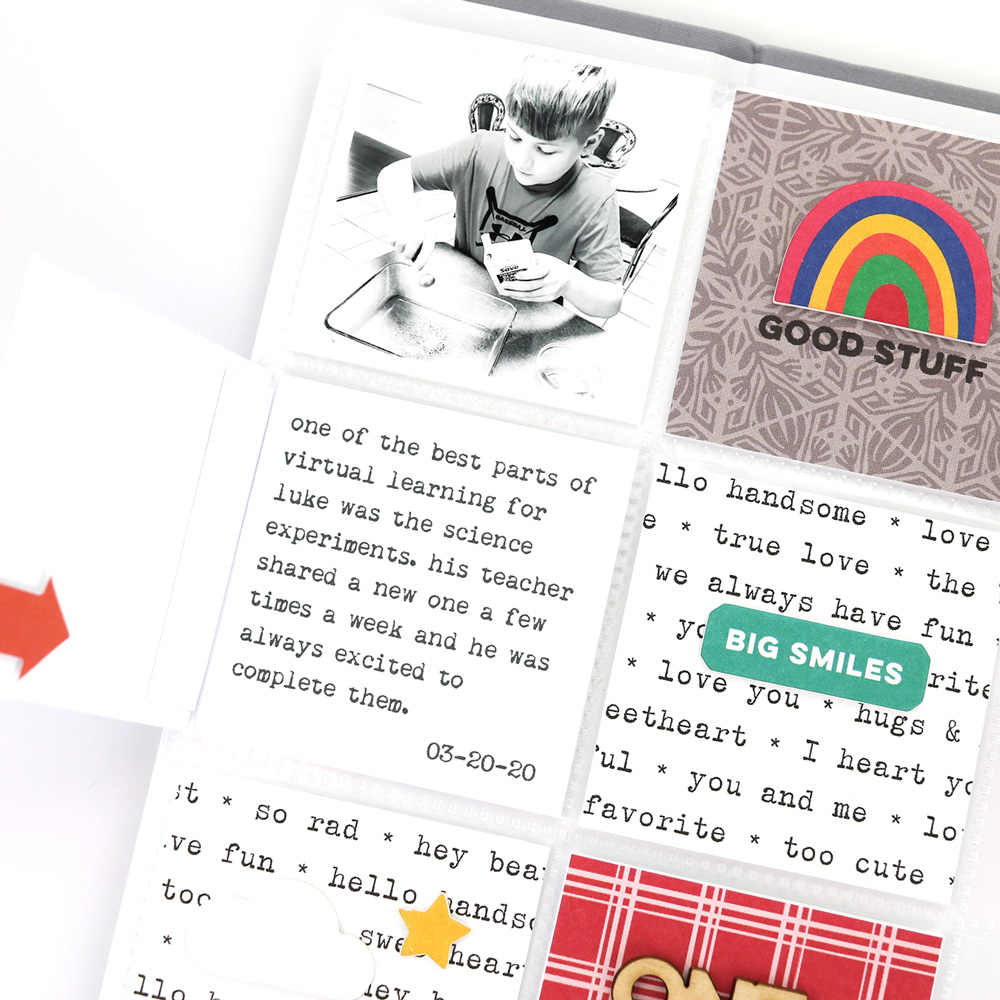
To finish this side, I used the same color inks for the outline tab image that I use on the right side to balance the spread, then added a Happy Little Moments Chipboard Stickers, and February Kit,t die cut, along with my date using the Mini Dated Stamp.

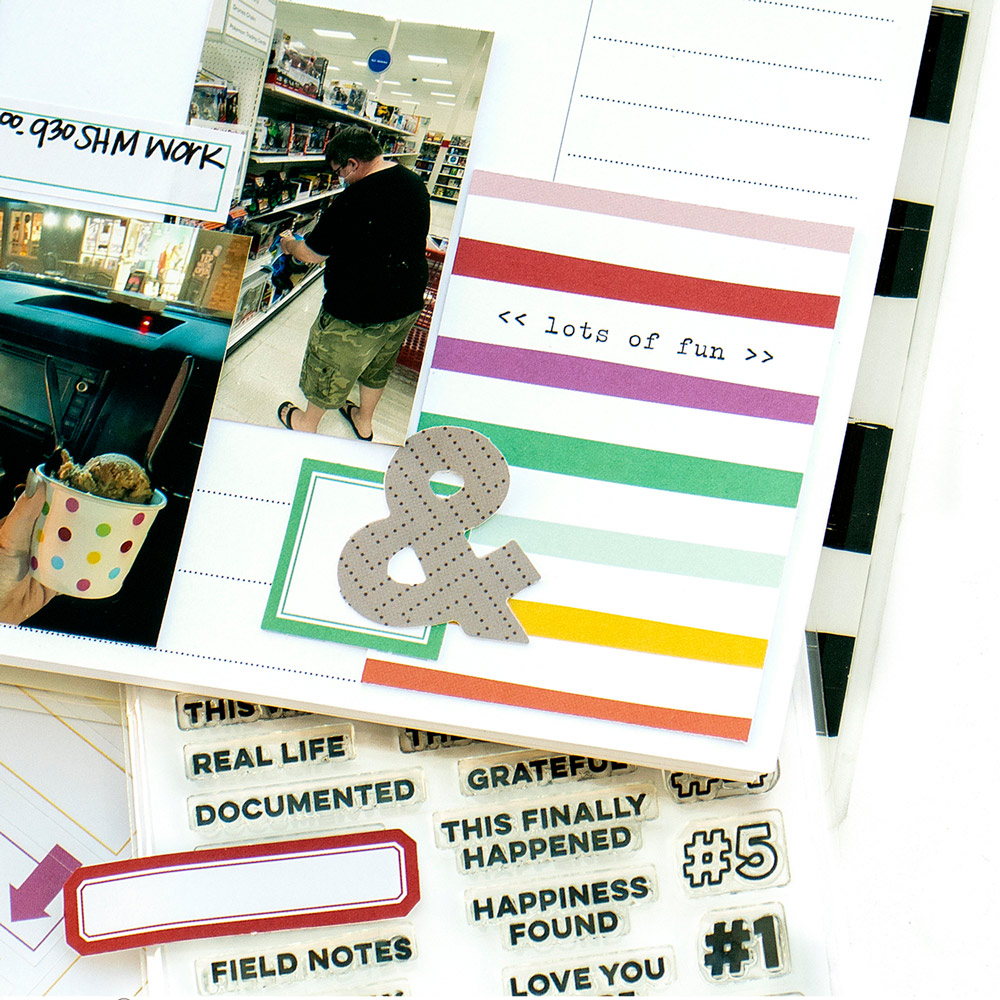
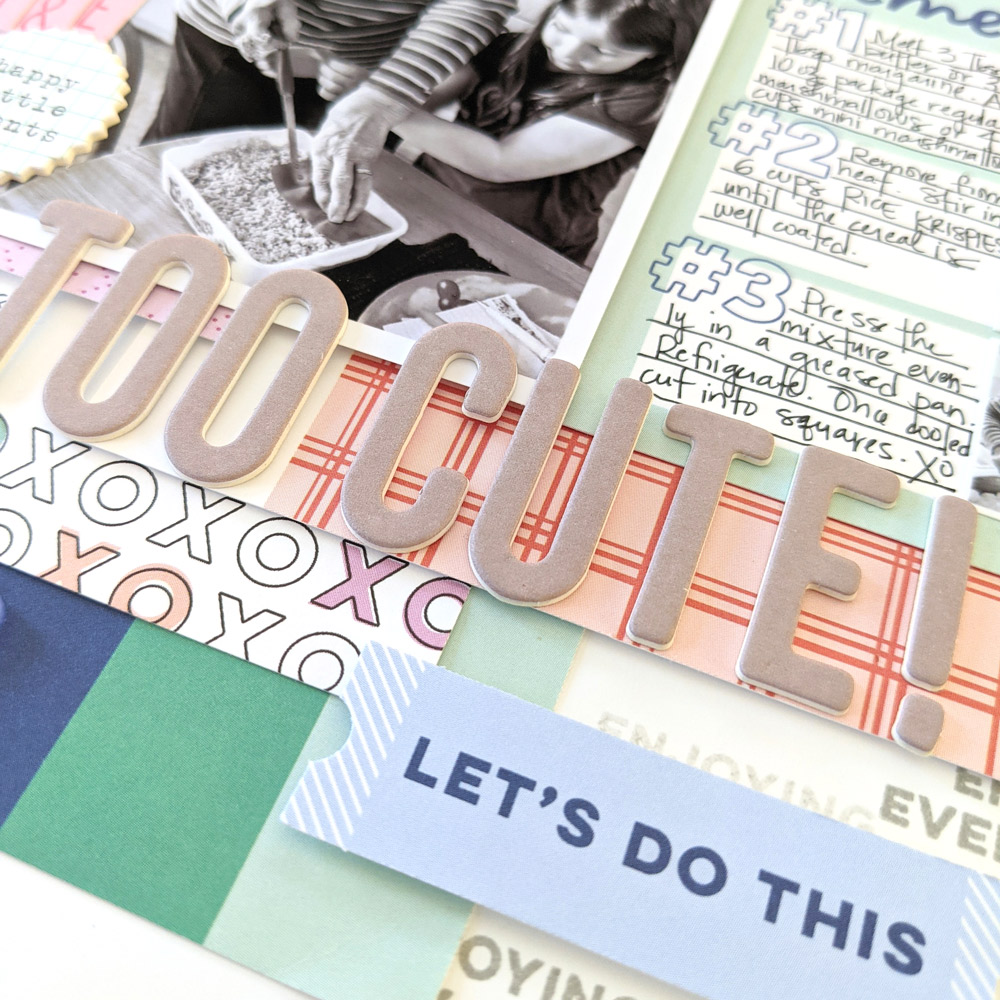
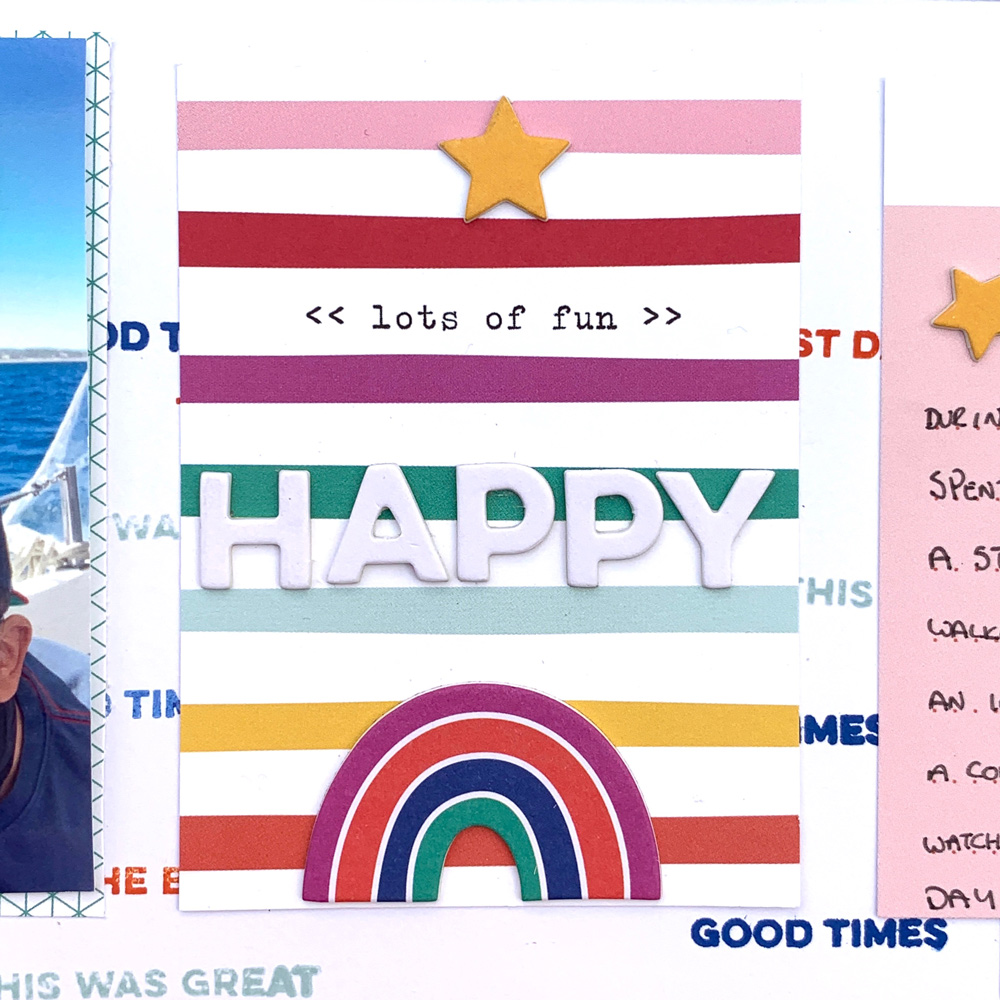
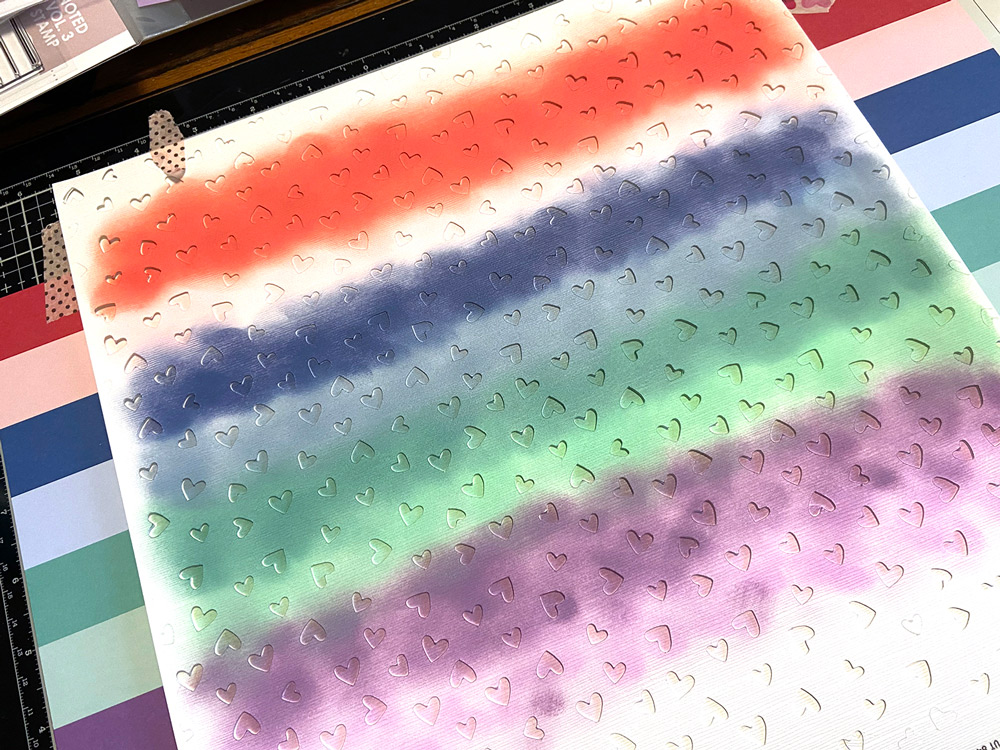
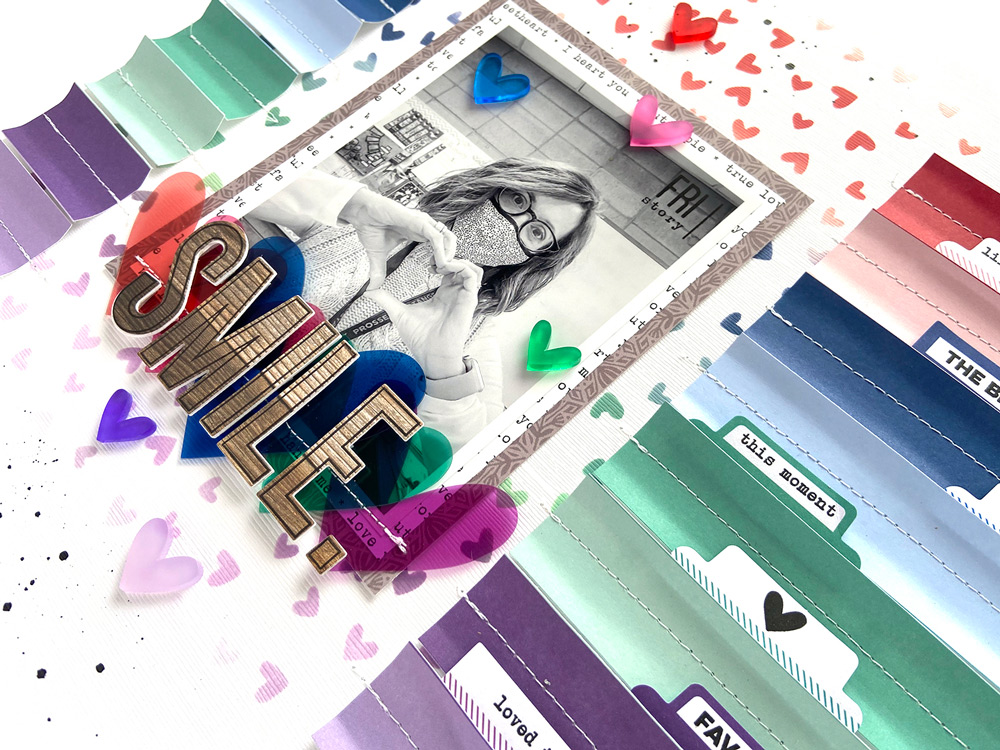
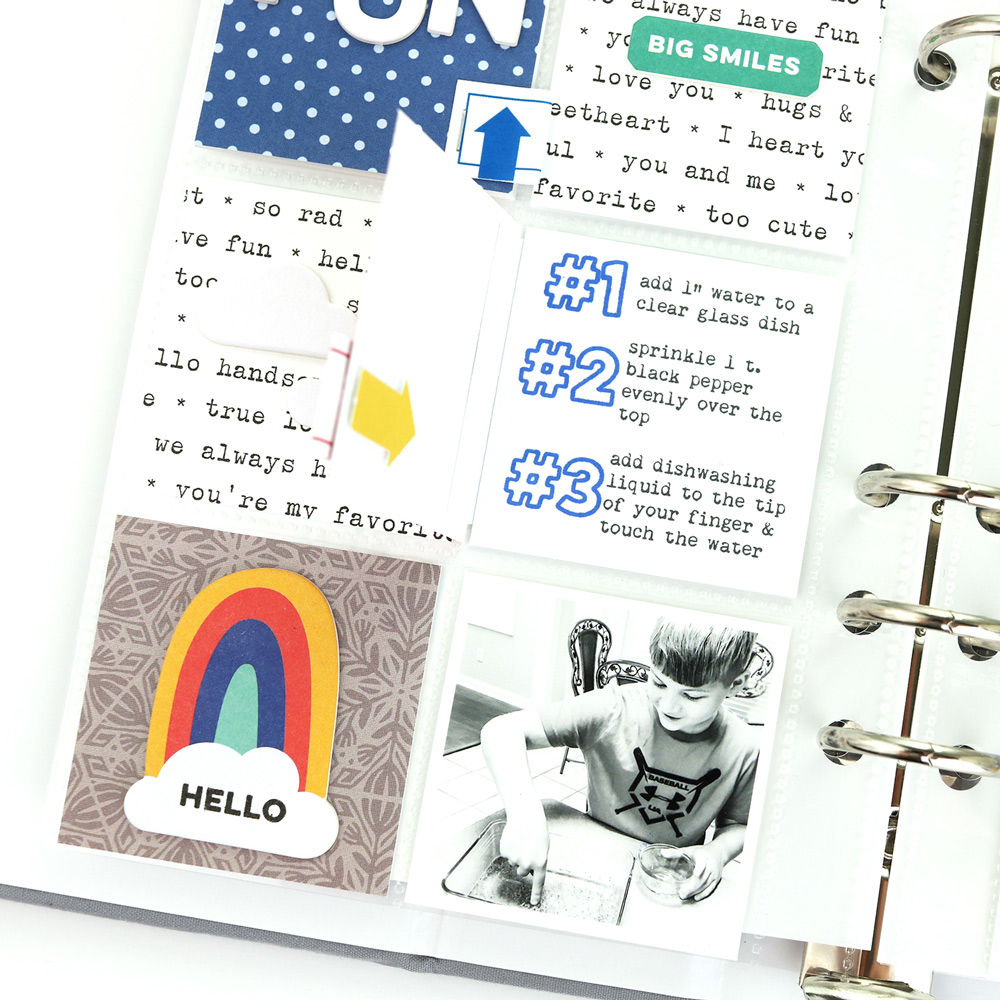
The right side uses the same solid tab image from the stamp set, but extending it to make one large tab in three different shades of green inks for an ombre look. To do this, I used washi tape again, but this time on my actual stamp to mask the corners of the image.  For the first stamp, I applied washi to only one side of the image, inked it up, removed and discarded the washi tape, and then stamped. To get the extended look of the tab next, I applied washi tape to both sides of the stamp image to get just a rectangle, inked it up, removed and discarded the washi tape, and then lined up to my first image and stamped.  I repeated this depending on how long I wanted my tabs.  After I finished, I trimmed them out leaving a white border around them.

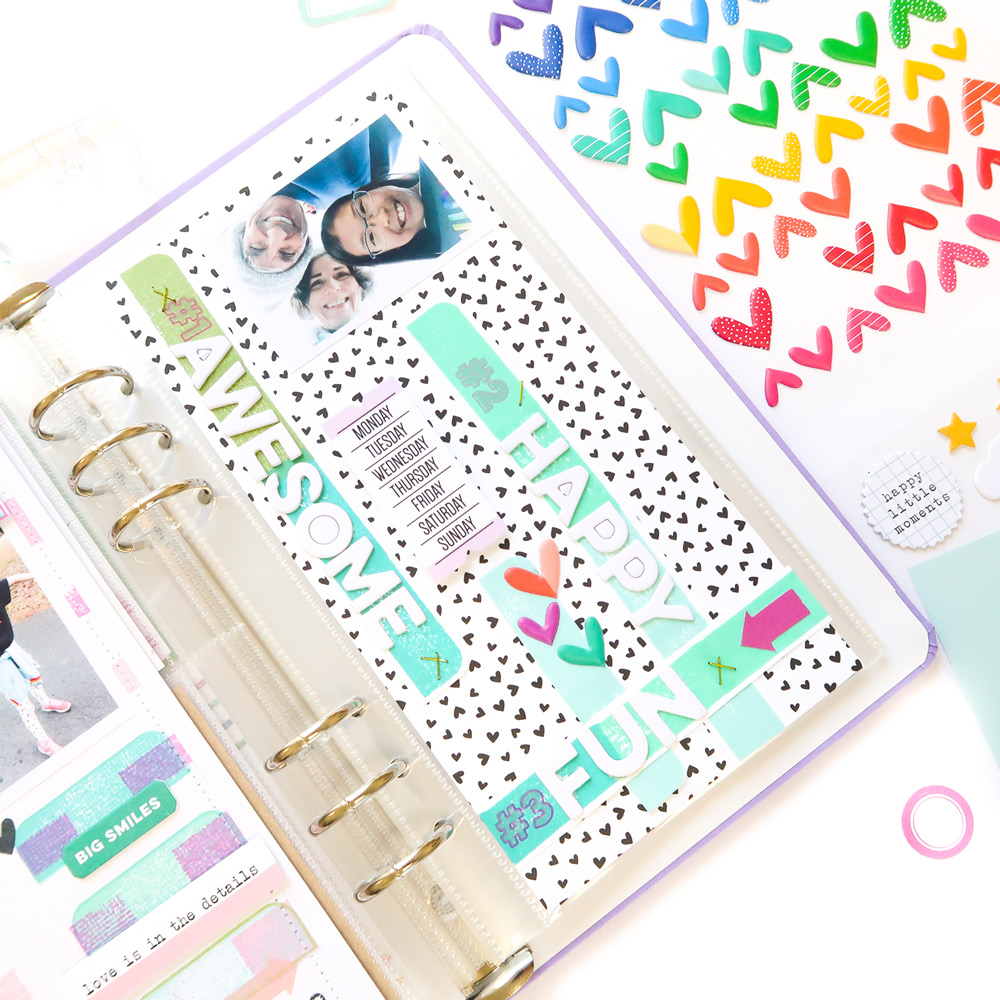
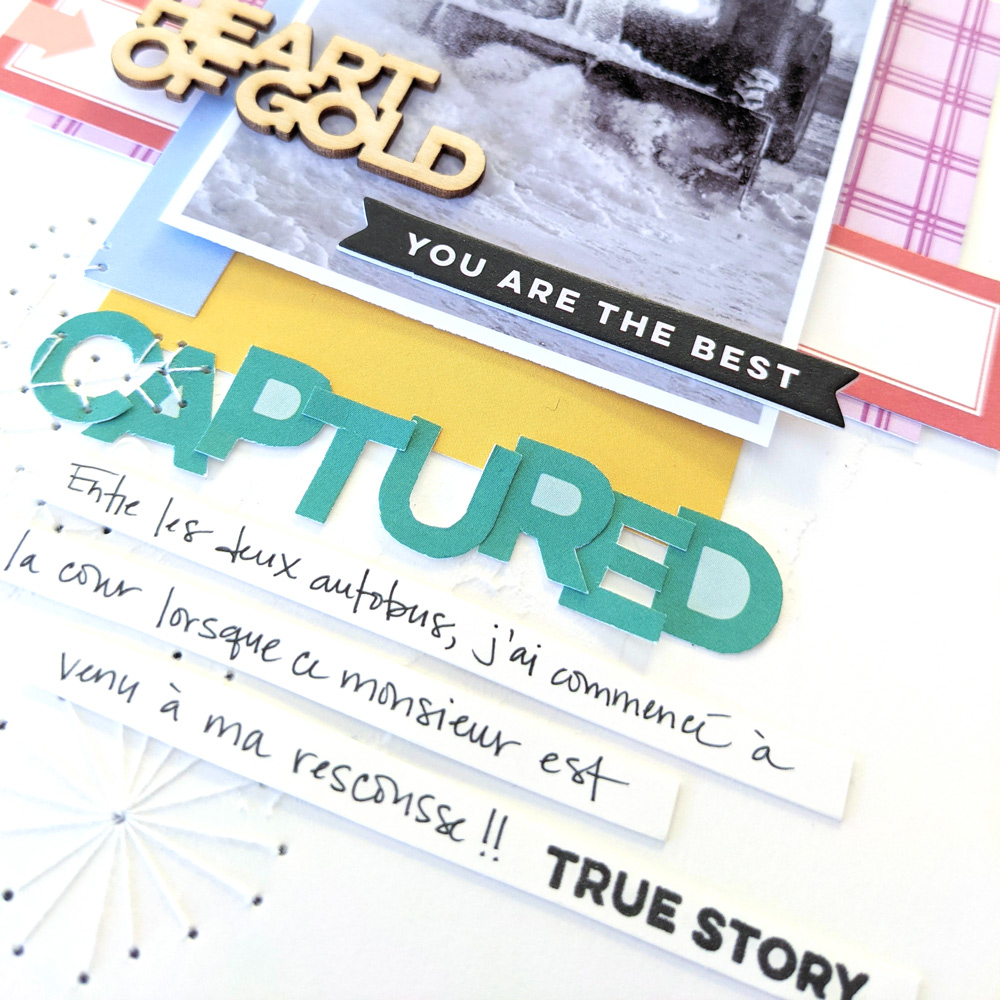
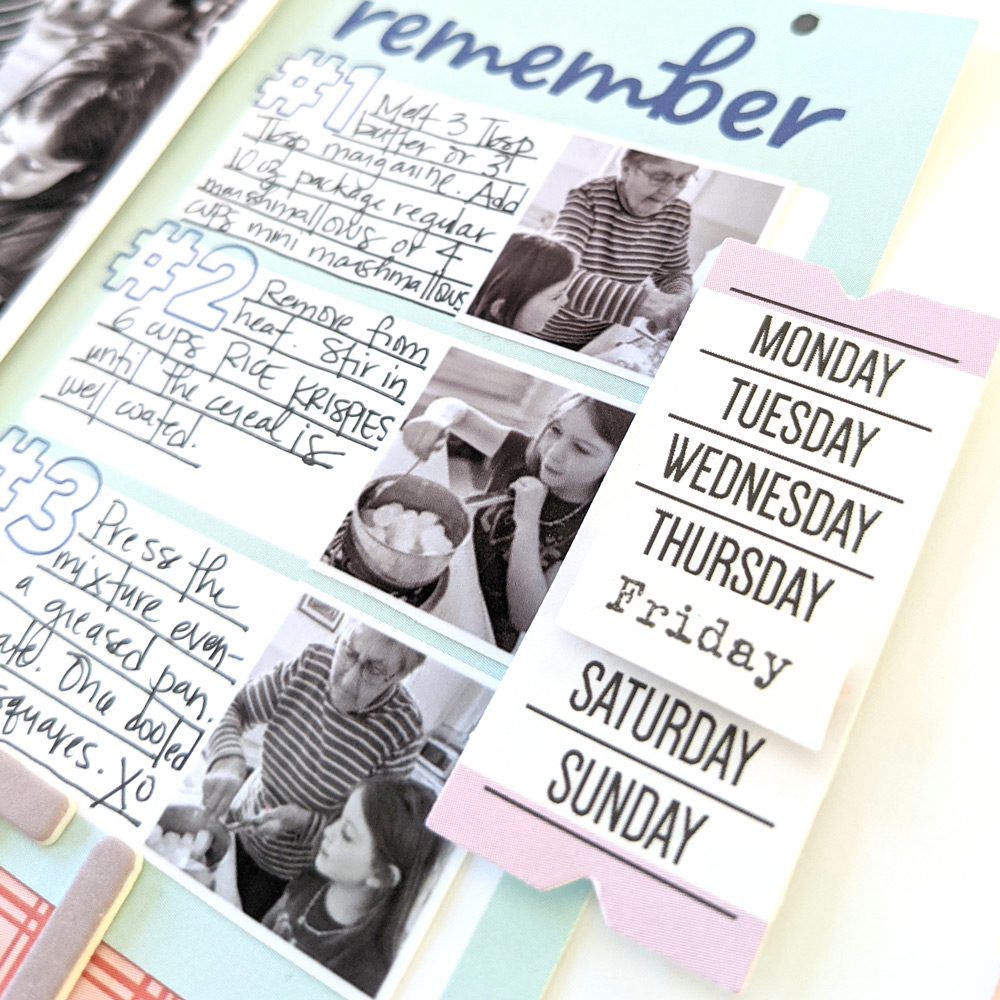
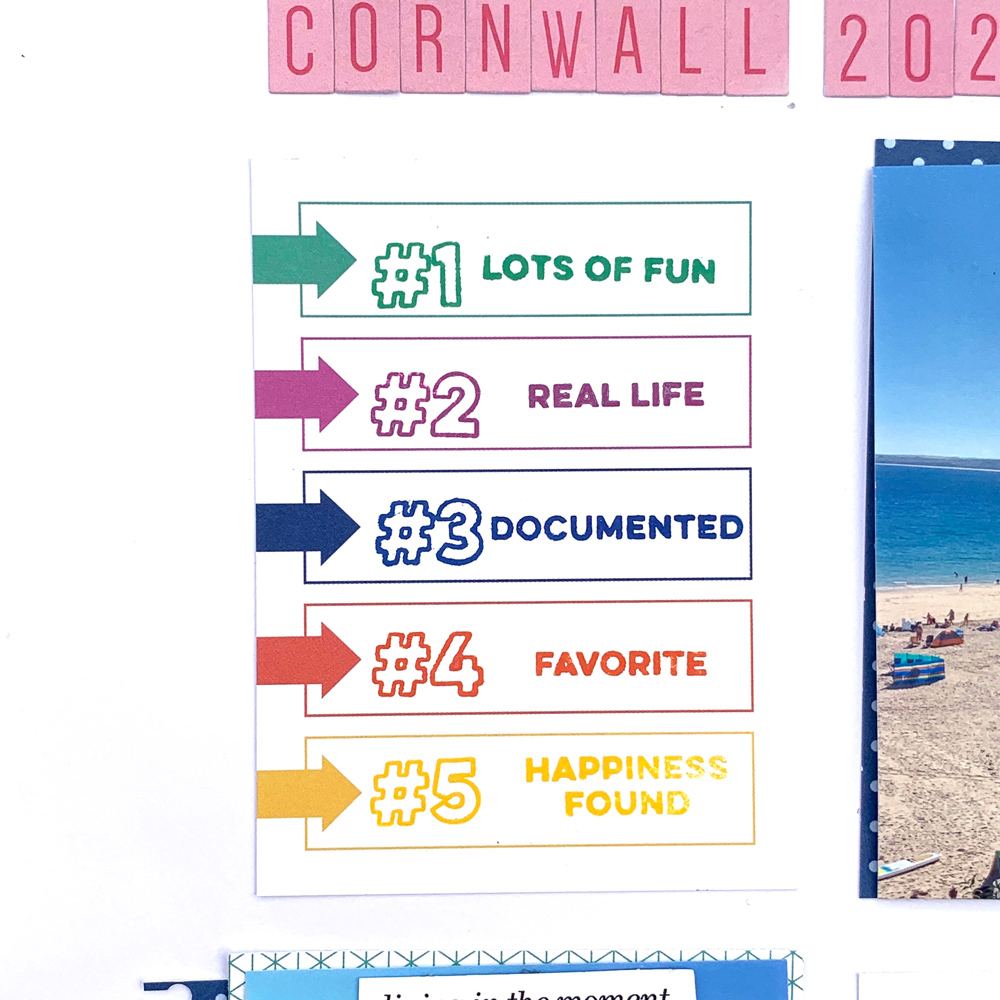
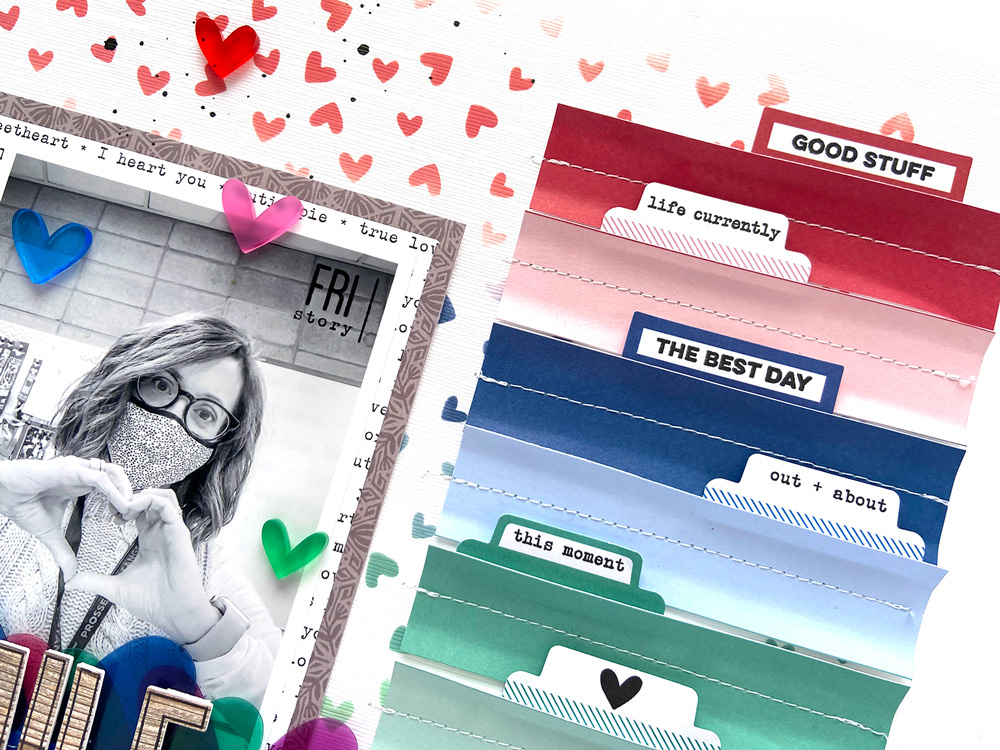
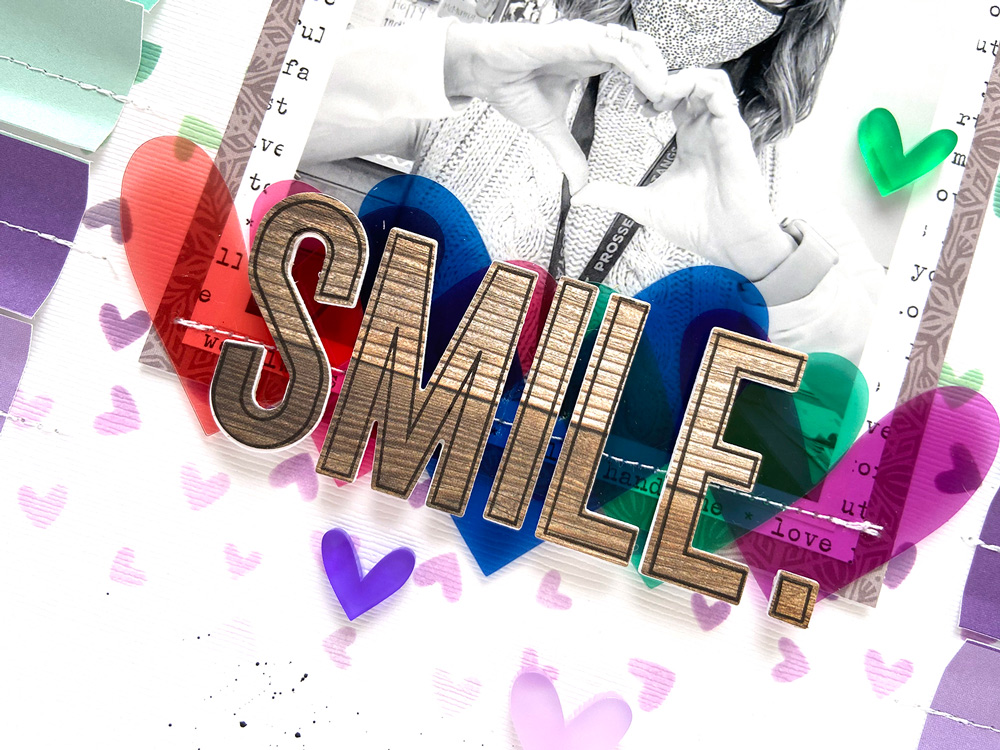
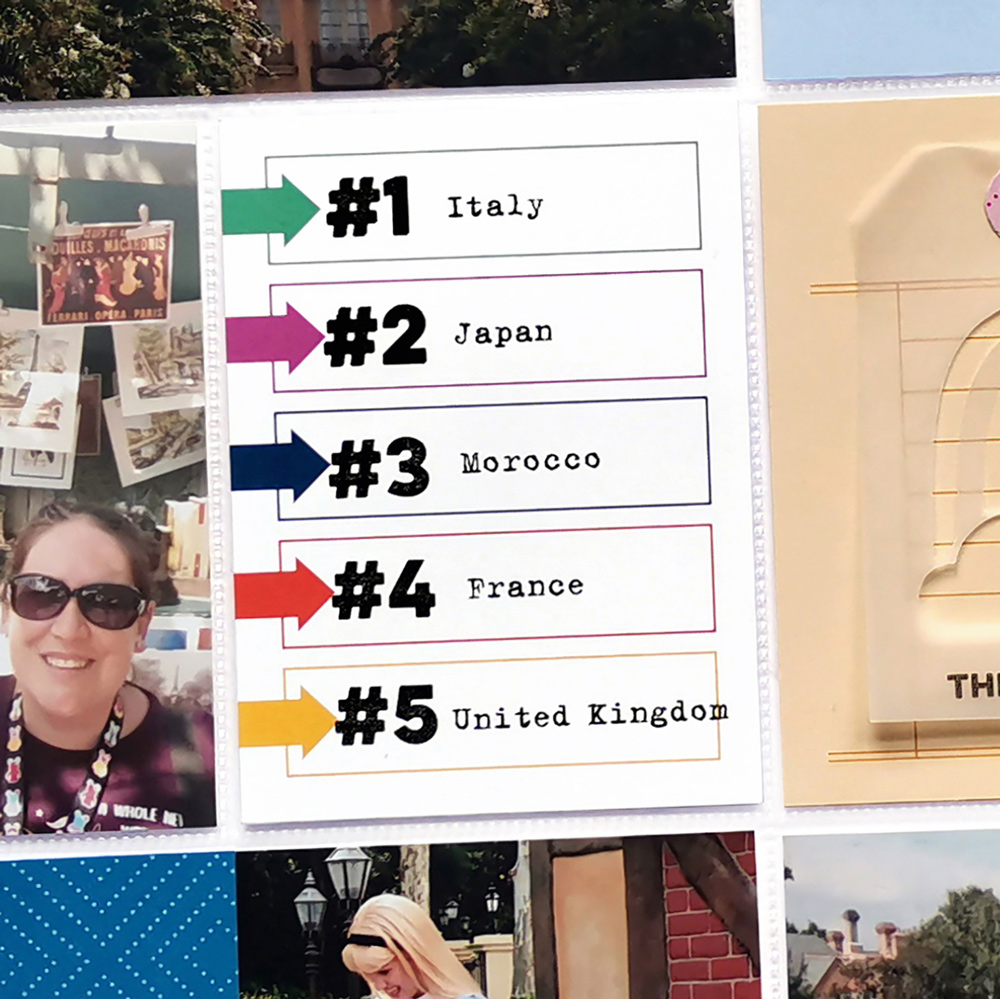
These long tabs can be used as is and would give a folder look to your project, but since I created the blocking look on the left, I loved the movement it created with lines, so I layered my fussy cut stamped images going vertically with three of them and horizontally with another, trimming where needed over the black and white heart XOXO Paper Stack. I used the chipboard words from the Happy Little Moments Chipboard Stickers on each one, and then added the #1, #2, #3 images from the Good Times stamp in both the solid and outline. Be careful stamping colors on top of any colors, as they can change.  For the solid number image, I chose grey ink and then used the pink inks for the outline.

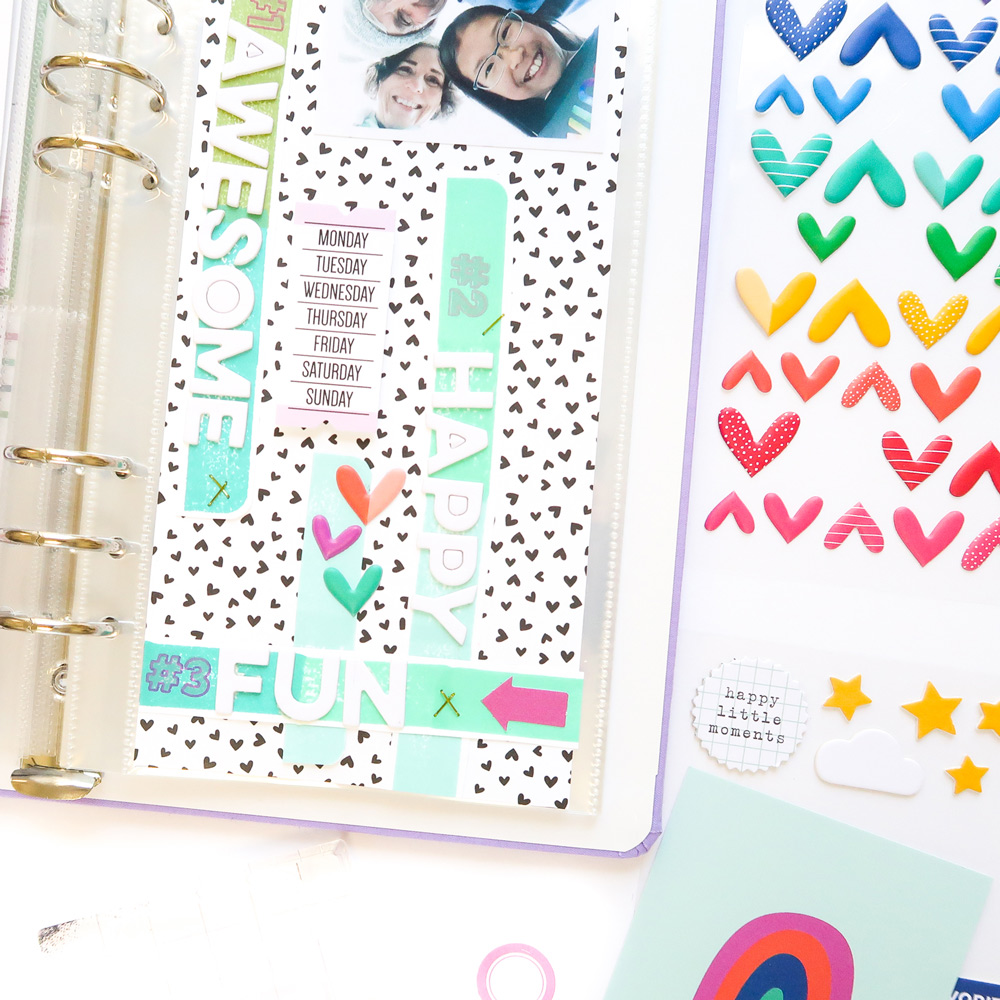
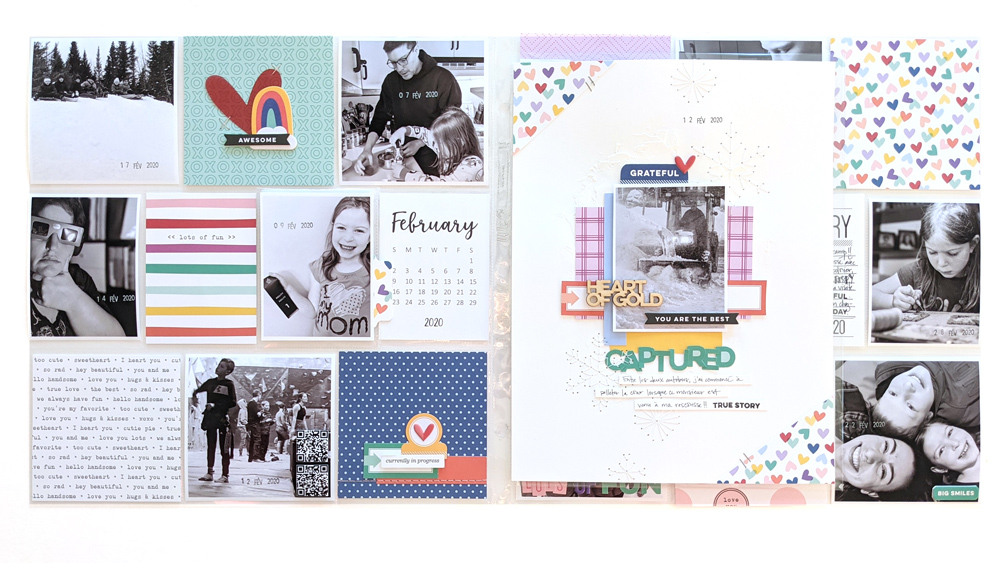
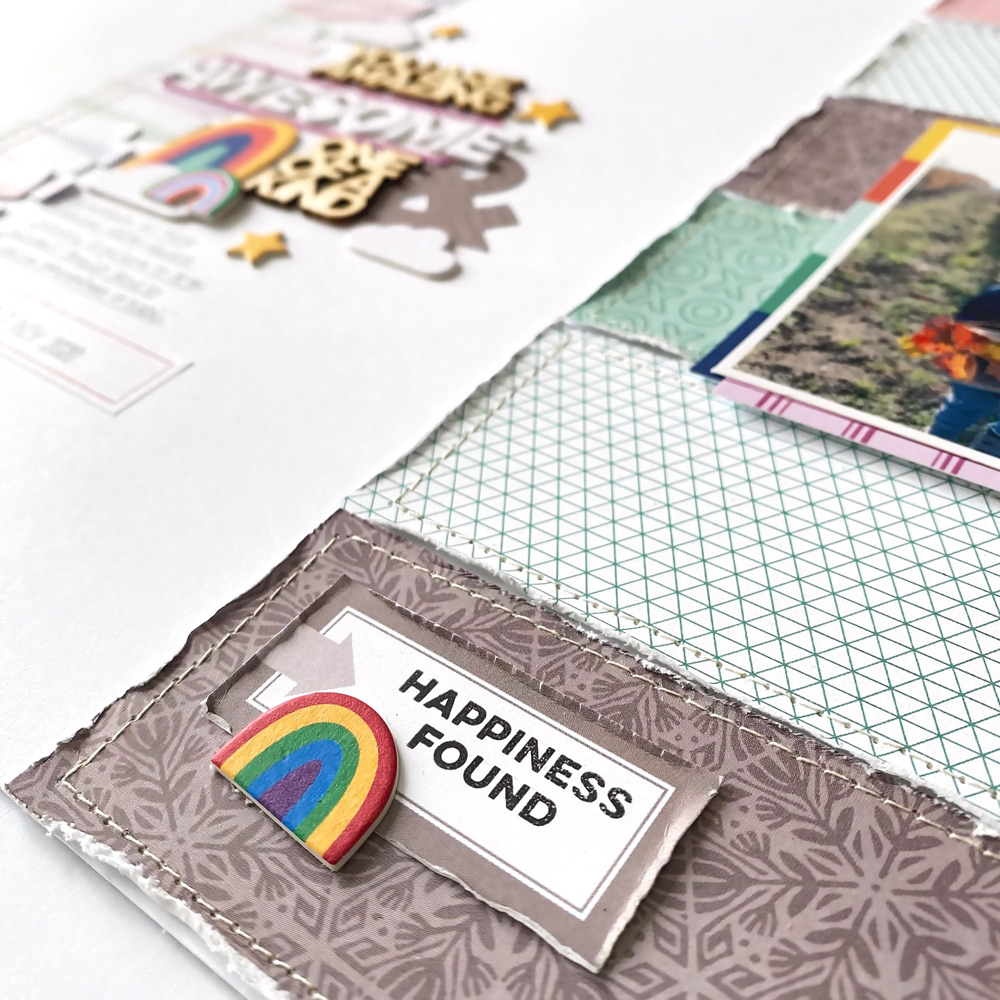
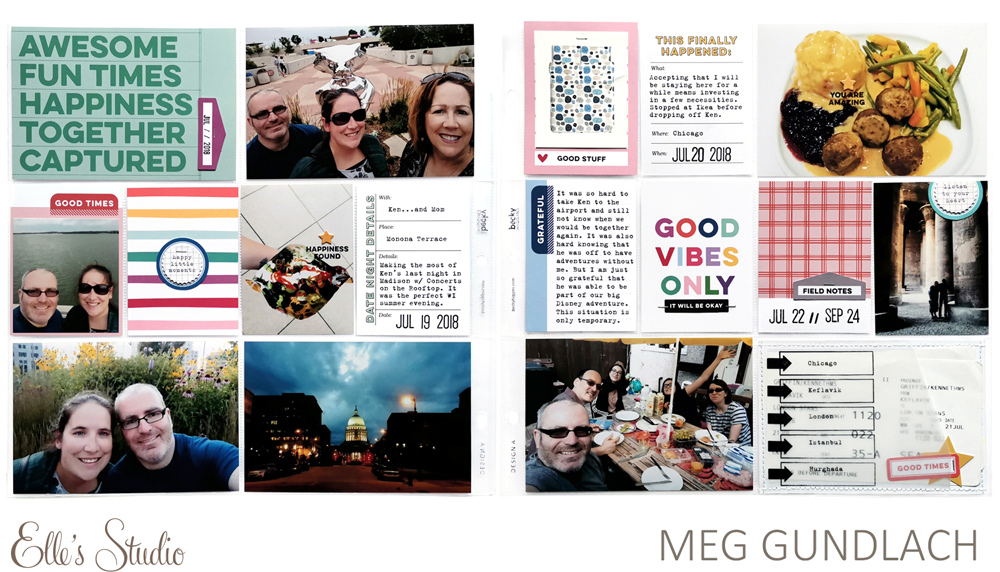
To finish, I added some staples, Puffy Heart Stickers, and a die cut from the February 2021 Kit. My tabs have created a unique grid which gives attention to my photo at the top. What other ways can you think of to use this set? Creating a background for your own tags would look amazing for your pocket pages.  If you have never tried masking with washi tape, I hope you give this color-blocking method a try and then extend the tab to make longer ones, or, use them in creative ways on your next project! Have fun!

Cutting a Gorgeous Grid with Michelle Flynn

Hello to beautiful March my friends! It’s Michelle here today, and I am sharing a layout using the fun February 2021 Cut Files and the February Print and Cut Labels. I love hybrid scrapbooking and using digital files on my layouts or in my pockets. The best part about these digital files is that we get to use them over and over again and your creativity truly has no bounds! I used the February 2021 Cut Files several times this month already, and today I am excited to show you how I used them in yet another way to create this layout: 

Supplies | February 2021 KitFebruary 2021 Cut FilesFebruary Print and Cut Labels, Happy Little Moments Chipboard Stickers, Dark Red Puffy Alphabet Stickers, Tiny Acrylic Hearts, XOXO 6 x 8.5 Inch Paper Stack, Hugs and Kisses Stamp, Pocket, Frame, and Flip Up Metal Die, Fa La La 6 x 8.5 Inch Paper Stack

I documented this special day of my daughter meeting a close social media friend for the first time in D.C. and the “real life” and “true story” tabs from the February 2021 Cut Files were absolutely perfect to document this sweet story! The girls took so many photos that I wanted to document their time together using a grid-based design which would allow me to incorporate more photos in the layout—always a big win for me! Once I decided on the grid design, I knew I wanted these cut files to frame the top and bottom of the photo grid and be the focal point. I chose that gorgeous red patterned paper from the XOXO Paper Stack and cut the designs to 5.54″ x 1.793″. I really like the boldness they added to the top and bottom of the layout.  I couldn’t help but add that perfect die cut “currently in progress” from the February Kit to the corner of the bottom title tab and I stamped a heart into the “O” of the True Story title using the Hugs and Kisses Stamp. I really love the way it turned out.

Moving on to the photo grid, I chose a different assortment of the amazing papers from the XOXO Paper Stack and I used the Pocket, Frame, and Flip Up Metal Die to create the small square grid frames to hold my photos and embellishments. Once I ran the paper and dies through my die cutting machine, I adhered my photos to four of the paper grids and layered two of the grids with just paper to embellish them a bit later. I downloaded the colorful and fun February Print and Cut Labels and chose a few to adhere to my photos, tucking the others away to use on my next layout! To complete the photo grid, I grabbed those super fun February Labels and cut a few out to tuck those into the sides of each photo frame.  

To wrap up this layout, I used that gorgeous red Tiny Acrylic Heart and a Happy Little Moments Chipboard Sticker for the center of the grid. I wanted a middle title to break up the grid and chose that Happy Little Moments Chipboard “awesome” word for some emphasis in the middle of the layout and to complete my title. The title actually reads top to bottom, “Real Life – Amazing – True Story”  because it truly was just that! Last, but not least I couldn’t complete this layout without adding the location and date at the bottom using those adorable Dark Red Puffy Alphabet Stickers

Thanks so much for sharing your time with me today!  I can’t wait to see what you create using the February 2021 Cut Files and all of the other beautiful February add-ons in the shop! Don’t forget to share your creativity using the #ellesstudio hashtag on Instagram and in the Elle’s Studio Facebook Group! Until next time, happy creating my friends!

A sneak peek of our March 10th reveal!

Our March kit + coordinating add-ons reveal is almost here and we can’t wait to share with you all the new and exclusive products that will be available soon! Our reveal will be full of the perfect products to document your March stories and take you right into the month of April! This month, our March kit will include 3 – 4 x 6 inch tags, 18 – 3 x 4 inch tags, and 27 die cuts!

Not a subscriber? You can pre-order our March kit now and lock in our $9.99 kit price by starting a subscription today! You’ll want to choose our SUBSCRIBE & SAVE option to get signed up and start your subscription with our March kit. We will then hold your kit and you’ll be ready to bundle and save at our March 10th reveal! Details on how to bundle with your subscription order will be emailed to you once you have purchased this product.

Kit subscribers, don’t forget! Along with being able to bundle any products from our shop that will ship for FREE with your kit during our 24-hour bundling period, starting on the 10th at 8:00 am Pacific each month, our subscribers will also have access to special discounts on select items! These discounted items can be found in our SALE section during our 24-hour bundling period, and you must be logged into your kit subscriber account to see them. Quick note: Our kits and add-ons are available without a subscription each month, too.

This month we also have a couple of EXTRA SPECIAL SURPRISES: We are excited to be celebrating 14 years in business this month and we are so thankful for all of your support and friendship over the years! We love and appreciate you all so much! All of our current and new kit subscribers will be receiving and Elle’s Studio pen with their March kit subscription, and subscribers will also be able to save on our new birthday themed products with our Birthday Bundle option:

We can’t wait to share all of these new products with you and to see how you use them on your upcoming projects! Make sure you set your alarm and mark your calendar for Wednesday, March 10th at 8:00 am Pacific! We hope to see you there!

Memory Planning Made Easy with Jennie McGarvey

Hello, friends! It’s Jennie McGarvey here today to bring back another layout in my 2021 Memory Planner.

Last month, I shared with you a few of my favorite tips for memory planning and I’d like to do a little bit more of that today. I believe that with products like the ones you find at Elle’s Studio you can document your memories really quickly and easily. Not only that, your pages will be beautiful, too.

Supplies | February 2021 KitFebruary LabelsArrow Label StickersJane Tile Alphabet Cardstock Stickers – PinkGood Times Tab StampHugs and Kisses Stamp

As you can see here, there is wide use of products (stickers! 3″x4″ cards! stamps!) and I think that provides a really fun and playful week in my memory planner.  This is almost always the goal for me each week.

Here’s the thing.  I’m obsessed with the Arrow Label Stickers. Seriously, I thought about them for weeks before I got to sit down and use them. They are positively PERFECT for using in my planner and my memory planner.  They have an adorable little detail and the signature Elle’s Studio colors.  However, they are simple enough to really help get the job done, or be functional, as you can see at the bottom of Wednesday.  If you look a bit closer though, you can see how they are also amazing as simple layering pieces that really pack a punch, which you can see at the top of Tuesday.

I’m typically a go big or go home type of person. The little details aren’t usually my thing. However, I often challenge myself to use supplies, or a specific supply, in a different way. I was really feeling like I wanted to sprinkle some simple stamping around this page only as accents. This is different, as I’m usually looking for those images to provide a big punch versus having a supporting role as they do on the right-hand side of this page.

I love 3″x4″ tags. I really do! In memory planning, it can be difficult to use them because they are often too large for the project. I’ve found, though, if a tag lends itself to being trimmed down to 2″x3″, I go for it because they are the best accents for memory planner pages. This “Lots of Fun” tag was perfect here, and I love how it looked as the base of this cluster. I kept the other elements very simple as the tag itself had enough going on and I didn’t want the other elements to compete.

I know I already mentioned my obsession for the Arrow Label Stickers, and that was true.  But, my one favorite element in the February Kit was hands down, the little days of the week ticket. I could hardly bring myself to use it, I think it’s so cute! A little embellishment cluster was the best way to use this cutie, paired with the Arrow Label Sticker, and a simple label.  This allowed the ticket to really shine!

Last, but not least—the Pink Jane Tile Alphabet Cardstock Stickers. I was honestly shuffling them around a lot, as they were not a natural fit for my style. However, since I’m always up to challenge myself for using items that are harder for me to visualize, I pulled them out to use. I must admit, I am so happy I did. I think that using them in an off-kilter way really enhanced the playful feel of the layout and I couldn’t be more pleased. Keeping it fun is how I prefer to keep the feel of these weeks. Obviously, there are weeks that is not possible and I treat those weeks with the feelings they deserve, since it reflects the spirit of the photos and stories I’m telling.

As you can see, memory planning is something so near and dear to my heart and the February kit and add-ons have blended right into this project, seamlessly! If you’re not sure if memory planning is for you, why not try adding an Elle’s Studio label, tag, or sticker into your regular planner this week and see if you like the way it feels. Maybe, try a photo, too! There are no rules on how to create your own memory planner pages. I’m positive you’re going to enjoy the colors and designs from Elle’s Studio in your planner!

Are you new to memory planning, or a seasoned pro? We’d love to see what Elle’s Studio products you are adding to your planner! Join our Elle’s Studio Facebook Group and post your planner spread there or on Instagram using our hashtag #EllesStudio!

Building a Month of Memories: Vol. 2, with Guest Aurélie Cormier

Join us in welcoming our February guest, Aurélie Cormier back to the blog today! Aurélie is continuing on her first post with us to show us how she records a month of memories in different formats in her album, so if you missed her first post, be sure to check it out for more inspiration! Let’s see what Aurélie created to share with us today.

Hello, again! It’s Aurélie with you today, and I am just as thrilled as earlier in the month to show you what I’ve been up to using the February kit and add-ons! Yay! 

This time around, it’s all about layouts. When I first started pocket scrapbooking a few years back, it didn’t take time for me to miss creating more traditional layouts. That’s why last year, I started adding traditional layouts of my two favorite monthly photos or memories in between my monthly pocket layouts. 

With this in mind, I always build my pages around the color schemes and patterns I’ve previously used in my pockets. I even try to create visual triangles from one page to the other so that the eye can flow more easily through the memories.

Supplies | February 2021 Kit, February Labels, Happy Little Moments Chipboard Stickers, Puffy Heart Stickers, Heart of Gold Wood Veneers, XOXO 6 x 8.5 Inch Paper StackGood Times Tab Stamp

I love mixing and matching textures. Can you tell? Wood veneer, chipboard, die-cuts, and good ol’ fashioned hand-stitching. And that title and tab? Totally fussy-cut from pocket tags included in the February Kit!

Here is what it looks like with the two monthly pocket pages I made earlier this month:

I used the same approach for the “b-side” layout. The soft lilac in the upper-left pocket was calling my name so I opted to choose tags, paper and embellishments that create a visual triangle not only on the layout, but also with the monthly pocket page to its right.

Supplies | February 2021 Kit, Jane Tile Alphabet Cardstock Stickers – PinkHappy Little Moments Chipboard Stickers, Tiny Acrylic Hearts, XOXO 6 x 8.5 Inch Paper StackGood Times Tab Stamp

The February 2021 Kit totally matches items from the January 2021 release. Look at that title! I just love how it draws the eye towards those photos of my sweet Miss E making treats with my Maman.

Did you notice that I added a stamped “Friday” to the die-cut on the right of the layout using a stamp from the Daily Tabs Stamp? Not only does it emphasize that the memory of my mother and daughter baking treats was actually on a Friday, but it’s totally hiding a coloring fiasco! An example of a  “flopportunity” at its finest. 

And there you have it! I hope you enjoyed seeing how I build a month’s worth of memories. It was a true pleasure to scrapbook with the February kit and add-ons and I look forward to seeing how you will use it!

Happy scrapping!

Scrapbooking has been an integral part of my life for the past dozen years or so. Published in Canadian Scrapbooker (now Creative Scrapbooker), Scrapbook & Cards Today, as well as France’s own Histoires de Pages, my creative style has evolved through the years. I now consider myself a memory keeper, mixing and matching traditional scrapbooking elements with pocket scrapbooking, documenting the normal and not so normal everyday moments of our lives. Journaling has become as important to my projects as my photos—I journal every morning about the day before, using a mish mash of stamps and hand-written fonts. These stories go hand in hand with my layouts in my albums.  

I originally hail from Cheticamp, a beautiful Acadian village right on the Cabot Trail in beautiful Cape Breton, Nova Scotia. I now reside in Dieppe, New Brunswick with my husband, Mathieu, our twelve-year old son, Louis-Olivier and seven-year old daughter, Éloïse. Besides scrapbooking, I enjoy teaching voice classes at home and sing most weekends at a few church services around the area.

Find more of Aurélie’s projects at these links : Instagram | Facebook | Gallery | Blog

Thank you so, so much for guesting for us this month, Aurélie! We have just loved everything that you have created for us! If you’ve been inspired by Aurélie, please share your work in our Elle’s Studio Facebook Group or on Instagram using our hashtag #EllesStudio!

Sketch Day with Jackie Ashton

Hi, crafters! It’s Jackie here to share the second of this month’s sketches, along with a layout that I created based off of it using the February kit and add-ons. I find that sketches are a great way to kick start a project, whether you are creating a layout, a traveler’s notebook, pocket page or even a card, they can help to get you started with placement of products on your page.

Here is the new sketch that inspired me:

And here’s what I created using it:

Supplies | February 2021 Kit, Bright Die Cut Tabs, Jane Tile Alphabet Cardstock Stickers – Pink, Happy Little Moments Chipboard Stickers, Tiny Acrylic HeartsXOXO 6 x 8.5 Inch Paper StackGood Times Tab Stamp

For my layout, I kept the position of the elements as shown on the sketch, but decided not to use patterned paper along the lower edge. Instead, I stamped some of the phases from the Good Times Tab Stamp.

To create my stamped background, I choose a few of the phrases and stamped randomly across the lower part of my cardstock. I did stamp across the whole length of the cardstock, even though most of it got covered up with my photograph and journaling tags. It was easier to do it this way, so you can still see some of the phases underneath.

I choose to use two photographs: one 6″ x 4″ and one 3″ x 4″, which were taken in July 2020, and I wanted my layout to be bright and fun, so I choose journaling tags from the February 2021 Kit to help bring the summertime vibe to my page.

The top left journaling tag had the boxes and arrows already printed, and I wanted to colour co-ordinate my stamping using some the lovely phases on the Good Times Tab Stamp with the same colours. I was so pleased how well my ink pads matched the printed tag.

For the striped journaling tag, I added chipboard pieces from the Happy Little Moments Chipboard Stickers.

My journaling was then added to the “Good Times” journaling tag, along with some chipboard stars from Happy Little Moments Chipboard Stickers.

For my title, which I positioned above my top journaling tag, I used the lovely pink Jane Tile Alphabet Cardstock Stickers.

To finish off my layout, I use some of the Bright Die Cut Tabs and Tiny Acrylic Hearts around the page.

There are so many different ways to use a sketch! Like me, you could look at the sketch and create your layout exactly like it is shown, or change it to add smaller photographs, or two 6″ x 4″ photographs, or you could even shrink it down to use on a traveler’s notebook spread! The possibilities are endless!

I loved how this page turned out and I know that this is a sketch I will use more than once as a starting point for a layout! Enjoy!

Show us how you use our second February sketch! Post your project to our Elle’s Studio Facebook Group or on Instagram using the hashtag #EllesStudio! Don’t miss our first sketch, too, found HERE. Have a creative weekend, friends!

Throwback Thursday: A Dynamic Duo!

Hello there, friends, and happy Thursday! Today we have a fun post for you! It’s Throwback Thursday, but to switch things up a bit, we’ve asked two of our team members to choose a past team project to inspire them, and we love the two different results that are sure to inspire YOU today! Let’s take a look at the project by Marsha Farris that Jennifer McMurtrey and Katarina Prevendarova were inspired by:

Now, let’s see what they made!

Jennifer McMurtrey

How about a bit of #TBT (Throwback Thursday) Elle’s Studio style?! I love using the designs of other creatives to inspire my own scrapbooking. Whether it’s a straight-up scraplift or mimicking a particular technique, it is always a great place to begin when searching for inspiration.

Having the opportunity to work with Marsha on the Elle’s Studio Design Team is amazing because I have long been a fan of her work. When Katarina and I were deciding on a project for this month’s Throwback Thursday, we both quickly decided on Marsha’s beautiful layout from February 2020. 

Here’s a look at what I created:

Supplies | February 2021 Kit, February 2021 Cut FilesBright Die Cut Tabs, Heart of Gold Wood Veneers, Tiny Acrylic Hearts, Acetate Hearts, XOXO 6 x 8.5 Inch Paper Stack, Autumn Days Paper Stack, Good Times Tab Stamp, Daily Tabs Stamp, Daily Details Stamp, Title Builder Vol. 4 Stamp, Large Jane Alphabet Stamp – Outline, Large Jane Alphabet Metal Die, Dated Stamp

Marsha is a master at creating layouts in traveler’s notebook size format, while I am most comfortable with a traditional 12″ x 12″ layout. Her original project featured striped patterned paper on one side of the spread with colorful stamping on the opposite, which is where I drew my inspiration.

To create the heart background, I used the tiny heart pattern in the February 2021 Cut Files to create a stencil. After lining up the striped patterned paper from the XOXO Paper Stack where I knew it would sit on the layout, I went over the stencil with inks that match.

Next, I cut the patterned paper into strips and machine-stitched them to the cardstock. Using the Good Times Tab and Daily Tabs Stamp, I stamped sentiments on coordinating Bright Die Cut Tabs before tucking them in with the strips of paper.

I love how Marsha used the wood veneer on her project and decided to recreate the effect using the Large Jane Alphabet Stamp and Metal Die with wood grain paper from the Autumn Days Paper Stack. To make the letters thicker, I first cut three of each with white cardstock and glued them together. These were then adhered to the top of a row of Acetate Hearts.

It is not super obvious, but the photo is attached with a die cut from the February Kit to create a flip-up element that hides my journaling (and yes, I know it’s sideways!)

To finish the layout, I added Tiny Acrylic Hearts for a bit more color and texture. 

Katarina Prevendarova

Hi friends! It’s Katarina here! I was inspired by the composition and some elements from Marsha’s spread and decided to create a 12″ x 12″ layout based on it using the February kit and add-ons.

Supplies | February 2021 KitFebruary LabelsBright Die Cut Tabs, Arrow Label StickersHappy Little Moments Chipboard Stickers, Heart of Gold Wood Veneers, XOXO 6 x 8.5 Inch Paper Stack, Good Times Tab Stamp

I created a fun border with a lot of texture using the Bright Die Cut Tabs. I arranged them in a column overlapping each other and hanging off the left edge and machine-stitched through them.

On the right side of my layout, I was inspired by the stripes from Marsha’s spread. I cut six stripes of patterned papers from the XOXO Paper Stack, distressed their edges and machine-stitched around them for some added texture.

I placed my photo in the middle right part of my layout overlapping the patterned papers, backed it with two journaling tags from the February 2021 Kit and used one of the Heart of Gold Wood Veneers and a die cut from the kit to embellish it.

I created three little clusters using the February Labels, Good Times Tab Stamp and the super cute Happy Little Moments Chipboard Stickers. I placed my title on the left side of my layout, combining the stickers, Heart of Gold Wood Veneers and die cuts from the February Kit.

It was so much fun digging into older DT inspiration projects and having fun giving it my own style. I really encourage everyone to give it a try too!

Thanks for joining us today for this fun post! We can’t wait to see how you are inspired by any of the projects from today’s post! Be sure to share what you create with us using the #EllesStudio hashtag on Instagram, or in our Elle’s Studio Facebook Group!

February Design Team Inspiration: Volume Three

It’s time for our third and final design team inspiration post using our February kit and add-ons. If you’ve been following the blog this month, you’ll have seen a ton of amazingly inspiring projects, but we have ten more for you today! Check out the layouts, pocket pages and notebook spreads that are sure to entice you to break out your February kit and add-ons and create!

Today by Sarah Kee – supplies used | February 2021 KitBright Die Cut TabsJane Tile Alphabet Cardstock Stickers — WhiteHappy Little Moments Chipboard StickersPuffy Heart Stickers, Black Puffy Alphabet StickersXOXO 6 x 8.5 Inch Paper StackGood Times Tab Stamp, Everyday Tabs Vol. 2 Metal Die

Date Night by Michelle Flynn – supplies used | February 2021 Kit, February 2021 Cut FilesJane Tile Alphabet Cardstock Stickers — WhiteHappy Little Moments Chipboard Stickers, Chipboard Label StickersTiny Acrylic Hearts, Hugs and Kisses Stamp, Mini Dated Stamp

Fun traveler’s notebook spread by Wei Wei Wang – supplies used | February 2021 Kit, Here’s the Story Printables, February LabelsHappy Little Moments Chipboard StickersHeart of Gold Wood VeneersXOXO 6 x 8.5 Inch Paper StackGood Times Tab Stamp

January weekly planner spread by Melissa Mann – supplies used | February 2021 KitFebruary Print and Cut LabelsBright Die Cut Tabs, Jane Tile Alphabet Cardstock Stickers — WhiteJane Tile Alphabet Cardstock Stickers — BlackHappy Little Moments Chipboard StickersXOXO 6 x 8.5 Inch Paper StackGood Times Tab Stamp, Noted Vol. 3 Stamp

Happiness Captured by Amanda-jayne Baldwin – supplies used | February 2021 Kit, February 2021 Cut FilesHappy Little Moments Chipboard Stickers, Heart of Gold Wood Veneers, Tiny Acrylic HeartsGood Times Tab Stamp

An Awesome Sight traveler’s notebook spread by Jennifer McMurtrey – supplies used | February 2021 KitFebruary 2021 Cut Files, Happy Little Moments Chipboard Stickers, Teal Puffy Alphabet Stickers, Heart of Gold Wood Veneers, Tiny Acrylic HeartsXOXO 6 x 8.5 Inch Paper StackGood Times Tab Stamp, Noted Vol. 3 Stamp

July 2018 pocket page spread by Meg Gundlach – supplies used | February 2021 KitHere’s the Story PrintablesBright Die Cut TabsGood Times Tab Stamp, Noted Vol. 3 Stamp, Mini Dated Stamp

NYC Summer traveler’s notebook spread by Jody Compton – supplies used | February 2021 KitBright Die Cut TabsHappy Little Moments Chipboard Stickers, Teal Puffy Alphabet Stickers, Tiny Acrylic HeartsXOXO 6 x 8.5 Inch Paper StackLarge Jane Alphabet Stamp – Outline, Daily Tabs Stamp

Coffee Love traveler’s notebook spread by Marsha Farris – supplies used | February 2021 KitFebruary Labels, Jane Tile Alphabet Cardstock Stickers – PinkHappy Little Moments Chipboard StickersPurple Puffy Alphabet Stickers, Heart of Gold Wood VeneersXOXO 6 x 8.5 Inch Paper StackGood Times Tab Stamp, Stanley Jr. Alphabet Stamp

Day in the Life traveler’s notebook spread by Nathalie Leonelli – supplies used | February 2021 Kit, February LabelsBright Die Cut TabsHappy Little Moments Chipboard StickersGood Times Tab Stamp, Dated Stamp

We hope you’ve loved our design team projects this month. In case you missed them, check out our Volume 1 and Volume 2 posts, and stay tuned for even more creative ideas here on the blog until our March kit releases on March 10th!

An Awesome Traveler’s Notebook Spread with Marsha Farris

Hey, Elle’s Studio friends! This is Marsha, and I’m excited to be here today sharing a traveler’s notebook layout using the amazing February kit and add-ons! For this spread, I chose to combine two of my favorite things to use in my traveler’s notebook: a large photo and a pocket page!

Supplies | February 2021 Kit, Arrow Label Stickers, Happy Little Moments Chipboard Stickers, Heart of Gold Wood Veneers, XOXO 6 x 8.5 Inch Paper Stack, Good Times Tab Stamp, Jane Alphabet Stamp

I printed my photo at 4.25″ x 8.25″ to fit as a full page in the album. I altered a tag from the February Kit, trimming the stripes that matched my color scheme, and adhered it to the bottom of the photo. Then, I created my title by combining a chipboard word from the Happy Little Moments Chipboard Stickers and a stamped word using the Jane Alphabet Stamp and blue ink.  I chose to keep this page really simple to allow the large photo of my son to shine.

For the left side of the spread, I selected several papers from the XOXO Paper Stack and trimmed them into 2″ squares to fill the pockets. I printed two additional photos at the same size to also use in the pockets. Next, I chose chipboard pieces from the Happy Little Moments Chipboard Stickers and a wood veneer piece from the Heart of Gold Wood Veneers to embellish the squares. The rainbow chipboard stickers are my absolute favorite embellishments this month, and I couldn’t resist using a few of them on the layout! The Good Times Tab Stamp was perfect for adding a bit of extra interest to some of the squares.

I also created two flip-ups to hold the journaling.  I used the Arrow Label Stickers and mini staples to create little tabs for opening the flips. Arrow die cuts from the February Kit added a pop of color to the inside of the flips.

I did a bit more stamping using the Good Times Tab Stamp and blue ink. To finish off the spread, I added a few chipboard stars from the Happy Little Moments Chipboard Stickers around the layout, adding the perfect little pop of yellow to the pages! 

I hope you have found some inspiration for using the February kit and add-ons in your traveler’s notebook. Thanks so much for stopping by today!

Do you love using our products in your traveler’s notebook, too? Share them with us by joining and posting in our Elle’s Studio Facebook Group, or by using the #EllesStudio hashtag on Instagram!

Listing Good Times with Meg Gundlach

Hi friends, Meg here! I’m back this month with another Disney-tastic spread because that project is a bottomless well of fun ideas. We may still only be in February, but the bright fun colors and all the arrow options in this release made me reach straight for the travel pages.  

Supplies | February 2021 Kit, February 2021 Cut Files, Here’s the Story Printables, February LabelsBright Die Cut TabsHappy Little Moments Chipboard StickersPurple Puffy Alphabet Stickers, XOXO 6 x 8.5 Inch Paper StackGood Times Tab Stamp

Choosing photos for a travel album can be overwhelming, but it is important to remember that there are absolutely no rules. Like most things in scrapbooking, I mix and match my approach to this. Sometimes I’ll have a full spread devoted to a single ride. Sometimes I combine multiple photo themes into one spread. For EPCOT’s World Showcase I dedicated several pages to individual countries and I have a couple ‘round-up’ pages to hold the miscellaneous pics.  

There were several countries of the World Showcase that I chose to print only one or two photos from. It would be totally fine to not individually identify them. However, I love sharing all sorts of little details in my travel albums even when they don’t need an entire journal tag. There is no better way to keep this simple than to number your photos and make a list. I’m totally obsessed with basically all parts of the new Good Times Tab Stamp, but those numbers are going to be a reoccurring theme for sure.  

Elle creates all sorts of products that work with this concept and I threw all of them at this page. The arrow list tag from the February 2021 Kit was the perfect starting point. Not only could I pair the outline and filled numbers from the Good Times Stamp, but I also color-coordinated the arrows on the tag with the matching February Labels. If you look closely you will see that Italy is marked as #1 on both the list and the photo AND I used the green arrow label to match the green arrow on the tag. So on and so forth across the rest of the Pavilions.    

Another huge part of a Disney album are character meets, but sometimes you just spot someone their natural habitat. We didn’t have time to stop and chat with Alice while we blasted through the UK— we were late for a very important date—but I did get this photo. This spread was the perfect home for a completely random pic and she fits right in.  

It’s really easy for round-up pages to get busy with all the different photos and products. A favorite technique is to include elements cut from vellum for subtle embellishments. I loved this rainbow tag from the February 2021 Cut Files, but I wanted to keep the focus on the shape of it and not on a paper design, so vellum was the perfect happy medium. The tag is only stapled on at the top, but the pocket keeps it more or less in place. 

And there you have it, another go-to approach for when you feel overwhelmed by the number of photos you have to choose from! In case you need to hear it today, I’m here to remind you that recording your travel memories is supposed to be fun! I know I said there were absolutely no rules, but that is the only rule. So tell me, are you a ‘print them all’ or a ‘just the highlights, thanks’ kind of travel scrapper? 

How are you using the Good Times Stamp to record your best moments!? Share with us in our Elle’s Studio Facebook Group or on Instagram using the hashtag #EllesStudio!