Starting with a Sketch with Amanda-jayne Baldwin!

We love how easy it can be to create a new layout with a sketch, and we’ve got just the class for you if you love working with sketches, too! Our latest From Sketch To Finish Vol. 4 Digital Class is our biggest sketch class yet, featuring 50 sketches, 10 talented contributors and 20 inspiring layouts to get your ready to create in a time-crunch. Today, design team member Amanda-jayne Baldwin is with us to share how she used one of our class sketches to create a beautiful layout about being thankful. Let’s take a look at what she created:
 
Hi friends! It’s Amanda here, and boy-oh-boy was I excited to dive into the all new From Sketch To Finish Vol. 4 Digital Class! Like previous volumes, this edition is jam packed full of fabulous sketches and inspiration to ignite your creativity and take the tricky decision-making out of the design process, not to mention there’s a ton of gorgeous sample layouts from a very talented array of paper artists! Trust me when I say, you need this class in your digital library!
 
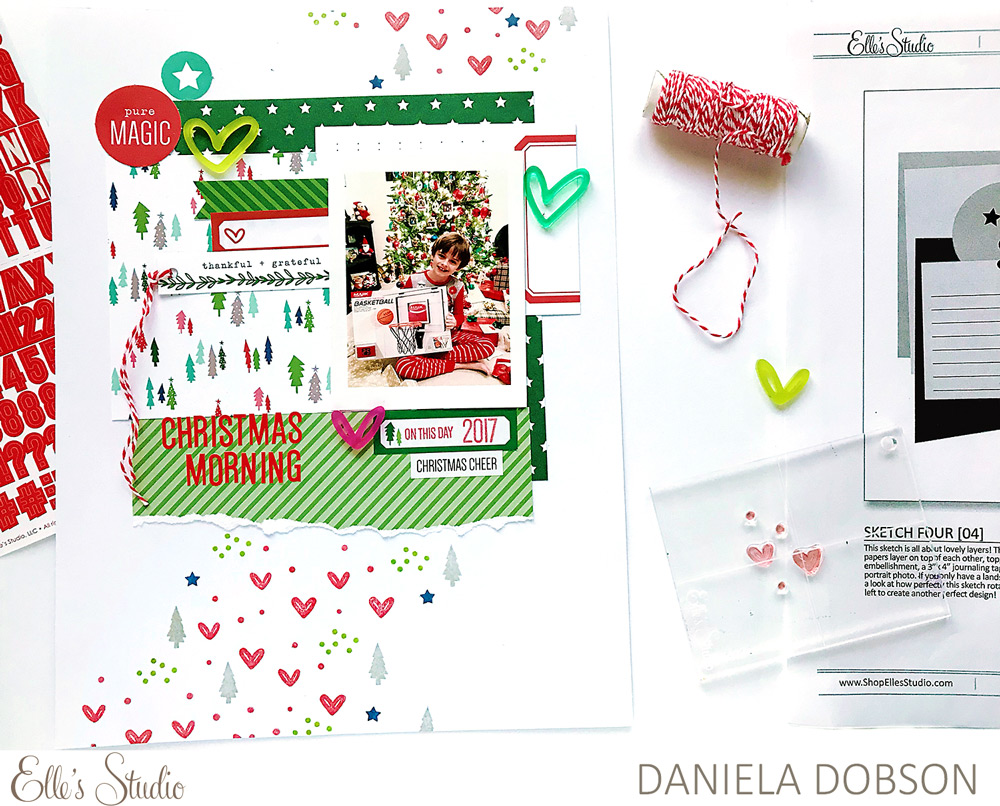
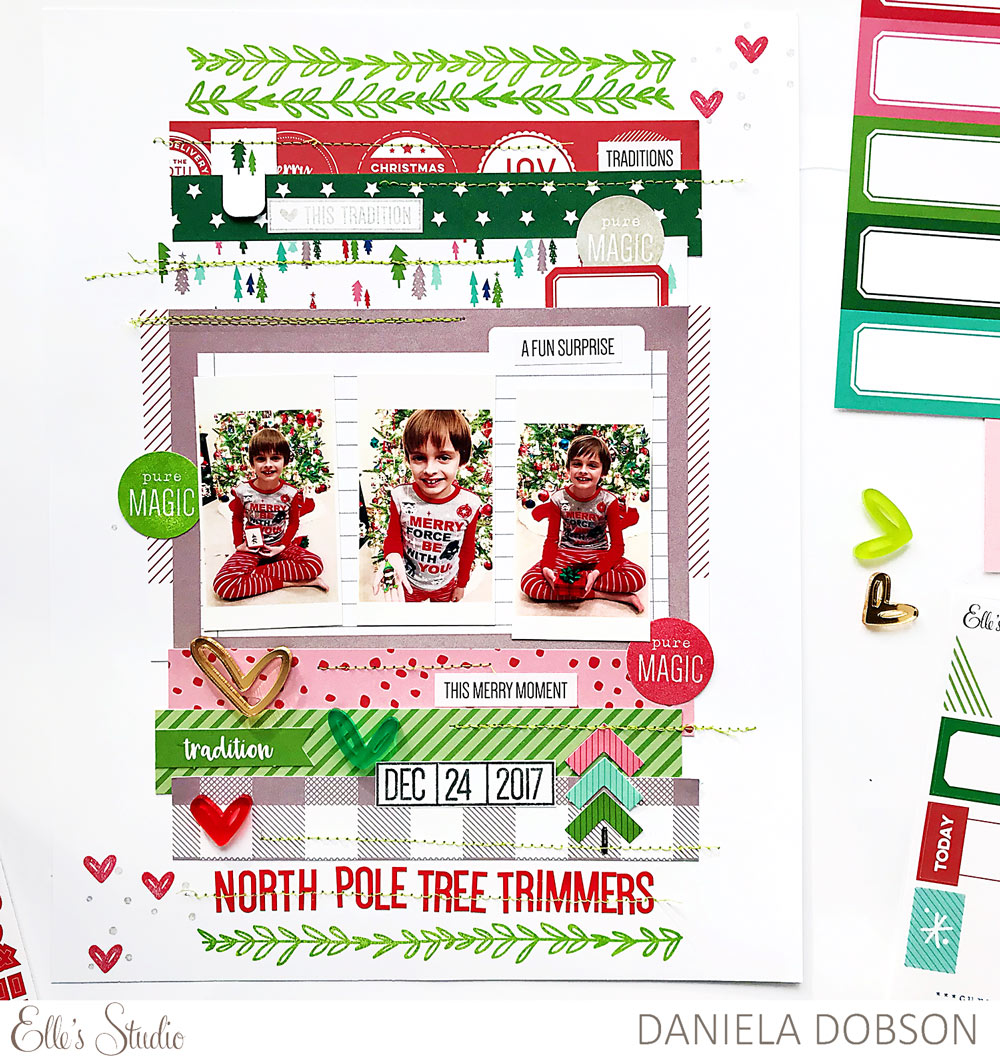
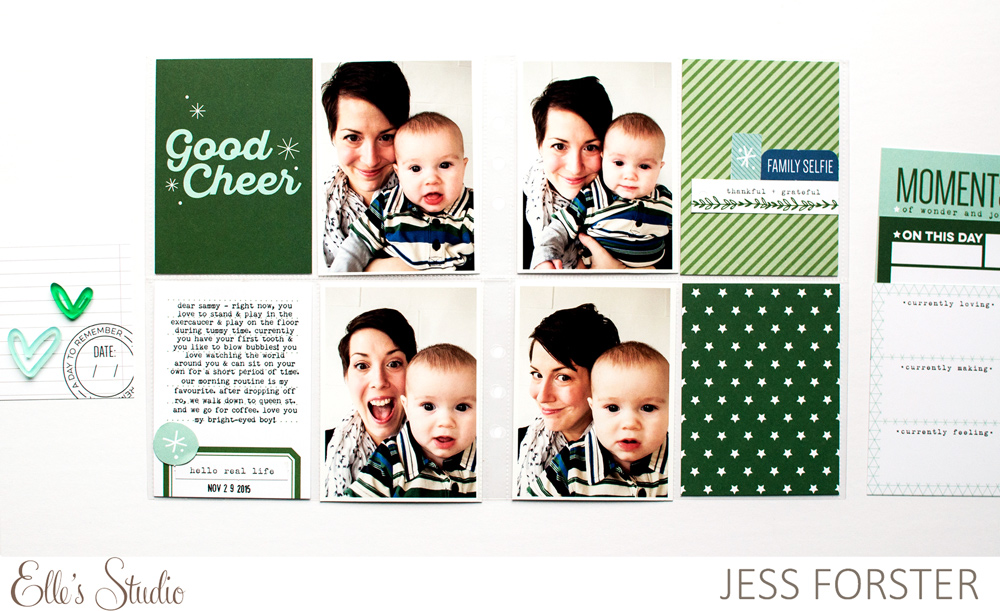
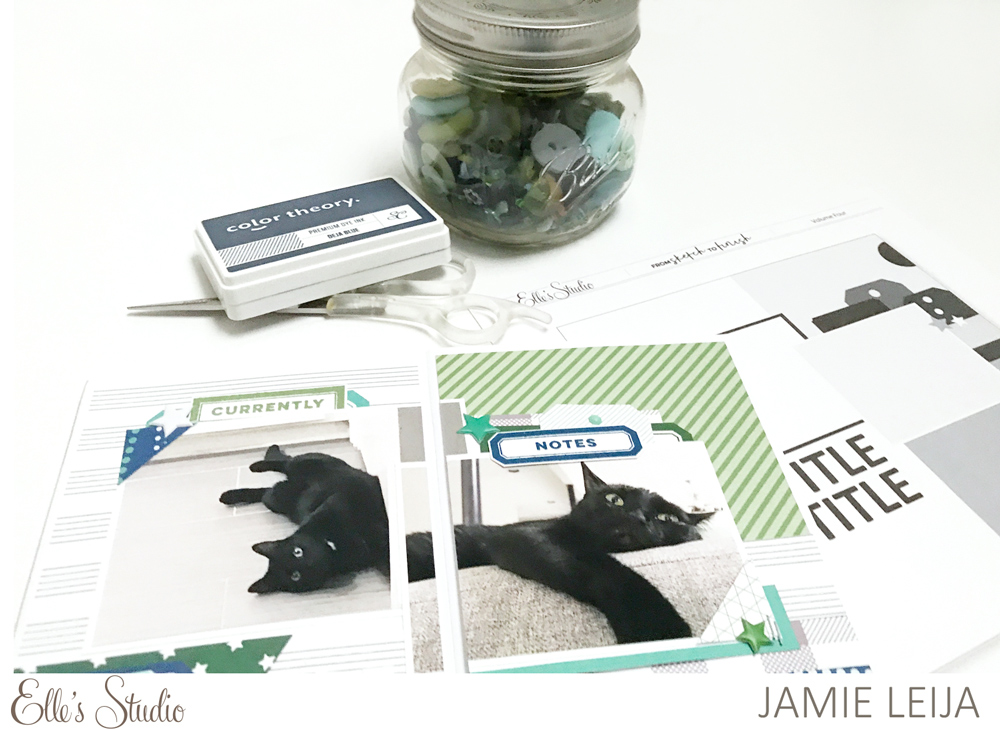
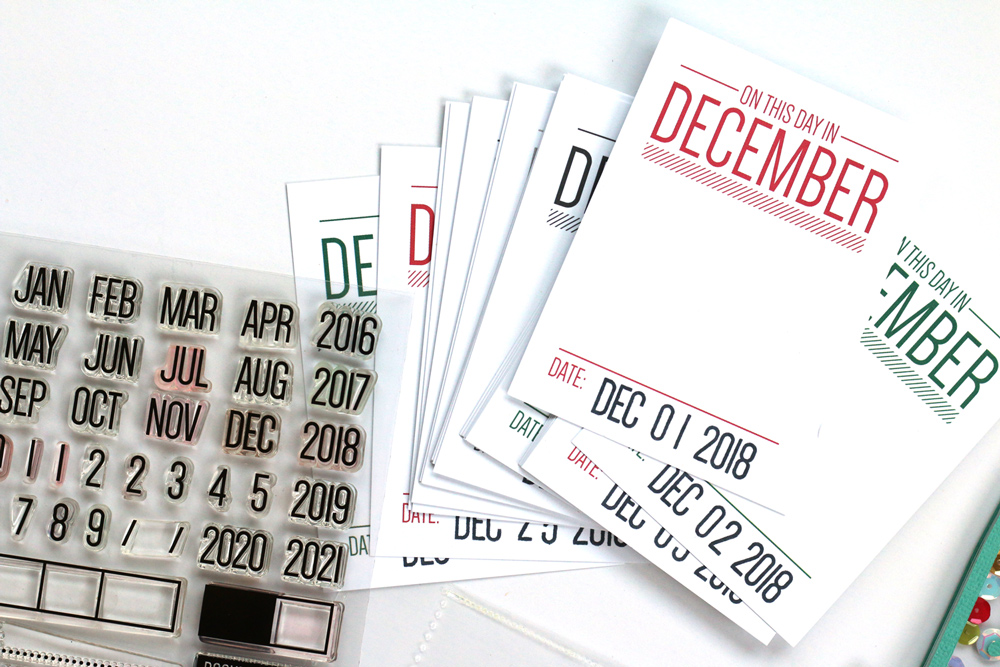
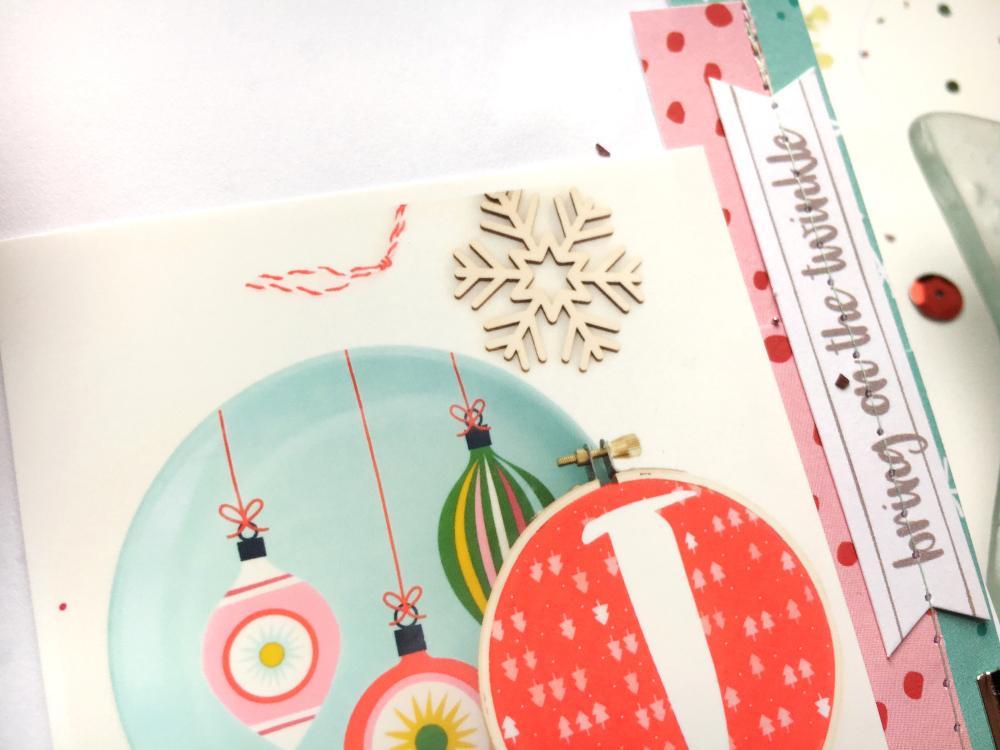
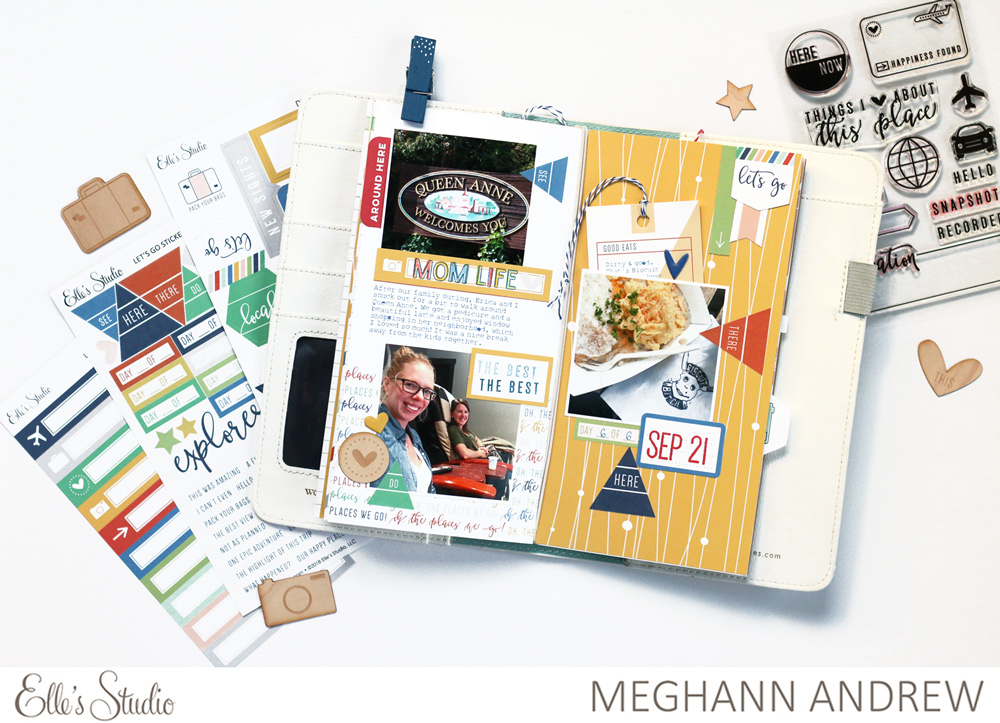
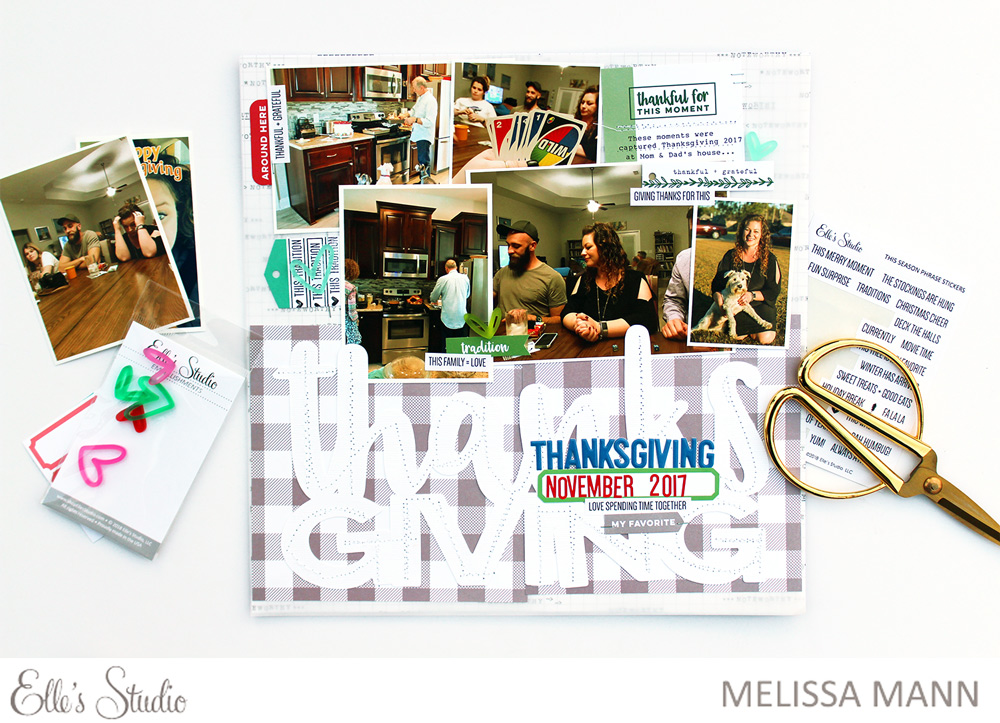
It’s no secret that I LOVE a good sketch, it’s kinda like an easy Sunday morning! Simply print out your fave sketch from the PDF, and go! Here’s my take on Sketch 20 with our current November Kit and add-ons:


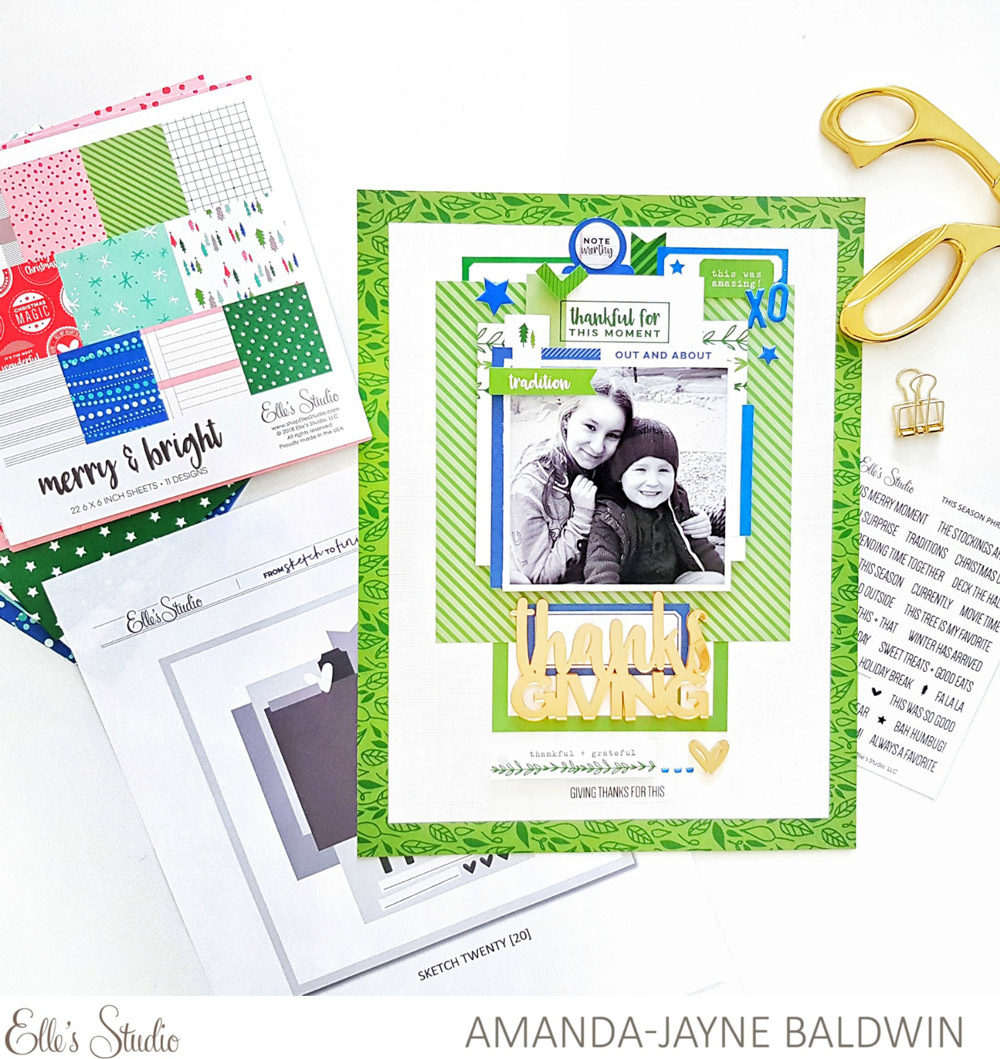
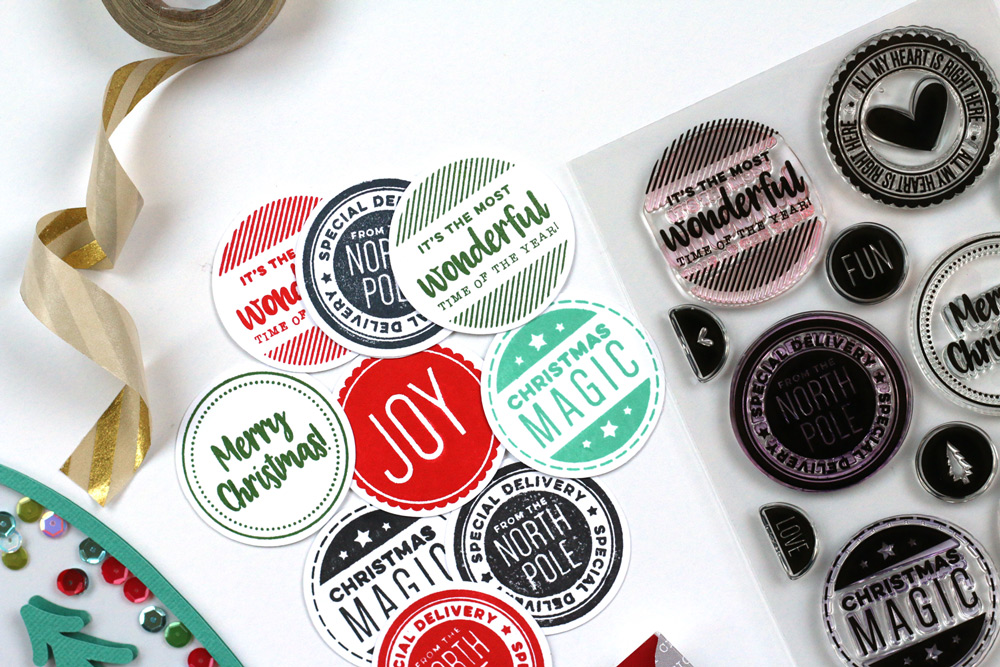
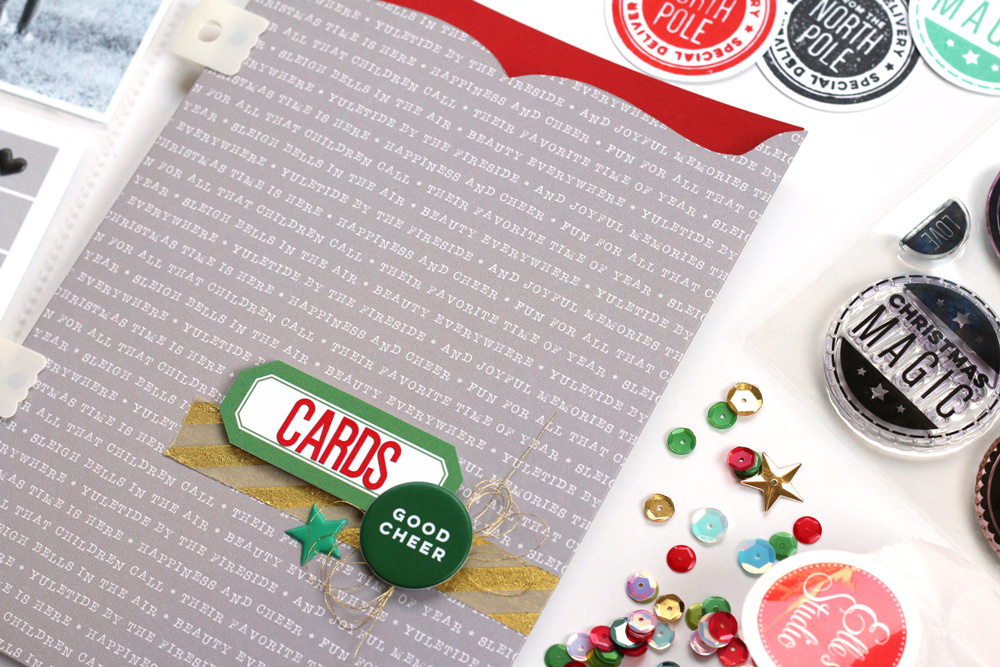
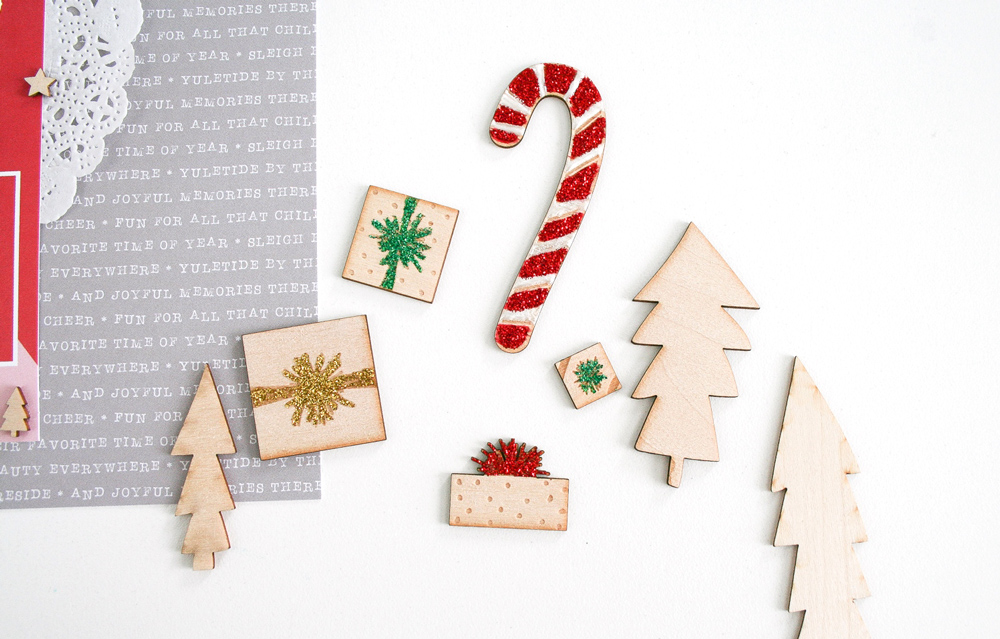
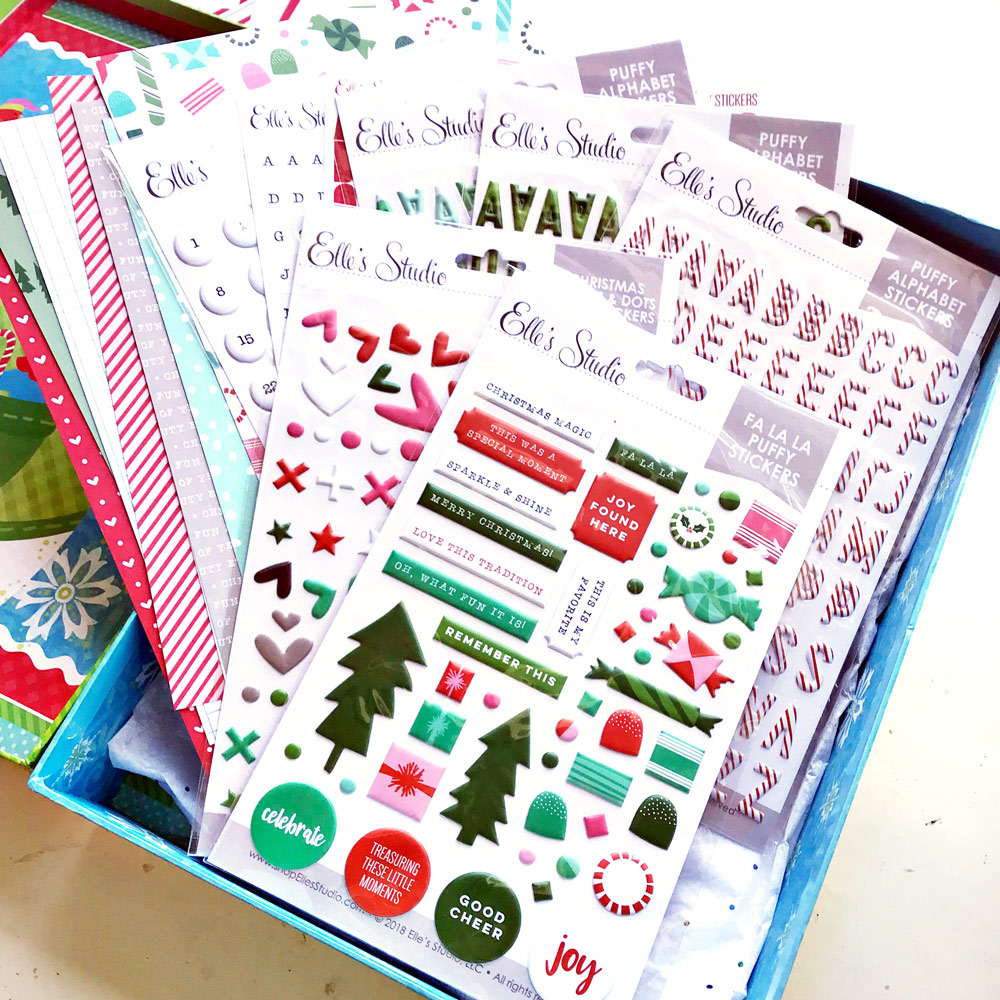
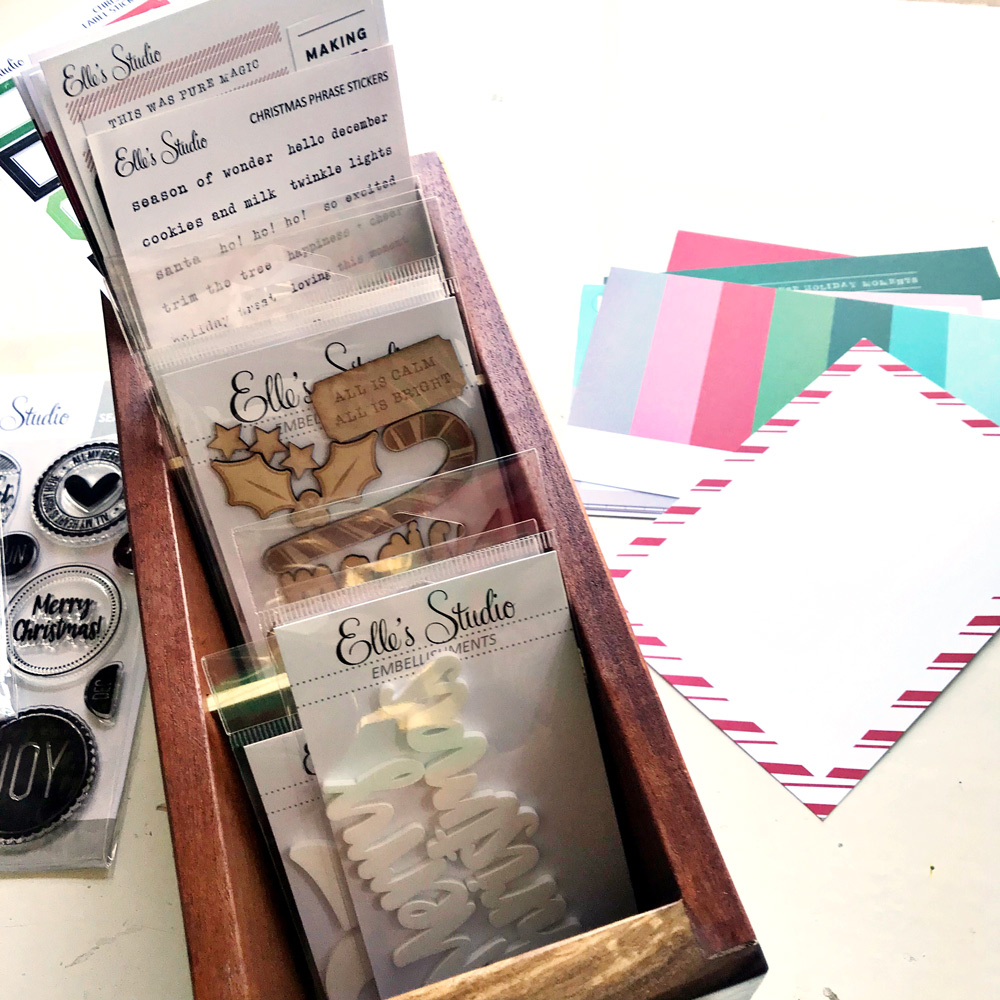
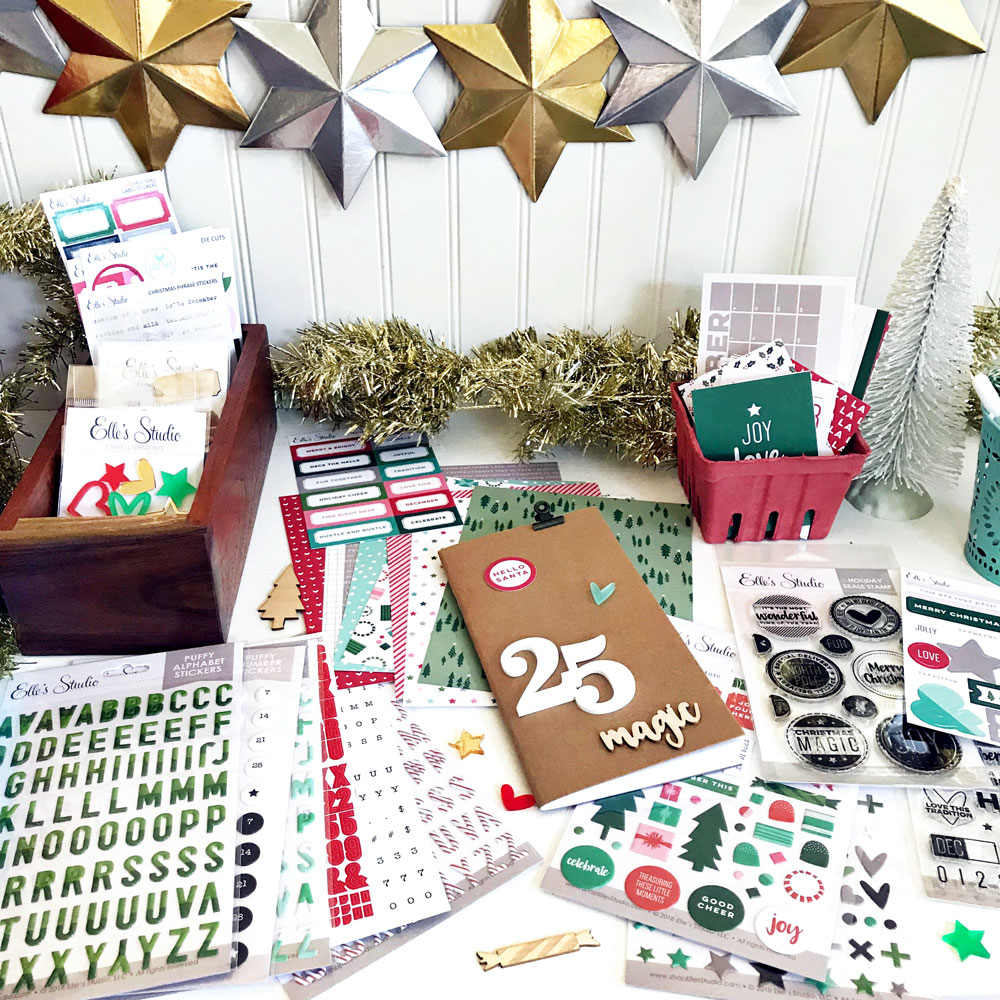
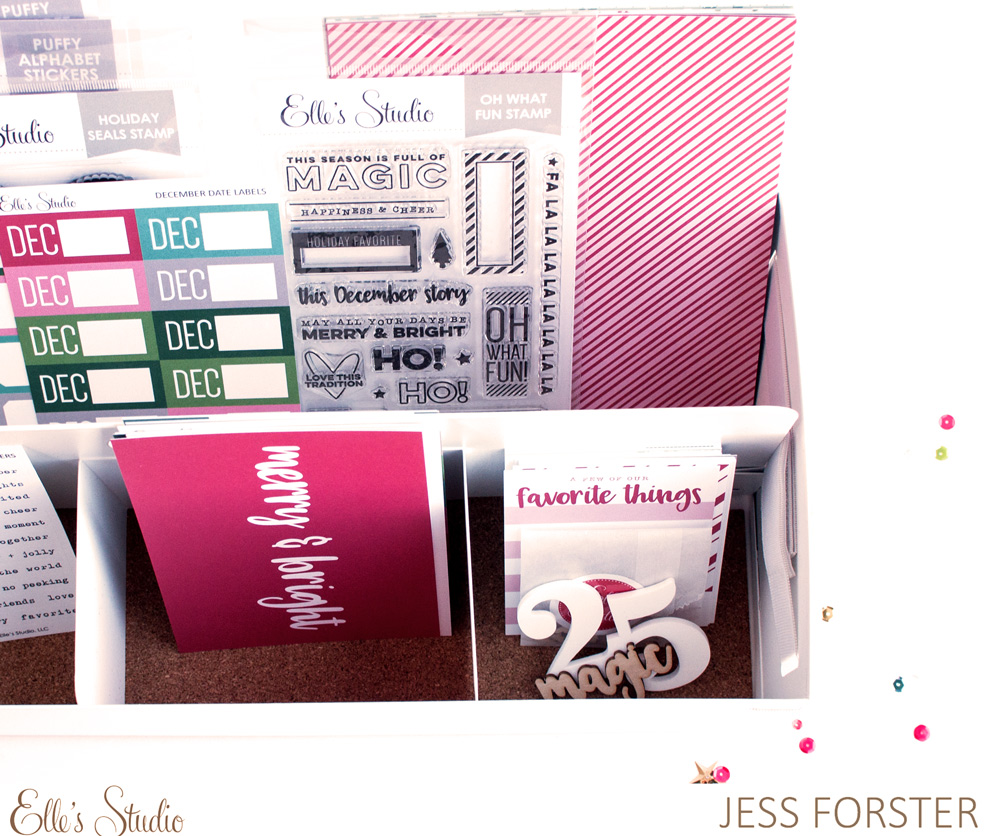
Supplies | November 2018 Kit, November Labels, This Season Phrase StickersNavy Puffy Alphabet Stickers, Thanksgiving Acrylic, Christmas Hand Drawn Acrylic Hearts, Stars and Dots Puffy Stickers, Merry and Bright 6 x 6 Paper Stack, Noteworthy – Epoxy Stickers, Family Fun – 12 x 12 paper collection
 
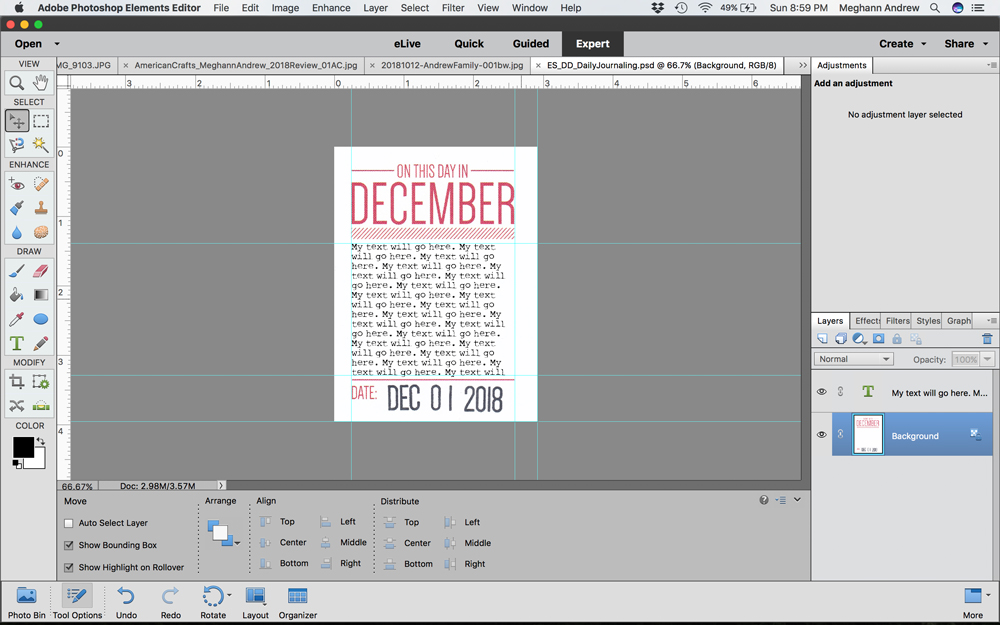
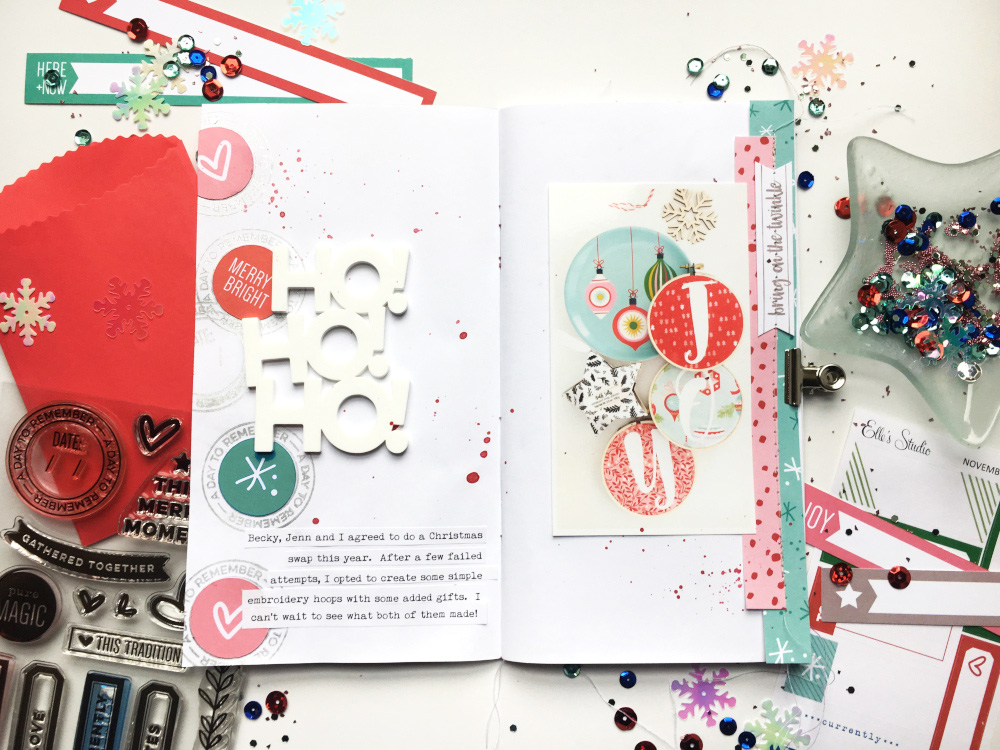
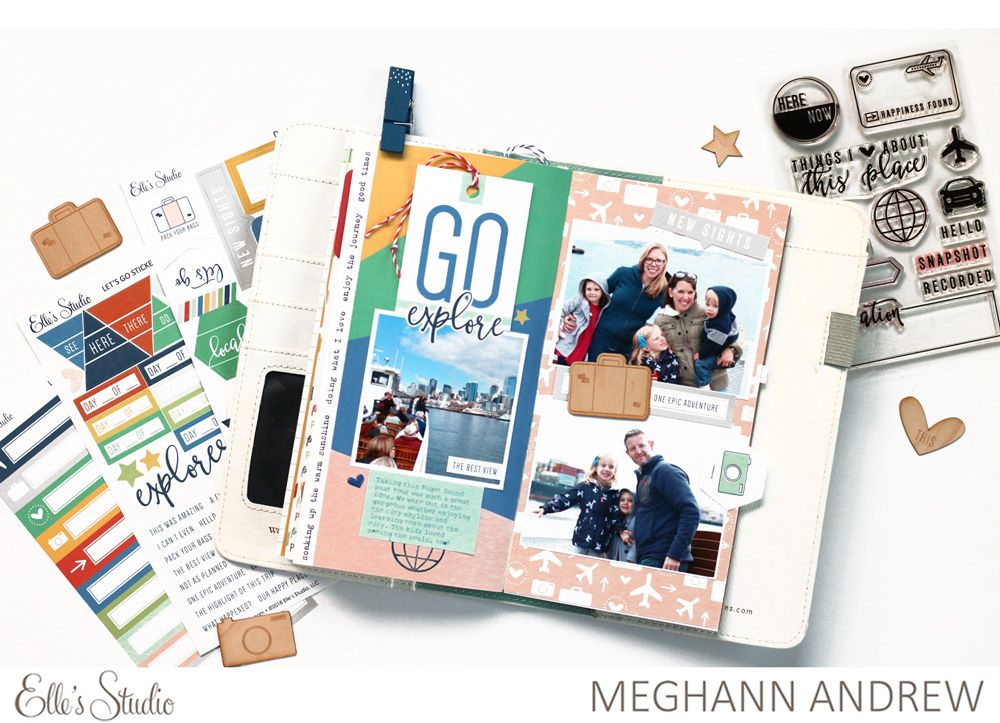
So beautiful! I altered the sketch from it’s 12″ x 12″ size to suit my 8.5″ x 11″ layout, and as such changed the dimensions of the layers beneath the photo too! Here’s a better look for you:


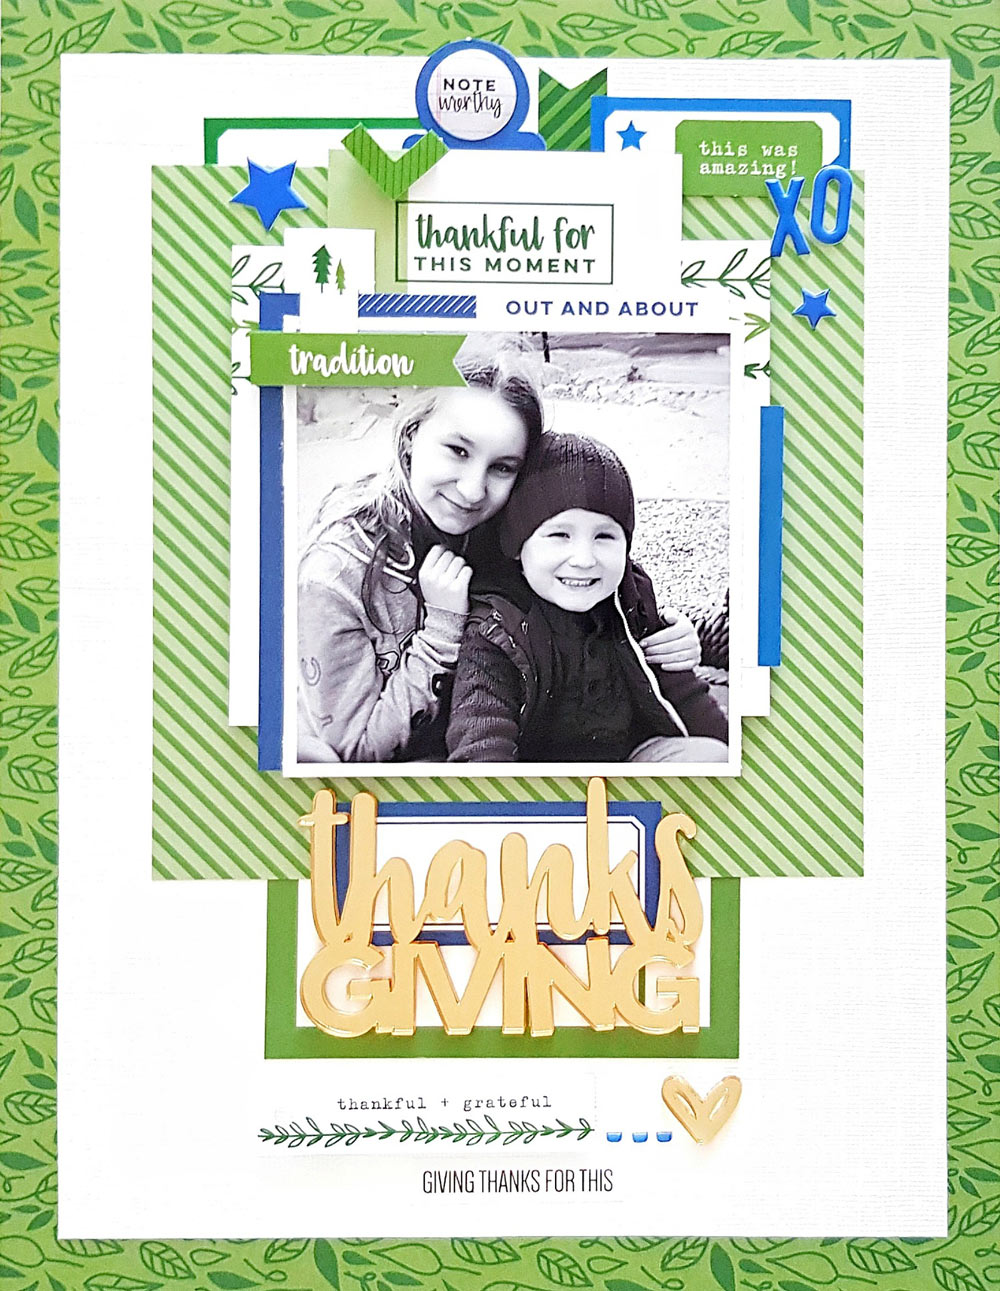
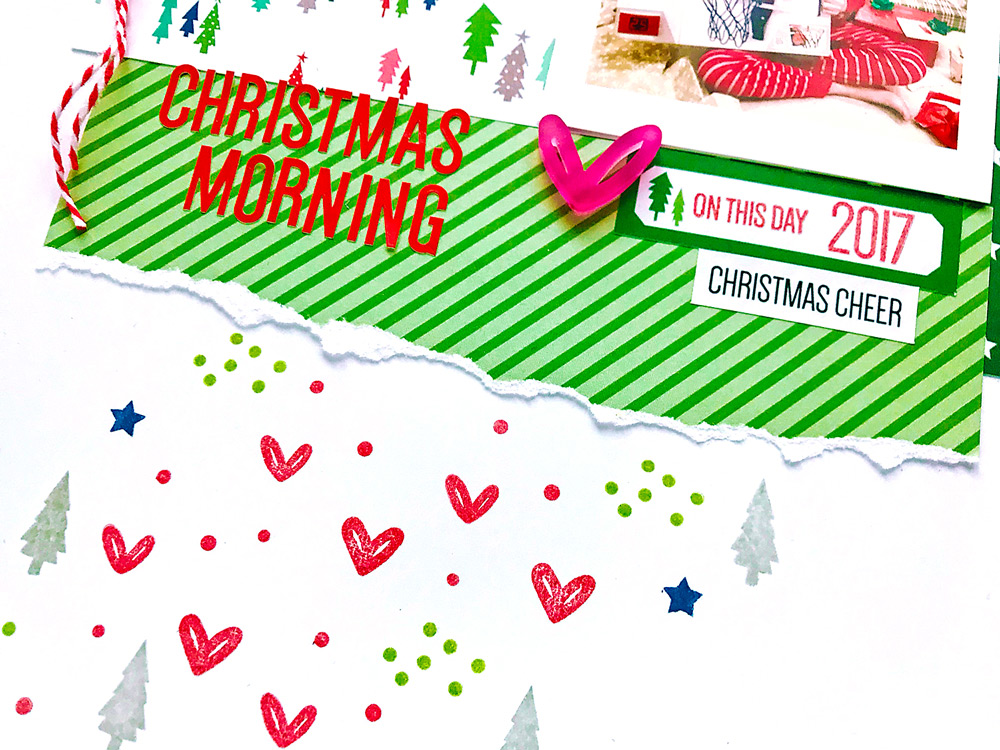
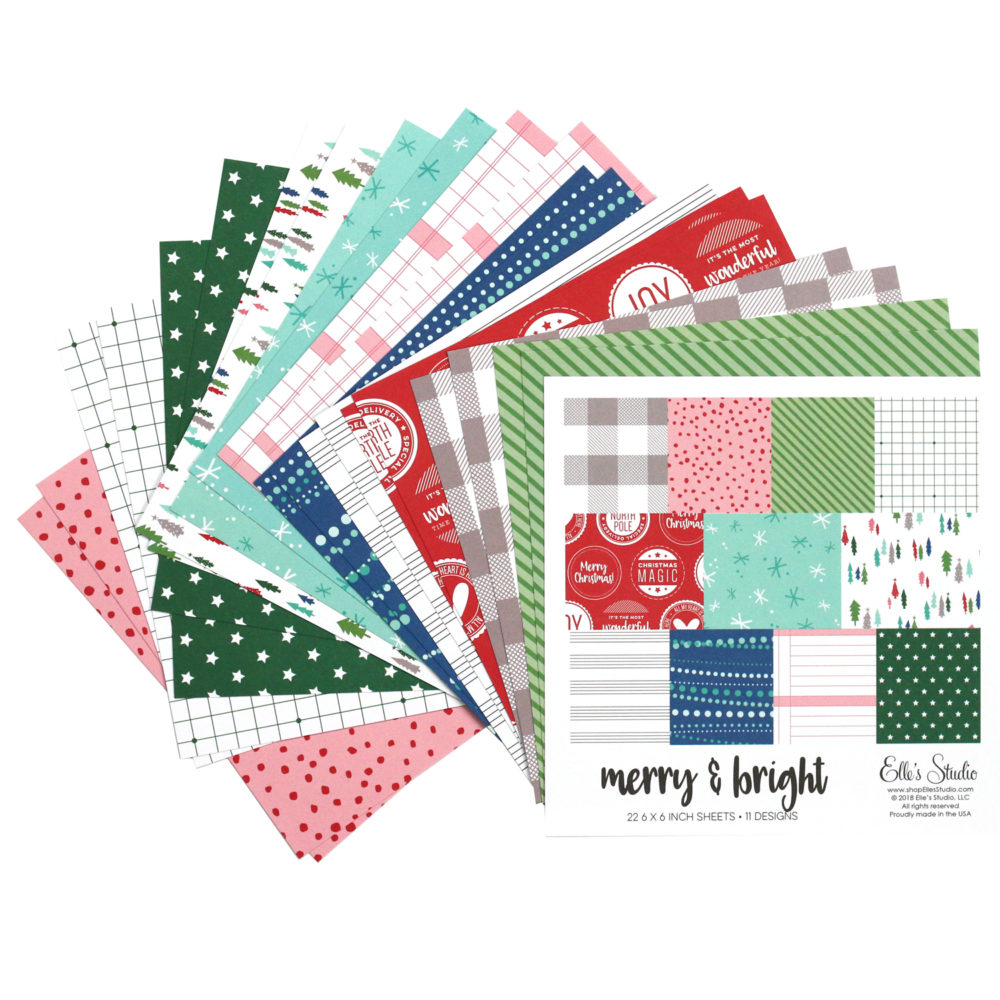
With a square photo, and the new Merry and Bright 6 x 6 Paper Stack being oh-so awesome, it seemed a no brainer to replace the layers beneath the photo with a 6″ inch pattern paper square. I used the beautiful green leaves pattern paper from the Family Fun 12″ x 12″ Paper Collection as my layout base, and draw on both the colors and autumnal feel of this paper to connect with my photograph, and the thankful/togetherness theme.


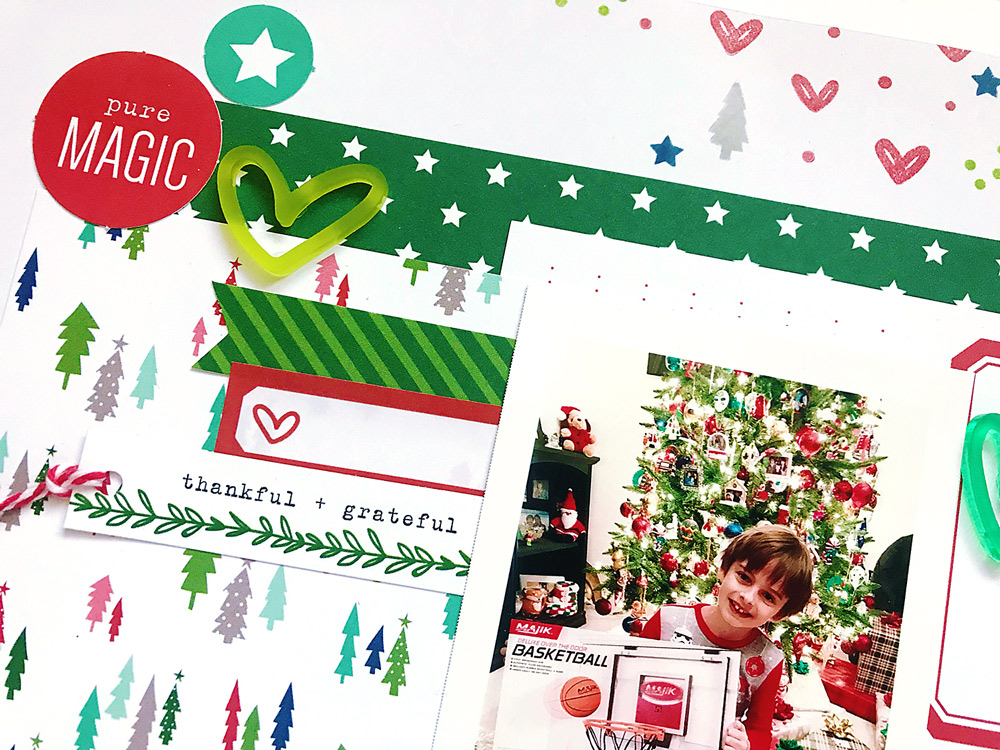
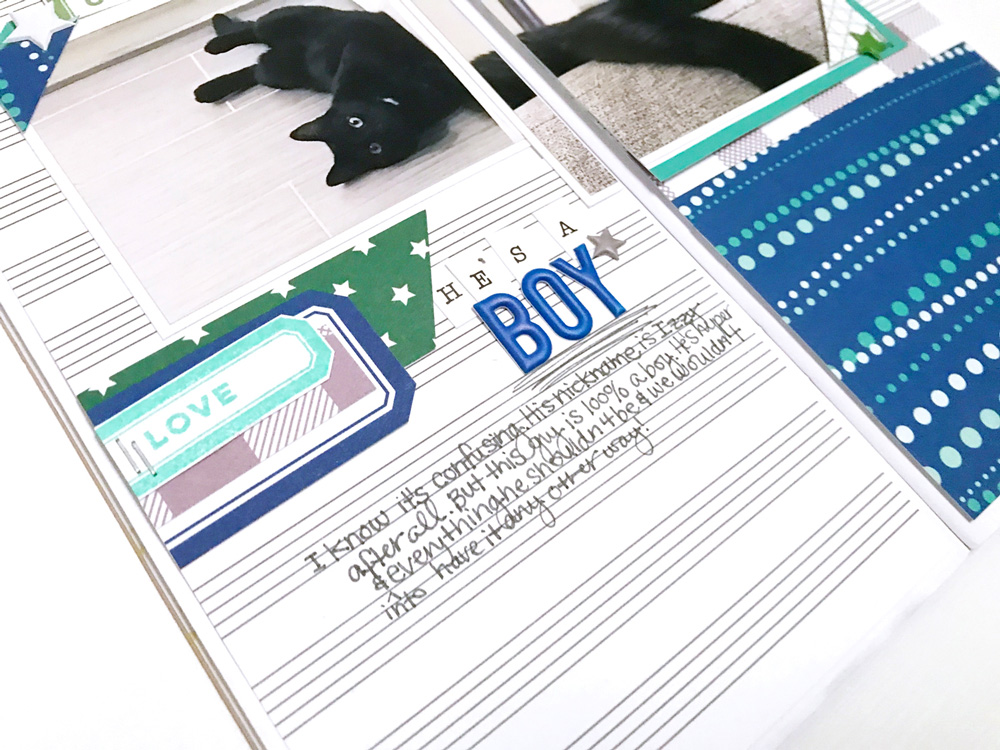
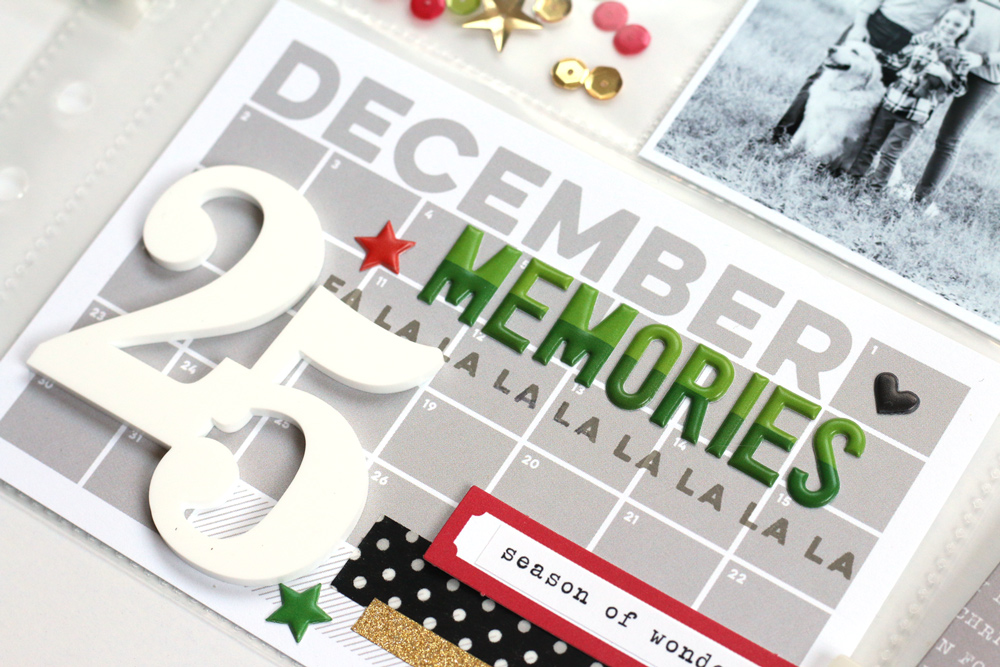
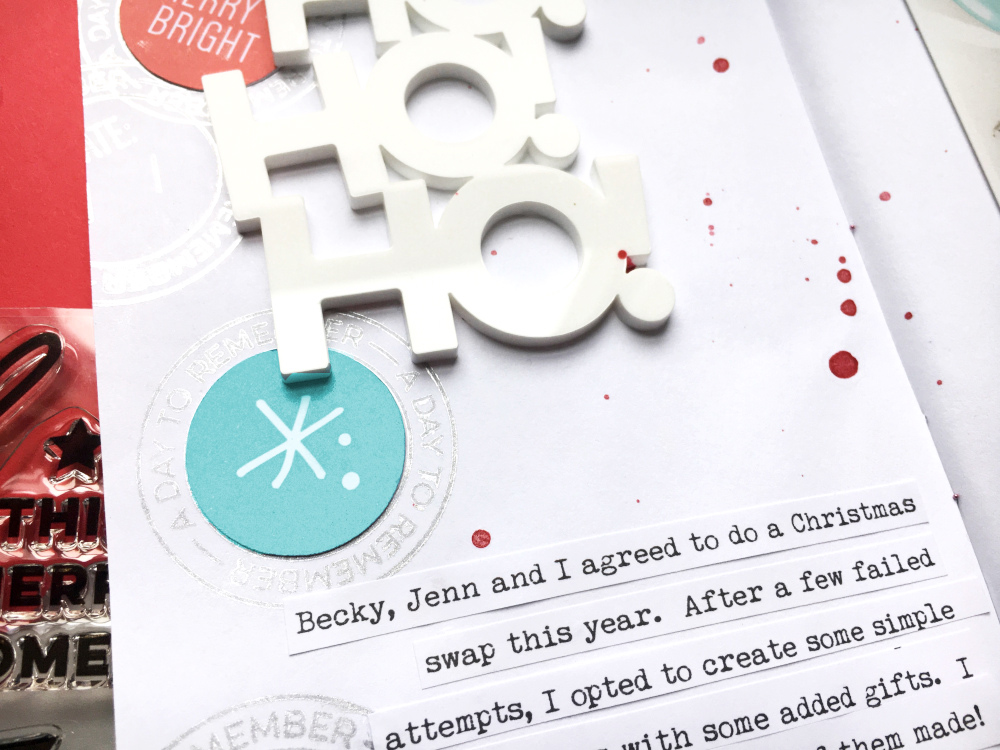
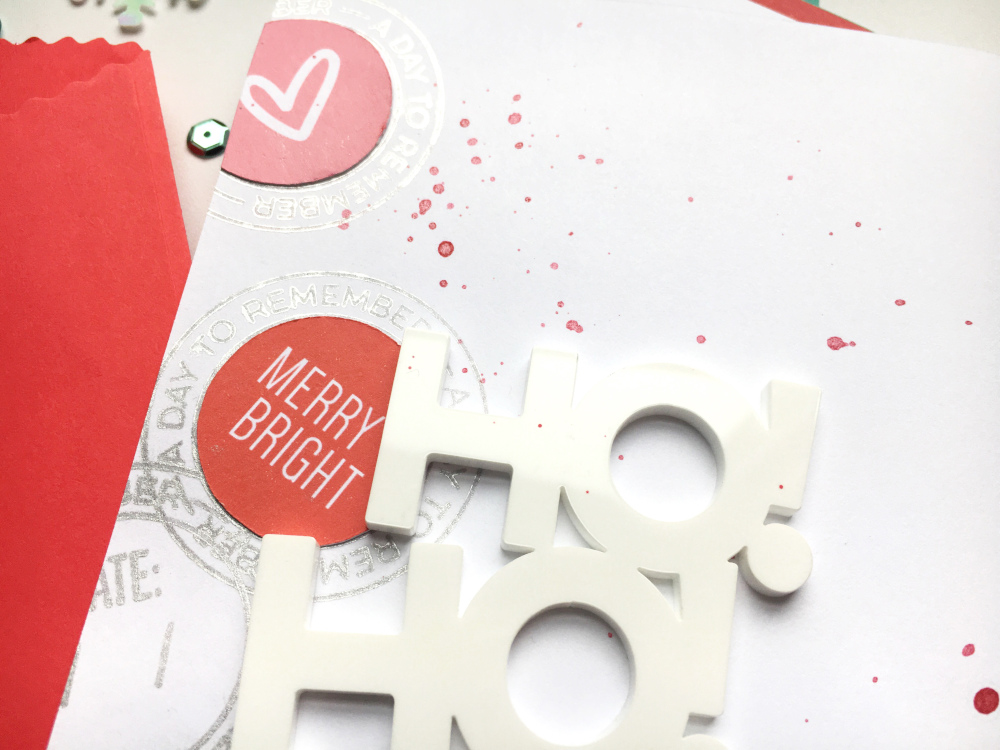
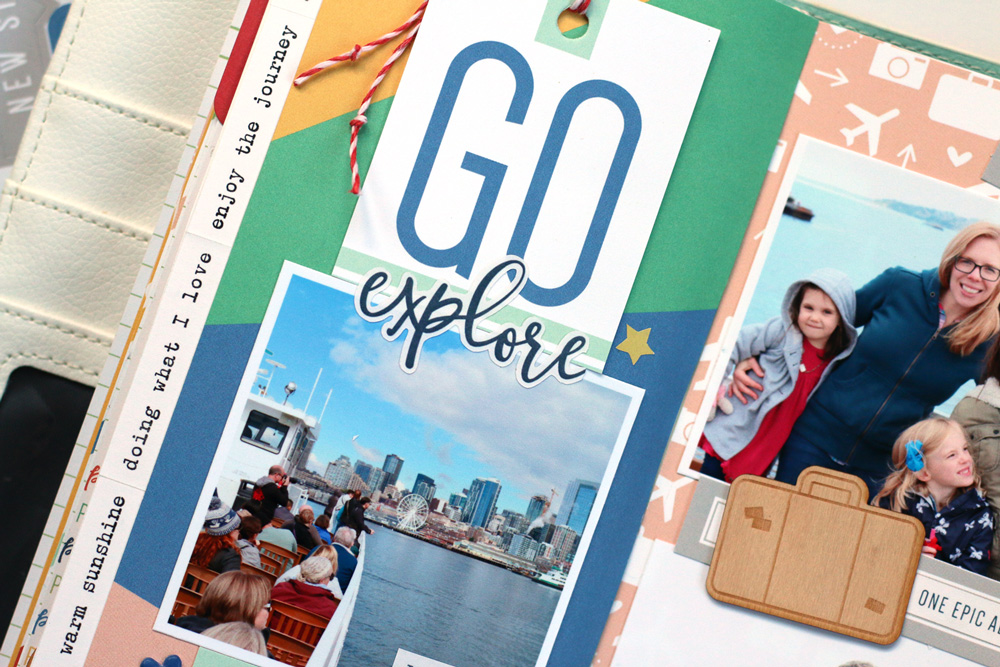
How amazing is that gold mirror Thanksgiving Acrylic?! It creates such a striking title and statement piece for any of your memory keeping projects! I love that despite being so shiny, it doesn’t draw your eye away from my special photograph. This is ultimately due to the clever title placement in this sketch design—see what I mean about taking the ‘tricky’ out of the process? Love it!


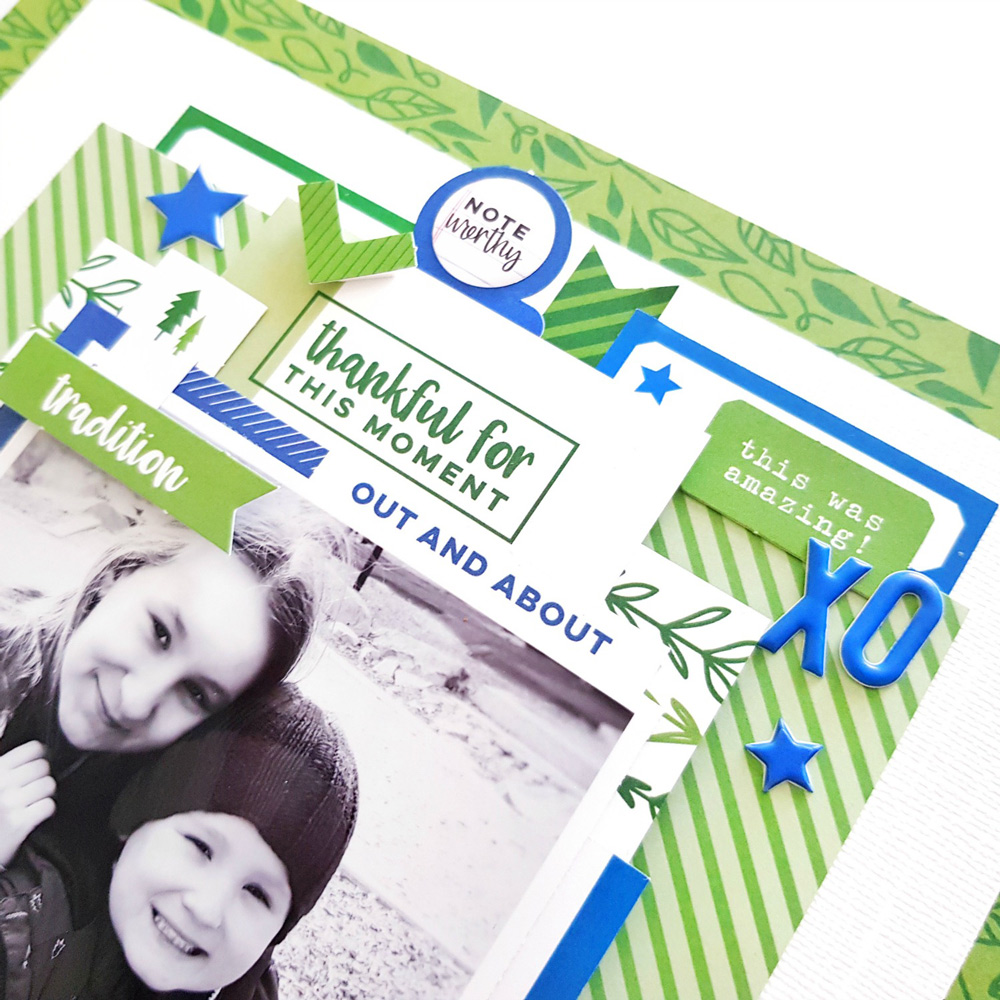
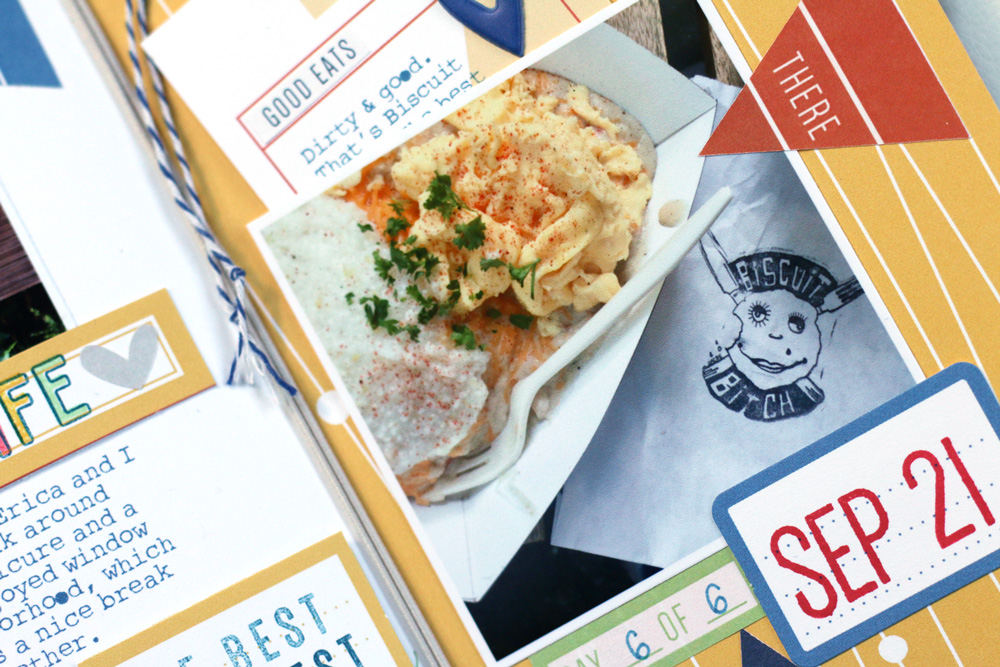
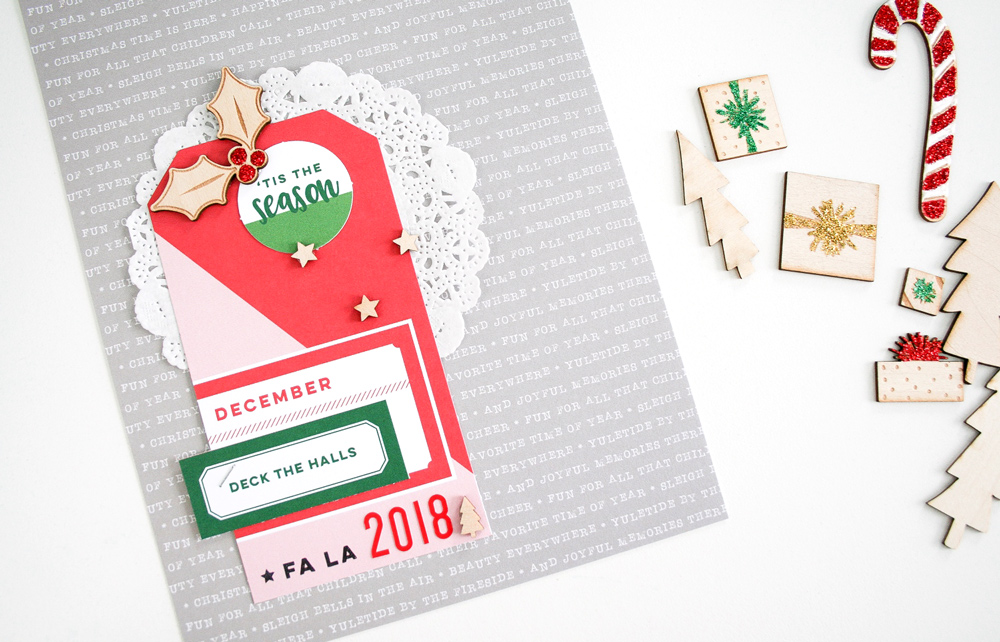
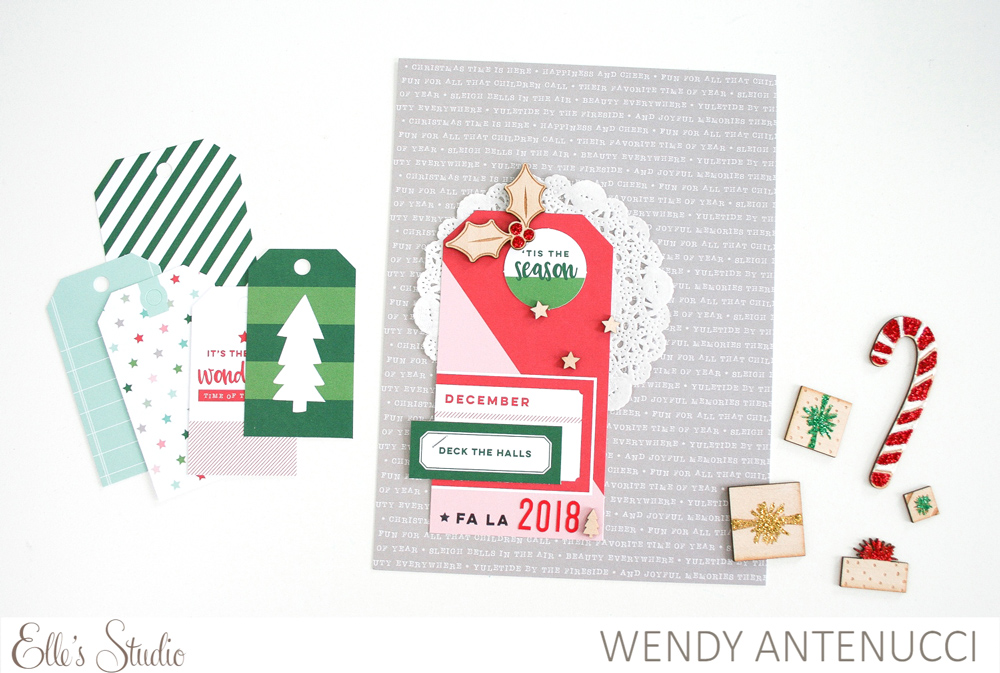
The top section of my photo cluster features lots of tucked in die cuts, labels and a few of the exclusive 3″ x 4″ tags from the November 2018 Kit. The pops of blue in this month’s kit coordinate beautifully with all the greens, and the Navy Puffy Alphabet Stickers are a definite fave of mine! Sunday morning scrapbooking never looked so good!
 
Print a sketch, add a photo and your fave Elle’s Studio products and you’ve got a recipe for paper crafting perfection! I hope I have inspired you to check out this fabulous digital class, ! Thanks for joining me today!


Grab your own digital copy of From Sketch To Finish Vol. 4 to create your own lovely layout from sketch 20, just like Amanda-jayne did!
 

Inspired by a sketch with Daniela Dobson

Our design team is still being inspired by our latest digital download class, From Sketch To Finish Vol. 4. With 50 sketches included in this class, there is no shortage on the inspiration you can gain from this class! Let’s hear how Daniela Dobson used one of our sketches to create something fabulous:
 
Welcome to the Elle’s Studio blog today! It’s Daniela here, and I’ve been inspired by sketch four [04] from the new class, From Sketch To Finish Vol. 4, to create a layout using the November 2018 kit and extras.


Supplies | From Sketch To Finish Vol 4November 2018 KitNovember Label StickersThis Season Phrase StickersJane Alphabet Stickers – RedChristmas Hand Drawn Acrylic HeartsMerry and Bright 6 x 6 Paper StackMerry Moment StampOh What Fun StampMini Dated Stamp
 
I created lots of layers in my layout using patterned paper, tags and embellishments, so this sketch with lots of layers was calling my name! I love the placement of the photo on the right of the layout, and I used a smaller version of the photo on my 8-1/2″ x 11″ page. I layered my photo over patterned paper from the Merry and Bright 6 x 6 Paper Stack and journaling tags from the November 2018 Kit.


I kept the clusters just like in the sketch; adding tags, circle die cuts and acrylic hearts. I moved my title to the bottom, since there wasn’t much room on the right side of the photo and I loved introducing the pop of red on the bottom of my page to complete my visual triangle.


I am a huge fan of those cute trees in the 4″ x 6″ journaling tag from the November Kit, so I created my own little pattern using the Merry Moment and Oh What Fun Stamp in the same colors as in the layout.
 
Sketches are a great way to start creating. Follow them exactly or give them your own spin! We would love to see what you create from these sketches. Use the hashtag #EllesStudio and mention our From Sketch To Finish Vol. 4 class when sharing on Instagram for a chance to be featured on our feed and here on our blog!


Be sure to download your copy of From Sketch To Finish Vol. 4 before the rush of the holidays hit, so that you can create quick and beautiful pages using our carefully designed sketches!
 

How to Use Your Merry and Bright Paper Stack!

One of our favorite products that released this month is the Merry and Bright 6″ x 6″ Paper Stack!


With a variety of patterns and colors included in this happy stack, your creative options are endless! Just in case you’ve not had a chance to create with your paper stack yet, or you’ve been on the fence about whether you should pick one up from the shop, here are a few ways that you can use these papers on your next project:


1. Cut strips of varying widths to create a focal column of pattern and color on your layout, the way that Daniela Dobson did here. We love all of the elements from our November Kit and add-ons that she used to embellish the patterns, too!


2. Create little doors to hide fun surprises, photos or journaling, like guest designer Kira Ness did on her Christmas activity advent calendar. We love that she created this project using only the Merry and Bright 6 x 6 Paper Stack and Jane Alphabet Stickers along with cardstock!


3. Create lovely layers on cards, like Melissa Mann did in this blog post. A bit of machine stitching and a Large Wood Veneer Snow Globe were all these cards needed to send a darling greeting during the holidays!


4. Fussy cut the seal circles to use as embellishment, like Heather Leopard did on this layout! We also love that her background is made completely from the Merry and Bright 6 x 6 Paper Stack!


5. Create with a monochromatic color scheme, like Jess Forster did on this pocket page spread. She used both of the green patterns from the Merry and Bright 6 x 6 Paper Stack, pairing them with green elements from the November 2018 Kit and Labeled Journaling Tags, and the result could not be more stunning!
 
We can’t wait to see how you use your Merry and Bright 6″ x 6″ Paper Stack! Share your creations on Instagram using the hashtag #EllesStudio to be entered to win a gift card to our shop, and be featured here on our blog and Instagram account!

Sketch Inspired with Jamie Leija

Our From Sketch to Finish Vol. 4 Class includes 50 sketches for 12″ x 12″ layouts, but what if you’re a traveler’s notebook scrapbooker, or prefer 8-1/2″ x 11″? As Jamie Leija is showing us today, it’s not a problem to interpret the sketch into any size you wish to create. Let’s take a look at her latest project:
 
Hiya! It’s Jamie, and today I’m sharing the traveler’s notebook spread I created using one of the extra sketches in From Sketch to Finish Vol. 4 Digital Class. This is based off of sketch number 35. Looking at how the sketch was divided down the middle into two sections, well that just made me think it needed to be turned into a traveler’s notebook spread!


Supplies | From Sketch to Finish Vol. 4 Class, November 2018 Kit, November Labels, Hazel Alphabet Stickers – WhiteNavy Puffy Alphabet StickersChristmas Shapes and Dots Puffy Stickers, Merry and Bright 6 x 6 Paper Stack,Merry Moment Stamp
 
I used several sheets of patterned paper from the Merry and Bright 6 x 6 Paper Stack. Yes, this is a selection of Christmas paper, but it is versatile enough to work on just about any story you want to tell! This page is a clarifying story about my cat. Even though his nickname is Izzy, he’s actually a boy cat!


I wanted to make sure this page ended up being more masculine, so I pulled out blues and greens and sprinkled in some black and white and gray. The sketch also divided up the right side of the spread into two halves, so that made it easy to add two different patterns. I didn’t realize until now that I gravitated towards the lined paper for this page.
 
Embellishing was more or less dictated by the sketch and since this is in a traveler’s notebook, I opted for flat embellishments like die cuts, labels and stamped images. The only dimensional elements are the Christmas Shapes and Dots Puffy Stickers and staples, but they’re still flat enough to work.


Using the Merry Moment Stamp, I stamped a few of the labels onto white cardstock using teal, green and blue ink and cut them out to add to my page. I like the extra text this adds to the page. For my title, I combined the Navy Puffy Alphabet Stickers and white Hazel Alphabet Stickers.


Don’t forget that even though the sketch may be 12″ x 12″, it can easily be adapted to whatever format you’re working in!


Be sure to download your copy of From Sketch to Finish Vol. 4 today! In this digital PDF download, you’ll receive 50 fun sketches and 20 layout designs from 10 amazing contributors to get you inspired to create! We know that it will help you craft your next favorite page! 

Document December Prep with Meghann Andrew + A Free Download!

Today is the final day that we’ll be sharing inspiration and ideas for prepping your Document December project with you, but if you’re not the pre-planning type, don’t worry! We’ll have finished project inspiration from our design team each weekend during the month of December, so there’s plenty more Document December projects to come!
 
Today, Meghann Andrew is with us to share how she’s prepping her album, and at the end of the post, we have a special treat—a downloadable photo and journaling prompt list to help you make this project a successful one! Let’s take a look at what Meghann has to share with us:


Hello! It’s Meghann here with you, and I have been a happy little elf this month, squirreled away in my creative space prepping my Document December album! I’ve chosen a red 6″ x 8″ album that I already had on hand and I’m planning on adding a mixture of pocket pages, envelopes, full 6″ x 8″ layouts and more fun additions, filled with items from the Document December collection! Let’s take a look at how I’m prepping this album in advance:


First, I created my title page. This is always my favorite part of my album. For the moment, I added a recent family photo as a place holder, but I will go back after the end of December and swap this photo out for my favorite one from the month. Next to this pocket, I added some sequins, a stamped circle “joy” and a couple of puffy stickers, that I “unstuck” with baby powder to a pocket before closing it up with my Fuse tool, creating a shaker pocket. At the base, I added the “December” calendar 4″ x 6″ tag from the Document December Kit, which I stamped on using the Oh What Fun Stamp, added washi, labels and stickers to, then created my “December Memories” title using the Green Dipped Puffy Alphabet Stickers. The big 25 Acrylic was the perfect finishing touch.


One of the best ways I find to prepare my album is to stamp as much as possible in advance. I plan on sharing a story each day on these December Journaling Tags, (which come in red, green and a multi-colored pack) so I stamped the date at the base of each tag using the Mini Dated Stamp.


I always add my journaling in Photoshop Elements using the Rough Typewriter font, so I went ahead and scanned in one of the December Journaling Tags, adding a text box and saving to my computer so that I will be ready to type out my journaling each day in December.


Another thing that I stamped in advance are the beautiful seals using the Christmas Seals Stamp. After cutting twelve 1-3/4″ diameter circles from smooth, white cardstock using my digital die cutting machine, I stamped each one twice in alternating colors of green, red, teal and black. I love that they’re ready to get added to an embellishment cluster in my album!


We always need pockets for things we collect throughout the month, right? Make those now! I simply cut a pretty edge at the top of one of the 6″ x 8″ papers from the Document December 2018 Kit, then scored 1/4″ on the left, right and bottom edges. After folding those under and snipping the corners, I placed red-line tape on those folded edges, then adhered them to a 6″ x 8″ piece of plain white cardstock to create my pocket back. Next, I adhered a 6″ x 2″ piece of red cardstock to the inside edge, to give it that pop of color at the top, and embellished the front with the Document December Kit labels and puffy stickers, red Jane Alphabet Stickers, Christmas Shapes and Dots Puffy Stickers, washi tape and some metallic thread.


Don’t forget about your digital die cut library! This adorable snow globe, found in the November 2018 Digital Cut File was just asking to be cut out at 6″ wide and put into my album! First, I cut two globes out of teal cardstock, one mirrored horizontally. Then, I cut two of the globe outlines out of acetate, adhering the cardstock globe to the outside of the acetate. After I added my thin line of dimensional adhesive around the edge of one snow globe piece, I added sequins to the center before sticking the top layer on, and added the “love this tradition” sticker from the Document December Kit puffy stickers.


I can’t wait for December to arrive, when I get to fill these little pockets of happiness and magic! Thanks so much for stopping by the blog today, and have fun getting your album prepped for December 1st! 


Supplies | Document December 2018 KitDecember Journaling Tags — Red, December Journaling Tags — Green, December Journaling Tags — MultiNovember 2018 Digital Cut FileJane Alphabet Stickers — RedChristmas Phrase StickersGreen Dipped Puffy Alphabet StickersChristmas Shapes and Dots Puffy Stickers25 AcrylicDec 2018 AcrylicChristmas Seals StampOh What Fun StampMini Dated Stamp


Have you been stuck on what memories to record in your Document December album in the past? We’re here to help!


We’ve created a free downloadable PDF sheet of photo and journaling prompts to help you make this your best Document December yet! Download this freebie today, print it out and add it to your purse, your album—anywhere that it can help you remember when to snap a photo, or add some journaling on the go in a journaling app. We can’t wait to see how you interpret these prompts! 

Gifting Documented with Guest Designer Kira Ness

Our November guest designer Kira Ness has shared a layout documenting a Christmas wish list and a fun Christmas activity advent calendar with us using the November kit and add-ons, and today she’s back to share her latest traveler’s notebook spread all about a holiday gift swap. Let’s take a look at what she created:
 
Hey there! I’m back today bringing you my final project made with this month’s kit and add-ons. I decided to break away from my December album to document something in my traveler’s notebook.


Supplies | November 2018 KitHo! Ho! Ho! AcrylicMerry Moment StampMerry and Bright 6″ x 6″ Paper Stack
 
I keep a few traveler’s notebooks going at a time, separated by each member of my family. I have one for my son’s stories, my stories, and so on. I recently did a Christmas swap with a couple of my friends, so I decided to document what I created for them in my TN.


I made a piece of wall décor with embroidery hoops and included a few other gifts in the box for my friend. I staged the items, so I could get a cute photo of everything I included. Each of my friends have a slightly different Christmas style, but the colors for Becky’s present worked perfectly with this month’s kit.
 
I started by creating layers on the right side under my photo by trimming down paper strips from the Merry and Bright 6″ x 6″ Paper Stack and one of the die cuts included in the November 2018 Kit. Then, I used my sewing machine to add a little texture. When using my sewing machine with my TN layouts, I always stitch the elements together first, and then adhere everything onto the page.


For the reverse page, I really wanted to mimic the circular elements from the photo. I used the “a day to remember” seal from the Merry Moment Stamp with some silver ink to repeatedly stamp down the edge of the page. Then using the “merry & bright”, snowflake and heart die cuts from the November Kit, I layered over some of the stamped images.


I try to keep my TNs relatively thin, but can’t resist sneaking some acrylic pieces in every once in a while. The Ho! Ho! Ho! Acrylic was perfect for this photo, so of course it made its way onto my page. I try to limit my travelers notebooks to have 4 or less acrylic pieces per book; otherwise, they get a little too chunky for my liking. I finished off this page with some splatters of Ruby Spritz Shimmerz spray and some typed journaling strips.


Thank you so much for stopping by! It has been a blast using this month’s kit and can’t wait to continue to use even more in my December daily album!


Hey there! My name is Kira and I am a thirty something wife to my best friends and mother to two energetic toddler boys. I am a Seattle native, but moved to San Antonio a little over a year ago. I started scrapbooking in October 2016 at the prompting of a friend and was immediately hooked. I started as a 12″ x 12″ scrapbooker, but switched to 8.5″ x 11″ a few months ago on a whim. I also love the ease of documenting in a travelers notebook. Along with scrapbooking, I also find joy in other crafts like embroidery, macramé and drawing. I asked for a loom for Christmas, and hope to start yet another hobby. Other than crafting, I love spending time with my family, binge watching shows on Netflix, and texting my friends. You can see more of my work, and get little glimpses of my life on Instagram, my blog and my YouTube feed!
 
We want to thank Kira so much for inspiring us this month with her beautiful projects! It has been a pleasure to see her creative projects each week. Please follow her via the links above for even more paper crafting eye candy and inspiration! 

Let’s Go Seattle Traveler’s Notebook with Meghann Andrew

Hello there! It’s Meghann Andrew and today I’m so excited to share with you the last installment of my Let’s Go Seattle traveler’s notebook, created using the Let’s Go Traveler’s Notebook Kit, which is currently half off in the Black Friday sale! This traveler’s notebook documents six days spent with good friends in the city and today, I’m sharing the final two days of my trip with you in three double page spreads. In case you missed my first and second posts, you can check those out to see the first and second half of my project.


On my first spread, I used that beautiful yellow patterned paper on the right side to highlight a photo from a favorite eatery in downtown Seattle, and to tie the left side in, I used two yellow labels and a yellow puffy heart sticker around my photos about our kid-free afternoon in Queen Anne. I had to add “mom life” in colorful stamped letters, a staple throughout this notebook, using the Stanley Jr. Alphabet Stamps in both the outline and solid.


I turned my photo of the best biscuit I’ve ever eaten into a pocket by adhering only the sides and bottom, and tucked the yellow tag behind the photo, adding the “good eats” phrase sticker from the Let’s Go Kit. I also added the date using the Dated Stamp on the blue label, another element that I have carried throughout my notebook.


This may be my favorite spread of all in the album! On the left, I added the beautiful, colorful diagonal striped paper on the background. I cut the green solid piece from the “go” tag, splitting it up on the top and bottom of my 3″ x 3″ photo of a day spent on a cruise. The “explore” sticker, one of my favorite elements in the kit, created the perfect title when paired with the word “go.” I finished off this column with the globe stamp at the base of the page.


I loved adding the Play All Day Phrase Stickers (sold out) to the edge of the page for another interesting element on the spread!


My final spread records an evening spent at a Seattle Mariners ball game. By keeping two of the Let’s Go Kit labels together, they created the perfect place to add my title, which I created using the kit letter stickers and Stanley Jr. alphabet stamps. This title split up my 3″ x 4″ photos in the center.


On the right, I used that fantastic diagonal striped paper to add my journaling to, and the lyrics to everyone’s favorite ballpark song! I love that this spread records how we spent our last evening of such a fantastic trip.
 
I have truly loved working with the Let’s Go Traveler’s Notebook Kit, and I love this completed journal, that documents such a fun-filled week, even more! Thanks so much for looking!
 
Supplies | Let’s Go Traveler’s Notebook Kit, Puffy Heart Stickers — Summer MixStanley Jr. Alphabet Stamp — SolidStanley Jr. Alphabet Stamp — Outline, Dated Stamp


Our Let’s Go Traveler’s Notebook Kit is currently on sale for 50% off in our Black Friday sale! Be sure to pick up your kit, while supplies last to document your adventures in your next traveler’s notebook project!

November Design Team Inspiration: Volume Three

We hope that you’ve had time to play with your new November goodies, but if you need that inspirational push to pull out your supplies, you’re in luck! Our design team is here to inspire you with these fabulous projects: 


Thanksgiving by Melissa Mann – supplies used | November 2018 Kit, November 2018 Digital Cut FileNovember Print and Cut LabelsThis Season Phrase Stickers, Jane Alphabet Stickers — RedNavy Puffy Alphabet StickersChristmas Hand Drawn Acrylic HeartsMerry and Bright 6″ x 6″ Paper StackFamily Fun 12″ x 12″ Paper Collection


Weeks 20 & 21 pocket page by Wendy Antenucci – supplies used | November 2018 Kit, Good Cheer Journaling TagsThis Season Phrase Stickers, Jane Alphabet Stickers — RedWood Veneer Snow GlobesMerry Moment StampMerry and Bright 6″ x 6″ Paper Stack


Sweet Pea by Daniela – supplies used | November 2018 Kit, Jane Alphabet Stickers — RedLetter & Number Stickers – Light PinkLetter & Number Stickers – Light GrayChristmas Hand Drawn Acrylic HeartsMerry Moment StampMerry and Bright 6″ x 6″ Paper StackNoteworthy 12″ x 12″ Paper Collection


Good Cheer Playlist by Andrea Gray – supplies used | November 2018 Kit, Document December 2018 KitLabeled Journaling TagsChristmas Shapes and Dots Puffy StickersMerry and Bright 6″ x 6″ Paper StackNoteworthy Puffy Stickers, Merry Moment StampChristmas Seals Stamp


Good Cheer pocket page spread by Nathalie Leonelli – supplies used | November 2018 KitThis Season Phrase StickersJane Alphabet Stickers — RedWood Veneer Snow GlobesChristmas Hand Drawn Acrylic HeartsMerry and Bright 6″ x 6″ Paper Stack, Merry Moment StampJane Alphabet StampMini Dated Stamp


Santa Cookies by Heather Leopard — supplies used | November 2018 Kit, Good Cheer Journaling TagsNovember Label StickersJane Alphabet Stickers — RedThis Season Phrase Stickers, Wood Veneer Snow Globes, Ho! Ho! Ho! Acrylic,  Merry and Bright 6″ x 6″ Paper Stack


Weekend Tradition by Jamie Leija — supplies used | November 2018 KitNovember Label StickersJane Alphabet Stickers – TealNavy Puffy Alphabet StickersWood Veneer Snow GlobesChristmas Hand Drawn Acrylic HeartsMerry Moment StampHazel Alphabet StampMerry and Bright 6″ x 6″ Paper Stack


Thankful by Susan Brochu – supplies used | November 2018 KitNovember Label StickersThis Season Phrase StickersMerry Moment Stamp


Love by Laura Wonsik – supplies used | November 2018 Kit, This Season Phrase Stickers, Christmas Hand Drawn Acrylic HeartsMerry Moment Stamp


Remember Joy pocket page by Meghann Andrew – supplies used | November 2018 Kit, November Label StickersThis Season Phrase Stickers, Jane Alphabet Stickers — RedJane Alphabet Stickers – NavyChristmas Hand Drawn Acrylic HeartsMerry and Bright 6″ x 6″ Paper StackMerry Moment StampNoteworthy 12″ x 12″ Paper Collection
 
Share what you’ve created using your November Kit and add-ons on Instagram using the hashtag #EllesStudio! You could be featured here on our blog and win a gift certificate to the store!

Prepping Your Document December Project: Week Four

The month of December is close at hand, and that means our Document December project is getting near! We’ve been asking our team members to share their prep and organizational tips with you, to help us all have a positive and stress-free month of magical documenting, and we know you’ll love what Wendy Antenucci, Heather Leopard and Jess Forster are sharing with you today! Let’s take a look:
 
Wendy | Can you believe it is that time of year again to be documenting our holiday fun?  I participated in my first December project in 2017 and I’m gearing up for another daily documenting project now.  Some of the things I learned from my first year were to have all my supplies organized and in view where I could easily grab my container and create when I had the chance.  This year I am using this plastic divider I found at IKEA with these handy little baskets from Target.


I really love using sparkly items in my December album, but they take a long time to dry depending on the media you choose.  To take care of my need for sparkly embellishments and not make a mess of my album, I chose Stickles in red, green, and gold to decorate my wood veneer so there was plenty of time to dry before I needed them to assemble!


Once I had my items situated and my wood veneers were dry, I couldn’t resist putting together a title page for this year’s December album. I love how tags provide an instant home to your clusters and provide layers of interest in one simple product.


One last tip that I have found to be essential to my December album is that I document the fun events, pretty sights, and lovely smells, but I don’t worry about having a picture for every day.  This approach for me allows me to capture everything that is important to our family but it takes the stress off of the project and leaves me with such good feelings as I look back at my finished albums.  Merry Christmas!


Supplies | Document December Kit + extras


Heather | Hi everyone. I’m excited to share how I’m organizing my Document December supplies with you.  I plan to do a page each day during the holiday season and I wanted the ability to have a portable station that can move around the house with me.


Having everything together in a crate will help make the process a bit less daunting as I can just grab and create in my pockets of spare time. Similar items are stored together in different compartments.  The 3″ x 4″ and 4″ x 6″ tags are together in a smaller crate and the stamps and adhesives are together in another bin.  Inks, journaling pens and other embellishments, such as twine, sequins and more also have their own place, too.


I’m using a traveler’s notebook as my album, which is stored in this snowman box along with larger items like the papers, and stickers, including puffy embellishments and alphas.


My dad made this wooden divided box for me and I like to use it regularly since it’s so easy to flip through. I’m constantly switching things out depending on what I’m working on.  It’s perfect all the Document December embellishments, such as acrylic words, acrylic shapes, wood veneer and all the stickers, die cuts, labels, etc.


I have a feeling I’ll be working on this a little bit every day so I love that it’s super portable and I can take it to any part of the house to work on.  I know this will make the process less stressful and lots of fun for the entire family this season!
 
Supplies | Document December Kit + extras
 
Jess | It’s the most wonderful time of the year! Although, I have been listening to Christmas music since the first week of November, I must confess, I don’t prep foundation pages in my December Album before the month begins. Given that I work full-time outside the home, I try to set realistic expectations when it comes to starting or finishing my album. Full disclosure, I will often make a few layouts during the holidays, but leave the bulk of the work until January. With that said, I do organize my supplies and write down my holiday photo ideas before December begins. As I have done in the past, this year, I am organizing my Document December kit in a Fallujah Ikea organizer, which sits in my kitchen island.


One of the main strategies for organizing my holidays supplies, is grouping like products together and sorting by colour. For example, my red journaling tags go in one pile, while my green tags go in another. I love documenting the holidays with traditional colours having my supplies organized does help when I choose to work on my pages. My album may not be completed by the end of December, but by having my supplies close at hand I can break tasks down into manageable chunks of time, so when I do have time to devote to printing out pictures, I will be ready to go. For those wondering, I am documenting December using a 6″ x 8″ album this year and it  will also include a traveler’s notebook insert when my family travels to Disney during the first part of the month. Thanks for looking!


Supplies | Document December Kit + extras


We’d love to see how you’re preparing for this merry project! Share YOUR tips in our Elle’s Studio Facebook Group or on Instagram using the hashtag #EllesStudio! 

Our Black Friday Weekend sale has started

Our biggest sale of the year has started! Our Black Friday weekend sale runs all weekend long, starting now and will end on Monday, November 26th at 9:00 pm PST or while supplies last. There are a TON of awesome deals and specials – here’s a quick summary:

DECEMBER CASH BONUS: Our December Cash is back! This year every order placed (on physical product that ships) during our weekend sale will receive an Elle’s Studio December Cash scratch ticket! Every ticket is a WINNER with prizes ranging between $5 – $50 off your order in December!

ITEMS 30% to 90% off: Over 100 items are on sale and prices are already marked, so no coupon code is needed! Some of these items are retiring, too, so once they are sold out, we will not be restocking!

GRAB BAGS: We have FIVE different types of grab bags to choose from during this sale. Our grab bags this year will include:

Scrapbooking Grab Bag – $50 value for only $15 – our biggest scrapbook grab bag to date! This bag includes some of the following items: cutouts, snippets, journaling tags, stickers, washi tape, wood veneer, puffy stickers, and acrylics. NO 12 x 12 papers or stamps are included in this bag. If you purchase more than one grab bag, you will receive duplicate items in the second bag.

Stamp Grab BagThis bag includes a range of our stamps. You can purchase two without receiving duplicate stamps.

Sticker Grab BagThis bag includes a range of our stickers–from flat to puffy! You can purchase one without receiving duplicate stickers.

Journaling Tag Grab BagThis bag includes twenty 3 x 4 tags and ten 4 x 6 inch tags from our collections and exclusive monthly kits, for a total of thirty tags. You can purchase three without receiving duplicate tags.

Die Cut Grab BagsThis bag includes a variety of die cuts on four 4 x 6 inch sheets from our exclusive monthly kits. You can purchase two without receiving duplicate die cuts.

MYSTERY KITS: Pick up one of our exclusive kits and it will be a mystery on which one you receive! You can purchase three kits without receiving duplicate kits.

MYSTERY 6 x 6 PAPER STACKS: Pick up a 6 x 6 paper stack and it will be a mystery on which one you receive! You can purchase two stacks without receiving duplicates.

DIGITALS: All of our digital cut files and printables are 50% off!

SUBSCRIBER DISCOUNT: Surprise! We have a special bonus for our kit subscribers! You’ll want to use the coupon code SAVEMORE at our weekend sale to save an extra 10% off your entire order! This coupon code is valid from 11/23/2018 – 11/26/18 only and you must be logged in to your subscriber account for it to work.

SHIPPING: Our shipping is based on the weight of your cart and we only charge what it costs us to ship your items. Our scrapbook grab bags are heavy and if your USA order is over 1 lb., your order will have to ship via Priority Mail due to the Post Office’s rules. Our site will quote you a shipping price before going through checkout.

PLEASE NOTE: Due to an increase in orders during this sale, please allow us extra processing time. We will be shipping orders in the order that they are received and we will have extra help on hand to get the orders out as quickly as possible.

Thanks so much for joining us this weekend during our BIGGEST sale of the year!