What ongoing paper crafting projects do you have to wrap-up? Design team member Meghann Andrew is sharing hers with us today—a traveler’s notebook about a trip from 2017, which she’s documenting with our Let’s Go Traveler’s Notebook Kit. Let’s see the progress that she’s made.
Hey there! It’s Meghann Andrew with you today, and today I’m sharing my third installment of my Seattle 2017 traveler’s notebook. In case you missed them, you can also find post one and post two here on the blog! I continued day three of our trip with an entry about a glorious adult-only date night!
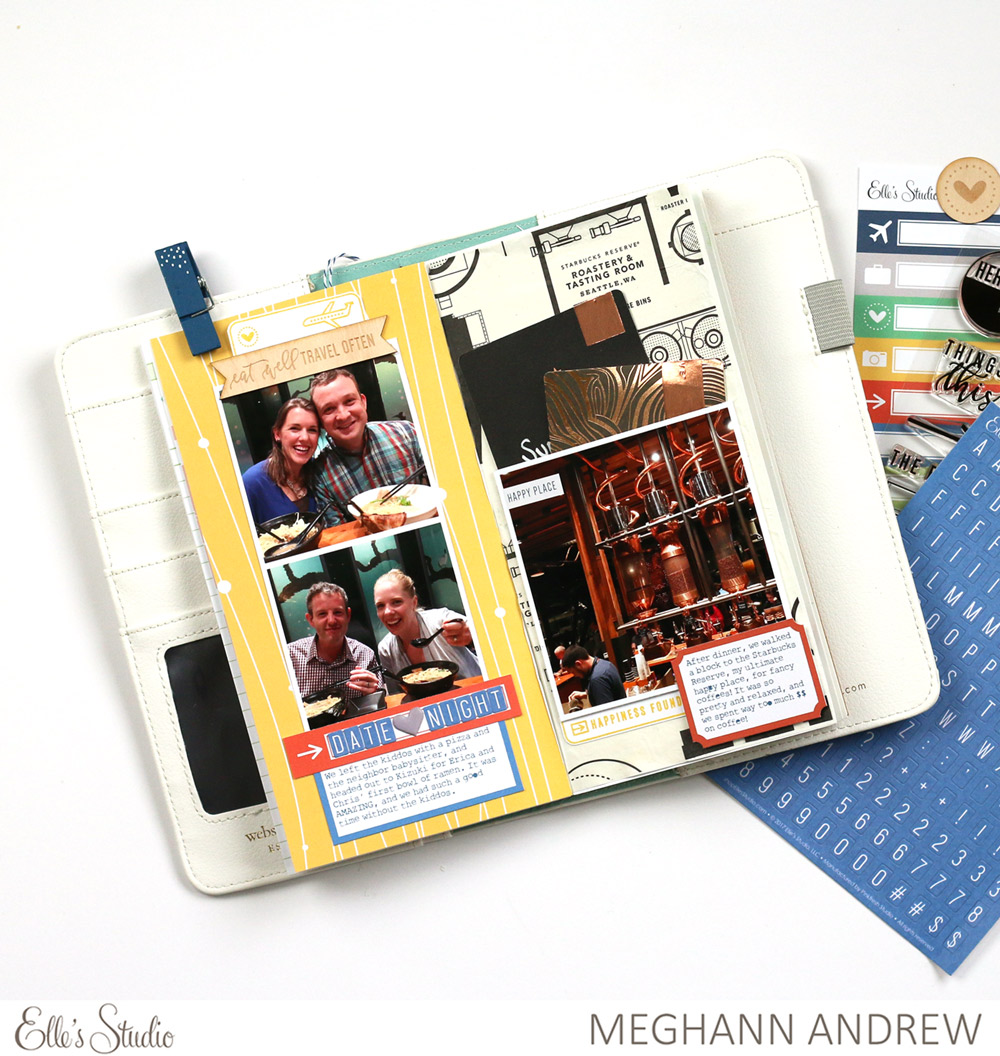
On the left side, I had to include photos from an amazing ramen dinner that we had, and the “eat well, travel often” wood veneer banner from the Let’s Go Traveler’s Notebook Kit went perfectly here. I lined up all of my embellishments in a column with my photos, starting with the stamped passport rectangle at the top, then the “date night” label, and my journaling, which I journaled and printed from the August Print and Cut Labels.
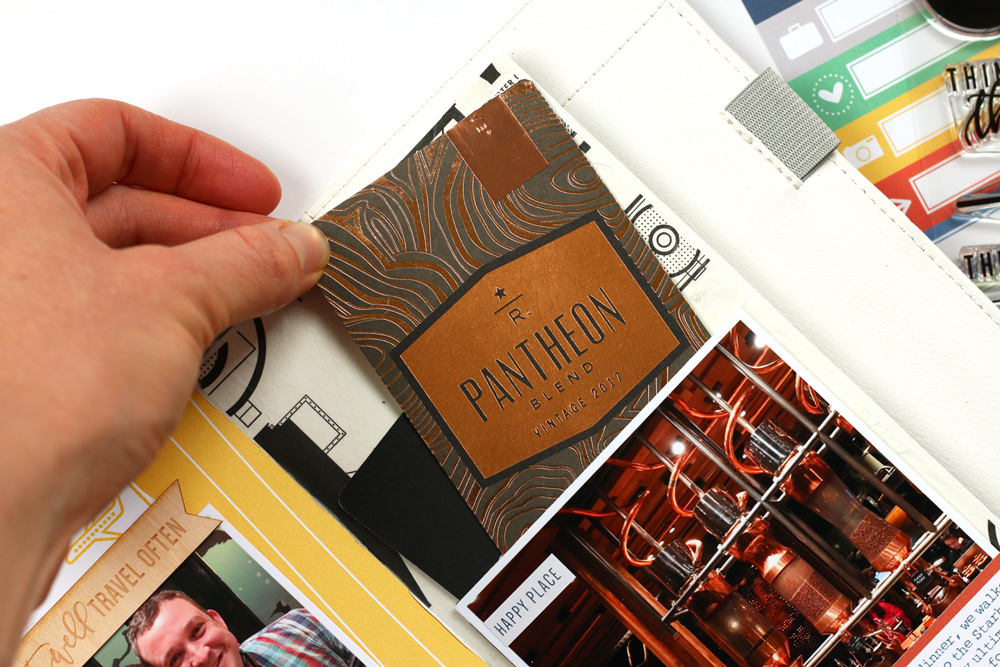
On the right page, I backed the page with a piece of tissue paper that I saved from the beautiful Starbucks Roastery, adhering it with a thin layer of liquid glue. On top, I added my photo using dimensional adhesive on three sides only, leaving the top open to tuck in the coffee labels from the bags that we purchased that evening. The “happy place” sticker from the Let’s Go Stickers in the kit was perfect for this chilled-out locale.
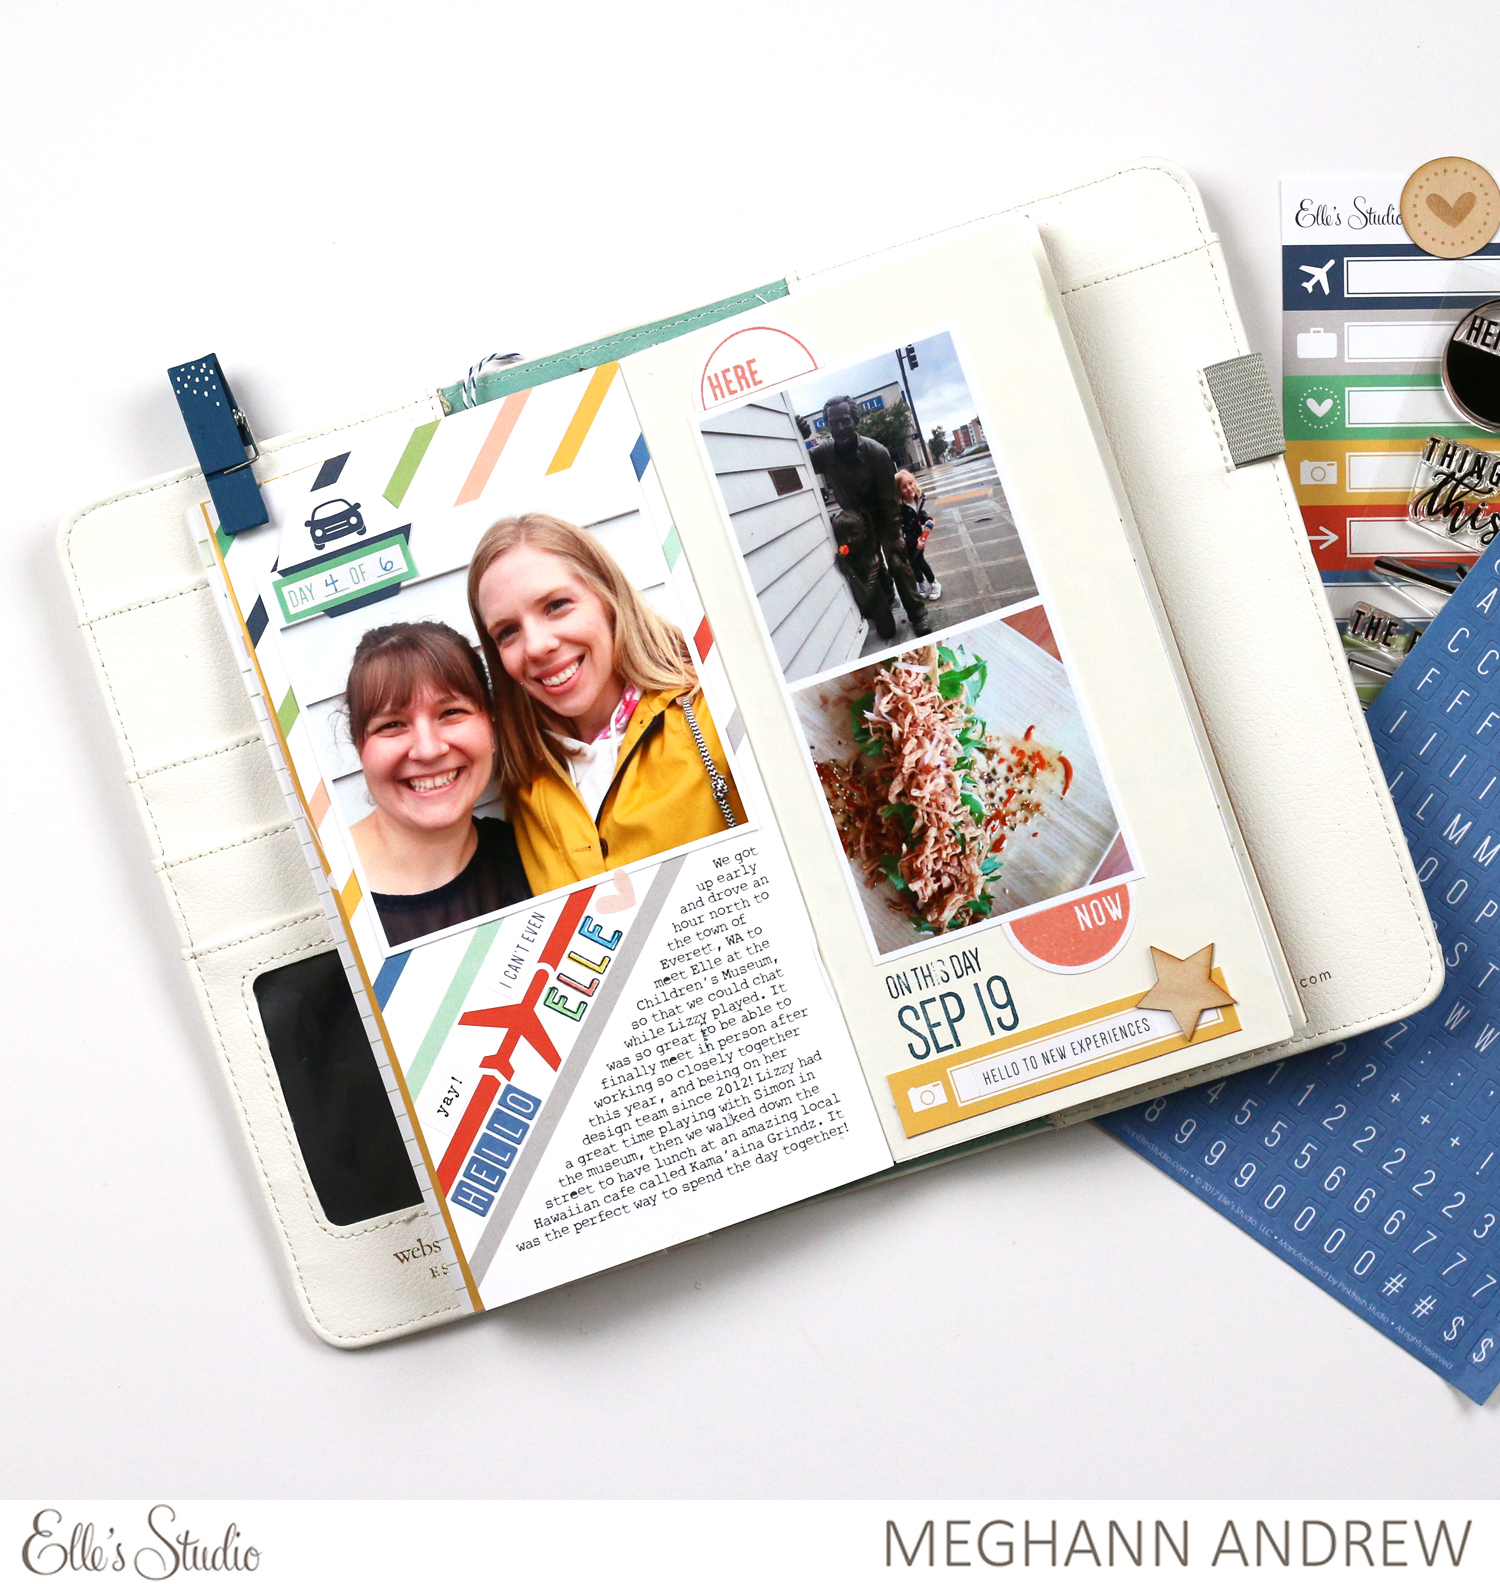
Now to day four of our trip, when I got to hang out with our fearless leader, Elle Price! We had a great day, and took one selfie together, so I had to add that to the left side. I scanned in the background paper (my absolute favorite from the Let’s Go Traveler’s Notebook Kit) and typed out my journaling before printing directly on the paper. In the line below my plane, I added “hello Elle” using the cardstock stickers from the kit and the Stanley Jr. solid and outline stamps.
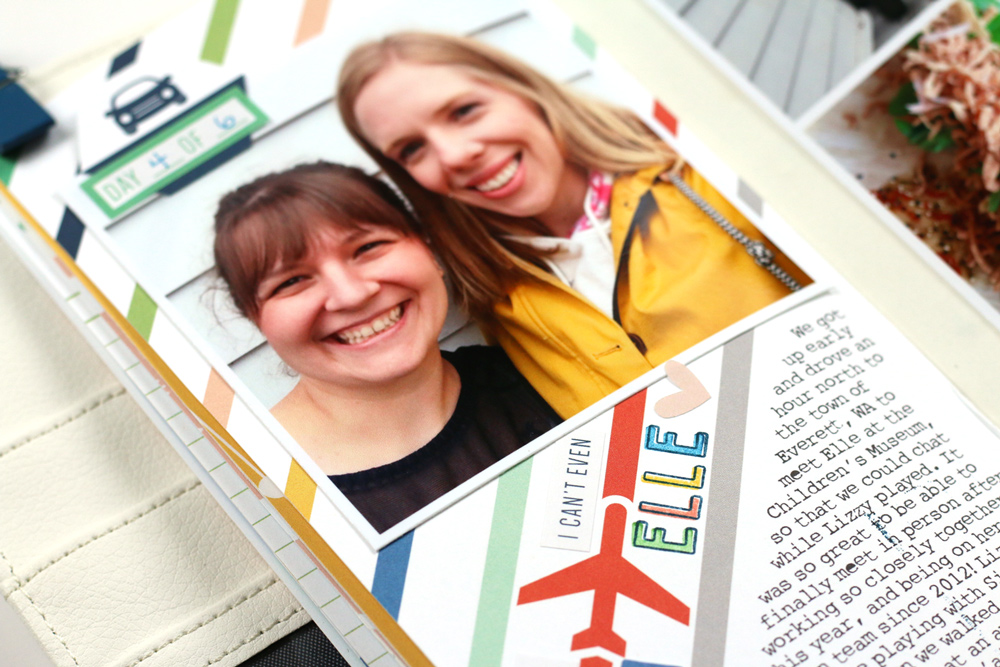
The “yay!” sticker from the Play All Day Phrase Stickers and the “I can’t even” sticker from the Let’s Go Traveler’s Notebook Kit were perfect for adding above my title. This meet up was the best part of our trip!
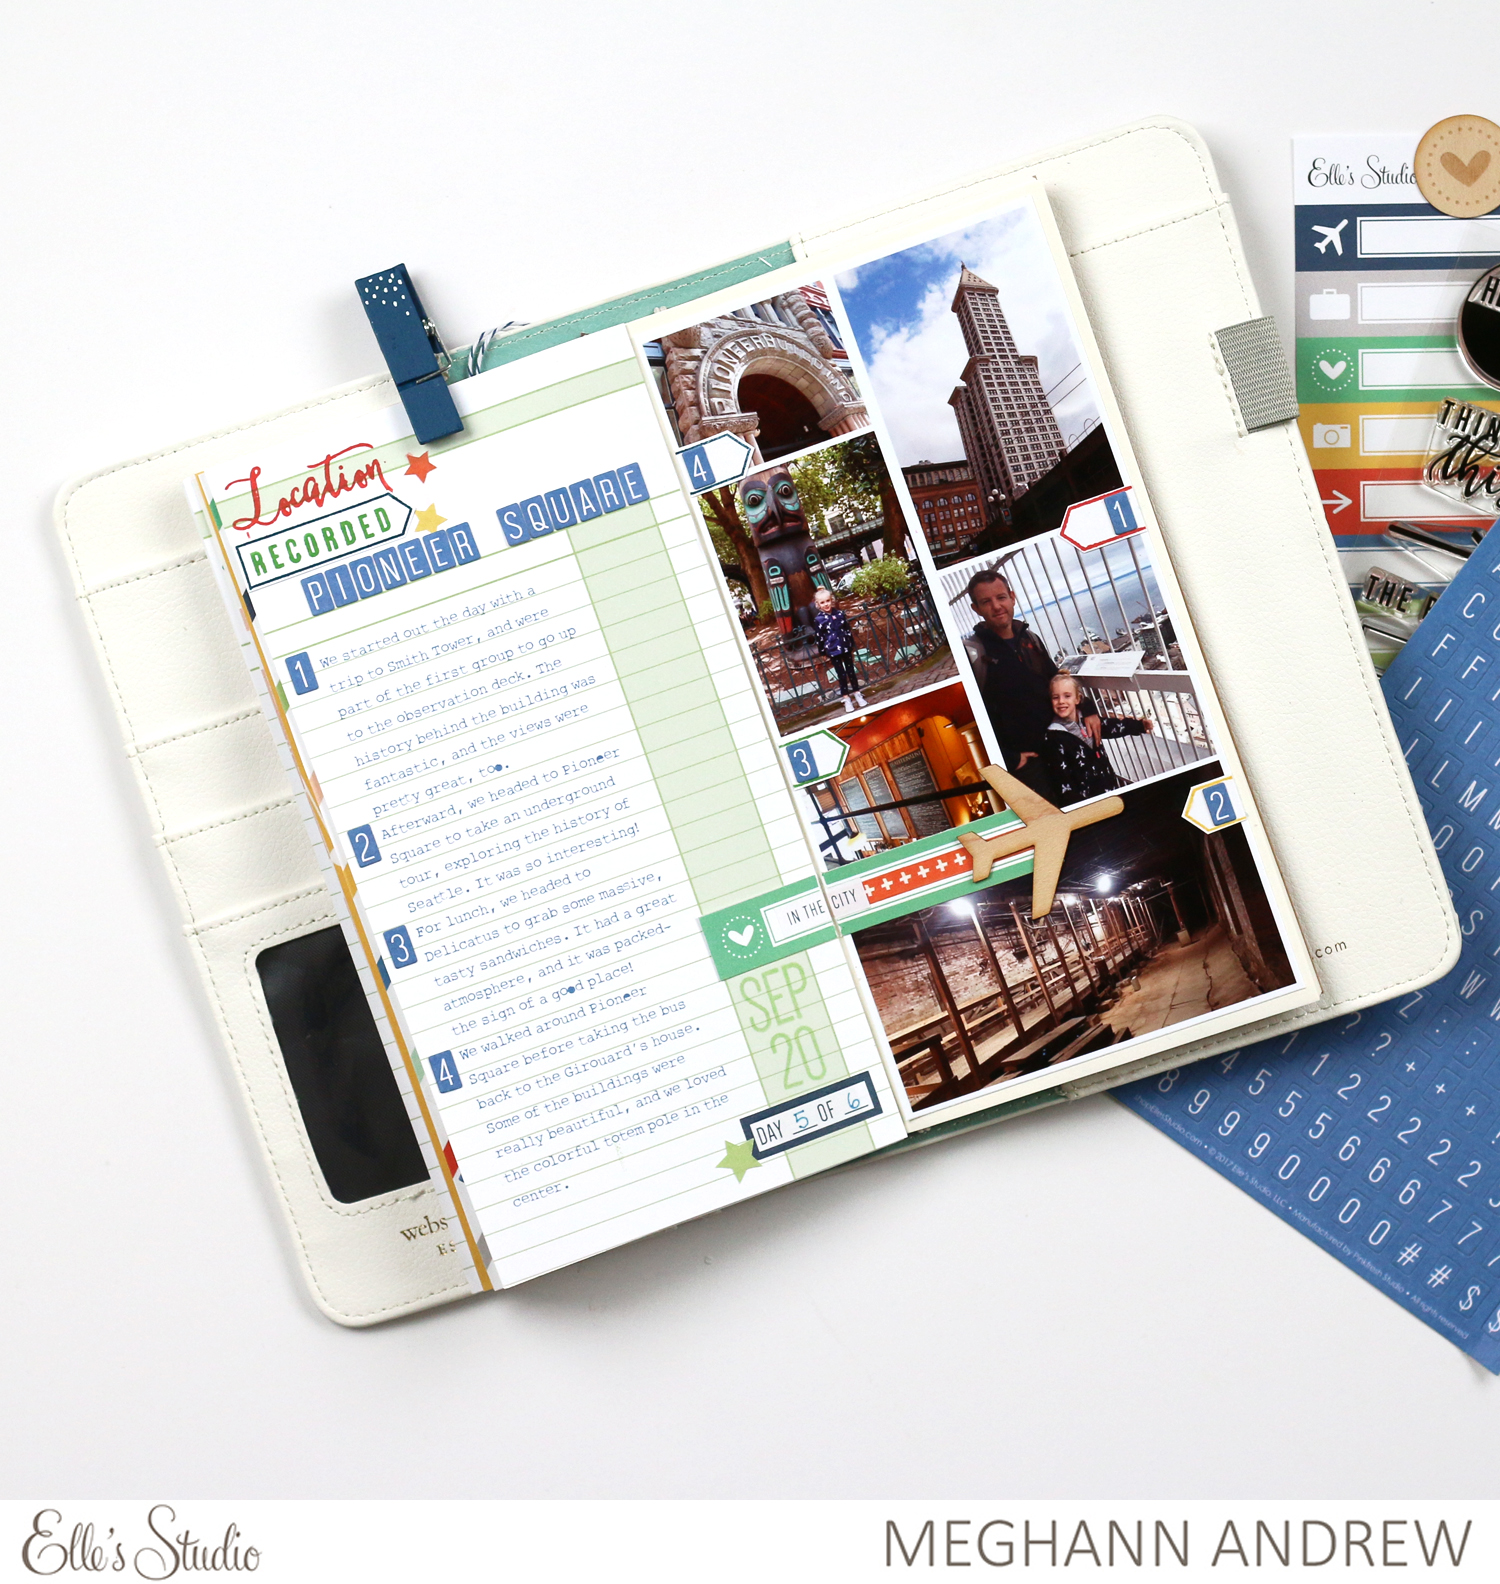
My third spread is all about a day spent sightseeing in Pioneer Square in Seattle. I started out with the ruled green paper on the left side, and stamped “location” and the recorded arrow from the Let’s Go stamp, included in the kit, at the top. Below it, I added “Pioneer Square” using the blue cardstock stickers. I then scanned in the page and added my typed journaling in Photoshop Elements before printing it out. On the right, I created an entire sheet of photos in a grid. I then stamped the arrows in different colors on a scrap piece of smooth cardstock, and adhered them at different lengths to the photos. Numbers that I added to the journaling on the left side corresponded to the numbers that I added to the arrows on the right, so that the photos matched up with my journaling.
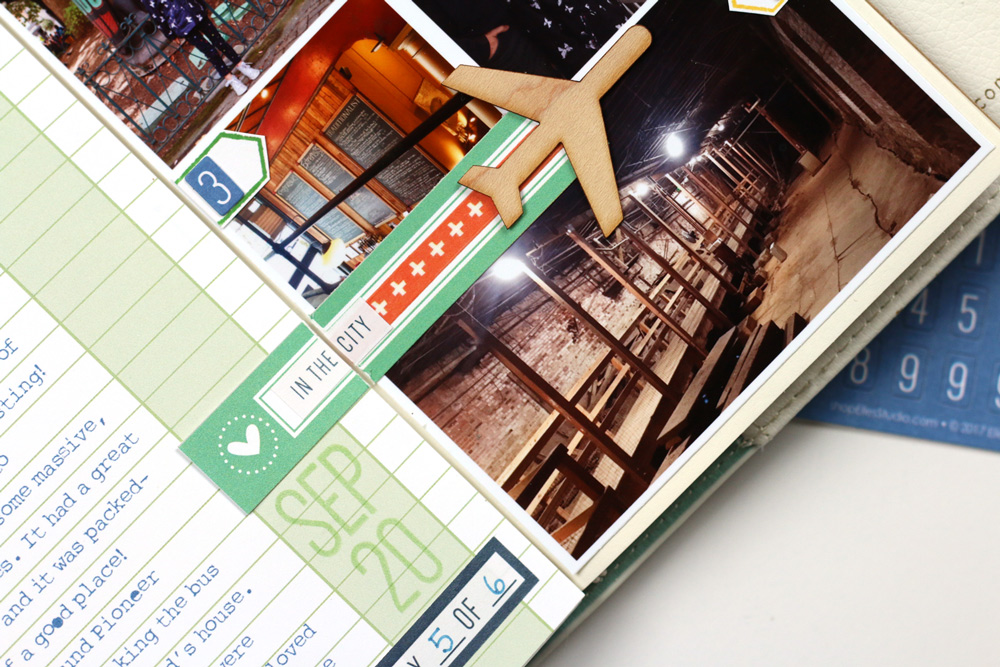
To join the two pages together, I added the “in the city” sticker to the green label in the Let’s Go Traveler’s Notebook Kit, then cut it, so that the label spanned both pages. Next, I added a thin strip of orange washi tape to draw your eye across to the photos, and the awesome wood veneer plane, to further that sense of movement. The date, stamped in light green on the light green background, and the “day _ of _” sticker below finished off the page.
I am almost finished with this traveler’s notebook that I love SO much! Stay tuned for the finale of this project. What past trips can you document easily with our beautiful, packed Let’s Go Traveler’s Notebook Kit and Traveler’s Notebook Insert? We would love to see what you create!
Supplies | Let’s Go Traveler’s Notebook Kit, Traveler’s Notebook Insert, August Print and Cut Labels, Play All Day Phrase Stickers, Puffy Heart Stickers — Spring Mix, Stanley Jr. Alphabet Stamp — Solid, Stanley Jr. Alphabet Stamp — Outline, Dated Stamp

A Let’s Go Traveler’s Notebook Update with Meghann Andrew
Comments