Hello there! It’s Meghann Andrew with you today! I’ve recently started an ongoing project that I can work on whenever I have a few minutes in my day: a traveler’s notebook insert documenting a family trip to Seattle last year. This is my first traveler’s notebook experience, and I’m finding that creating in it is SO easy with the help of the Let’s Go Traveler’s Notebook Kit! Today I’m here to share my two most recent spreads. I case you missed it, you can see the beginning of my insert here on my blog.
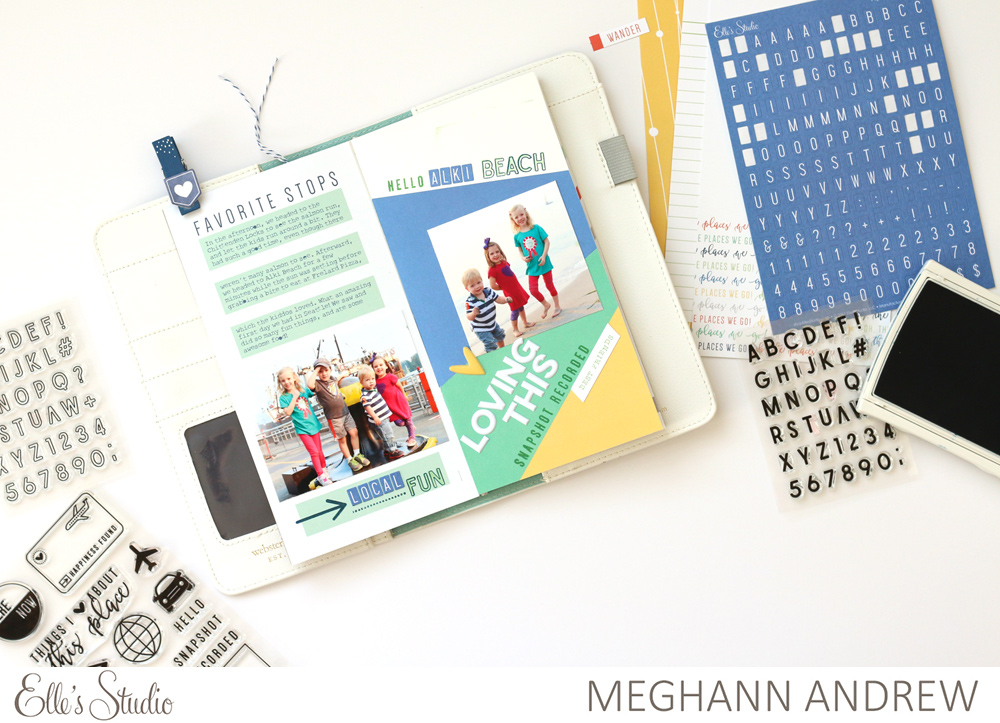
This spread documents the end of the first full day of our trip, with a visit to the Chittenden Locks, then on to Alki Beach for the sunset. I pulled the green out of the photos, and started with the “favorite stops” paper on the left. I love that the 3″ x 3″ photo just covers up two of the green rectangles on the page, leaving me three spots for my typed journaling, then a title at the bottom.
On the right side, I carried the green and blue colors over, adding yellow with the sunburst color paper, placing the angle in my photo at the line where the green meets the blue on the page.
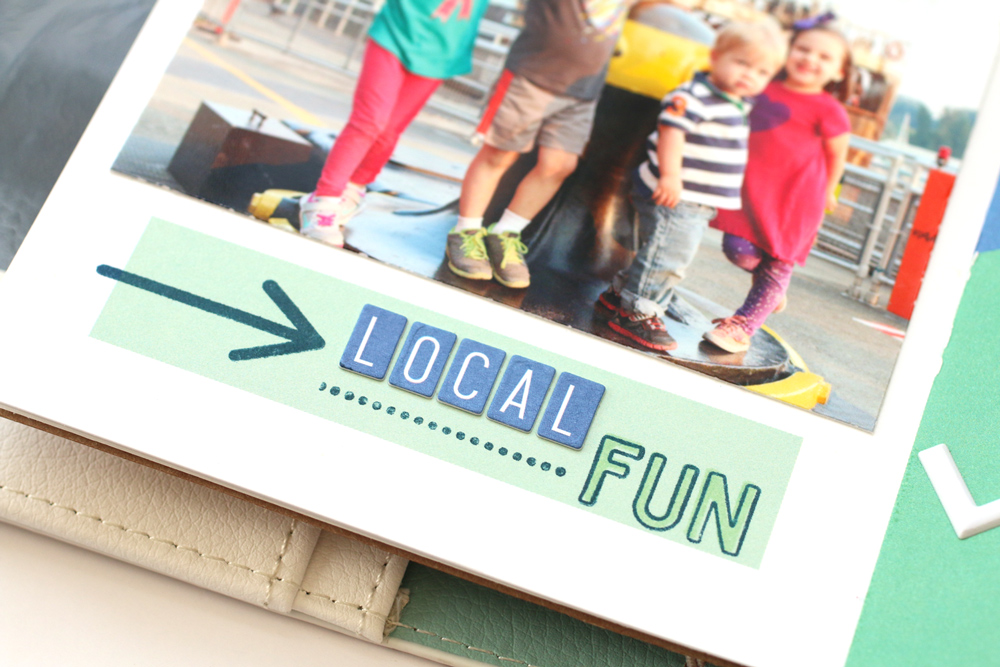
To create this title, I used the navy cardstock alphabet stickers that are found in the Let’s Go Traveler’s Notebook Kit, along with the arrow from the Let’s Go Stamp, the dots from the Mini Dated Stamp and the Stanley Jr. solid and outline alphabet stamps to spell out “fun.” I love how all of these elements came together!
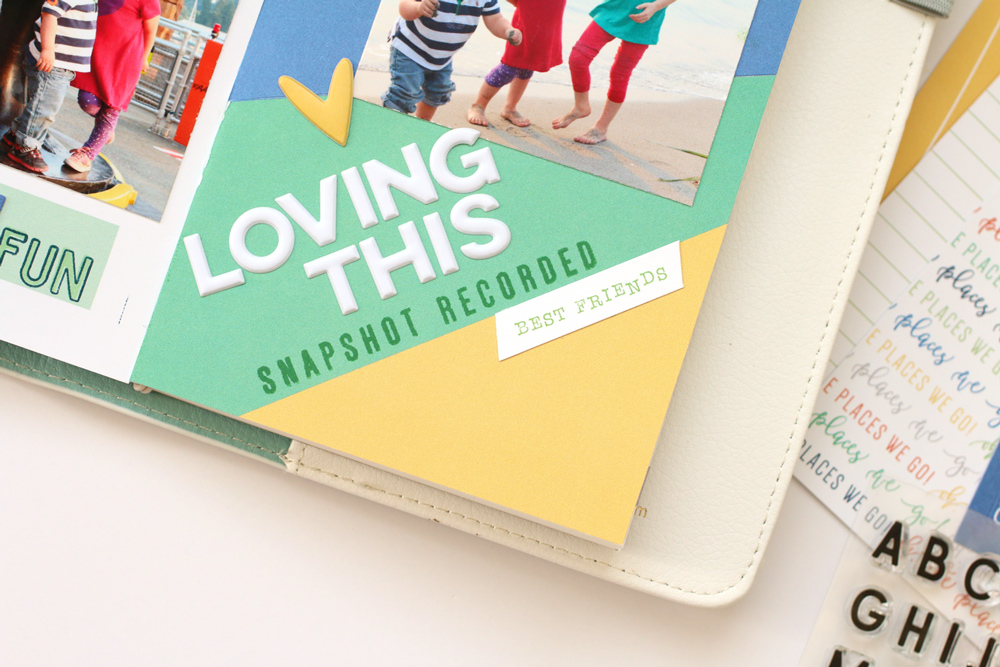
At the base of the right page, I had to use that lovely green ray to add the “loving this” phrase from the Adventure Puffy Stickers—I find that they are working so beautifully with the Let’s Go Traveler’s Notebook Kit! I then stamped “snapshot recorded” in green below using the Let’s Go Stamp, then added the “best friends” die cut from the May 2018 Kit before finishing off the grouping with a yellow Puffy Heart Sticker. This little grouping of puffy stickers, stamps and die cuts makes me so happy!
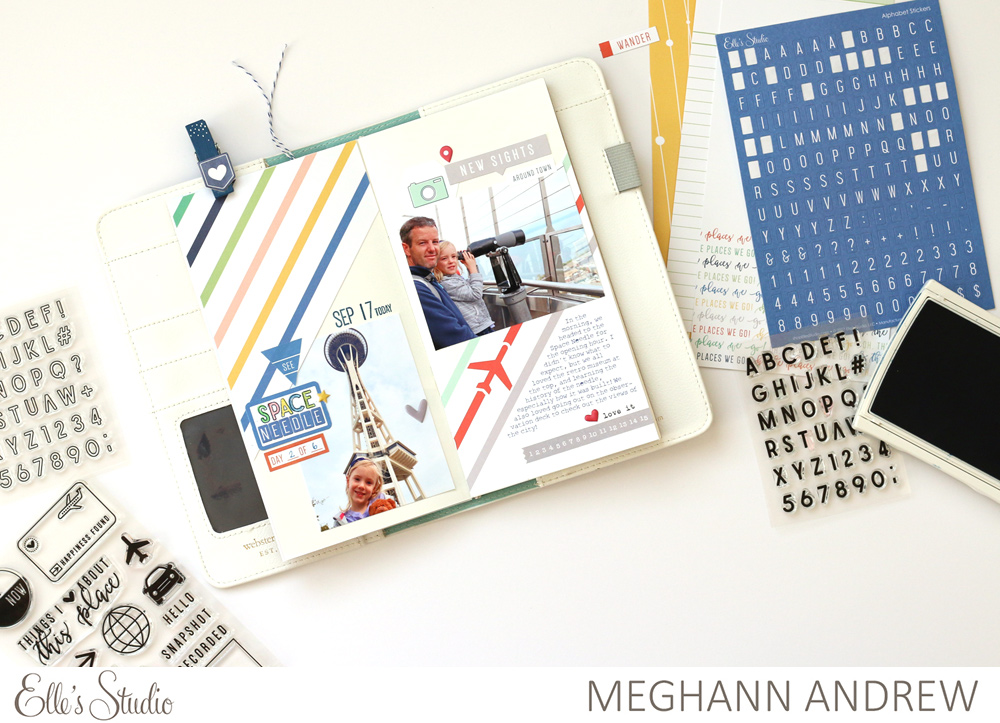
The next spread records the beginning of day two of our trip, and we started off with a visit to the Space Needle! I wanted my spread to have a “retro” look to it, so I halved the multicolored diagonal stripe paper and split is across the spread, adding my two photos to the center.
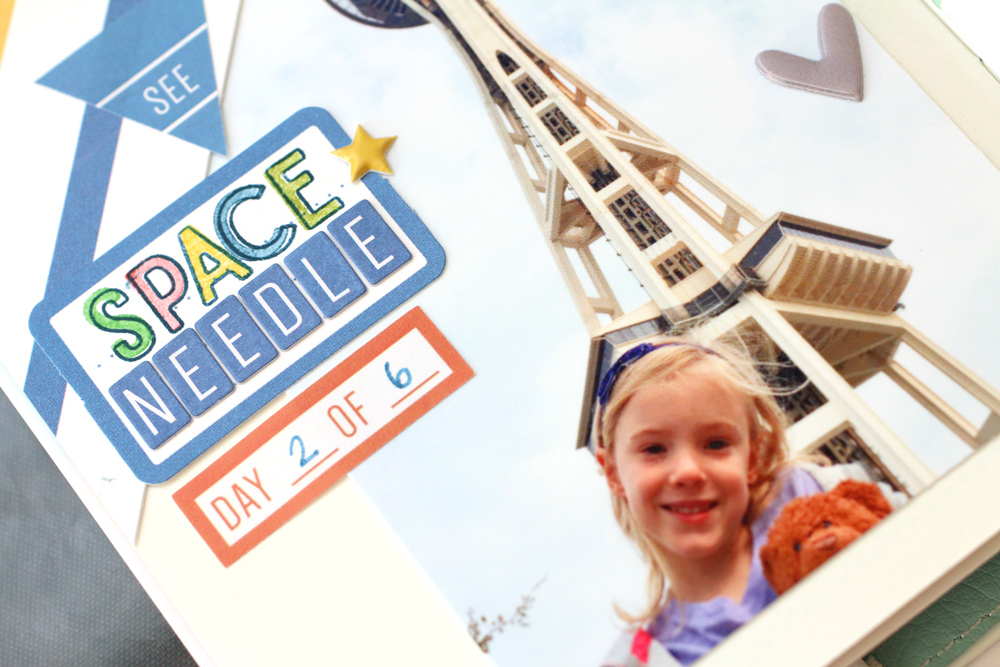
On the left, I repeated the multi-colored title from my insert title page, spelling out “space” onto a label from the die cut sheet, and then added the blue cardstock alphabet stickers below. I had to add a yellow star from the Shapes and Dots Puffy Stickers to that page. Above and below my title label, I added the “see” and “day _ of _” stickers from the Let’s Go Traveler’s Notebook Kit.
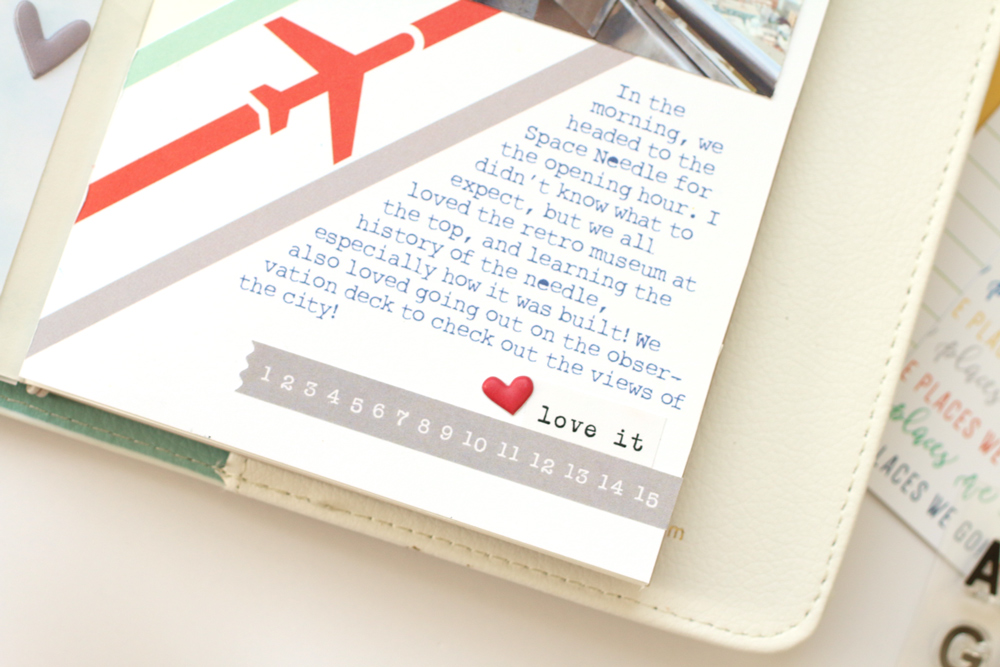
On the right, a few die cuts and a sticker from the kit topped my photo, and the blank space at the bottom was the perfect place for my journaling. Below it, I needed something to finish off the open space, so I added the numbers Everyday Goodness Sticker, along with the “love it” Play All Day Phrase Sticker. I love that the monthly add-ons are working so well in my insert along with the Let’s Go Traveler’s Notebook Kit!
Be sure to grab the Let’s Go Traveler’s Notebook Kit in the shop if you haven’t already, to document all of your summer excursions! If you’re already creating with the kit, we’d love to see what you’ve made! Share your notebook spreads on Instagram, using the hashtag #EllesStudio! Thanks so much for stopping by the blog today!
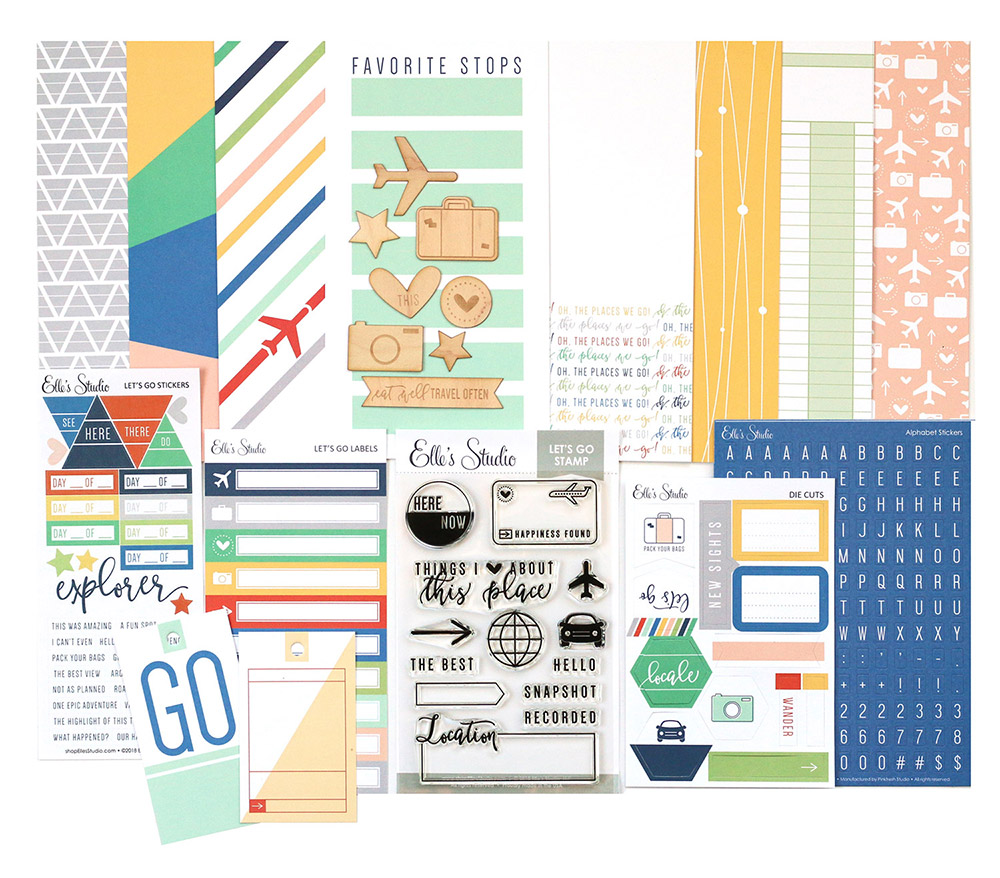
Supplies | Let’s Go Traveler’s Notebook Kit, May 2018 Kit, Everyday Goodness Stickers, Play All Day Phrase Stickers, Shapes and Dots Puffy Stickers, Adventure Puffy Stickers, Puffy Heart Stickers—Spring Mix, Mini Dated Stamp, Stanley Jr. Alphabet Stamp — Solid, Stanley Jr. Alphabet Stamp — Outline

Let’s Go Traveler’s Notebook Spreads with Meghann Andrew
Pingback: A Let's Go Traveler's Notebook Update with Meghann Andrew | Elle's Studio Blog