My Fall Fave with Jennifer McMurtrey

Autumn is just around the corner, and there are so many reasons to love the change of seasons—cooler days, a change in our wardrobe, or our favorite sweet treats! Today, design team member Jennifer McMurtrey is documenting her favorite fall treat in a beautiful fall layout using our September Kit and add-ons! Let’s take a look!

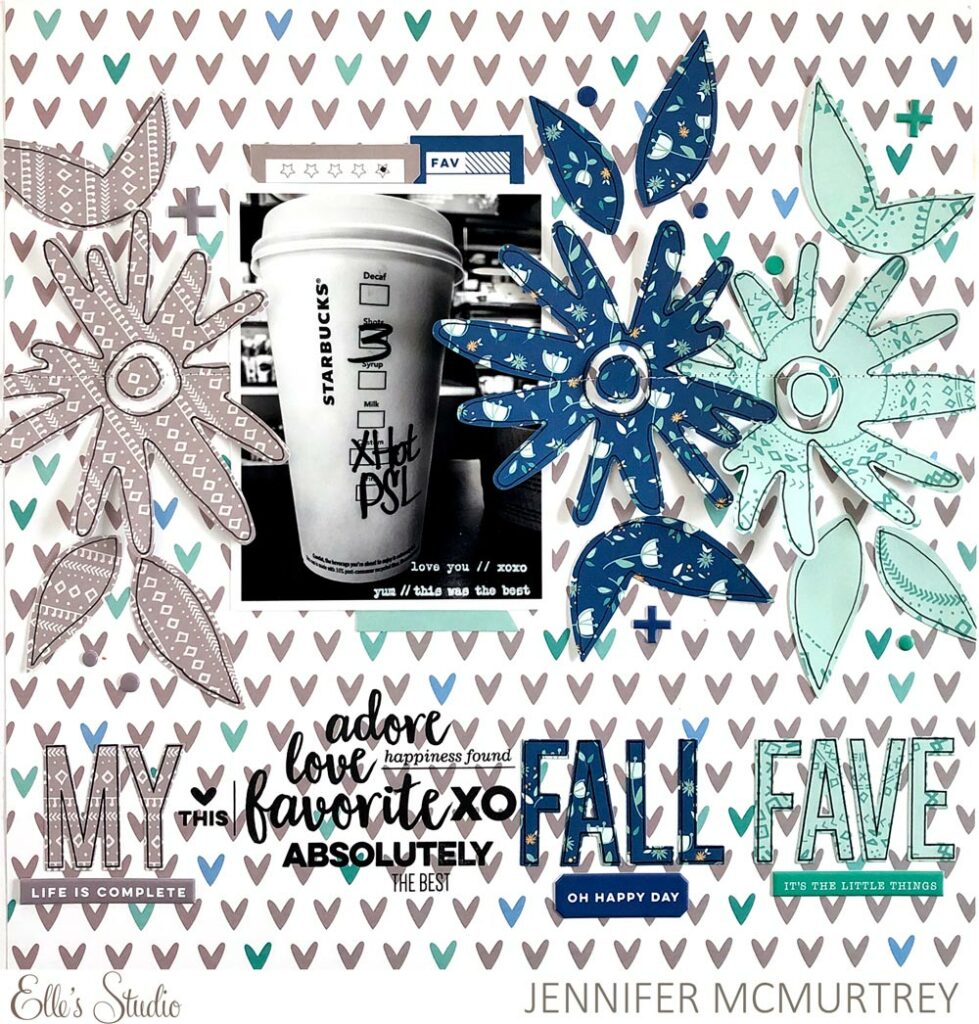
Hello Elle’s Studio friends! Fall is just around the corner and it is my absolute favorite time of year. There is something about the season that makes my heart happy. Perhaps it’s the cool, crisp air, the changing leaves—or the fact that pumpkin spice lattes are back! My daughter has informed me that I’m “basic” because I love them so much, but it doesn’t bother me in the least. In fact, today’s layout is dedicated solely to my love of PSLs.

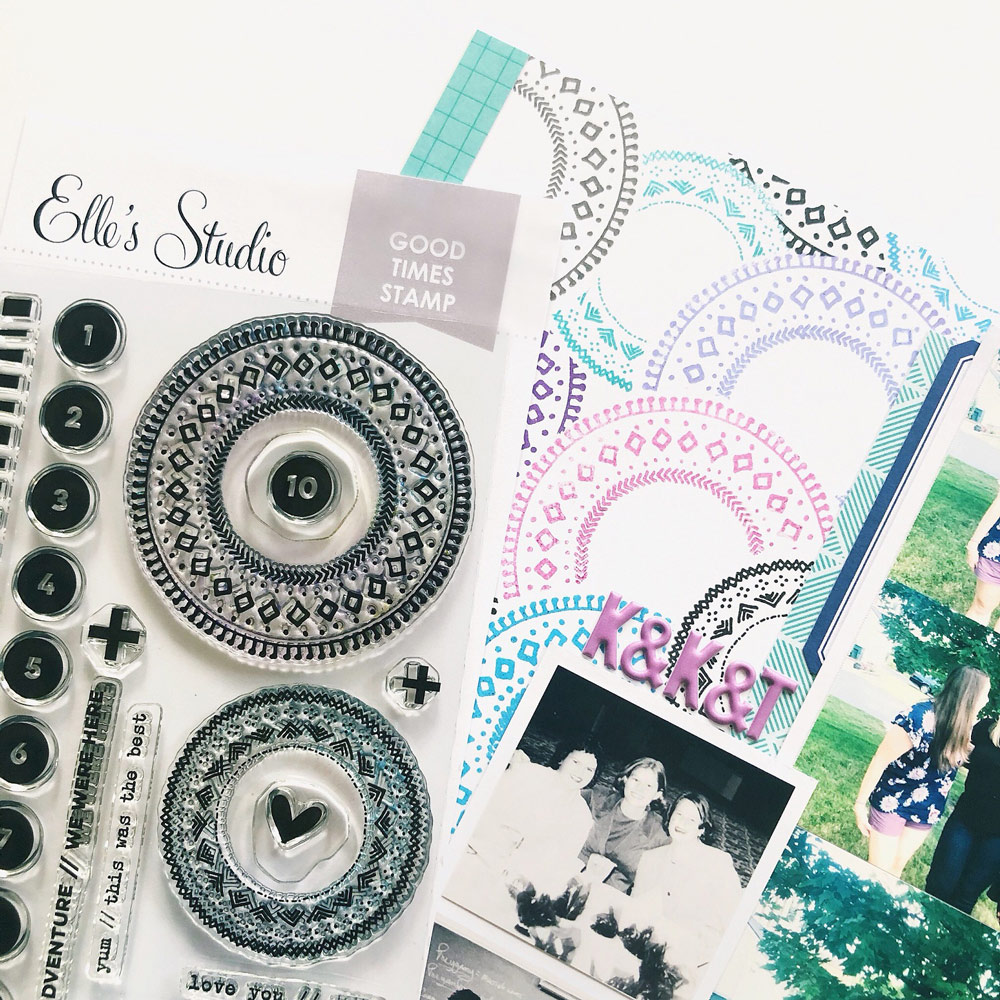
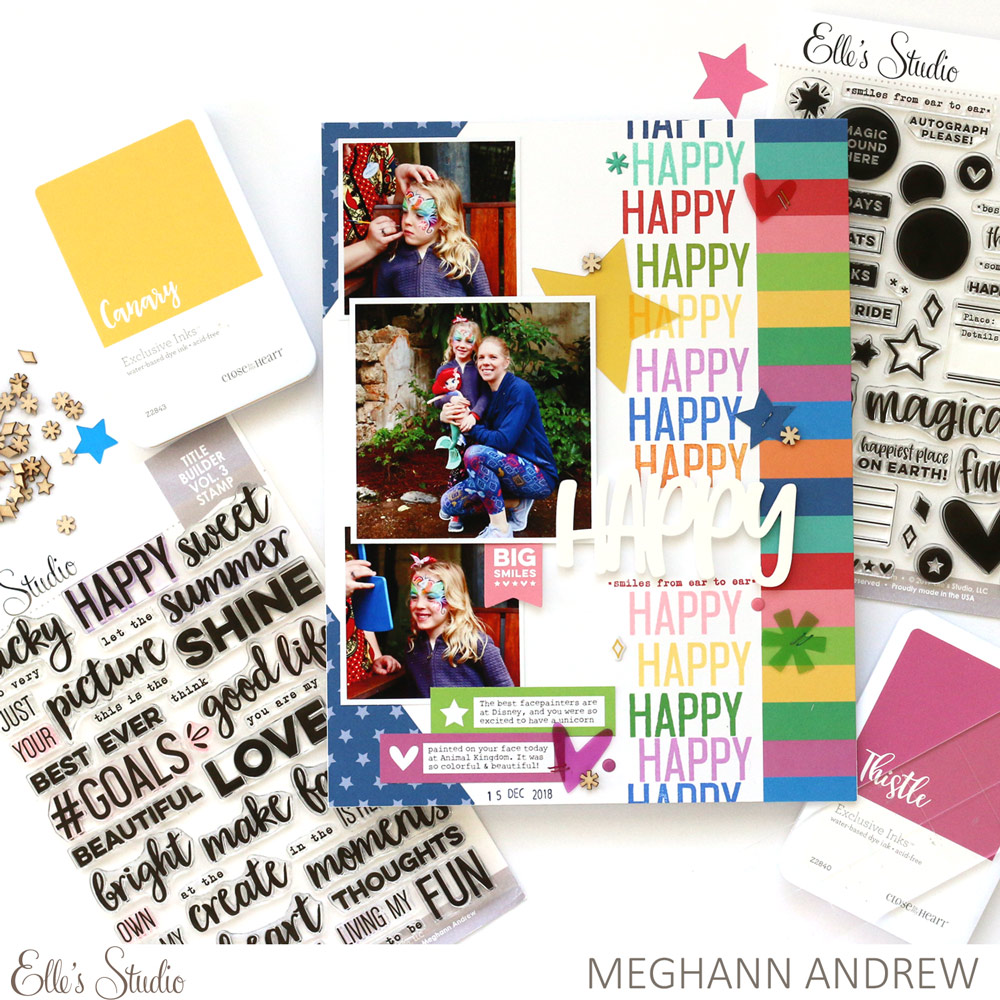
Supplies | September 2019 Kit, September 2019 Digital Cut File, Happy Moments Puffy Stickers, Home Sweet Home 6 x 6 Paper Stack, Noteworthy 12″ x 12″ Paper Collection, Good Times Stamp, Large Jane Alphabet Stamp – Outline, Large Jane Alphabet Metal Die, Here and Now Stamp, Happy Heart Stamp, Oh Happy Day Stamp, Title Builder Stamp, Title Builder Vol. 2 Stamp

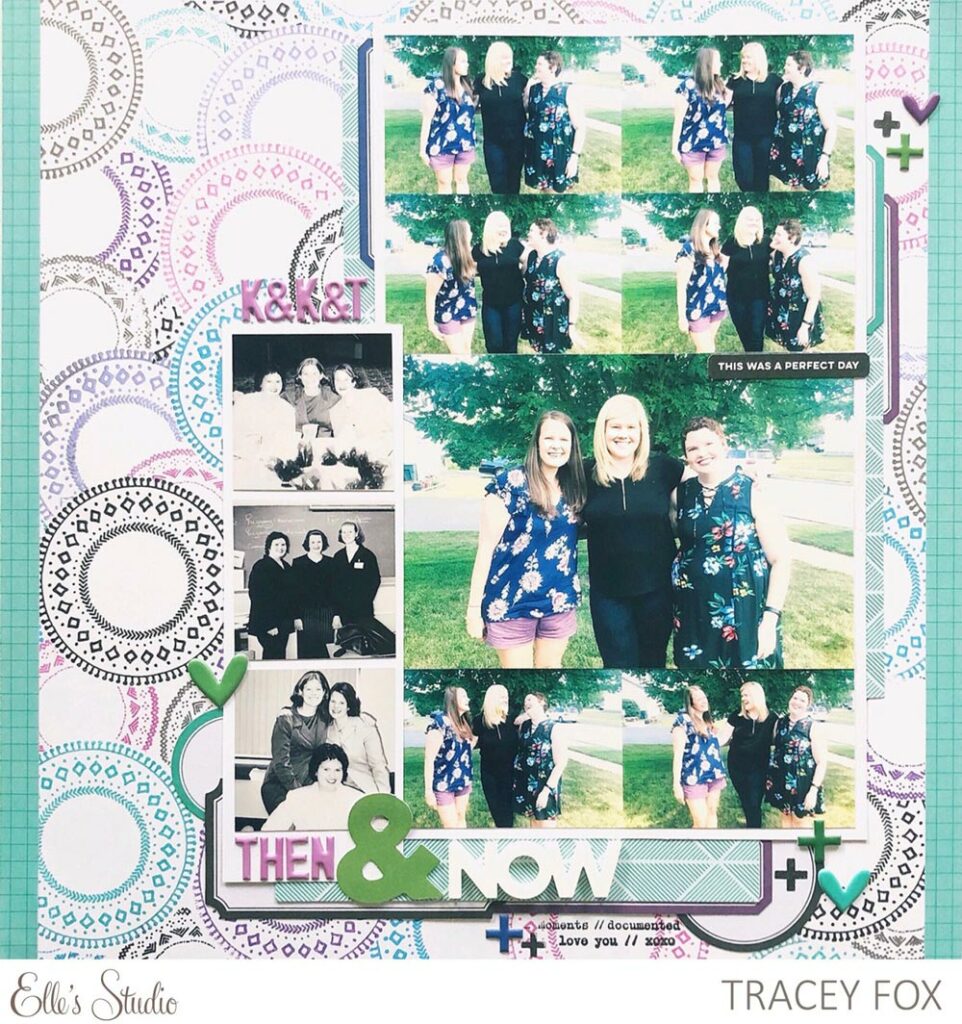
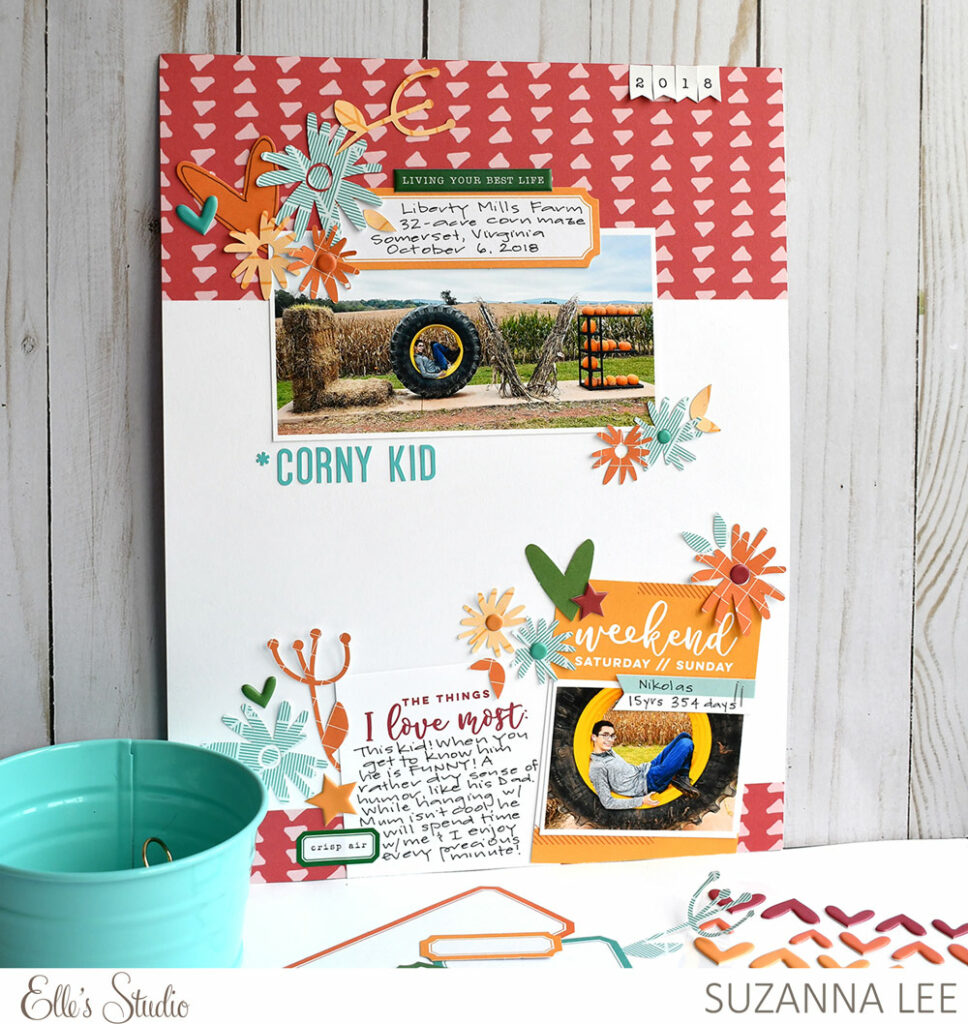
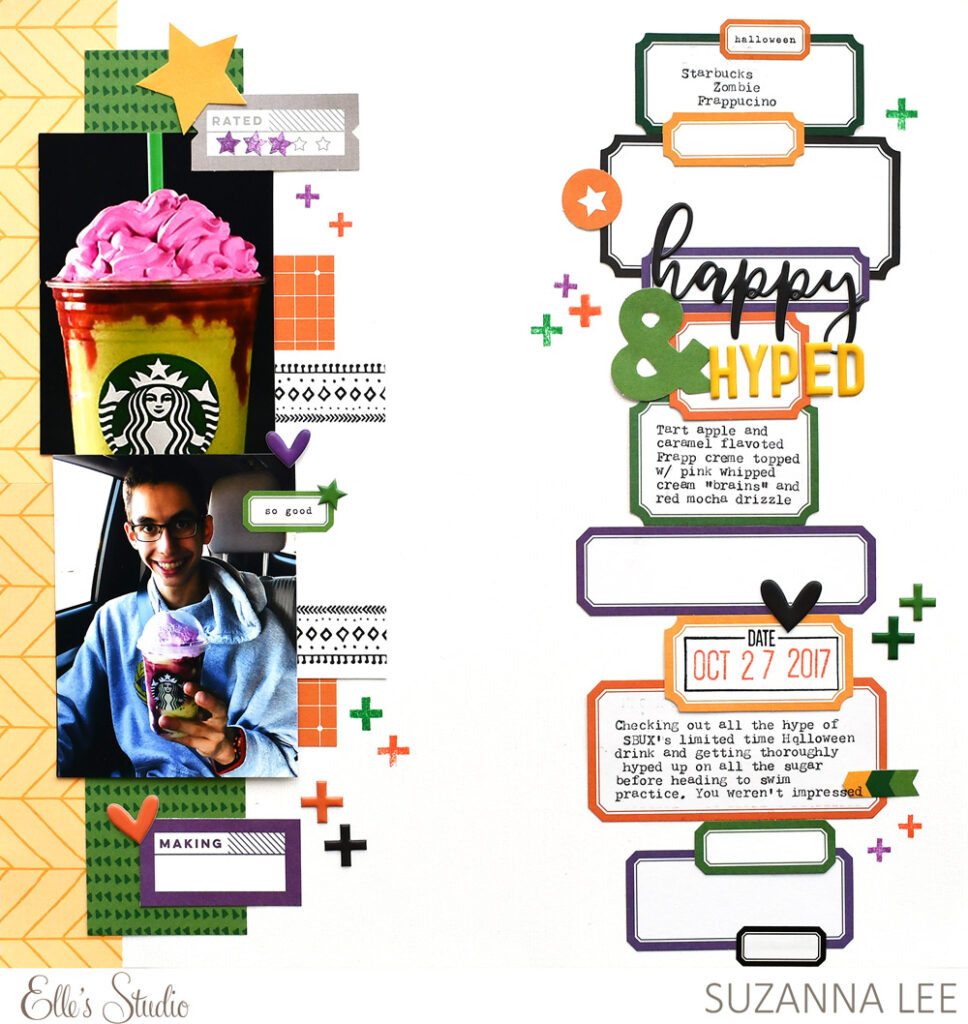
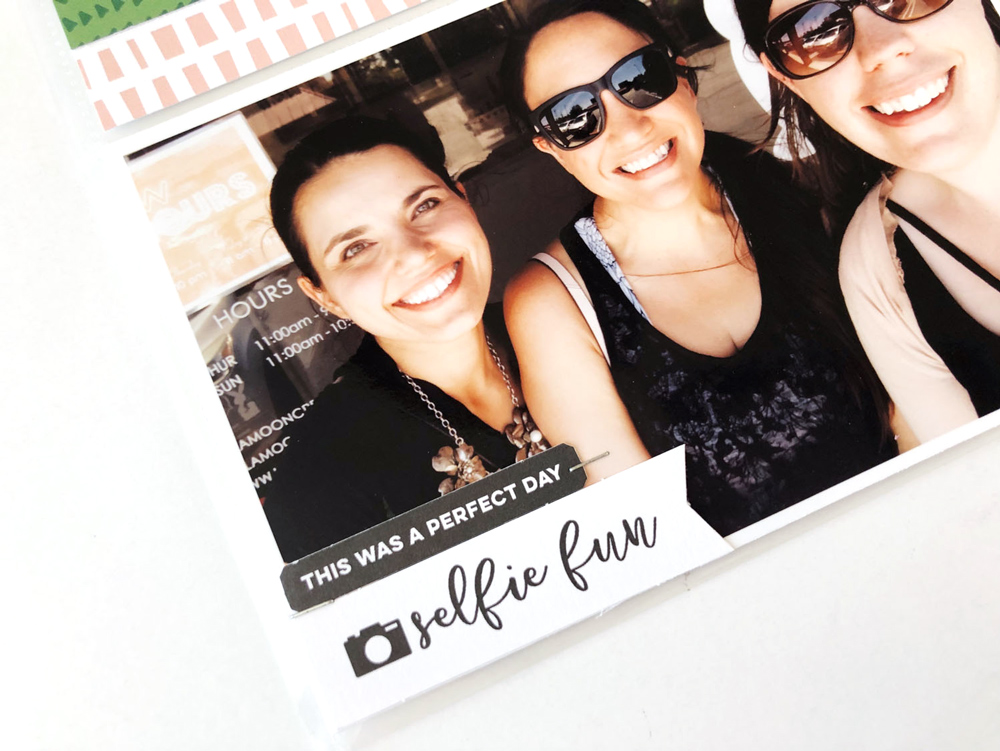
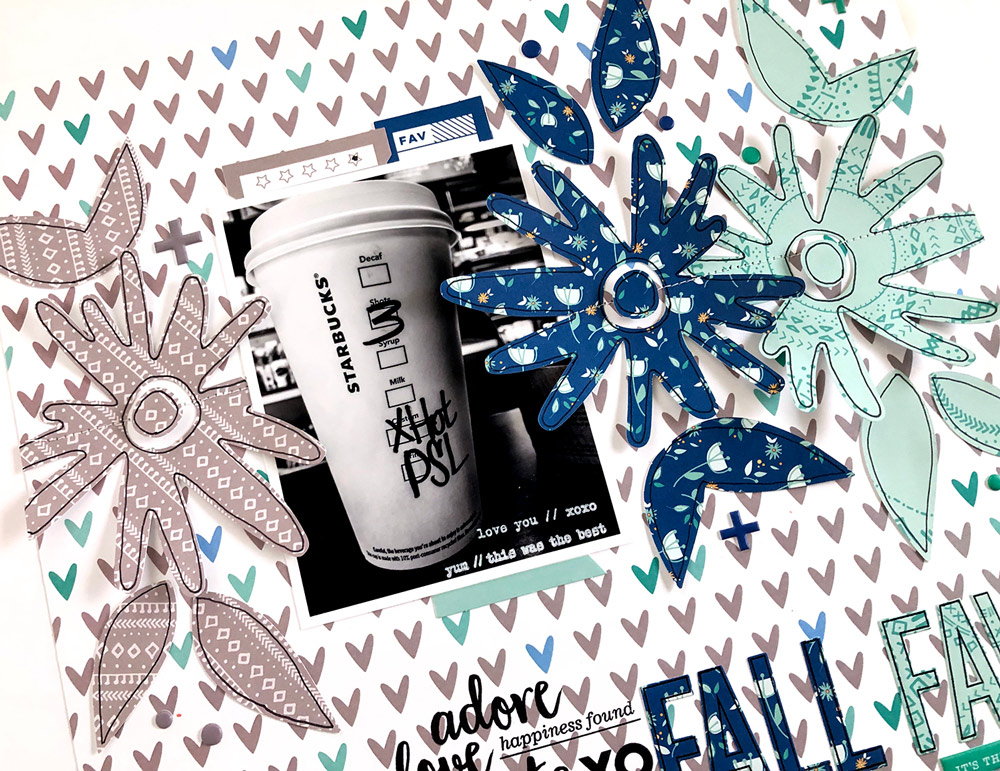
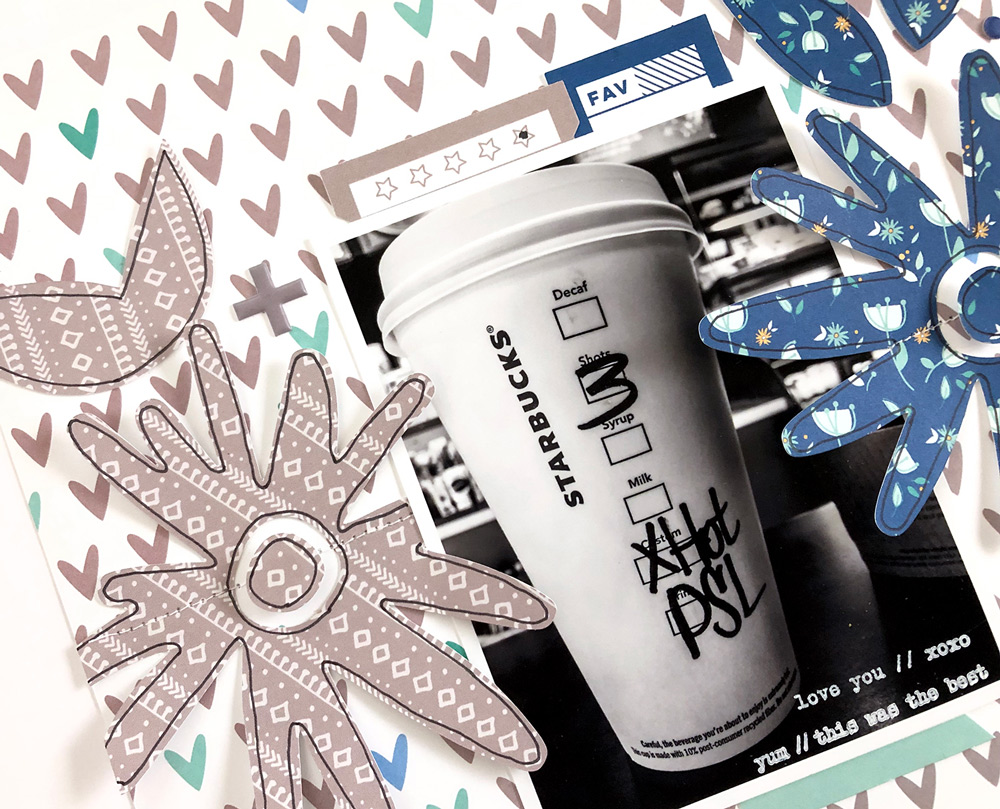
The September Kit and add-ons have so many wonderful elements and the digital content this month is amazing. As soon as I saw the flowers and leaves included in the September 2019 Digital Cut File, I knew they would make an appearance on a project. With this layout, I enlarged the flowers and leaves and cut several on my Silhouette using the patterns in the Home Sweet Home 6 x 6 Paper Stack. To keep the color scheme simple, I used three colors of patterned paper and printed my photo in black and white so it didn’t clash.

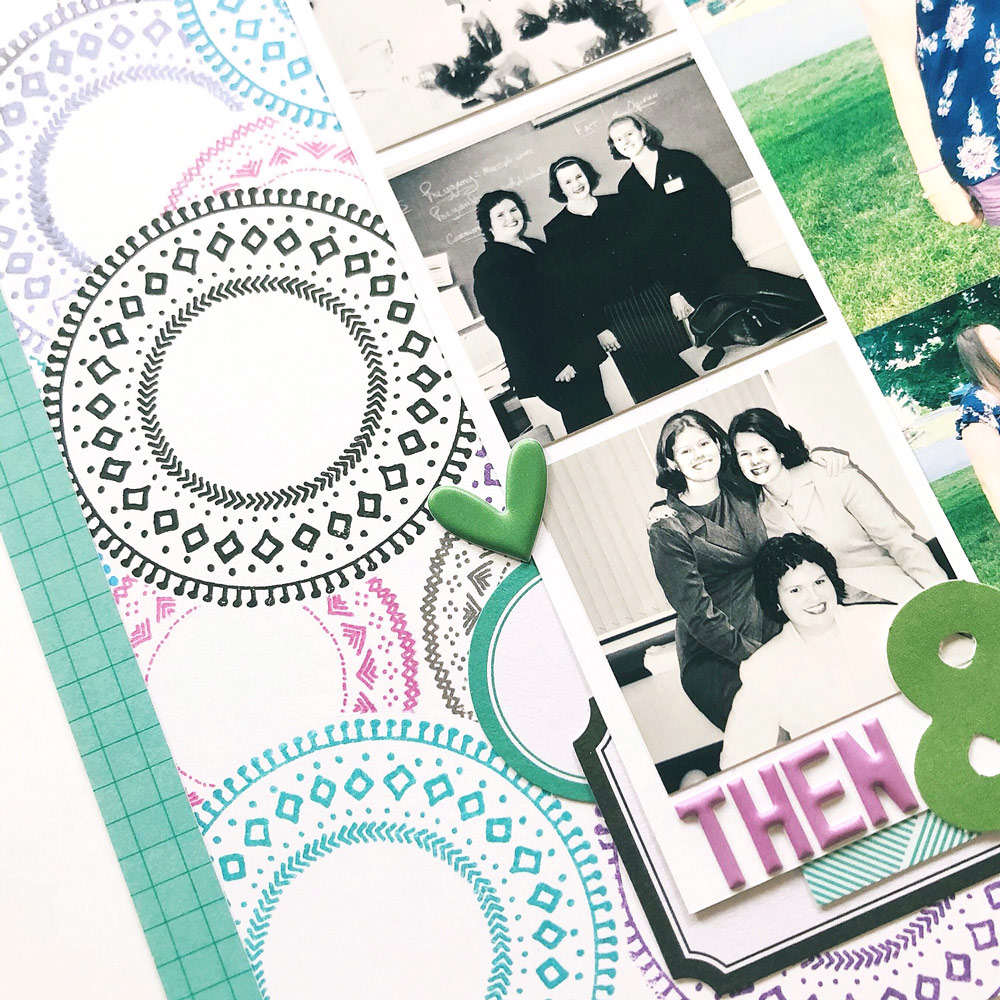
The idea of keeping each color clustered together came to me after I began playing with the placement of the flowers on my layout. I love the look and decided to create the title in the same manner using the outline Large Jane Alphabet Stamp and Large Jane Alphabet Metal Die.

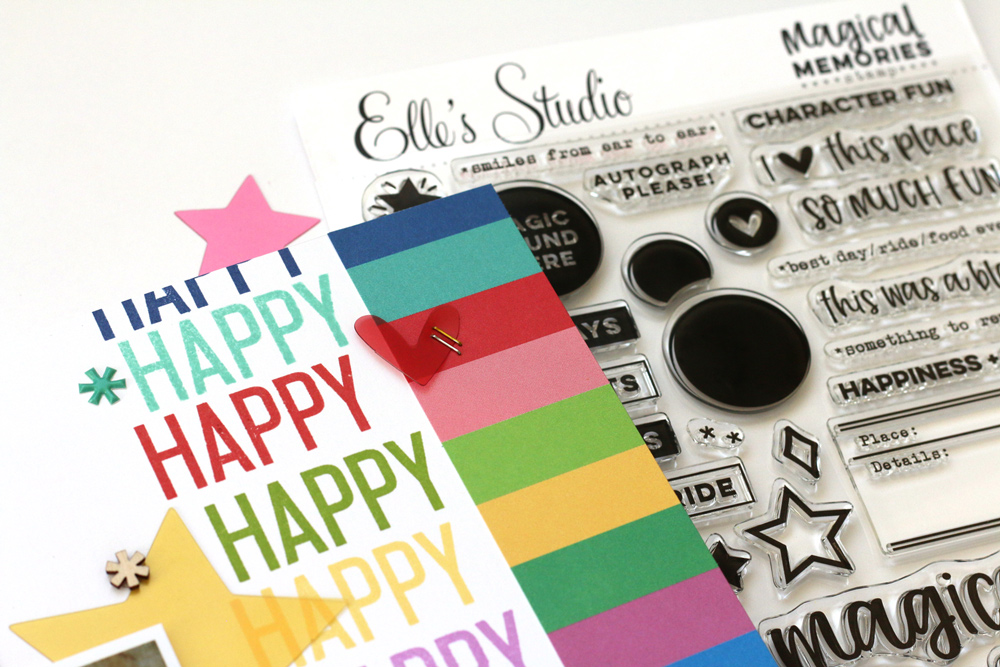
Because the alphas were all outlined, I went back and used my favorite Elle’s Studio Sharpie pen to doodle a border around each flower and leaf to keep everything cohesive.

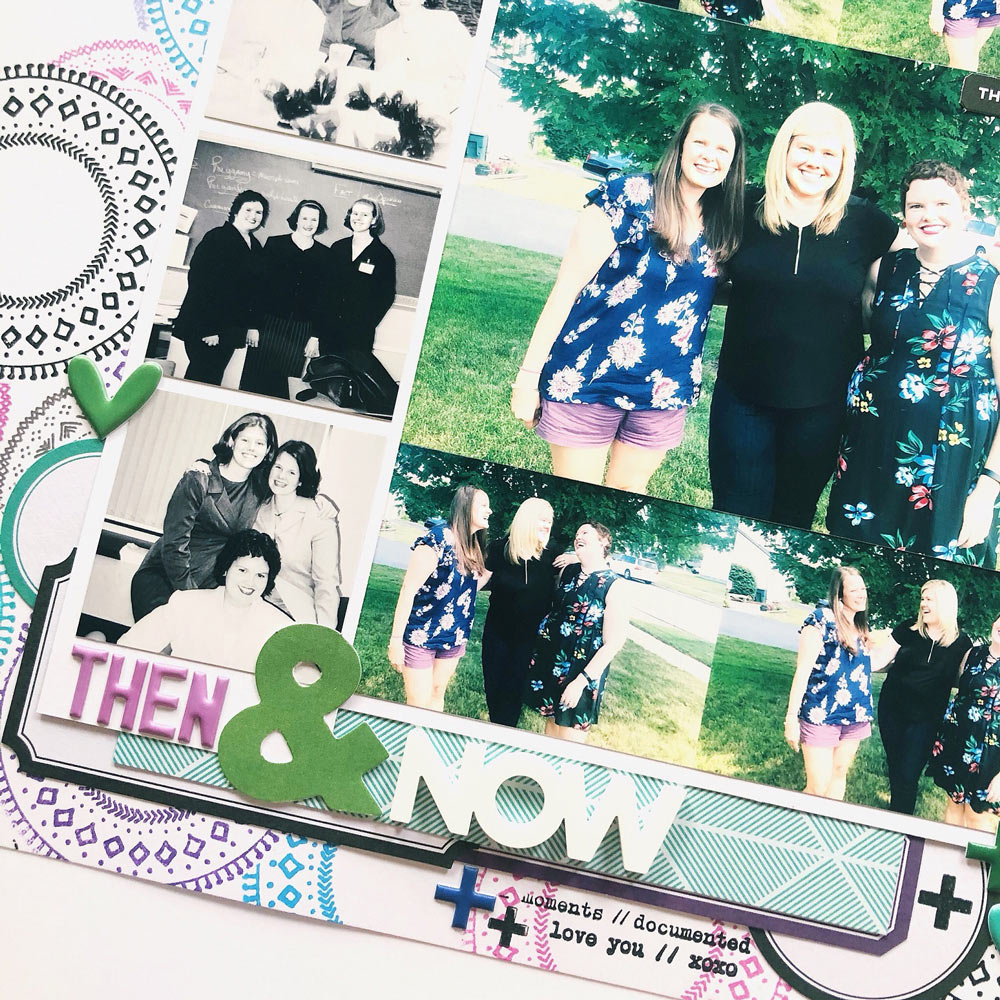
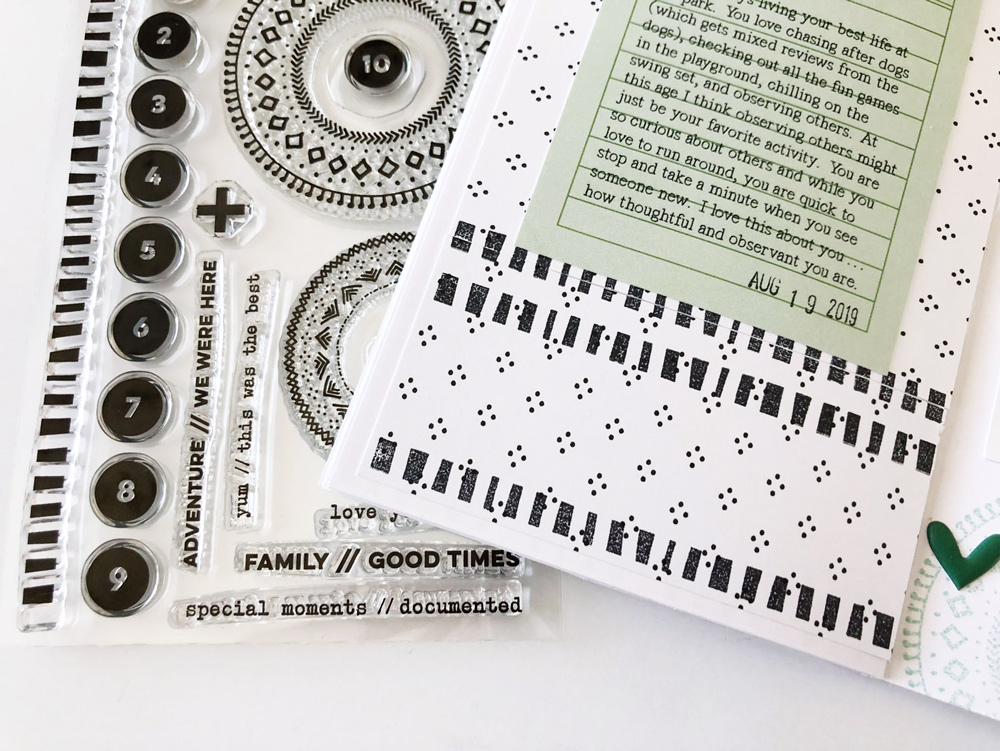
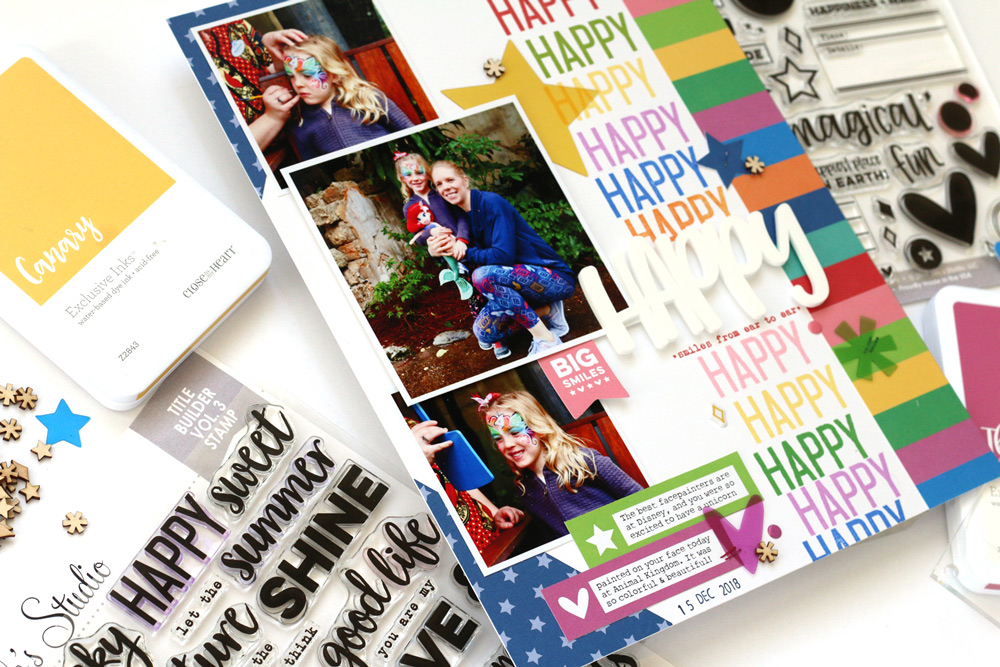
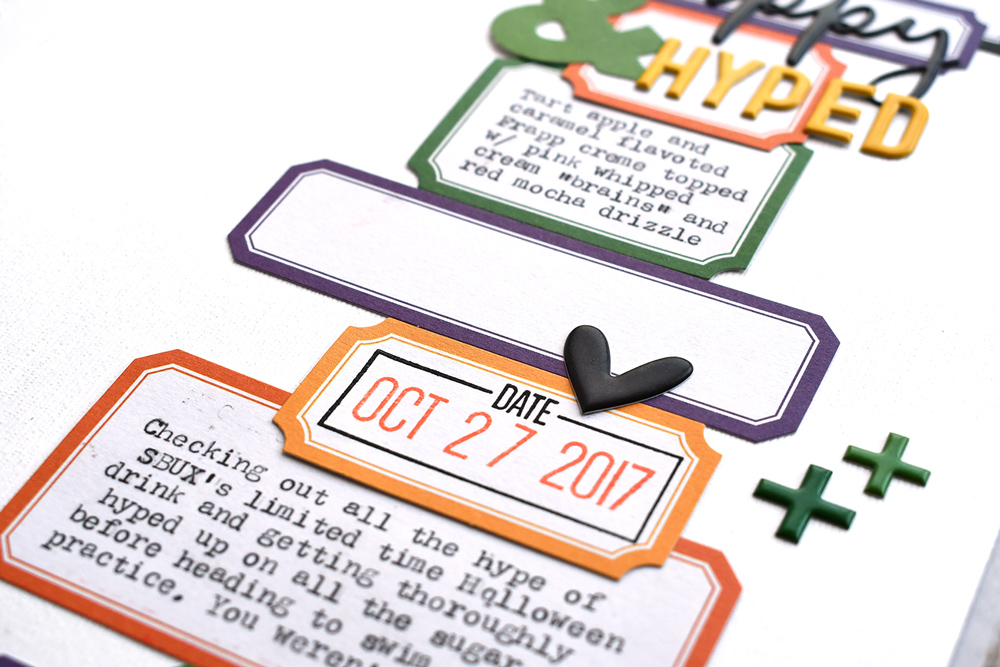
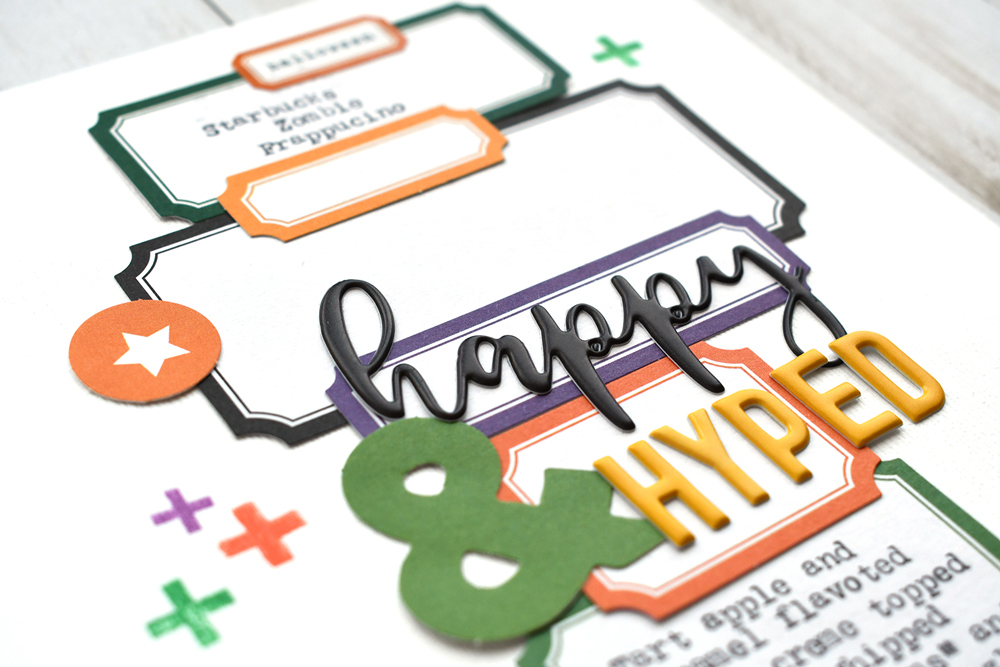
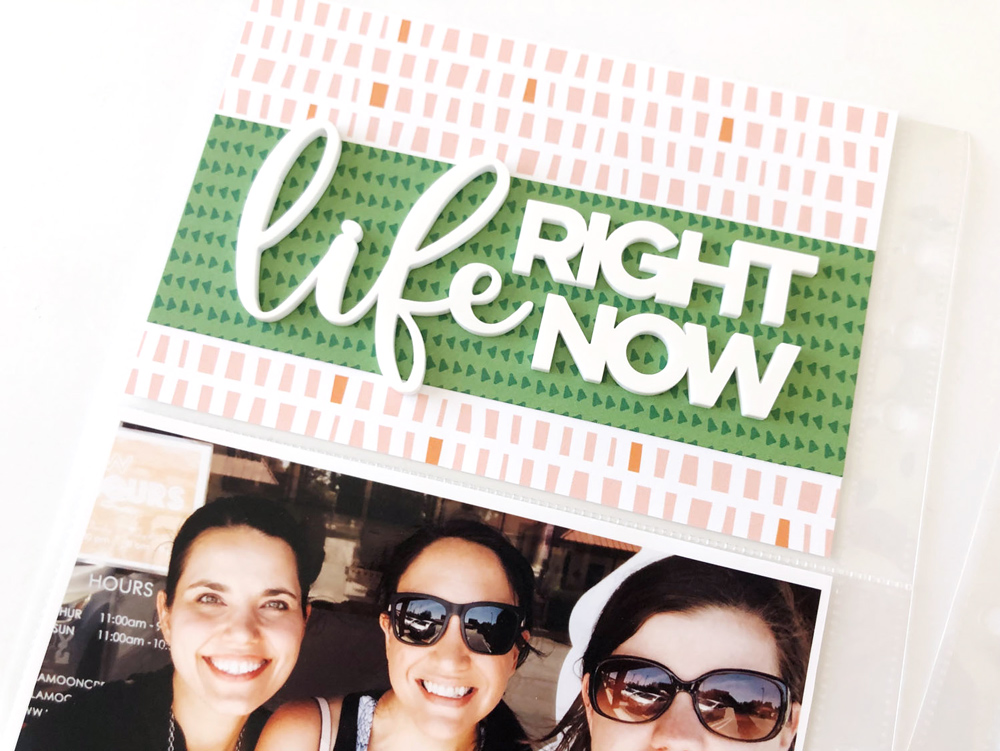
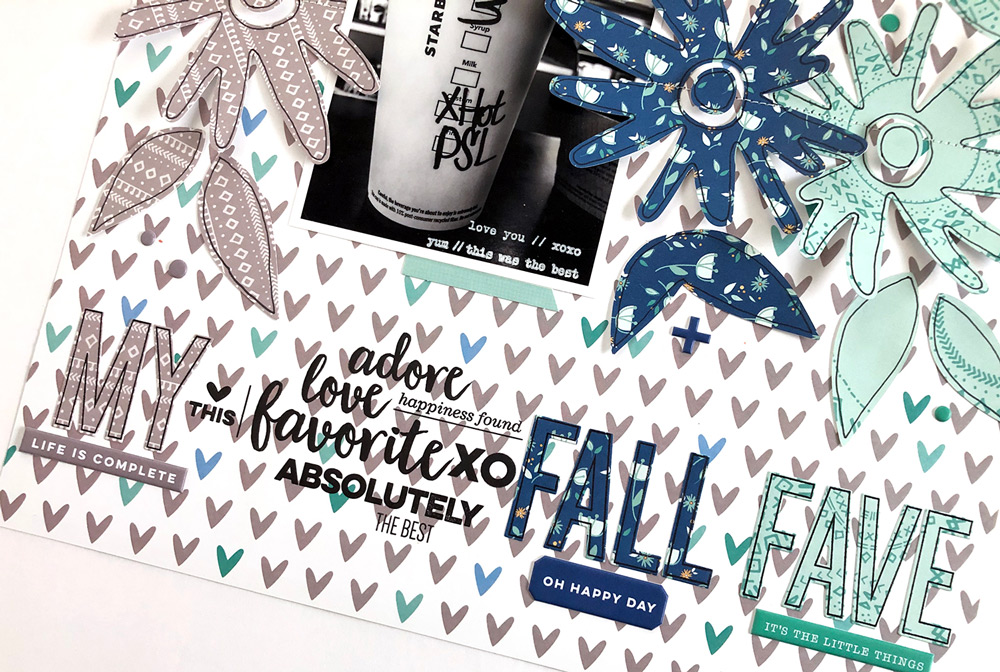
The title was a true labor of love and did take quite a bit of time to complete. After the alphas were stamped and cut, I began laying them out along the bottom of the page. Clearly, the letters do not stretch across the layout, but I really wanted the words to line up underneath their corresponding colors. In order to do this, I pulled out several different stamp sets and began adding sentiments between the first two words. I totally love how it turned out and it even matches the bold black of the writing on my coffee cup!

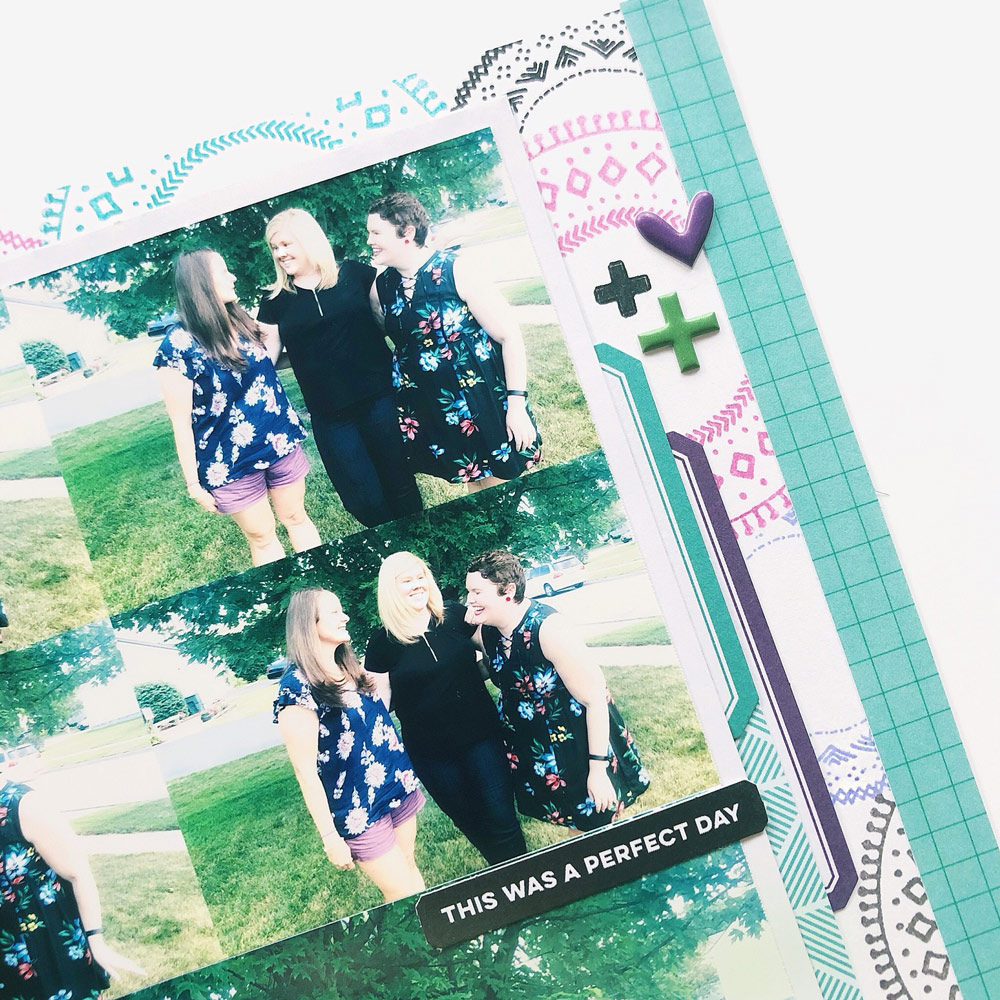
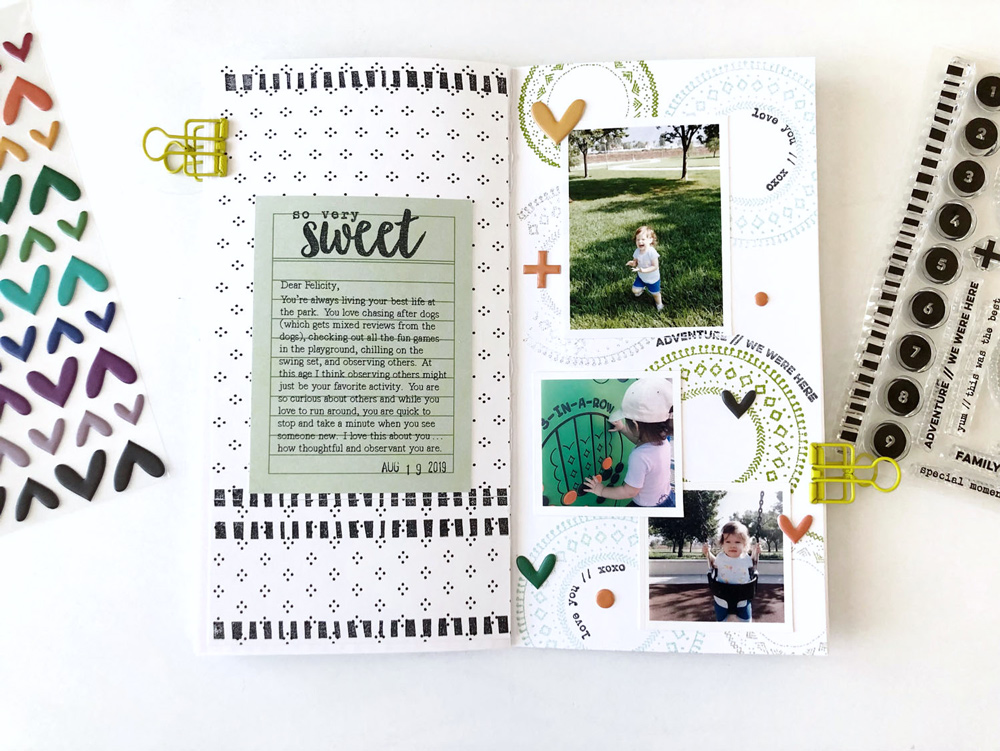
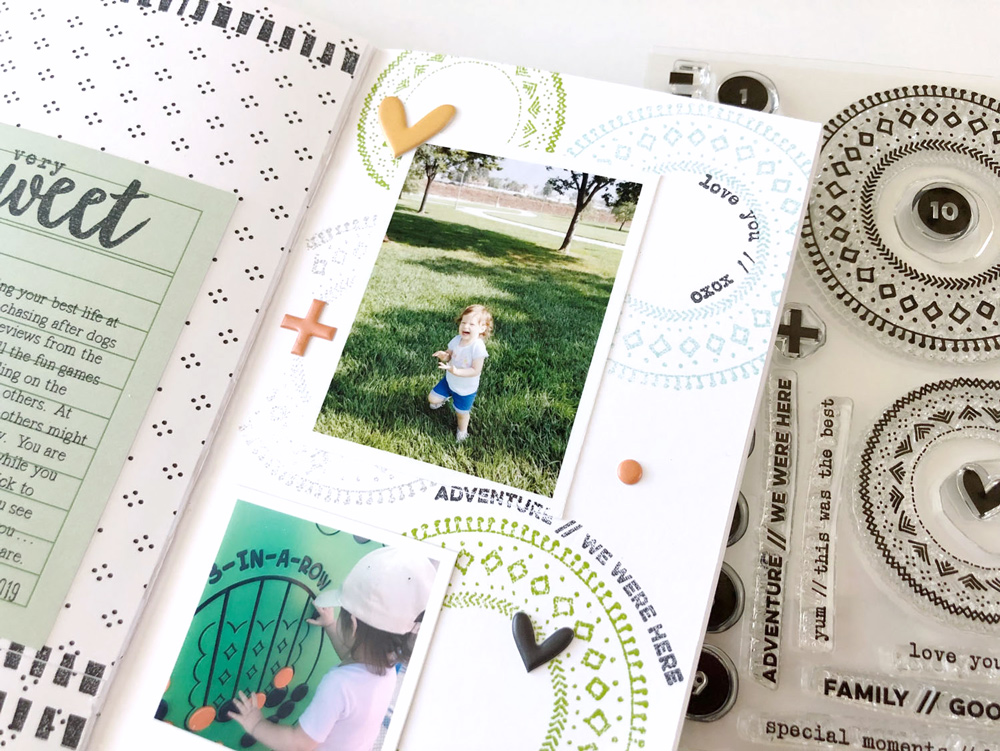
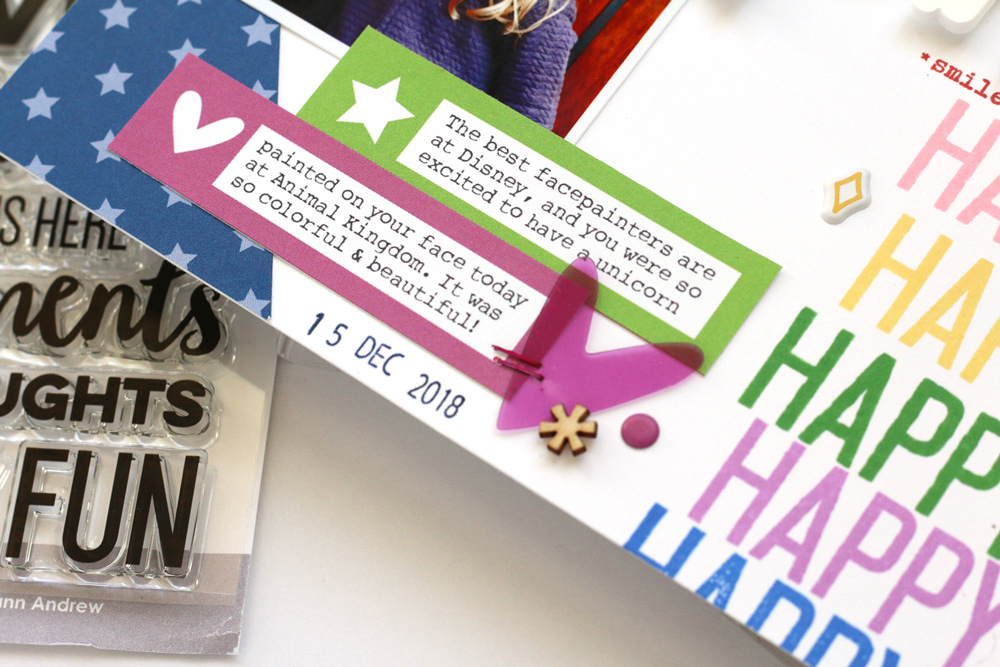
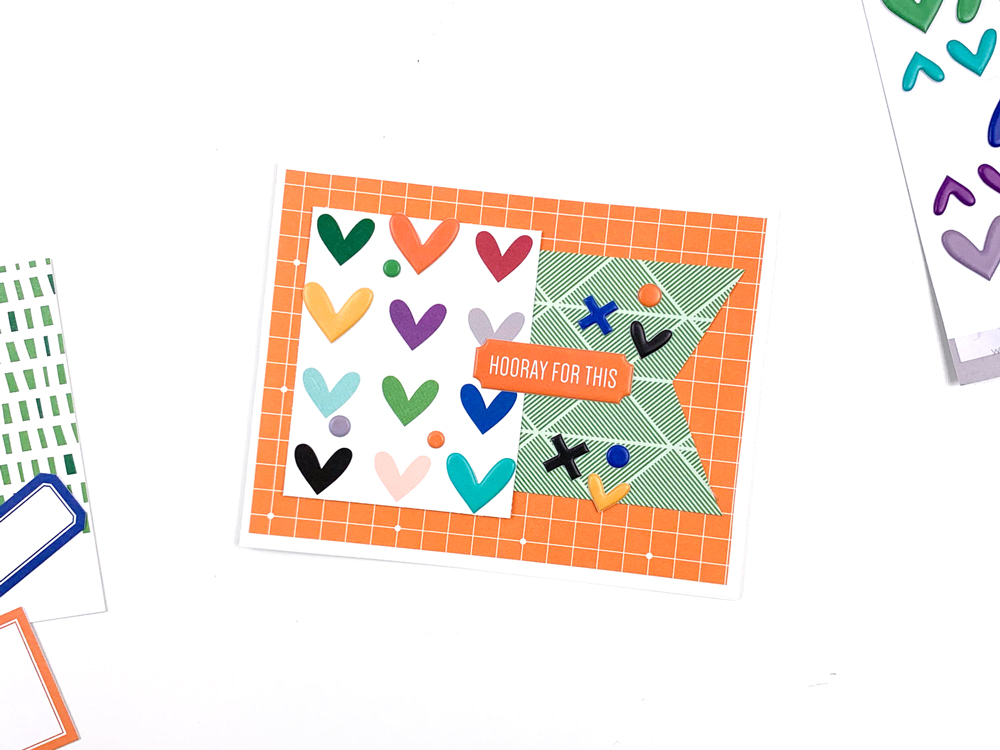
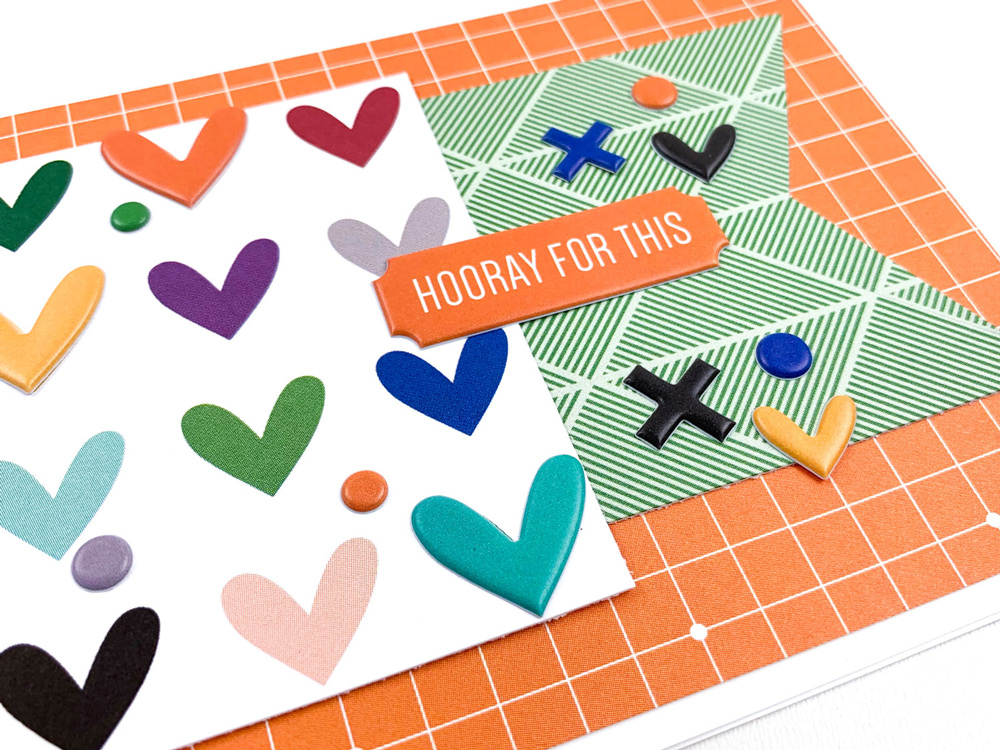
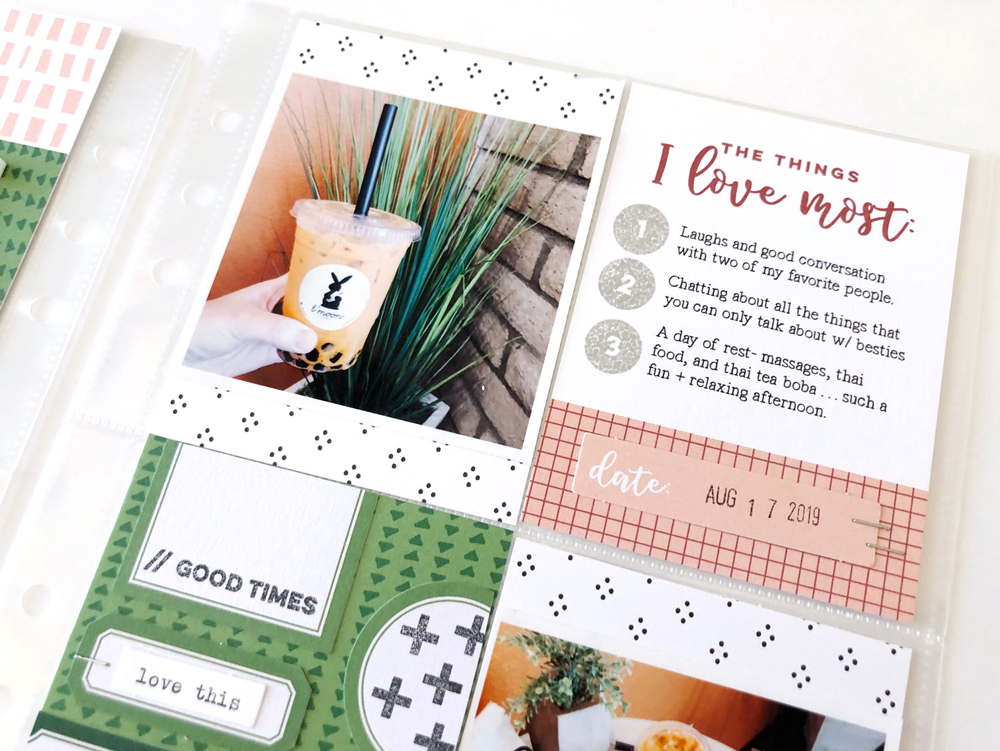
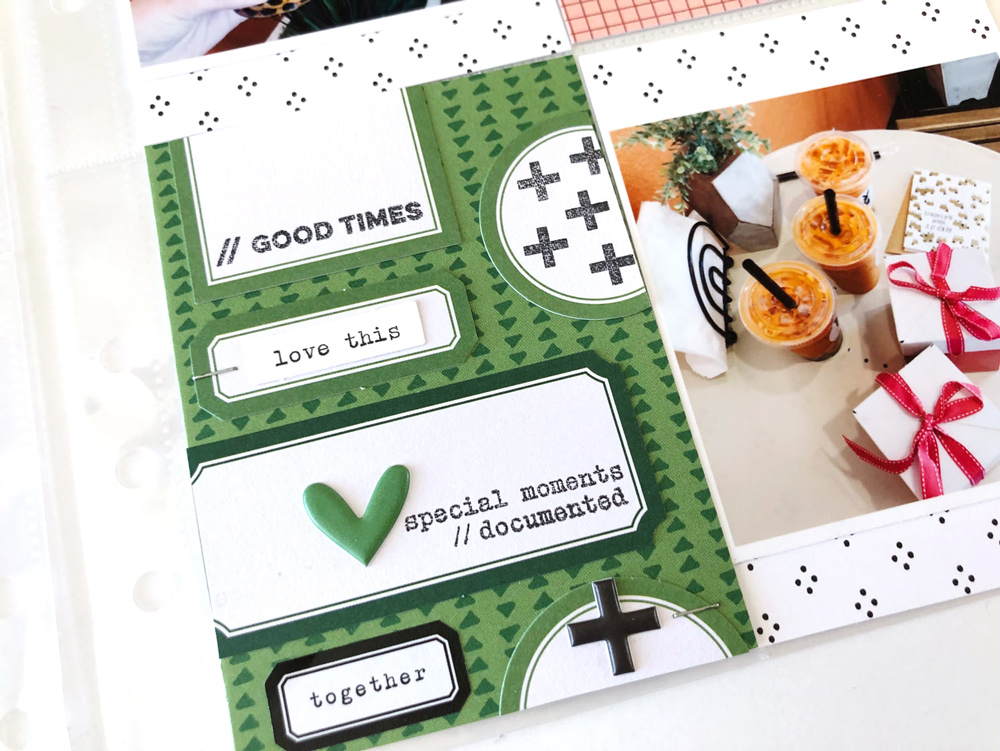
To give the layout a bit more texture and color, I added several of the Happy Moments Puffy Stickers among the flowers and underneath the title.

Today’s project has been so fun to create and I am still inspired to dig into the September Kit and add-ons to see what else I can make. I hope you are enjoying the amazing products this month as much as I am!

Please be sure to share your finished projects by tagging them on social media with #ElleStudio. We can’t wait to see what you create! Have a great day!

Good Times Then & Now with Tracey Fox

Stamps offer so many possibilities to get creative—especially our newest exclusive, the Good Times Stamp! You’ll love the beautiful way that design team member Tracey Fox is using it in her project today to document a significant change over time in a special relationship! Let’s take a look!

Isn’t the new Good Times Stamp gorgeous? As soon as I saw the lovely circle mandala stamps, I knew they would make a great background for a scrapbook page. For the topic of the page, I paired some recent photos with two of my closest friends with some pictures of the three of us in high school. When the three of us get together, we’re always reminiscing and full of nostalgia for all the years we spent growing up together, so it felt like the perfect opportunity to create a pretty “then and now” style page.

Supplies | September 2019 Kit, Die Cut Labels — Jewel Tones, Happy Moments Puffy StickersPuffy Autumn Heart Stickers, Fuchsia Puffy Alphabet Stickers, Life Right Now Acrylic, Noteworthy 12″ x 12″ Paper Collection, Good Times Stamp

In order to layer up the stamps into a colorful background filling my page, I decided to use a masking technique. I stamped each circle mandala a few times onto a sheet of scrap paper and fussy-cut them out so that I would have masks to use so that I wouldn’t stamp the shapes on top of each other. As I worked across the page, stamping the circles in different colors of ink to match the photos I had chosen for this page, I placed the paper masks over the circles I had just stamped before stamping the next one. I love the finished result!

Once my background was complete, I arranged my “then and now” photos on the layout. I had printed my older photos in black and white so that I could choose ink colors for the stamping that matched the more recent photos—pink, teal, and purple with pops of black. 

I tucked some of the new jewel tone Die Cut Labels and a scrap of a patterned 4″ x 6″ tag from the September Kit under the block of photos to build a foundation for my title, which I built using the Fuchsia Puffy Alphabet Stickers, a die cut ampersand from the kit, and the word “now” from the Life Right Now Acrylic. The Good Times Stamp also has these great tiny phrases on it that can add just the right sentiment and touch of embellishment to a page, so I stamped a couple of them under my title.

I created some more layers under my photos using the jewel tone Die Cut Labels and more patterned scraps from the September Kit. The labels make great layering pieces since they provide a nice pop of color and a add a bit of interest with their varied shapes! To finish off the layout, I added some of the Puffy Autumn Heart Stickers and plus signs from the Happy Moments Puffy Stickers.  

Do you ever use a stamp set to fill the entire background of your scrapbook pages? It’s so fun to create your own patterned paper, and the Good Times Stamp offers so many options for creating different looks!

Thanks for stopping by the blog today, and if you try this technique, I hope you’ll post your project on social media and tag #ellesstudio, and also join and share your project in the Elle’s Studio Facebook group!

Sweet Park Days with Sarah Zayas

We welcomed our friend, Sarah Zayas here to the blog last week, and she shared a beautiful pocket page with us using the September 2019 kit and add-ons. Today, she’s switching up her project type and inspiring us with a new traveler’s notebook spread! Let’s take a look at how the products inspired her to create!

Hello, friends! Today I’m back with a traveler’s notebook layout that I had a lot of fun mixing patterns and stamping on. For this layout I wanted to document some of the highlights of going to the park with my daughter.  I love how much movement there is on this page, and while the spread is a little more busy than my typical simple style, I’m still really happy with how it turned out.

Supplies | September 2019 KitHappy Moments Puffy StickersPuffy Autumn Heart StickersHome Sweet Home 6 x 6 Paper StackGood Times Stamp, Title Builder Vol. 3 Stamp

I started with the right side of my layout. I used some of the gorgeous patterned circles included on the Good Times Stamp and randomly stamped them around my page, adding in a few colors that went well with the photos and making sure that some of the circles came off the edge, which helped to ground the stamping. After I placed my photos where I wanted them, I used some of the typed sentiments from the same stamp to add to the inside of the circles. If you haven’t tried bending your smaller acrylic stamps on a stamping block to get a curved line, I’d definitely recommend trying it. It’s produces a really fun look!

On the left side, I cut down one of the patterned papers in the Home Sweet Home 6 x 6 Paper Stack. Since the paper wasn’t quite large enough to cover the length of the page, I had to use another piece of the same pattern paper and line it up as best I could to cover the rest of the page. The bordered pattern stamp from the Good Times Stamp that I added in black also helped to further hide that dividing line!

Lastly, I added a journaling card to the left side of my spread to house my story, which I stamped my title, “so very sweet” on using the Title Builder Vol. 3 Stamp, and then added a few puffy stickers to finish things off.

Even though there’s a lot going on, this page actually came together super quickly and easily using the coordinating September kit and extras! Thanks for letting me share another project with you. I’ll be back later this month to share my final project using these wonderful products!

Happy crafting!

Hi, everyone!  My name is Sarah and I live in sunny Southern California with my husband, daughter, and our dog, Nugget. In my free time you’ll either find me hanging out with my family, reading (I’m a bit of a bookworm!), traveling, spending too much time on Instagram, or of course playing with pretty papers in my studio. I’ve been fortunate enough to work on several amazing creative teams in the last few years and I’m currently part of the Studio Calico creative team.

Find Sarah here on the blog next week to share her final project to inspire us! Until then, find Sarah on Instagram, her YouTube feed, or on her blog!

September Design Team Inspiration: Volume Two

Hello! We hope you enjoyed last week’s reveal inspiration gallery—our round up of the most inspiring projects from our design team using our latest September kit and extras! Today we have our second round of pocket pages, layouts and traveler’s notebook spreads with you, ready to inspire when your ES box of goodies arrives on your doorstep!

July-August pocket page spread by Jess Forster – supplies used | September 2019 KitDie Cut Labels — Jewel TonesPuffy Autumn Heart Stickers, July Wood Veneer, August Wood VeneerHome Sweet Home 6 x 6 Paper Stack

Corny Kid by Suzanna Lee – supplies used | September 2019 Kit, Home Sweet Home Printables, September 2019 Digital Cut FileDie Cut Labels — Jewel TonesAutumn Tiny Everyday Label Stickers, Hazel Alphabet Stickers — White, Jane Alphabet Stickers — TealHappy Moments Puffy StickersPuffy Autumn Heart Stickers

Braid by Daniela – supplies used | September 2019 KitSeptember Labels, Die Cut Labels — Jewel TonesJane Alphabet Stickers — Black Happy Moments Puffy StickersPuffy Autumn Heart StickersHome Sweet Home 6 x 6 Paper StackGood Times Stamp

Home pocket page spread by Candace Perkins – supplies used | September 2019 Kit, Home Wood Veneers, Home Sweet Home 6 x 6 Paper Stack

July pocket page spread by Nathalie Leonelli – supplies used | September 2019 KitDie Cut Labels — Jewel Tones, Happy Moments Puffy Stickers, Puffy Autumn Heart Stickers, Black Puffy Alphabet Stickers, Typewriter Keys Puffy Alphabet Stickers, July Wood Veneer, Life Right Now AcrylicHome Sweet Home 6 x 6 Paper StackLarge Jane Alphabet Stamp – OutlineGood Times Stamp

Right Now by Melissa Mann – supplies used | September 2019 KitSeptember 2019 Digital Cut FileAutumn Tiny Everyday Label Stickers, Puffy Autumn Heart StickersHome Sweet Home 6 x 6 Paper StackNoteworthy 12″ x 12″ Paper CollectionGood Times Stamp

So Cute traveler’s notebook spread by Patricia Roebuck – supplies used | September 2019 Kit, September LabelsSeptember 2019 Digital Cut FileDie Cut Labels — Jewel TonesAutumn Tiny Blank Label Stickers, Jane Alphabet Stickers — NavyHappy Moments Puffy StickersHome Wood VeneersHome Sweet Home 6 x 6 Paper StackGood Times Stamp

Football Moments by Mary-Ann Maldonado – supplies used | September 2019 KitSeptember 2019 Digital Cut File, September LabelsAutumn Tiny Everyday Label StickersHappy Moments Puffy StickersPuffy Autumn Heart StickersNavy Puffy Alphabet Stickers, Home Wood VeneersSmall Months of the Year Wood Veneers, Home Sweet Home 6 x 6 Paper StackLarge Jane Alphabet Stamp — Solid, Large Jane Number Stamp — Solid and Outline

Share your box of new products, or what you’ve created with them by using the hashtag #EllesStudio on Instagram, or in our Elle’s Studio Facebook group!

Our new website is coming soon!

Exciting new changes are headed your way and begin next week when we reveal our brand new website which will feature a smoother, more user-friendly shopping experience, the ability to choose bundled shipping during checkout without a coupon code for our kit subscribers, and more, making it easier and faster for you to find what you are looking for on our site and check out quickly, without any hassle!

WHAT WILL CHANGE: With this new and exciting transition comes a few minor changes. Your current order history will not carry over to the new website. If you need access to your order history and you do not have copies of your emailed receipts, we recommend taking a screen shot of your order history as soon as possible in your account. We also ask that you download any digital files that you have purchased. We have on file a copy of all receipts that have been emailed to you, so if at any time in the future you need us to forward any receipt, or any digital files to you, please email us, and our customer service team will be happy to help!

WHAT DOES THIS MEAN FOR MY KIT SUBSCRIPTION: Your current kit subscription will also not carry over to our new website. We are so sorry for this inconvenience, but we have a process in place to make the re-subscription process as smooth as possible, and will make sure to reserve your subscription spot for our October kit! If you currently subscribe to our kit, please check your email to learn about the special offer you will receive when you re-subscribe with our October kit! If you do not see our email in your inbox, please check your promotions/spam/junk mail folder. If you still do not see our email, please email us at info@shopellesstudio.com

Thank you so much for your patience with us during this transition and we look forward to all of the fun things our new site will bring! If you have any questions or concerns, please feel free to email us at info@shopellesstudio.com and we will be happy to help!

Matching Magical Memories and TB3 with Meghann Andrew

Hello, friends! It’s Meghann Andrew here with you today and I hope you’re having a wonderful, crafty weekend! It has been a while since I scrapped a Disney memory, and since the days are counting down to our next trip to “the most magical place on earth,” I decided it was time to pull out the colorful Magical Memories collection! But, when I went to craft my title, I realized that the word I needed was featured on the Title Builder Vol. 3 Stamp, so I combined the two to create a most happy 8-1/2″ x 11″ layout! Take a look:

Supplies | Magical Memories Journaling Tags, Magical Memories Acetate Die Cuts, Magical Memories Puffy Stickers, Magical Memories Happy Acrylic, Magical Memories Wood Veneer Confetti, Magical Memories 6 x 6 Paper Stack, Magical Memories Stamp, Title Builder Vol. 3 Stamp

This page documents my daughter’s delight at having her face painted while visiting Animal Kingdom in Disney World last year—a great memory to record. To match all of the beautiful colors on her face, I grabbed the colorful striped pattern in the Magical Memories 6 x 6 Paper Stack, cut it into two 1-1/2″ x 6″ pieces and added it to the right edge of my layout.

This is when I decided that I wanted my title to be a BIG part of my layout, and what better word to use for a Disney memory than “happy?” I grabbed the Title Builder Vol. 3 Stamp and matched my ink colors to the colors in the paper to create a waterfall of my chosen word along the right side of the page.

Mixing font styles and colors in titles creates eye-catching contrast, and I decided to break up the monotony of my stamped “happy” word with the Magical Memories Happy Acrylic, adhered at the center of the column. To finish off my title, I stamped “*smiles from ear to ear*” from the Magical Memories Stamp under the acrylic word. I just love how this magical stamp pairs with Title Builder Vol. 3 Stamp to create this bold and fun design!

Three photos on the opposite side balanced out the weight of my title column, and I added triangles of the dark blue star pattern from the Magical Memories 6 x 6 Paper Stack at the corners to add more weight. My journaling was added to the icon cut-apart tag from the Magical Memories Journaling Tags and placed at the bottom of my photos, matching the colors to the “happy” words at the right.

I kept my embellishment light, knowing that the two columns of my photos and my title needed to be kept as the focus. Matching the colors on the stamped word and striped patterned rows, I added Magical Memories Acetate Die Cuts and Puffy Stickers from the top to bottom of my page, and finished off with a sprinkle of Magical Memories Wood Veneer Confetti to add a neutral texture.

I am so “HAPPY!” with how this page turned out, and I’d love for you to watch it come together in this process video:

Thanks so much for watching! I hope you try combining the Title Builder Vol. 3 Stamp with the Magical Memories collection to craft a truly memorable, magical moment!

Quick and Simple Cards with Steph Grimes

When was the last time you tried to send a handmade card and found your card collection lacking? The end of the year is a great time to create cards and send to the ones we love, and Steph Grimes is with us today to share two quick and simple, yet beautiful designs created with our newest products! Let’s see what she made!

Hi everyone! It’s Steph again and I’m here to share two greeting cards that I made using the September 2019 Kit and extras. I used to do a TON of cardmaking, as in, it was my main hobby; but since scrapbooking has taken center stage again, I have barely made any cards in the last few years. I noticed a few weeks ago that my card stash is just plain sad, and dwindling. To rectify that, I am going to try to make a few quick and easy cards each month. Starting now!  

It’s also worth mentioning that these two cards took me around 20 minutes to make both of them!


Supplies | September 2019 Kit, Die Cut Labels — Jewel Tones, Happy Moments Puffy Stickers, Puffy Autumn Heart Stickers, Home Sweet Home 6 x 6 Paper Stack, Jane Alphabet Stamp

I like to have a variety of cards in my stash for any occasion that might require a card. So this month I made a “congrats on your new home” card and a general celebration card. I started by picking the tags from the September Kit that I wanted to use: the house tag and the peach mandala tag. Every decision I made following was inspired by those two choices. I decided that the house tag was too large to use whole, so I cut the house image out to use on its own and then cut a little banner around the phrase on the card. I also really liked the idea of adding a little more shape to the card by trimming around the mandala to create curved edges. These three elements together would create the centerpiece of my card.


After I had the main design of the card figured out, I needed to select the rest of the elements that would round it out. I used a plain white card base and then layered on a gray patterned paper and a strip of yellow patterned paper, both from the Home Sweet Home 6 x 6 Paper Stack (which is gorgeous, by the way!) I decided to tear the edge of the gray a little for some added visual interest and to make it less boxy.

 I also knew that I wanted to add a label and additional sentiment, so I used the Jane Alphabet Stamp and coral ink and one of the teal colored labels from the jewel-toned Die Cut Labels to create a label that says “congrats!” The final touch was adding in an odd number of embellishments. On my cards, if I am adding embellishments, I like to stick to odd numbers, often three, and arrange them in a visual triangle. In this case, I used three little shape stickers in matching colors from the Happy Moments Puffy Stickers and Puffy Autumn Heart Stickers

For my second card, I had a specific purpose in mind for creating this particular card. My cousin just started a new job and she loves all things autumn! I went into this second card knowing I wanted to use the beautiful fall colors included in the September Kit and really lean into that warm color scheme!

Again, my goal was to make quick and easy cards, so I went really simple with this second card. I started with the “hooray for this” puffy sticker from the Happy Moments Puffy Stickers, then I picked the multicolor heart card from the September Kit as my main element. I trimmed it down a good bit so it would fit a little better onto the card. Then, I used the green 4″ x 6” tag in the September Kit and cut it into a banner shape by cutting along the shape of the pattern on the card to make the ‘flag’ end. I tried a couple options for a background, but ultimately decided on using the orange grid paper from the Home Sweet Home 6 x 6 Paper Stack. Then, I layered everything up! 

For embellishment on this card, I used hearts and a few other shape stickers from the Happy Moments Puffy Stickers and Puffy Autumn Heart Stickers to add a little extra dimension. On the heart tag, I added a trio of puffy hearts in matching colors right on top of the printed hearts. Then I used the other shapes in two little clusters around the sentiment. 

I hope this gives you some ideas for how to use the September 2019 Kit and extras (or any Elle’s Studio kit!) to create some quick and easy greeting cards to use for a nice handmade touch to let someone know you are thinking of them! Do you like to make cards? What are some of your tips for making quick cards? Share them on Instagram using the hashtag #EllesStudio. I can’t wait to see what you make!

Labeled with Love with Suzanna Lee

We love our newest BIG pack of Jewel Toned Die Cut Labels that coordinate perfectly with our September Monthly Kit! Today, Suzanna Lee is showing us that they’re not just for adding quick journaling or a date—they can actually be used as one of the main elements on your page! Let’s take a look!

Hiya, scrappy peeps! It’s Suzanna here today! So what do you think of the September kit and add on’s this month? To DIE for, right?! The color palette is just sublime. Elle’s Studio really nailed the fall color palate. And the accompanying jewel-toned Die Cut Labels? PERFECTION! Perfect for not just the odd sprinkling here and there, but as a focal element to a scrapbook page! Check it out:

Supplies | September 2019 Kit, September Labels, Die Cut Labels — Jewel Tones, Autumn Tiny Everyday Label Stickers, Puffy Autumn Heart Stickers, Home Sweet Home 6 x 6 Paper Stack, Good Times Stamp, Noteworthy 12″ x 12″ Paper Collection

There is an abundance of shapes, sizes and colors to choose from in this pack of 34 Die Cut Labels! I selected an assortment of black, greens, yellow, orange and purple to coordinate with the Halloween-themed photos that I was using. There are still plenty of labels remaining for other projects, despite using enough to run the length of a page!

I then ran the labels down the length or height of the page, alternating colors and shapes. Some overlap and others abut one another.

Two of the Autumn Tiny Everyday Label Stickers were a perfect compliment for variation in size while a label from the September 2019 Kit and the September Labels on the left hand side strive to carry over the horizontal elements.

The labels serve not only as layers, but resting places for my title, journaling, date and other miscellaneous information relevant to the layout, while also serving as embellishment and color to the project! I like to think of it as “functional decorating”! This layout is most certainly labeled with love!

Thanks for stopping in today! I hope I’ve given you a fresh idea for your new pack of Die Cut Labels!

Documenting Transitions with Jess Forster

Hi, friends! It’s Jess with you today! Last week, my youngest kiddo, Sam, started junior kindergarten—insert sad tear emoji! Yes, it’s hard to believe that he is old enough to go to school; however, regardless of the shock I am in, I feel like now that I have two kids attending the same school, I am extra aware of the transition from summer to fall. Today, I am here to show you how I am documenting small details of everyday life as we move through this time. 

Supplies | September 2019 Kit, Home Sweet Home PrintablesHappy Moments Puffy StickersLife Right Now AcrylicHome Sweet Home 6 x 6 Paper Stack

I was really inspired by the blue 4″ x 6″ “New Season / New Routine” journaling tag from the September 2019 Kit. Specifically, I have been conscious over the last few weeks of the time my kids were going to bed. This card is helpful to visually show a timeline of what our first week back to school was like. Some days feel exactly the same but in 10 years I know I will look back and wonder was it like our days were like when both kids started school. Hooray for simple journaling prompts!

I used the Life Right Now Acrylic and paired it with the yellow patterned paper from the Home Sweet Home 6 x 6 Paper Stack from the September release to create a big bold title. I love “in the moment journaling” and this transition feels like an important threshold that our family is crossing. 

I used the 3″ x 4″ red journaling tag from the Home Sweet Home Printables and recoloured it in PSE to yellow to match the complementary colour scheme I was going for. On the card, I reflect on my daughter’s first day of school and how the first day for my son was very similar. I also asked each kiddo what their favourite part was of their day. I recorded their simple responses, which I printed on a 3″ x 4″ journaling tag from the June 2019 Kit and paired with the “fav” navy blue die cut from the September 2019 Kit, dated with a simple date stamp. 

I love this asymmetrical 6″ x 12″ + 9″ x 12″ layout about transitioning back to school! I hope this inspires you to tell your own stories about the change of seasons. Now if you will excuse me, I am going to cry! Ha! Thanks for reading!

Life Right Now with Guest Designer Sarah Zayas

We are so excited to welcome September’s guest designer Sarah Zayas to the Elle’s Studio blog today to inspire us to create with the September kit and add-ons! Sarah’s style is clean and bold, with beautiful color combinations, intentional photography and stamped images always on display! That’s why we thought she would be the perfect guest to highlight our newest products in her projects, and we think you will agree!

Hello, friends!  I am so happy to be back as the Elle’s Studio guest designer this month! The September kit and add-ons are absolutely gorgeous and I had so much fun playing with everything. Today I’d like to share a 6″ x 8″ pocket page layout with you.  

Supplies | September 2019 Kit, Die Cut Labels — Jewel TonesAutumn Tiny Everyday Label StickersHappy Moments Puffy StickersPuffy Autumn Heart StickersLife Right Now AcrylicHome Sweet Home 6 x 6 Paper Stack, Good Times Stamp

For this layout, I trimmed down some of the patterned papers found in the new Home Sweet Home 6 x 6 Paper Stack to act as my filler cards and backgrounds for my photos. I used the pink striped paper for my title card and layered a strip of green striped paper on top of that. The green helps to make the title stand out, plus it ties in the green from the right side of the spread. I love the Life Right Now Acrylic, and while I think they would look amazing on a traditional layout, I love how nicely they also work in pocket pages! 

On the right side of my layout, I used some of the black dot diamond patterned paper to back my square photos.  I kept these pockets really simple because it’s so easy to over-embellish 6″ x 8″ pages. I prefer a more simple style, so I try to refrain from adding all the things to at least a couple of pockets to maintain that look.

In the bottom left pocket, I decided to incorporate some Die Cut Labels and stamping: two of my favorite things when it comes to crafting! I don’t know about you, but I have a drawer filled with labels and I’m always trying to figure out ways to use them. One way that I like to incorporate them in pocket pages is to stagger the labels on a patterned paper. It creates small windows that can then be filled with just about anything. I chose to use some of the green labels here because it helped to make the edges blur into the background. From there I used some pattern and phrase stamp sentiments from the Good Times Stamp to fill little areas of each label. I love how this customized filler card turned out!

Finally, I added in my journaling card. When I placed my text I left a little bit of room to the left of each bullet point so that I could stamp out some numbers using the Good Times Stamp. I love adding in little details like that, and I’m always looking for an excuse to use my stamps!

Thanks so much for letting me share this pocket page spread with you! I’m looking forward to showing you a couple more projects throughout the month using the September kit and extras!  Happy crafting!

Hi, everyone!  My name is Sarah and I live in sunny Southern California with my husband, daughter, and our dog, Nugget. In my free time you’ll either find me hanging out with my family, reading (I’m a bit of a bookworm!), traveling, spending too much time on Instagram, or of course playing with pretty papers in my studio. I’ve been fortunate enough to work on several amazing creative teams in the last few years and I’m currently part of the Studio Calico creative team.

Sarah will be back next week with her second project to inspire us! Until then, find Sarah on Instagram, her YouTube feed, or on her blog!