A Sunshine & Rainbow Birthday with Katarina Prevendarova

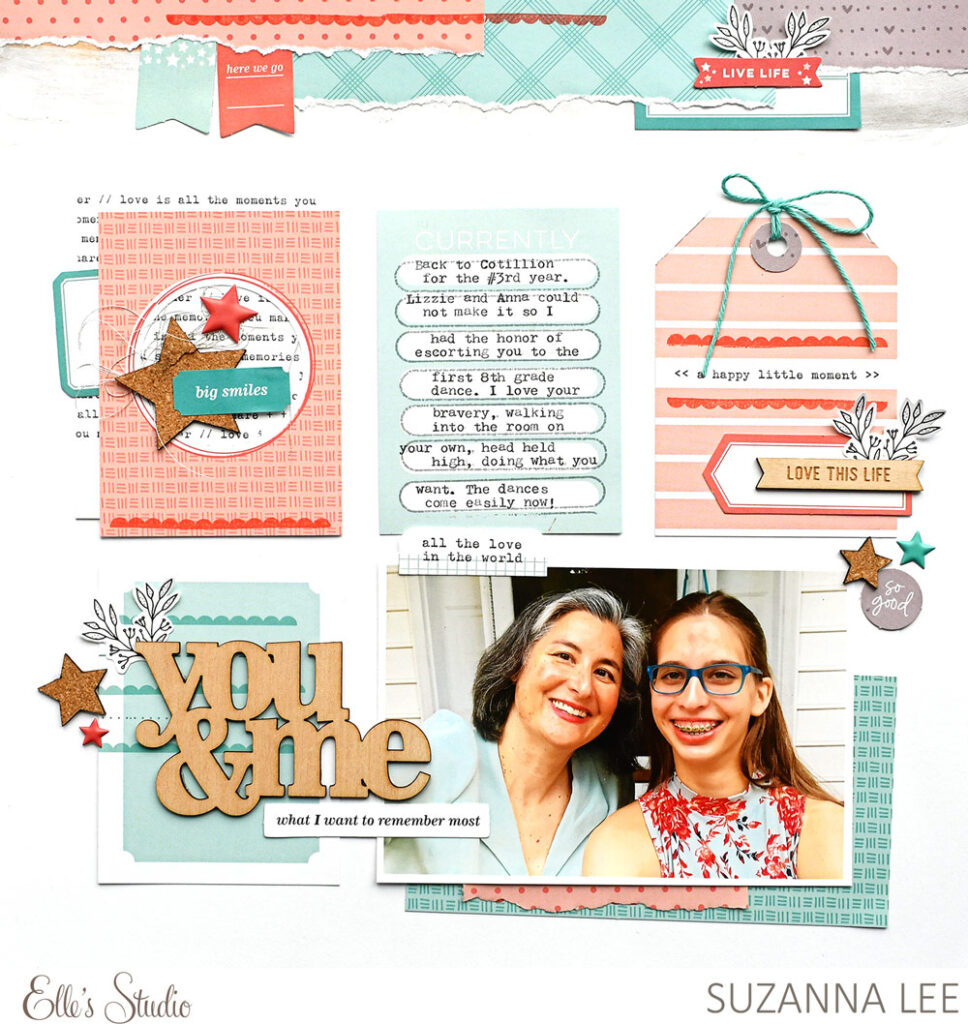
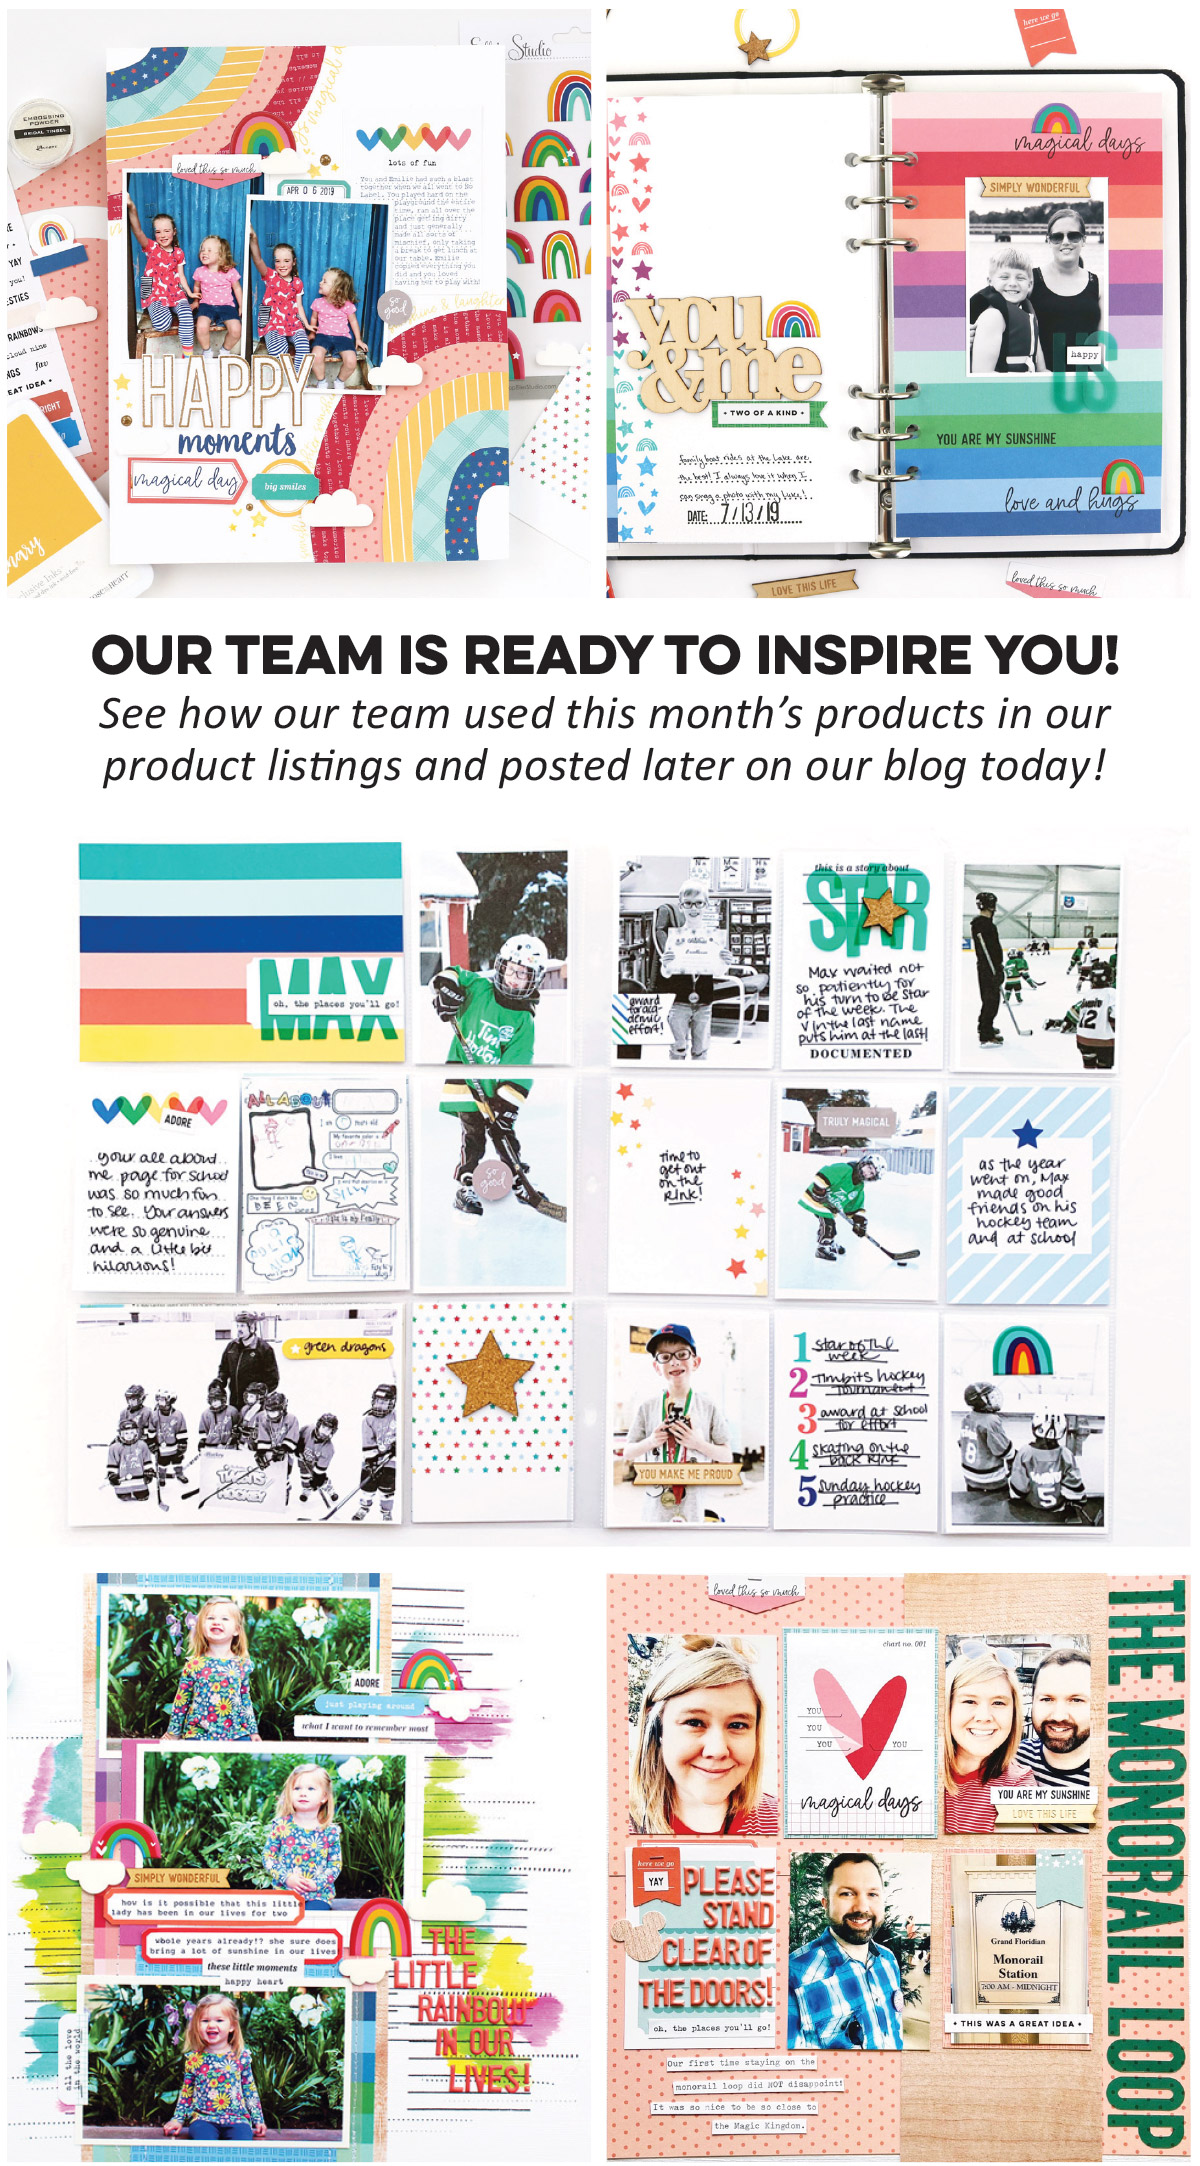
Our February 2020 kit and add-ons feature a rainbow of colors—and lots of rainbow icons, too! But, don’t think that you have to use them to record rainbows seen in the sky—these cheerful products can be used to record any happy memory, as design team member Katarina Prevendarova is showing us today on a beautiful, new layout! Let’s take a look!

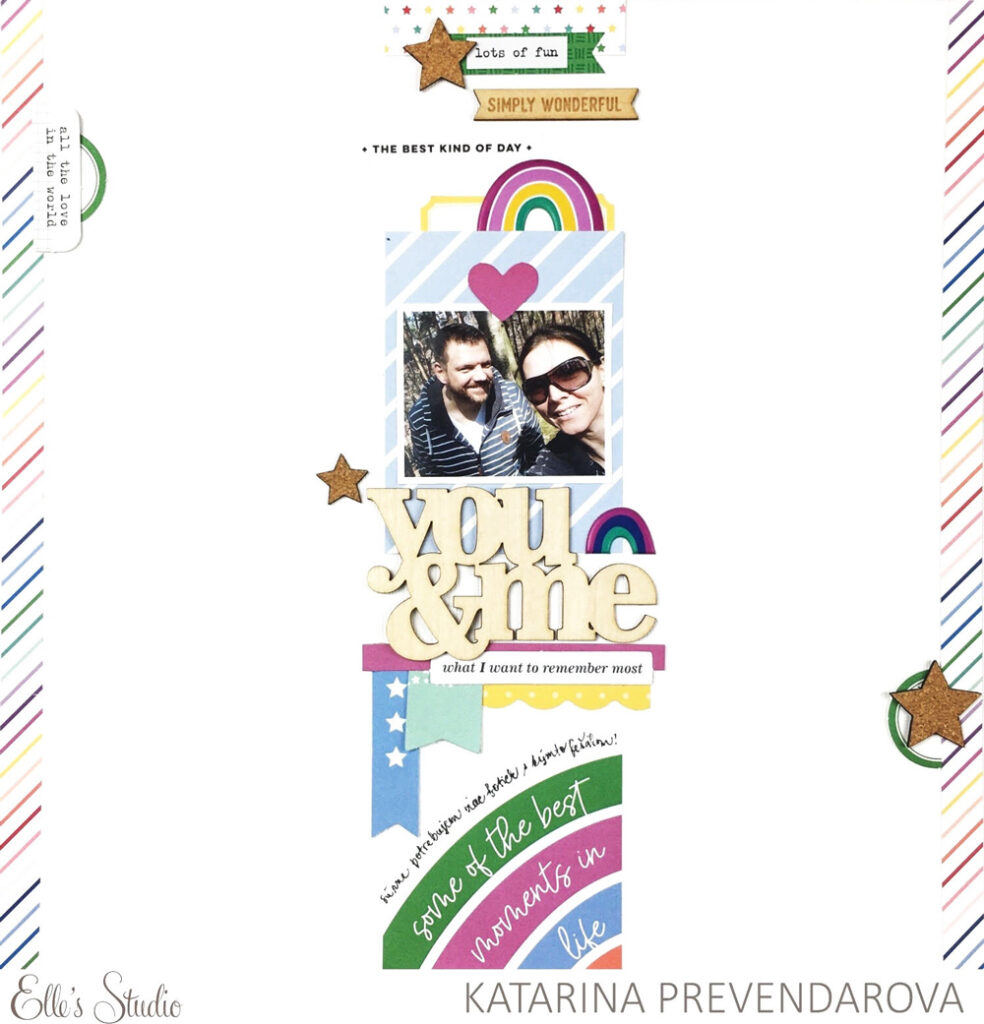
Hello scrappy friends, it’s Katarina here again! Today I am going to share with you my love for stamping and bring you some tips on how to use the new, playful and versatile Sunshine & Laughter stamp. It can be used to make fun cards, but today I am going to share a layout where I used the stamps to document a photo of me and my son opening his birthday present—a ukulele. 

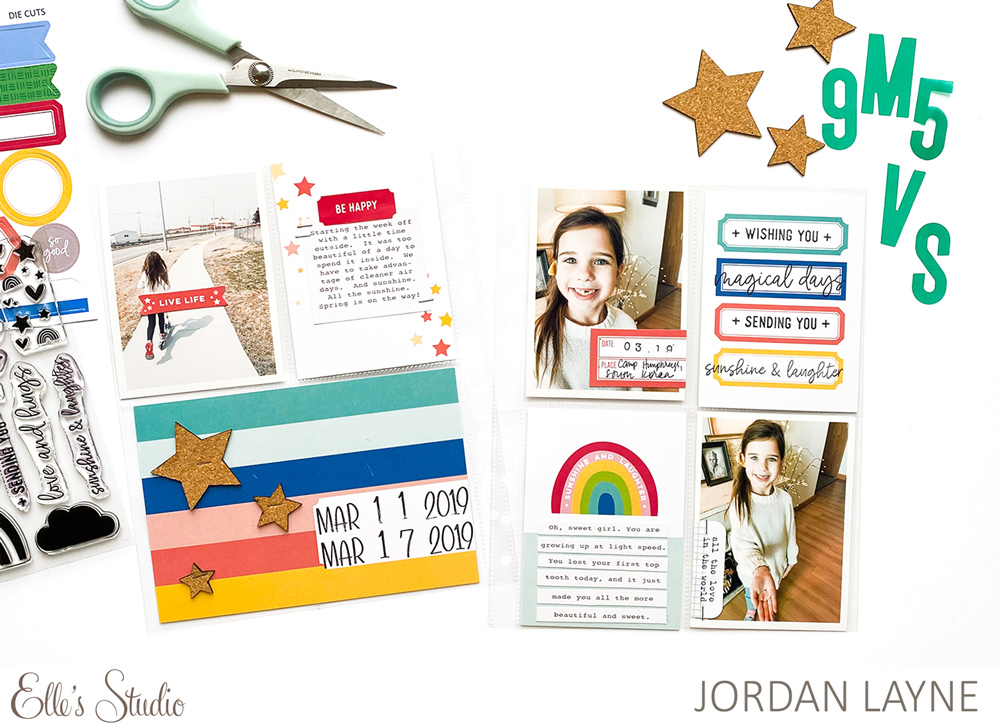
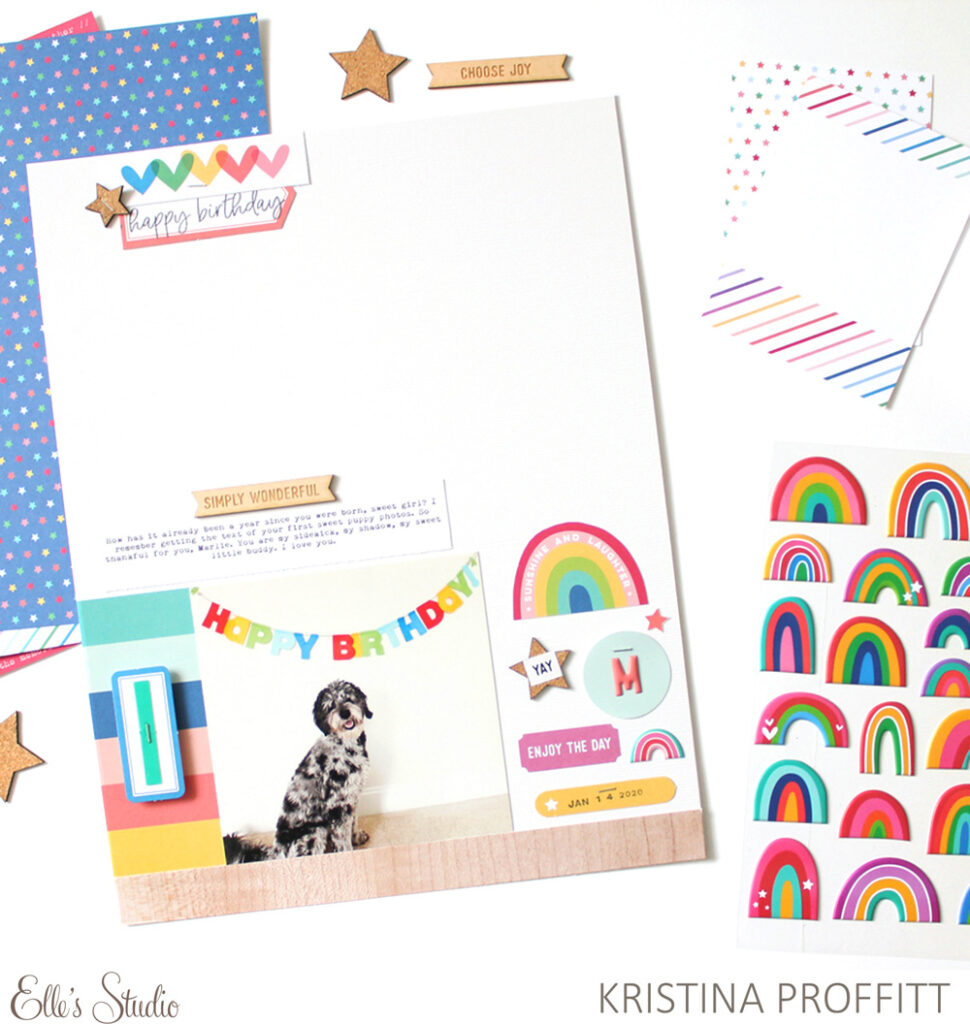
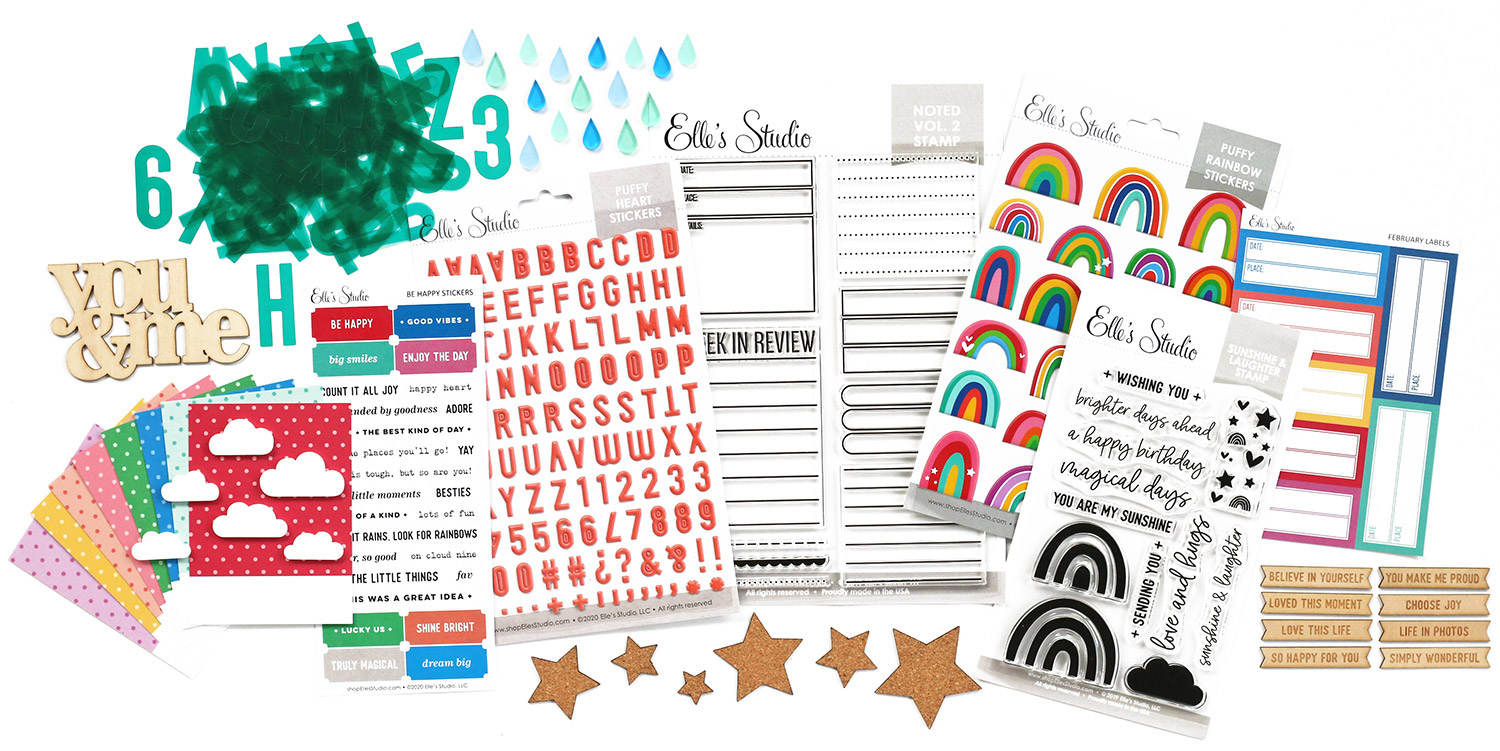
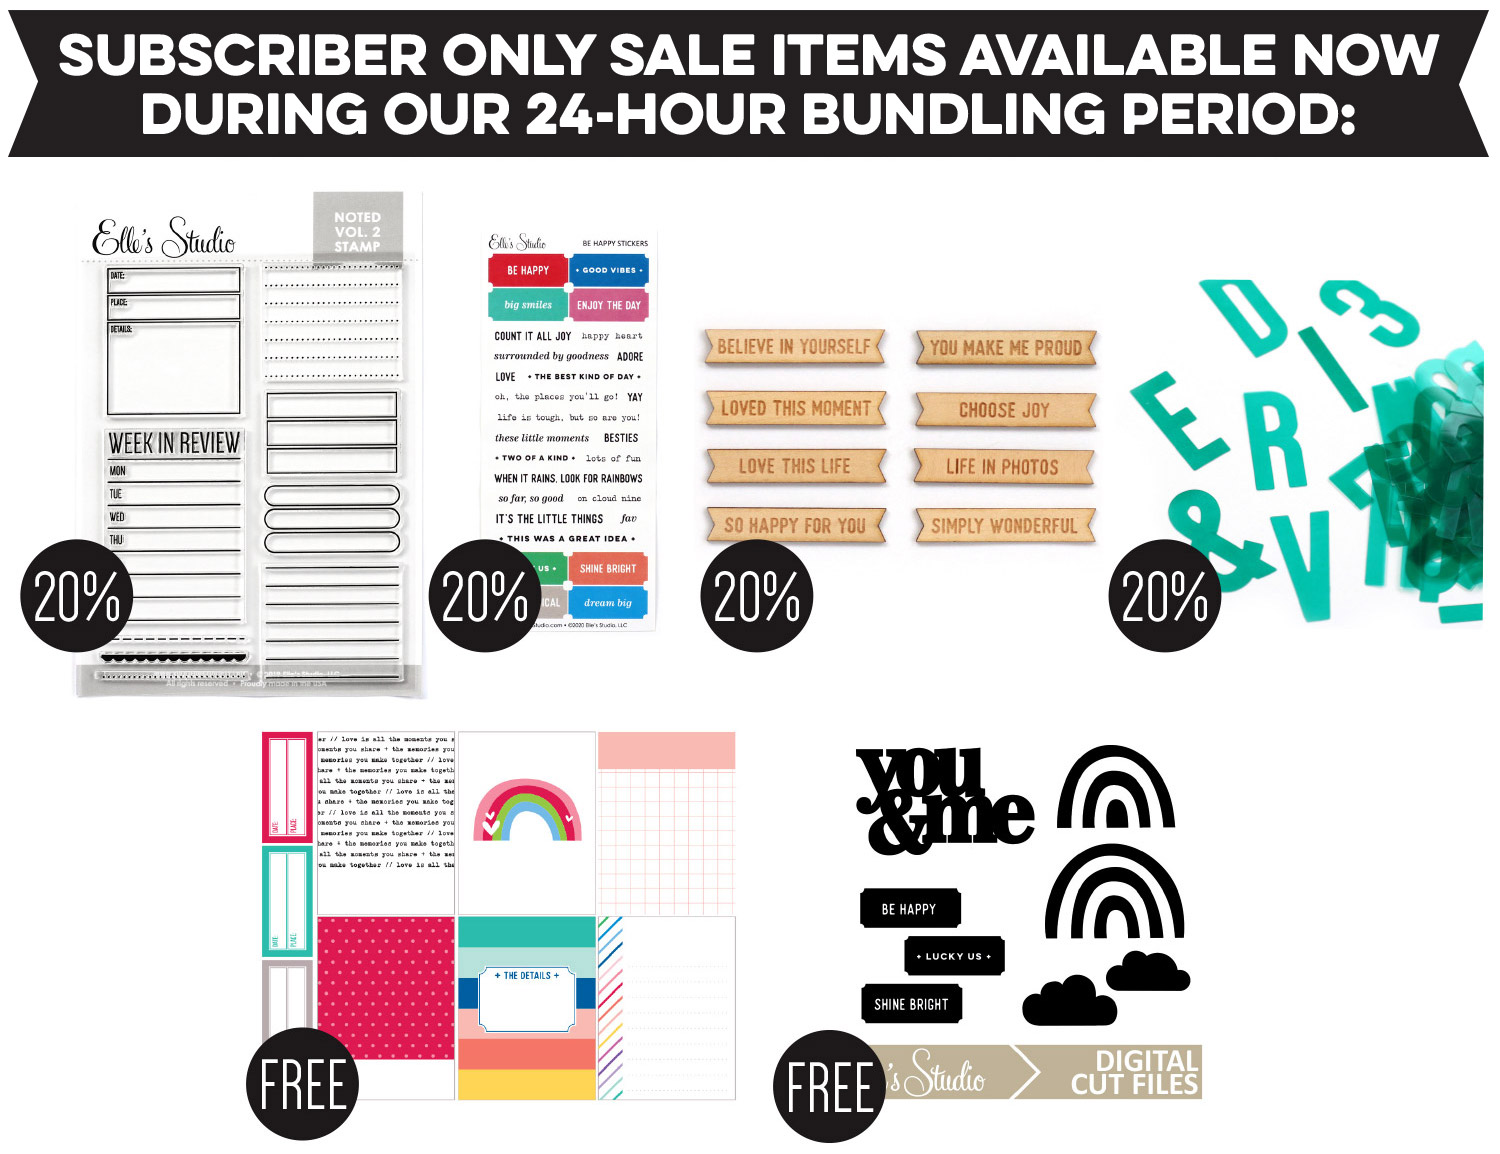
Supplies | February 2020 Kit, Teal Acetate Alphabet, Die Cut Labels, Be Happy StickersJane Alphabet Stickers – Black, Puffy Rainbow Stickers, Coral Puffy Alphabet Stickers, Yellow Puffy Alphabet Stickers, Lime Green Puffy Alphabet Stickers, Teal Puffy Alphabet Stickers, Simply Wonderful Wood Veneer Banners, Love Is 6 x 8.5 Paper StackSunshine & Laughter Stamp, Mini Dated Stamp, Mini Dated Extras Stamp

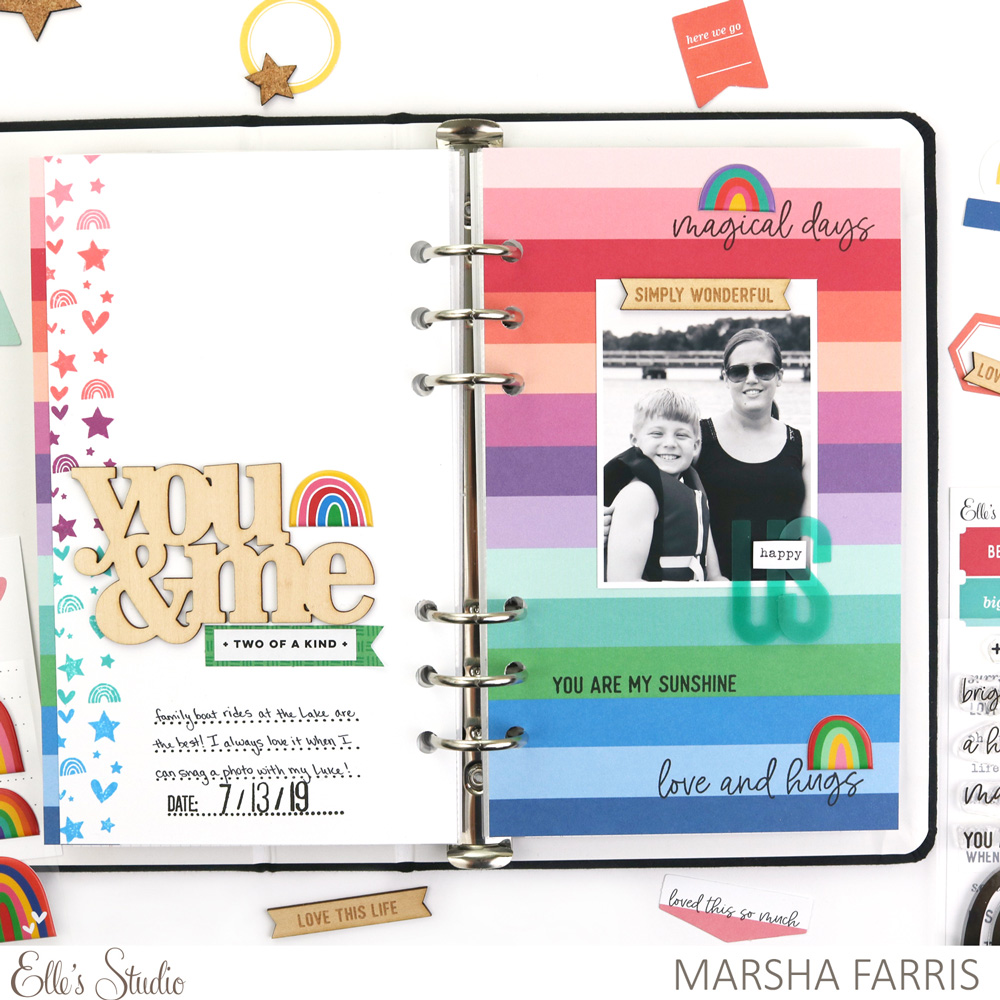
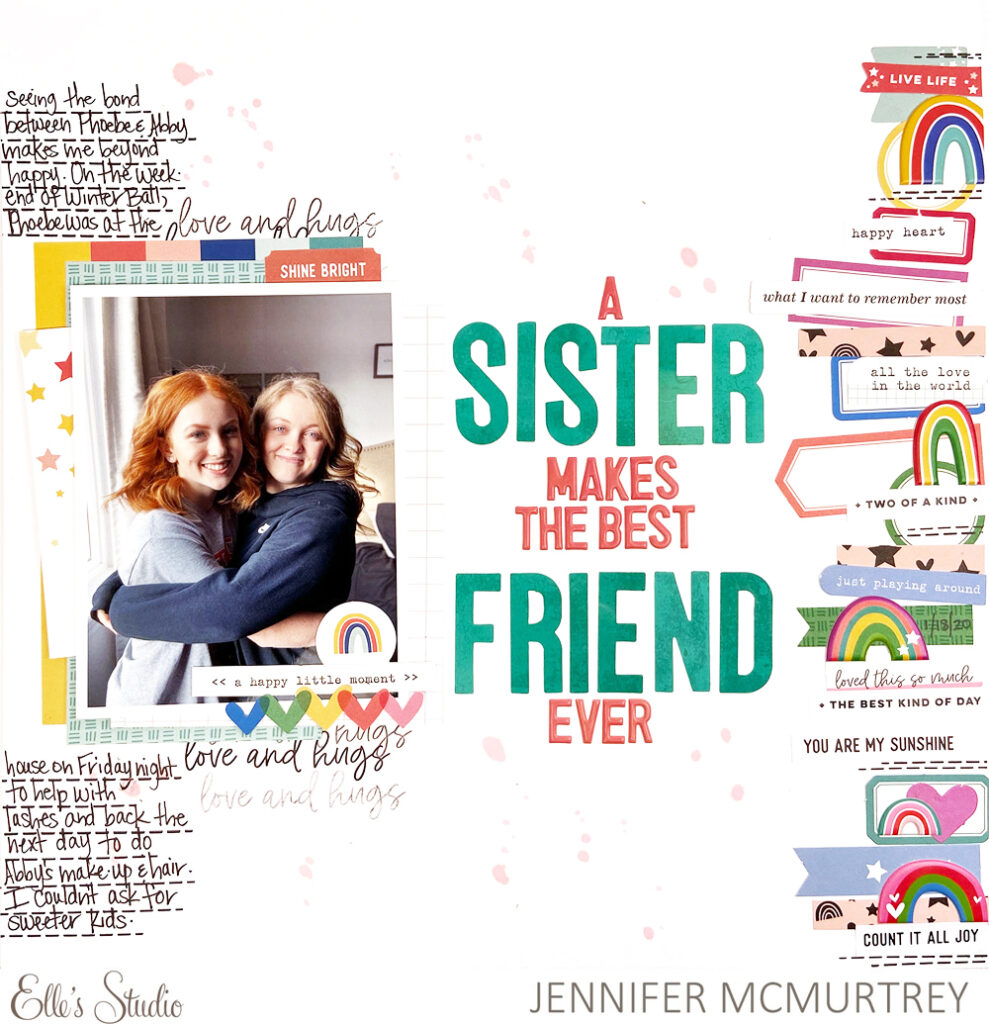
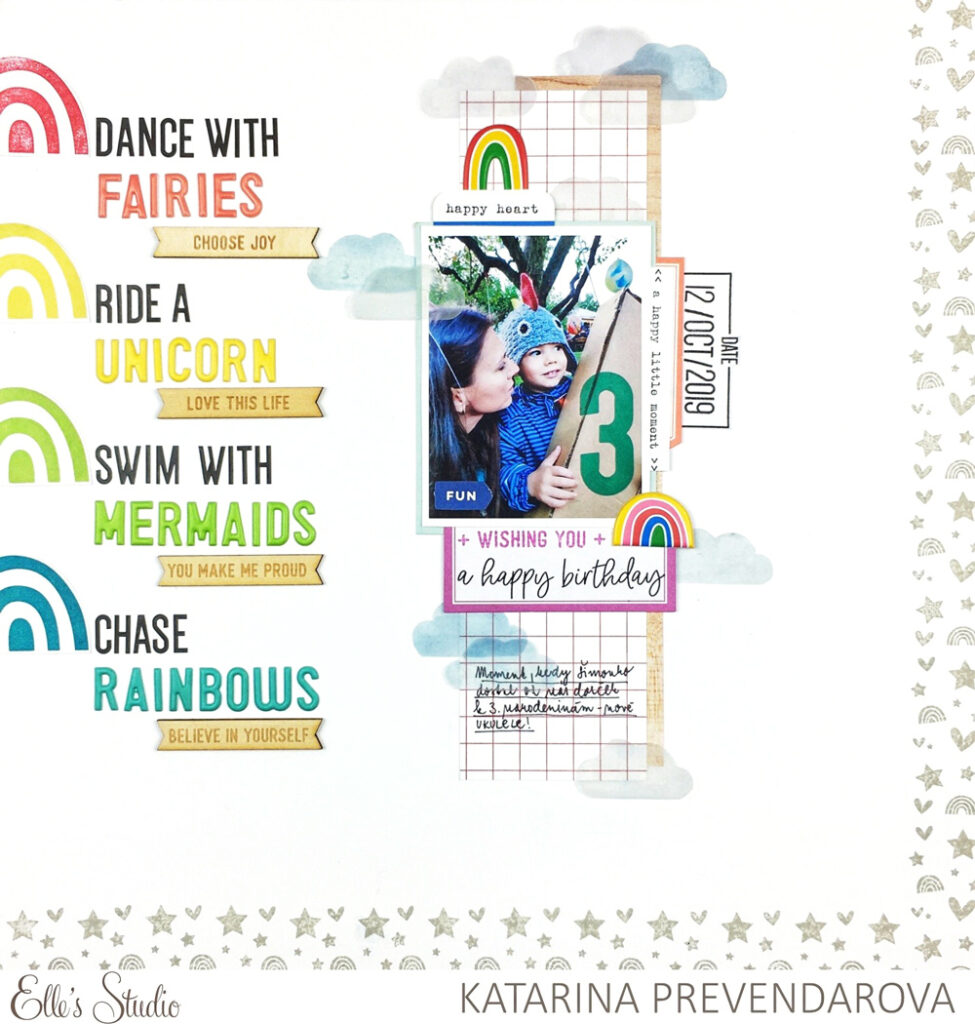
When I saw the stamp set for the first time, I knew I was definitely going to use those cute rainbows. You can totally ink each part of the stamp with a different color and make a colorful rainbow, but I created my own rainbow of rainbows down the left side of the page.

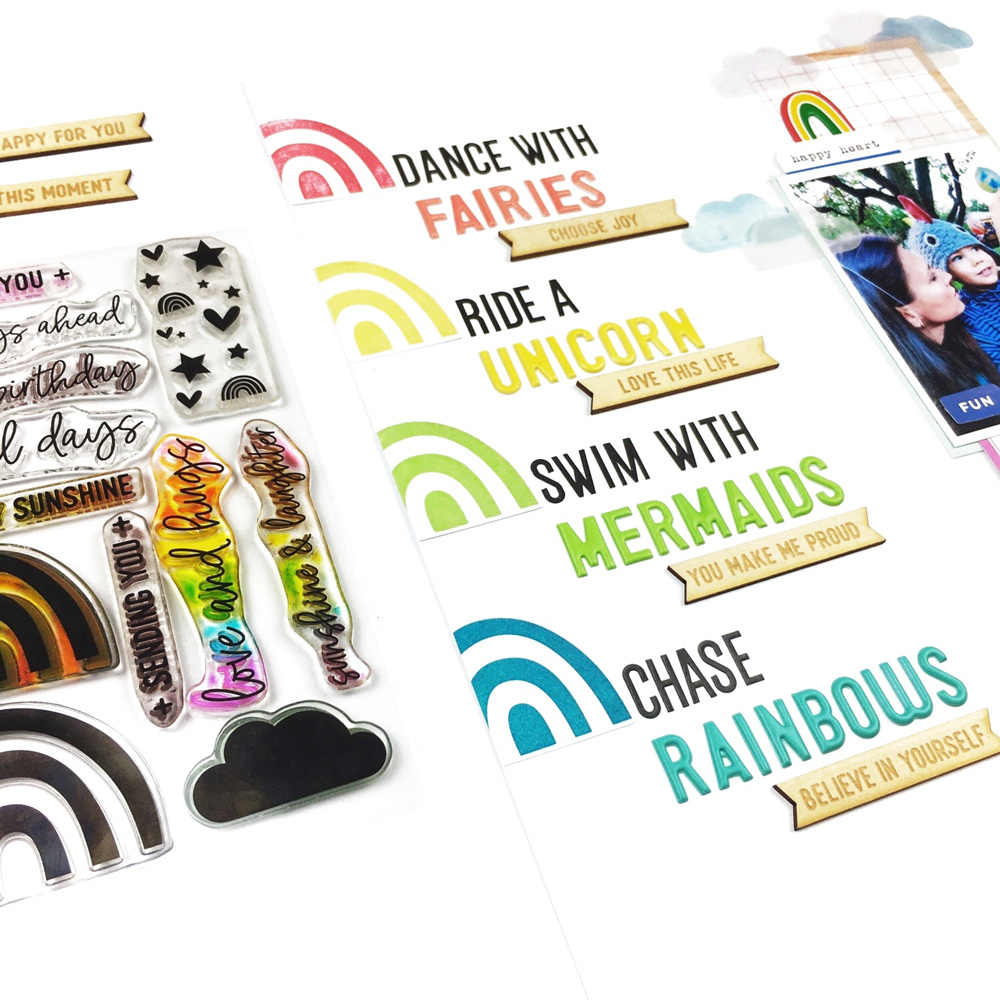
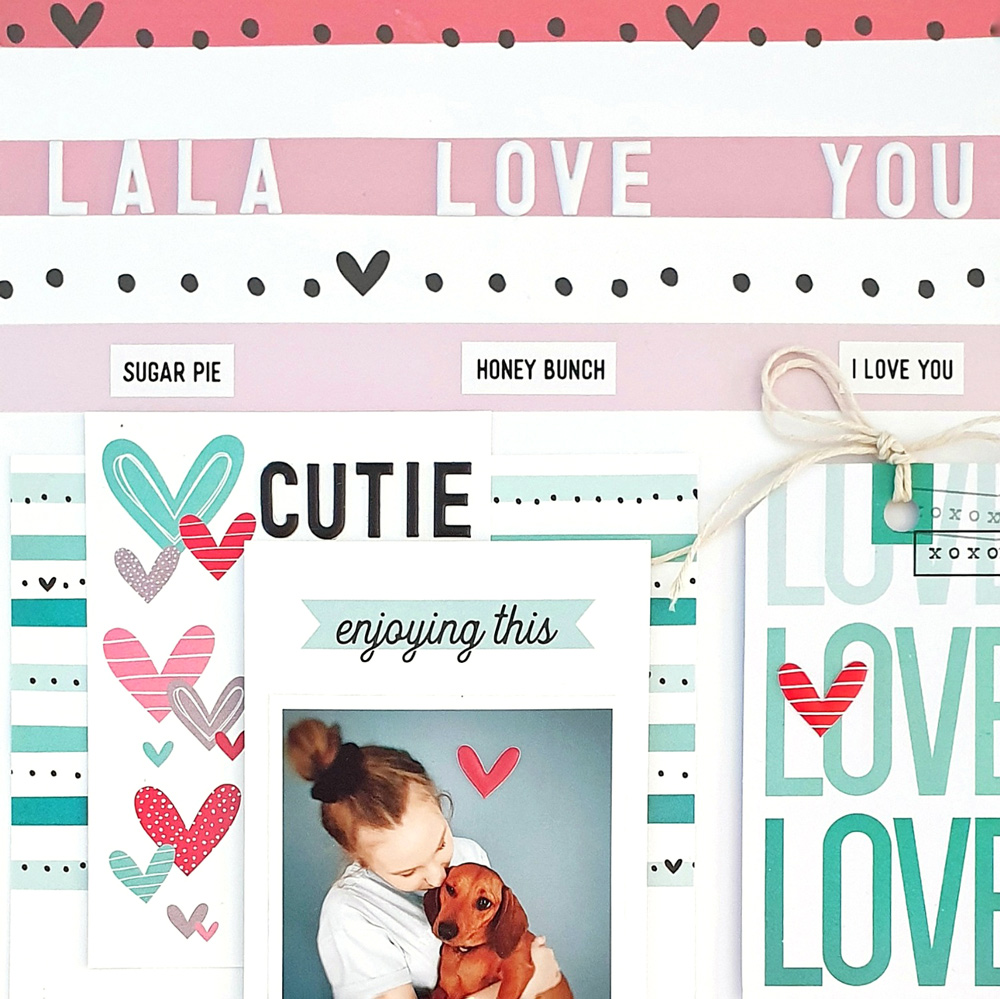
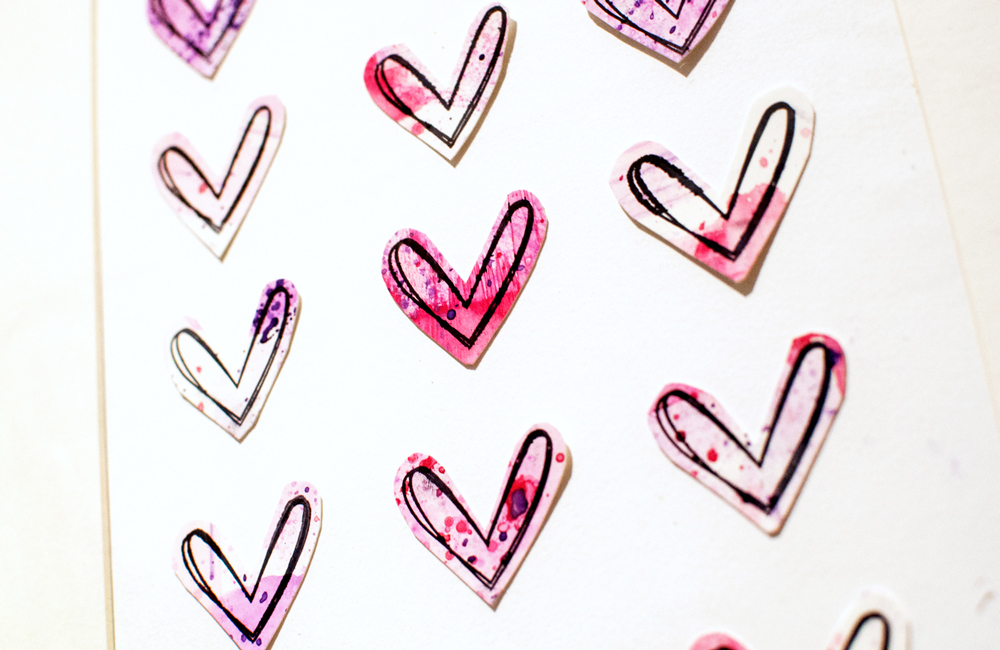
I started by searching Pinterest to find a perfect quote that included the word “rainbows.” I divided it into four parts and used the Yellow, Lime Green, Teal and new Coral Puffy Alphabet Stickers together with the black Jane Alphabet Stickers to place the phrase on the left side of a white piece of cardstock. Next, I stamped the rainbows from the Sunshine & Laughter Stamp in coordinating colors on a piece of white scrap paper, fussy cut them out and put them slightly off the edge next to the colorful quote. To emphasize the repetition, I used four of the Simply Wonderful Wood Veneer Banners under each separate color.

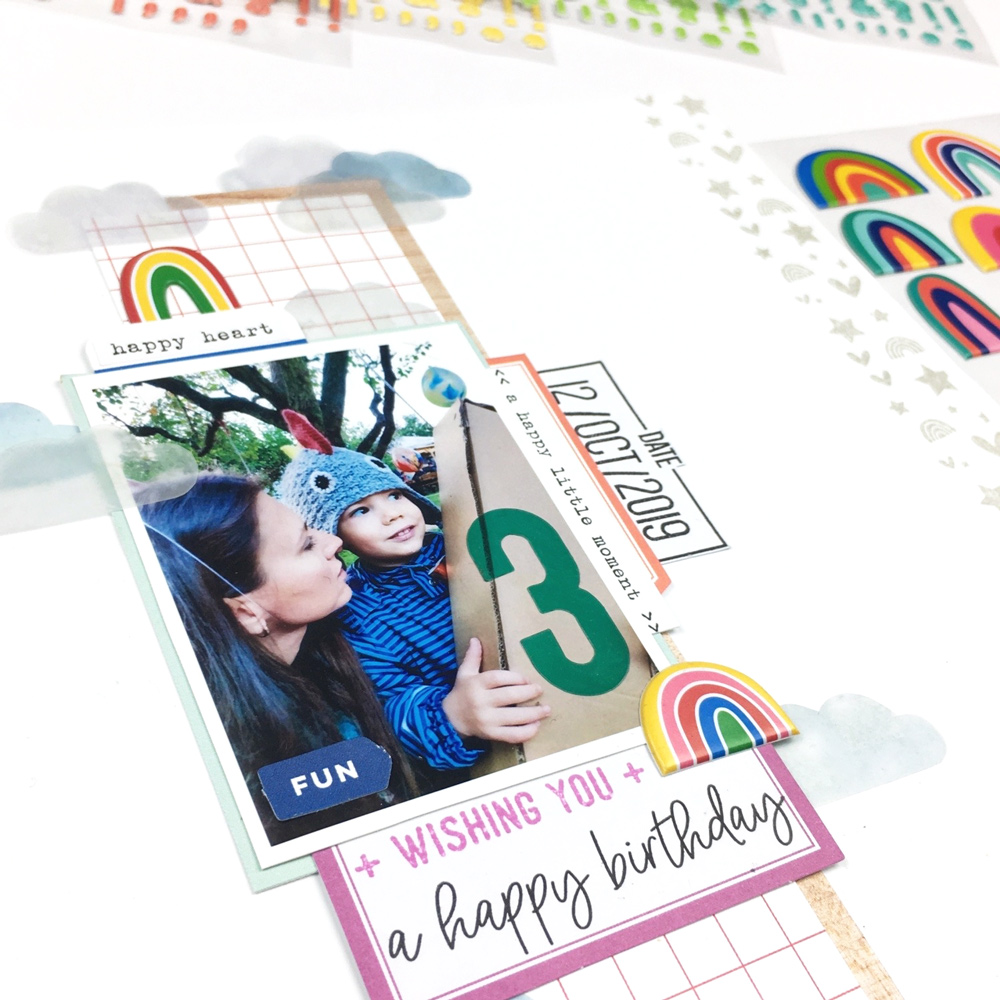
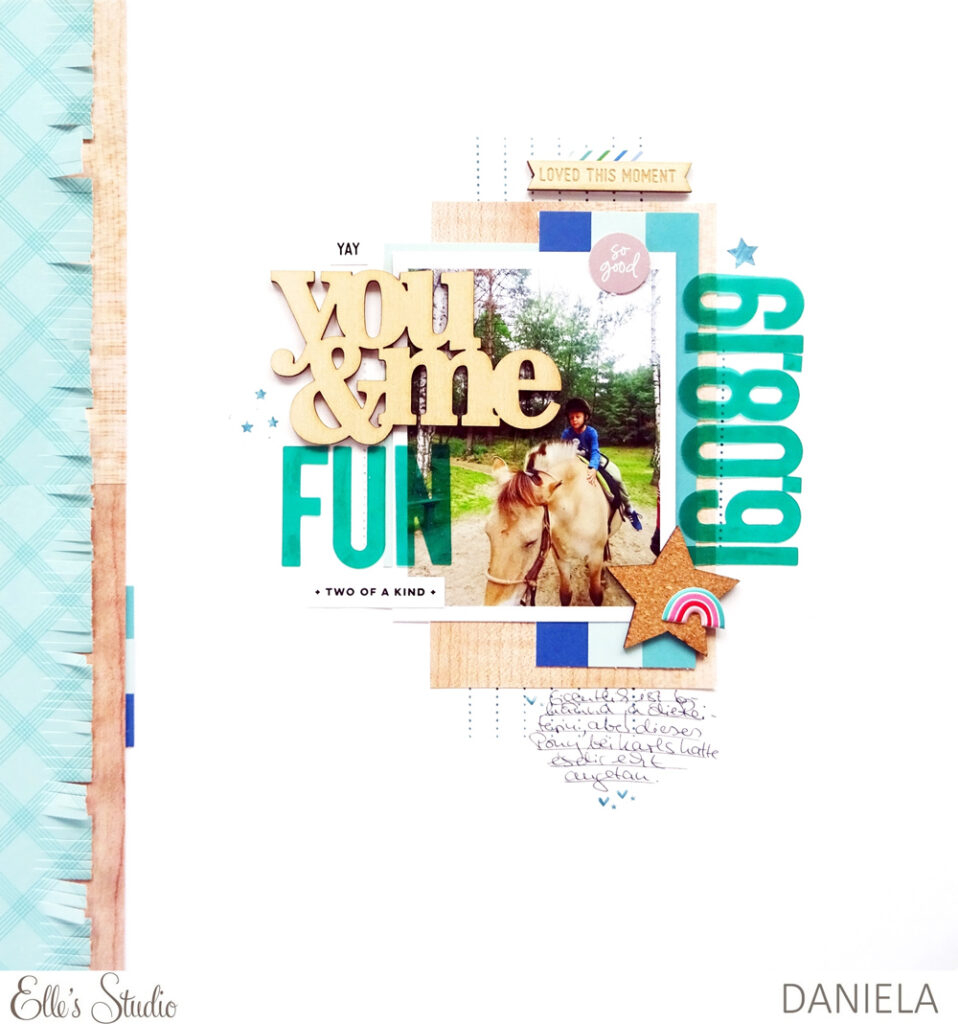
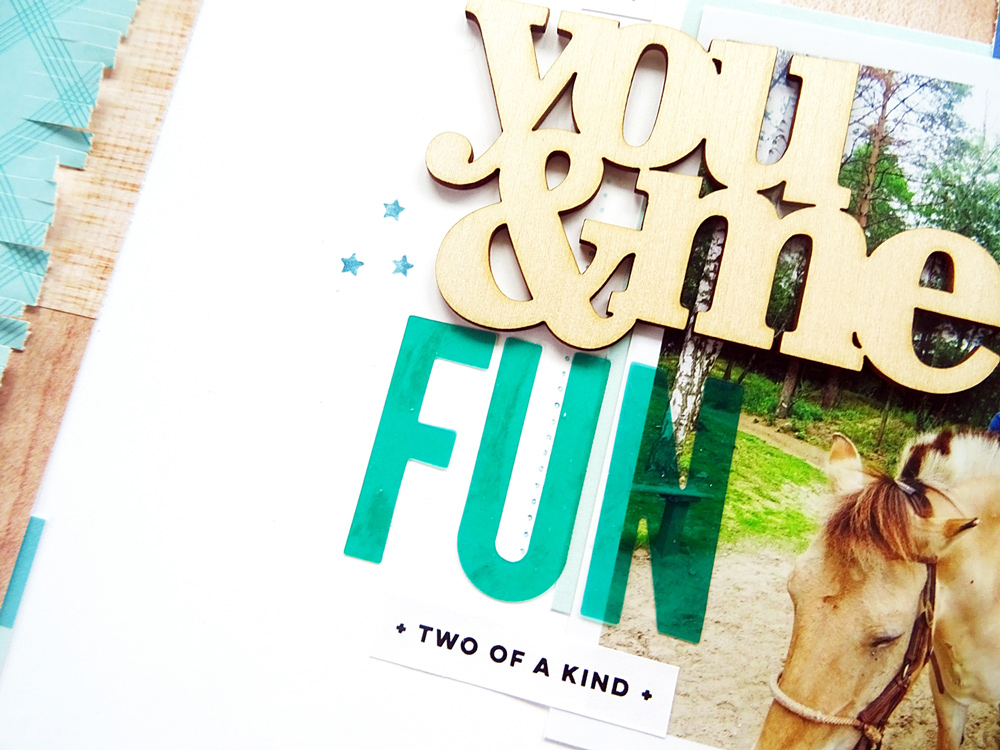
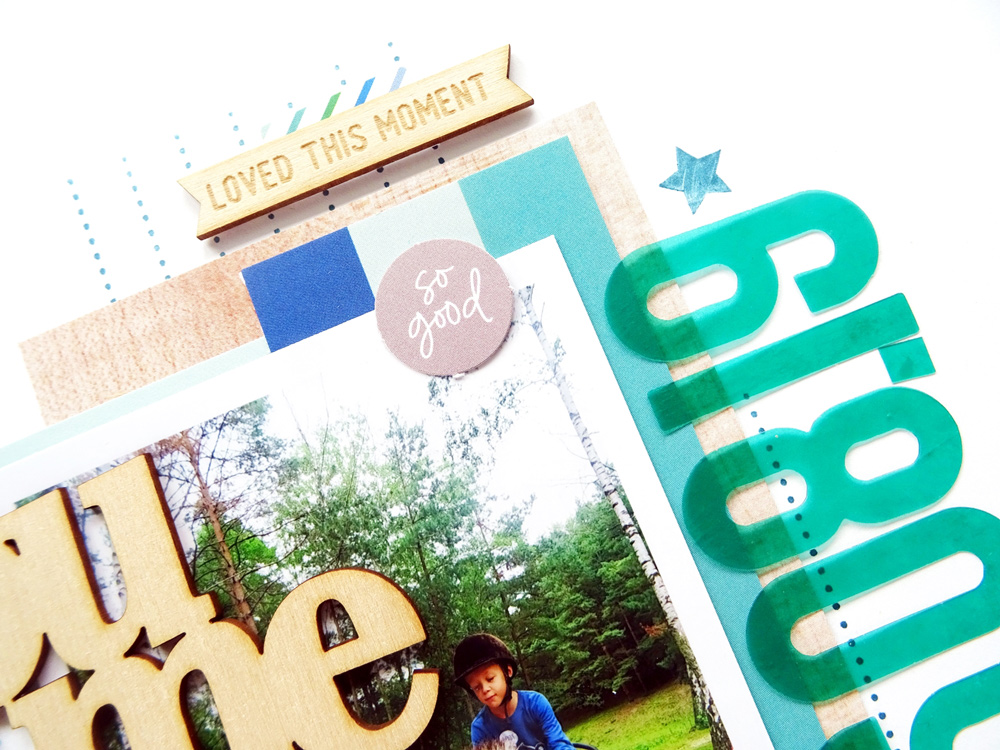
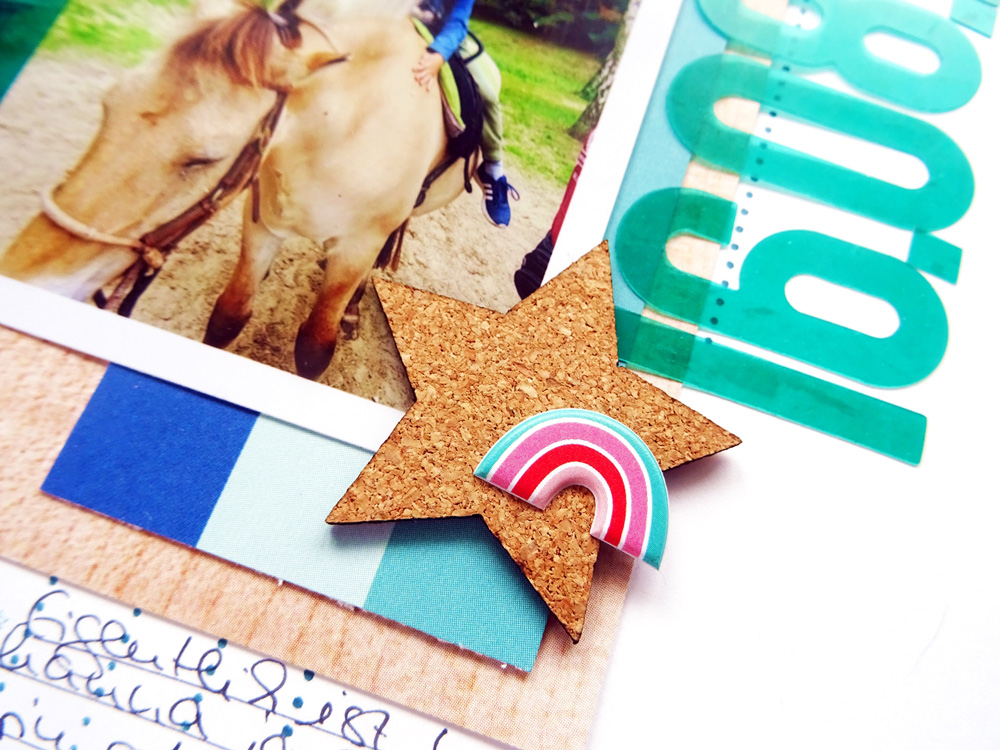
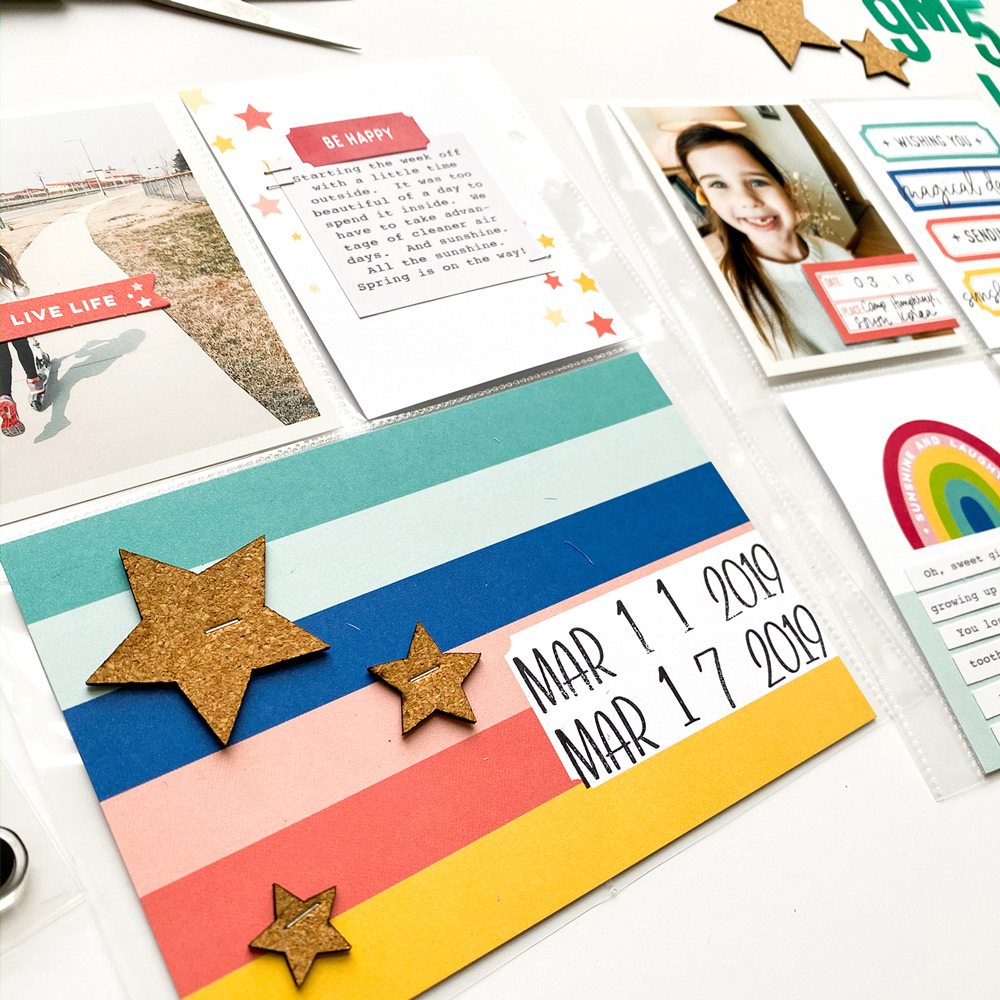
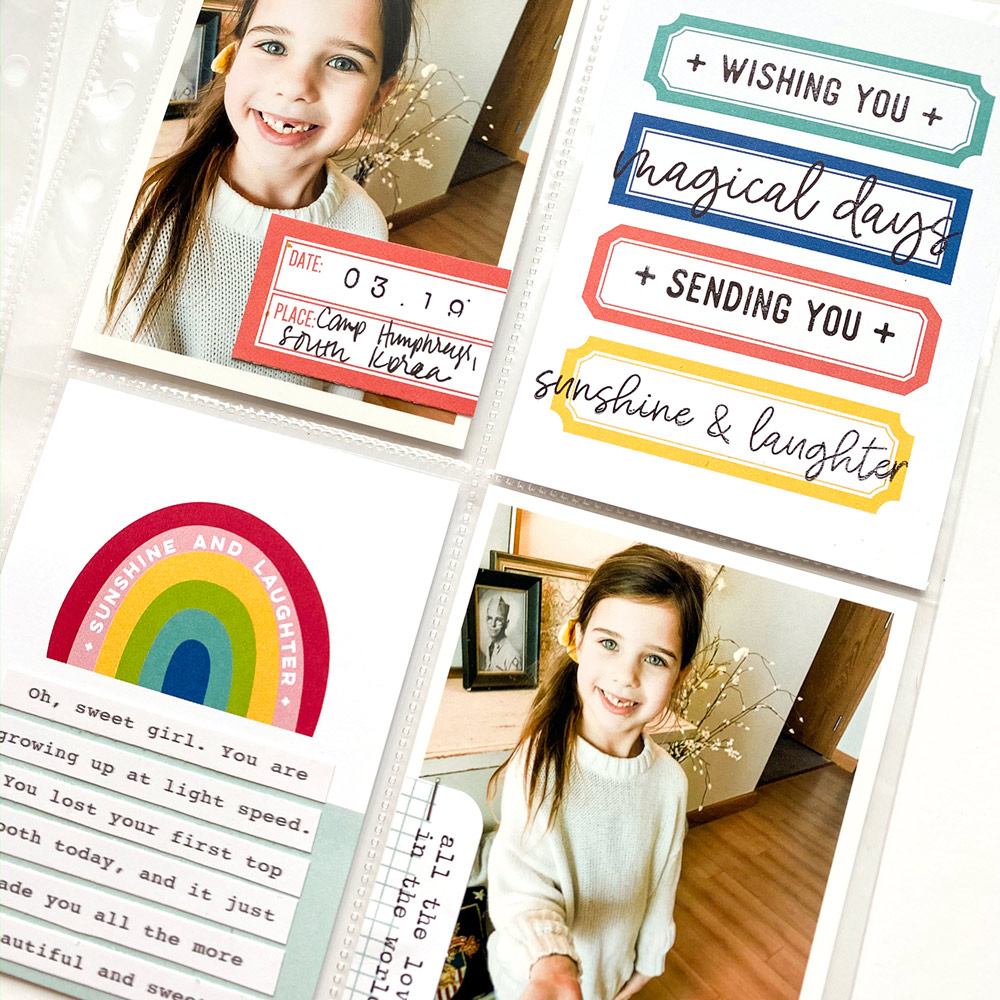
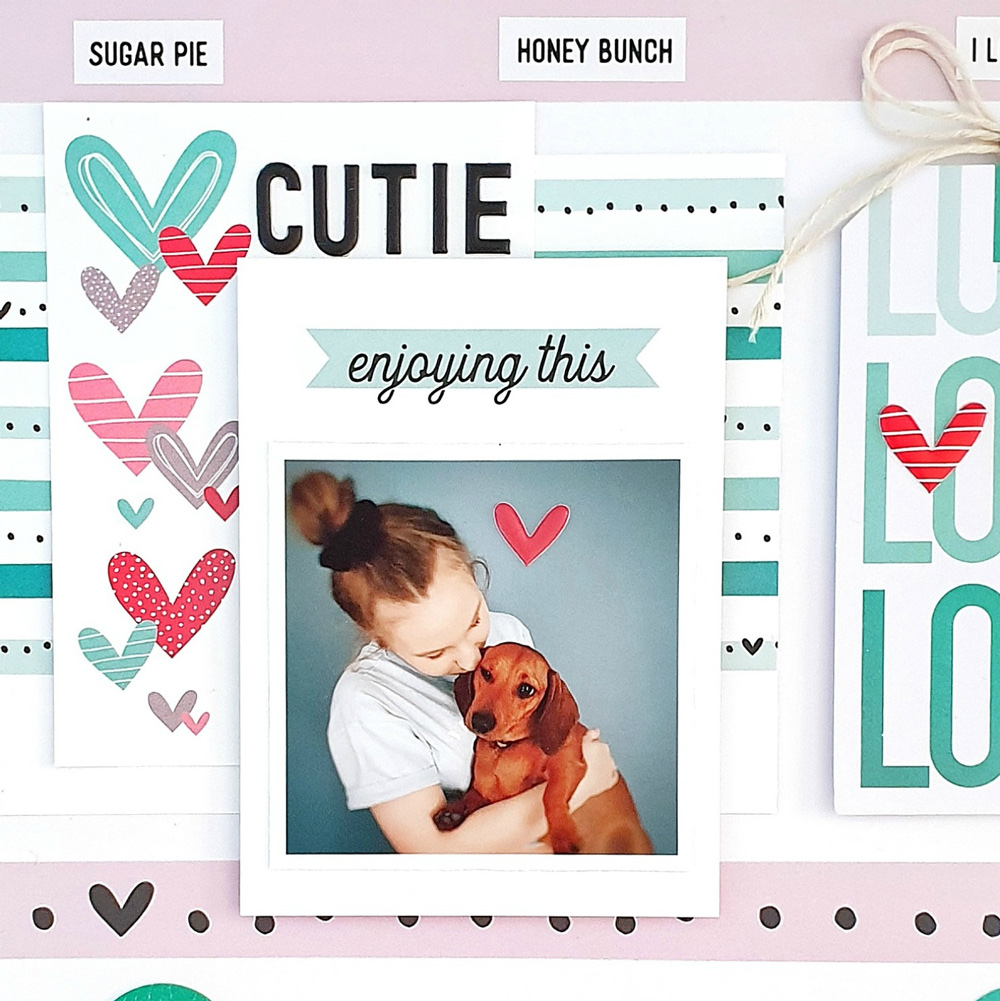
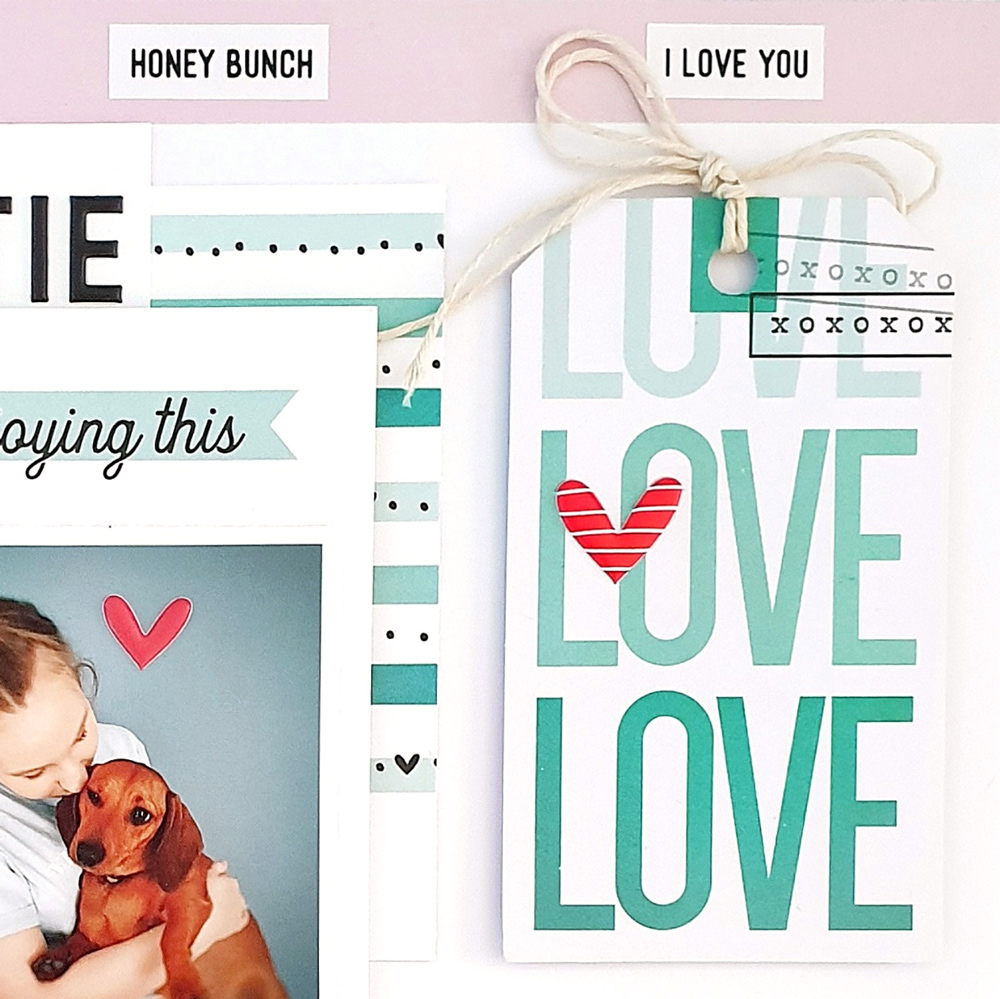
I continued by layering long, vertical strips of the wood grain and grid papers from the Love Is 6 x 8.5 Paper Stack to make a place for my photo, which I backed using a light blue journaling tag from the February Kit. To embellish the photo, I used a few of the die cuts from the February Kit, a sticker from the Be Happy Stickers and two of the super cute Puffy Rainbow Stickers. My son celebrated his third birthday and to document it, I layered a “3” from the Teal Acetate Alphabet over the photo. To complete the rainbow colors, I used a big purple label from the Die Cut Labels and the Sunshine & Laughter Stamp to add the “Wishing You a Happy Birthday” sentiment under my photo.

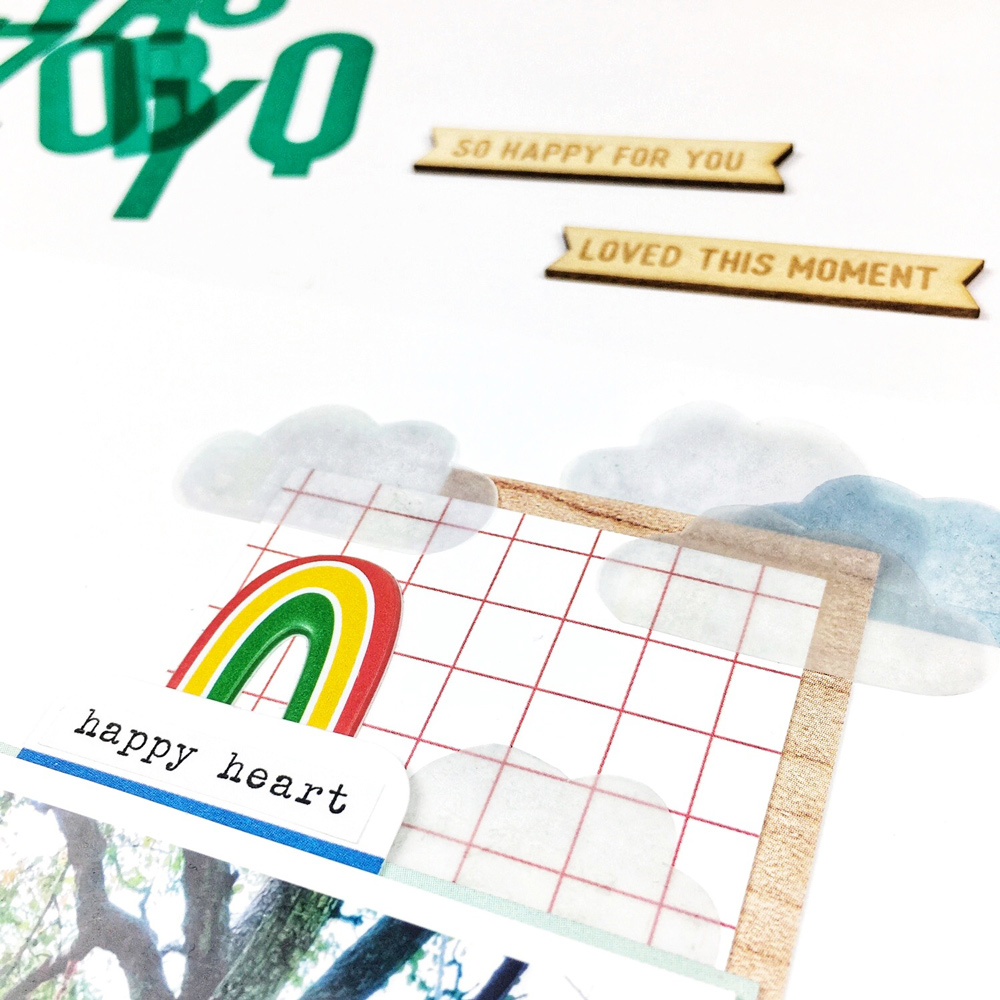
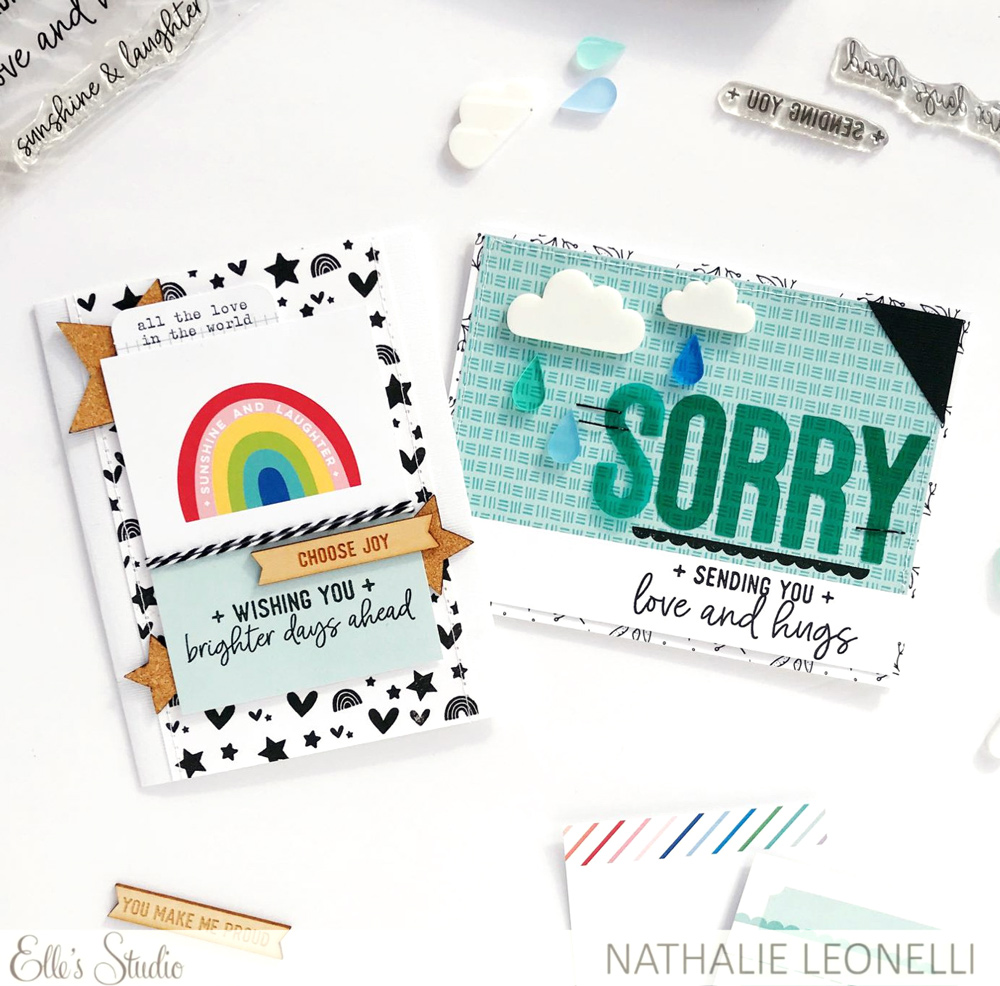
Next, I added clouds around my layout using the cloud from the Sunshine & Laughter Stamp, stamping them onto vellum to create a translucent effect. A tip for those who don’t know: when stamping on vellum, it takes much longer for the ink to dry, so make sure to wait patiently until completely dry or use your heat gun to speed up the drying. The waiting paid off—I really love the light, airy look of the clouds.

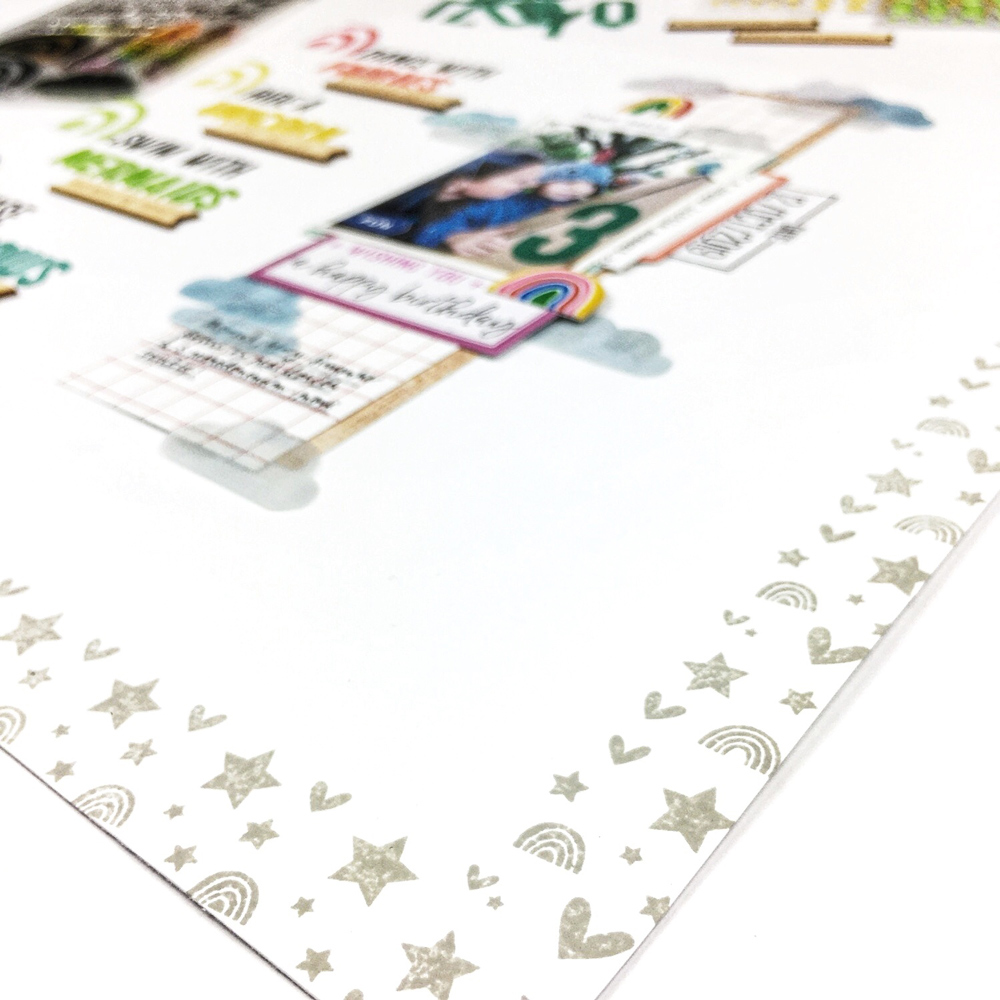
The last stamp I used from the Sunshine & Laughter Stamp is the one with tiny rainbows, hearts and stars. As all the elements on my layout were positioned in the top and left part of the layout, I stamped it repeatedly to create a border on the right and bottom part of the layout to balance everything. It added the perfect finishing touch!

I love how my project turned out! I must say that I am totally in love with the February Kit and add-ons. I can’t stop using them as there are so many beautiful products, and the Sunshine & Laughter Stamp is definitely one of my favorites. I hope that I have inspired you to also give it a try—there’s always a good reason to add a rainbow or two, right? Thanks for stopping by, friends. Have fun creating and don’t forget to share your projects on Instagram, tagging #ellesstudio so we can admire them too!

Layers and Texture with Daniela

Hello Elle’s Studio fans! Today on the blog, design team member Daniela is with us to share a lovely page that records a special moment, and she’s used our February kit and add-ons to add loads of texture and layers to her page. See if you can spot all of the new products that she layered on top of each other to create a fantastic layout design!

Hi friends! It’s Daniela here and I’m happy to be sharing another layout created with the February kit and add-ons. I can’t even tell which product is my favorite one this month. Everything is so awesome, especially all the embellishments!

For my new layout I picked all the browns and blues and created a boyish layout. Let’s take a look:

Supplies: February 2020 Kit, Teal Acetate Alphabet, Be Happy Stickers, Puffy Rainbow Stickers, Cork StarsYou and Me Wood VeneerSimply Wonderful Wood Veneer BannersSunshine and Laughter StampNoted Volume 2 StampLove Is 6 x 8.5 Paper Stack

Usually, my daughter is the one who is totally crazy about horses and ponies, but on one of our holidays, my son found his four-legged mate—a beautiful light brown horse. While flipping through my stash, I realized that the You and Me Wood Veneer matches the color of the horse just perfectly. I also added a piece of the woodgrain patterned paper from the Love Is 6 x 8.5 Paper Stack; this way the color of the picture is underlined by the wood veneer and the paper. 

Since my son’s shirt is blue, I also picked some blue and teal-colored elements like the beautiful Teal Acetate Alphabet and another piece of paper from the Love Is Paper Stack. As you might have realized, I love clusters, and of course I’ve built one on this page as well. To add more depth, I stamped dotted lines in the background using the Noted Volume 2 Stamp to add a different layer on the page.

The Cork Stars were a perfect embellishment for this picture and also underlines the main color of my layout. I love the mix of different textures—one thing that I love about Elle’s products so much. Each month, there are so many different add-ons like acrylics, wood veneers, acetates, paper die-cuts, cork pieces, and puffy stickers to add all kinds of texture to your projects.

I hope you like how I used the February products to record a special memory! Thanks so much for stopping by.

Colorful Memories with February Guest Designer Jordan Carroll

We are so excited to welcome our February guest designer, Jordan Layne, to the blog today! We could look at Jordan’s Instagram feed for hours—her simple, yet colorful, beautifully designed and well balanced pocket pages and traveler’s notebook spreads make us want to delve into her stories, and we think you’ll love what she has created using the February 2020 kit and extras! Let’s take a look at her first project and learn a bit more about her process:

Hey, hey crafty friends! It’s Jordan here today with my very first guest post for Elle’s Studio! I don’t think I have ever enjoyed working with a kit and add-ons more than I did with these new February products! Every little bit is seriously so, so good!

For my first project, I chose to document a week in March of last year. I had to get these snaggle toothed pictures of my daughter documented! Oh my heart! Why do they grow up so fast?!

Supplies | February 2020 Kit, February Labels, Be Happy Stickers, Cork Stars, Sunshine & Laughter Stamp

For me, the jumping off point of my projects is usually my images. Once I have them selected, edited, and printed, I get out whatever kit I’m working with and choose tags and supplies that will coordinate. Here, the colors in my images were neutral, so I pulled tags from the February 2020 Kit that were fun and colorful to bring life to the spread.

Once I have the photos and tags arranged how I like them, I type and print out my journaling and attach it to the tags. I don’t have a typewriter, so I use Photoshop to size and print the journaling and then I get creative with how I add it. Sometimes, I leave a half inch or so of the card showing at the top or bottom, or I’ll type it in a square and staple it in the middle of the card. Other times, I’ll fussy cut it into sentence strips and adhere it that way; it just depends on the tag I am attaching it to and how much or how little I have to say. For a small amount, like on the photo below, the February Label was perfect for adding the facts of the day.

Finally, I pull out the coordinating add-ons and begin choosing which embellishments I want to add. I always use a variety of stickers, stamps and die cuts, and I always try to use something to add dimension. My favorites for this are cork elements, like the Cork Stars I used here, puffy stickers, and wood veneer. I also add staples, stitching, or a combination of both to almost every project I make!

I hope you enjoyed a glance into my process and are inspired by my project to document a special memory of your own in a colorful way using the February 2020 kit and extras! I look forward to seeing what you create and in joining you throughout this month!  

Hello crafty friends! I’m Jordan, wife to a soldier and mama to 3 awesome littles. I made my first scrapbook 15 years ago when my husband was deployed to Iraq. I used all of the photos he sent back to me and gave it to him as gift when he returned. He still has it. It was 5 years later that I began scrapbooking again when our oldest was 2, and a friend introduced me to digital scrapbooking. I’ve since gone back to paper and glue, but have been making time to document our life ever since. If I’m not making a mess documenting, you can probably find me with a cup of coffee in hand, nose buried in a book. As a family we love to travel, go for long walks, and hike. In the last 15 years we’ve lived in 3 countries and 8 states! It’s been a blessing to show our kids the world and fulfill my need for adventure, and of course, to have plenty of memories to document!

Find more of Jordan’s pocket pages and traveler’s notebook spreads at her Instagram feed, until she returns next week to inspire us with another project using the February 2020 kit and extras!

February Reveal Design Team Inspiration

Happy reveal day! We are so excited that the new February 2020 kit and extras hit the shop today, and our amazing design team has been hard at work creating beautiful projects to inspire you to record your most colorful memories with our new products! We know you will want to pin each one to your inspiration board for when your kit arrives! Let’s take a look at a project from each of our team members today:

Happy Moments by Meghann Andrew – supplies used | February 2020 Kit, February 2020 Cut Files, Be Happy Stickers, Puffy Rainbow Stickers, Acrylic Clouds, Love Is 6 x 8.5 Paper Stack, Magical Memories 6 x 6 Paper Stack, Sunshine & Laughter Stamp, Title Builder Vol. 3 Stamp, Large Jane Alphabet Stamp — Outline

Star pocket page by Amy Jo Vanden Brink – supplies used | February 2020 Kit, Be Happy Stickers, Teal Acetate Alphabet, Puffy Rainbow Stickers, Cork Stars, Simply Wonderful Wood Veneer Banners

The Little Rainbow by Melissa Mann – supplies used | February 2020 Kit, February 2020 Print & Cut Labels, Be Happy Stickers, Puffy Rainbow Stickers, Coral Puffy Alphabet Stickers, Acrylic Clouds, Simply Wonderful Wood Veneer Banners, Love Is 6 x 8.5 Paper Stack, Noted Vol. 2 Stamp

You & Me by Marsha Farris – supplies used | February 2020 Kit, Be Happy Stickers, Puffy Rainbow Stickers, Simply Wonderful Wood Veneer Banners, You & Me Wood Veneer, Love Is 6 x 8.5 Paper Stack, Sunshine & Laughter Stamp, Noted Vol. 2 Stamp, Mini Dated Stamp

You & Me by Katarina Prevendarova – supplies used | February 2020 Kit, Be Happy Stickers, Puffy Rainbow Stickers, Cork Stars, Simply Wonderful Wood Veneer Banners, You & Me Wood Veneer, Love Is 6 x 8.5 Paper Stack

Brighter Days Ahead pocket page spread by Patricia Roebuck – supplies used | February 2020 Kit, 2020 Calendars, Teal Acetate Alphabet, Be Happy Stickers, Puffy Rainbow Stickers, Cork Stars, Simply Wonderful Wood Veneer Banners, Acrylic Raindrop Confetti, Large 2020 Gold Acrylic, Love Is 6 x 8.5 Paper Stack, Sunshine & Laughter Stamp, Noted Vol. 2 Stamp

Greeting cards by Stacie Watson – supplies used | You Are Loved Die Cuts, Puffy Rainbow Stickers, Black Puffy Alphabet Stickers, Acrylic Clouds, Love Is 6 x 8.5 Paper Stack, Sunshine & Laughter Stamp

It’s Gonna Be Okay by Daniela – supplies used | February 2020 Kit, Teal Acetate Alphabet, Be Happy Stickers, Puffy Rainbow Stickers, Cork Stars, Acrylic Raindrop Confetti, Acrylic Clouds, Love Is 6 x 8.5 Paper Stack, Mini Dated Extras Stamp

January pocket page spread by Jess Forster – supplies used | February 2020 Kit, Puffy Autumn Heart Stickers, Monthly Puffy Stickers, Simply Wonderful Wood Veneer Banners, Sunshine & Laughter Stamp

Happy Birthday by Kristina Proffitt – supplies used | February 2020 Kit, Teal Acetate Alphabet, Be Happy Stickers, Puffy Rainbow Stickers, Coral Puffy Alphabet Stickers, Cork Stars, Simply Wonderful Wood Veneer Banners, Love Is 6 x 8.5 Paper Stack, Sunshine & Laughter Stamp

February pocket page spread by Steph Grimes – supplies used | February 2020 Kit, Be Happy Stickers, Puffy Rainbow Stickers, Simply Wonderful Wood Veneer Banners, Love Is 6 x 8.5 Paper Stack, Mini Days of the Week Stamp, Stanley Jr. Alphabet Stamp

Sister by Jennifer McMurtrey – supplies used | February 2020 Kit, Teal Acetate Alphabet, Be Happy Stickers, Puffy Rainbow Stickers, Coral Puffy Alphabet Stickers, Sunshine & Laughter Stamp, Noted Vol. 2 Stamp

Tough Times greeting cards by Nathalie Leonelli – supplies used | February 2020 Kit, Teal Acetate Alphabet, Cork Stars, Simply Wonderful Wood Veneer Banners, Acrylic Raindrop Confetti, Acrylic Clouds, Love Is 6 x 8.5 Paper Stack, Sunshine & Laughter Stamp, Noted Vol. 2 Stamp

You & Me by Suzanna Lee – supplies used | February 2020 Kit, Be Happy Stickers, Puffy Star Stickers, Cork Stars, Simply Wonderful Wood Veneer Banners, You & Me Wood Veneer, Love Is 6 x 8.5 Paper Stack, Noted Vol. 2 Stamp

Monorail Loop by Tracey Fox – supplies used | February 2020 Kit, Teal Acetate Alphabet, Be Happy Stickers, Coral Puffy Alphabet Stickers, Simply Wonderful Wood Veneer Banners, Love Is 6 x 8.5 Paper Stack, Sunshine & Laughter Stamp

You & Me by Candace Perkins – supplies used | February 2020 Kit, Be Happy Stickers, You & Me Wood Veneer, Acrylic Raindrop Confetti, Acrylic Clouds, Sunshine & Laughter Stamp

Always be a Rainbow by Amanda-jayne Baldwin – supplies used | February 2020 Kit, Love Is Printables, February 2020 Cut Files, Teal Acetate Alphabet, Be Happy Stickers, Puffy Rainbow Stickers, Coral Puffy Alphabet Stickers, Cork Stars, Acrylic Raindrop Confetti, Acrylic Clouds, Love Is 6 x 8.5 Paper Stack

Join us tomorrow when our guest designer for the month of February will be revealed—we can’t wait to share her work with you using all of our new products!

Our February kit + add-ons have arrived!

Our February reveal is here and we can’t wait for you to see all of the brand new and exclusive products that are now available in our shop today! Our February kit includes 3 – 4 x 6 inch tags, 18 – 3 x 4 inch tags, and 26 die cuts, that will work great on your scrapbooking layouts, pocket pages, traveler’s notebooks, cards, planners, and more! When designing our kits, we love to think of tags that can be used as prompts to help make it easier for you to get your story started and documented, and this kit is full of those and so much more!

Here’s the first look at all of the fun tags and die cuts included in this kit:

Our monthly kits are limited and once they sell out we will not be restocking! Look for a new kit on the 10th each month at 8:00 am Pacific! Our kits are available for single purchase or select our subscription option to subscribe and SAVE!

Here’s a peek of all the new and exclusive add-ons we have available this month! All of our coordinating add-ons can be purchased separately, so you have a chance to pick the products that work for your stash and what you’re documenting now, and if you need more than one, you can purchase multiples, too! The new items added to the shop for February are: stamps (Sunshine & Laughter and Noted Vol. 2), puffy stickers (Rainbows and Coral alphabet) Be Happy stickers, wood veneers (You & Me and Simply Wonderful banners), cork stars, acrylics (clouds and raindrops), Teal Acetate Alphabet, Polka Dot journaling tags and labels.

Our digital files this month include coordinating printables, February cut files, and print and cut labels that coordinate with our kit – once you download these files, you can use/print them over and over again!

We have also added new products to our Sale section! Most of these products will not be restocked once they have sold out, so you’ll want to grab them now while supplies last!

Subscribers, you can start bundling now! Bundling is easy – just log into your account and use the “Bundle with my kit subscription” shipping option during checkout to receive FREE shipping on any extra items purchased from our shop that will ship with your kit. This option will only be available during our 24-hour bundling period.

Not a subscriber? Don’t wait any longer to sign up! Subscribe today to lock in our special kit price of $9.99 + shipping, and you’ll be able to bundle any additional products from our shop and have them ship for FREE with your kit subscription, during our 24-hour bundling period, starting on the 10th at 8:00 am Pacific!

When starting a new subscription: you’ll want to first check out with only the kit subscription in your cart. After you have subscribed to our kit, you will then be able to see your special discounts on select items in our SALE section during our 24-hour bundling period! You must be logged into your kit subscriber account to see your discounted items. Quick note: Our subscription is risk free and can be cancelled at any time by emailing us. Our monthly kit and add-ons are available without a subscription each month, too.

Here’s a look at the items on sale for our subscribers only this month:

Subscribers: Pick up these six items for FREE to 20% off during our 24 hour bundling period that is going on now and ends on Tuesday, February 11th at 8:00 am Pacific! Please make sure you are logged into your subscriber account, then click on the SALE section to see these items on sale! Once you are logged in, you’ll see your special discounted product listing that specifies Sub Discount.

Looking for more inspiration? Our design team is ready to inspire you with brand new, fresh inspiration using the new products this month! You’ll be able to find our their amazing inspiration in our product listings so you can see their projects while you shop! We will also be showcasing our team’s projects on the blog later today, and throughout the entire month!

Thank you so much for joining us today and for all of your support! We are excited to see how you use these new products! You can share your projects with us in our Facebook group and make sure you use the #EllesStudio hashtag when posting on Instagram for a chance to be featured on our feed and win a gift certificate to our shop!

February Design Team Sneak Peeks

We are just two days away from our February kit and add-ons reveal and we are so excited to be able to share these fun sneak peeks of amazing projects our team made using all the new products that will be available soon! Our February reveal will be full of exclusive products that we’ve designed and will have you ready to document your February stories and take you right into March!

Not a subscriber? Don’t wait any longer! You can pre-order our February kit now and lock in our $9.99 kit price by starting a subscription today! You’ll want to choose our SUBSCRIBE & SAVE option to get signed up and start your subscription with our February kit. We will then hold your kit and you’ll be ready to bundle and save at our February 10th reveal! Details on how to bundle with your subscription order will be emailed to you once you have purchased this product.

Kit subscribers, don’t forget! Along with being able to bundle any products from our shop that will ship for FREE with your kit during our 24-hour bundling period, starting on the 10th at 8:00 am Pacific each month, our subscribers will also have access to special discounts on select items! Above is a preview of our February discounts and savings that will be available for our subscribers during our February bundling period! These discounted items can be found in our SALE section during our 24-hour bundling period, and you must be logged into your kit subscriber account to see them. If you haven’t subscribed to our kit, sign up now to take advantage of these special offers on February 10th! Quick note: Our kits and add-ons are available without a subscription each month, too.

Make sure you set your alarm and mark your calendar for this Monday, February 10th at 8 am Pacific! We hope to see you there!

Handmade with Love Valentine’s Day Cards with Nathalie Leonelli

There is still time to create handmade greeting cards to let your loved ones know just how much you care on Valentine’s Day, using our beautifully coordinating January kit and extras, and today, to wrap-up Valentine’s Week here on the blog, design team member Nathalie Leonelli is here to inspire you with two beautiful designs! Let’s take a look!

Welcome back! It’s Nathalie with you, and with just a week left to go before Valentine’s Day, I wanted to show you how you could make a few simple and pretty cards using your January kit and extras. I have two examples to inspire you today:

Supplies | January 2020 Kit, 2020 CalendarsI Adore You Stickers, La La Love You Puffy Stickers, Little Moments Leatherette Stickers, Monthly Puffy StickersXO Wood Veneer, Love Is 6 x 8.5 Paper Stack

The background of both cards features patterned papers from the newly sized Love Is 6 x 8.5 Paper Stack that I matched with some tags. For this first card, I used two tags: a favorite from the January Kit and a monthly tag from the 2020 Calendars.

I added texture with the wonderful Little Moments Leatherette Stickers and puffy hearts from the La La Love You Puffy Stickers. I found a fun way to enhance the date by using the ‘O’ from October in the Monthly Puffy Stickers

Note: You could use this design with any of the months from the 2020 Calendars to celebrate birthdays or any special date too!

My second card is completely centered on the large XO Wood Veneer. It looks gorgeous on top of a tag from the January Kit and embellished with black accents.

It was easy to add sentiments for both cards, as they are all ready for you on the I Adore You Sticker sheet.

This concludes our Valentine’s Day-themed week, but make sure to come back on Monday for the big February reveal! Between you and I, the new extras are to die for!

Share what you created using this week’s inspiration on Instagram using the hashtag #EllesStudio, and in our Elle’s Studio Facebook Group! We can’t wait to see your LOVE-filled projects!

A True Love-Filled Layout with Amanda-jayne Baldwin

Hi. Elle’s Studio friends! It’s Amanda here, and I’m super excited to be part of the Valentine’s Week-themed posts here at Elle’s Studio! It’s no secret that I like to put hearts on all the things, you only need to look at my previous blog post HERE to know how much I adore this loved-up holiday! Rather than document my main squeeze, I wanted to show you how I used the January kit and extras to create a love-filled layout of my sweet girl and doxie pup! Here’s what I created:

Supplies | January 2020 Kit, True Love PrintablesI Adore You StickersYou Are Loved Die CutsLa La Love You Puffy Stickers, Little Moments Leatherette Stickers

Oh, how adorable is this?! La la love, indeed! And you bet I put hearts on it! For those of you who follow me, you’d know that this is my fifth scrapbook page that I have created with the January kit and extras. Yes, you read correctly, layout #5, because the January 2020 Kit is THAT awesome! That said, I was definitely getting low on supplies when I made this, so how did I get my kit and extras to stretch so far? 

Three little words: True Love Printables!

I started my layout by downloading & extracting the True Love Printables zipped file to my laptop. Once extracted, instead of opening the True Love PDF, I opened the single “JournalingTag02″ file. I then selected to print this image in the standard Windows Print Pictures option. I selected A4 photo size (but you could also choose 8-1/2″ x 11”), best quality photo and printed the image to ‘fill the page’. I used a quality, smooth white printer paper to print with. Please note that printed colors may vary depending on your individual paper, printer and ink options. 

Once printed, I trimmed my A4 paper down to the 8.5″ x 11″ layout size. Perfect! Who would’ve thought that the True Love Printables would also make fabulous pattern papers?! What a great way to maximize your supplies and make them last that little bit longer! 

With such a fabulous striped pattern at the top and base of my paper, I decided to fill the white area with my sweet girl’s photograph. I layered my photo onto my few remaining tags from the January Kit – you’ll spy that the 4″ x 6″ tag is actually the same pattern design (only a different color) as the printed one. I trimmed it to 4″ x 5″ to fit my page, then layered the 3″ x 4″ heart tag over it. Repeat patterns, shapes, and colors are all integral elements to my design style. With this in mind, it was quickly determined that my page would feature horizontal stripes, hearts, and that super pretty pink and green color palette with red, black and white accents. 

To the right of my photo cluster, I embellished with the Love Tag from the You Are Loved Die Cuts. I adorned the tag with a La La Love You Puffy Sticker and some baker’s twine from my stash. For added impact, I foam mounted the tag which added some subtle dimension to the page. 

On the pretty pink stripes at the top of the printed paper, I embellished with my La La Love You Puffy Sticker title and I Adore You Sticker sentiments and journaling. The puffy alphas fit perfectly inside the stripe, and really popped against the pink! As my layout appeared to have alternating stripes or features of black and white, I added the ‘cutie’ puffy alphas in black above my photo cluster to maintain this look and achieve balance.

For finishing touches, I added a few more of the You Are Loved Die Cuts and that fabulous Little Moments Leatherette Sticker

Simple, easy, and I loved creating with the January kit and extras! I hope my layout has inspired you to document your loved ones, and to stretch your kits a little further with the amazing True Love Printables

Thanks so much for visiting!

Unique HeART Work with Jess Forster

When was the last time you got a bit inky, or tried a new technique? Today, design team member Jess Forster is inspiring us to create a new piece of home decor, using some mixed media supplies that you may already have on hand, and our versatile Love You Lots Stamp. Let’s see her amazing project!

It’s almost February 14th and in addition to making Valentine’s Day cards with my kids, I am also enjoy decorating my house. Today I am going to show you how I created this customized art print using the Love You Lots Stamp and some artful techniques.

For this customized art print, I gathered the necessary supplies which included: Vicki Boutin Foundations Media paper, Vicki Boutin art crayons, gesso, acetate, paint brushes, black ink and the Love You Lots Stamp. To learn more about the technique I am replicating, check out Vicki’s fabulous video here: Vicki Boutin Art Crayons, Gesso and Stamps

I covered one 12″ x 12″ sheet of Foundations paper in gesso, and let it dry overnight. From my basic understanding, gesso is a medium that primes a surface for painting. Here I primed paper so that I could then use Vicki Boutin’s art crayons mixed with water, which I applied using acetate, a paint brush and sponge. I really had fun creating a mixture of textures, colours and layers.

Once the paper was dry, I then used the heart outline from the Love You Lots Stamp with black ink to stamp images on the page. Once the images were stamped, I then use my scissors to fussy cut the hearts by hand.

From there I arranged the hearts in five rows on a piece of 8.5″ x 11″ cardstock and slipped it in an extra white Ikea Ribba frame that I had lying around the house. Super simple to create, I love how unique this art print turned out and I am proud to display it with my other Valentine’s Day décor on my mantel. Also, I am super pumped that I am keeping my new year’s resolution to use my ES stamps! Thanks so much for looking!

Elle’s Studio Supplies | Love You Lots Stamp

Mixed media supplies | Vicki Boutin Foundations Media paper, Vicki Boutin Art Crayons, gesso, brayer, acetate, paint brush

Celebrating Valentine’s Week: Treat Bags with Patricia Roebuck

We are continuing Valentine’s Week here on the blog with gift bags—we all have surprises to give out on Valentine’s Day, right? Design team member Patricia Roebuck is with us to share how easy it can be to customize store-bought gift bags using our January kit and add-ons! Let’s see her sweet gifts!

Hello Elle’s Studio Friends! Valentine’s Day is just around the corner!   Today’s post will give you ideas for treat bags: what to fill them with, and how to decorate them with the Elle’s Studio January kit and extras. Let’s get started! 

Supplies | January 2020 Kit, You Are Loved Die Cuts, Love Is 6 x 8.5 Paper Stack, ‘Tis the Season 6 x 6 Paper Stack, Love You Lots Stamp, Love You Lots Metal Die

My treat bags include Veggie Mini Heart Chips, Made Good Mini Bars, a coiled bracelet, and rose petals. Everything was found in the Valentine’s section at Target, except for the rose petals, which were in the Dollar Spot. I decided on large, solid red bags found at Michael’s for two reasons: it would fit the Veggie Chips bag, and the Elle’s Studio products would show up beautifully against a solid color versus a decorated cellophane bag. I also found the pink yarn at Michael’s. The crochet pattern for the lacy heart is from Happy Berry here, but this idea would still work without it! 

I wanted to keep the bag simple to keep the emphasis on the tags, but I began by adding just a little bit of stamping for texture and color at the bottom of the bag using the Love You Lots Stamp in a shade darker than the red bag. Dye ink will dry and lighten, so use it is important to use a darker ink, even if it is not the same color as your bag.

When I create treat bags, I like them all to follow the same design. I used the Love You Lots Stamp to stamp pink banners, cutting them out with the matching Love You Lots Metal Die. This will create a consistent design for each tag, making assembly quick.

I began each tag by starting with a You Are Loved Die Cut as the base, topping with my pre-stamped and cut pink banner, and a large die cut heart, adhered using dimensional adhesive. I then added a smaller die cut heart next to it, and then stapled or adhered a die cut from the January Kit. I repeated this layering process for the amount of tags I needed, punching a hole at the top of each tag and threading the crocheted heart through.

I attached the crochet heart by taking the top loop threaded through the tag and looping it completely around the tag, pulling through until the tag was completely attached.  

Next, I hung the completed decoration over the handle of the bag.  If you don’t have a crocheted heart, twine or ribbon would work just as well to add a different texture! 


There are so many possibilities with the January kit and extras to decorate your treat bags!

These handmade bags add a thoughtful touch to gifts for friends, family, teachers, or anyone else you care about!

Don’t put away your January kit and extras just yet—visit your local craft store and pick out simple bags so that your tags that you attach to your bags can stand out. Beautiful packaging really adds to the excitement of getting a gift! Happy Valentine’s Day!