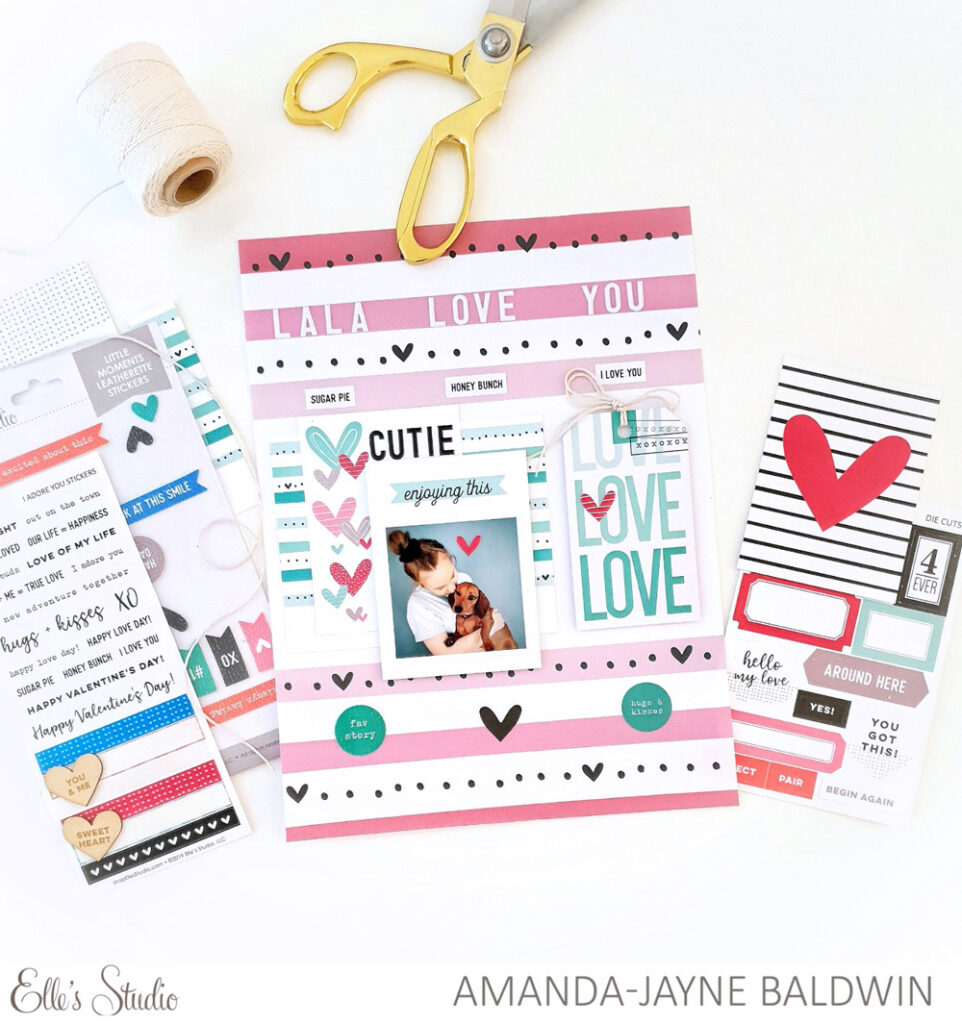
Hi. Elle’s Studio friends! It’s Amanda here, and I’m super excited to be part of the Valentine’s Week-themed posts here at Elle’s Studio! It’s no secret that I like to put hearts on all the things, you only need to look at my previous blog post HERE to know how much I adore this loved-up holiday! Rather than document my main squeeze, I wanted to show you how I used the January kit and extras to create a love-filled layout of my sweet girl and doxie pup! Here’s what I created:
Supplies | January 2020 Kit, True Love Printables, I Adore You Stickers, You Are Loved Die Cuts, La La Love You Puffy Stickers, Little Moments Leatherette Stickers
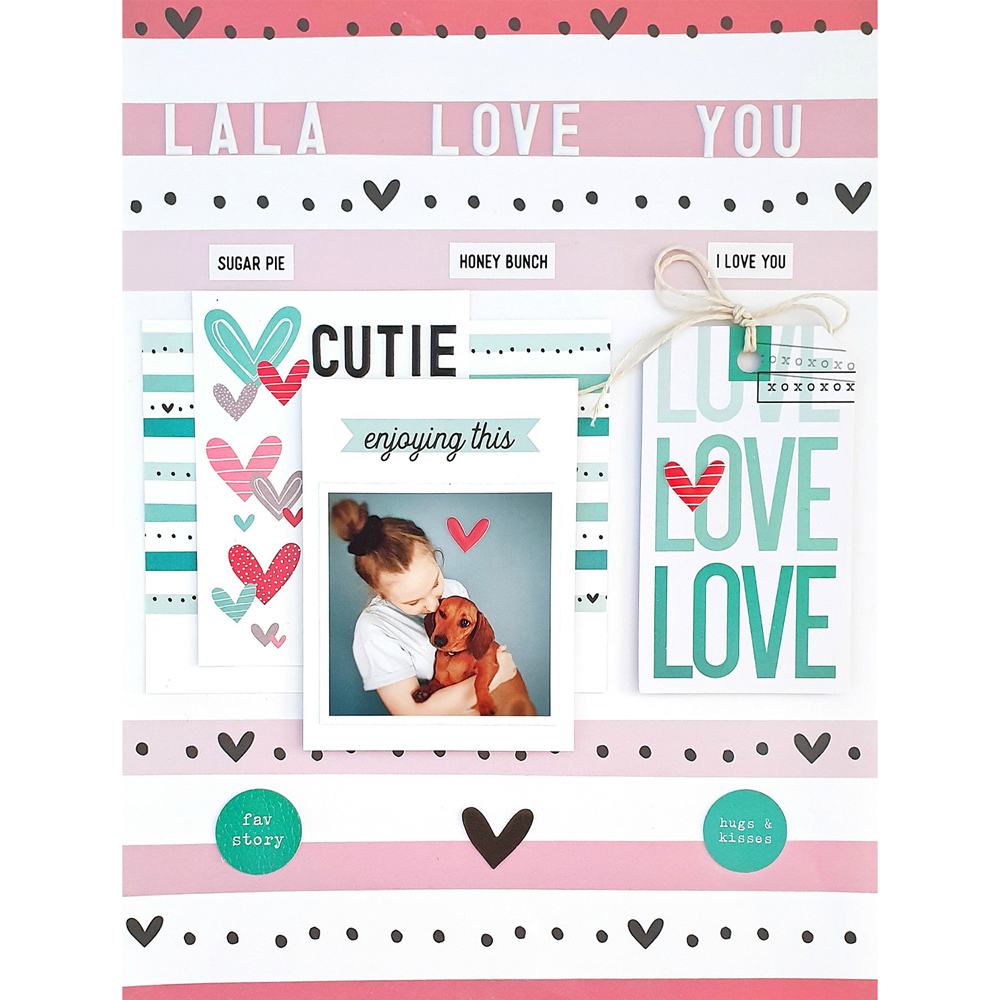
Oh, how adorable is this?! La la love, indeed! And you bet I put hearts on it! For those of you who follow me, you’d know that this is my fifth scrapbook page that I have created with the January kit and extras. Yes, you read correctly, layout #5, because the January 2020 Kit is THAT awesome! That said, I was definitely getting low on supplies when I made this, so how did I get my kit and extras to stretch so far?
Three little words: True Love Printables!
I started my layout by downloading & extracting the True Love Printables zipped file to my laptop. Once extracted, instead of opening the True Love PDF, I opened the single “JournalingTag02″ file. I then selected to print this image in the standard Windows Print Pictures option. I selected A4 photo size (but you could also choose 8-1/2″ x 11”), best quality photo and printed the image to ‘fill the page’. I used a quality, smooth white printer paper to print with. Please note that printed colors may vary depending on your individual paper, printer and ink options.
Once printed, I trimmed my A4 paper down to the 8.5″ x 11″ layout size. Perfect! Who would’ve thought that the True Love Printables would also make fabulous pattern papers?! What a great way to maximize your supplies and make them last that little bit longer!
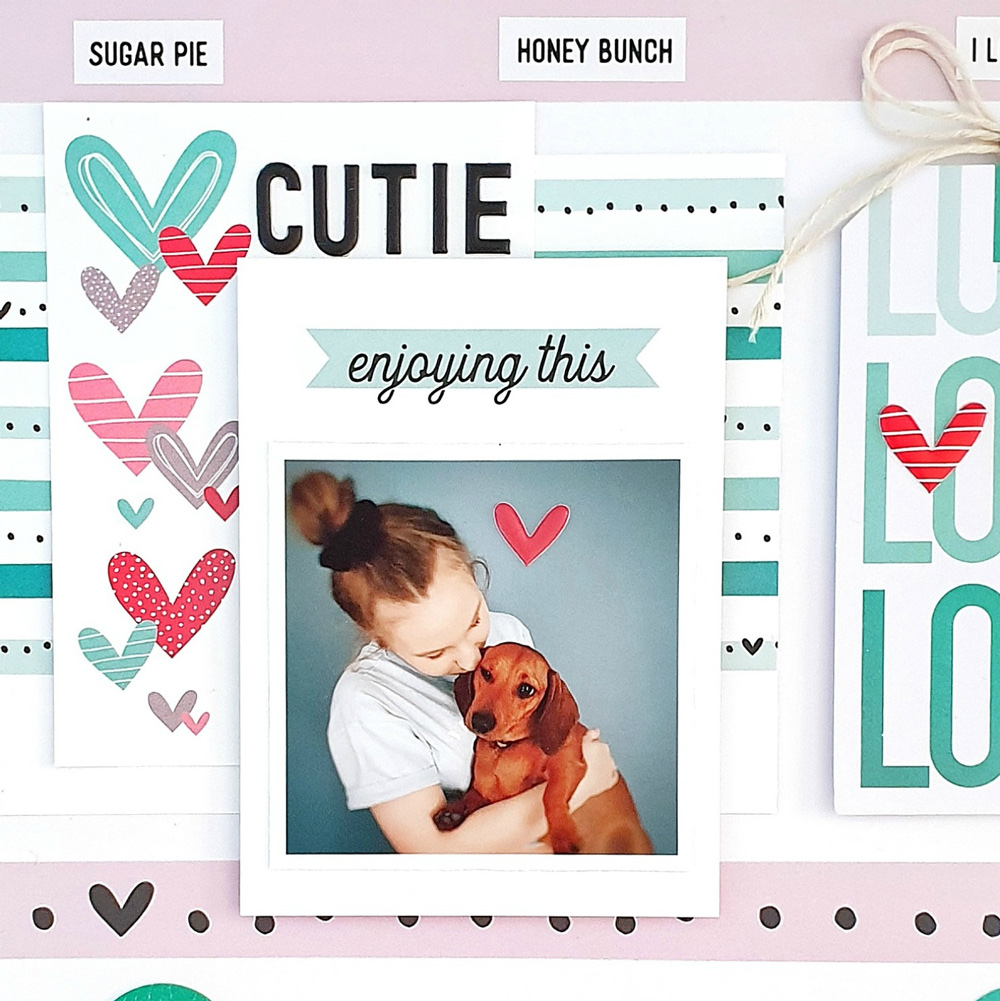
With such a fabulous striped pattern at the top and base of my paper, I decided to fill the white area with my sweet girl’s photograph. I layered my photo onto my few remaining tags from the January Kit – you’ll spy that the 4″ x 6″ tag is actually the same pattern design (only a different color) as the printed one. I trimmed it to 4″ x 5″ to fit my page, then layered the 3″ x 4″ heart tag over it. Repeat patterns, shapes, and colors are all integral elements to my design style. With this in mind, it was quickly determined that my page would feature horizontal stripes, hearts, and that super pretty pink and green color palette with red, black and white accents.
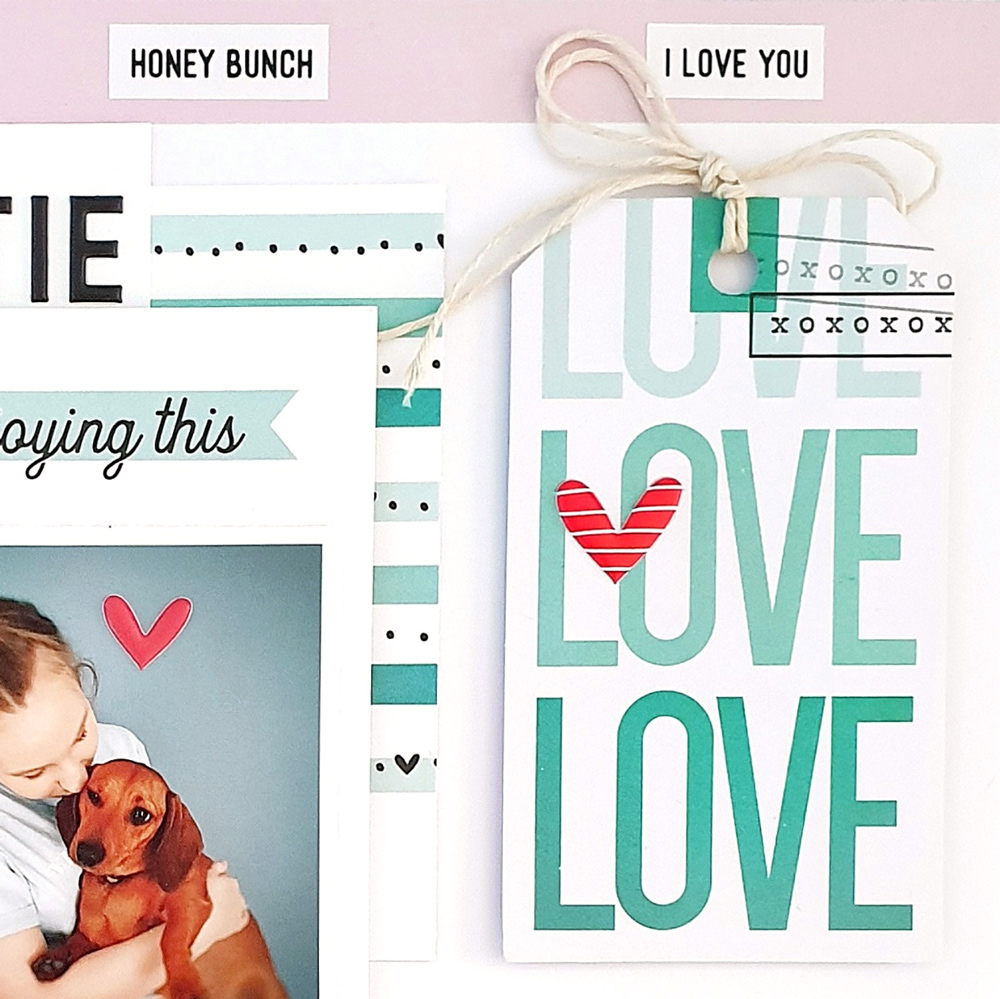
To the right of my photo cluster, I embellished with the Love Tag from the You Are Loved Die Cuts. I adorned the tag with a La La Love You Puffy Sticker and some baker’s twine from my stash. For added impact, I foam mounted the tag which added some subtle dimension to the page.
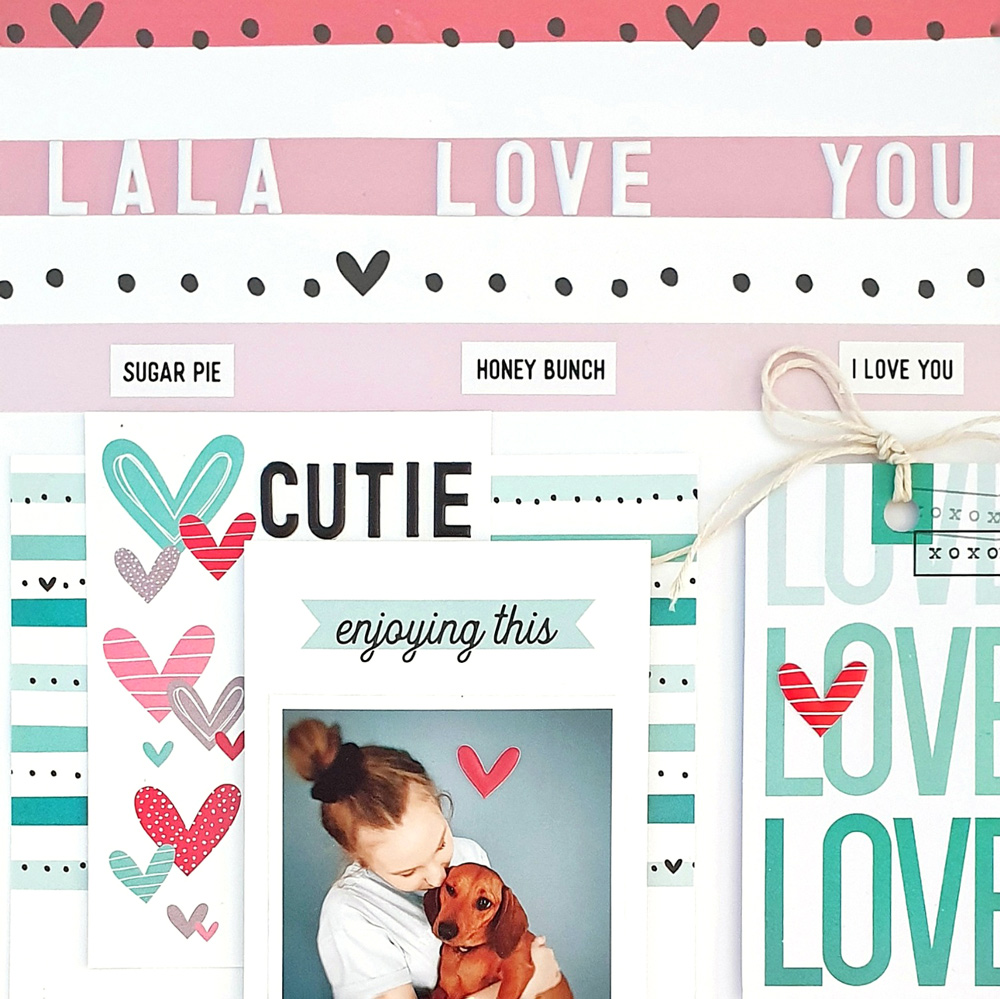
On the pretty pink stripes at the top of the printed paper, I embellished with my La La Love You Puffy Sticker title and I Adore You Sticker sentiments and journaling. The puffy alphas fit perfectly inside the stripe, and really popped against the pink! As my layout appeared to have alternating stripes or features of black and white, I added the ‘cutie’ puffy alphas in black above my photo cluster to maintain this look and achieve balance.

For finishing touches, I added a few more of the You Are Loved Die Cuts and that fabulous Little Moments Leatherette Sticker.
Simple, easy, and I loved creating with the January kit and extras! I hope my layout has inspired you to document your loved ones, and to stretch your kits a little further with the amazing True Love Printables!
Thanks so much for visiting!