Using Color Wisely with Shannon Dombkowski

Hey there, Elle’s Studio friends! It’s Shannon here to talk with you about color. When I’m creating layouts, I’m always very mindful of my color choices. Color has the power to make a layout look cohesive or discombobulated and today I want to share a few tips for incorporating color into your next layout.

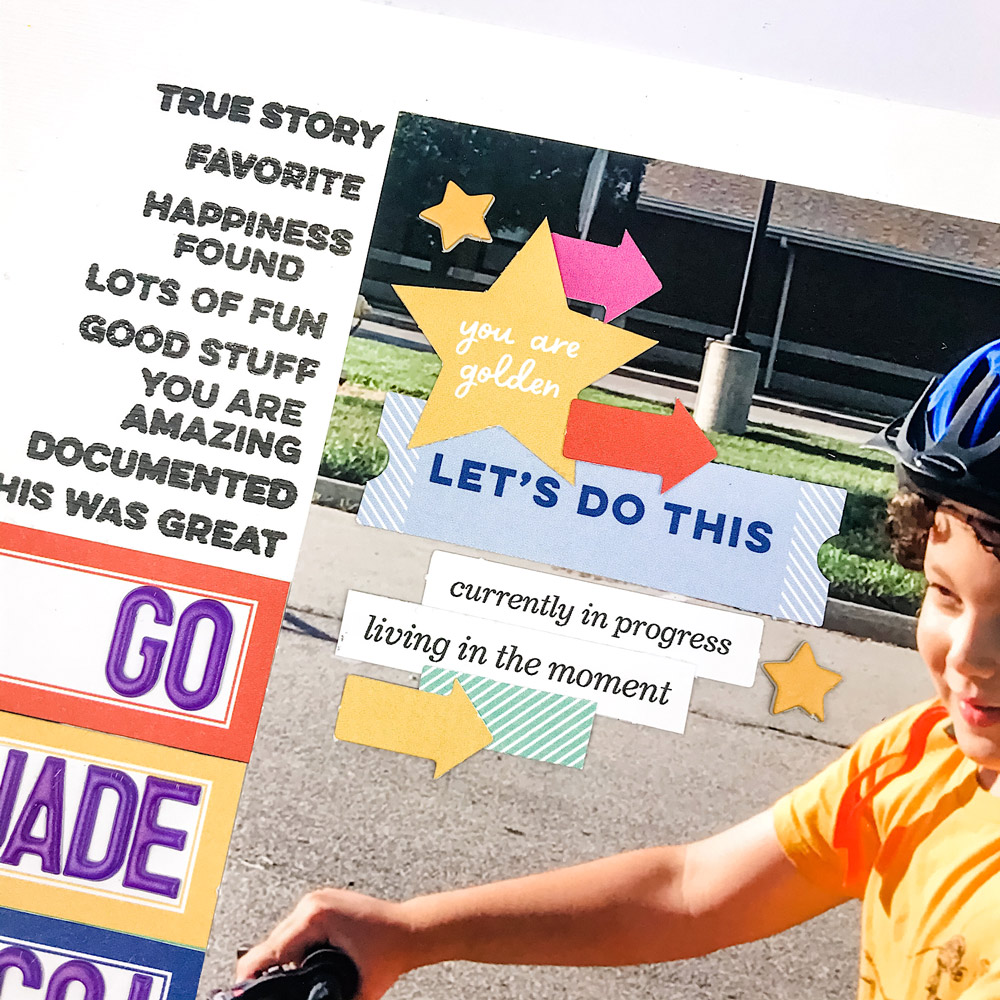
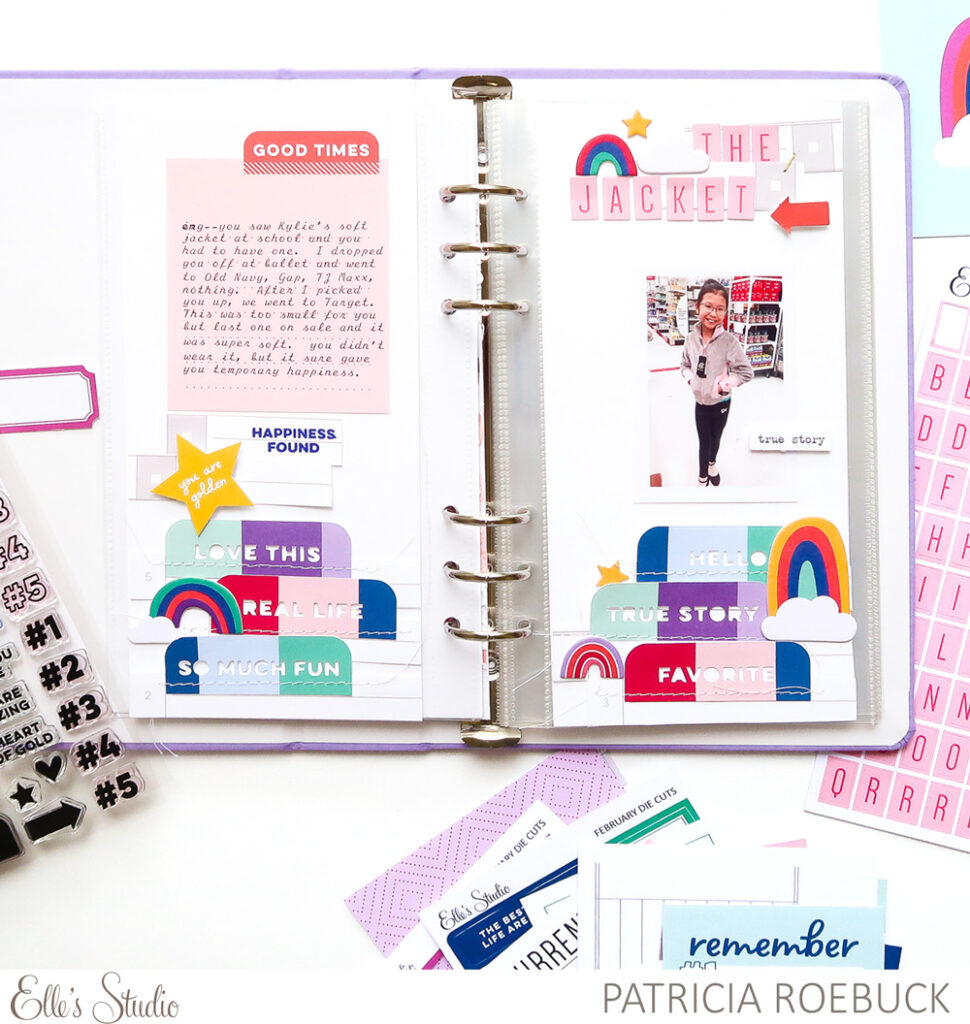
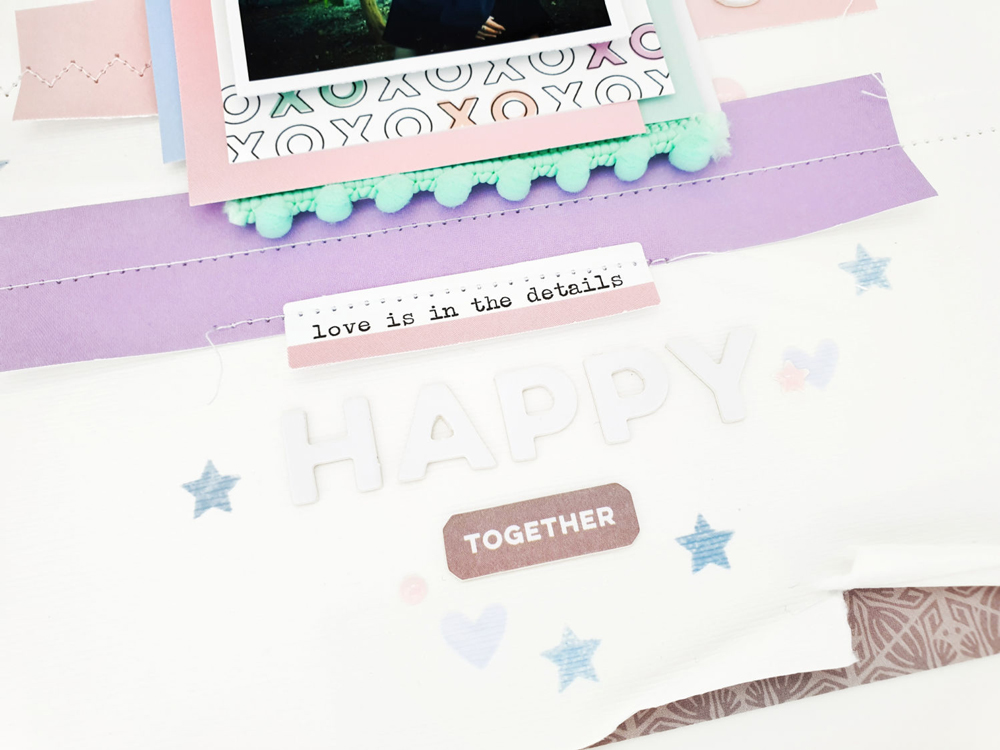
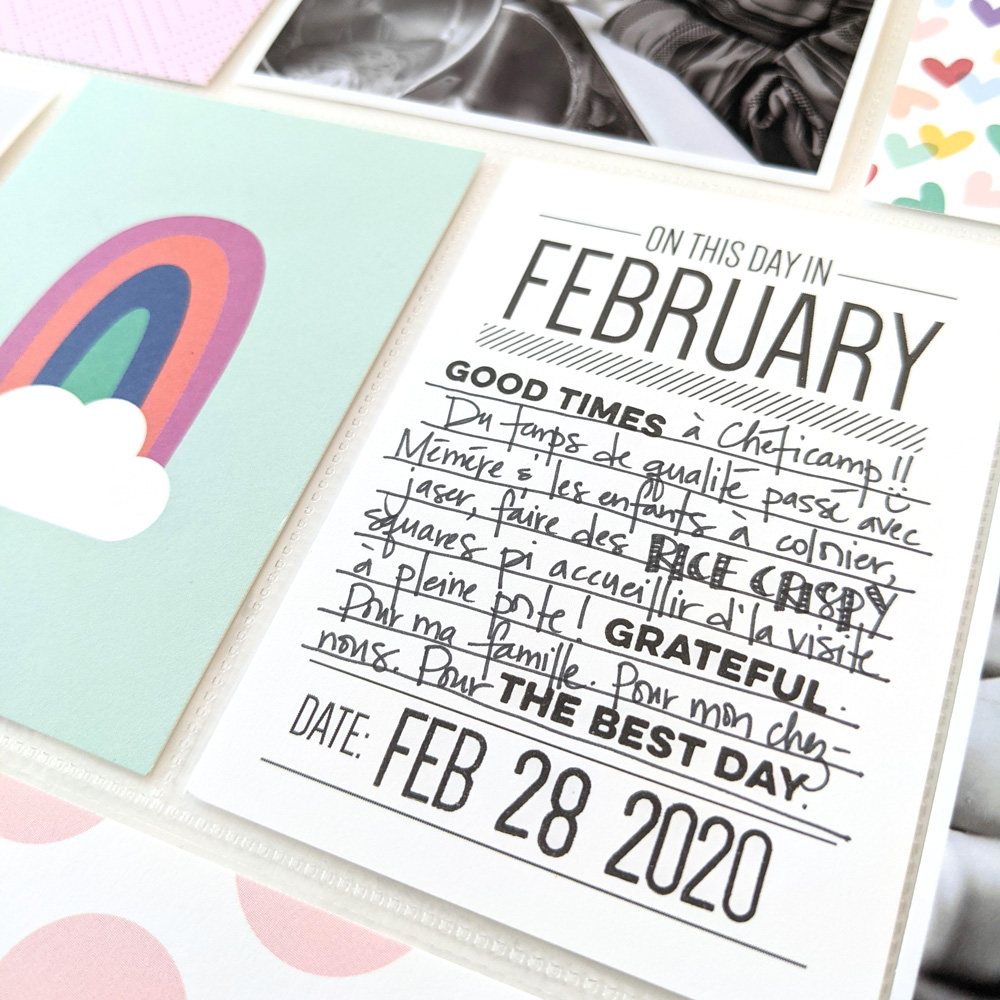
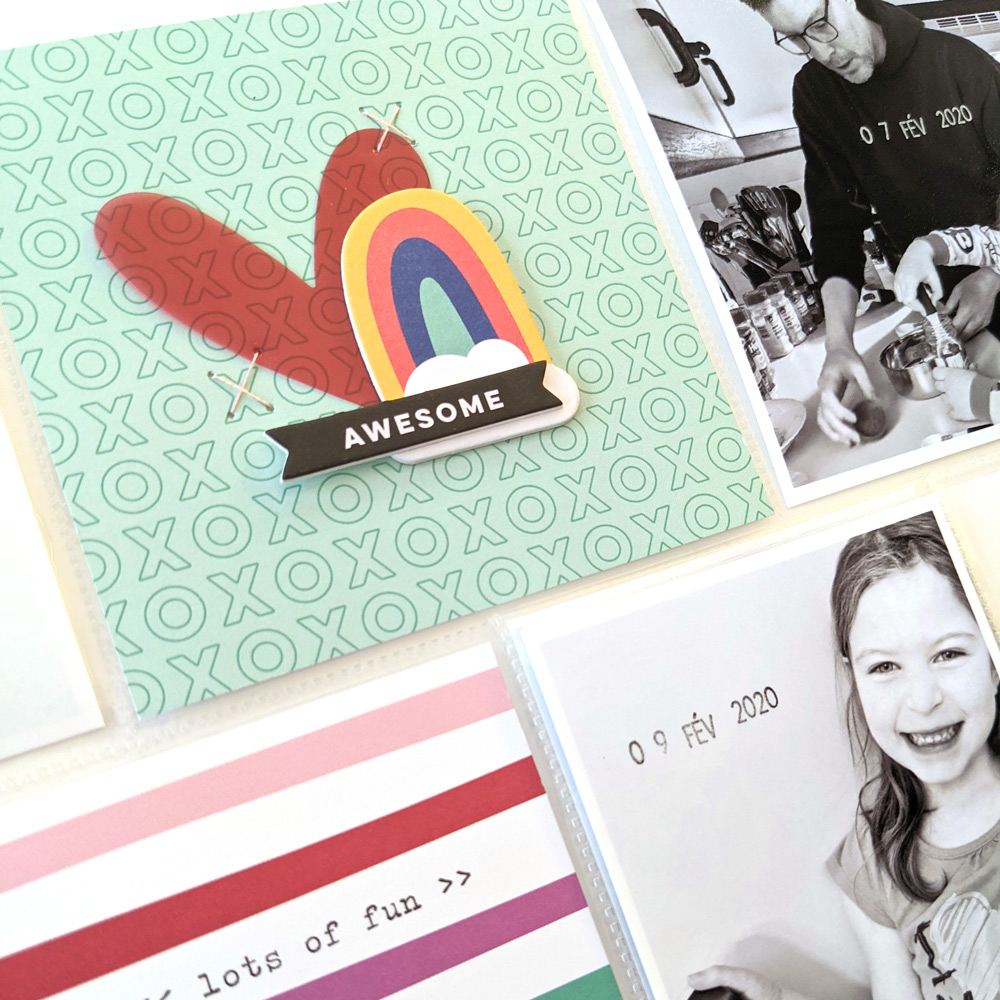
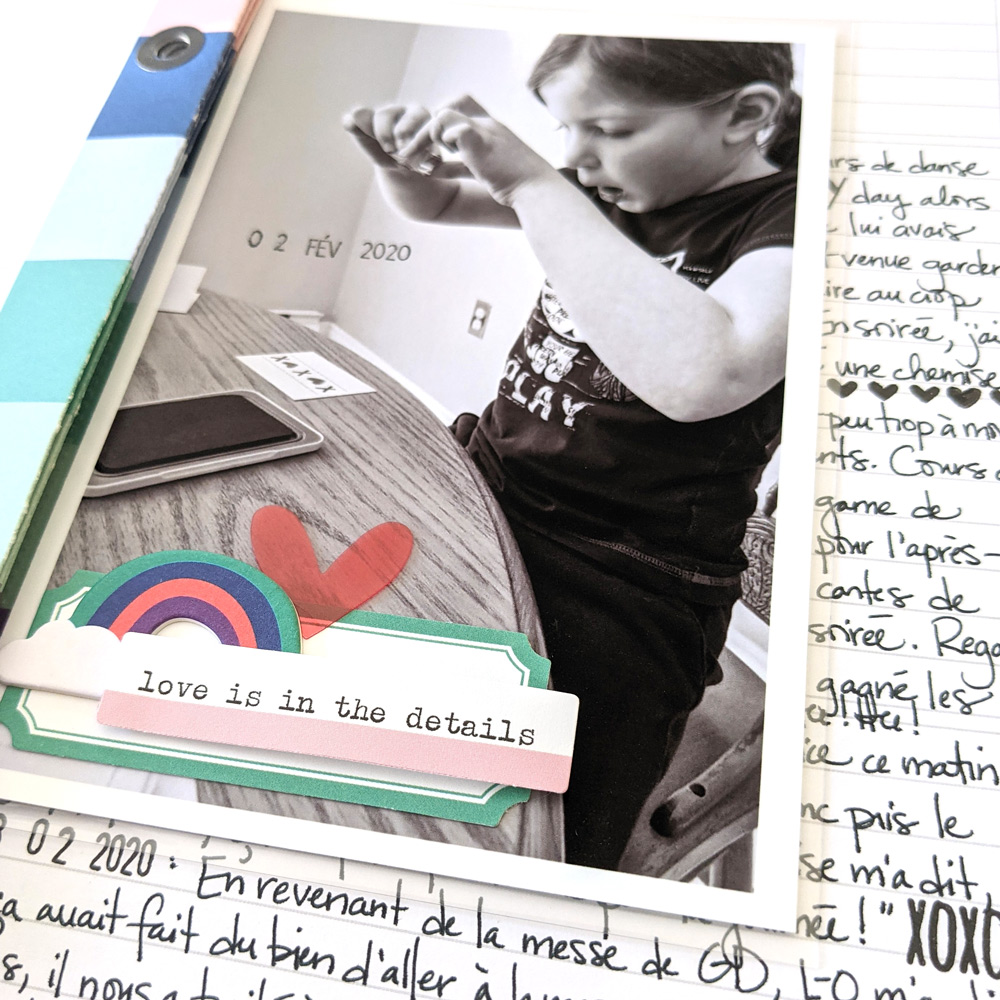
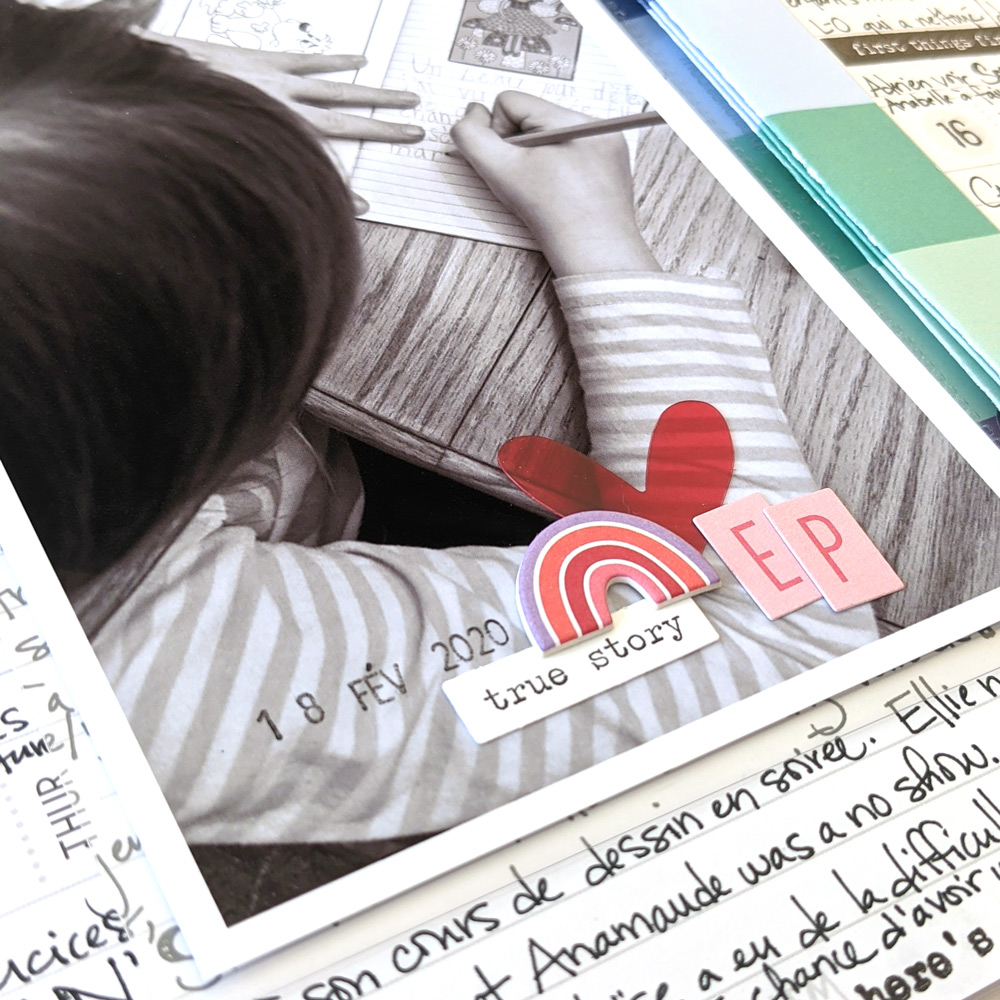
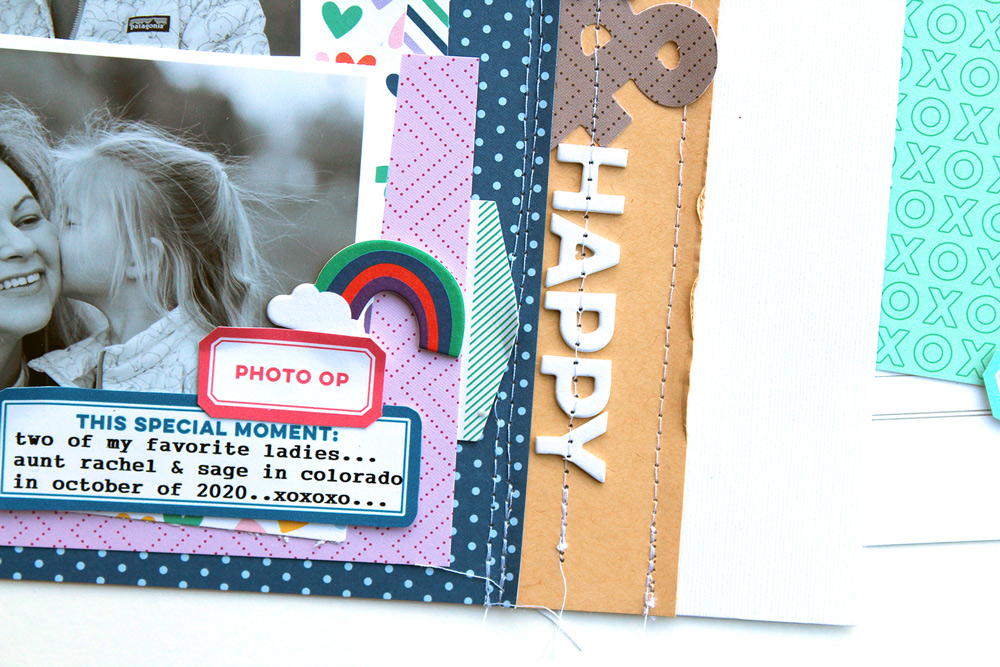
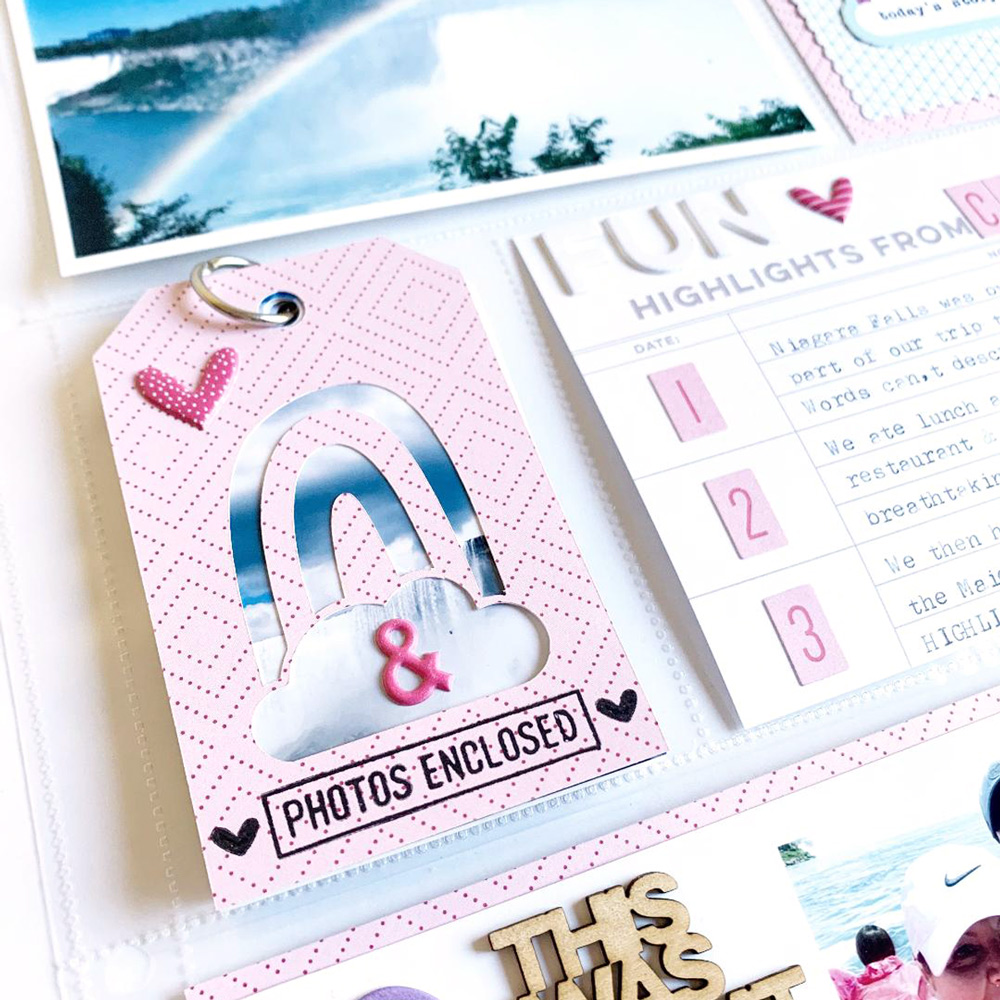
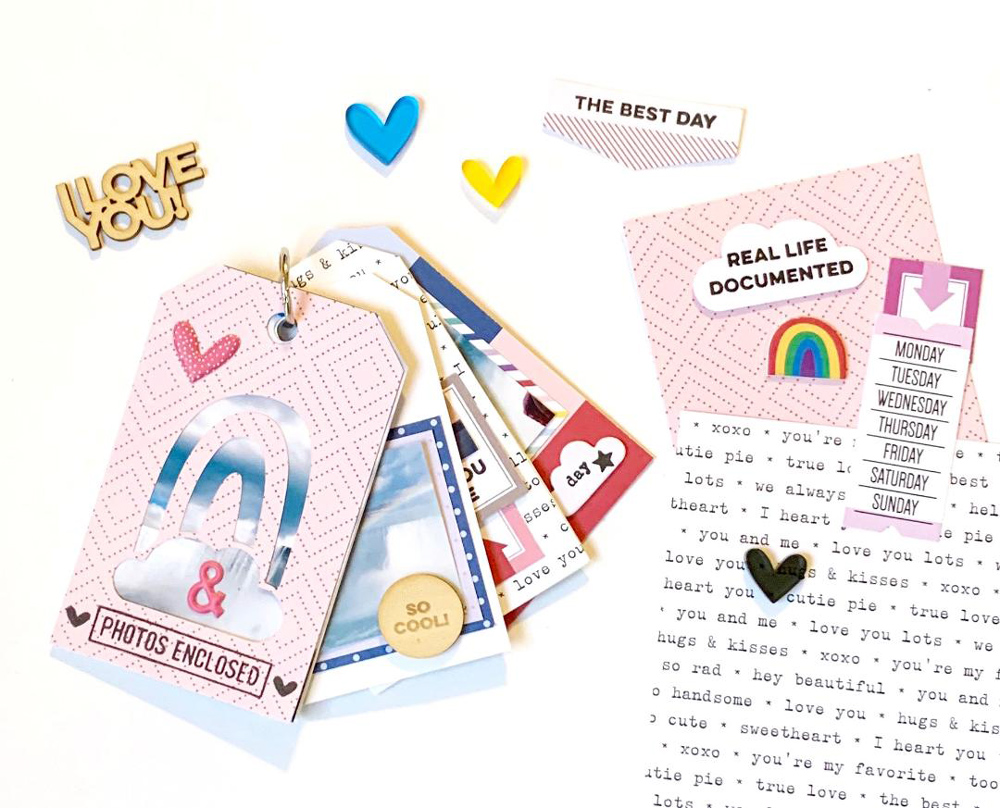
Now, I don’t know about you, but I can’t resist any rainbow stickers that Elle’s Studio puts out. Maybe it’s because I’m a sucker for rainbows! When I saw the new Happy Little Moments Chipboard Stickers, I knew they had to find a home on my layout. Since they’re rainbows and full of color, I had to put some planning into my layout. Let’s look at what I did.

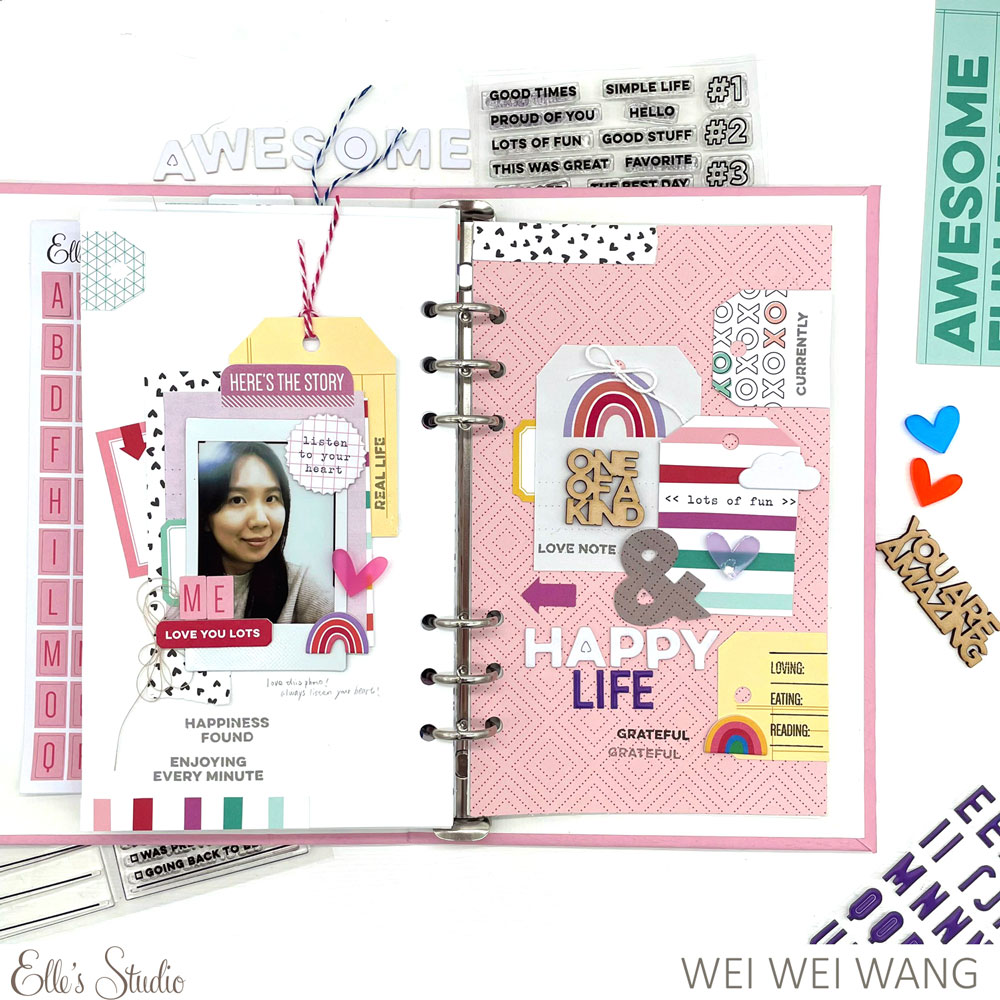
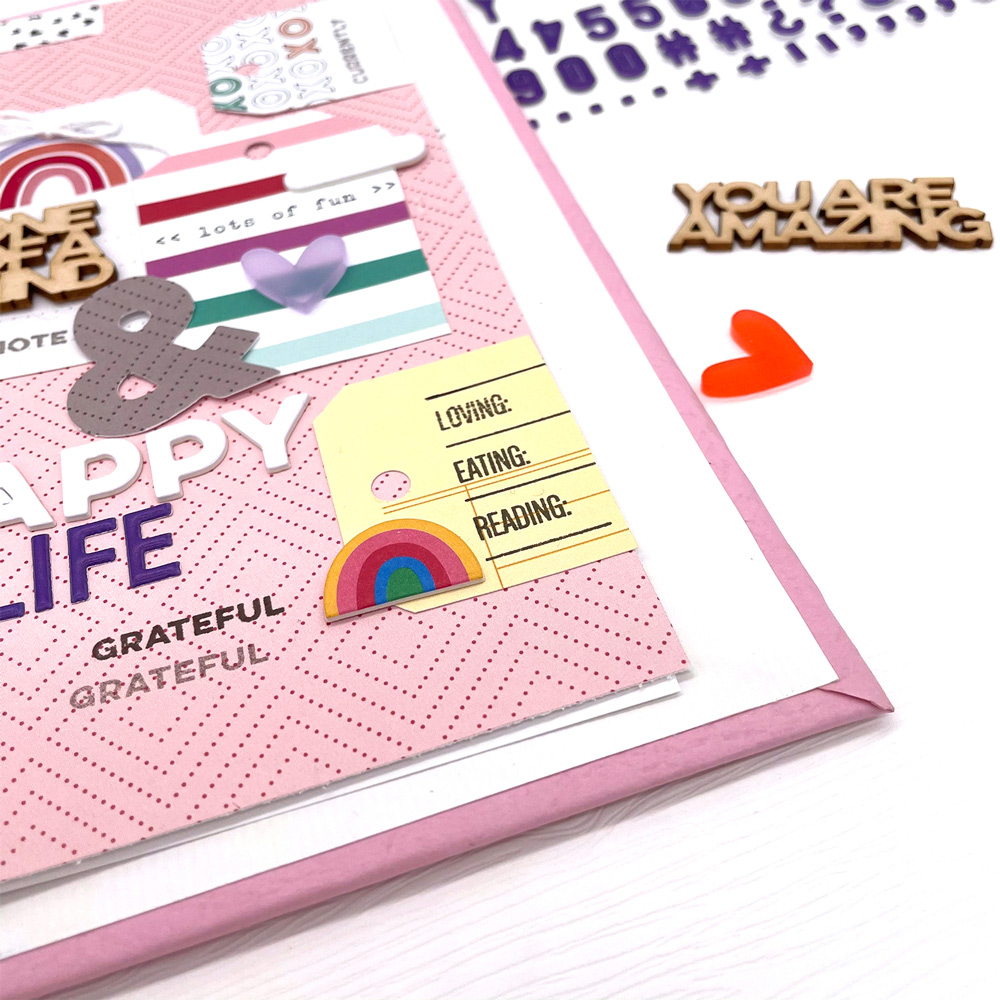
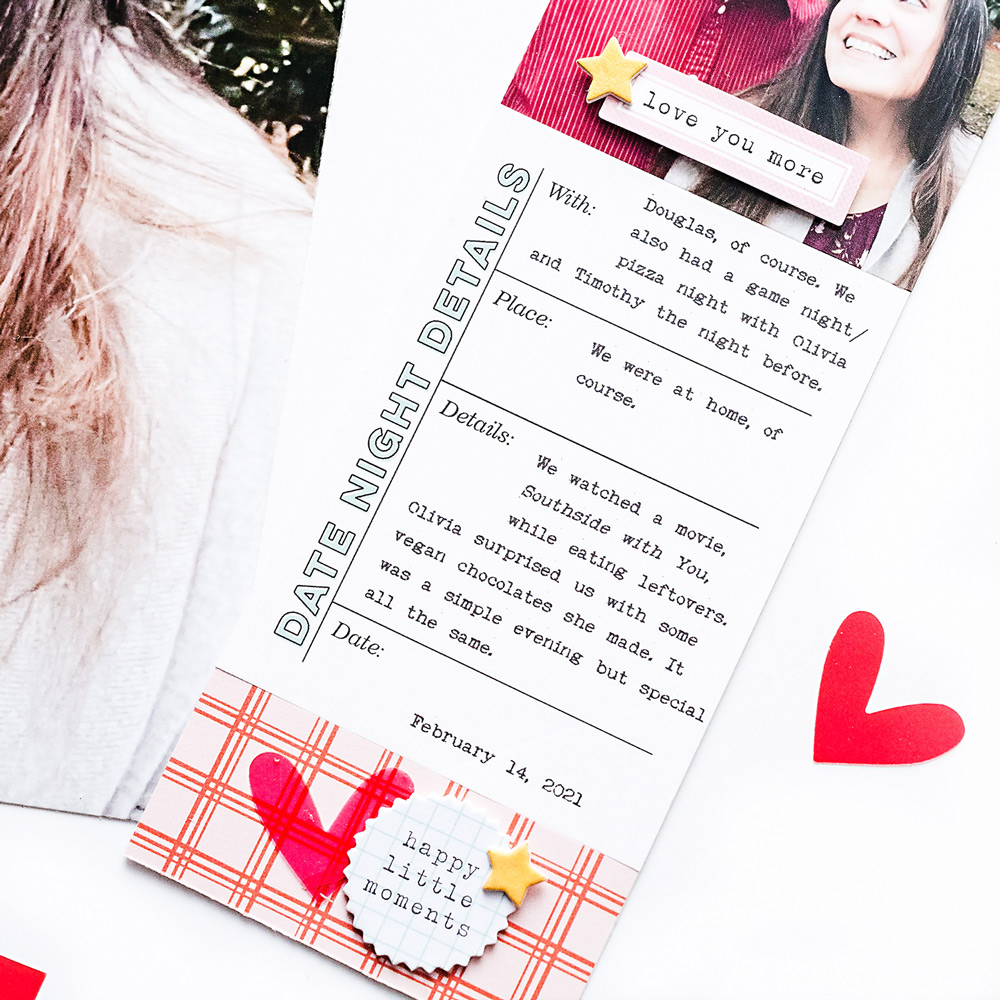
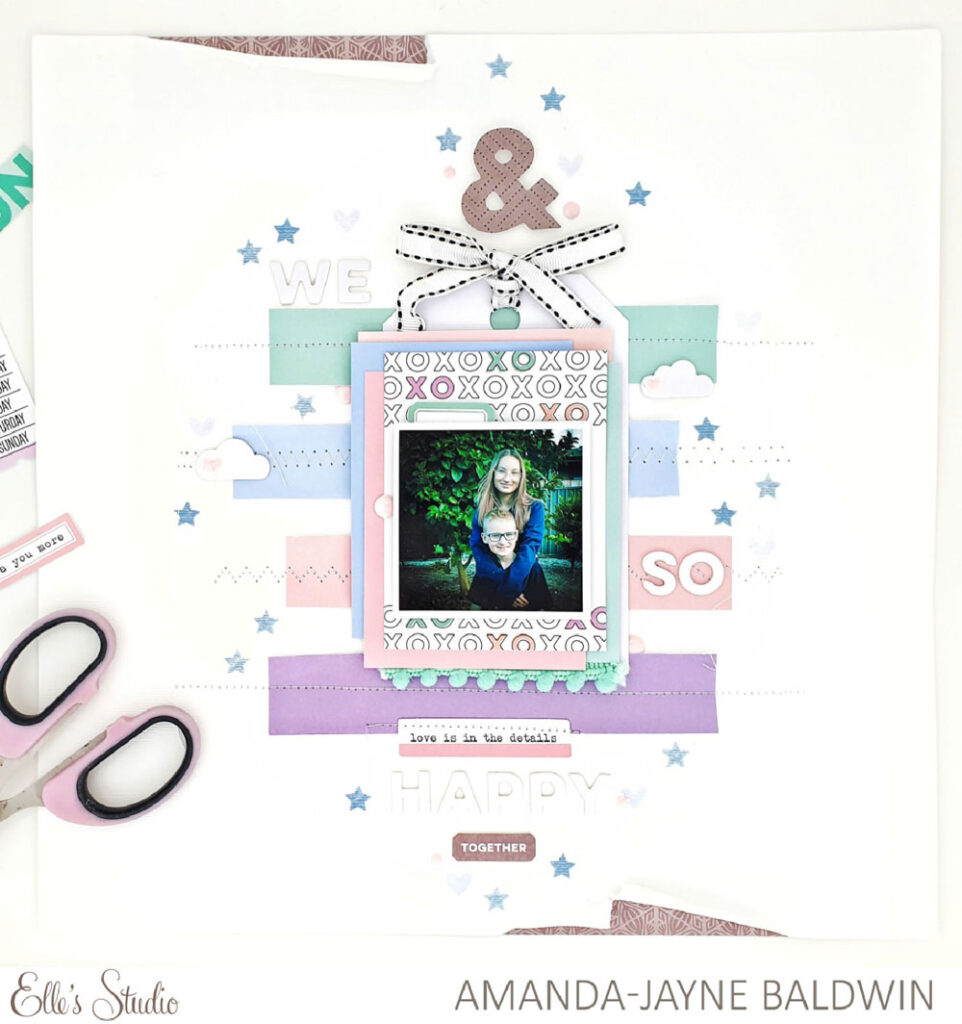
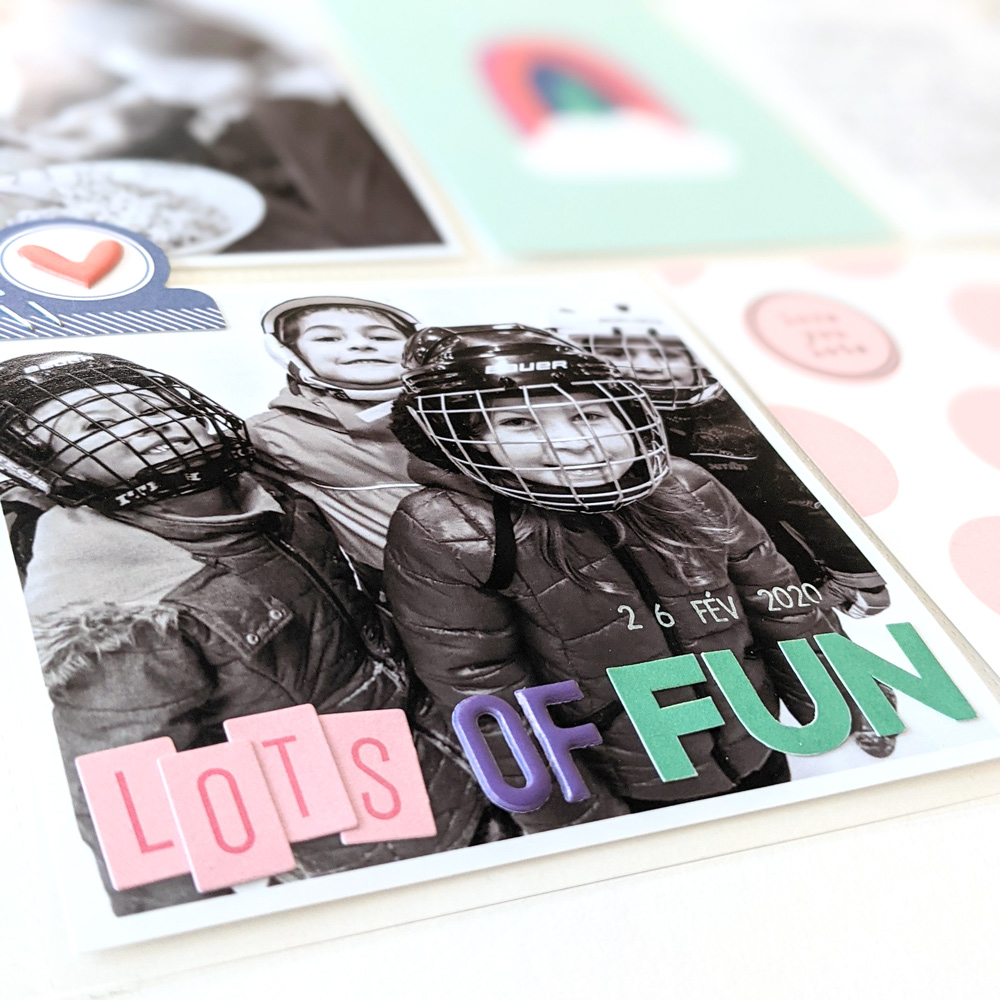
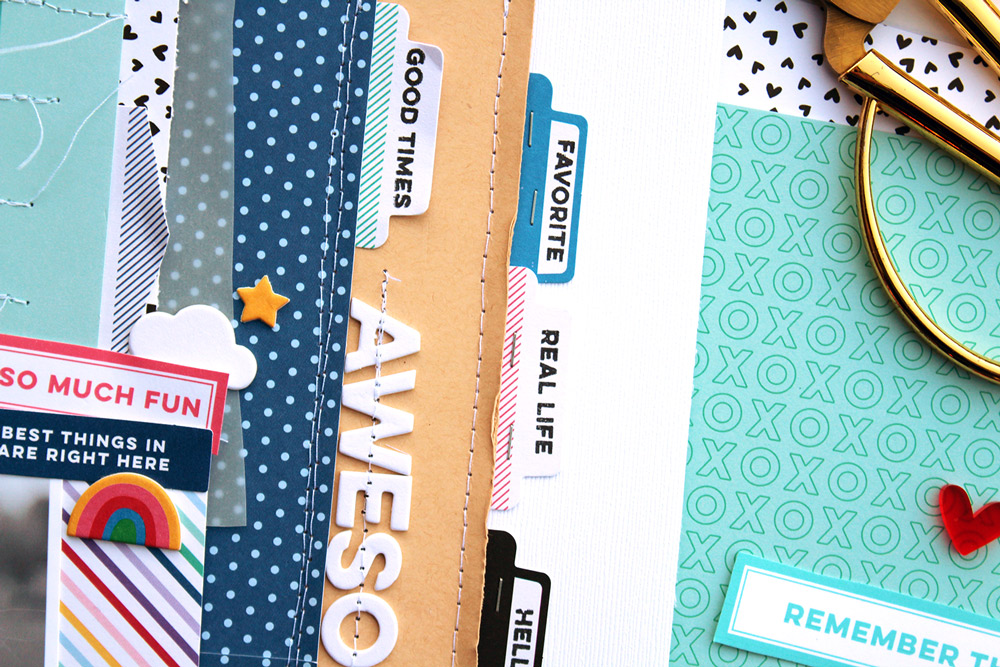
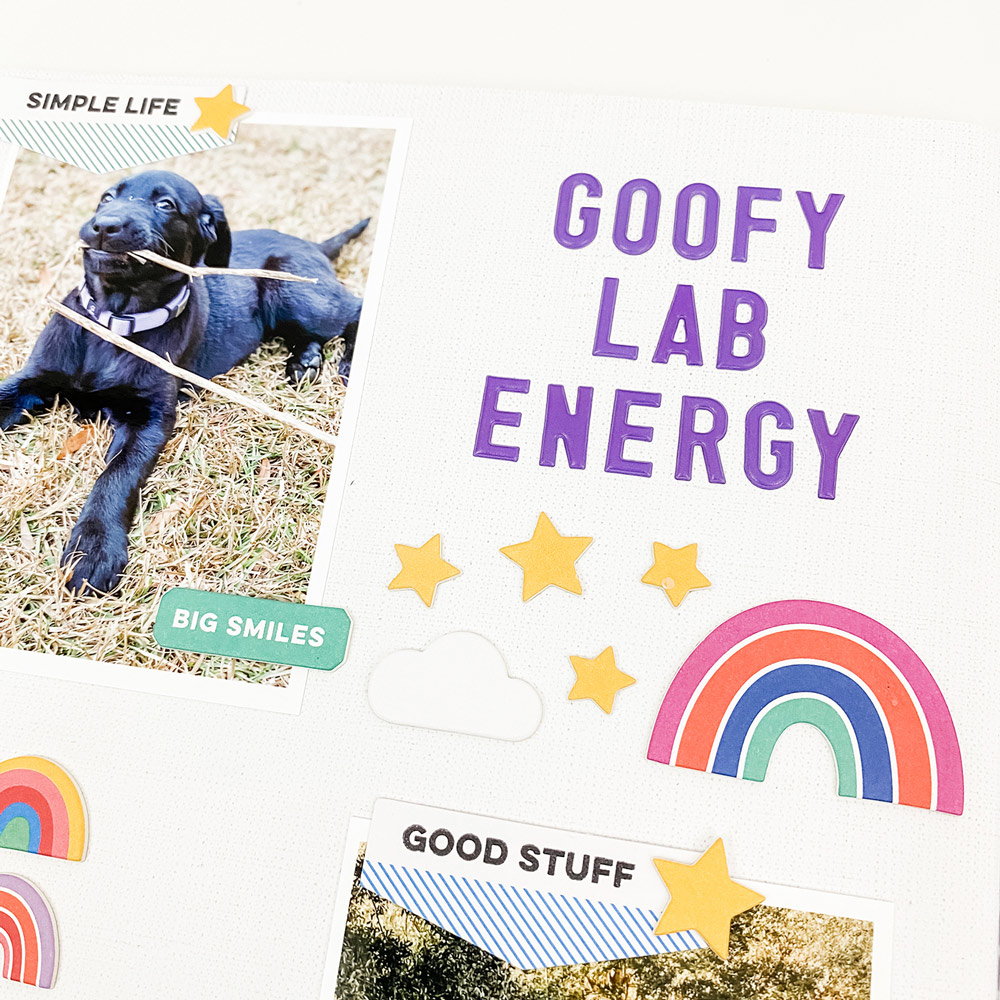
Supplies | February 2021 Kit, Bright Die Cut Tabs, Happy Little Moments Chipboard Stickers, Purple Puffy Alphabet Stickers, Good Times Tab Stamp, Noted Vol. 3 Stamp

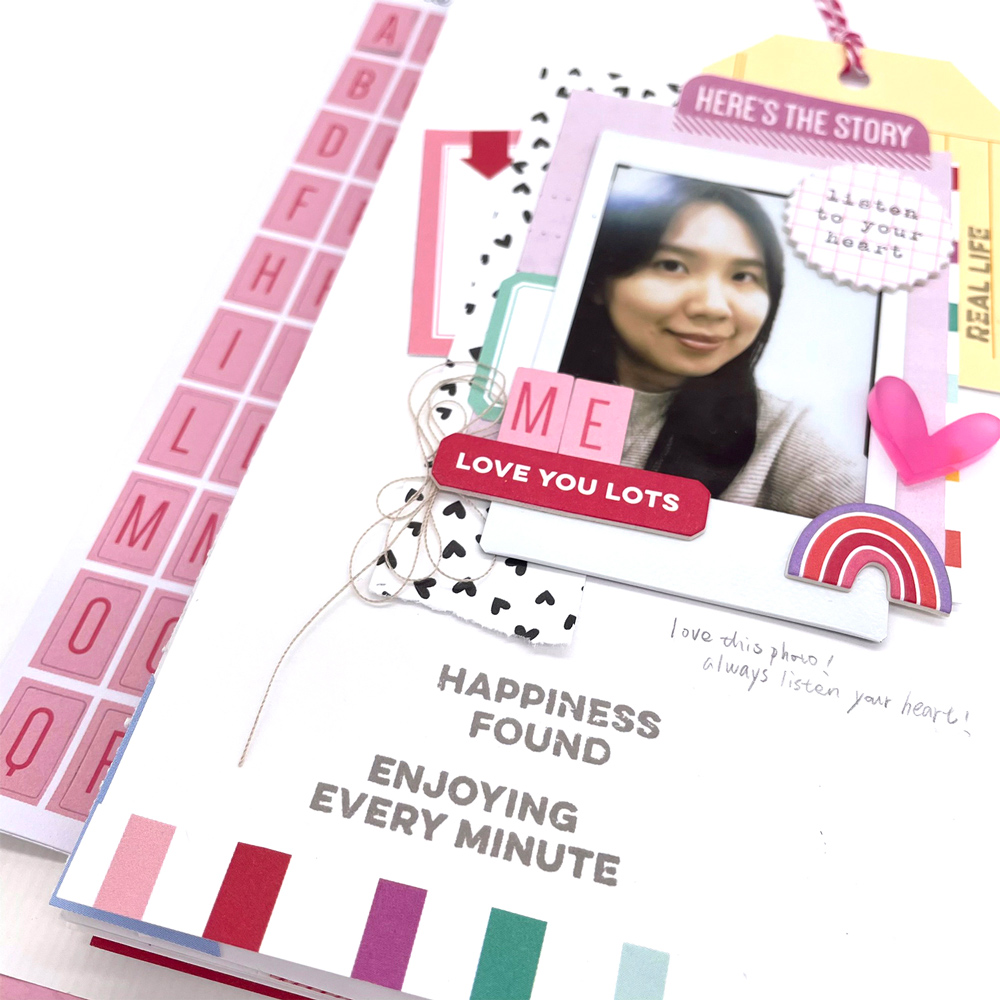
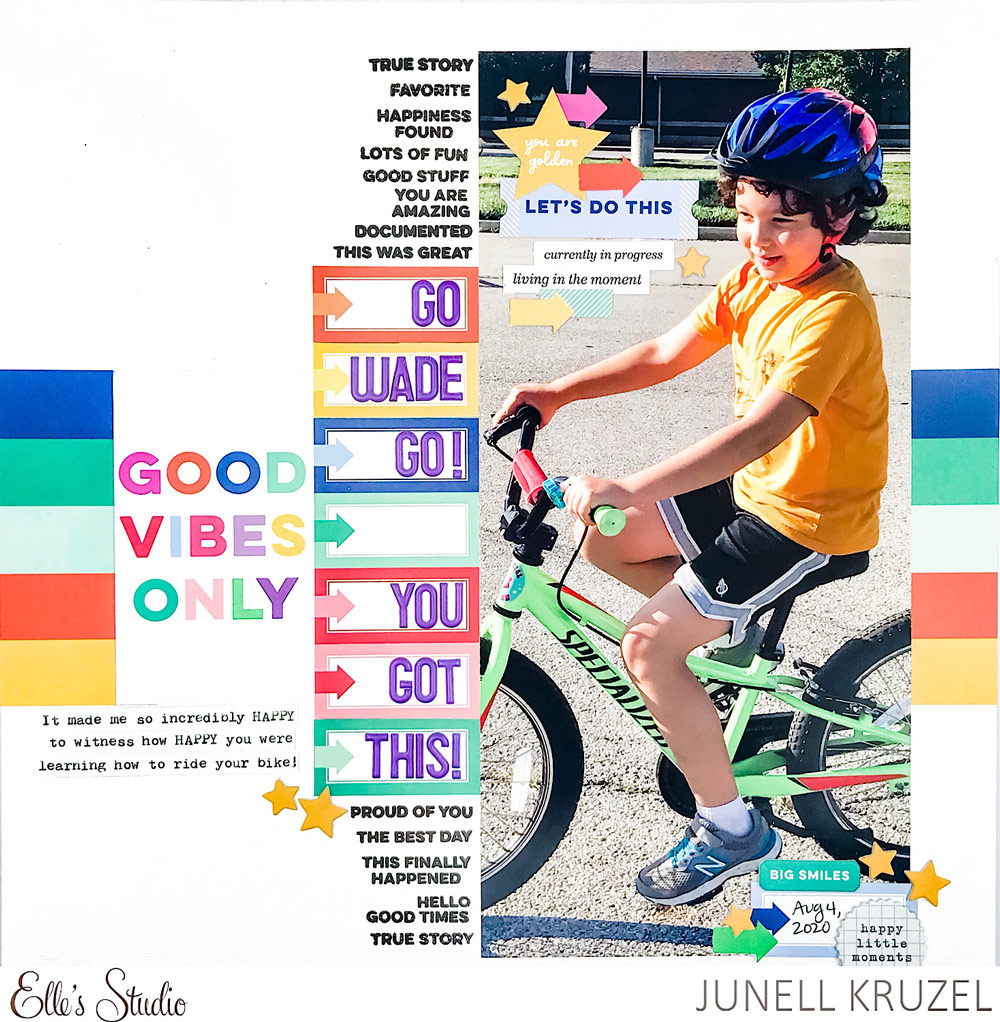
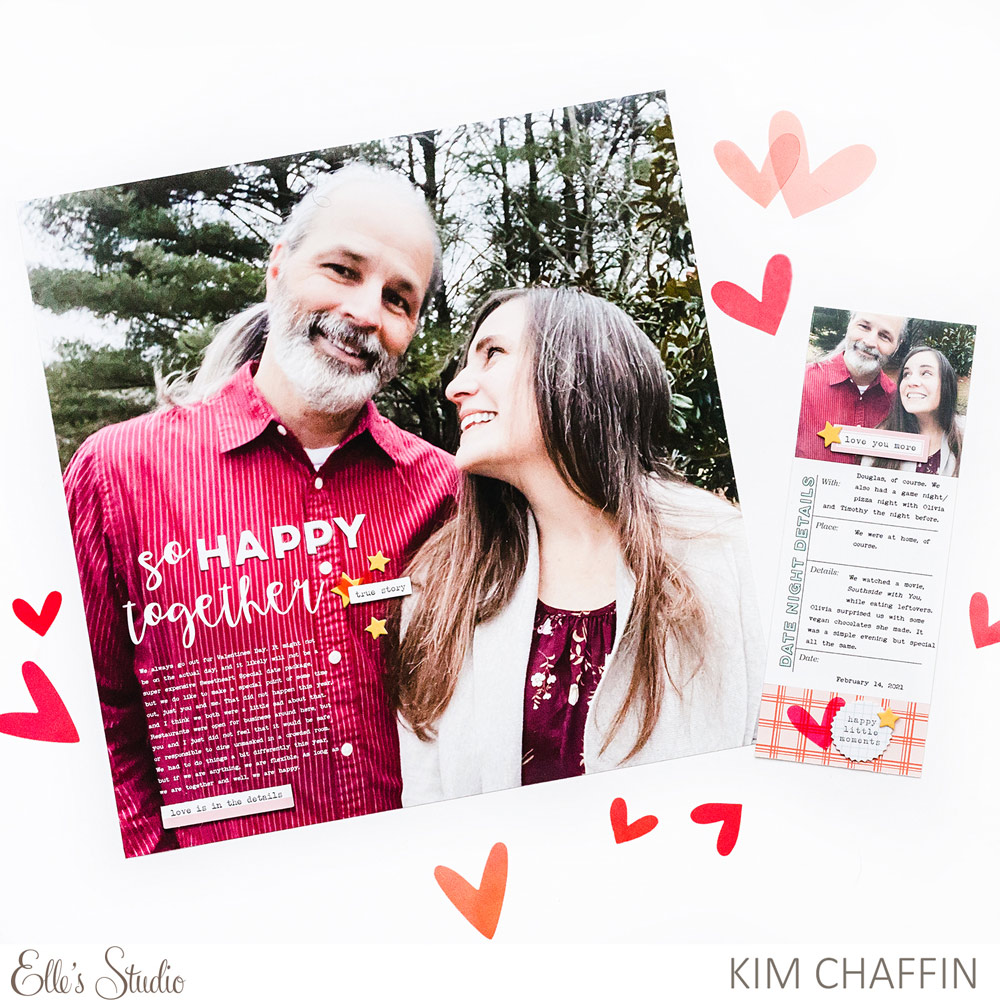
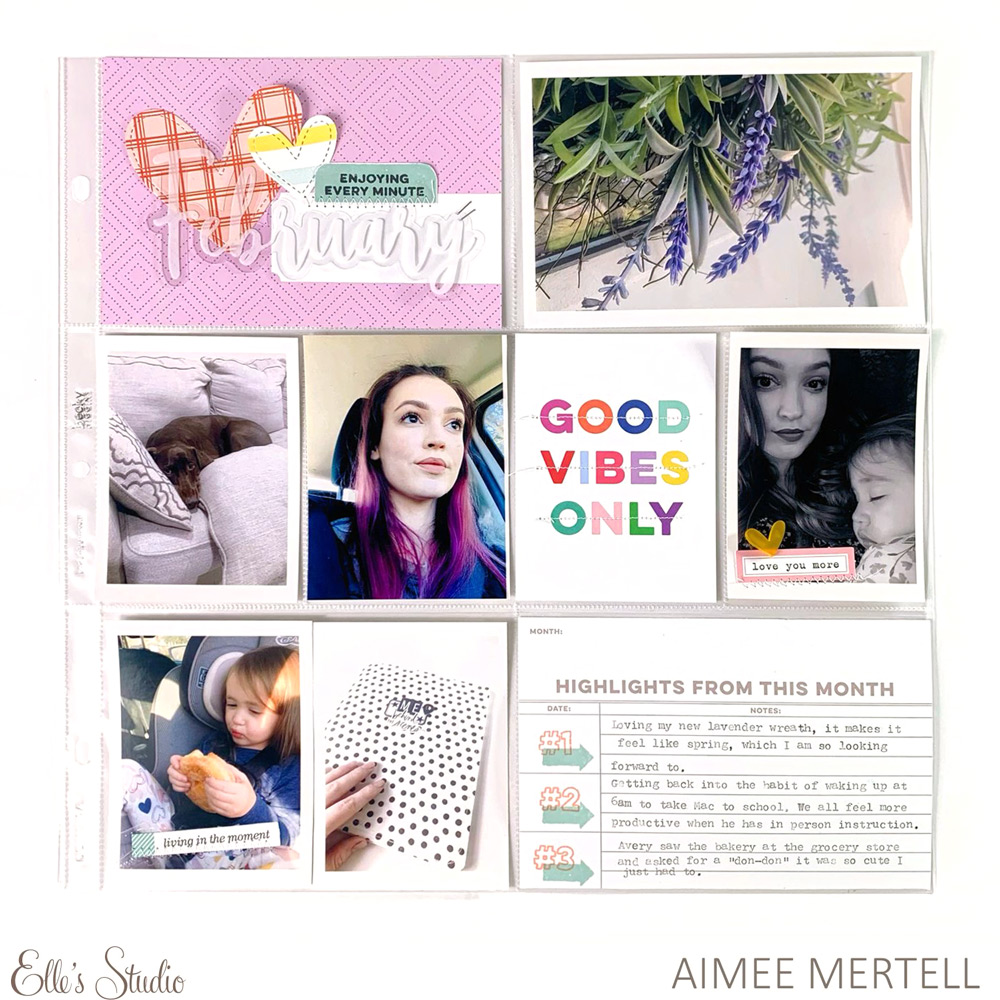
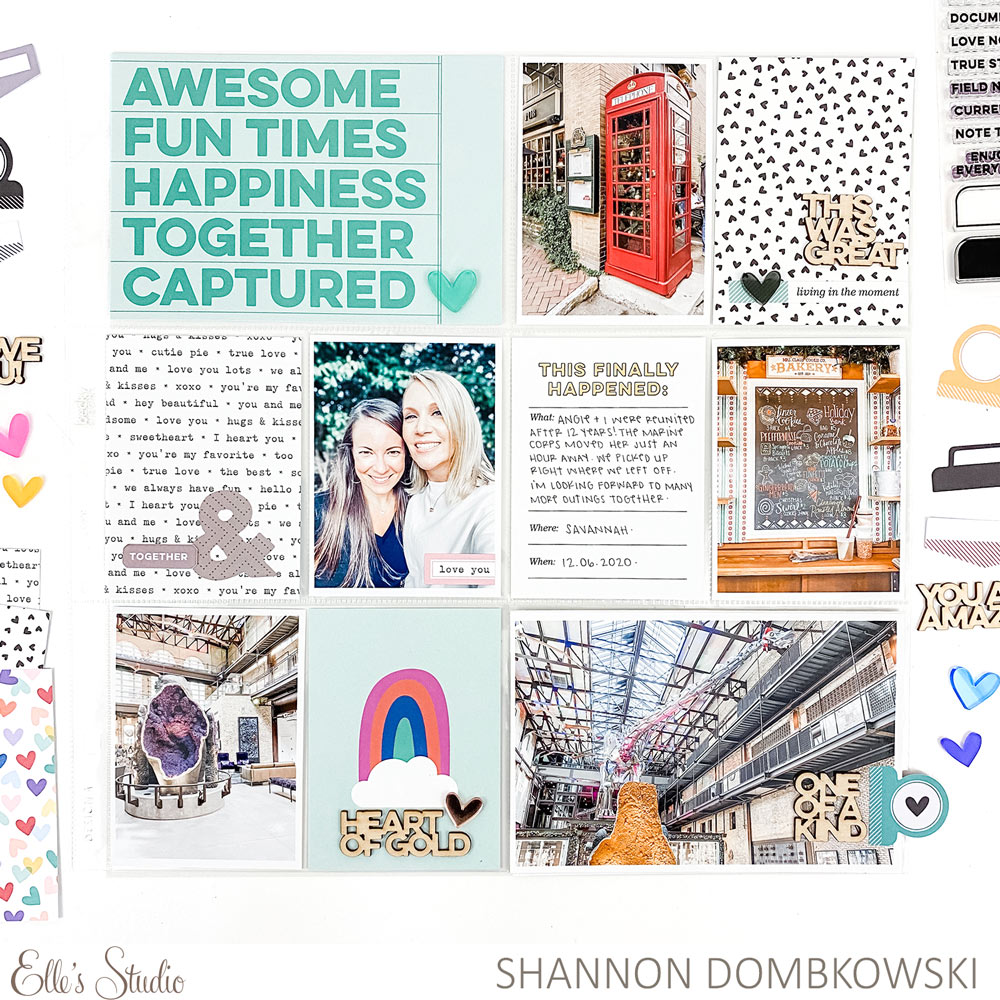
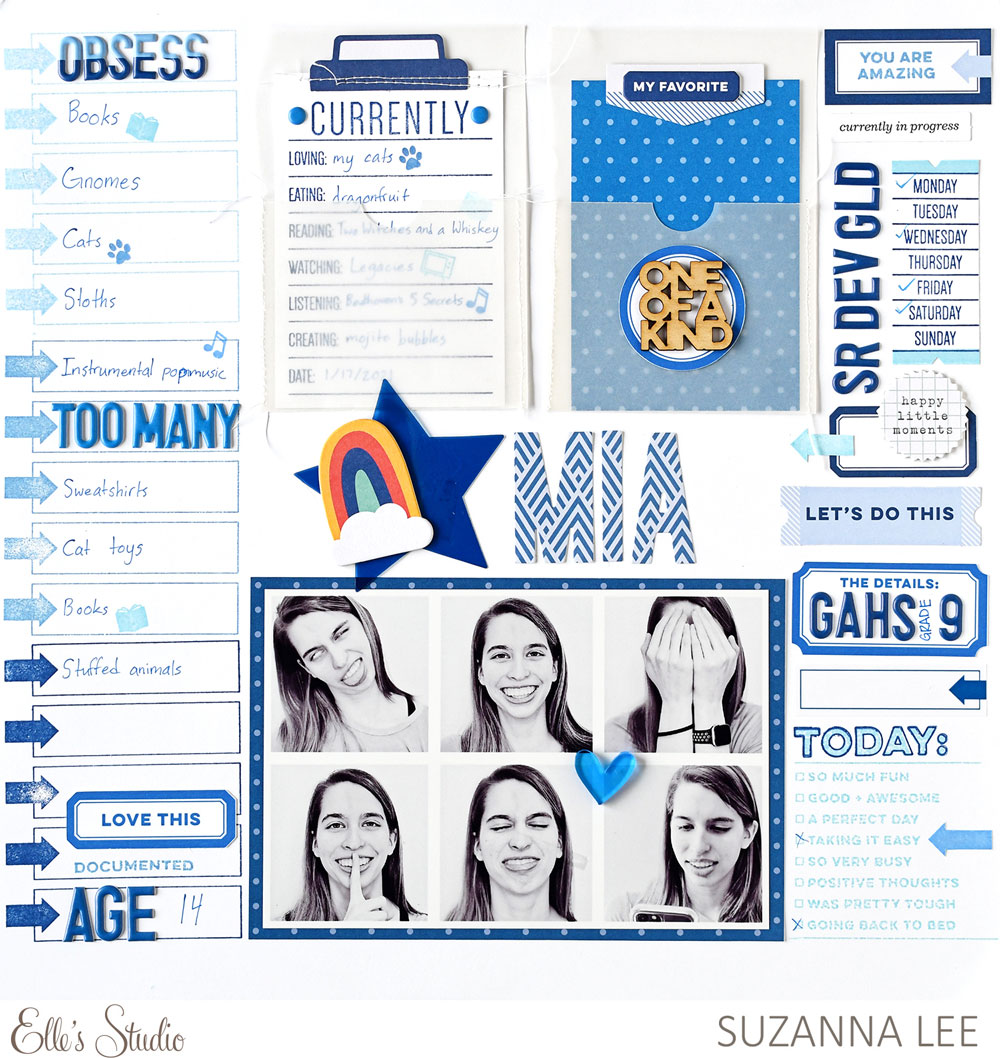
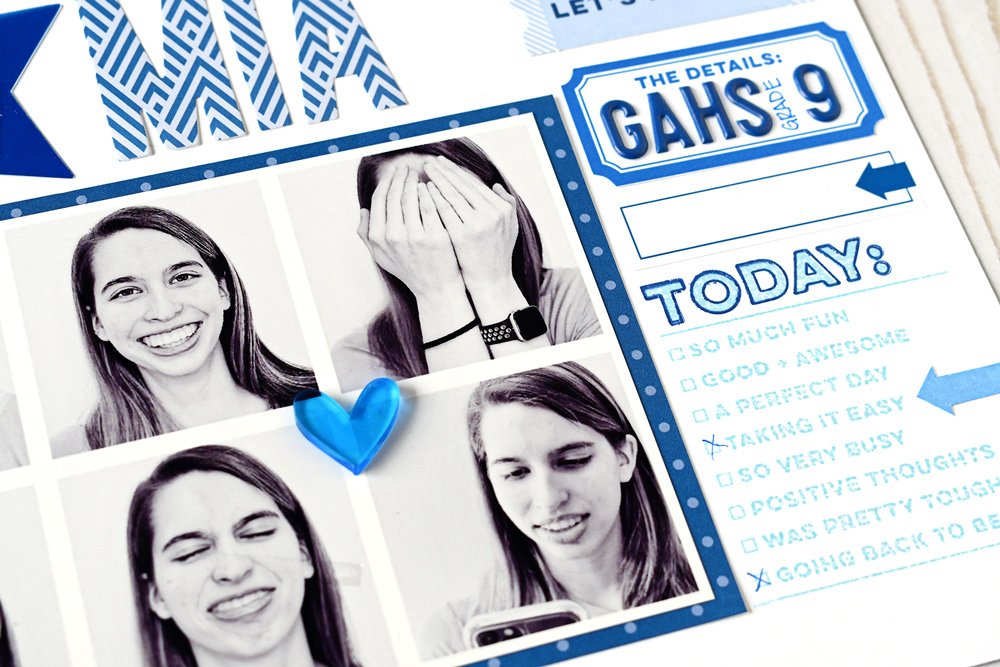
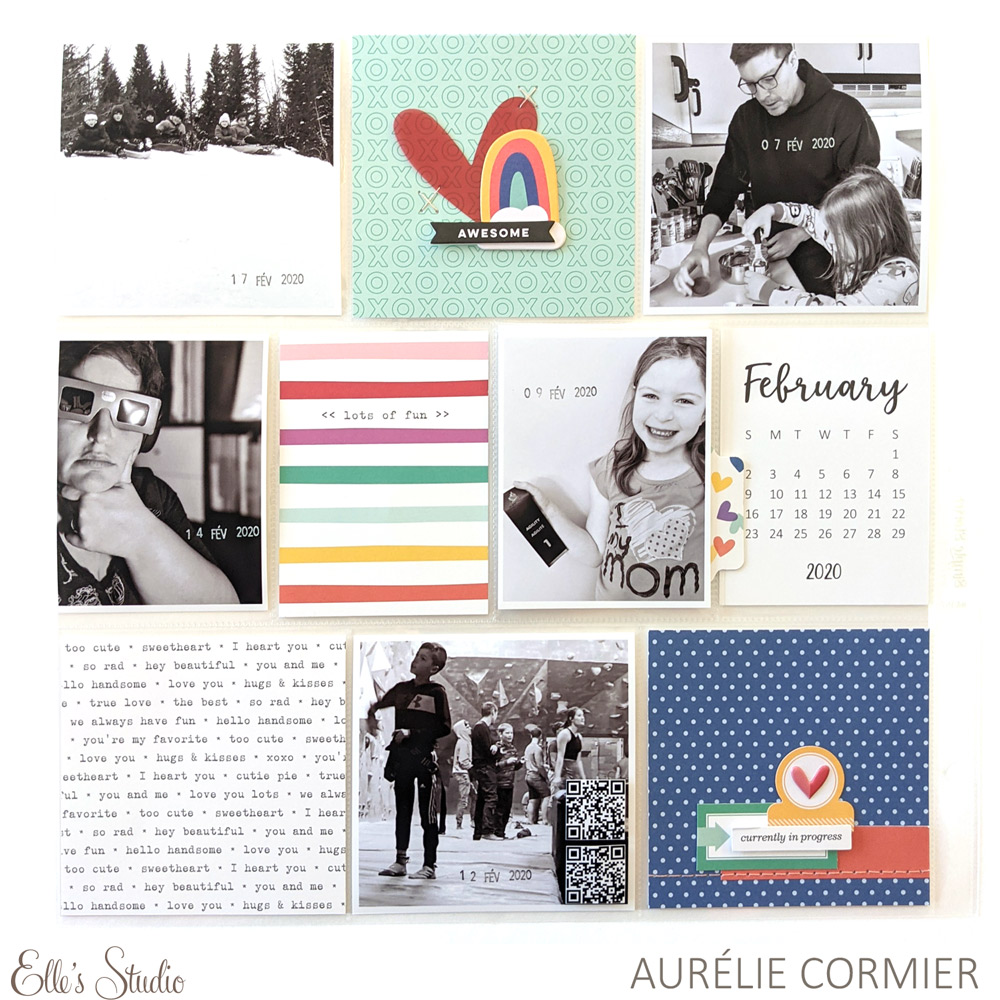
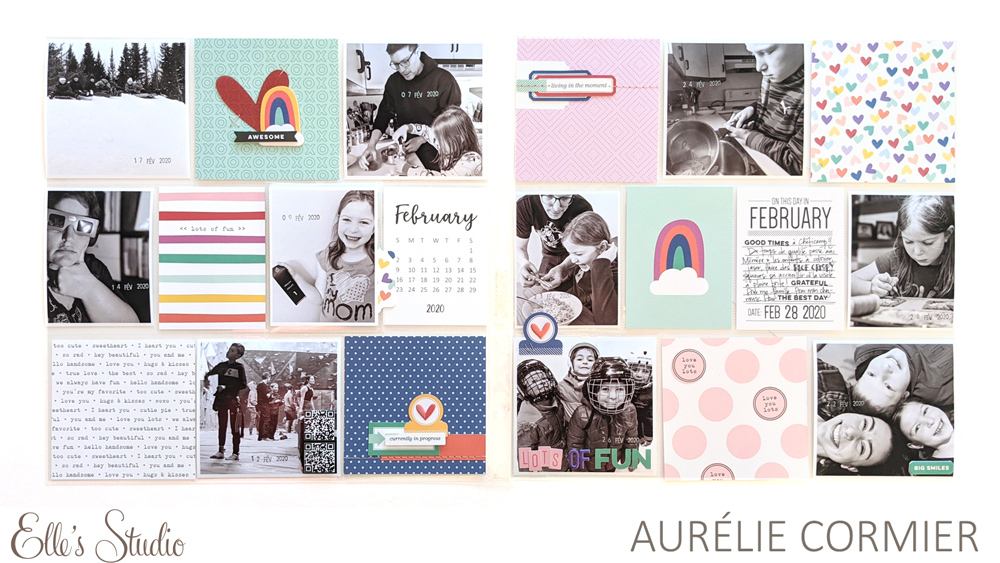
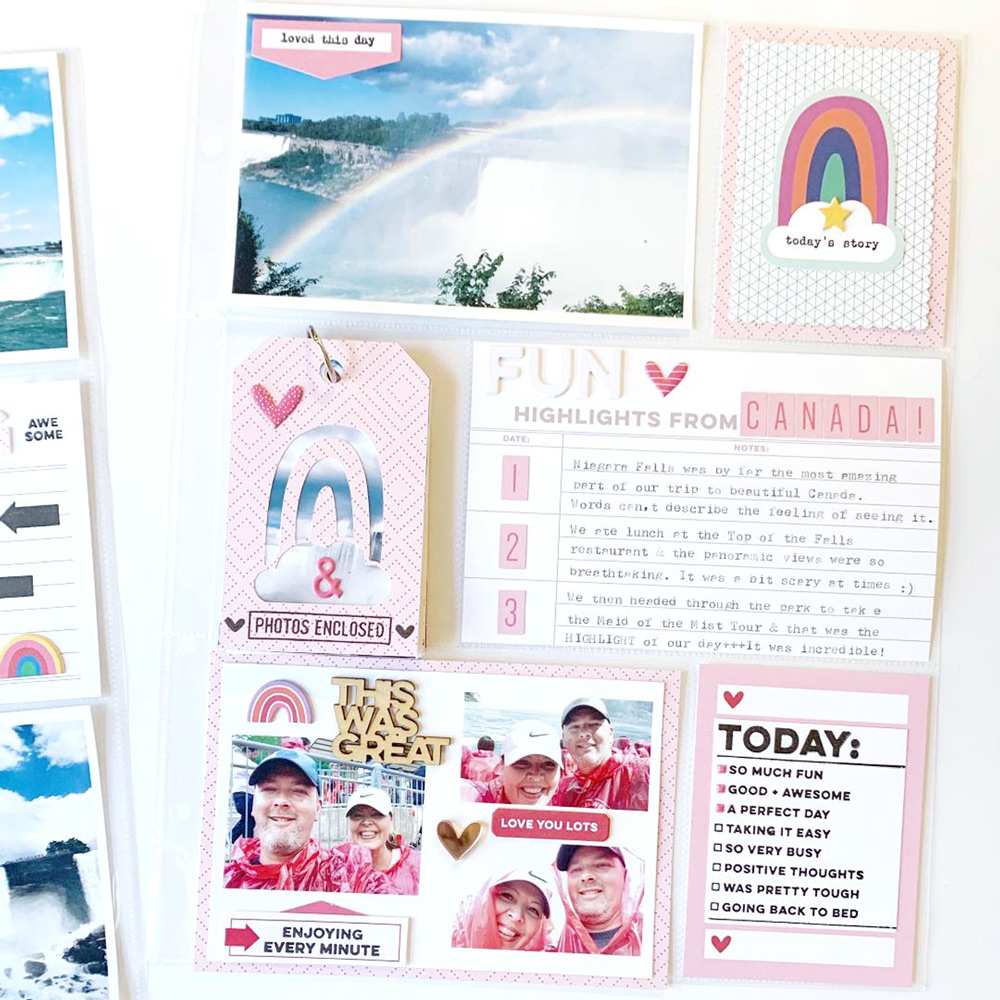
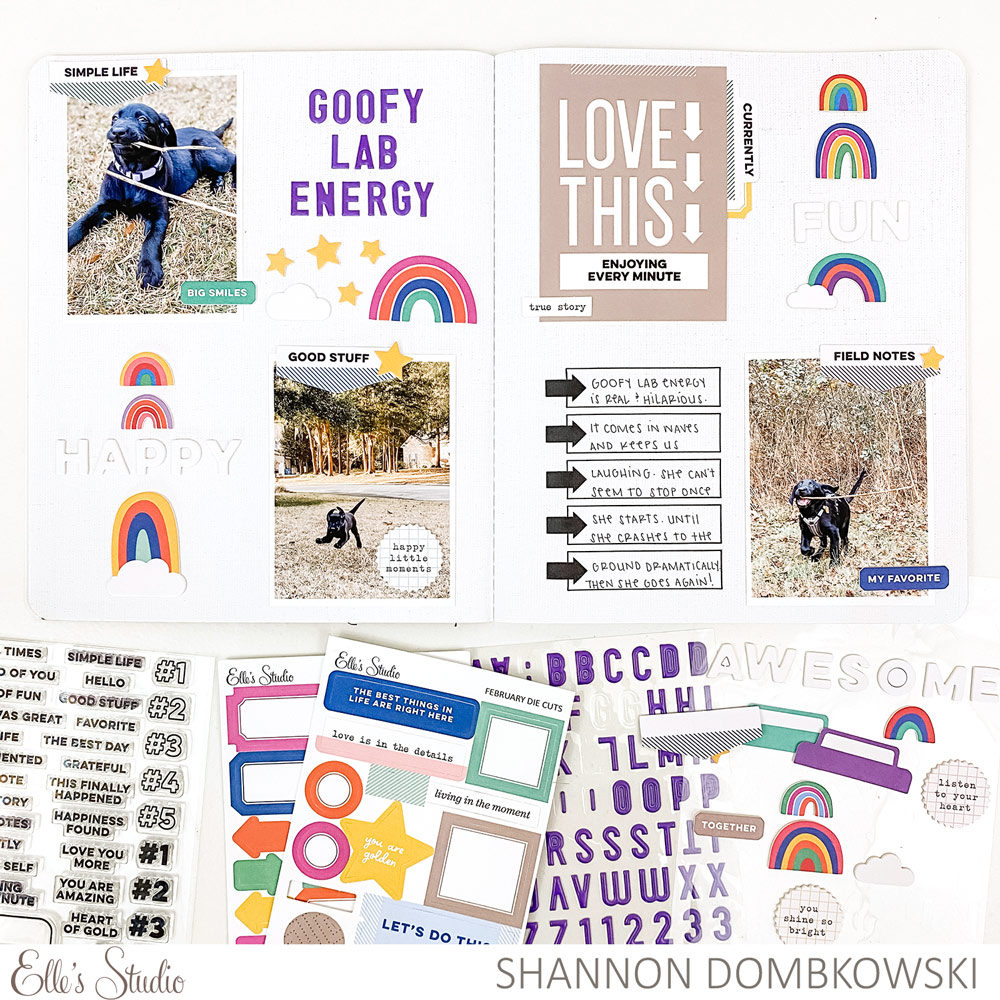
First, let’s look at the photos. I chose to use photos with natural colors. Since it’s winter here in Georgia, our grass is dormant. Not so pretty to look at, but perfect for neutral photos! And, of course, my black lab puppy is neutral by default! If your photos have lots of colors, you can make them neutral by turning them black and white. You could also choose a series of photos with one dominant non-neutral hue and make that the primary color of your layout. In addition to neutral colors in your photos, you’ll want to make sure you have plenty of white space. Especially if you’re working with a lot of colors as I did on this layout.

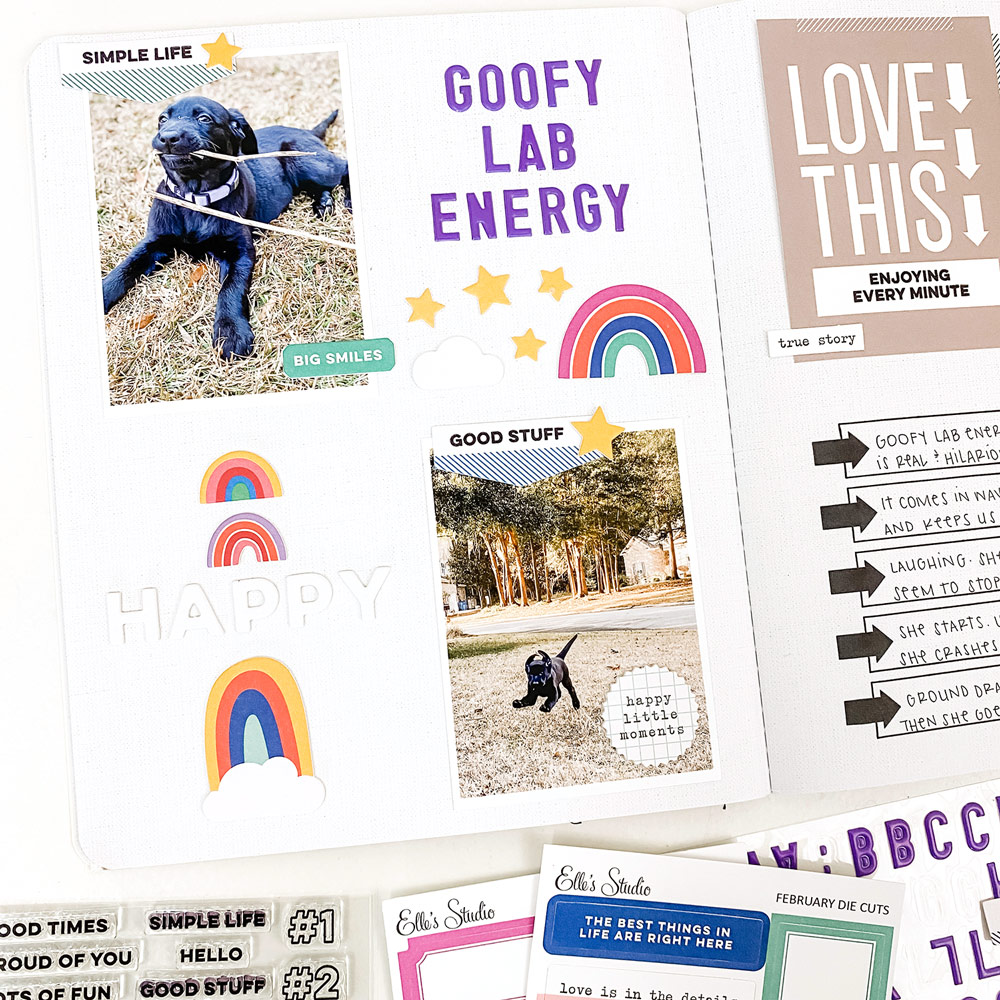
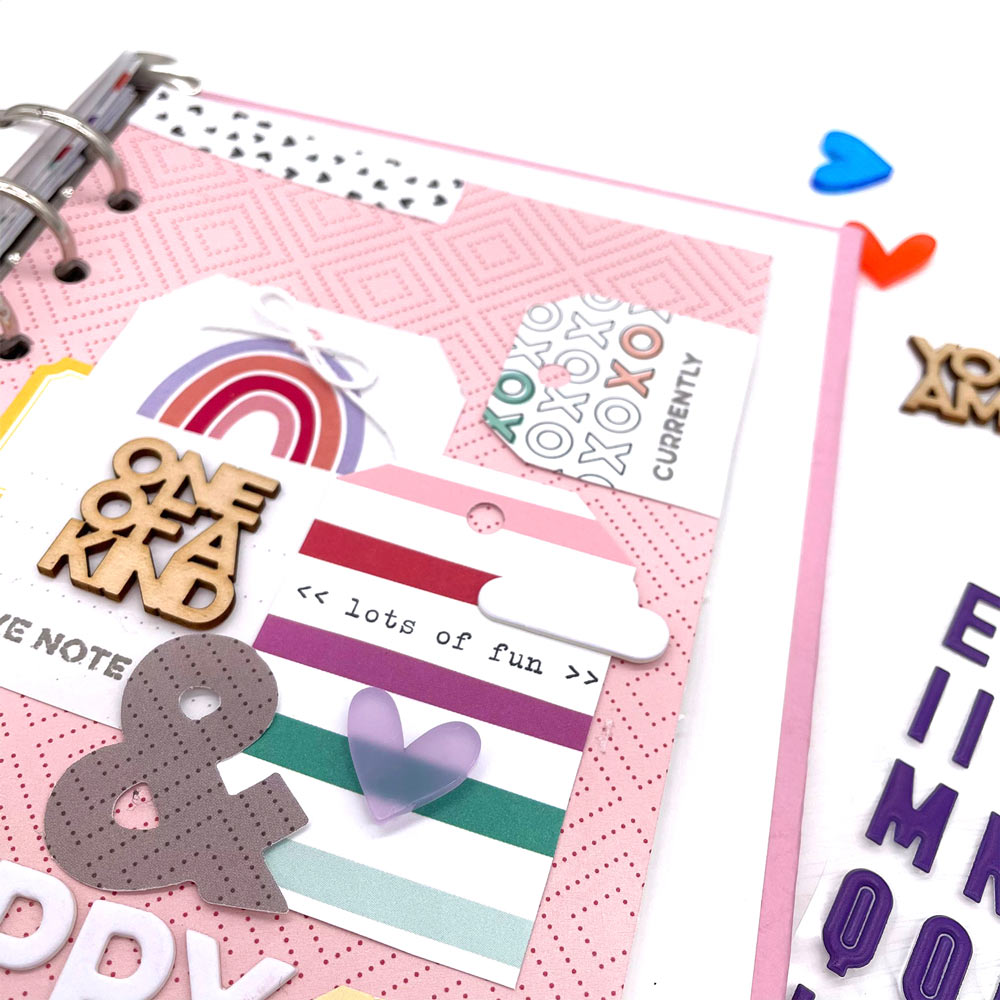
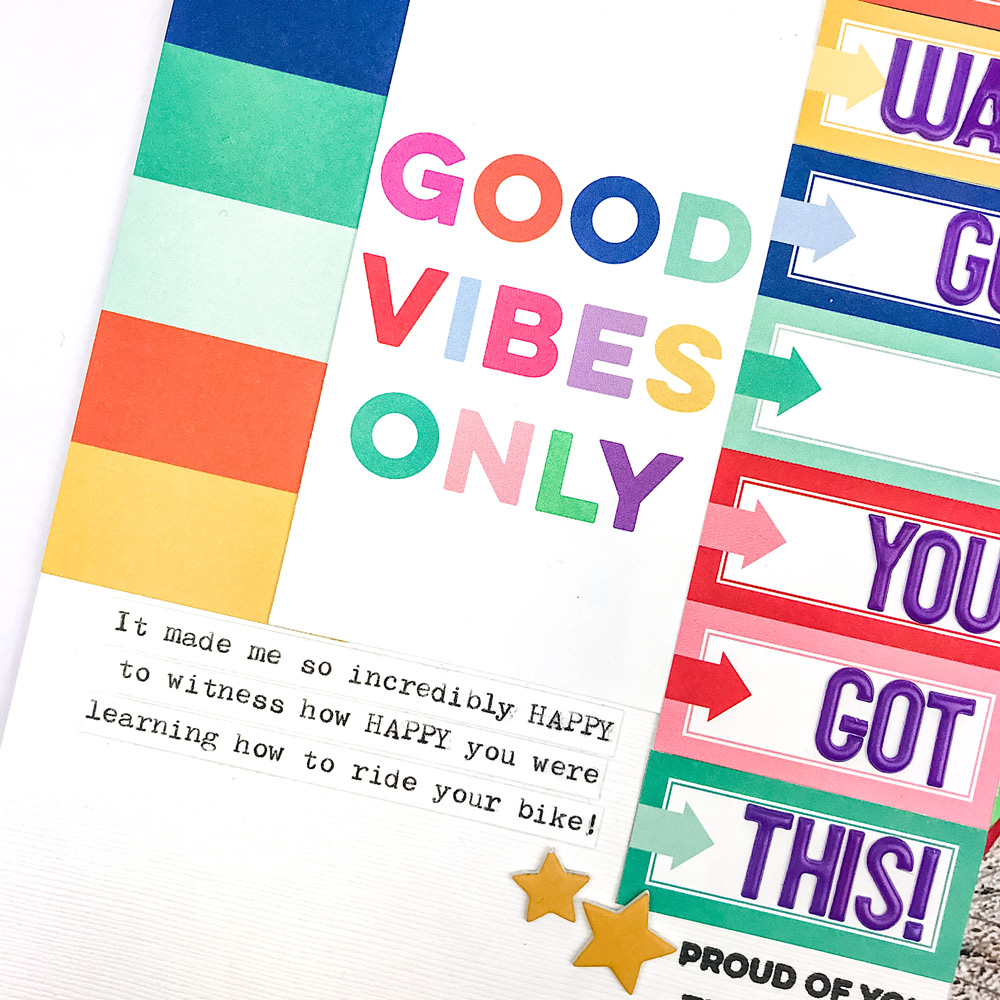
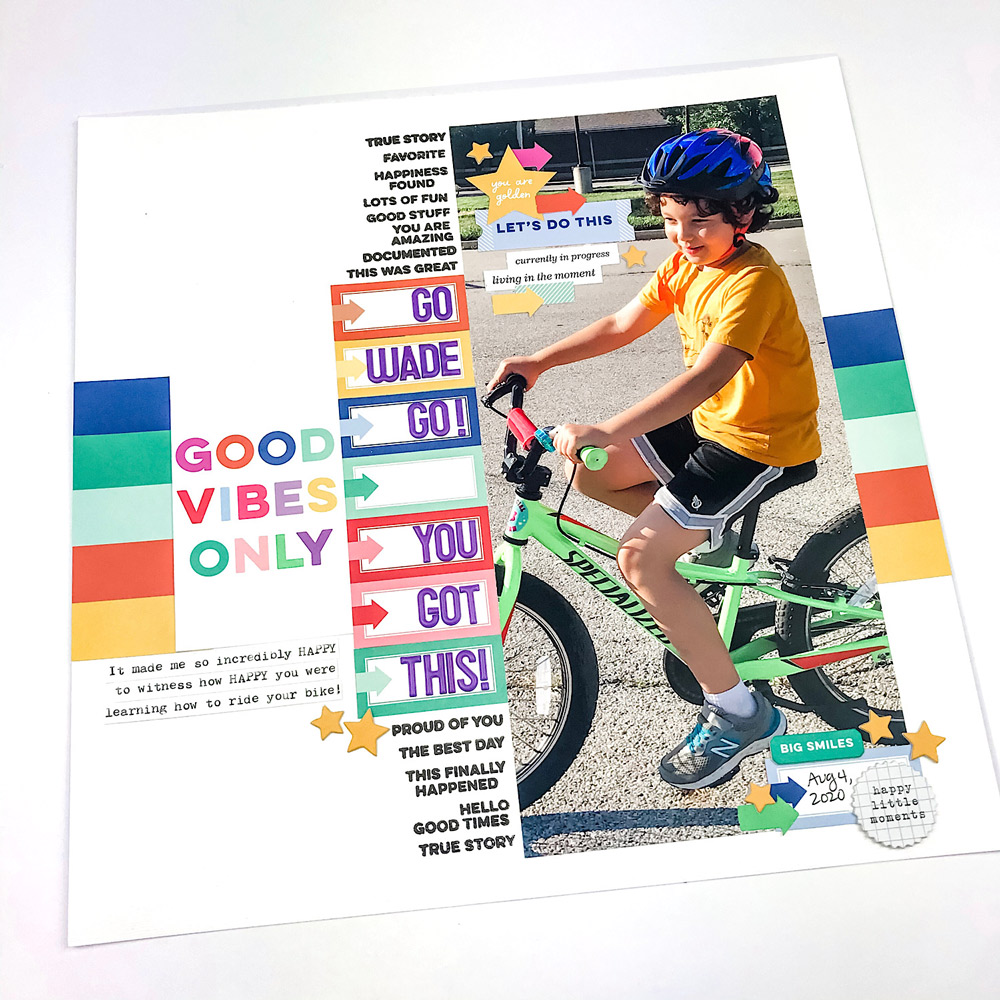
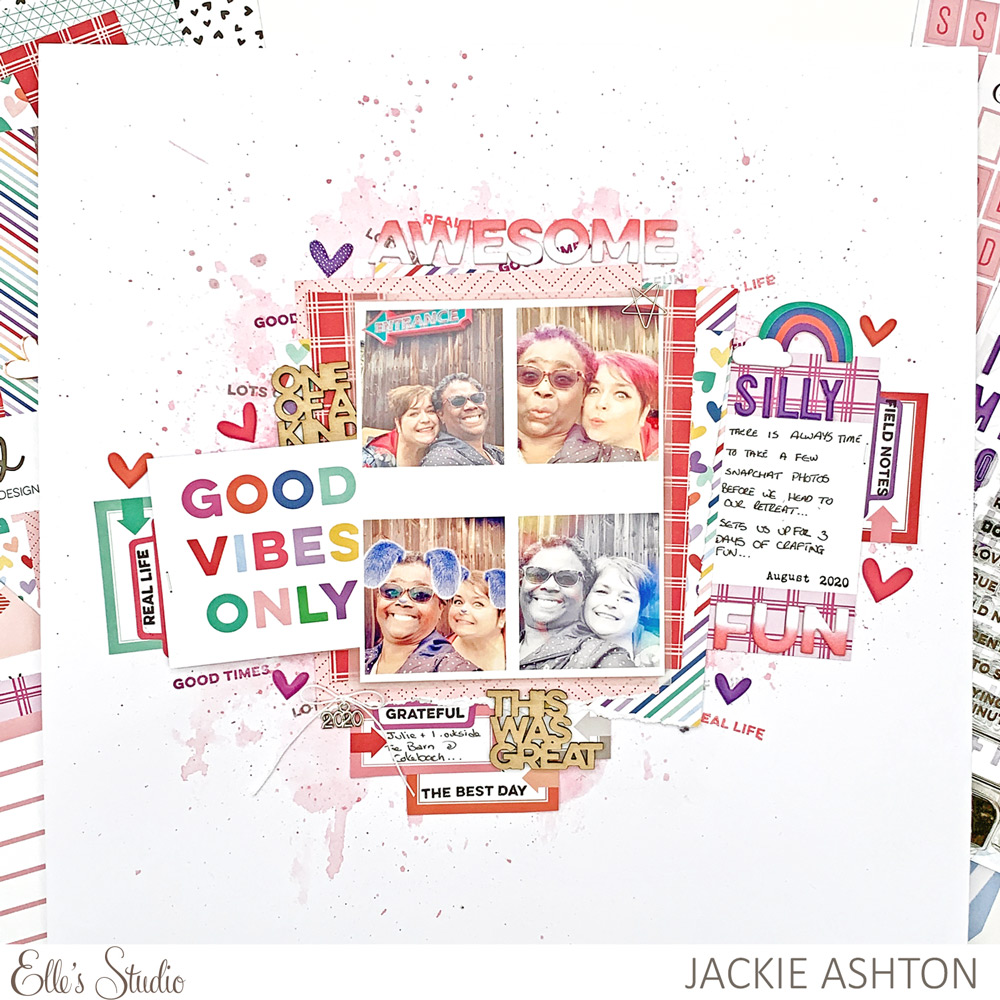
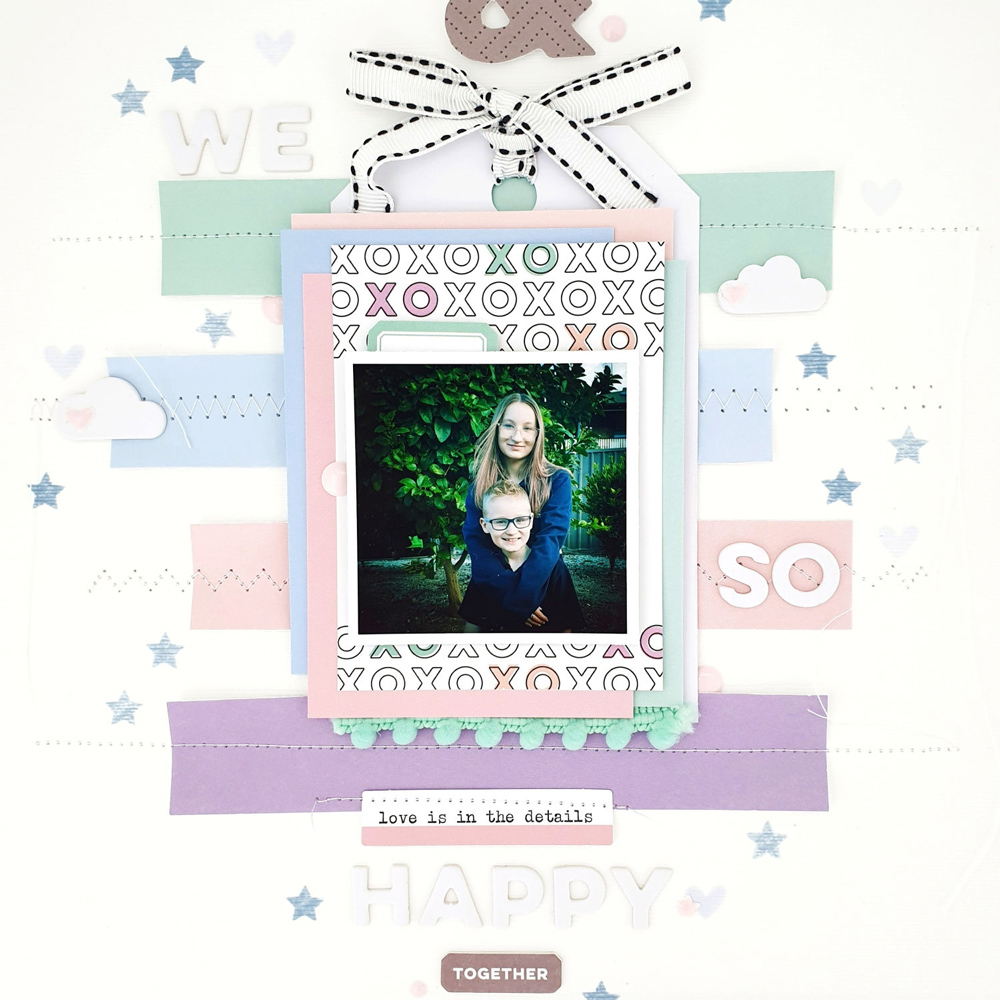
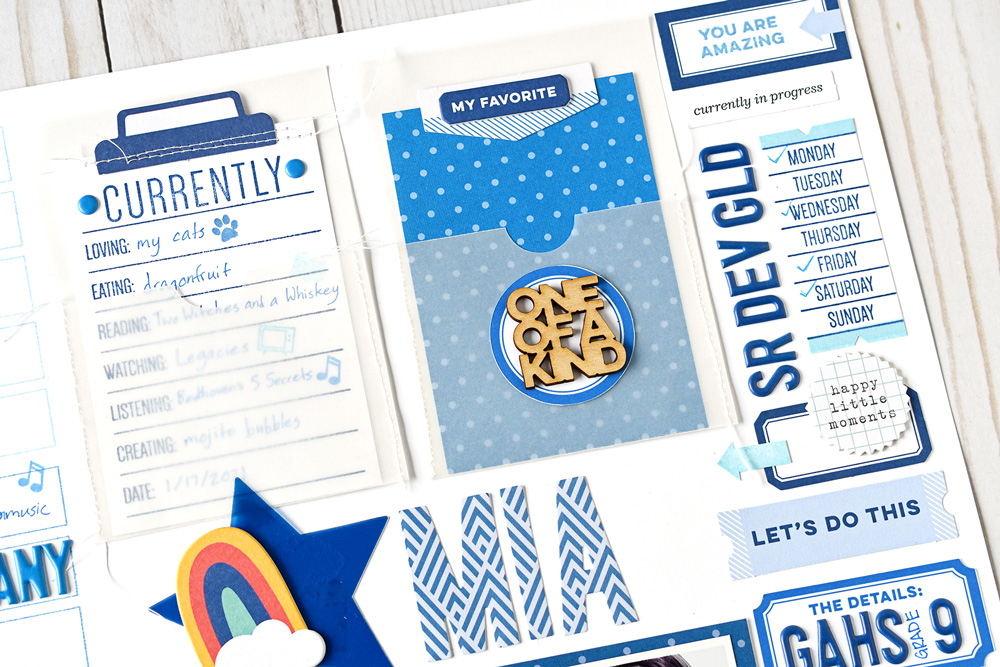
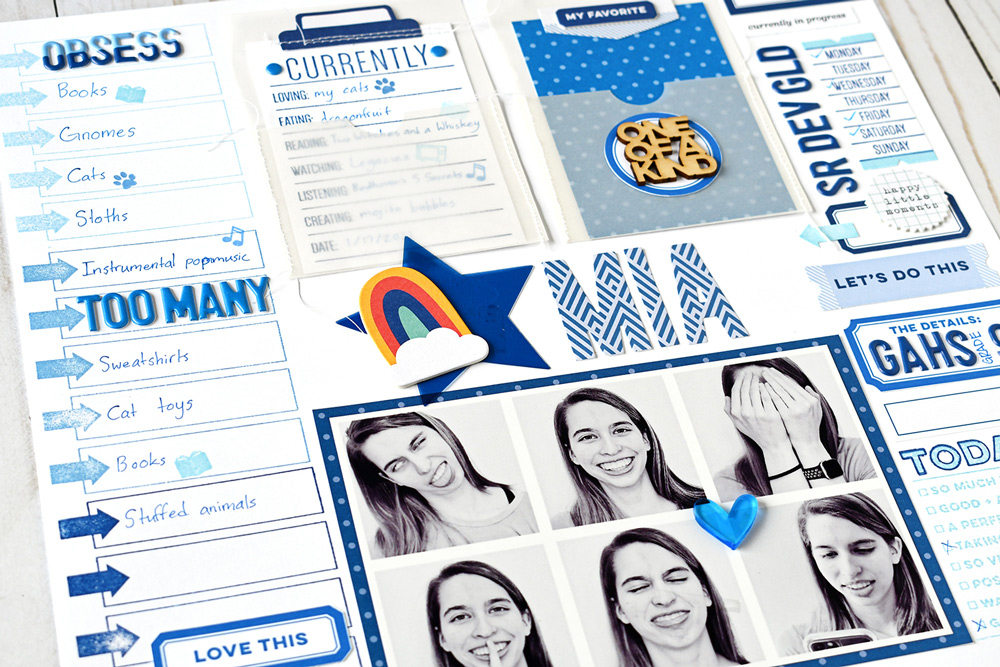
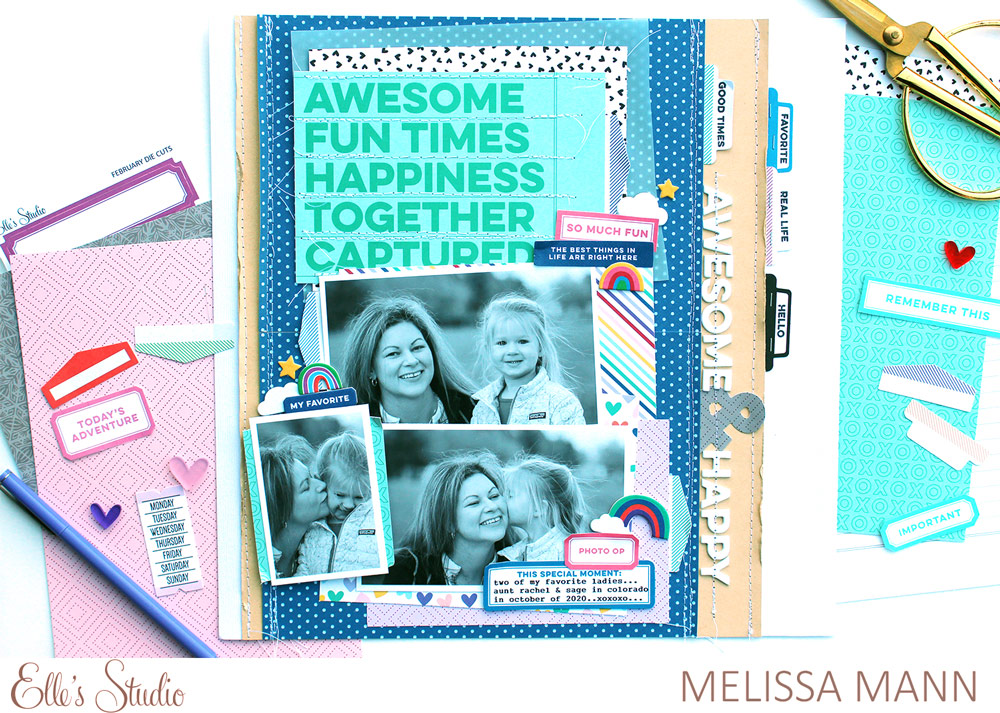
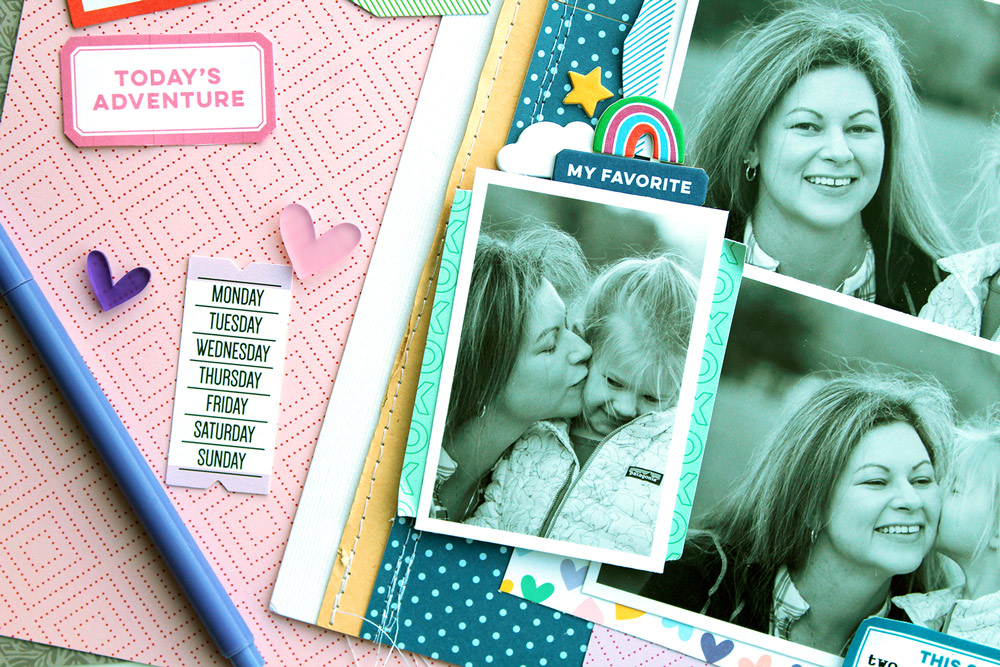
Second, choose a primary color to highlight throughout the layout. I knew that I’d be using the Purple Puffy Alphabet Stickers for my title, so I found ways to work that color into the rest of my layout. I made sure each of my rainbows had a purple stripe, though they are different shades. I also made sure that the rainbows with the purple stripes were arranged in a triangle on my page. This leads me to my next tip…

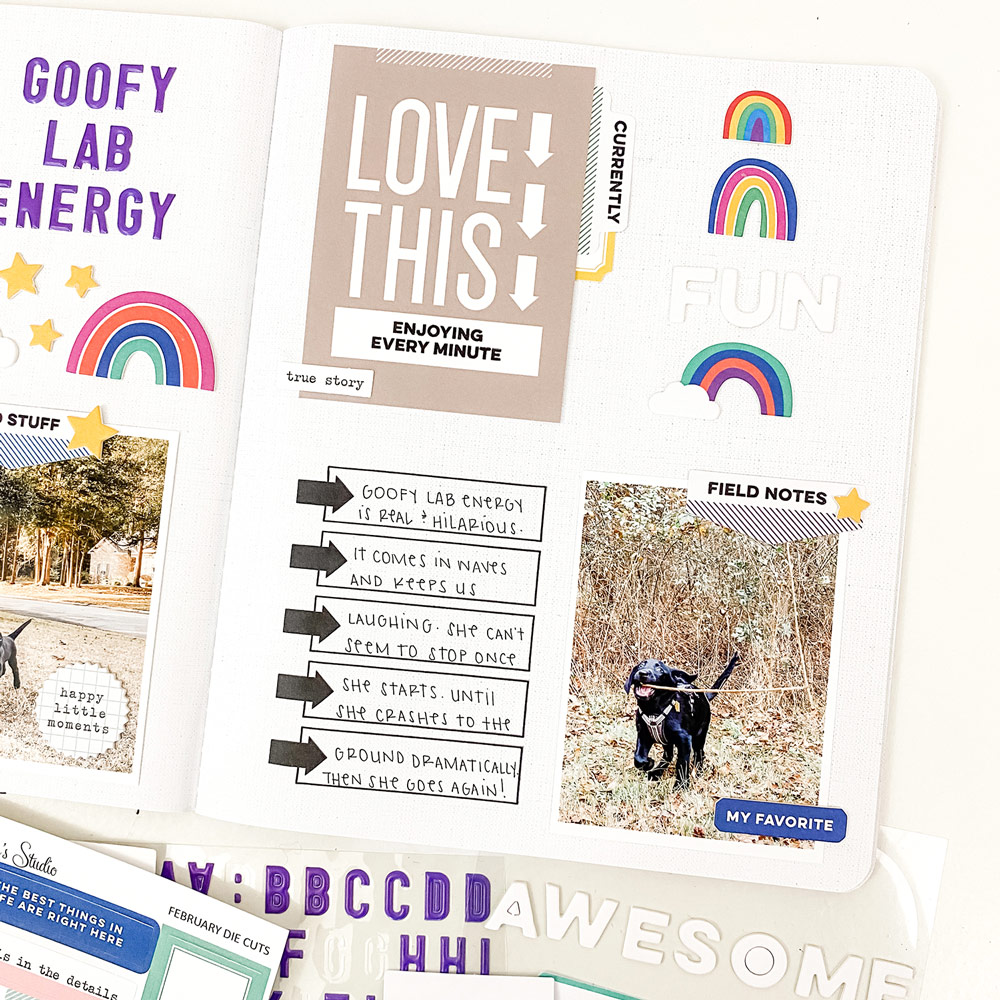
Third, arrange your colors in a visual triangle. On this two page spread, I arranged my color clusters in a visual triangle (it’s an odd-shaped triangle but there is a definite separation between the clusters). I made sure each cluster had a rainbow with a purple stripe. This allowed me to weave the color throughout my layout.

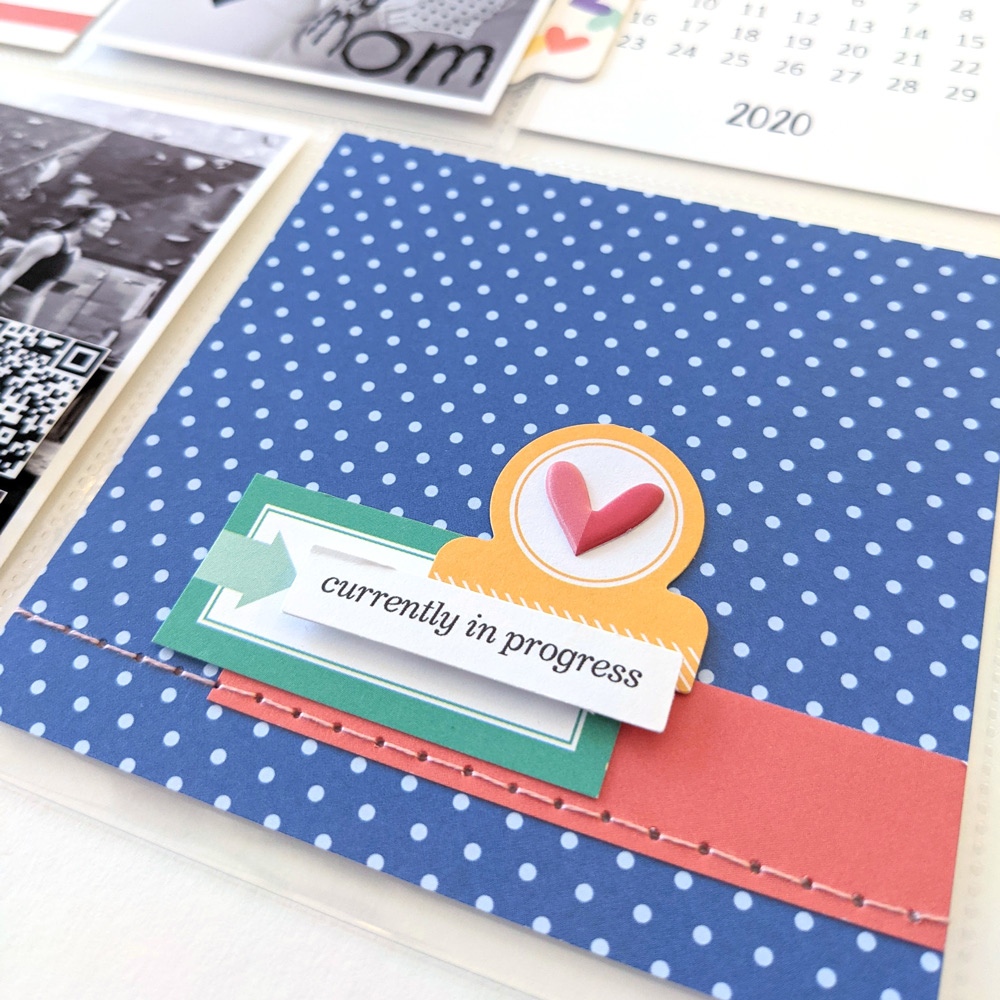
My fourth and final tip is to use the color wheel. I chose yellow as my secondary color on this layout. If you look at a color wheel, you’ll see that yellow and purple are complementary colors. This means that they enhance each other’s intensity. When you use complementary colors, you bring bold energy to your layout. That sounds like the perfect feeling for the theme of my page!

I hope I’ve given you some ideas that will help you use color with confidence on your next layout. Take a leap and see how you can use color in a new way!

Show us how you’re using our colorful February kit and add-ons to create your projects! Share with us on Instagram using the hashtag #EllesStudio, or in our Elle’s Studio Facebook Group!

Happy Life Traveler’s Notebook Layout with Wei Wei Wang

Hello crafty friends! It’s Wei Wei with you today to share a bit of inspiration using the February kit and add-ons.

Supplies | February 2021 KitHere’s the Story Printables, February Labels, Jane Tile Alphabet Cardstock Stickers – Pink, Happy Little Moments Chipboard Stickers, Purple Puffy Alphabet Stickers, Heart of Gold Wood VeneersXOXO 6 x 8.5 Inch Paper Stack, Tiny Acrylic HeartsGood Times Tab StampNoted Vol. 3 Stamp

I printed out my photos and positioned it on the left side of the page and layered it using the February 2021 Kit. The delightful colors and patterns were perfect to add to this layout without taking the focus away from my photo. I also grabbed a piece of little black heart paper from XOXO Paper Stack and one pink February Label to tuck under the photo. Then, I embellished the layers with Happy Little Moments Chipboard Stickers, pink Jane Tile Alphabet Cardstock Stickers and the adorable Tiny Acrylic Hearts. I also added some tangled thread in a neutral color, adding some great texture to the layout. 

On the right side of the page, I focused on using the February 2021 Kit journaling tags and Here’s the Story Printables

A tag embellishment cluster is one of my favorite decorations to add to any scrapbook layout. Not only are tags a great base for a cluster, but they are easy to make. I used a scissor and punch to make these tags from kit journaling tags and Here’s the Story Printables. I placed two tags on the center of the page, and added others on the top and bottom. Each tag serves as a grounding element for all the other embellishments, so they aren’t floating on the layout. 

The sweet “one of a kind” Heart of Gold Wood Veneer piece really helped me to remember the mood of the photo. Also, the Purple Puffy Alphabet Stickers and Happy Little Moments Chipboard Stickers were a great way to add to the cluster without making the layout too heavy. They are my new favorite! I have to admit I loved using the different elements to complete my title.

Of course, I also had to add tags to my left side of the page to bring the whole layout together.

To add a few more details to my pages, I added stamping by using the Noted Vol. 3 and Good Times Tab Stamp. To finish off, I used the paper scraps that was left over from making tags to embellish and bring the whole layout together.

The lovely journaling tags and embellishments from this month’s release made it really easy for my layout to come together. I really hope this project has inspired you to use the February kit and add-ons to create a project of your own. Happy creating!

Share what you are creating with your February kit and add-ons! Join and post in our Elle’s Studio Facebook Group, or share on Instagram using the hashtag #EllesStudio!

Five on Friday with Junell Kruzel

Hello to all of my Elle’s Studio friends! It’s Junell here today for Five on Friday, a challenge to create a layout using only five products from the current February kit and add-ons. This challenge forced me to flex my creativity muscle with the limited number of supplies, but it did not hinder the fun, colorful vibe I was going for. Let’s take a look!

Supplies | February 2021 Kit, February Labels, Happy Little Moments Chipboard Stickers, Purple Puffy Alphabet Stickers, Good Times Tab Stamp

I loved the colors of the multicolor striped and “Good Vibes Only” 3″ x 4″ tags and knew immediately that I wanted to use both. I cut the striped card in half vertically to use on both sides of the layout to make it look like it stretched across the page. Because my nephew is riding his bike in the photo,  I wanted the page to have a feeling of movement, which the striped card helped me to achieve. I also used the February Labels as a place to add my title using the Purple Puffy Alphabet Stickers. The arrows on those labels also help to add that sense of movement. 

Once I had my horizontal foundation in place with the photo, tags, and title, I felt like it was missing something—stamps! They are a great way to add elements to a layout. I decided to use the Good Times Tab Stamp to fill in where I felt my layout was lacking. Almost all of the stamps in this set were perfect for the photo of my nephew learning to ride his bike! I placed them above and below the title to compliment the large rectangular photo.

Now, I needed some finishing touches, so I added three embellishment clusters. The first was placed on the negative space on the photo near his face, to draw attention to his smile and how happy he was. The second went in the bottom, right corner, and the last one near the bottom of the title. I almost always do clusters in threes to draw your eye around the page. For this I used some of the die cuts from the February 2021 Kit, Happy Little Moments Chipboard Stickers, and the February Labels. To continue to show movement on the page, I used more arrows!

The last thing I did was add my journaling, which wasn’t a lot because the photo, stamps, and title did most of the storytelling for me.

I was challenged to only use five products this month and I think I was pretty successful. Cutting 3″ x 4″ tags from the February Kit in half and using the Good Times Tab Stamp was a major factor in being successful at a challenge like this. My page is colorful, shows movement, expresses joy, and has a complete story—all with only five products! 

How about taking on this challenge yourself? Just select five products and see how you can flex your creative muscle and stretch your supplies! I can’t wait to see what you create!

Share what you create with us using only 5 Elle’s Studio products! Post your finished project on Instagram using the hashtag #EllesStudio for a chance to win a $20 gift certificate to the shop, or join our Elle’s Studio Facebook Group and share there! We can’t wait to see how you get creative with only five supplies!

Documenting Date Night Details with Kim Chaffin

Hello! It’s Kim, and today I’m sharing a layout I created with the fun Elle’s Studio February Kit and extras! Elle’s Studio kits have beautiful colors and fun themes, and they are great for pocket page layouts. However, I’d like to examine ways to use the pocket tags and other kit elements on a traditional layout. Let’s take a closer look!

Supplies | February 2021 Kit, Happy Little Moments Chipboard Stickers, Acetate Hearts

I like to start first by enlarging a favorite photo. If you don’t have a large format printer at home, many photo printing services will print in a variety of larger sizes. A full page photograph makes a good canvas for journaling, title stickers, and accent pieces.

I chose the “Date Night Details” 3″ x 4″ pocket tag from the February Kit to add more specifics about my stay-at-home Valentine’s date with my husband. To print on the tag, I first printed the details on a plain piece of cardstock. I checked it against the card, and when it looked like the type was correctly placed, I used repositionable adhesive to adhere the pocket tag directly onto the printed cardstock and ran it through the printer again. I’ve adhered the printed card, a second photograph, and a patterned pocket tag to a 3″ x 8″ strip of cardstock.

I used the “HAPPY” cardstock word from the Happy Little Moments Chipboard Stickers as part of my title. I like to choose a few repetitive elements as embellishments to tie the layout together. Additionally, I love that the kits and extras coordinate so well together. You can’t go wrong when choosing accent pieces!

I chose a pretty plaid 3″ x 4″ tag and cropped to fit the bottom of my 3″ x 8″ strip, and I finished my layout with a cardstock starburst, a word phrase, another acetate heart, and more chipboard stars. Easy peasy! 

What will you create with the February Kit and extras? Whether it is a traditional layout, pocket pages or both, I can’t wait to see what you do with this fun kit!

Show us what you’re making with our latest monthly kit and add-ons! Join our Elle’s Studio Facebook Group to share your projects, or post on Instagram using the hashtag #EllesStudio!

February Design Team Inspiration: Volume Two

Hello there and welcome to volume two of our February kit and add-on design team projects! Today we have more colorful and creative projects headed your way, featuring positive vibes and happy colors to brighten up your day! Let’s take a look!

Good Vibes Only by Aimee Mertell – supplies used | February 2021 KitHappy Little Moments Chipboard Stickers, Acetate MonthsTiny Acrylic Hearts, Good Times Tab Stamp, Everyday Tabs Vol. 2 Metal Die, My Heart Metal Die

Good Vibes Only traveler’s notebook spread by Katarina Prevendarova – supplies used | February 2021 Kit, February Labels, Arrow Label Stickers, Happy Little Moments Chipboard StickersXOXO 6 x 8.5 Inch Paper StackGood Times Tab Stamp

Good Vibes Only by Jackie Ashton – supplies used | February 2021 KitFebruary LabelsBright Die Cut TabsHappy Little Moments Chipboard StickersPurple Puffy Alphabet Stickers, Puffy Heart Stickers, Heart of Gold Wood VeneersXOXO 6 x 8.5 Inch Paper StackGood Times Tab StampDaily Tabs Stamp

Adventure Challenge by Nicole Kerr – supplies used | February 2021 KitFebruary 2021 Cut FilesFebruary LabelsBright Die Cut TabsJane Tile Alphabet Cardstock Stickers – PinkHappy Little Moments Chipboard Stickers, Puffy Heart Stickers, Heart of Gold Wood VeneersXOXO 6 x 8.5 Inch Paper StackGood Times Tab Stamp

Fun Times pocket page by Shannon Dombkowski – supplies used | February 2021 Kit, Bright Die Cut Tabs, Heart of Gold Wood VeneersTiny Acrylic Hearts, XOXO 6 x 8.5 Inch Paper Stack, Good Times Tab Stamp

All-Occasion cards by Jennie McGarvey – supplies used | February 2021 KitHappy Little Moments Chipboard StickersTiny Acrylic Hearts, XOXO 6 x 8.5 Inch Paper Stack

State Champ by Suzanna Lee – supplies used | February 2021 KitFebruary 2021 Cut FilesFebruary LabelsArrow Label Stickers, Happy Little Moments Chipboard Stickers, Navy Puffy Alphabet Stickers, XOXO 6 x 8.5 Inch Paper StackGood Times Tab Stamp, Mini Dated Stamp

The Jacket traveler’s notebook spread by Patricia Roebuck – supplies used | February 2021 Kit, February 2021 Cut Files, Jane Tile Alphabet Cardstock Stickers – PinkHappy Little Moments Chipboard StickersHeart of Gold Wood VeneersTiny Acrylic Hearts, XOXO 6 x 8.5 Inch Paper StackGood Times Tab Stamp

You Are Amazing by Kim Chaffin – supplies used | February 2021 Cut FilesHappy Little Moments Chipboard StickersTiny Acrylic Hearts

& Jump traveler’s notebook spread by Meghann Andrew – supplies used | February 2021 KitFebruary Labels, Happy Little Moments Chipboard StickersXOXO 6 x 8.5 Inch Paper StackGood Times Tab Stamp, Noted Vol. 3 Stamp, Everyday Tabs Stamp, Large Jane Alphabet Stamp – Outline, Large Jane Alphabet Metal Die

Love Notes for Wade by Junell Kruzel – supplies used | February 2021 KitBright Die Cut TabsJane Tile Alphabet Cardstock Stickers – Pink, Purple Puffy Alphabet StickersTiny Acrylic HeartsGood Times Tab Stamp, Noted Vol. 3 Stamp

Be sure to check out our blog here, Instgram feed and Facebook Group for more February kit and add-on inspiration headed your way in the next week, and be sure to “pin” the projects that most inspire you for when your kit arrives!

Pretty in Pastels with Amanda-jayne Baldwin

Hi, Elle’s Studio friends! It’s Amanda here, and today I am sharing more February kit and add-on inspiration—such a beautiful kit with so many crafty possibilities! Here’s what I created with it:


Supplies | February 2021 Kit, February 2021 Cut Files, Happy Little Moments Chipboard Stickers, XOXO 6 x 8.5 Inch Paper Stack, Good Times Tab Stamp 

Let’s take a more detailed look at my project:

The pretty pastel colors included in the February Kit were too good to ignore, so I stacked and layered five of the 3″ x 4″ tags together to form a beautiful pastel base for my sweet photo. To create more interest, I foam mounted this journaling tag stack onto the February 2021 Cut File rainbow tag to really draw attention to my photograph. Simple, and yet so effective!

To enhance the soft pastel look, I also trimmed one of the XOXO Paper Stack to give me four pastel 6″ x 1″ paper strips, which I machine stitched onto my white cardstock base. The variance in machine stitches and the addition of ribbon and pom pom trim really add texture and interest to my otherwise soft and delicate design. 

I embellished around my photo cluster with some of the chipboard clouds from the Happy Little Moments Chipboard Stickers—aren’t they the cutest?! I used these very same stickers to form my layout title, ‘We So Happy’, where the “we so” was taken from the “awesome’ sticker. 

To break up the very white background, I also stamped around my photo cluster with the tiny heart and star icons from the Good Times Tab Stamp. The stamped stars and hearts give a playful and magical vibe to the page, whilst adding color and interest as well. 

With such a crisp, clean and pretty color scheme, I felt that I need to add something more to balance my design. Cue the fabulous gray elements! That gray die cut ampersand from the February 2021 Kit is SO good! You’ll also spot the gray chipboard “together” sticker and those pretty patterned pops of gray pattern from the XOXO Paper Stack peeking through my distressed cardstock edges. 

Clean, simple and oh so beautiful memory keeping with the February 2021 Kit! I hope my scrapbook page has inspired you to get creating today! Thanks so much for stopping by!

Share what you’re creating with your February kit and add-ons when your box arrives! We can’t wait for you to share your projects on Instagram using our #EllesStudio hashtag or in our Elle’s Studio Facebook Group!

An “All About Me” Layout using Noted Vol. 3 with Suzanna Lee

Hiya scrappy peeps! It’s Suzanna here today! In addition to all the usual amazing goodies Elle releases each month, there is another volume of the well loved “Noted” stamp sets: the Noted Vol. 3 Stamp! All six of the stamps have been used on this “all about me” layout of my daughter, Mia, in addition to other goodies from the February 2021 Kit and a few from past months to create a monochromatic blue page with a shot of rainbow!

Supplies | February 2021 Kit, February Print and Cut Labels, February Labels, Bright Die Cut Tabs, Arrow Label Stickers, Happy Little Moments Chipboard Stickers, Cerulean Blue Puffy Alphabet Stickers, Navy Puffy Alphabet Stickers, Navy Dipped Puffy Alphabet Stickers, Heart of Gold Wood Veneers, Tiny Acrylic Hearts, Acetate Stars, Bright Polka Dot 6 x 8.5 Inch Paper Stack, Good Times Tab Stamp, Noted Vol. 3 Stamp, Large Jane Alphabet Metal Die, Pocket, Frame and Flip-Up Metal Die

The stamps in the Noted Vol. 3 Stamp are perfect for journaling of all types.

I used the “arrow boxes” to list out specific topics. By repeating the “arrow boxes” down the length of the page, each time in a darker shade of blue, an ombre effect can be created. Don’t have enough content to fill each box? No worries! They make great little white spaces where the eye can rest from the chaos of the remainder of the page!

The “currently” stamp is filled with, well, current preferences. I loved tucking it into a vellum pocket created with the Pocket, Frame and Flip-Up Metal Die.

Next to her currents is the snippet of conversation we had about her favorite color.

On the back of a 3″ x 4″ tag of that favorite color using a Bright Die Cut Tab, in that same color, and a wonderful Happy Little Moments Chipboard Sticker to indicate the topic “My Favorite.” This stamp resembles a lined notebook and could be used for a little mini book, with a notebook edge punch or digital cut file!

The right hand column of the layout included a mix of labels from the February Kit, February Print and Cut Labels, February Labels and Arrow Label Stickers, stamped with two of the stamps from Noted Vol. 3 Stamp. Using the days of the week stamp, I replicated the fuchsia die cut that came with the kit to fit my blue color scheme. Today is stamped directly on the page, and I love the two tone shading that having that outline provides!

Just as versatile as they are in their use for storytelling or documenting, so too are the stamps in the Noted Vol. 3 Stamp in their actual use. Some of the stamping on this layout is done directly on the smooth, white background paper and some of it is done on cardstock and cut to size. Tucking those 3″ x 4″ tags into vellum made the layout interactive and more engaging.

I know for many of you, stamping on your projects is terrifying. It was for me too, but it shouldn’t be! Look at my layout, it’s not perfect. There is a splotchy blue arrow on the left hand side, the top of today is darker than the bottom (must stop rocking stamp!) and so on, but I still love the look. Those little “errors” are human mistakes that happen. I am not perfect, nor is stamping! If I can do it, you can too!

I do have a process video that will be up on my YouTube channel should you want to watch how everything came together.

Thanks for stopping by the blog today!

Show us how you use our Noted Vol. 3 Stamp on your projects by posting them on Instagram using the hashtag #EllesStudio, or in our Elle’s Studio Facebook Group!

Building a Month of Memories: Vol. 1, with Guest Aurélie Cormier

We are so very excited to welcome our guest for February, Aurélie Cormier! Whether it is on a card, layout or pocket page, Aurélie combines beautiful photos and products with delicate details and good design to create stunning projects. We can’t wait to share what she has created with our newest products—two projects that we know will inspire you!

Hello, everyone! I am beyond excited to have been given the opportunity to share with you some of the projects I have created using the fresh out of the presses February kit and add-ons! For those of you who will receive this gem of a kit, you will not be disappointed, I promise!

As soon as I saw what Elle had sent me, I immediately knew I wanted to work with my photos of February 2020. Yes, I am still working on 2020! No shame! I quickly chose the rainbow pocket tag and built my page around it. I cut the 4″ x 6″ lilac title tag from the February 2021 Kit into a 4″ X 4″ square and layered a few kit labels and die-cuts. And yes, that’s hand-–I just had to add a bit of that orange shade to create a visual triangle with the orange in the rainbow and the puffy heart sticker! Right?

On the On This Day in February Journaling Tag, I’ve incorporated some stamping with my journaling, which I love to do. The Good Times Tab Stamp had the perfect word snippets for me to use!

I also built a title for the bottom-left photo using the pink Jane Tile Alphabet Cardstock Stickers and Purple Puffy Alphabet Stickers. The green “fun”? That was fussy-cut from one of the February Kit’s 4″ x 6″ pocket tags! The Bright Die Cut Tab with the heart? It’s totally hiding what my scrappy friends and I like to call a “flopportunity”— I stamped the wrong date on my photo! Nothing that a cute tab can’t hide, though!

Now, you can’t have a double-page monthly spread without a left page, right? With the February 2021 Kit,, it was a breeze. Everything matches! And bonus! It totally goes with the XOXO Paper Stack released with the January 2021 Kit! Genius! 

On this page, I had tons of fun layering die-cuts, acrylic and puffy sticker hearts and chipboard elements. And of course, since I have been known to say, “When in doubt, stitch!” I decided to do a bit more hand stitching in these pockets. Texture without elevation. Fun!  

And ta-da! Here are the two pocket pages side by side!

Supplies | February 2021 Kit, On This Day in February Journaling Tags, Bright Die Cut Tabs, Jane Tile Alphabet Cardstock Stickers – Pink, Happy Little Moments Chipboard Stickers, Love You Chipboard Stickers, Purple Puffy Alphabet Stickers, Puffy Heart StickersAcetate Hearts, XOXO 6 x 8.5 Inch Paper StackGood Times Tab Stamp, Mini Dated Stamp, Everyday Tabs Metal Die

Now, through the years, I have fallen in love with jotting down stories as much as creating pages. You may be wondering where my journaling is, right? And why I date stamp all my photos? There is a method to my madness, I promise!

I coordinate my journaling pages with my pockets by using strips of paper from the collection I’ve used to fill those pockets for the month. And just like the journaling tag on the right-hand pocket layout I showed you above, I L-O-V-E mixing and matching all kinds of stamps with my journaling. My Elle’s Studio stamps are always close by, for sure!

I also add some photos and memorabilia I can’t fit into the monthly pockets and decorate them with a few layers of die-cuts, chipboard, and sticker clusters.

Supplies | February 2021 Kit, Jane Tile Alphabet Cardstock Stickers – Pink, Happy Little Moments Chipboard Stickers, Acetate Hearts, XOXO 6 x 8.5 Inch Paper Stack, Title Builder Stamp, Mini Dated Stamp,

And there you have it! I’ll be back later in the month with a few extra projects I added to this month’s storytelling. Hope to see you then! Happy scrapping!

Scrapbooking has been an integral part of my life for the past dozen years or so. Published in Canadian Scrapbooker (now Creative Scrapbooker), Scrapbook & Cards Today, as well as France’s own Histoires de Pages, my creative style has evolved through the years. I now consider myself a memory keeper, mixing and matching traditional scrapbooking elements with pocket scrapbooking, documenting the normal and not so normal everyday moments of our lives. Journaling has become as important to my projects as my photos—I journal every morning about the day before, using a mish mash of stamps and hand-written fonts. These stories go hand in hand with my layouts in my albums.  

I originally hail from Cheticamp, a beautiful Acadian village right on the Cabot Trail in beautiful Cape Breton, Nova Scotia. I now reside in Dieppe, New Brunswick with my husband, Mathieu, our twelve-year old son, Louis-Olivier and seven-year old daughter, Éloïse. Besides scrapbooking, I enjoy teaching voice classes at home and sing most weekends at a few church services around the area.

Find more of Aurélie’s projects at these links : Instagram | FacebookGallery | Blog

What an amazing pocket page spread and notebook Aurélie shared with us today! Be sure to follow her at the links above for beautiful and inspiring projects and watch for her to come back again this month to share what she is creating with the February kit and add-ons!

Sketch Day with Melissa Mann

Hello! This is Melissa and I’m so excited to be here with you all today on the blog with a new layout created from the our newest sketch! Let’s take a look at the sketch I worked with to create my page:

There are so many ways to interpret a sketch and it is such a great jumping off point for a new project. I will often use a sketch or another layout to get my creative juices flowing. Sometimes it is just the push you need to get a project done and completed. Here’s what I created:

Supplies | February 2020 Kit, February Print and Cut Labels, Bright Die Cut Tabs, Happy Little Moments Chipboard Stickers, XOXO 6 x 8.5 Inch Paper StackGood Times Tab Stamp

As you can tell, I stuck pretty close to the original sketch. However, I really loved that teal 4″ x 6″ journaling card included in the February 2020 Kit that has several words printed on it. I printed my photos a bit smaller than the traditional 4″ x 6″ size and layered them underneath the journaling tag. The only other change I made was where I placed my title, which I created using the awesome Happy Little Moments Chipboard Stickers. I placed it on the inside layer to the right hand side rather than the very outer layer. 

This was the perfect sketch to scrap these adorable photos of my sister and my niece and a great bonus that the sketch included three separate pictures! I love multi-photo layouts, as they are such an awesome way to scrap a sequence of photos. 

Thanks for stopping by the blog today! Share what you create using this sketch as your jumping-off point by posting your project on Instagram using the hashtag #EllesStudio, or by joining and posting in our Elle’s Studio Facebook Group!

Sunshine and Rainbows in Pockets with Michelle Flynn

Hi friends!  It’s Michelle here and I am so excited to show you how I used the incredibly beautiful February kit and add-ons to document a rather special day of our trip to amazing Canada! I am sure I am not alone in this, but I find it almost impossible not to take a lot of photos of everyday life and even more so on a trip or a special occasion. I really love capturing every moment, but I certainly don’t like to be overwhelmed with photos when I am trying to document those moments in my albums. Today I thought I would share a few little things I like to do that allows me the freedom to incorporate more photos and moments into a traditional pocket page layout.

Supplies | February 2020 Kit, January 2021 KitFebruary 2021 Cut FilesHere’s the Story Printables, Bright Die Cut TabsArrow Label StickersJane Tile Alphabet Cardstock Stickers – Pink, Happy Little Moments Chipboard Stickers, Chipboard Label Stickers, Thankful Chipboard Label Stickers, Dark Pink Puffy Alphabet Stickers, Puffy Heart StickersHeart of Gold Wood Veneers, All My Heart Wood Veneers, Tiny Acrylic HeartsXOXO 6 x 8.5 Inch Paper Stack, Monthly Highlights 6 x 8.5 Inch Paper StackGood Times Tab Stamp, Noted Vol. 3 Stamp, Hugs and Kisses Stamp, Daily Tabs Stamp, Collected Stamp, Title Builder Vol. 3 Stamp, Title Builder Vol. 4 Stamp, Pocket, Frame, and Flip Up – Extra Frames Metal Die

One of the ways I like to add more photos into my layouts is to use a grid design which allows you to add multiple photos into one 4″ x 6″ pocket. I did that here in the bottom left corner of the 9″ x 12″ page and I layered it using the beautiful pink pattern paper from the XOXO Paper Stack. I chose wood veneer from the Heart of Gold Wood Veneers and that incredibly gorgeous Tiny Acrylic Heart. I added the Arrow Label Sticker and layered it with a Bright Die Cut Tab and used the Good Times Tab Stamp to stamp directly on it. I had to add some of those sweet Happy Little Moments Chipboard Stickers to finish it off. I love that I was able to create my own 4″ x 6″ pocket with all of these beautiful items and I was also able to incorporate three photos in one pocket!   

Not only did we capture some beautiful rainbows at Niagara Falls, but we also captured a sweet little bird sitting on the side of us singing away and I wanted to capture that moment with a little title-based 4″ x 6″ pocket. I used the pocket tag from this the February Kit for the middle of the 6″ x 12″ page cutting the “amazing” February Cut File using the same pink patterned XOXO Paper. I used the Noted Vol. 3 Stamp for the “currently” phrase and added the arrow stamps from the Hugs and Kisses Stamp. Title Builder Vol. 3 and Vol. 4 Stamps added the words in script font, and I finished it off with a sweet rainbow from the Happy Little Moments Chipboard Stickers.   

Another fun little thing I love to do is to make mini books, one more way to add more photos to your layout while making it interactive. Who says a mini book can’t also slide right into a single pocket page insert? For the cover, I used the rainbow February Cut File, and more of the XOXO Paper Stack to cut the design using my Cricut, adding a tag shape. I used the Collected Stamp for the phrase on the front of the tag. One of the Niagara waterfall photos created a peek-a-boo effect behind the rainbow cut out.

I used a combination of the February kit and add-ons to create each page while carefully paying attention to the weight and thickness—you want it to fit easily into the pocket and not be too heavy. I adore how it turned out using all of the beautiful embellishments from this month’s release and I hope you’ll check out my Instagram profile for more photos of each page. It might be a mini, but it sure is mighty!          

I loved the rainbow pocket tag in this month’s kit. I fussy cut the rainbow and then chose two sheets of patterned paper from the lovely XOXO Paper Stack to layer under it using the Pocket, Frame, and Flip Up – Extra Frames Metal Die, creating a lovely frame of patterns. I finished this sweet and simple pocket off with the star from the Happy Little Moments Chipboard Stickers, and by stamping “today’s story” using the Daily Tabs Stamp.

The second pocket tag I chose for this layout was the gorgeous pink and red heart tag from the February Kit. I used the Noted Vol. 3 Stamp to add the captions on white cardstock, then trimmed it down so that it could be adhered directly on top of the red heart tag while leaving the top and bottom hearts visible. I then used an idea from another creative team member—sometimes the best ideas come from others—and added the periods from the Dark Pink Puffy Alphabet Stickers to check the boxes. 

I then moved onto my journaling. I just love the Monthly Highlights 6 x 8.5 Inch Paper Stack, as it can be used in so many ways! I decided to trim it down to a 4″ x 6″, adding the Happy Little Moments Chipboard Stickers and the pink Jane Tile Alphabet Cardstock Stickers for my title and my top three highlights of that day. I just adore how it turned out and I couldn’t finish without a Puffy Heart Sticker!

I had such fun finally documenting this day with these beautiful Elle’s Studio products and I hope you found just one little thing to inspire you to create. I cannot wait to see how you document your memories with this month’s kit and add ons! Don’t forget to share your own creativity and inspiration on Instagram using the #ellesstudio hashtag and over in the Elle’s Studio Facebook Group! Until next time, happy creating friends!