March Design Team Inspiration: Volume Three

It’s hard to believe that we’re already three weeks into our month of new March kit and add-ons, but here we are! Today we’re excited to share ten new projects with you created by our talented design team, to keep the inspiration going and your creativity flowing! Be sure to pin these to come back to later when you have a moment to create!

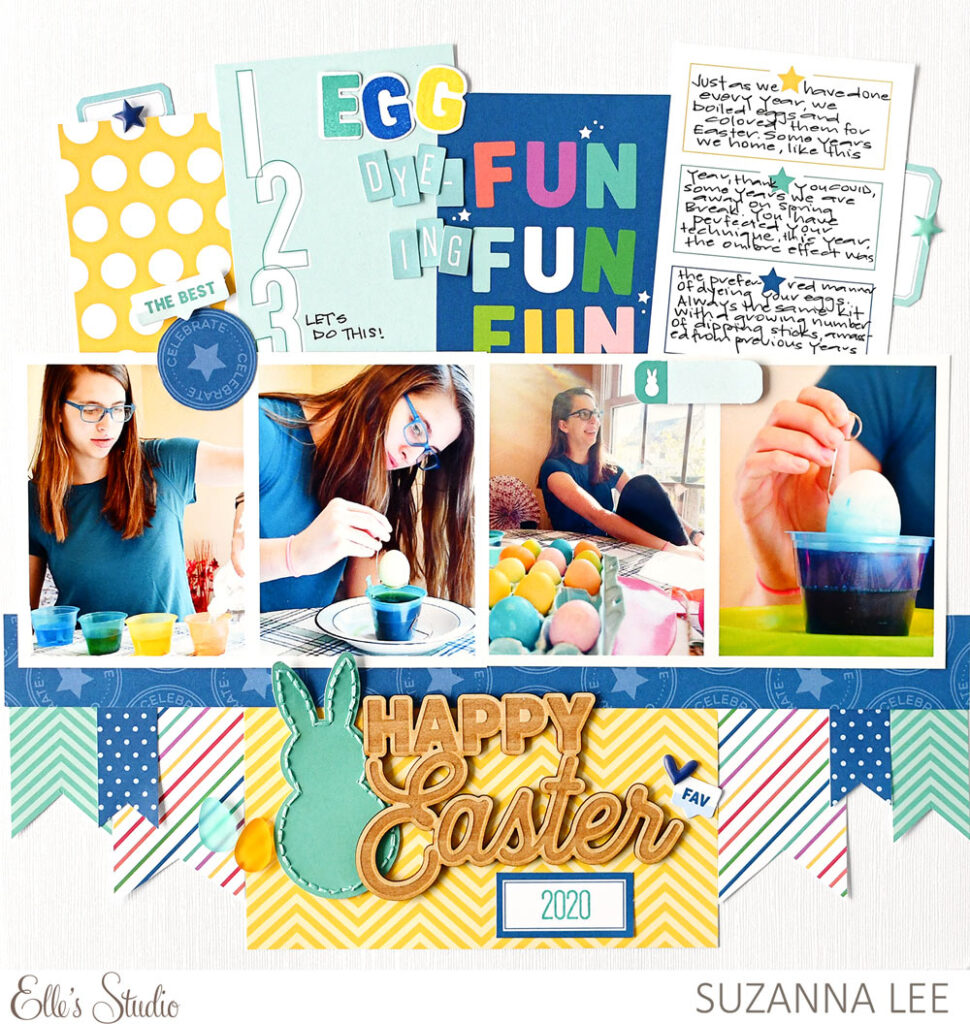
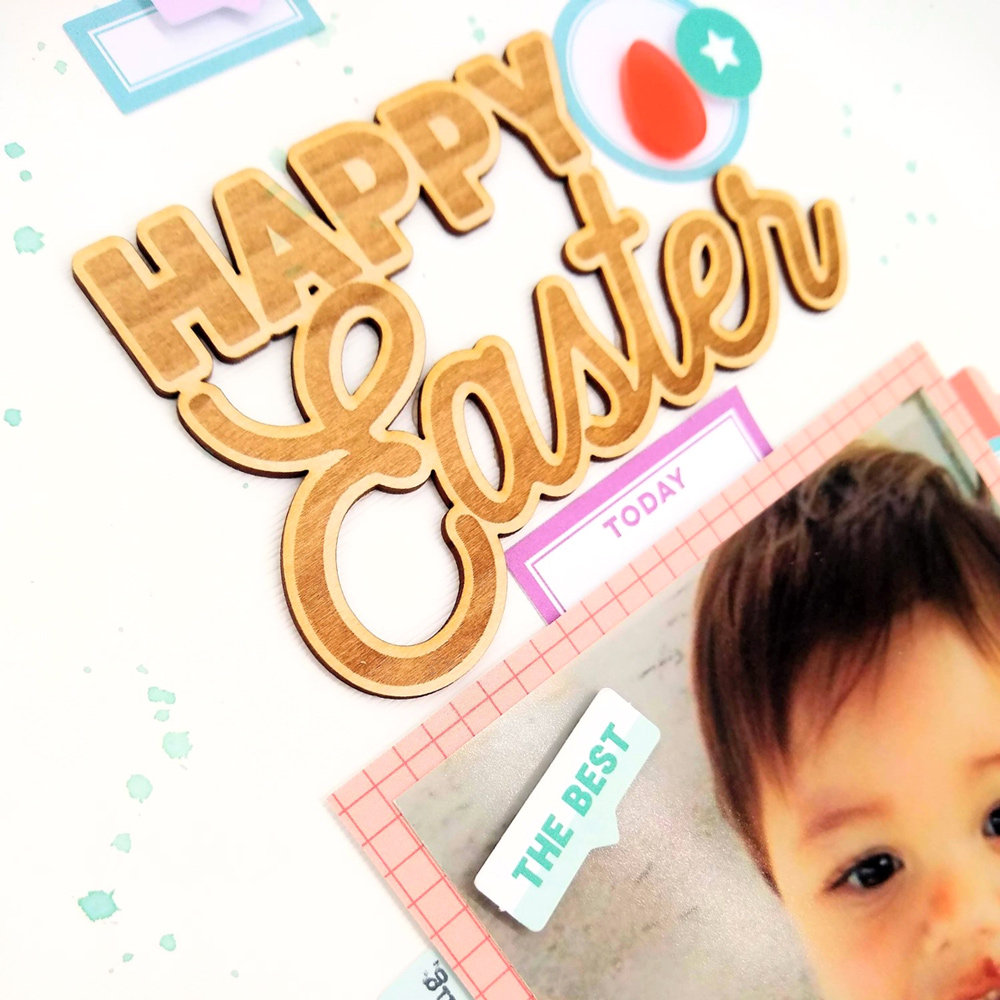
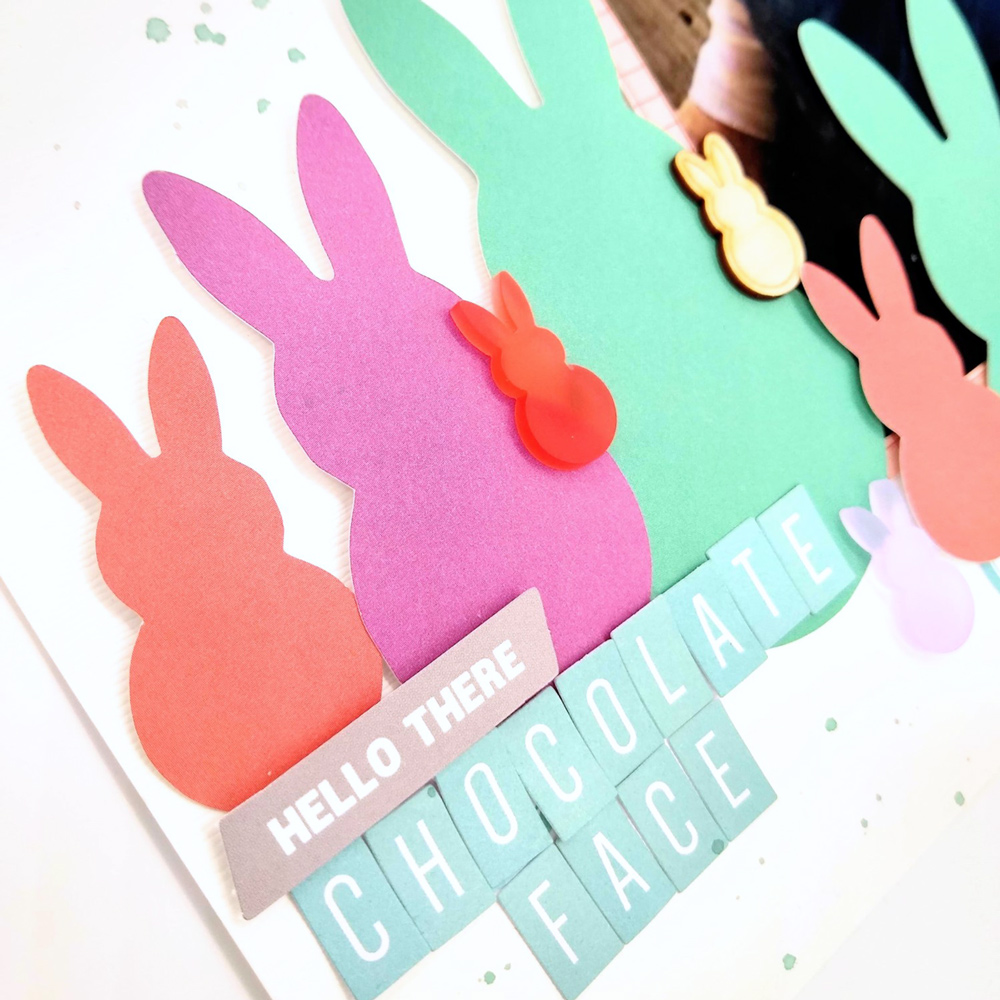
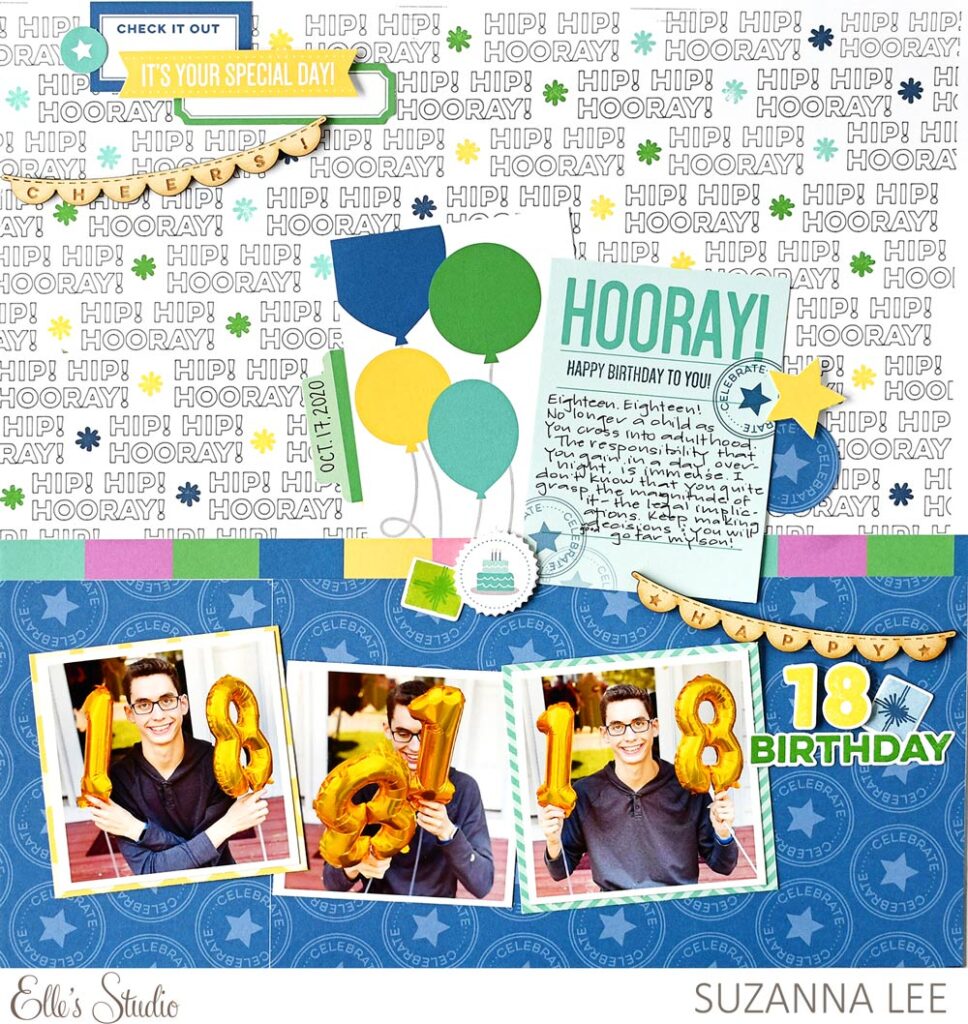
Happy Easter by Suzanna Lee – supplies used | March 2021 Kit, March 2021 Cut FilesJane Tile Alphabet Cardstock Stickers – Light Teal, Tiny Shapes and Dots Puffy Stickers – Cool TonesHappy Easter Wood Veneers, Tiny Acrylic Eggs and Bunnies, Celebrate 6 x 8.5 inch Paper Stack, Parker Alphabet StampParker Alphabet Metal Die, Mini Dated Stamp

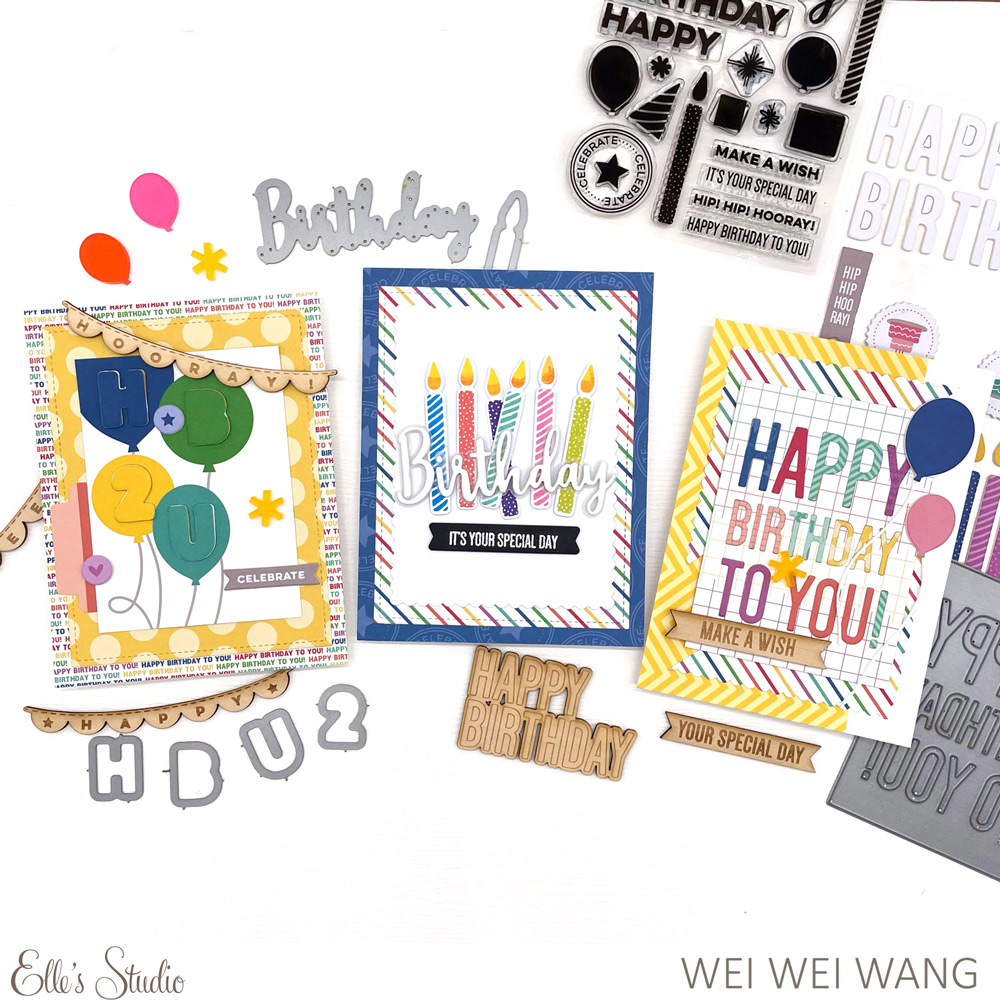
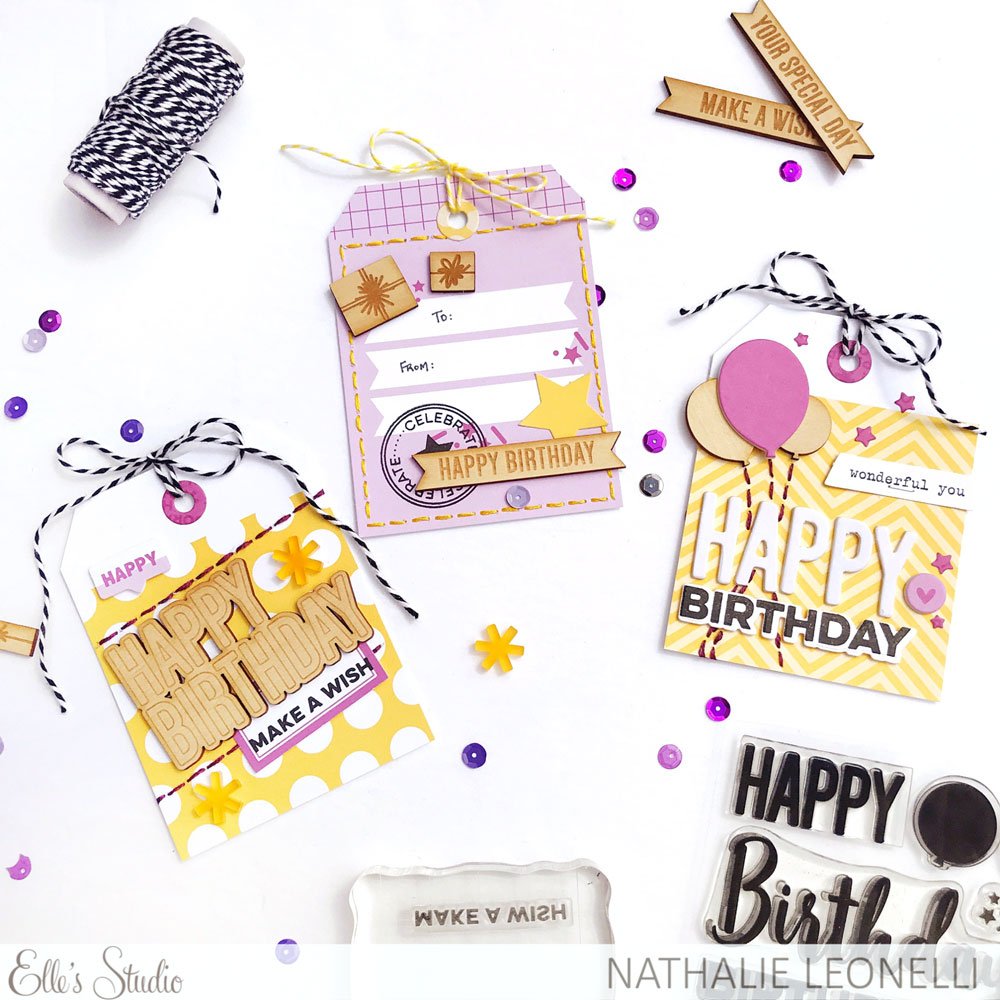
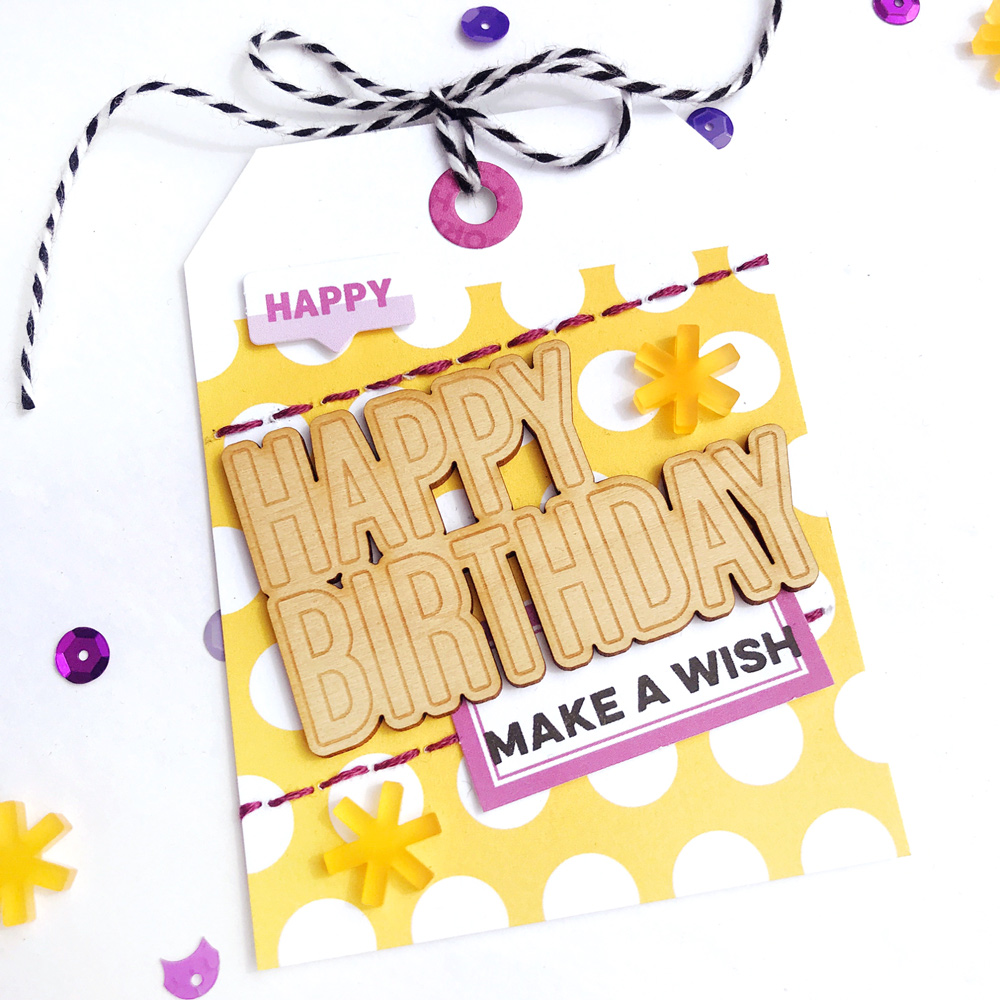
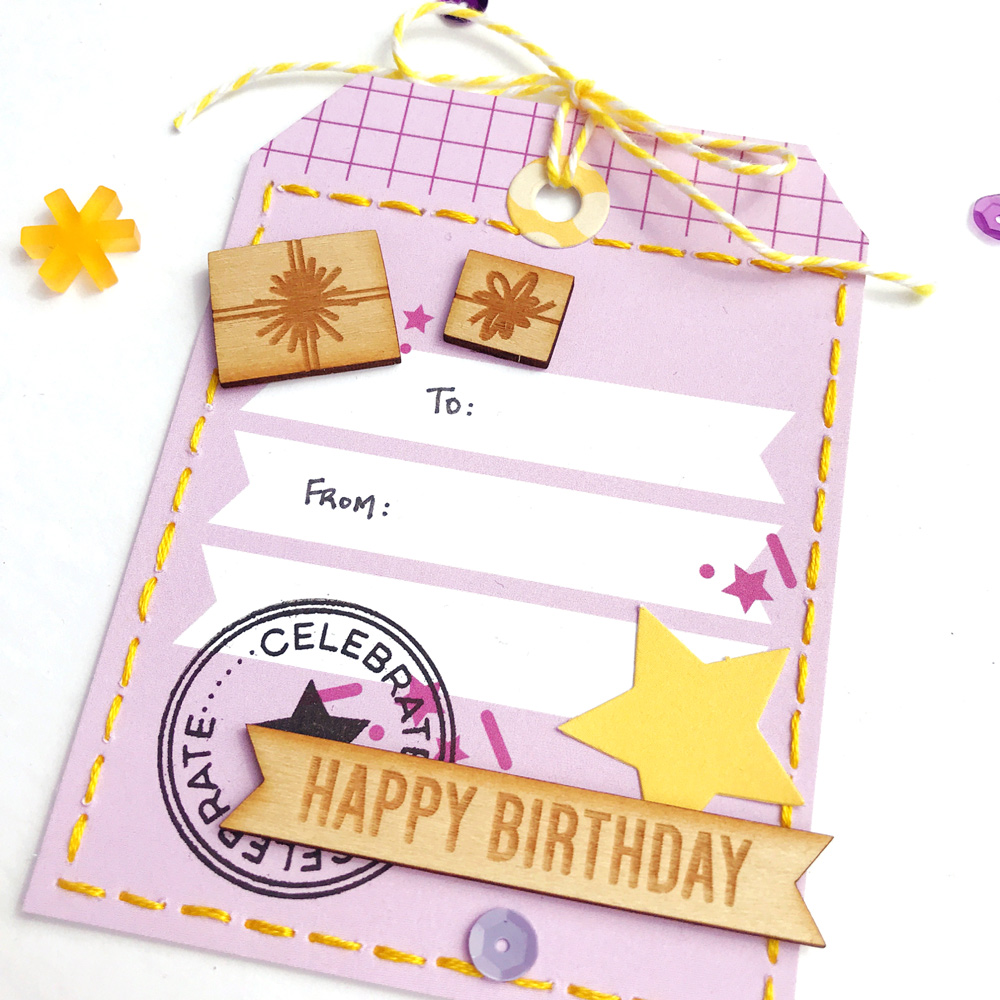
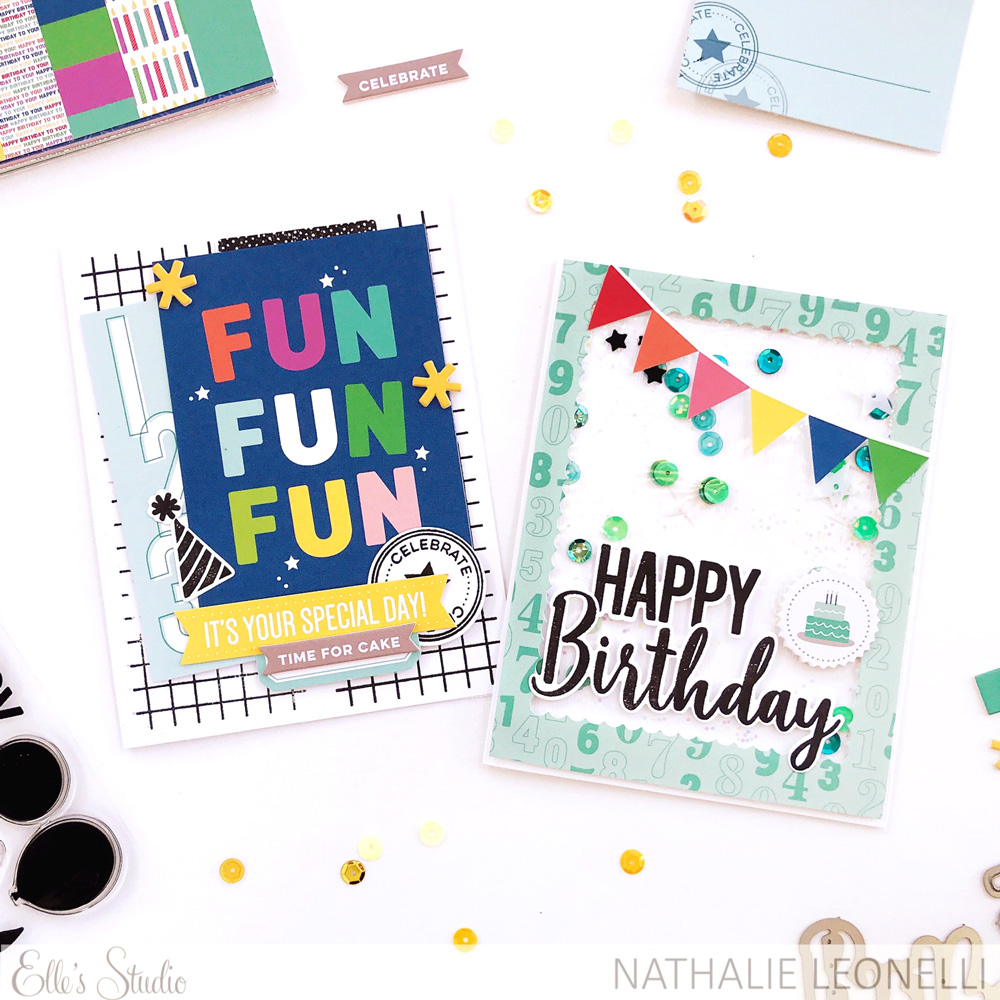
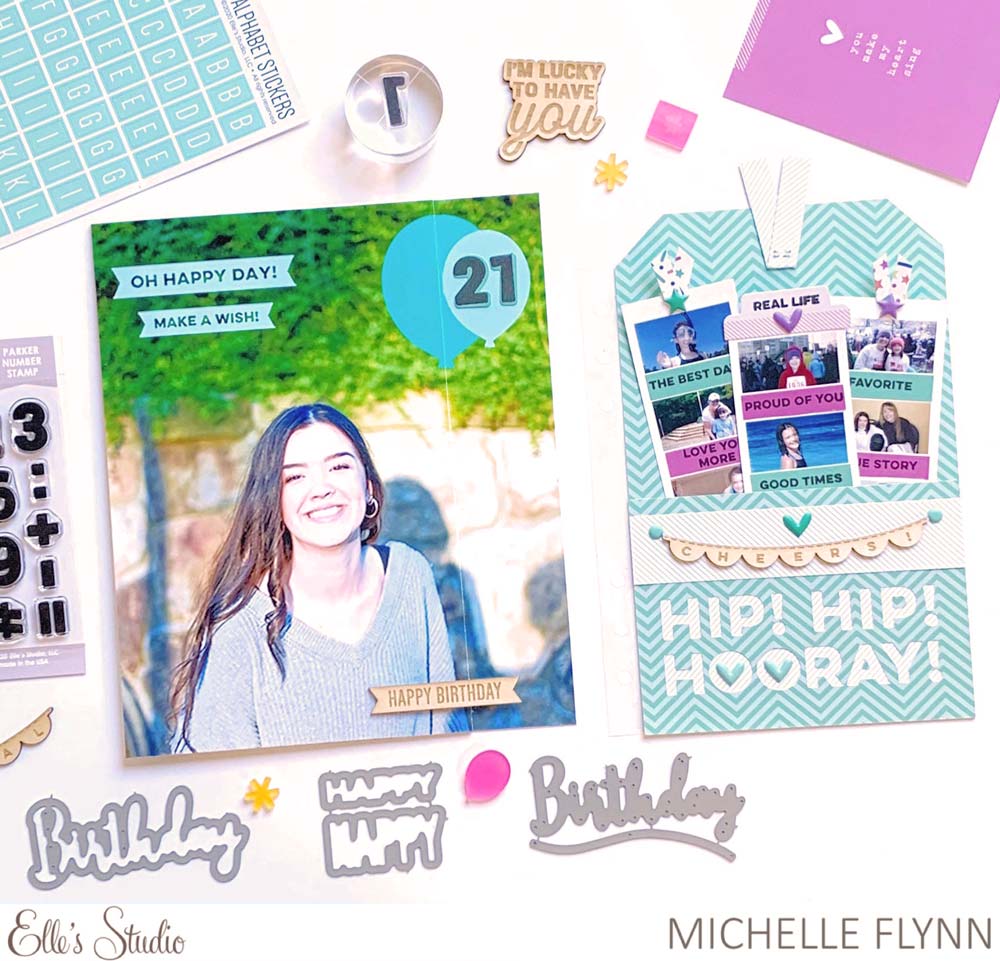
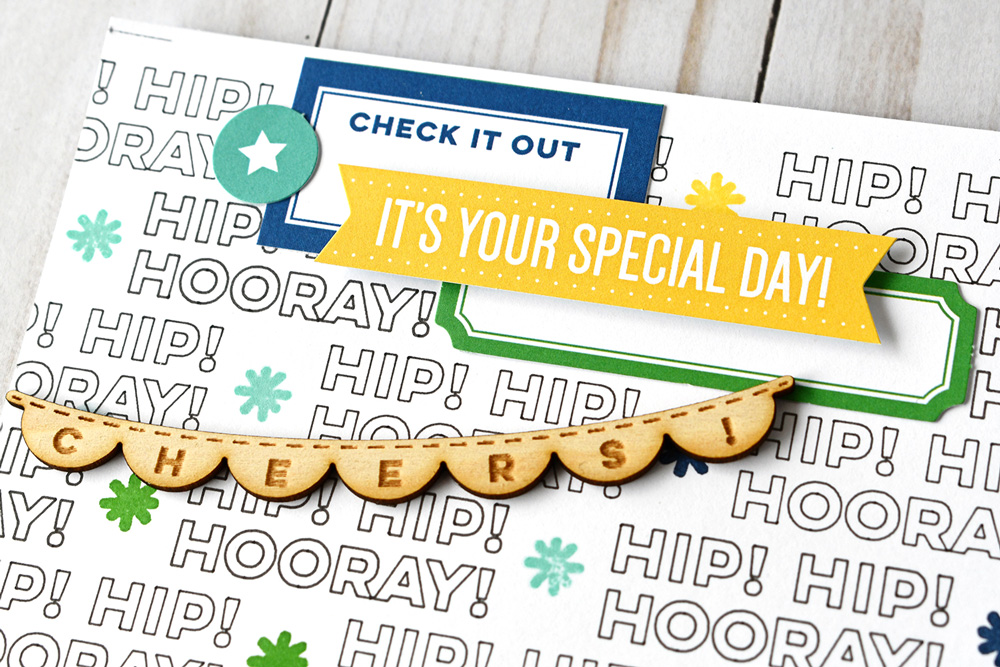
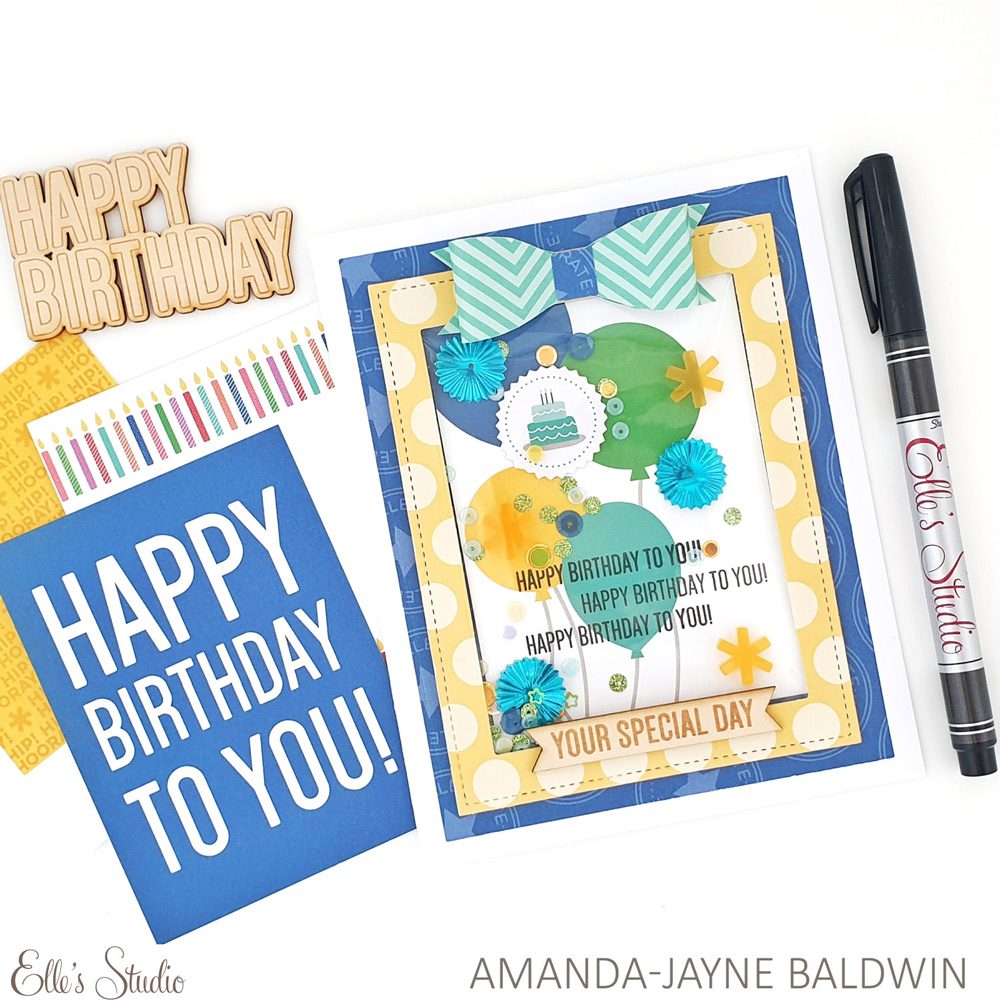
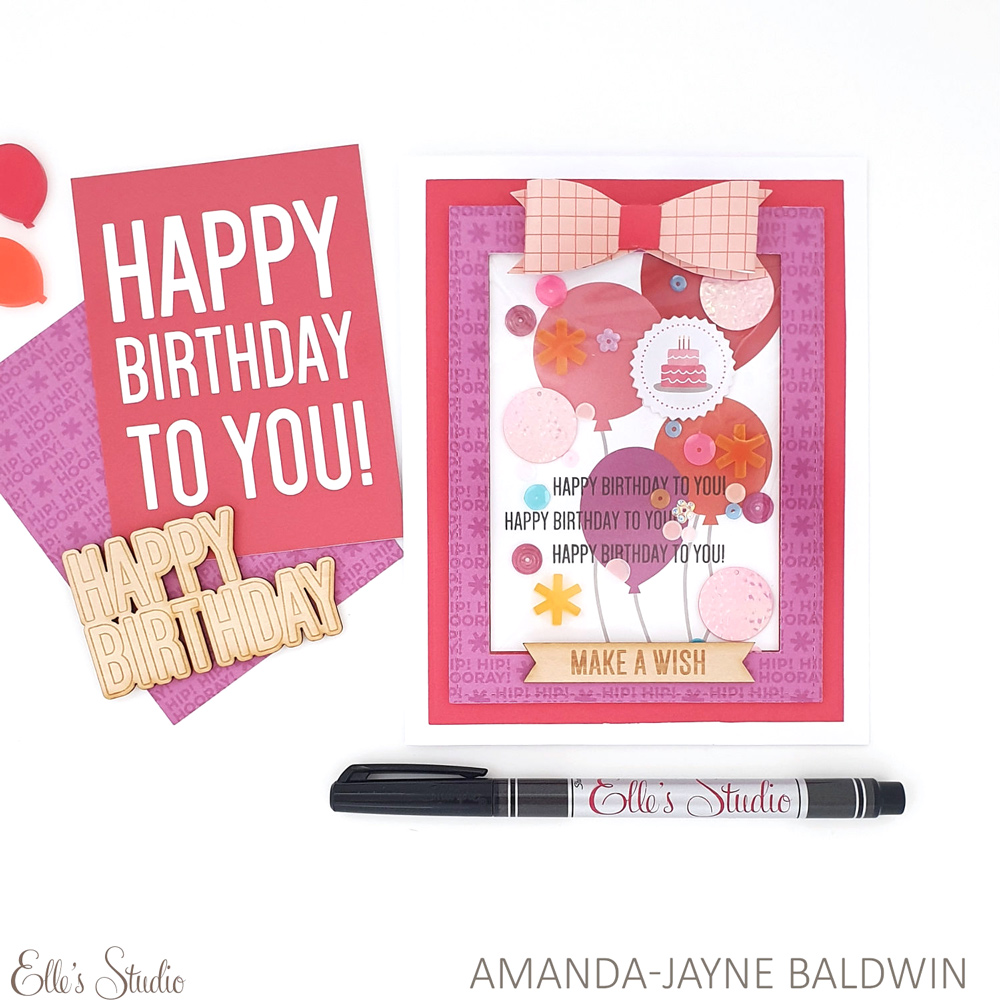
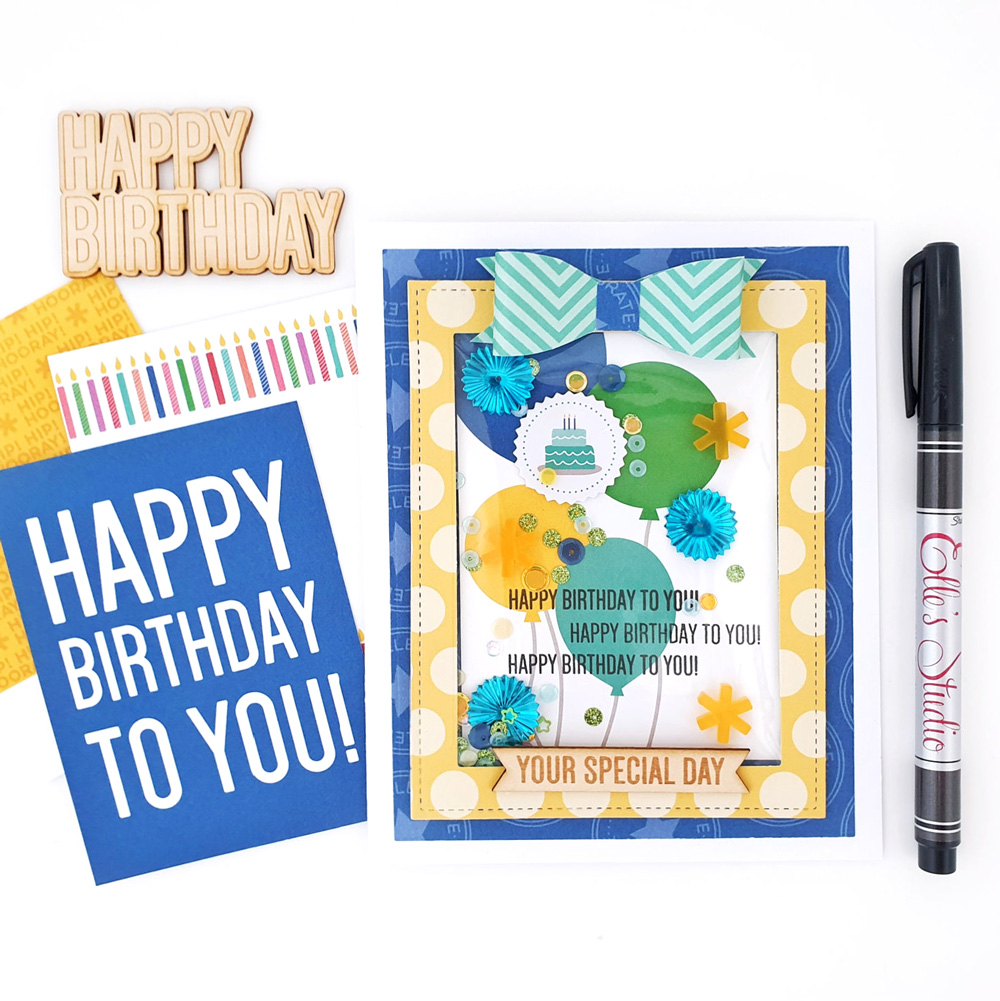
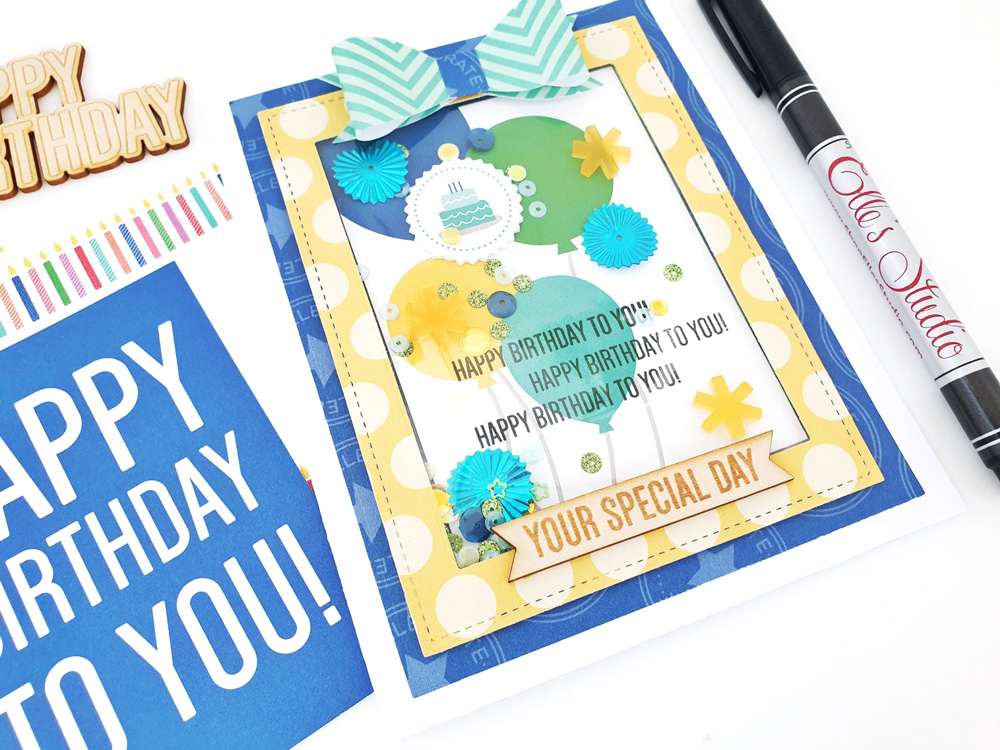
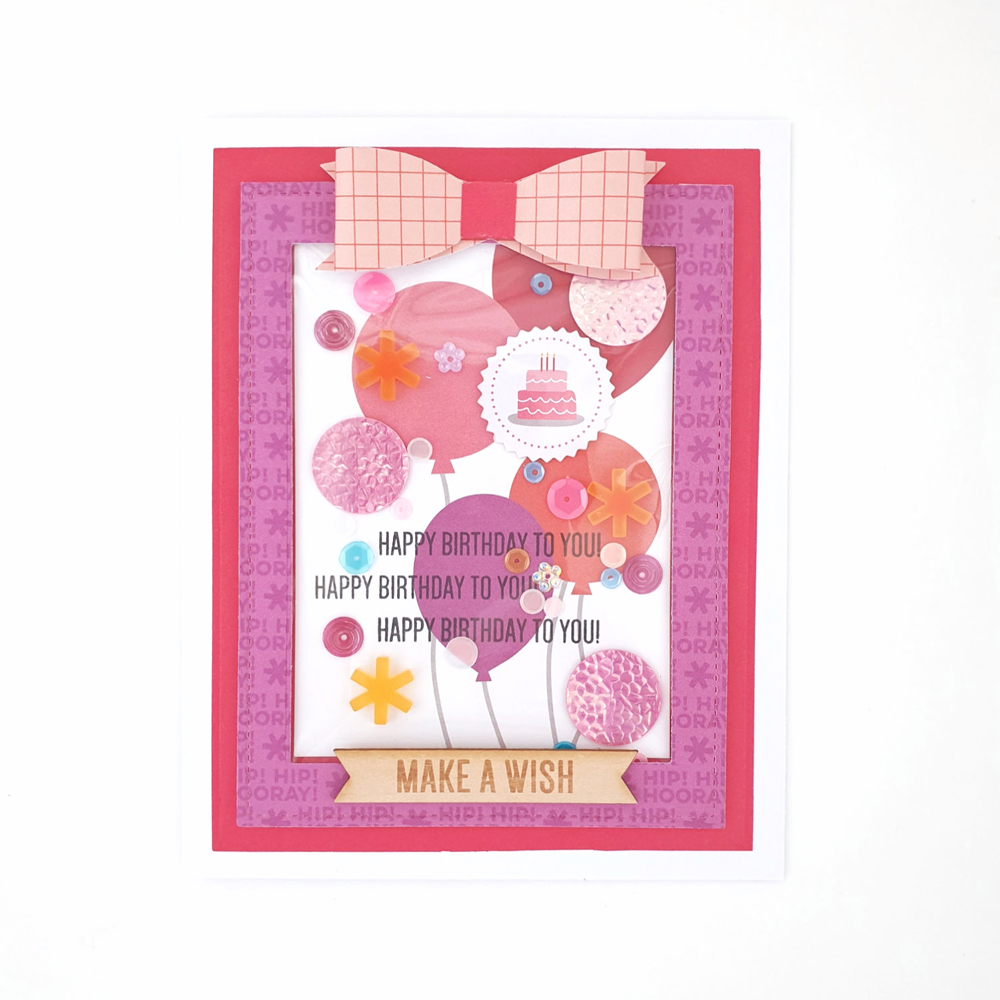
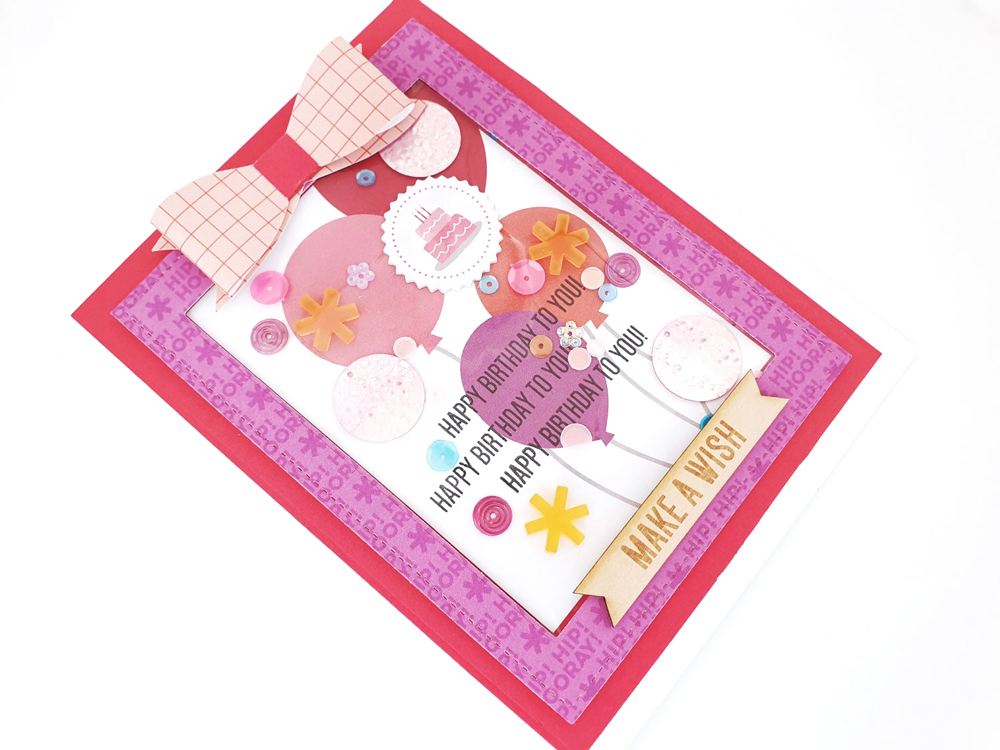
Birthday cards by Wei Wei Wang – supplies used | March 2021 Kit, Happy Birthday Journaling Tags, Happy Birthday Chipboard Stickers, Happy Birthday Wood Veneers, Hooray Wood Veneer Banners, Acrylic Balloons and PresentsCelebrate 6 x 8.5 inch Paper Stack, Make a Wish StampMake a Wish Metal Die, Parker Alphabet StampParker Alphabet Metal Die, Mini Dated Stamp, Happy Birthday Metal Die, Layered Card Metal Die

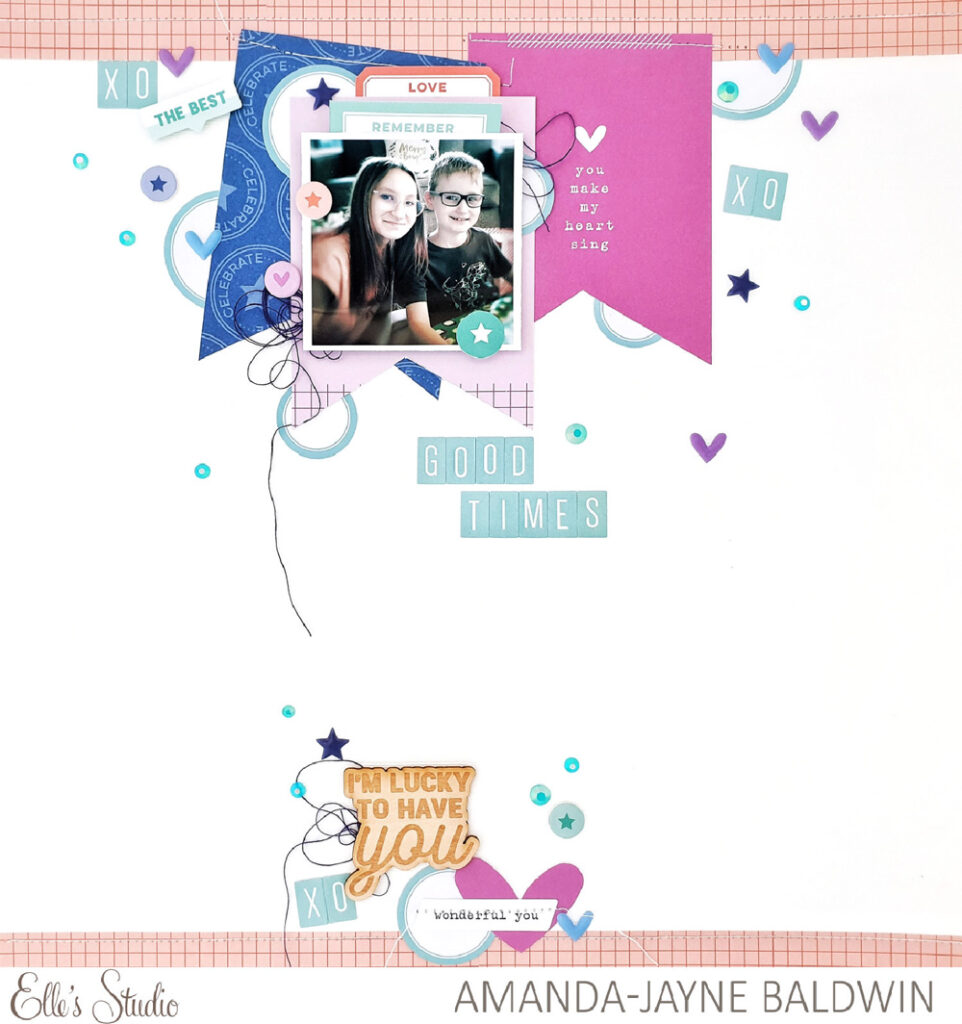
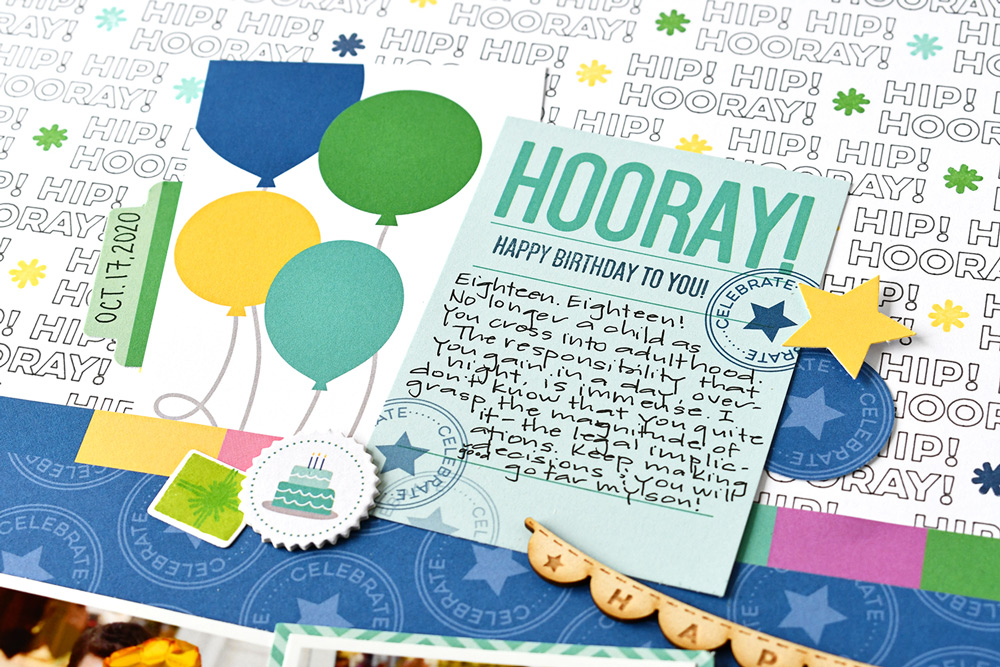
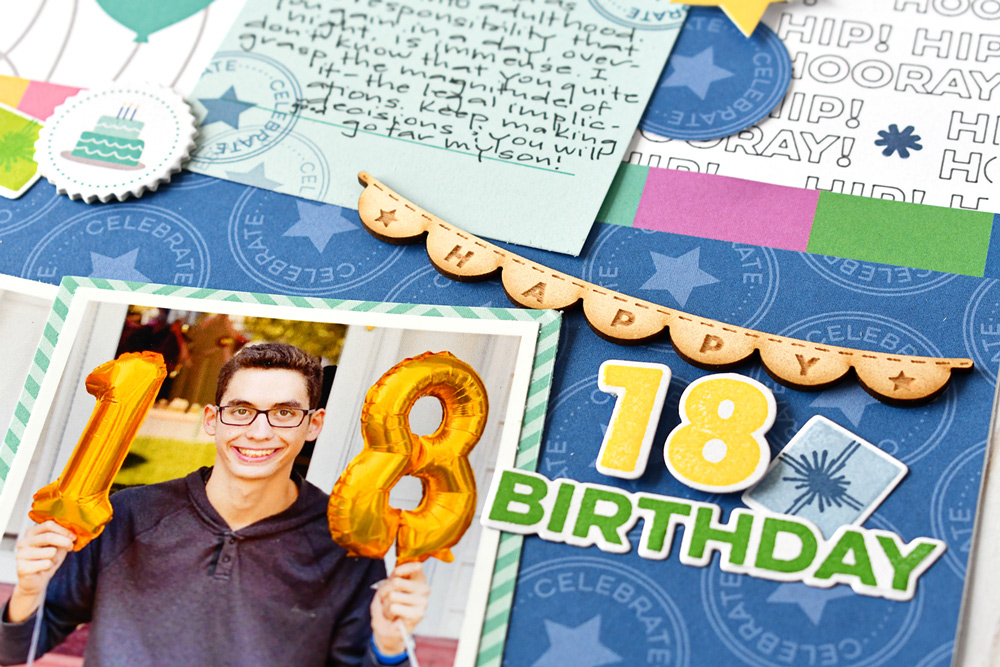
Good Times by Amanda-jayne Baldwin – supplies used | March 2021 KitMarch 2021 LabelsJane Tile Alphabet Cardstock Stickers – Light TealLight Teal Cardstock Label Stickers, Happy Birthday Chipboard StickersTiny Shapes and Dots Puffy Stickers – Cool TonesGrateful Wood VeneersCelebrate 6 x 8.5 inch Paper Stack

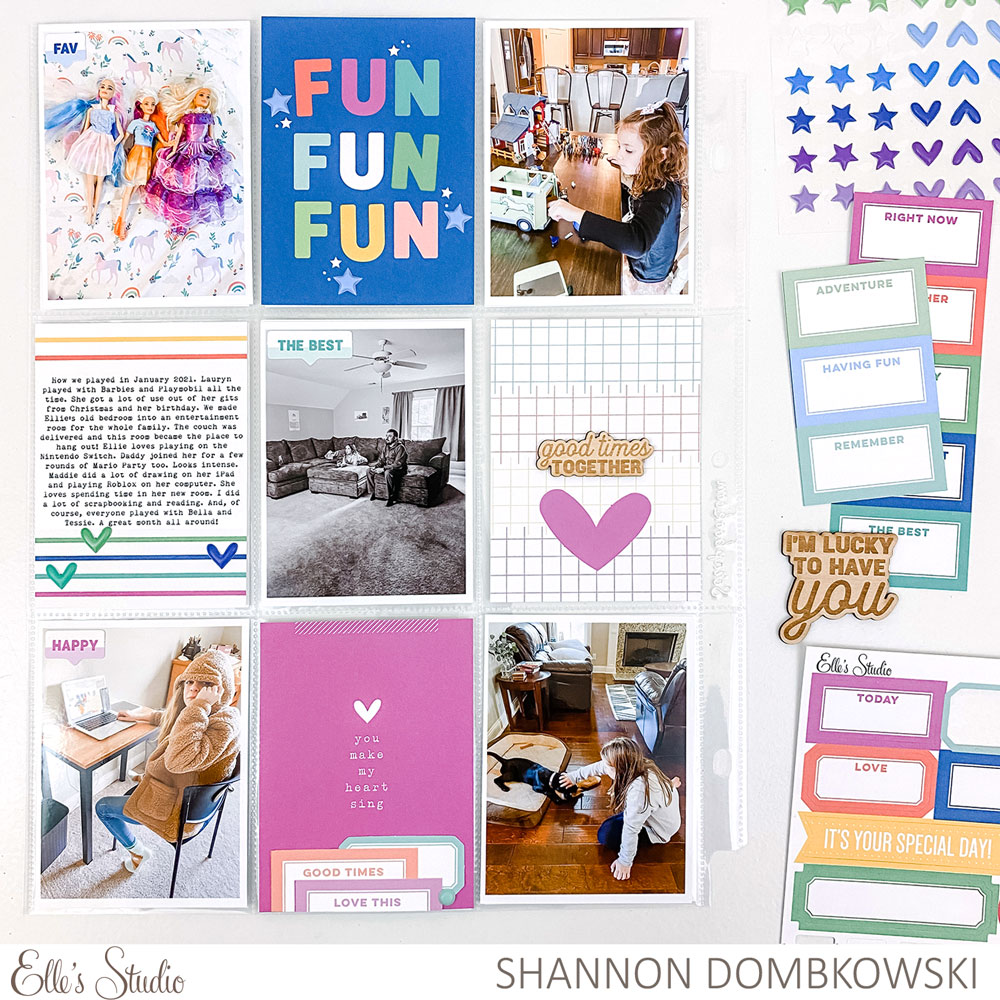
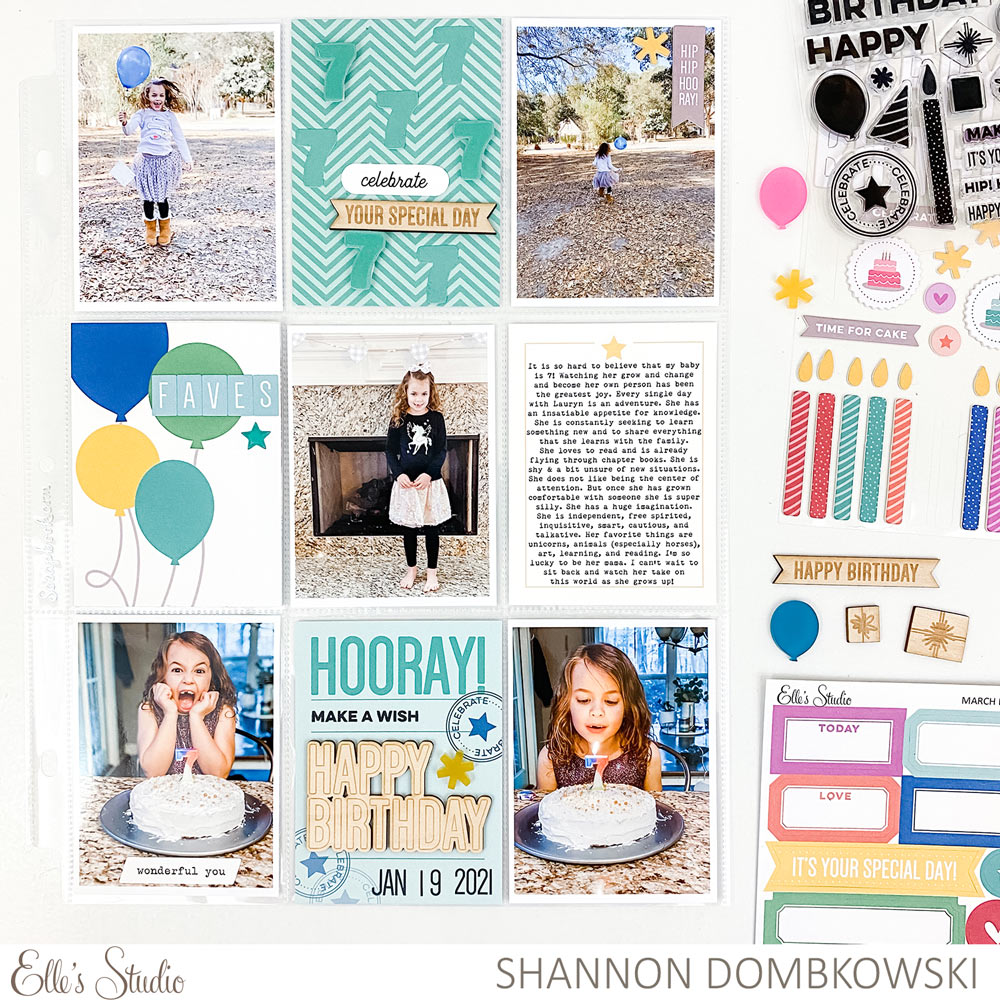
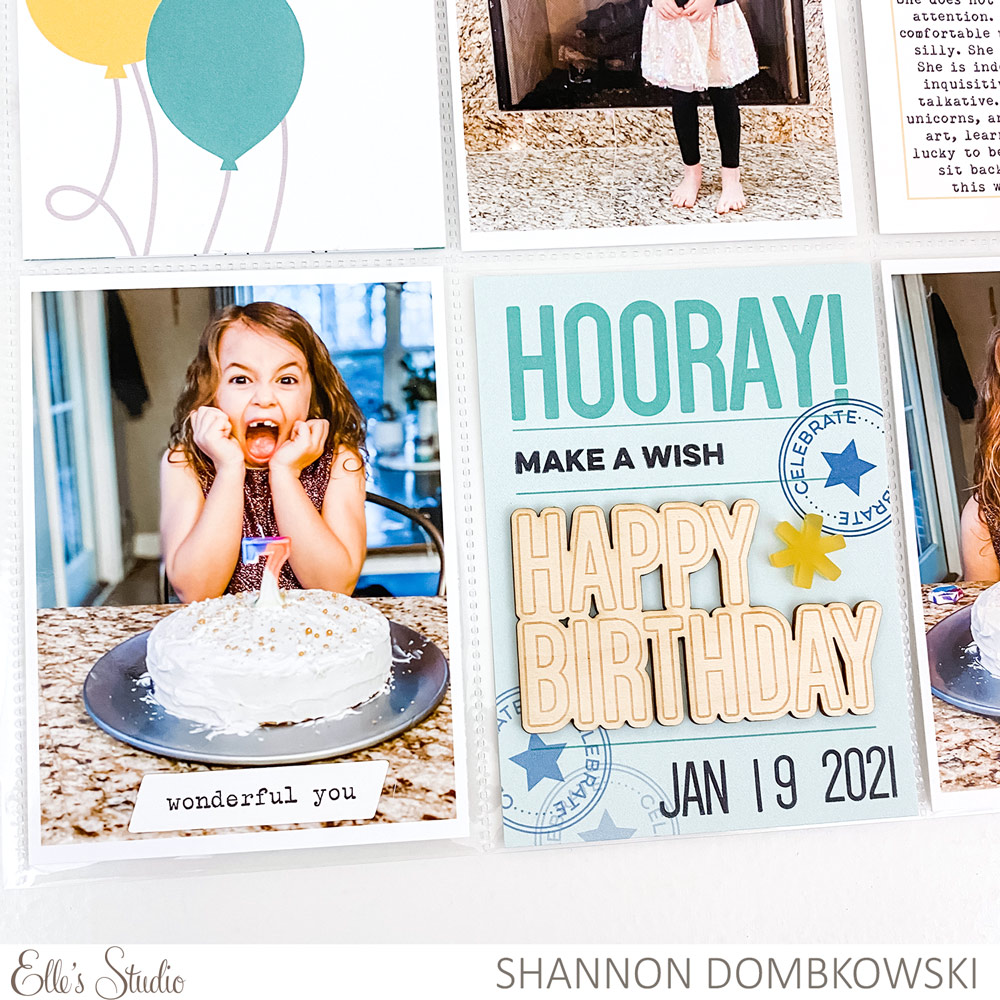
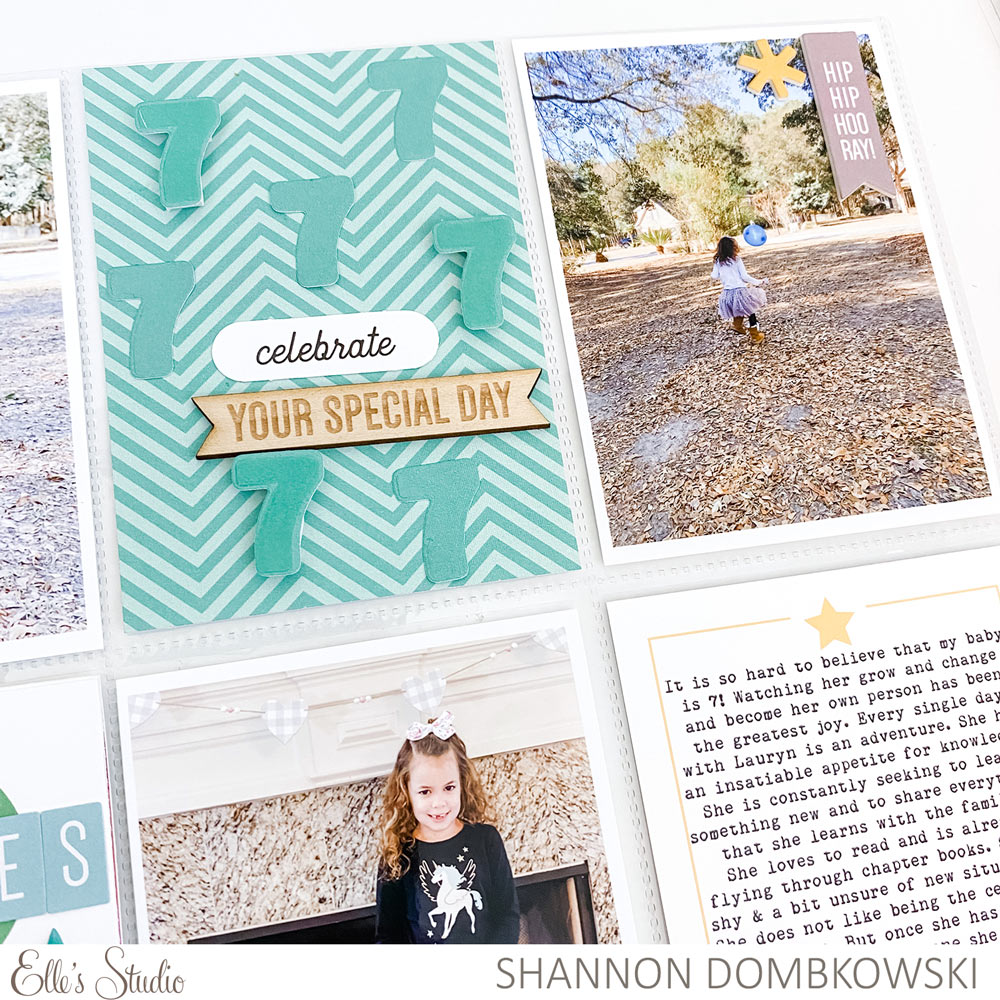
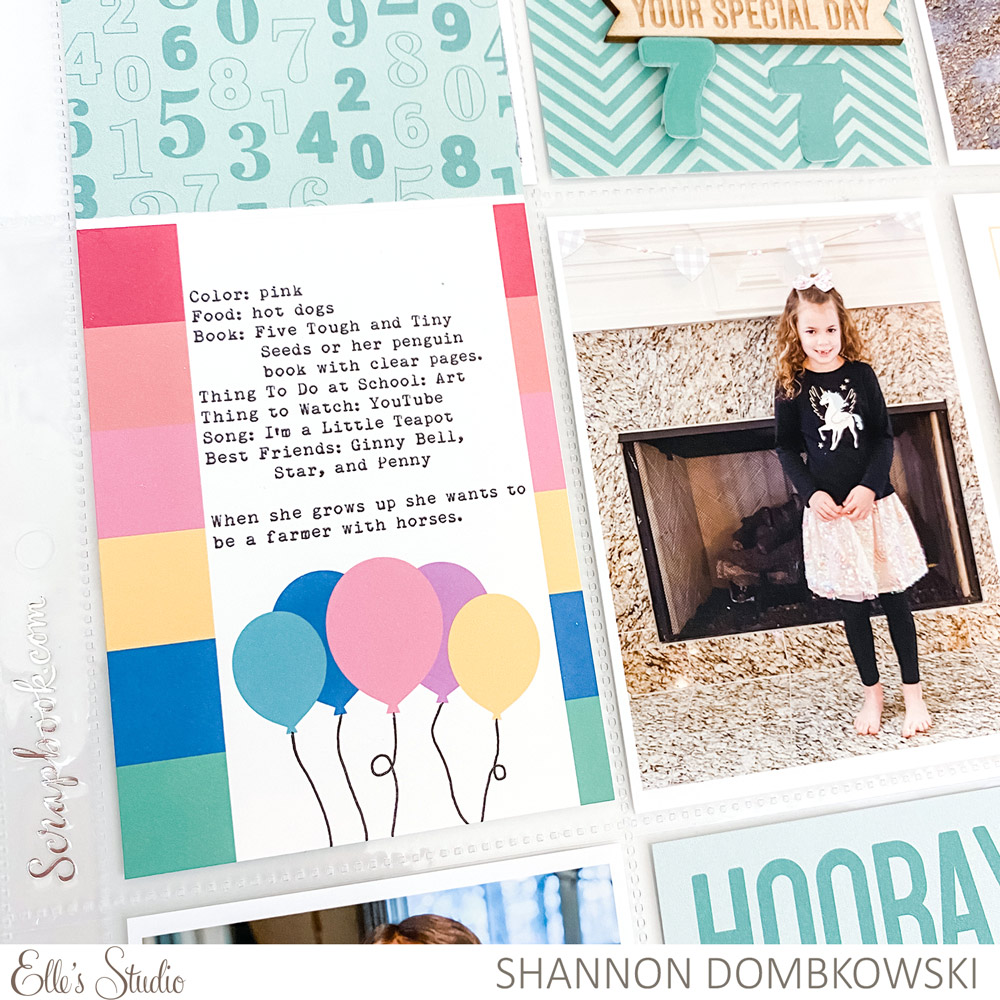
Fun, Fun, Fun by Shannon Dombkowski – supplies used | March 2021 KitMarch 2021 LabelsTiny Shapes and Dots Puffy Stickers – Cool TonesGrateful Wood Veneers, Celebrate 6 x 8.5 inch Paper Stack

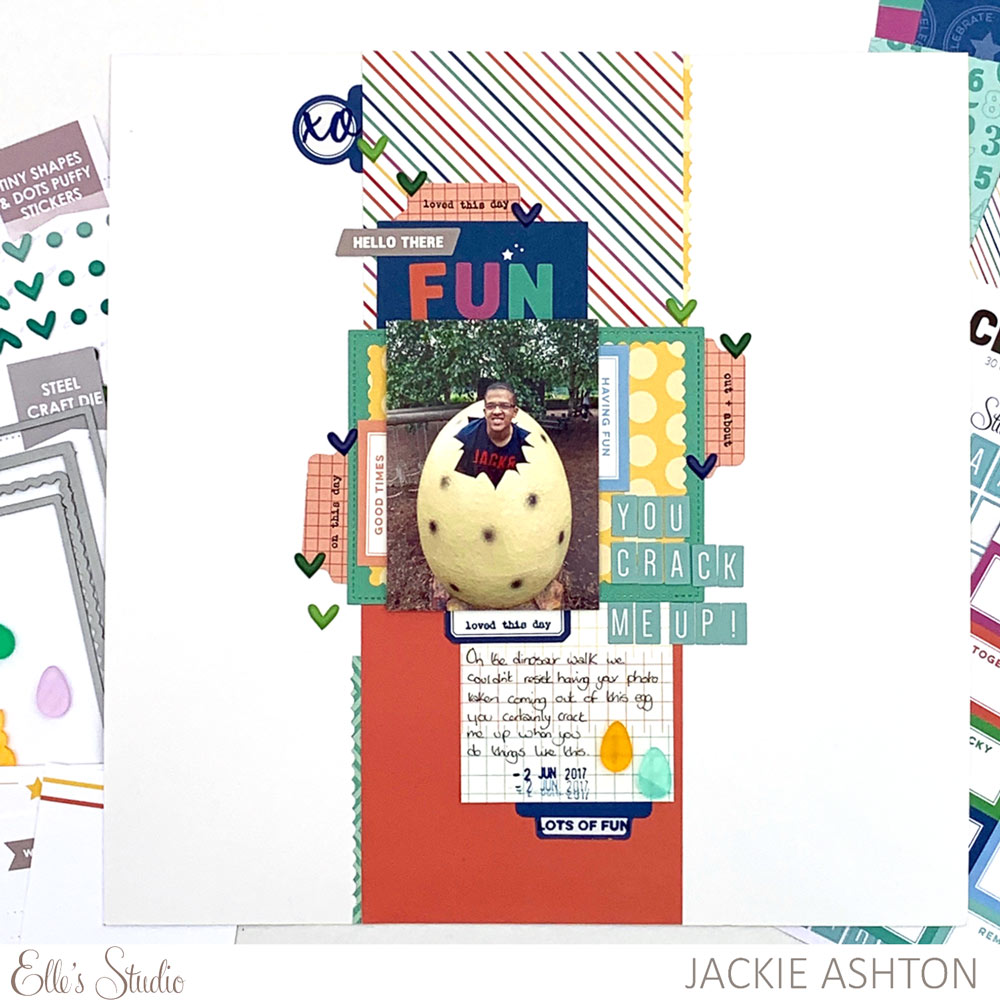
You Crack Me Up! by Jackie Ashton – supplies used | March 2021 Kit, March 2021 Labels, Bright Die Cut TabsJane Tile Alphabet Cardstock Stickers – Light TealTiny Shapes and Dots Puffy Stickers – Cool TonesTiny Acrylic Eggs and Bunnies, Celebrate 6 x 8.5 inch Paper StackDaily Tabs Stamp, Good Times Tab Stamp, Everyday Tabs Metal Die

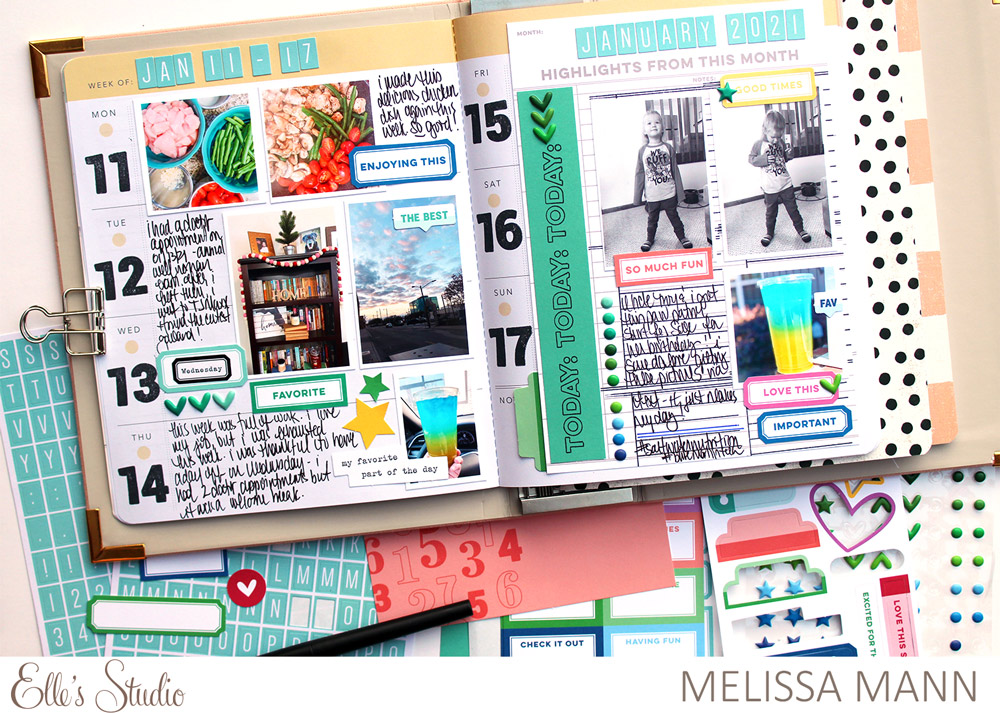
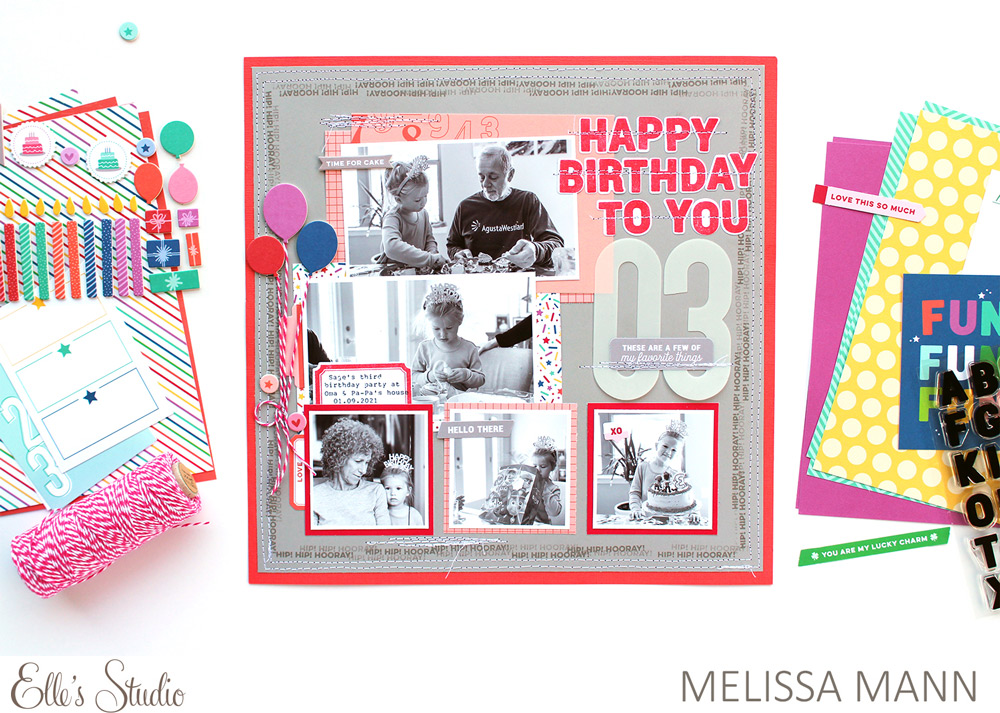
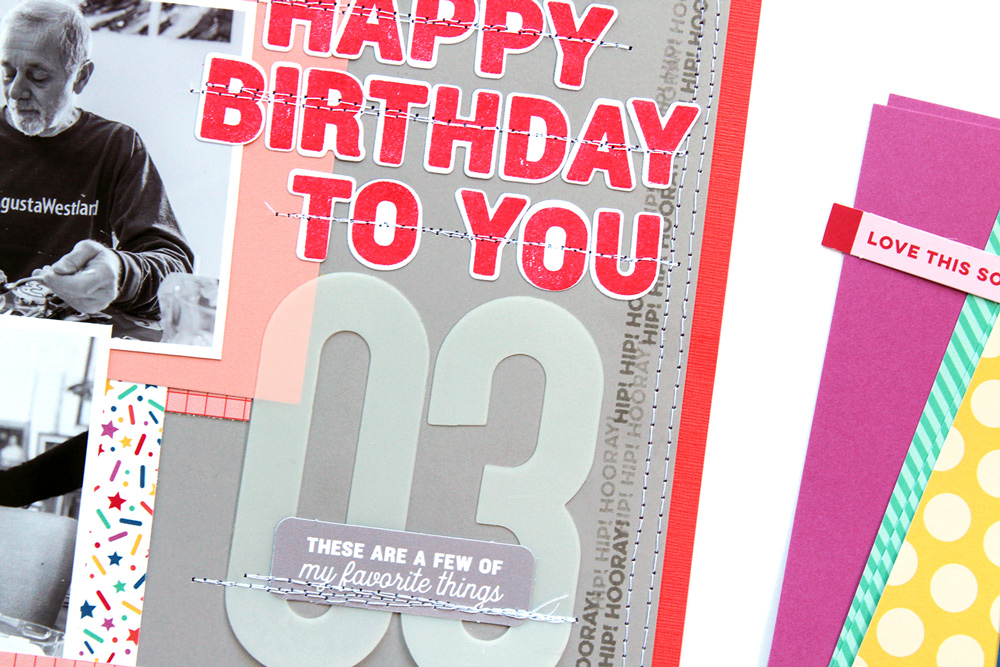
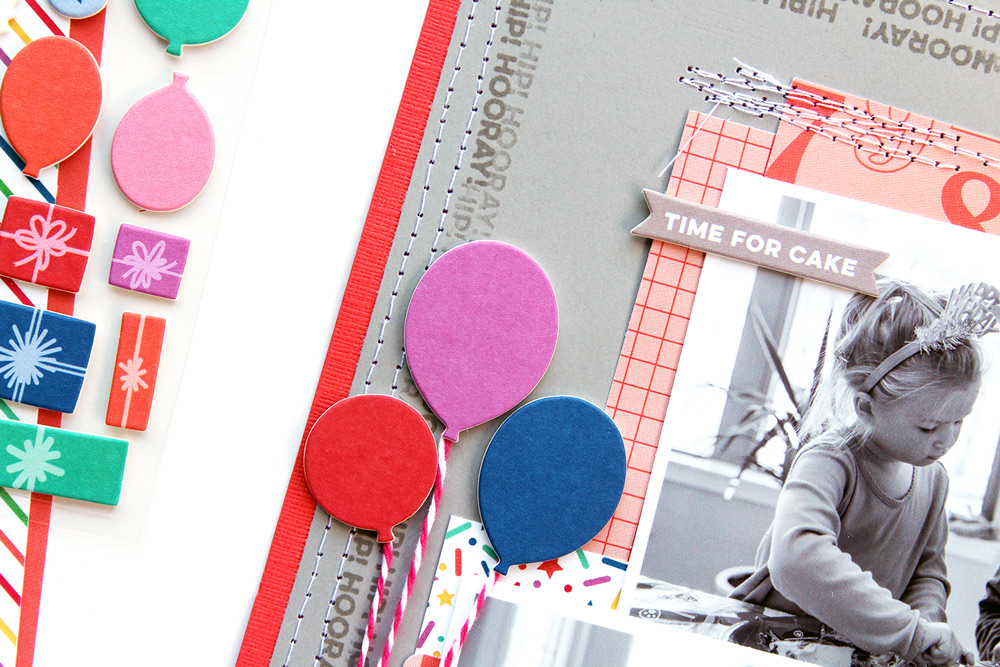
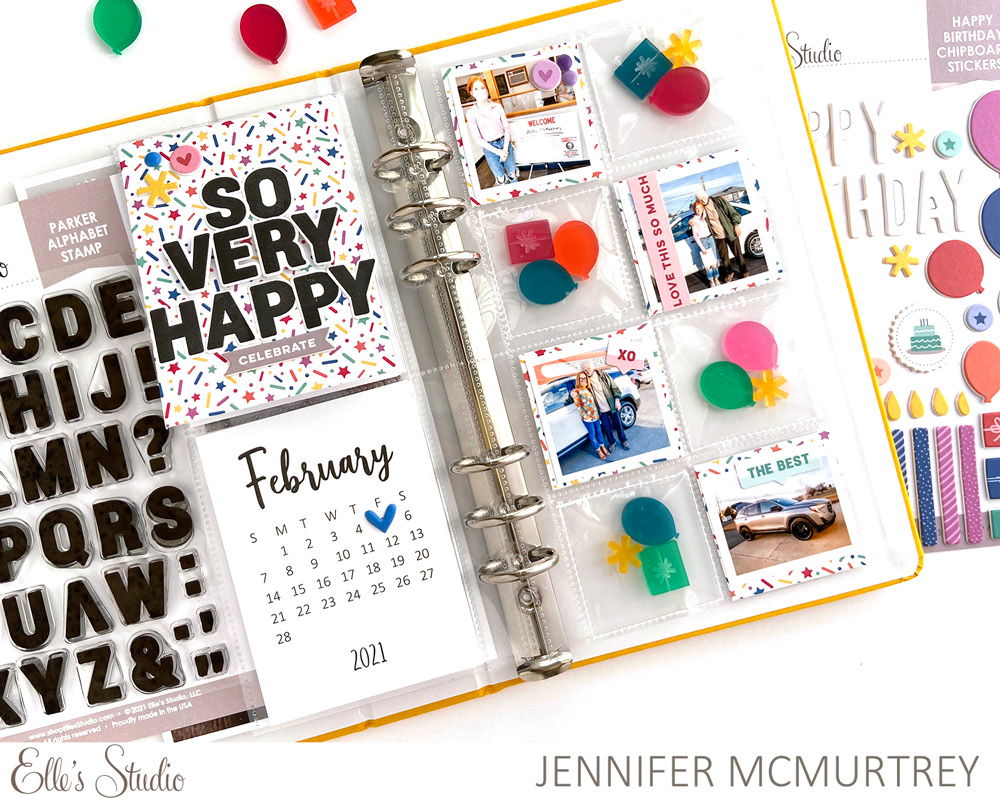
January 2021 by Melissa Mann – supplies used | March 2021 KitMarch 2021 Print and Cut Labels, Monthly Highlights 6 x 8.5 Inch Paper Stack, Jane Tile Alphabet Cardstock Stickers – Light Teal, Days of the Week Stickers – NeutralTiny Shapes and Dots Puffy Stickers – Cool TonesCelebrate 6 x 8.5 inch Paper Stack, Parker Number Stamp,

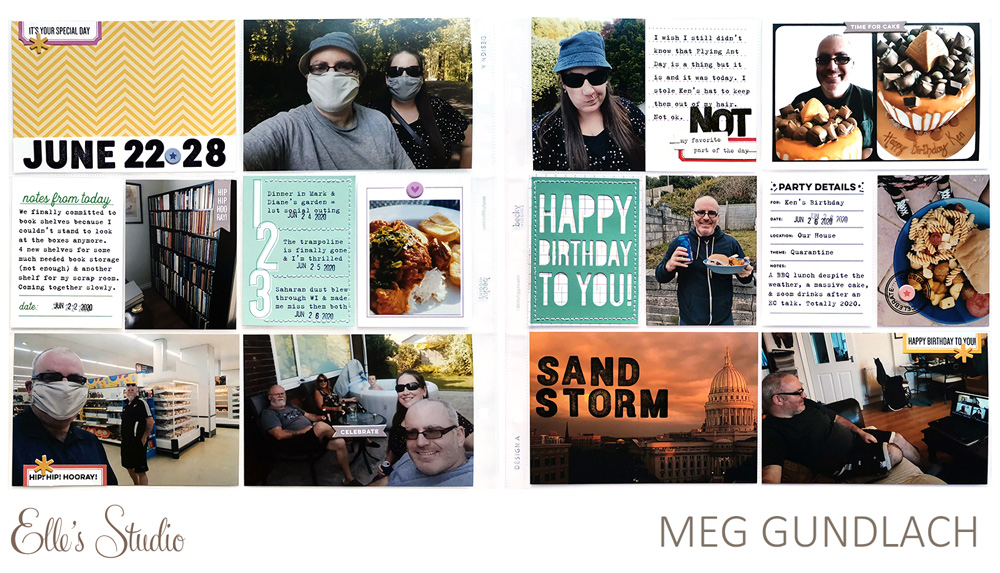
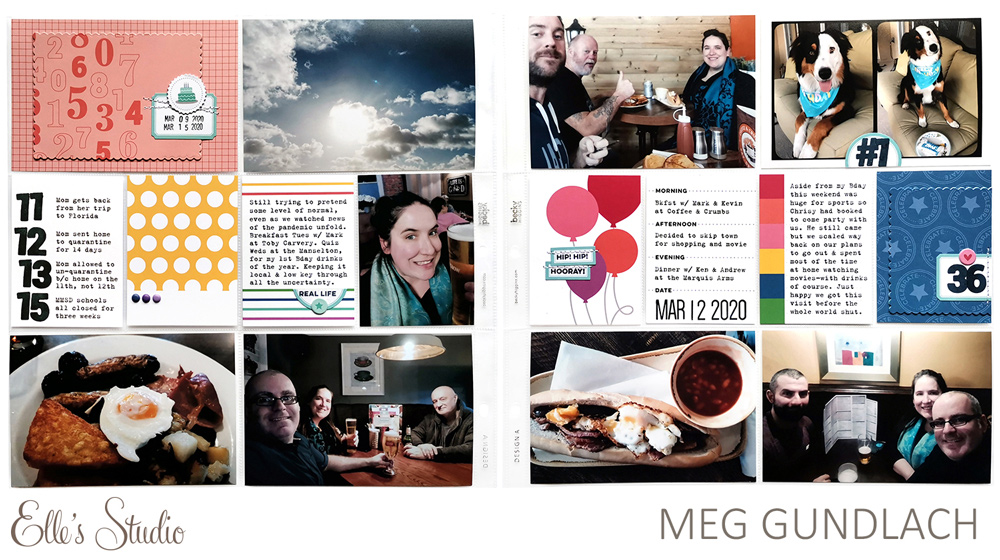
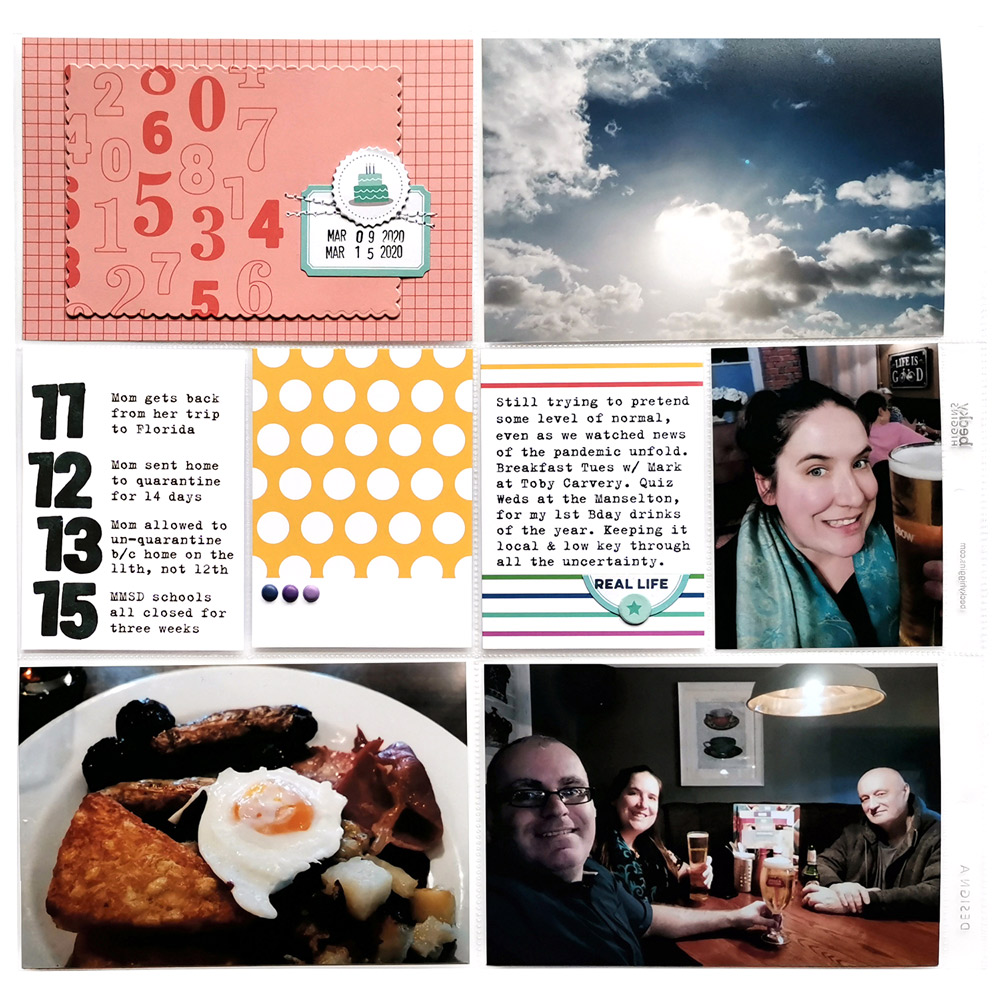
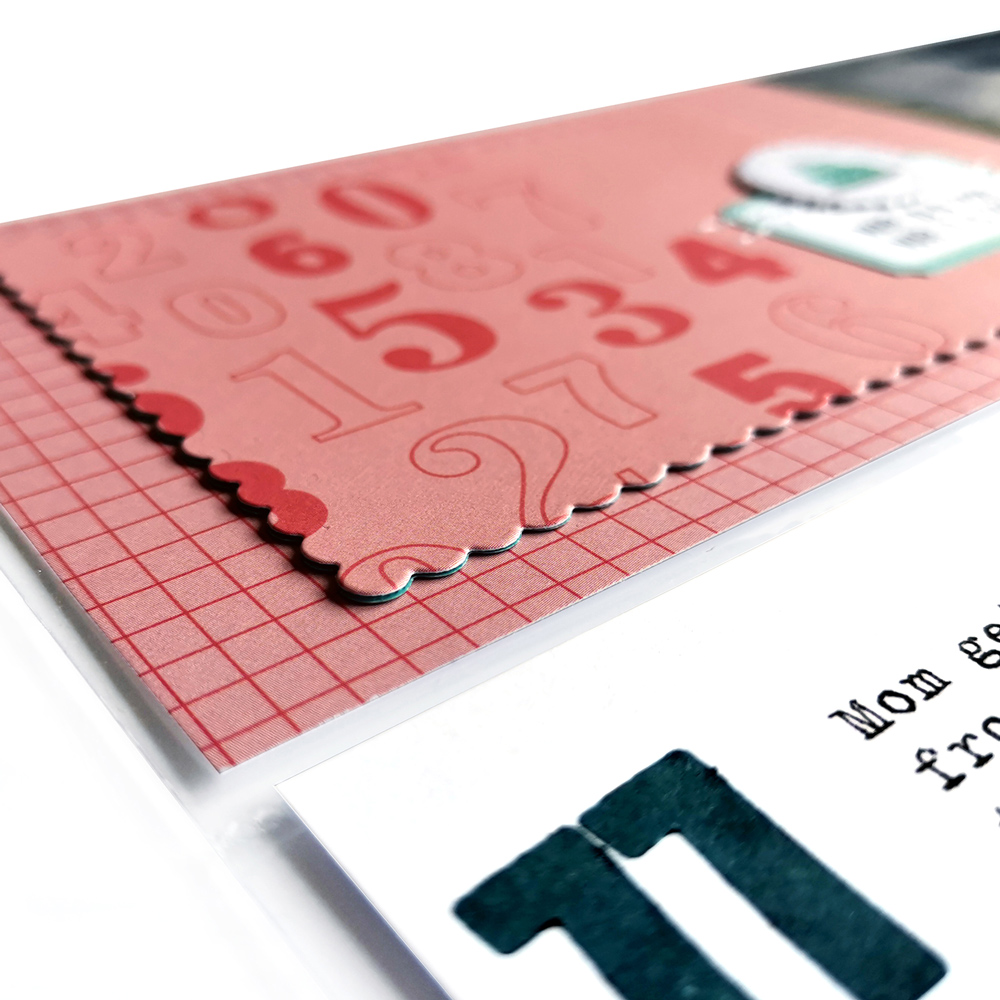
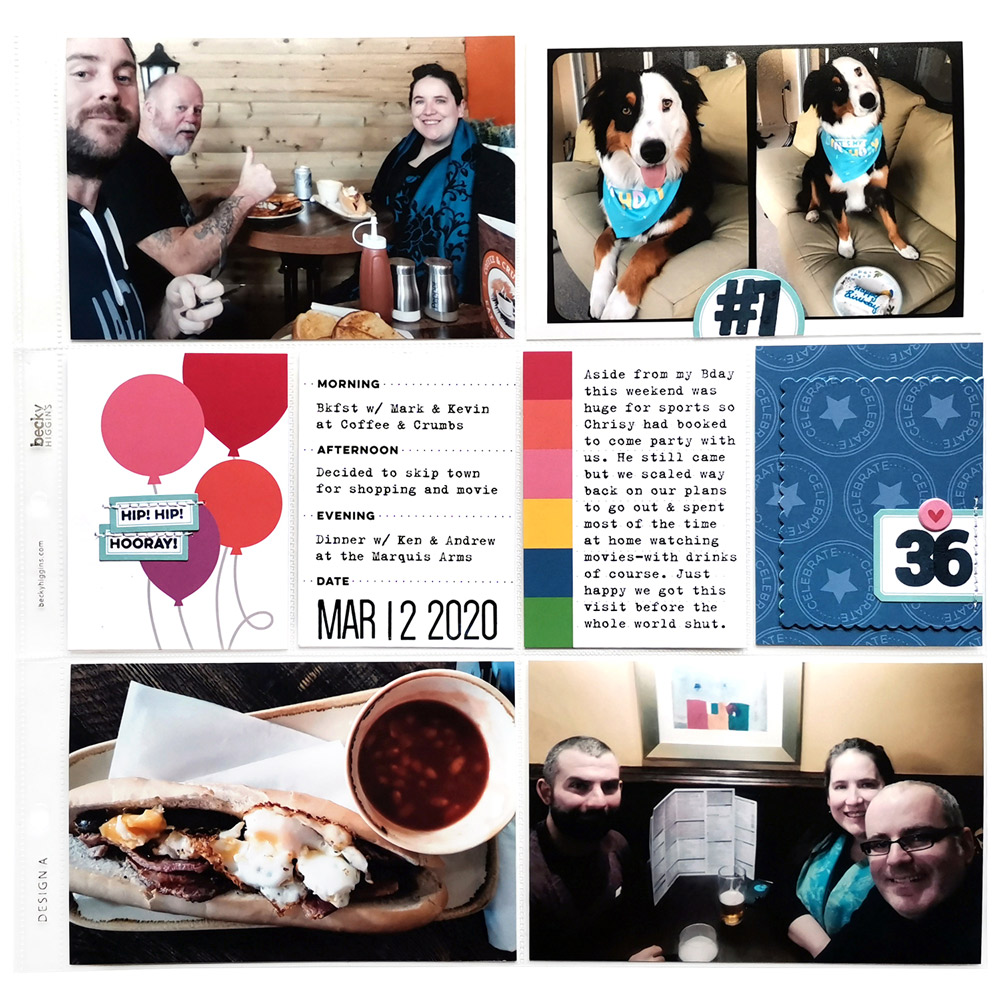
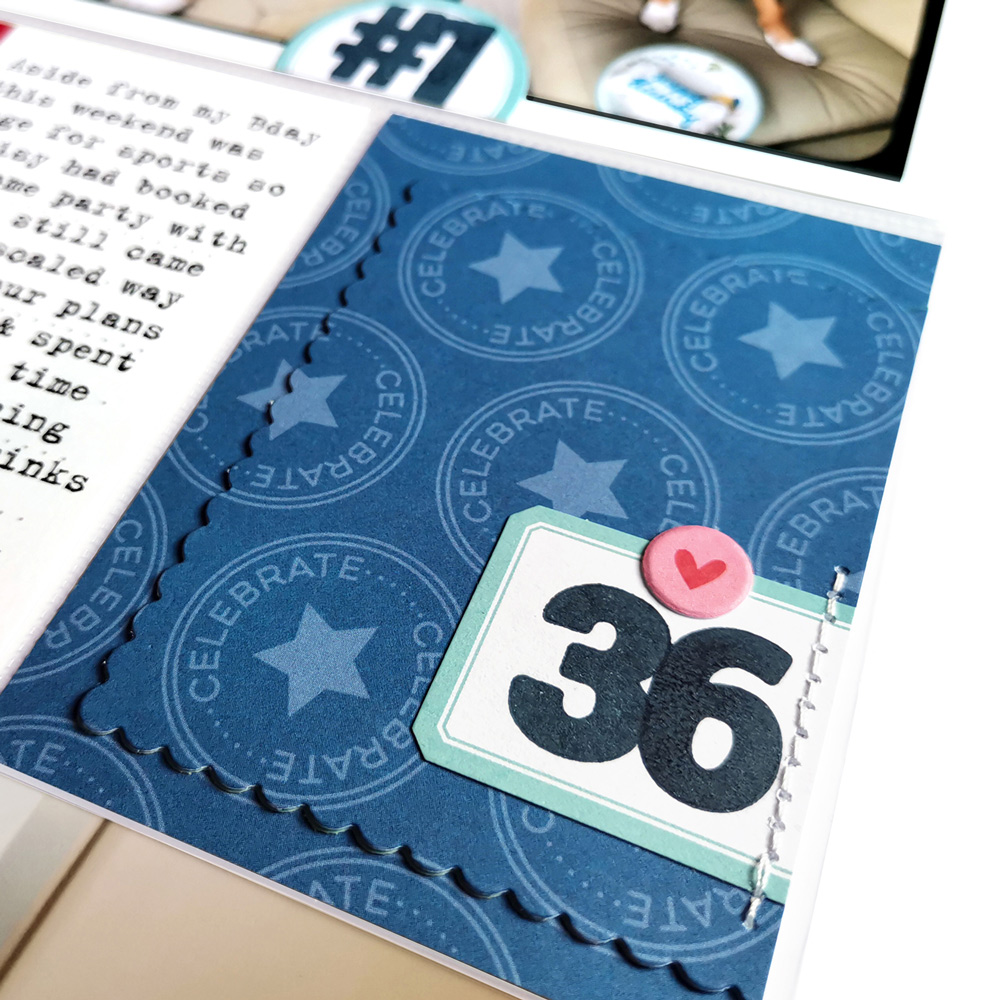
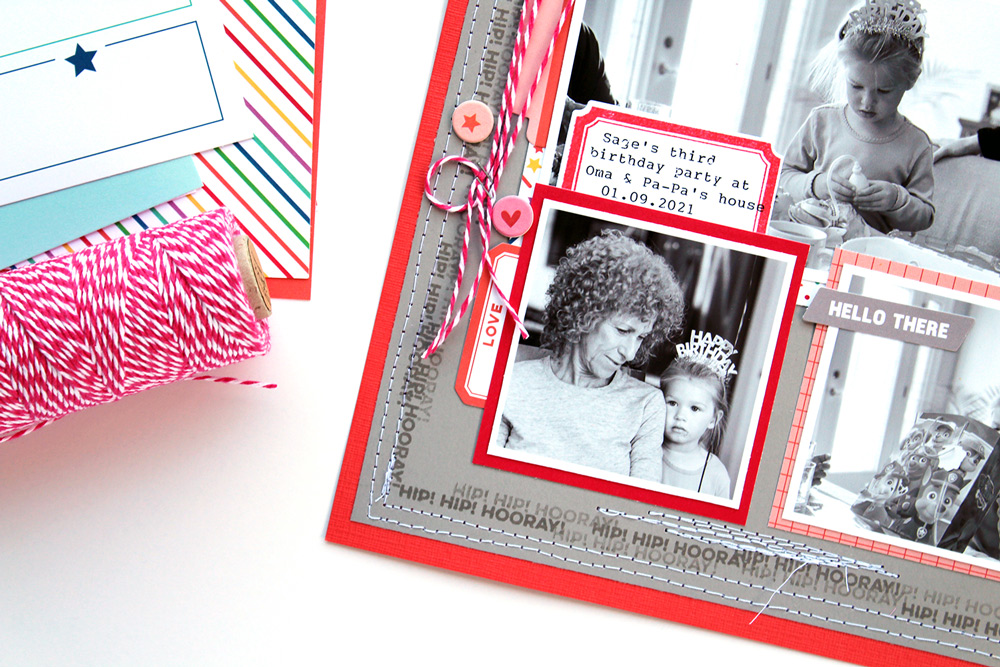
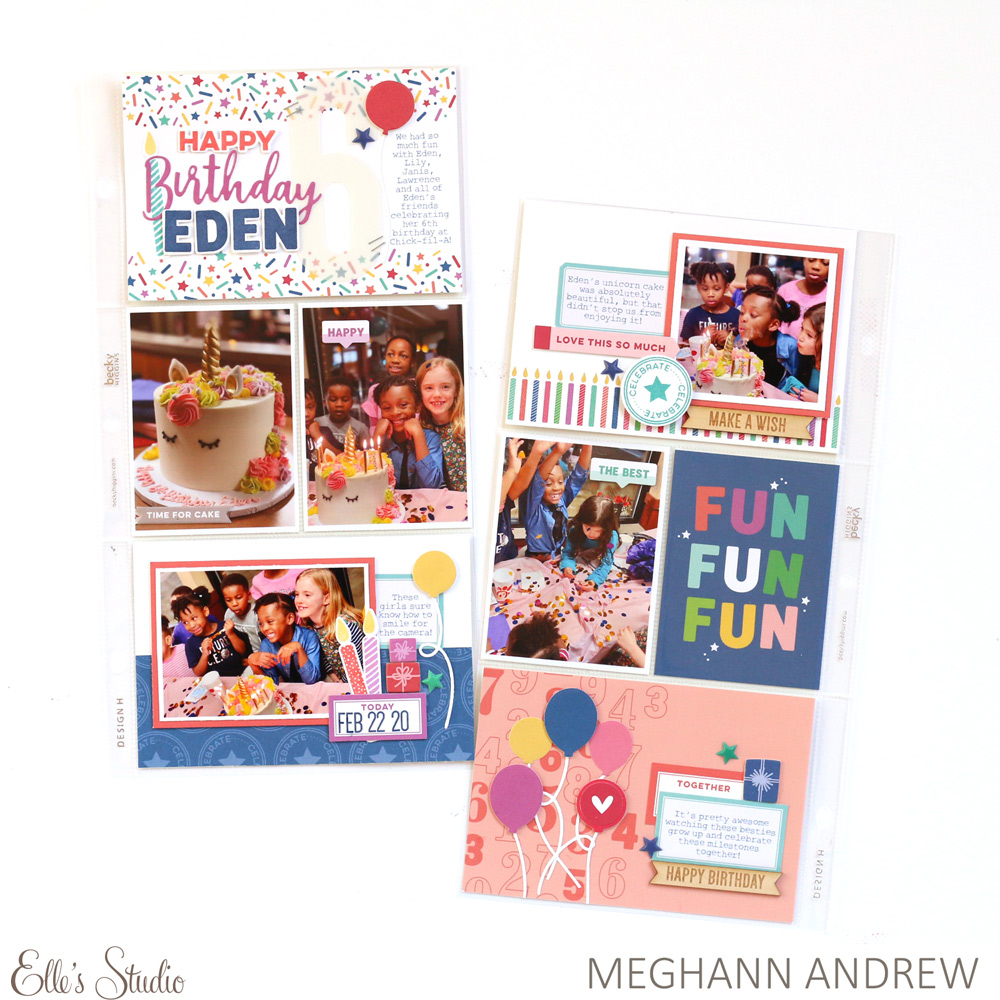
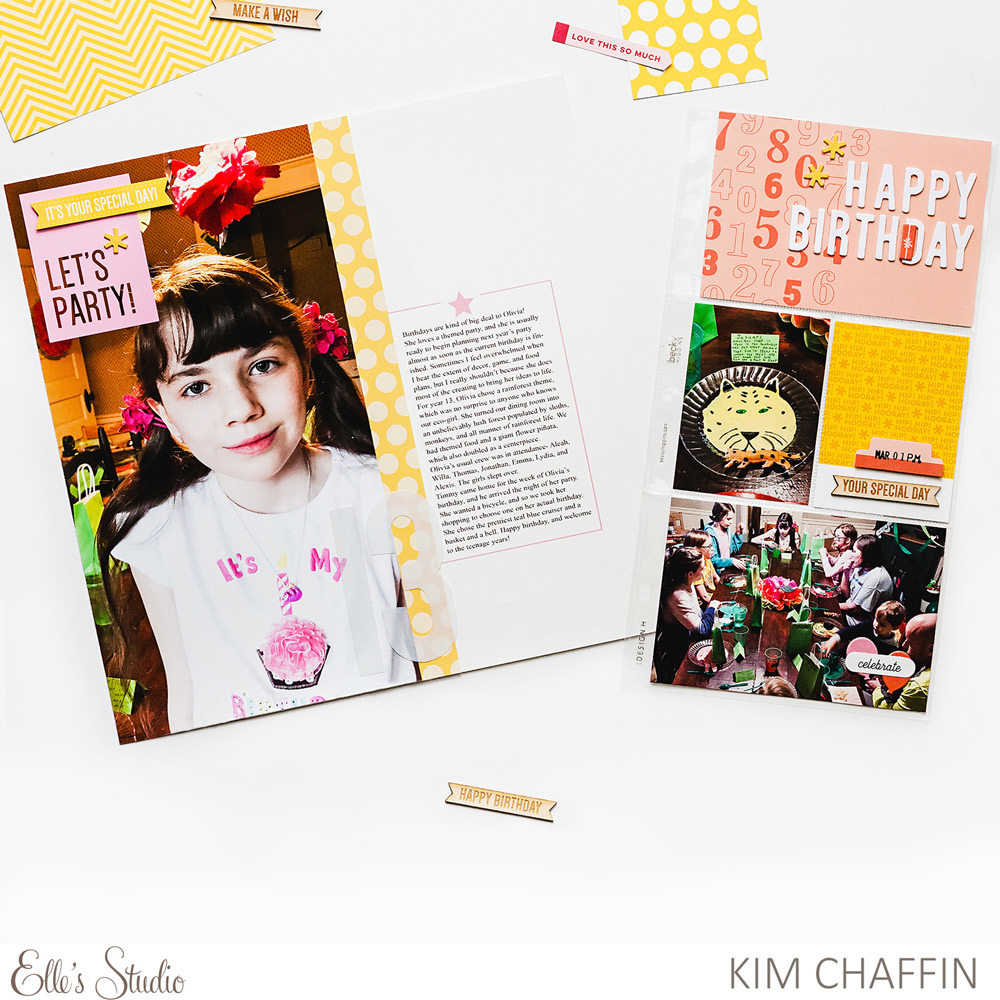
June pocket page by Meg Gundlach – supplies used | March 2021 Kit, Happy Birthday Journaling Tags, Happy Birthday Chipboard StickersTiny Shapes and Dots Puffy Stickers – Cool TonesCelebrate 6 x 8.5 inch Paper StackParker Alphabet StampMake a Wish Stamp, Happy Birthday Metal Die

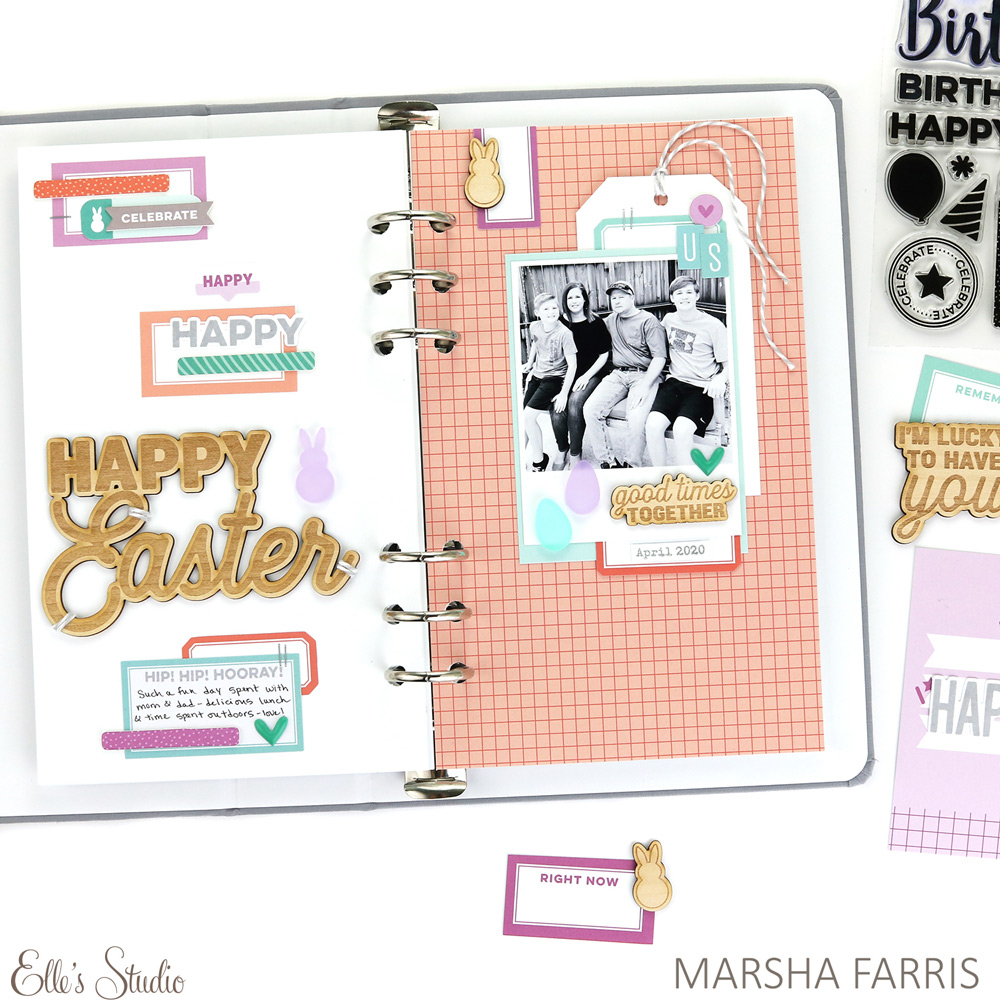
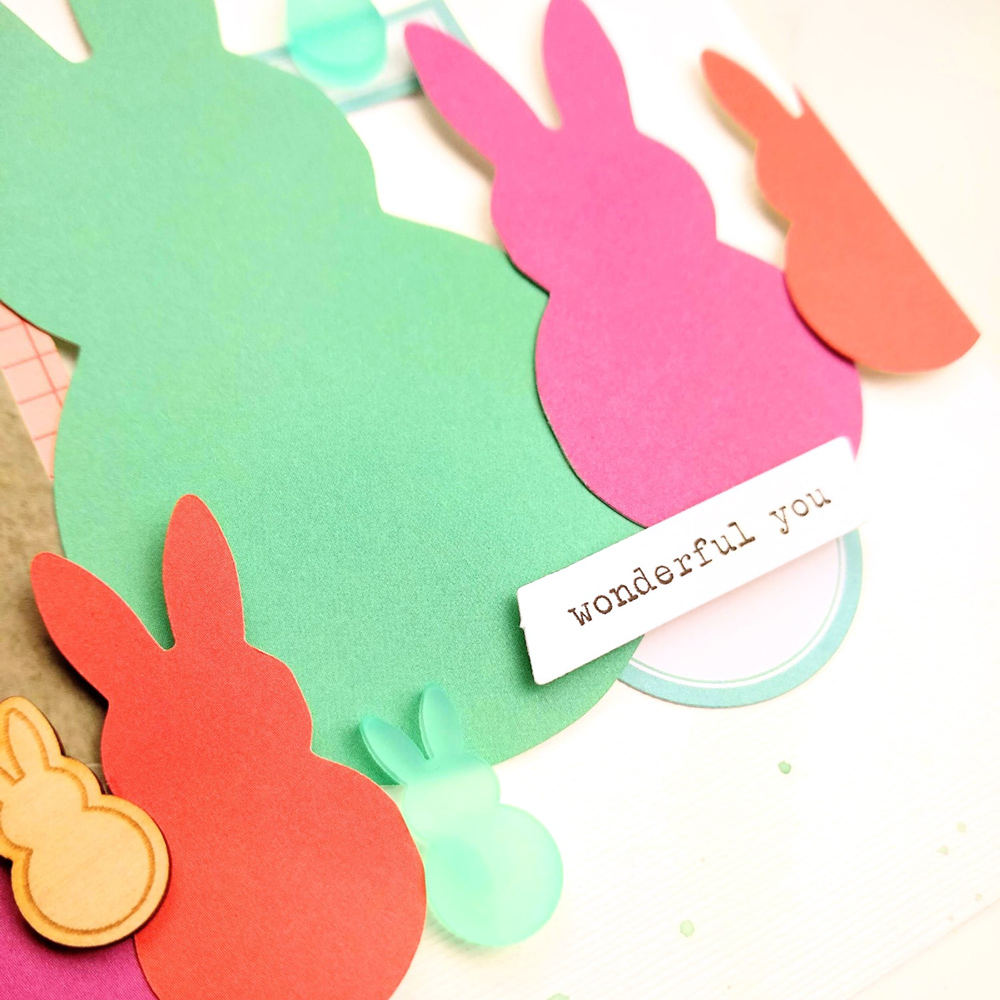
Happy Easter by Marsha Farris – supplies used | March 2021 Kit, March 2021 Print and Cut Labels, Jane Tile Alphabet Cardstock Stickers – Light TealHappy Birthday Chipboard StickersTiny Shapes and Dots Puffy Stickers – Cool TonesHappy Easter Wood Veneers, Tiny Acrylic Eggs and Bunnies, Grateful Wood Veneers, Celebrate 6 x 8.5 inch Paper StackMake a Wish Stamp, Make a Wish Metal Die

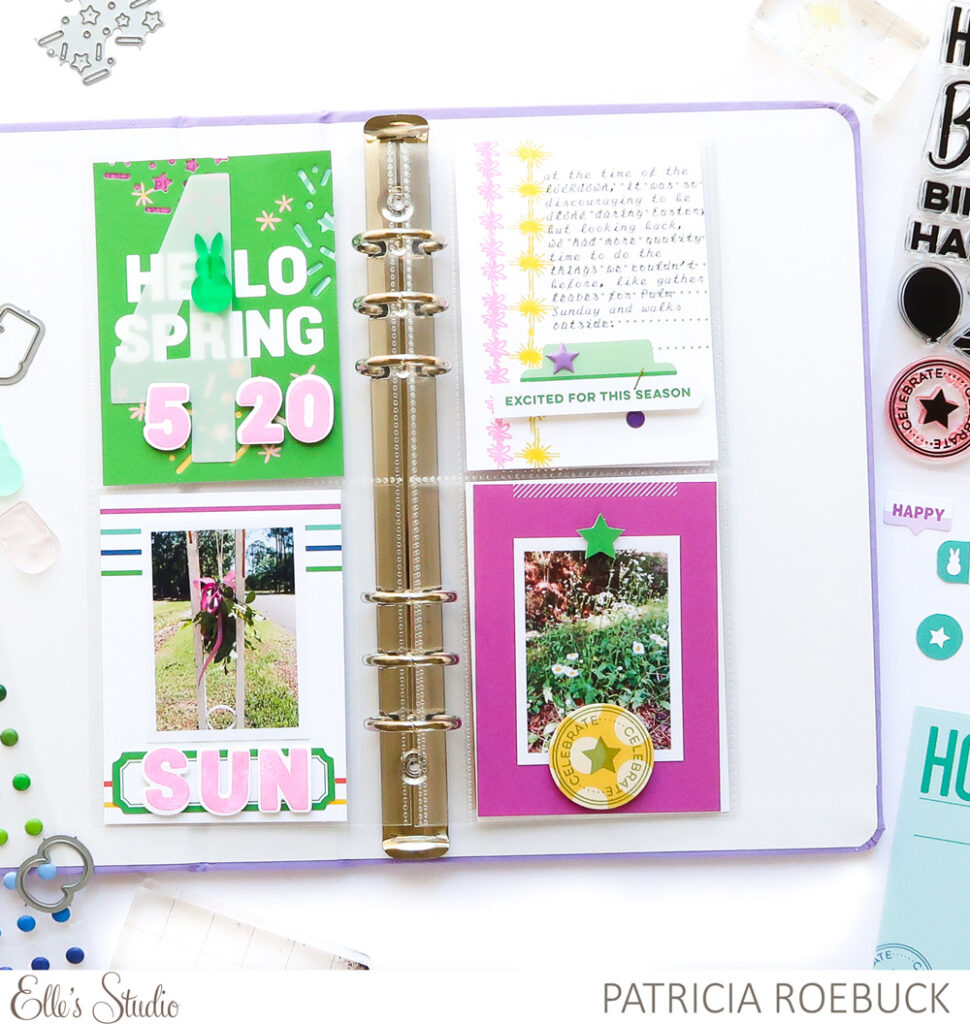
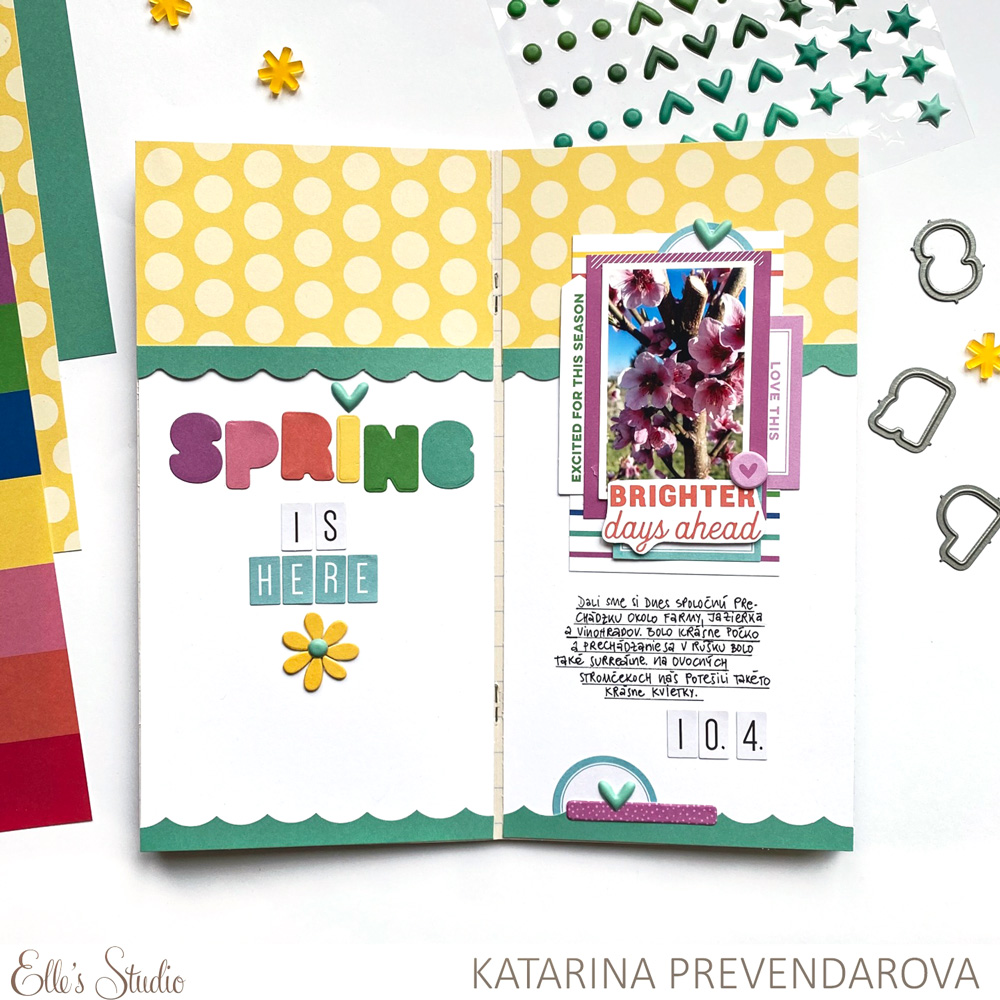
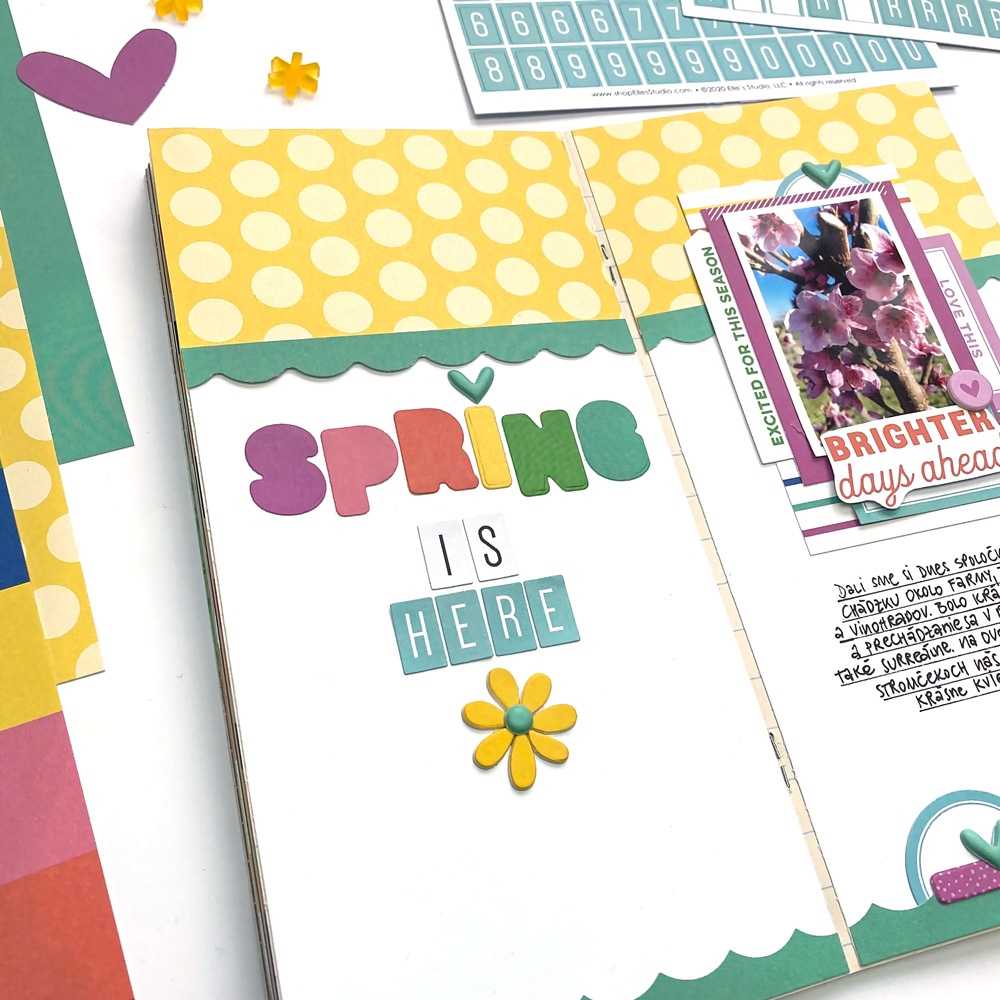
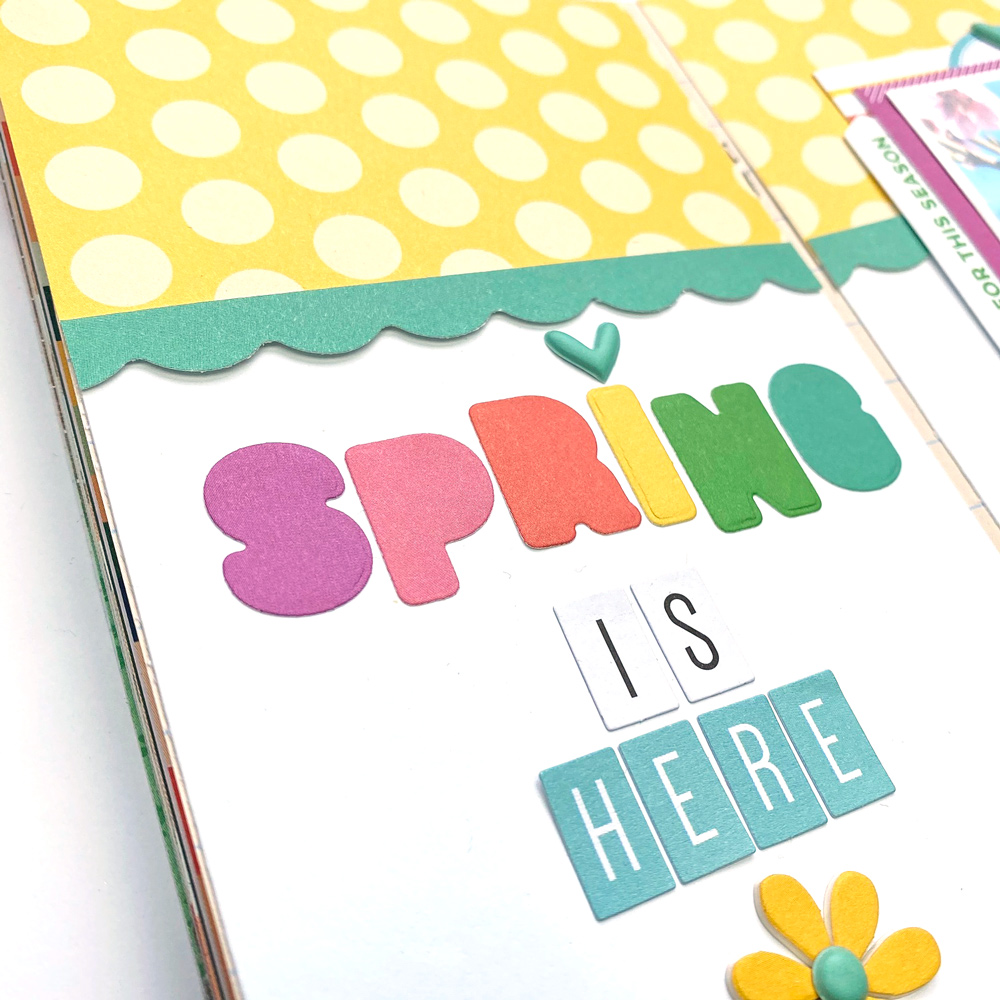
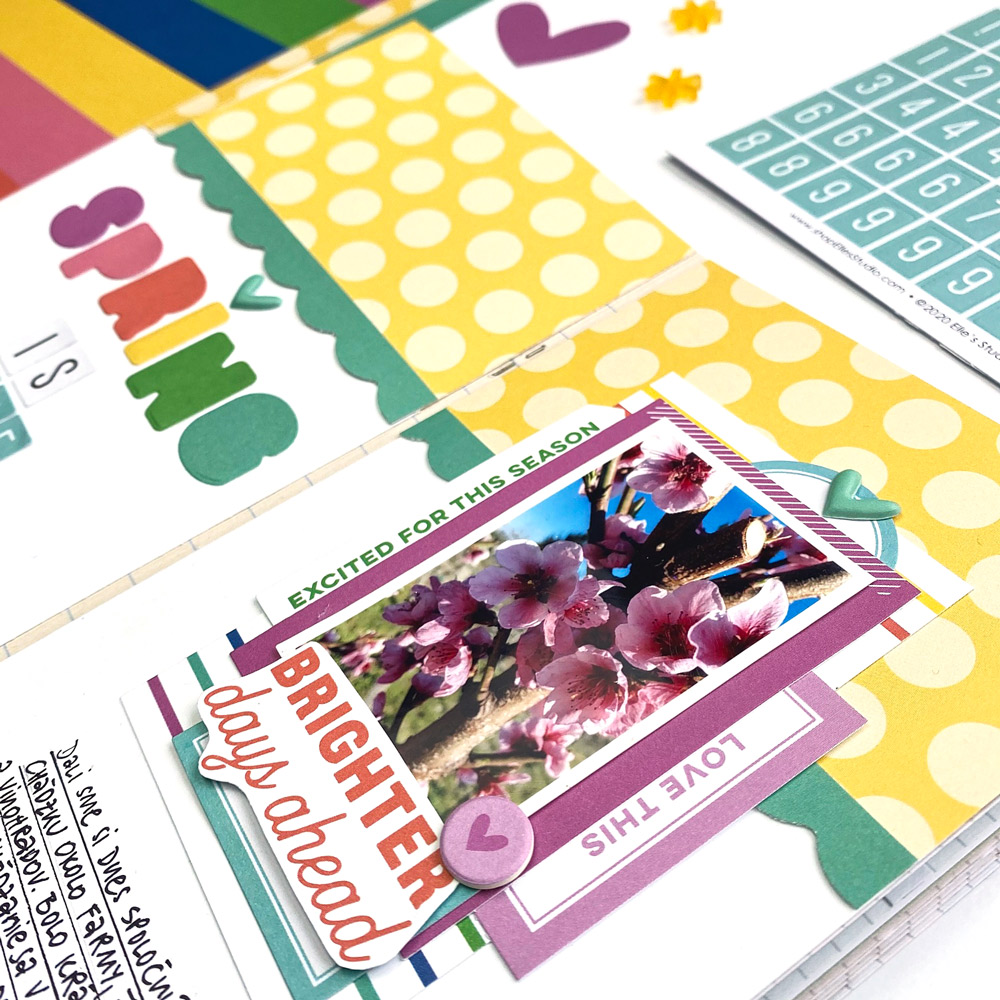
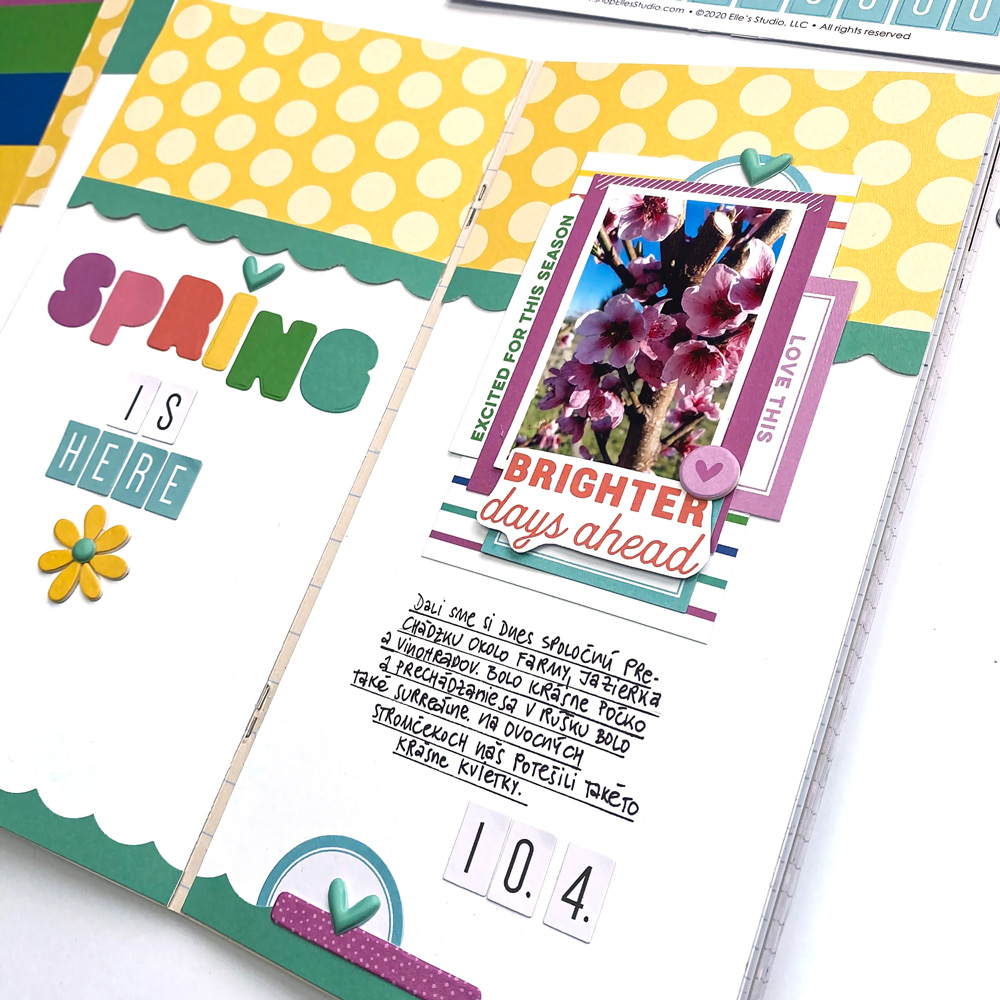
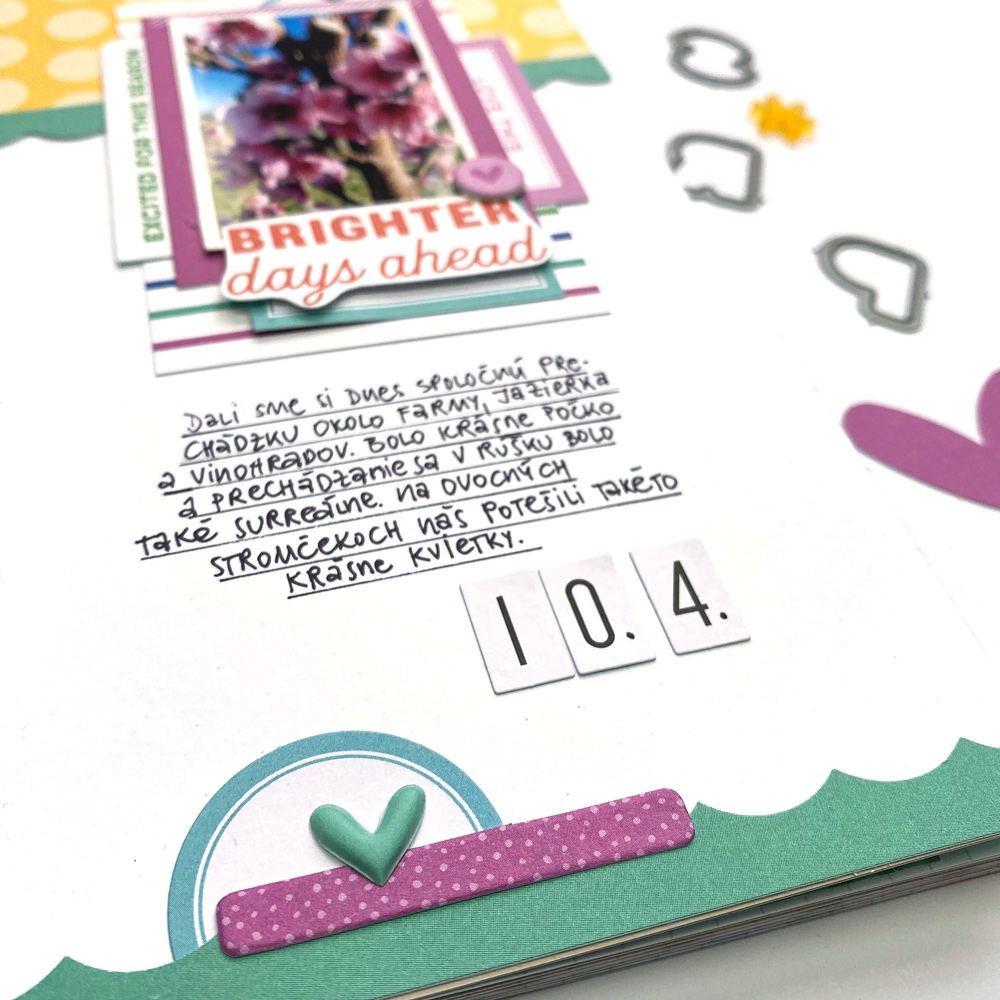
Hello Spring by Patricia Roebuck – supplies used | March 2021 KitTiny Shapes and Dots Puffy Stickers – Cool Tones, Large Acetate Numbers, Tiny Acrylic Eggs and BunniesParker Alphabet StampParker Alphabet Metal Die, Parker Number Stamp, Parker Number Metal Die, Make a Wish Stamp, Make a Wish Metal Die

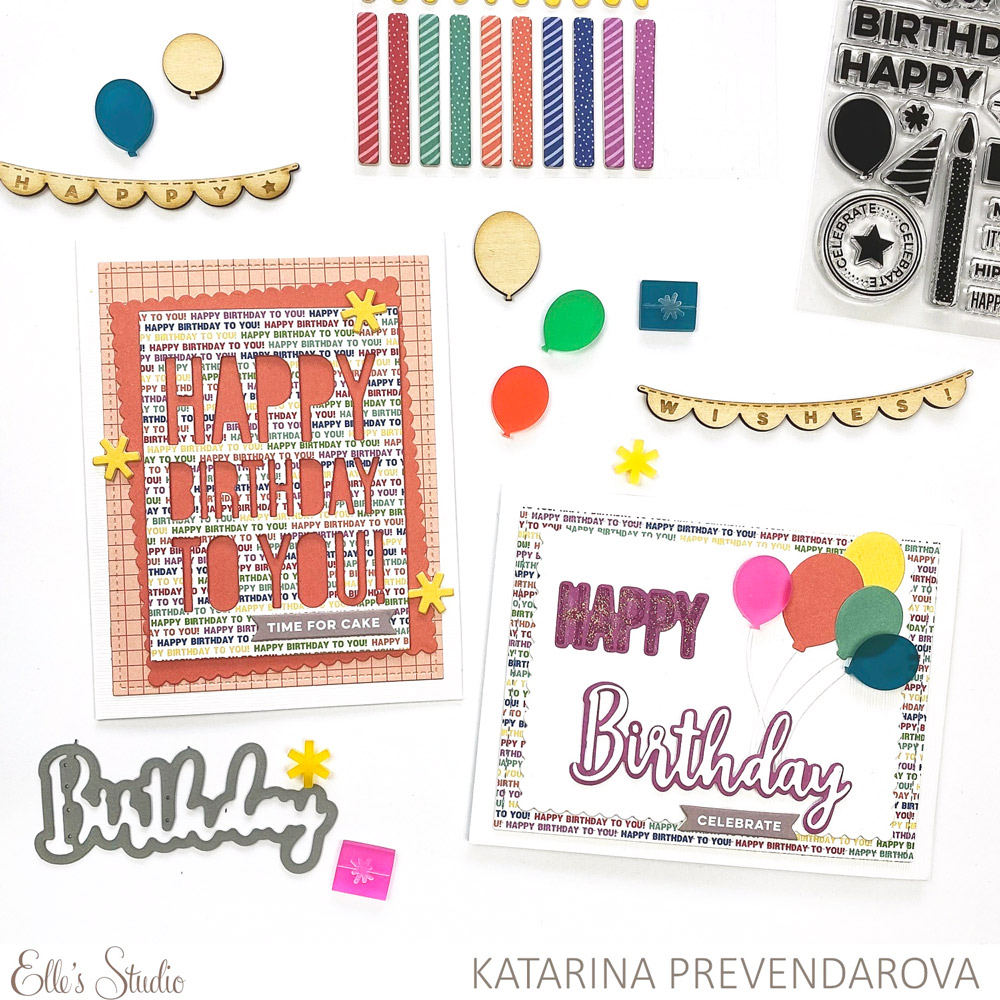
Happy Birthday cards by Katarina Prevendarova – supplies used | Happy Birthday Chipboard StickersAcrylic Balloons and PresentsCelebrate 6 x 8.5 inch Paper StackMake a Wish Metal Die, Layered Card Metal Die

What a great month of amazing team projects! In case you missed volumes one and two, be sure to check them out for even more amazing designs! We can’t wait to see what YOU create, too! Share your projects in our Facebook Group, or on Instagram using the hashtag #EllesStudio!

Spring in Full Color with Katarina Prevendarova

Hi, friends. It’s Katarina with you here again. Today I am really excited to share traveler’s notebook inspiration with you using the gorgeous March kit and add-ons.

Supplies | March 2021 KitMarch 2021 Labels, Jane Tile Alphabet Cardstock Stickers – Light Teal, Jane Tile Alphabet Cardstock Stickers — White, Light Teal Cardstock Label Stickers, Happy Birthday Chipboard StickersTiny Shapes and Dots Puffy Stickers – Cool Tones, Celebrate 6 x 8.5 inch Paper Stack, Parker Alphabet Metal Die

I was really feeling some positive spring vibes and although there are not too many flowers growing outside yet, I found a nice photo from last year. With my April 2020 TN being still unfinished, the decision was easy.

I used the yellow dotted paper from the new Celebrate Paper Stack in the top part of my spread. Then I used a scalloped border punch to create a little border using the solid green paper from the same paper stack. I didn’t want to waste the excess part of my green paper so it ended up at the bottom edge where it fit perfectly.

Next, I used the new fabulous Parker Alphabet Metal Die and the colorful striped patterned paper from the Celebrate Paper Stack to cut the word SPRING – each letter with a different color. I love how it turned out. These dies work perfect both with or without the newly released stamps.

For the rest of the title, I used the white and the new Light Teal Jane Tile Alphabet Cardstock Stickers. I desperately needed a flower, so I made my own using the little flames from the candles in the Happy Birthday Chipboard Stickers with one of the Tiny Dots Puffy Stickers in the middle. 

I used the right side of my spread for my photo, journaling and a little cluster at the bottom. I backed my photo with two of the journaling tags from the March Kit, two of the Light Teal Cardstock Label Stickers and a light purple March Label. I added a die cut from the kit, fussy cut sentiment from a journaling tag and a little chipboard circle.

To balance my spread, I made a simple cluster at the bottom for which I used the second part of the Light Teal Cardstock Label Sticker, one of the Happy Birthday Chipboard Sticker candles that I adhered horizontally, like a piece of washi tape, and a tiny puffy heart. To create a visual triangle, I added two more hearts from the Tiny Shapes and Dots Puffy Stickers and called my TN spread done.

I really love the positive vibes of the March kit and add-ons. The colors are so vibrant and bright, it was a true pleasure putting this layout together. I hope you try these ideas or this design in your traveler’s notebook, and if you do, don’t forget to share your projects in our Facebook Group or on Instagram using the hashtag #ellesstudio. We love seeing what you create!

Thanks for stopping by today and have a wonderful day!

Sweet Easter Memories with Jody Compton

Hi, Elle’s Studio friends! It’s Jody here, and today I am sharing a colorful Easter layout using the March kit and add-ons, and specifically, the March 2021 Cut Files. Here’s what I created:

Supplies | March 2021 Kit, March 2021 Cut Files, Jane Tile Alphabet Cardstock Stickers – Light Teal, Light Teal Cardstock Label Stickers, Happy Easter Wood Veneers, Tiny Acrylic Eggs and Bunnies, Celebrate 6 x 8.5 inch Paper Stack

The 3″ x 4″ digital card in the March 2021 Cut Files has adorable bunny and egg cut outs. I simply used one bunny in four different sizes and three different colors of solid paper from the Celebrate Paper Stack. I decided to make a loose horizontal design of bunnies to create a shelf for my picture.     

I used the Light Teal Cardstock Label Stickers to anchor some of the bunnies and other small embellishments. The bunnies in the Happy Easter Wood Veneers and Tiny Acrylic Eggs and Bunnies were too adorable to not add, and they gave another layer of texture and color.  

The beautiful large “Happy Easter” wood veneer created the perfect title. It is front and center, so I know exactly what the picture is about. I tucked in a few more Light Teal Cardstock Label Stickers to add the year, to hold a few die cuts from the March Kit and the rest of the cute Tiny Acrylic Eggs

The Jane Tile Alphabet Cardstock Stickers in light teal gave me the perfect excuse to add a sub-title. That chocolate face is the sweetest! I hope my scrapbook page has inspired you to use the March 2021 Cut Files in a fun way to record an Easter memory. Thanks so much for stopping by!

What Easter memories are you recording with our March kit and add-ons? Share with us on Instagram using the hashtag #EllesStudio, or post in our Elle’s Studio Facebook Group! We can’t wait too see your projects!

2020 in Numbers with Meg Gundlach

Hi scrappy friends! It’s Meg here for my turn to wish a very Happy 14th Birthday to Elle’s Studio! The March kit and add-ons were the perfect way to celebrate and if it just happens to have also been my birthday, I was more than willing to share the party! Doesn’t every new release kind of feel like a present anyway? 

Supplies | March 2021 Kit, Happy Birthday Journaling Tags, Light Teal Cardstock Label Stickers, Happy Birthday Chipboard StickersTiny Shapes and Dots Puffy Stickers – Cool TonesCelebrate 6 x 8.5 inch Paper Stack, Make a Wish Stamp, Parker Number Stamp, Dated Stamp, Good Times Tab Stamp, Daily Tabs Stamp, Layered Card Metal Die 

I know I say this all the time, but one of the things I love about having all my photos organized into pocket page albums is that there is a spread waiting for every mood or product. I’ve recently been working to get all of 2020 printed and laid out, so when the March release arrived in all its celebratory awesomeness I decided to jump right into the birthday weeks! 

One year on, this week has become a bit infamous as the point the whole world changed. On a smaller scale, it is also known as my birthday week. Both the week and the spread walked the line as transition from the ‘before’ and ‘after’ times. Lots of cancelled plans. Lots of ‘the last time we….’ moments. It seemed like as good a page to jump into 2020 documentation as any.  

I set a mini goal this year of making one date tag a month that is just a little more creative than my normal go-to. This month I decided to include more of the patterns by using the fun scallop from the Layered Card Metal Die to trim down my favorite tag from the March 2021 Kit. Because I like to keep my pockets as flat as possible, I cut one layer of teal cardstock to pop it up with—it adds just enough dimension to be noticeable and there are little peeks of teal at the edges that coordinate with the rest of the spread.   

I used the scallop die on the right side as well, this time cut from the Celebrate 6 x 8.5 inch Paper Stack to layer the same pattern. Just a little nod to the title tag at the end of the spread. The beauty of making your repeated technique tool-based is that you can do it over and over again. Bonus points for the number of label choices included in the Light Teal Cardstock Label Stickers!  

I’m a huge fan of using numbers in my yearly albums and am already a little obsessed with the bold chunky Parker Number Stamp. On this spread, I used it to record my neph-pup’s first birthday, my own current age (a little higher than one…), and a simple timeline of the unfolding events. For better or worse, I suspect my 2020 album is going to be full of milestones, statistics, counts and dates. Starting with a layout using numbers as the main embellishments made perfect sense to me. I also used the amazing Large Acetate Numbers to make my cover page, which you can check out here.   

Sitting down to an entire year’s worth of memories can be intimidating, especially when that year was 2020. If you needed to take a little pause last year it is definitely not too late to go back. Even though my album spans from January through December there is no rule that says I need to make the pages in order—I just jumped right into a spread that inspired me and I will figure out the rest. What is a project that you would like to make progress on right now?   

We’d love to see how you use our March kit and add-ons in pockets! Share with us in our Elle’s Studio Facebook Group, or on Instagram using the hashtag #EllesStudio!

Birthday Week: Capturing Birthdays in Pockets with Shannon Dombkowski

It’s our final day of our 14th Birthday Week celebration here on the blog, and we couldn’t forget about one of our favorite ways to record memories: pockets! Shannon Dombkowski is the perfect team member to finish up our week of inspiration, with beautiful and colorful pocket page inspiration, and a reminder to focus on the facts of the person being celebrated! Let’s take a look!

Hey there, scrappy friends! Welcome to the last day of Birthday Week here on the Elle’s Studio blog. I hope you’ve been inspired by all of the birthday projects shared by the team this week! Today, I’m going to share a new pocket page layout with you created using the amazing March kit and add-ons. I create monthly pocket pages, so I’ve decided that each of my daughters will get a full page decided to their birthday in their respective birthday months.

First, let me show you the full page before we get into details. This page celebrates my youngest daughter who turned 7 in January 2021.

Supplies | March 2021 Kit, Birthday Cut Files, Hip Hip Hooray Printables, Happy Birthday Journaling Tags, Jane Tile Alphabet Cardstock Stickers – Light Teal, Happy Birthday Chipboard Stickers, Tiny Shapes and Dots Puffy Stickers – Cool Tones, Happy Birthday Wood Veneers, Acrylic Balloons and PresentsCelebrate 6 x 8.5 inch Paper StackMake a Wish Stamp, Parker Number Stamp, Mini Dated Stamp, Parker Number Metal Die

Let’s first look at what I consider to be the title card. I used the Happy Birthday Wood Veneer piece as the title. The tag came with what I’m calling a “pre-stamped” image with the circles. Instead of using the blank space for journaling, I added the wood veneer, but it didn’t seem like quite enough. Of course, I had to add the date at the bottom using the Mini Dated Stamp. Then, I pulled out the Make a Wish Stamp to add a sentiment under the word HOORAY! Using a stamp in a sans serif font, like the rest of the words on the tag, helps it look cohesive. Finally, I just had to add a yellow acrylic asterisk from the Acrylic Balloons and Presents to fill in the little bit of space.

Next, let’s look at the “7” tag. First of all, how perfect are the Parker Alphabet and Number Stamps? I love this font! I chose a patterned background and matching solid from the Celebrate 6 x 8.5 inch Paper Stack. My idea was to scatter solid-colored “7s” around the page, but I wanted to take it up a notch. Hello, clear embossing powder! I stamped three and then embossed them with clear embossing powder. The look is subtle, which is exactly what I wanted against the patterned background. Then, I used the Parker Number Metal Die to cut out seven “7s”. To take it one step further, I used a dimensional foam adhesive to pop the embossed numbers off the page just a little bit. Very subtle details for a bigger impact!

Finally, let’s look at my flip-up journaling tag. If you look back at my full-sized page above, you’ll see that the tag in the middle left pocket says “faves.” If you were flipping through my album, you’d be able to flip that up and see some of my daughter’s favorite things at this very moment. I love this kind of journaling for birthdays. It’s always so fun to look back and see what has changed and what has stayed the same. Since my journaling didn’t take up the full tag, I decided to get creative at the bottom. I pulled the Balloons digital PNG file from the Birthday Cut Files into Photoshop. Next, I snipped the balloons so each was its own layer. Then, I arranged them at the bottom of my card. Finally, I used the dropper tool to recolor the balloons to match the kit. After printing, I hand-drew the balloon strings. I’d never used a cut file in that way before! I recommend giving it a try if you don’t have access to an electronic cutting machine.

I hope that I’ve given you some ideas about how you can document birthdays using pocket pages. It doesn’t always have to be about the party, in fact, we didn’t have a party this year! I prefer to focus on the particulars about my daughters at that period in time so I can look back year after year. I can’t wait to see what you create!

Show us how you’re using our products in pockets! Post your pocket pages to our Elle’s Studio Facebook Group or on Instagram using the hashtag #EllesStudio!

Birthday Week Sketch Day with Melissa Mann

We couldn’t have a Friday blog post during our birthday week without a sketch for you, and we’re excited to share a birthday-themed layout just perfect for using those new March kit and add-ons that may be sitting on your desk! Plus, Melissa Mann is sharing some amazing inspiration using the sketch, too! Let’s take a look!

Hey there, everyone! This is Melissa with you here today and I’m excited to share a new layout featuring a new sketch and lots of the new March birthday goodies! Let’s check out the sketch first:

And take a look at the layout I created using it as inspiration:

Supplies | March 2021 Kit, March 2021 Print and Cut Labels, Happy Birthday Chipboard Stickers, Large Acetate NumbersCelebrate 6 x 8.5 inch Paper Stack, Make a Wish Stamp, Parker Alphabet StampParker Alphabet Metal Die, Labels Stamp, Labels Metal Die

I really had a LOT of fun with this sketch. I love a sketch that includes a bunch of pictures. A lot of times, I tend to be a one or two picture layout girl and I knew this would be the perfect sketch to document a bunch of photos I took at my niece’s third birthday party earlier this year. 

I stuck pretty much as close to this sketch as I could. I really loved the design and all the fun elements that supported the layout, such as the balloons and the Large Acetate Numbers. To be honest with you, the size of the large acetate numbers was somewhat daunting to me, but I LOVED how they were used on this project. The opaque nature of them really helped them to not take away from the other things going on with the layout while providing a fun design element! 


Of course, I loved the double line of stitching around the border of the layout as well. As I’m sure you all are aware, I love my sewing machine. After I stitched the lines around, I felt like I wanted to add a little extra pizazz and used some tone on tone stamping around the inside of the stitched lines using the Make a Wish Stamp. This is such a great stamp that can be used on layouts, cards, or pocket pages! So many great sentiments!

A couple of tips if you decide that you want to take on the sketch:

1. Don’t worry about trying to keep all five blocks on the sketch as photos; these spots could easily become journaling boxes or embellishment boxes! You could trim down some of the 3″ x 4″ journaling cards in the March 2021 Kit to use in their place or you could use one of the 4″ x 6″ journaling cards in place of one of the bigger photo spots.

2. If you don’t have a sewing machine, a good old pen and ruler will work just as well! You can create faux-stitching lines around your layout OR you could add a stamped border like I did here with the Make a Wish Stamp!

We can’t wait to see how you interpret this sketch! Be sure to share with us in our Elle’s Studio Facebook Group or on Instagram using the hashtag #EllesStudio! Thanks for stopping by today!

Birthday Week: Terrific Tags with Nathalie Leonelli

Tags are always a great thing to have around! They can be used to dress-up a simple gift bag, accent a wrapped present, or make a quick and easy card when you are in need of a handmade greeting in a hurry! To continue our Birthday Week party, lets get some ideas from team member Nathalie Leonelli on how to create gorgeous tags using our March kit and add-ons!

Let’s continue with our weeklong birthday celebration! It’s Nathalie here today to share some gift tags created with the March kit and extras. I love having a small stash of ready-made tags for last minute birthday gifts. 


Supplies | March 2021 Kit, Happy Birthday Chipboard Stickers, Happy Birthday Wood Veneers, Acrylic Balloons and Presents, Celebrate 6 x 8.5 inch Paper StackMake a Wish StampMake a Wish Metal Die, Happy Birthday Metal Die

Some of the new add-ons totally inspired me to get creative, but I made a point to only use tags from the fun March Kit as bases.

To create each tag, I simply cut notches in the top corners and punched a hole in the middle of the selected tags from the March Kit. I love the natural look of the Happy Birthday Wood Veneers against the contrasting black sentiments added with the Make a Wish Stamp. I have used this stamp set on so many projects already! It is, along with its matching metal dies, a must-have this month!

To add more details, I used a few die-cuts from the kit and hand stitched each tag with matching embroidery thread. The mix of textures pleases me to no end and I think these gift tags will look so pretty on top of my kraft wrapping paper!

Whether you make gift tags, cards or filler cards for your pocket pages, I hope this post gave you some fun ideas using the new March kit and add-ons. Finally, I would like to wish Elle’s Studio a very happy 14th birthday!

Birthday Week March Design Team Inspiration: Volume Two

We’re still continuing Birthday Week here on the Elle’s Studio blog, and today’s Design Team Inspiration post is all about… you guessed it: birthdays! Check out these ten wonderful pocket pages, layouts, card designs and more using our new March kit and add-ons!

Happy Birthday Eden by Meghann Andrew – supplies used | March 2021 Kit, March 2021 Labels, Light Teal Cardstock Label StickersHappy Birthday Chipboard StickersTiny Shapes and Dots Puffy Stickers – Cool TonesHappy Birthday Wood Veneers, Large Acetate Numbers, Celebrate 6 x 8.5 inch Paper StackParker Alphabet StampParker Alphabet Metal DieMake a Wish StampMake a Wish Metal DieMini Dated Stamp

Happy Birthday by Sarah Kee – supplies used | March 2021 KitHappy Birthday Chipboard StickersTiny Shapes and Dots Puffy Stickers – Cool Tones, Acrylic Balloons and Presents, Large Acetate NumbersCelebrate 6 x 8.5 inch Paper StackMake a Wish StampDaily Tabs StampMake a Wish Metal Die

Birthday cards by Nathalie Leonelli – supplies used | March 2021 Kit, Light Teal Cardstock Label StickersHappy Birthday Chipboard Stickers, Celebrate 6 x 8.5 inch Paper Stack, Make a Wish Stamp, Noted Stamp, Make a Wish Metal Die, Layered Card Metal Die

Hello There 45 by Junell Kruzel – supplies used | March 2021 Kit, Light Teal Cardstock Label Stickers, Jane Tile Alphabet Cardstock Stickers – Light TealTiny Shapes and Dots Puffy Stickers – Cool TonesHooray Wood Veneer Banners, Large Acetate NumbersCelebrate 6 x 8.5 inch Paper Stack

So Very Happy by Jennifer McMurtrey – supplies used | March 2021 KitHighlights From This Month 3 x 4 Inch Journaling Tags, Happy Birthday Chipboard Stickers, Tiny Shapes and Dots Puffy Stickers – Cool TonesAcrylic Balloons and PresentsCelebrate 6 x 8.5 inch Paper StackParker Alphabet StampParker Alphabet Metal Die

Happy Birthday by Kim Chaffin – supplies used | March 2021 Kit, Hip Hip Hooray Printables, Happy Birthday Chipboard Stickers, Large Acetate NumbersHappy Birthday Wood Veneers, Celebrate 6 x 8.5 inch Paper Stack, Medium Jane Alphabet Stamp – Solid

Happy Birthday by Jennie McGarvey – supplies used | March 2021 KitHappy Birthday Chipboard StickersTiny Shapes and Dots Puffy Stickers – Cool Tones, Hooray Wood Veneer Banners, Large Acetate Numbers, Acrylic Balloons and PresentsCelebrate 6 x 8.5 inch Paper Stack

Happy Birthday by Aimee Mertell – supplies used | March 2021 Kit, Happy Birthday Chipboard StickersLarge Acetate NumbersHappy Birthday Wood VeneersCelebrate 6 x 8.5 inch Paper Stack, Make a Wish Metal Die

Hip Hip Hooray by Michelle Flynn – supplies used | March 2021 Kit, Birthday Cut FilesTiny Shapes and Dots Puffy Stickers – Cool Tones, Happy Birthday Wood Veneers, Hooray Wood Veneer BannersCelebrate 6 x 8.5 inch Paper Stack,  Make a Wish Stamp, Parker Number StampGood Times Tab Stamp, Make a Wish Metal Die

Happy Birthday by Jody Compton – supplies used | March 2021 Kit, March 2021 Labels, Jane Tile Alphabet Cardstock Stickers — WhiteAcetate Hearts, Happy Birthday Wood VeneersCelebrate 6 x 8.5 inch Paper StackMake a Wish Stamp

In case you missed the start of our celebration week, check out Amanda-jayne’s amazing shaker cards featured Monday, and Suzanna’s wonderful layout shown yesterday! We can’t wait to see your birthday memories recorded with our products! Be sure to share them with us in our Elle’s Studio Facebook Group or on Instagram using the hashtag #EllesStudio!

Birthday Week: Hip Hip Hooray On Repeat with Suzanna Lee

Welcome to day two of our 14th birthday celebration! Today we’re excited to share a new birthday-themed layout from Suzanna Lee, who is sharing some wonderful tips on how to use our March kit and add-ons to really add that “wow” factor to your project! Let’s take a look!

Hiya Scrappy Peeps! It’s Suzanna here today! Elle’s Studio is celebrating a birthday this month and what better way to celebrate than with a super special birthday release! I’m using these fabulous products to document celebrating my son’s 18th birthday.

Supplies | March 2021 KitBirthday Cut Files, Happy Birthday Journaling Tags, March 2021 Labels, Happy Birthday Chipboard Stickers, Hooray Wood Veneer Banners, Celebrate 6 x 8.5 inch Paper StackMake a Wish Stamp, Parker Number Stamp, Happy Birthday Metal DieMake a Wish Metal Die, Parker Number Metal Die

The highlight of this layout is, in my opinion, the top background. Self made, using one of the Birthday Cut Files and the asterisk stamp from the Make a Wish Stamp. Yup, a digital cut file, you read that correctly! I used the sketch pen function in Silhouette Design Studio with a pen and “sketched” out the saying “Hip Hip Hooray” on repeat. I intentionally left a gap between each saying to stamp the asterisks in between. It’s like confetti falling in motion down the page.

The Happy Birthday Journaling Tags are perfect not only for journaling but as a center piece to the page. The color inspiration for the page came from the blue, green, yellow and aqua balloon card found in this pack and serve as embellishment. Stamping the first letter of the birthday person’s name or their age would be a fun way to dress them up a little bit. Possibly even hand stitch around the balloons?

There are lots of embellishments available to add that celebratory feeling to your paper project and document a special memory; acrylic balloons and presents, chipboard stickers, stamps and dies, birthday die cuts and not one but two wood veneer packs! I used two of the Hooray Wood Veneer Banners as swags to tie the top, left embellishment cluster to that on the bottom, right of the page. The stamped Parker Numbers look just like the balloons that Nikolas is holding, wouldn’t you agree?

This top, right embellishment cluster is all die cuts from the March Kit. Layer them up and it’s a party in a cluster!

I do have a process video that will be up on my YouTube channel should you want to watch how everything came together.

Thanks for stopping by the blog today! I hope you’ll give some of these ideas and techniques a try on your next celebratory page!

“Pin” Suzanna’s awesome birthday layout to help you create when your March kit and add-ons arrive, and be sure to share what you’ve created inspired by her layout! Post your project to our Elle’s Studio Facebook Group, or on Instagram using the hashtag #EllesStudio!

Birthday Week: Shaking Things Up with Amanda Baldwin

We are so excited to celebrate our 14th birthday with you this month, and this week, our design team is joining in on the fun with a week of birthday-themed projects! From cards to gift ideas, we think you’ll love what they have in store for you! We’re kicking things off today by shaking things up—in card form! Let’s get some great tips from Amanda-jayne Baldwin on how to create shaker cards easily by using our March kit and add-ons!

Hi Elle’s Studio Friends! Hip, hip, hooray, it’s Elle’s Studio’s 14th birthday! Yay! It’s Amanda here, and to celebrate this momentus occasion, I have created a twin set of super fun, shaker cards! Woohoo! Let’s get this party started! 

Supplies | Happy Birthday Journaling TagsHappy Birthday Chipboard Stickers, Happy Birthday Wood Veneers, Acrylic Balloons and PresentsCelebrate 6 x 8.5 inch Paper StackMake a Wish Stamp, Layered Card Metal Die, Acrylic Stamp Block 3 x 4 inches

Oh my goodness! How cute ‘n’ fun is this card duo?! Oh, and did you spy my Elle’s Studio pen? All current and new subscribers will receive it with their March Kit subscription—another great reason to start a subscription! Just sayin’!

Let’s take a better look at each individual card…

What a fabulous birthday card for someone special! The blue card definitely has my heart, but the purple and red version is pretty awesome too…

So gorgeous! I know, you’re probably thinking that shaker cards are tricky to make, but honestly these cards were really easy to assemble! Elle’s Studio products are cleverly designed to coordinate together—they make creating a dream! Here are my top tips for making these fun cards:

1. Take advantage of the Happy Birthday Journaling Tags! These tags are the perfect base to any layered birthday card design, and are super easy to customize too! I chose the balloons design for both of my cards, personalized them with repeat stamping from the Make a Wish Stamp, and used their colors to dictate my overall color schemes.

2. Select papers that coordinate with the color palette and theme. I used the new Celebrate Paper Stack to enhance both of my birthday cards. These papers are super cute, and the colors just pop! I even fussy cut some bows out of my papers to add that extra somethin’!

3. Use the Elle’s Studio Layered Card Metal Die! Possibly the most genius metal die ever invented! It ensures that all layered cuts are accurate, plus saves me so much time, and frustration, on measuring and cutting! This die set is so good, it even makes my Elle’s Studio ‘Hall Of Fame’ must-have product list!

4. Use your old Elle’s Studio packaging to form clear acetate pockets! Such a simple idea, but it really takes the ‘tricky’ out of pocket shakers. I mounted these clear packaging bags onto the back of the layered die cut frames before filling them with a Happy Birthday Journaling Tag and all the sprinkles!

5. Maximize embellishments to create shaker ‘stoppers’. I adhered the Happy Birthday Chipboard Stickers and the balloons from the Acrylic Balloons and Presents to the Happy Birthday Journaling Tag to prevent the sequins and sprinkles from falling straight to the bottom of the card. Super pretty, and purposeful!
 
6. Last, add a sentiment that is easy to read, despite all the ‘shaking sequins’. The Happy Birthday Wood Veneers were ideal for this: the warmth of the wood cut through all the bright colors, created balance and were easy to see when positioned over the layered frame and shaker pocket.

Simple, easy tips for beautiful birthday cards! I hope my cards have inspired you to give shaker cards a try sometime soon using your new Elle’s Studio March kit and add-ons! Thanks so much for stopping by!

Share your cards with us—shaker or not—by joining our Elle’s Studio Facebook Group and posting there, or sharing your project on Instagram using the hashtag #EllesStudio!