Another beautiful layout was shared by Devra (@thebeachygal) using our September release, and we love the way that she added the stamped stitched details on the border using the Home Sewn Stitches Stamp. On the right, we love the beautiful traveler’s notebook that Kim (@kjl571) created using our autumn products—be sure to check out all of the pages that she shared on her Instagram feed!
Just for sharing their projects, these six paper crafters will each win a $10 gift certificate to the shop! Thank you so much for posting your projects and using the #EllesStudio hashtag, ladies! Please email us at info@shopellesstudio.com to claim your prize!
Use our products on your next project and post to Instagram using the hashtag #EllesStudio for a chance to be featured here on our blog, and win a gift certificate to the shop! We can’t wait to see what you create this month!
Comments Off on September & October #EllesStudio Spottings on Instagram | Share This
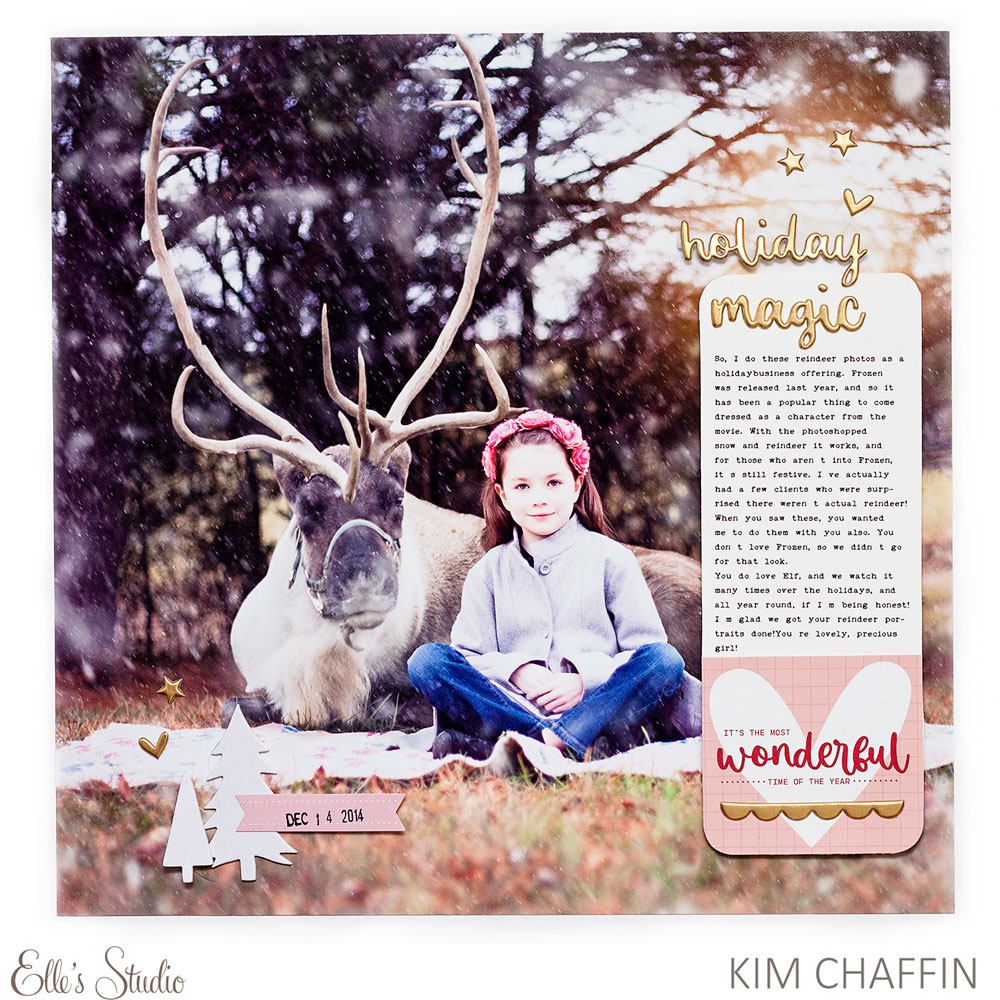
It’s the final day of Wrap it Up Week, and design team member Kim Chaffin is finishing off this week of inspiration with a simple and magical layout! Kim’s project just shows how you can emphasize a gorgeous photo with just the right touches of products from our Document December 2021 Kit and add-ons. Let’s take a look!
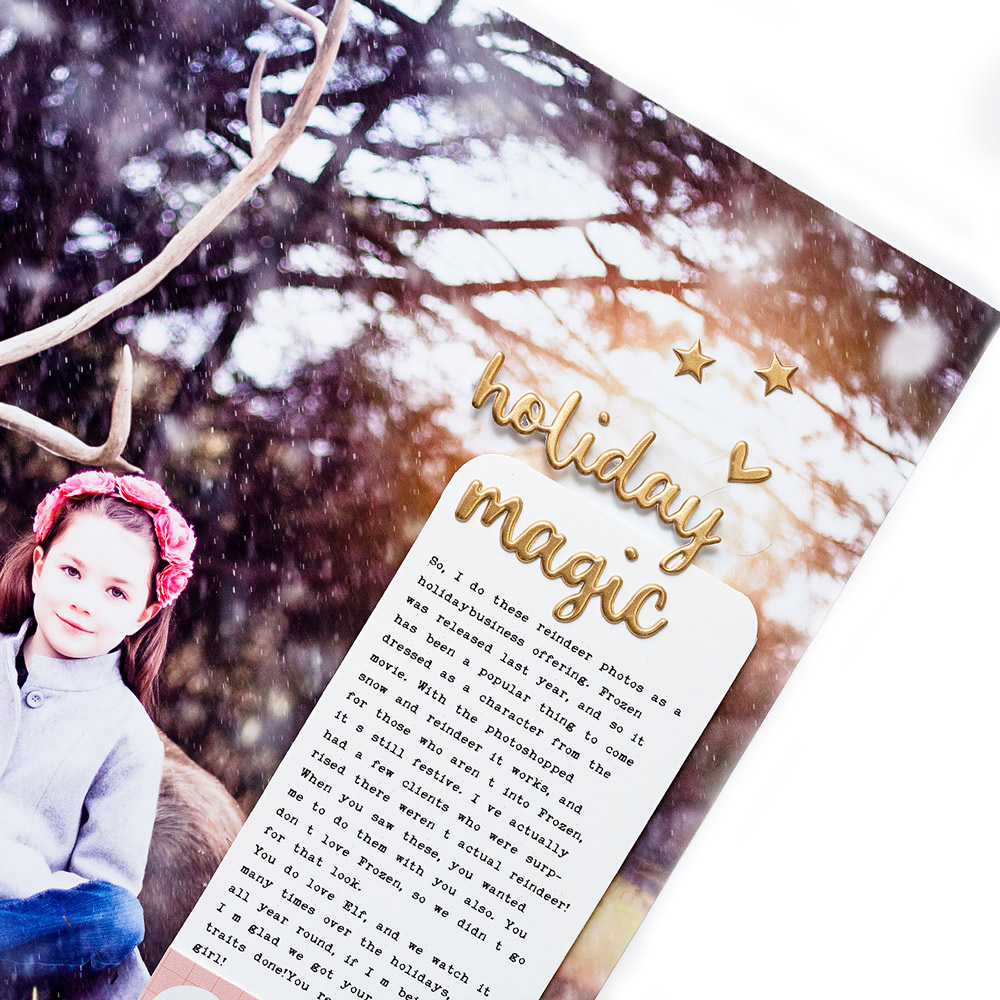
Hello, friends, it’s Kim, and I am so excited to be here with you for Wrap It Up Week! I have been in the holiday mood since August, and I’ve been working on plans to get my 2014 holiday season, which I’ve just never gotten finished, into an album before December 2021 rolls around. I’m using the Document December 2021 Kit and add-ons to make this happen. Let’s take a look at my first 2014 holiday layout which is finally ready for an album!
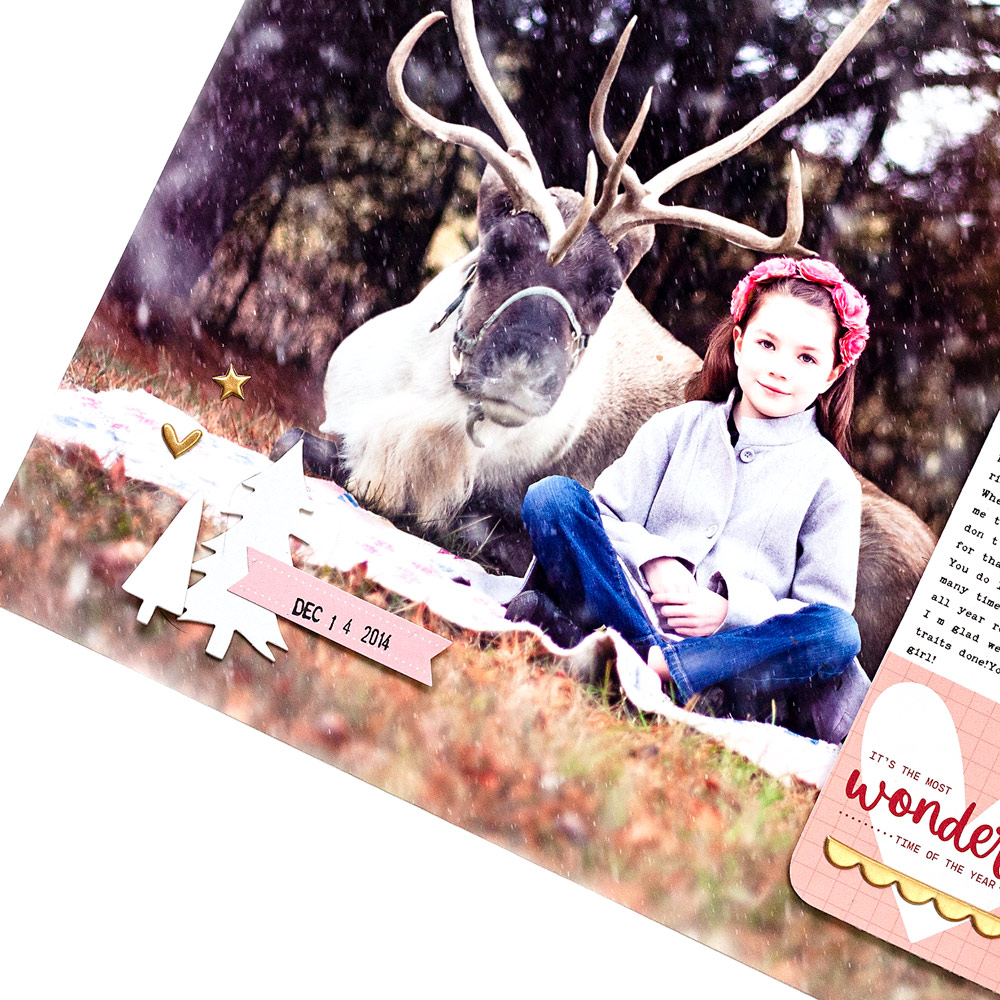
As I often love to do, I printed a large 12 x 12 inch photo for my background. I’m a photographer, and in 2014, I offered mini-sessions in which a reindeer was photoshopped into the image. Of course, my daughter wanted a reindeer portrait, too! I chose to tell that story on a 3 inch wide strip of white cardstock, adhering a beautiful pink pocket tag from the Document December 2021 Kit at the bottom of my journaling strip.
This photo has pink in my daughter’s hair accessory, and I knew that the Holiday Magic Gold Puffy Stickers would go beautifully with the pink to accent this special photo. I used those stickers for my title, to add a banner at the bottom of the pocket tags, and to scatter some sparkly stars and hearts throughout the layout.
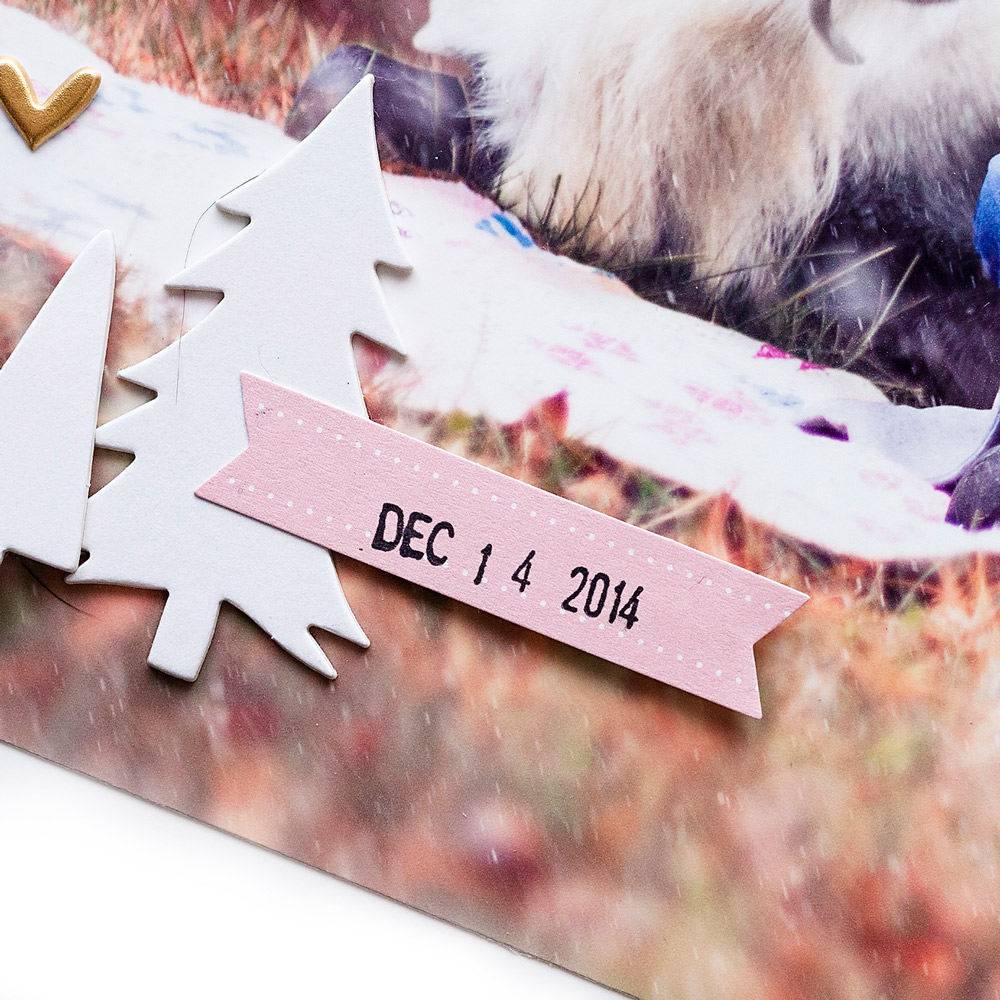
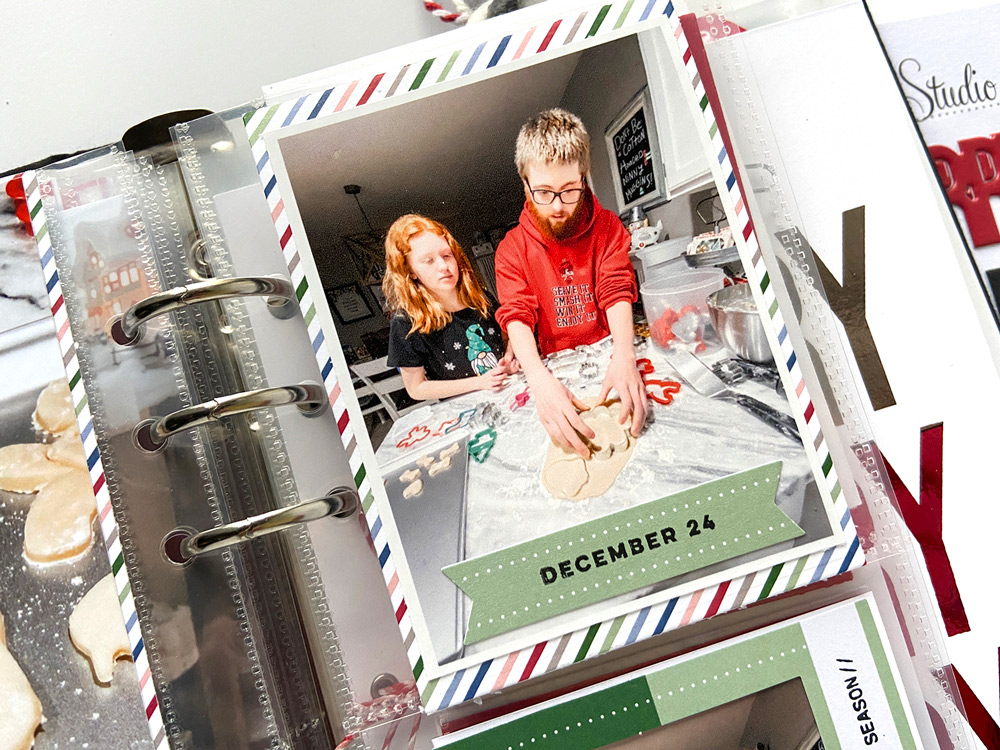
I love to include the date on layouts because as time goes by, it can be easy to forget. I stamped the date onto a pink banner die cut from the Document December 2021 Kit.
As I looked at the layout, I felt it needed just a little something more, and the Chipboard Tree Stickers were just the thing! I chose two white trees to coordinate with the photoshopped snow in the photo. I used them as an anchor for the date banner in the bottom left corner.
I love the feeling of getting a past project done, and I hope you’ll follow along with me as I continue to work on documenting my 2014 December. I’d love to see the past holiday projects you are wrapping up!
Thank you so much for joining us for Wrap it Up Week! Please share how YOU are using our products to wrap up your past December projects. Post on Instagram using the #EllesStudio hashtag or in our Facebook Group!
Comments Off on Wrap it Up Week: Holiday Magic Documented with Kim Chaffin | Share This
Welcome to day four of Wrap it Up Week, the week our team inspires you to record those holiday memories that may be missing from your albums! Today we have Jen McMurtrey sharing how she documented an out of the ordinary Christmas using products from our Document December 2021 kit and add-ons as well as our new Title Builder Vol. 5 The Merriest collection. Maybe you can relate, too, and use Jen’s helpful ideas to wrap up your Document December project!
When I began documenting December 2020 last year, all was right with the world . . . the tree was up, gifts wrapped, and plans made for a small and safe family gathering. Then, my husband tested positive for COVID and we had to cancel all of it. I have to admit I have not been excited to go back and complete my 2020 Document December album, which is why I volunteered to participate in this week’s Wrap it Up posts. Doing so forced me to revisit last year’s holiday and get our story recorded even if it wasn’t a typical Christmas.
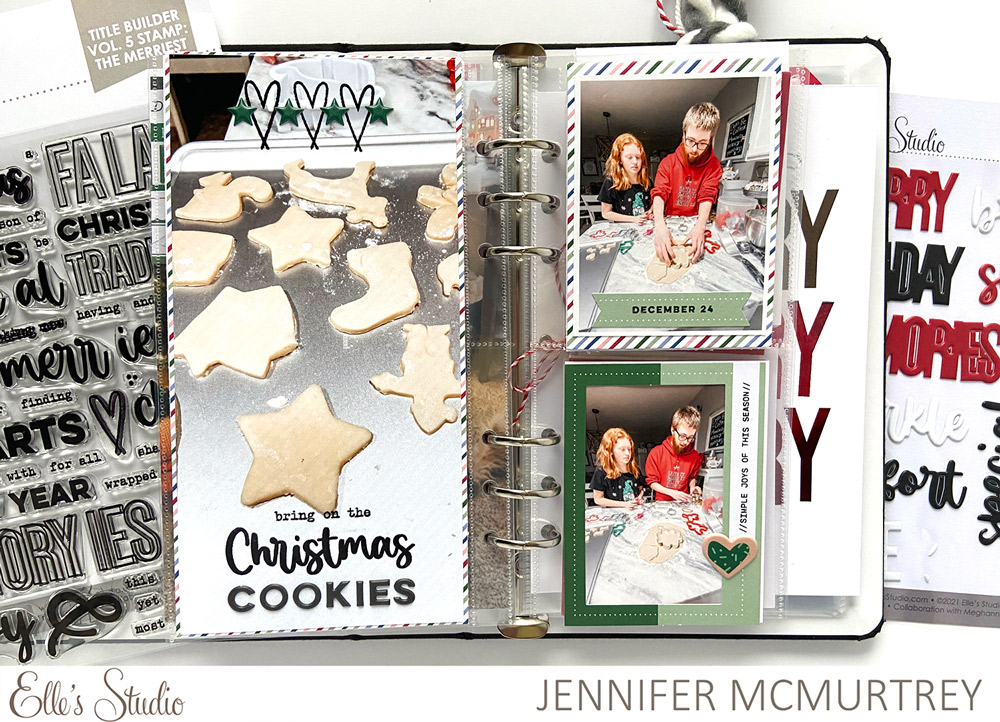
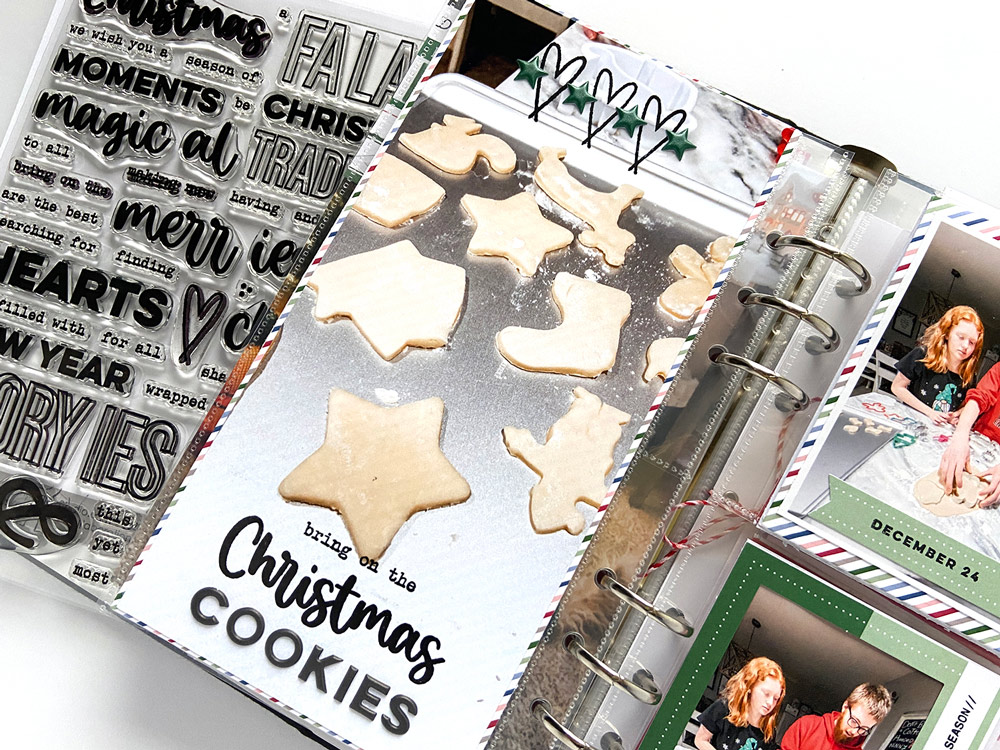
While a majority of the album was done, there were still a few stories I wanted to add. First was Christmas Eve when the kids decided to bake sugar cookies just as we have done every other year since they were born. I had purchased all of the ingredients prior to being quarantined, so we made quick work of mixing the dough, cutting the shapes, and baking them.
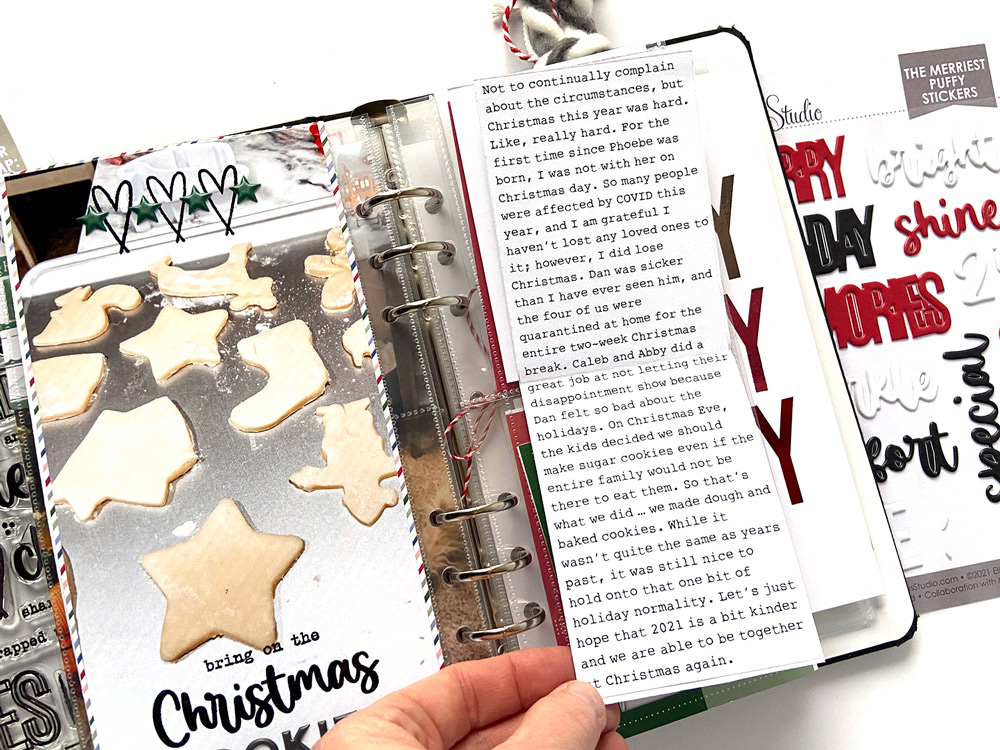
Inside the flip up, I typed out the story using a word processing software, printed it, and cut it to fit.
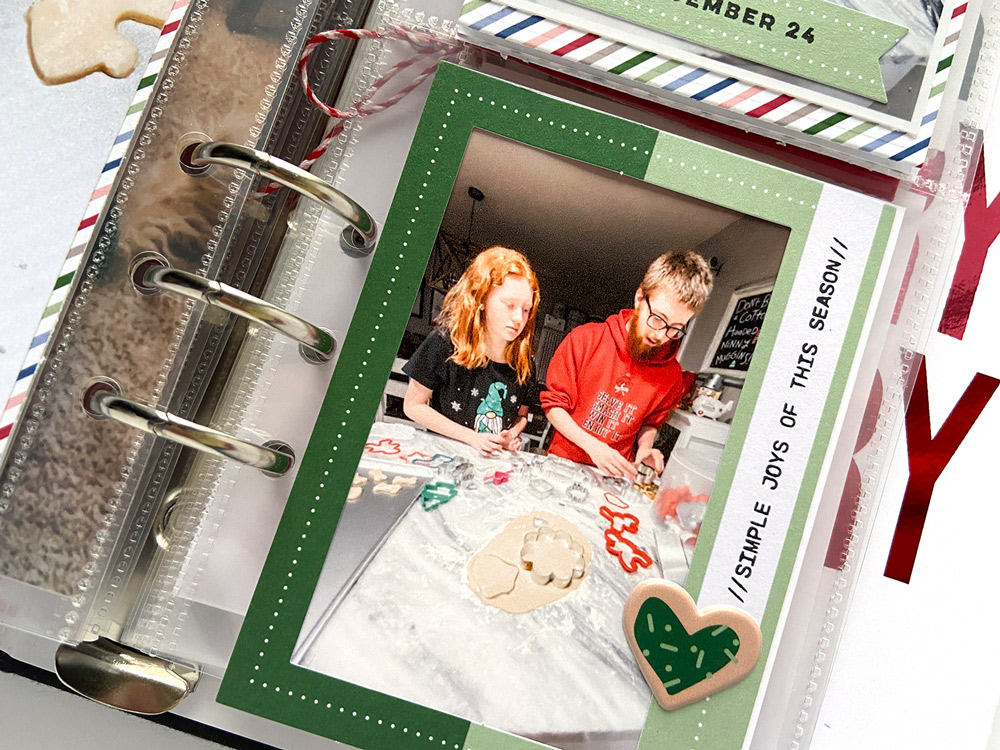
Below is a second photo of the kids cutting out cookie dough that I adhered behind a die cut frame. I added minimal embellishments with a cookie-shaped puffy sticker and stamped sentiment.
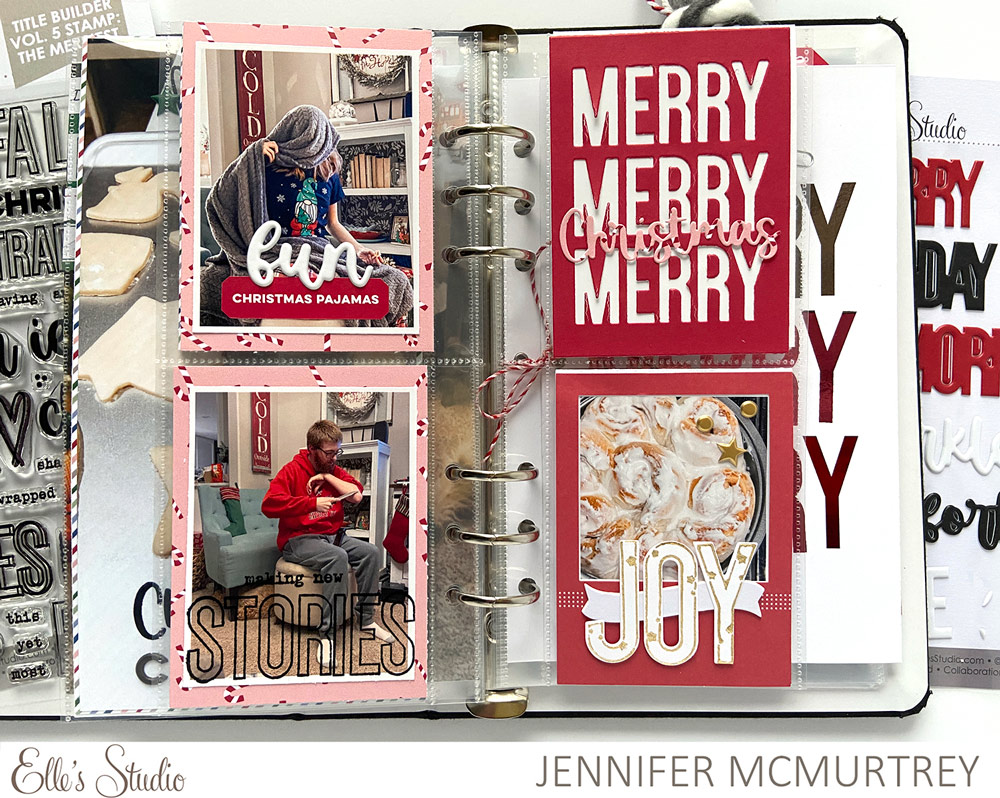
On the following pages, I went with a red and pink theme to record Christmas Eve and our breakfast the next morning. Each year the kids get to unwrap their new pajamas and ornaments on Christmas Eve. Abby decided that she did not want her face showing when I took her picture, but I love the goofy photo. Caleb stayed in his sweats, but entertained us by demonstrating how sharp his new knife was by shaving the hairs on his arm (totally a boy thing). The photos of the kids were embellished with a sentiment from The Merriest Puffy Stickers, Holiday Label Stickers, and the Title Builder Vol. 5 The Merriest Stamp.
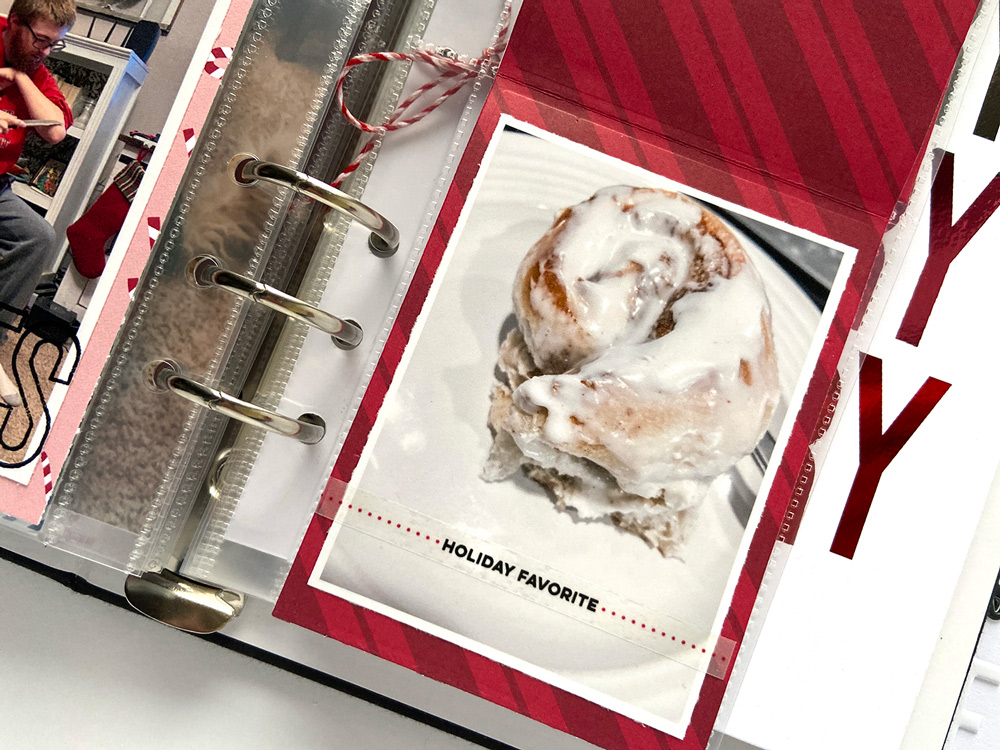
On the right, I used the Merry Christmas Metal Die to create the Merry Christmas 3 x 4 tag, which is absolutely adorable. Last, I created another flip up with the metal die to house pictures of the cinnamon rolls I baked Christmas morning. Inside the flip up is a second close-up photo with a December Vellum Sticker across the bottom.
Working on my 2020 Document December album was a bit therapeutic. I’ve avoided it for the past year because I didn’t want to be reminded of last year’s difficult Christmas. Because so much time has passed, I found I am able to look back at the holiday with appreciation. So many have been negatively affected during the pandemic, and I am fortunate to still have all of my family members when others do not. I have just a few more items to add and the album will be complete … just in time to begin working on this year’s album! Thank you for stopping by and have a fabulous day!
Let’s continue Wrap it Up Week with a traditional holiday memory: cookie baking! Although we do it every year, this memory would be missed if it were not in our album, so today design team member Aimee Mertell is here to share the sweet spread that she created to record this fun holiday tradition, using one of her favorite Document December add-ons!
Hey there Elle’s Studio friends! It’s Aimee on the blog today for Wrap It Up week—a week where we are picking up past holiday projects that we may have left unfinished or filling in any blank spaces in our albums using the newest Document December release! I chose to document some cookie decorating photos from December of 2019. Let’s take a look!
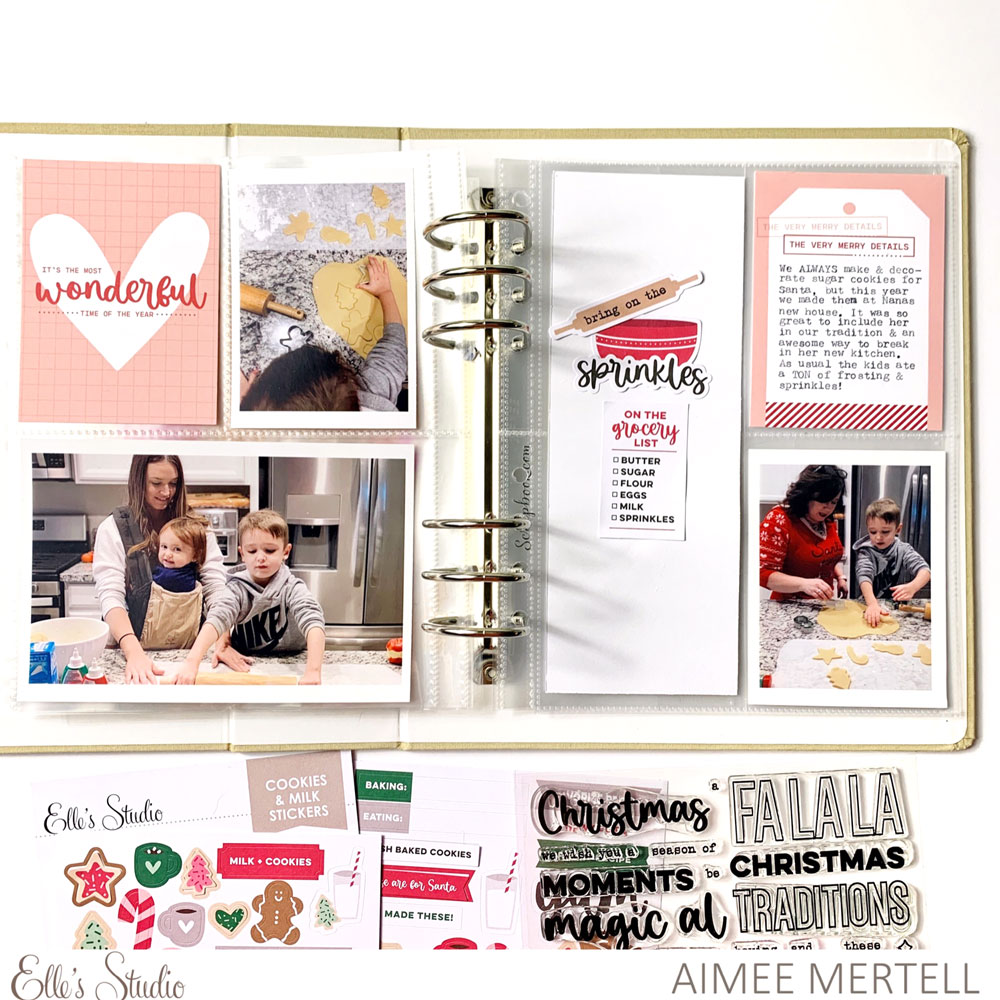
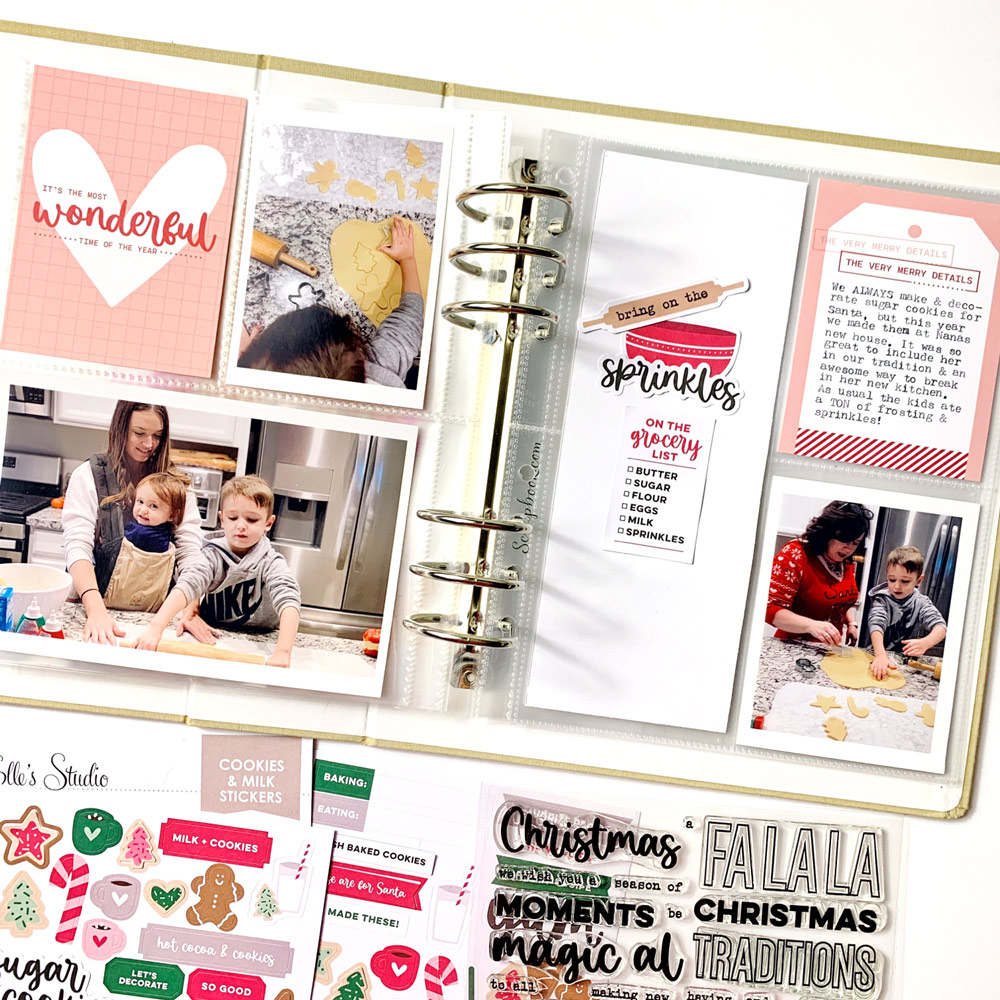
I don’t know about you, but I love documenting a story each day in the month of December and giving them their own album, but it can be a big undertaking! I was looking through my 2019 album and realized I never told the story of our sugar cookie decorating. I knew that I wanted to wrap this story up and that Elle’s Studio products would be a perfect fit— especially the Cookies and Milk Cardstock Stickers!
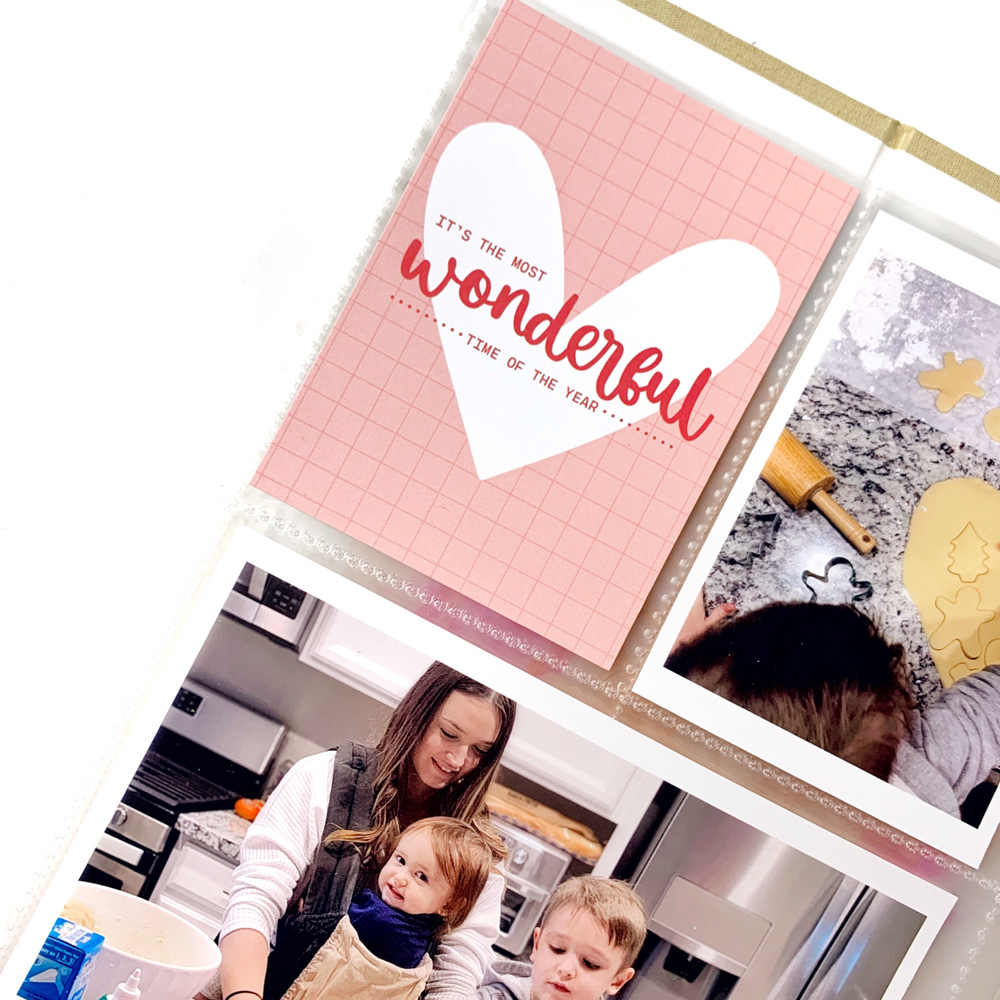
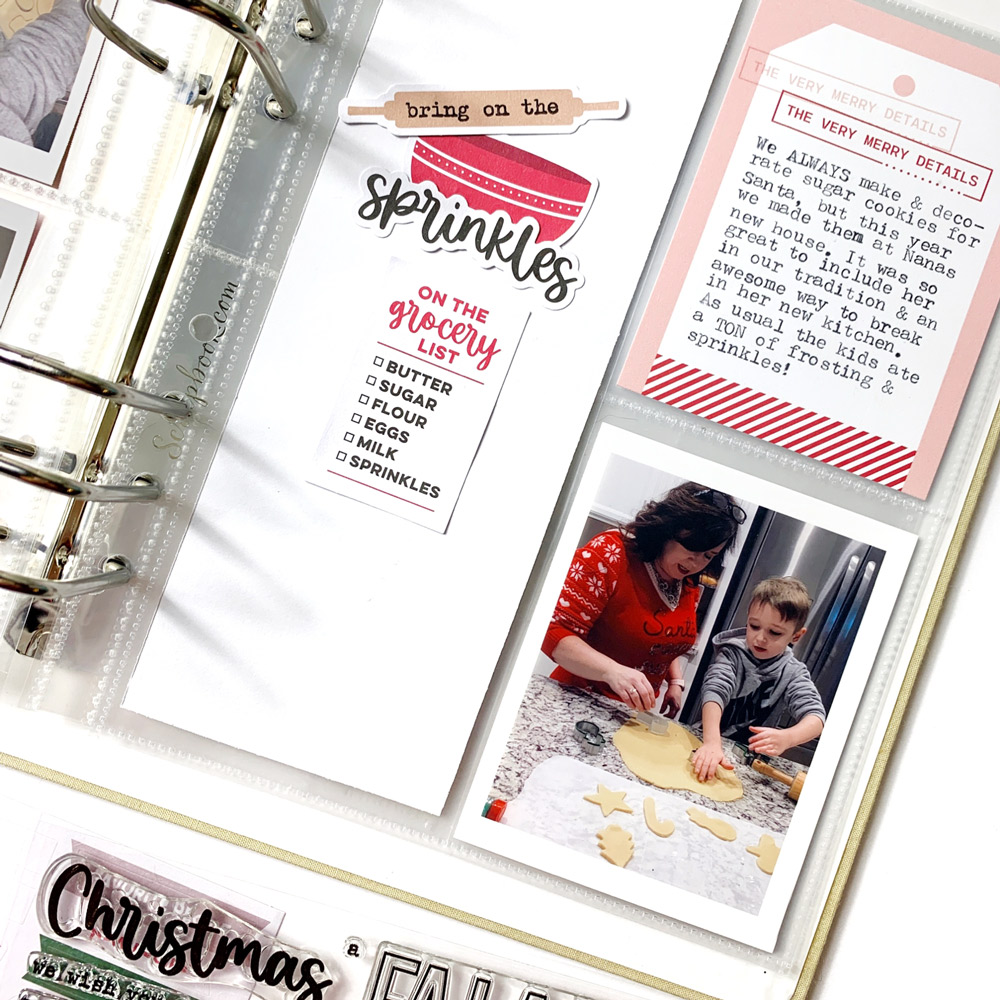
I set about making a 6 x 8 inch double page spread by first laying out my photos and then filling in the blanks with 3x 4 inch tags from the Document December Kit. I decided to keep to pinks and reds and chose my tags accordingly.
I used a page protector that had a 3 x 8 inch space and rather than using it for my journaling, I decided to make it a focal point. I used stickers from the Cookies and Milk Cardstock Stickers to build a fun cluster as well as a title! Bring on the sprinkles! How perfect are these stickers for documenting holiday baking? They’re my absolute
Next, I typed up my journaling about how we love this cookie decorating tradition—even if it’s a bit messy! Voila! There you have it! I’ve wrapped up my 2019 album and I couldn’t be more pleased! Remember— it doesn’t have to be overly-complicated or over-embellished to still pack a punch and get your stories told. I hope this inspires you to dig out a long-forgotten holiday project and get to work before you pull out all the stops documenting the current season! Enjoy!
Show us how you’re wrapping up your past holiday albums using our products! Tag us on Instagram using the #EllesStudio hashtag or join our Facebook Group and post on the message board!
Comments Off on Wrap it Up Week: with Aimee Mertell | Share This
Welcome back to Wrap it Up Week! Maybe you’ve finished your 2020 Document December project, but you have memories from Christmases past that are left unrecorded? Take a cue from team member Jody Compton today and document them, and remember those special memories using this year’s product! Let’s see what Jody created!
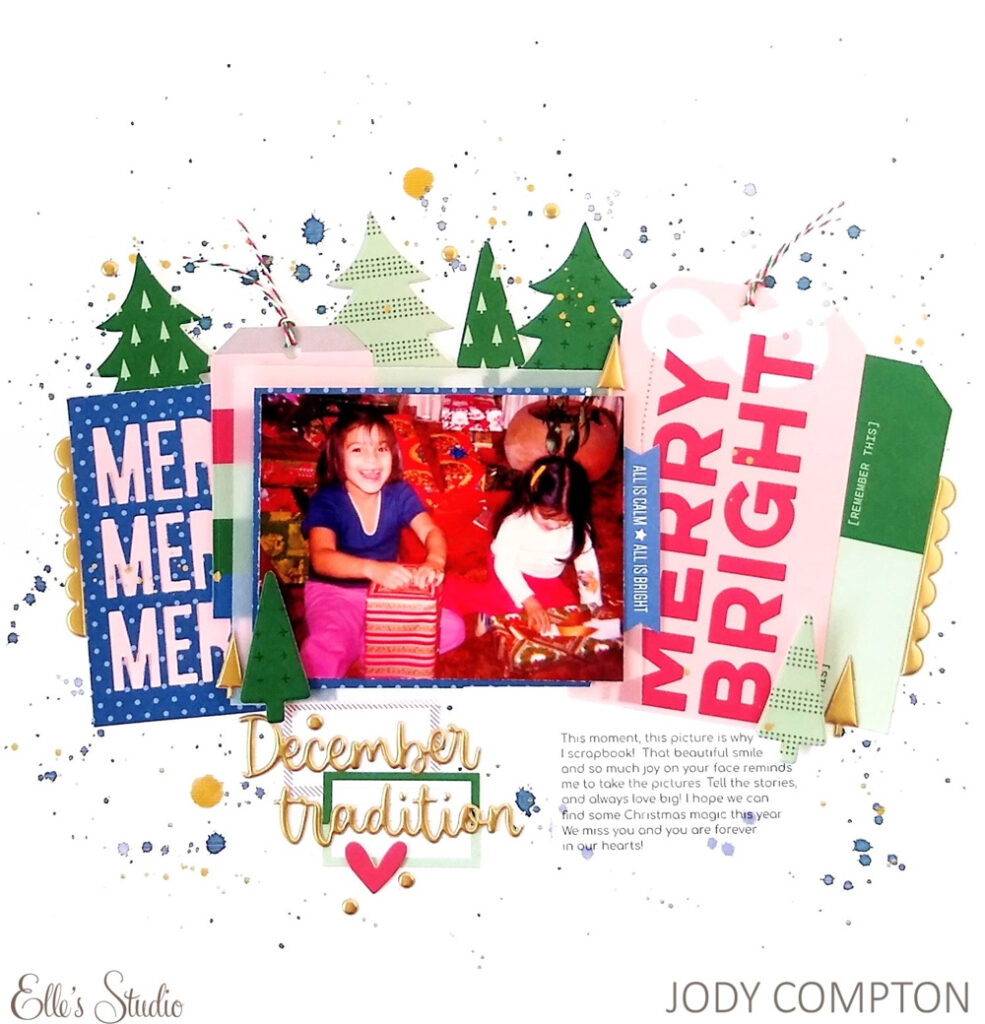
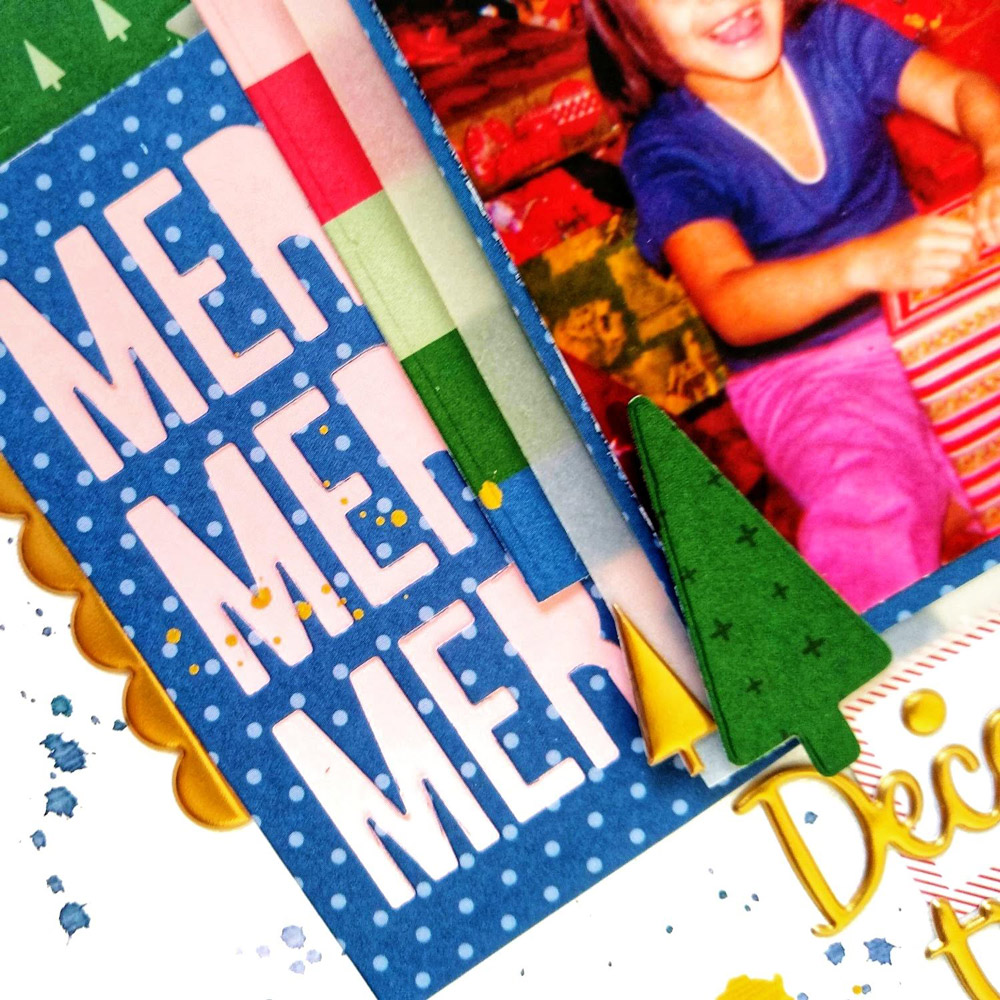
Hello! It’s Jody joining you on the blog today to wrap up a Christmas memory using the amazing Document December 2021 kit and add-ons to create a layout from a forty year old picture! When you lose a loved one, you realize all the pictures, good or bad, new or old are VERY important.
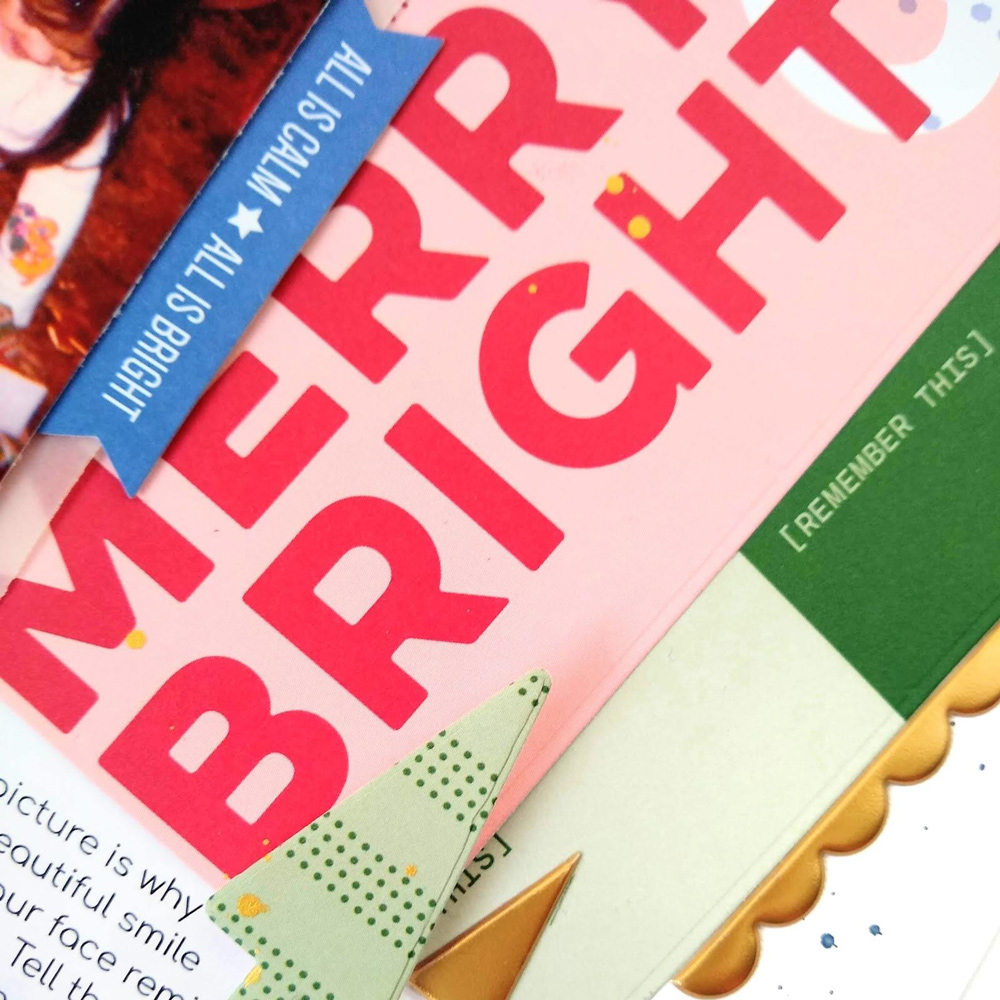
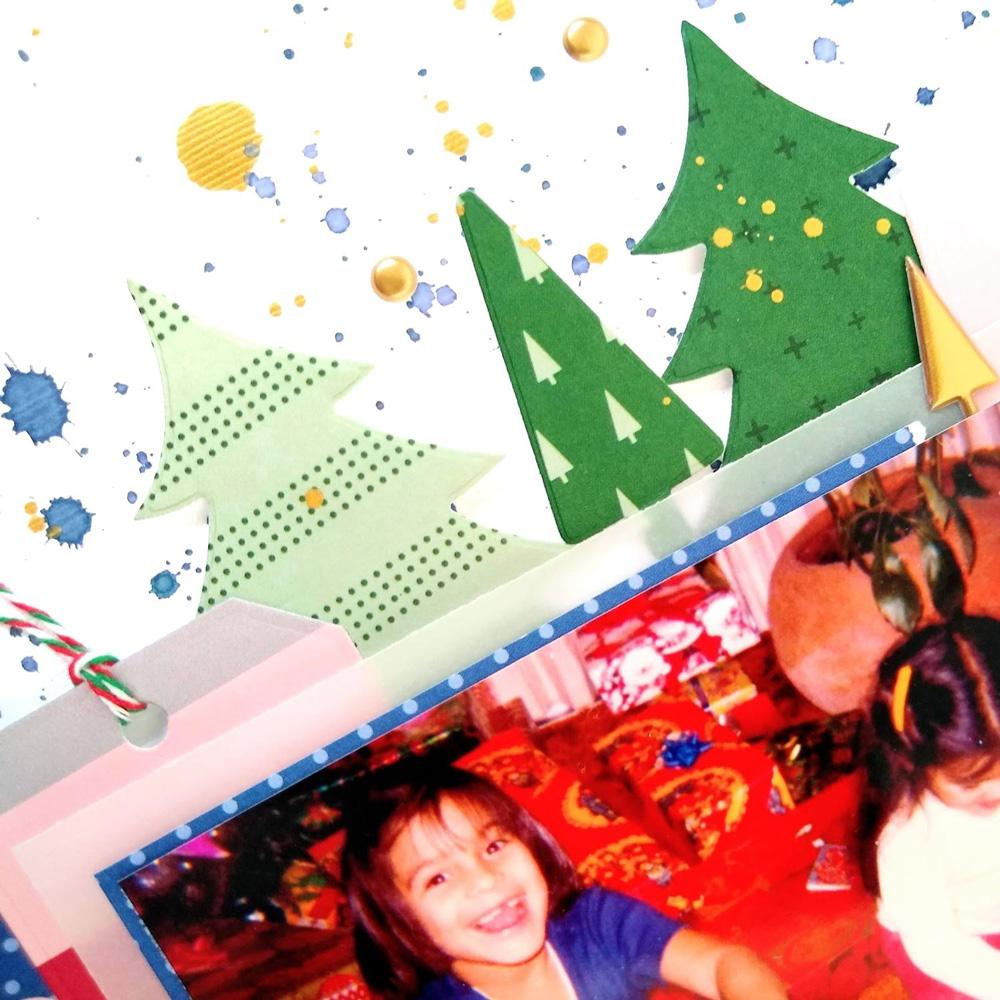
I was immediately drawn to the Document December 2021 Kit’s 4 x 6 inch tags. The large font and bright colors were perfect to layer under my photo. Running the tags through the Nesting Tags Metal Dies gave them a fun shape for added interest. Even though you can not see my face, my sister’s magical smile is definitely worth scrapbooking.
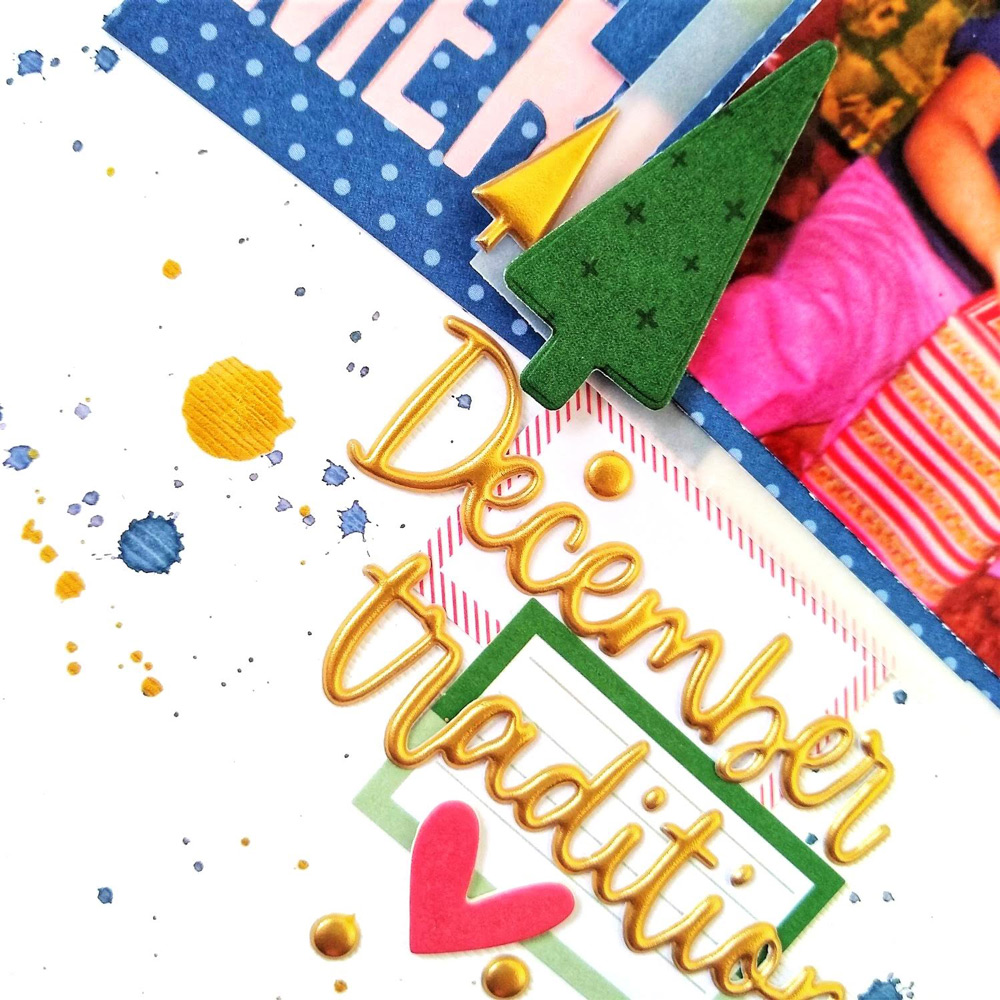
The trees cut using the Holiday Shapes Metal Dies added another fun layer behind my photo. The dies come with two different shaped and sized Christmas trees. Using the Wonder Paper Stack patterned papers added those touches of green to help move your eyes around the page.
One of my favorite products from the Document December Kit and add-ons is the Merry Christmas Metal Die. The simple, but impactful sentiment gave me a chance to add color and a whimsical feel to the layers behind my photo. And can I say how cool are those hot pink pants!?
The must-have Holiday Magic Gold Puffy Stickers added the perfect title. A few die cut pieces help create a ledge for the title to rest, plus add another pop of color. I could not find a date or location for this photo, but it is fine to have fun, candid layouts in your albums. It means life was good!
Thank you so much for stopping by today. Please take the pictures, tell the stories and love big! Remember when using Elle’s Studio products to use the hashtag #EllesStudio when posting to social media so we are sure to see your amazing work!
Comments Off on Wrap it Up Week: Documenting a Vintage Christmas Memory with Jody Compton | Share This
We are so excited to start off a fun week to help you wrap up past December projects: Wrap it Up Week! Each day, you’ll find a new post from a team member who is finishing off a past year’s album, using our new Document December 2021 kit and add-ons, and we hope these posts inspire you to wrap up your past projects, too! First, Michelle Flynn is with us to share a spread that she was hesitant to document because of dark, nighttime photos. Let’s see what she created!
Hi friends! It’s Michelle here with you today kicking off an exciting week that Elle’s Studio has planned for our creative community! It’s Wrap It Up Week and there’s so much inspiration coming your way to help you finish your holiday documenting from previous years!
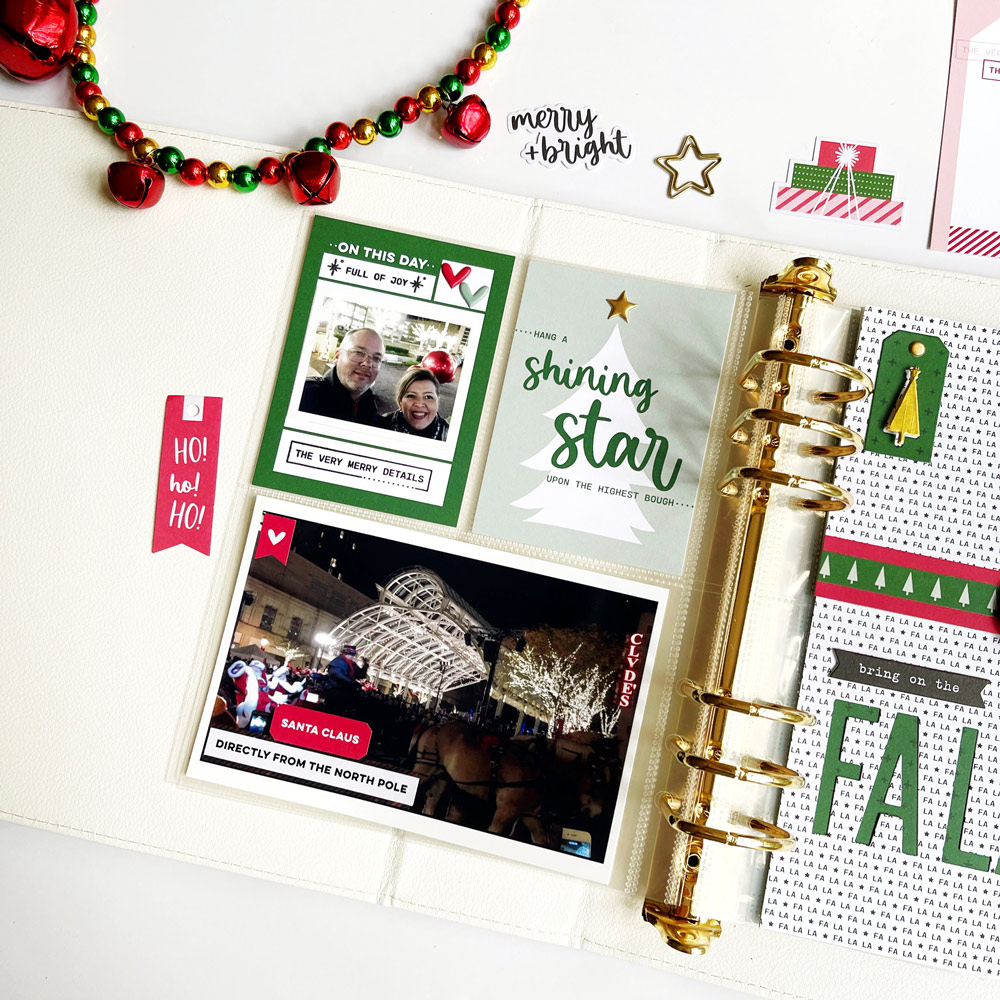
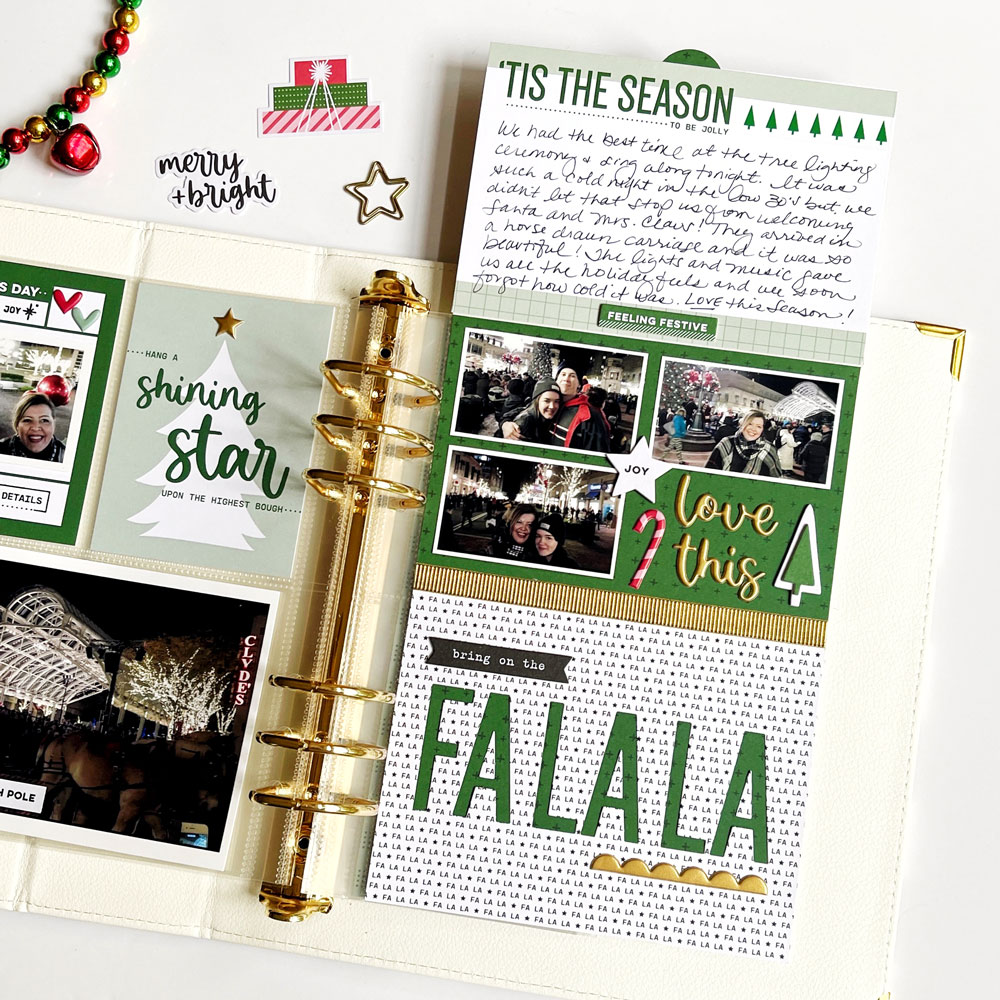
I love the encouragement to finish documenting our holiday memories! Today I am documenting a holiday evening we spent welcoming Santa and Mrs. Claus to the annual tree lighting ceremony in our community. We were so wrapped up in all the merry moments that evening (and freezing cold) that each photo was pretty rushed but I am happy to say that I let the products inspire me to bring these memories to life and it helped highlight even those dark photos! Every moment matters so I’ve been left appreciating these photos even more now that I’ve finished documenting it with the beautiful Document December 2021 kit and add-ons.
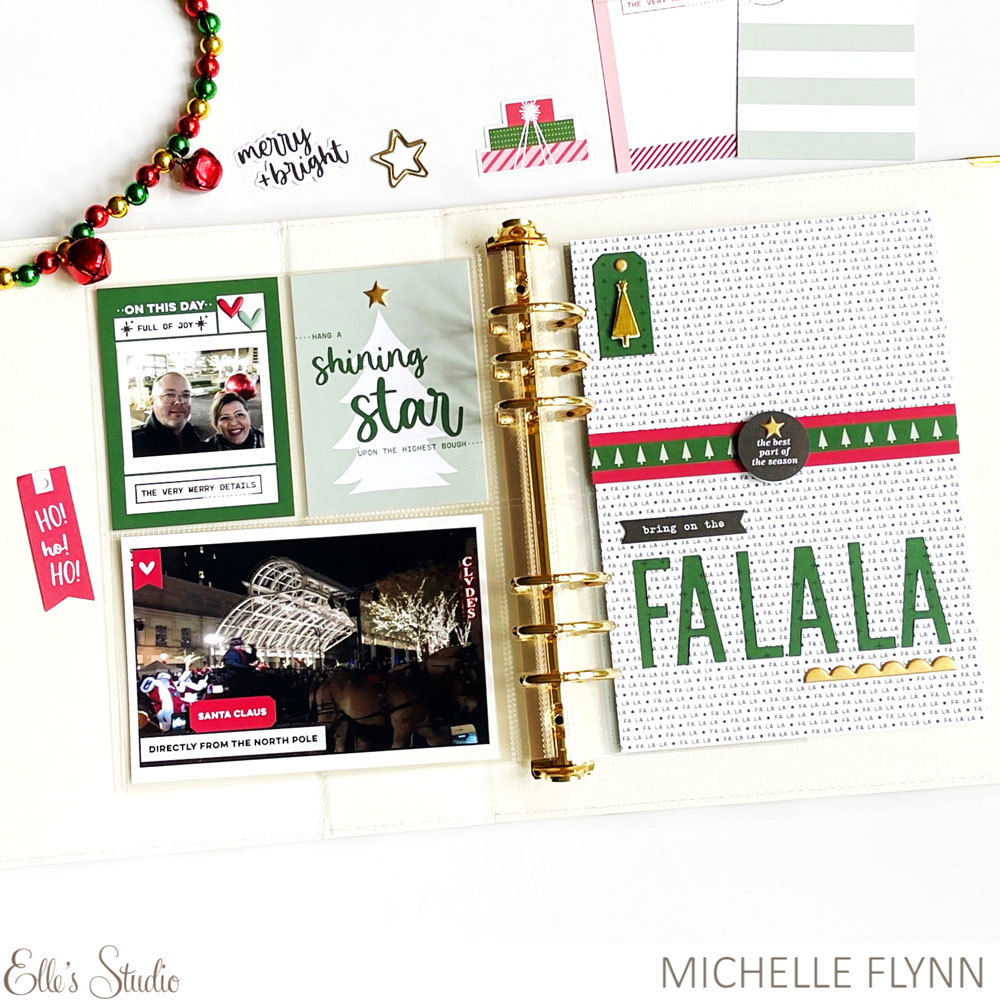
I began by sorting through the Document December 2021 Kit, selecting the “hang a shining star” tag to begin the left side of my layout. It was the perfect sentiment and such a pretty color. It really didn’t need anything else but I had to add that sweet star to the tree using the Gold Puffy Heart and Star Stickers.
By this time, I was just loving the light and darker shades of those greens and I started the foundation page for the right side of my layout with that in mind. I used the festive Wonder Paper Stack—I just love that black and white “fa la la” paper so much and paired with the green paper it’s gorgeous! That sheet inspired me to grab the fun Holiday Tags Metal Die. I ran the “fa la la” metal die through and backed it with the green paper. I then cut the sheet in half and added a border with the Wonder Paper Stack so I could create a flip. I added raised foam adhesive to the cute die cut on the border from the Document December 2021 Kit so that would serve as the opening to the flip up. I used that little tree tag from the Christmas Die Cuts Metal Die to the corner of the flip using the paper stack and gold cardstock. Again, this was simple and didn’t take much effort other than my smiles during this crafting time as I started to realize how easily this was coming together!
As I said earlier, our photos weren’t the best, and to be honest that might just be why I’ve put off documenting this holiday memory. This little flip-up allowed me to incorporate the photos in a smaller format and in a creative way with beautiful elements that focuses on the fun we had versus the photo quality! I used that gorgeous green pocket tag from the Document December 2021 Kit for my journaling. I added a few little touches with decorative ribbon, the December Vellum Stickers, Santa’s Favorite Chipboard Stickers from the kit, the Simple Joys Puffy Stickers, Holiday Magic Gold Puffy Stickers and those adorable Chipboard Tree Stickers!
And that’s a wrap for me friends! I am so incredibly happy to have been inspired to finally have these memories documented with the beautiful Elle’s Studio Document December release. I hope this inspired you in some small way to let your products motivate you to wrap up your own holiday memories! Share how you are documenting December using the #ellesstudio hashtag on Instagram and don’t forget about all of the fun in our Elle’s Studio Facebook Group! There’s so much inspiration coming to you this week and I’m really excited to see your holiday memories come to life with the inspiration from this wonderful release! Happy creating, friends!
Comments Off on Wrap it Up Week: Documenting Not-So-Perfect Photos with Michelle Flynn | Share This
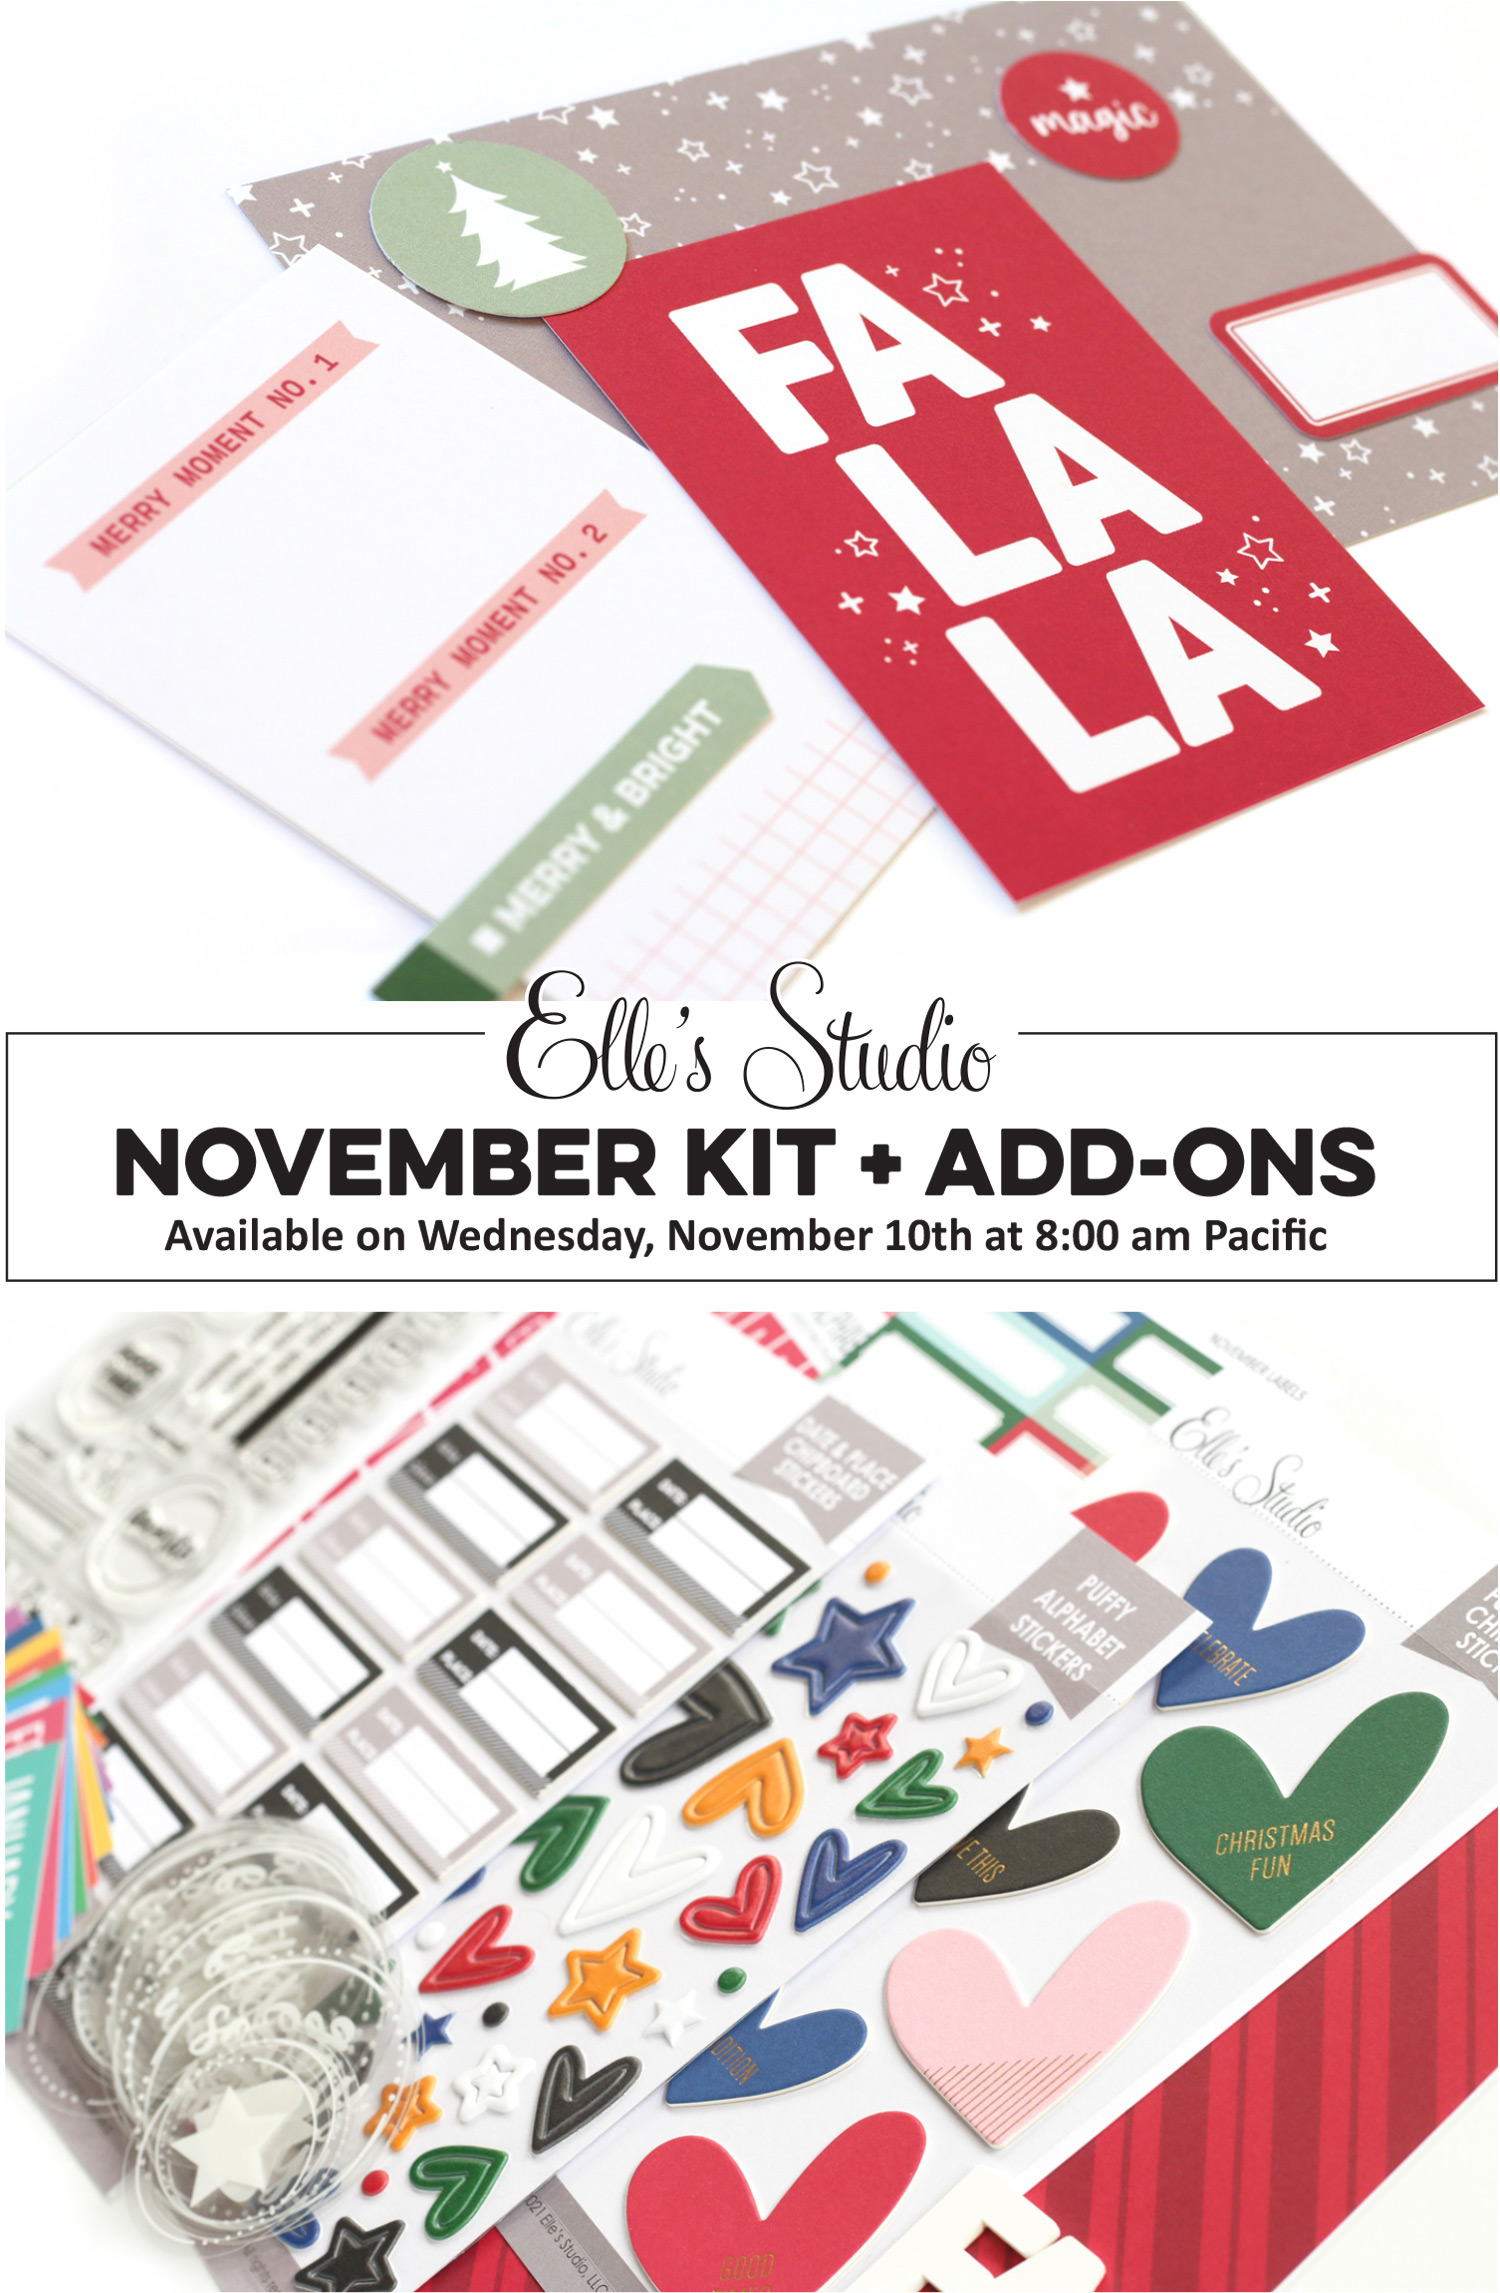
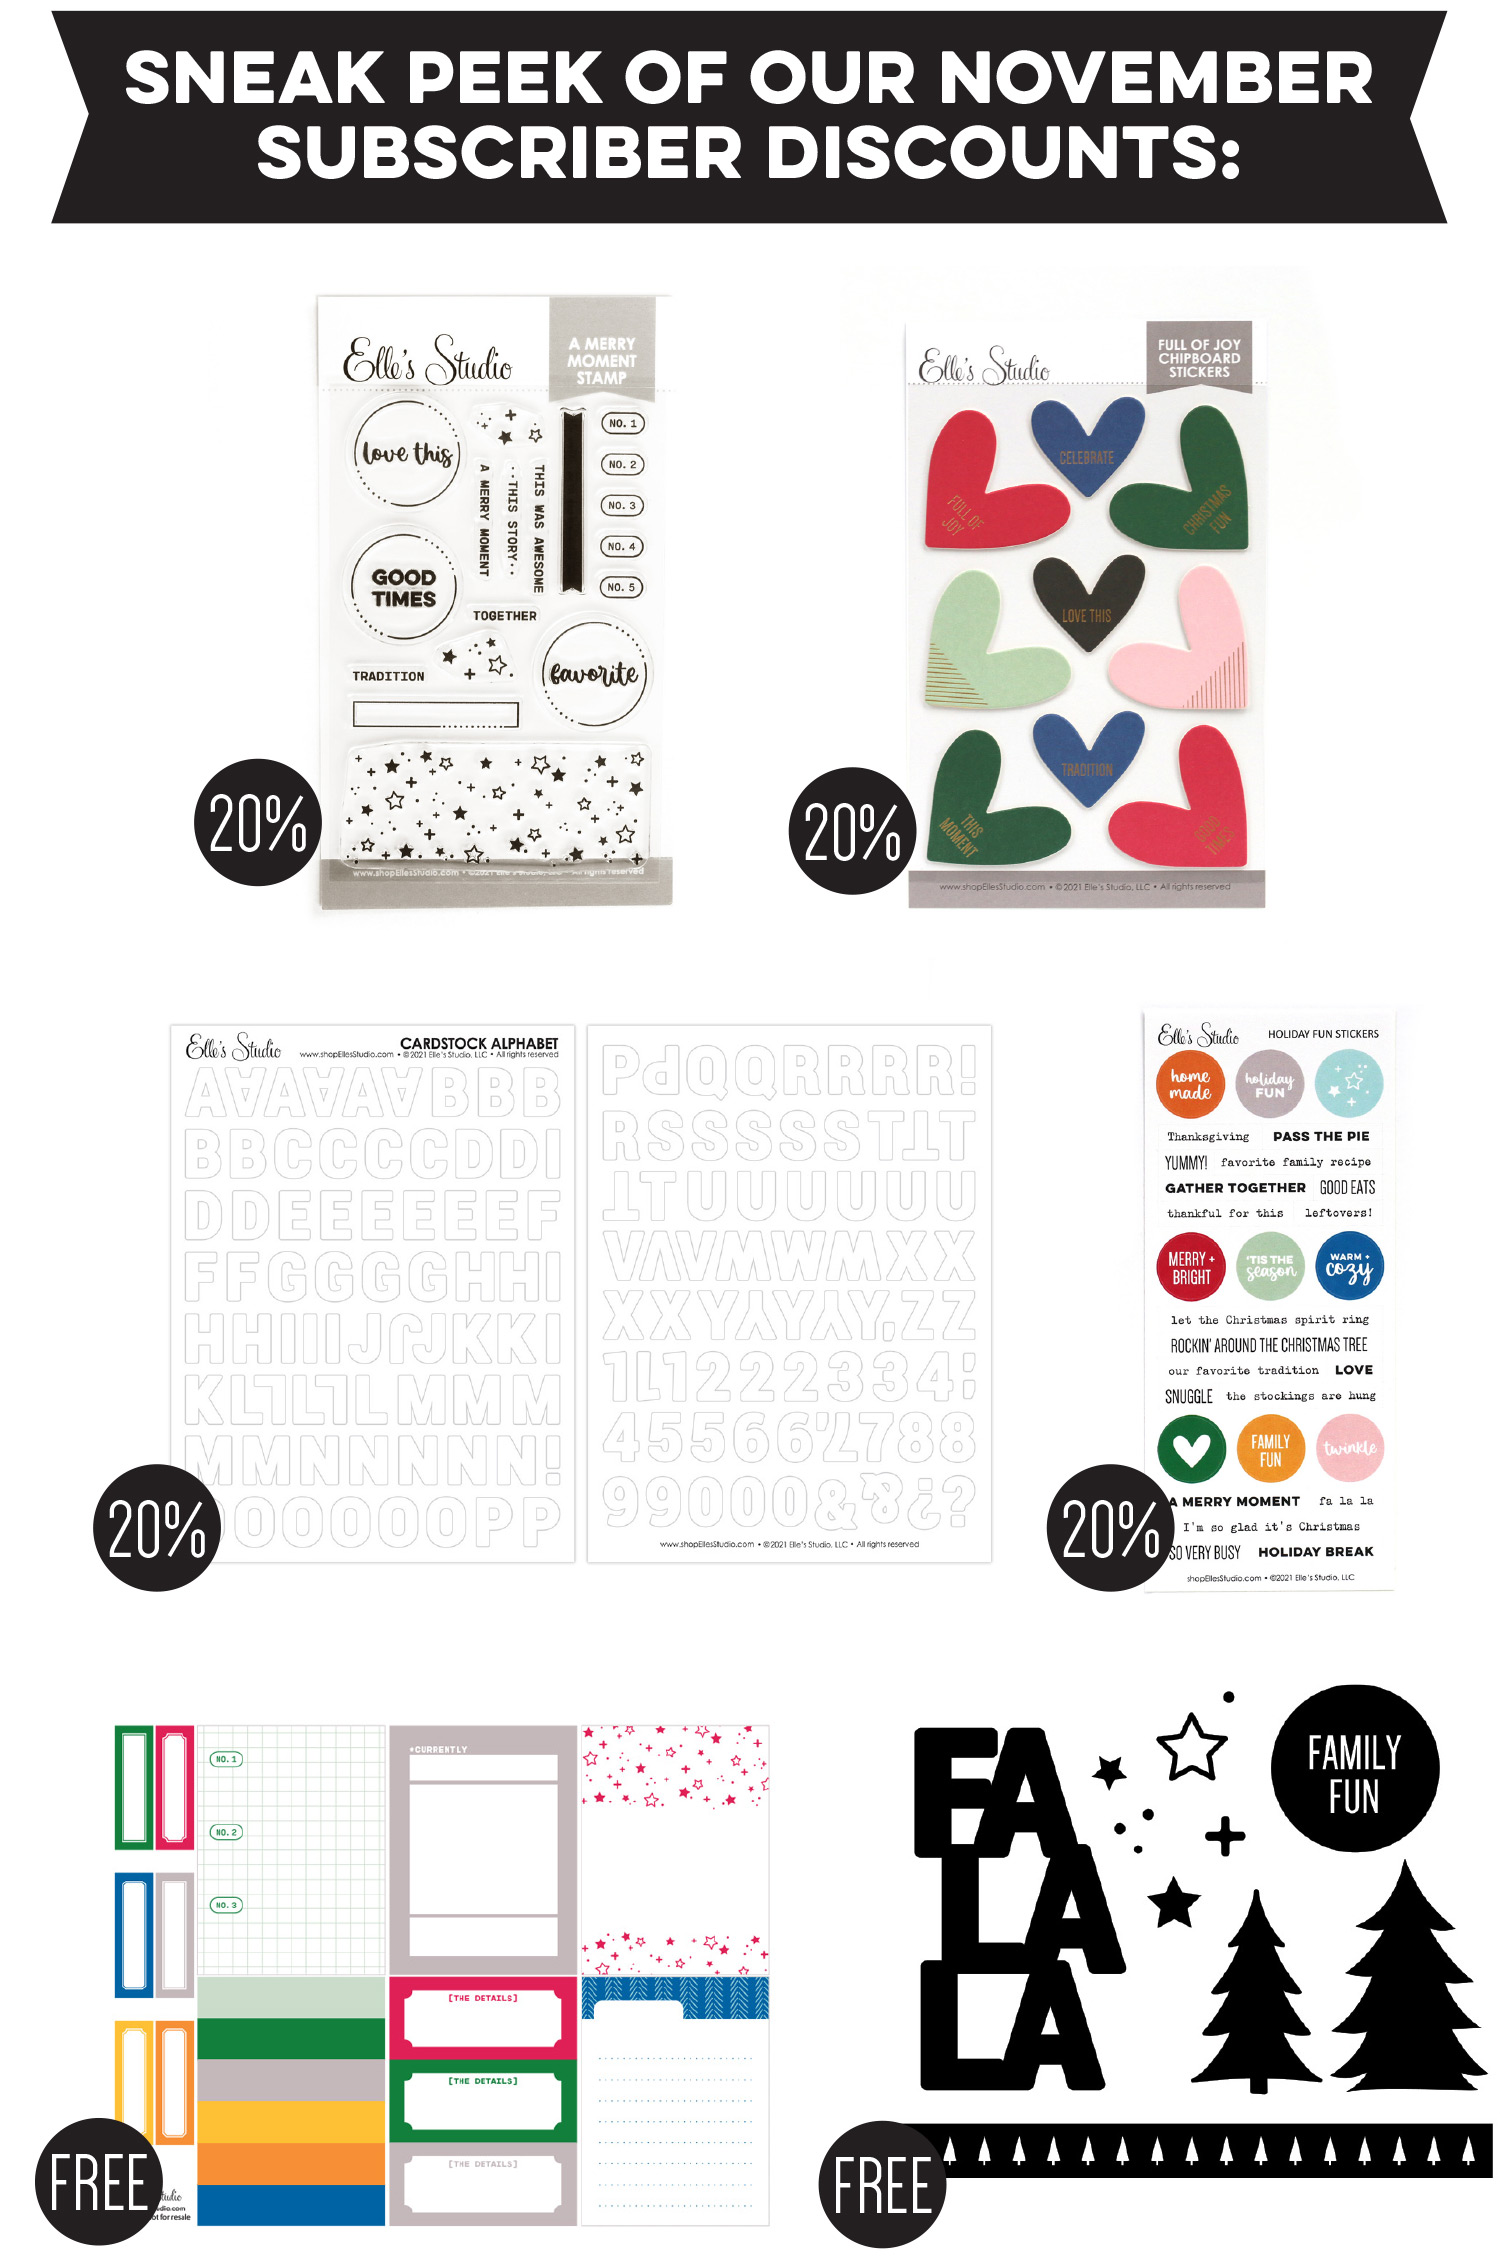
Our November kit + coordinating add-ons reveal is almost here and we can’t wait to share with you all the new and exclusive products that will be available soon! Our reveal will be full of the perfect products to document your November stories and take you right into the month of December! This month, our November kit will include 3 – 4 x 6 inch tags, 18 – 3 x 4 inch tags, and 25 die cuts!
Not a subscriber? You can pre-order our November kit now and lock in our $9.99 kit price by starting a subscription today! You’ll want to choose our SUBSCRIBE & SAVE option to get signed up and start your subscription with our November kit. We will then hold your kit and you’ll be ready to bundle and save at our November 10th reveal! Details on how to bundle with your subscription order will be emailed to you once you have purchased this product.
Kit subscribers, don’t forget! Along with being able to bundle any products from our shop that will ship for FREE with your kit during our 24-hour bundling period, starting on the 10th at 8:00 am Pacific each month, our subscribers will also have access to special discounts on select items! These discounted items can be found in our SALE section during our 24-hour bundling period, and you must be logged into your kit subscriber account to see them. Quick note: Our kits and add-ons are available without a subscription each month, too.
We are so excited to share all of these new products with you and see how you use them on your projects! Make sure you set your alarm and mark your calendar for Wednesday, November 10th at 8:00 am Pacific for our November kit and add-ons reveal! We hope to see you there!
Comments Off on A sneak peek of our November 10th reveal! | Share This
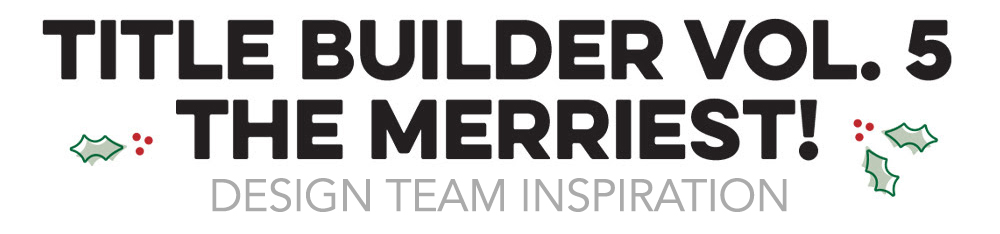
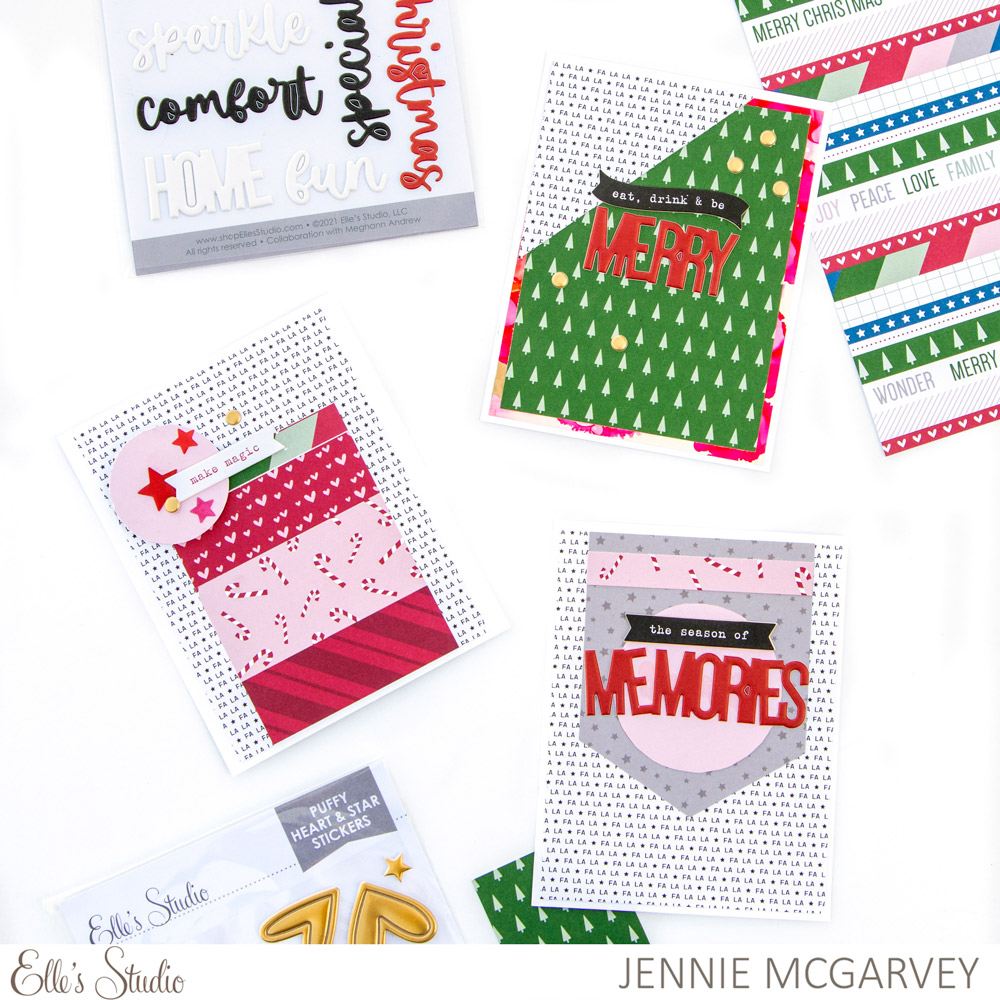
Today we’re sharing one final post of inspiration using our new Title Builder Vol. 5 The Merriest collection, and the projects may be a bit unexpected… cards! Yes, this latest volume can create quick and easy card sentiments in no time, as Jennie McGarvey is here to show us!
Hello! It’s Jennie McGarvey and I’m going to share with you how I turn intimidation into something I can work with! What does that mean, you ask? Let me explain! I see so many incredible handmade cards out there. I mean, works of art! I used to create a lot of cards, and enjoyed it very much, but haven’t done so in the past few years. When I saw the Title Builder Vol. 5 The Merriest products, I knew these could make great Christmas cards. So, I decided that I would dip my toe back into cardmaking. If you’ve not done it for a while, or don’t make cards a lot, I’m hoping you’ll see what I create and find some ways for you to start again, too!
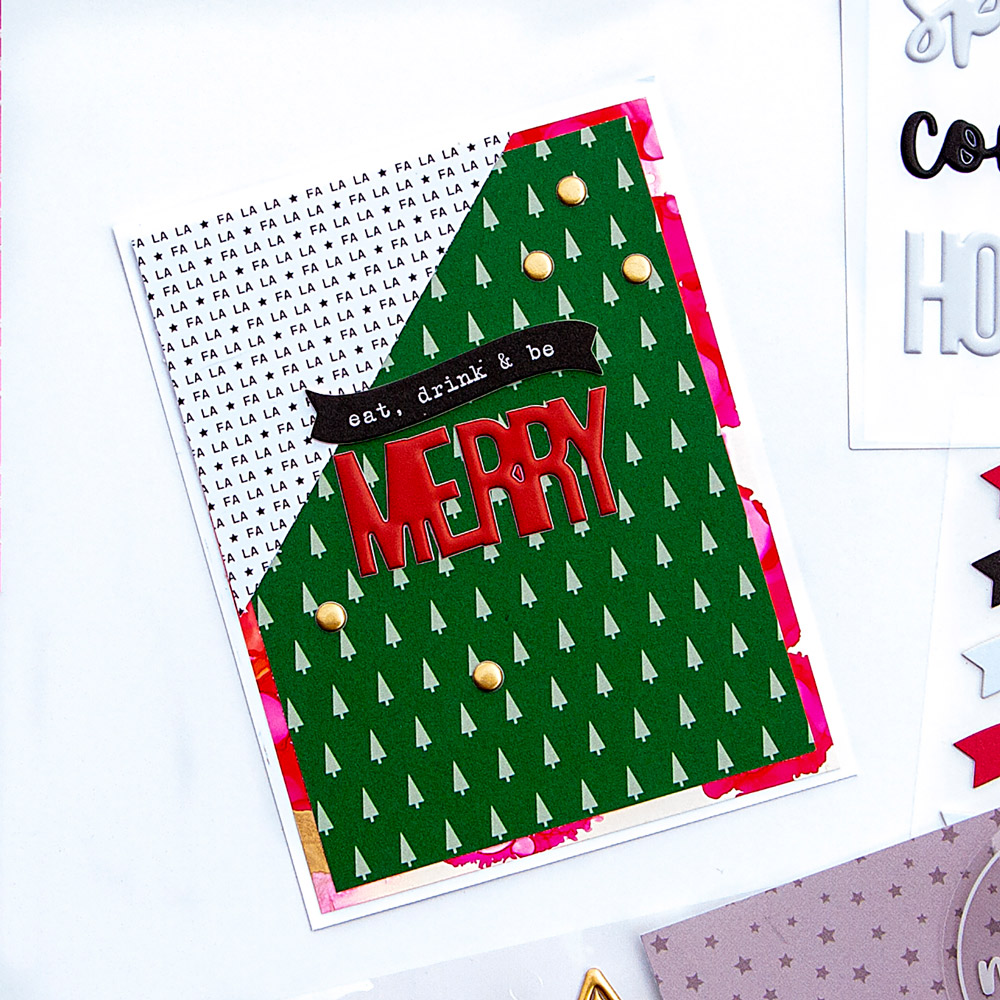
I created three cards with the Title Builder Vol. 5 The Merriest products. The first card could be used as invite. However, it could also be a greeting you give with an edible gift, bottle of wine or a holiday meal. I did use a background that I created with alcohol inks to really make the patterned papers pop. But, as you can see, the card is very simple—no involved techniques here! I still think it’s really festive and I would be happy to give this card to a loved one.
Why not use The Merriest Chipboard Stickers as an accent with your other favorite Elle’s Studio products? They don’t have to be the star, they work beautifully to simply highlight the rest of your project. I loved the banner not only to act as part of the greeting, but also to provide some great contrast.
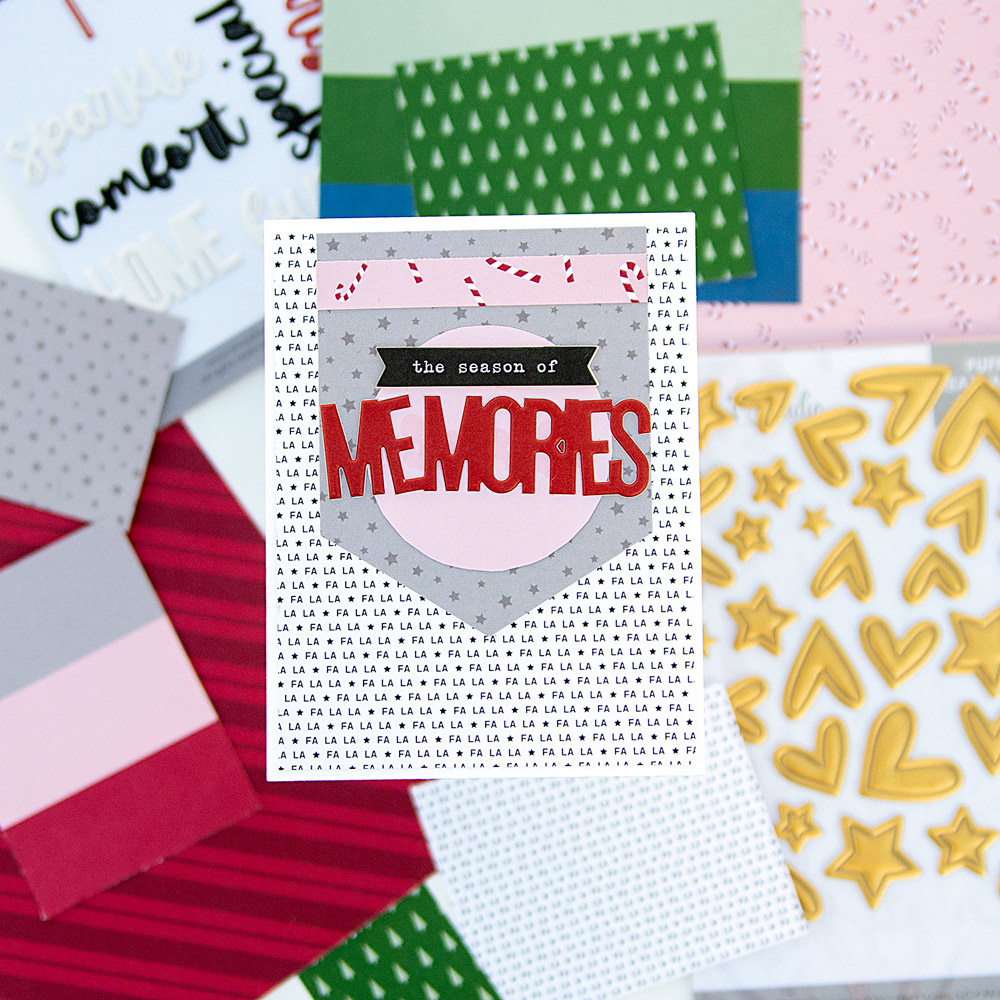
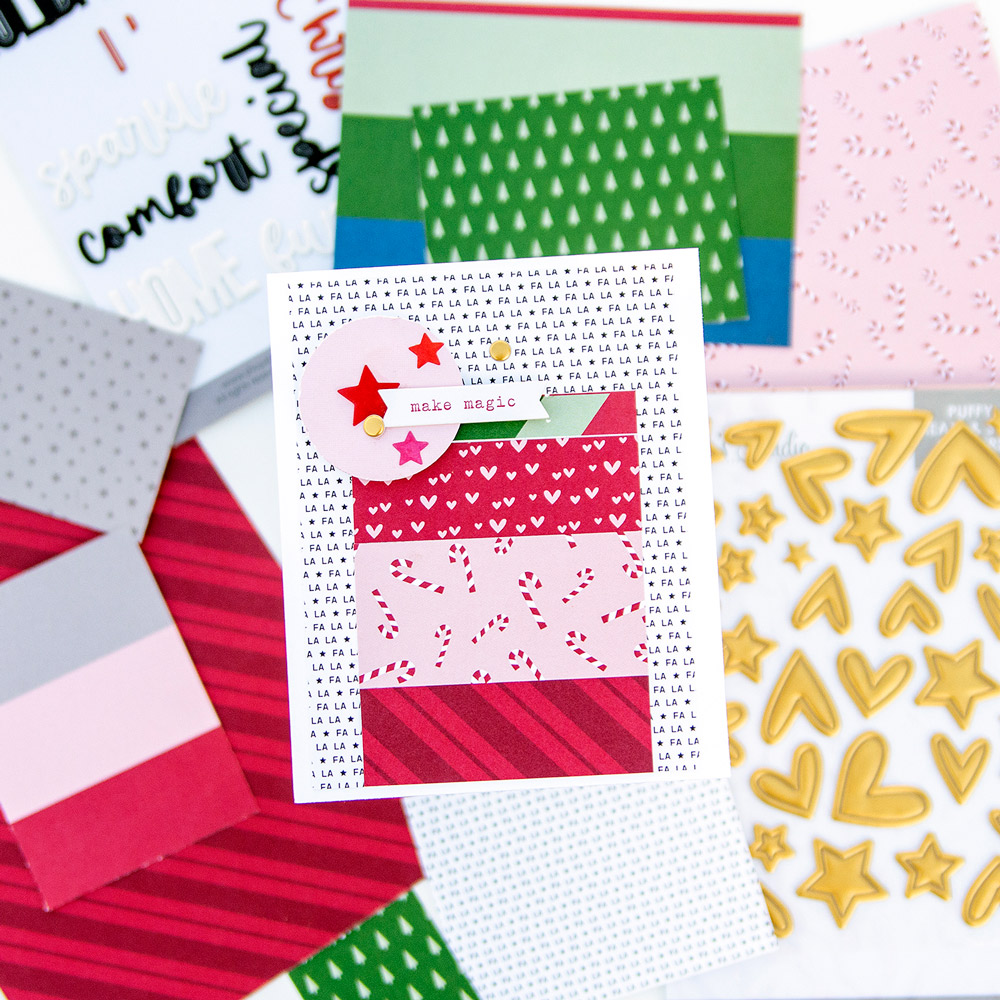
Now, creating a card with some favorite patterns is ALWAYS fun. I mean, when you get to trim those cute candy canes how can you be anything but happy? Now, using the patterned papers from the Wonder Paper Stack to create a 3 x 4 inch card was really fun. I mean, I chose my favorites that went together and then one for contrast, the top diagonal stripe. However, the best part is the cute FA LA LA background paper as it goes with anything!
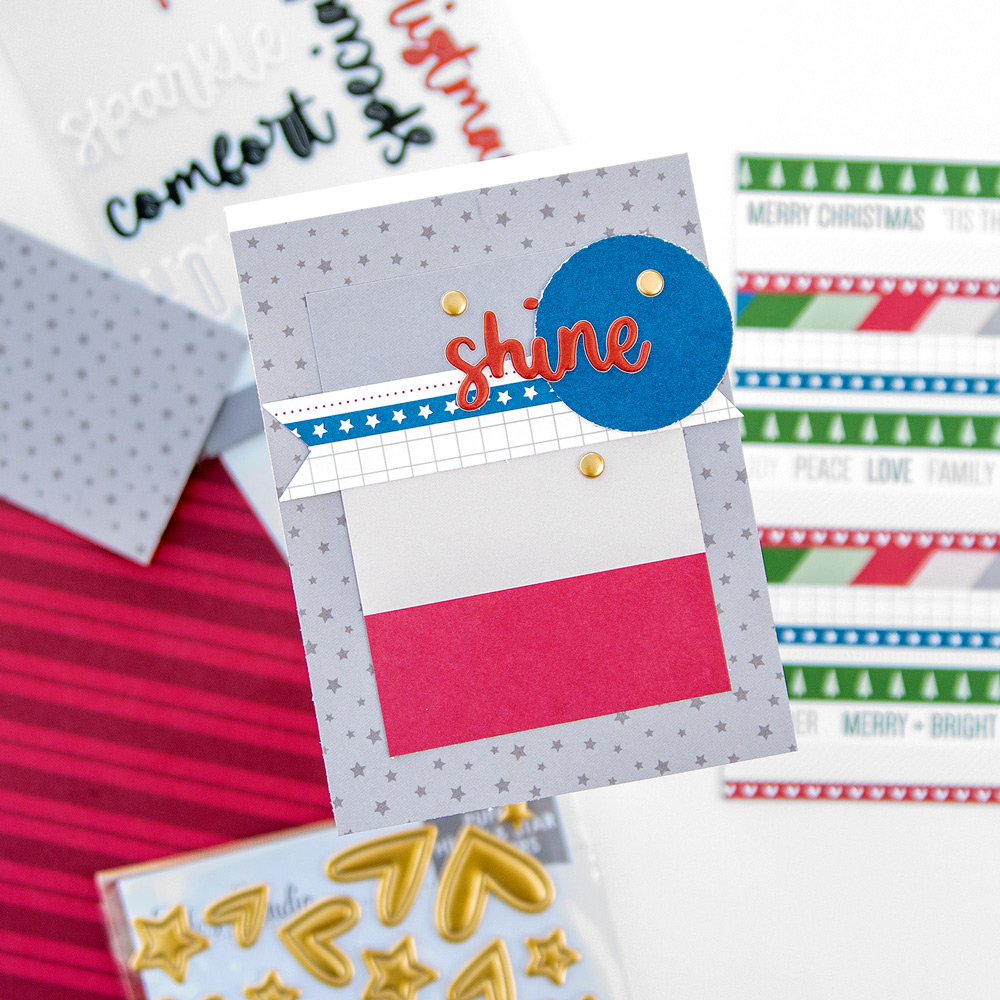
Now, here’s the thing. After the holidays you’re often left with some Christmas supplies. Don’t let that top you! These supplies will definitely take you further than the holidays. Simply look at the colors and any phrases of the supplies you still have left and you might have a great card to give any time of the year. Why not make some as soon as you finish with your Christmas projects so you have them ready to go when you need them?
Now, do you think you might use the The Merriest collection to create some holiday cards, even if they do not include stamping? I’d love to see what you dream up, so share them with us on social media using the hashtag #EllesStudio!
Thanks so much for joining us this week as we shared our design team’s inspiration and ideas using the Title Builder Vol. 5 The Merriest collection! Be sure to show us what you’re creating with it using the hashtag #EllesStudio on Instagram or in our Facebook Group! We cannot wait to see what titles, or sentiments, you create!
Comments Off on The Merriest Holiday Cards with Title Builder Vol. 5 and Jennie McGarvey | Share This
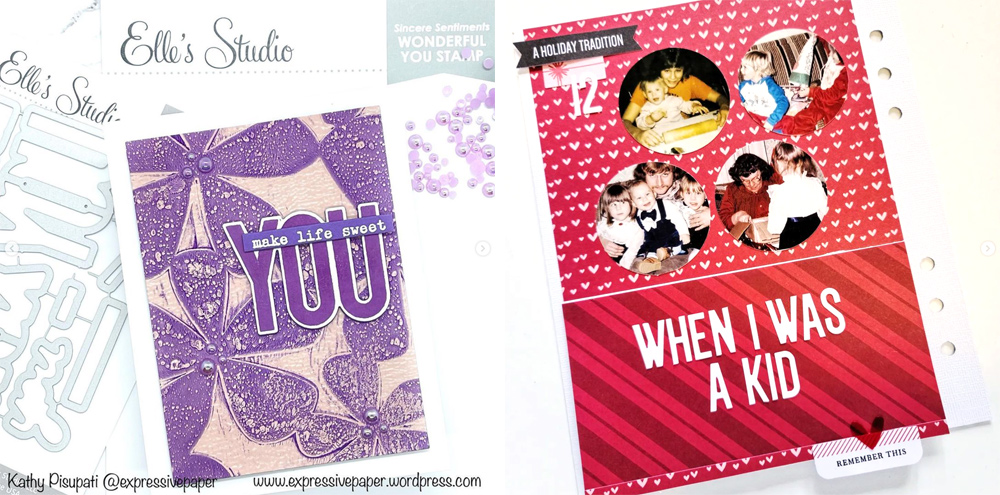
Title Builder in pockets? Yep, you’ve got that right! Title Builder stamps also work perfectly in pockets, and whether you’re creating a sweet and simple title tag, or getting a bit more creative with your stamps, we think you’ll love what design team member Junell Kruzel has to share with us today!
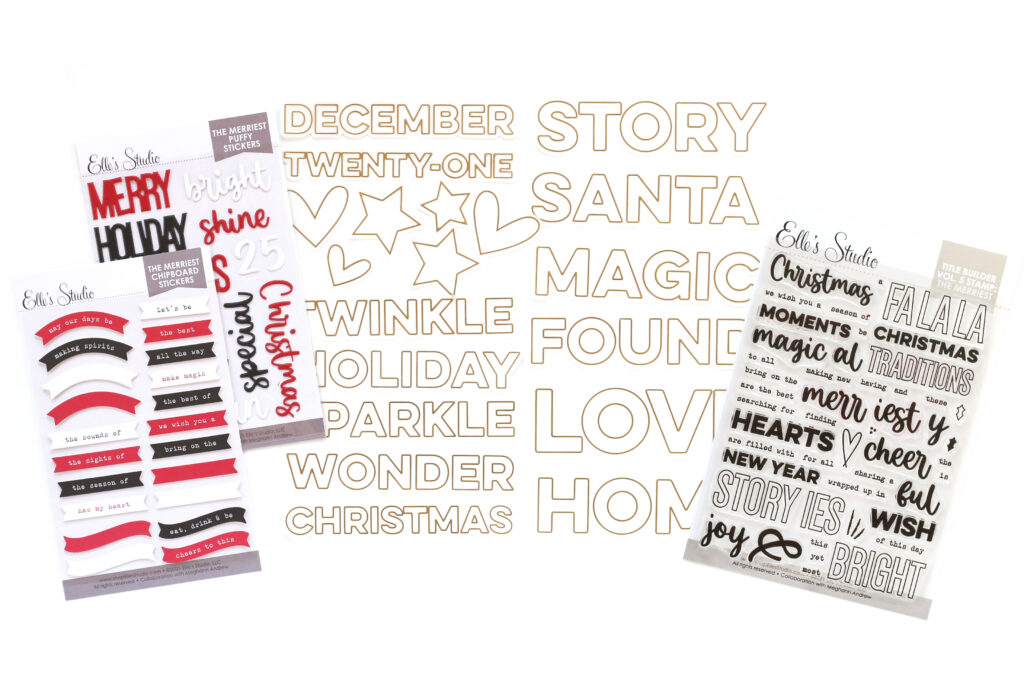
Hello, hello my friends! It’s Junell on the blog today. It’s hard to believe that we’re thinking about Christmas time already, but all of the Elle’s Studio holiday goodies just have me buzzing with excitement for the season! Have you seen the brand new Title Builder Vol. 5 collection yet? It’s called “The Merriest” and it is filled with holiday words that you can mix and match to create your own titles and sentiments! There are even stamps with just suffixes, such as -al, -iest, -y, and -ful to help you create your own words in the manner you wish to use them. So clever!
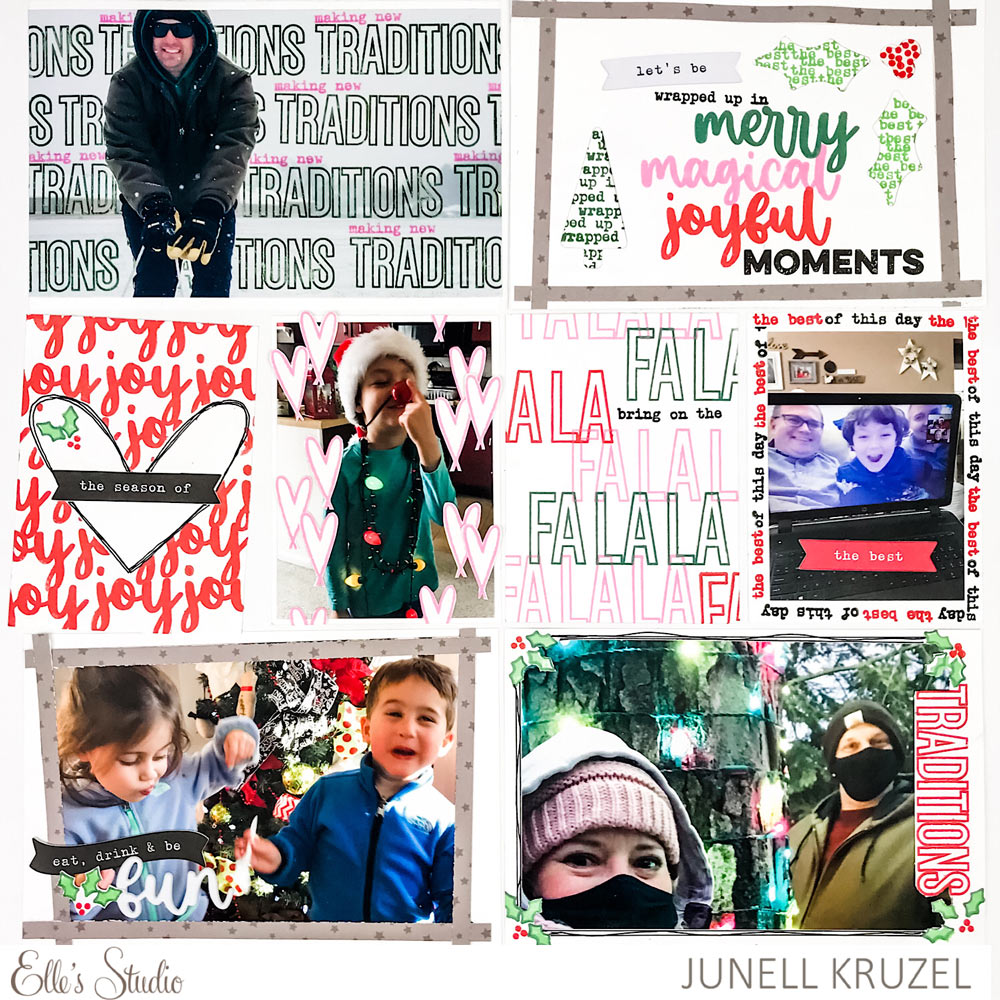
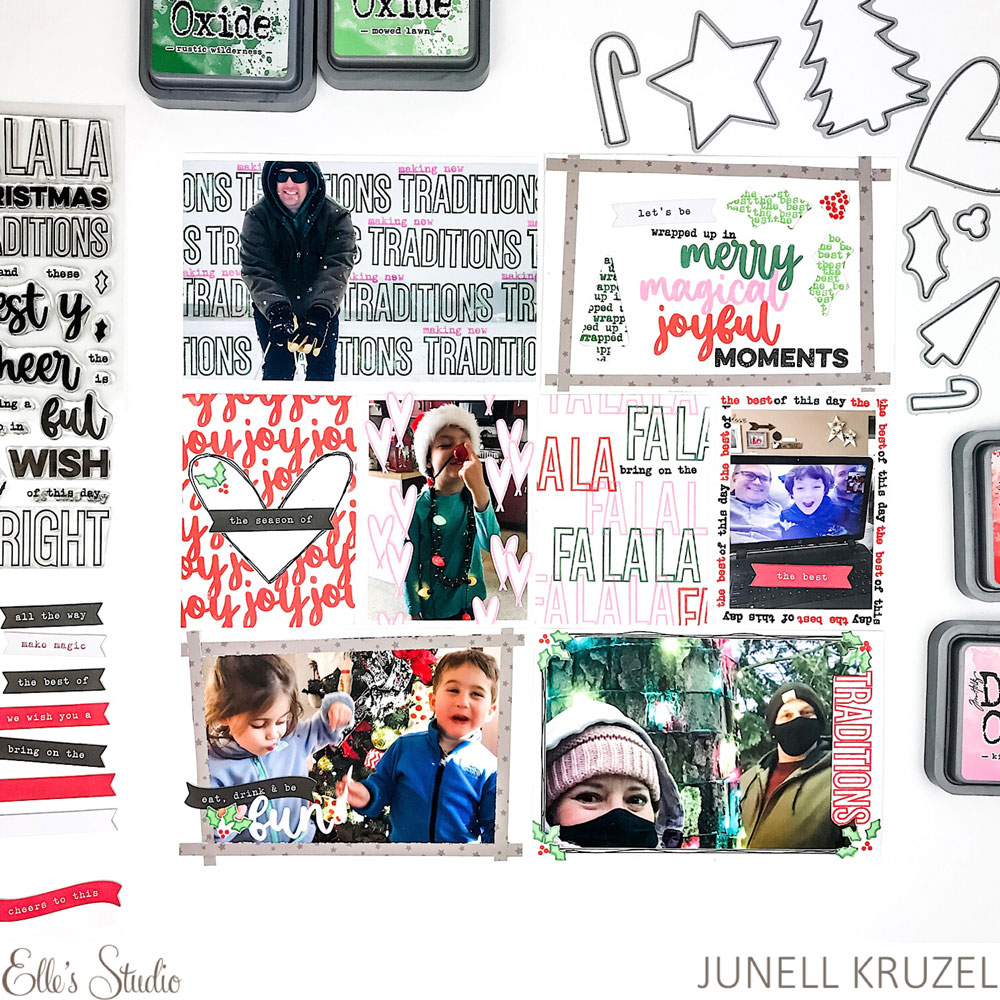
For my pocket page spread, I really wanted to showcase the Title Builder Vol. 5 The Merriest Stamp and all the different ways you can use it along with the most used stamping techniques I create with. For this page I only used four Distress Oxide colors: Kitsch Flamingo, Candied Apple, Rustic Wilderness, and Mowed Lawn. Let’s jump right in!
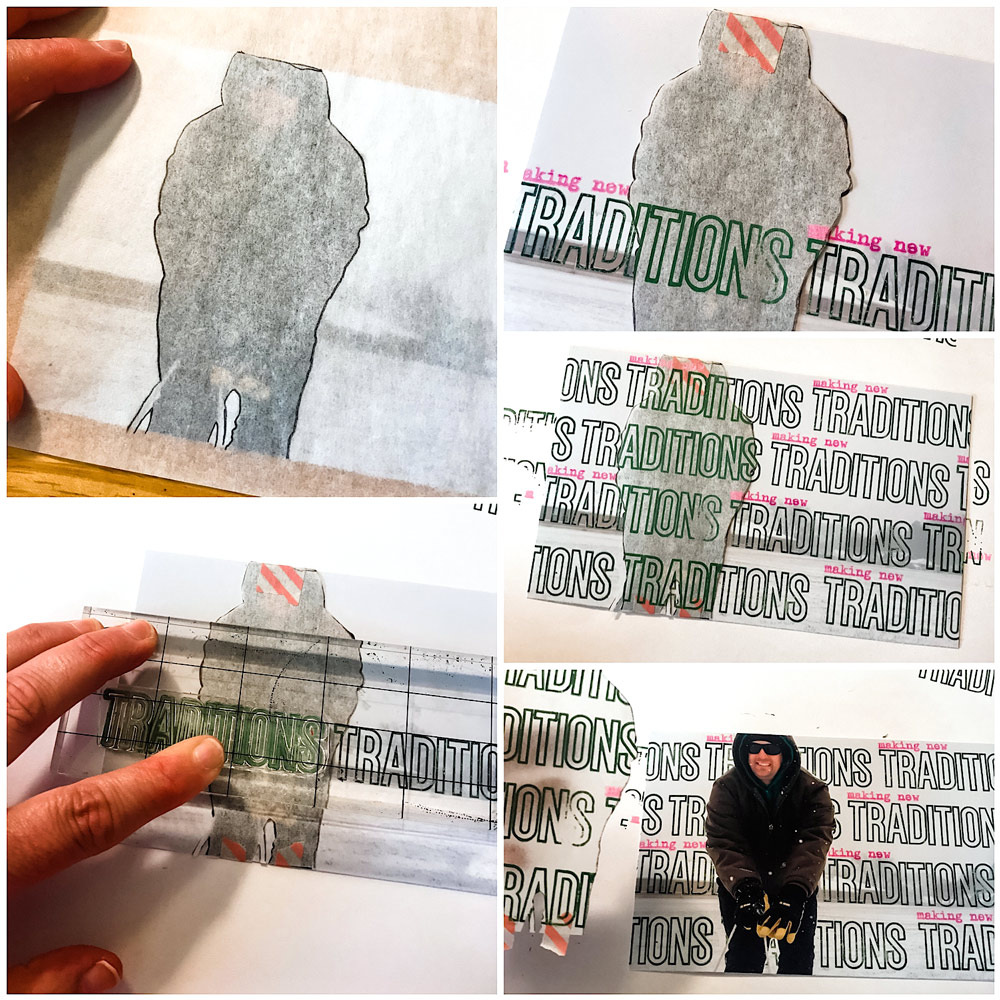
I’m starting right off with my favorite masking technique on the top, left 6 x 4 inch photo. I just love how it kind of gives the photo a 3D effect. And it’s pretty simple to achieve!
First, I laid a piece of tracing paper over my photo and used a pencil to trace an outline of my husband. This is where I do not want the stamping to go. I then cut it out and used washi tape to tape it back over the picture making sure the tape didn’t touch my photo, just the tracing paper and the back of the photo.
Once I figured out what stamp I wanted to use from the Title Builder Vol. 5 The Merriest Stamp, I inked it up and started my stamping on the horizon line in the photo. I continued repeat stamping over the photo and tracing paper until the photo was covered. Because I used Distress Oxide, I had to let it dry for about 20 minutes. I did not want it to smear after doing all that stamping! Once I was positive the stamping was dry, I carefully removed the washi tape and tracing paper from the photo and was left with a pretty cool photo! I just love how this looks!
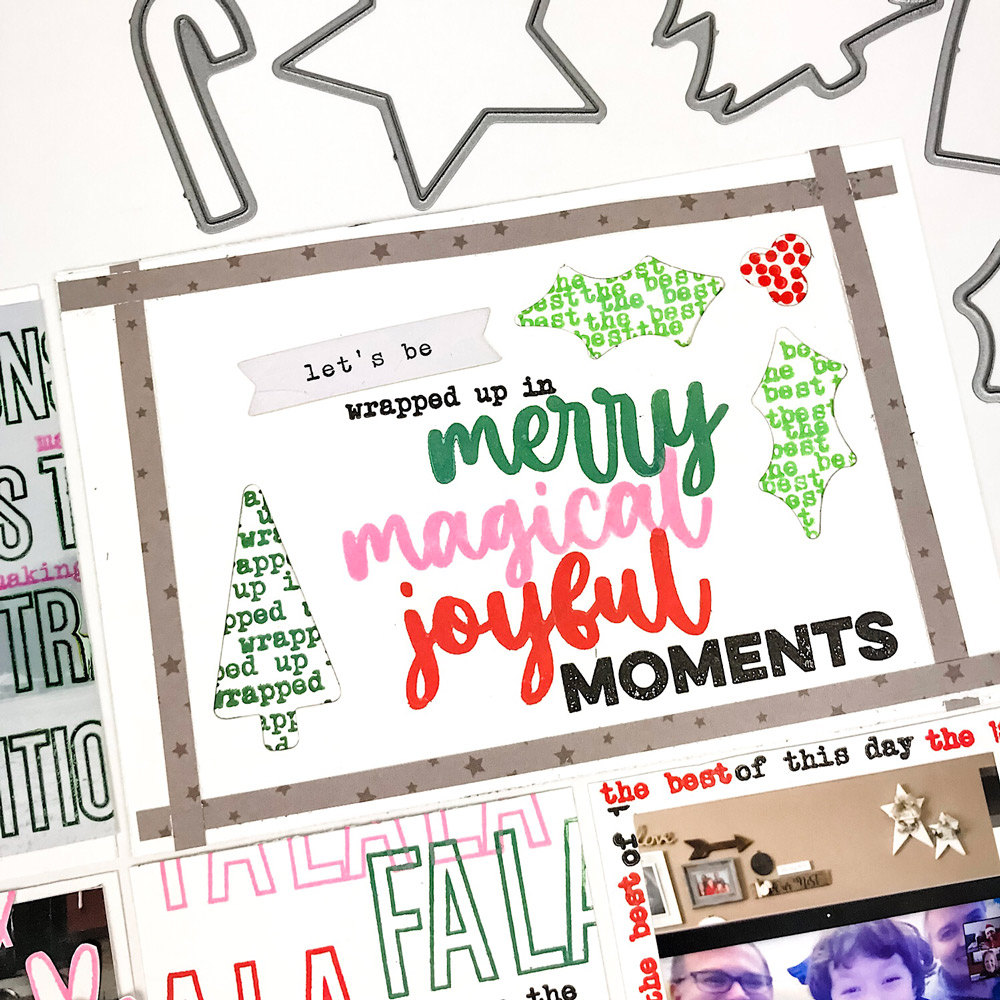
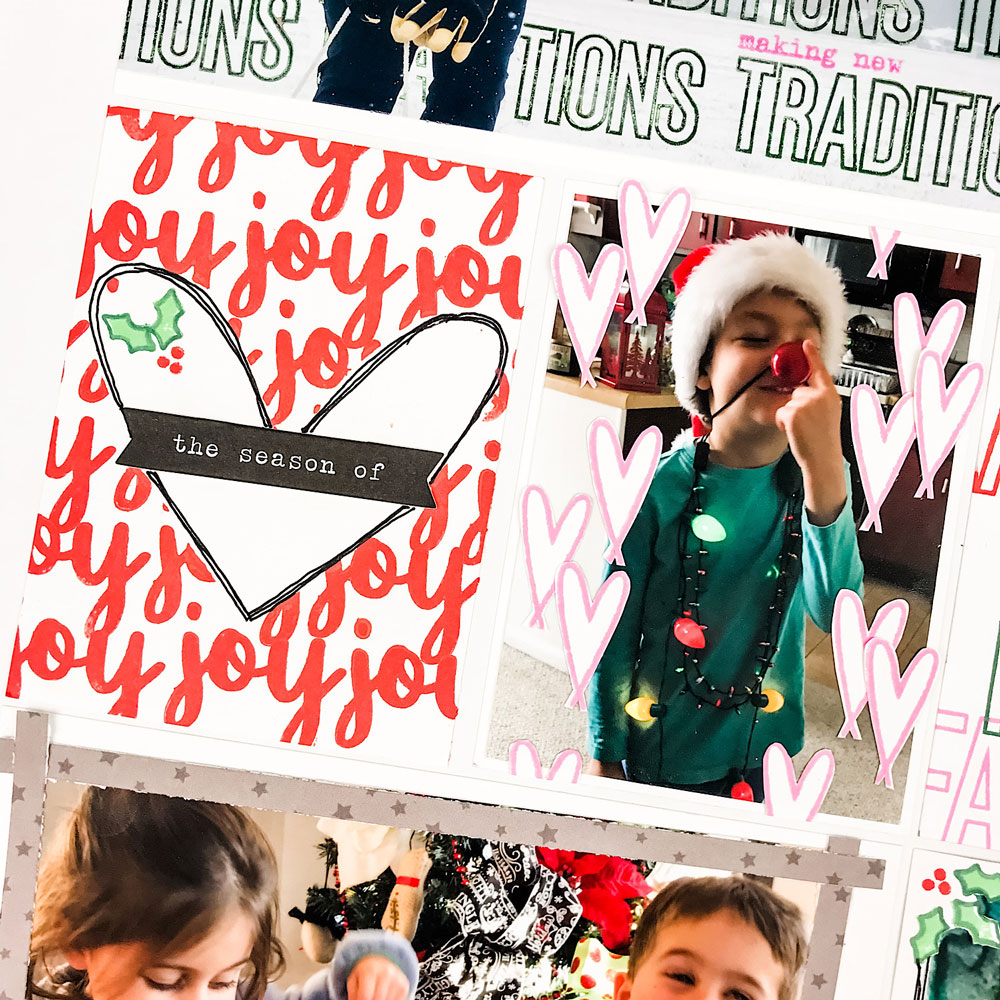
For the first 3 x 4 inch tag on the left, I used the masking technique again. I had an acetate heart in my stash that I lightly adhered before stamping across the entire tag with the word joy. I removed the acetate heart to reveal a white heart shape. I then added a banner from The Merriest Chipboard Stickers and did more stamping to add the holly leaves and berries.
The second 3 x 4 inch tag on the right is so cute! To create it, I stamped several hearts from the stamp set and then fussy cut them out and added them directly on top of the photo. Quick and easy.
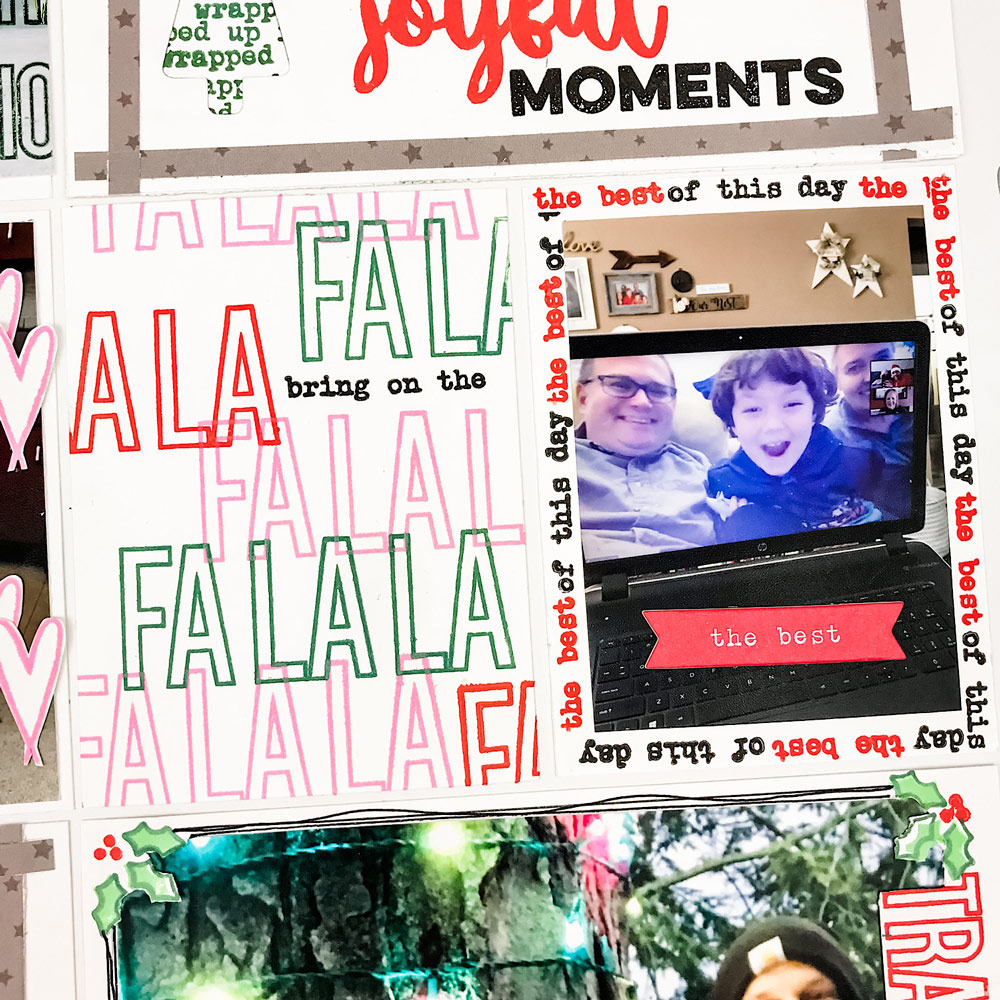
On the next tag, I created my own design with repeat stamping in different colors making sure to overlap them just a little to make it more interesting.
One of my favorite things to do with word stamps is create a border, so I did that with my last 3 x 4 inch tag. I alternated two different stamps to get the phrase I wanted. The first part “the best” actually comes from a stamp that says “are the best”. I very carefully used washi tape to mask off the word “are” to make it work. (I also could have cut the stamp apart, too.) I alternated between two colors to stamp my border.
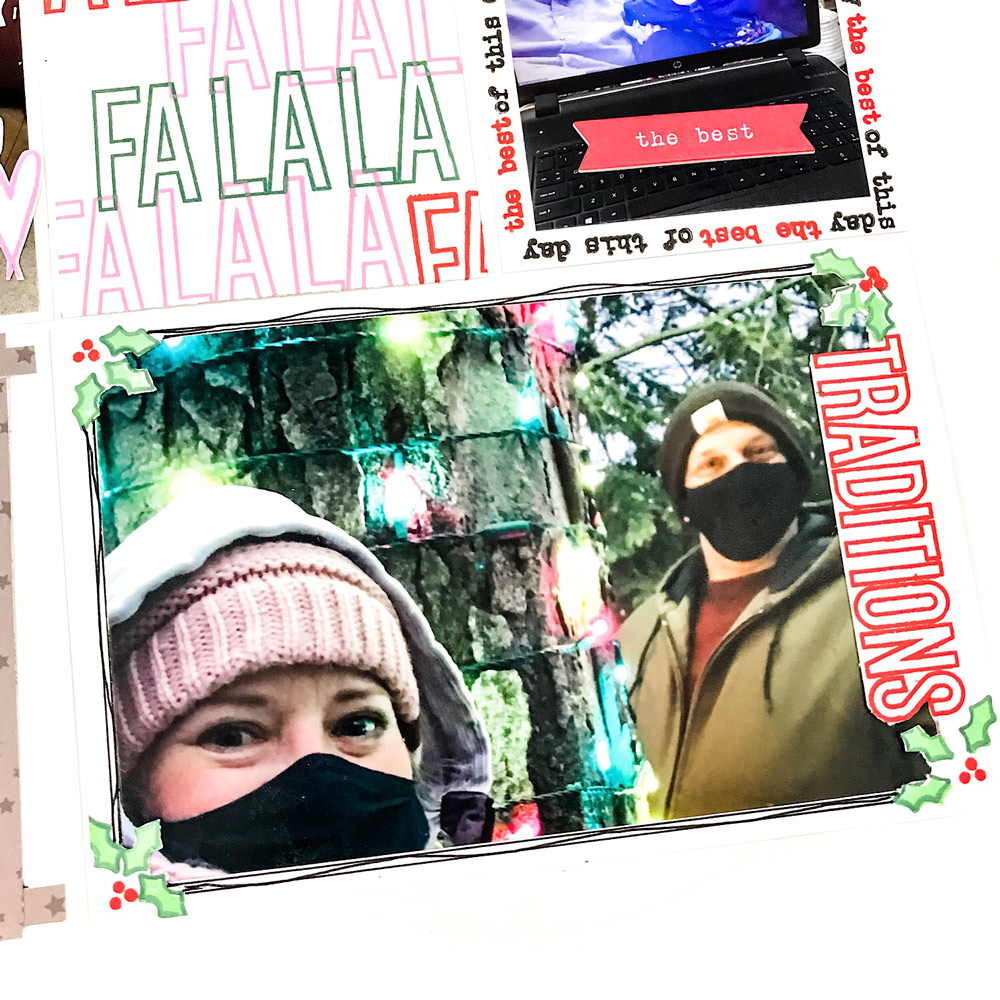
For the bottom right 6 x 4 inch photo, I stamped the word “traditions” vertically and also stamped holly sprigs in each corner. Instead of placing my photo over the top, I used an exacto knife to cut out the center and then slipped the photo underneath. I used a black pen to create doodles to add a border (and cover up some slips of the knife!)
These are the tried and true (and easy!) techniques I use when stamping. It was so fun playing with the new Title Builder Vol. 5 The Merriest Stamp to create my own sentiments and phrases! It will be in heavy rotation during Document December!
I cannot wait to see what you create with this set. What is your favorite stamping technique? Let me know! I’m on Instagram at @junell.kruzel and you can share with all of us, too, in the Elle’s Studio Facebook Group! Thanks for reading!
Comments Off on Sensational Stamping Techniques with Title Builder Vol. 5 and Junell Kruzel | Share This
Did you know that our Title Builder products are designed to fit a wide variety of memory keeping formats? If you love traveler’s notebooks as much as we do, you can use our new Title Builder Vol. 5: The Merriest collection in your TN, too! Let’s take a look at the beautiful way that design team member Marsha Farris did just that!
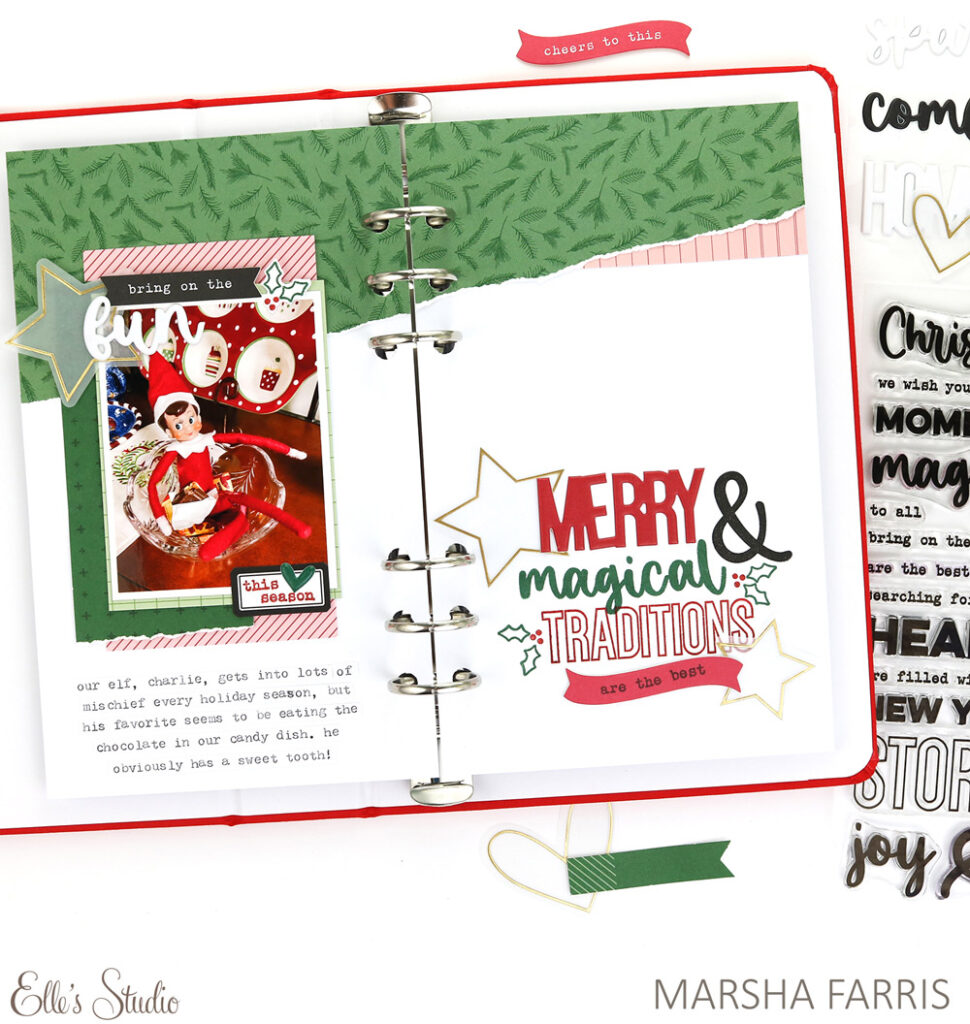
Hey, Elle’s Studio friends! This is Marsha, and I’m excited to share a traveler’s notebook layout featuring the amazing new Title Builder Vol. 5: The Merriest products! This release was perfect for a layout in my December album for last year documenting our elf, Charlie, and some of the mischief he got into during the holidays!
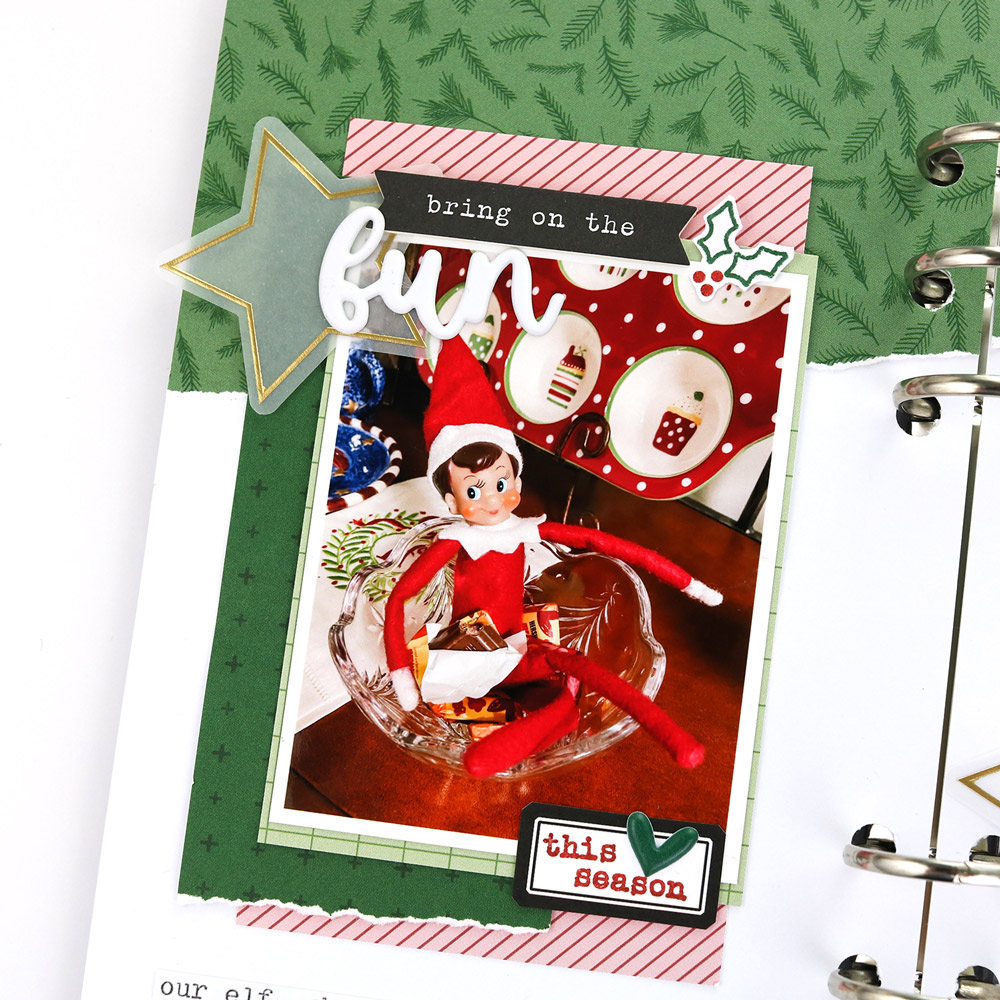
I began the spread by tearing a strip of green patterned paper from the Wonder Paper Stack and adding it across the top of white cardstock base pages. I used a journaling tag from the October 2021 Kit, a Grid Journaling Tag, and trimmed patterned paper to create layers behind the photo. To embellish the page, I added a banner from The Merriest Chipboard Stickers and a puffy sticker word from The Merriest Puffy Stickers. Next, I stamped a holly cluster from the Title Builder The Merriest Stamp onto white cardstock, trimmed it out, and added it along the edge of the photo, creating my own embellishment. A vellum star from The Merriest Vellum Words was perfect to complete the embellishment cluster.
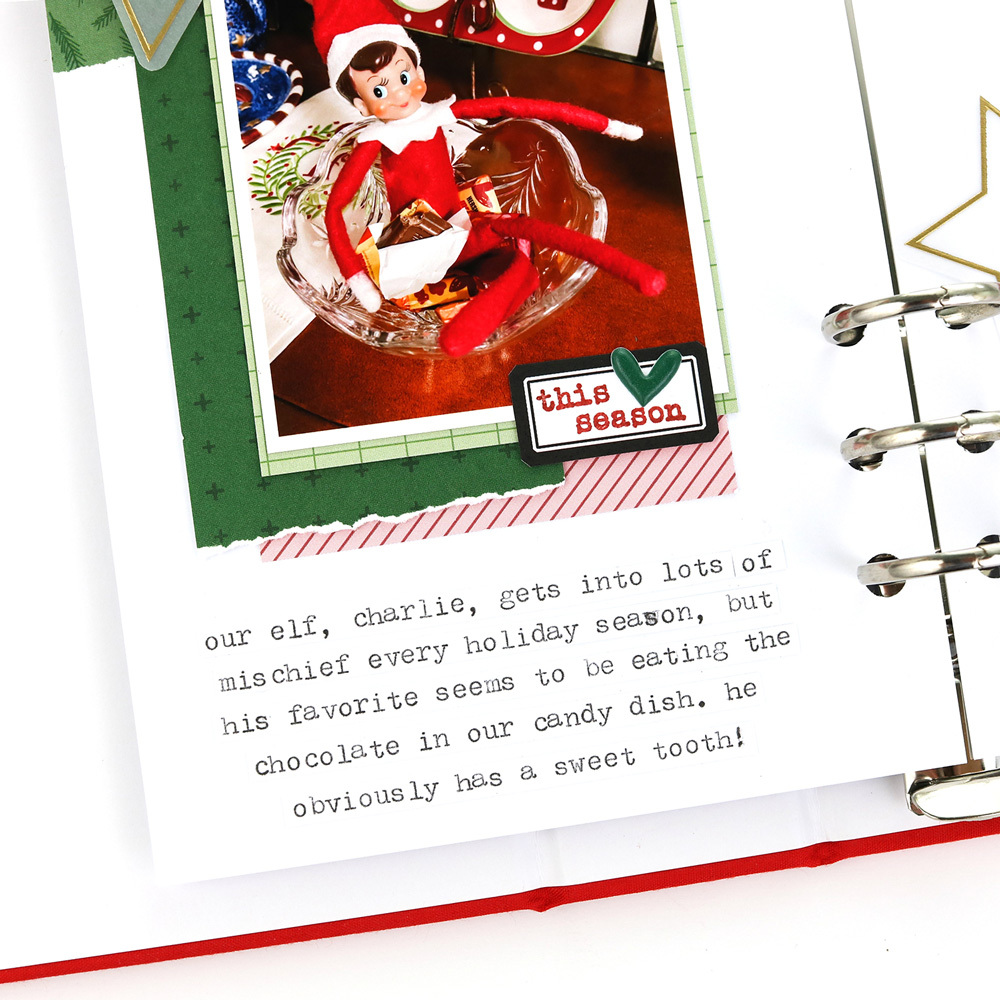
Next, I stamped a phrase from the Title Builder The Merriest Stamp onto a die cut label from the October Kit. You can create so many phrases by mixing and matching the words and sentiments from this stamp! To complete this side of the layout, I typed my journaling, trimmed it into strips, and added it to the bottom of the page.
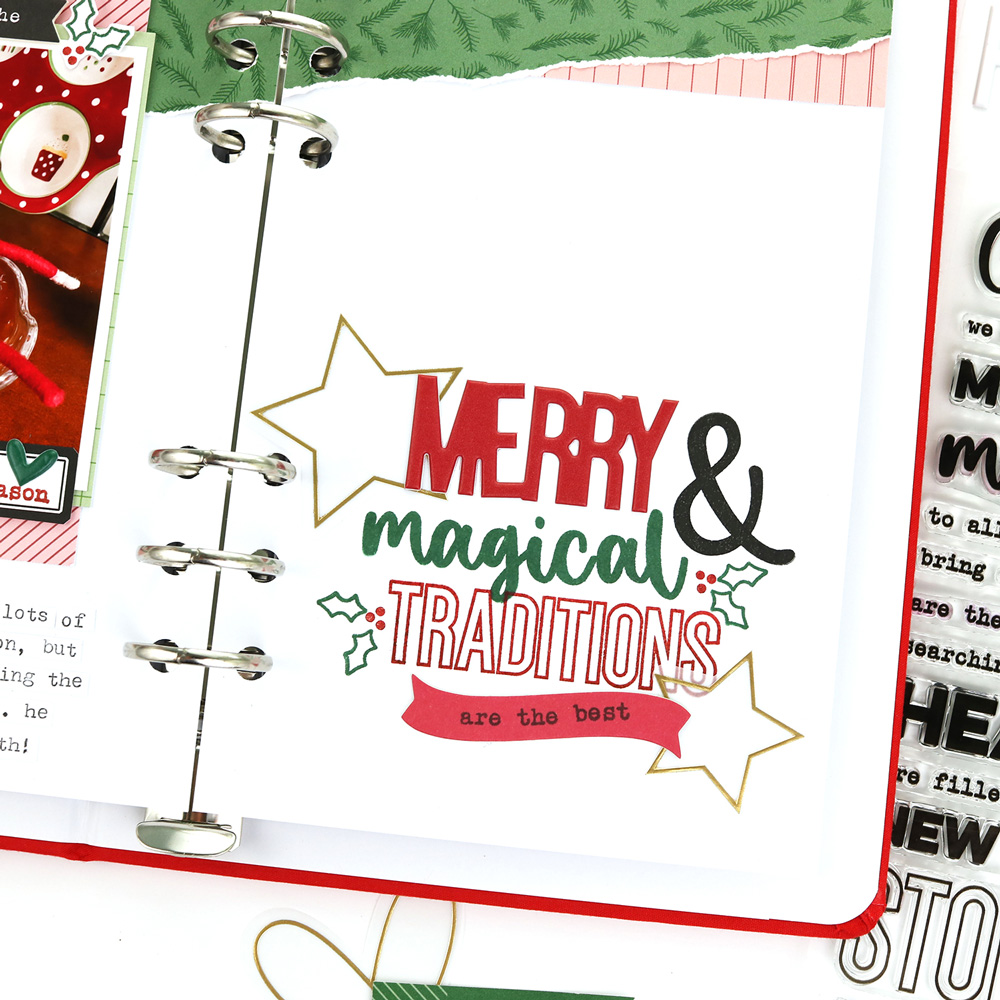
For the other side of the spread, I had fun creating the title using only the Title Builder: The Merriest products! I began by adding a puffy sticker word from The Merriest Puffy Stickers. Next, I stamped two words from the Title Builder The Merriest Stamp with green and red inks. Then, I finished off the title by stamping a phrase from the same stamp set onto a chipboard banner from The Merriest Chipboard Stickers. Vellum stars from The Merriest Vellum Words and stamped holly clusters added the perfect finishing touches for this page. There are so many title possibilities using this release. These products are definitely a must have for holiday documenting!
I hope you have found some inspiration for using the Title Builder Vol. 5: The Merriest products in your traveler’s notebook! Thanks so much for stopping by today! Happy creating!
Stop by tomorrow where design team member Junell Kruzel will be showing us how to use our newest Title Builder collection in pockets! We think you’ll love it!
Comments Off on A Merry and Magical Traveler’s Notebook Spread with Title Builder Vol. 5 and Marsha Farris | Share This