Sketch Thursday 12.13


Happy Thursday and if you’re here for our Celebrate December event, welcome to Sketch Thursday! Each Thursday we have a new sketch and invite our readers to play along and make a project based off the sketch. There’s a cool prize in it for one lucky winner, too!

Inspired by Sophie’s booth layout this sketch is sure to get your creative juices flowing. 

Take a look at how Jen Kinkade interpreted the sketch… Amazing, as always!


I was immediately drawn by the the use of envelopes on this sketch. For my interpretation, I used  die cut pockets. I filled the window pocket with glitter, sequins and snowflake wood veneer pieces–secured by machine sewing the pocket in place. I continued to layer the page with lots of Elle’s Studio supplies to complete the page for a non-traditional Christmas themed layout.

We’d love to see what you create with this sketch! Upload your project to our gallery and leave a link in the comment section below, for a chance to win a $10 Elle’s Studio gift certificate, just in time for Christmas! We’ll announce the winner next Thursday, when we introduce the new sketch for the week! 
THANK YOU to all that played along last week. Lots of fantastic entries!! 🙂 The randomly selected winner is… Jennifer Grace with her beautiful Joy layout. 
Congratulations!! Please email michelle@shopellesstudio.com the following info to claim your prize:


Name/Address:

Contest: Sketch 12.06.12
Prize: $10 Elle’s Studio gift certificate

Celebrate December – Treasure Hunt!

Welcome to Celebrate December at Elle’s Studio!  The month of December will be packed with holiday inspiration, projects, layouts, and gift ideas from many talented designers.  Be sure to check the Elle’s Studio blog everyday for prizes, giveaways, and inspiration!

Are you ready for our monthly Inspiration Gallery Treasure Hunt? All you have to do is find the answers to the questions below, and email them to us! The answers to our questions can all be found in our Design Team Gallery. From all the correct entries we will draw one winner that will win a $25 Elle’s Studio gift certificate!

Ready?! Here are the questions:
1. Who is our guest designer this month?
2. Which designer captured their “Elf on the Shelf” this month?
3. How many cards where in the December Inspiration Gallery?
4. Who made a cute Advent Paperchain?
5. Link us to the layout that says “Baby’s First Christmas”
6. Link us up the “Pampering Set”
7. How many projects did our gallery feature this month?
8. Who’s layout features the date “30 OCT 2012”
9. Kay made a really fun Christmas Frame! How many ES product sets did she use?
10. Link us up to the layout that features two light blub testers
11. What ES products did Diana use on her Christmas tags?

Alright, don’t forget to e-mail us the answers – do NOT post them in the comments section! We will draw the winner and notify them, via email, on December 17th, so don’t delay!

Good luck!

Celebrate December with Mandie Pierce

Welcome to Celebrate December at Elle’s Studio!  The month of December will be packed with holiday inspiration, projects, layouts, and gift ideas from many talented designers.  Be sure to check the Elle’s Studio blog everyday for prizes, giveaways, and inspiration!

Today we are thrilled to have Mandie Pierce joining us for Celebrate December. Mandie was a member of the Elle’s Studio Design Team in 2011.  Today she is sharing a portion of her Project Life album, and I know you will be inspired by her work!  Thanks for joining us Mandie!

Our first week of December was not too Christmas-y.  It was a typical week here– filled with school, play practices, and work functions.  I did manage to get the decorations put up on the mantel and the entry table and remembered to take some photos of our elf Buddy.  So a lot of our week in the photos was our elf and boys’ Lego advent calendars!  

The left side of the spread mostly houses photos of our elf and the Legos, with a couple other odds and ends from the week (I still can not believe we forgot to take a picture all dressed up for the Christmas party!)  

I used an insert page to include the decorations and our new Hallmark ornament for the year.  My dad works for Hallmark, and my mom sends us each a new ornament every year. (We have a ton!)  

On the right side, we have the main journaling, some more elf photos (of course!), my daughters room that I performed an “intervention” on, all of the boxes I took to the post office, and a photo from the wonderful night my husband and I spent in Napa celebrating a birthday with a friend. 

I loved using all the Elle’s Studio products this week.  I mostly use flat objects in my Project Life album.  I find I end up with a very thick album when I use 3 dimensional products, so I try to keep it as flat as possible.  The tags, stamps, and little bits are perfect for that.  You can make several layers without creating a lot of bulk on the page!

Today we are giving away a Celebrate December prize pack!  Leave a comment on this post and we will draw a random winner to receive this prize pack full of Elle’s Studio goodies!

Kelly Purkey Signature Series Launch Party – Giveaway

We are interrupting our Celebrate December event to bring you a really special giveaway from Northridge, to celebrate the launch of the new Signature Series book by Kelly Purkey!!

I was so, SO excited when I heard she was doing a Signature Series book and have been waiting for it to come out ever since! I love Kelly’s scrapbooking style and the fun things she captures in her travels, too! I got a sneak peek of the book last week and it is amazing!!

To celebrate the release, we have a really special giveaway for you! We have FIVE copies of her new book to give away and you have three chances to WIN one! To enter to win:
1. Leave a comment below
2. Friend us on facebook and then come back here and leave a comment saying you did
3. Tweet about our giveaway and then come back here and leave a comment with your twitter name

But wait! That’s not all 🙂 We are also giving away some Elle’s Studio items on their blog! Head on over there to win one of the five prize packs! And, we also have a special offer on her book from Northridge! If you click here, you can get FREE SHIPPING when you purchase the book! Pretty awesome, right?!

We want to thank Northridge for this special giveaway today and for providing the prizes!

Celebrate December with Jennifer Kinkade

Welcome to Celebrate December at Elle’s Studio!  The month of December will be packed with holiday inspiration, projects, layouts, and gift ideas from many talented designers.  Be sure to check the Elle’s Studio blog everyday for prizes, giveaways, and inspiration!

Today we have Jennifer Kinkade with us to share some of her beautiful December Daily album.  Jennifer is a member of our current design team, and we just adore all her beautifully layered layouts and projects.  

Happy December everyone!!  It’s Jennifer Kinkade here and I am going to share a few pages of my December Daily album with you.

This is my third year doing the December Daily and I still love it.   My typical format is 6″ x 8″.

First I would like to show you a few of the pages that I created using Elle’s Studio tags.
I like to make numbered divider pages to separate all of my days, like this one for day 4 (above).
Here you will see a few example of how I alter the Be Merry Note Tags.  You can see by adding simple things such as washi tape and letter stickers, it is easy to customize and layer your tags.
On my divider pages I like to add some “bling” with rhinestones, brads, sequins and embellishments.

I hope this gives you some ideas on how to use Elle’s Studio tags/labels/stamps for your December Daily!

Celebrate December with Daniela Dobson

Welcome to Celebrate December at Elle’s Studio!  The month of December will be packed with holiday inspiration, projects, layouts, and gift ideas from many talented designers.  Be sure to check the Elle’s Studio blog everyday for prizes, giveaways, and inspiration!

Today we have Daniela Dobson with us sharing a beautiful Christmas Morning layout using our Be Merry line.  Daniela was a member of our first ever design team in 2010.  We just love her work and are thrilled that she is joining us in our Celebrate December event.  Thanks Daniela!

I stamped the star banners with VersaMark and heat embossed with red embossing powder.  I cut them out and tucked them under the stamped “joy” (from the Exclusive Christmas Stamp set) that I cut out using a punch.  I layered “joy” over one of the Be Merry Tidbits using 3D Foam Squares.

I used the Be Merry Large Journaling Tags and Be Merry Note Tags as a base for my photos.  I stamped little bits and sayings on white card stock and cut them out (“Be Merry” and “December Notes”).   I love the little arrow/chevron from the stamp set that belongs with “Favorite photo”.  I carefully cut it apart and used just the arrow/chevron alone.

The Christmas trees are created by me in Silhouette Studio and cut out with the Cameo.
Other Products Used:
Echo Park patterned paper and stickers
Silhouette Cameo
Martha Stewart Punch
Therm O Web adhesive
Technique Tuesday and Clearsnap ink
The Twinery Twine
Embossing Powder
Christmas Trees created by Daniela Dobson in Silhouette Studio.


Today we are giving away a Celebrate December prize pack!  Leave a comment on this post and we will draw a random winner to receive this prize pack full of Elle’s Studio goodies!

Winners

Congratulations to the winners from this past week’s Celebrate December events:

December 1 Gallery Reveal:  Suz Mannecke for commenting on this layout by Valerie O’Neall
December 3 with Lisa Dickinson:  Michelle Huegel
December 5 with Nicole Harper:  Margie
December 7 with Ali Edwards: Leslie Harvey

Please contact michelle@shopellesstudio.com with the following info to claim your prize.
Name:
Address:
Prize/Date Won: Celebrate December Prize Pack

Be sure to check the Elle’s Studio blog daily next week for more chances to win!

Celebrate December with Valerie O’Neall


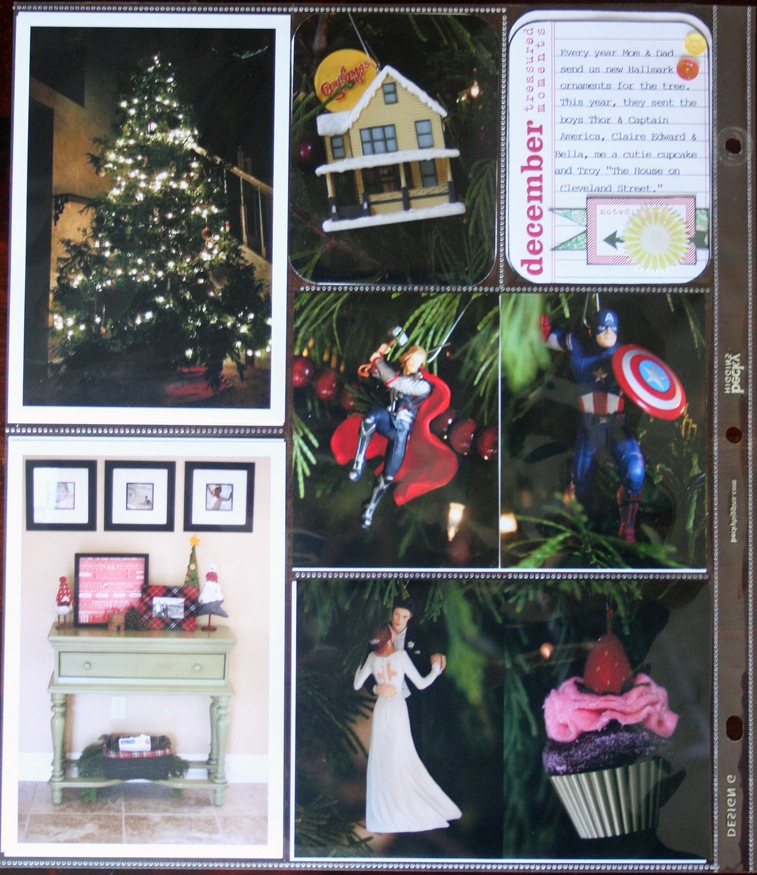
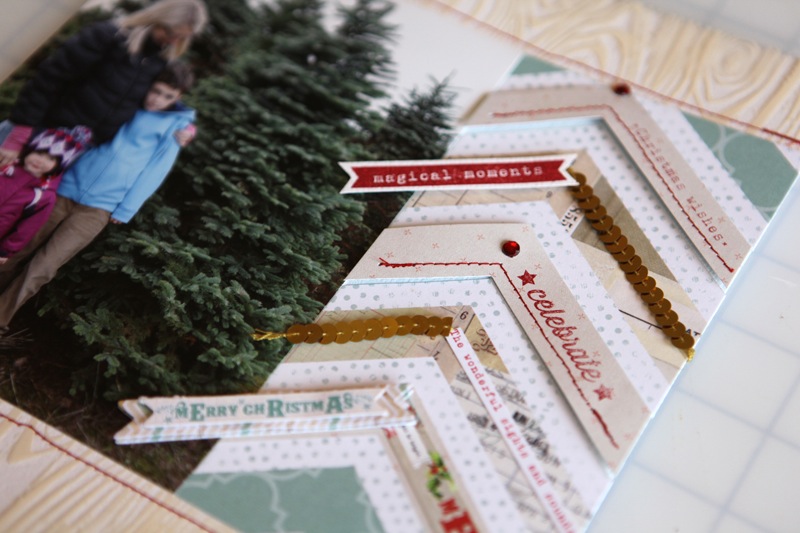
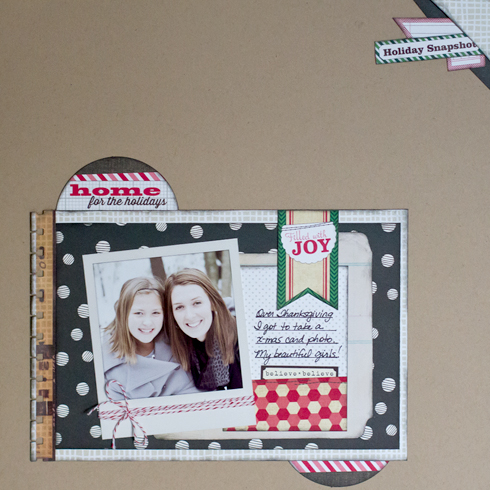
Welcome to Celebrate December at Elle’s Studio! The month of December will be packed with Holiday inspiration, projects, layouts, and gift ideas from many talented designers.  Be sure to check the Elle’s Studio blog everyday for prizes, giveaways, and inspiration!

Today we have Valerie O’Neall with us with a wonderful gift idea!  Valerie is on our current design team and we are thrilled she was able to join us in Celebrate December and create TWO quick and easy calendar set using our Calendar tags.   


I have two simple calendars to share with you today.  Both are so easy to create.  You could easily make each one of these in an hour or less and most likely already have the supplies you need in your scrapbooking stash or could easily find a substitution if you are missing something.  I used a set of 2013 Chic Calendars- brights and a set of 2013 layered calendars- 3 inch circles.  

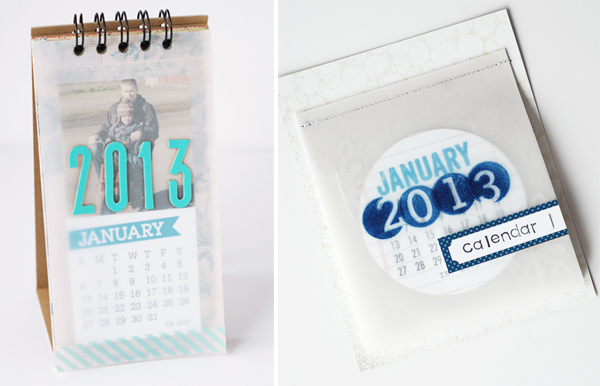
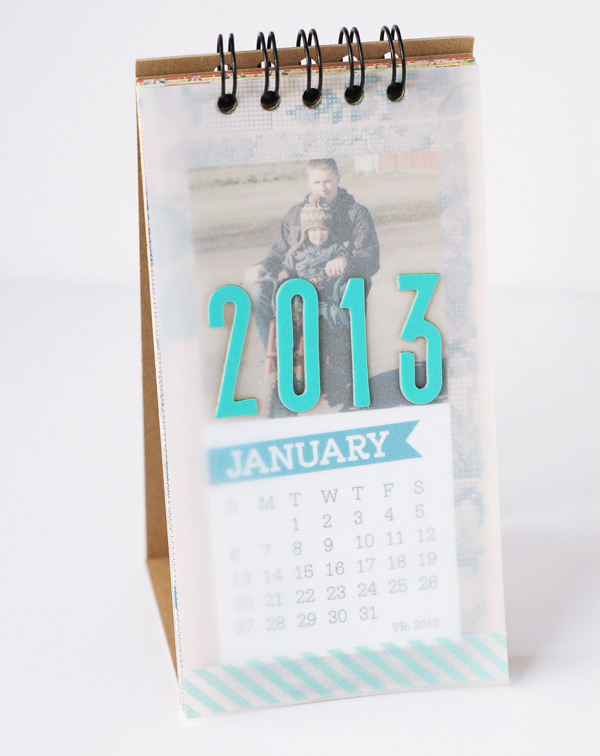
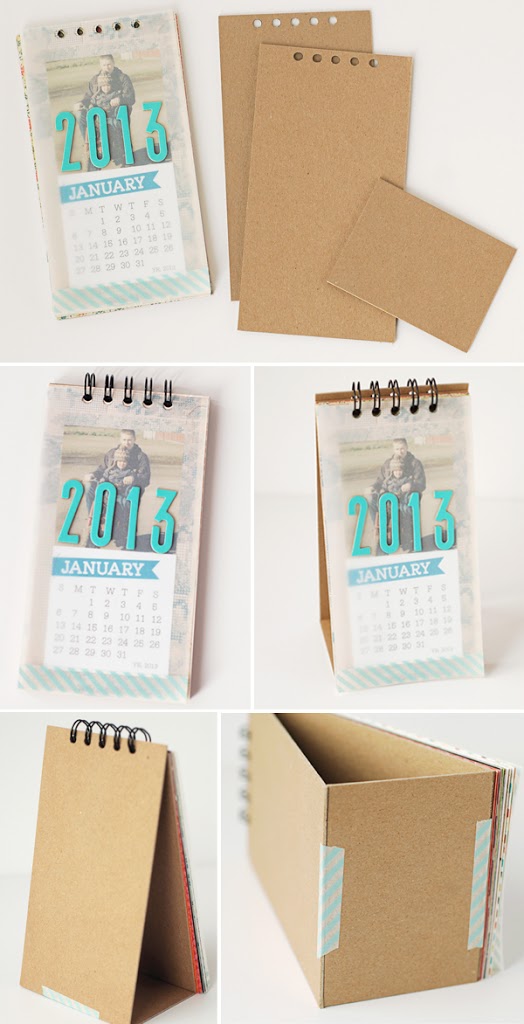
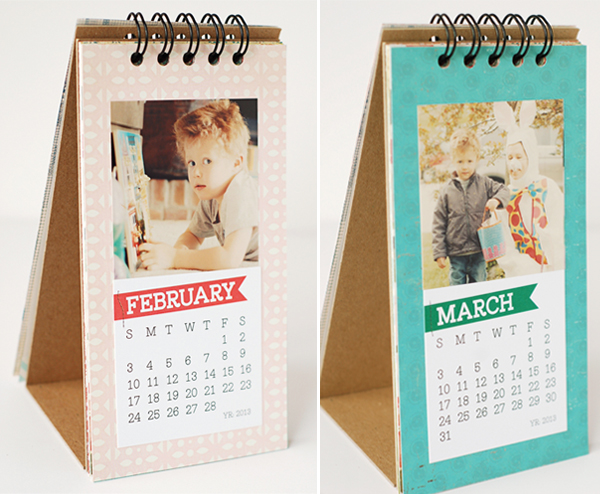
First up is the stand-alone desk calendar.  If you would like to make your own, this one measures 4 inches by 7.5 inches.  Gather 12 sheets of patterned paper (I pulled from a box of scraps) and cut to size.  Photos are 3 inch squares like the calendar tags.  Adhere one calendar tag and one photo to each rectangle of patterned paper leaving about a half-inch of patterned paper showing at the bottom and about an inch showing at the top to leave room for binding.  I used vellum, a strip of washi tape, and some Thickers to create a simple cover page.
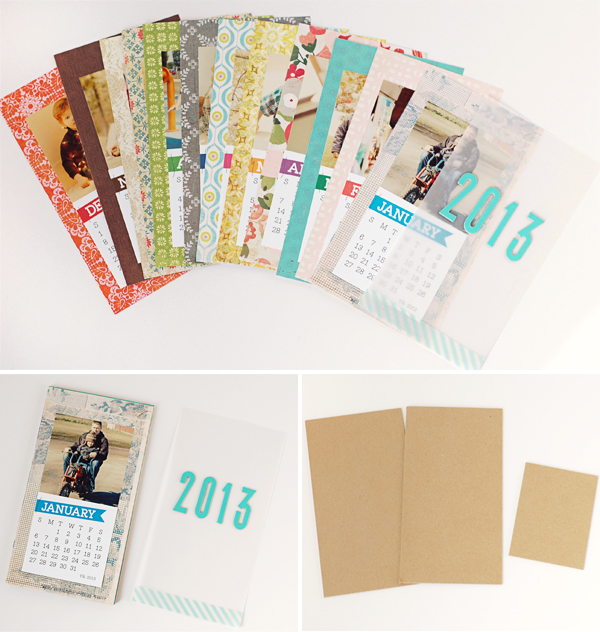
Cut the chipboard to create the stand,  You’ll need two 4 x 7.5 inch pieces, and one 4×3 inch piece.  I left my chipboard raw, but you can cover yours with more patterned paper if you prefer.  Using the binding method or machine of your choice– punch holes along the top of all the calendar pages and the two 4 x 7.5 pieces of chipboard.  Make sure all of your calendar pages are in the correct order, place a piece of chipboard on the bottom and the top, place your coil on, and cinch according to the instructions on the binding machine.  If you don’t have a binding machine, no worries– you can simply hold everything together with two binder rings.
Assemble the chipboard calendar stand by taping the smaller chipboard piece between the two larger pieces to make a triangle.  And that’s about all there is to it!  One personalized calendar to place under the tree for someone special to enjoy all year.


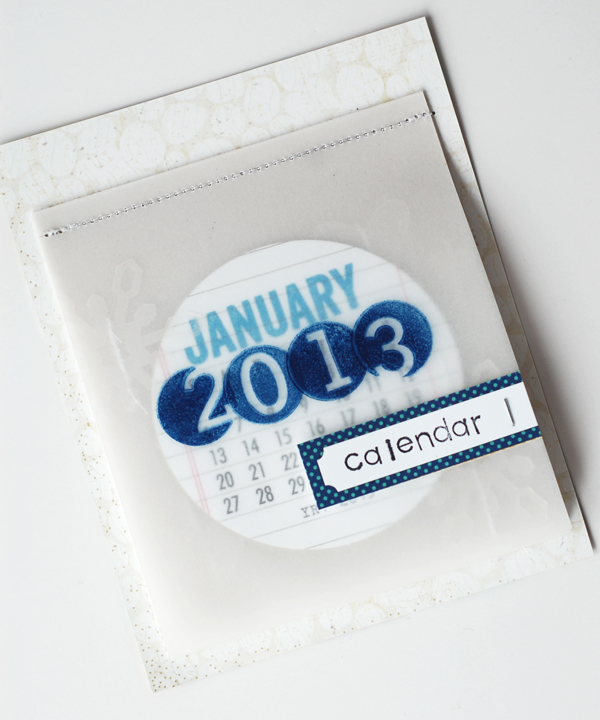
And now for a fun little tear-away calendar.  This one can easily be pinned to a bulletin board or hung on the wall.  I think it would look extra cute clipped onto a small clipboard.
I’ve got a slight obsession with vellum right now.. can you tell?  Go ahead and cut thirteen 4 x 4.5 inch rectangles from vellum.  Take the first layered 3 inch circle calendar and center it on the first rectangle of vellum.  Adhere with a tape runner.  Leave more space again at the top (compared to the bottom) for binding.  To make sure all 12 circles are located in the same spot on the vellum, leave that first month down and lay the next piece of vellum on top.  Carefully adhere the next month, lining up with the circle below. Repeat this process to line them up until all twelve months are done. 
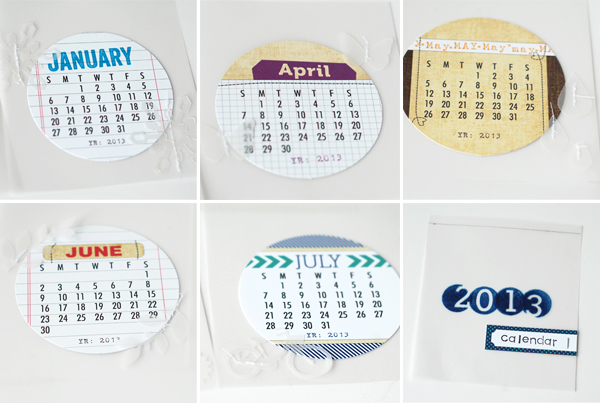
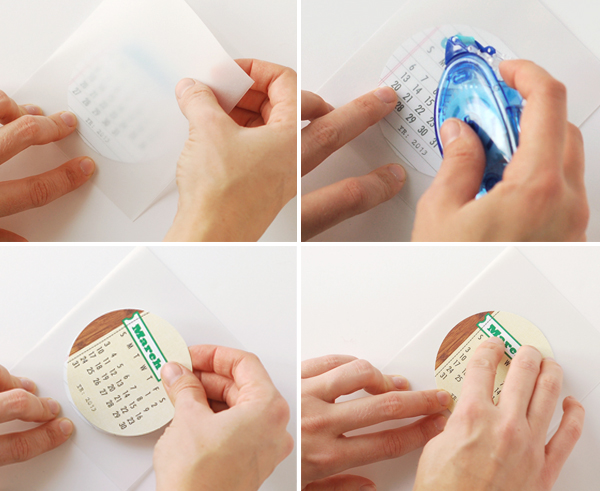
Decorate each month with shapes cut or punched from vellum or patterned paper.  I stuck with simple vellum shapes that I either cut with my Silhouette SD or punched.  To cut the vellum with the Silhouette, I set my blade at 5 and used the heavy card stock setting.  This may vary depending on the weight of vellum you are using.   I am using a 30 lb. 44 gsm vellum.  I sewed each vellum shape with some messy sewing machine stitching.  The cover page was stamped with the Number-It stamp set 
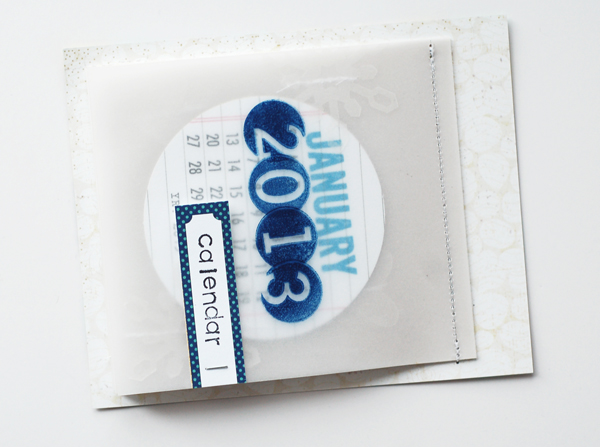
I measured a quarter of an inch down from the top and drew a line along the cover or my stitching guide.  The back of the calendar is a piece of patterned paper cut to 4.5 x 5.5 inches.  Carefully stack your month pages in correct order and put the cover page on top.  Place these 13 pages on top of your patterned paper calendar base.  Make sure you have a heavy- duty needle loaded into your sewing machine so the needle doesn’t break on you.  All the layers of vellum end up being rather thick, but I didn’t have any trouble sewing through it.  Also, adjust your stitch length so your stitch length is small and allows for easy tearing.

Giving myself a pat on the back for having two more gifts crossed off my list.  Hope you have a great December and a fantastic Christmas!  

Celebrate December with Ali Edwards

Welcome to Celebrate December at Elle’s Studio!  The month of December will be packed with Holiday Inspiration, projects, layouts, and gift ideas from many talented designers.  Be sure to check the Elle’s Studio blog everyday for prizes, giveaways, and inspiration!

We are thrilled to have Ali Edwards with us today, sharing a beautiful Holiday Layout featuring our Exclusive Christmas Stamp Set.  Currently, Ali is documenting the month of December in a December Daily album– so be sure to also visit her blog for daily December inspiration!  We are delighted to have Ali join us for our Celebrate December event!


SUPPLIES
Stamps: Elle’s Studio 
Pattern Paper & Accents (gems, circle accent) : My Mind’s Eye
Overlay: Hambly
Sequin Ribbon: American Crafts
Ink: StazOn

We love the way Ali used our Exclusive Christmas Stamp set and mixed it within the chevron design, embellishments, and stitching within her layout.   The Exclusive Christmas Stamp set contains sentiments that are perfect for Christmas and Holiday layouts, yet could be used throughout the year.
Today we have a giveaway!!!   Leave a comment below for your chance to win the Exclusive Christmas Stamp set Ali used for this layout along with many items from our Be Merry line and MORE!

Sketch Thursday 12.06

Happy Thursday and if you’re here for our Celebrate December event, welcome to Sketch Thursday! Each Thursday we have a new sketch and invite our readers to play along and make a project based off the sketch! There’s a cool prize in it for one lucky winner, too!

Today’s sketch is inspired by Valerie’s cousins layout. I like the slanted picture and how she added splashes of color (literally!) and embellies.


And here’s Kay fabulous take on the sketch.
I love Valerie’s work, and always find so much inspiration! I changed this layout to a 12×12 layout, and replicated the photo and card being on an angle. I loved the wrapping across the page, and how it gave the page unity. I decided for this size to only wrap the photo. Maybe someday I’ll get brave enough to add the ink splatters! – Kay


We’d love to see what you create with this sketch! Leave us a comment or link your projects here for a chance to win a $10 Elle’s Studio gift certificate, just in time for Christmas! We’ll announce the winner next Thursday, when we introduce the new sketch for the week!


Last week’s randomly selected winner is… Kim. Congratulations!! Please email michelle@shopellesstudio.com the following info to claim your prize:


Name/Address:

Contest: Sketch 11.29.12
Prize: prize pack