A January 2022 Kit Preview with LeeAnne Jones

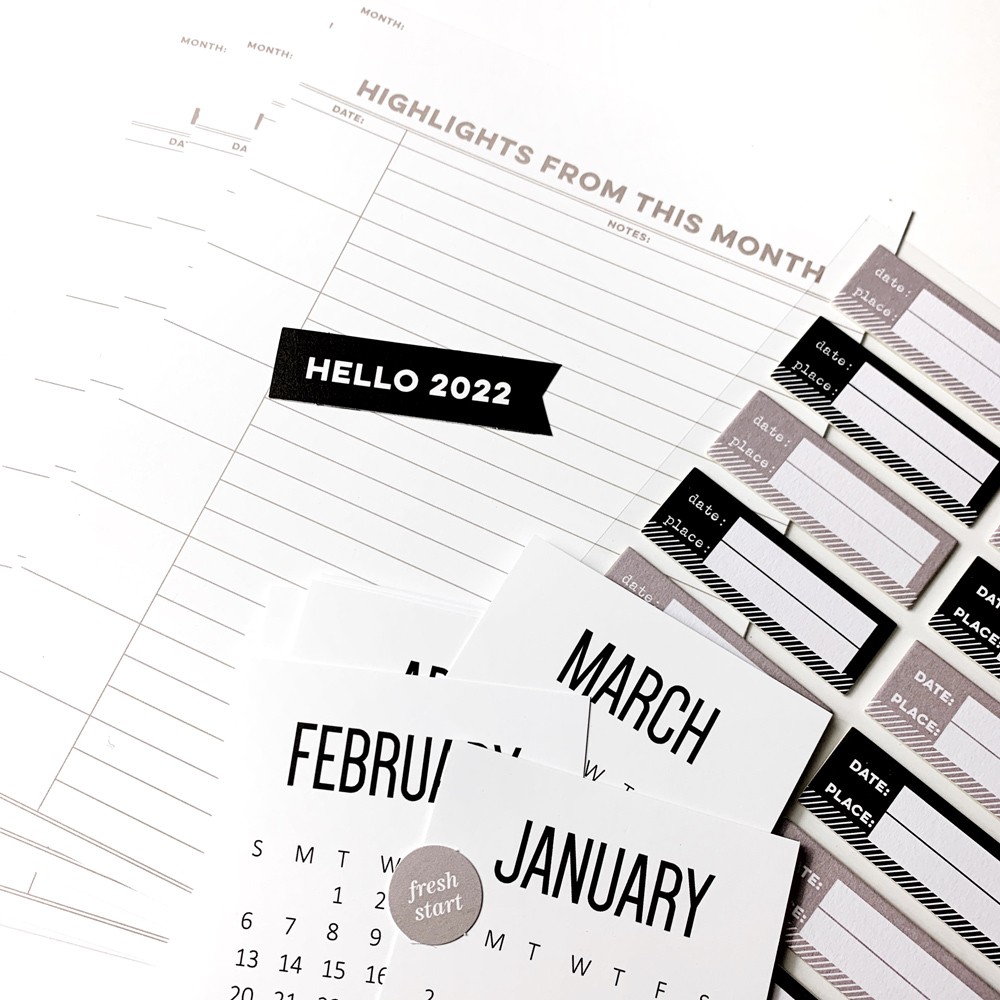
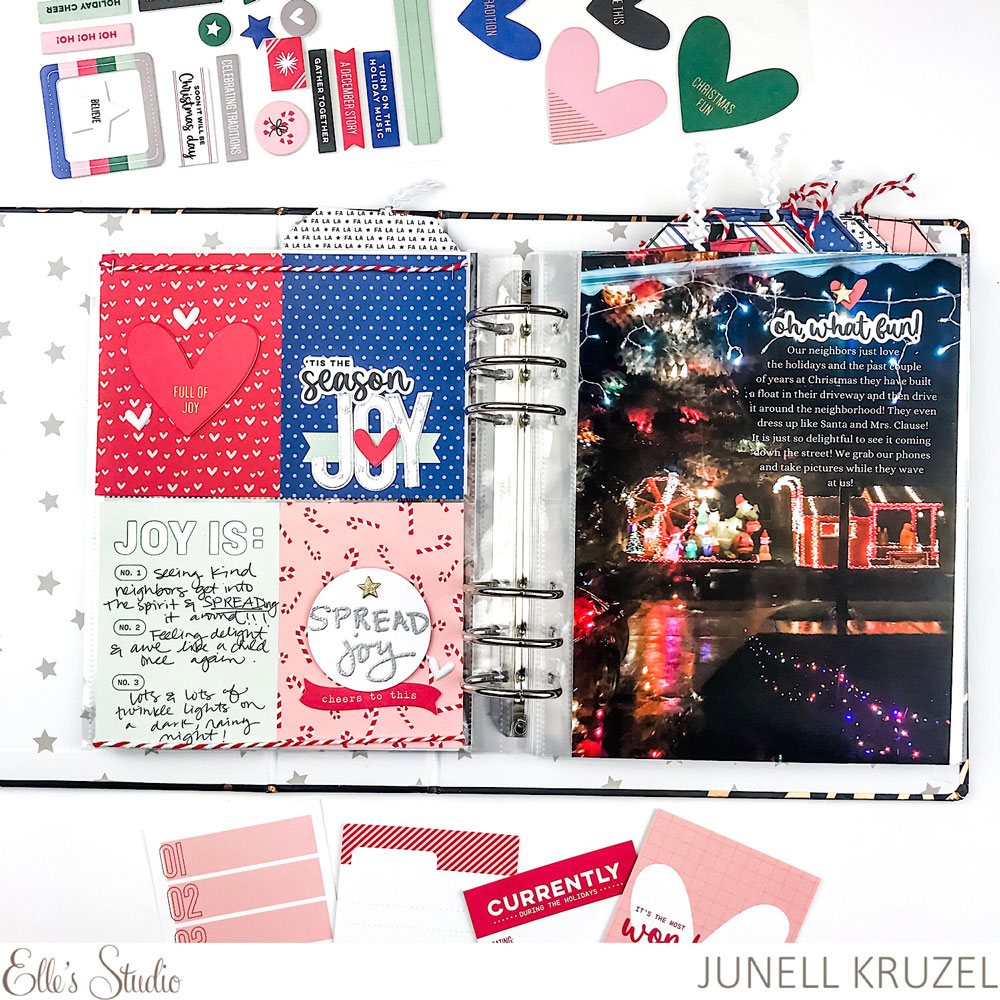
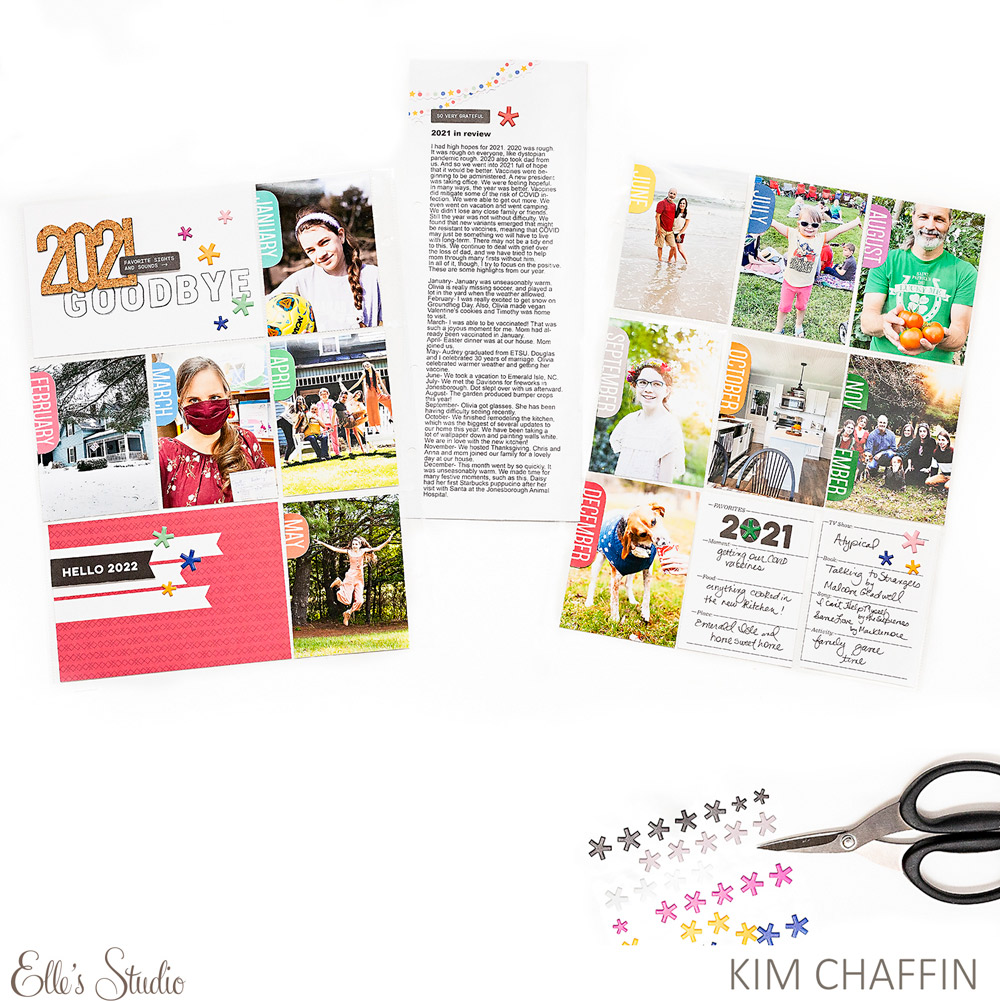
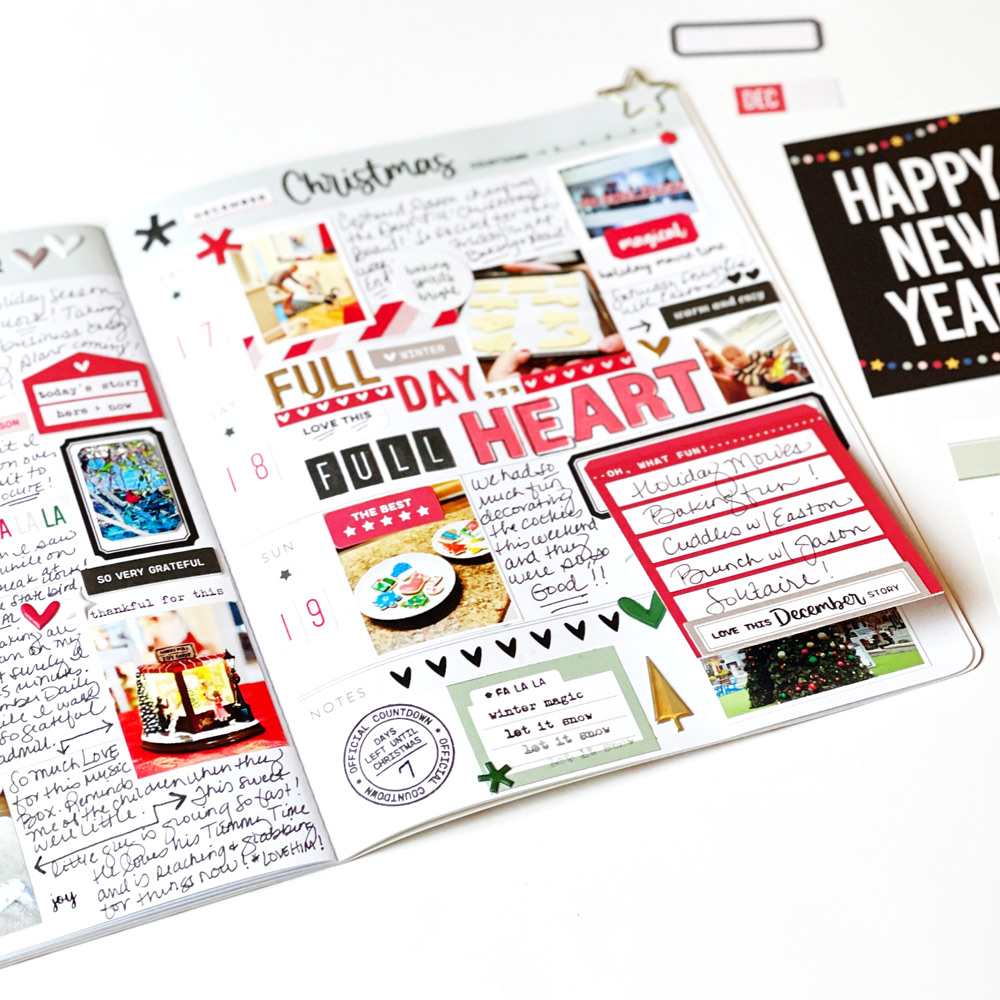
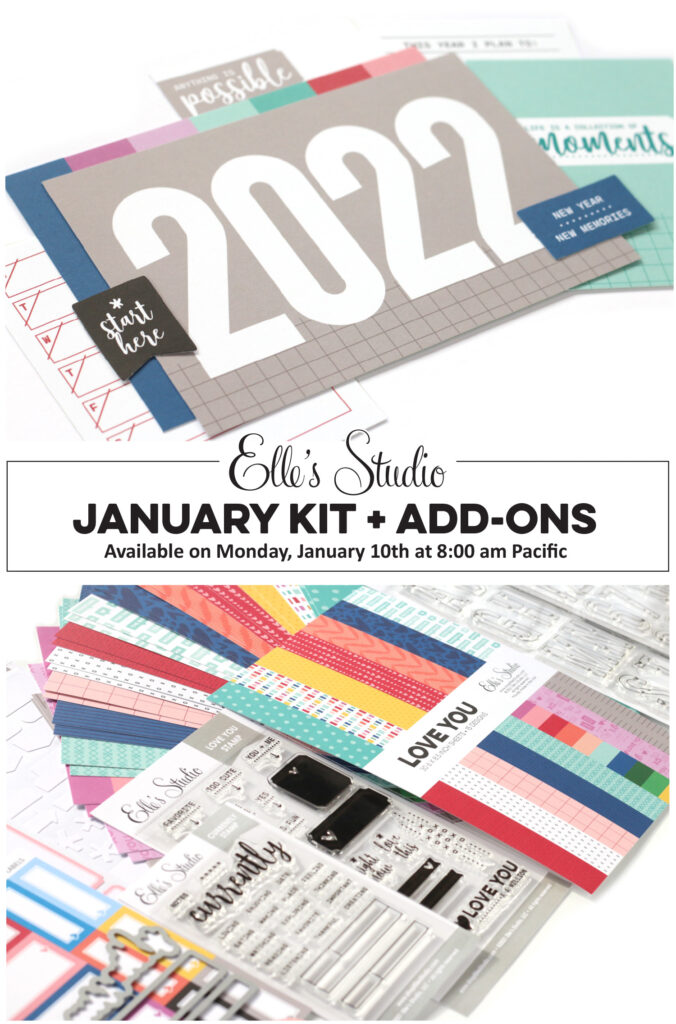
Hello, everyone! My name is LeeAnne, and this is my first post as an Elle’s Studio Design Team member. I’m so excited to work with the new releases and help inspire you to document! This month, I created a pocket page spread previewing the delightful January 2022 kit and add-ons, which release on Monday, January 10th!

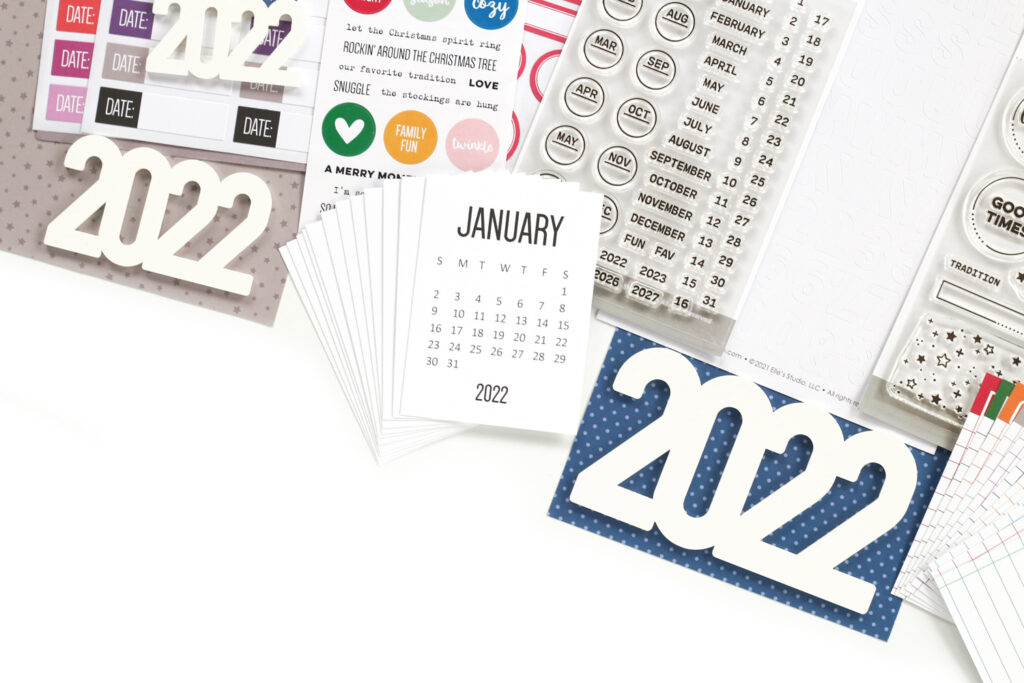
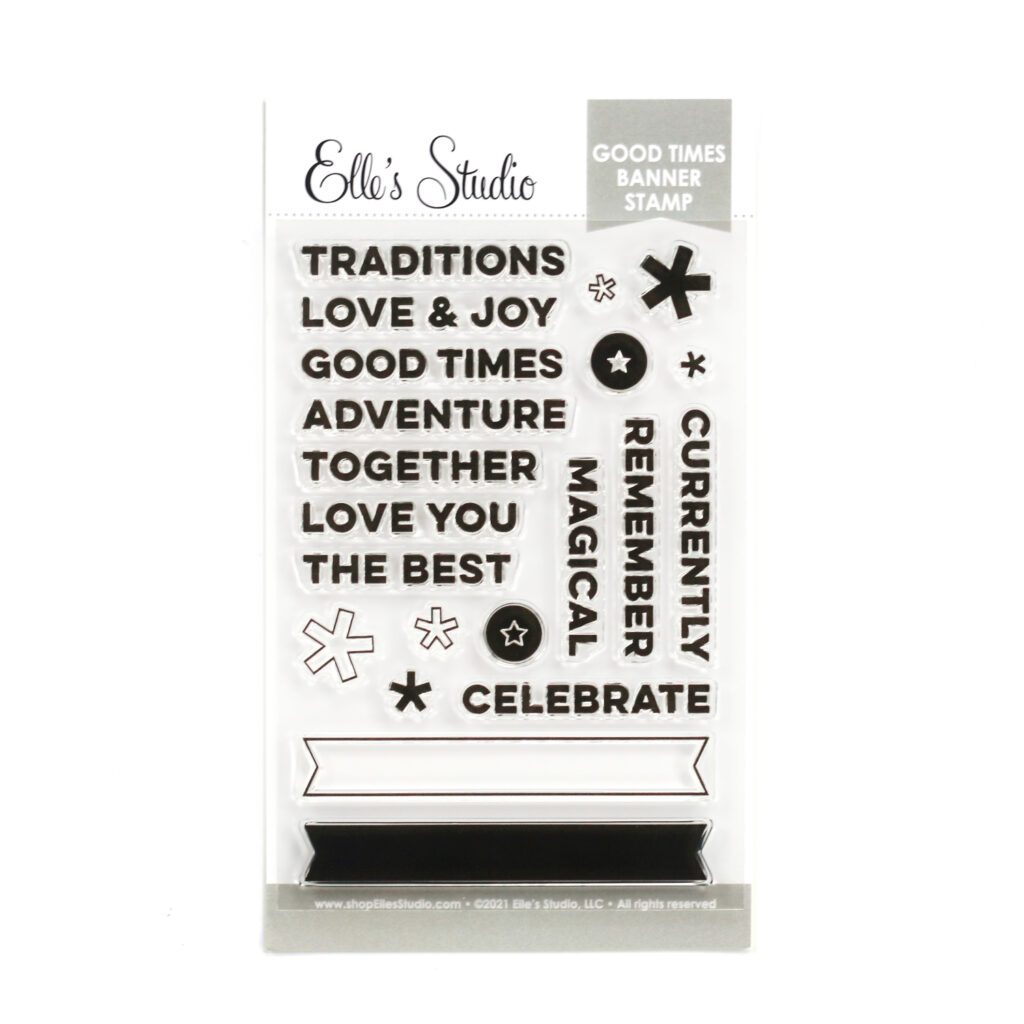
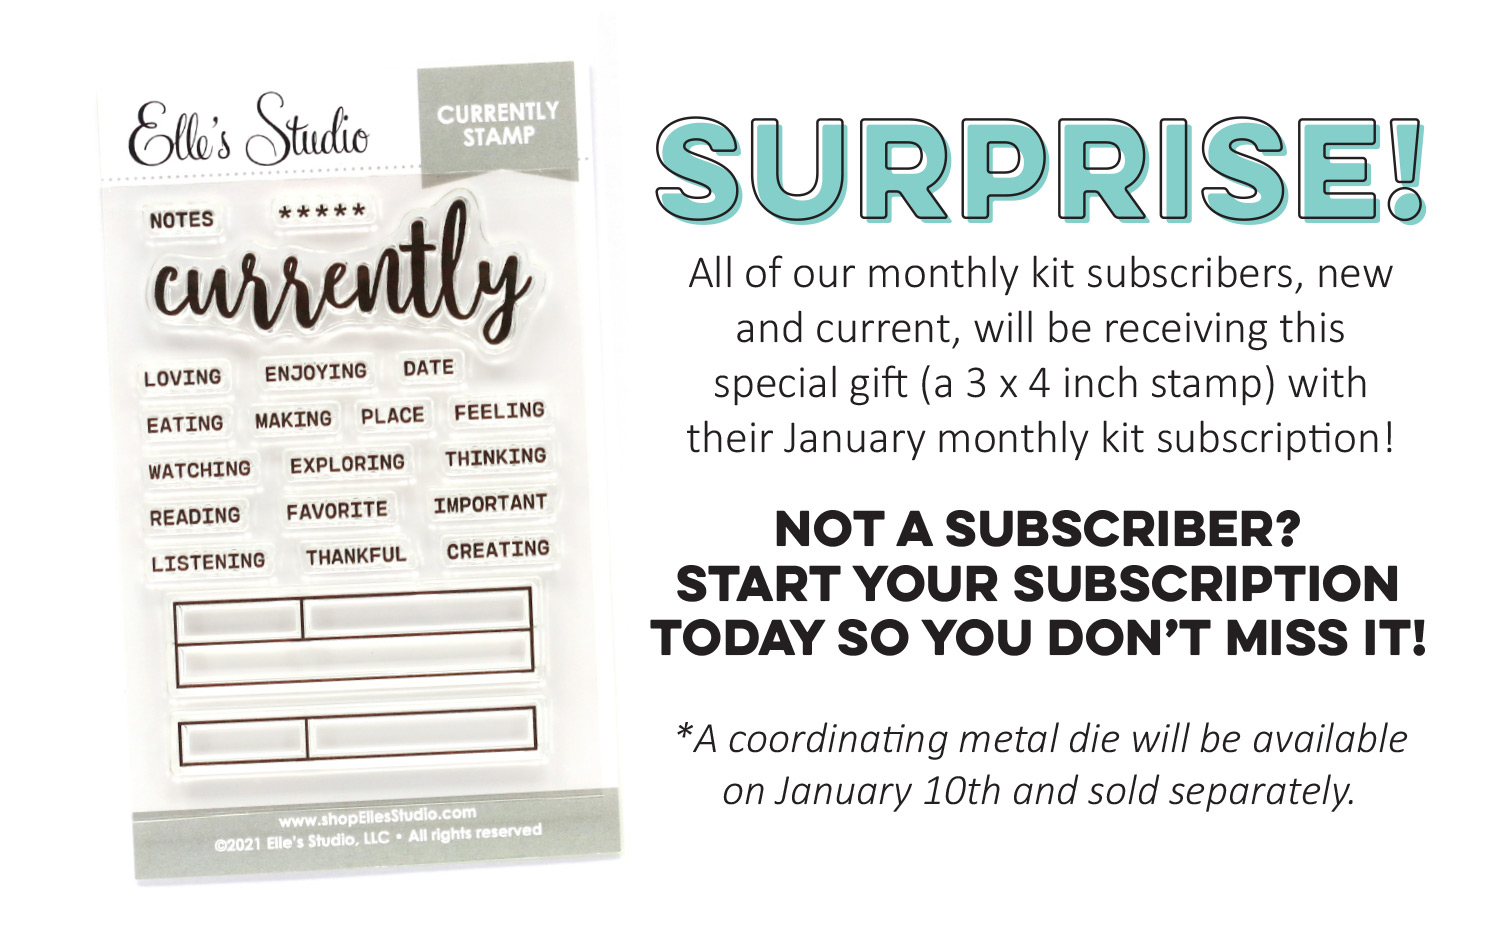
Supplies | January 2022 Kit, January 2022 Printables, January 2022 Labels, Bright Heart Journaling Tags, Love Notes Die Cuts, Love Chipboard Stickers, Love You Paper Stack, Large Heart Jane Alphabet Stamp, Love You Stamp, Pocket, Frame, and Flip Up Metal Die, Tiny Shapes and Dots Puffy Stickers – Warm Tones, Tiny Shapes and Dots Puffy Stickers – Cool Tones, Black Puffy Alphabet Stickers

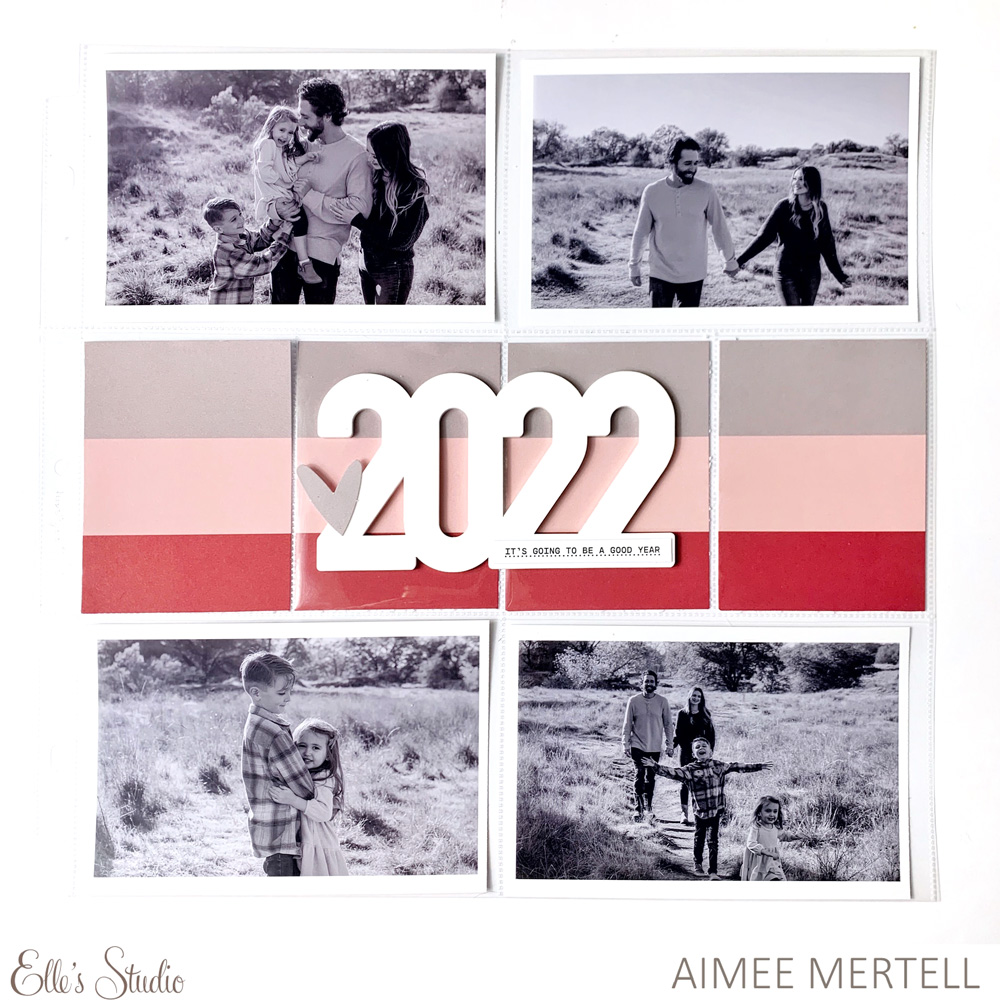
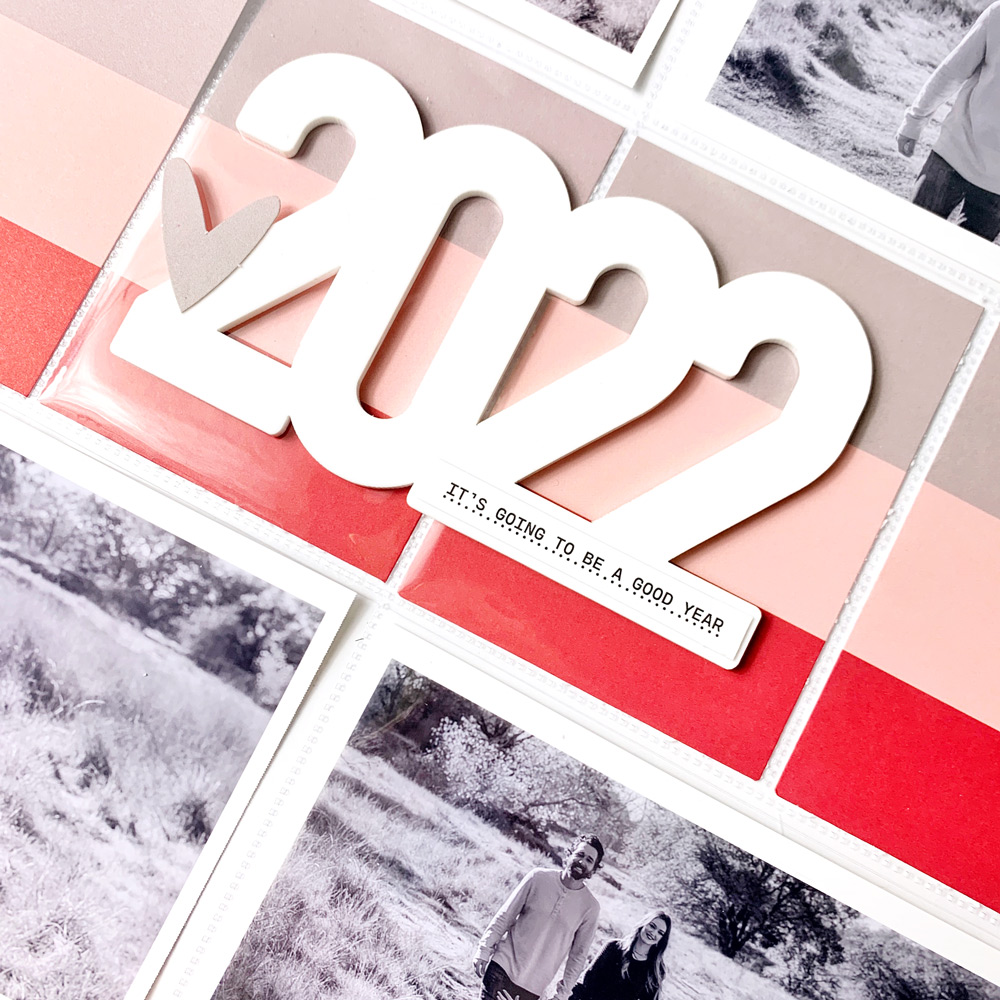
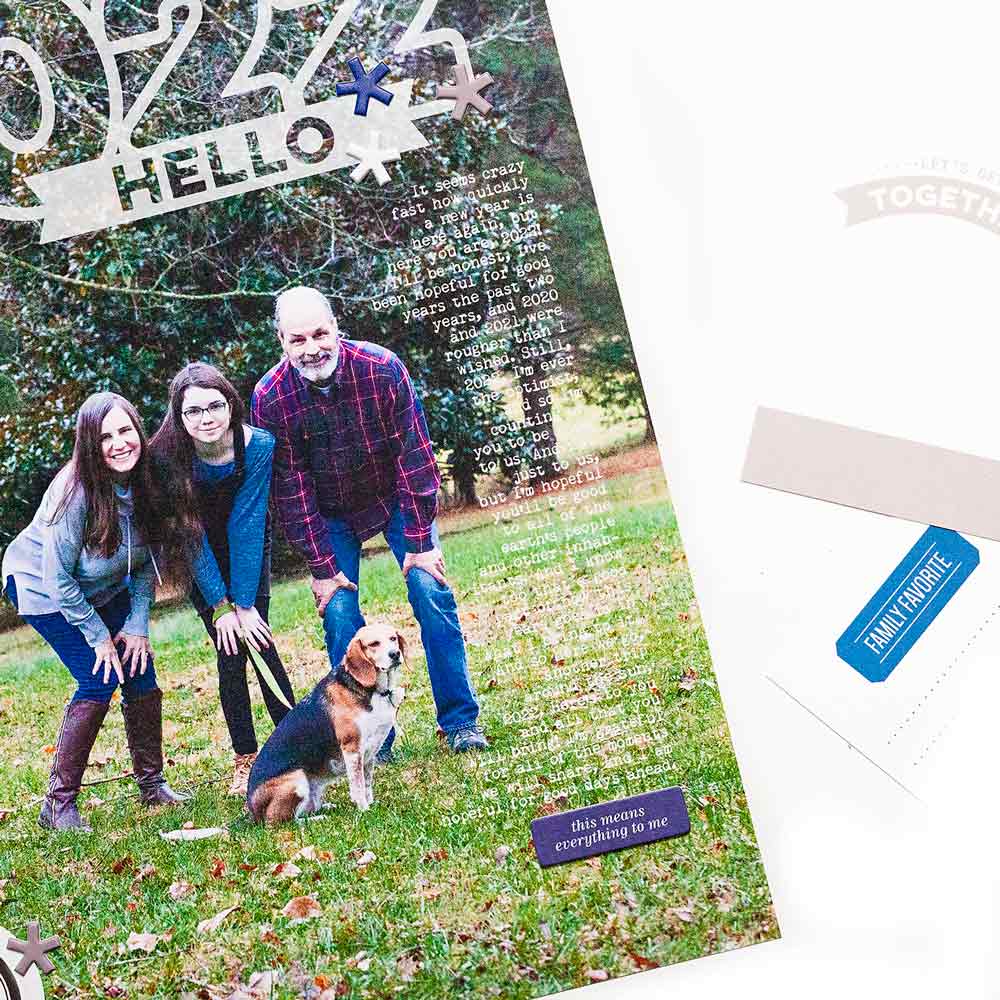
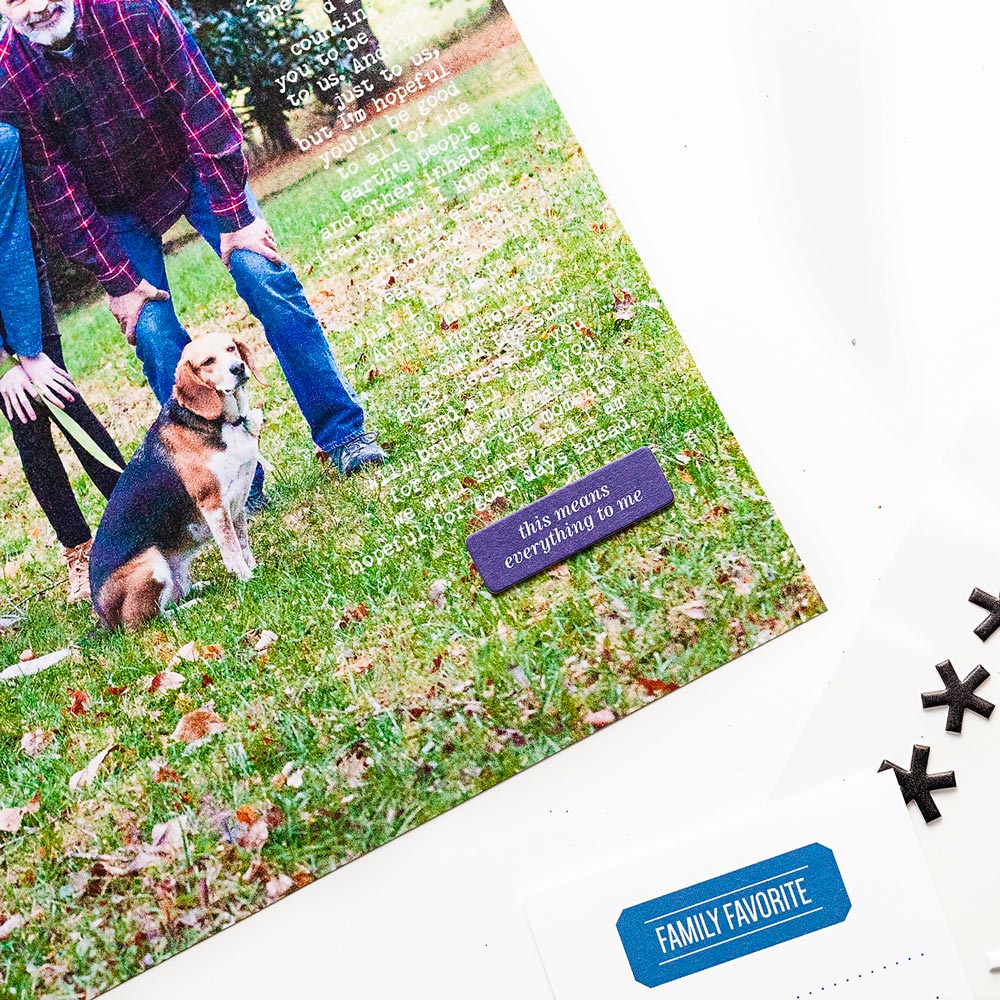
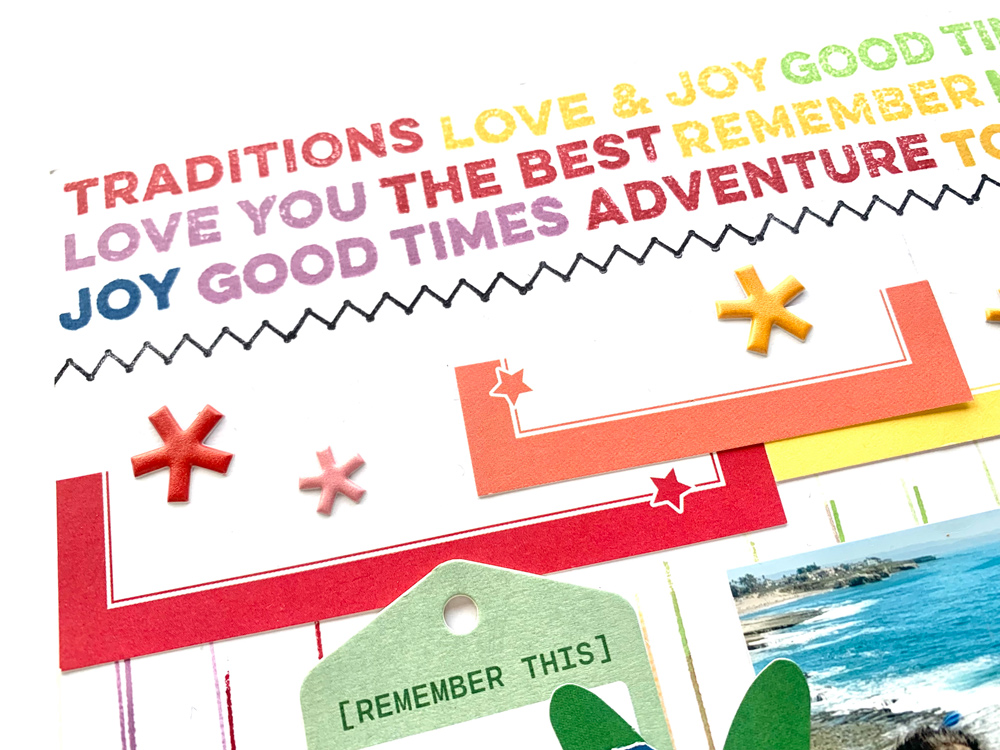
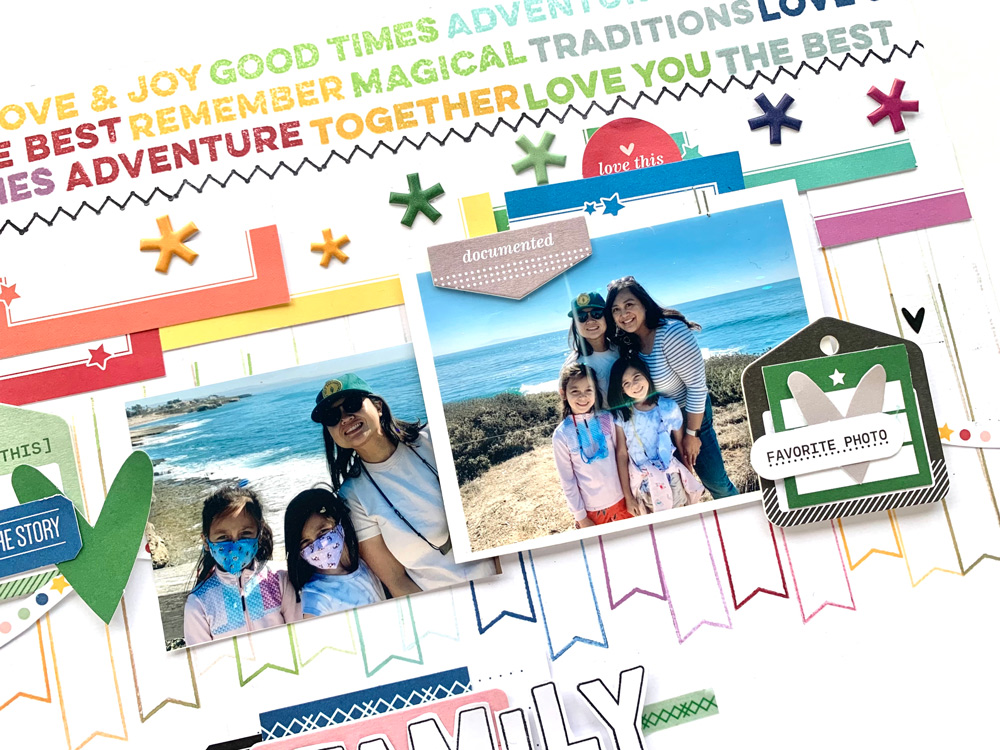
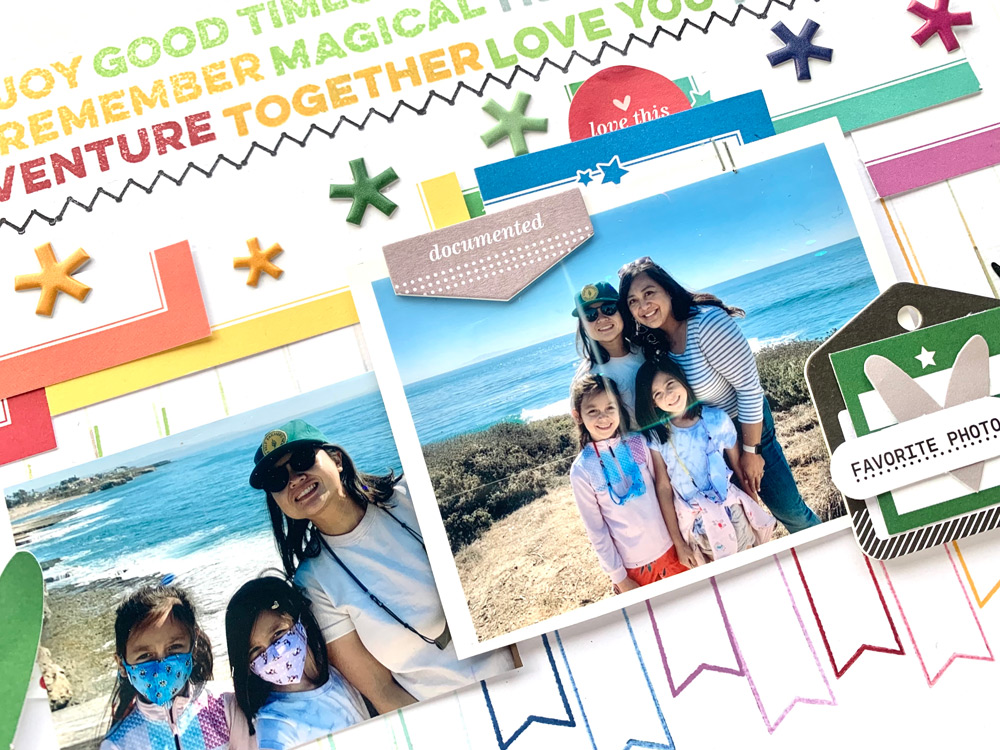
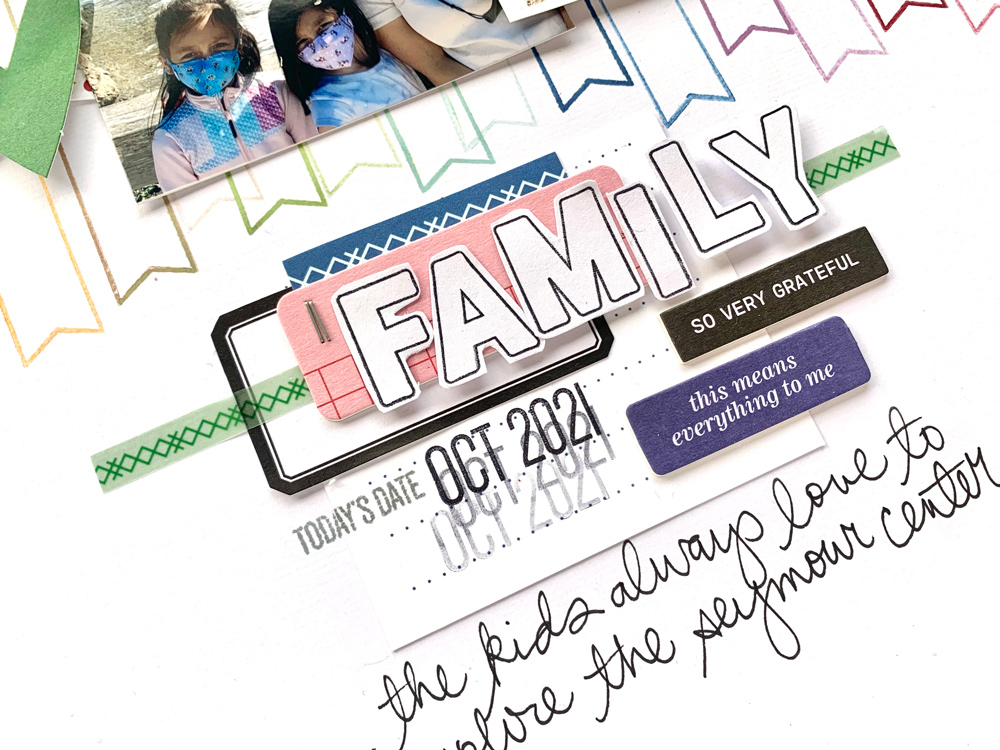
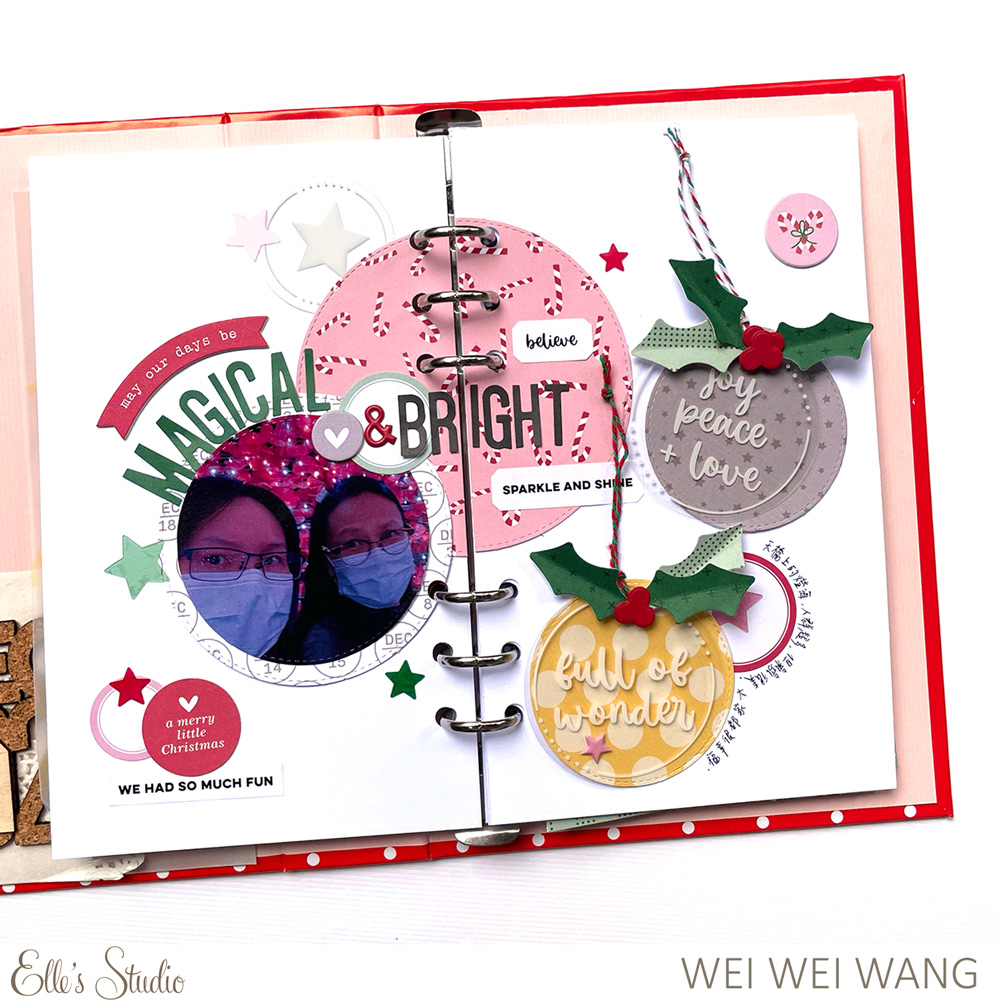
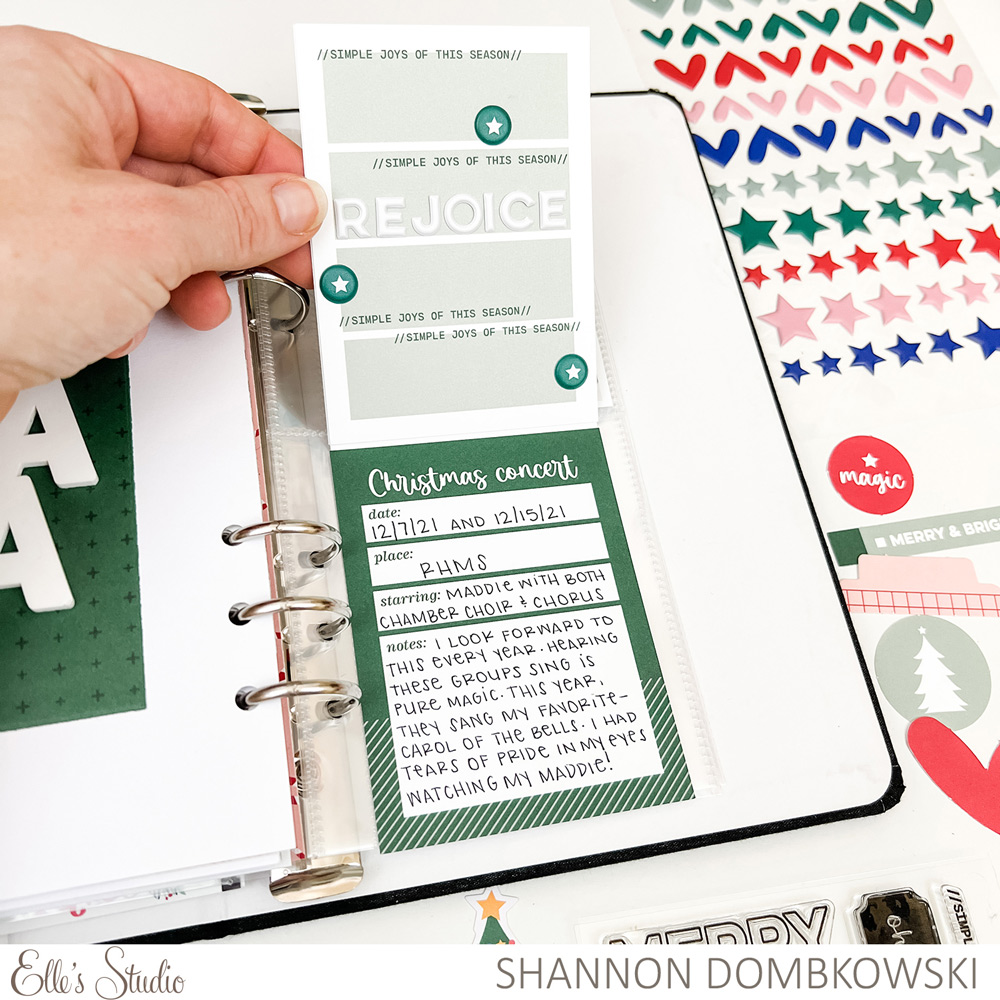
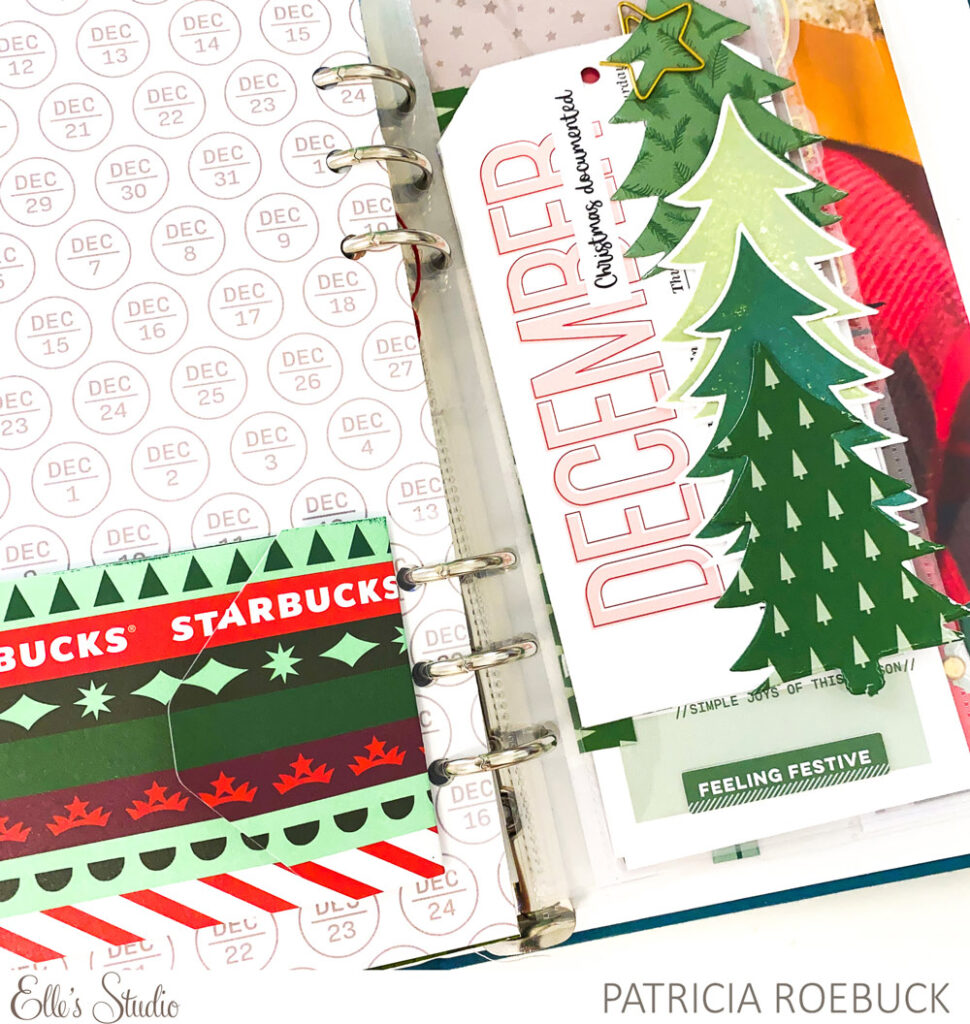
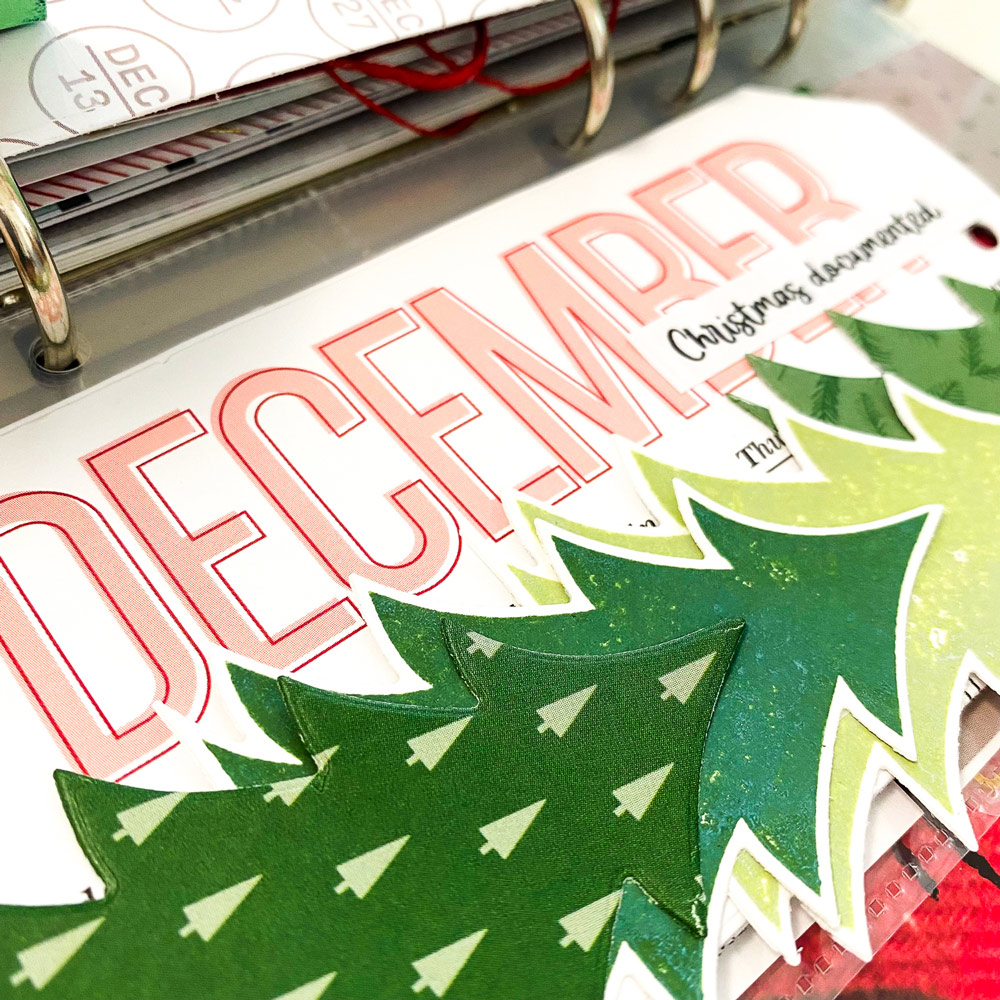
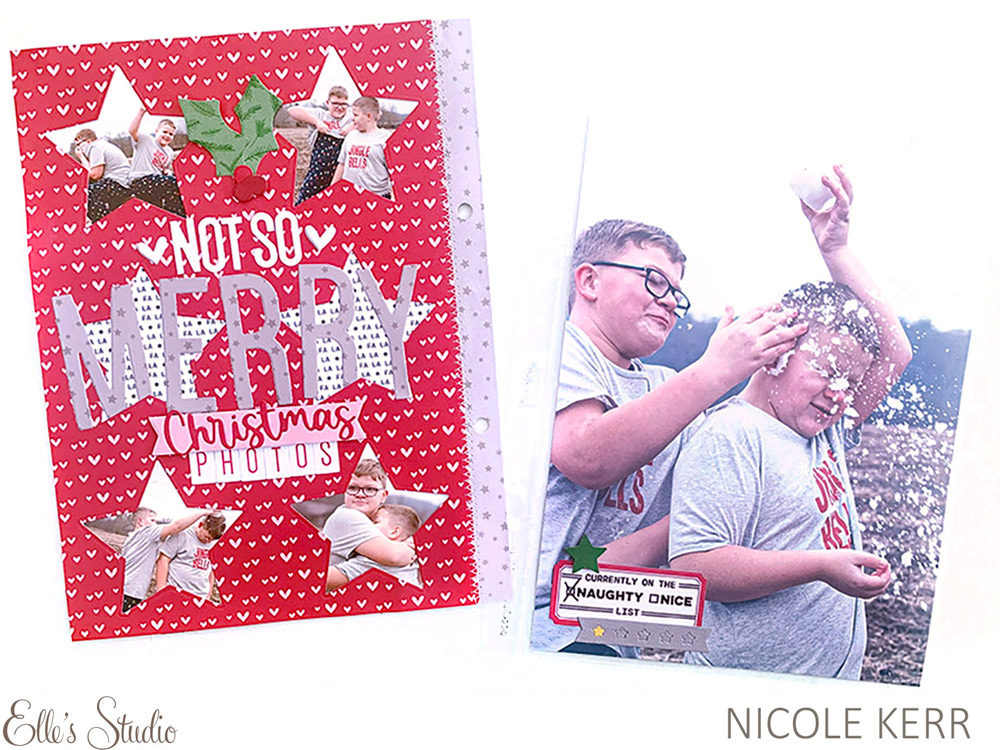
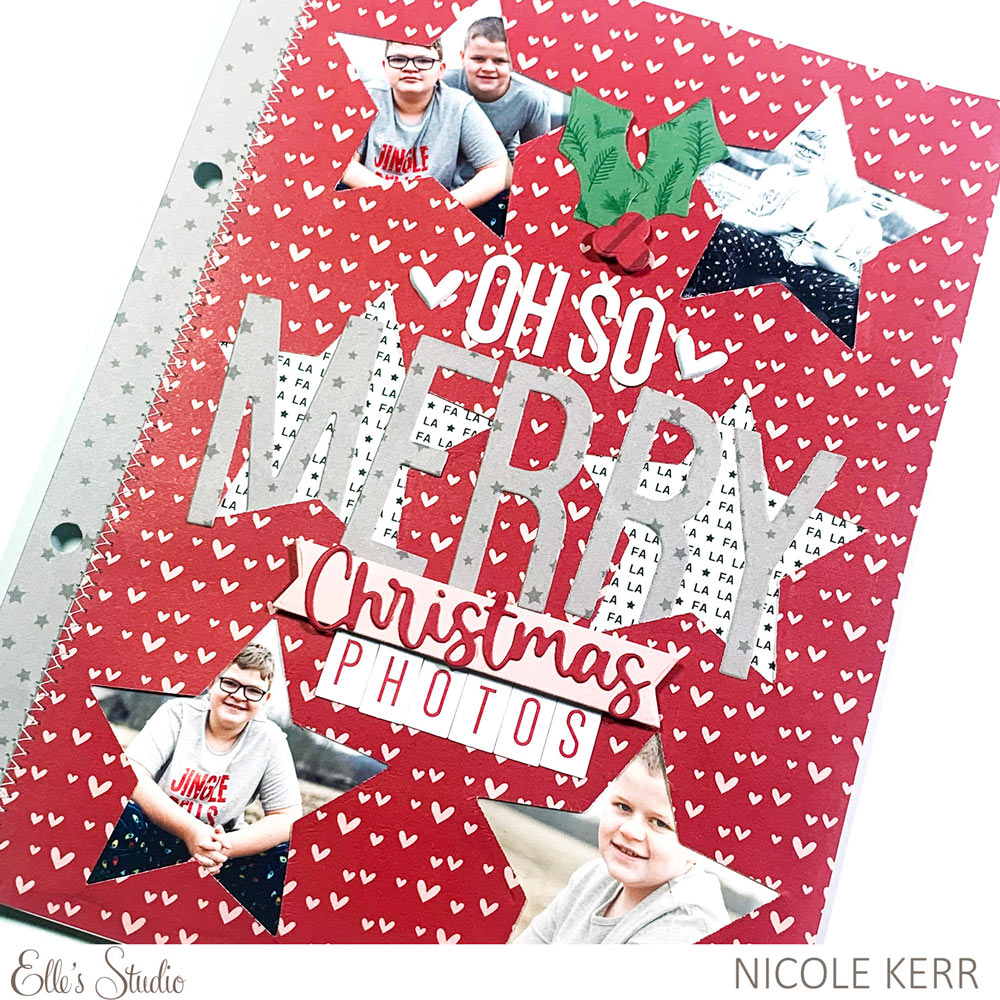
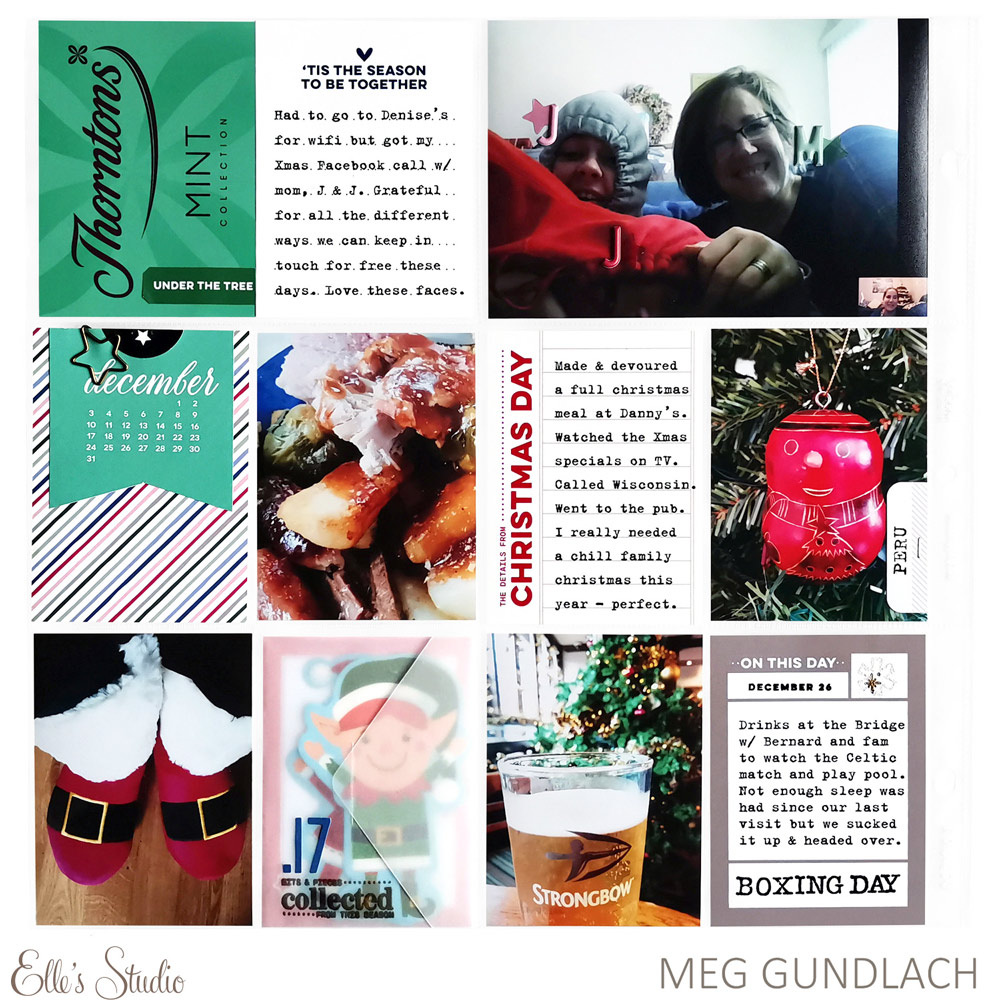
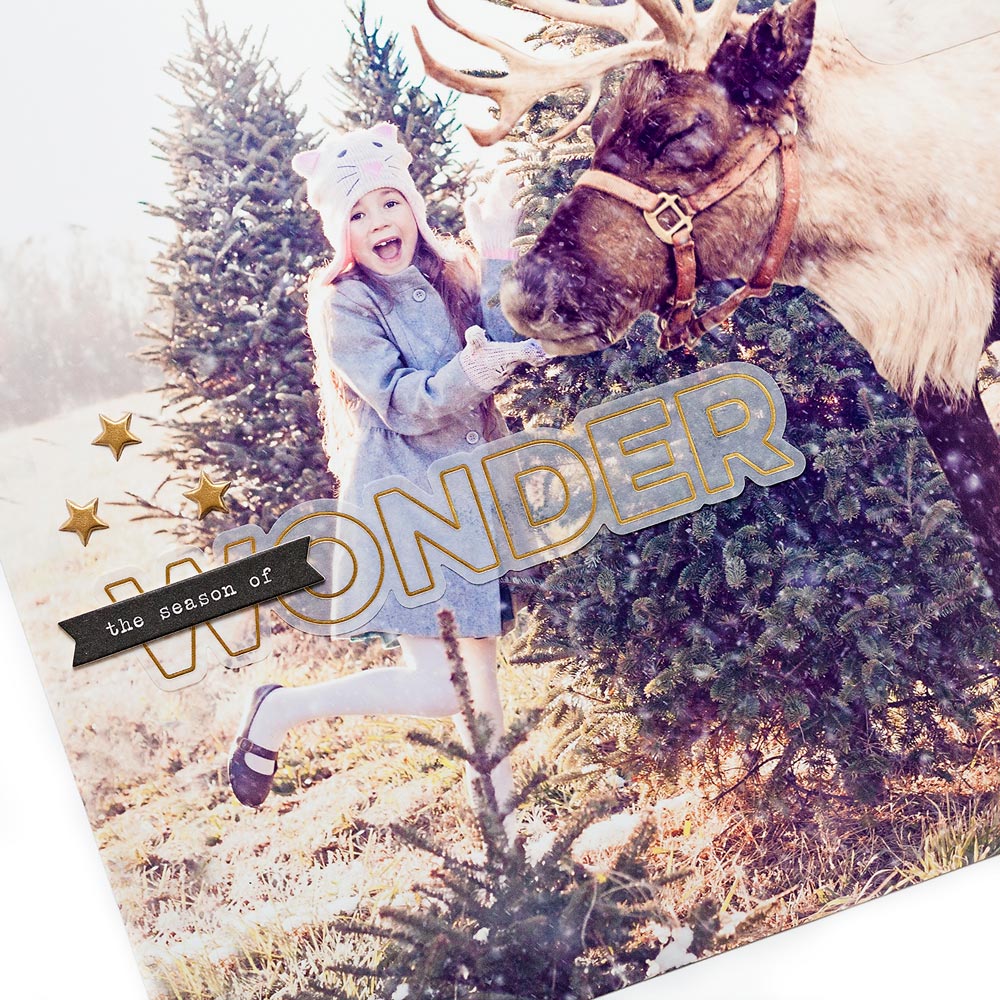
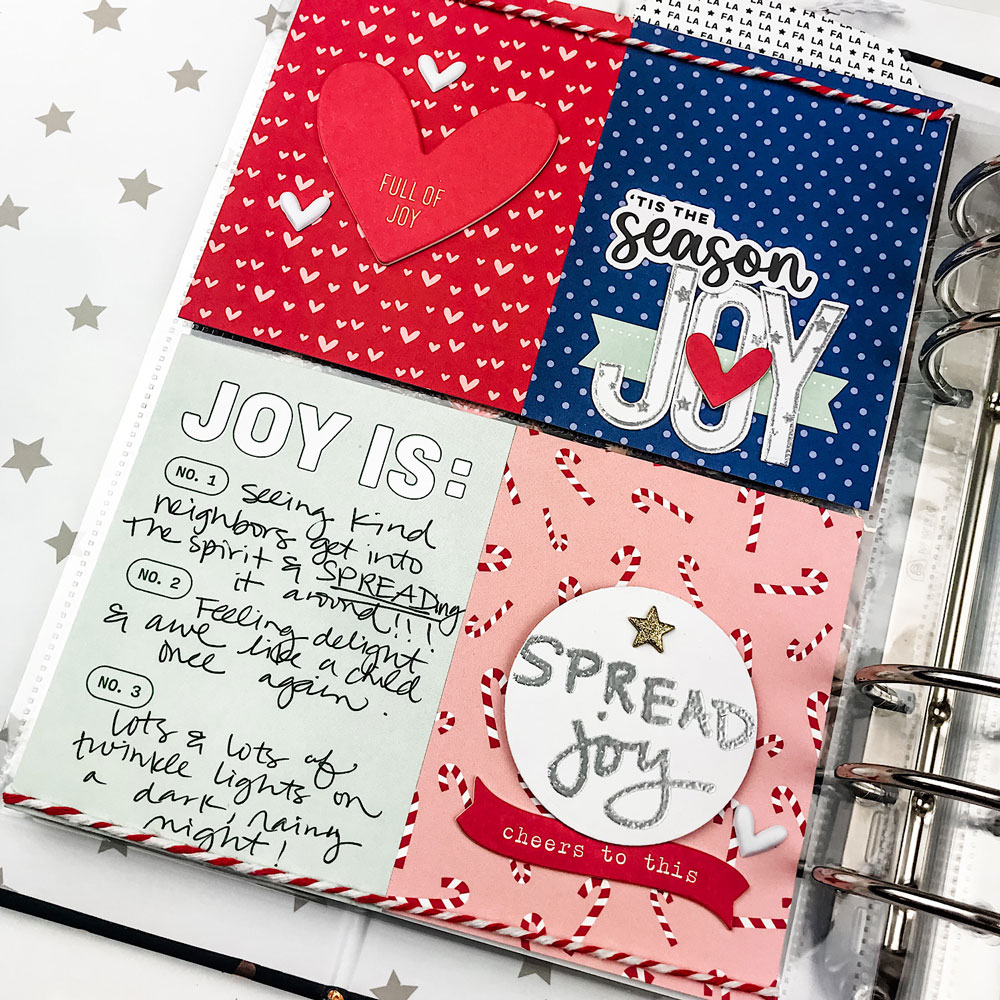
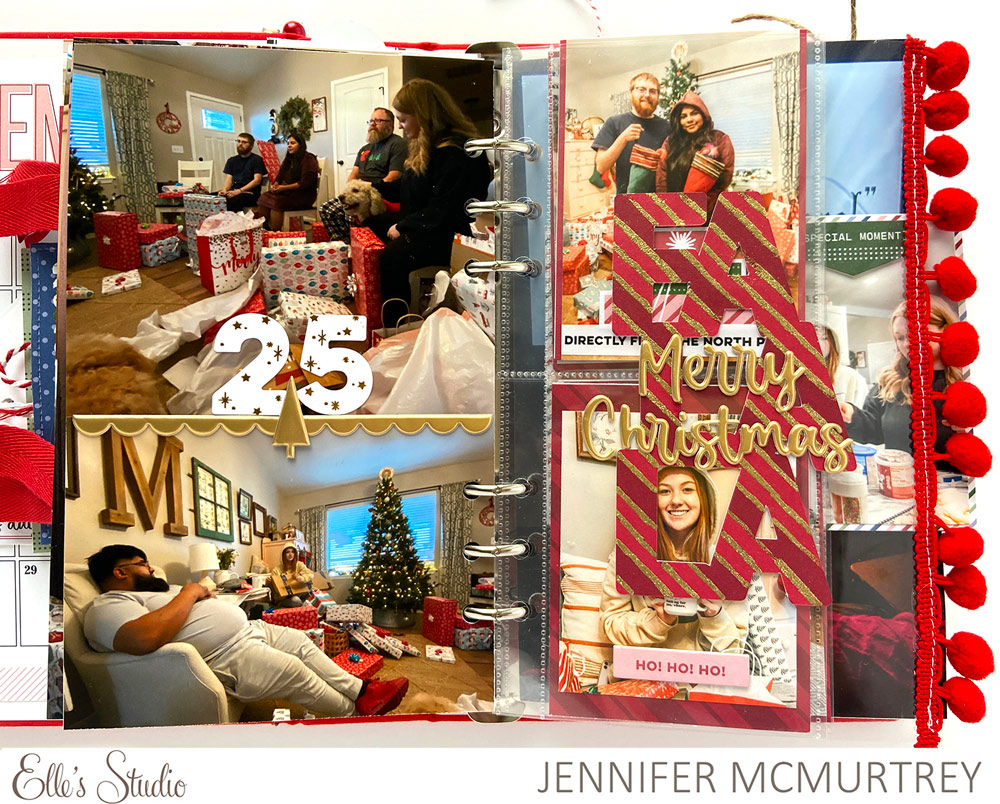
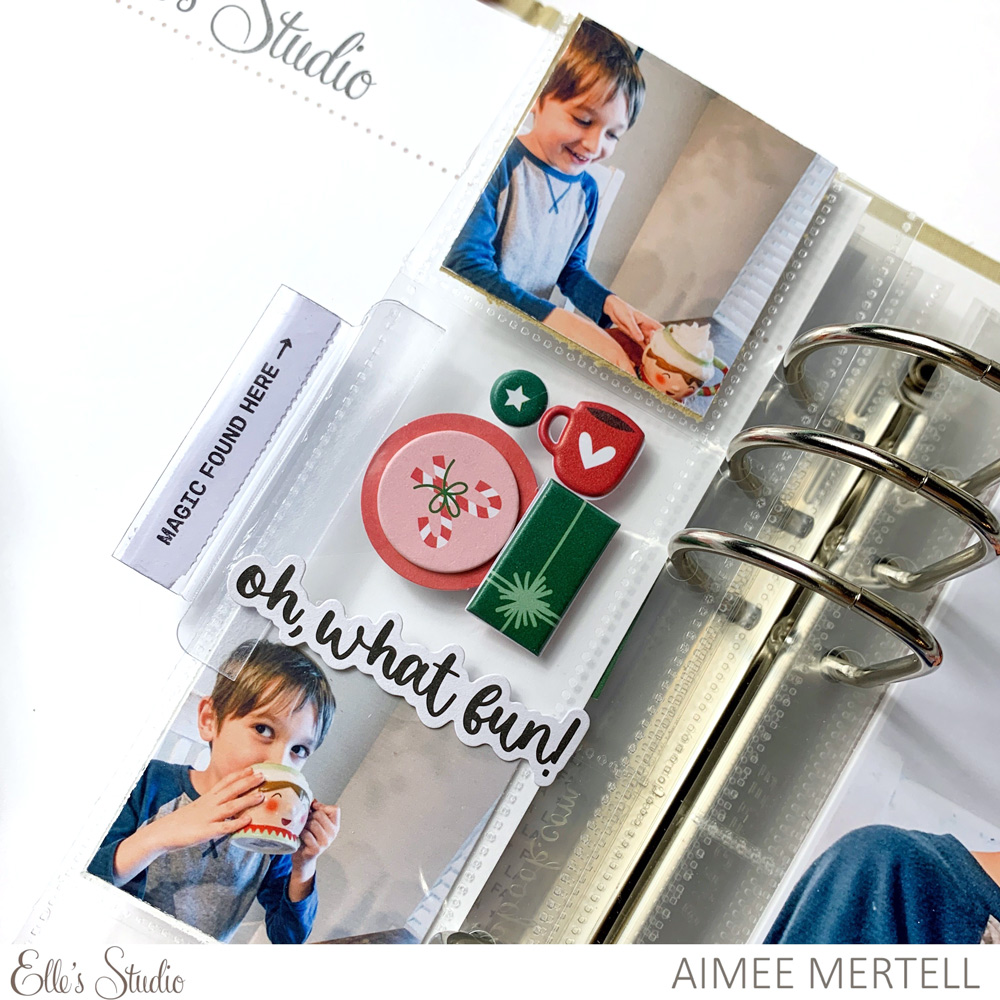
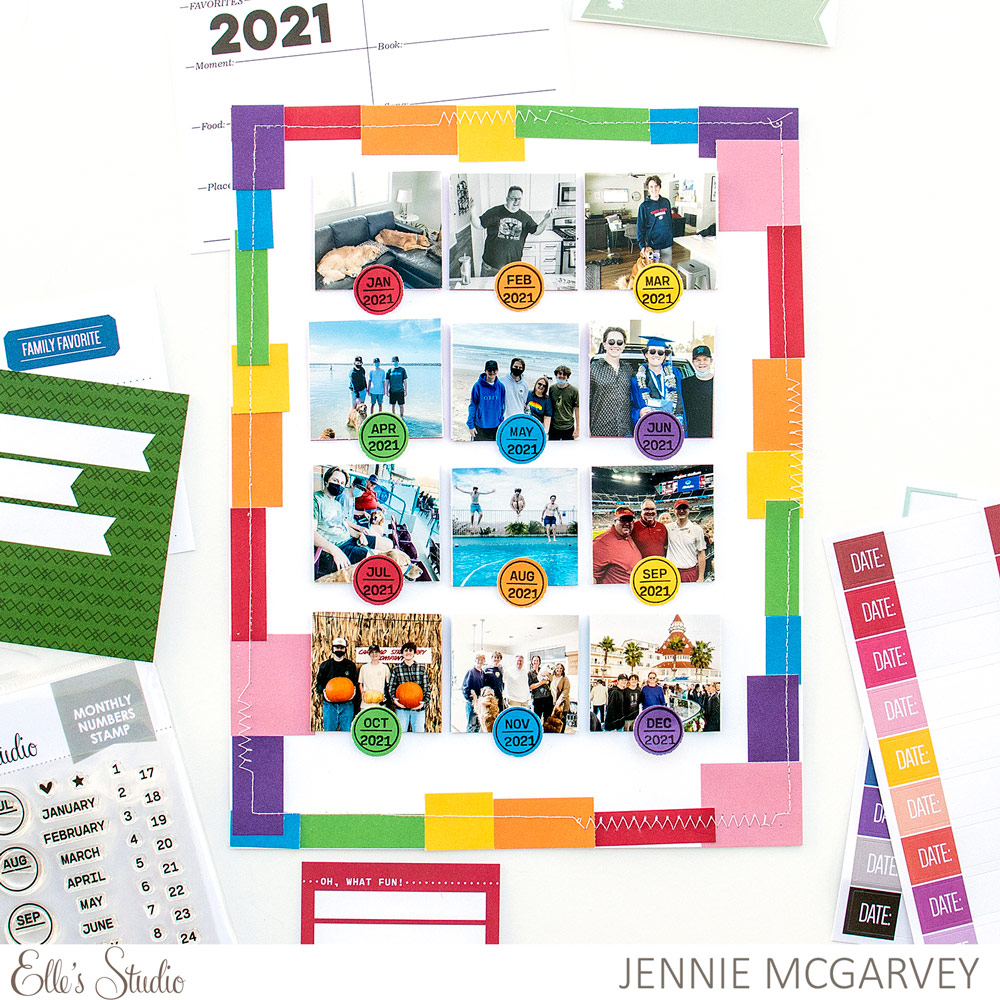
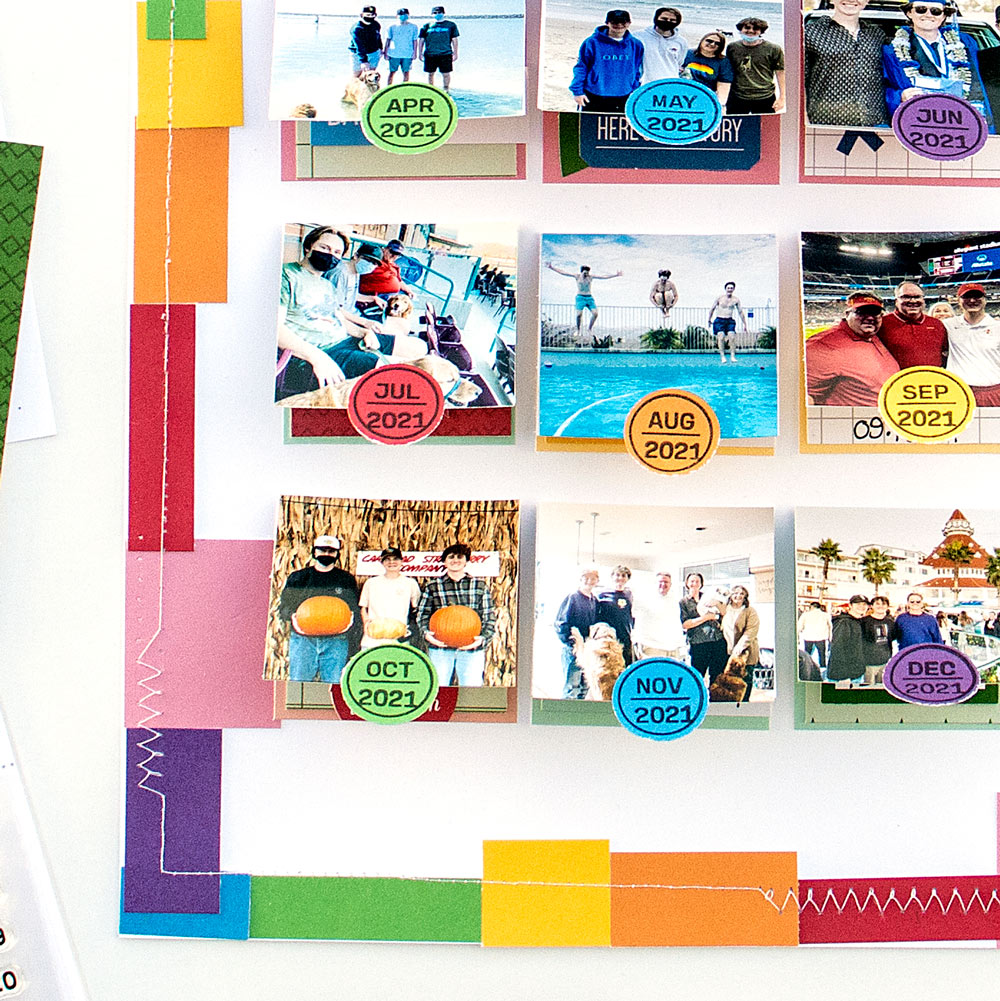
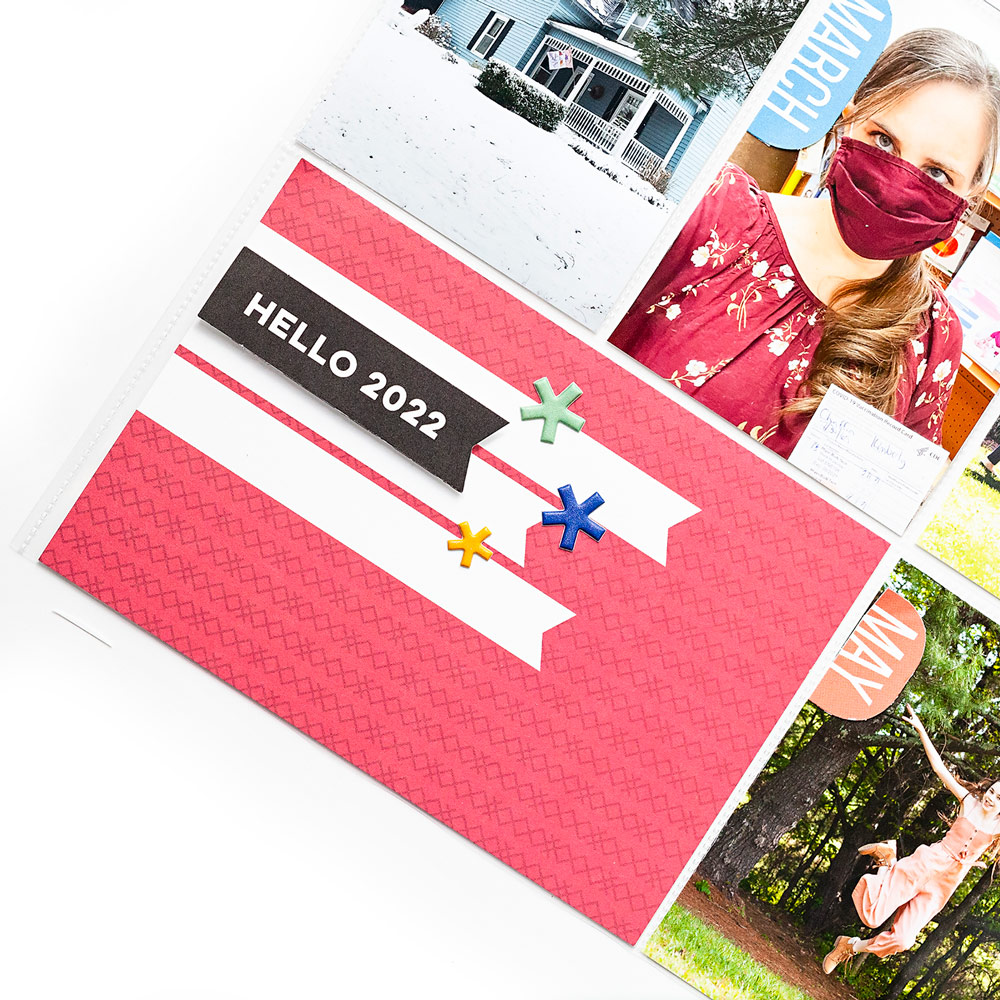
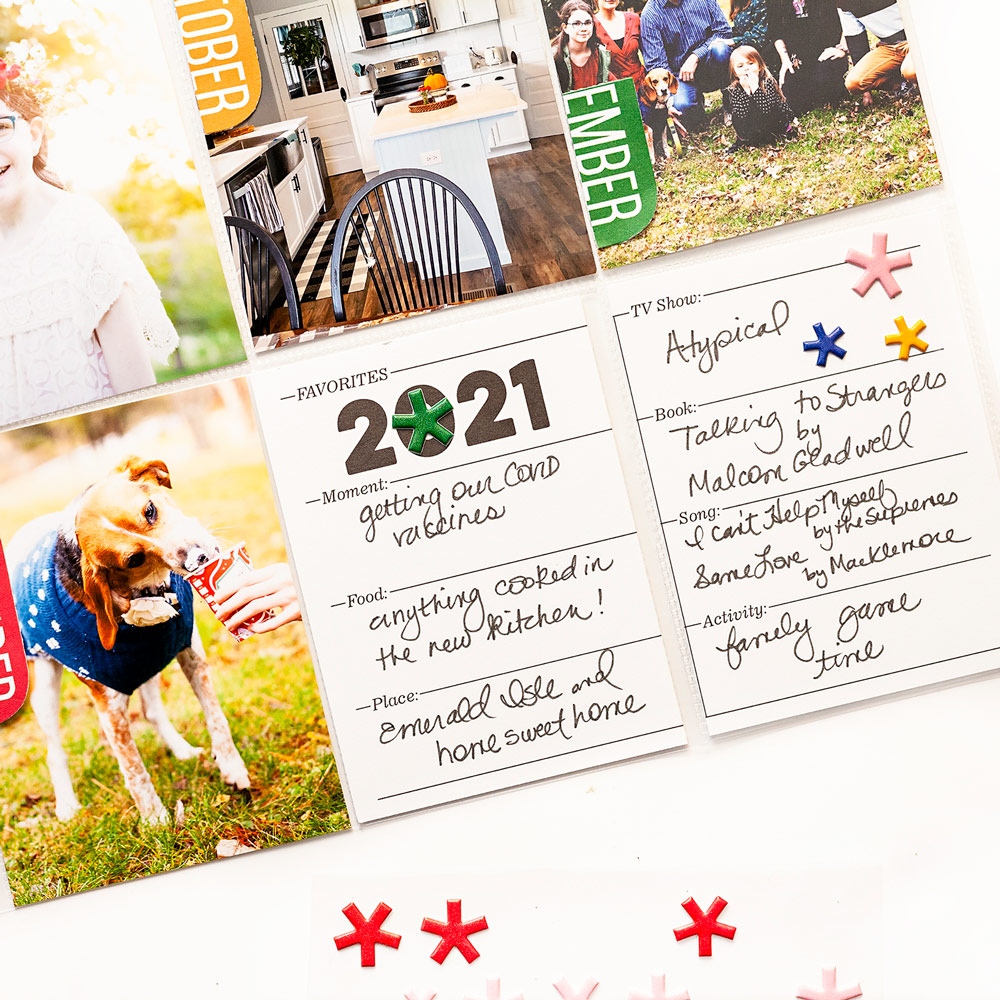
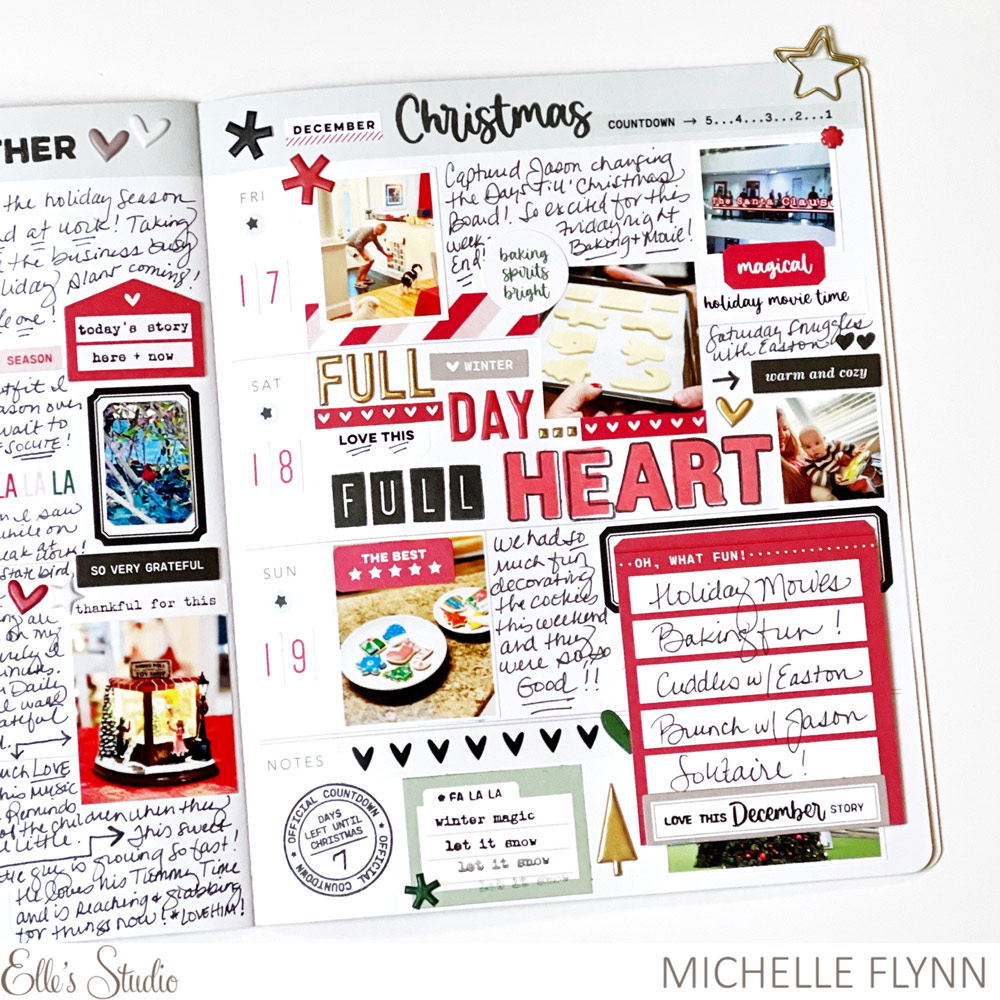
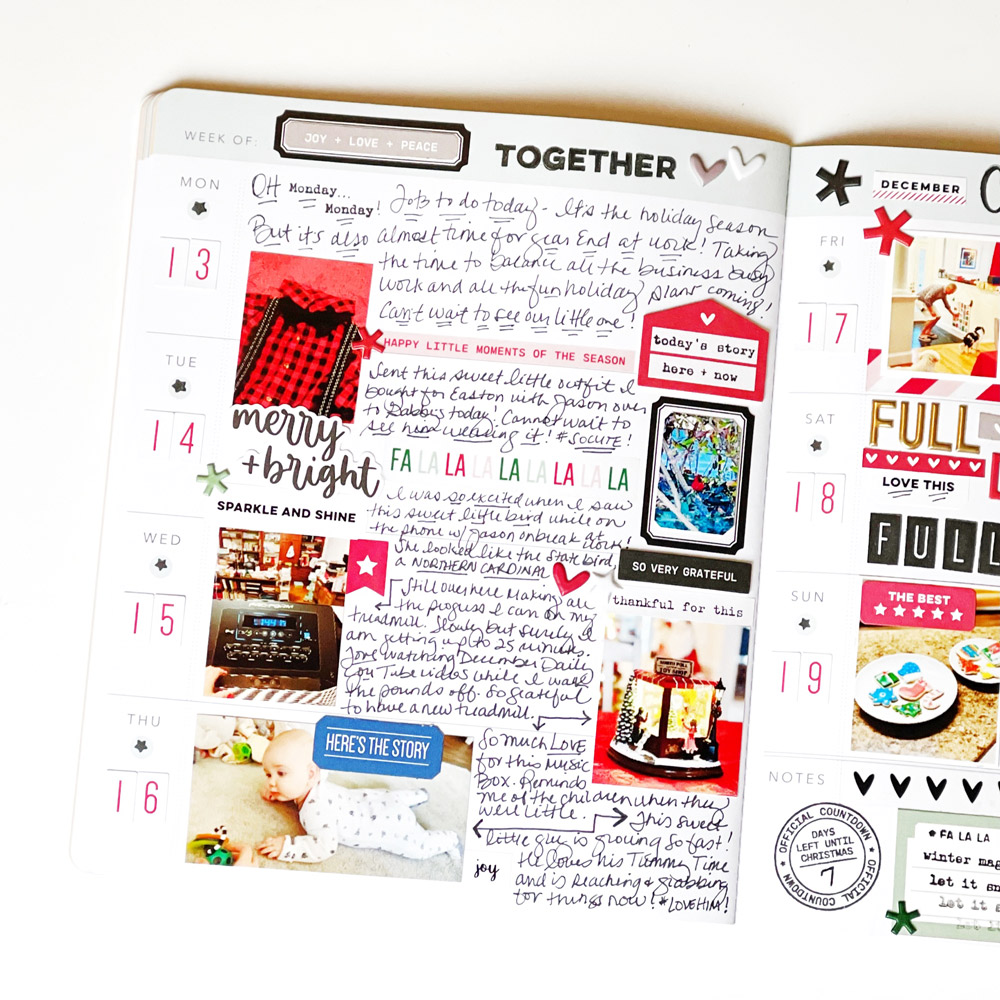
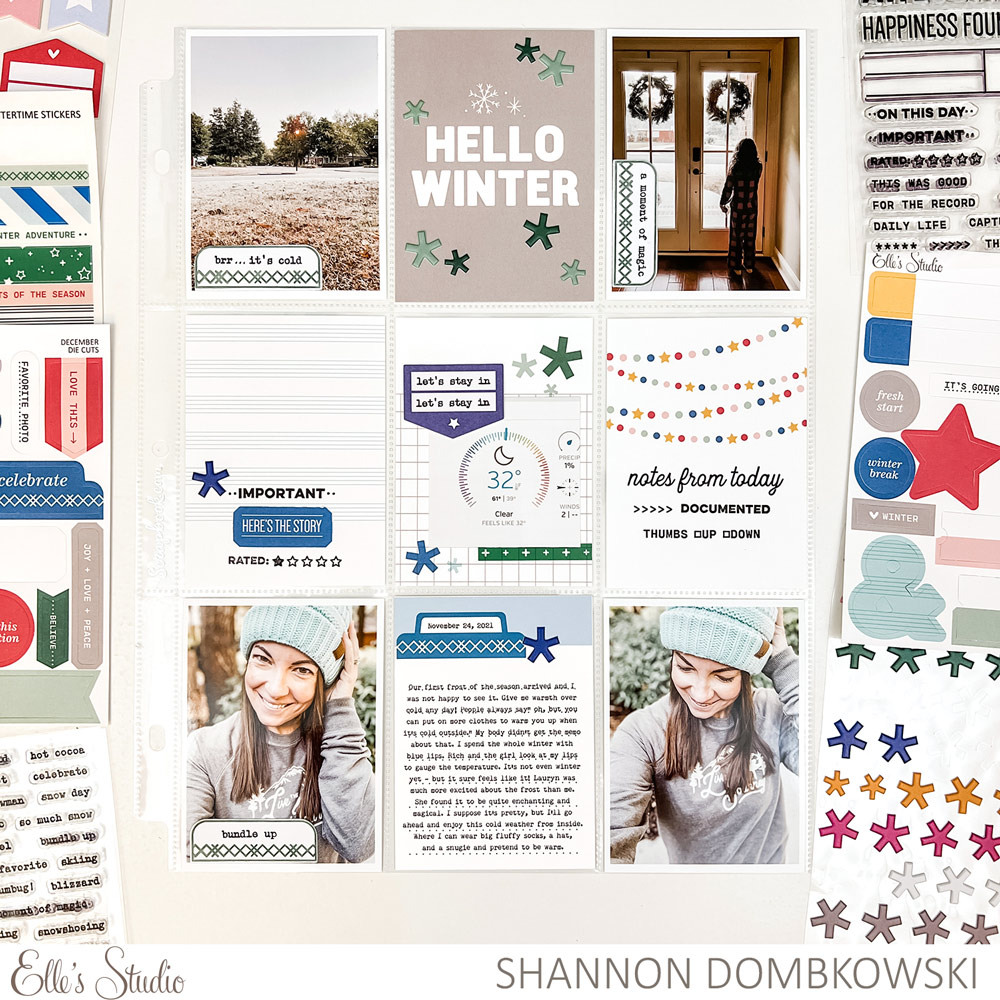
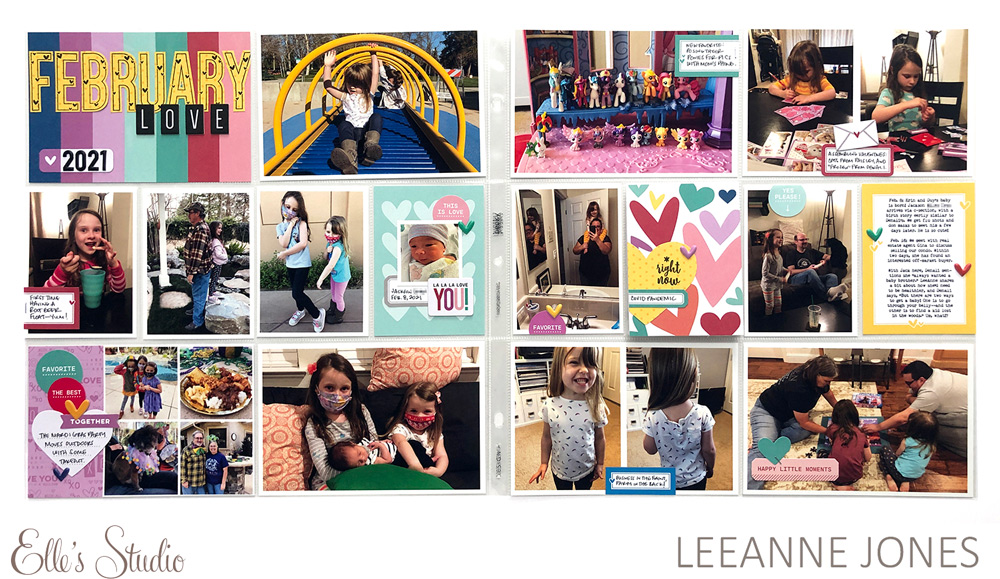
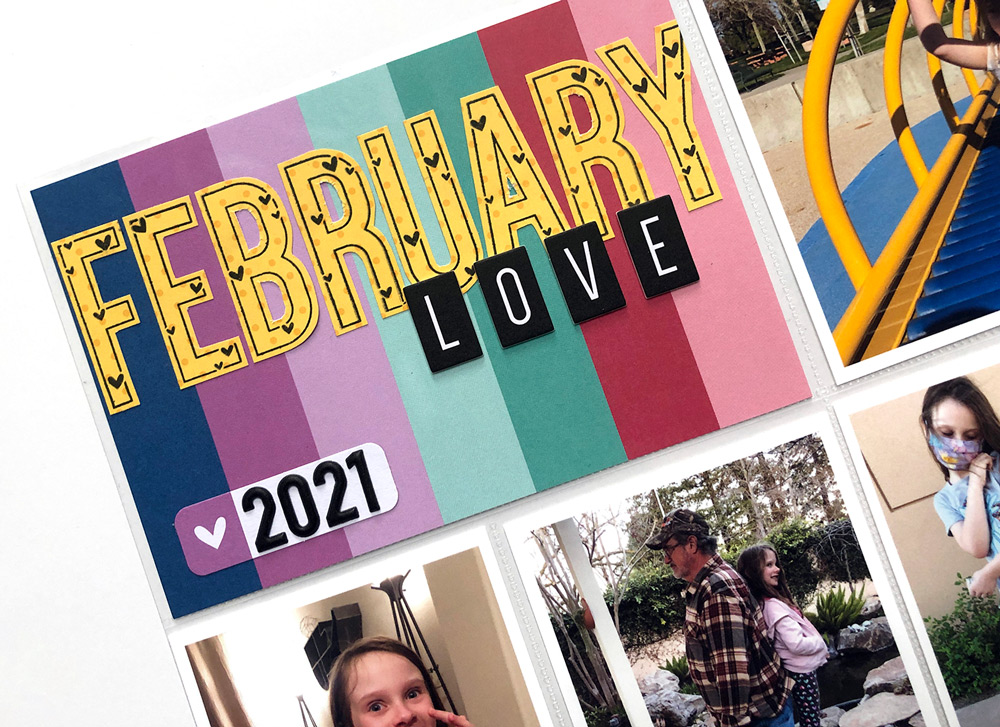
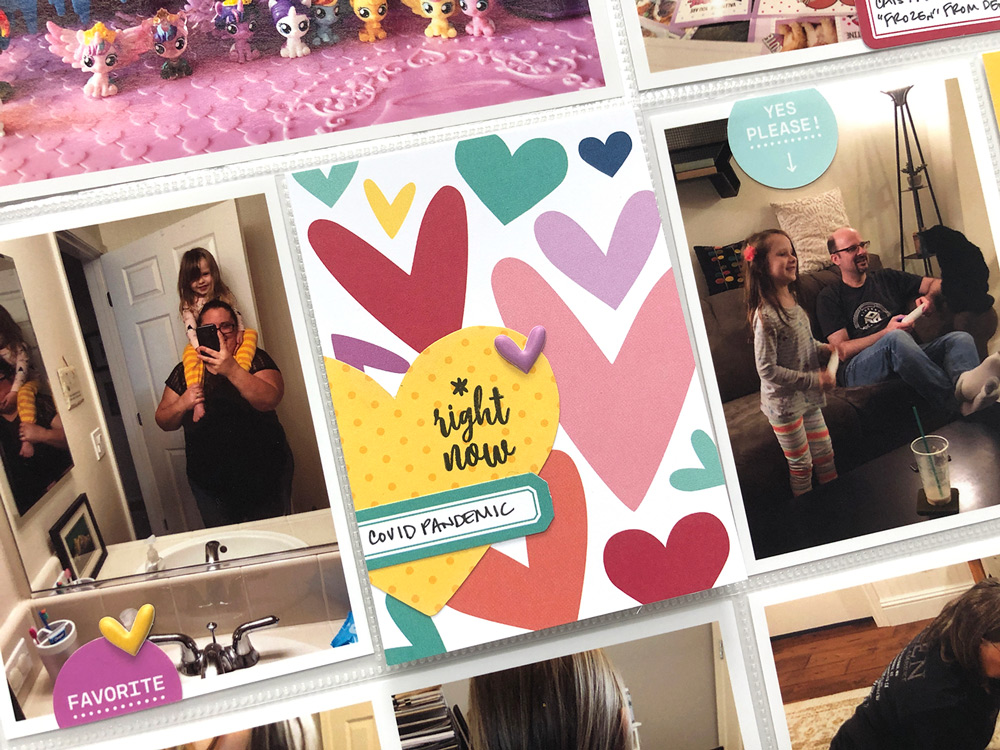
The heart-filled January 2022 Kit lent itself well to documenting last February in my pocket page album. In addition to classic Valentine’s Day colors like pink, purple, and red, the kit includes bright pops of yellow and teal. I thought it would be fun to lean into those and turn up the volume of the color palette. For example, the title tag uses the yellow dot pattern from the Love You Paper Stack paired with the Large Heart Jane Alphabet Stamp for a big, bright statement. I also selected teal and yellow journaling tags and sprinkled puffy heart stickers throughout. Overall, the effect is a rainbow.

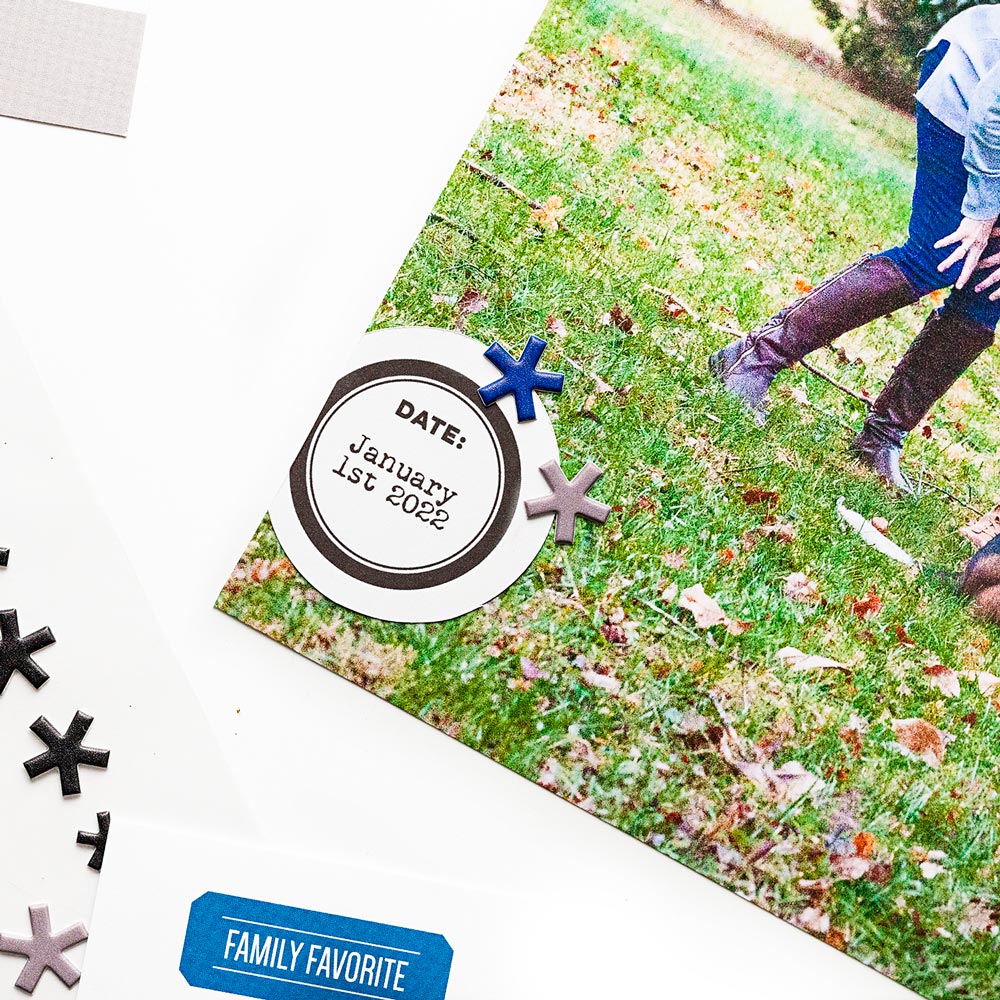
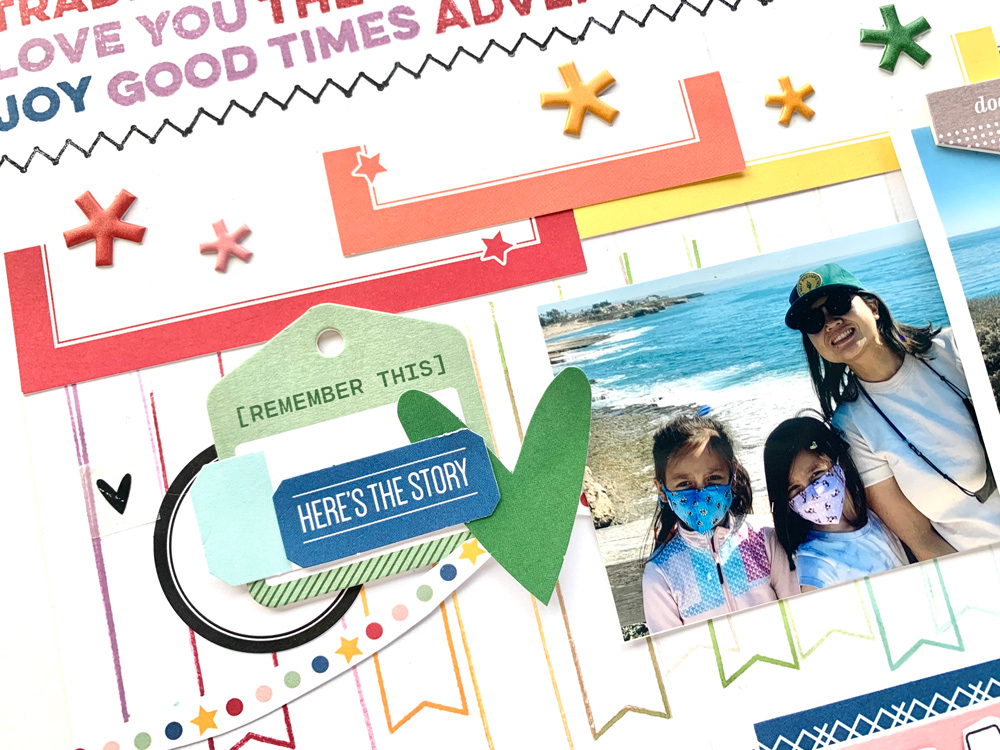
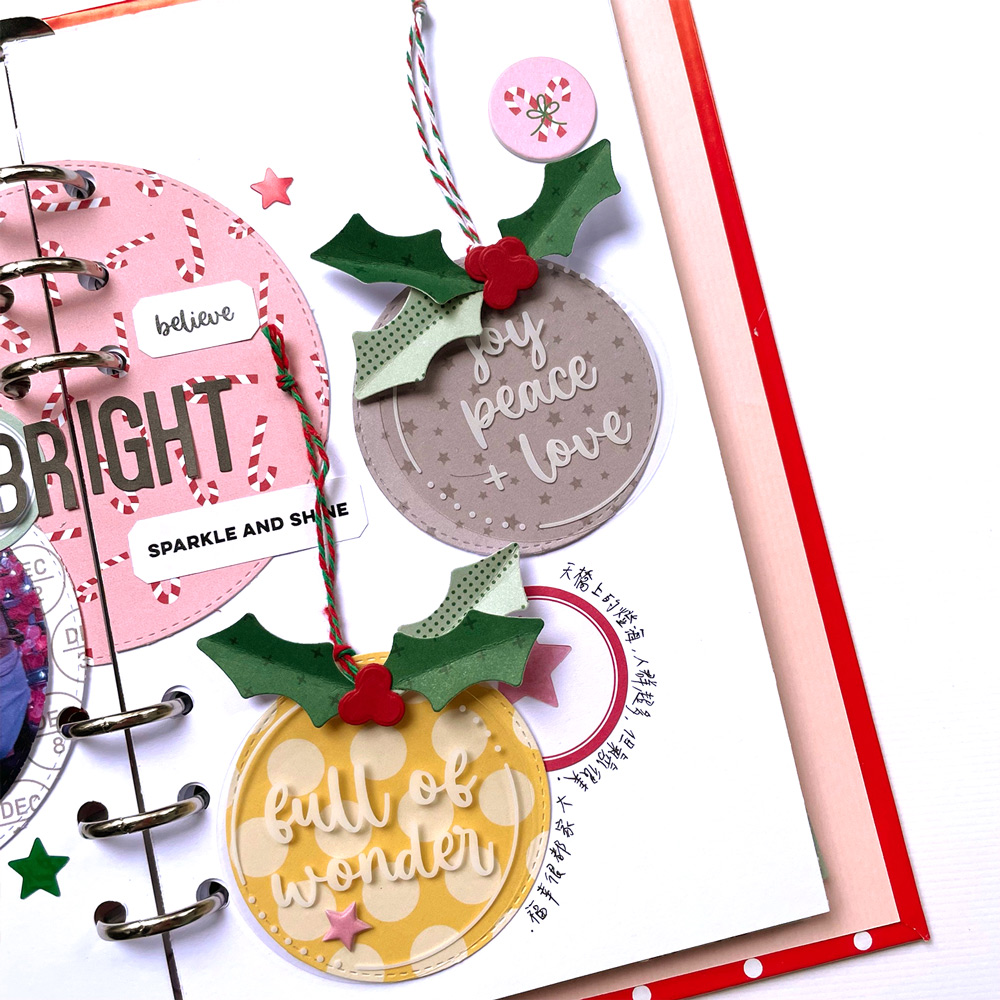
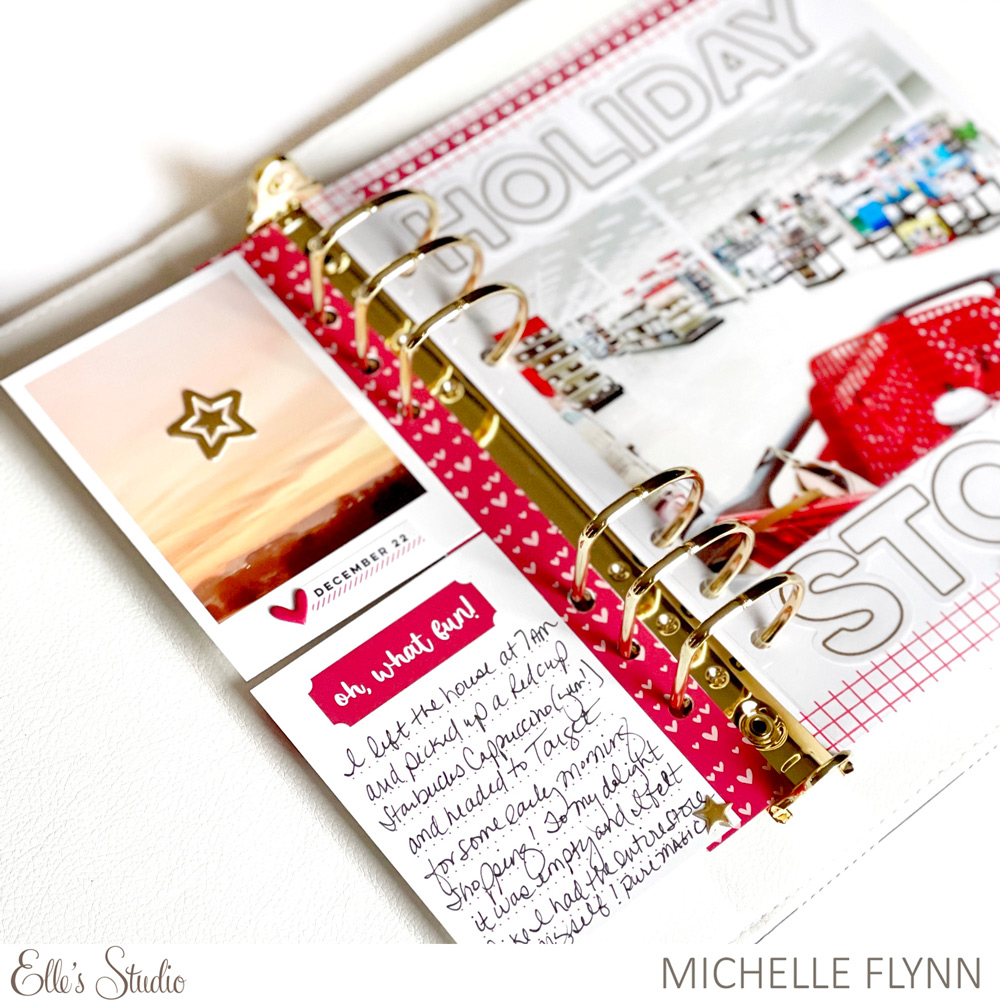
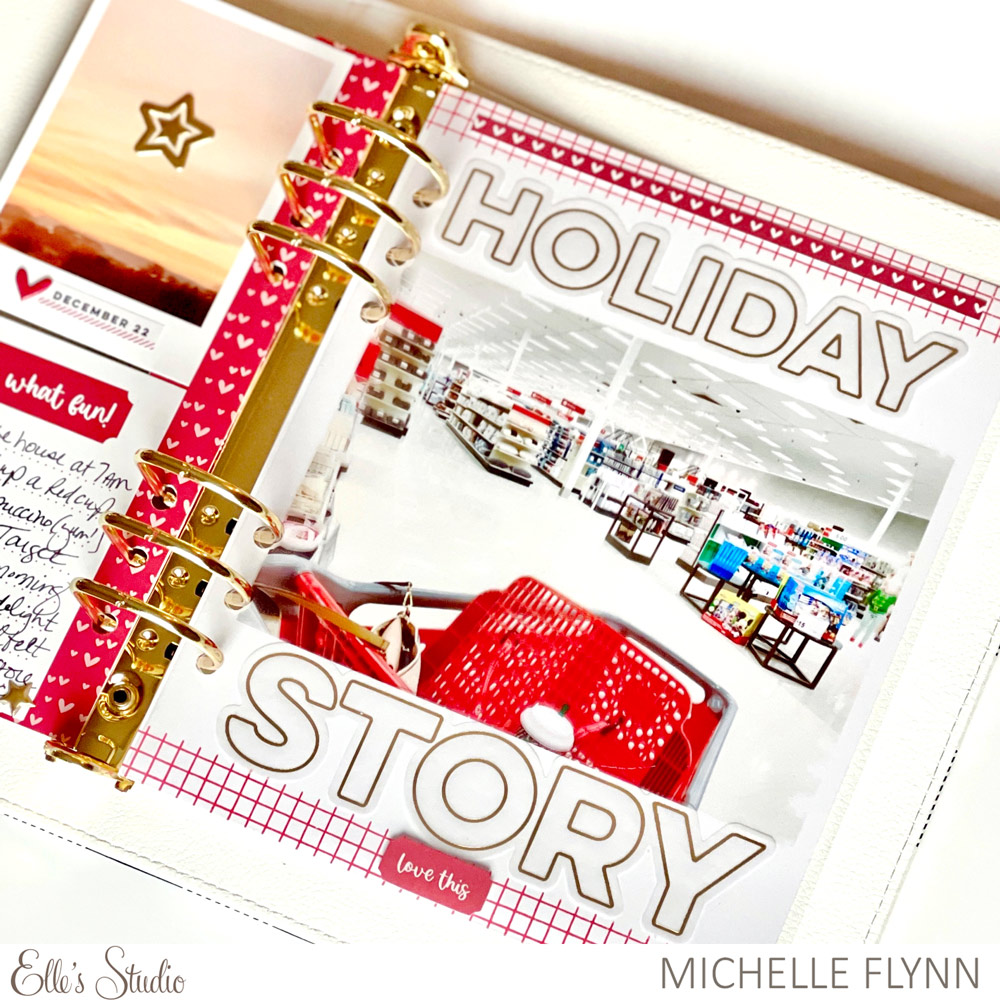
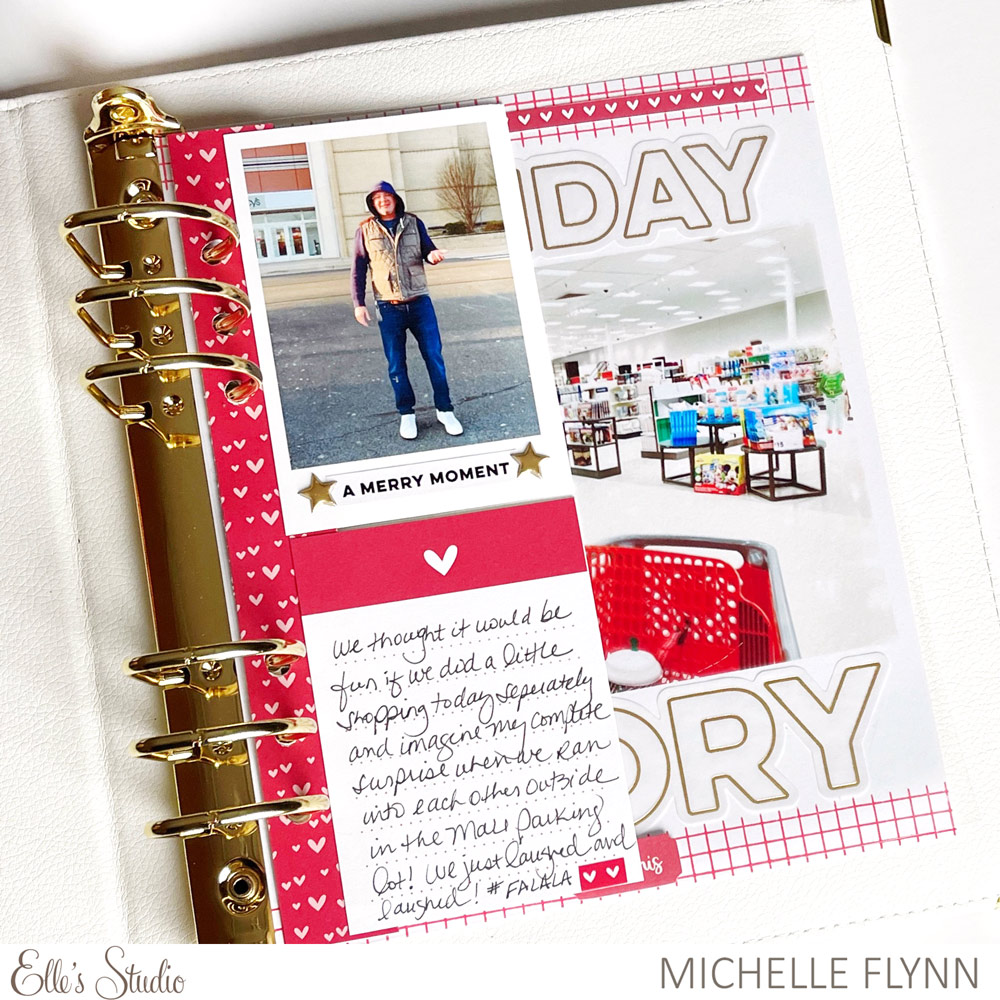
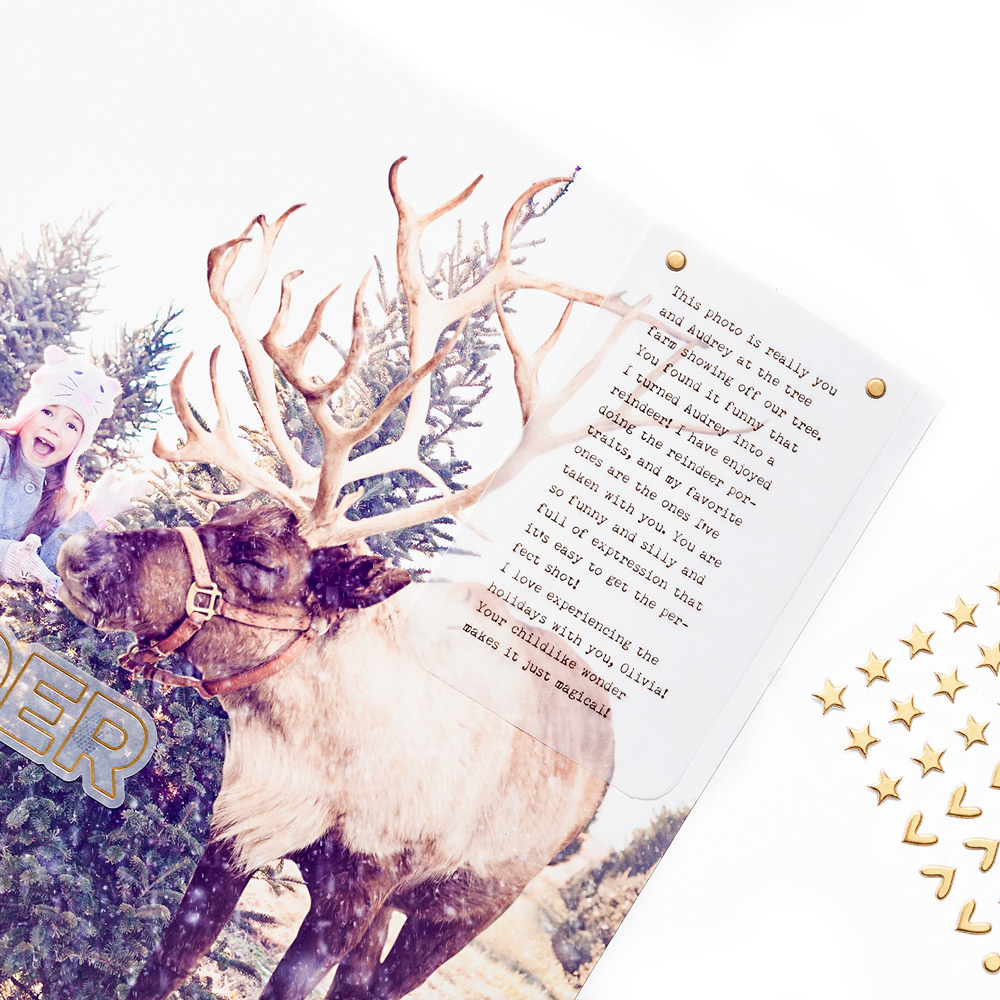
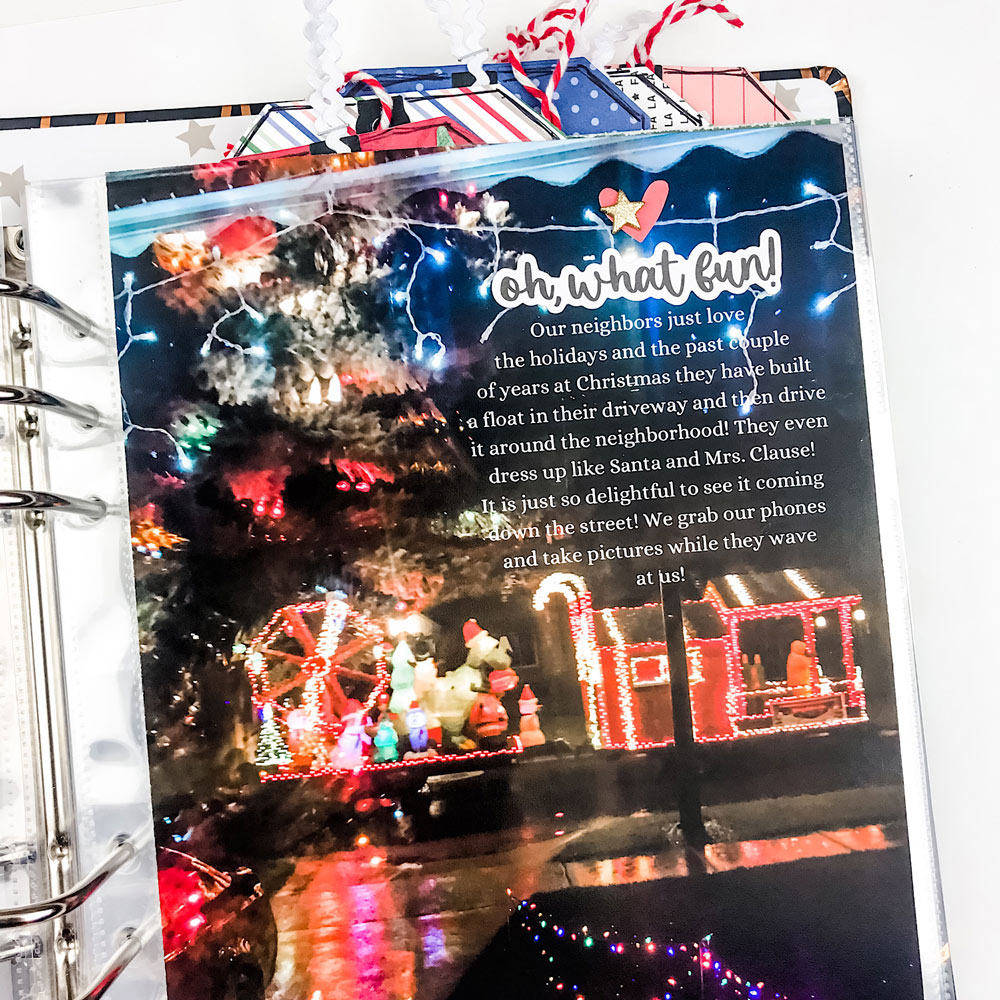
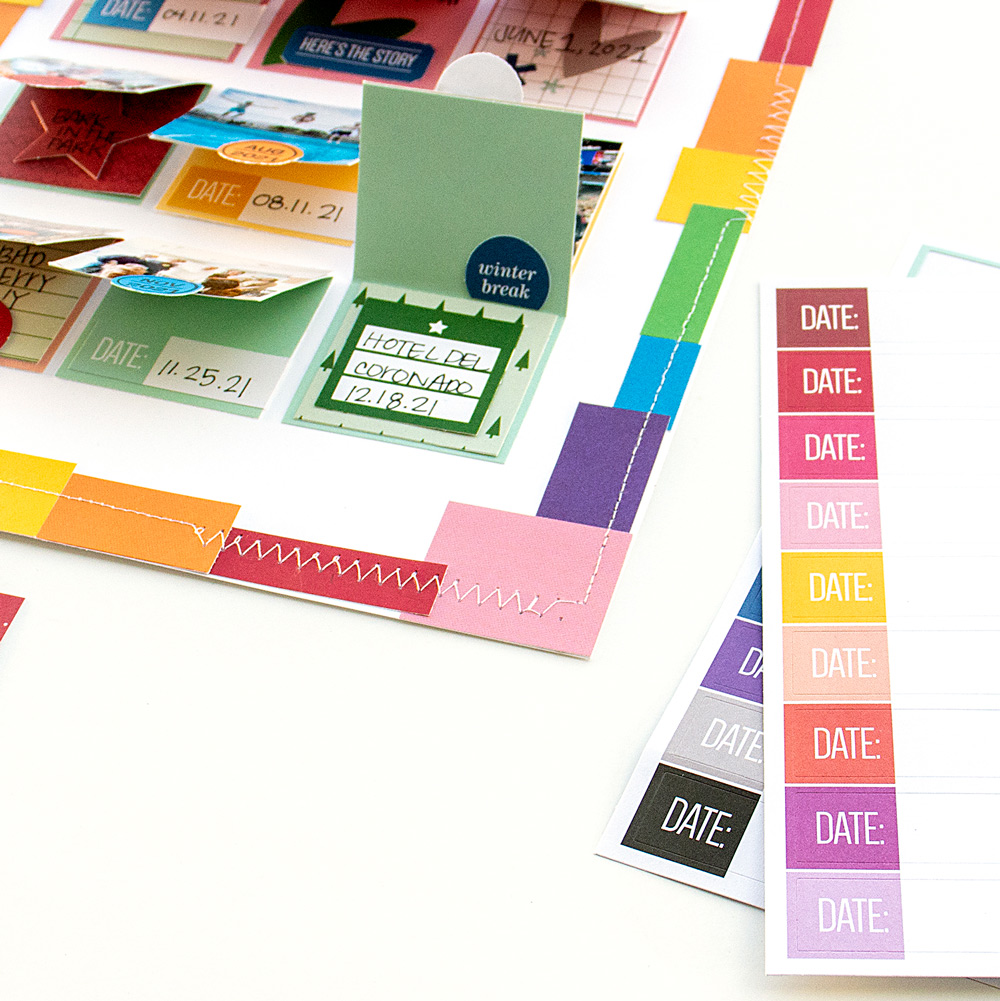
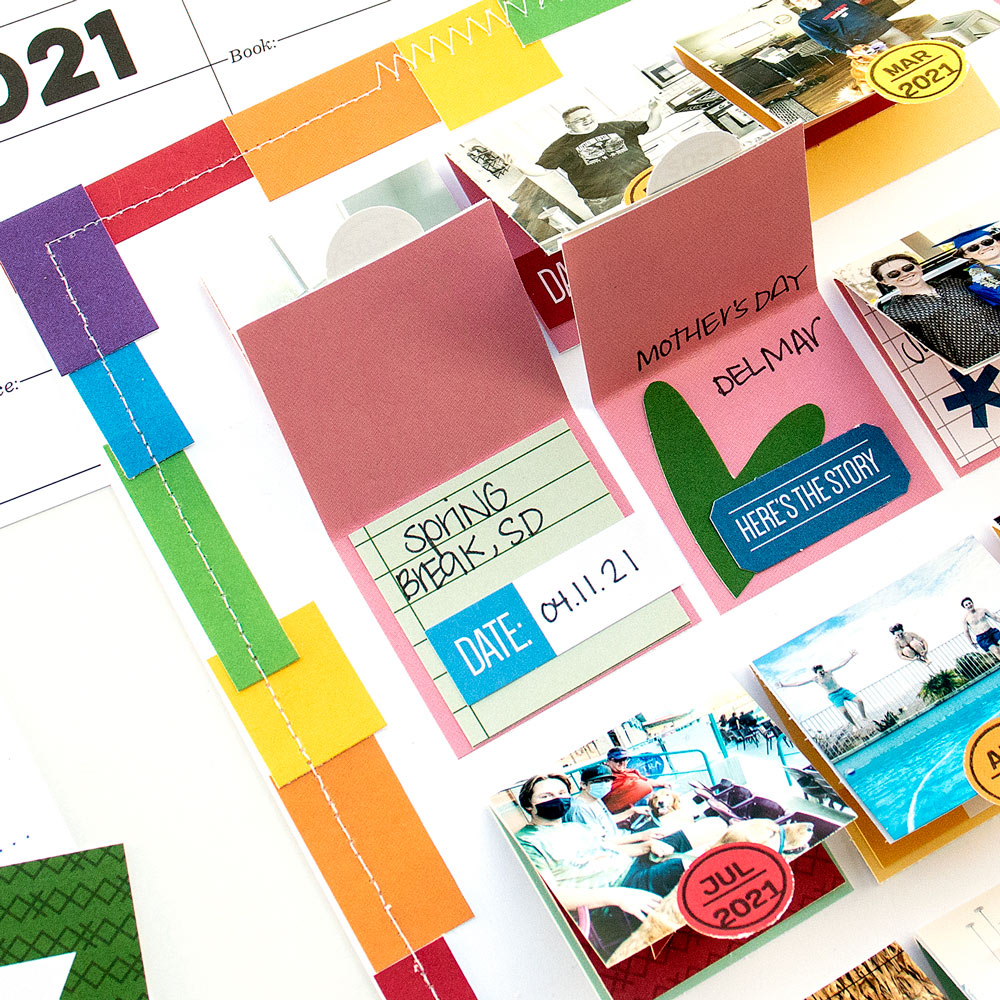
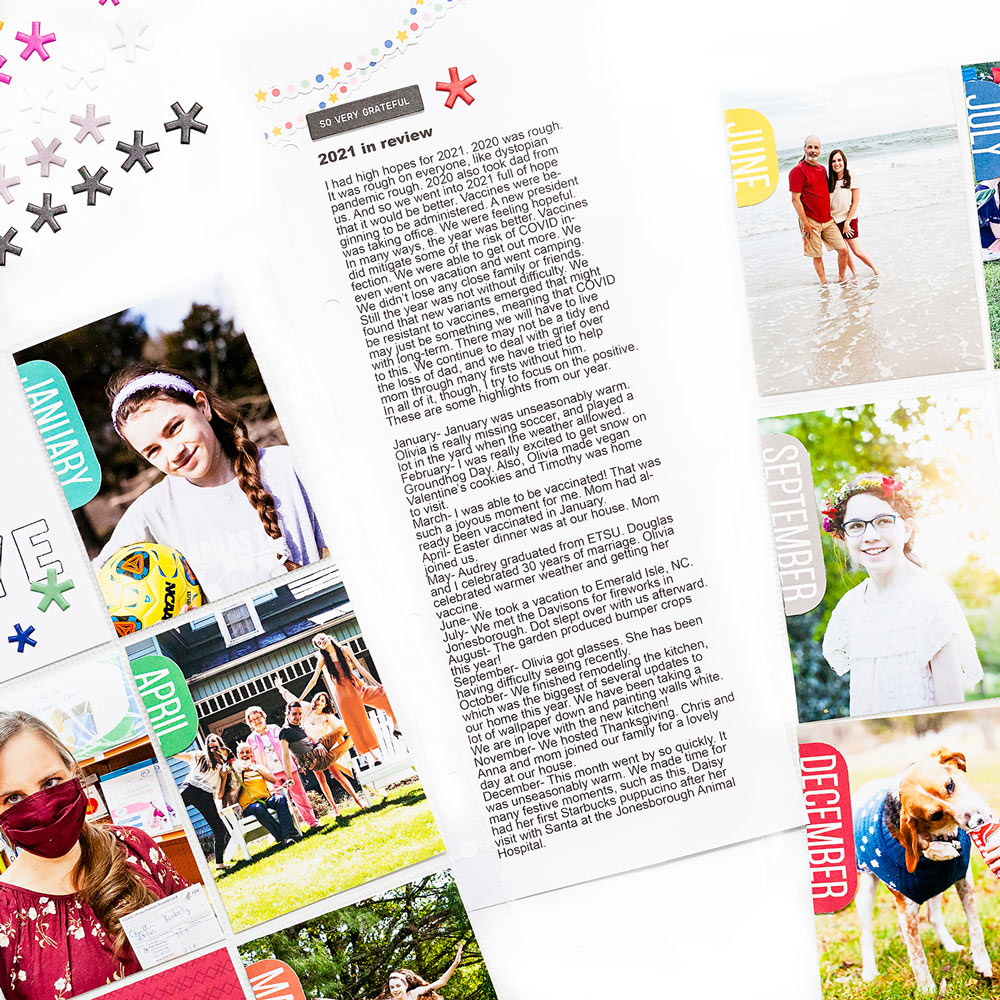
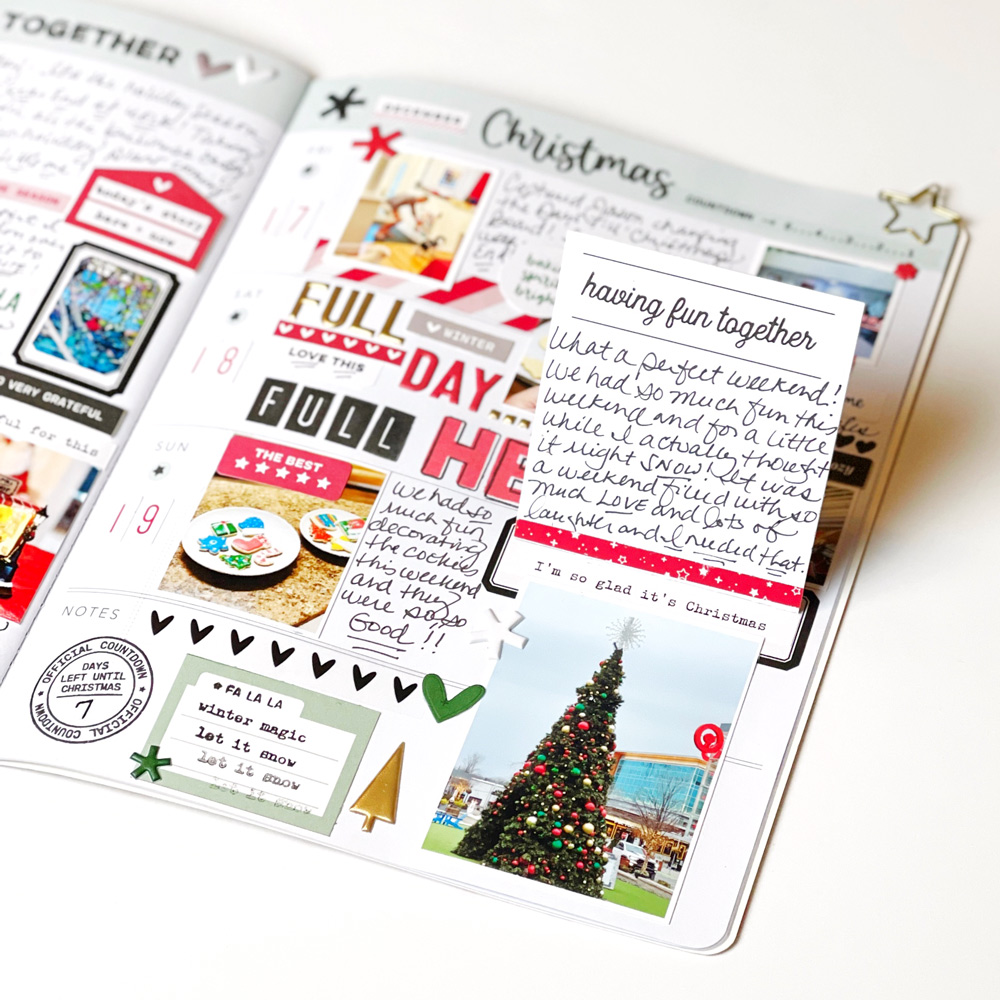
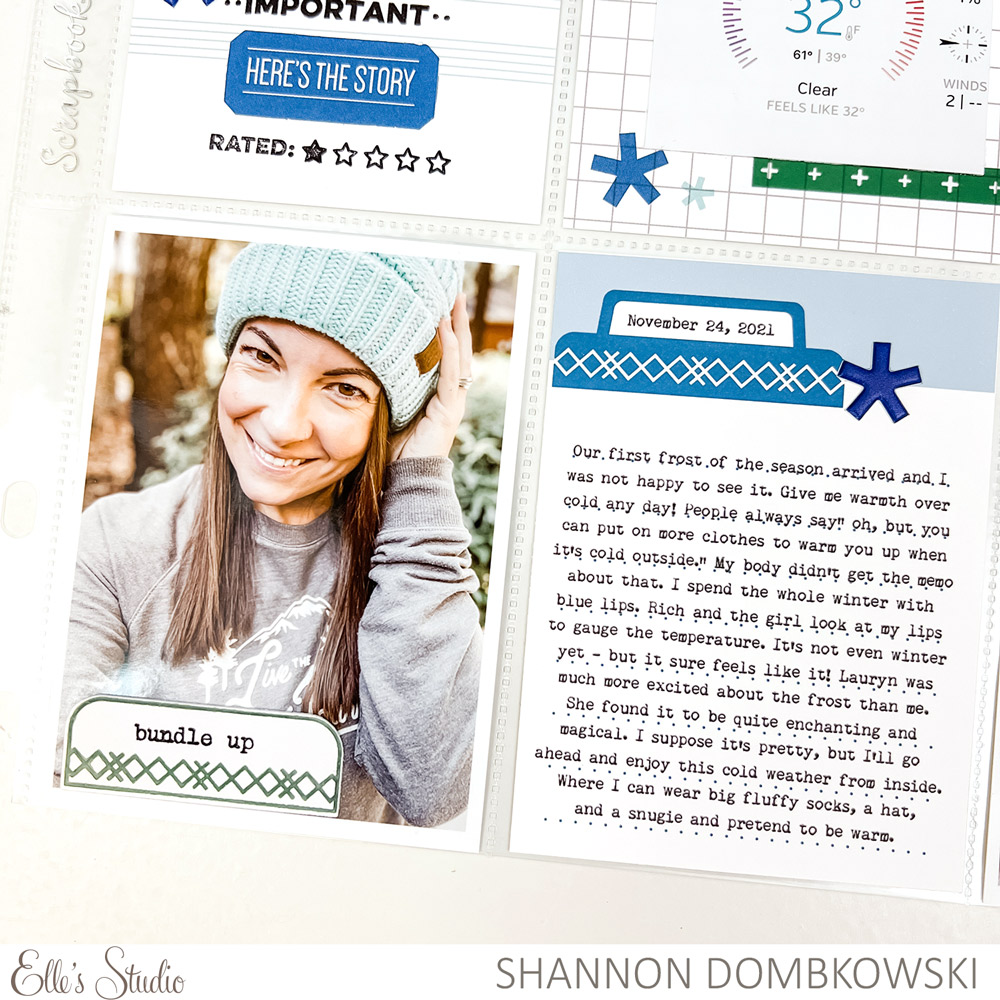
This is only the second layout I’ve made that covers life during the pandemic. I spent most of my time since Spring 2020 documenting earlier, normal years as a sort of crafting therapy! But it is time to get caught up. My plan is to include a timeline of pandemic milestones each month, from world statistics to local laws to how it’s personally affected my family. I can see this being interesting to future me, but I also don’t want it to draw a lot of attention in the layout. My solution is to use the Pocket, Frame, and Flip Up Metal Die to create a flip-up behind one of the journaling tags. I embellished the tag with a yellow heart (traced from the Love Notes Die Cuts) using the Love You Paper Stack and the “Right Now” sentiment from the Love You Stamp. If I want to read the details of the pandemic in February 2021, it’s there, but I can also just as easily skip it.

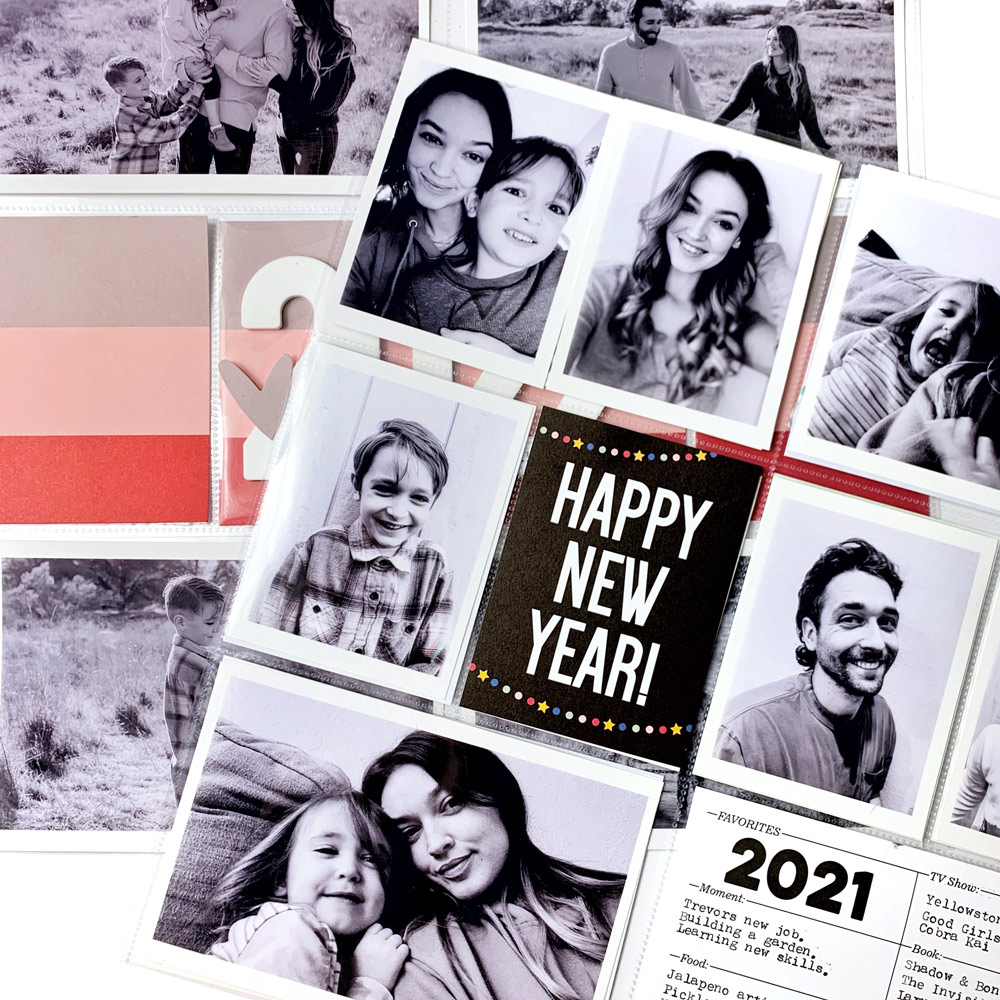
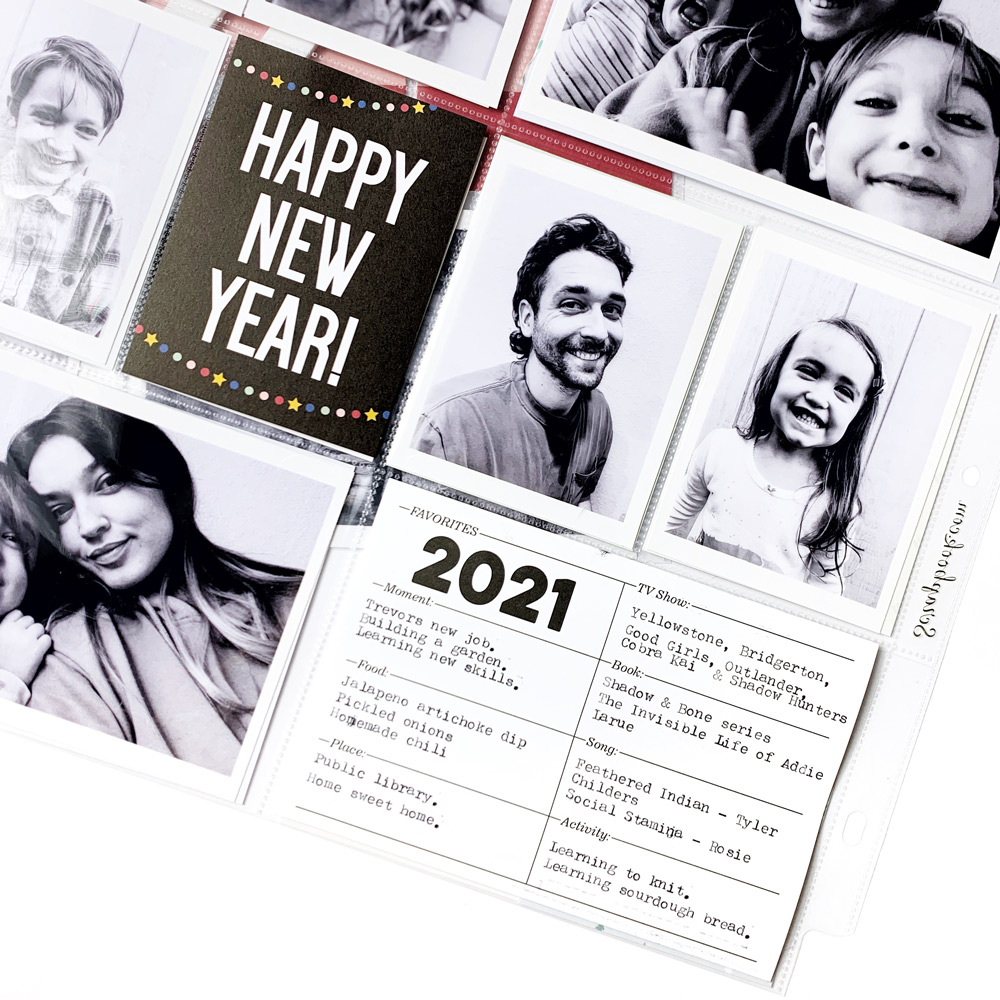
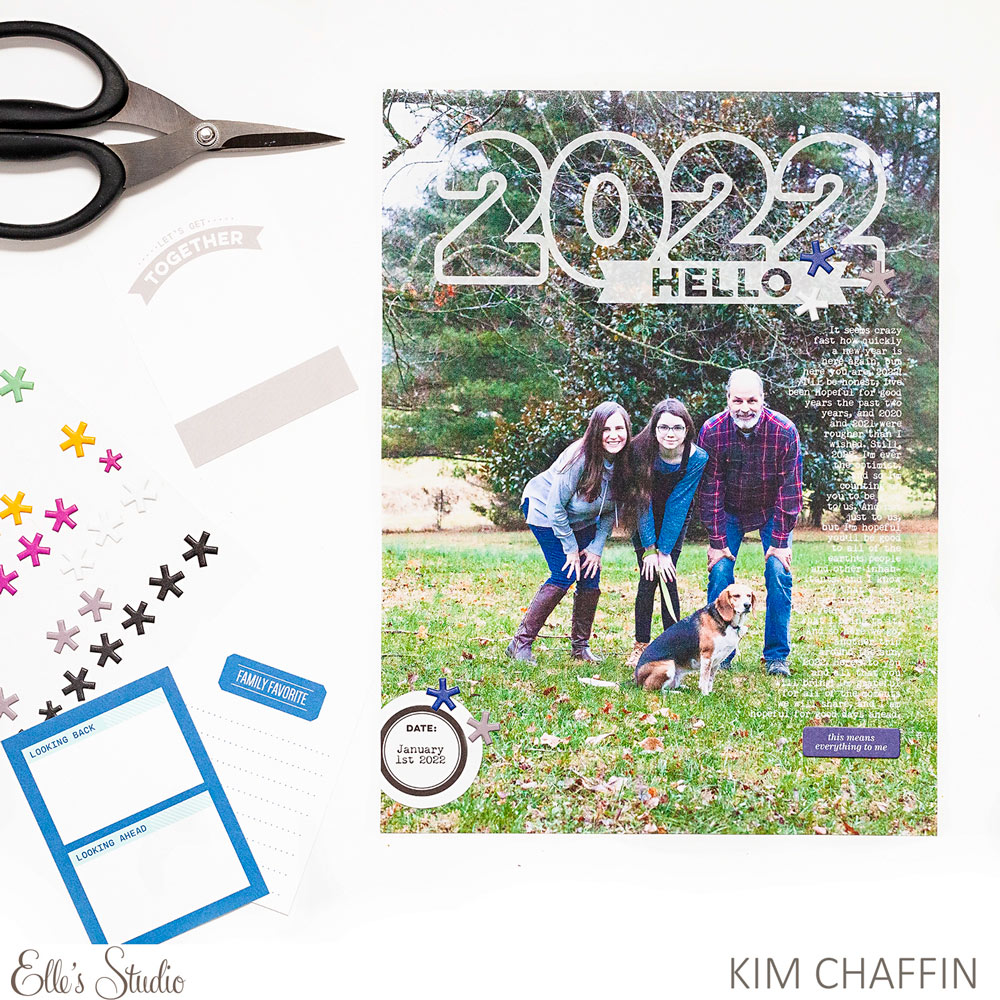
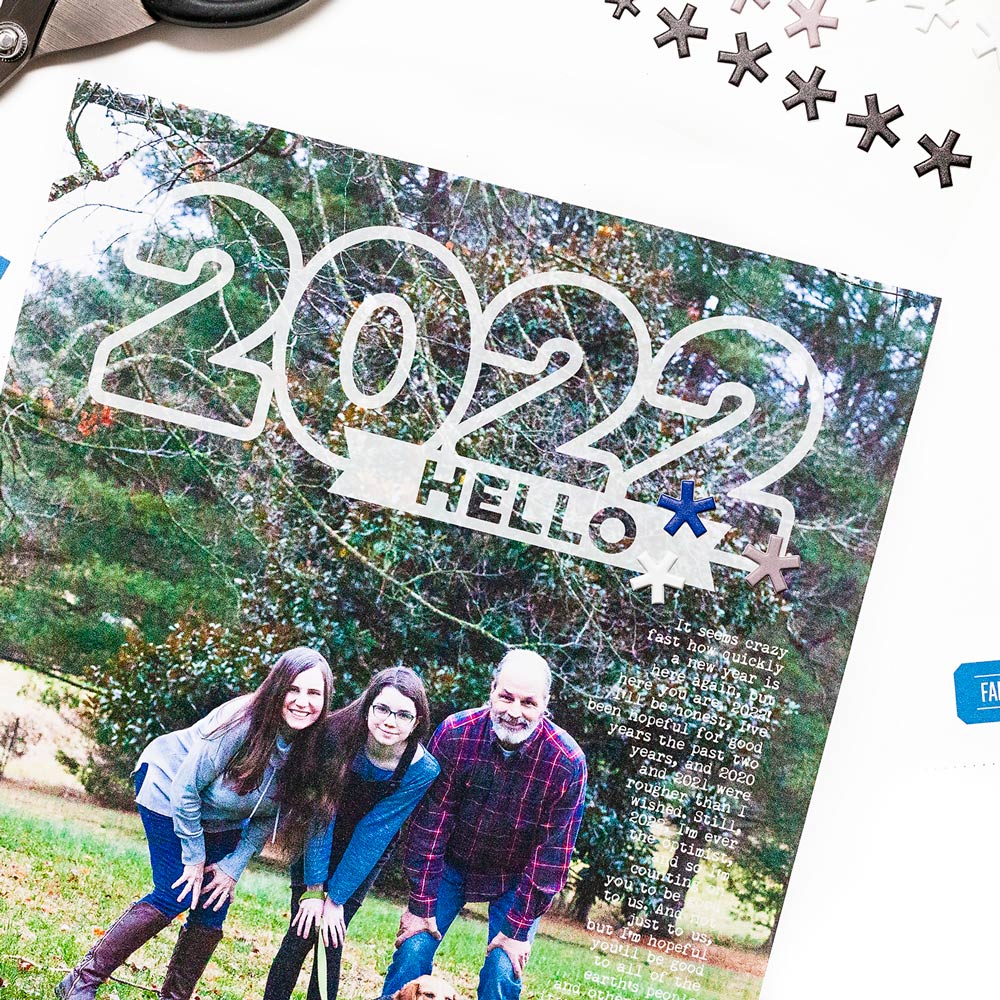
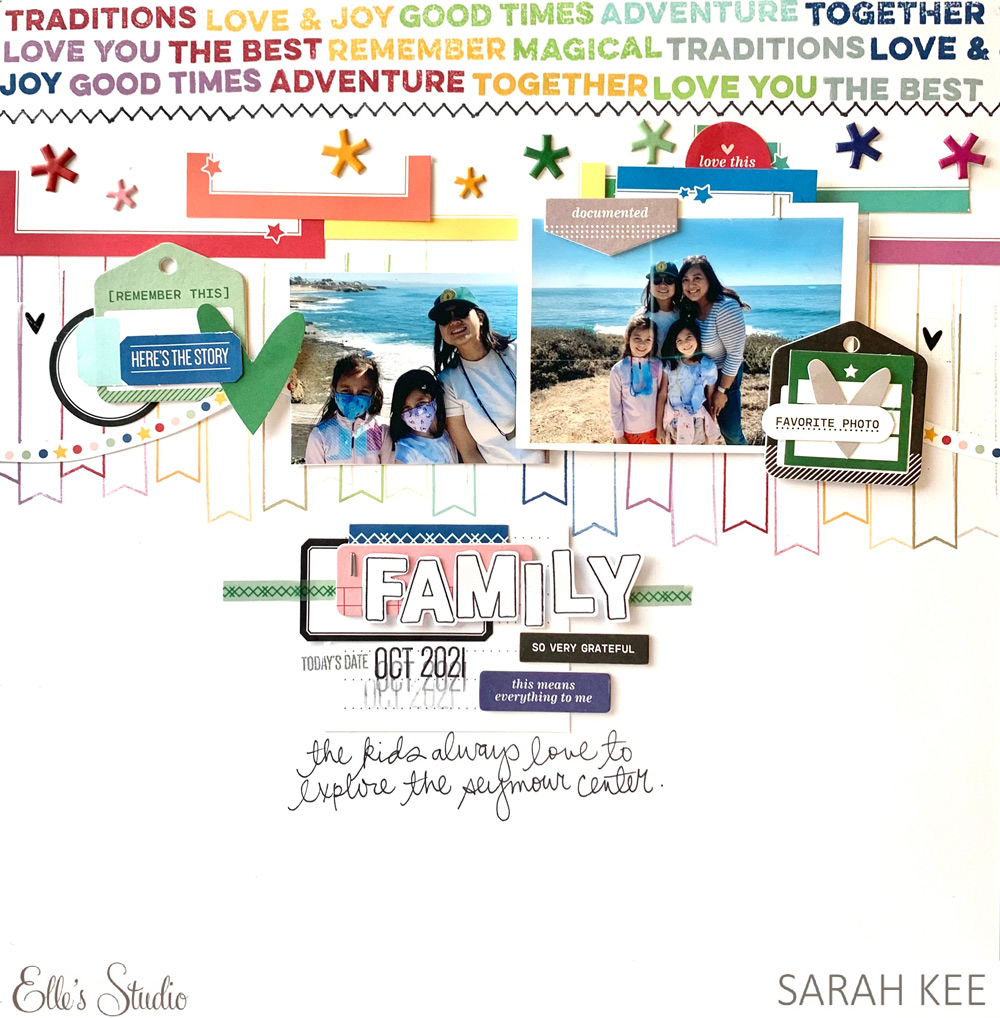
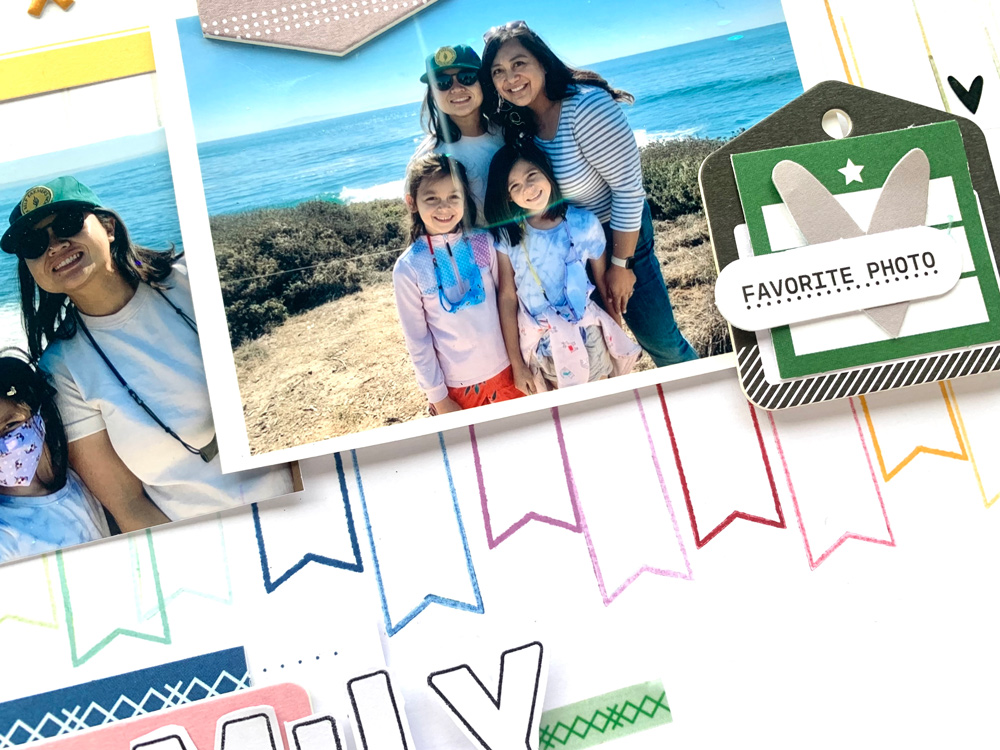
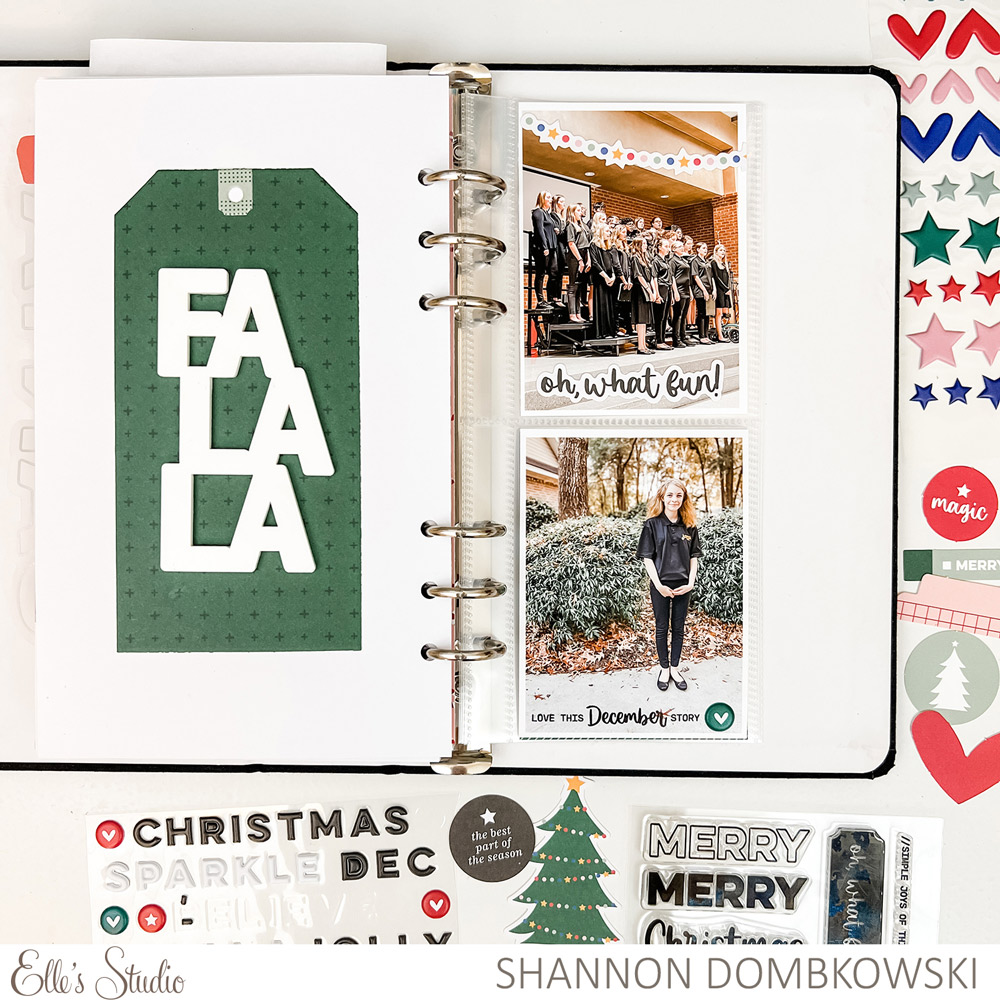
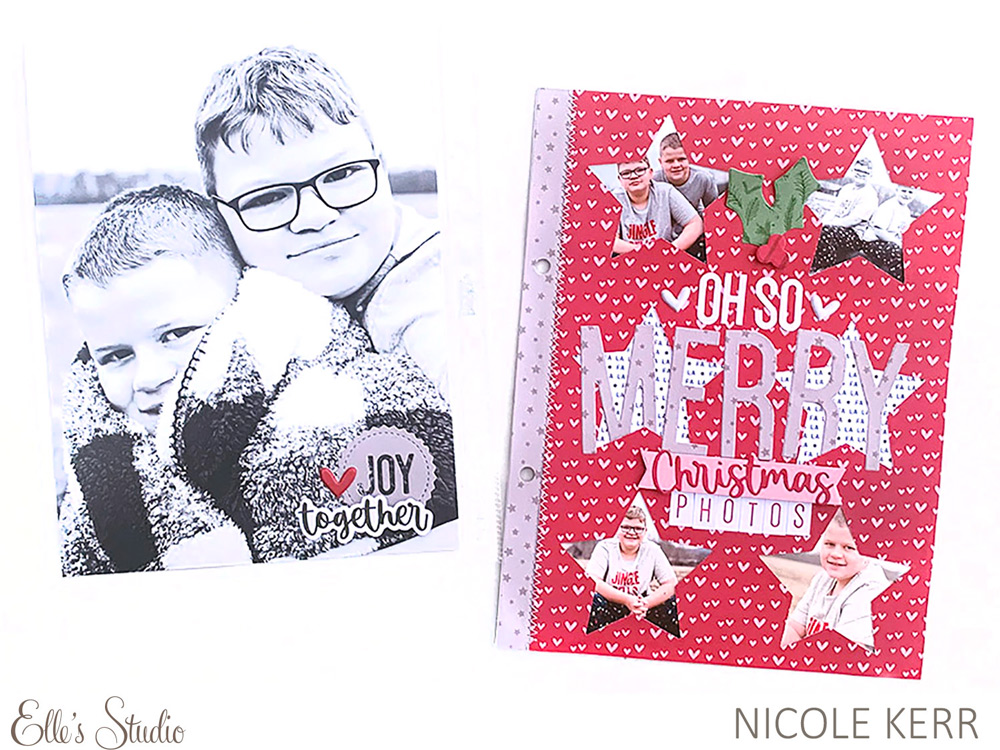
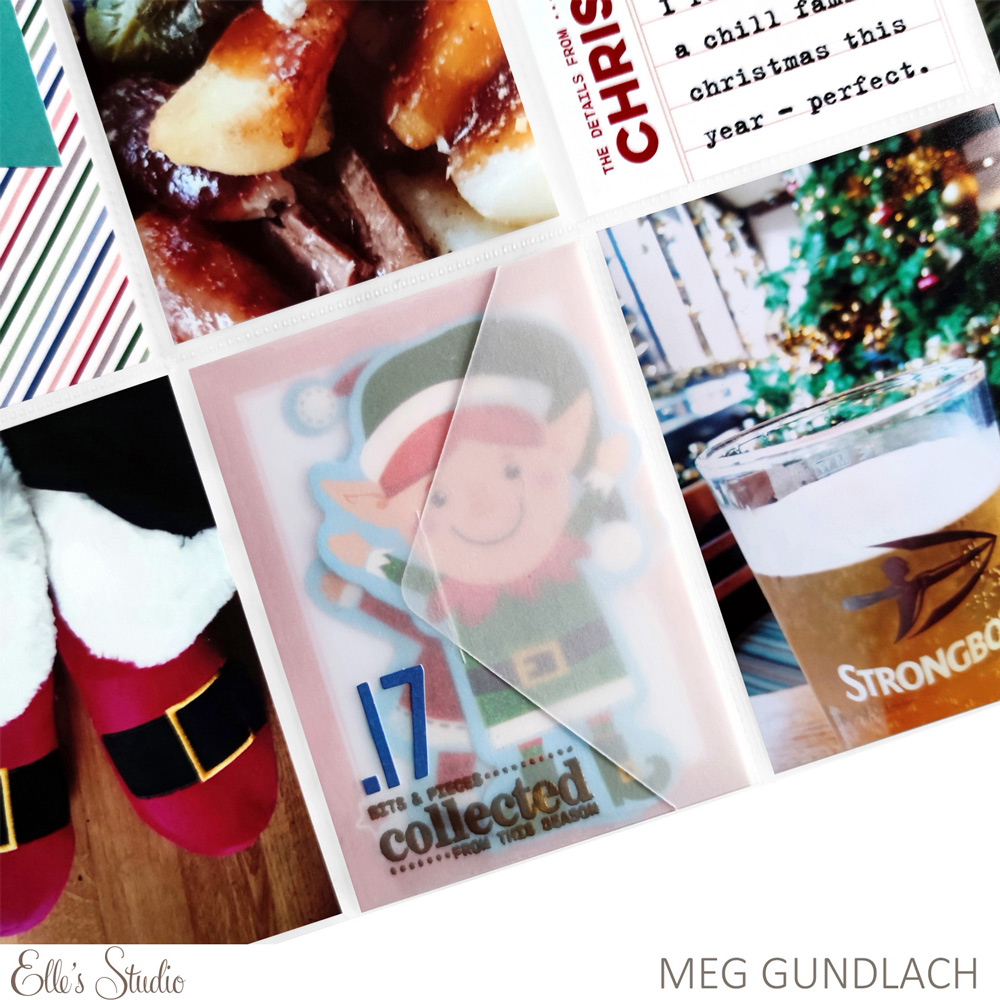
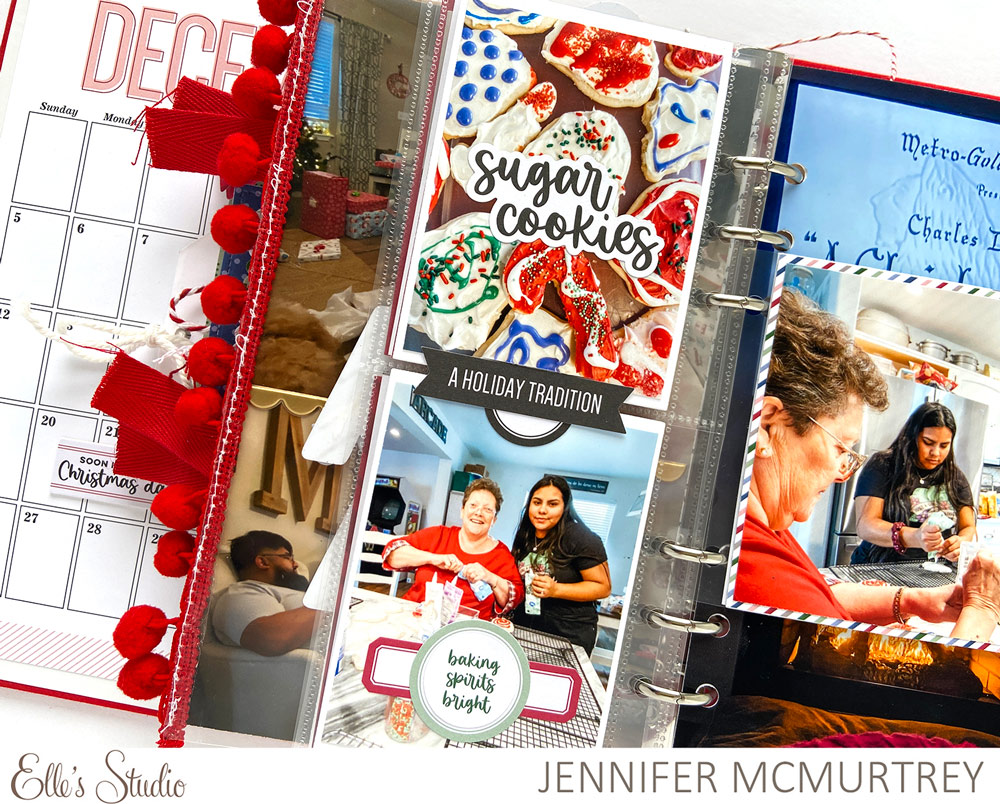
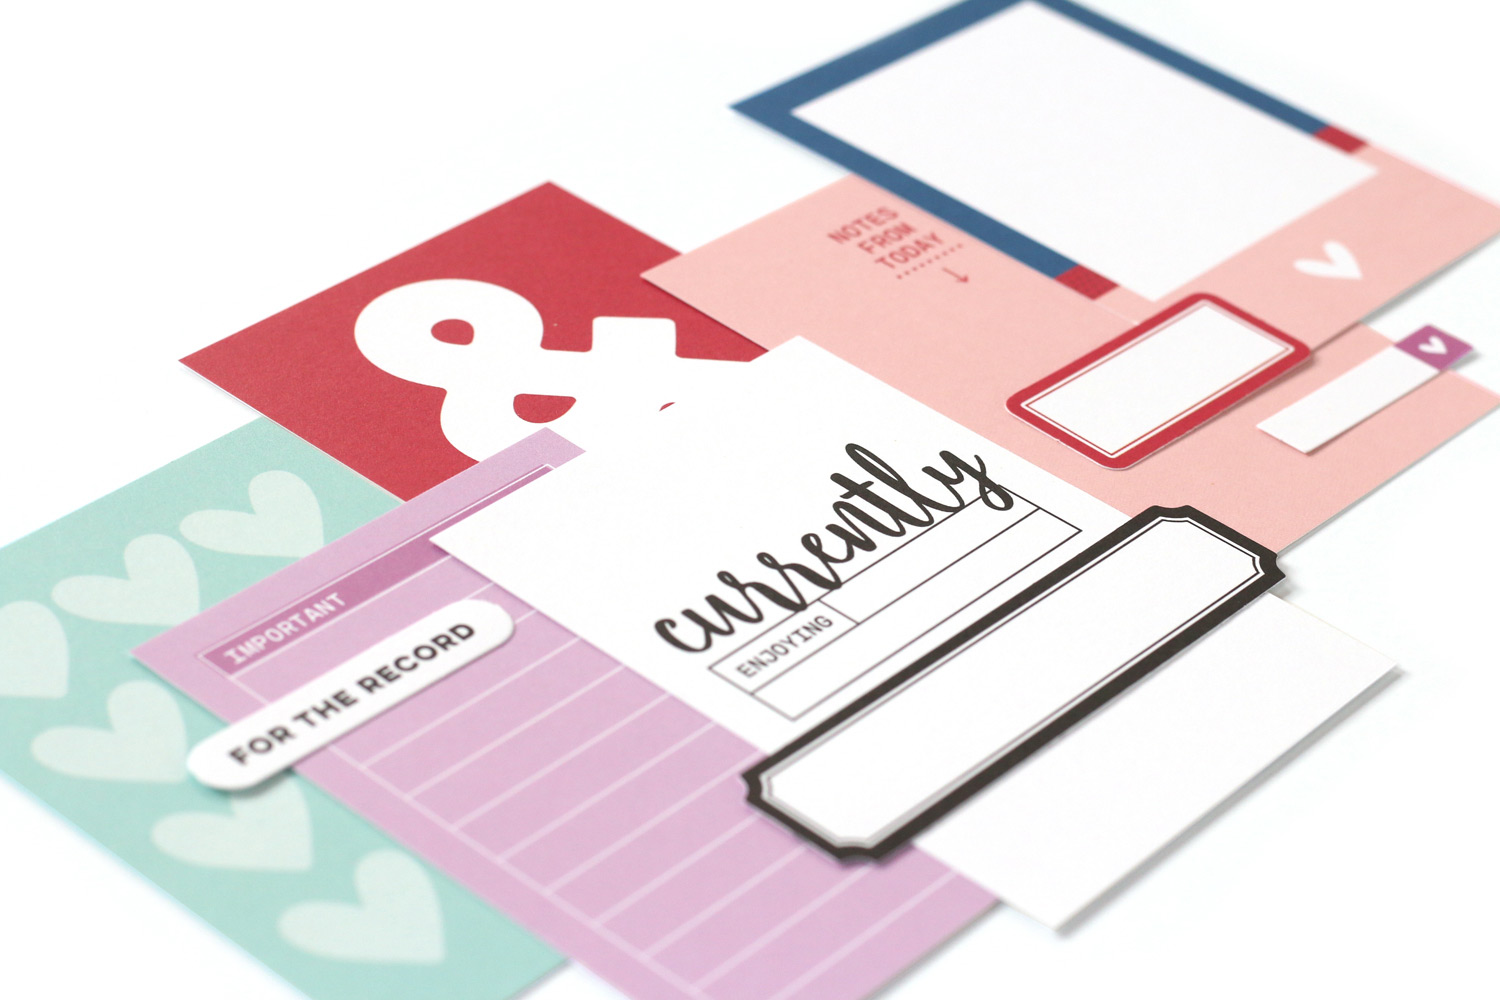
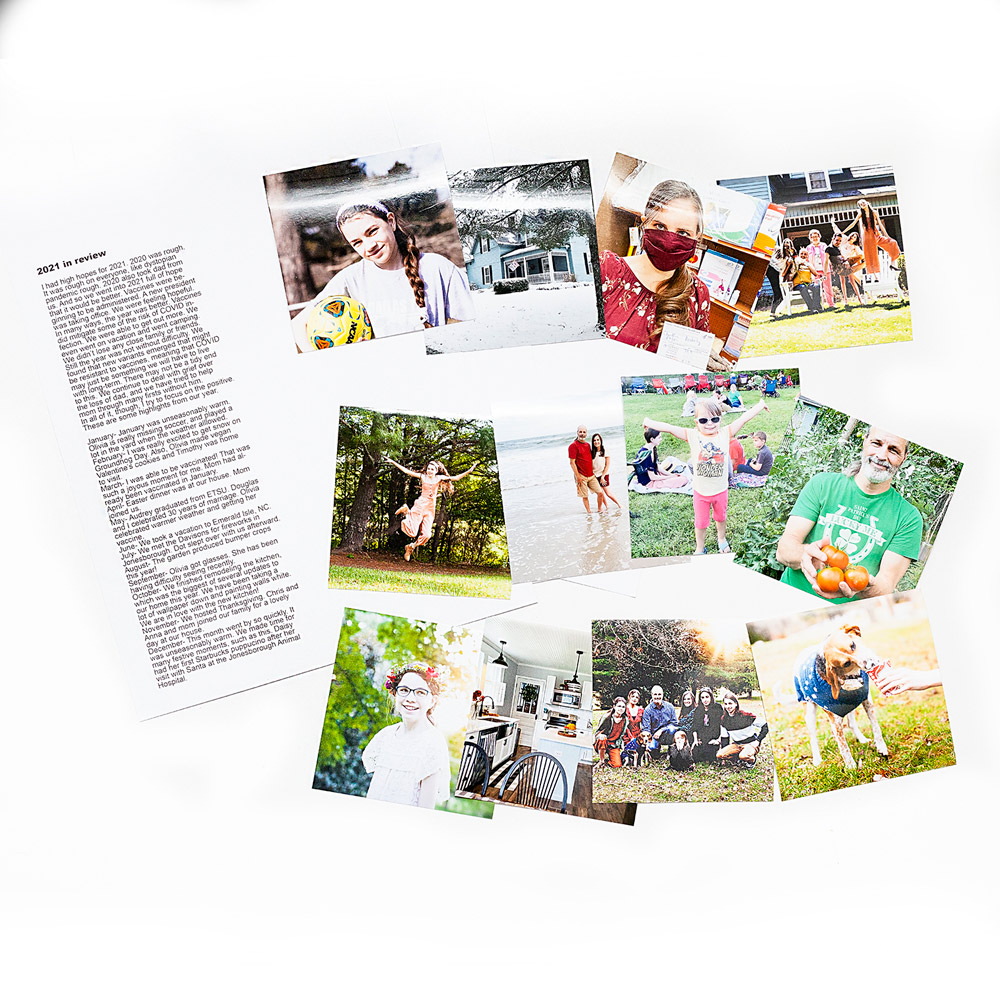
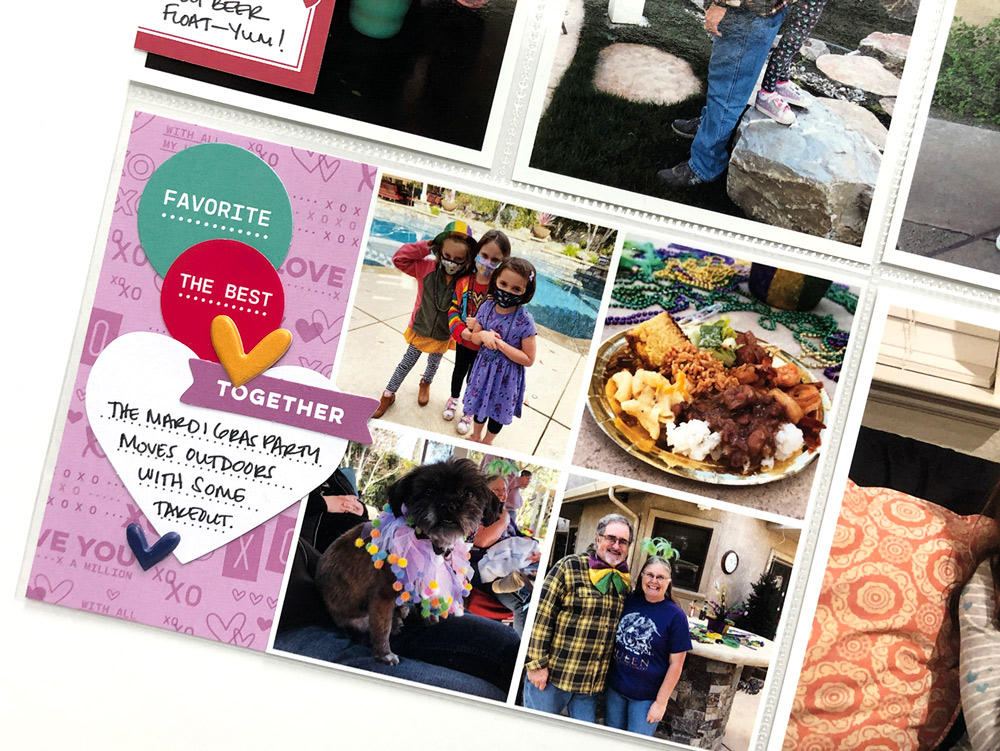
I’m a big fan of using photo collages. It’s an easy way to include multiple photos from one event, especially if it’s an annual event that gets repetitive or something I plan to document more in-depth in another album. A 4 x 4 inch square of four photos is my favorite configuration. It allows me to mount it on a journaling tag (or in this case, the lavender sheet from the Love You Paper Stack) in a 4 x 6 inch pocket for extra color and room for journaling. Here, I layered January 2022 Kit die cuts, Love Notes Die Cuts, January 2022 printables, and some puffy hearts for a fun cascade.

That’s it for now. I hope you enjoyed this preview of all the heart-filled, colorful, fun items coming to the Elle’s Studio shop on January 10th. I look forward to seeing what everyone creates with the January 2022 Kit!

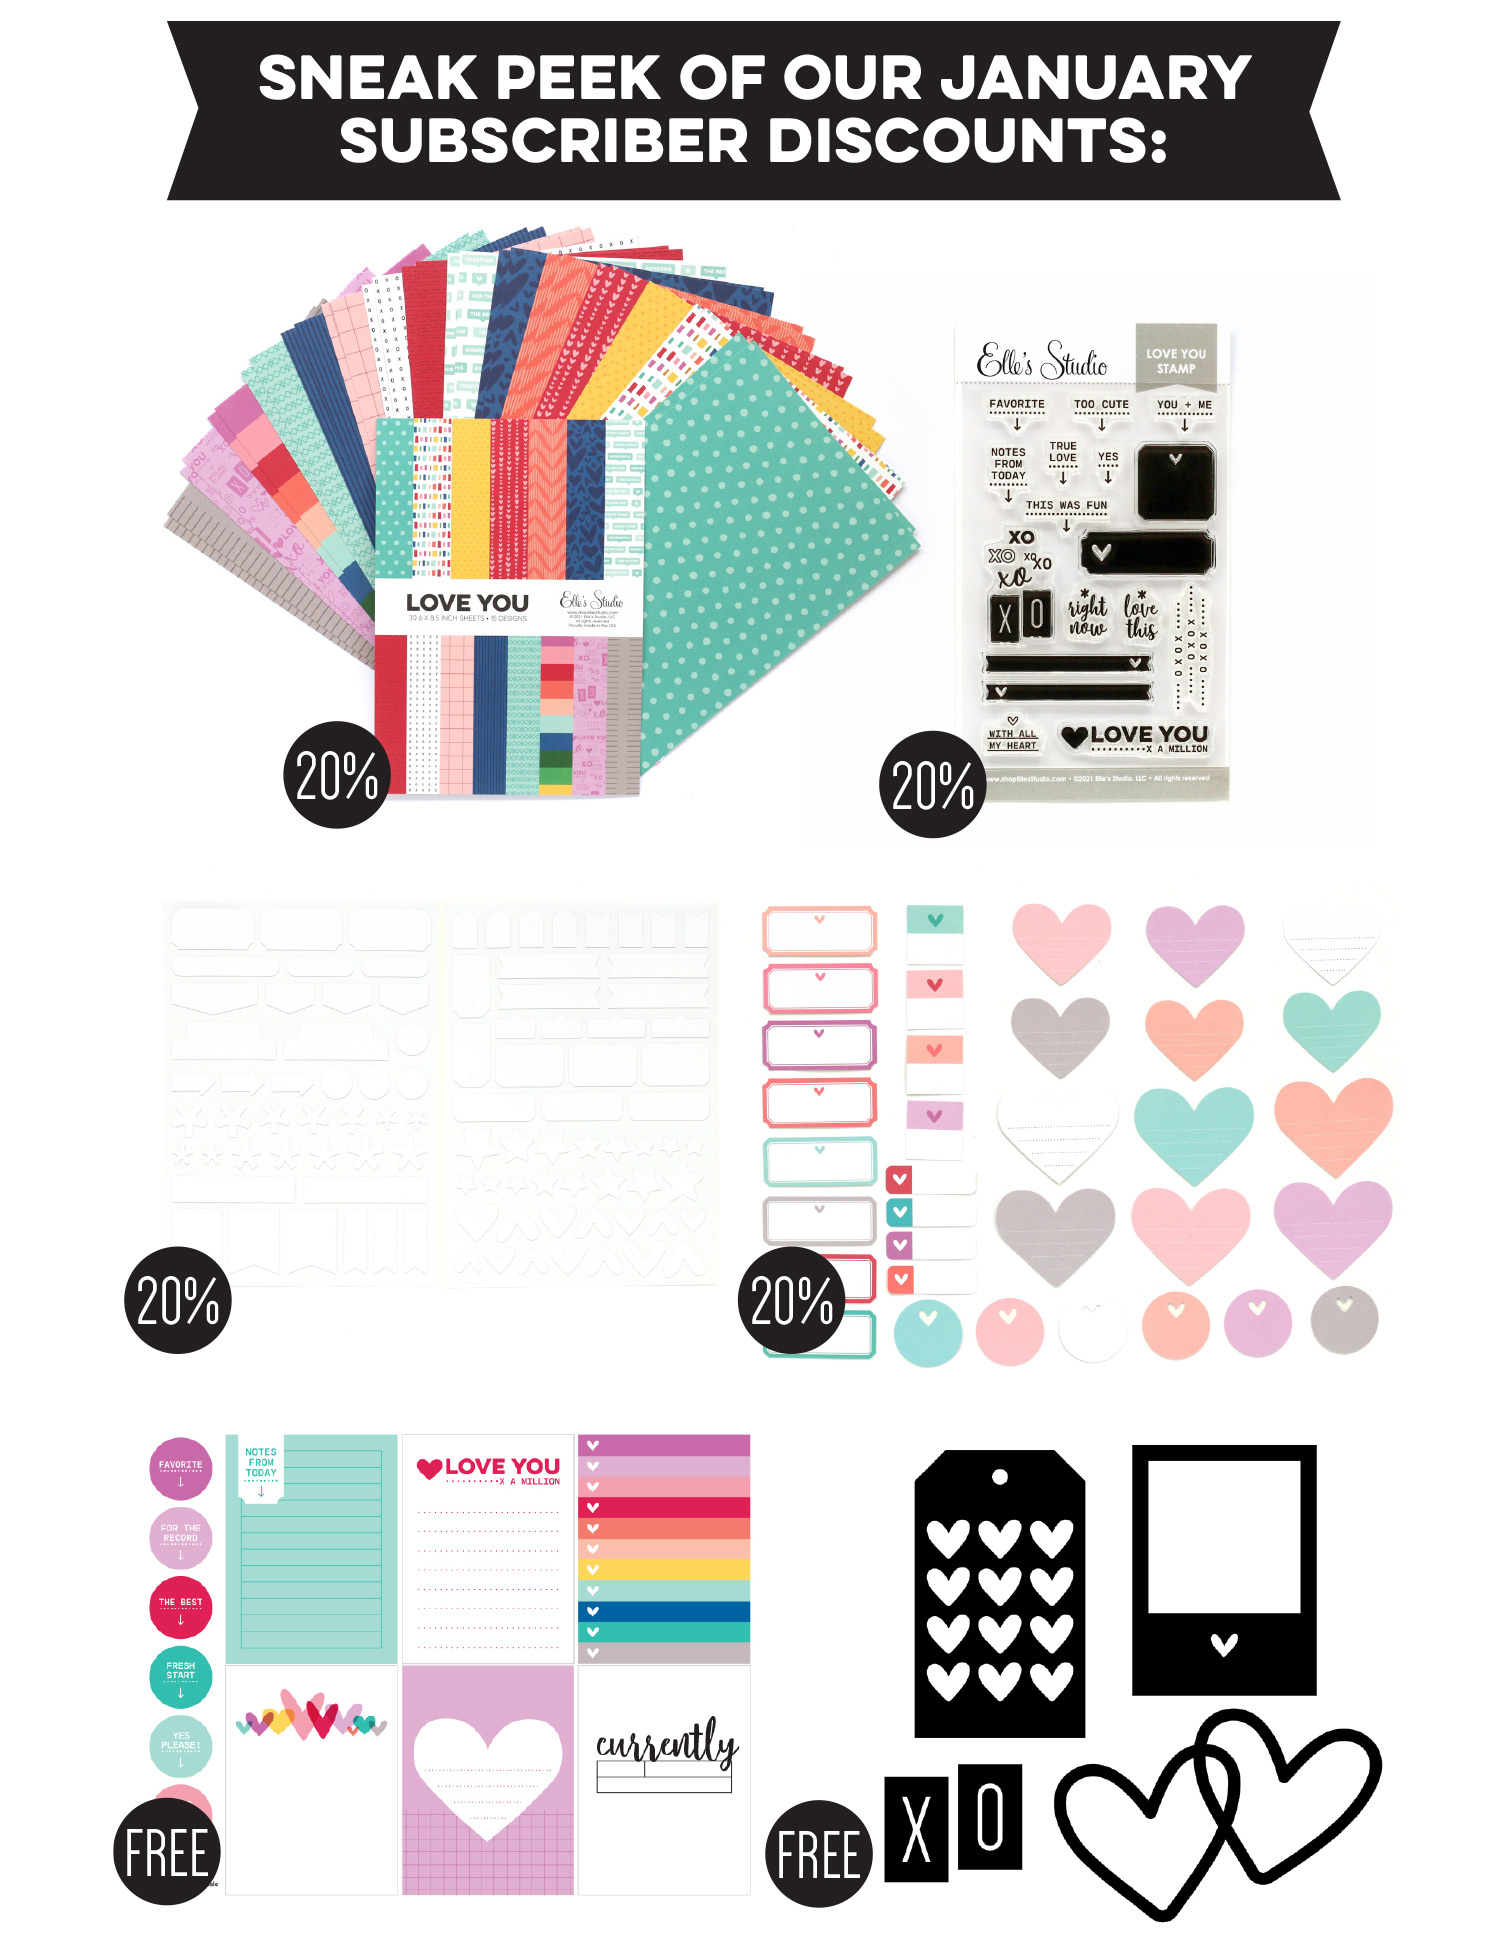
Subscribe today to be guaranteed our new January kit and lock in our $9.99 kit price! Along with being able to bundle any products from our shop that will ship for FREE with your kit during our 24-hour bundling period, starting on the 10th at 8:00 am Pacific each month, our subscribers will also have access to special discounts on select items! These discounted items shown above can be found in our SALE section during our 24-hour bundling period.

Choose our SUBSCRIBE & SAVE option to get signed up and start your subscription with our January kit. We will then hold your kit and you’ll be ready to bundle and save at our January 10th reveal! Details on how to bundle with your subscription order will be emailed to you once you have purchased this product.

We can’t wait to share these new products with you on January 10th at 8am Pacific Time!

Goodbye 2021, Hello 2022 with Aimee Mertell

Hello, Elle’s Studio friends! It’s Aimee here with you today and I thought I would share the title page I created for my 2022 project life album as well as how I wrapped up 2021 with the December 2021 kit and add-ons

Supplies | December 2021 Kit, 2022 Calendar Tags, 2022 Jumbo Acrylic, Wonder Paper Stack, Monthly Highlights Paper Stack

Let’s first talk about how I wrapped up my 2021 album. The December Kit was full of lovely tags for documenting New Year celebrations and so I let them inspire my last set of pockets. I chose the 3 x 4 inch ‘Happy New Year’ tag and I loved the invitation to document my end of the year favorites with the 4 x 6 tag that came in the monthly kit. 

I opted to print my photos in black and white to pack a real punch at the end of my album. I love the simplicity of the tags paired with the photos of me and my family on New Years. 

Similarly, I chose the high contrast look of black and white family photos to kick things off in the new year as well! I trimmed down papers from the Wonder Paper Stack so to fit in my pockets and create a bold row of color. This really helps to draw the eye to my focal piece in the center of the pockets—the Jumbo 2022 Acrylic!

I then added die-cuts from the December Kit that indicate it’s going to be a good year. I absolutely love this bold start to my 2022 album and love even more that Elle’s Studio has products dedicated to helping you document your 2022. Some personal favorites of mine besides the acrylic pieces are the Monthly Highlights Paper Stack and the 3×4 inch 2022 Calendar Tags.

I often fill out the Monthly Highlights and add them as an insert to my pocket page album and the 2022 Calendar Tags would make an easy and excellent addition to many monthly formats! I hope this post has inspired you to get your own albums set up for the new year and that you have a happy and productive 2022! 

Find all of our fun 2022 products in the shop today, perfect for setting up a new year of memorykeeping!

Saying Hello to 2022 with Kim Chaffin

Hello, and happy new year crafty friends! It’s Kim Chaffin, and I’m here sharing some ideas for using the Elle’s Studio digital elements! I love these pieces because they are so versatile! My layout today is my opening page in my 2022 scrapbook. Let’s take a look!

Supplies | December 2021 Print and Cut Labels, December 2021 Cut Files, Grateful Chipboard Stickers, Puffy Asterisk Stickers

I used a large photo of our family that was taken on New Year’s Day as my page, printed at 9 x 12 inches. A favorite technique of mine is to use the digital cut files as a page title. Of course, you could use it as a cut file, the traditional use, and cut it out. However, I love to add these files as a digital layer in Photoshop, where I can resize and recolor them in whatever way I like. In this case, I used the “Goodbye 2021, 2022 Hello” file. I only wanted the “2022 Hello” portion on my page, so I enlarged the file and placed it high enough so that the “Goodbye 2021” portion did not show. I made this one pretty large, and I love that because it’s a great way to maximize the impact of the title. The cut files are black, but they can easily be recolored in photo-editing software. I converted this one to white, and then I reduced the opacity to 50% so that the photo could be seen through it. 

I typed my journaling directly onto the photo as well, also in white. I lined up the right edge of my words with the right edge of the cut file, and I carefully shaped the left edge of my journaling block so that the typed words created an outline around my husband. 

Did you know that you can type onto the Print and Cut Labels before you print? I opened the document in Photoshop before printing, and then I typed over the label I wanted to use. I chose the black date circle to document the date of this photo. Then I was able to simply print the label with my text already added.

I embellished with a few of the Puffy Asterisk and Grateful Chipboard Stickers, and this layout was complete! Digital elements are a fun way to customize your kit to work for you, and they really do make quick work of putting a page together! I can’t wait to see how you take these digital files and make them yours!

A Stamped Banner Background with Sarah Kee!

Hi, Elle’s friends! It’s me, Sarah, on the blog and today I’m excited to share how I incorporated stamping onto a 12 x 12 inch layout using the December 2021 kit and add-ons.

So, you know how a lot of the Elle’s Studio stamps have fun sentiments or phrases on them? Or how about the cute little banners on the stamp set? I am always trying to find ways to incorporate them onto a layout instead of using them on journaling tags. Have you ever considered stamping them to create a background? I’m a huge fan of creating stamped backgrounds and here’s how I used the Good Times Banner Stamp to create a 12×12 layout:

Supplies | December 2021 KitBright Star Journaling Tags, Black Cardstock Label StickersGrateful Chipboard StickersWintertime Vellum Stickers, Puffy Asterisk Stickers, Good Times Banner Stamp, Home Sewn Stitches Stamp, Parker Outlined Alphabet Stamp, Monthly and Daily Tab Stamp, Mini Dated Stamp

I started off by stamping words from the stamp at the top of my layout. I only stamped about three lines of words, but feel free to stamp however far down the layout you would like. I used an assortment of ink colors for that bright, colorful look.

Then, a little further down on my cardstock, I vertically stamped the banner outline using the same ink colors that I used for the words. I made sure to stamp horizontally across my layout to help create my background.

To create some dimension to my layout, I cut up the Bright Star Journaling Tags and layered them across my page. I also added Puffy Asterisk Stickers.

After adding those main elements, I added two photos on top of my stamped background, and then embellished around it with pieces from the Grateful Chipboard Stickers and die cuts from the December 2021 Kit

For my title, I really wanted it to stand out from the rest of my layout, so I used the Parker Outlined Alphabet Stamp. I backed my letters with a label from the Black Cardstock Label Stickers, as well as a piece from the Grateful Chipboard Stickers

That’s all I have for today. What do you think? My favorite part about creating this layout was using the sentiments in various colors to create a unique background. The possibilities are endless when you think about all the ways you can arrange your stamps to create backgrounds for your projects!

We’d love to see how you use your stamps! Join us, and please do share your projects with all of us at our Elle’s Studio Facebook Group or on Instagram using the hashtag #EllesStudio.

And as always, thanks for letting me share my work with all of you!

Find our new Good Times Banner Stamp in the shop today while supplies last!

Say Hello to Our 2022 Design Team!

We are so excited about a fresh, new year and an insanely talented group of designers to create for us! Today we’d like to introduce you to our 2022 design team:

1st row : Aimee Mertell, Aurélie Cormier, Diane Dzubian, Jennifer McMurtrey

2nd row : Junell Kruzel, Kat Benjamin, Kim Chaffin, LeeAnne Jones

3rd row : Marsha Farris, Meghann Andrew (Design Team Coordinator), Melissa Mann, Michelle Flynn

4th row : Nathalie Leonelli, Sarah Kee, Suzanna LeeWei Wei Wang

We are so excited to see what our new team creates for us this year, so be sure to follow us on our blog, Instagram, and Facebook group! And don’t forget to follow each of our wonderful team members at their links above to see what they’re creating throughout the year! Here’s to 2022!

Document December 2021 Inspiration: Week Five

Welcome to week five, the final week of our Document December design team inspiration! December is over, but don’t lose your momentum—our team is here to inspire you to finish up your album using your Document December 2021 products! Let’s take a look!

Wei Wei Wang

Wei Wei’s traveler’s notebook is looking festive with this spread created using our Document December products and Magical Acetate Circles. We especially love the holly cut with the Holiday Shapes Metal Die!

Shannon Dombkowski

Festive moments at a Christmas concert were documented here in Shannon’s traveler’s notebook and our Holiday Words Puffy Stickers added a nice detail under her flip-up pocket created with our Pocket, Frame and Flip Up Metal Die.

Patricia Roebuck

Patricia created the sweetest spread here using our Holiday Shapes Stamp and Metal Die to create a layered forest of trees!

Nicole Kerr

Nicole documented the merry and not-so-merry moments of her boys’ December in these two spreads! We especially love her title work created using the Holiday Tags Metal Die, White Jane Alphabet Cardstock Stickers, Merry Christmas Metal Die and White and Red Jane Tile Cardstock Alphabet Stickers.

Michelle Flynn

If you did holiday shopping, take a look at Michelle’s spread below and how she used the The Merriest Vellum Die Cut words to make a big impact on her spread!

Melissa Mann

Melissa also used the The Merriest Vellum Die Cut words here along with our Document December Kit, on an awesome large-format photo. We love all of the special details that Melissa included about her day on the 4 x 6 journaling tag from the kit, topped with our Holiday Magic Gold Puffy Stickers.

Meg Gundlach

The details of Christmas came together perfectly on this page by Meg, which also included a fun vellum pocket created using our Pocket Envelope Metal Die and Collected Stamp to hold special details.

Marsha Farris

Marsha’s spread documents a holiday favorite treat using our Simple Joys Puffy Stickers and includes the perfect title created using our newest alpha: the Parker Outlined Alphabet Stamp! The December 2021 Kit also paired perfectly with the Document December Kit here!

Kim Chaffin

Kim’s magical full-page photo is topped with the The Merriest Vellum Die Cuts and The Merriest Chipboard Stickers as well as coordinating gold accents from the Holiday Magic Gold Puffy Stickers to create the perfect touch!

Junell Kruzel

Junell has recorded joy perfectly in this colorful spread in her album! We love how she used the Full of Joy Chipboard Stickers and Large Star Jane Alphabet Stamp to put ‘joy’ front and center here!

Jennifer McMurtrey

If you thought the Large Star Jane Alphabet Stamp looked good stamped, you should see it foiled, as Jennifer McMurtrey has done in this spread, pairing it with the The Merriest Vellum Die Cuts! We also love her cookie baking photos embellished with the Cookie and Milk Cardstock Stickers!

Aimee Mertell

Joy can be found in something as simple as a new cocoa cup, as Aimee shows us here! We love that she paired Document December products like our Simple Joys Puffy Stickers with new products, like our Grateful Chipboard Stickers!

Thanks so much for joining us to document your December this year! If you’ve missed our previous posts, check them out at the links below, and don’t forget to share how YOU are wrapping up your Document December album! Post your pages on Instagram using the hashtag #EllesStudio and in our Elle’s Studio Facebook Group!

Document December 2021 Inspiration: Week 01

Document December 2021 Inspiration: Week 02

Document December 2021 Inspiration: Week 03

Document December 2021 Inspiration: Week 04

Document December 2021 Inspiration: Week 05 << you are here!

A sneak peek of our January 10th reveal!

Happy New Year, everyone! We are so excited to share that our January kit + coordinating add-ons reveal is almost here and we can’t wait to share all the new and exclusive products that will be available soon to help you document 2022! Our reveal will be full of the perfect products to document your January stories and take you right into the month of February! This month, our January kit will include 3 – 4 x 6 inch tags, 18 – 3 x 4 inch tags, and 28 die cuts, and we also have a special surprise for all of our kit subscribers this month:

Not a subscriber? Reserve your spot now by pre-ordering our January kit and lock in our $9.99 kit price by starting a subscription today! You’ll want to choose our SUBSCRIBE & SAVE option to get signed up and start your subscription with our January kit. We will then hold your kit and you’ll be ready to bundle and save at our January 10th reveal! Details on how to bundle with your subscription order will be emailed to you once you have purchased this product.

Kit subscribers, don’t forget! Along with being able to bundle any products from our shop that will ship for FREE with your kit during our 24-hour bundling period, starting on the 10th at 8:00 am Pacific each month, our subscribers will also have access to special discounts on select items! These discounted items shown above can be found in our SALE section during our 24-hour bundling period, and you must be logged into your kit subscriber account to see them. Quick note: Our kits and add-ons are available without a subscription each month, too.

We have so many exciting plans for 2022 and lots of fun and inspiring products coming in! We also want to thank you all SO much for your incredible support throughout the years! We feel so blessed to be able to spend another year with you and we are so grateful to see you using our products to document your special memories! Make sure you set your alarm and mark your calendar for Monday, January 10th at 8:00 am Pacific for our January kit and add-ons reveal! We hope to see you there!

2021 In Review: Two Takes with Jennie McGarvey & Kim Chaffin

Hooray for New Year’s Eve! As we say goodbye to 2021, we love to reflect on the moments of the year, both highs and lows, and a great way to get them recorded is with a year-in-review type of project. Whether you love to document on a traditional layout or in pockets, we’ve got you covered with inspiration from both Jennie McGarvey and Kim Chaffin for you! Let’s take a look at both of their fantastic reviews of 2021!

Jennie McGarvey

Hey there, friends! It’s Jennie McGarvey back one last time to talk about 2021.  It’s been a year, hasn’t it?  No matter if it’s good or bad, it’s the time of the year we can reflect on the year that was.  I didn’t know how to do this at first, but once I figured it out, I was excited for the layout and for the fun I had in creating it!

Supplies | December 2021 Kit, Warm and Cool Paper Stack Bundle, Date Label Cardstock Stickers, Monthly Numbers Stamp

Isn’t it so colorful? 2021 was really colorful and I love that this layout reflects just that. I also love how truly simple it is, yet I was able to add some details from the December 2021 Kit, stamps, and other from the shop.

Each 2″x2″ photo flips up to show an embellishment or a bit of journaling. I used the Warm and Cool Paper Stack Bundle to stamp the dates stamped with the Monthly Numbers Stamp and then I punched those out.  I adhered the top half of the circles to the bottom part of the photo, creating a tab to lift the photos.

Isn’t this fun?  Adding just a little bit of detail, in this case, the date and the place of the photo. I had to add the circle “winter break” die cut, it was just the perfect accent to this month’s story.

These two flip-ups were created with 4″ tall by 2″ wide pieces of the paper from the Warm Solids Paper Stack. It was so incredibly easy to give an overview of each photo – the Date Label Cardstock Stickers and die cuts from the monthly kit were perfect for this.

I loved this look at 2021 in one layout and hope you enjoy it, as well. Can you see creating something like this for yourself?  We hope you will try it out!

Kim Chaffin

Hello, friends, and happy New Year’s Eve! It’s Kim here, and I thought it would be fun to ask how long it normally takes you to complete a layout, because this one took me a year! At least, it was a year in the making. A year-in-review layout is a nice way to wrap up a year, and I’d like to show you the way I put together my recap of 2021.

Supplies | December 2021 Kit, Month to Month Journaling Tags, Grateful Chipboard Stickers, Dec 2021 Cork, Puffy Asterisk Stickers, Parker Outlined Alphabet Stamp

I decided to choose one photo from each month in 2021 as a highlight from that month. I printed all of my photos at 4 x 4 inch, but I ended up using 3 x 4 inch pockets, so I had to trim them down.

I did my journaling on a 4 1/2 x 12 inch piece of cardstock and I punched holes so that it could be placed directly into the album. I wrote a brief recap of highs and lows during the year, followed by a month-to-month summary. 

I stamped “goodbye” on my title card with the Parker Outlined Alphabet Stamp and used the “2021” cut from the December 2021 Cork, and embellished with various Grateful Chipboard Stickers and Puffy Asterisk Stickers

I finished my layout with the 4 x 6 “Favorites 2021” pocket tag from the December 2021 Kit. It’s the perfect spot to highlight the top experiences from the past year. I love the way this layout creates a look back at 2021. I’d love to see how you wrap up your year, too!

Wow! Those were two wonderful examples of 2021 year-in-review pages! Now we want to see yours! Post to the discussion board in the Elle’s Studio Facebook Group or on Instagram using the hashtag #EllesStudio! Cheers to 2022 and a new year of creativity ahead of us!

December Moments with Michelle Flynn

Hi friends! I hope you’ve all had a beautiful holiday and are ready to ring in the New Year! It’s Michelle, and I’m so happy to be back with you today to share how I’m using the December 2021 kit and add-ons in my memory planner! I started using my monthly kits and stamps in a weekly memory planner in October as I was intrigued by documenting small moments in the day in a simple format. I’ll certainly continue my monthly pocket pages as I have so much love for telling our stories that way, but this has been a super fun way to capture bits and pieces of our daily life. I really love that it has allowed me the freedom to use my kits and stamps differently, outside of pockets and it has helped me remember some of those small moments I’d like to further highlight in more detail in my pocket pages.  

Supplies | December 2021 Kit, Document December 2021 Kit, December Labels, Wintertime Vellum Stickers, December Vellum Stickers, Holiday Label Stickers, Black Cardstock Label Stickers, White and Red Jane Tile Alphabet Cardstock Stickers, Grateful Chipboard Stickers, Puffy Asterisk Stickers, Red Puffy Alphabet Stickers, Gold Puffy Alphabet Stickers, Good Times Banner Stamp, Winter Tabs Stamp, For the Record Stamp, Merry Christmas Stamp, Monthly Numbers Stamp, Daily Tabs Stamp, Parker Outlined Alphabet StampParker Alphabet Stamp, Medium Tile Alphabet Stamp

I started by selecting a few of the die cuts and the red “oh what fun” pocket tag from the December 2021 Kit. I used the sweet gray diecut to begin my title for the week and adhered it to a Black Cardstock Label Sticker for emphasis.  I continued the title across both pages using the Good Times Banner Stamp, the Merry Christmas Stamp, the Wintertime Vellum Stickers and the Document December 2021 Kit sticker. I just love how the title flows on both pages.  I added those adorable Puffy Asterisk Stickers and a few puffy hearts to finish it off!  

I moved on to numbering the days of that week and the White and Red Jane Tile Alphabet Cardstock Stickers were so perfect for this! I used the stickers for each day of the week and added a star above each day using the Monthly Numbers Stamp. I started adhering my photos and adding my journaling while using several accents including the Grateful Chipboard Stickers. I’m such a fan of Elle’s chipboard stickers and I love being able to stamp on them too. I used the Daily Tabs Stamp on the red Grateful Chipboard Sticker. I was super excited to break out one of my favorite stamp sets, the Parker Alphabet Stamp and The new Parker Outlined Alphabet Stamp, too. I used those stamps along with the fun Medium Tile Alphabet Stamp for my “Saturday” title and then pulled out the fun puffy alphabet stickers in both Red and Gold.  I just love how it turned out and expressed my sentiment from that weekend so sweetly.  

I decided to use the red pocket tag from the December Kit as a flip so I could add further notes and another photo of the pretty market square tree that morning. I truly thought it looked like we had snow coming that morning! I used the green December Labels and the Winter Tabs Stamp to express my hope for the snow! I also added that sweet countdown stamp from the Merry Christmas Stamp set showing seven more days until Christmas! 

Thanks so much for spending your time with me today! I loved sharing another fun way I’m using my monthly kits and add-ons! Get out your kit and your stamps and see if this way of memory keeping brings you as much joy as it does to me! If you create in a memory planner, share with us by tagging #ellesstudio on Instagram and joining us over on the Elle’s Studio Facebook Group! Here’s to a memorable New Year friends!  

Happy Harmony with Shannon Dombkowski

Hi there, Elle’s Studio friends! It’s Shannon here, and by now, you’re probably in that post-holiday haze and can’t remember exactly what day it is. As we charge toward 2022, I want to share some pocket page inspiration with you. One of the comments that I receive most often is about the cohesive and consistent feel of my pocket pages. I am very intentional when I make my pages, but achieving a harmonious look is easier than you think! Let’s take a look at how I did it with this page about our first frost of the year:

Supplies | December 2021 Kit, Wintertime Printables, Wintertime Vellum Stickers, Grateful Chipboard Stickers, Puffy Asterisk Stickers, Winter Tabs Stamp, For the Record StampEveryday Tabs Vol. 2 Metal Die

I create monthly pocket pages, so when I’m first starting my page, I look for photos with the same look, feel, or color scheme. Once my photos have been chosen, I move on to choosing my tags. I try to make the tags match the colors of my photos as much as possible. On this page, I chose the center tag from the December 2021 Kit first. It has green and blue asterisks so I chose those to be the two focus colors of this page. I try to make sure that I have a good balance of white tags and colored tags. 

Once my tags are picked out, it’s time to embellish my page. Once again, I drew my inspiration from the center tag. The Puffy Asterisk Stickers allowed me to add asterisks to other tags on my page. I like how they kind of look like green snowflakes on this 3 x 4 inch tag! If you look in the bottom left corner of the photo, you can see that I also used a Puffy Asterisk Sticker as a way to draw attention to my stamping and sentiments at the bottom of the striped 3 x 4 inch tag.

Another common embellishment that I added were tabs and stamped sentiments. I stamped the tab and sentiments using the Winter Tabs Stamp and then I used the Everyday Tabs Vol. 2 Metal Die to cut the shape with no fuss. I scattered these around my page in a visual triangle to draw the eye around the page and lend to that cohesive look.

Finally, I added even more stamping. I chose to use stamps in fonts that matched the “Hello Winter” 3 x 4 tag from the For the Record Stamp. This helps make everything look like it belongs together. It also adds a little extra something to the mostly white 3 x 4 inch tags without making them too overwhelming for the page. Part of a harmonious page is making sure that there are places for the eye to rest.

Bringing a cohesive look to your pages is easier than you think. Once you’ve done it a few times, it’ll become second nature. I hope you’ll give these tips a try on your next project!