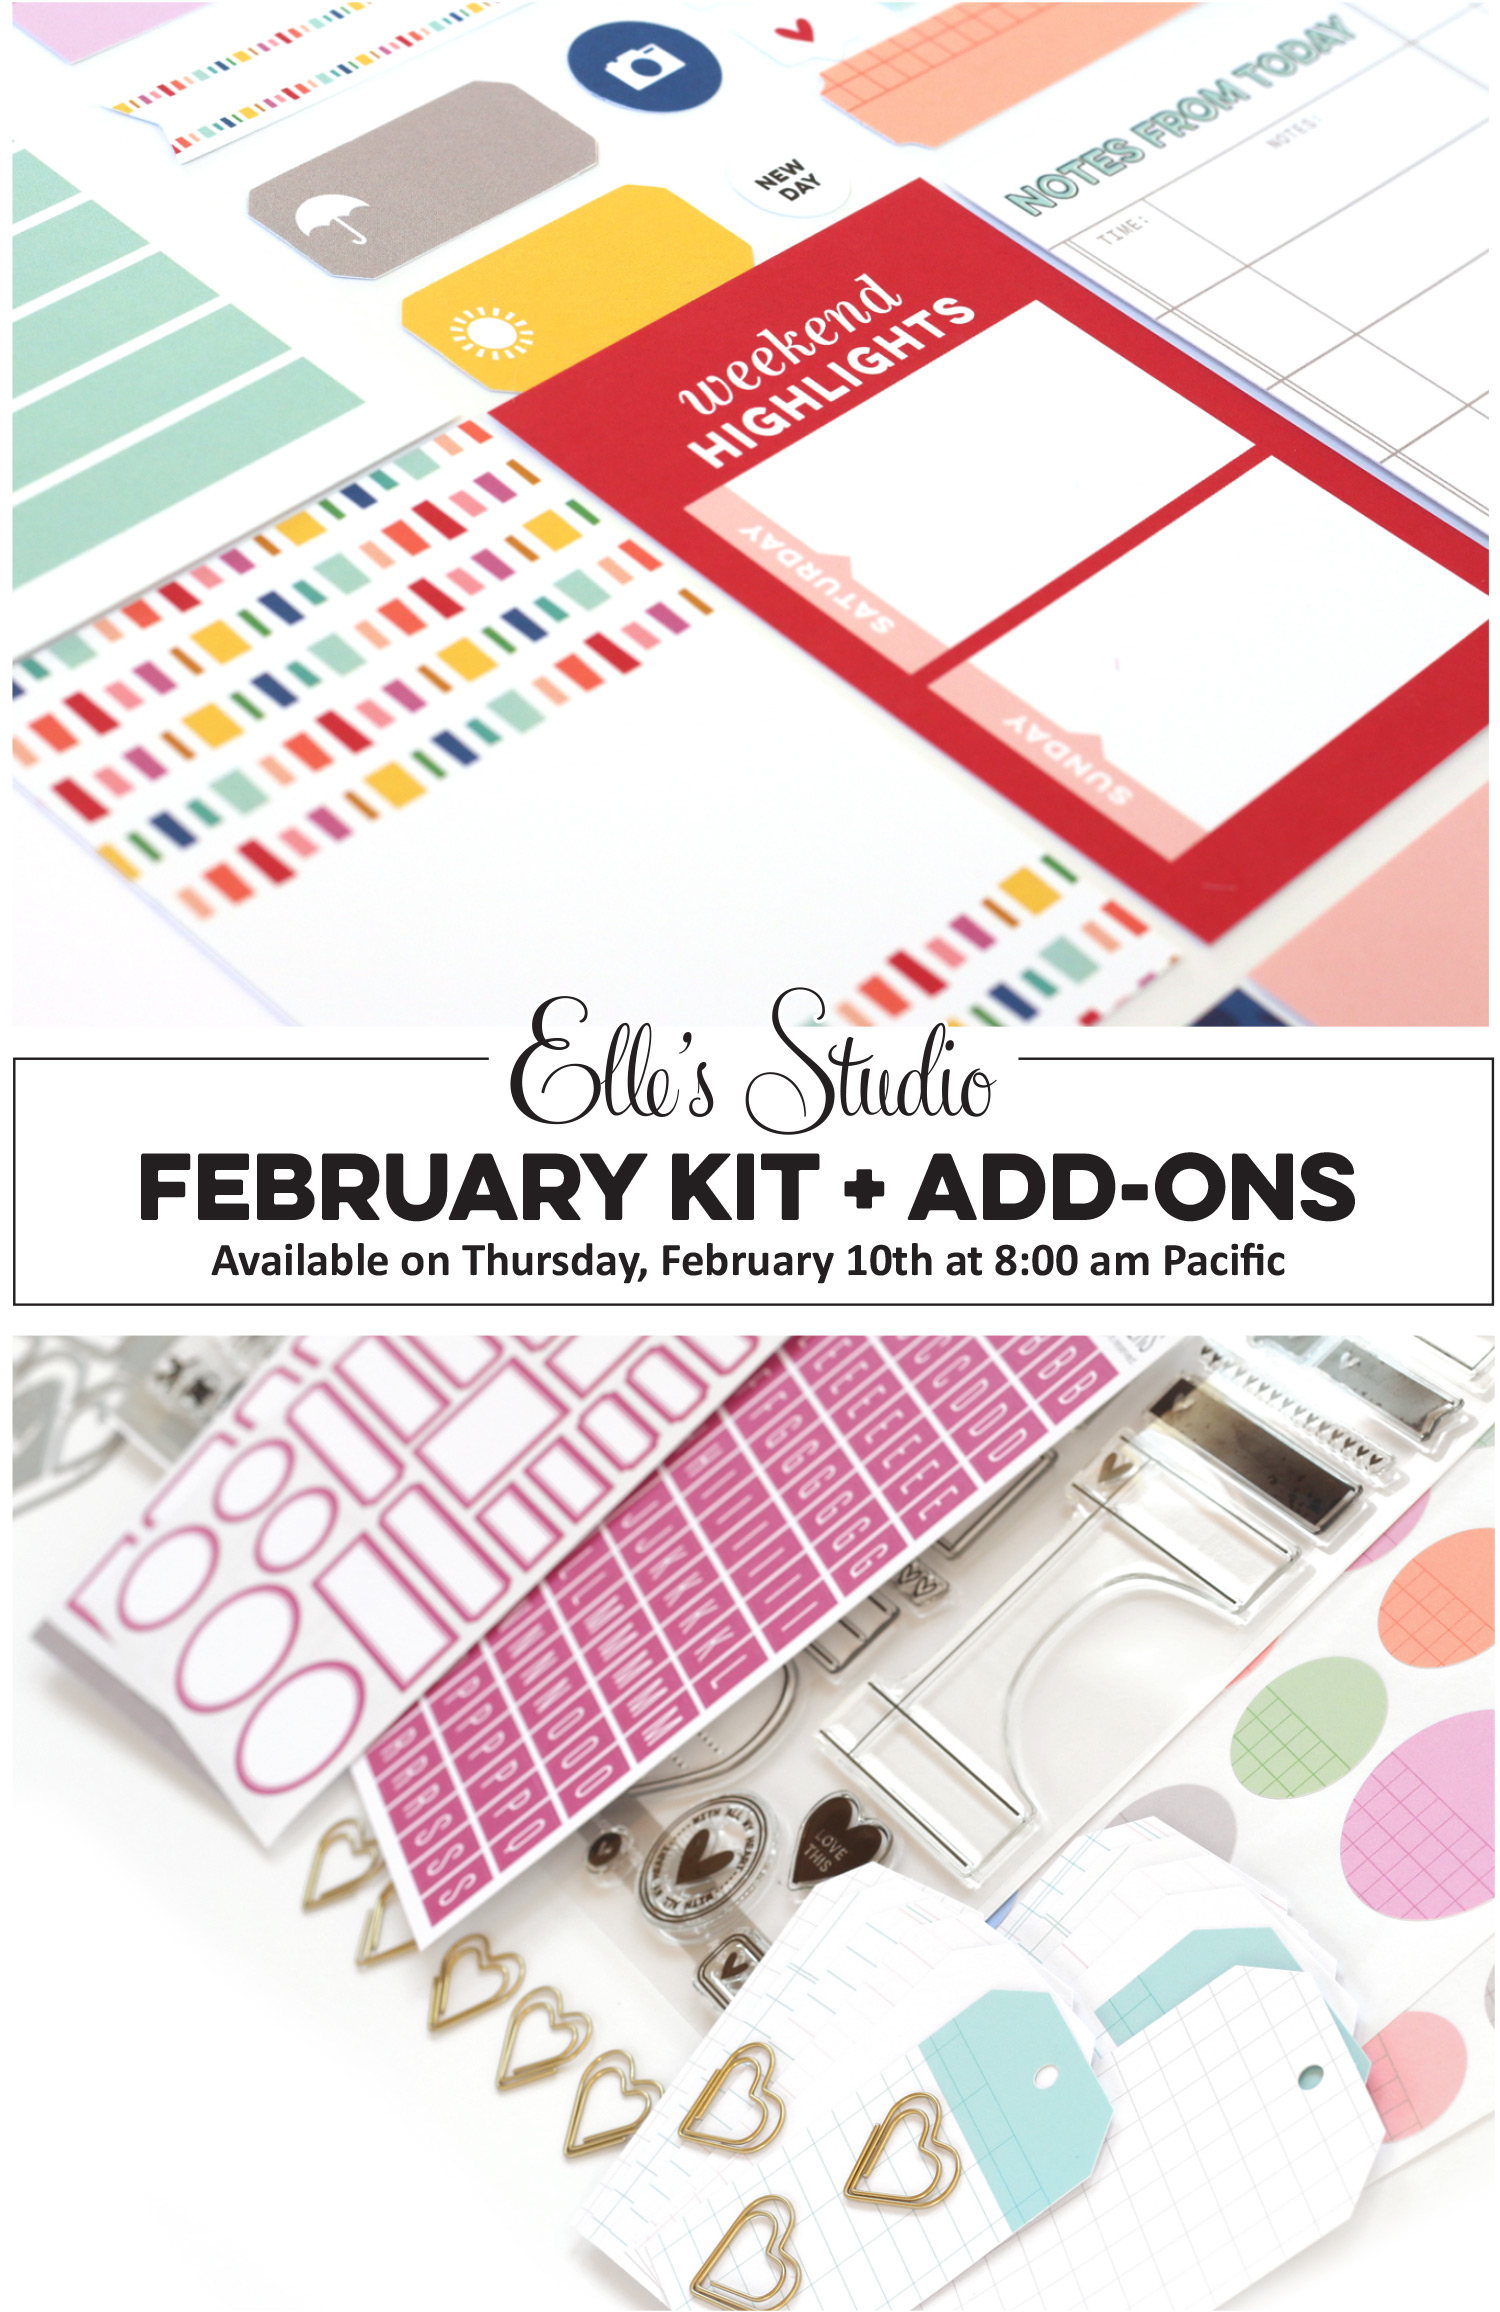
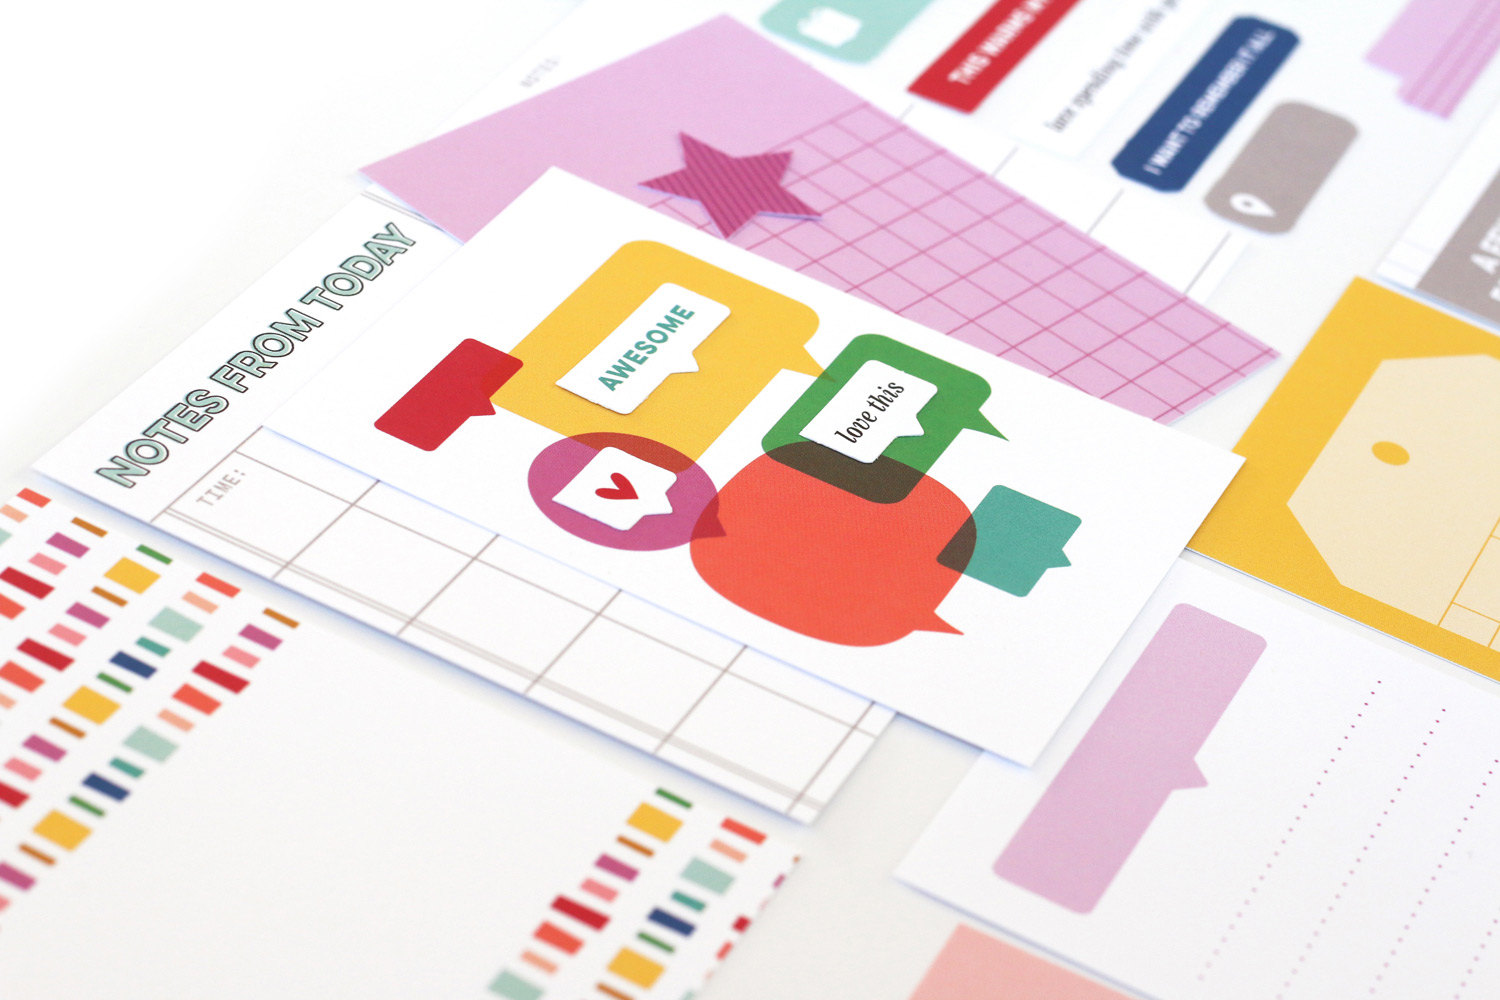
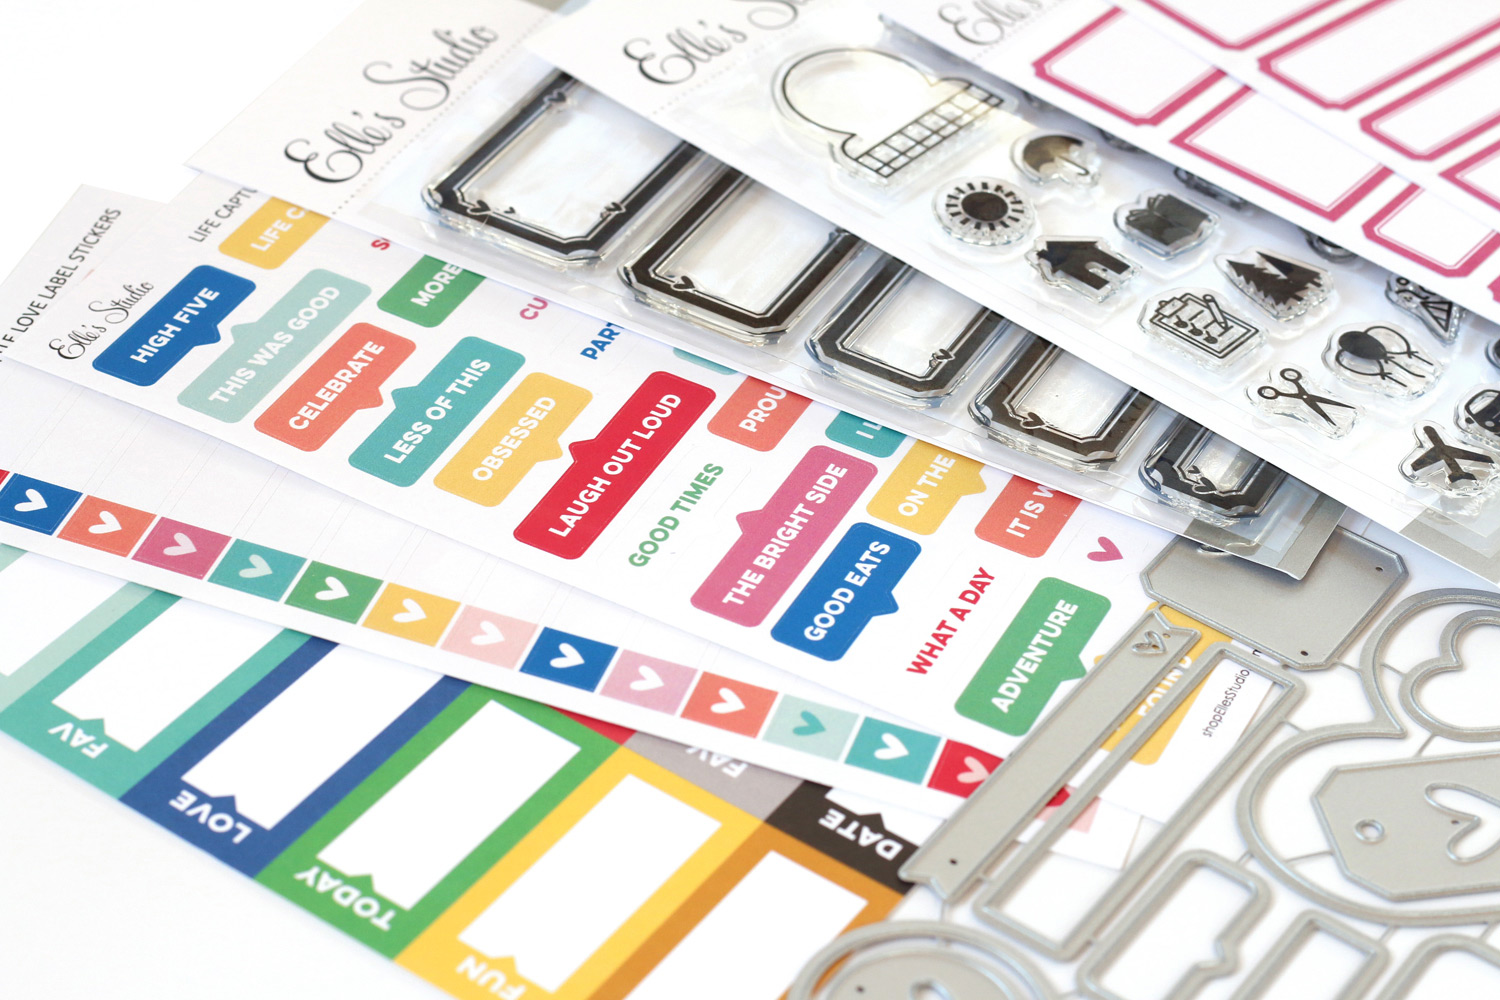
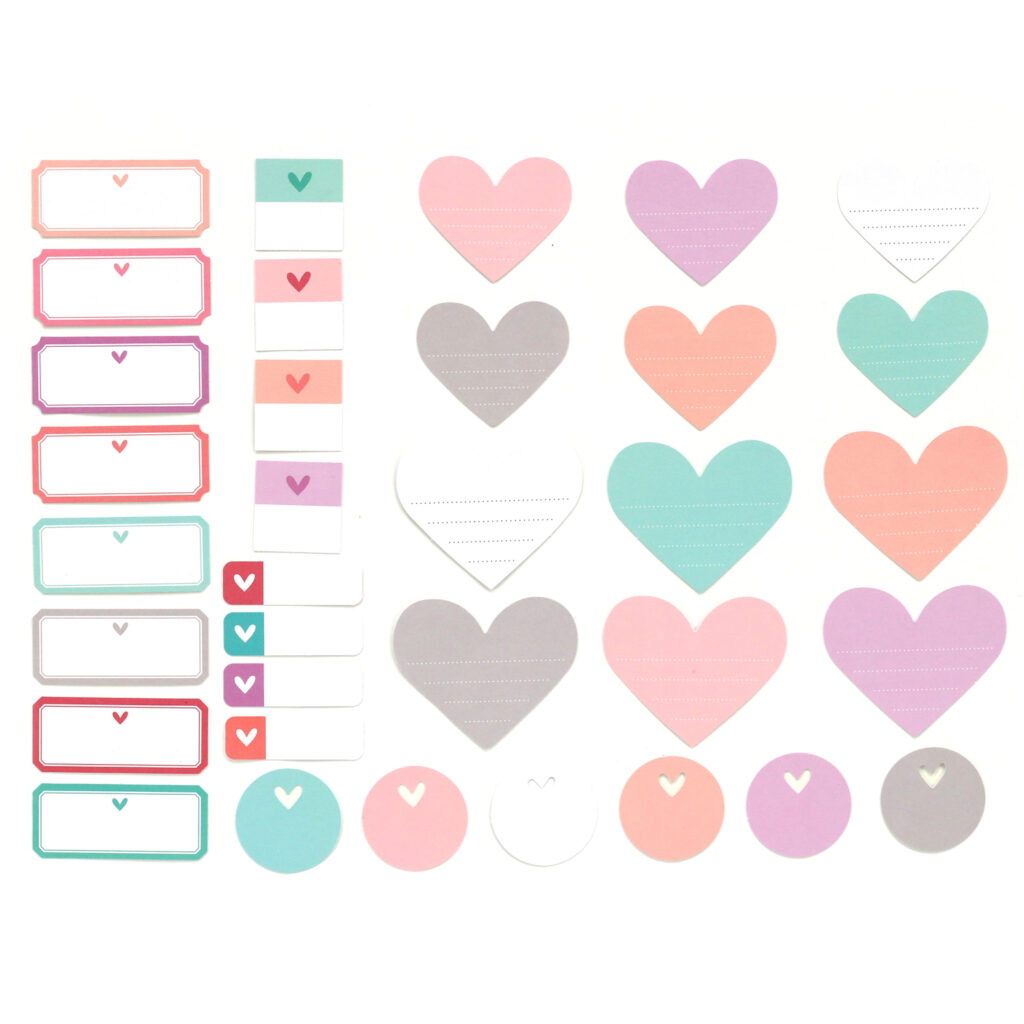
Our February kit + coordinating add-ons reveal is almost here and we can’t wait to share with you all the new and exclusive products that will be available soon! Our reveal will be full of the perfect products to document your February stories and take you right into the month of March! This month, our February kit will include 3 – 4 x 6 inch tags, 18 – 3 x 4 inch tags, and 27 die cuts!
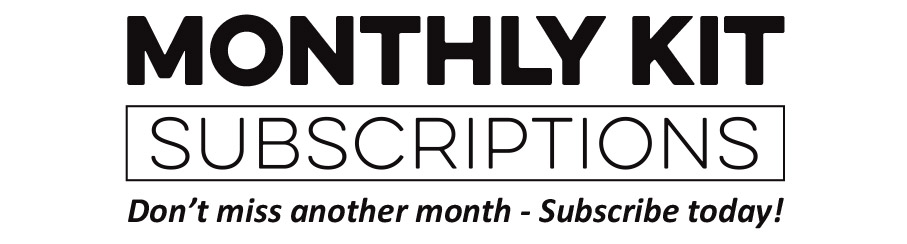
Not a subscriber? You can pre-order our February kit now and lock in our $9.99 kit price by starting a subscription today! You’ll want to choose our SUBSCRIBE & SAVE option to get signed up and start your subscription with our February kit. We will then hold your kit and you’ll be ready to bundle and save at our February 10th reveal! Details on how to bundle with your subscription order will be emailed to you once you have purchased this product.
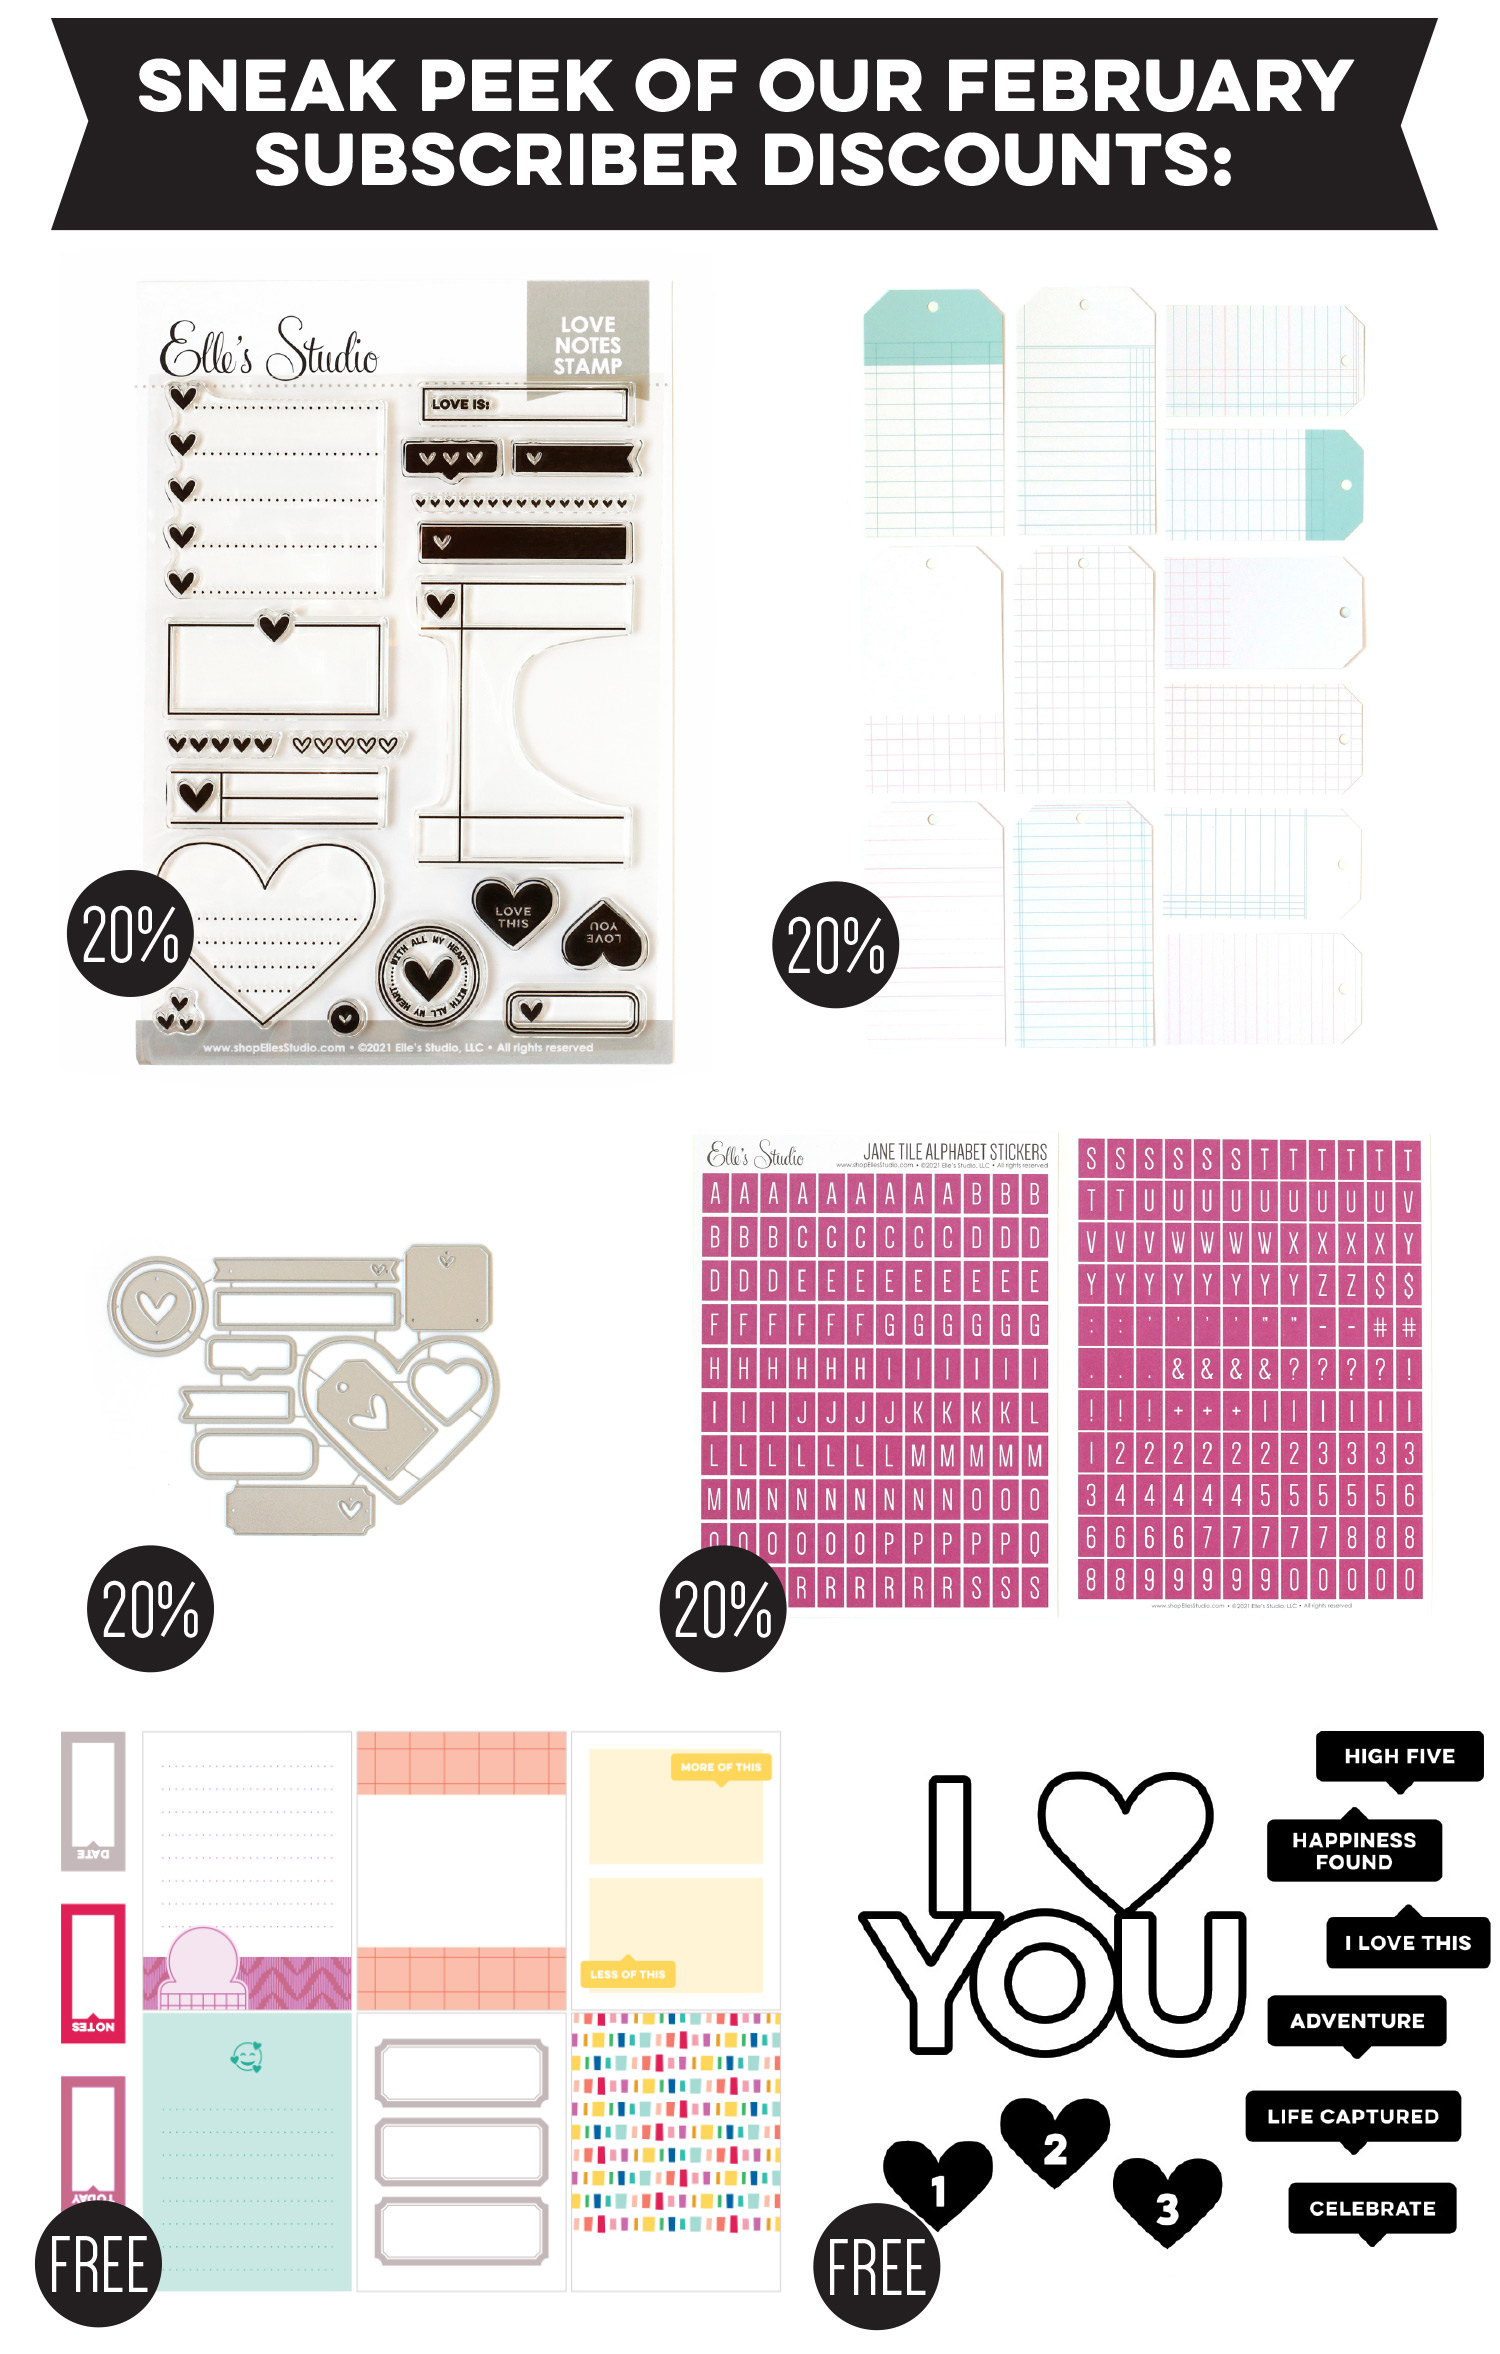
Kit subscribers, don’t forget! Along with being able to bundle any products from our shop that will ship for FREE with your kit during our 24-hour bundling period, starting on the 10th at 8:00 am Pacific each month, our subscribers will also have access to special discounts on select items! These discounted items can be found in our SALE section during our 24-hour bundling period, and you must be logged into your kit subscriber account to see them. Quick note: Our kits and add-ons are available without a subscription each month, too.
We are so excited to share all of these new products with you and see how you use them on your projects! Make sure you set your alarm and mark your calendar for Thursday, February 10th at 8:00 am Pacific for our February kit and add-ons reveal! We hope to see you there!
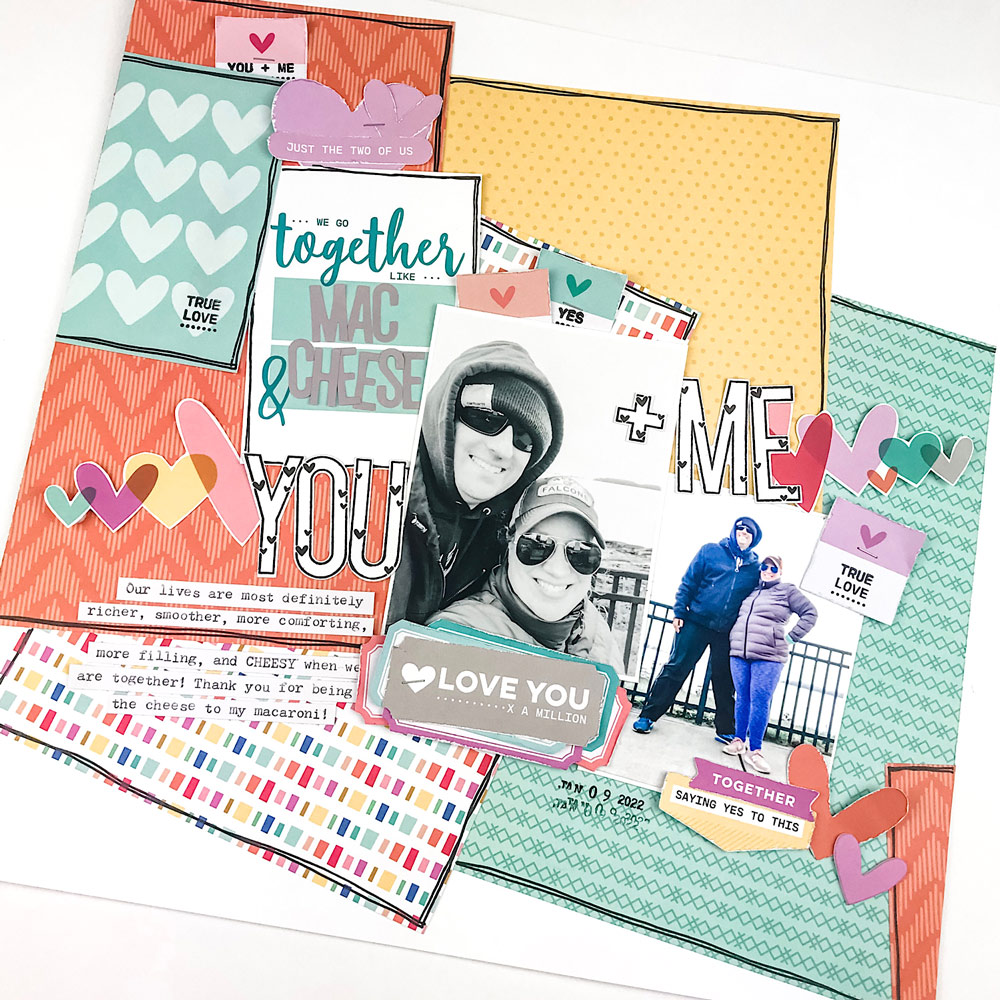
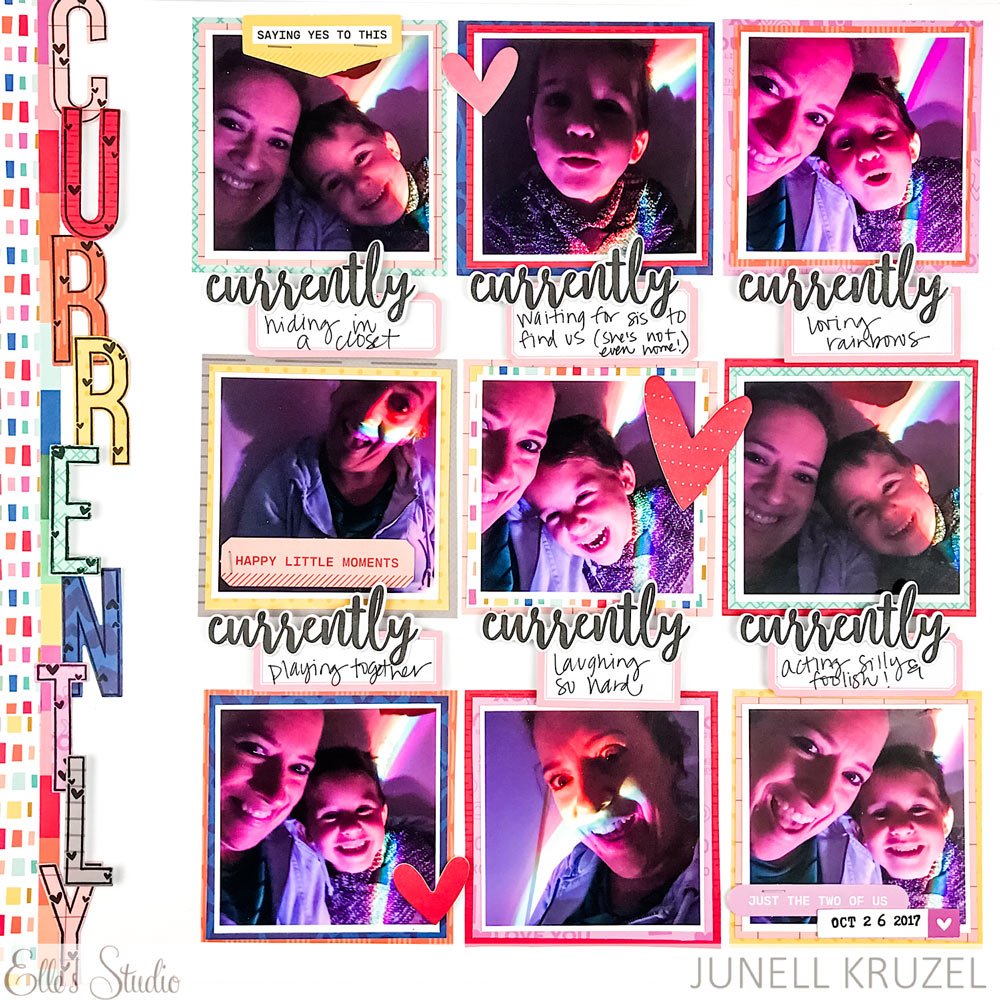
Happy 2022! How’s the new year going so far for you? It’s Junell on the blog today and so far this year is going well for me! The January 2022 kit and add-ons are divine as usual! I just can’t get over how happy the colors in this kit make me! So cheerful and energetic—making me just want to jump into scrapbooking the new year! Let’s get started!
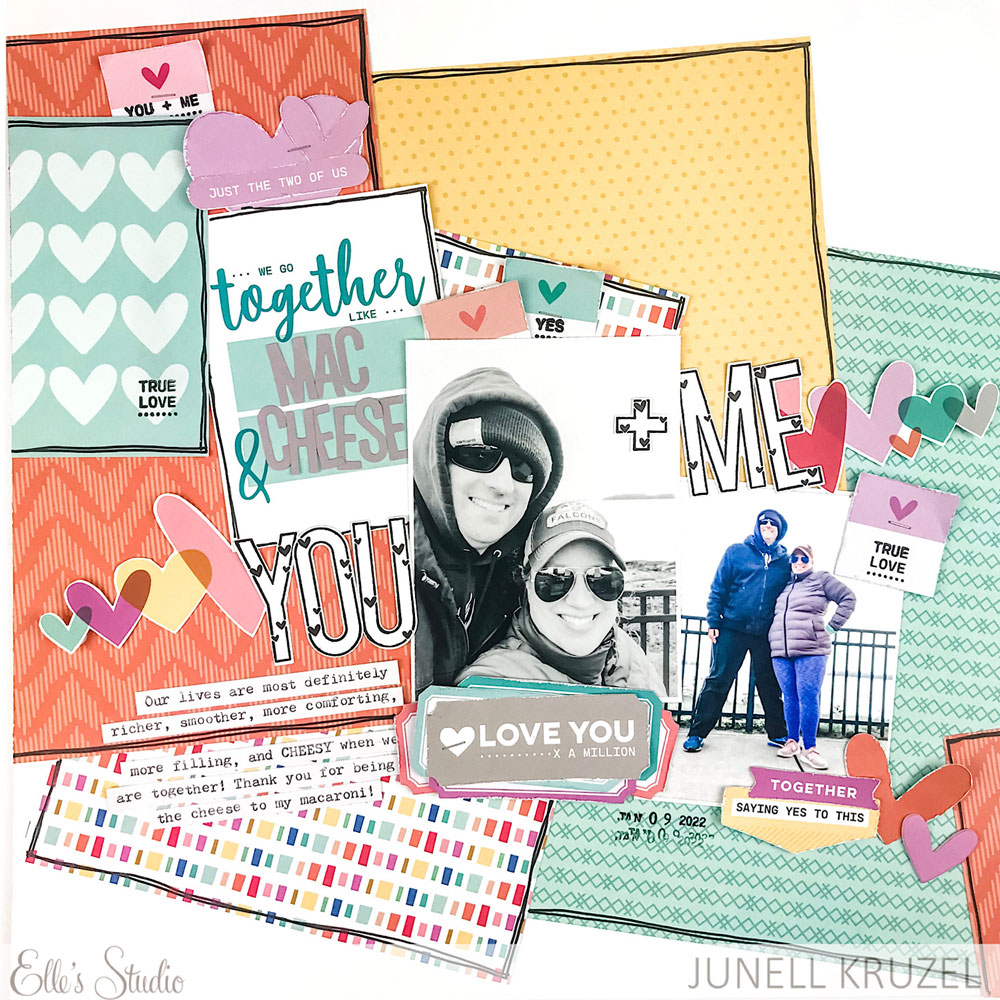
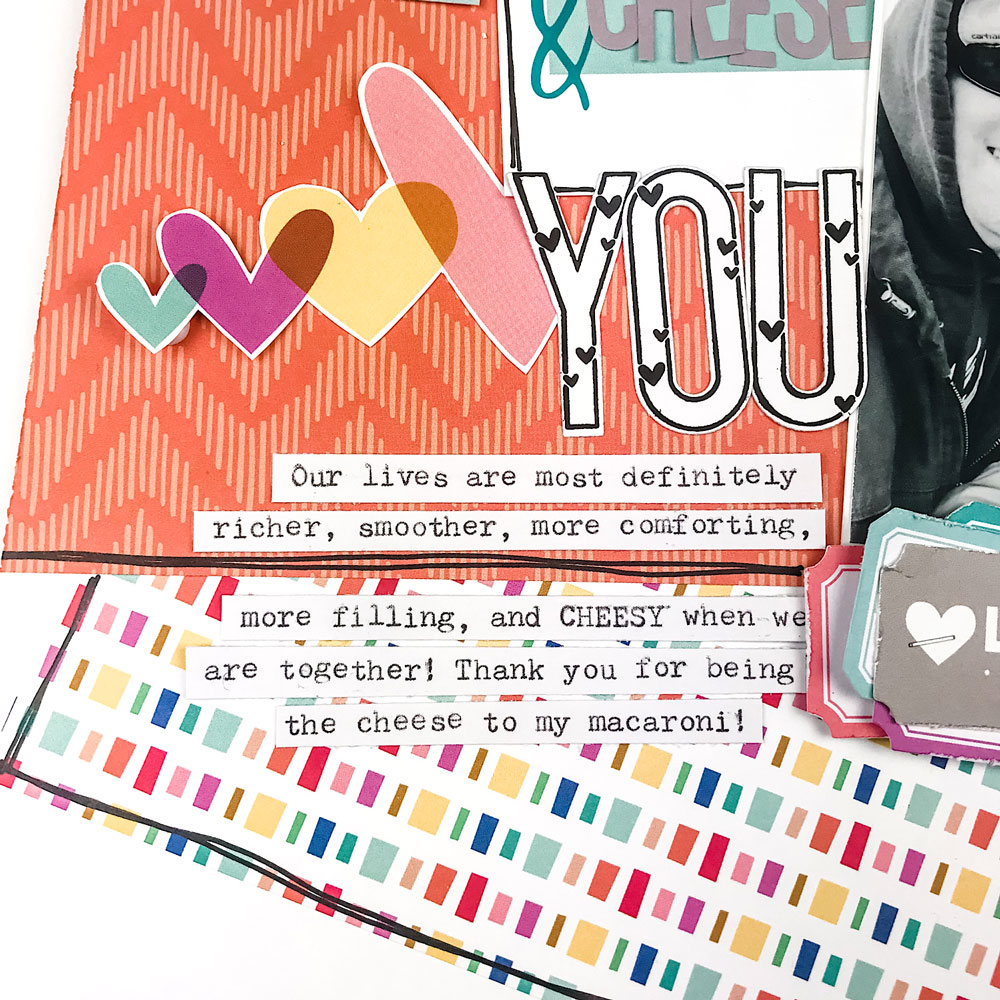
I started this layout the way I start most of my layouts, by looking through the Love You Paper Stack and finding the colors and patterns that I’m drawn to. I love the paper with all the colorful rectangles and then chose a few more papers that coordinated.
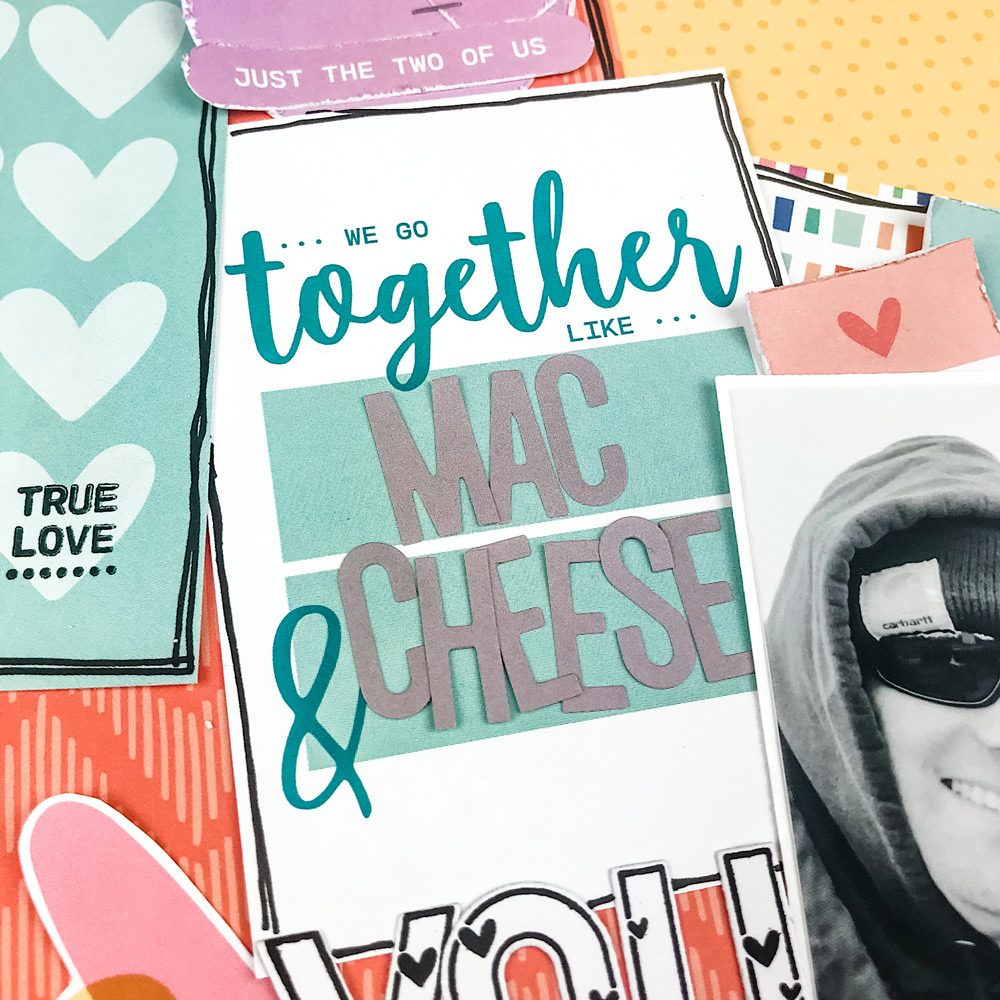
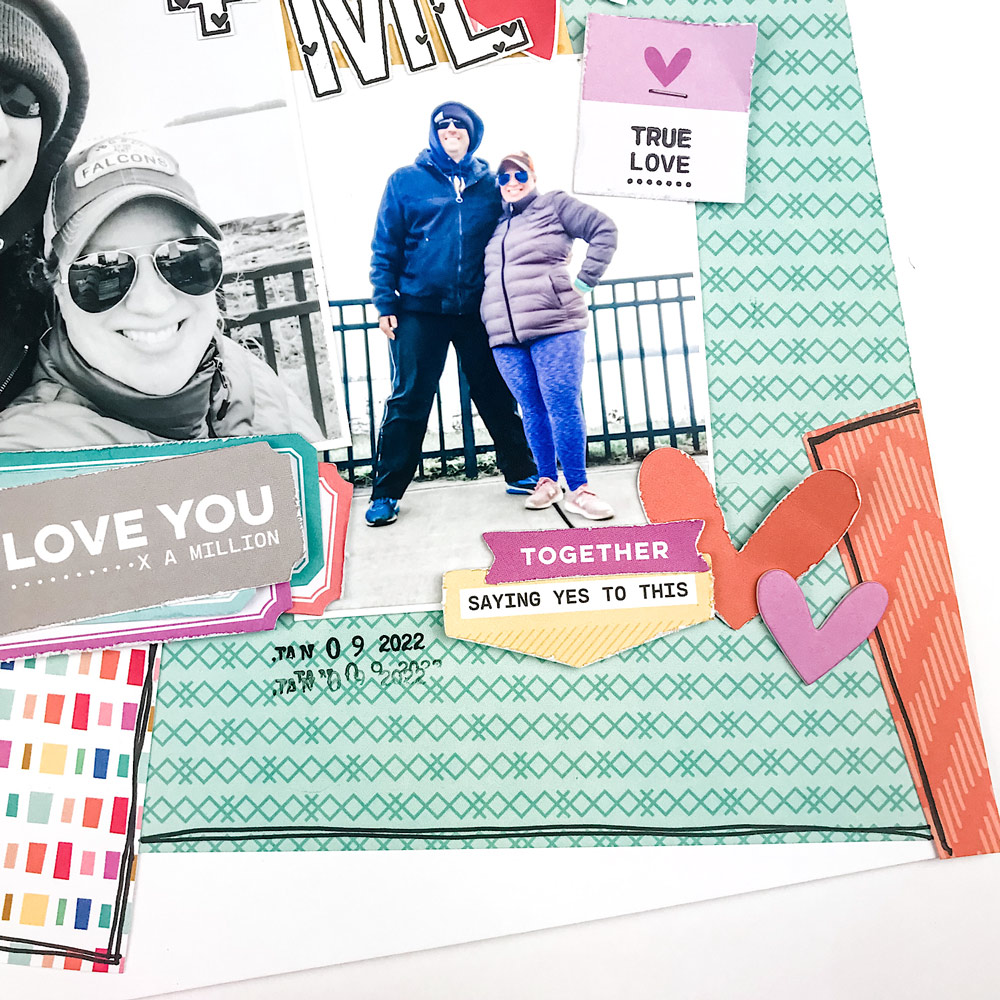
Once I had my papers down in a pleasing way and selected my photos, I took a look through the tags from the January 2022 Kit and thought it would be fun to use the “we go together like…” tag. I put it on the opposite side of my photo along with the teal heart tag to create a balance in colors. There’s teal on the left and on the right now.
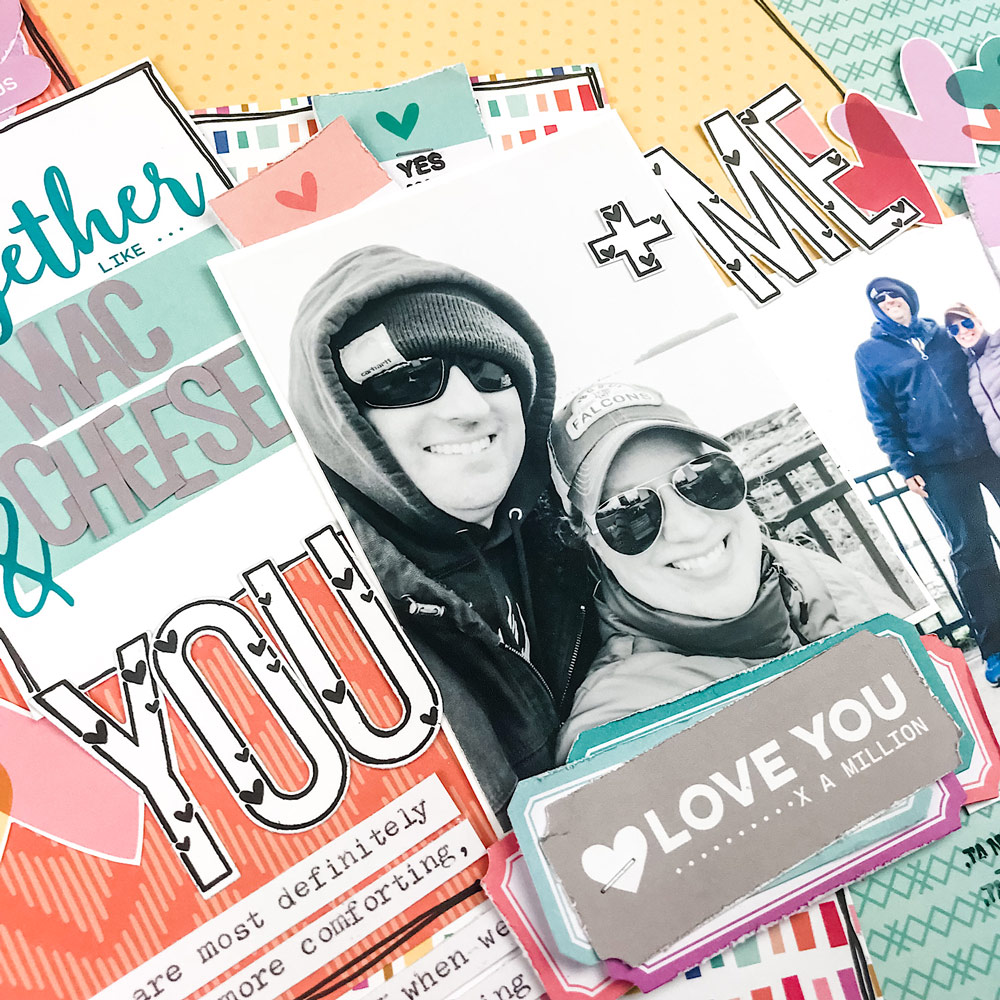
I typed out my journaling (which I somehow managed to make relate to mac & cheese!), cut it into strips, and adhered it.
The really fun part for me was going through all the bits and pieces that came with the kit and all the extras to embellish and make the layout come to life! I did some fussy cutting of tags and ruffled the edges of some die cuts. I don’t like things looking too flat and one-dimensional. I also added a few stamped phrases using the Love You Stamp. This layout was simple, but quite fun to make!
Thank you for reading! I encourage you to share in the Elle’s Studio Facebook group what you made with this month’s kit! It’s so fun to see everyone’s creations and how the products are used in different ways!
Comments Off on We Go Together Like… with Junell Kruzel | Share This
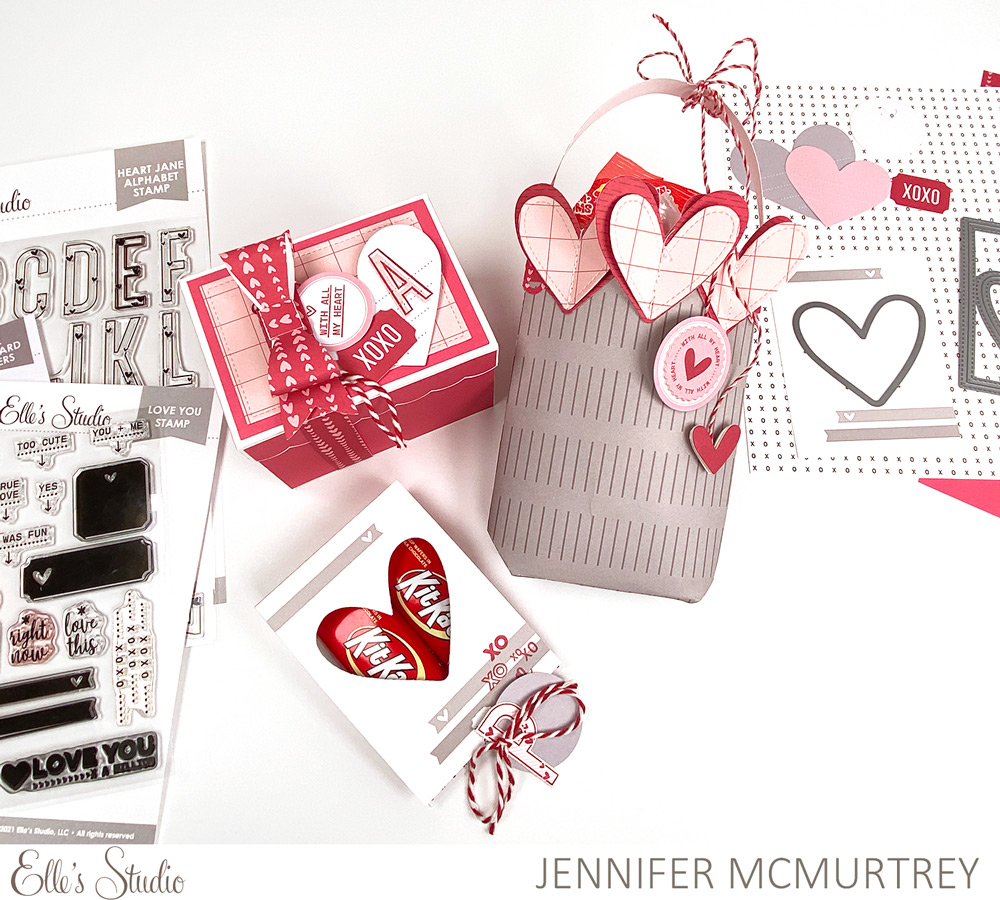
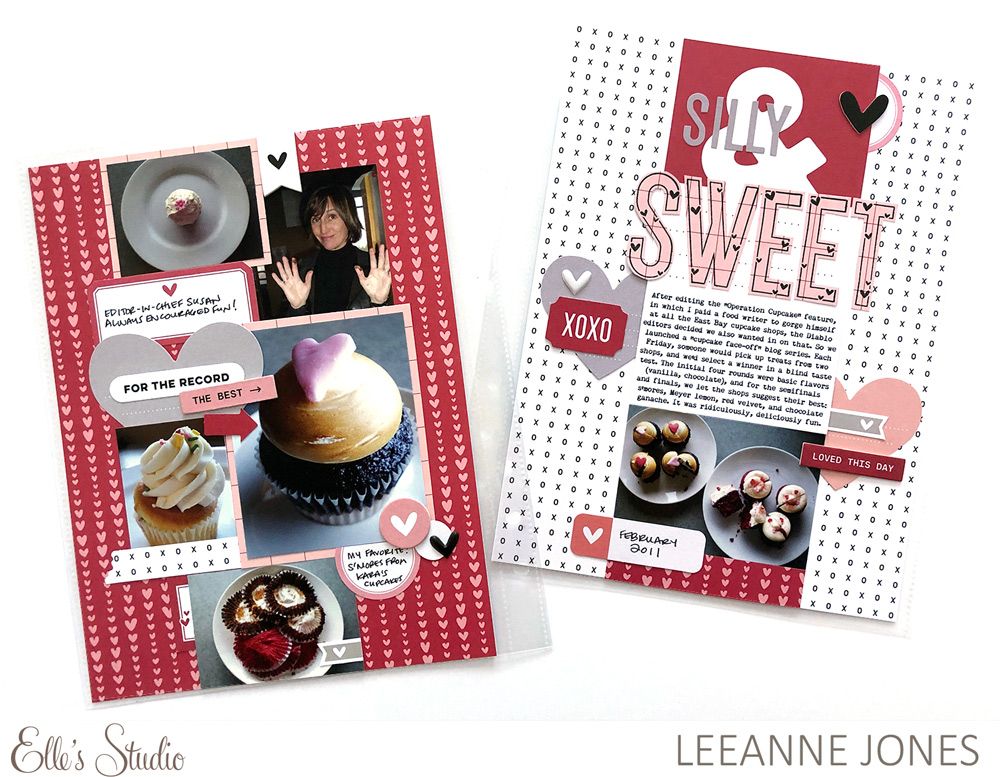
It wouldn’t be Valentine’s Day without sweets, so let’s package them in style for the final day of Love Week! Jennifer McMurtrey is with us to share not one, but three different wonderful ideas that are sure to “wow” any special person who you gift this holiday!
Happy love week, friends! I so enjoy this time of year and all of the cute products Elle releases to help us celebrate the ones we love!
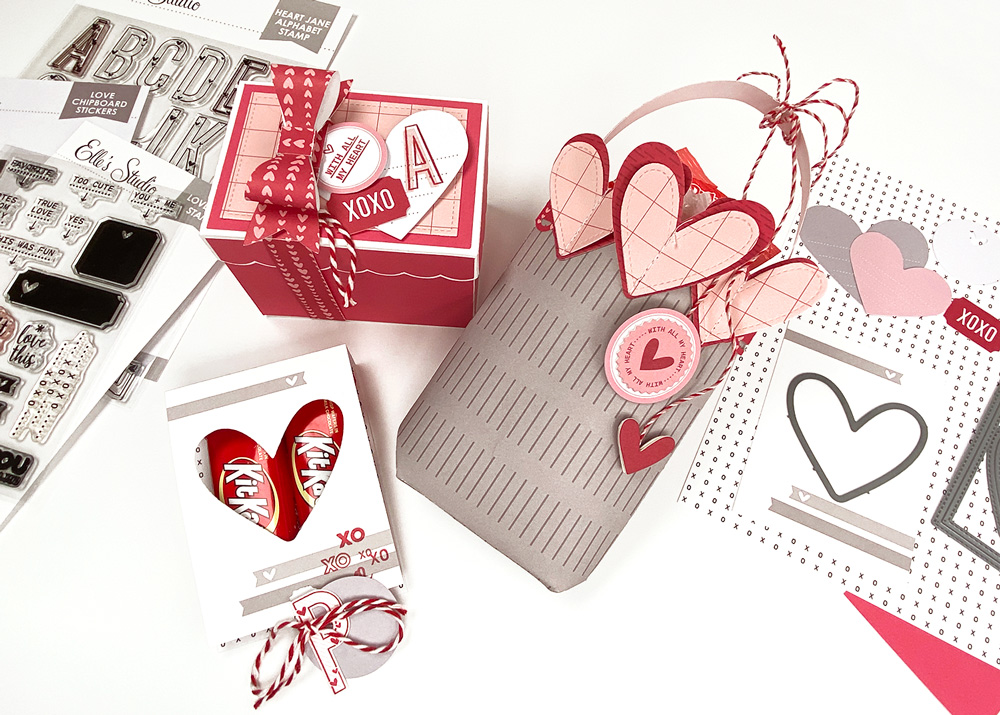
Today, I have three different ideas for you to try when creating Valentines for friends and family. Each of the projects are fairly simple to create, and only took me a couple of hours. Granted, now that I know what to do, I could mass produce them pretty easily. Let’s take a look at what I put together using the January 2022 kit and add-ons along with stamps and dies from my stash.
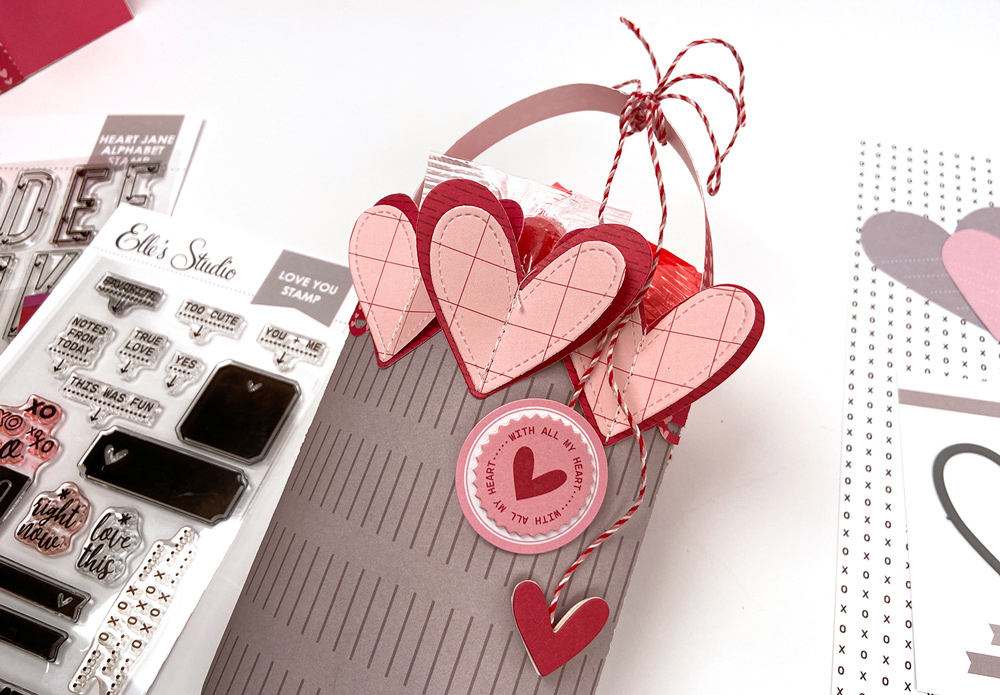
First up is a cute treat bag that I created using January products, the Love You Paper Stack, and My Heart Metal Die. For the base, I used the gray patterned paper and added elements using pink and red patterns. When building the bag, I used white copy paper for a practice run so I wouldn’t waste any of my patterned papers, which was very helpful!
Once the bag was assembled, I added red paper trim around the top and adhered the machine-stitched hearts to the front. When adding the handle, I simply used a narrow strip of paper glued to the inside of the bag. Last, I tied twine to the handle and glued Love Chipboard Stickers and Heart and Star Chipboard Stickers to the ends.
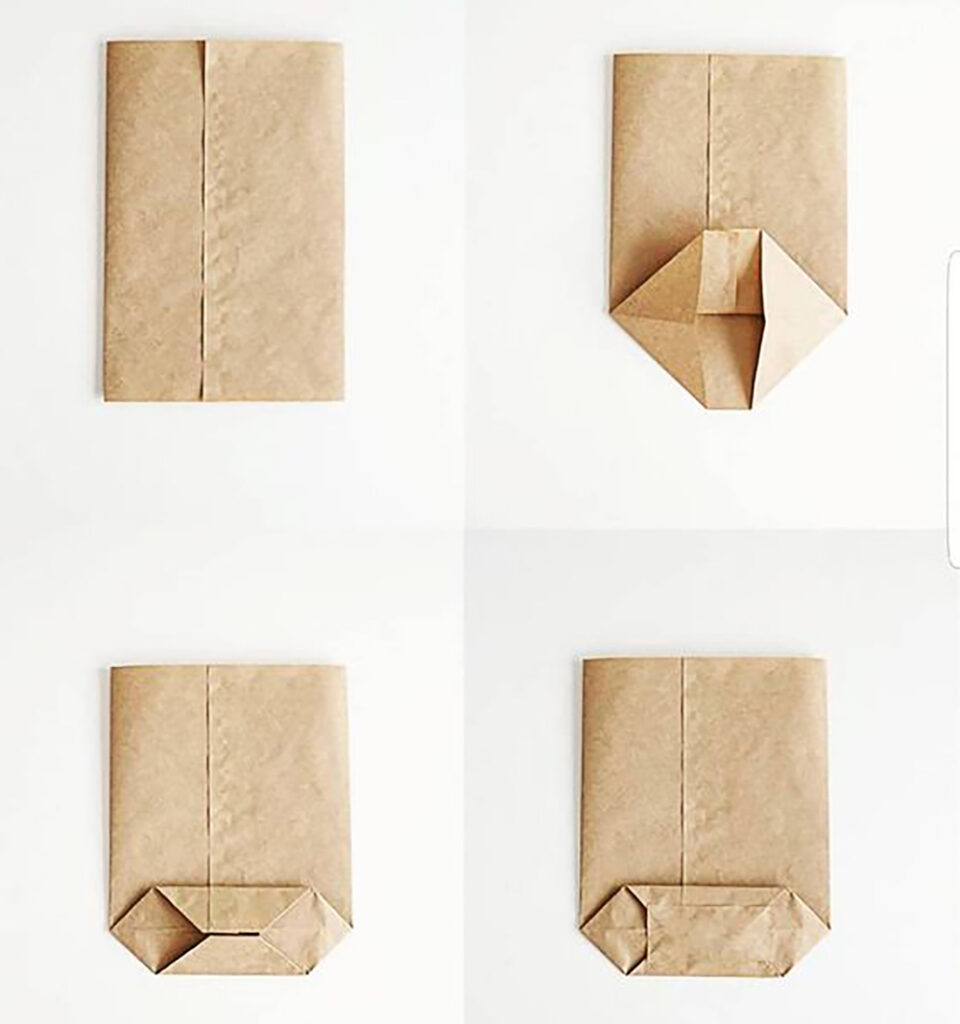
In anticipation of making these projects, I had been scouring Pinterest for a couple of weeks looking for ideas and found a simple pattern for a treat bag that uses one piece of paper.
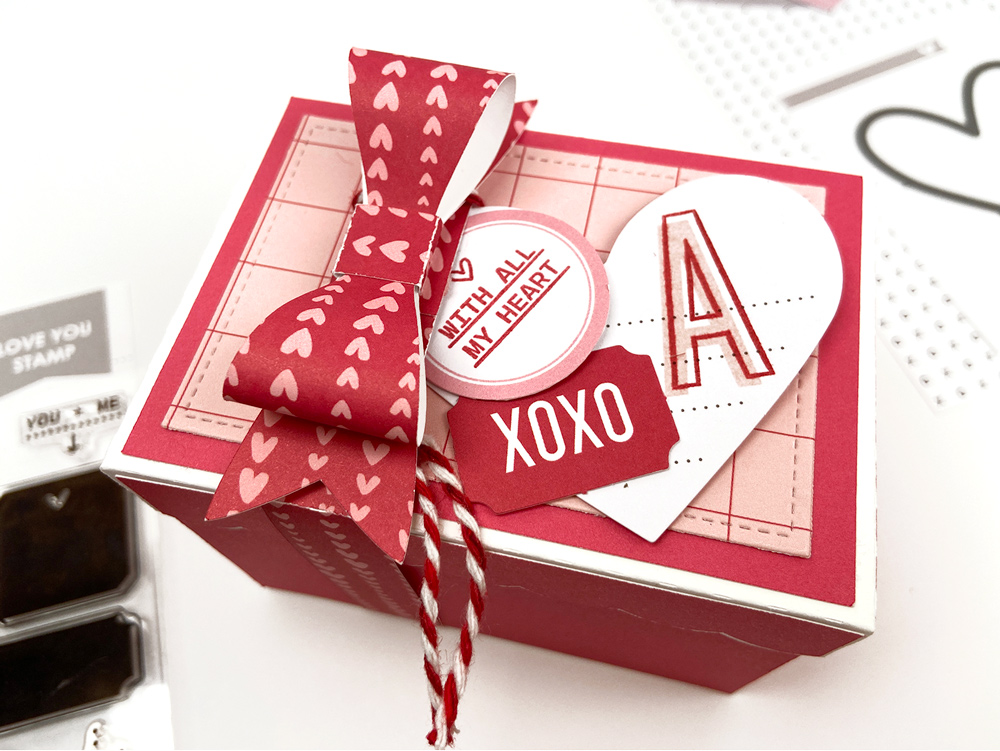
Next is a sweet treat box that I plan to fill with candy for my youngest kiddo. The base for the box was created using white cardstock and a Lori Whitlock Silhouette cut file that I’ve had forever. After assembling the box, I used more of the Love You Paper Stack along with a piece from the Warm Solids Paper Stack.
The box ended up being super cute and I am excited to give it to her on Valentine’s Day.
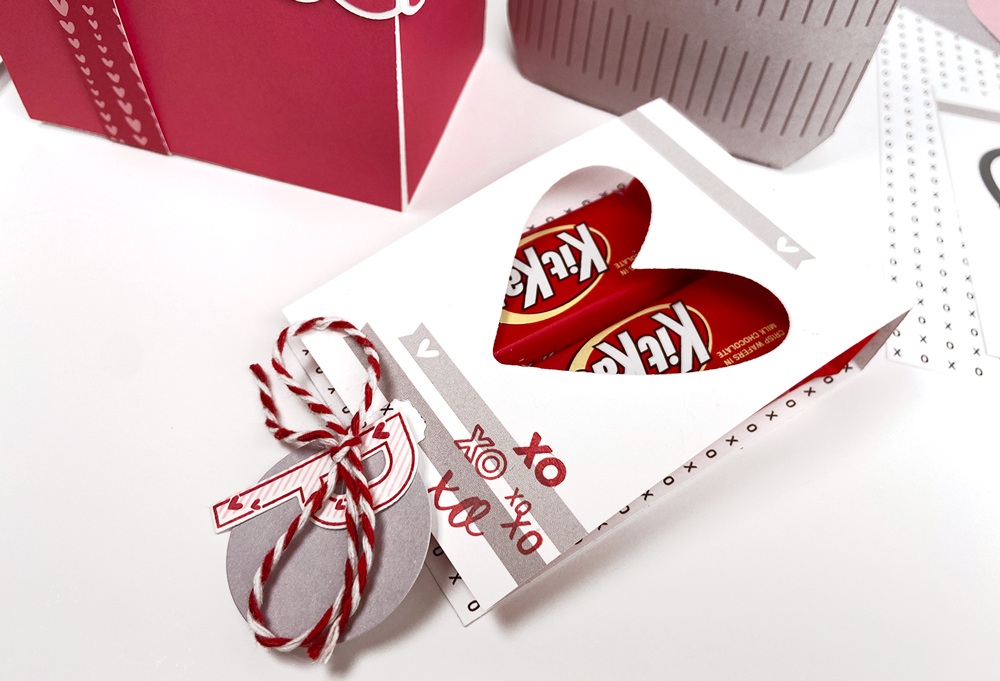
Last, I created a small candy holder that I designed using a 3 x 4 journaling tag for inspiration.
This last project was a bit of trial and error because I did not have a pattern to follow and was making things up as I went.
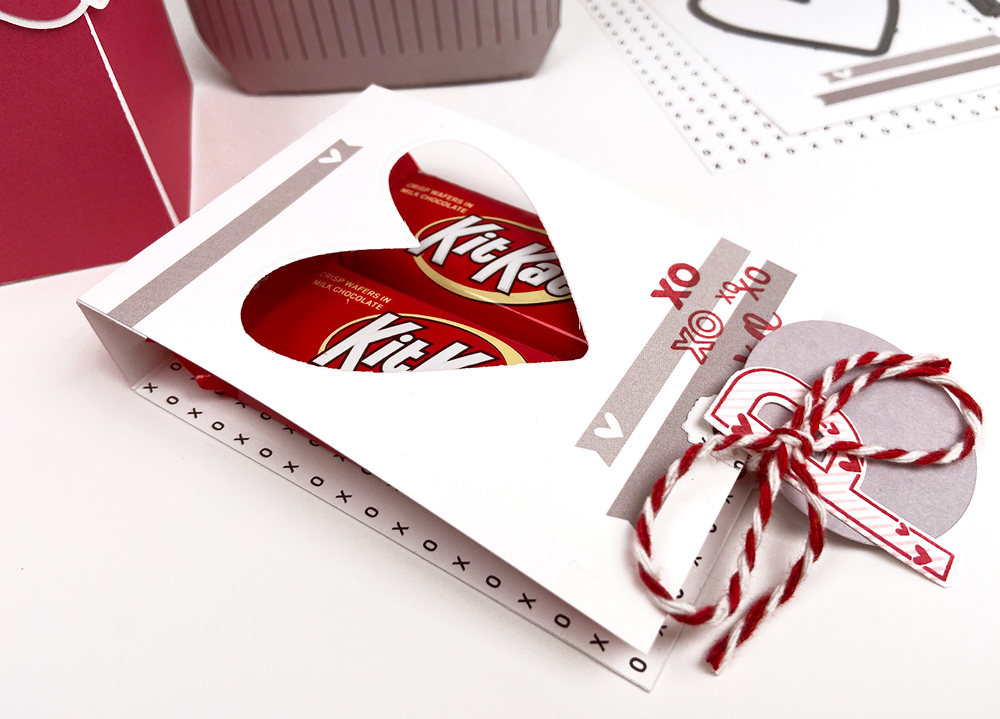
First, I used a My Heart Metal Die on the 3 x 4 inch journaling tag from the January Kit to create a window for the candy. Next, I cut the “XOXO” patterned paper from the Love You Paper Stack slightly larger than the journaling tag and glued the two pieces together. Using the thickness of the candy bars as a guide, I scored the paper along the top inside edges so it resembled a matchbook when closed.
After stamping the red “XOXO” sentiment from the Love You Stamp on the bottom edge of the front journaling tag, I punched a hole on the bottom edge of both papers. which I reinforced using the hole reinforcer from the Holiday Tags Metal Die.
As a finishing touch, I stamped a “P” using the Large Heart Jane Alphabet Stamp and cut it out using the accompanying Metal Die. After looping the twine through each of the holes, I strung the die cut letter on the strand with a gray Love Notes Die Cut circle and tied the two sides together. I think this ended up being my favorite of the three projects because it was super simple to make and is a great way to use the journaling tags. If you are making a lot of these, be sure to check out the January 2022 Printables, too!
Thank you for sticking with me to this point! I hope that today’s three designs have provided you with a starting point in creating sweet, personalized treats for your loved ones. If so, please share what you create and tag us on social media using the hashtag #EllesStudio, or post your project in our Facebook Group so we don’t miss your amazing projects!
Thank you so much for joining us this week for Love Week here on the blog! We hope you’re inspired to create something handmade, whether a layout, pocket page, cards, or treats, for those that you love!
Comments Off on Love Week: Sweet Treats with Jen McMurtrey | Share This
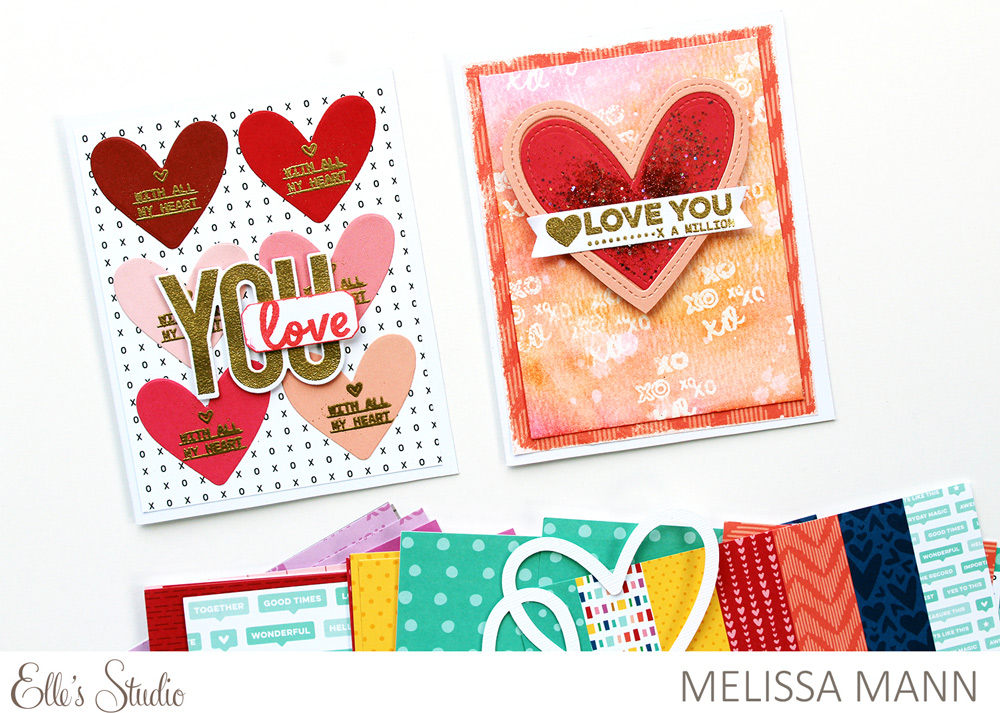
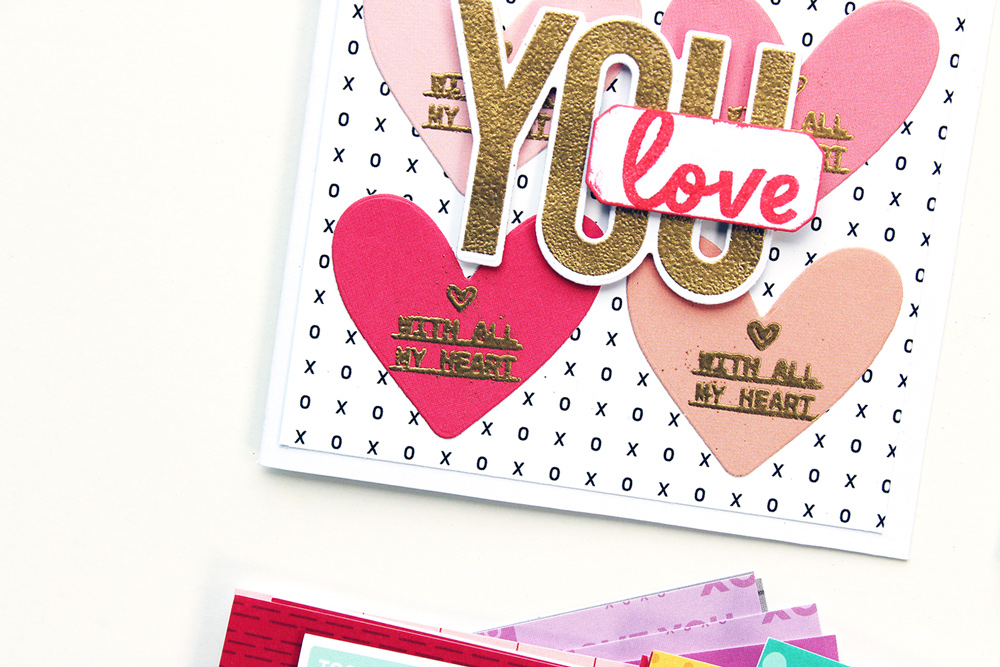
You can buy thousands of different Valentine’s Day card designs off of a shelf, but why not give from the heart and create handmade this season? Today Melissa Mann is sharing two different card designs that we just love, and hope they inspire YOU to craft a card for someone you love!
Hello, friends! This is Melissa with you today for my first blog post of this new year! I have to be honest, cards are not typically my forte, but once I opened up my January 2022 kit and add-ons and got going on them, I really loved how they turned out! Take a look:
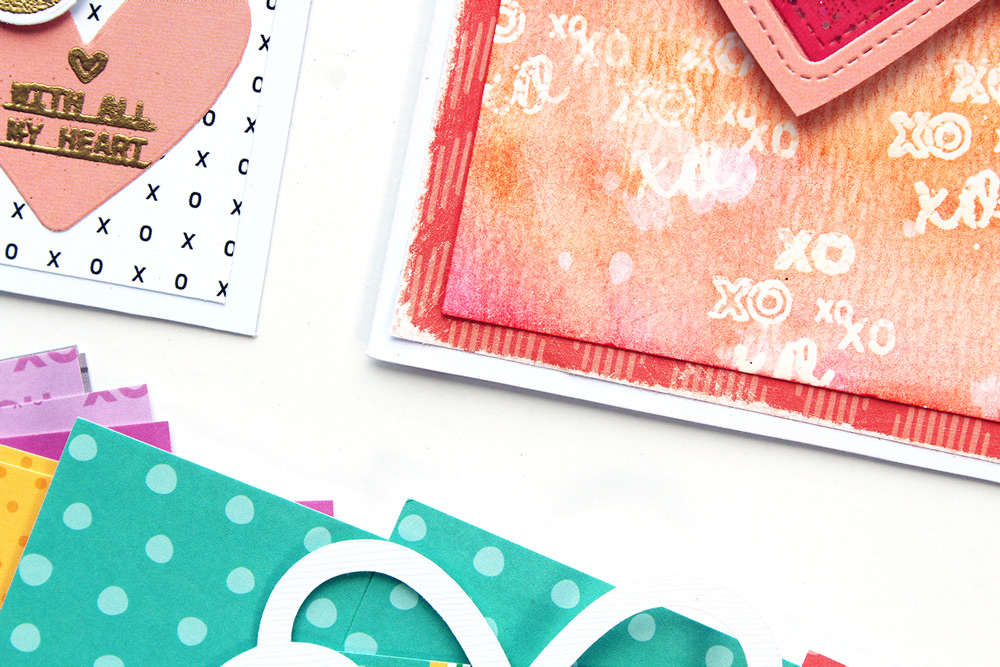
For my next card, I played around with texture and embossing on the background panel. Using watercolor cardstock, I heat embossed the “XOs” from the Love You Stamp with a clear embossing powder all over the panel. After it was embossed, I blended three different ink colors over the background, which allowed the background design to appear! I further distressed it by dropping some flicks of water over it and then dabbed it with a paper towel.
I created my big heart by using the My Heart Metal Die. I layered the hearts together and sandwiched a piece of clear acetate between them with glitter inside. I again stamped my sentiment and embossed it with gold powder and then layered it over the heart.
Thanks for stopping by and taking a peek at my cards! I hope you’ll be inspired to create handmade cards of your own to show your love this Valentine’s Day!
Comments Off on Love Week: Cards with Hearts with Melissa Mann | Share This
Let’s document love in pockets with Michelle Flynn today! Michelle is here to show how she recorded love for her family, and documented past and present photos and feelings that are so touching and heartfelt! Let’s take a look!
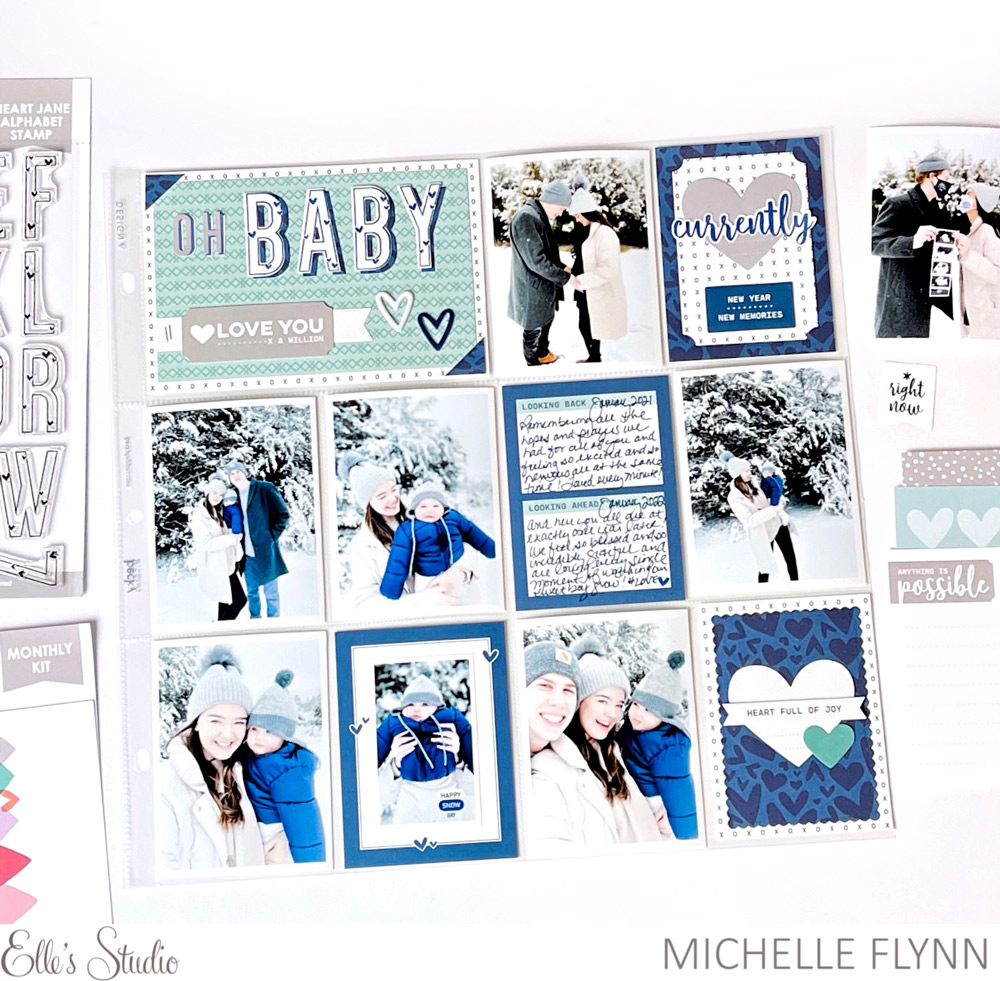
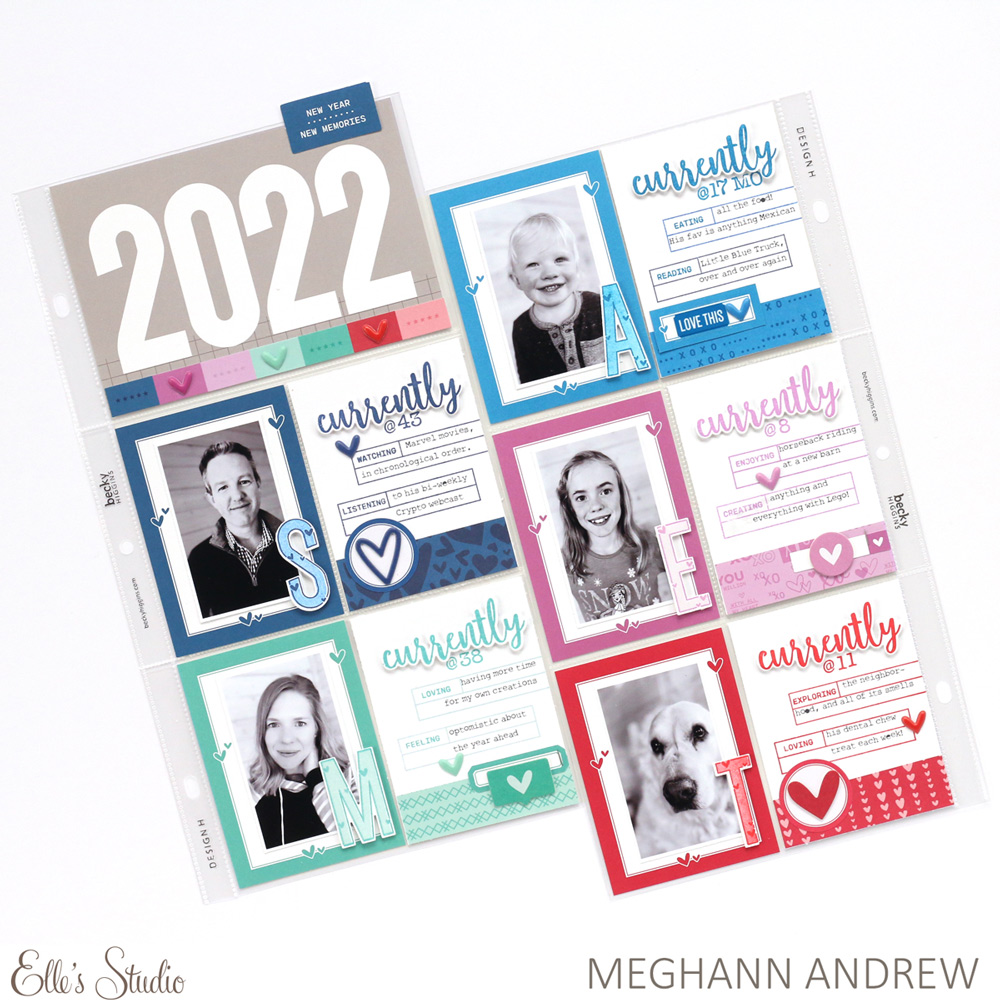
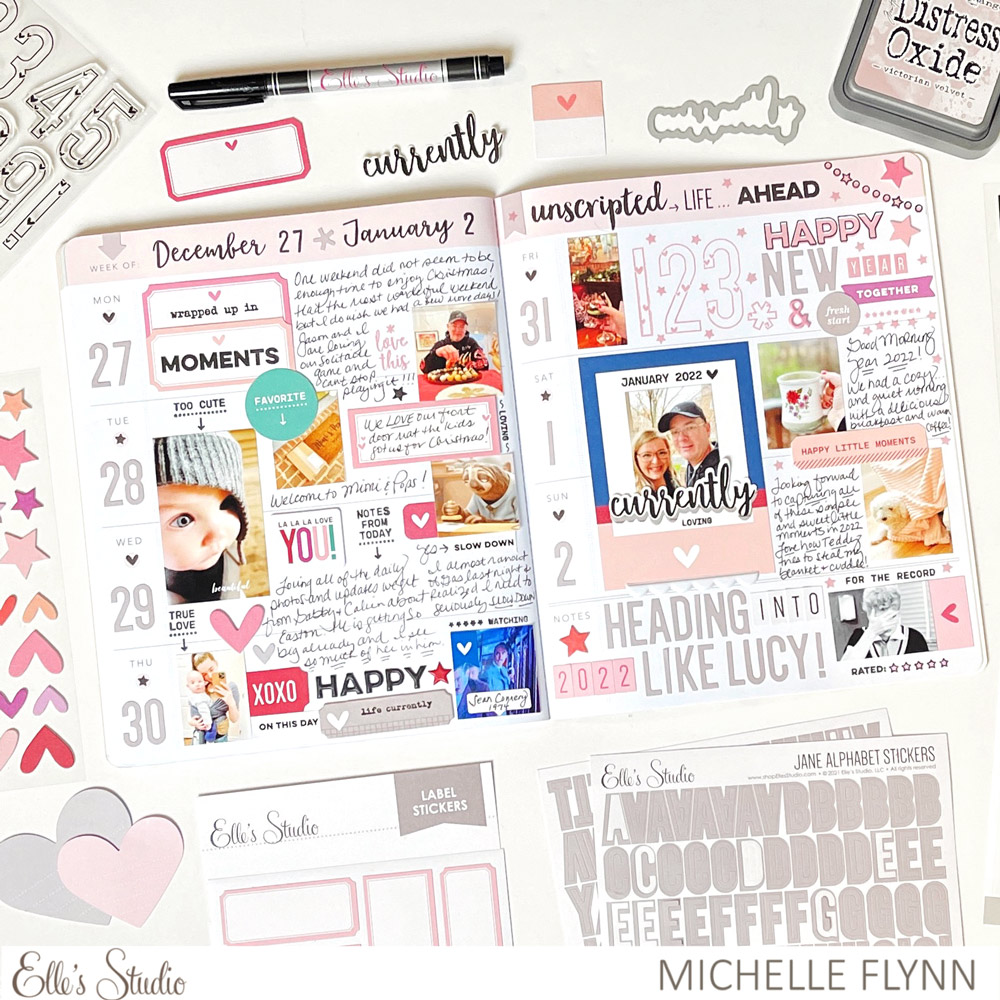
Happy New Year Friends! I’m so happy to be here with you today during Elle’s Studio Love Week! I can’t tell you enough how in love I am with the January monthly kit and add-ons! Today I’m sharing a pocket page layout for my current year album documenting my Love for our new grandson, both before and after he was born:
I really love letting the products inspire me and I began this layout the same way I typically do by choosing the pocket tags and die cuts from the January monthly kit that complimented my photos. I was incredibly excited to break into the Love You Paper Stack, too! The designs and colors are so gorgeous and I chose a few of the beautiful patterns to begin making my opening pocket page tag below.
The paper stacks inspire me to get a bit more creative in the pockets, and make me feel like I am creating a mini version of a traditional layout. I made the opening 4 x 6 inch pocket tag and the inspirational momentum had me continuing to create two other 3 x 4 inch pocket tags with the paper stack as well.
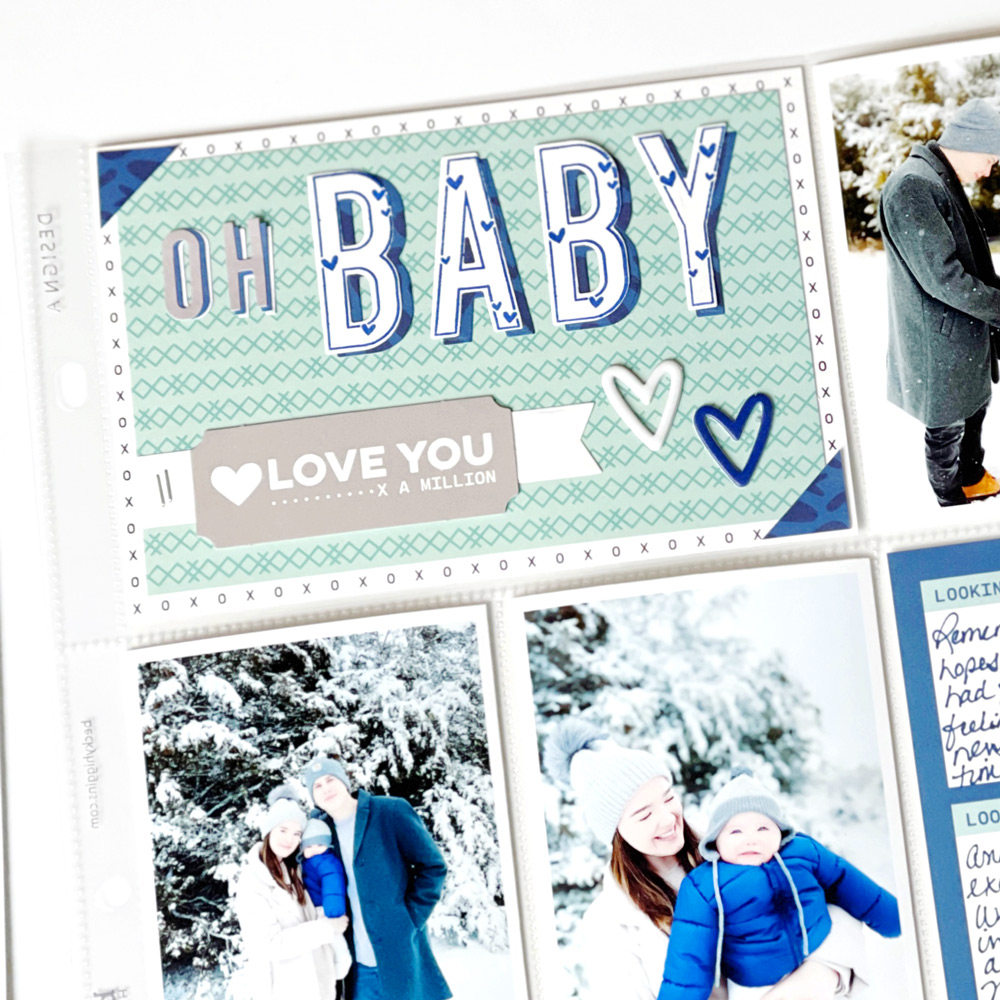
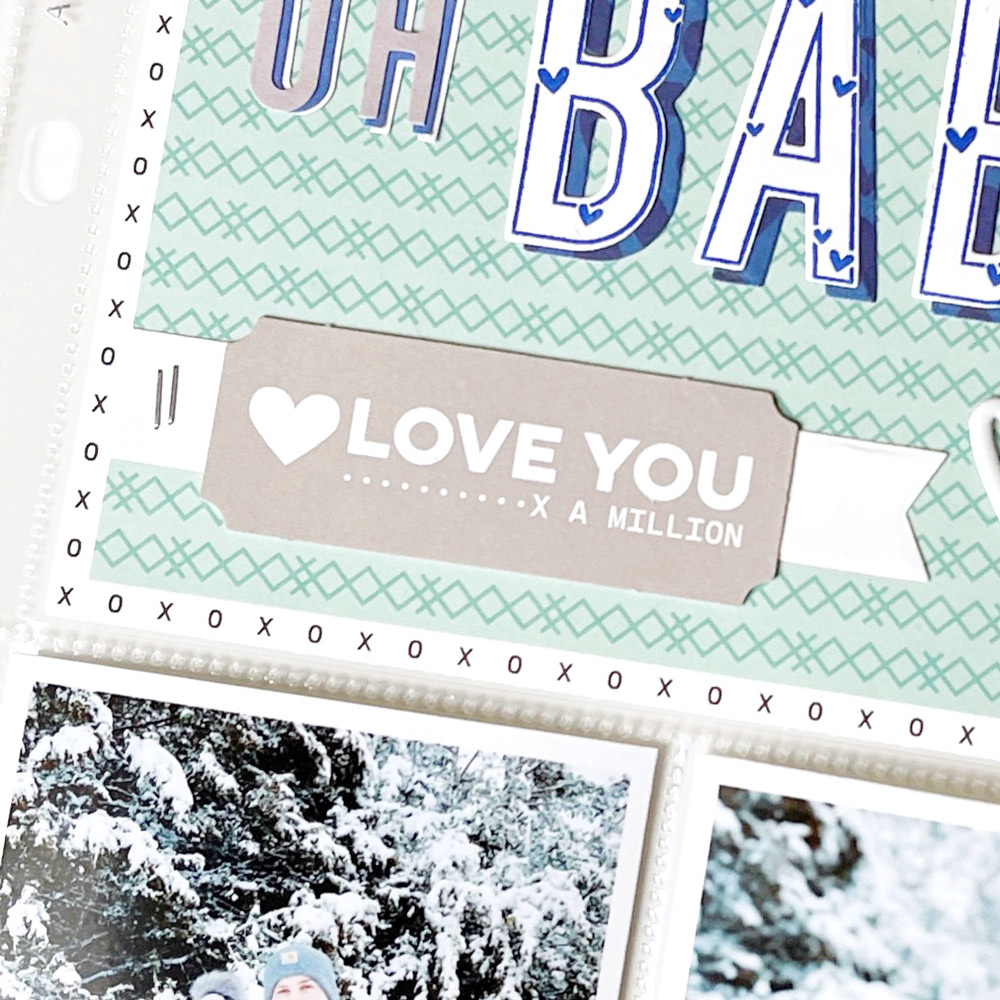
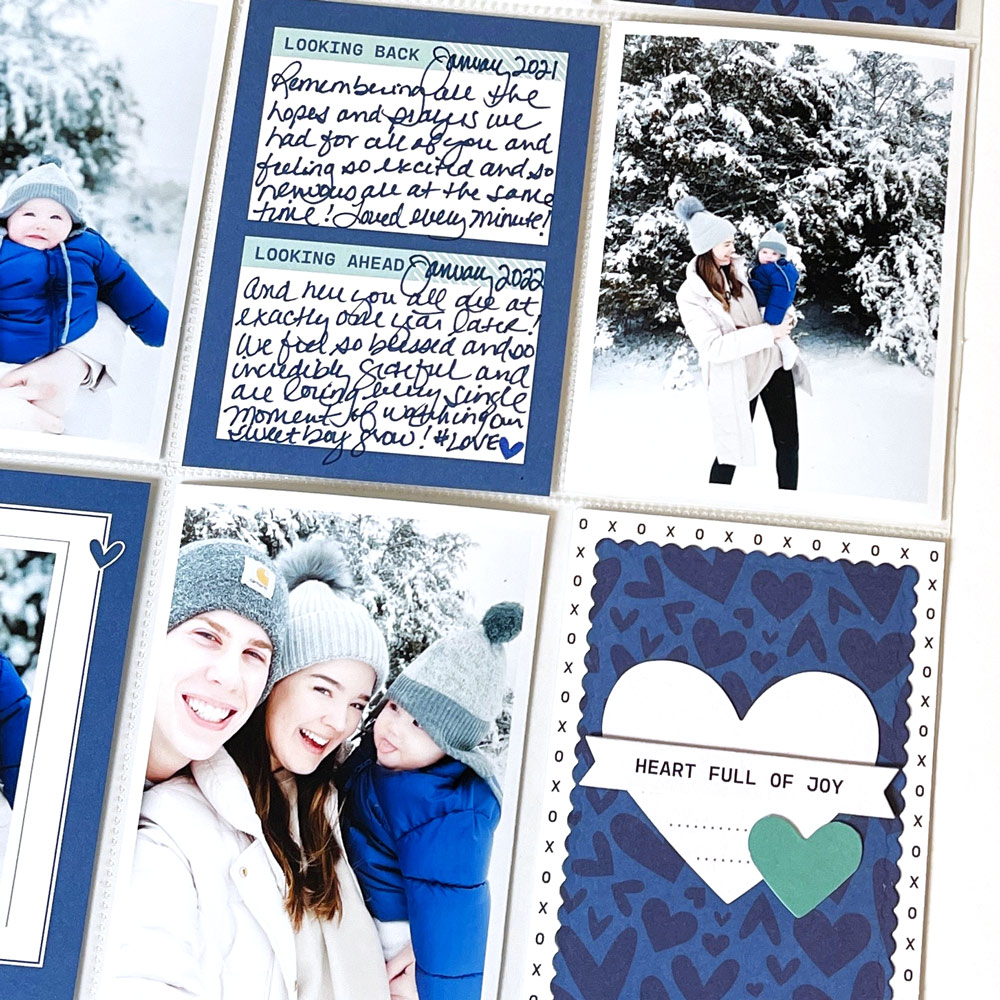
I started with the opening pocket tag by layering that sweet ‘XO’ paper with the dreamy mint paper and used the fabulous Large Heart Jane Alphabet Stamp with navy blue ink to begin my title. I thought I’d take it a bit further and use the coordinating Large Jane Alphabet Metal Die paired with the a sheet of the navy blue paper from the Love You Paper Stack to add some dimension to the title. I also layered the beginning words of my title using three sets of the Jane Alphabet Cardstock Stickers; in gray, white and navy.
Have you used the Banners Metal Die? They are my favorite for adding a bit of fun to your pocket tags! I backed that precious gray die cut from the January Kit with the white banner and adhered it with a tiny stapler, then wrapped this pocket tag up by adding a few of the sweet Puffy Heart and Star Stickers!
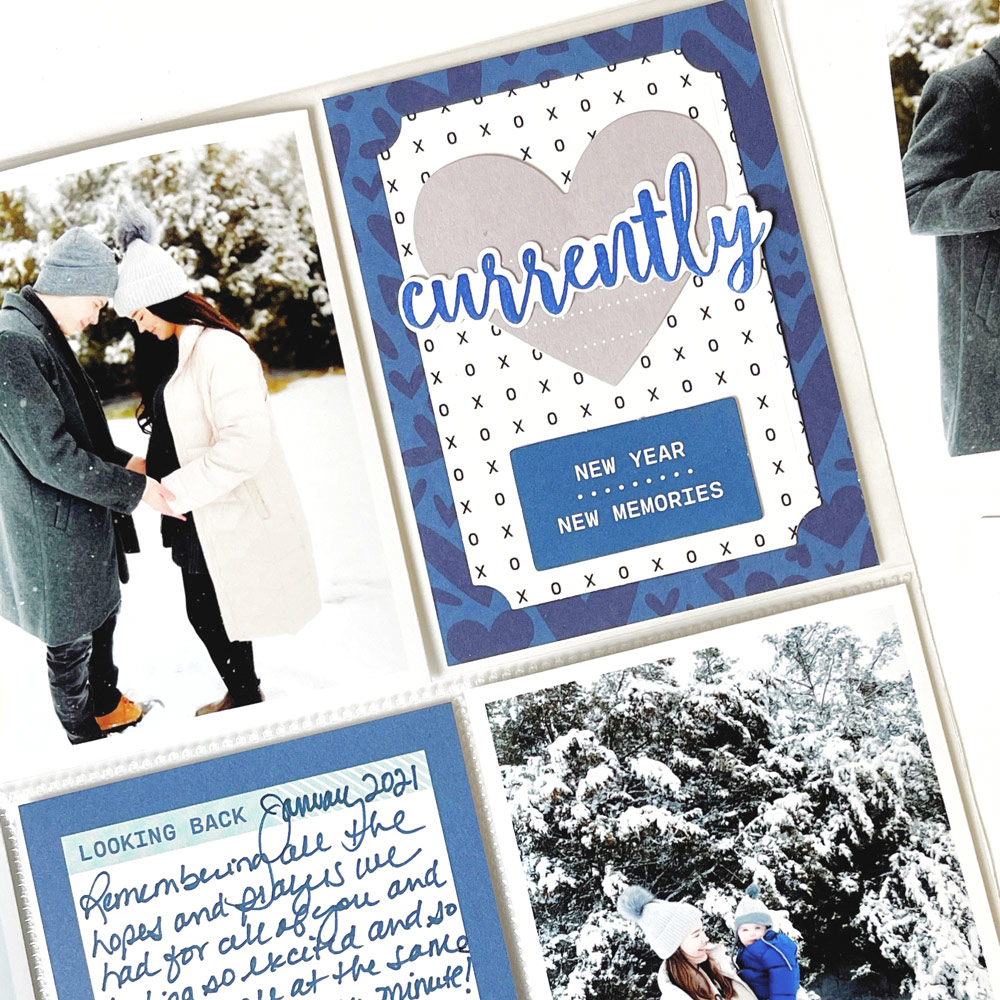
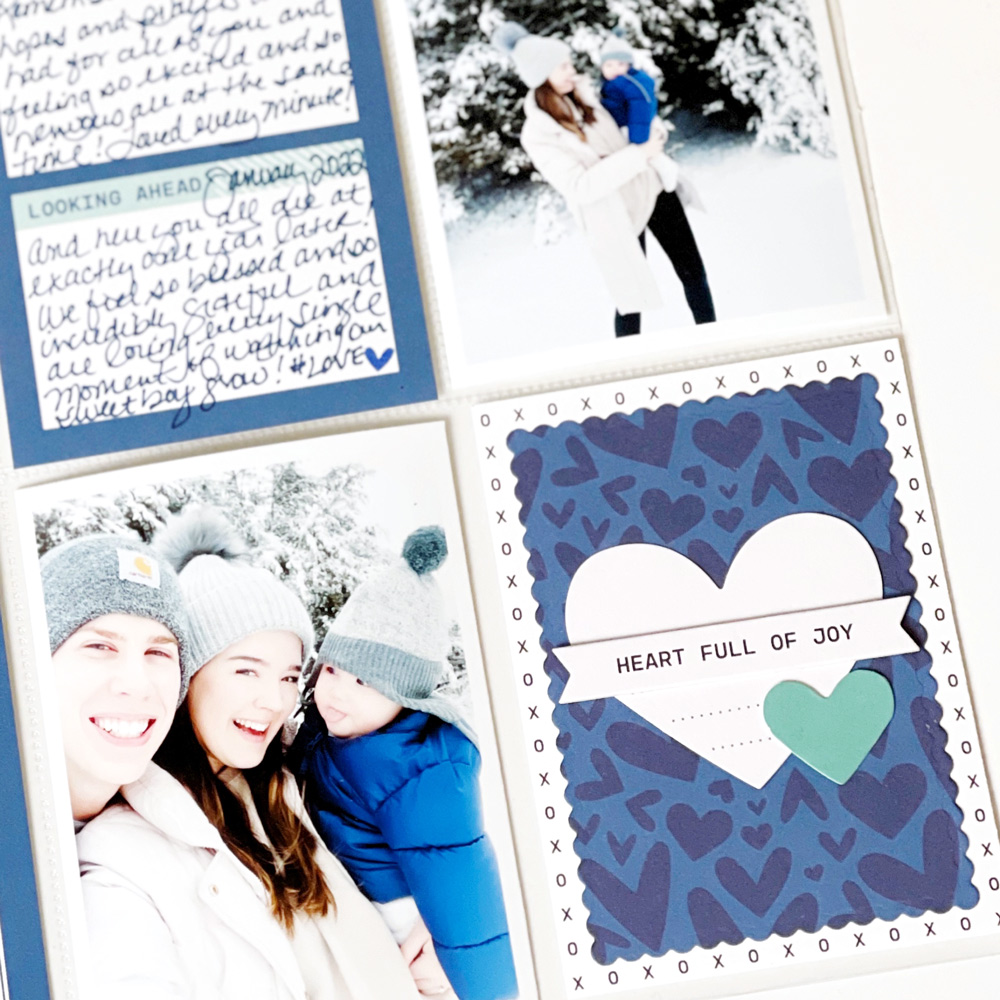
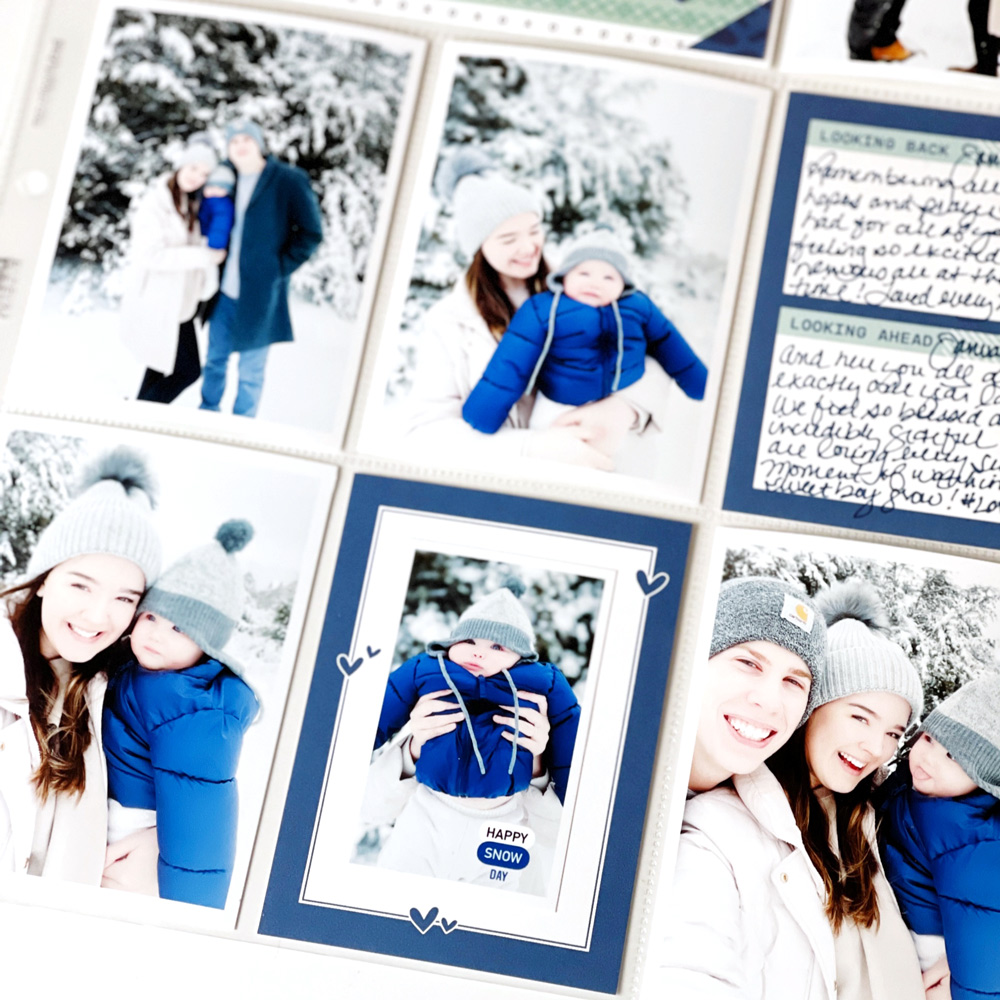
While I was still having fun with my dies, I thought it would be fun to make a few of my own pocket tags. For the pocket in the upper right corner, I used the ‘XO’ and navy patterns from the Love You Paper Stack and the Pocket, Frame and Flip-Up Extra Frames Metal Dies to create a 3 x 4 inch tag. I added the gray heart from the Love Notes Die Cuts and topped it with the “currently” die cut, stamped with the subscriber exclusive Currently Stamp and cut with the coordinating Currently Metal Die. The blue “New Year, New Memories” die cut from the January Kit was exactly the perfect sentiment to finish up this pocket tag!
For my journaling on this layout I chose a pocket tag from the December 2021 Kit that was perfect for this layout! Looking back and Looking Ahead expressed exactly how these photos made me feel!
For my last pocket, I chose the navy Bright Heart Journaling Tag, topping it with a smaller photo of our grandson. It looked so sweet all on its own and really needed nothing else!
Thanks so much for sharing your time with me today during Love Week! I just Love how the January 2022 kit and add-ons brought these photos and memories to life in my album! Don’t let pockets confine your creativity—use your products and get creative in those pockets and you’ll see your love for your own precious memories shine through those pockets! Happy creating friends!
Share how you’re documenting LOVE in pockets, layouts or notebooks with our products! Post your creations to our Facebook Group, or share on Instagram using the hashtag #EllesStudio! Be sure to come back tomorrow for another amazing Love Week design team creation!
Comments Off on Love Week: New Year, New Memories with Michelle Flynn | Share This
Let’s celebrate a season of love though paper crafting! It’s Love Week here on the blog, and we are so excited to bring you four new projects from our amazing design team members this week that will show you how to add love to layouts, pockets, cards and treats! Kat Benjamin is here today to kick off the fun using our January 2022 kit and add-ons—plenty of time before Valentine’s Day arrives!
Good morning everyone! It’s Kat here today, and I am so excited to be kicking off “Love Week” here on the Elle’s Studio blog! This week, the team will be sharing a variety of love-filled projects that we hope will inspire you to create your own!
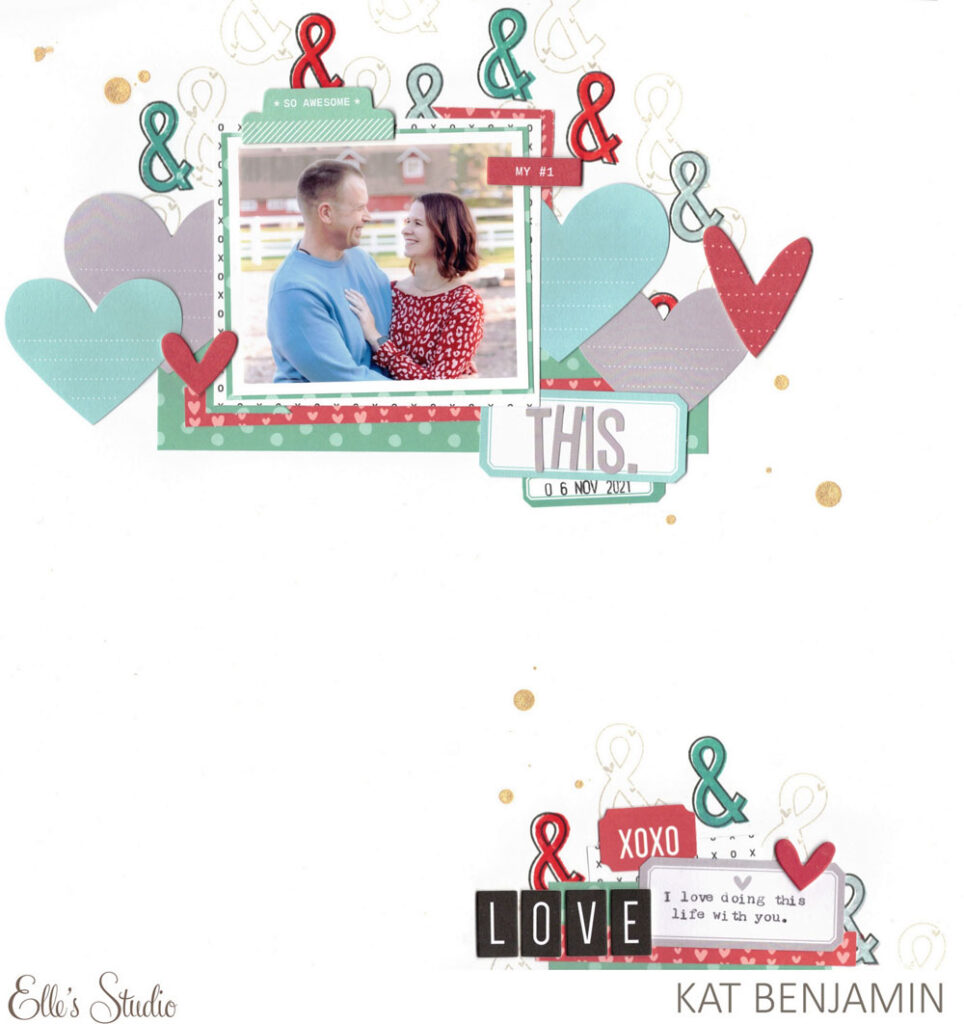
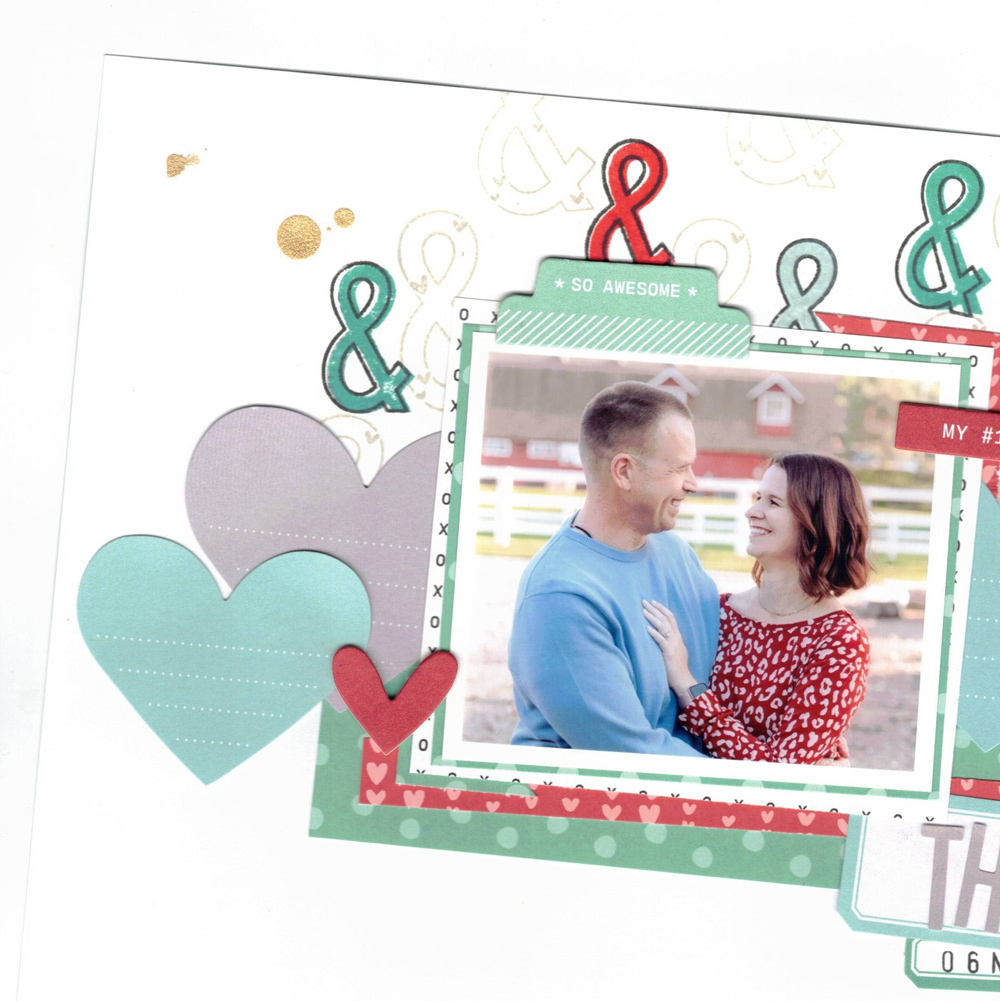
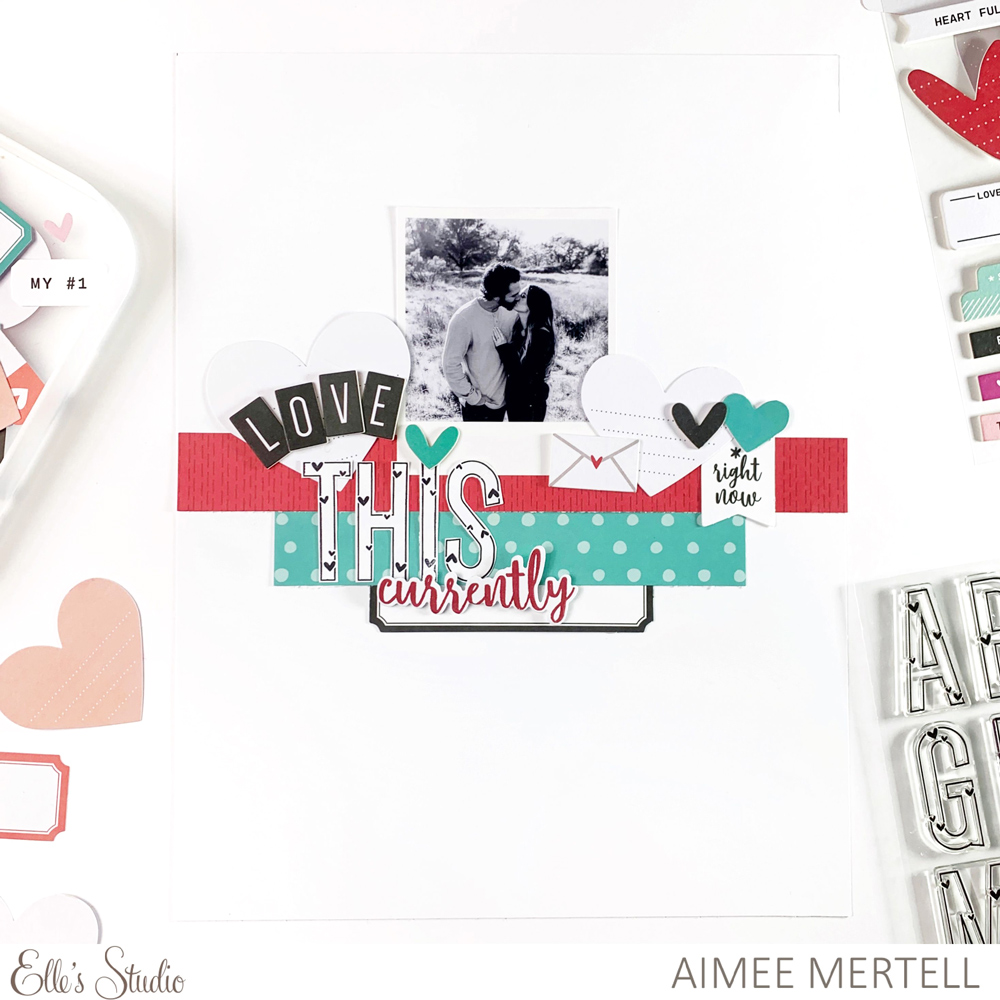
While love comes in many forms, I decided to focus on romantic love for this layout and scrapped a photo of my husband and me.
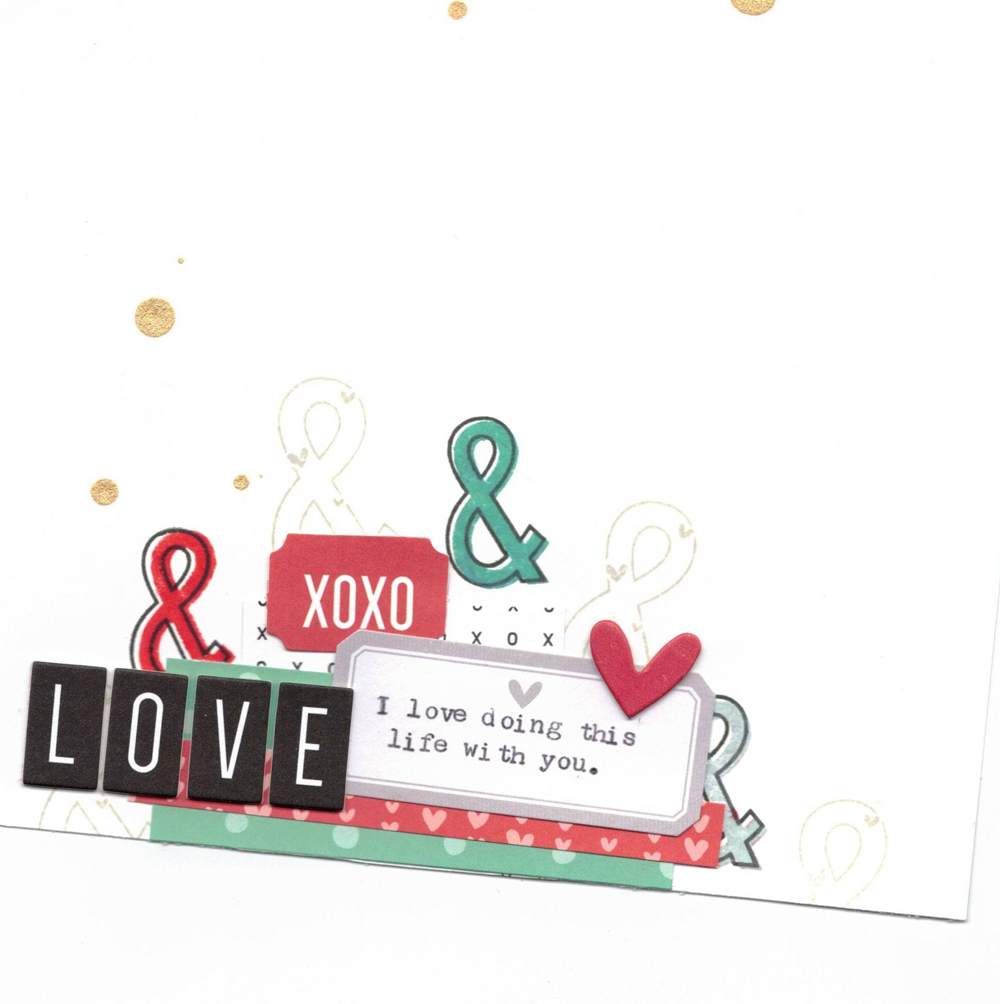
I knew I wanted to include a lot of ampersands on this page, so I created a background using the ampersand in the new Large Heart Jane Number Stamp and mixing it with the ampersands from the Medium Jane stamps.
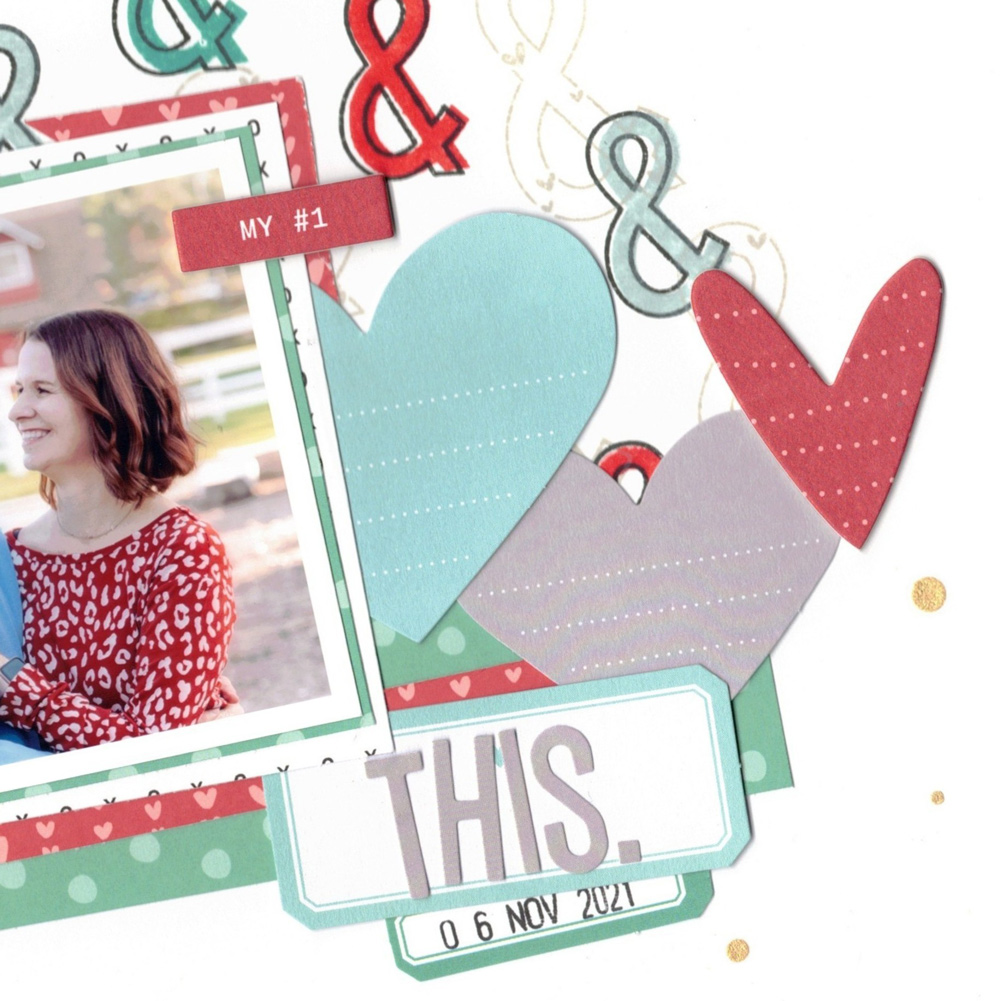
Once I had my background created, I built my layout design on top of it. I really loved the hearts from the Love Notes Die Cuts, so I spread those across the top of my page behind my photo. I also sprinkled in some of the Love Chipboard Stickers and added my title on one of the die cut labels.
Finally, to finish off my layout, and to create balance, I added a small embellishment cluster in the bottom right corner of my page.
I hope you decide to join in and create with us for Love Week! Share your designs filled with love with us in our Facebook Group, or on Instagram using the hashtag #EllesStudio!
Hello, friends! Can you beleive how quickly this month has gone? It’s time for volume three of our January 2022 kit and add-ons inspiration from our amazing design team, and we think you’ll love what they have to share with you this week! Choose a project from these eight and let it inspire you to create this week!
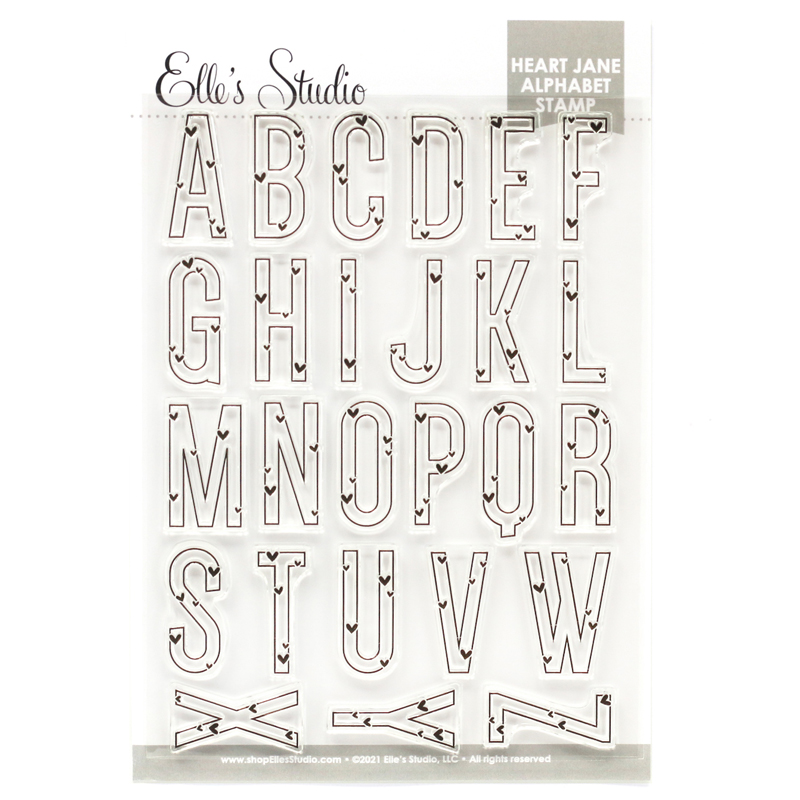
Happy Friday, friends! Today we are excited to share our newest alphabet stamp with you, the Large Heart Jane Alphabet Stamp, and some of the fun ways that you can create with it! If you have this new alpha sitting on your desk, we know that one, or all of these five ideas will have you ready to stamp this weekend!
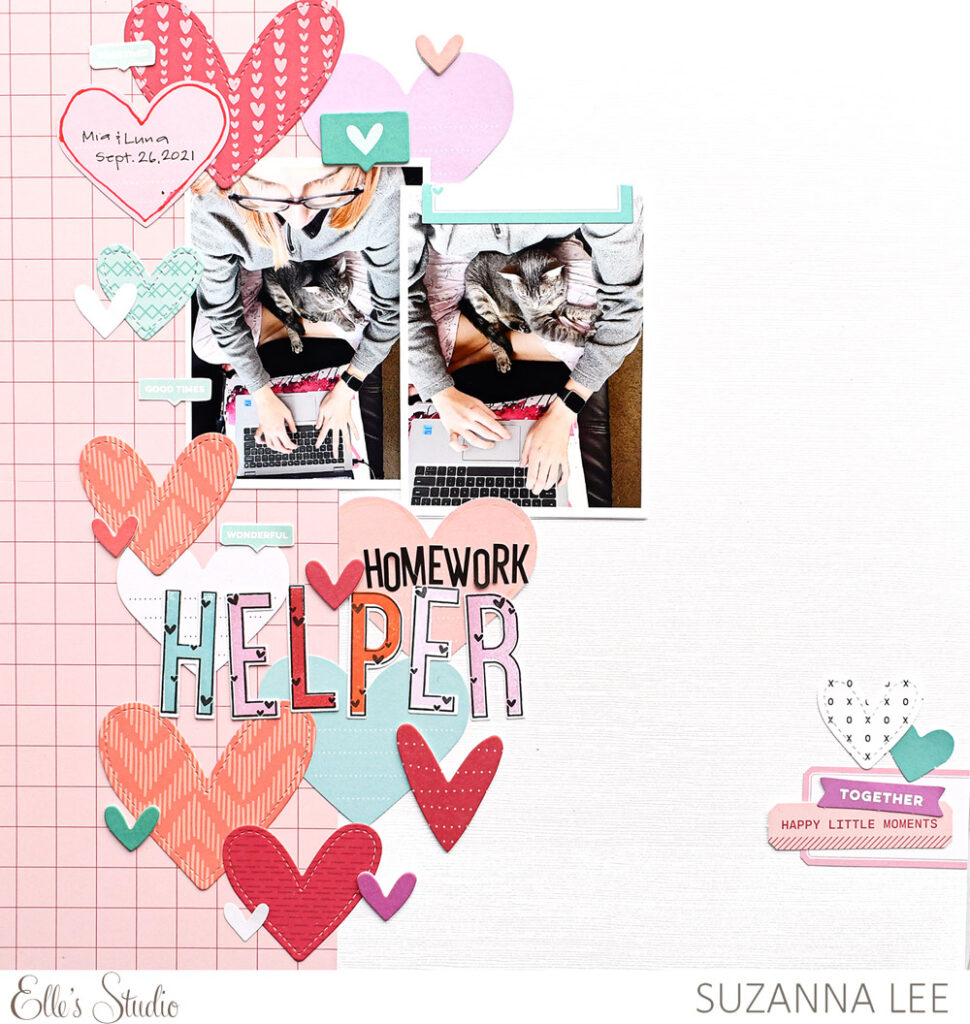
1. Add color!
We designed this new alphabet stamp to coordinate perfectly with our other Large Jane alphas, including the solid, which allows you to color these sweet letters in any color that you have in your stash! What a beautiful color scheme Suzanna shows us on her layout!
2. Keep them soft
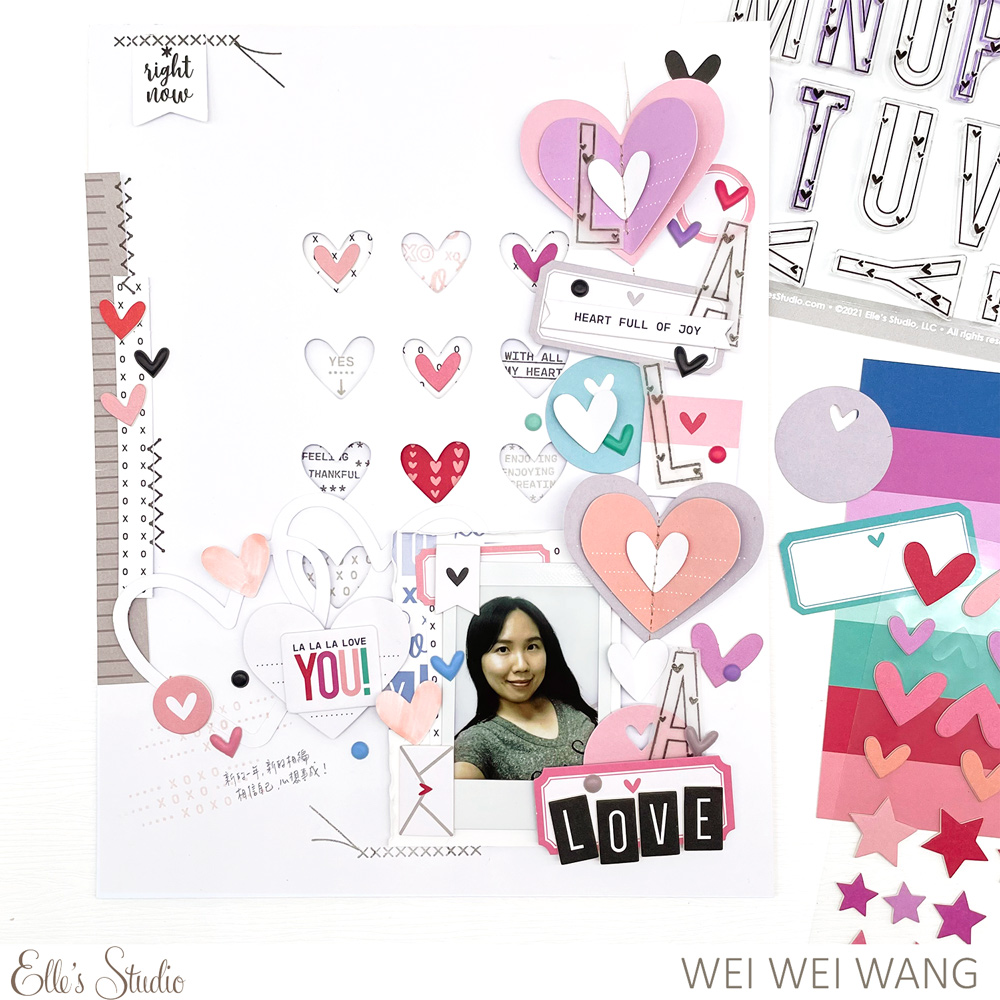
Stamping these alphas on vellum, like Wei Wei did on her beautiful page, allows them to blend into the design in a soft and subtle way instead of making them the focus of her page.
3. Pattern play
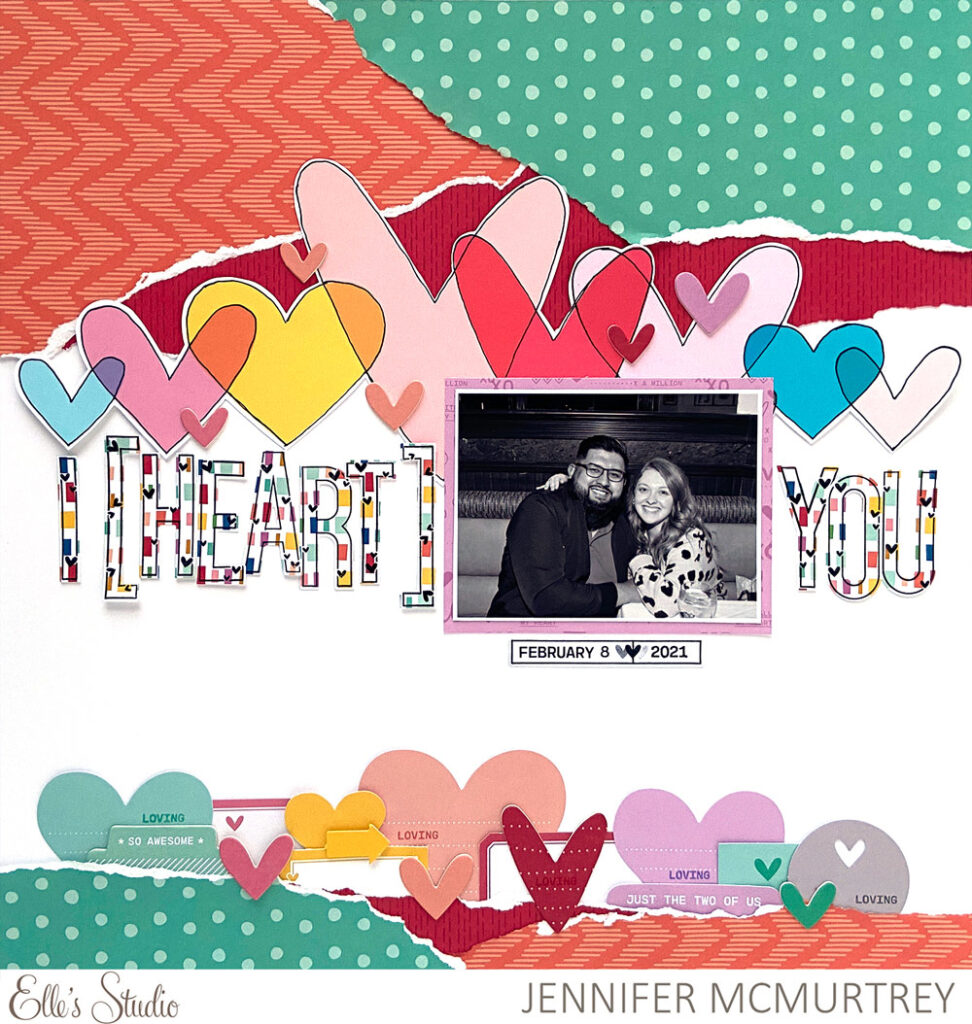
Choose a favorite patterned paper and start stamping your alphas! We love the colorful design that Jennifer chose from our Love You Paper Stack that really made her title pop off of the page!
4. Keep it classic
Black and white goes with any color scheme you choose! Start with this classic combination and combine your alphas with a rainbow of color on your project, as Sarah did on this page!
We hope these five ideas will inspire you to create with your new Large Heart Jane Alphabet Stamp (and don’t forget that we have the Numbers Stamp, too!) Share how YOU use this new alphabet with us by posting in our Facebook Group, or on Instagram using the #EllesStudio hashtag! Happy creating this weekend, friends!
Comments Off on 5 Ways With The Large Heart Jane Alphabet Stamp! | Share This
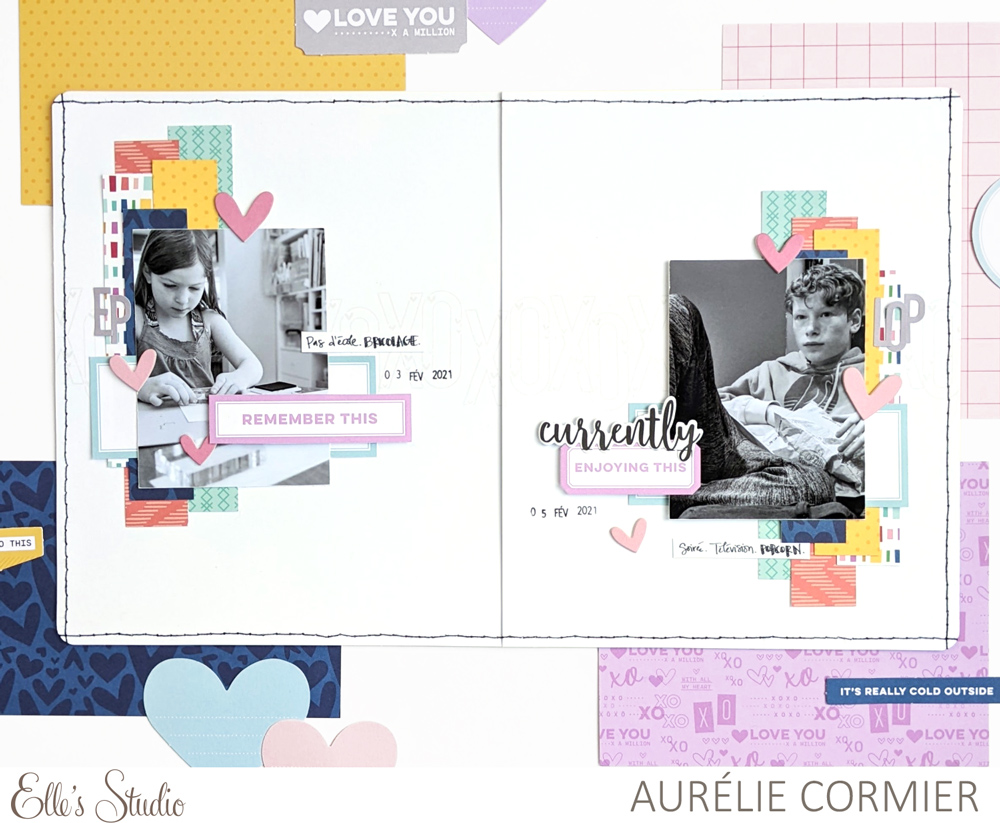
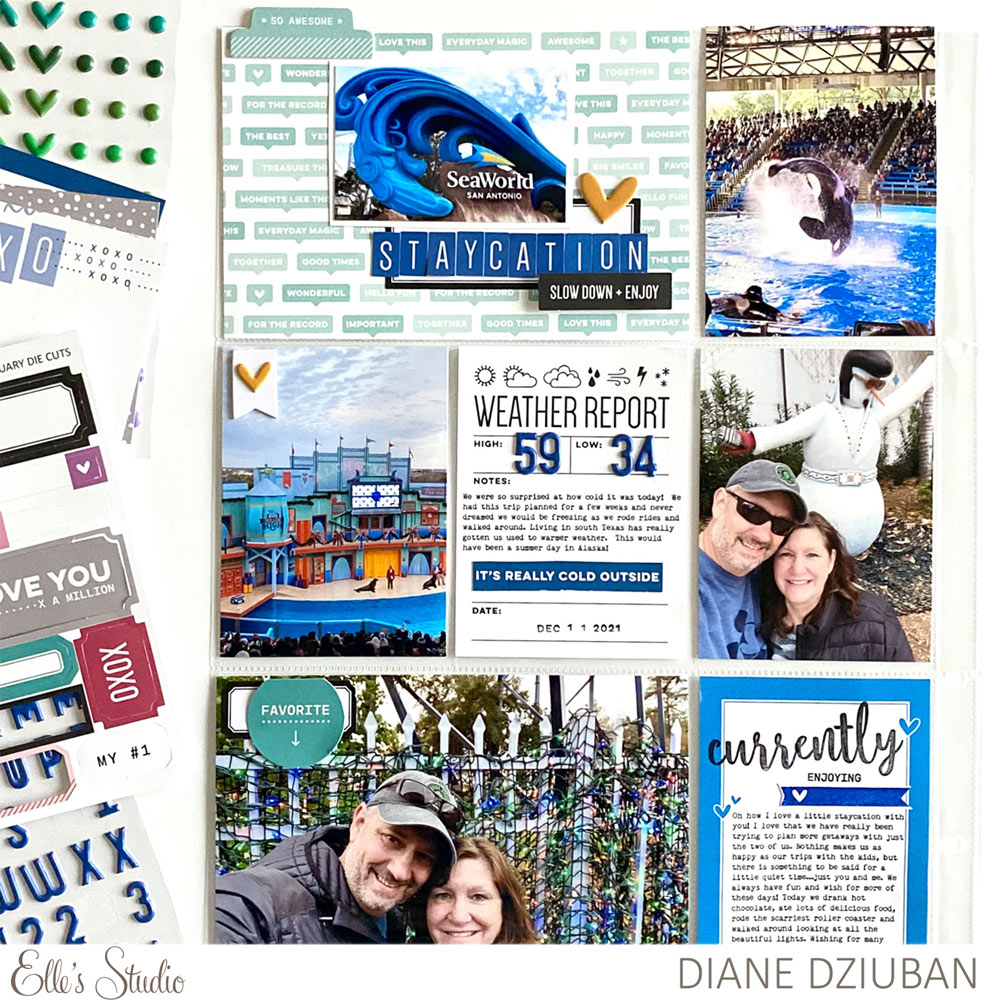
Hello, everyone! It’s Aurélie here today to share not only my very first Elle’s Studio design team blog post (eek!), but my first memory planner layout in almost a year! YAY!
I must say, I stared at my memory planner pages a long time before jumping in again. I wanted to create something beautiful for Elle’s Studio and I hadn’t scrapbooked in this format for almost a year! The pressure was definitely O-N! However, once I started, it came together in a snap! I truly love how memory planning enables me to capture the everyday stories of my life. And the beauty of Elle’s Studio products is that everything goes hand in hand so it really takes most, if not all, of the matching/guessing game away when you’re creating, especially in uncharted territory like this was for me.
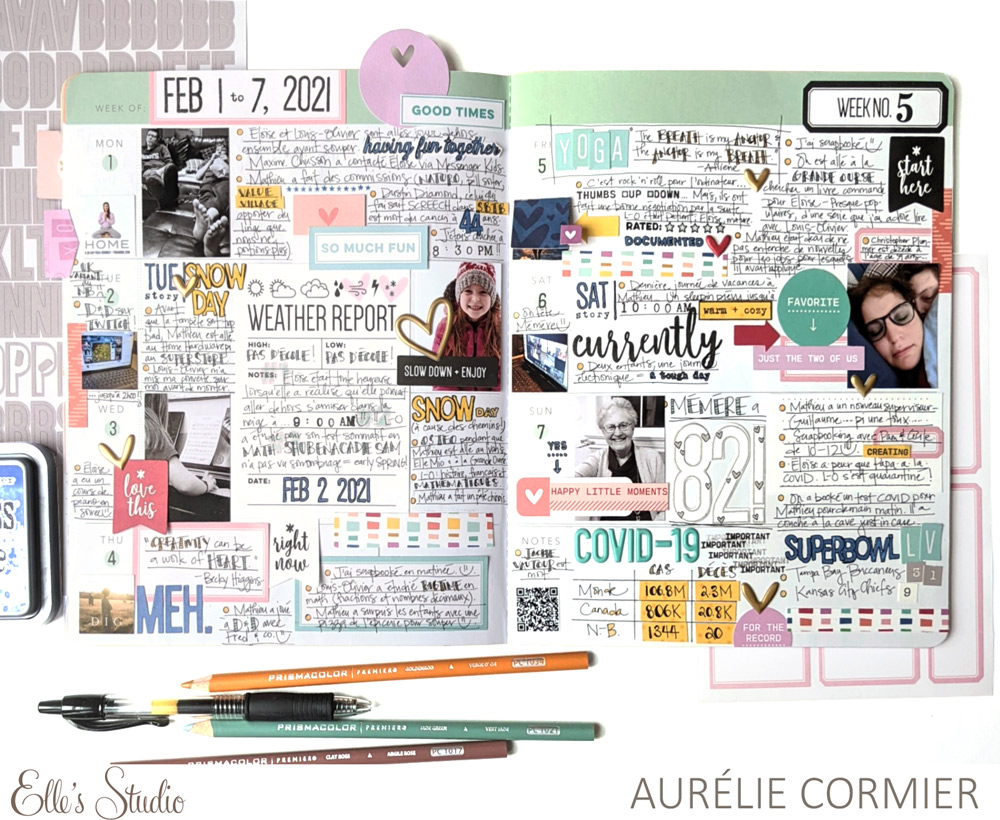
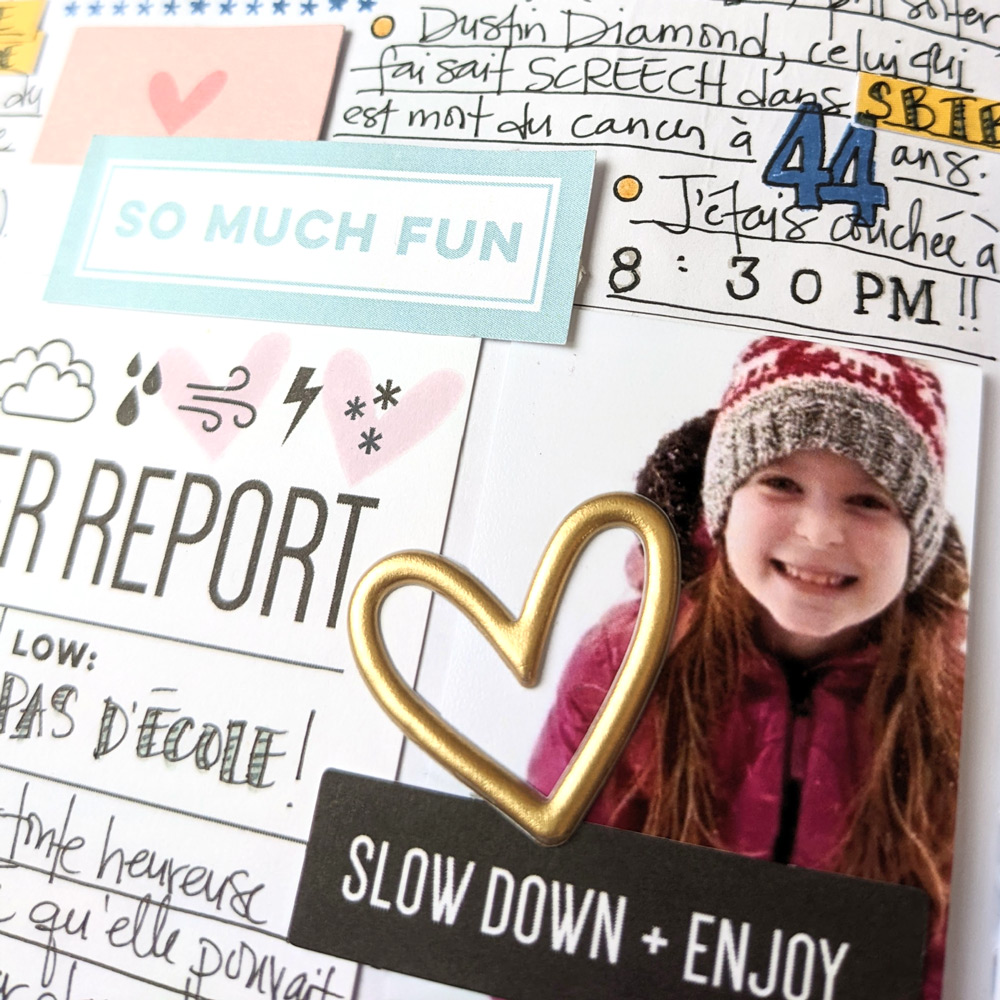
And that’s exactly what happened with this layout. After placing my photos, I added key elements—the “Weather Report” journaling tag from the January 2022 Kit, the die-cut “82” using the Large Heart Jane Number Stamp, and the layered elements around my photos.
I then followed with my journaling—insert using labels to cover up “flopportunities” at their finest! Yes, I admit it. Most of the labels with journaling on them on this layout have creative mishaps under them. Another thing I love about memory planning? It enables me to color to my little heart’s content. On this layout, I either colored in hollow shapes and alphas or traced solid stamped shapes and alphas with a fine-tipped black pen. It just makes everything pop so much more.
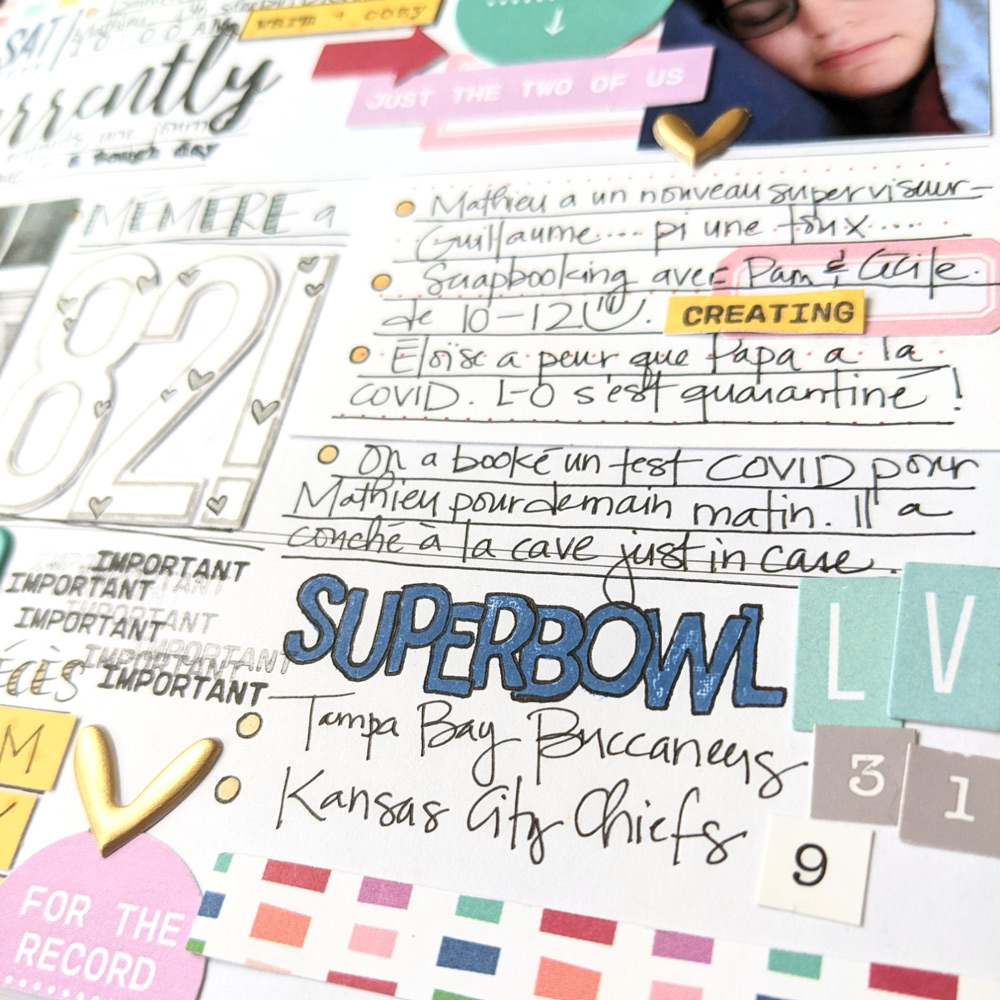
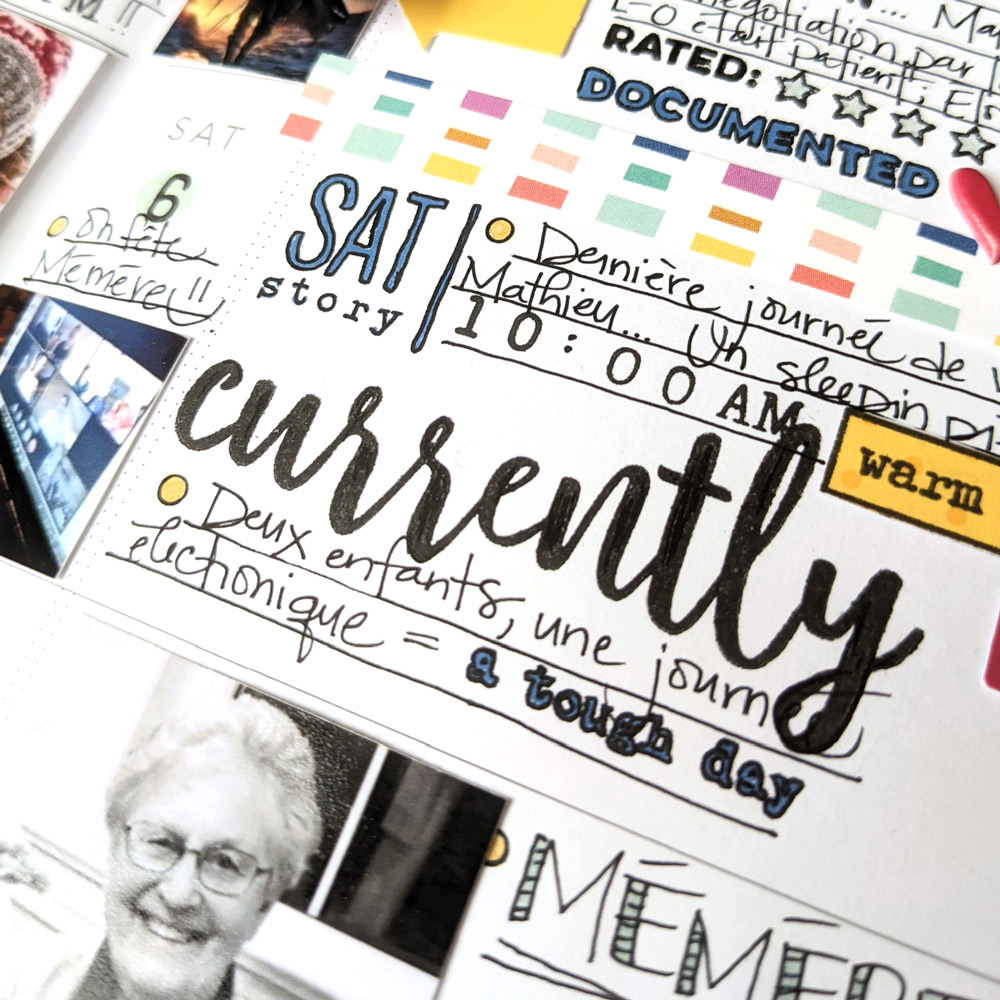
I then ensured I added a variety of Elle’s Studio stamps and stickers onto my layout, especially where there was white space.
Now, when I say a variety, I mean a V-A-R-I-E-T-Y. I used twelve different Elle’s Studio stamp sets on this layout, including those released this month! WOW! But seriously, that’s the beauty of Elle’s Studio products—used together, or even solo (yes, it happens from time to time), they bring a cohesive look to any project, even those in formats we haven’t created for almost a year!
Moral of the story? Mix and match! Mix and match! Mix and match! With Elle’s Studio, the possibilities are endless! We can’t wait to see what you’ll come up with, too! Please share your projects with us in our Elle’s Studio Facebook Group or on Instagram using the hashtag #ellesstudio!
Comments Off on Revisiting Memory Planner Magic with Aurélie Cormier | Share This
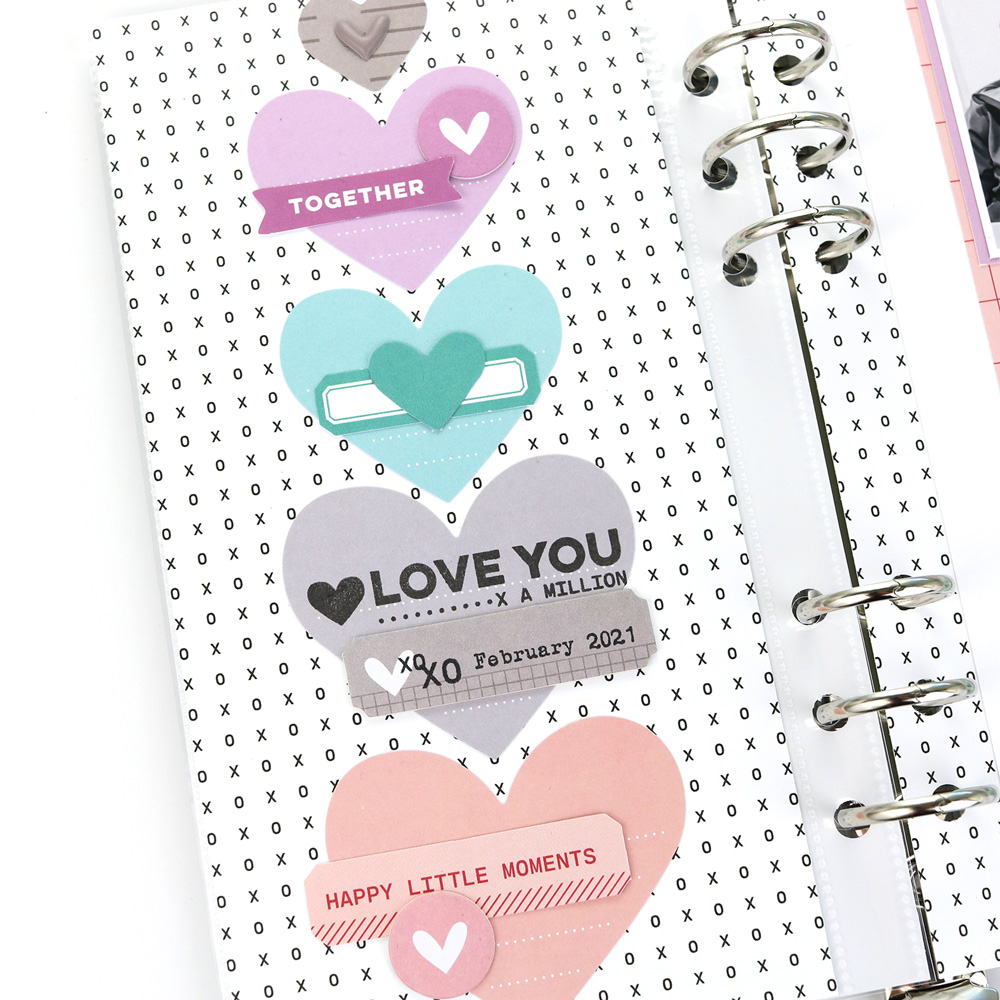
Hey, Elle’s Studio friends! It’s Marsha here today, and I’m excited to share my first blog post of the new year! I love using hearts on my layouts and was excited to feature the new Love Notes Die Cuts on my traveler’s notebook spread!
To begin my layout, I trimmed a patterned paper from the Love You Paper Stack to use as a base for the left page. I chose several die cut hearts from the Love Notes Die Cuts and arranged them in a column on the page. The colors used in this pack of die cuts are so dreamy! I also hand-cut a smaller heart from a gray patterned paper to use at the top of the page. Next, I began embellishing the hearts with the Love Chipboard Stickers, the January 2022 Kit tags, and neutral Tiny Shapes and Dots Puffy Stickers. To complete this page, I added stamping to one of the hearts using the Love You Stamp and Daily Tabs Stamp. I loved including tone-on-tone embellishing—it kept the layout from looking too busy even though lots of color and embellishments were used on the page.
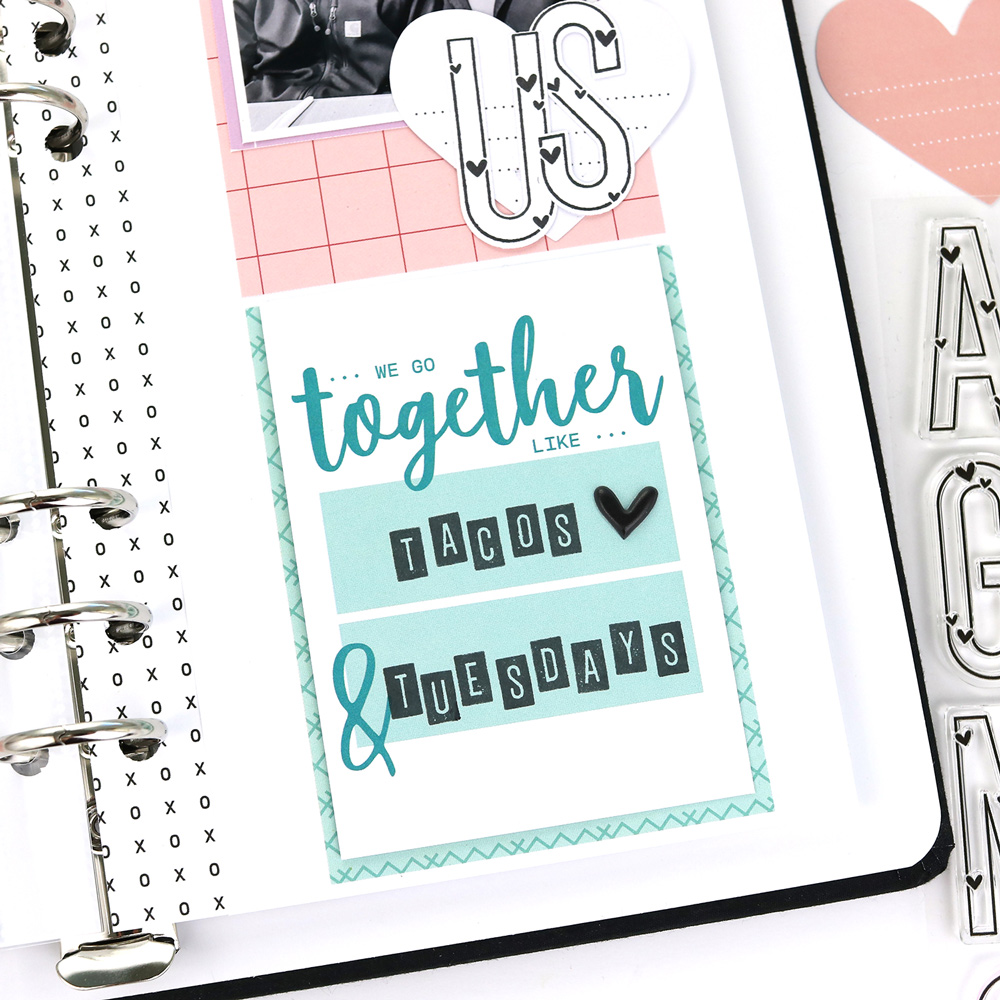
I added my photo on the other page of the spread. Because I printed my picture in black and white, it would work well with any color scheme! I stamped the word “us” with the Large Heart Jane Alphabet Stamp and trimmed it out with the coordinating Large Jane Alphabet Metal Die. I love how it looks layered over the heart die cut!
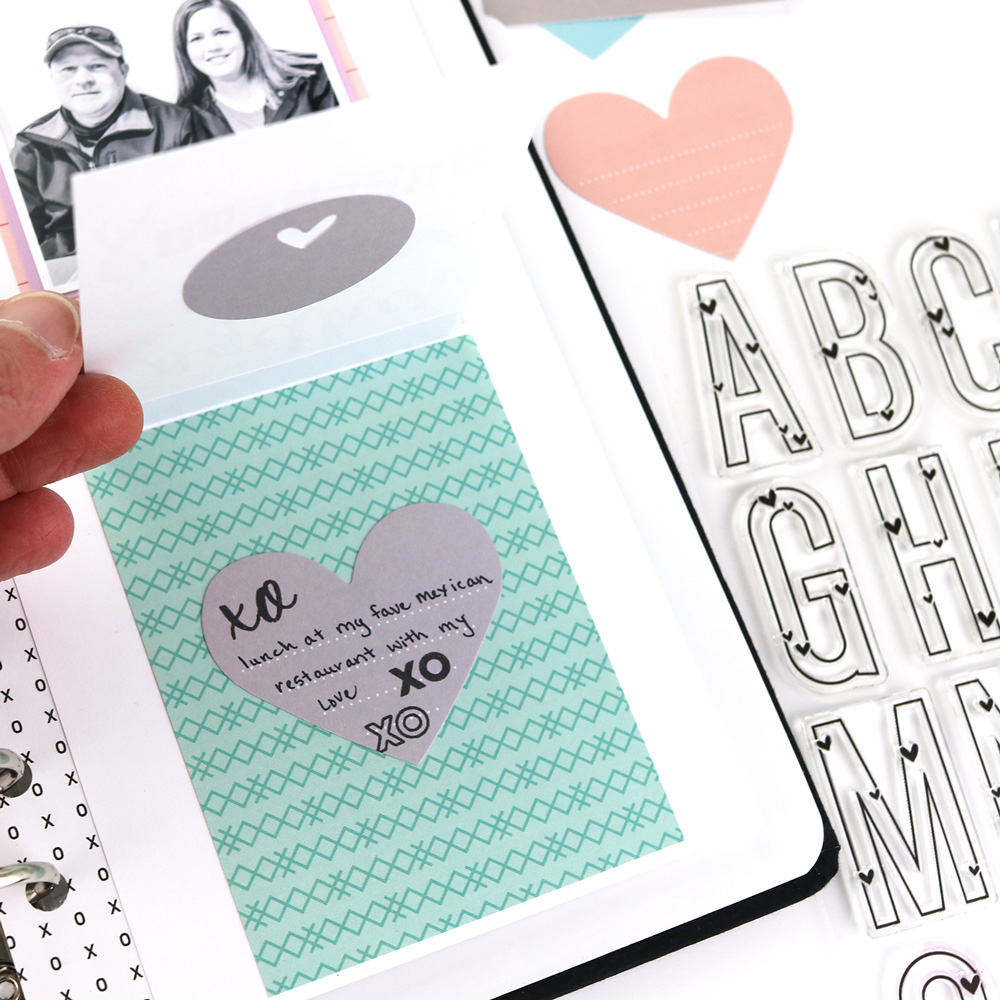
Next, I stamped onto the “we go together like…” tag from the January 2022 Kit with the Small Tile Alphabet Stamp and black ink. I saw this quote on Pinterest and thought it was perfect for my layout documenting a photo of my husband and I enjoying lunch at our favorite Mexican restaurant.
The tag flips up to reveal the journaling on another heart die cut from the Love Notes Die Cuts. This layout includes so many hearts, and I just love how it turned out!