Celebrating Love Week: A Layout with Heather Leopard


We’re still in love over here with our January Kit and extras, and today, to continue our Celebrating Love Week, we have the fabulous Heather Leopard to share a beautiful new layout that she created with these fun supplies. You’re sure to fall in love with her page design, and it may just inspire you to pull out your circle punch! Let’s take a look.
 
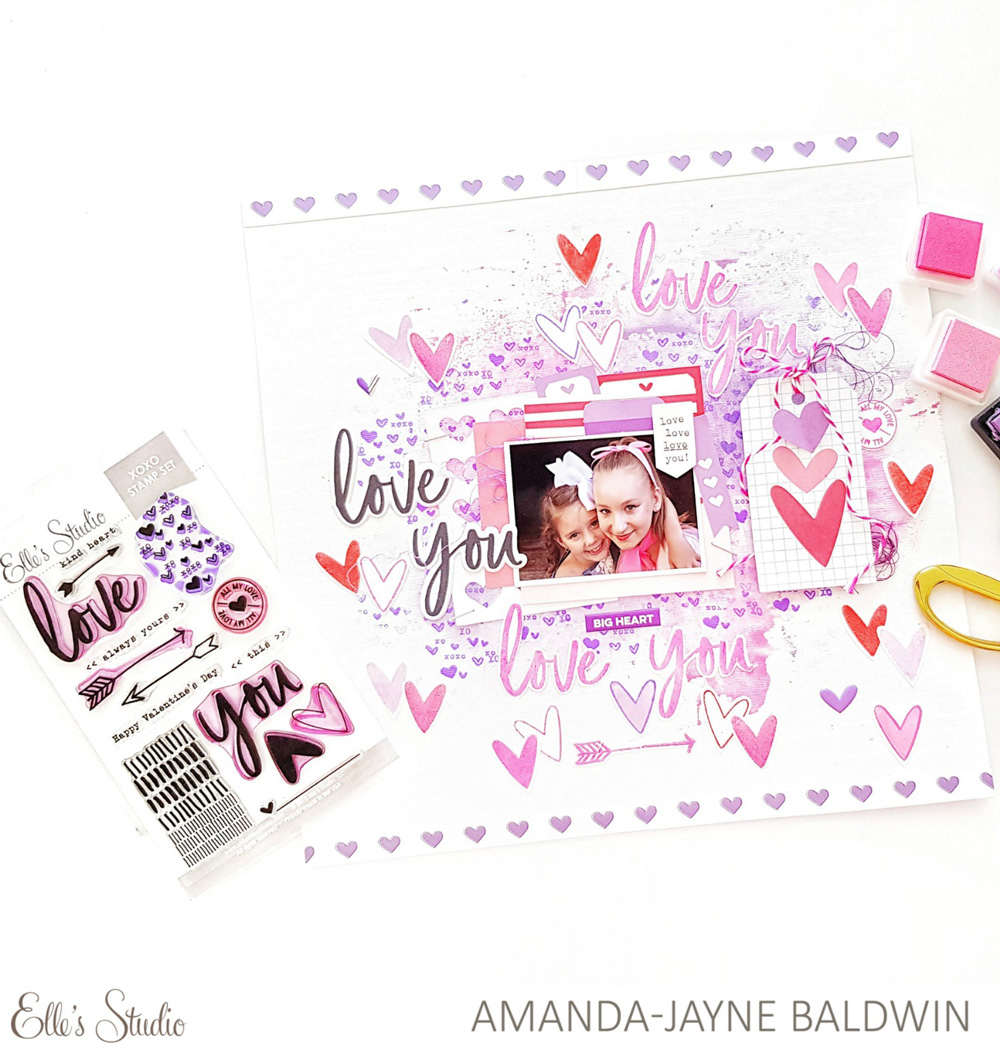
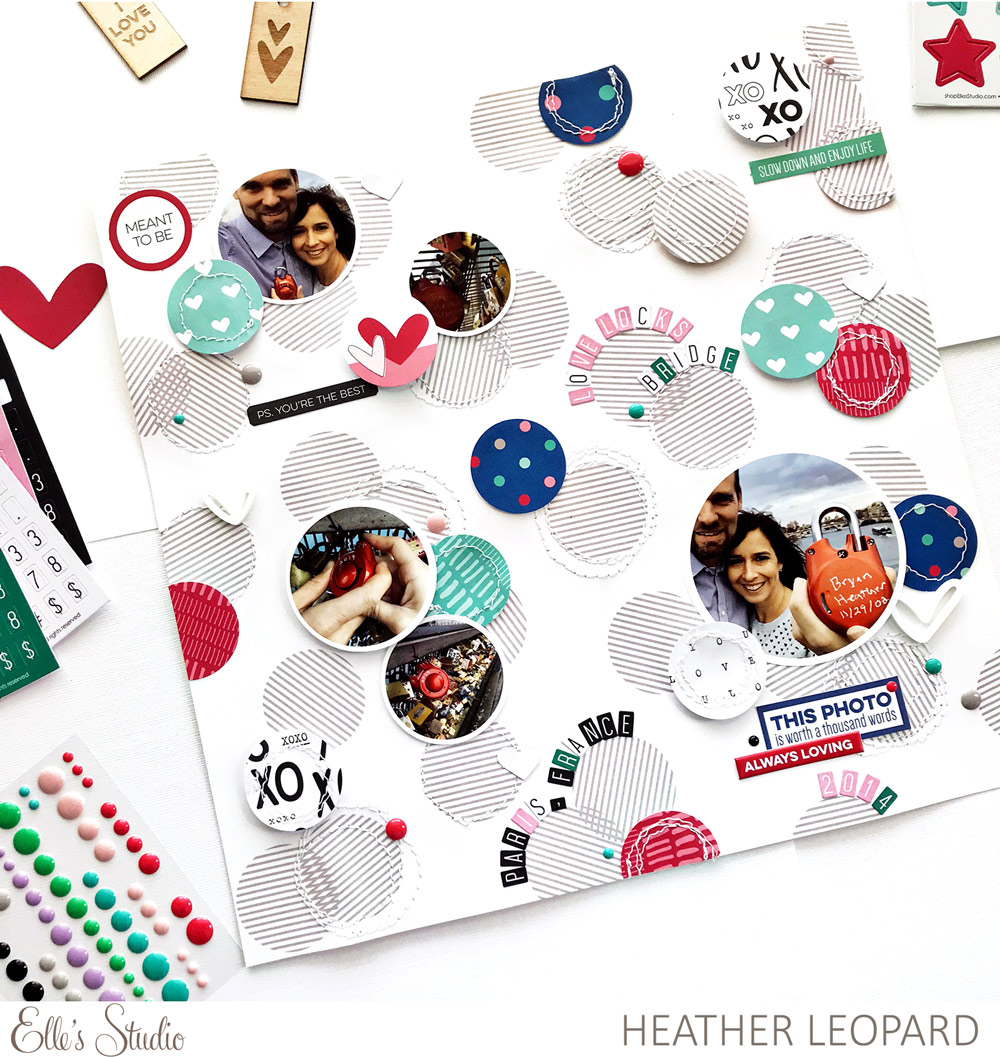
Hi everyone. It’s Heather Leopard with you today, reminiscing about a trip my love and I took a few years ago. We were lucky enough to visit Paris for our anniversary and had a chance to leave our mark—an inscribed lock on the Pont des Arts bridge. Since we’re celebrating love week on the blog this week, I only thought it fitting to create a layout about that day!


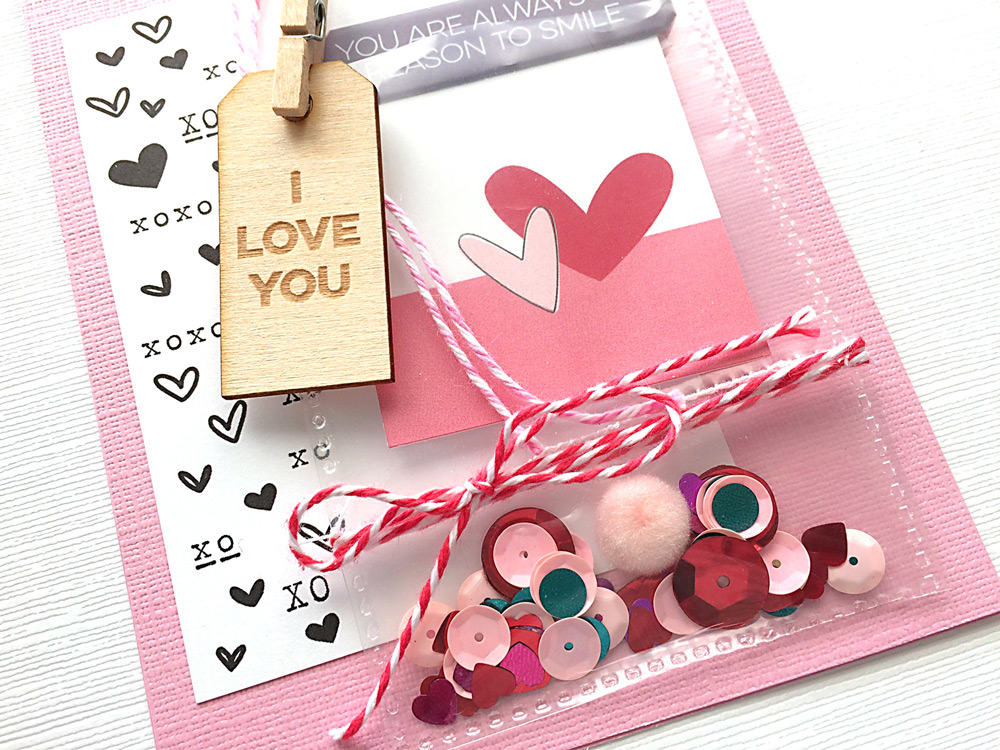
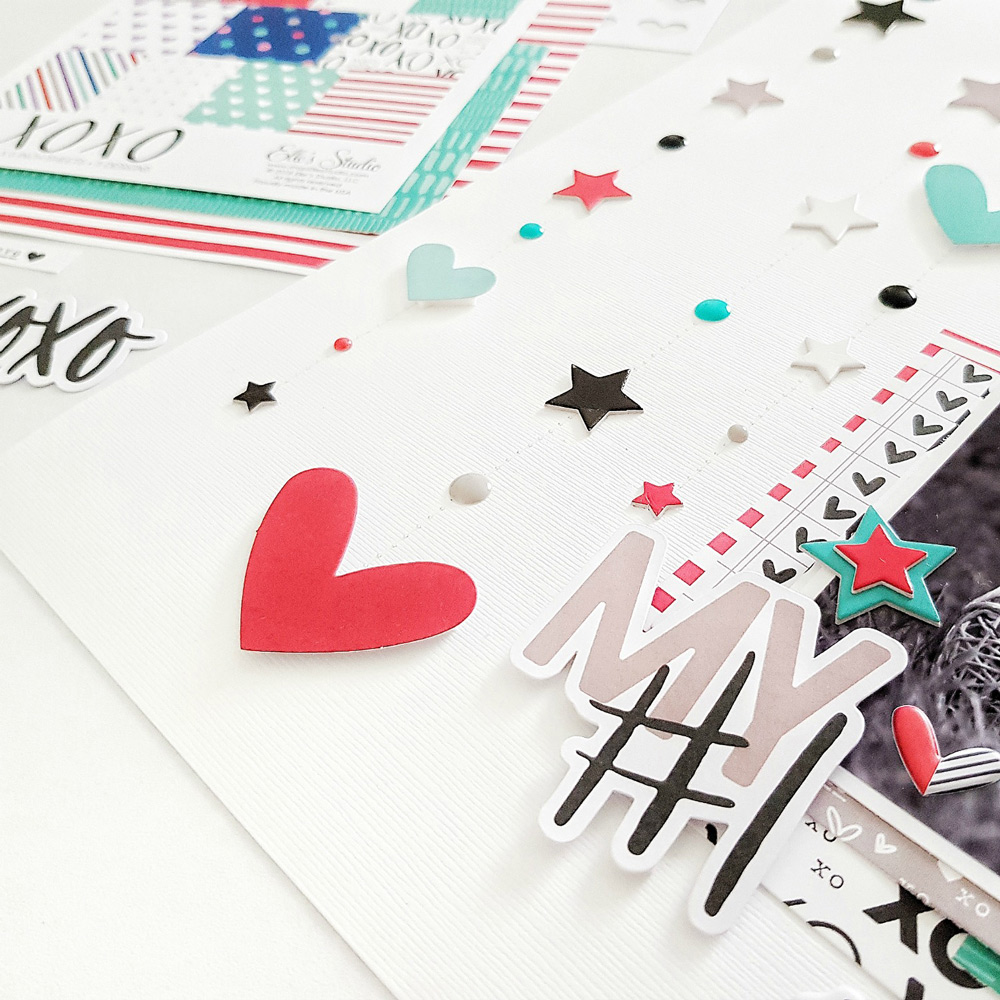
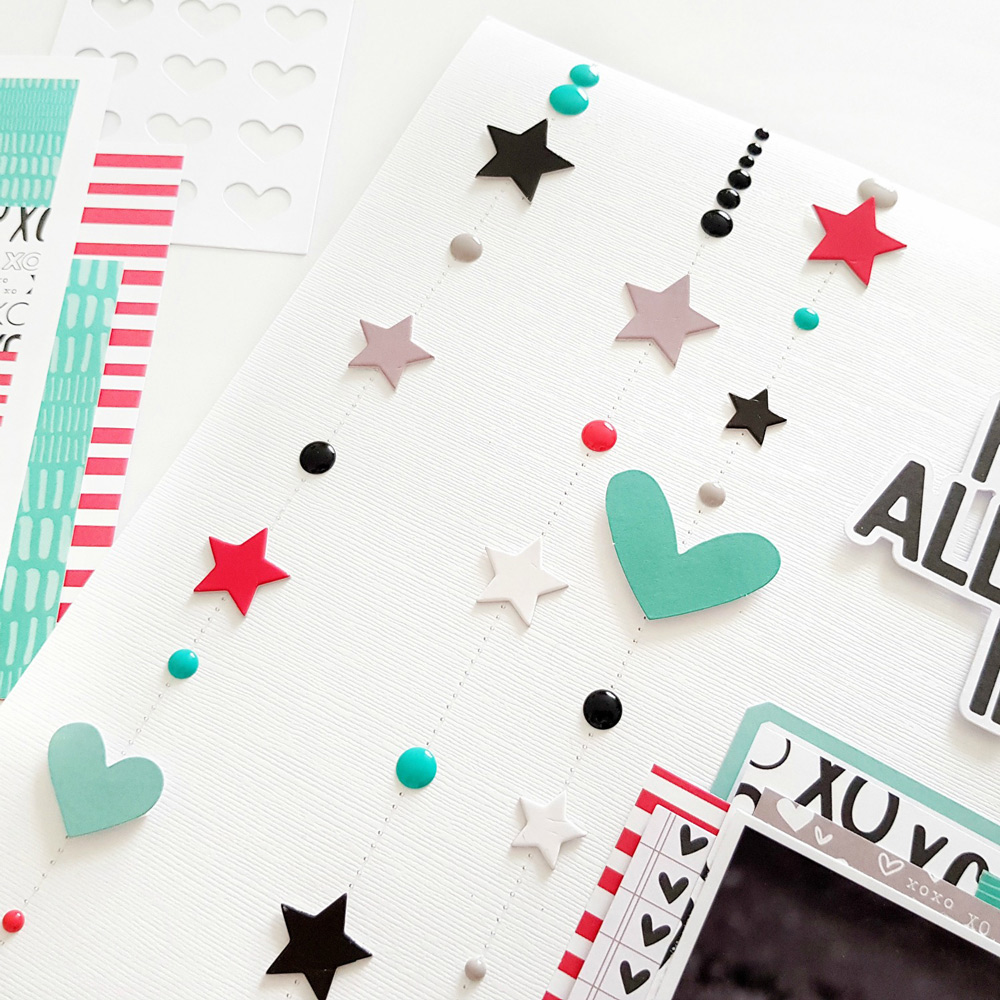
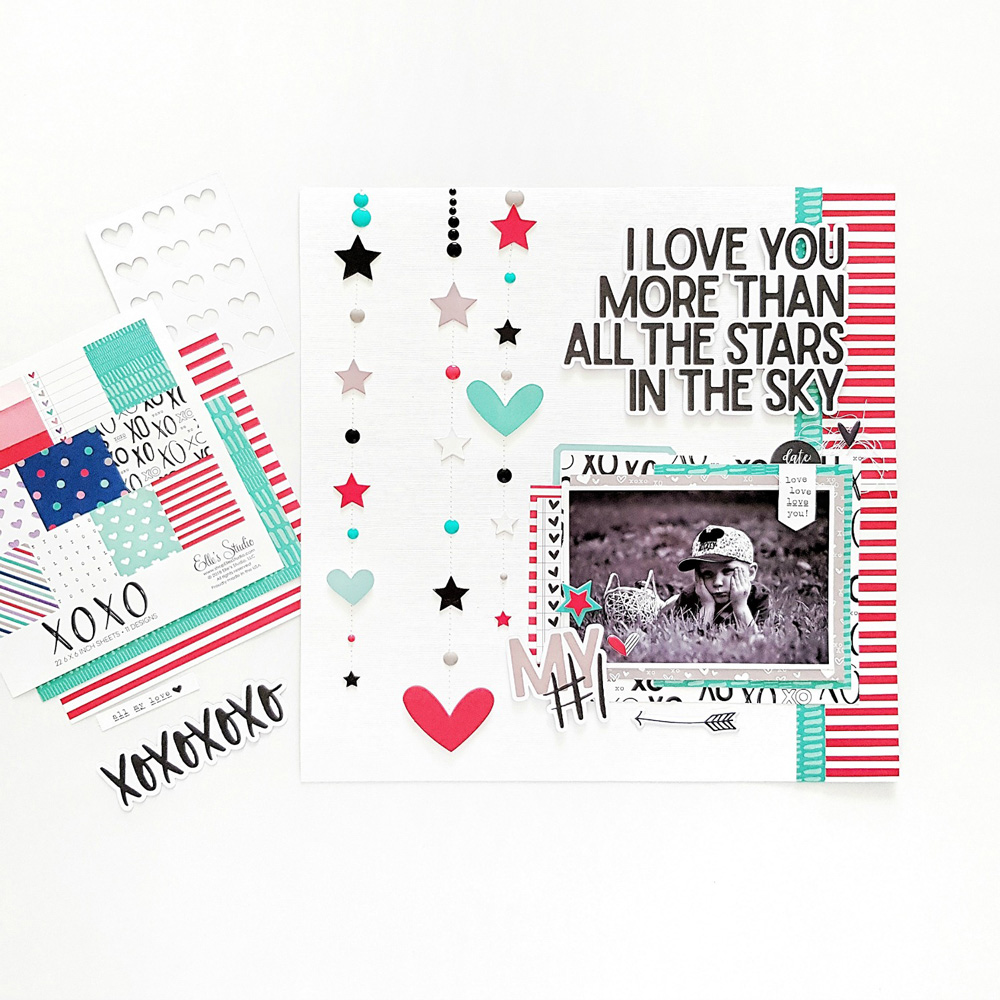
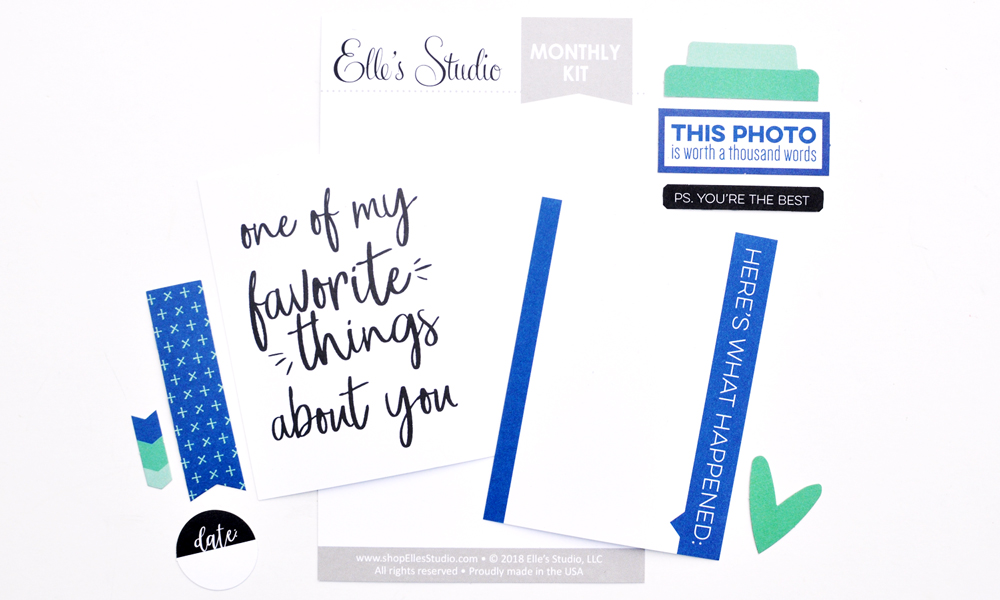
Supplies | January 2018 Kit, XOXO 6″ x 6″ Paper Stack, Love You Die Cuts, Hugs and Kisses Puffy Stickers, Hand Drawn Acrylic HeartsPink Cardstock Alphabet StickersBlack Cardstock Alphabet StickersWhite Cardstock Alphabet Stickers, Dark Teal Cardstock Alphabet StickersEnamel Dots, Family Fun 12″ x 12″ Paper Collection
 
This layout was inspired by the background patterned paper from the Family Fun 12″ x 12″ Paper Collection. Those striped circles called out to me, so I went all in with the circular design. I even printed my photos as circles!


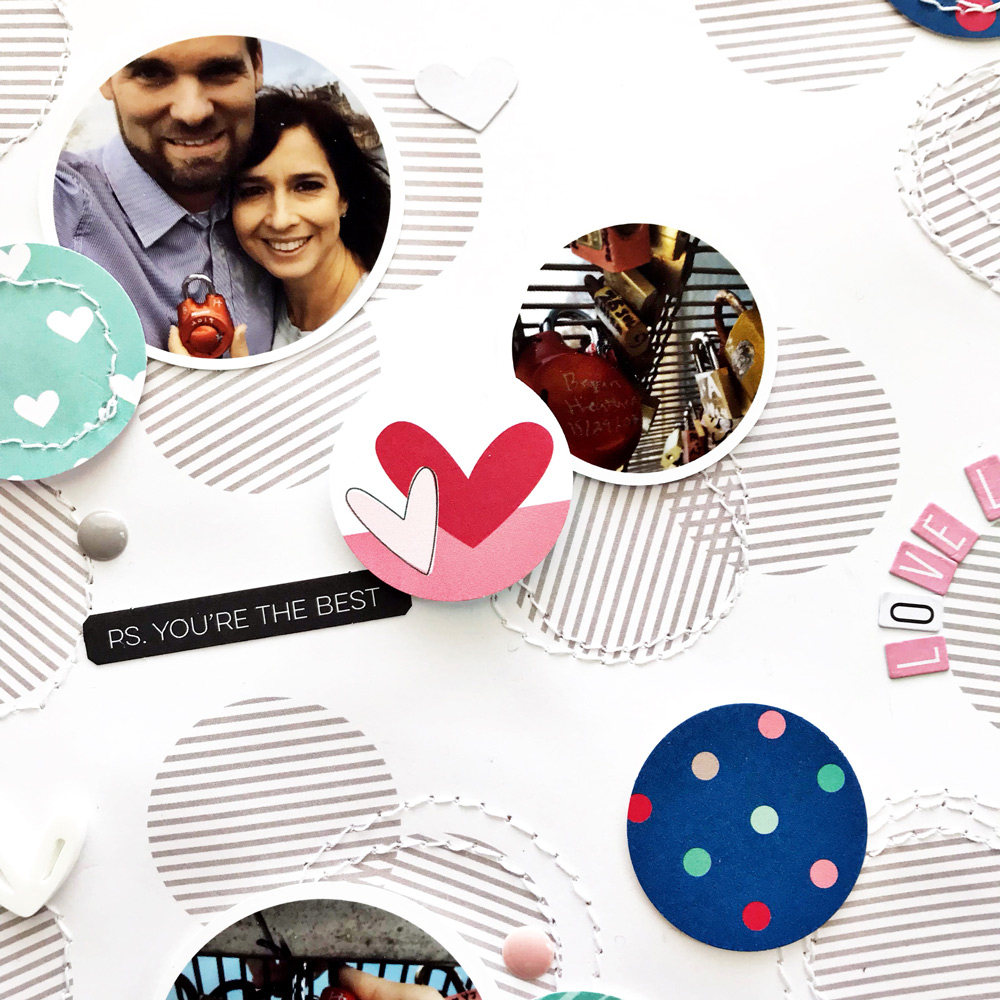
I knew I would cover up a lot of the background, but I still wanted to highlight the pattern that gave me the inspiration so I stitched circles around a little less than half of the circles on the background, not worrying if they were perfect and actually intentionally stitching them a bit wonky.


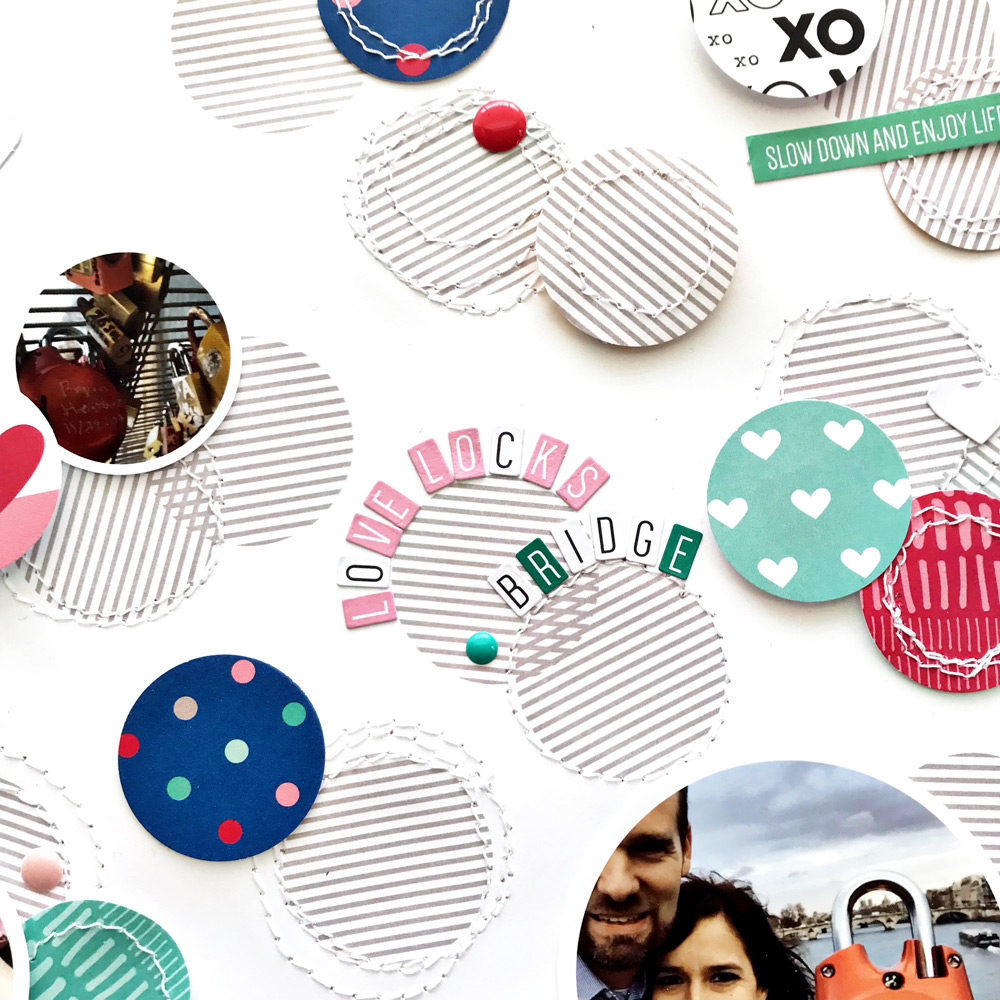
Next, I punched additional circles out of a second sheet of the same pattern as well as colorful patterns from the XOXO 6″ x 6″ Paper Stack. I stitched around half of those as well and scattered them around the page along with my photos.


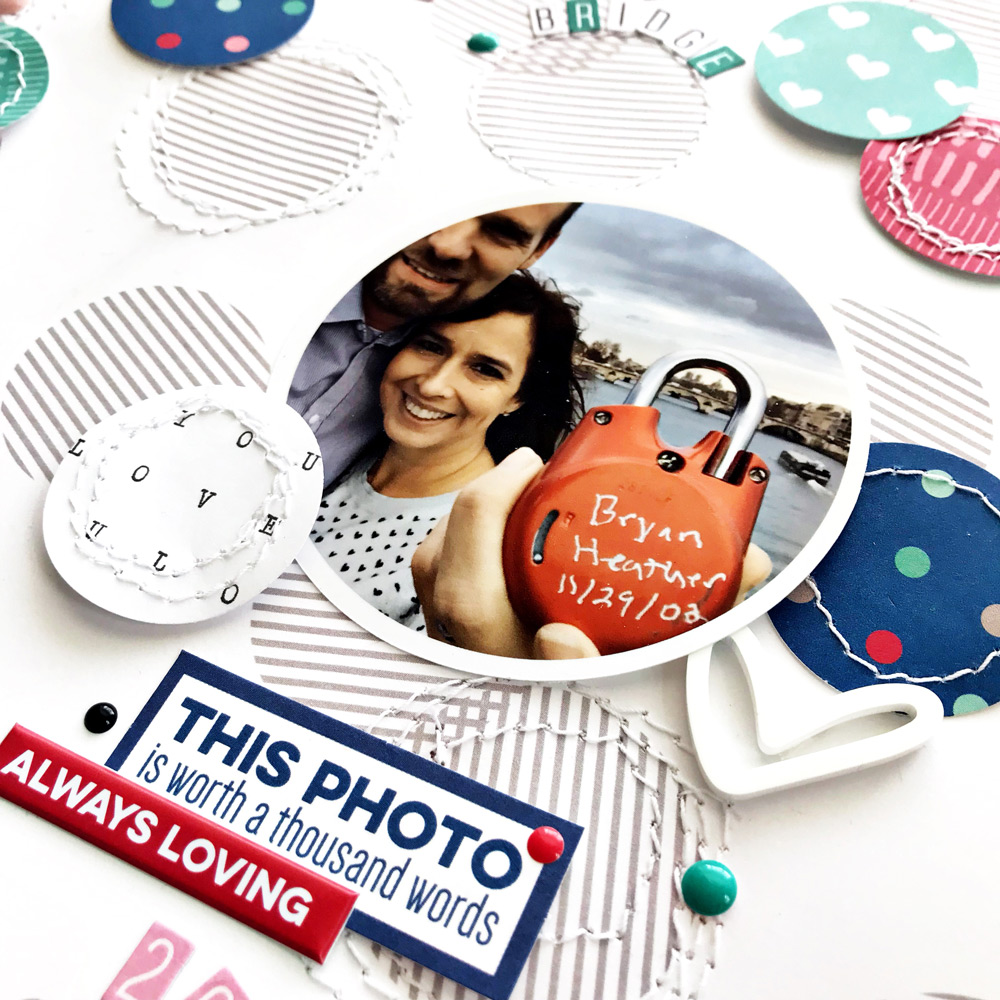
Some circles were adhered straight to the background paper, while others were popped up using foam dots, layering over others where it made sense.


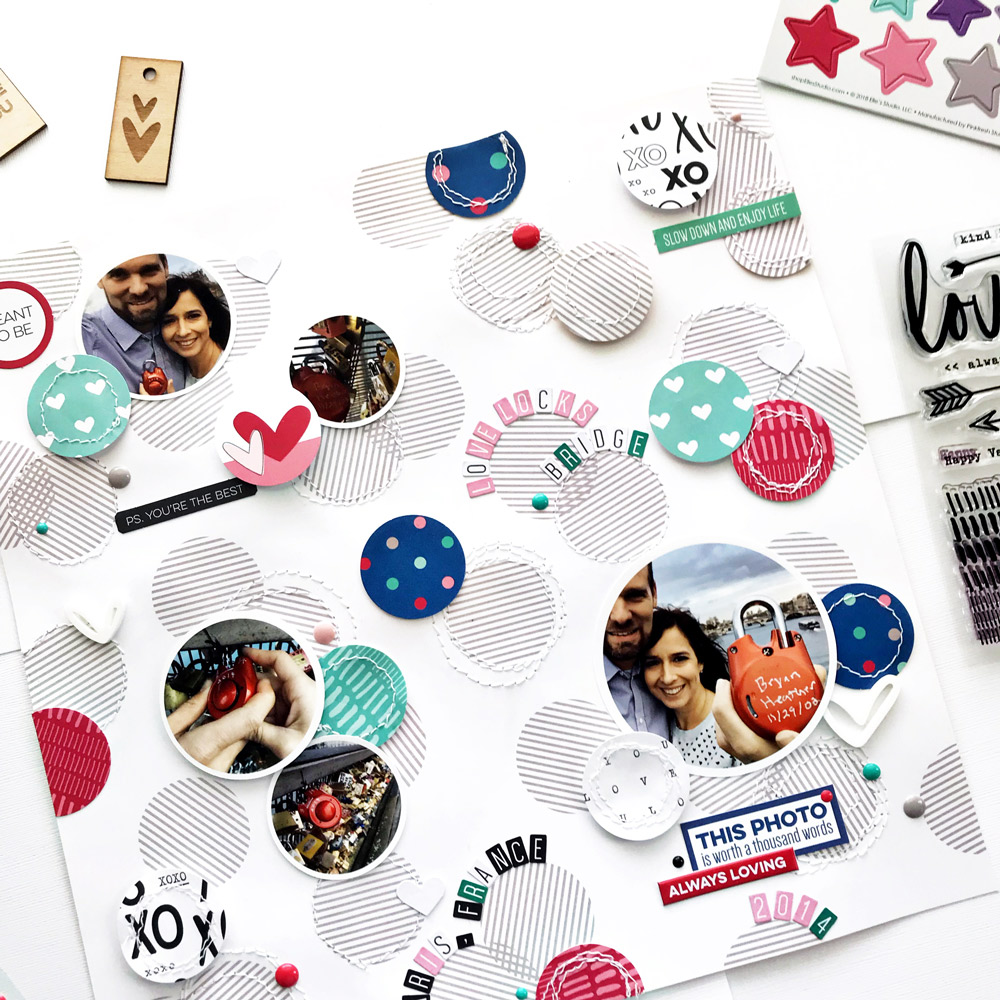
I added circle Enamel Dots because there just weren’t enough circles on my layout already! I also added a few die cut sentiments from the Love You Die Cuts and puffy stickers from the Hugs and Kisses Puffy Stickers to finish off the embellishing. The only things left were to add a title, location, date and journaling. I used the cardstock alphabet stickers to add everything but the journaling. The journaling will go in the circle right in the middle but I’ll add that once I have the perfect words.
 
I think the circular photos in this instance really keep the design looking cohesive. I hope I’ve inspired you to try working with shaped photos; they’re a ton of fun!
 

January #EllesStudio Spottings on Instagram

We are so excited to share six inspiring projects with you, created by Elle’s Studio customers! All of these ladies posted their creations on Instagram, used the hashtag #EllesStudio to catch our eye, and won a $10 gift certificate to the shop! We even have a winner from our first sketch day edition of the year! Let’s take a look!


Do you have a favorite television show? @whatjenren does, and on the left, she’s sharing an awesome tag that she created using the TV Stamp and Heart of Gold Chipboard Stickers to document it! On the right @jayandxansmom created a beautiful, layered, cool-toned page using our Family Fun collection. How beautiful is that?


On the left, @oliquigscraps documented a happy moment with our Family Fun collection, Title Builder Stamp and Title Builder Alphabet Stamp, and we think her design is just perfect! On the left, @sandipressley used our January sketch to inspire her grid-designed layout, using the January Kit, Live Laugh Love collection, along with other past products. Great layout Sandi!


@prettypapers22 rocked this star-designed back-to-school page using our Family Fun collection on the left. We love how it frames her photo perfectly, and how she incorporated our Autumn Wood Veneer Words. On the right, @pameinke created three beautiful Valentine’s Day cards using our January 2018 Kit and add-ons. We love her cards, and we know the recipients will as well!
 
Thank you so much to all of you ladies for sharing your projects with us this month! Please email us at info@shopellesstudio.com to claim your prize!
 
Have you created something with Elle’s Studio products lately? Upload your projects to Instagram using the hashtag #EllesStudio for a chance to be featured here on the ES blog next month!

Celebrating Love Week: Creative Cards with Daniela Dobson


We’re back to share some card inspiration for our Celebrating Love Week! Daniela Dobson always wows us with her card creations, and we know you will love the two she’s sharing with us today! Let’s take a look.
 
Welcome to the Elle’s Studio blog today! It’s Daniela here with two Valentine’s Day cards. We are celebrating love this week and creating projects for people that we love, and these cards are perfect and easy to send to your favorite Valentine!


Supplies | January 2018 Kit, Love You Die Cuts, Hugs and Kisses Puffy Stickers, Wood Veneer Love Tags, Hand Drawn Acrylic Hearts, XOXO Stamp
 
For both cards I thought it would be fun to create a little pocket in the front of the card, filled with little bits and pieces. I cut down a 2” x 3” baseball card clear sheet to hold my confetti and layered the pocket over a journaling tag from the January 2018 Kit.


I added sequins to the bottom and machine stitched it closed, but only about an inch from the bottom, leaving the pocket open at the top to add a tag, cut down from one of the larger journaling tags from the January 2018 Kit. I punched a hole at the top and added a the “you are always my reason to smile,” from the Hugs and Kisses Puffy Stickers to the tag. A little clothespin holds the Wood Veneer Love Tag in place at the top, and I added twine to the tag, and over the stitched portion of the clear pocket.


The second card was created pretty much the same, filled with sequins topped with tags.


On this card, I stamped the “Happy Valentine’s Day” sentiment from the XOXO Stamp on the left side of the arrow journaling tag to make up the first layer of the card.


Think about other possibilities for this little pocket—money, special notes, love letters or candy?
 
Thanks for stopping by today. I hope I have inspired you to create some fun Valentine’s Day cards using Elle’s Studio products!
 

A sneak peek of what is coming on February 10th!


Our February kit + coordinating add-ons reveal is right around the corner and we can’t wait for you to see all the new products we’ll have in the shop – This month our kit + add-ons will have you ready to document all your everyday real life moments, and more! Plus, it will take you right into the month of March! February’s kit includes 3 – 4 x 6 inch tags, 18 – 3 x 4 inch tags, and 26 die cuts!

Get ready to pick up our February kit for our launch day special pricing of only $9.99 on Saturday, February 10th, at 8:00 am PST. After the 10th, our kits go back to their regular price of $11.99. Or, you can lock in the $9.99 price anytime by starting a subscription! And subscribers, don’t forget! You’ll be able to bundle anything from our shop (including the new add-ons) with your monthly kit for FREE (USA subscribers) or reduced (International) shipping!

Not a subscriber? We have just a few spots left were you can start with our January kit now! Or, wait until February 10th to sign up and start with our February kit! With a monthly subscription, you will be guaranteed a kit each month, lock in our launch day special price of $9.99 + shipping, and receive FREE (USA) or reduced (International) shipping on anything added to your box each month during our 24 hour bundling period (starting on the 10th at 8:00 am PST and ending on the 11th at 8:00 am PST). Along with more time to shop, our subscribers will also have access to special discounts on select items during the 24 hour bundling period! These discounted items can be found in our SALE section during bundling, and you must be logged into your kit subscriber account to see them. Quick note: Our kits and add-ons are available without a subscription each month, too.

Make sure you set your alarm and mark your calendar for Saturday, February 10th at 8:00 am PST! If you haven’t signed up for our newsletter, make sure you do to receive a reminder of when everything is available for sale!  We hope to see you there!

Celebrating Love Week: Pocket Pages with Jess Forster


We are so excited that today kicks off “Celebrating Love Week” here on the Elle’s Studio blog! This week, our talented design team will bring you pocket page, card, layout and mini album inspiration, all about love! Let’s get started with filling up some pockets, shall we?
 
What’s black and white, pink and red all over? An amazing pocket page spread by Jess Forster, of course! We LOVE how she pairs saturated color with high contrasting tones in her pockets, and this one, which is all about love, is no exception! Let’s take a look at her pages which kick off our week of love here on the blog!
 
Happy February Folks! I don’t know about you, but when the calendar switches to the shortest month of the year, I love scrapbooking about love. Here is a pocket page layout about my favourite little people in my life, my kiddos, Rowan and Sam.


Supplies | January Kit, Love You Die Cuts, Hugs and Kisses Puffy Stickers, Enamel Dots
 
One of the greatest joys that I have experienced as a parent is watching my kids interact with each other. With that in mind, I decided to pair pictures of my kids from Valentine’s Day last year with those amazing red & pink tags from Elle’s January 2018 Kit.


Using the colorful tags, I embellished with arrows from the Hugs and Kisses Puffy Stickers, along with some current observations about the games my kids play together right now.


Not only did I include my own thoughts, I also asked my husband’s perspective on what he loves most about Rowan and Sam’s interactions. It’s so awesome to have another person’s perspective in my layout… and it was less pressure to write / come up with all the words / ideas! Win-win!


Did I mention that I am a fan of Elle’s Enamel Dots? I so enjoyed pairing them with the “love you” puffy sticker. I wanted to add some visual interest and mimic the look and feel of the xo black and white journaling tag from the January Kit. I really love that whimsical look.


Overall, this layout just makes my heart happy. Although the photos of my kids are a year old, I have incorporated thoughts on what I love about my kids playing with each other right now. Happy Love Day and I hope this layout inspires you to document the people you love in your life.


Thanks for looking!
 

Keeping it Simple with Wendy Antenucci

Wendy Antenucci is sharing her secret to keeping up with three year’s worth of weekly pocket page layouts—use a kit and keep it simple! We love this advice! Our monthly kits, embellishments and stamps are designed to work together each month to take the guesswork out of your creative time, and Wendy created two beautiful pages with the January kit and add-ons! Let’s take a look.
 
I love that the monthly kits make catching up on your pocket pages so convenient as everything comes included. It’s Wendy here today to share a double page spread from my pocket page album which I created mainly with the January Kit. I have completed 3 years worth of pocket pages so far and this will be my fourth; the reason I am still going (although I am a little behind) is that I have made my pages as simple as I can. Each week is only one page in my book and sometimes I even trim my 12″ x 12″ pages down to make them fit the stories I have to tell.


Supplies | January Kit, All My Love Printables, Love You Die Cuts, Hugs and Kisses Puffy Stickers, Pink Cardstock Alphabet Stickers, Black Puffy Alphabet Stickers
 
Even though many stories happened over this time frame I was able to unite my spreads through my use of color; mainly blue and red, with small splashes of other colors.


I chose to use hearts throughout the pages with die cuts from the kit, the fun die-cut 3″ x 4″ tag from the Love You Die Cuts, and even hearts from the Hugs and Kisses Puffy Stickers.


I always save one spot (or tag) to make note of the date and the week that I am documenting. In these pages I used black on each to highlight the time period and also a few hearts so that even my time tags were united, furthering the flow of the spread.


I was so pleased to find out that the tags easily went into my We R Memory Keepers typewriter and didn’t move around so that I was able to type some further journaling to the stories that needed more information. I use the Collect App on my phone as it allows me to capture a picture for the day and journal directly on the card at that moment; even though I am behind in my PL album, the thoughts/details are already recorded which is so helpful!


I’d love to hear some of your time saving or catching-up tips that you’ve found in your journey to document your everyday moments in pockets! Thanks for stopping by!
 

Stamping X’s and O’s with Amanda Baldwin

Our latest stamp release, the XOXO Stamp, has our hearts all a flutter over here! Whether you’re documenting the one you love on a layout, or sending a sweet Valentine, you will want this stamp for your stash! Today we have Amanda-jayne Baldwin with us to share a new mixed-media layout she created using this lovely stamp! Let’s see what she made!
 
Hi Elle’s Studio friends & fans! It’s Amanda here, and I’m getting inky! Well, at least my fingers are! Have you checked out the fabulous XOXO Stamp yet?! It’s all kinds of awesome and would suit a variety of projects and creations!
 
I’ve created a traditional 12″ x 12″ layout with it today, and oh me oh my, this was SO much fun!


Supplies | January Kit, Love You Die Cuts, Hugs and Kisses Puffy Stickers, XOXO Stamp, XOXO 6″ x 6″ Paper Stack
 
I told you that stamp was all kinds of awesome!
 
For my layout background, I start with a quick mist of shimmering pink and purple ink. As soon as it dries, I repeat the tiny hearts & “xo” cluster stamps in a coordinating purple ink pad color. I do this throughout the inky base area, trying to keep it uneven and less structured. This builds interest and color to the base, and draws your eye into my super-sweet photograph.


For my larger, hand drawn heart stamps & “love you” title, I stamp onto a scrap piece of white cardstock using a variety of pinks, reds, and purple ink cubes. I love stamping this way as I can fussy cut the stamped images that I am happy with, and arrange on my layout without any mess, or stress!
 
That title is really stunning.


By keeping the white cardstock edge, it still stands out despite the similarly colored background. This is such a simple but effective technique to try with clear stamps. Here’s another view for you—I just adore that sweet arrow!


I think you’ll agree with me that the XOXO Stamp is just divine! I complete my layout with the gorgeous January Kit die cuts, XOXO 6″ x 6″ Paper Stack, Love You Die Cuts and Hugs and Kisses Puffy Stickers. Perfection!


I hope I have inspired you to give the fabulous XOXO Stamp a try! You wont regret it!
 
Thanks so much for visiting!
 

Going Modern and Bold with Amanda JAN 30th

The January kit and add-ons are so versatile—perfect for your winter layouts, Valentine’s Day greetings, and everyday pockets. Our design team has been sharing so many inspiring projects using these products here on the blog, and today Amanda-jayne Baldwin is with us to share another gorgeous page. You’re sure to be inspired to use your kit once you see it! 
 
Hi Elle’s Studio friends & fans! It’s Amanda here for my first official post as part of the new 2018 Elle’s Studio design team, and boy-oh-boy, am I excited! The January Kit and extras have been nothing short of exceptional, and I just couldn’t wait to create with them! I hope you will feel inspired by the 12″ x 12″ layout I’m sharing with you today.


Supplies | January Kit, Love You Die Cuts, Hugs and Kisses Puffy Stickers, Star Chipboard Stickers, Enamel Dots, XOXO 6″ x 6″ Paper Stack
 
Oh isn’t this something?! There is nothing like a large, bold title to make your pages ‘pop’! That incredible die cut title, “I Love You More Than All The Stars In The Sky,” is from the Love You Die Cuts, and is a perfect sentiment for my sweet boy!
As my handsome subject is looking to the right, I have used a right alignment on my layout to ensure visual flow and ‘ease on the eye’ from a design aesthetic.
 
You’ll spy those gorgeous XOXO 6″ x 6″ Paper Stack patterns lining the right side of my layout. To give the appearance of a strip of 12 inch paper, I have used the patterns where you don’t really notice the ‘join’ at the 6 inch mark. Stripes and simple patterns are best for this option. I have also distracted away from the paper join by partially covering it with cotton thread from my stash and paper layers from my photo cluster.
 
And while we’re talking papers, how good is that color combination?!


The mint, red & white background really allows the bold, black title to be a standout feature. To add further emphasis, I applied foam tape to my title, creating dimension & interest.
 
I use more of the XOXO 6″ x 6″ Paper Stack patterns to layer beneath my photo, as well as tags, die cuts and labels from the January Kit.


I embellished my photo cluster with Star Chipboard Stickers, Hugs and Kisses Puffy Stickers and “My #1” from the Love You Die Cuts. So many lovely layers and details here!


As my layout is totally inspired by my darling and that title, it seemed only fitting to feature hearts and stars in my background. I took inspiration from Nursery decor, and created a ‘mobile’ look with sewn lines, Enamel Dots, Star Chipboard Stickers and die cut hearts from the January Kit and Love You Die Cuts.


I just love how this turned out! So simple and yet, oh so striking!


Beautiful photo, beautiful products = layout bliss! There you have it—my inspirational layout you to get creating with our January Kit!
 
Thanks so much for stopping by today!
 

Getting Wordy with Jess Forster

If journaling on your scrapbooking and pocket page projects doesn’t come easy for you, you’re not alone! Today, design team member Jess Forster is with us to give us a few pointers about how we can allow the tags from the January Kit to prompt our documentation, and in turn, our writing. Let’s see what she created! 
 
It’s no secret that I am a fan of journaling! I am super wordy and proud of it. Today, I am going to show you two of Elle’s products that have inspired me to record my thoughts and feelings in this layout about my son Sam in the snow. Check it out!


Supplies | January 2018 Kit, Hugs and Kisses Puffy Stickers, Black Cardstock Alphabet Stickers, Letter and Number Stickers — Black,  Enamel Dots, Family Fun Bits and Pieces, Family Fun Puffy Stickers
 
What is great about Elle’s 3″ x 4″ tags, (besides everything!), is that you can find story prompts within their design. In this layout, I used two cards as jumping off point for this page. I love the script lettering used in the “My Favourite Things About You” filler card as well as the simple invitation to document the details in the “Here’s What Happened” journaling card, both from the January 2018 Kit.


Since I am a true simple scrapbooker at heart, I copied the phrase from Elle’s filler card and incorporated it as part of my opening sentence. Here I wrote a love letter to my son describing what I believe is his best character trait to date. Spoiler alert, I write a lot of love letters like these to my kids and I will never ever be sad that I copied, again and again, this style of writing.


In the journaling tag, I decided to record the little details of the day. Instead of stating the obvious, like the who, what, when, where and why’s that could be located in the photo, I thought about what the picture doesn’t capture. Here I documented part of my son’s reaction to the snow, as well as specific gestures and comments he said during our walk. Knowing that he is a specific age and stage, and most likely won’t be talking in 4 word sentences, I wanted to bring the photos to life. After closing my eyes and reliving the experience I was able to write some ideas down. A simple die cut from the January kit, a puffy heart from the Hugs and Kisses Puffy Stickers and an enamel dot finished off the tag.


Regardless if you like journaling or not, the journaling tags found in the monthly kit can help prompt us to write down our thoughts and feelings.It can be simple or complex – it’s important to just start!


Thanks for looking!
 

Adding Streamers and Celebration to your Pages with Nancy Damiano

We have to document the good and bad from our lives, but let’s be honest—the good times are always more fun to record! Nancy Damiano is here with us today to show how she documented a celebratory moment in a texture-filled, bright and beautiful way, and she’s sharing how you can create it, too! Let’s take a look.
 
Hey there Elle fans. It’s Nancy here today with a bit of a celebration theme and some of my favorite add-ons from the January release. Let’s create a background of streamers embellished with pops of color and an explosion of stars!


Supplies | January 2018 KitStar Chipboard StickersDark Teal Cardstock Alphabet Stickers, Dark Purple Cardstock Alphabet Stickers, Black Cardstock Alphabet Stickers, White Cardstock Alphabet Stickers, Enamel Dots, Favorite AcrylicXOXO 6″ x 6″ Paper Stack, Family Fun Cutouts, Family Fun Bits and Pieces 
 
Begin by creating a background full of texture. This is very easy to create and packs a punch of visual pop. Cut about 20 strips of white cardstock that are ¼” wide. Adhere them at the top of the page overlapping and slightly skewed. Real streamers aren’t straight, so these strips shouldn’t be either! Crinkle up the ends slightly to mimic this look. Use the Star Chipboard Stickers and scatter them throughout the layout.


The photo is surrounded by tags from the January 2018 Kit and Family Fun Cutouts that add a kick of color to the stark background. The circle die cut from the Family Fun Bits and Pieces adds a contrasting shape to the layers. The Favorite Acrylic title frames out the photo and draws attention to the photo with a different texture at the base.


The cardstock alphabet stickers in dark teal, dark purple, black and white, were used to add words to the streamers. “Happy” repeats itself in different colors throughout the background. A few Enamel Dots decorate the words.


Although the design can seem complicated at first glance, it was easy to create. The white-on-white streamer background with it’s pops of text and color are perfect for all of your celebration stories!


Want to give Nancy’s celebration page a try? Post your scrap-lifted creation to Instagram and use the hashtag #EllesStudio so that we can see what you’ve made! Just by posting, you will be entered to be featured here on the blog, and possibly win a $10 gift certificate to the shop!