Coordinating Embellishments with Guest Amy Gretchen

The coordinating labels and embellishments that come along with our kit are so fun to use along with our exclusive kit contents each month, and today, guest designer Amy Gretchen is sharing her final project with us that was inspired by combining two of these matching elements together! Let’s see what she created:
 
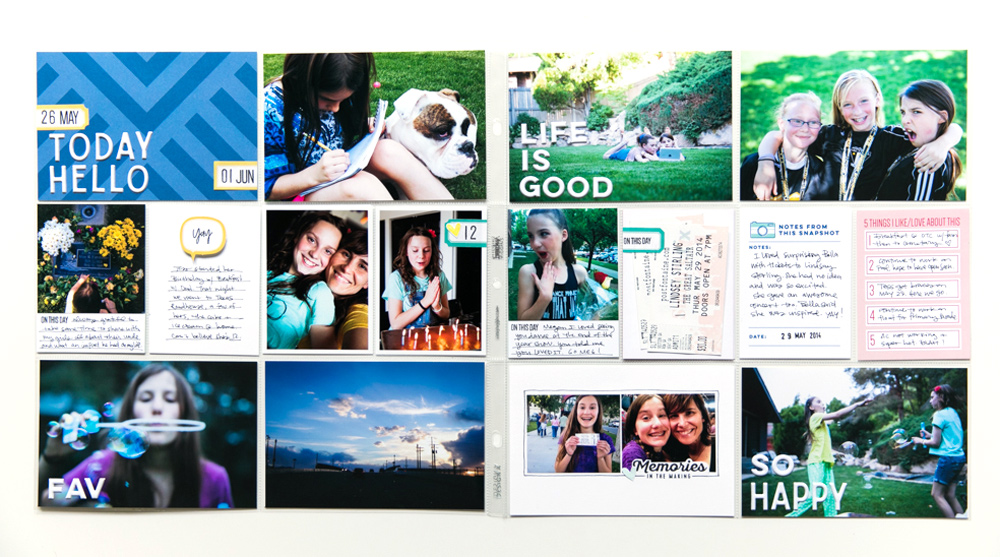
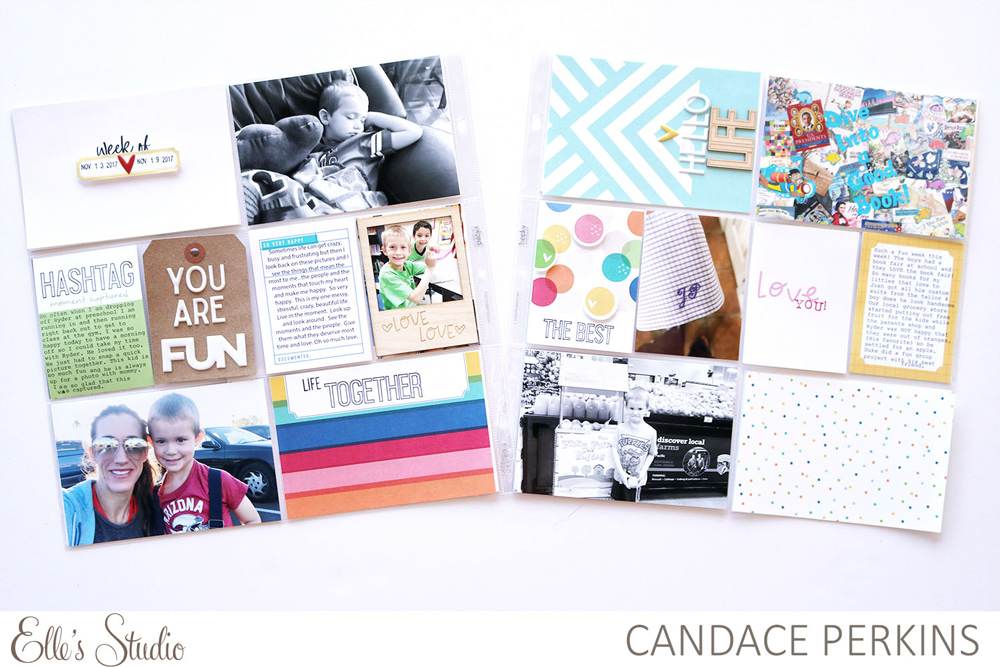
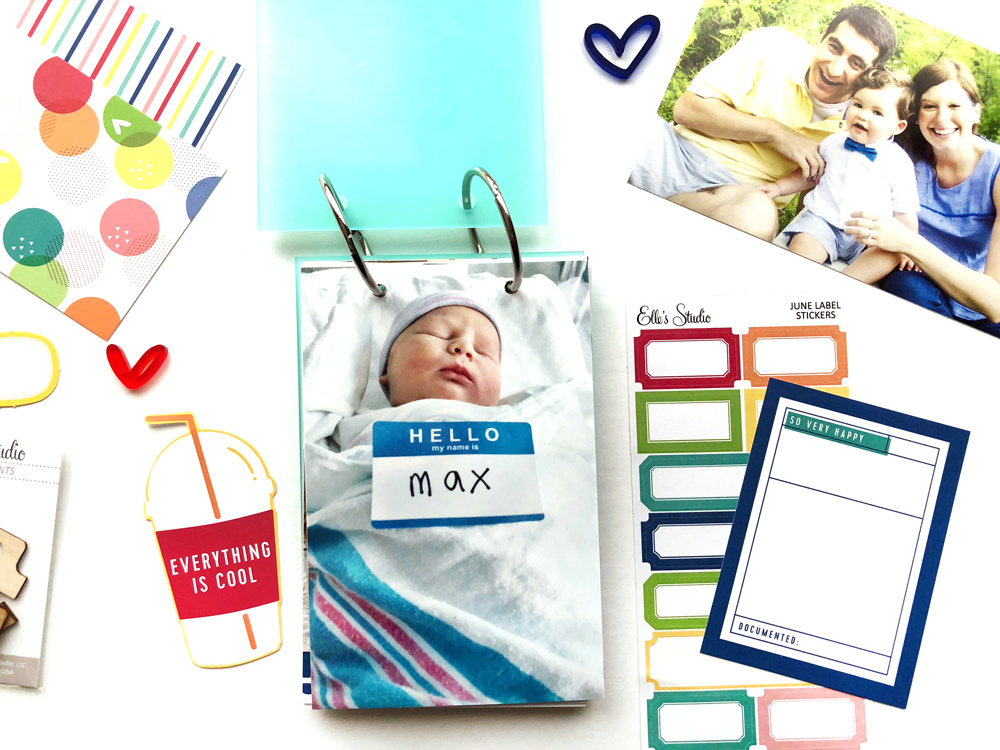
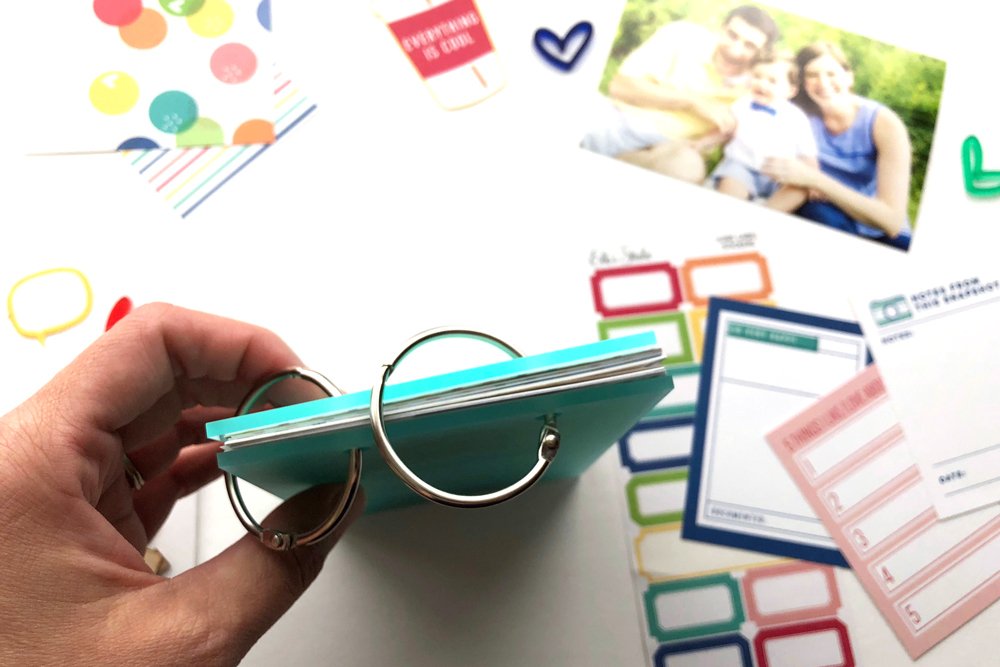
It’s Amy Gretchen here again with one last pocket page spread. I am quite behind on my 2014 album and wanted to work on another spread from that year.


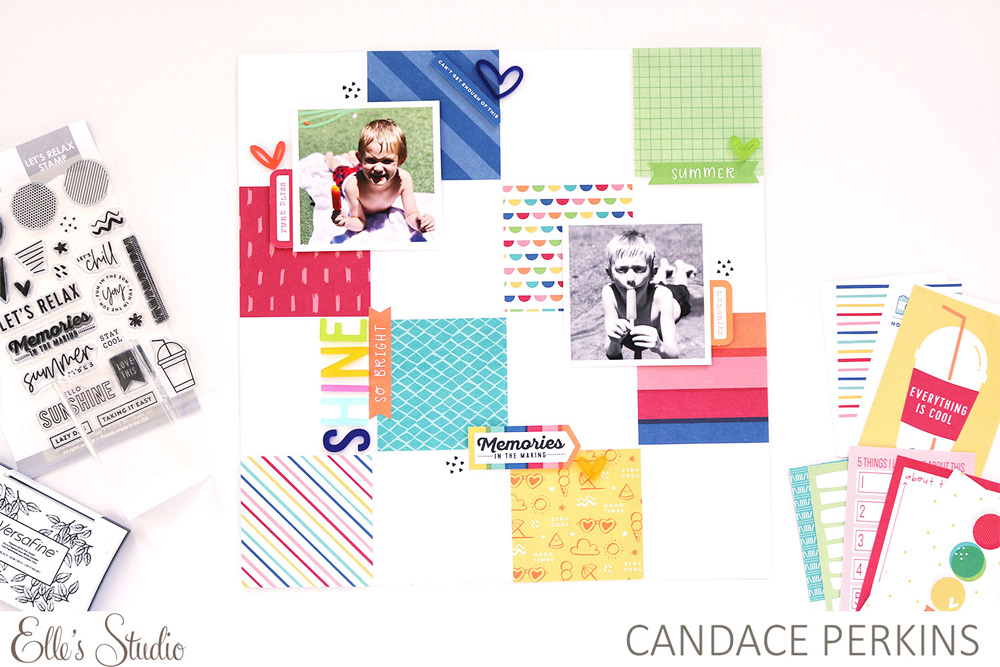
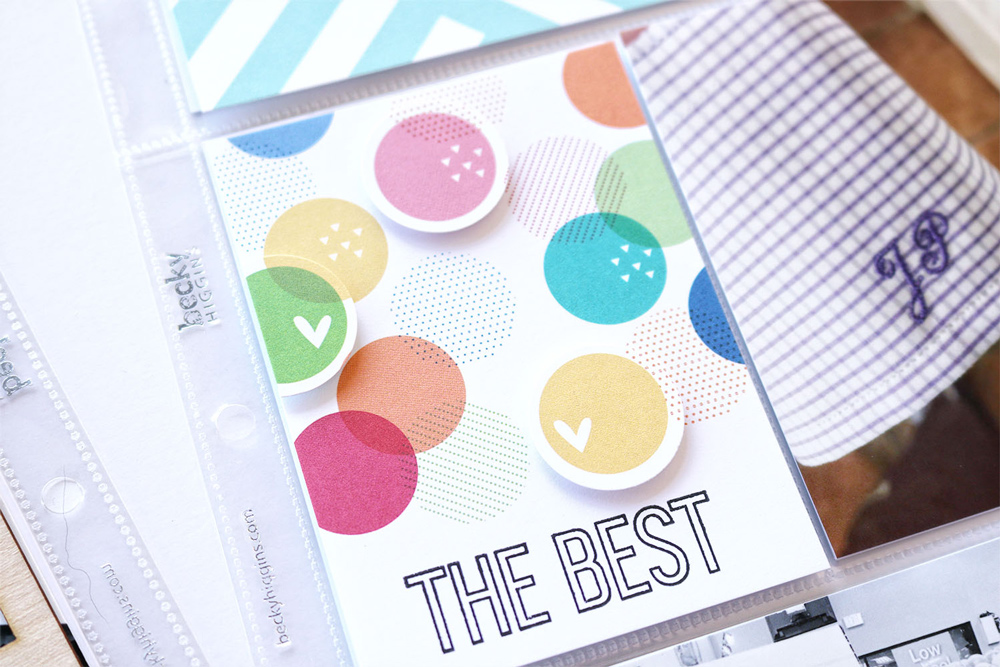
Supplies | June 2018 Kit, June Labels, Bright Hand Drawn Acrylic Hearts, Shine 6″ x 6″ Paper StackChloe Alphabet Stamp, Mini Dated Stamp
 
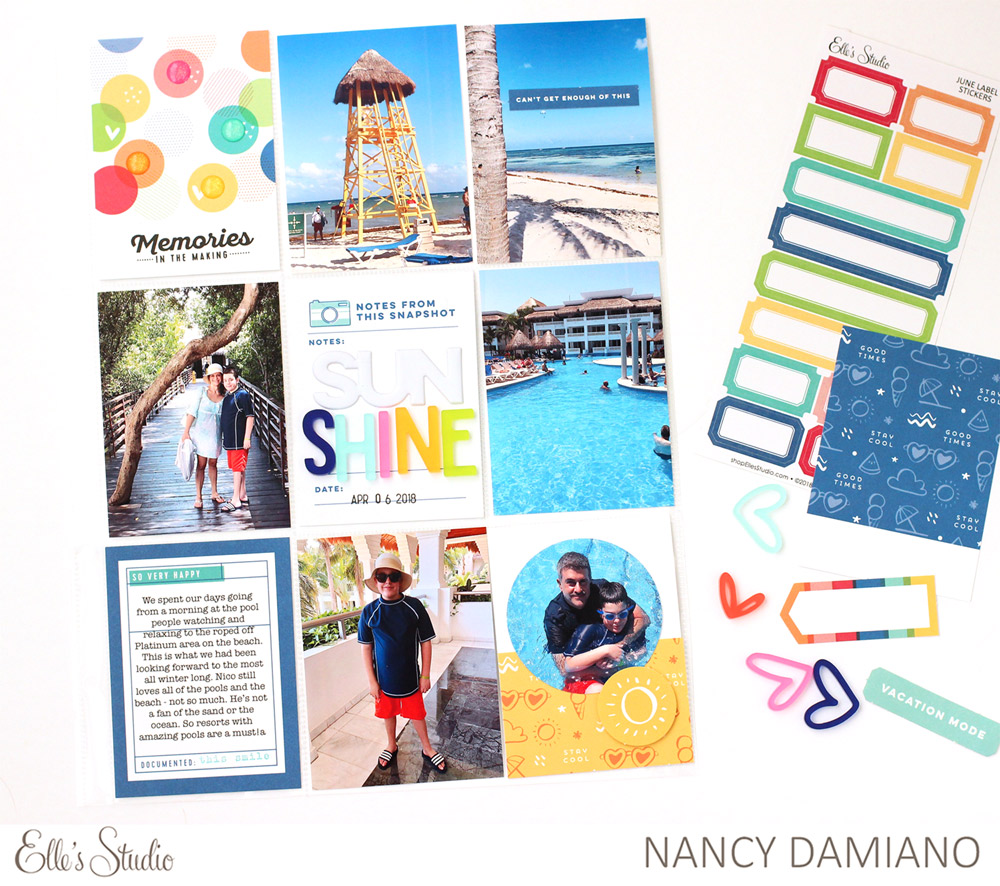
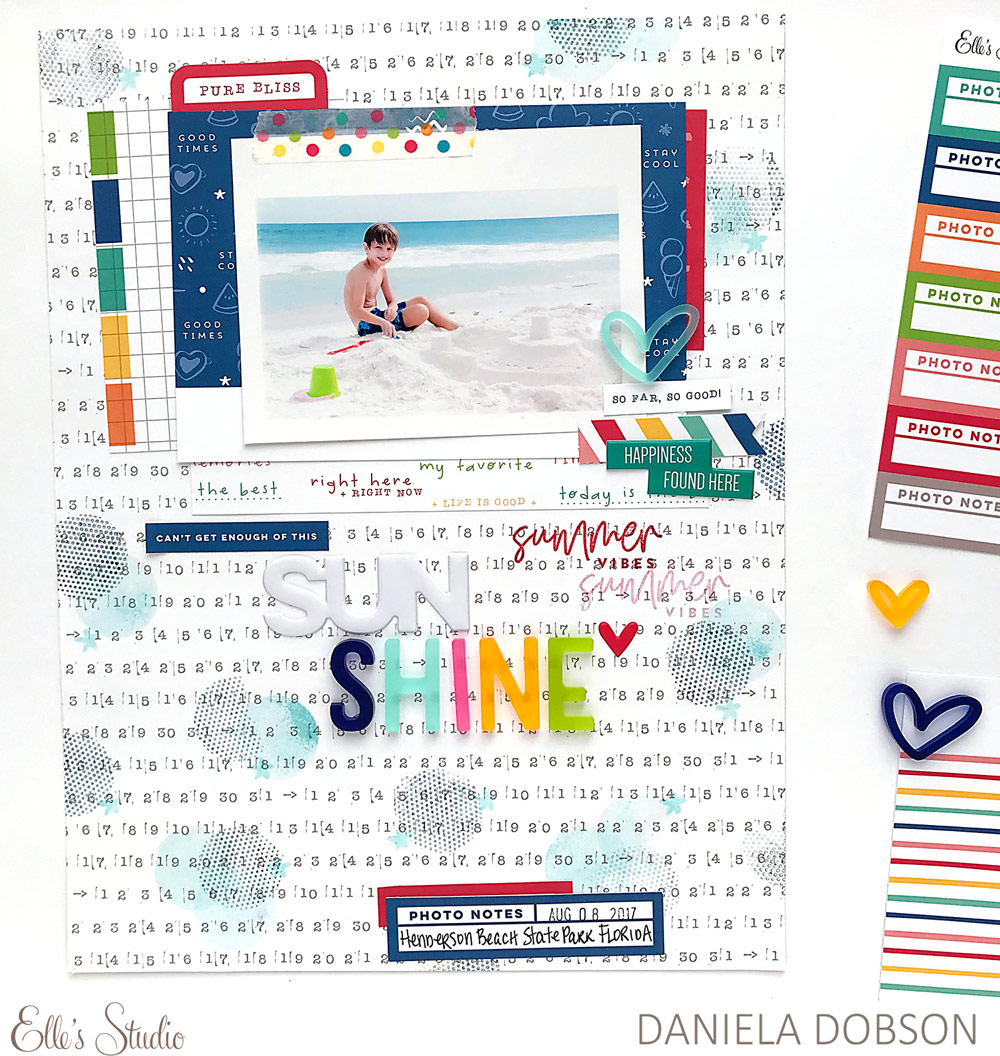
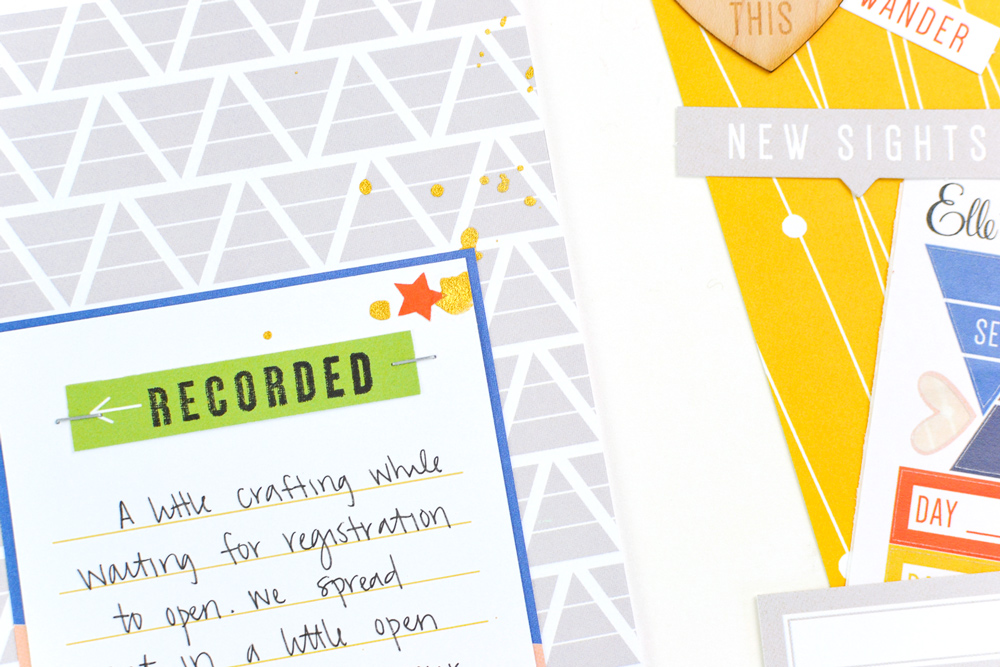
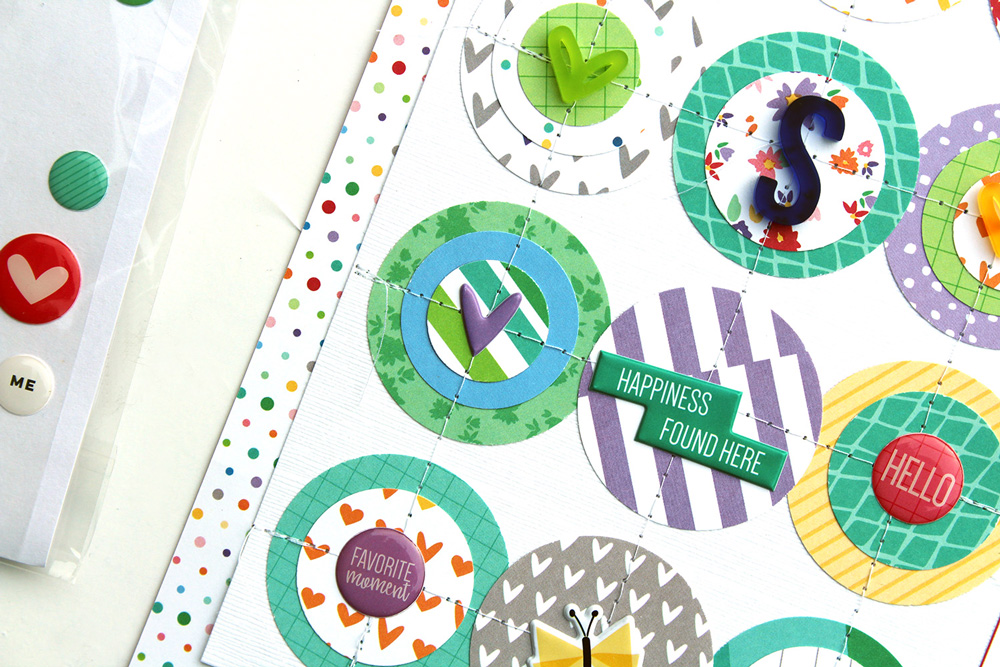
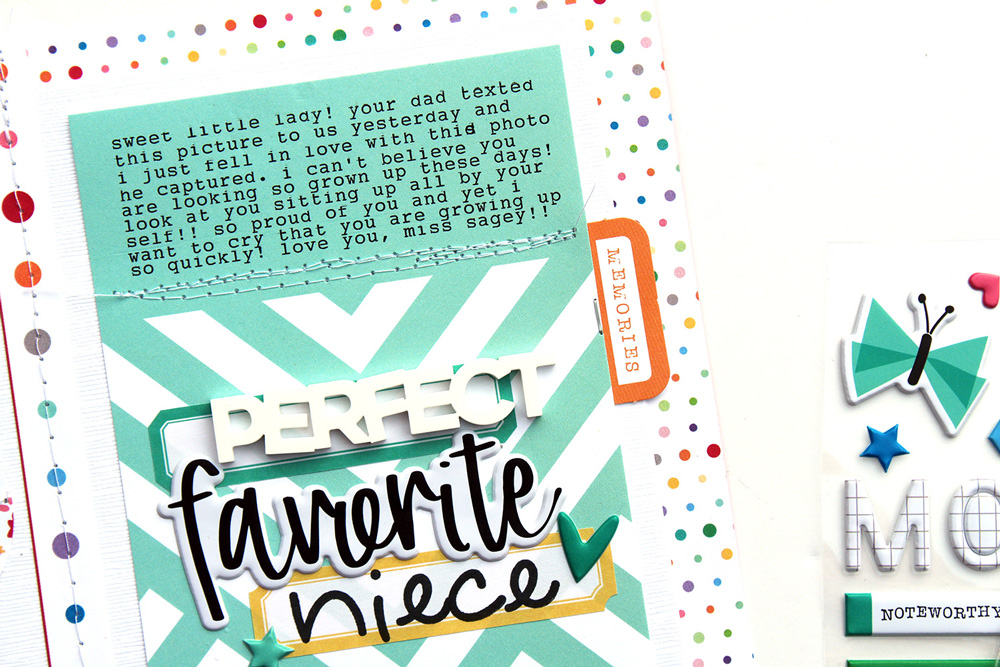
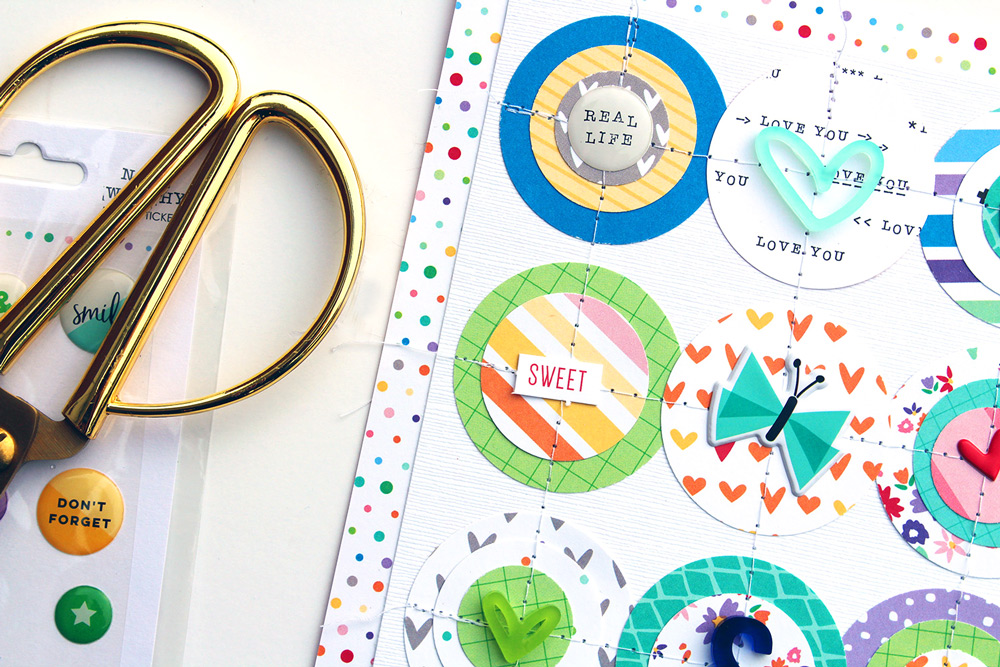
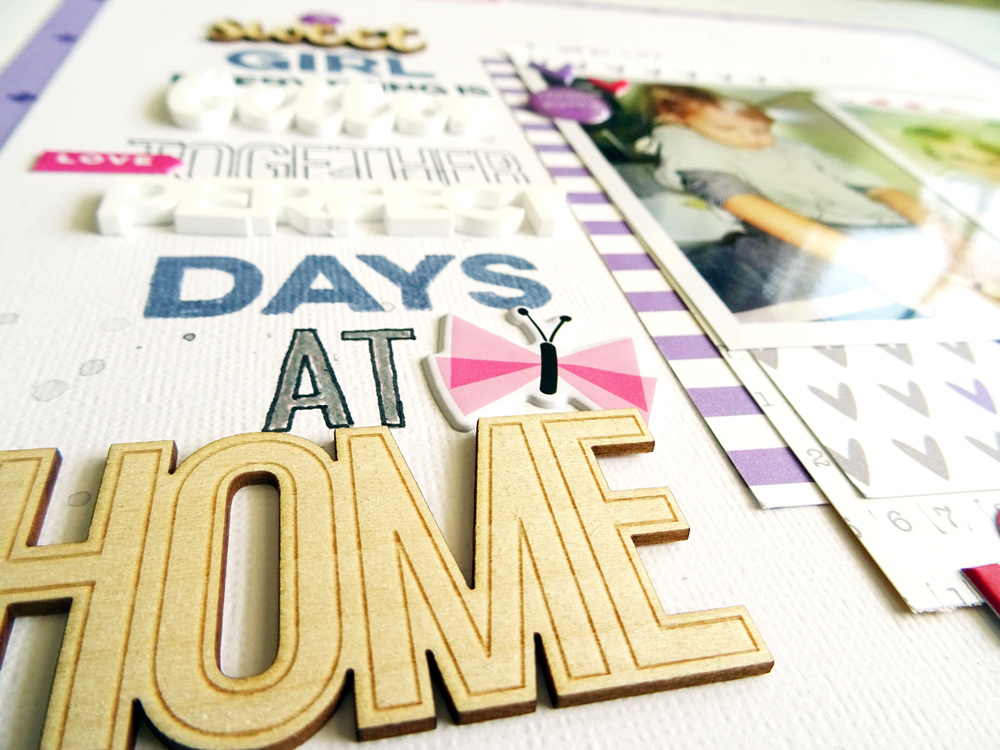
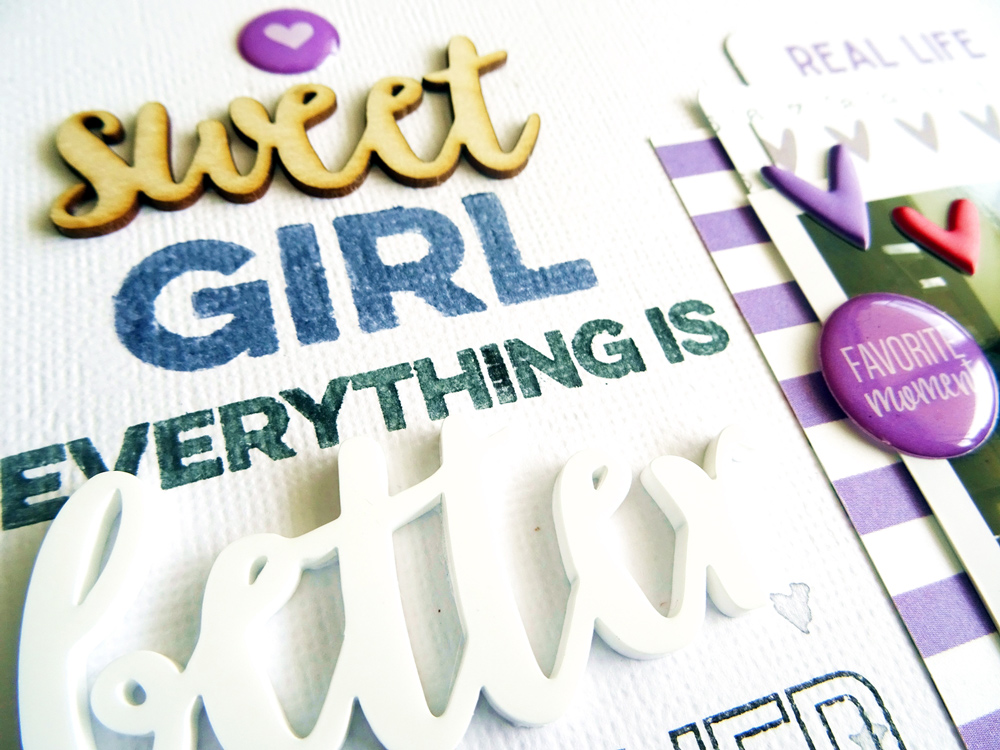
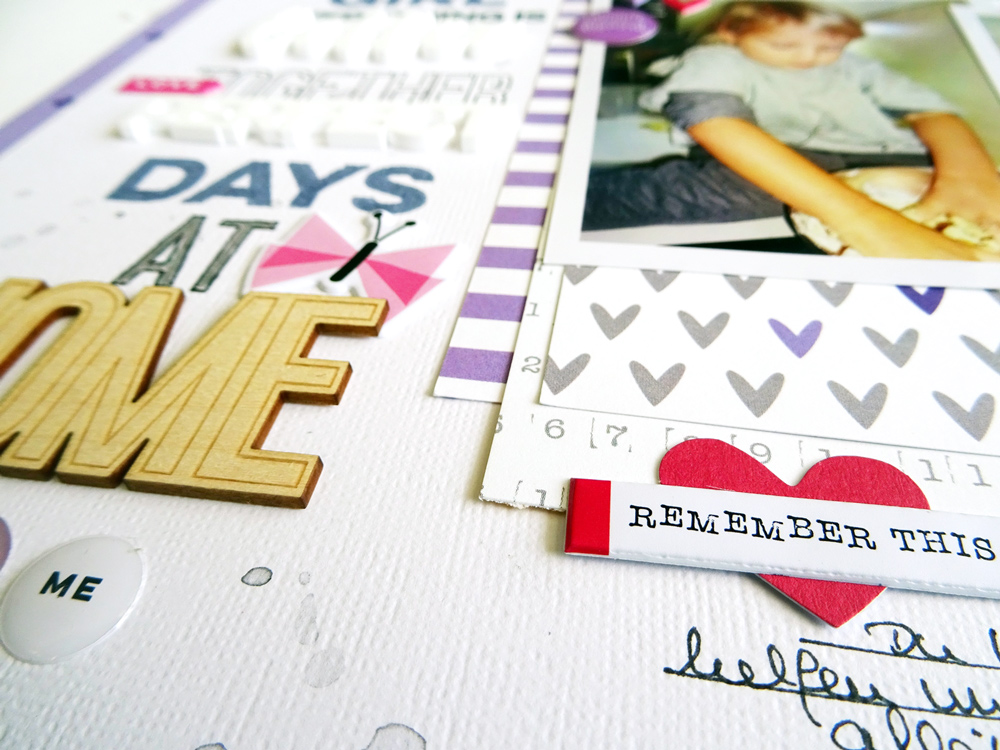
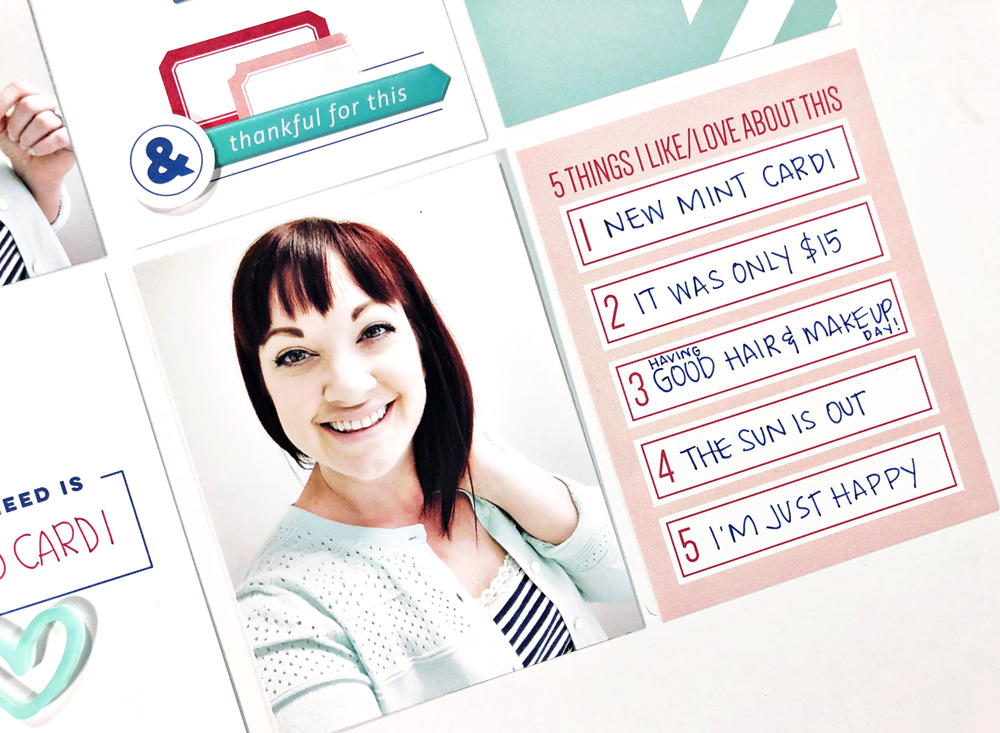
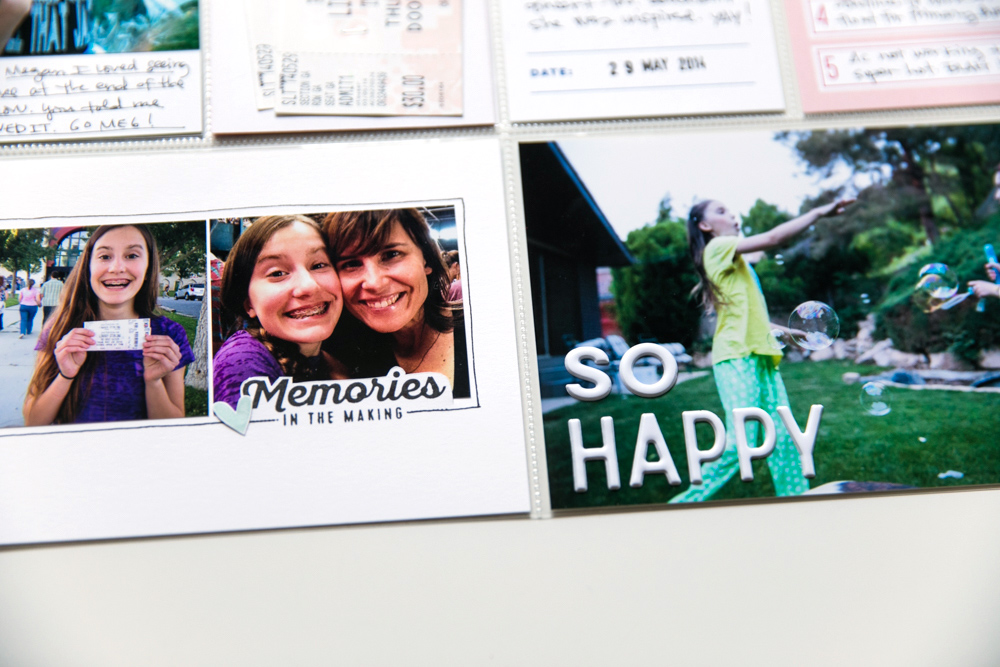
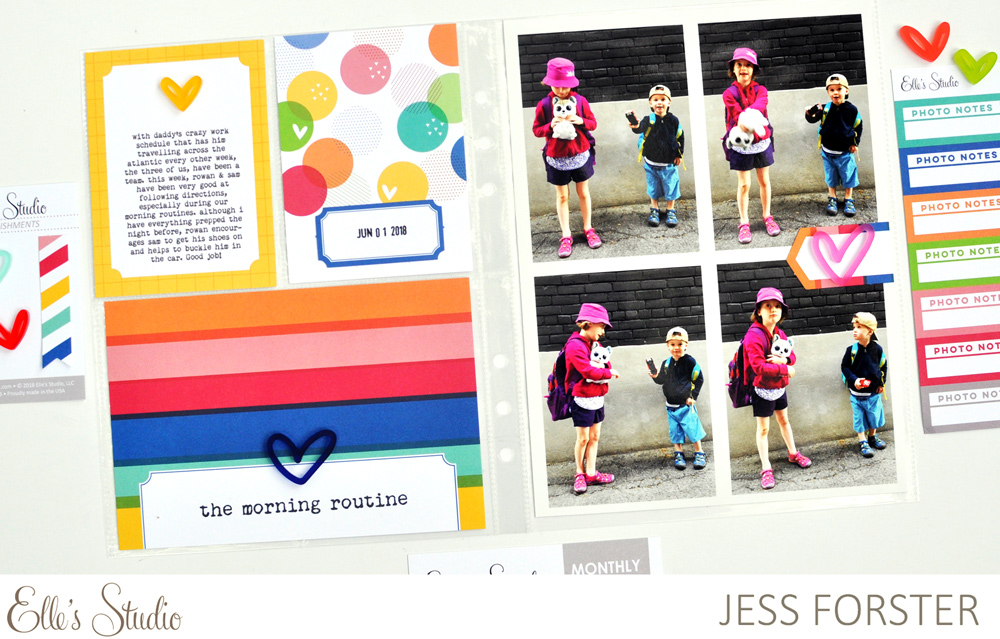
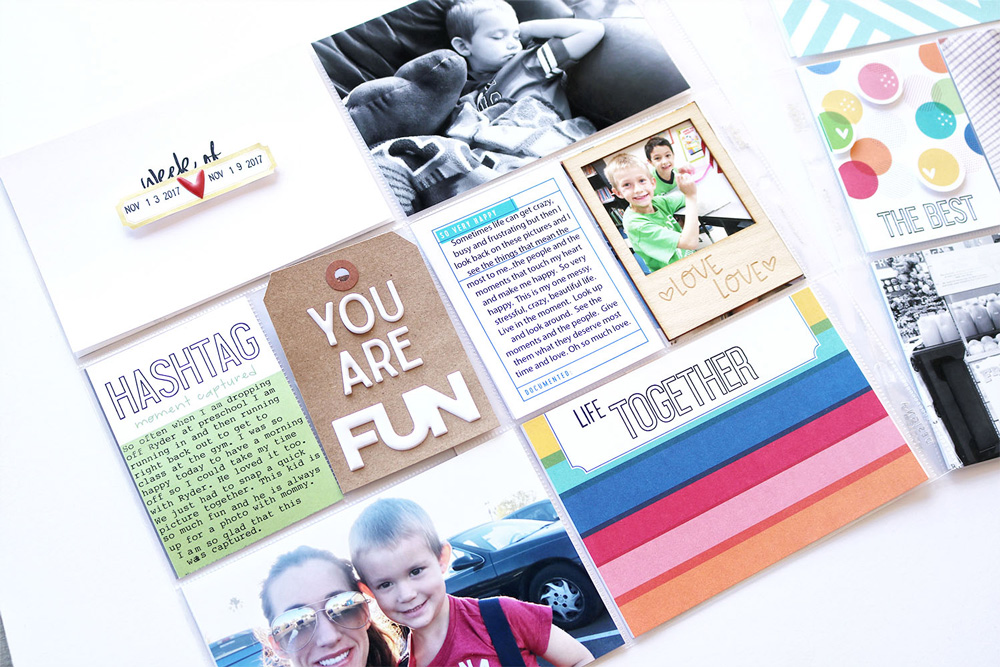
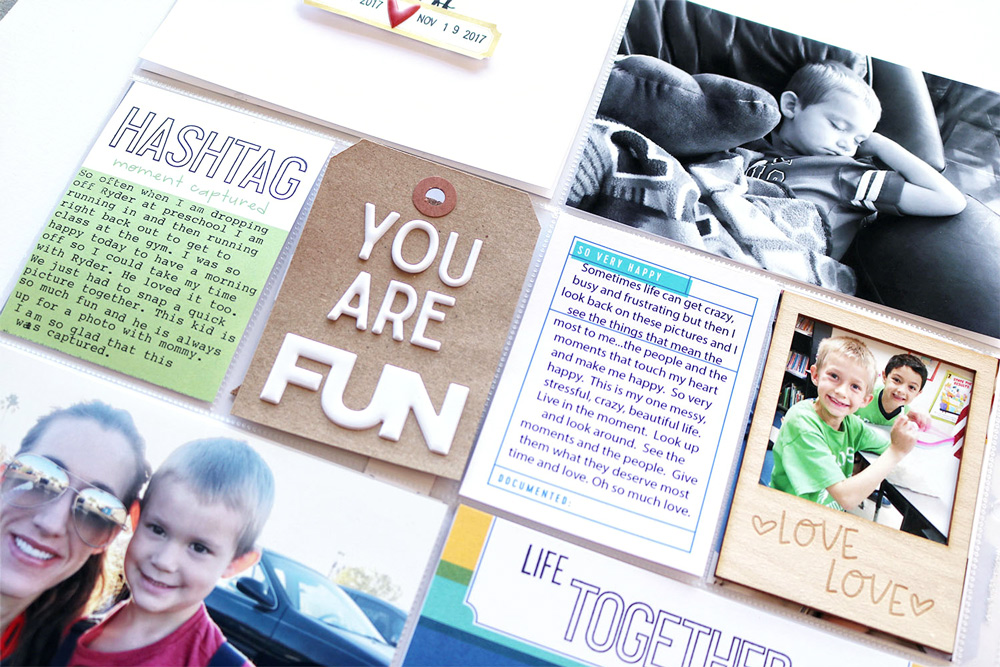
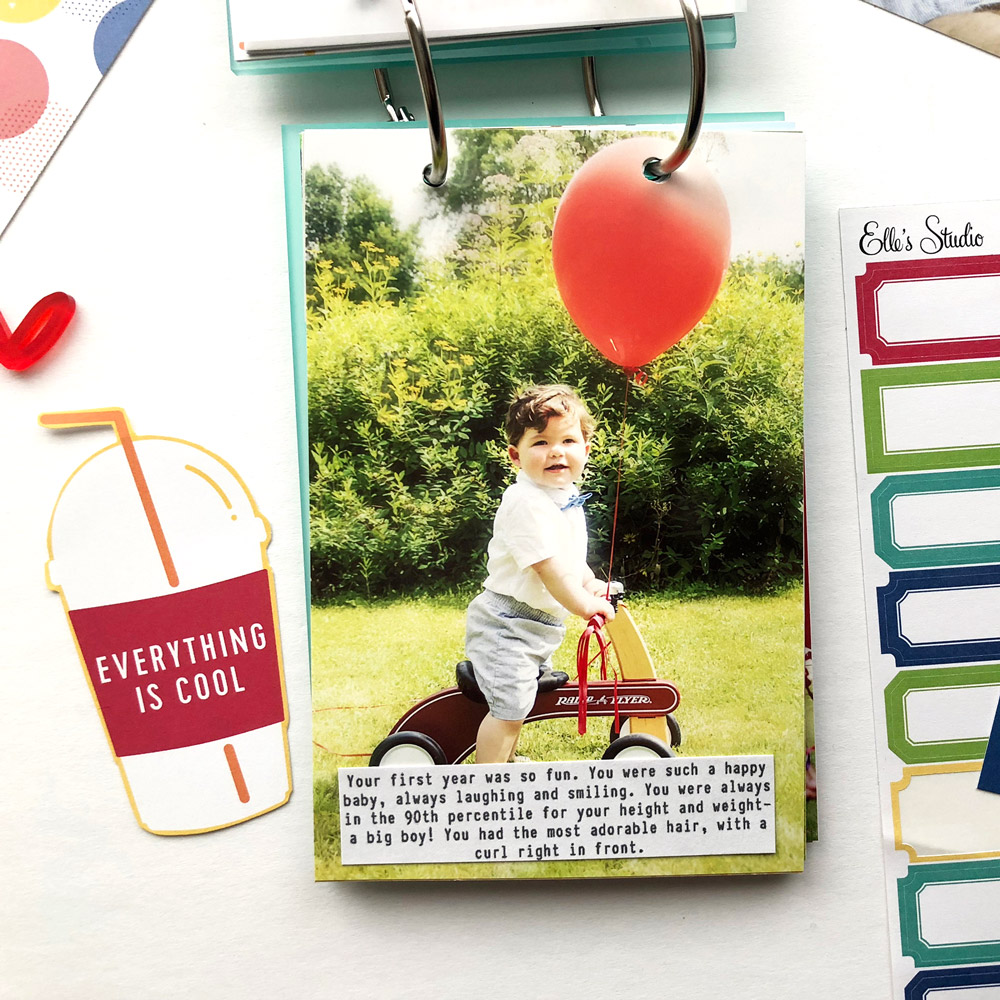
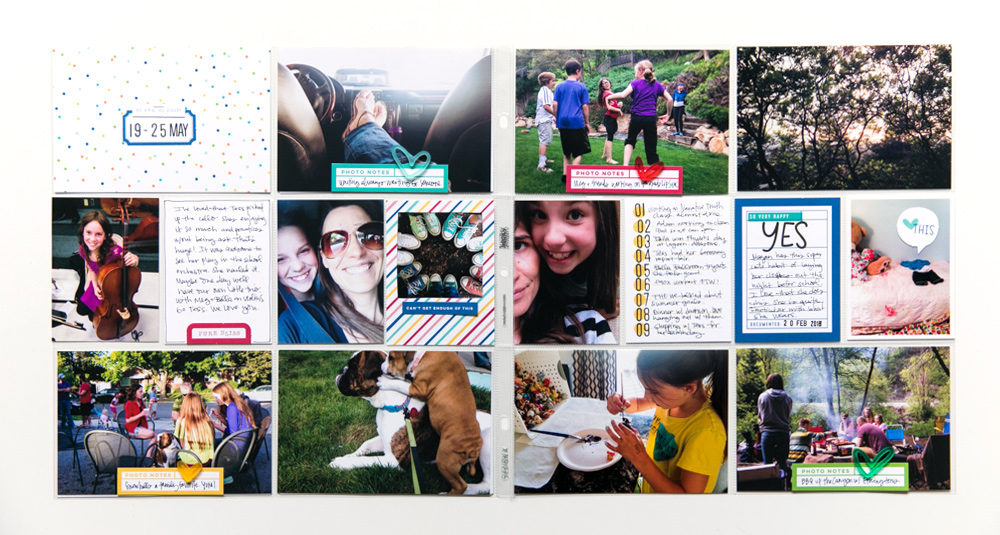
For this project I was drawn to the “photo notes” June Labels. A lot like the first project l did, I like that there was a Bright Hand Drawn Acrylic Heart for each color and wanted to pair them together. I cut the labels out and placed them at the bottom center of each photo. At first, I had them on all seven photos, but it felt like too much, so I removed three. I loved being able to get a bit more of the story told by adding these labels.


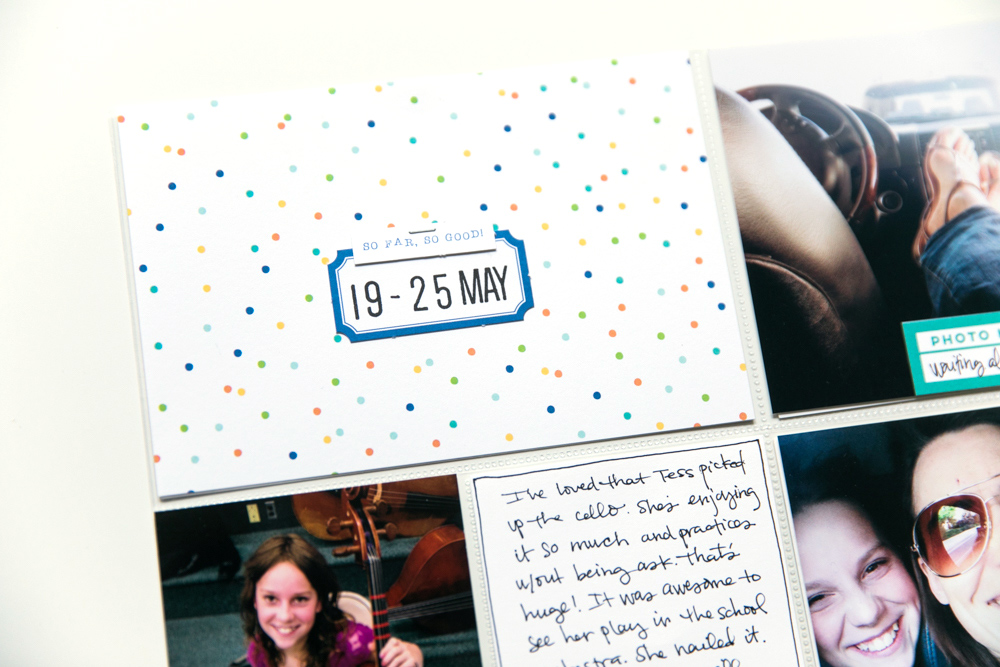
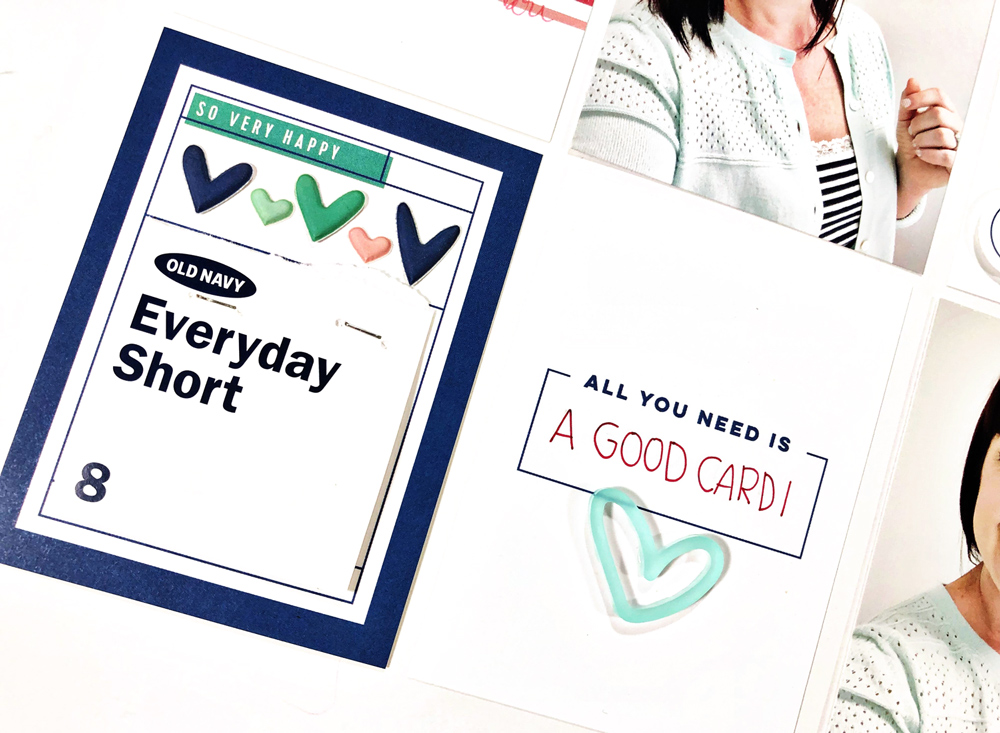
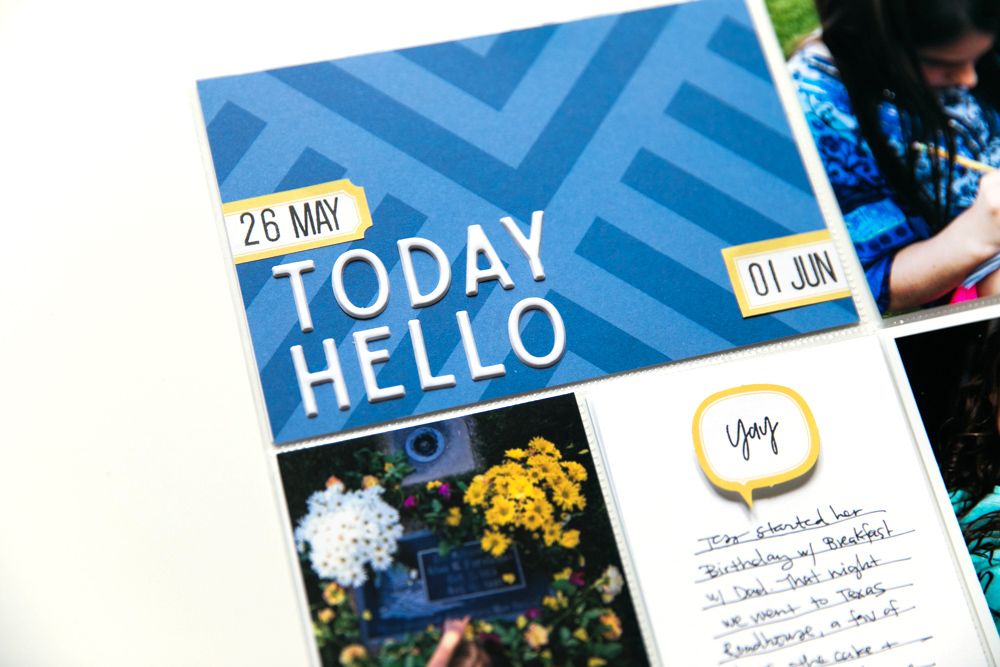
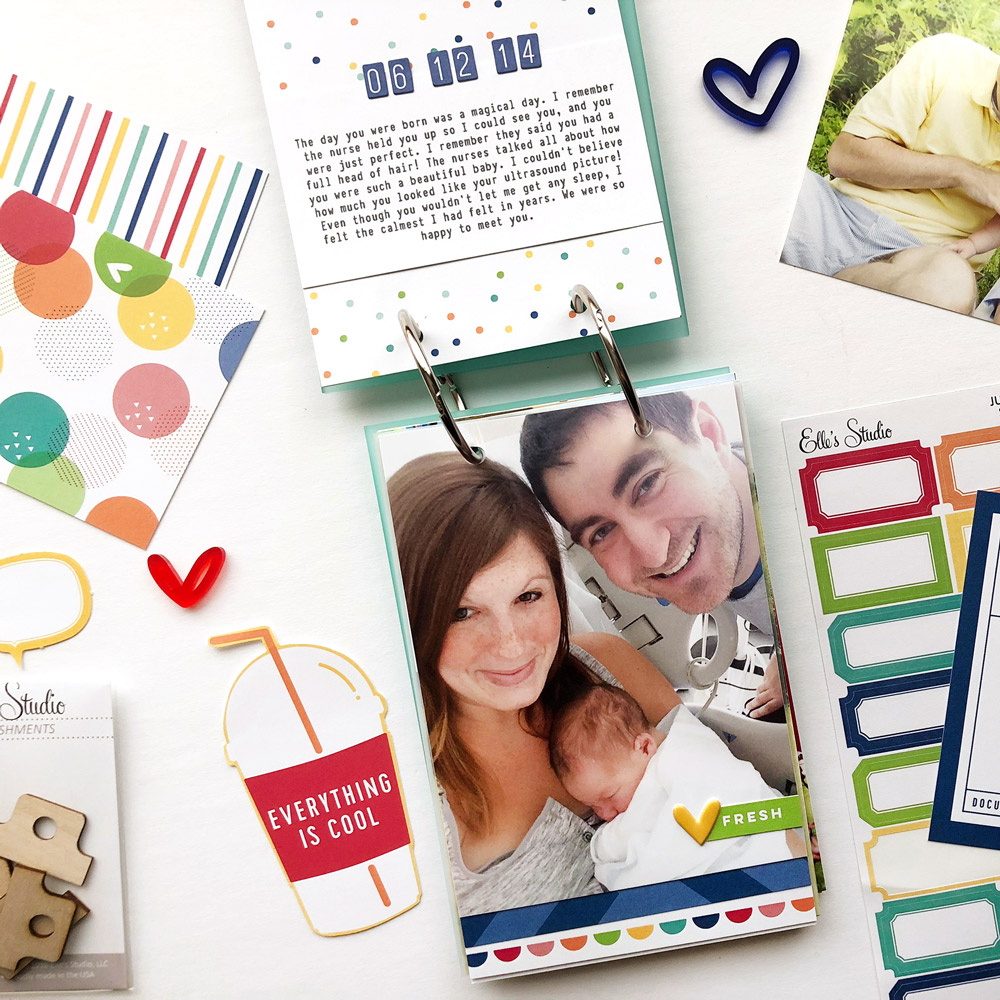
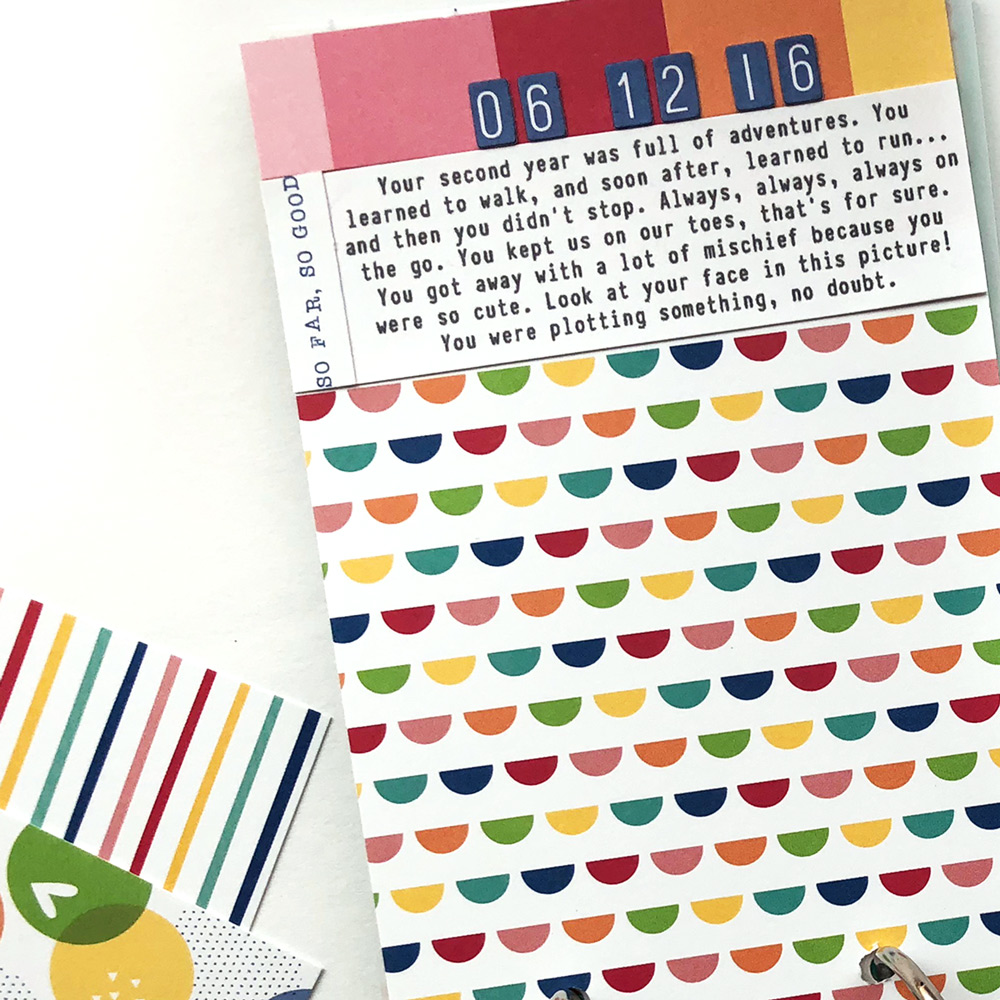
For the title card I used one of the label die cuts from the June 2018 Kit. I told you I loved labels, and stamped the date in black using the Mini Dated Stamp . To help make it look like the label wasn’t floating I added the “so far, so good” die cut on top and used a mini staple to hold it in place.


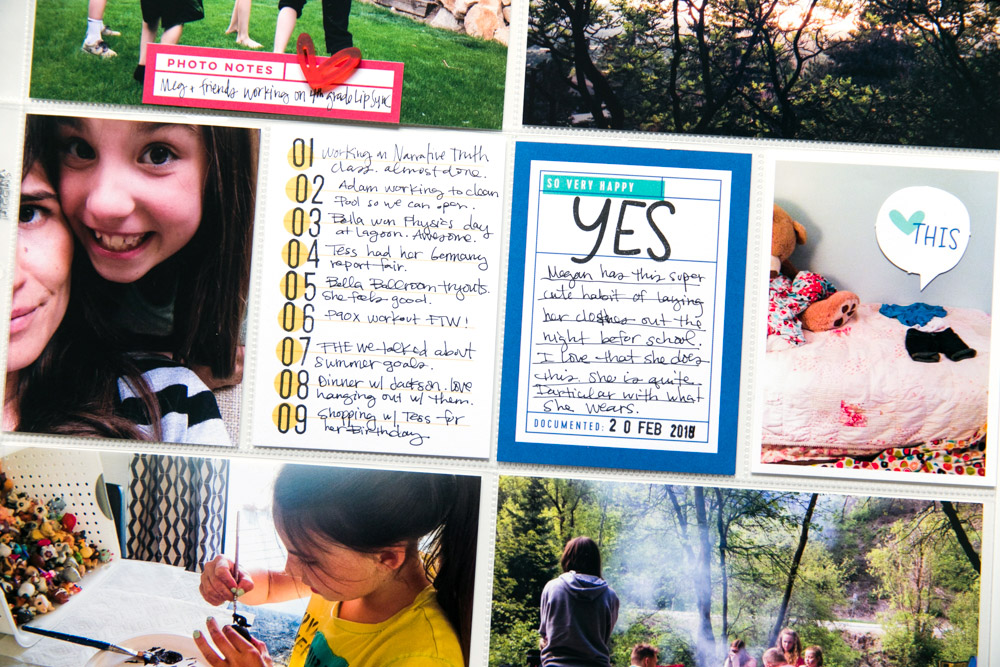
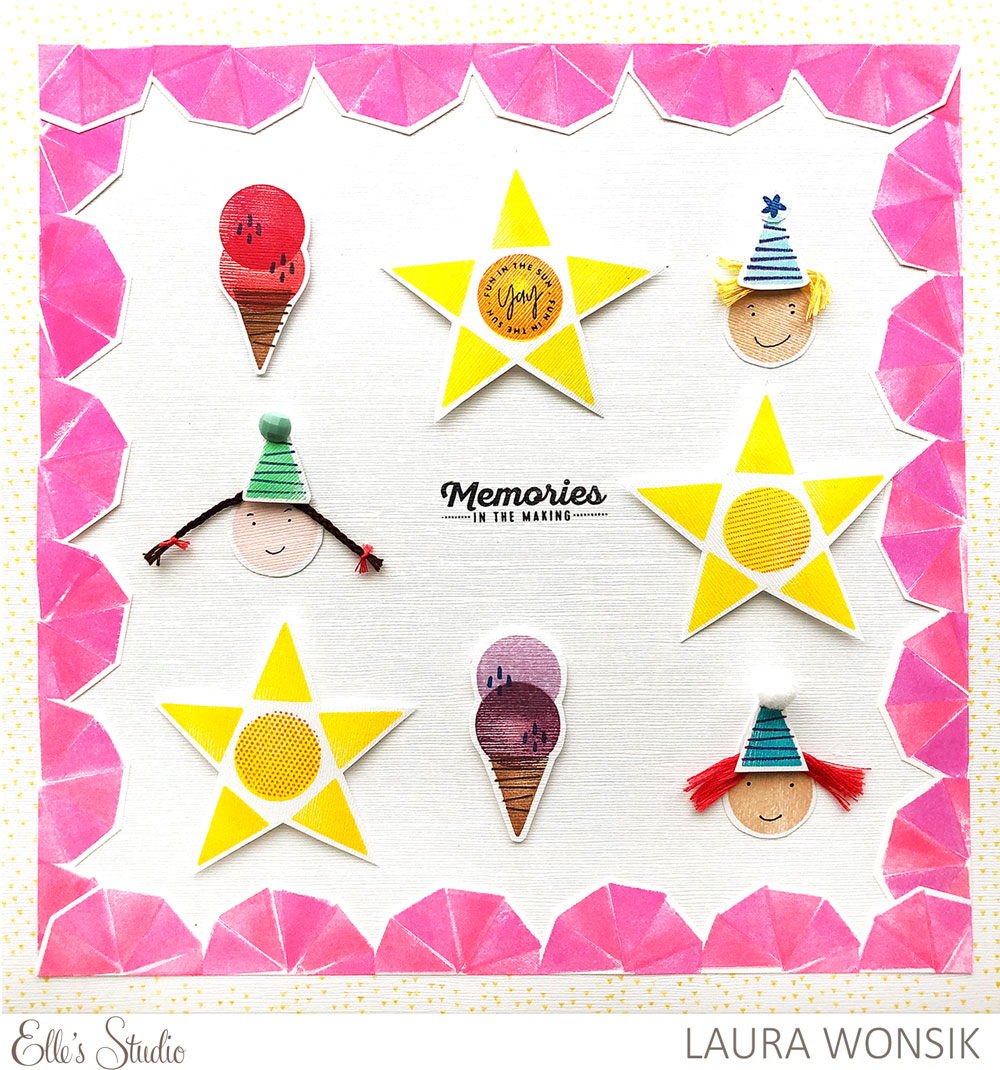
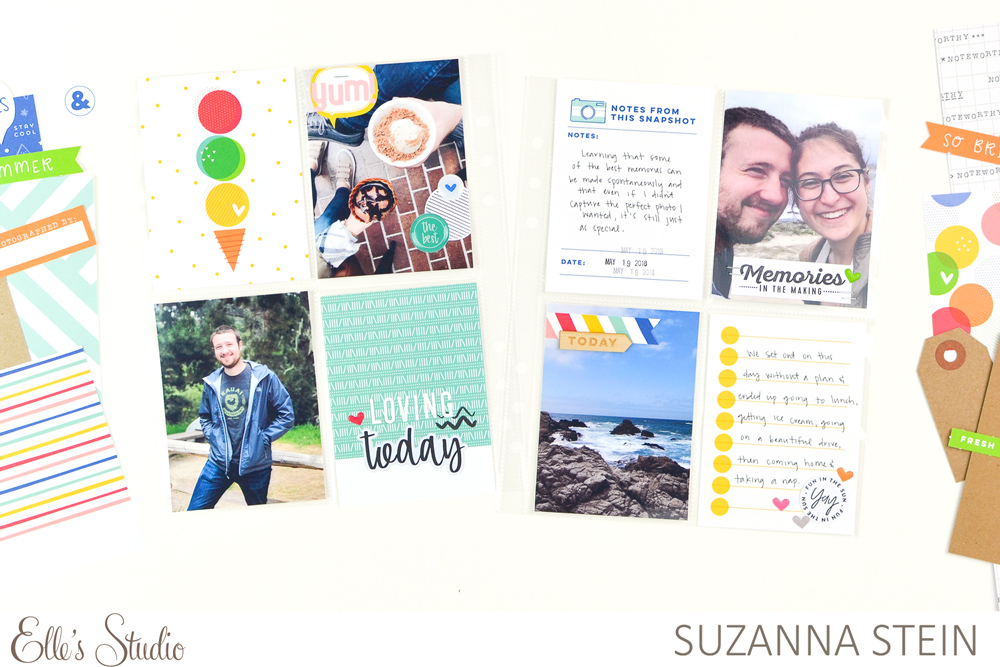
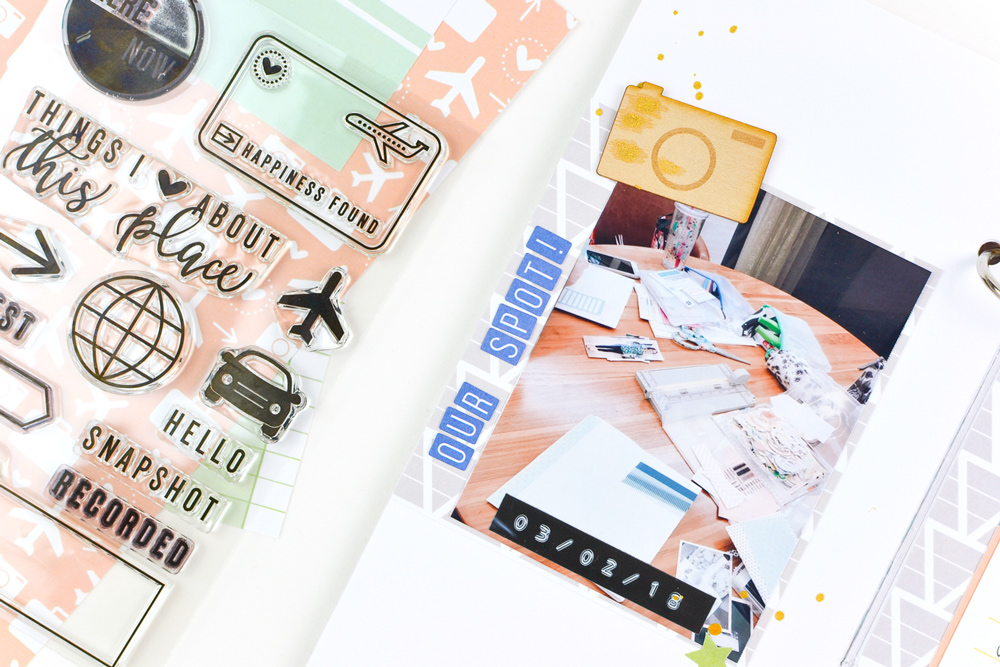
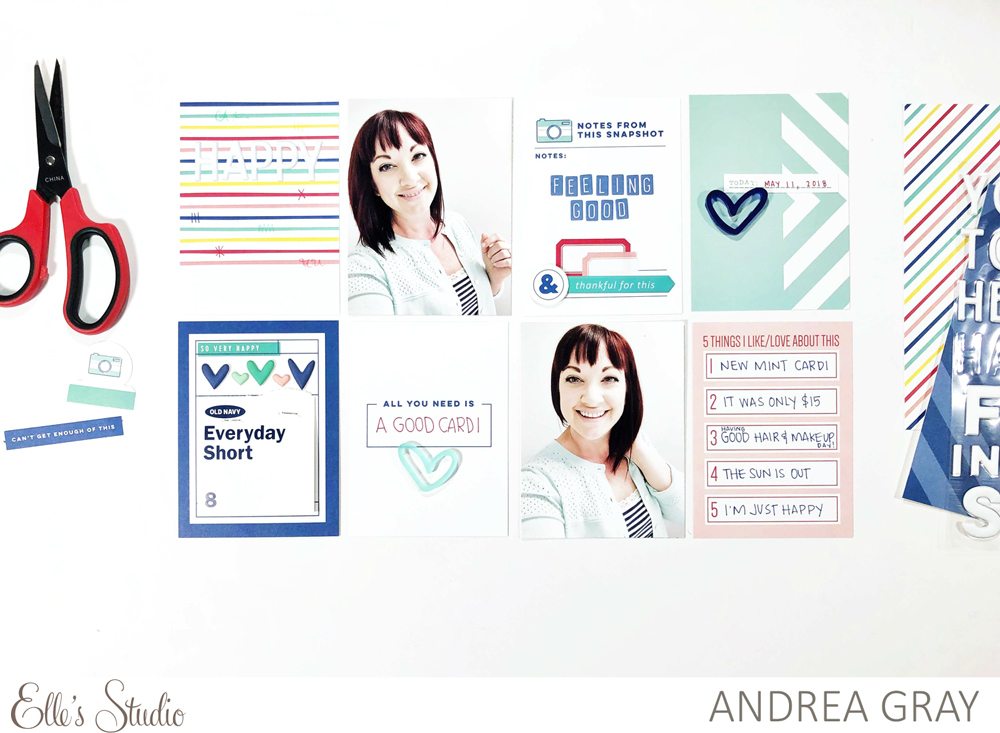
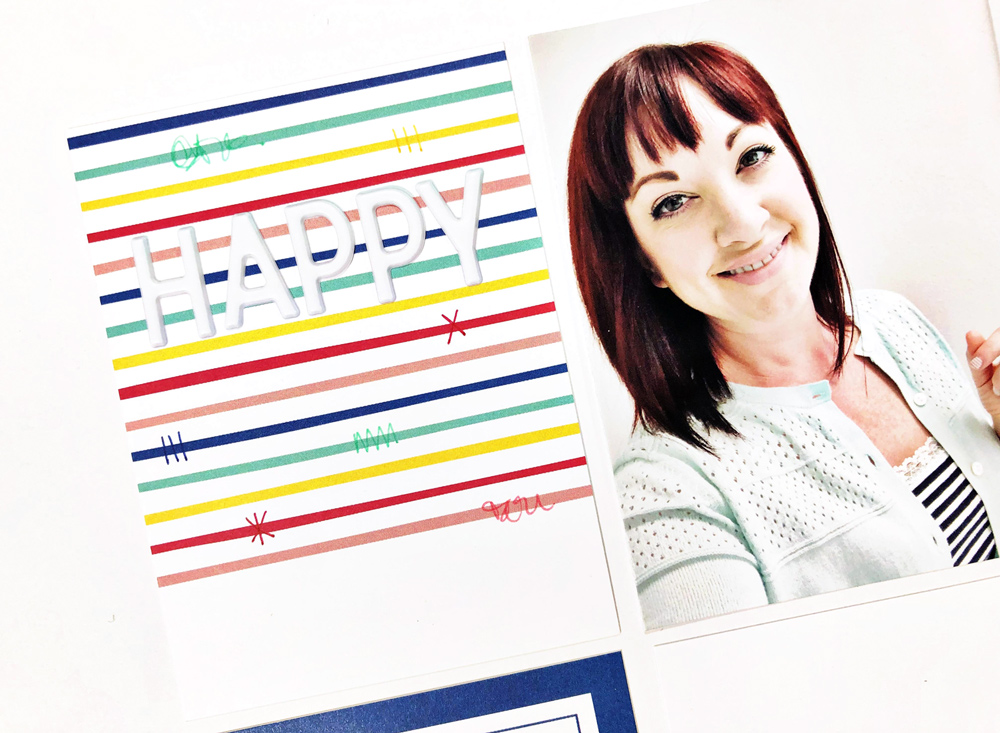
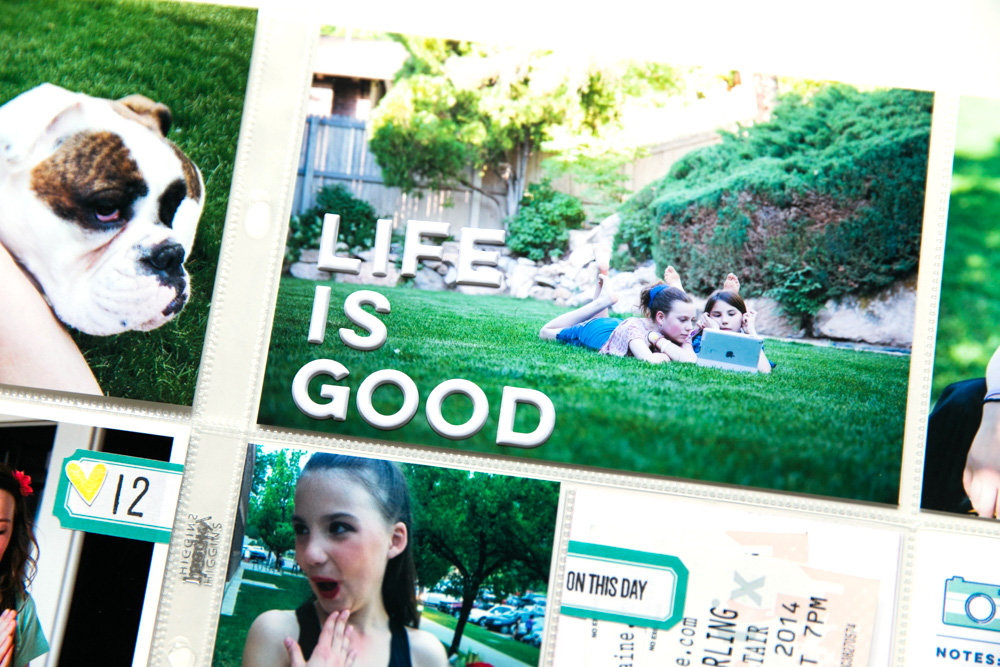
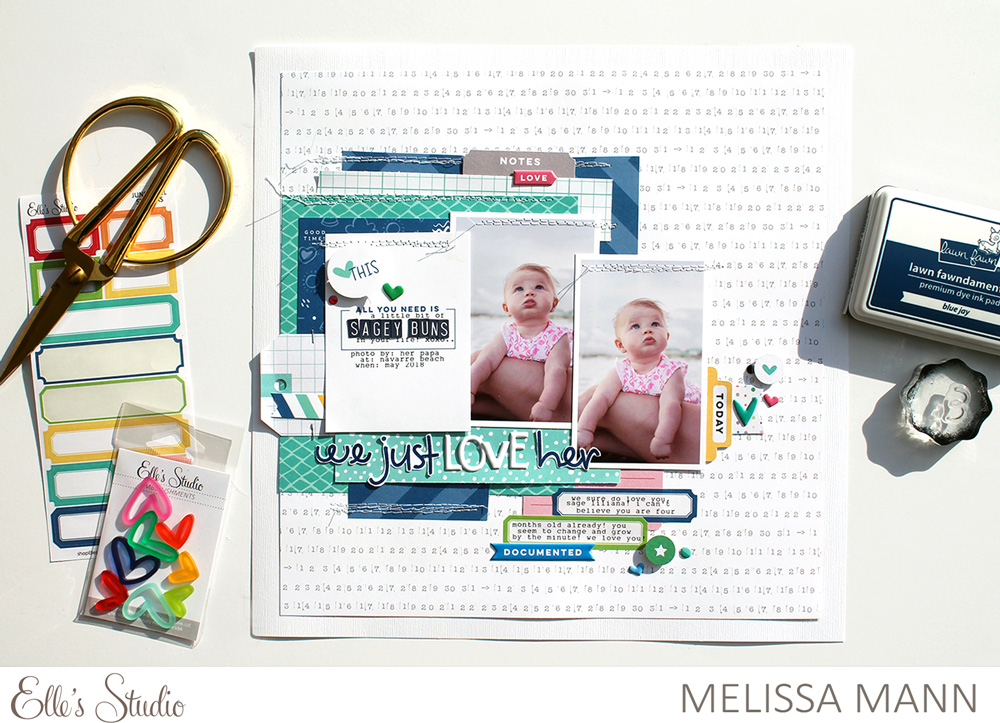
I love making lists, so I used the 3″ x 4″ list card from the June Kit and stamped numbers from the Mini Dated Stamp on each of the yellow circles, highlighting each item. For the “so very happy” tag, I stamped the word “yes” using the Chloe Alphabet Stamp in black. I loved including some large type to this spread.


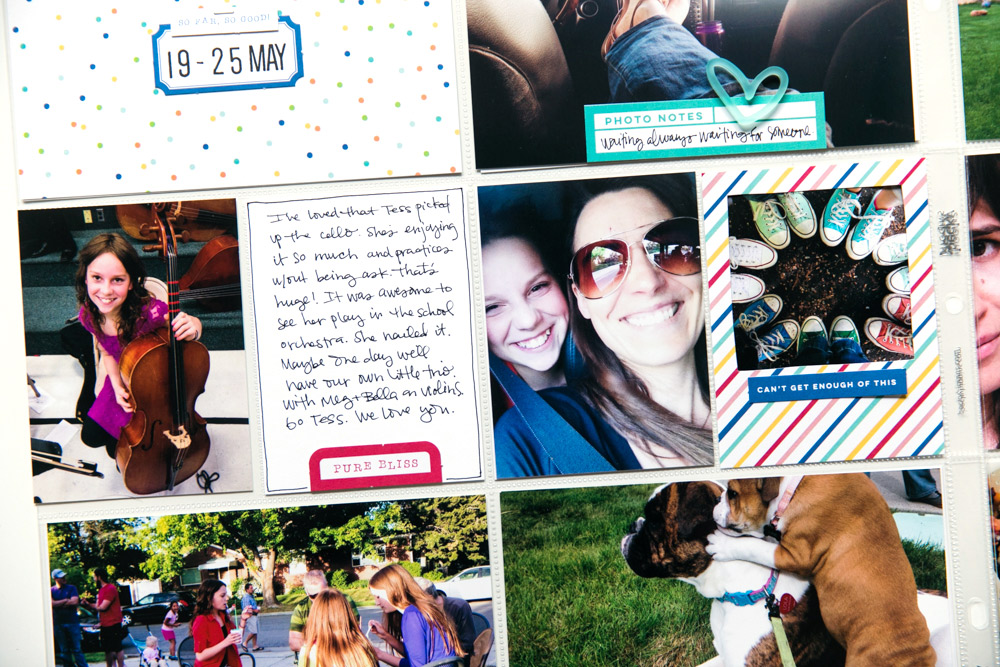
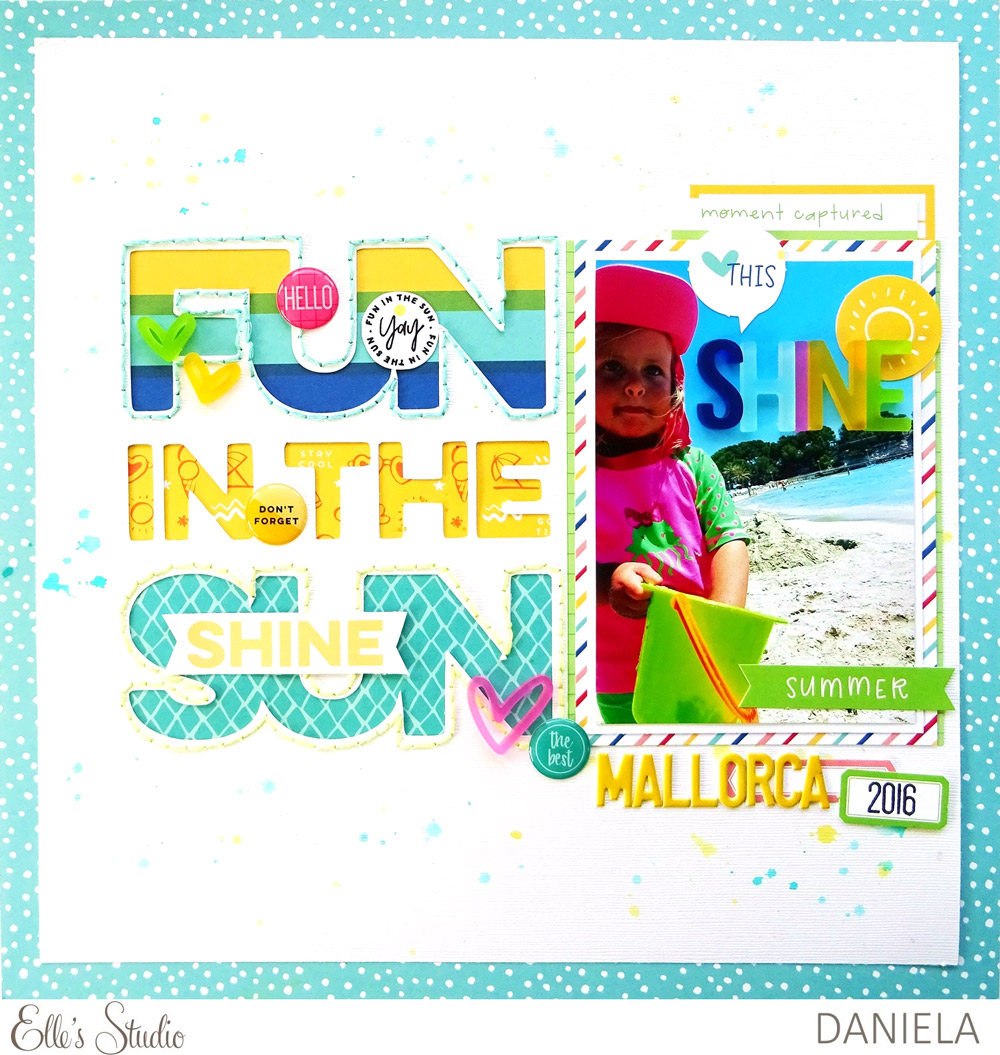
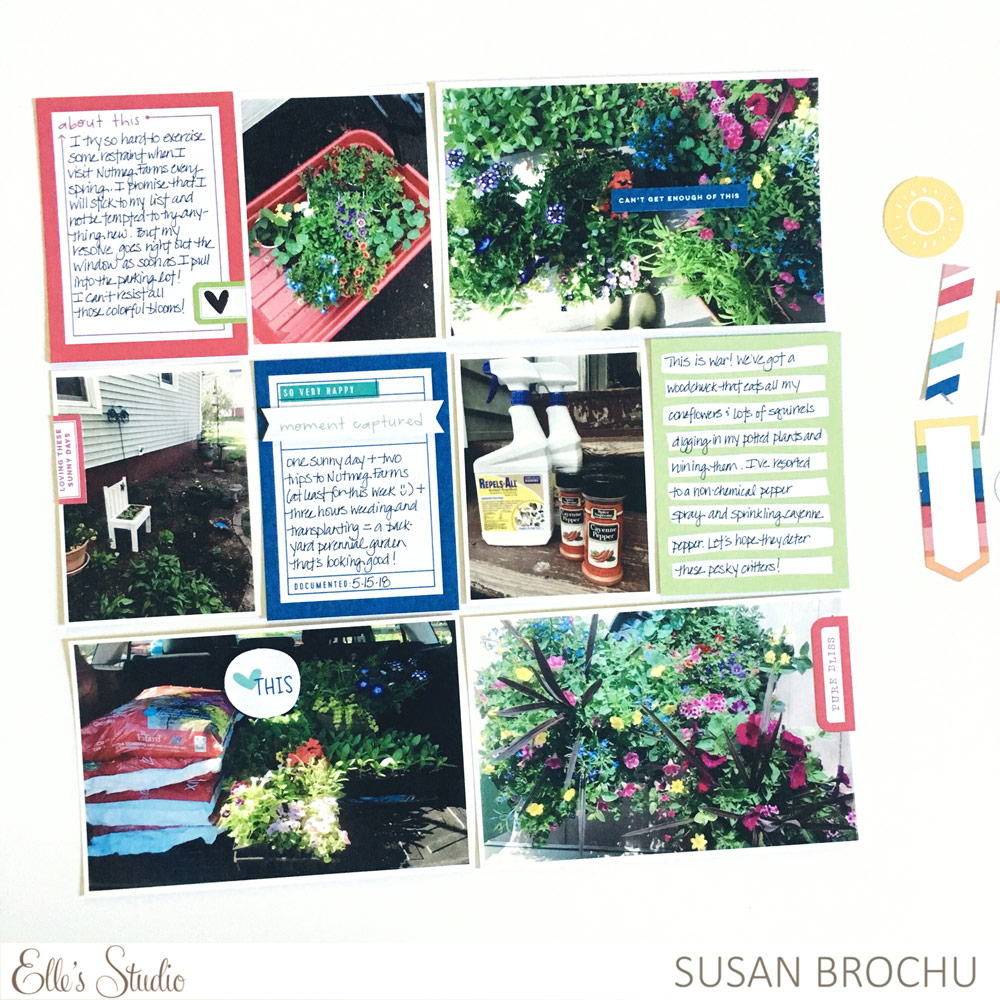
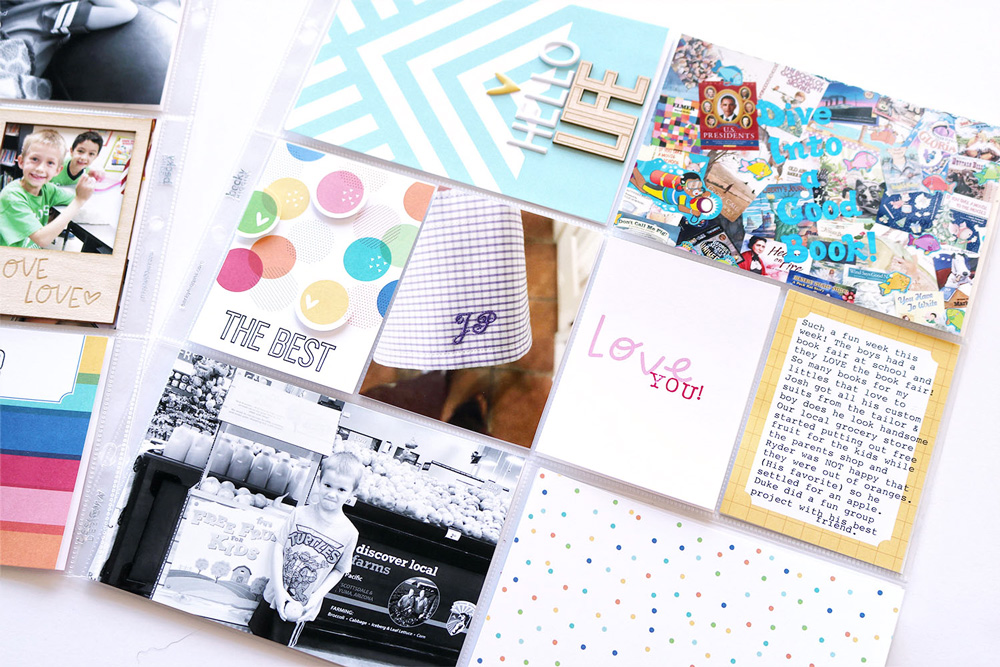
The last thing I did was create a frame out of the multicolored, diagonal striped pattern in the Shine 6″ x 6″ Paper Stack, using the Summer Wood Veneer Frames as my guide. I cut the patterned paper to 3″ x 4″ and then used the wood veener to trace the square opening, cutting it out using an x-acto. I then added the “can’t get enough of this” phrase die cut and placed the photo behind.
 
Thank you for joining me this month. I hope you were able to get some inspiration from my projects, and that you’ll enjoy using the June Kit and add-ons as much as I did. I hope your summer is off to a great start!


Hello. I’m Amy Gretchen and I live in Salt Lake City with my husband and three teenage daughters who keep life interesting. I have been filling up my book shelves with traditional scrapbooks for the past 15+ years and since then my passion has evolved to include everyday photography. I love how photos + words help me to see life more fully and have gratitude for the details. Documenting life on a weekly basis through pocket pages fits perfectly with my goal to capture the everyday moments and keep it simple.
 
I enjoy teaching what I love and currently share weekly process videos and tips on my YouTube channel to help inspire others to get their stories told. When I’m not documenting life I love to travel, eat chocolate, do jigsaw puzzles, listen to podcasts and learn something new. You can find more of my work on my YouTube feed, at my blog, and on Instagram!
 
We have loved all of the projects that Amy has shared with us this month! In case you missed them, she shared a 6″ x 12″ layout on her first week, and another fantastic pocket page spread on her second week with us. Be sure to follow Amy at the links above for more of her paper crafting inspiration! Thank you so much for designing for us, Amy!

June Design Team Inspiration: Volume Three

Our next reveal is fast approaching, but now that you have our June kit and add-ons on your desk, we’re sharing more, fresh inspiration from our design team with you today! You’ll love these 9 projects that really make these products shine, and record some of our design team’s awesome summer memories! Let’s take a look: 


Never-ending Self Serve by Tracey Fox – supplies used | June 2018 Kit, June Blank Label Stickers, Pink Cardstock Alphabet StickersBright Hand Drawn Acrylic Hearts, Let’s Relax Stamp, Chloe Alphabet Stamp, Noteworthy Bits and Pieces, Noteworthy Puffy StickersNoteworthy Epoxy StickersNoteworthy 12″ x 12″ Paper Collection


Sunshine pocket page by Nancy Damiano – supplies used | June 2018 Kit, Shine Acrylic, Hello Happy Puffy WordsLet’s Relax Stamp


Memories in the Making by Laura Wonsik – supplies used | Let’s Relax Stamp


Weeks 15 & 16 pocket page spread by Nathalie Leonelli – supplies used | June 2018 Kit, June Blank Label StickersShine 6″ x 6″ Paper Stack, Currently StampLet’s Relax Stamp, Mini Dated Stamp, Foodie StampNoteworthy Epoxy Stickers


Sunshine by Daniela Dobson – supplies used | June 2018 Kit, June LabelsHello Happy Puffy Words, Bright Hand Drawn Acrylic HeartsShine AcrylicShine 6″ x 6″ Paper StackLet’s Relax Stamp, Noteworthy Puffy Stickers


Loving Today by Suzanna Stein – supplies used | June 2018 Kit, Jane Alphabet Stickers — White, Letter and Number Stickers — Light PinkPuffy Heart Stickers — Spring MixShine 6″ x 6″ Paper StackLet’s Relax Stamp, Noteworthy Wood VeneersNoteworthy Puffy Stickers


Beach Fun in the Sun by Meghann Andrew – supplies used | June 2018 Kit, June Blank Label Stickers, Jane Alphabet Stickers — WhiteHello Happy Puffy Words, Bright Hand Drawn Acrylic HeartsLet’s Relax Stamp, Noteworthy Puffy Stickers, Noteworthy 12″ x 12″ Paper Collection


Spring Dress by Andrea Gray – supplies used | June 2018 KitJune Blank Label StickersLet’s Relax Stamp


Shine So Bright by Candace Perkins – supplies used | June 2018 Kit, Bright Hand Drawn Acrylic HeartsShine Acrylic, Shine 6″ x 6″ Paper StackLet’s Relax Stamp
 
Keep a look-out for a new blog post each day for even more inspiration using our newest June products until our next reveal on July 10th! Has one of these projects inspired you to create? Share it on Instagram using the hashtag #EllesStudio for chance to win a gift certificate to the shop, and be featured here on the blog and on our Instagram account

Let’s Go Traveler’s Notebook Spreads with Suzanna Stein

How many adventures will you have to document once summer is over? They can all be recorded quickly and easily in a traveler’s notebook using our Let’s Go Traveler’s Notebook Kit, and today Suzanna Stein is with us to share two new spreads from one  of her latest trips! Let’s take a look:
 
Hey friends, it’s Suzanna here! I’m so excited to be back on the blog with another project using the Let’s Go Traveler’s Notebook Kit! I previously shared two layouts that I created with the kit documenting a trip I made earlier this year. After realizing how many photos I wanted to fit in the notebook, I decided to transition it to a ring bound notebook instead of the traditional format. I love that the Let’s Go Kit was able to make that transition super easily—it’s perfect for all different formats of documenting!


For the first page, I kept it simple with journaling on one side and my photo on the other. I used a label layered partially under a sticker to add a pop of color and a place for my date above my journaling.


On the right side of the page, I kept my title simple and descriptive using the alpha stickers from the kit. I of course had to add that wood veneer piece above this photo because this story is documenting lunch and that embellishment was too perfect!


I created another page with the kit, and stuck with the photo on one side/journaling on the other layout. This time I added a bit more detail and mixed it up a bit. I used lots of layers on both sides of the page. I also used one of the stamps to create my own embellishment by stamping it on a white piece of card stock and cutting it out.


I titled my journaling with a layered tag and a stamp. To add texture to the page, I stapled the label to the journaling card and love the little extra detail it gives!


On the left side of the page, along with my photo, I used the alpha stickers to add a title vertically along the side of the image. This is something different than I usually do, but I really love the interest it adds to that side.


Like most of my layouts, I finished both pages off with a few embellishment clusters and splatters of gold craft mist. I hope this gives you a little inspiration on ways to use the Let’s Go Traveler’s Notebook Kit! Remember, you don’t have to be working in a traditional traveler’s notebook format to make gorgeous layouts using it.
 
I can’t wait to see what y’all are creating with this month’s goodies, and will be back next month with more crafty inspiration!
 

“Inspired By” with Melissa Mann

Hello, friends! This is Melissa with you today and I’m sharing a layout that was inspired by one of my fellow design team members today! I love a scrapbook layout that includes a grid and was immediately mesmerized by this layout created by Laura Wonsik:


I was so inspired by the circle grid that she created on the left side of her layout and knew that I wanted to create the same idea, while layering smaller circles on top.


Supplies | June 2018 Kit, June Blank Label StickersShine Acrylic, Bright Hand Drawn Acrylic HeartsShine 6″ x 6″ Paper StackTitle Builder Vol. 2 AcrylicChloe Alphabet StampNoteworthy Puffy Stickers, Noteworthy Epoxy Stickers, Noteworthy 6″ x 6″ Paper Stack, Noteworthy 12″ x 12″ Paper Collection 


To switch things up a bit from Laura’s layout, I created larger circles that overlapped each other slightly and I placed my title—which I created using the Title Builder Vol. 2 Acrylic, “favorite” Noteworthy Puffy Sticker, and Chloe Alphabet Stamp— in a different place than the original layout. That’s the great thing about being inspired by someone else’s project—you can take the idea and put your own spin on it!


I loved embellishing each one of my circles with different bits and pieces: Noteworthy Epoxy StickersNoteworthy Puffy StickersBright Hand Drawn Acrylic Hearts, and die cuts from the June 2018 Kit. I hope this project inspires you to create a layout! Whether you are inspired by the circles, the grid, or the blocked off elements to this design, I would love to see what you create!


Thanks for stopping by!
 

Having Fun with Title Builder Vol. 2 and Daniela

Don’t forget about our Title Builder Vol. 2 products, which are still available in the shop! These products, which include a stamp, wood veneer and acrylic, help you to create perfect titles quickly and easily—the perfect product for your busy summer documenting! Let’s take a look at what design team member Daniela created with these useful products:
 
Hi there, it’s Daniela again and I’m so excited to share a layout today created with the Title Builder Vol. 2 Bundle. I love the different materials included in this bundle: acrylic words, wood veneers and, of course, the amazing stamps that give you so many ways to create your own title! I combined all three textures and made a big title for the center of my page.


Supplies | Title Builder Vol. 2 Bundle, Noteworthy Bits and Pieces, Noteworthy Puffy Stickers, Noteworthy Epoxy Stickers, Noteworthy 6″ x 6″ Paper Stack, Noteworthy 12″ x 12″ Paper Collection
 
I used the wood veneers, stamps and acrylics alternately, so the title becomes more interesting.


Like on most layouts I do, I decided on a certain color scheme—in this case purple, pink and red. The colors occur all over the page. I used lots of different embellishments, but due to the analogous color scheme, it isn’t too overwhelming.


To add more dimension to my page, I also used some Noteworthy Puffy Stickers on top of the stamped parts of the title.


All in all, the layout consists of two big parts: the big title on the left-hand side and the embellished photos with Noteworthy 6″ x 6″ Paper Stack layers on the right-hand side.


Working with Title Builder Vol. 2 is so much fun! You can come up with so many different combinations and give your projects a personal touch.
 
I hope you like my page. I can’t wait to see what you are creating with this fantastic new bundle! Thanks for stopping by and have a great day!


We want to see how you’re using the Title Builder Vol. 2 products! Share your layout, pocket page or traveler’s notebook creation on Instagram using the hashtag #EllesStudio and you could win a gift certificate to the shop, and be featured here on our blog and our Instagram feed!

Good Vibes Documented with Andrea Gray

Today, Andrea Gray is showing us that a successful pocket page spread does not have to be about a big event, it can be created to document something as simple as a good hair day, or a favorite summer outfit. What feels good to you is worth documenting! Let’s see what she created:
 
Hello friends! Today I am sharing a 6″ x 8″ pocket spread that’s filled with journaling tags and embellishments from the June Kit and add-ons!


Supplies | June 2018 Kit, June Blank Label StickersHello Happy Puffy Words,  Bright Hand Drawn Acrylic Hearts, Let’s Go Traveler’s Notebook Kit, Noteworthy Puffy Stickers
 
The whole layout was inspired by this striped card. It has ALL THE COLORS and was perfect for adding a little of my own flair. I used the Hello Happy Puffy Words and then found colored pens to match each line and did a little random marking on a few of them. I love how it came out!


Sometimes a layout is about nothing more than just feeling good about your outfit or hair or just in general, and that’s the point of this one. So, I made that into another title on this “notes from this snapshot” tag found in the June Kit, and balanced it out by layering some June Blank Label Stickers and embellishments at the bottom. A simple date label and acrylic heart is a good balance for the neighboring tag.


I made a perfect little border on the tag on the left, using some puffy heart stickers. I also used a clothing tag from a pair of shorts I recently bought. The color was perfect but it’s also an accurate statement—I am short every single day and thought it was a humorous touch! On the next tag, I simply added text and another Bright Hand Drawn Acrylic Heart to balance out the other one at the top.


I LOVE LISTS! Being able to jot down a quick list to bust out my journaling is the BEST!


I hope you’ve enjoyed this project and that you’re having a crafty day!
 

Life in Pockets with Guest Designer Amy Gretchen

We are so excited to welcome our June guest designer Amy Gretchen back to the Elle’s Studio blog! In case you missed her first post, she shared a 6″ x 12″ layout, and today, she’s wowing us with her pocket page spreads, which use our June 2018 kit and add-ons in such a beautiful way. Let’s take a look at what she created:
 
Hey guys. I’m excited to be back on the Elle Studio blog today to share another project with you using the June 2018 Kit. Most of the documenting I do is with pocket pages, so it was a no brainer to tackle a full 12″ x 12″ inch spread for my second project.


Supplies | June 2018 Kit, June Blank Label StickersHello Happy Puffy Words, Bright Hand Drawn Acrylic HeartsShine 6″ x 6″ Paper StackLet’s Relax StampMini Dated Stamp
 
I loved the big Hello Happy Puffy Words and knew it would be a great fit for this particular spread. I decided to add them to three photos and spread them out to create a visual triangle. I also added the words left justified to make sure it wouldn’t interfere with the subject of the photos. I love the bold statement it makes to the spread.


I had two small photos I wanted to highlight on a 4″ x 6″ card so I created a hand drawn box in black and where the lines met I stamped the “memories” stamp in black ink using the Let’s Relax Stamp. I wanted the photo to be tucked behind the stamp, so I used an X-acto knife to cut out the stamp from the cardstock. I also added a cut out of the stamped heart from the same Let’s Relax Stamp for some added color.


For the title tag, I choose to use the blue patterned paper from the Shine 6″ x 6″ Paper Stack as a base. I thought it would go well with the strong blues on the page. I added more of the Hello Happy Puffy Words, mostly because I wanted more on the spread. After thinking about how I wanted to add the dates, I looked again to the labels from the June Kit and June Blank Label Stickers. I used two different yellow labels on the left and right side of the tag and made sure it interacted with the edge. I then stamped the dates using the Mini Dated Stamp. I love how the yellow pops against the blue.


That’s it for this week’s spread! I really loved how those Hello Happy Puffy Words helped the photos to pop off the page. What are you doing with those stickers?


Hello. I’m Amy Gretchen and I live in Salt Lake City with my husband and three teenage daughters who keep life interesting. I have been filling up my book shelves with traditional scrapbooks for the past 15+ years and since then my passion has evolved to include everyday photography. I love how photos + words help me to see life more fully and have gratitude for the details. Documenting life on a weekly basis through pocket pages fits perfectly with my goal to capture the everyday moments and keep it simple.
 
I enjoy teaching what I love and currently share weekly process videos and tips on my YouTube channel to help inspire others to get their stories told. When I’m not documenting life I love to travel, eat chocolate, do jigsaw puzzles, listen to podcasts and learn something new. You can find more of my work on my YouTube feed, at my blog, and on Instagram!
 
Be sure to come back next week to see Amy’s third blog post with us! Until then, check out her links above to see more of her beautiful pocket pages! 

June Design Team Inspiration: Volume Two

There are so many beautiful possibilities available for your paper crafting projects using the June 2018 Kit and extras, and today we have a second round of design team inspiration for you, utilizing all of our new product in such a beautiful way! Check out these amazing projects, and get inspired to create as soon as your June box arrives!


Fun in the Sun by Daniela – supplies used | June 2018 Kit, June 2018 Digital Cut File, Yellow Puffy Alphabet StickersBright Hand Drawn Acrylic Hearts, Shine AcrylicShine 6″ x 6″ Paper StackLet’s Relax Stamp, Mini Dated StampNoteworthy Epoxy StickersNoteworthy 12″ x 12″ Paper Collection


Morning Routine pocket page spread by Jess Forster – supplies used | June 2018 Kit, June Blank Label StickersBright Hand Drawn Acrylic Hearts


We Just Love Her by Melissa Mann – supplies used | June 2018 KitJune Labels, Black Cardstock Alphabet StickersHello Happy Puffy Words, Shine 6″ x 6″ Paper StackChloe Alphabet StampNoteworthy Bits and Pieces, Noteworthy Puffy StickersNoteworthy 12″ x 12″ Paper Collection


About This pocket page layout by Susan Brochu – supplies used | June 2018 KitLet’s Relax Stamp


Fun in the Sunshine by Amanda-jayne Baldwin – supplies used | June 2018 KitJune Blank Label StickersHello Happy Puffy Words, Puffy Star StickersShine AcrylicBright Hand Drawn Acrylic Hearts, Shine 6″ x 6″ Paper StackLet’s Relax Stamp, All the Details StampNoteworthy Bits and Pieces, Noteworthy Puffy StickersNoteworthy Epoxy Stickers


Life is Good by Heather Leopard – supplies used | June 2018 Kit, Summer Wood Veneer FramesHello Happy Puffy Words, Bright Hand Drawn Acrylic HeartsShine 6″ x 6″ Paper StackNoteworthy 12″ x 12″ Paper Collection


Fun in the Sun by Neela Nalam – supplies used | June 2018 Kit, Hello Happy Puffy Words, Bright Hand Drawn Acrylic Hearts, Shine 6″ x 6″ Paper StackLet’s Relax Stamp


Friends and Frosé by Jamie Leija — supplies used | June 2018 KitBright Hand Drawn Acrylic HeartsShine 6″ x 6″ Paper StackLet’s Relax Stamp, Title Builder Vol. 2 Stamp, All the Details Stamp, Hazel Alphabet Stamp, Noteworthy 12″ x 12″ Paper Collection
 
Be sure to grab your June Kit and add-ons while supplies last, to document your sunny, summer memories! 

Happy Pockets with Candace Perkins

Pocket pages can be so fun to create, but how do you coordinate all of those little canvases across a big double-page spread? Using products from our shop is one way, as they are specially coordinated to work together seamlessly! Today, design team member Candace Perkins is here to give us some tips on how to get the most out of your pocket pages! Let’s take a look:
 
Hello friends! It’s Candace here with you to share a bit of pocket page inspiration using the June 2018 Kit and extras in the shop. I had so much fun creating this spread! Even with the summer theme and colors of the kit, I was able to complete a spread all about an everyday week in November. I pulled out the June Kit along with the coordinating extras and a few stamp sets from the shop and I got to creating and playing!


Supplies | June 2018 Kit, So Very Happy PrintablesJune Blank Label Stickers, Kraft Tags, Summer Wood Veneer Frames, Title Builder Vol. 2 Wood VeneerHello Happy Puffy Words, Puffy Heart Stickers — Spring Mix, Shine 6″ x 6″ Paper StackTitle Builder Vol. 2 Stamp, All the Details Stamp
 
I started by filling the pockets with photos from the week and coordinating tags from the June Kit. I also used a few of the So Very Happy Printable tags this month to add the “love you” filler tag and “so very happy” journaling tag—which I added my journaling directly to the digital file before printing.


Here are a few tips and tricks that helped me bring this spread together in a snap:
 
1. Use coordinating fonts across your spread for balance and to create a theme. The words “hashtag,” “together,” and “the best,” all from the Title Builder Vol. 2 Stamp help to tie the left and right sides of my spread together.
2. Add dimension to your tags by cutting out shapes and popping them up directly on top of your cards.


3. Try using shaped tags in the pockets, like the Kraft Tags.


4. Create a focal point on your spread using large stickers, fonts or sentiments, like I did here using the Hello Happy Puffy Words and Title Builder Vol. 2 Wood Veneer:


This was such a fun spread to create! I loved playing with all the June goodies. I hope this inspires you and gives you a few ideas on how to use your June Kit to document your special moments and memories. I can’t wait to see what you create!
 

A Celebratory Mini Album with Laura Wonsik

One of our newest products is made just for mini projects: the Aqua Acrylic Album! This beautiful, bright acrylic bundle comes with a front and back cover, sized at 6″ x 4″, as well as two 1-1/2″ book rings. All you have to do is create the interior pages to tell a story that is anything but miniature! Design team member Laura Wonsik did just that with the mini album that she’s sharing with you today, and we know it will give you all kinds of ideas for how to craft one of your own! Let’s take a look: 
 
Hello! It’s Laura Wonsik here, and I have to tell you, I have been scrapbooking for a (really) long time but I have never seen a mini-album quite like this new acrylic one! I was so excited to fill it up because as soon as I saw it I knew just what stories I wanted it to hold.


My best friend’s son’s birthday is coming up and she really loved the last mini album I made for her, so I decided to make another one!


This album comes with really big binder rings, which made me realize that this album is perfect to grow along with her son!


My friend has a tradition of taking a photo of her son every year with the number of balloons of his age.


I asked her to email me the photos from the last three birthdays as well as the day he was born and I created a mini birthday album that is meant to be added to every year. She wrote a few sentences about the year, as well as documentation about his birthday party.


Every year from now on, my gift to Max will be sending him two 4″ x 6″ photos, printed out and ready to be placed in the album as well as some journaling that his mom sends to me.


I hope that you find a great way to use this album yourself, and let’s all wish Max a big, happy 4th birthday!
 
Supplies | Aqua Acrylic Album, June 2018 Kit, June Blank Label StickersDark Navy Cardstock Alphabet StickersPuffy Heart Stickers — Spring Mix, Bright Hand Drawn Acrylic HeartsShine 6″ x 6″ Paper Stack