Getting Creative with the Chloe Alphabet Stamp and Nancy Damiano

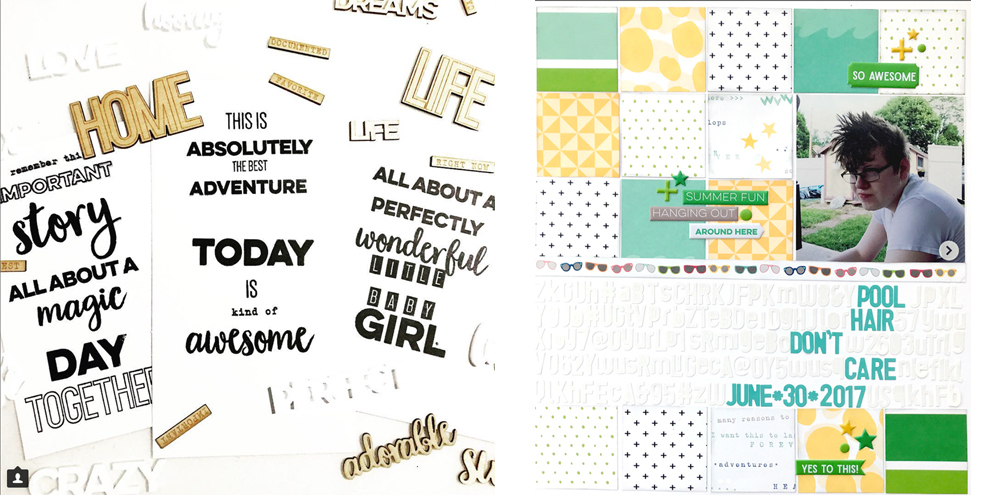
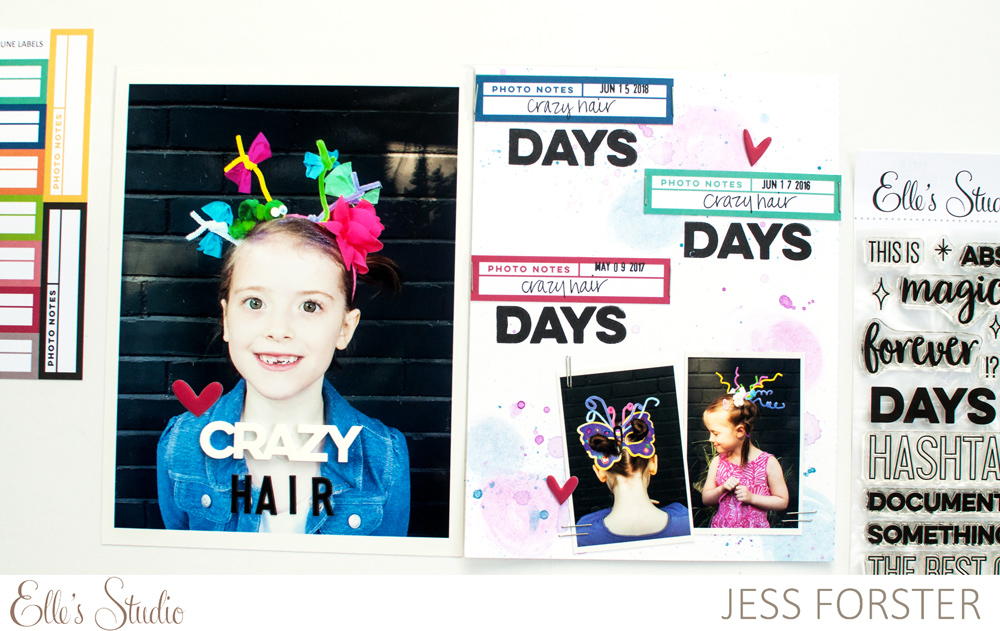
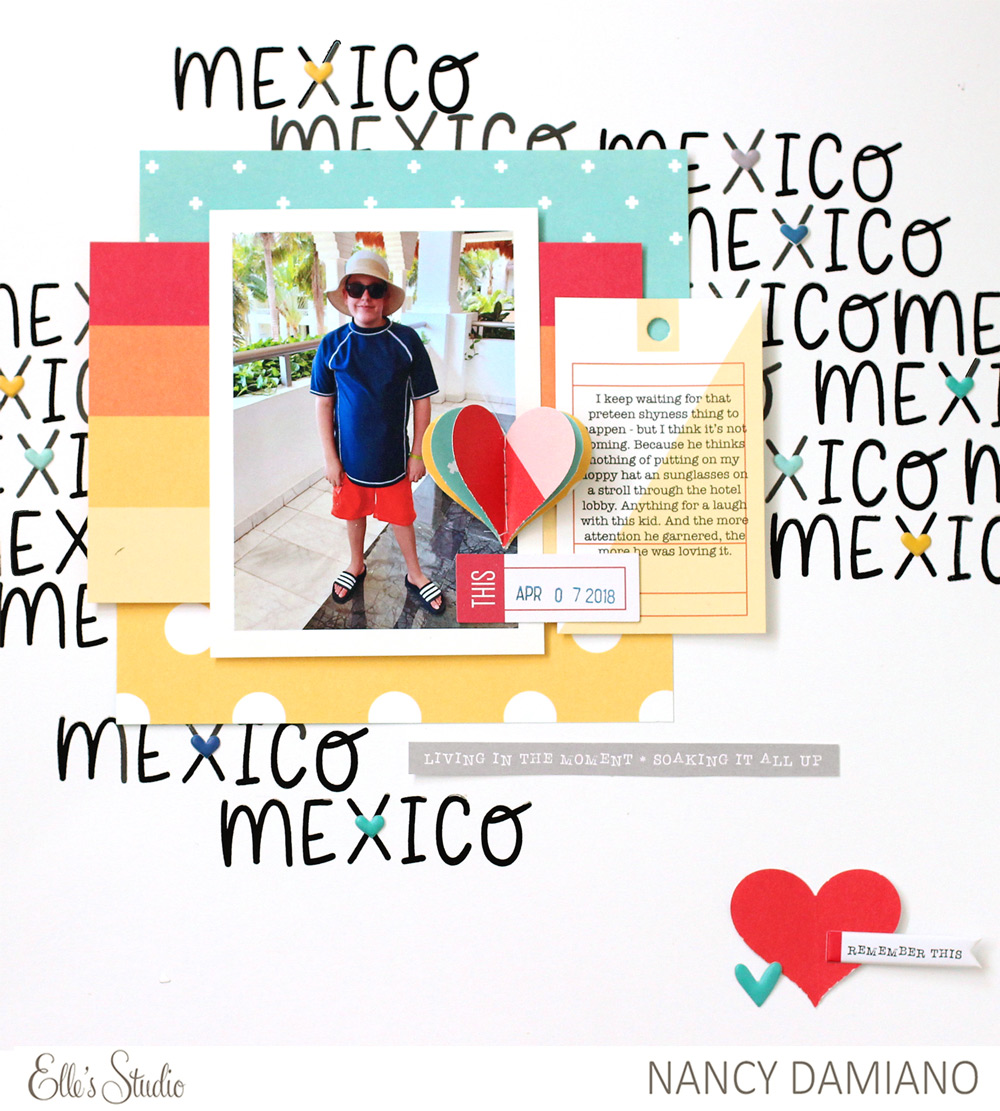
We love our newest alphabet in the shop, the Chloe Alphabet Stamp! This fun font, in a perfect size for layouts, pocket pages or traveler’s notebooks, can be used for any kind of project! Today Nancy Damiano is sharing how she created a layout background using these awesome alpha stamps, and is sharing how easy it is to recreate for your own vacation documentation! Let’s take a look:
 
Hey there Elle’s Studio fans! It’s Nancy here today with a look at the Chloe Alphabet Stamp. I love the whimsical and bold look of this font, and have used it for several titles. Let’s do something a little bit different today and create a background pattern that can be customized for all of your summertime travels.


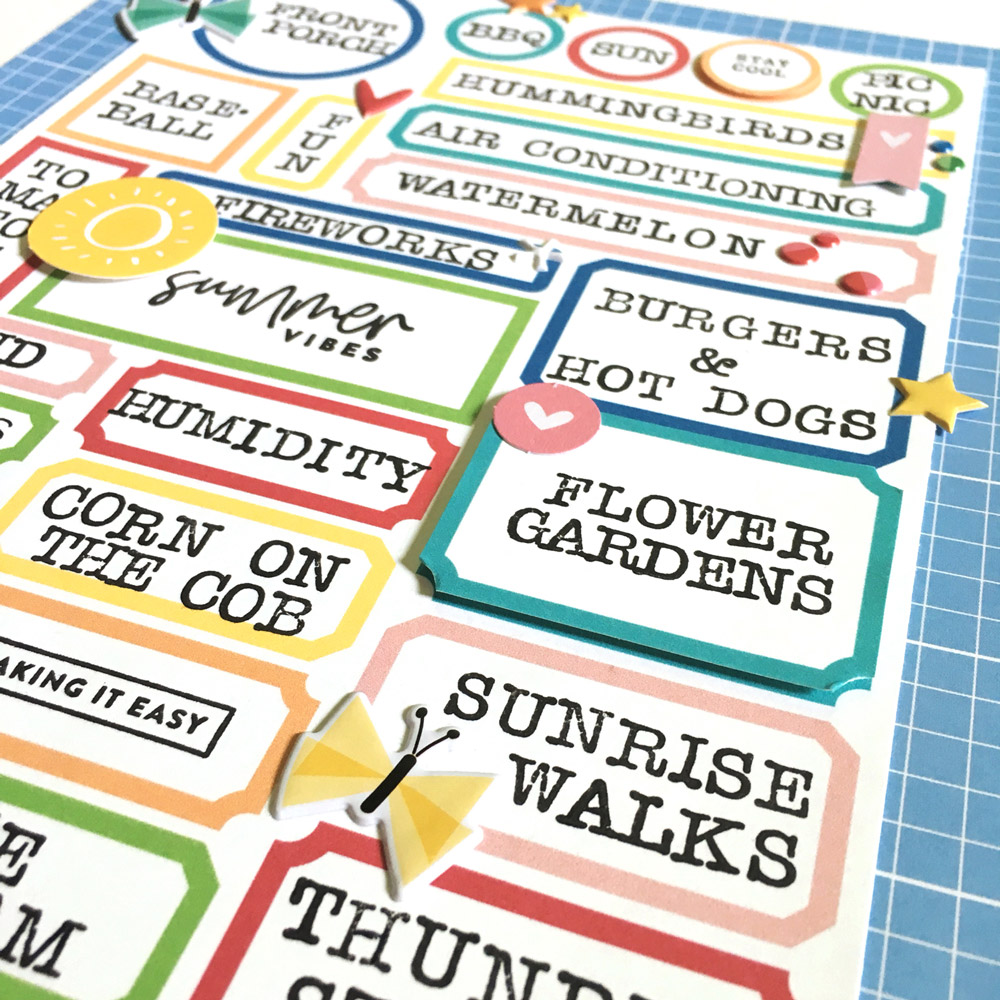
Supplies | Shapes and Dots Puffy Stickers, Chloe Alphabet Stamp, Let’s Go Travelers’ Notebook Kit, Noteworthy Bits and PiecesNoteworthy 6″ x 6″ Paper Stack
 
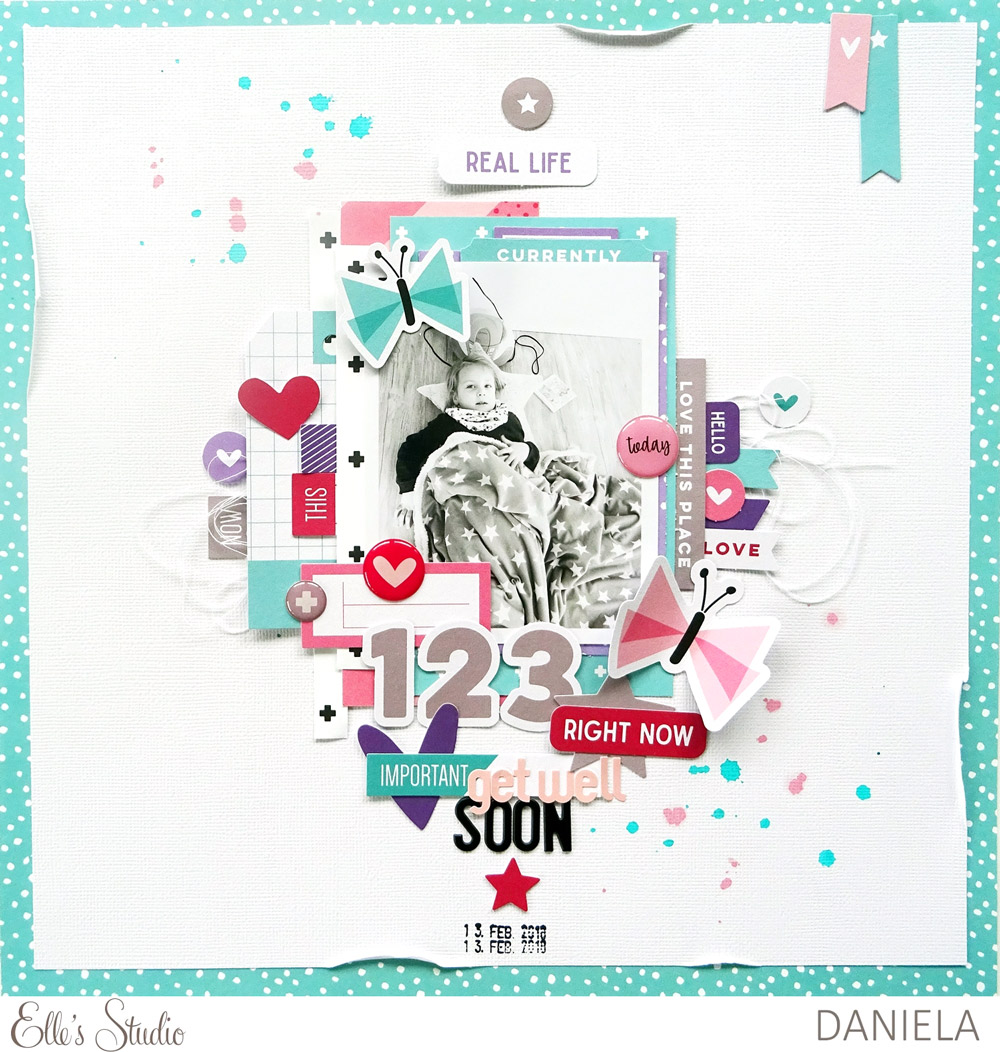
Start by using a ruler to lightly sketch out lines that are approximately 1” in width. This will help to keep the lines of stamped text perfectly straight. Use the Chloe Alphabet Stamp and black ink to stamp your destination word repeatedly all over the background.


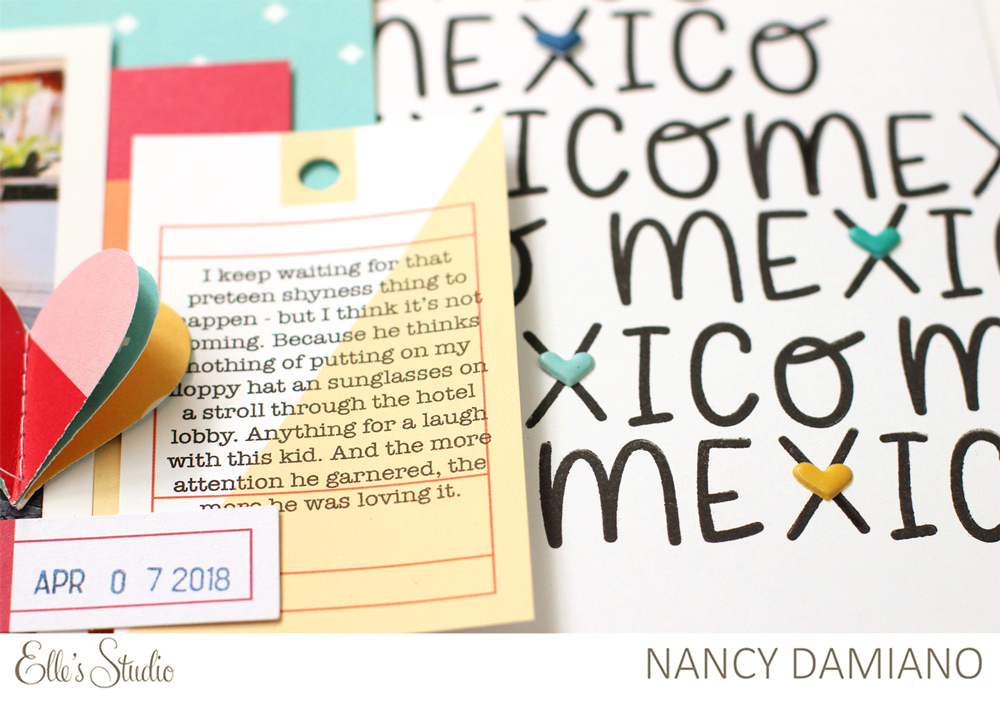
To add a little bit of color and texture to the background, place a tiny puffy heart in the center of all (or most) of the x’s in the text. You could also use enamel dots or puffy stars to highlight one letter.


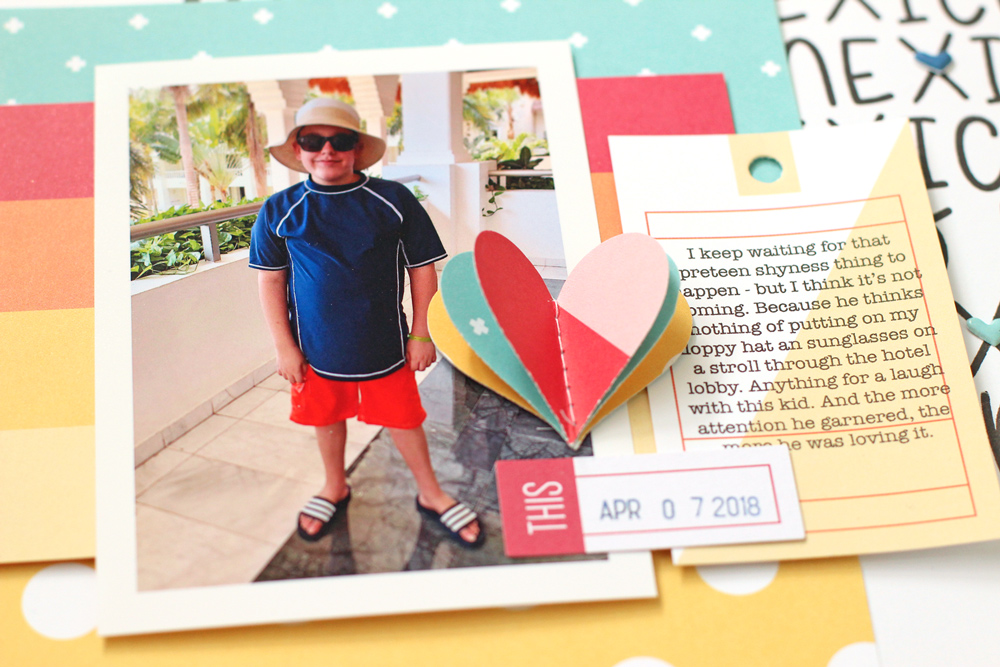
A small, stacked heart sewn in the center adds an interesting embellishment without overpowering the photo. Keep in mind that the bold background needs to be balanced out with smaller, subtle embellishments.


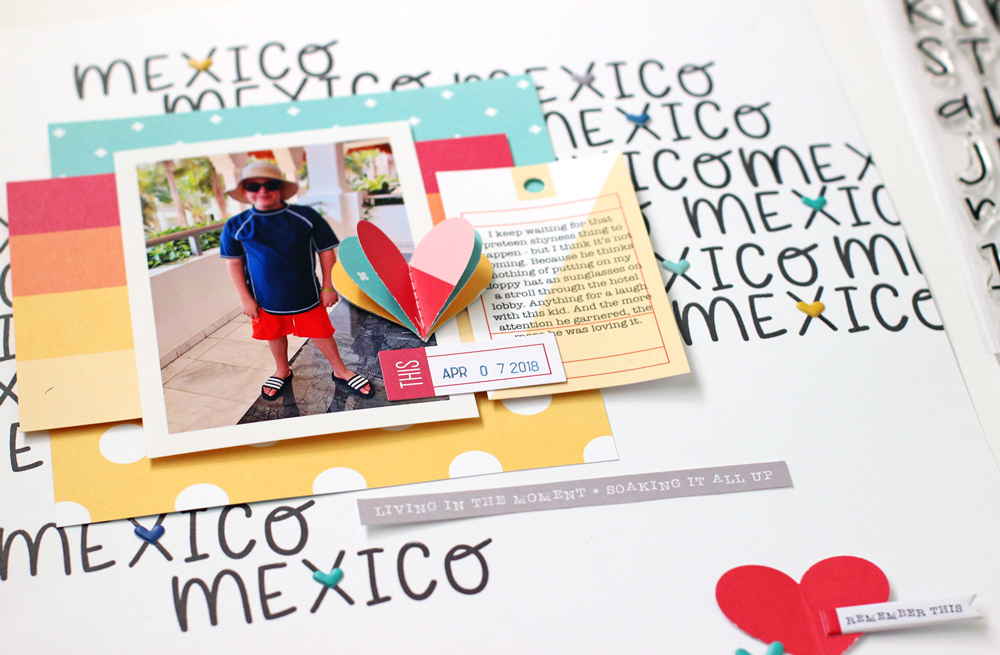
Get creative and customize this design for your story. Stamp the repeated text in perfectly stacked rows, in shapes or on a staggered diagonal. The Chloe Alphabet Stamp is both versatile and fun!
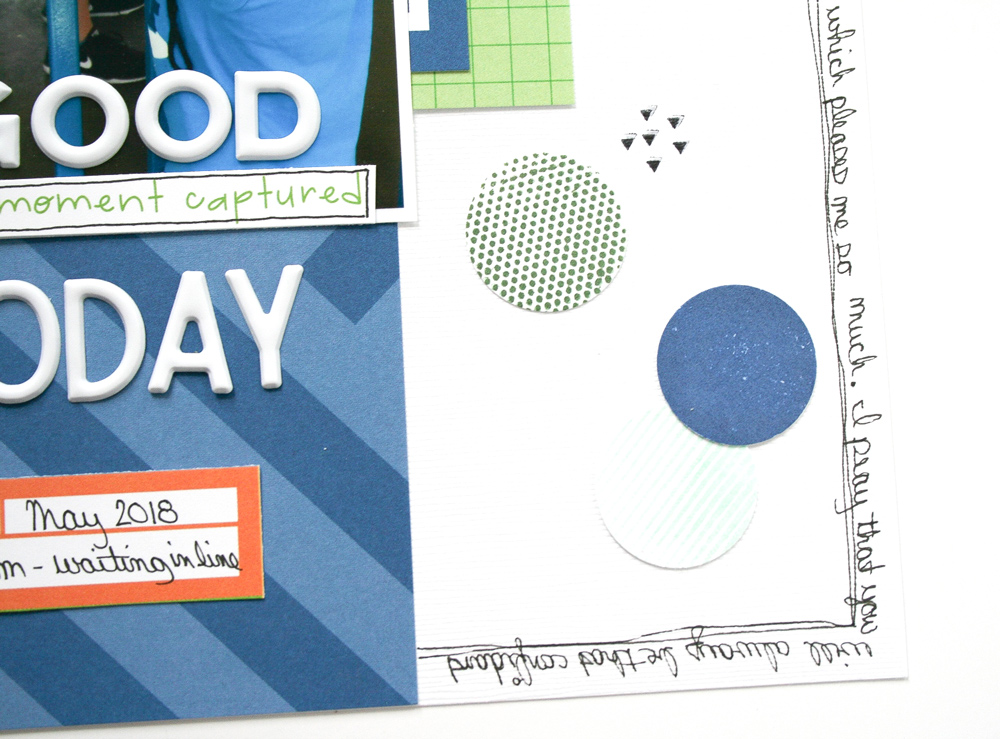
 

June #EllesStudio Spottings on Instagram!

Even though summer is upon us, we’re happy to see that our followers are still posting new projects on Instagram using the #EllesStudio hashtag! Let’s take a look at the six projects that caught our eye this month:


We love that @takingascenicroute had some time to play with the Title Builder products on the left, and it looks like she’s already come up with some pretty fantastic titles! We can’t wait to see them on a layout, Laura! On the right, how awesome is the band of alphas created with our Letter and Number Stickers on the layout that @sara.scraps made?


We spy perfectly coordinated pockets created by @theredwren on the left, using the April 2018 Kit, and on the right, we love how @popfizzpaper stamped that bold “bagel” word using our Stanley Alphabet Stamps in both the solid and outline.


How awesome is @scrapping_gran ‘s memory-keeping system on the left, which she created using our monthly kits? We love seeing all of those embellished 4″ x 6″ pages! On the right, @lynettejacobs rocked the papers, stamps and epoxy stickers from our Noteworthy collection, as well as the Red Puffy Alphabet Stickers and Title Builder Stamp. Just beautiful, Lynette!
 
Just for posting their projects on Instagram using the hashtag #EllesStudio, these six ladies will win a $10 gift certificate to the shop! Thank you so much to all of you for sharing your projects with us this month! Please email us at info@shopellesstudio.com to claim your prize!
 
Have you created something with Elle’s Studio products? Upload your projects to Instagram using the hashtag #EllesStudio for a chance to be featured here on the ES blog next month, and be sure to check out all of the projects using the #EllesStudio tag for some fast inspiration during your short, summer creative moments!

Highlighting the Noteworthy Bits and Pieces with Daniela

Our Bits and Pieces are often a customer favorite when we release a new collection. The packs are full of fun, shaped die cuts and journaling tags, and can be enough to use on their own to create a fantastic project! That’s what design team member Daniela is sharing with us today—a layout that focuses on making this awesome pack of bits and pieces center stage! Let’s take a look:
 
Hi there, it’s Daniela, and I’m so excited to share a new layout with you today. I’m still totally crazy about the Noteworthy Collection and focused on the Noteworthy Bits and Pieces on this project. There are so many wonderful shapes and colors included in this package that you don’t need much apart from this product to create a bright page.


Supplies: Letter & Number Stickers — Light PinkBlack Puffy Alphabet StickersNoteworthy Bits and Pieces, Noteworthy Epoxy Stickers, Noteworthy 6″ x 6″ Paper StackNoteworthy 12″ x 12″ Paper Collection
 
I wanted to create a big cluster in the center of my page around the picture, so I used lots of Bits and Pieces on top of different papers from the Noteworthy 6″ x 6″ Paper Stack.


The butterflies are so cute, and you can create great effects if you only fix the middle of it to the paper. This way you can fold up the wings slightly and add more dimension to your project.


Noteworthy Epoxy Stickers add a nice textural contrast to the paper embellishments.


All the elements on my page are overlapping here and there and I also used some color splashes to add a messy touch. The thread also helps create this style.


I hope you like my page. I can’t wait to see what you are creating with the Noteworthy collection!
 
Thanks for stopping by and have a great day!
 

A sneak peek of what is coming on July 10th!


July is here and we are so excited to document it with all the new products that will be available this month! Our July reveal is going to be full of so many awesome and fun exclusives that we’ve designed, along with some contributions from In A Creative Bubble! This month our kit + add-ons will have you ready to document all your everyday real life moments, summer, and more! Plus, it will take you right into the month of August! July’s kit includes 3 – 4 x 6 inch tags, 18 – 3 x 4 inch tags, and 26 die cuts!

Get ready to pick up our July kit for our launch day special pricing of only $9.99 on Tuesday, July 10th, at 8:00 am PST. After the 10th, our kits go back to their regular price of $11.99. Or, you can lock in the $9.99 price anytime by starting a subscription! And subscribers, don’t forget! You’ll be able to bundle anything from our shop (including the new add-ons) with your monthly kit for FREE (USA subscribers) or reduced (International) shipping!

Not a subscriber? Don’t wait any longer! We have just a handful of spots left were you can start with our June kit now! Or, wait until July 10th to sign up and start with our July kit! With a monthly subscription, you will be guaranteed a kit each month, lock in our launch day special price of $9.99 + shipping, and receive FREE (USA) or reduced (International) shipping on anything added to your box each month during our 24 hour bundling period (starting on the 10th at 8:00 am PST and ending on the 11th at 8:00 am PST). Along with more time to shop, our subscribers will also have access to special discounts on select items during the 24 hour bundling period! These discounted items can be found in our SALE section during bundling, and you must be logged into your kit subscriber account to see them. Quick note: Our kits and add-ons are available without a subscription each month, too.

Make sure you set your alarm and mark your calendar for Tuesday, July 10th at 8:00 am PST! If you haven’t signed up for our newsletter, make sure you do to receive a reminder when everything is available for sale!  We hope to see you there!

Summertime Print and Cut Labels with Susan Brochu

Have you noticed a new product in our shop this month? Our customers have asked for them, and we listened! The June Print and Cut Labels have been a huge hit, both with our customers and our design team, and we know that you’ll love how Susan Brochu is using them today! Let’s take a look:
 
My label-loving heart was very excited to see the June Print and Cut Labels in the shop! There are so many colors and shapes—27 different labels on each sheet, and you can print as many sheets as you like. They coordinate perfectly with the rest of the June releases and, since the Elle’s Studio color palette is so consistent from release to release, you’ll be able to use these labels with past and future shop products as well.
 
I decided to use the entire sheet as a whole, treating it like a piece of patterned paper, and then fill the labels with words and phrases that really define summer for me. I began by printing the PDF un-lined version of the June Labels on an 8-1/2’’ by 11” sheet of white cardstock and trimmed the edges to leave a thin, white border. I flipped the page 180 degrees because I wanted the row of circles to run along the top of the page.


Supplies | June 2018 KitJune Print and Cut LabelsTwinkle Puffy StickersPuffy Star StickersLet’s Relax StampHazel Alphabet StampHappy Moments StampFoodie StampNoteworthy Bits and PiecesNoteworthy Puffy StickersNoteworthy 12″ x 12″ Paper Collection
 
I used the “summer vibes” sentiment from the Let’s Relax Stamp as my title and stamped it in the large, rectangular green label that is just about in the center of the sheet. I liked that its script writing is different from the rest of the fonts I’d be using. To help that label stand out a bit more, I added the sun die-cut from the June 2018 Kit, adhering it with some dimensional adhesive. Then it was time to fill the rest of the labels!


I’d brainstormed a list of words before I started the page so I filled in the labels with words from my list using the Hazel Alphabet Stamp, mixing and matching the length of the words to the different size and shape labels. I also used a few phrases from several other stamp sets. The Let’s Relax Stamp has a summer theme, so I had plenty of choices there, and there were also summer-appropriate phrases on the Happy Moments and Foodie Stamp.


You might notice that some of my labels are lifted off the background.  I printed a second sheet of labels, stamped on a couple of them and then cut them out and adhered them over the top of their matching shape using dimensional adhesive.  I’ll admit that this wasn’t originally my plan, but I accidentally misspelled one of my words. Because I could print multiple copies of the labels, it was easy for me to cover up my mistake! I decided to do the same thing with a few more labels to make this technique look more intentional.


I completed my layout by scattering some Noteworthy Puffy Stickers and Noteworthy Bits and Pieces around the page, placing a few of them on dimensional adhesive.  I matted the page on a blue grid patterned paper from the Noteworthy 12″ x 12″ Paper Collection, trimmed to measure 8-1/2” by 11”. I included the branding strip at the bottom to pull in all the colors of the labels and embellishments.
 
I hope I’ve given you some inspiration today. Whether you cut and use the labels individually or keep the entire sheet intact like me, get printing those June Print and Cut Labels!


Crazy Hair Days with Jess Forster

One of the best aspects of a stamp is using it over and over again in different ways, and you can even do this on the same project to add repetition to your page—a great technique for adding movement and pattern. Today, Jess Forster is here to share how she did just that using the Title Builder Volume 2 Stamp and the June Labels. Let’s take a look!


When it comes to creating layouts, sometimes you just want to play! 


I was inspired to create a unique background by combining the word “Days” from the new Title Builder Volume 2 Stamp with the June Labels. Specifically, I wanted to create a piece of patten paper that felt as wild and crazy as my daughter’s most recent crazy hair / school spirit day. 


Using the Vicki Boutin art crayons, I used the drop technique to create splatter on my white background. Next, I selected three June labels and added date stamps representing three different time points in my photos. After writing “Crazy Hair” on the label, I adhered it to the dry white paper and stamped the word “Days” directly under the label onto the paper.


Supplies | June LabelsTitle Builder Vol 2 Stamp, Title Builder Vol 2 Acrylic, Puffy Heart Stickers — Spring Mix, Black Puffy Alphabet Stickers
 
Eh Viola! It’s not rocket science, but it is a great way to use the Title Builder Vol 2 Stamp along with the June Labels. You also get the opportunity to play and create something artistic!
 

Documenting Summer Sports with Jess Forster

In April, I showed you how I use monthly pocket pages to document everyday life in 2018. Today, I am back to stare another process video to showcase how I highlight one story in a 6″ x 8″ double-page spread.


For me, the first step in creating this layout is looking at the products that inspire from the monthly kit and add on release. This month, I am digging the 3″ x 4″ bright green journaling tags from the June 2018 Kit. I like a challenge, and given that I don’t typically work with this type of color, it sparks my creative interest and desire to play.


Next, I focus on coming up with a design. Typically this involves deciding what size of photos I want to include. Given that I have two 3″ x 4″ journaling tags selected, I decide to print one 6″ x 8″ photo as well as two 3″ x 4″ photos. This means that I will use one 6″ x 8″ page protector and another that includes four 3″ x 4″ spaces. For this layout, I am highlighting a story of my daughter starting her soccer season.


Once the products and design is secured, I then focus on writing the story. For this layout, I am highlighting a story of my daughter starting her soccer season. I include a letter about what I am noticing right now, as well as overheard statements from game nights. After the story is recorded, I turn my attention to embellishments. I am a huge fan of the Bright Hand Drawn Acrylic Hearts; especially the bright green heart combined with the black and white photo, journaling tags and Summer Wood Veneer Frames. I really like the look of the green, black and white as well as the wood elements on this page. I use the “summer” die cut from this month’s kit as well as the word “fun” from the Hello Happy Puffy Words to finish the title.

Supplies | June 2018 KitSummer Wood Veneer FramesBright Hand Drawn Acrylic Hearts, Hello Happy Puffy Words, Noteworthy Wood Veneers

To see how this page came together, watch the video below:

I hope I have inspired you to document using the green journaling tags in the June Kit, the Summer Wood Veneer Frame or encouraged you to tell a summer sport story!

Thanks for looking!

Sketch Day with Tracey Fox

Now that summer is here, the pool and the back yard are calling to us, leaving little time to scrapbook. But, with the new sketch we’re sharing today, we know that you will want to drop your summer bucket list to create, the way that Tracey Fox did! Let’s take a look:
 
Don’t you just love creating a page from a sketch? I sure do—especially when the sketch is based off of an amazing layout created by fellow Elle’s Studio design team member Melissa Mann for the May inspiration gallery. Here’s a look at the sketch:


The signature feature of this sketch is the awesome sunburst surrounding the focal point of the layout. Melissa used branding strips from past 12″ x 12″ paper collections to create this effect on the original, and when Laura Wonsik scraplifted Melissa’s layout for last month’s “Inspired By” series, she mixed branding strips with stamps from the Hello stamp set. I wanted to go in a different direction for my layout:


Supplies | June 2018 Kit, June 2018 Digital Cut FileJune Blank Label Stickers, Summer Wood Veneer Frames, Bright Hand Drawn Acrylic Hearts, Hello Happy Puffy Words, Shine 6″ x 6″ Paper Stack, Noteworthy 12″ x 12″ Paper Collection
 
For my take on the sunburst, I selected a sheet of paper from the Shine 6″ x 6″ Paper Stack with lines of colorful scallops. I trimmed it into strips which I adhered to the grid background paper from the Noteworthy 12″ x 12″ Paper Collection. I also added some white stitching in between each of the “rays” of the sunburst for a little extra interest.


I used my smaller photo in one of the Summer Wood Veneer Frames, and I built my title using the Hello Happy Puffy Words and letters I fussy cut from the words printed on Noteworthy Paper 3. I then layered up the photo and frame with bits of paper and tags from the June Kit and the Shine 6″ x 6″ Paper Stack, and I adhered them to the center of the sunburst.


Some die cuts from the June Kit, three of the Bright Hand Drawn Acrylic Hearts, and a few yellow ink splatters helped me embellish the layout. For a finishing touch to bring a bit more color to an edge of the page, I added some of the summer sentiment ticket shapes from the June 2018 Digital Cut File to the top left corner.


How would you create a layout or other project from this sketch? We’d love to see! If you share a take on this sketch on social media, don’t forget to tag #ellesstudio. Thanks for stopping by today!
 

Journaling Through Product with Wendy Antenucci

Journaling is an important part of any documentation project, but maybe we could think outside of the box a bit, and figure out ways to add it to enhance our project design? Wendy Antenucci did just that with the layout she’s sharing with us today, and she’s used our June kit and add-ons to record the perfect words to tell her story:
 
Hello everyone, it’s Wendy here today to share one of my favorite things to do: journal! I love to tell my family’s story (even though I’ve been telling a lot of this one lately) and that means getting the details down… somewhere! Thanks to the Elle’s Studio puffy stickers, acrylic, and all those gorgeous stamps I was able to tell my story so that it popped off the page. I finished my journaling by using my words to frame my page.


Supplies | June 2018 Kit, June Labels, Hello Happy Puffy WordsShine Acrylic, Bright Hand Drawn Acrylic HeartsShine 6″ x 6″ Paper Stack, Let’s Relax Stamp Chloe Alphabet StampThank You Stamp
 
I began by layering my pictures onto patterns from the Shine 6″ x 6″ Paper Stack, looking for colors that would make my pictures pop. I knew I wanted the Shine Acrylic to be with my son’s picture as it perfectly told the story of the picture.


To further tell the story the Hello Happy Puffy Words were my next product to play with, as I added in phrases that fit his cute little face. With all the different sentiments and words in this set, it was easy to create my journaling to be bold and grab the page.


I grabbed the Thank You Stamp next to further add my journaling to the page. These sentiments were small enough that I could squeeze them between the Bright Hand Drawn Acrylic Hearts that I had used to mimic the colors of the SHINE title above and help to bring your eyes down the page with the rainbow-colored visual triangle.


To put my own thoughts down on the page and to not disturb the design I had created, I chose to journal around the page and add a hand drawn line. Not only is this a great spot to get a lot of words on the page, but it also serves to hold the design in and not let it fly off the page! The addition of a few of the circles from the Let’s Relax Stamp in various colors added to the carefree feel of the page.


I love to journal on my pages; it is important that my family doesn’t just look in my books and sees pretty pages or pictures, but the facts, thoughts, and dreams are documented to know life is good! Thanks for joining me today and I hope you take some time today to write down those little things before they are gone.
 

Summery Greetings with Daniela Dobson

Next time you have your Elle’s Studio supplies out for a layout or pocket page, why not make a quick and easy greeting card? Today Daniela Dobson is showing us just how beautiful and easy cards created with our monthly kit and add-ons can be, and illustrates that saving time by replicating elements across your cards can be effective and lovely! Let’s take a look: 
 
Welcome to the Elle’s Studio blog today! It’s Daniela here, sharing two cards created using June 2018 kit and extras.


Supplies | June 2018 KitHello Happy Puffy Words, Bright Hand Drawn Acrylic Hearts, Shine 6″ x 6″ Paper StackLet’s Relax Stamp
 
I used different elements from the Let’s Relax Stamp to create these cards, in ways that you may not have imagined!


On my “hello” card I used the triangular, ice cream cone shape, stamping it in alternating directions in two colors at the top of the card. Once that bright border was complete, I adhered a 4″ x 6″ journaling tag from the June 2018 Kit to the bottom of the card. I added two strips of the multicolored dot paper from the Shine 6″ x 6″ Paper Stack to the front, adding fringe cuts to the bottom piece for added texture.


More texture was added with the white tulle ribbon, and a Bright Hand Drawn Acrylic Heart really popped above it. The “hello” sentiment from the Hello Happy Puffy Words completed the card.


On the second, “summer vibes” card, I stamped the Let’s Relax Stamp textured circles at the top. To get them lined up, I used a pencil to lightly mark the rows where the stamps would go. The striped paper from the Shine 6″ x 6″ Paper Stack on the bottom of the card was the inspiration for ink colors at the top.


Below the hearts, I added another fringe border with same patterned paper from the previous card and tied another ribbon into a bow. A Bright Hand Drawn Acrylic Heart and the “summer vibes” stamped sentiment onto a die-cut label from the June 2018 Kit finished the card nicely.
 
Thanks for stopping by!