A sneak peek of what is coming on March 10th!

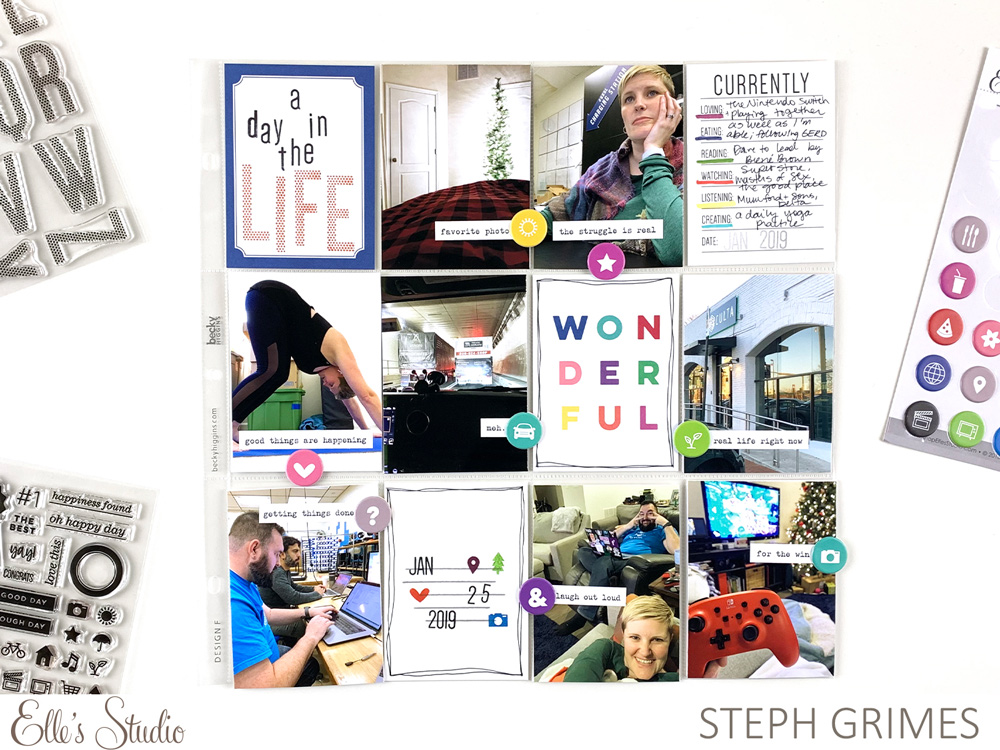
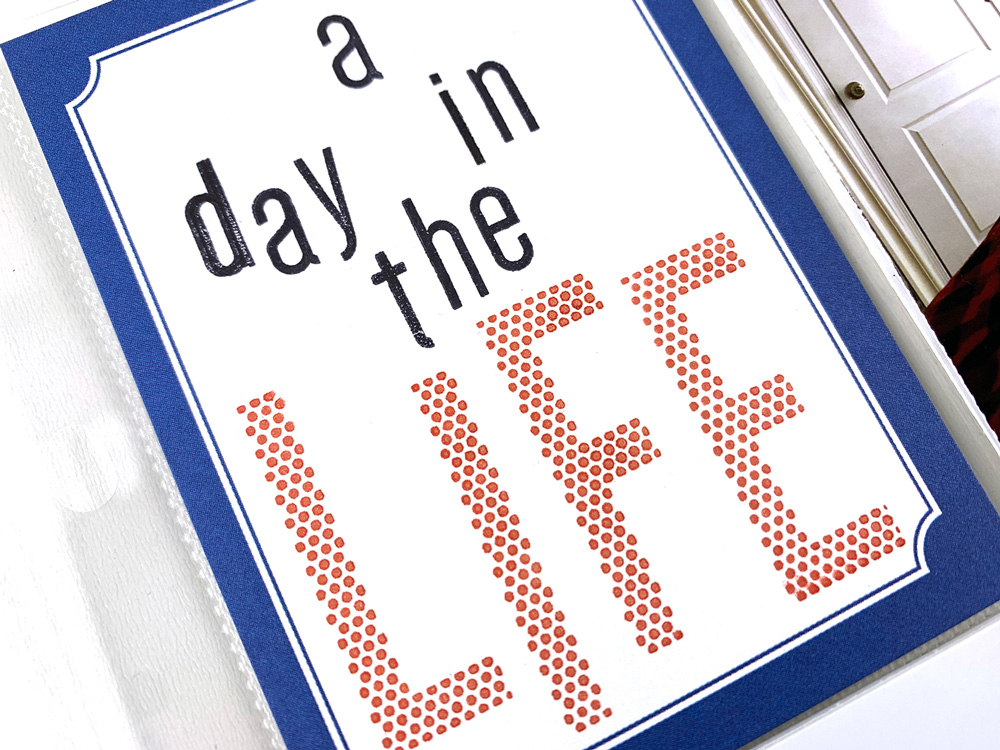
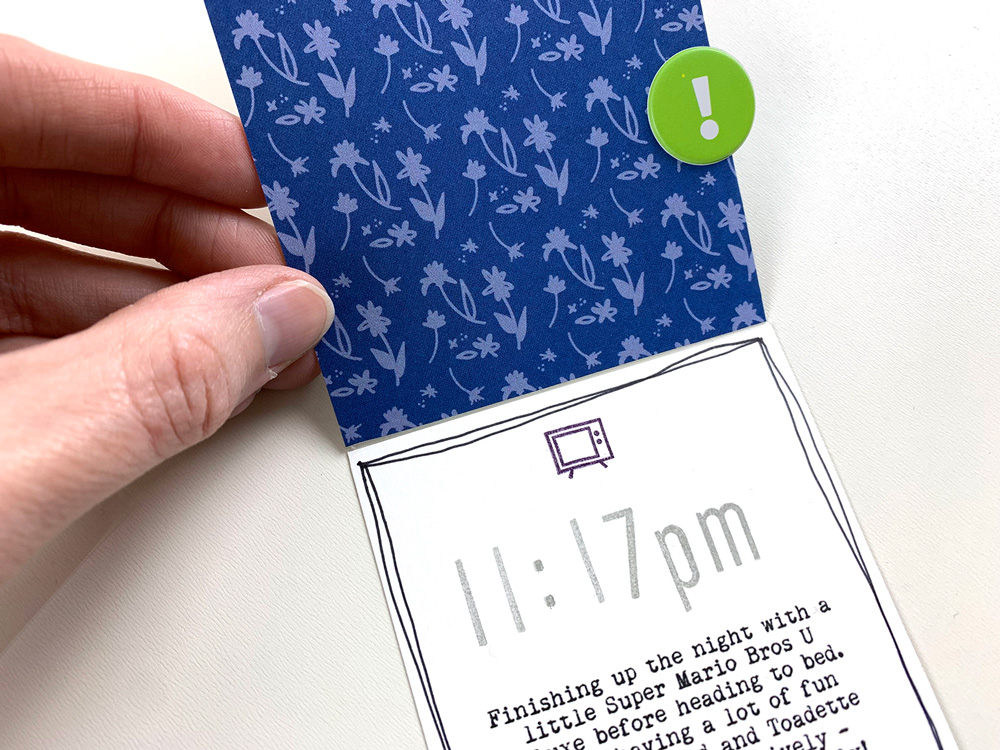
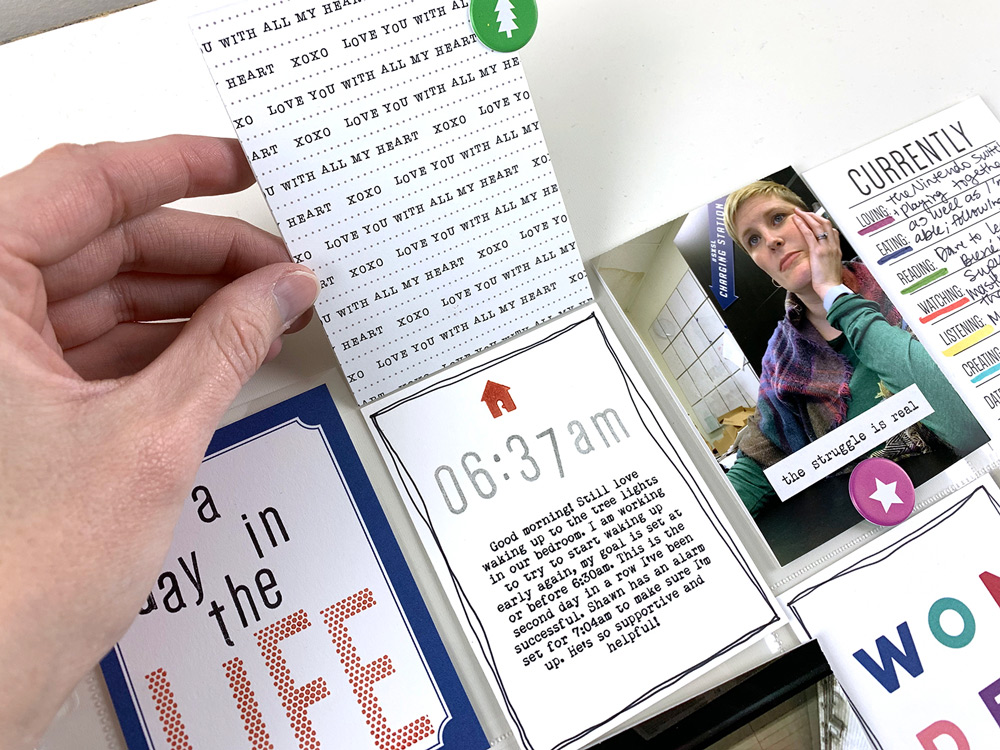
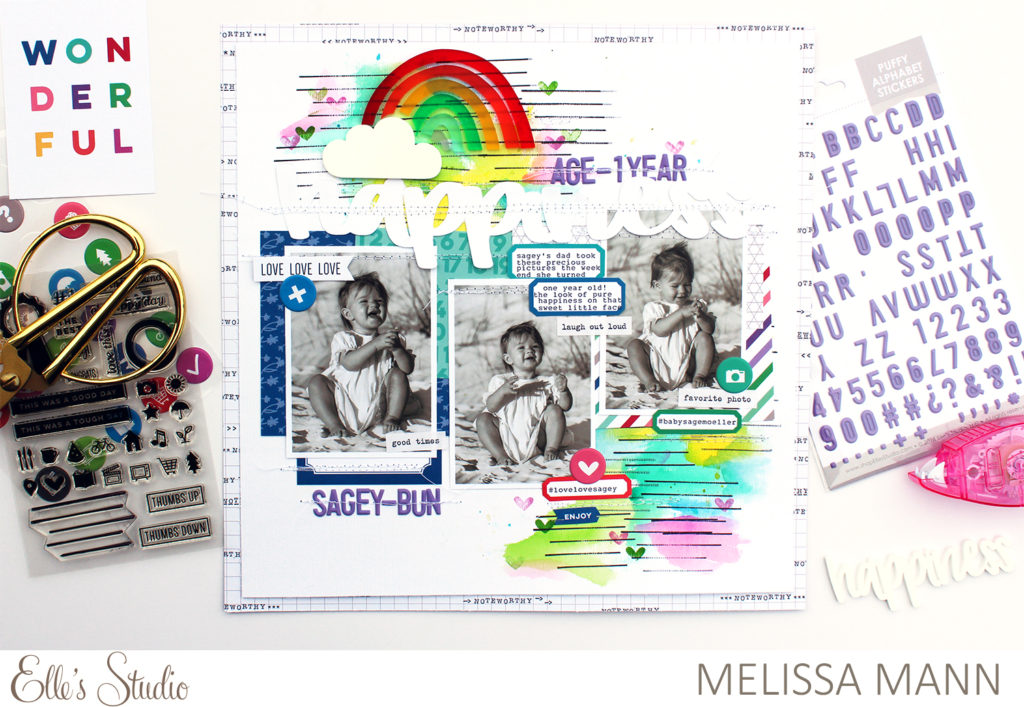
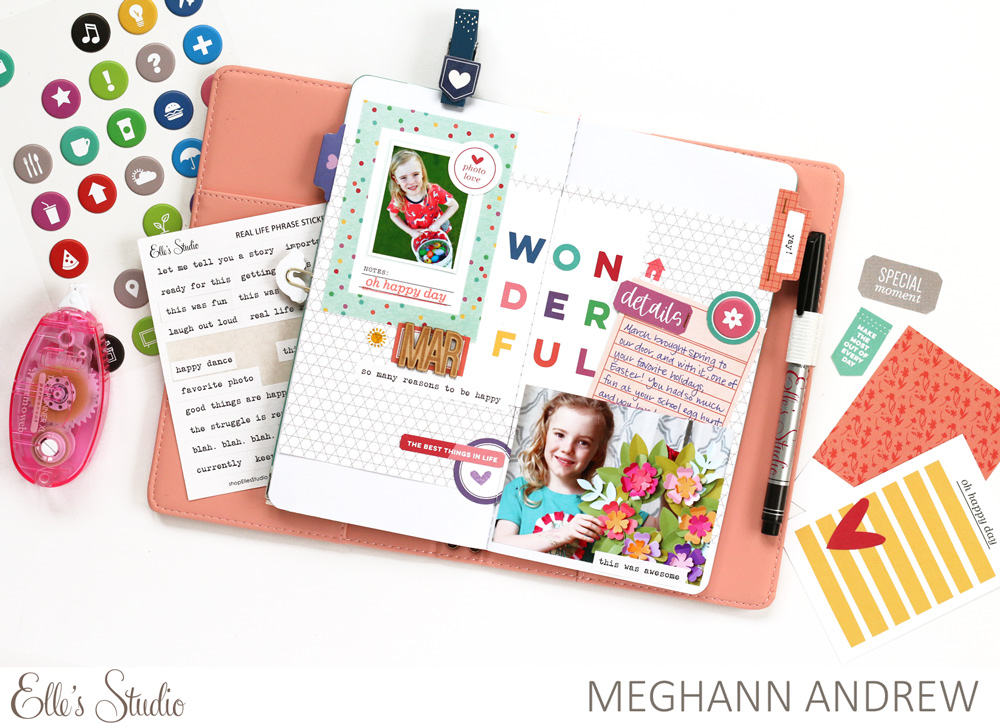
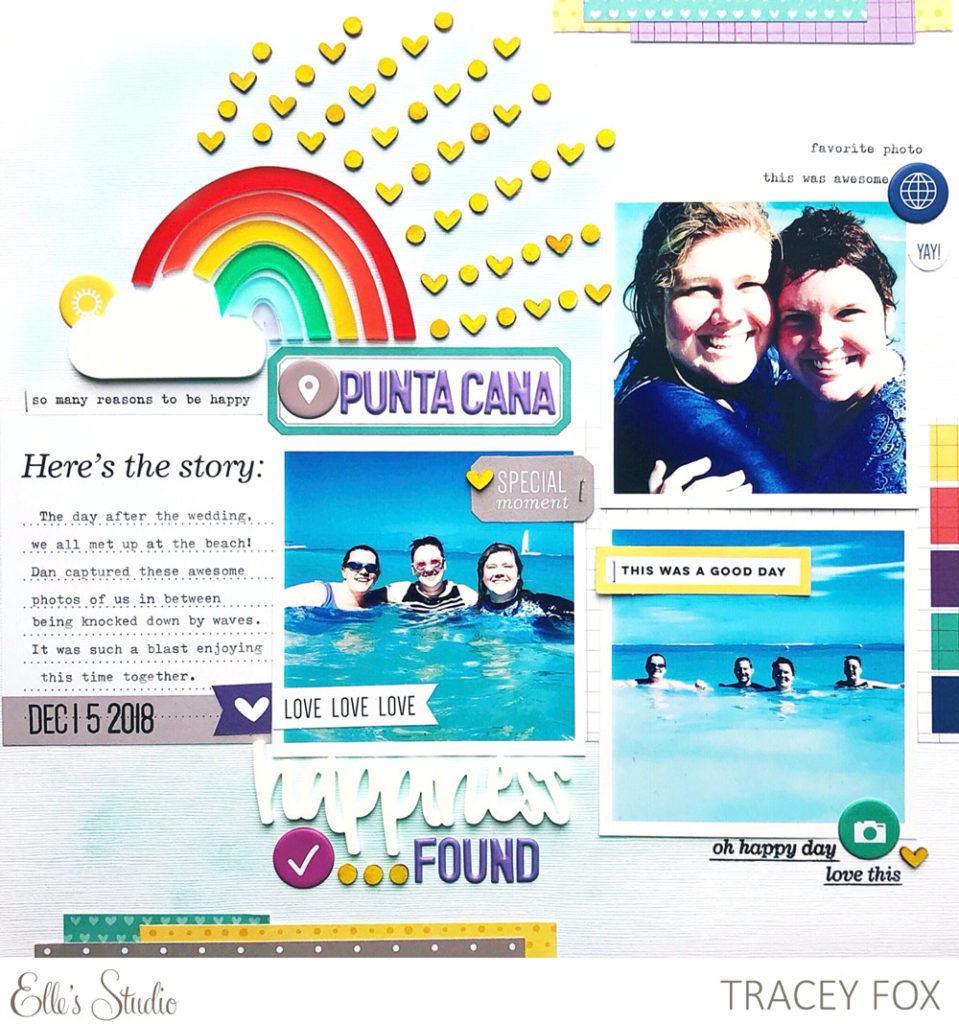
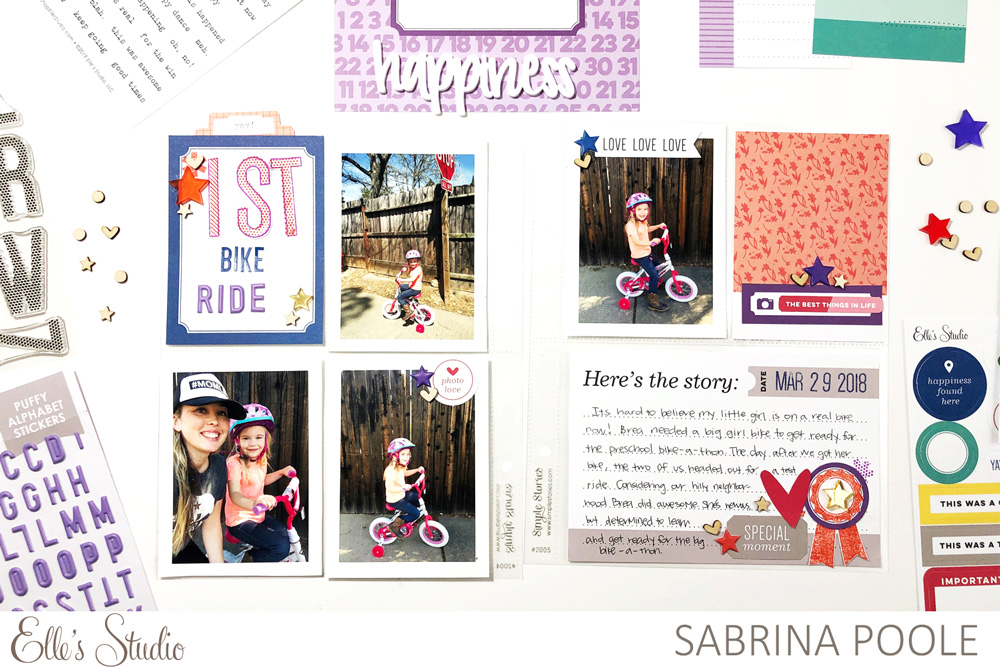
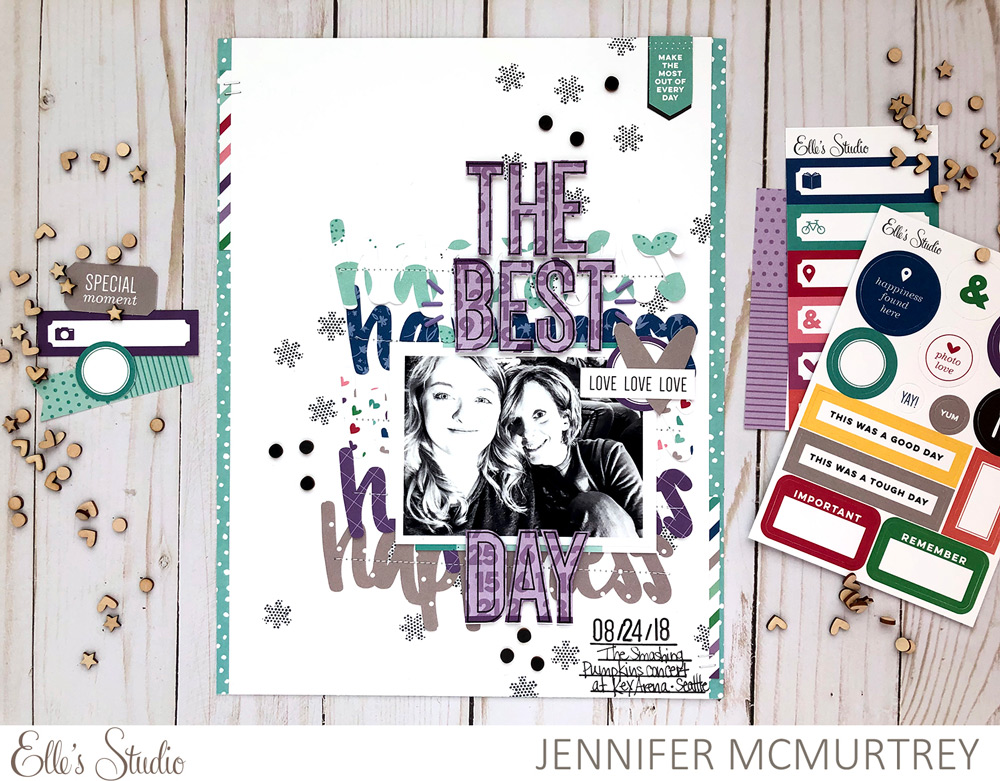
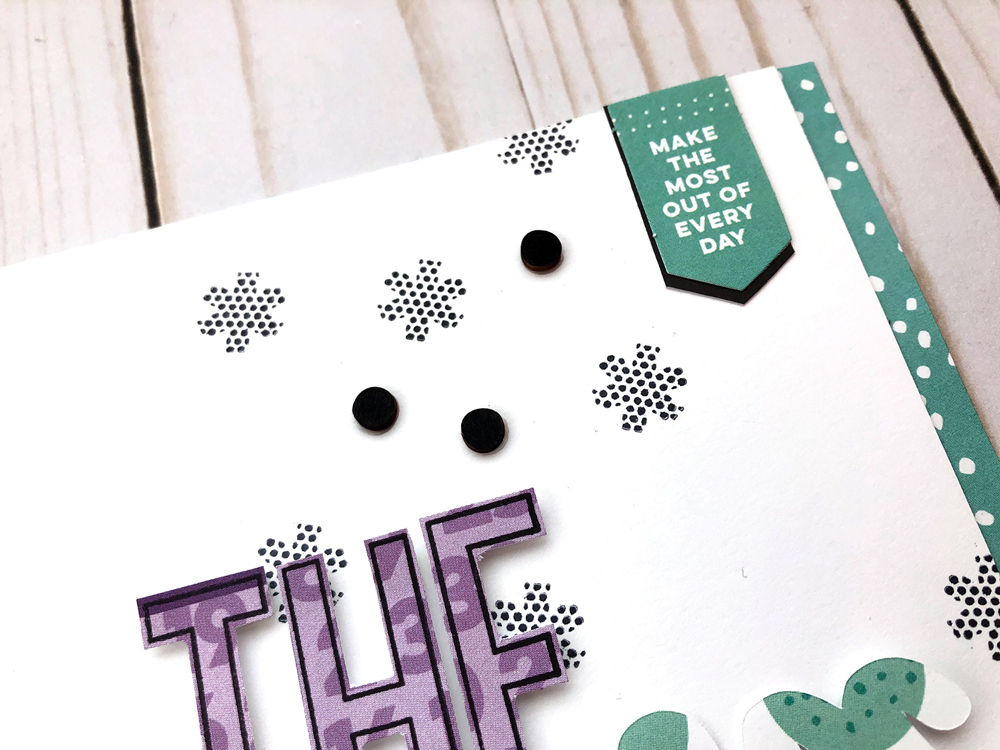
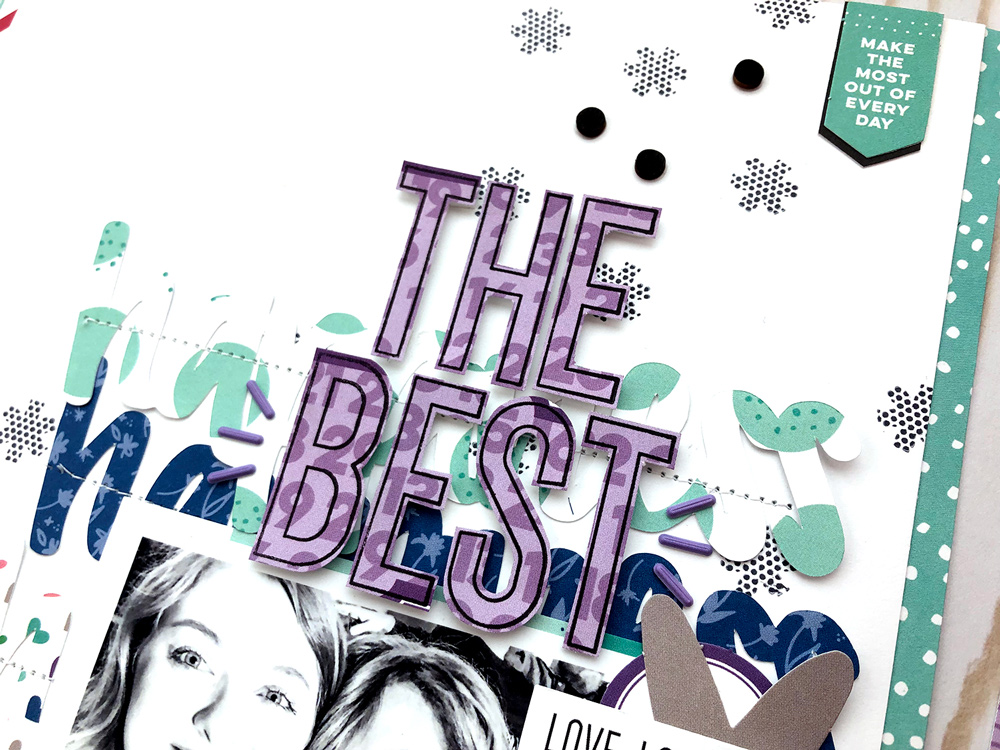
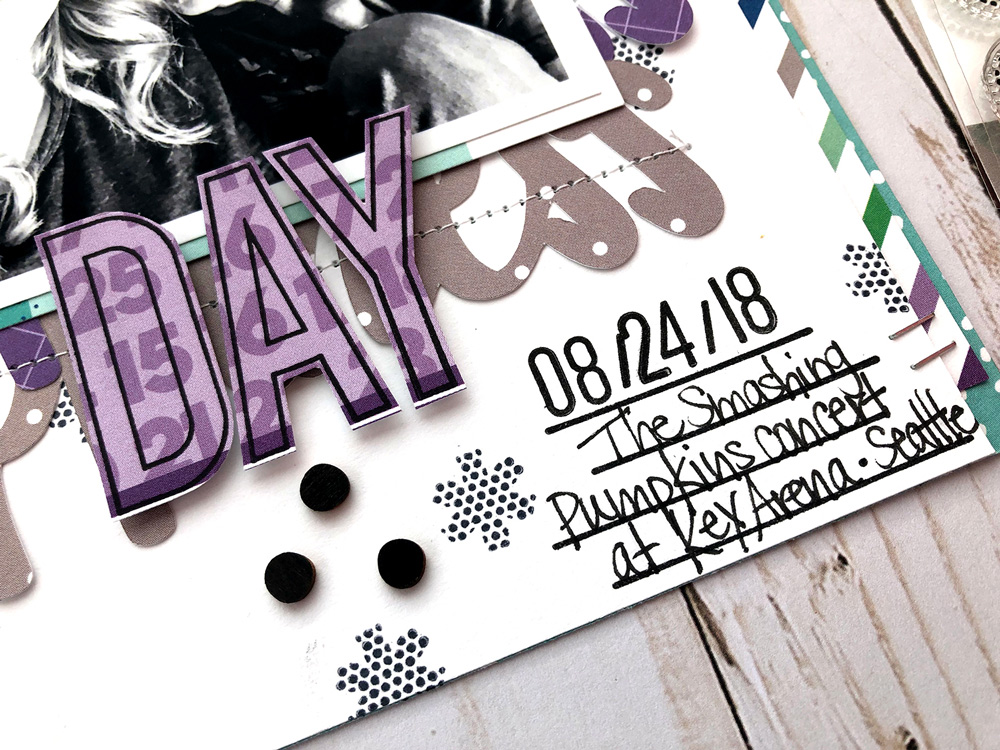
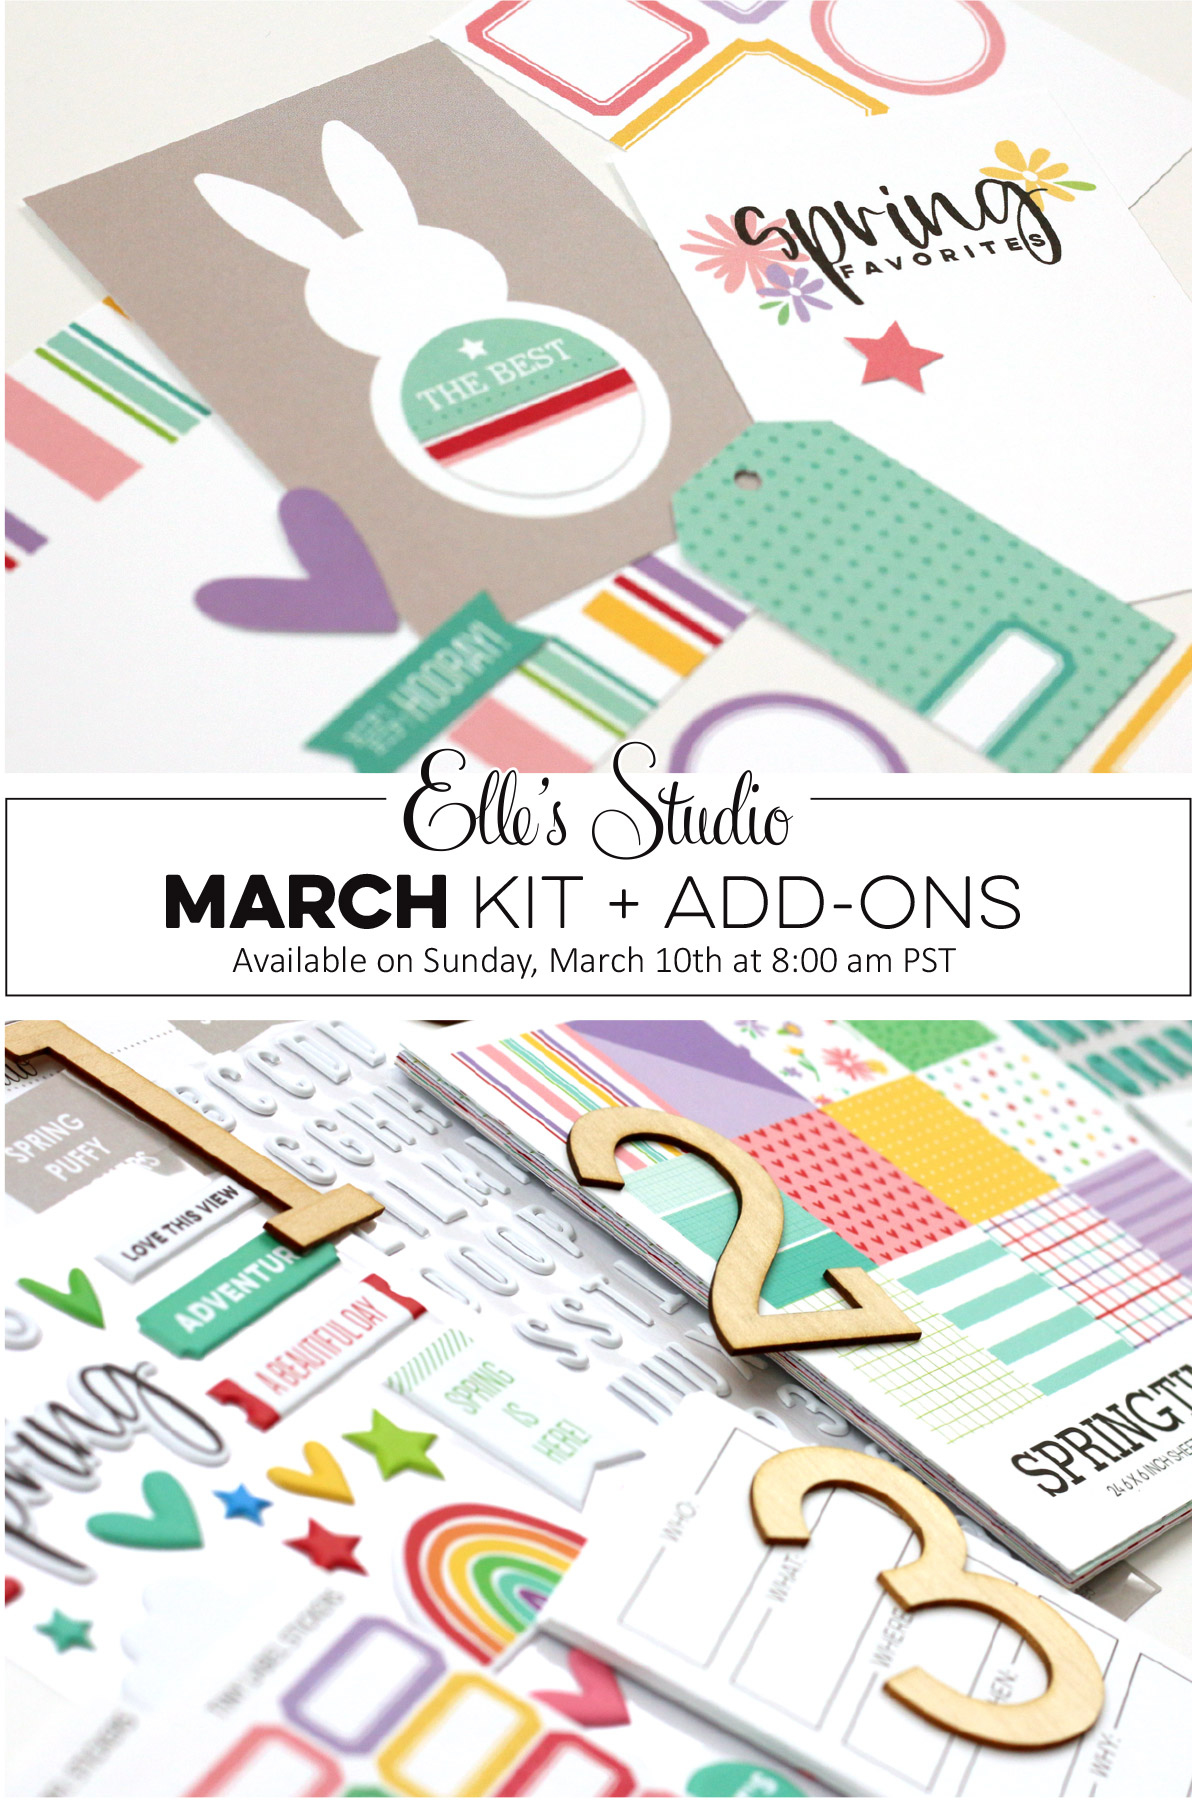
Our March kit + coordinating add-ons reveal is almost here and we are so excited for you to see all the new products we’ll have in the shop – This month our kit + add-ons will have you ready to document all your everyday real life moments, and more! Plus, it will take you right into the month of April! March’s kit includes 3 – 4 x 6 inch tags, 18 – 3 x 4 inch tags, and 26 die cuts!

Get ready to pick up our March kit for our launch day special pricing of only $9.99 on Sunday, March 10th, at 8:00 am PST. After the 10th, our kits go back to their regular price of $11.99. Or, you can lock in the $9.99 price anytime by starting a subscription! And subscribers, don’t forget! You’ll be able to bundle anything from our shop (including the new add-ons) with your monthly kit for FREE (USA subscribers) or reduced (International) shipping!

And, this month we have a special SURPRISE:

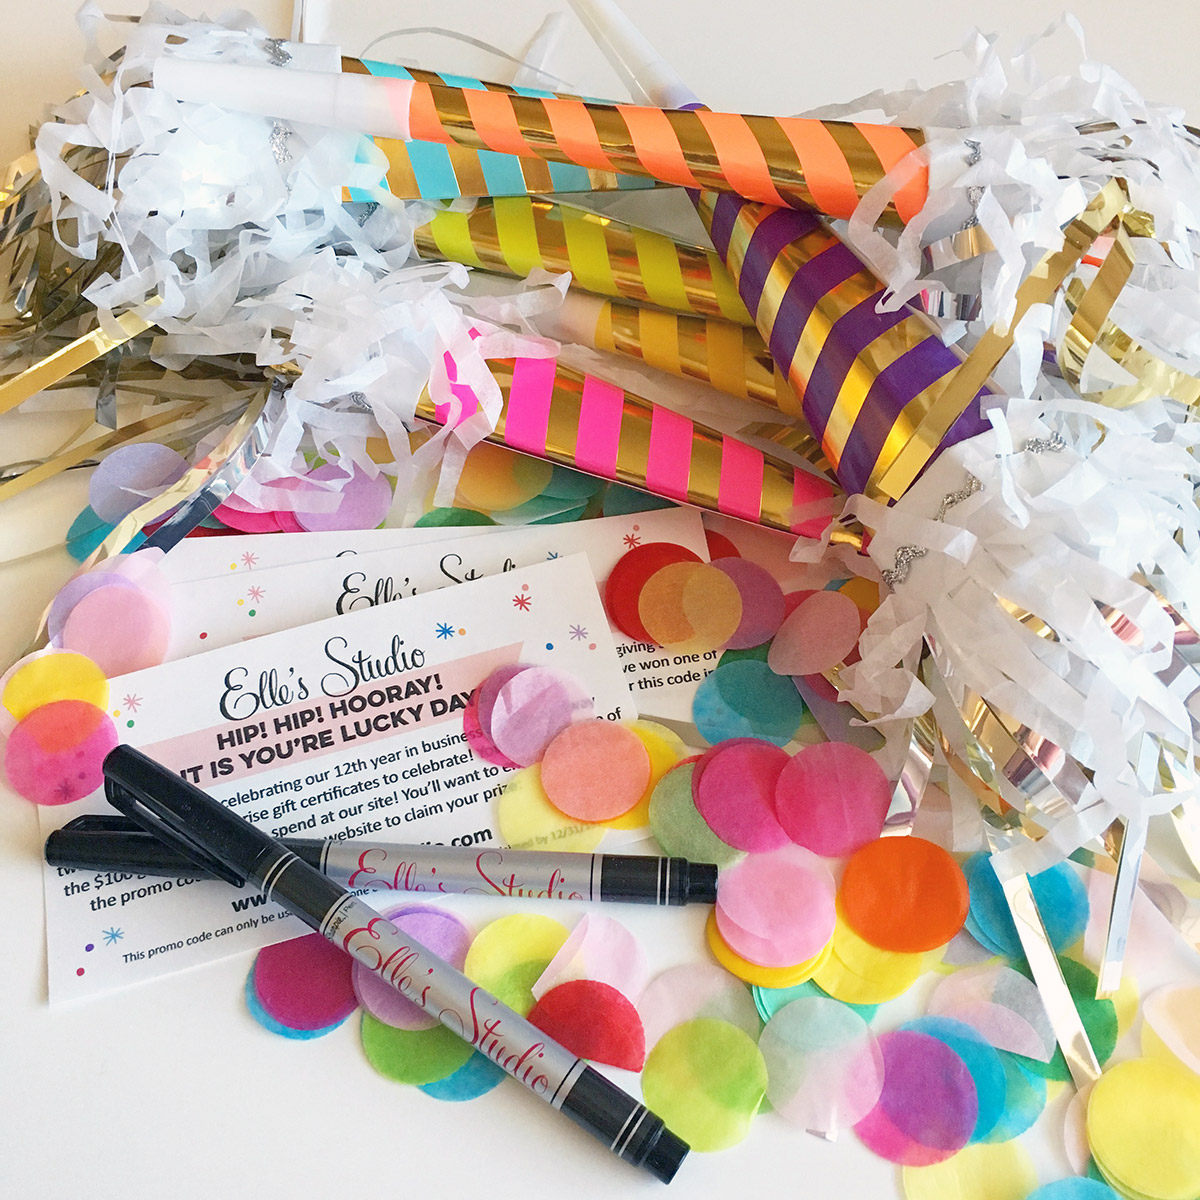
We are excited to be celebrating 12 years in business this month and we are so thankful for all of your amazing support and friendship over the years! We love and appreciate you all so much!

We’ll be celebrating ALL month long: This month we are giving away twelve $100 ES gift certificates! When you get your order, open it up and look for one of our birthday horns! If you find one in your box, you will also find a $100 gift code attached so that you can start shopping right away! We will also be dropping free gifts in random orders throughout the month! PLUS! All our current and new kit subscribers in March will also receive an ES pen with their March kit!

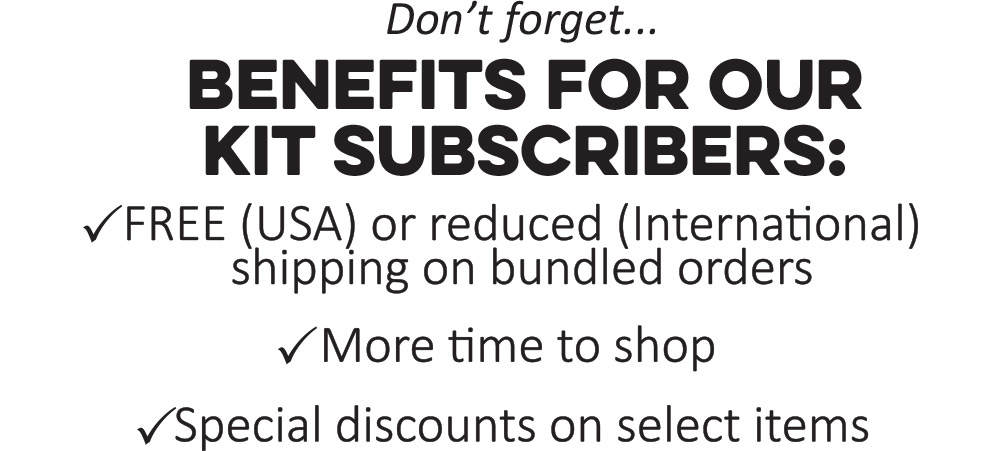
Not a subscriber? We have just a few spots left were you can start with our February kit now! Or, wait until March 10th to sign up and start with our March kit! With a monthly subscription, you will be guaranteed a kit each month, lock in our launch day special price of $9.99 + shipping, and receive FREE (USA) or reduced (International) shipping on anything added to your box each month during our 24 hour bundling period (starting on the 10th at 8:00 am PST and ending on the 11th at 8:00 am PST). Along with more time to shop, our subscribers will also have access to special discounts on select items during the 24 hour bundling period! These discounted items can be found in our SALE section during bundling, and you must be logged into your kit subscriber account to see them. Quick note: Our kits and add-ons are available without a subscription each month, too.

Make sure you set your alarm and mark your calendar for Sunday, March 10th at 8:00 am PST! If you haven’t signed up for our newsletter, make sure you do to receive a reminder of when everything is available for sale! We hope to see you there!

Celebrate in Style with Melissa Mann

Our March birthday celebration continues today with an amazing, textural page created by Melissa Mann. This project is sure to have you inspired to look for a celebration from your past that you don’t yet have in your album to document!

Good Morning! This is Melissa here with you today and I’m sharing one more project made with the February 2019 kit and add-ons, a fun birthday-themed layout to celebrate Elle’s Studio’s birthday month! Along with the February Kit, I also used the fantastic Celebrate Stamp! This is a great themed set that would work for a variety of celebratory projects: birthdays, graduations, baby showers!

Supplies | February 2019 Kit, February Print and Cut Labels, Real Life Phrase Stickers, Hazel Alphabet Stickers – Gray, Little Acrylic Stars, Puffy Icon Stickers, Celebrate Stamp, Noteworthy Puffy Stickers, Noteworthy 12 x 12 Paper Collection

To create this project, I used a piece of white cardstock and on the far right side, I stitched a piece of Noteworthy patterned paper to the underside of the card stock. Once this was stitched down, I tore the white card stock down the length of the layout to reveal the pattern paper underneath. I liked the look of the dotted pattern paper “peeking” out from behind the torn white paper.

I then placed a block of patterned paper in the middle of my layout. I traced a large circle out of the Noteworthy dotted turquoise paper and placed that over the block of grid pattern paper, also from the Noteworthy 12 x 12 Paper Collection and stitched the circle down. 


Next, I layered three photos on top of the circle and backed them with 3″ x 4″ and 4″ x 6″journaling tags from the February Kit, as well as vellum for a different texture. I adhered the photos down and placed my typed journaling label from the February Print and Cut Labels underneath one of the photos. Next came the fun part!


Using the Celebrate Stamp, I stamped the word “celebrate” down the length of the layout near the torn edge on the right side, and four balloons, which I colored with Copic markers and fussy cut out. Around the outside edge of the pattern paper circle, I placed the gray Hazel Alphabet Stickers, then arranged the balloons in two bunches on my layout. I embellished by placing Noteworthy Puffy Stickers and Little Acrylic Stars around the circle. 
Thanks for stopping by and taking a peek at my project! Don’t forget to share your projects with us in our Elle’s Studio Facebook Group, or on Instagram, using the hashtag #EllesStudio! We love to take a look at what you all have created!

Birthday Month Kick-Off with Patricia Roebuck

We are so excited that March is here! Not only does this month bring the first day of spring, it also is the month that ES turns another year older! We are celebrating our 12th birthday this month, and for the next two weekends, we wanted to share some birthday project inspiration with you to celebrate! We truly value the relationship that we share with our loyal fans and customers, and we know that we wouldn’t be here without your support! Without further ado, design team member Patricia Roebuck is going to kick off the festivities today with an amazing pocket page spread!

Hi Elle’s Studio friends!  This is Patricia to share with you an idea using the Large Jane Alphabet Stamps to build a fun title for your next layout or a title card for your pocket page layout. 

Supplies | Celebrate Journaling Tags, Stars and Dots Puffy Stickers, Heart and Star Acetate Die Cuts, Little Acrylic Stars, Round Months of the Year Wood Veneers, Large Jane Alphabet Stamp – Stripes, Large Jane Alphabet Stamp – Polka Dot, Large Jane Alphabet Stamp – Solid, Large Jane Alphabet Stamp – Outline, Celebrate Stamp, Oh Happy Day Stamp, Noteworthy Bits and Pieces, Noteworthy Puffy Stickers, Noteworthy 12 x 12 Paper Collection

While you definitely can use one pattern of the Large Jane Alphabet Stamps, I used all four! I used the stripes, polka dot, and the solid for the inside of the letters and used the outline for each one.  The design of these alphabet stamps are so clean and classic; combining them all with different colors of ink create just the right look for your projects.  In this case, mine is celebrating a birthday!

Since this was a birthday themed project, I combined the Large Jane Alphabet Stamps with the Celebrate Stamp to create the title “Birthday Girl.”  Other great ideas could be to spell out a child’s name, birthday month, or stamp either “Happy,” “Birthday,” or both!  Experiment with layering your Large Jane Alphabet Stamps as I did here with the smaller Elle’s Studio font sentiments.  Making the smaller font in black helps give contrast to the lighter inks I used for both the inside and the outline of the Large Jane Alphabet stamp, and helps to show it as the first word of the title.  Take your title to the next level and combine fun stamped images to connect to your title, as I did here with the balloon tassels, that I “attached” to my title to give it a more festive look.

Continue the festive look by stamping out the banners from the Celebrate Stamp in coordinating inks, then layering embellishments over the top.  This gives great dimension to your page.  For these banners, you just have to curve them on your acrylic block to give them a banner look.

The Celebrate Journaling Tags are perfect for birthday celebrations, and the large 4″ x 6″ tag was the inspiration for my stamped banner at the top of my 6″ x 8″ layout. I used this tag to type my journaling, and finished it off by adding the pink Noteworthy Bits and Pieces circular tag, which I stamped with “make a wish,” and topped with a Star Acetate Die Cut.

Using another 3″ x 4″ Celebrate Journaling Tag as a filler, and to give balance to both sides of my spread, I stamped “let’s” in black ink and “party” in pink ink using the Celebrate Stamp, then stapled more acetate stars directly to it.

Pull out your Large Jane Alphabet Stamps, inks, and other Elle’s Studio stamps to create your own titles for your layouts or pocket pages.  Experiment with different layering possibilities as well as ink colors, and  have fun documenting!

A Day Documented in Pockets with Steph Grimes

Every once in a while, it’s a good idea to dive deep into our daily grind by documenting a day intensively. Whether you do this in pockets, on layouts or in a traveler’s notebook, our February kit and add-ons can help you get those tiny details of your life down, and Steph Grimes is with us today to show us how she did just that!

Hi all! This is Steph Grimes and I am excited to share with you all today a quick page I created documenting a day in our life using the February Kit and extras! As soon as I saw the Oh Happy Day Stamp, I felt inspired to create a pocket page that used some of my own tags to hold small stories of moments throughout a single day.

Supplies | February 2019 Kit, Real Life Phrase Stickers, Puffy Icon Stickers, Large Jane Alphabet Stamp – Polka Dot, Oh Happy Day Stamp, Mini Dated Stamp, Jane Alphabet Stamp, All My Heart 6 x 6 Paper Stack

For starters, to document a this day in my life, I set an alarm for every hour on my phone to remind me to take a photo and write some notes about what was happening in that moment. I used a note-taking app on my phone to jot down notes that I then used for my journaling on this project. The goal of this, for me, is to capture really small details I might otherwise overlook in my weekly approach to documenting. Then, about a week after my day of documentation, I created this page to bring it all together.

I started by creating a title tag for my page using one the border tags from the February 2019 Kit. I love these simple tags that have plenty of space for a photo, journaling, or, in this case, stamping out a title. I’m obsessed with the Large Jane Polka Dot Alphabet Stamps and love the way they look here paired with the simpler and smaller Jane Alphabet Stamp.

Remember when I said that I knew as soon as I saw the Oh Happy Day Stamp that I knew this was the type of page I wanted to create? Well those tiny icons included in the stamp were the spark for this idea. For each moment throughout the day that I had a photo and story for, I created a flip-up journaling tag. On the outside of each tag, I added my photo, a phrase sticker from the Real Life Phrase Stickers, and a Puffy Icon Sticker to indicate that there’s a flip.

Inside the tag, I lined the top half with patterns in coordinating colors from the All My Heart 6 x 6 Paper Stack and added another correspondingPuffy Icon Sticker. Then, using a blank white tag, I typed out my journaling, stamped one of the icons from the Oh Happy Day Stamp and the time using the numbers included in the Jane Alphabet Stamp. I added some hand-drawn lines around the outside of each tag for a little extra embellishment. I attached the two tags with washi tape under the photo and on the back of the white tag to create a hidden hinge for my flip-ups.

To round out the page, I used the “currently” tag from the February Kit to make a list of current activities from the day. Using markers, I underlined the list items on the card to match the colors of the rest of my page and wrote my responses for a quick and easy alternative type of journaling on this project.

I hope that you found some inspiration in this page and will use your kit components to create your own deep-dive project about a typical day in your life!  

#Thursday3 Traveler’s Notebook with Sabrina Poole

Traveler’s notebooks are a popular recent addition to the world of paper crafting, and our exclusive kit and add-ons work perfectly inside them! From our tags to stickers to wood veneers, you can find a wide variety of products in our shop to use TNs to tell your stories. Sabrina Poole is starting an exciting new project in her TN, and she’s sharing it with us today! Let’s take a look!

Hello everyone! This is Sabrina, and today I wanted to share a fun traveler’s notebook spread that I put together using the February Kit and extras. I absolutely love scrapping in traveler’s notebooks (sized at 4.25″ x 8.5″) and Elle’s Studio products work perfectly in this format!

This TN is going to record my weekly selfie documentation project called #thursday3, and I wanted to create the opening page to start things off! I took out my Large Jane Alphabet polka dot stamps and stamped “Thurs 3” and a hashtag. I then used the Large Jane Alphabet outline stamps and stamped over the polka dot letters to create some more dimension. The page needed some more color, so I used the light blue grid from the Noteworthy 12 x 12 Paper Collection to use as my background. I then fussy cut out stamped letters and numbers, and adhered to the background. I finished off the opening page with a February Kit teal banner die cut and a few other die cuts from the January 2019 Kit

Supplies | January 2019 KitFebruary 2019 KitBright Die Cut Labels, Puffy Icon Stickers, Purple Puffy Alphabet Stickers, Highlight Stamp, Large Jane Alphabet Stamp – Outline, Large Jane Alphabet Stamp – Polka Dot, Large Jane Number Stamp – Solid and Outline, Large Jane Number Stamp – Stripes and Polka Dots, Here and Now Stamp, Title Builder Stamp, Oh Happy Day Stamp, Noteworthy 12 x 12 Paper Collection

My next step was to get started on documenting my January selfies. For the start of each month, I knew I wanted to do a ‘fancy’ spread with lots of color, and the February 2019 Kit had tons of colors to work with! Since I was wearing a purple shirt in my January selfie, I pulled out the multi-colored journaling tag as my starting point. I then gathered up the Bright Die Cut Labels that coordinated with the colors in that card.

I worked on placing my tags and photo next. I had all 3″ x 4″ sized pieces, so I went with a stacked design. The multi-colored tag was placed below my selfie and the ‘currently’ tag balanced that on the left side. I wanted to create a cohesive element between the two pages so I cut apart the numbered purple 4″ x 6″ tag—which went perfectly with my theme—and spread the two pieces across the spread.

Next, I took out my stash of Elle’s Studio stamps and had the best time picking out all the different sayings that I would use. I used an older stamp, Highlight, to stamp ‘”Thurs” on the yellow label, plus I added in the February Kit “details” die cut and the word “today” with the Purple Puffy Alphabet Stickers. On the teal label I used the Here and Now Stamp to add “for the record”. I also used another label on the bottom of the multi-colored card to stamp “documenting”.  The last bit of stamping was done using the Oh Happy Day Stamp—”happiness found” on the multicolored tag, a heart and stars around the background of the page. So much stamping, and I had the best time!

I finished up the spread by adding Puffy Icon Stickers and a few die cuts from the February Kit to add more dimension and also help with the visual triangle. Overall, this spread was the best way to spend an afternoon, and I had so much fun playing with all the different elements from the February Kit and extras

I hope you enjoyed my project and see that Elle’s Studio kits can be used easily in your traveler’s notebooks! Have a great day! 

Happiness Recorded with Candace Perkins

Hello Elle’s Studio friends! I am excited to be here sharing a fun new project created with the February kit and goodies this month. One of my goals this year is to tell more stories. There are so many details of this one beautiful life that we enjoy and I want to make sure that I remember them all. For today’s story, I wanted to document what makes my little Ryder happy right now, at age 5. Kids grow fast and their likes change just as fast so I wanted to make sure I recorded all the details! 

Supplies | February 2019 Kit, Bright Die Cut Labels, Light Purple Puffy Alphabet Stickers, Black and White Polka Dot Puffy Alphabet Stickers, Rainbow AcrylicHappiness Acrylic

I started with a full 6″ x 8″ photo of my Ryder.  I love this photo and how it shows his personality.  It is the perfect photo to tell my little guy’s story.

For the right side of the spread I created a base of two 4″ x 6″ tags from the February 2019 Kit.  I loved the large acrylic shapes in the shop this month and thought they would be perfect to act as my title for the spread. I started by placing the Rainbow Acrylic on the 4″ x 6″ tag.  I added the Happiness Acrylic under the cloud, then placed the purple puffy alphabet stickers on the card to finish the title.  I love that the Light Purple Puffy Alphabet Stickers pull the little bit of purple from the rainbow and add a bit more balance to the spread.  

The 4″ x 6″ journaling tag with all the fun blocks of color was the perfect match to the rainbow acrylic piece! I ran the tag through my typewriter to add my journaling & special memories. To pull a bit of the black and white from the photo, I used the Black and White Polka Dot Puffy Alphabet Stickers to number all the things that bring happiness to Ryder.   

For the final touches on the spread and to bring the left and right side of the spread together I added a few die cut pieces to the lower left hand corner of the photo.  I used one of the Bright Die Cut Labels to add “Ryder” and his current age.  I adhered it all to the photo with a tiny attacher.  Another fun memory and story documented!  I know these are things that I will someday forget, so I am so glad that I took the time to record all these special memories.

There are little details that happen everyday that we think that we will remember, but we quickly forget, so be sure to document them! Have a beautiful day! Thanks for stopping by!  

Happiness Recorded with Guest Designer Marsha Farris

As we welcome Marsha Farris back for her final post with us as our February guest designer, we are stunned again by what she created using our newest products! We think you’ll love her traveler’s notebook/pocket page combination with her beautiful use of color and white space—both of which are part of her signature style!

Hello everyone!  I am here today sharing my third and final project as the February guest designer.  I have loved creating these layouts using the Elle’s Studio February kit and extras. Today, I am sharing a pocket page layout in my traveler’s notebook album.  I enjoy working with pocket pages, and it’s fun to mix it up and add them to a traveler’s notebook spread.

Supplies | February 2019 Kit, February Labels, Hazel Alphabet Stickers – White, Wood Veneer Confetti, Happiness Acrylic, All My Heart 6 x 6 Paper Stack, Oh Happy Day Stamp, Noteworthy 6 x 6 Paper Stack

To begin the layout, I chose a few of my favorite cards from the February 2019 Kit.  I love the orange, peach and gray color combo, so I chose several die cuts from the kit in these colors.  The colors in my photo did not match this color scheme, so I chose to print my picture in black and white for a more cohesive look.  I used the Oh Happy Day Stamp to stamp the “thumbs up” sentiment and the coffee cup icon and added them to the tag.  These stamps were perfect for documenting my love of coffee, especially that first cup in the morning!  Next, I layered a label and sentiment die cut to the bottom of the photo.


For the pocket above, I layered the “love, love, love” piece over a die cut heart from the kit.  I printed my journaling on white card stock, cut it into strips, and adhered it to the card.  To finish off this pocket tag, I stamped the date and a star from the Oh Happy Day Stamp.


For the opposite page, I added a gray dot patterned paper from the All My Heart 6 x 6 Paper Stack in a strip to the edge of the page.  I chose to use the Happiness Acrylic as my title and added the white Hazel Alphabet Stickers to complete it.  The Oh Happy Day Stamp added the “yay!” sentiment onto one of the tags and I used a punch to create the circle shape. 

 
To finish the layout, I added some machine stitching to several areas and then scattered some the Wood Veneer Confetti around the spread.  This layout came together so fast and easy using the new releases!

Thank you for joining me today.  I have enjoyed my time here as the February guest designer.  I hope I have inspired you to use the February kit and extras on your traveler’s notebook layouts or other projects!  

Hello!  I’m Marsha Farris, and I live in Alabama with my wonderful husband and our two sons, ages 15 and 9. I love photography, documenting my stories, and sharing my projects. I also enjoy reading, knitting, and helping my family on our farm. I began scrapbooking many years ago while expecting my oldest son and have continued to do some form of memory keeping since then.  I scrapped 12 x 12 layouts and pocket pages for many years, but am now focusing on creating in smaller formats. Traveler’s notebooks are my current obsession. I even dream about what my next TN layout will be! You can find my projects on Instagram and my blog. I am so honored to be an Elle’s Studio guest designer!

Don’t forget to follow Marsha’s Instagram feed for some amazing traveler’s notebook spreads, and her blog, Hey Marsha MakesThank you so much for inspiring us this month, Marsha!

February Design Team Inspiration: Volume Three

We hope you love creating with our February kit and extras as much as our team does! Today we have a fresh round of scrapbook layouts, cards, pocket pages and traveler’s notebook spreads to share with you. Use them as inspiration to get your memories documented this week!

Happiness by Melissa Mann – supplies used | February 2019 KitFebruary 2019 Digital Cut FileFebruary Print and Cut LabelsReal Life Phrase StickersPuffy Icon Stickers, Light Purple Puffy Alphabet Stickers, Rainbow AcrylicAll My Heart 6 x 6 Paper Stack, Happy Day StampNoteworthy 12 x 12 Paper Collection

You’re #1 card by Wendy Antenucci – supplies used | February 2019 KitBright Die Cut Labels, Black Puffy Alphabet StickersPuffy Icon Stickers, Happy Day Stamp

Wonderful traveler’s notebook spread by Meghann Andrew – supplies used | February 2019 KitBright Die Cut LabelsReal Life Phrase StickersPuffy Icon Stickers, Small Months of the Year Wood VeneersOh Happy Day StampAll My Heart 6 x 6 Paper Stack

Punta Cana by Tracey Fox – supplies used | February 2019 KitBright Die Cut LabelsReal Life Phrase StickersPuffy Icon Stickers, Light Purple Puffy Alphabet StickersHappiness Acrylic, Rainbow Acrylic, Wood Veneer Confetti, All My Heart 6 x 6 Paper Stack, Oh Happy Day StampMini Dated Stamp

Creative pocket page spread by Sabrina Poole – supplies used | February 2019 KitFebruary LabelsBright Die Cut Labels, Light Purple Puffy Alphabet Stickers, Stars and Dots Puffy Stickers, Little Acrylic StarsWood Veneer ConfettiOh Happy Day StampLarge Jane Alphabet Stamp – Outline, Large Jane Alphabet Stamp – Polka Dot, Jane Alphabet Stamp, Mini Dated Stamp

Dreaming With Eyes Open by Amanda-jayne Baldwin – supplies used | February 2019 KitFebruary Labels, Real Life Phrase Stickers, Light Purple Puffy Alphabet StickersWood Veneer Confetti, Happiness Acrylic, All My Heart 6 x 6 Paper Stack, Oh Happy Day StampNoteworthy 12 x 12 Paper Collection

Rainbow Loom by Kristina Proffitt – supplies used | February 2019 KitFebruary LabelsReal Life Phrase StickersPuffy Icon StickersStars and Dots Puffy Stickers, Puffy Heart Stickers – Spring MixStars and Dots Puffy Stickers, Black Puffy Alphabet StickersWood Veneer Confetti, Rainbow AcrylicOh Happy Day Stamp, Mini Dated Stamp

Happiness Is… by Suzanna Lee – supplies used | February 2019 KitJFebruary 2019 Digital Cut FileBright Die Cut LabelsReal Life Phrase Stickers, Jane Alphabet Stickers – Black, Light Purple Puffy Alphabet Stickers, Puffy Heart Stickers – Spring MixOh Happy Day Stamp, Large Jane Alphabet Stamp – Polka DotNoteworthy 12 x 12 Paper Collection

Live In Color pocket page spread by Patricia Roebuck – supplies used | February 2019 KitBright Die Cut LabelsSweetheart Puffy Stickers, Jane Alphabet Stickers – Red, Jane Alphabet Stickers – TealYellow Puffy Alphabet Stickers, Light Purple Puffy Alphabet Stickers, Puffy Heart Stickers – Summer Mix, Puffy Heart Stickers – Spring Mix, Little Acrylic Stars, Rainbow Acrylic, Wood Veneer ConfettiLarge Jane Alphabet Stamp – StripesOh Happy Day Stamp, Mini Dated Stamp, Here and Now Stamp, Happy Heart Stamp, Noteworthy Epoxy Stickers, Noteworthy 12 x 12 Paper Collection

Memories by Jennifer McMurtrey – supplies used | February 2019 KitJanuary 2019 Digital Cut File, February Labels, Bright Die Cut Labels, Wood Veneer ConfettiOh Happy Day Stamp, Large Jane Alphabet Stamp – SolidNoteworthy 12 x 12 Paper Collection

We can’t wait to see what YOU create with our newest products! Share your projects with us in our Elle’s Studio Facebook Group, or on Instagram, using the hashtag #EllesStudio!

“Inspired By” with Jennifer McMurtrey

Our team creates the most inspiring projects, so it is natural that our team members should all be inspired by each other! Today, Jennifer McMurtrey has been inspired by Daniela, specifically her use of digital cut files. How will it inspire you? Let’s take a look!

Hello Elle’s Studio friends! It’s Jennifer today with this month’s “Inspired By” layout.

Using digital cut files is one of my go-to methods for creating embellishments and building titles. I have long been a fan of Daniela’s stunning application of cut files on her projects and chose to use her January XOXO layout as my jumping off point.

While Daniela’s project is a 12″ x 12″ layout, I decided to cut mine down to 8-1/2″ x 11″, because I felt it fit my overall design better. 

Supplies | February 2019 Kit, February 2019 Digital Cut File, February Labels, Wood Veneer Confetti, Light Purple Puffy Alphabet Stickers, All My Heart 6 x 6 Paper Stack, Oh Happy Day StampLarge Jane Alphabet Stamp – Outline, Large Jane Alphabet Stamp – Stripes, Large Jane Alphabet Stamp – Polka Dot, Large Jane Number Stamp – Stripes and Polka Dot, Mini Dated Stamp, Noteworthy 12 x 12 Paper Collection

I prepped the background first by cutting a piece of patterned paper from the Noteworthy 12 x 12 Paper Collection down to size and then adhering a slightly smaller piece of white card stock to that. I knew the focal point of the project would be on the lower right of page, so I worked to bring attention to it by stamping the polka dot asterisks from the Large Jane Number Stamp in a visual triangle from top to bottom. Admittedly, stamping is not one of my stronger suits, so I am working hard to “up” my stamping game on projects this year. Elle’s stamps make this easy with their fun, versatile designs, and I am especially loving the new Large Jane stamps that were just released. Trust me when I say you will be seeing them on a lot of my future projects. 

Using the February 2019 Digital Cut File, I cut the “happiness” sentiment using five different patterned papers from the All My Heart 6 x 6 Paper Stack. These were then machine-stitched into place, again in the lower right area of the page, to create color and texture behind my photo was to be placed.

The title was creating by using the outline Large Jane Alphabet Stamp on one of the 4″ x 6″ tags included in the February 2019 Kit. I fussy cut the letters and used foam squares to adhere them to the page. If you look closely, you will see three purple puffy lines on either side of the word “best” in the title. I created these marks of emphasis by using the negative space from the O’s in the Light Purple Puffy Alphabet Stickers. Part of the fun of crafting for me is finding other uses for product than may have been originally intended, and you will see this a lot in my projects.

Below the title, I used the Oh Happy Day Stamp to stamp the lines for my journaling and followed that with the Mini Dated Stamp. Here, you can see my stamping is not necessarily perfect, but it adds a fun element to the layout.

To complete the layout, I added a few embellishments from the February Kit to the photo along with several pieces of the Wood Veneer Confetti. A cool way to alter the wood veneer pieces is to paint or color them, as I did here. You can do so easily by gluing them in place and then coloring them with a pen once the glue has dried so they stay in place and you don’t get ink all over your fingers. Win, win!

It has been a blast using Daniela’s layout for inspiration, and I hope I did it justice! Please be sure to share your projects in the Elle’s Studio Facebook Group or on Instagram using the hashtag #EllesStudio. We love seeing all of your fabulous creations!

Thank you for stopping by today and I hope you are inspired to create!!

A Winning Layout with Suzanna Lee

You are always a winner with Elle’s Studio Large Jane Alpha Stamps, and this month, not only are there additional patterns of the Large Jane Alphabet Stamp available in both stripes and dots, BUT there are also metal dies! That’s HUGE!

Supplies | February 2019 Kit, Bright Die Cut Labels, Real Life Phrase Stickers, Oh Happy Day Stamp, Large Jane Alphabet Stamp – Polka Dot, Large Jane Alphabet Stamp – Stripes, Noteworthy Epoxy Stickers, Noteworthy 12 x 12 Paper Collection

Not only are these stamps good for title work, but you can also use them to adorn your projects as well! It’s Suzanna here today to share with you a layout I created using the Large Jane Alphabet Stamps for my title but I used them to create additional “ribbons” for my pennants and a header for the large photo. Let’s take a closer look!

For the header of the layout, I used the Large Jane Polka Dot “I” horizontally, stamping it in repetition across the page—first with a darker shade of blue, then a medium shade, then light blue. You can see where I overlapped in spots and I’m okay with that. I could have used a stamping aid if I were worried about precision, but I like the way the gaps and overlap mimic the ripples in the water in the photo.

The pennants were stamped with the Oh Happy Day Stamp, but I was able to add a fun element behind them by stamping the Large Jane Stripes “V” upside down. It mimics the tails of the pennant and adds a personal touch to the layout. It also creates unity, as there is not only stamping from top to bottom, but the stripes tie into the striped border at the bottom of the layout and the stripes in the pool deck in the photo above. It is subtle details like that that really pull a layout together.

Last but not least: the title! I opted for just the Large Jane Polka Dot letters, omitting the outline stamp. While I certainly could have used the outline stamp in navy blue, it would have drawn your eye straight to the title and away from the large photo which I wanted to the emphasis of the layout. I could have also used the metal dies to pop the letters up off the page for added dimension to the page.

The possibilities are endless with the Large Jane Alphabet Stamps, don’t you think? If you have used these amazing stamps, be sure to share with us over on the Elle’s Studio Facebook Group, or on Instagram using the hashtag #EllesStudio! Thanks for stopping in today!