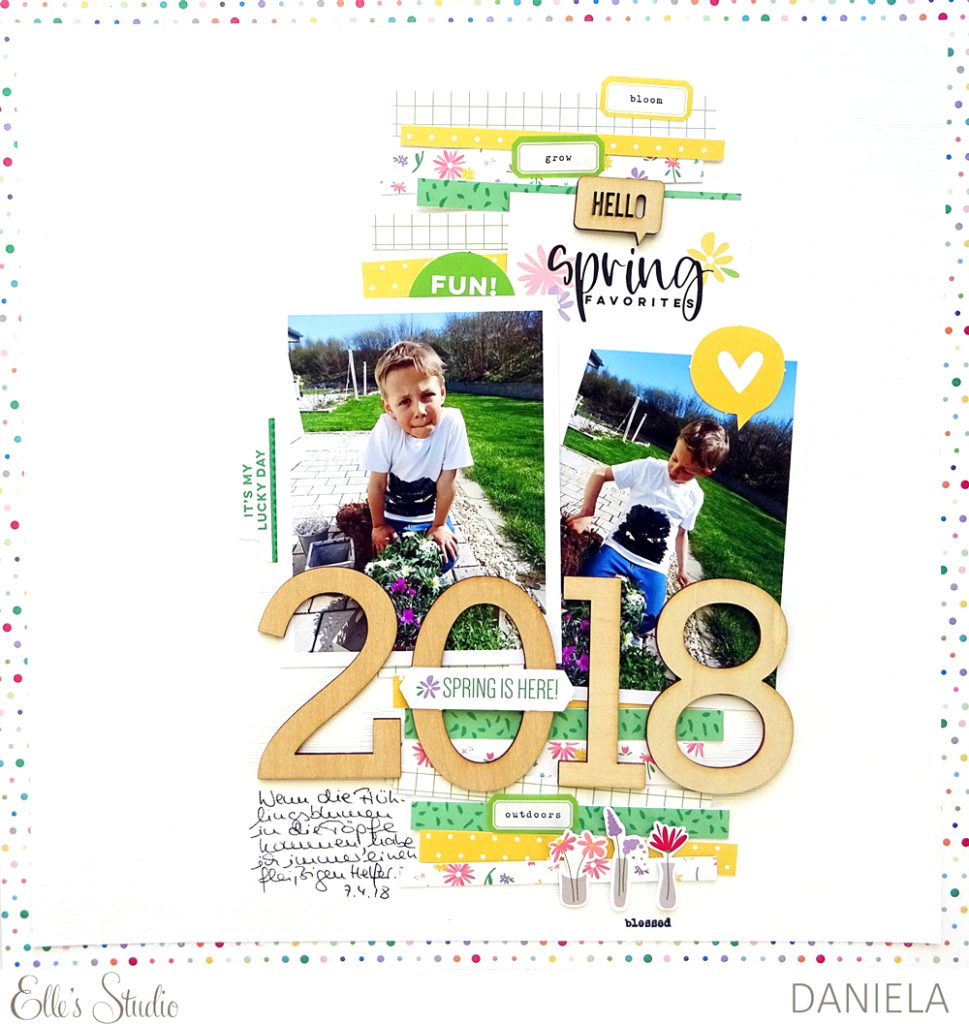
Our newest puffy stickers in the shop, the Spring Puffy Stickers, will have you wanting to document spring no matter what the weather looks like where you are! Design team member Daniela took the opportunity with a break in the weather to document an early spring day, and made great use of these puffy embellishments on her page. Let’s take a look!
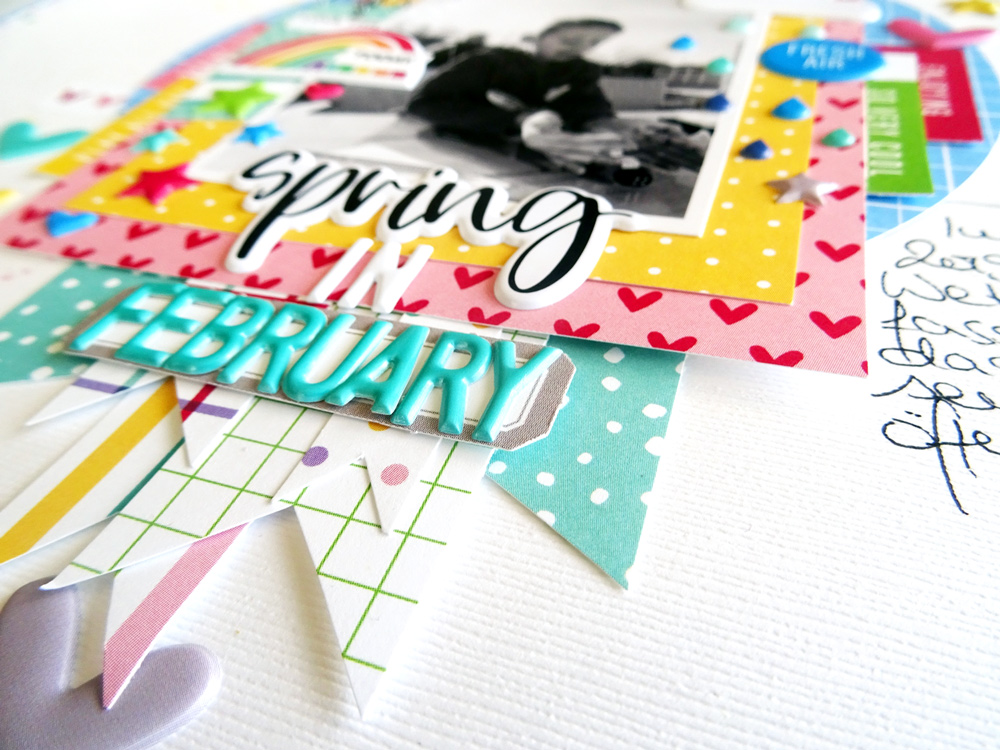
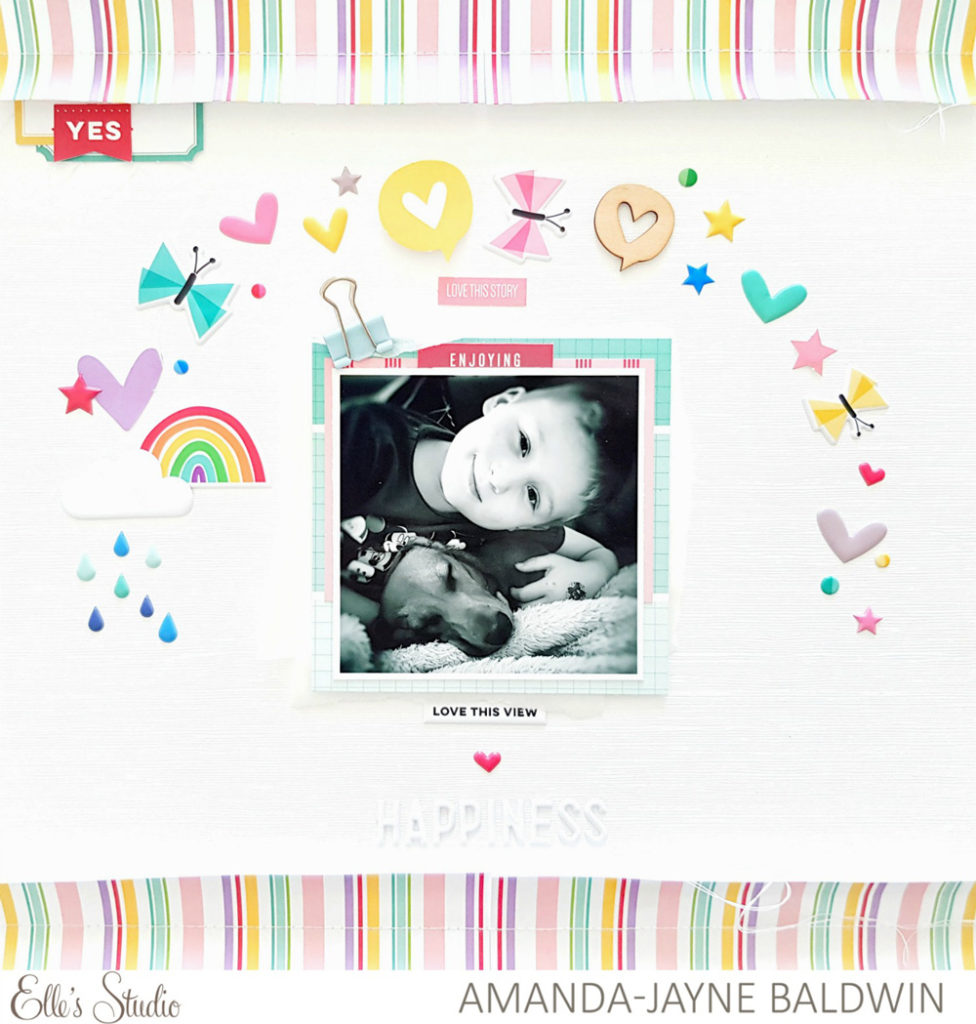
I friends, it’s Daniela, sharing another layout with you guys today, focused on the lovely Spring Puffy Stickers. We had the most amazing February here in Germany this year. Although it’s winter, temperatures went so high that we could walk around in t-shirts and enjoy the sun. I took a picture of my son playing a game outside in the garden and I felt that the Spring Puffy Stickers matched this picture just perfectly. I grabbed some of the papers from the Springtime 6 x 6 Paper Stack and bits and pieces from the Noteworthy collection and started scrapping. This is how my layout turned out:
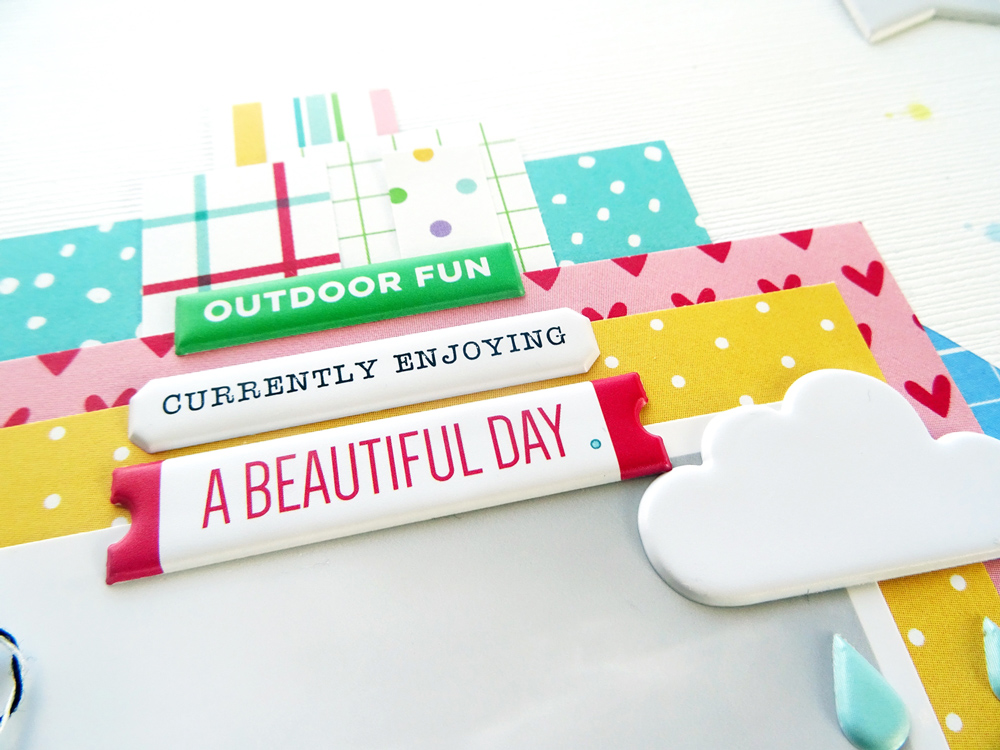
You see, it became quite a colorful page. I felt that spring calls out for lots of colors! I mostly used the Spring Puffy Stickers on top of my big paper cluster in the center of the page. The phrase stickers are placed in groups of threes.
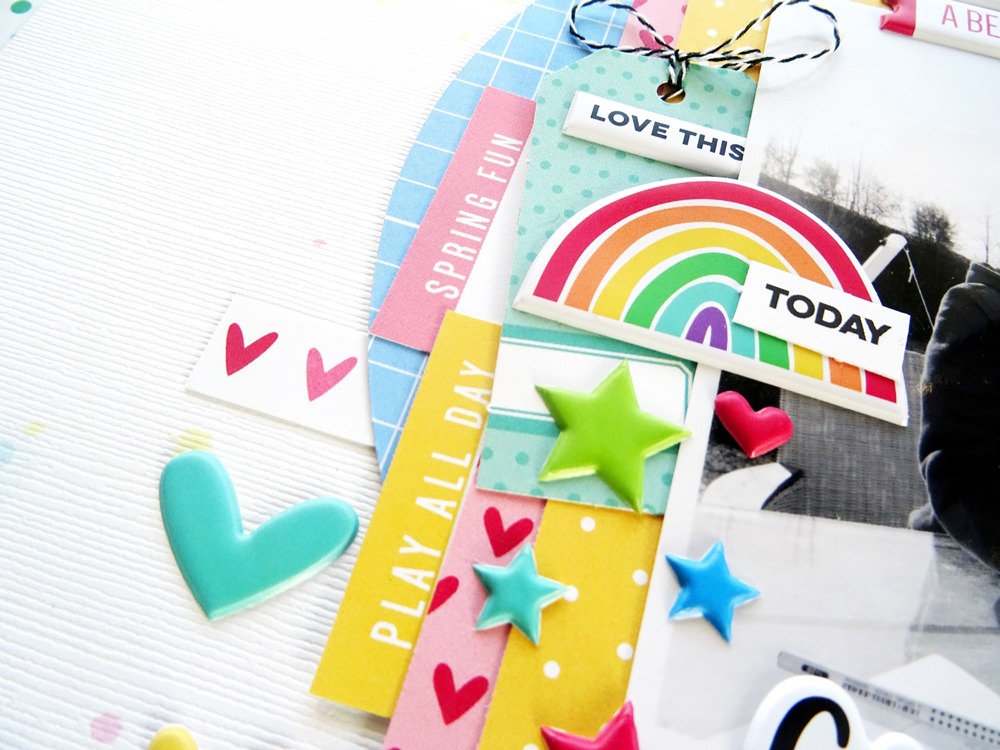
Some of the stickers are also placed on top of the pictures. This way, everything is connected somehow and there aren’t any lose elements. I have highlight stickers on both sides to keep the page balanced.
As you can see, I did a lot of layering on this page. The great thing about Elle’s Studio products is that they can be combined so easily, giving you the possibility to create big clusters. Have you noticed that the Teal Puffy Alphabet Stickers match the teal dotted paper from the Noteworthy 12″ x 12″ Paper Collection just perfectly? The designs make scrapping so fun and easy—I love it when pages come together quickly!
Don’t hoard your Spring Puffy Stickers! Use them on your projects to create something beautiful.
Thanks so much for stopping by and have a great day!
Comments Off on Spring Puffy Sticker Love with Daniela | Share This
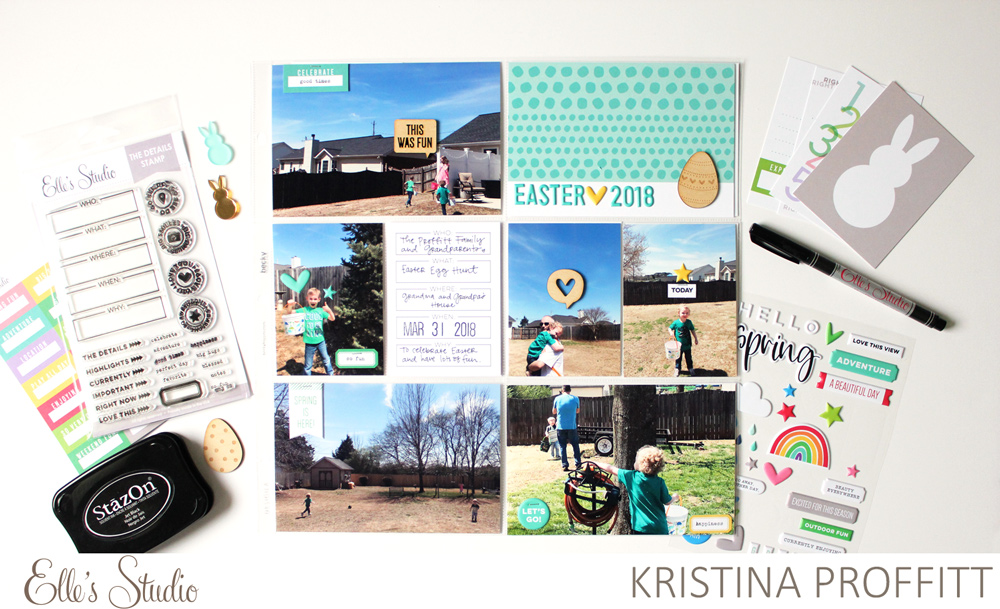
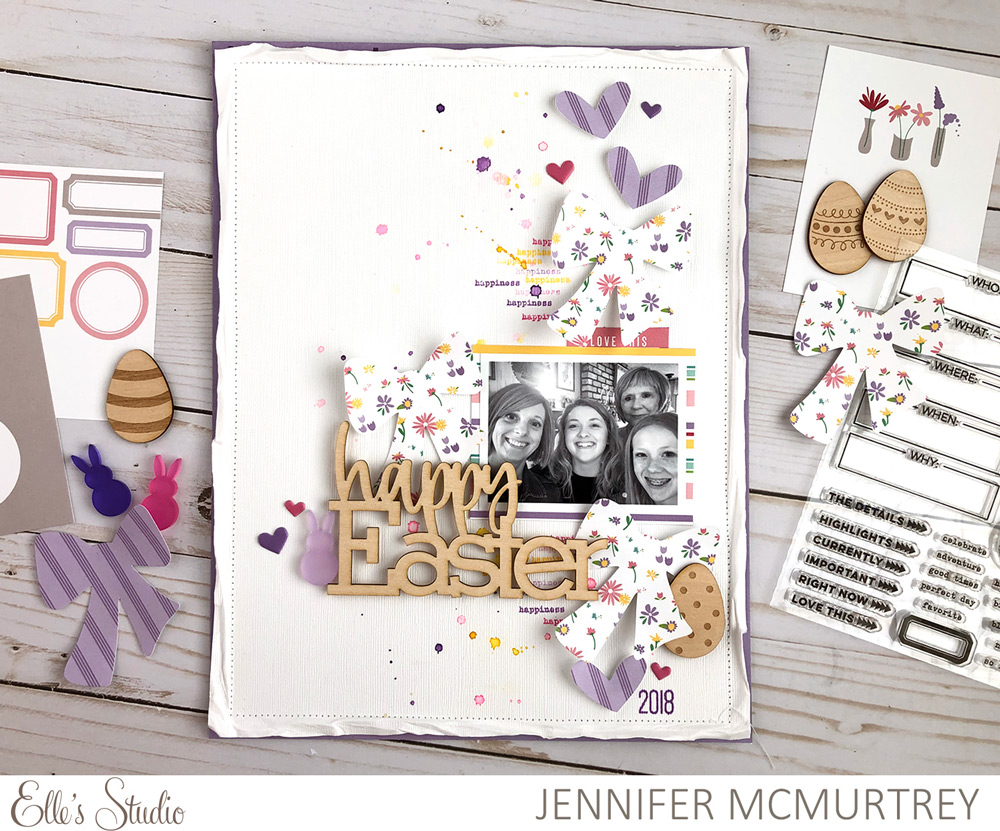
There are so many treats to be had at this time of year! Whether its a candy that is delivered in your Easter Basket, or placed on the table for Sunday Easter dinner, document it with our March 2019 Kit and add-ons, the way that Wendy Antenucci is doing today with a brand new layout! Let’s take a look:
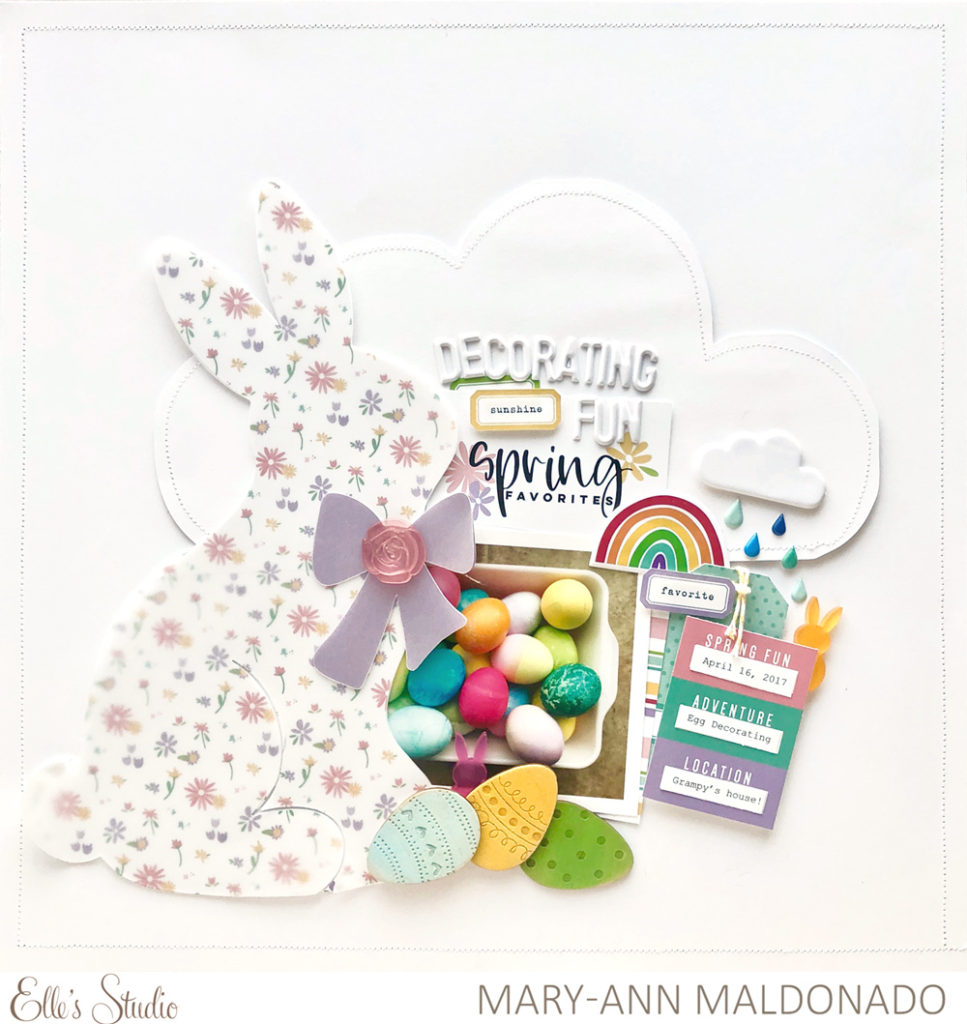
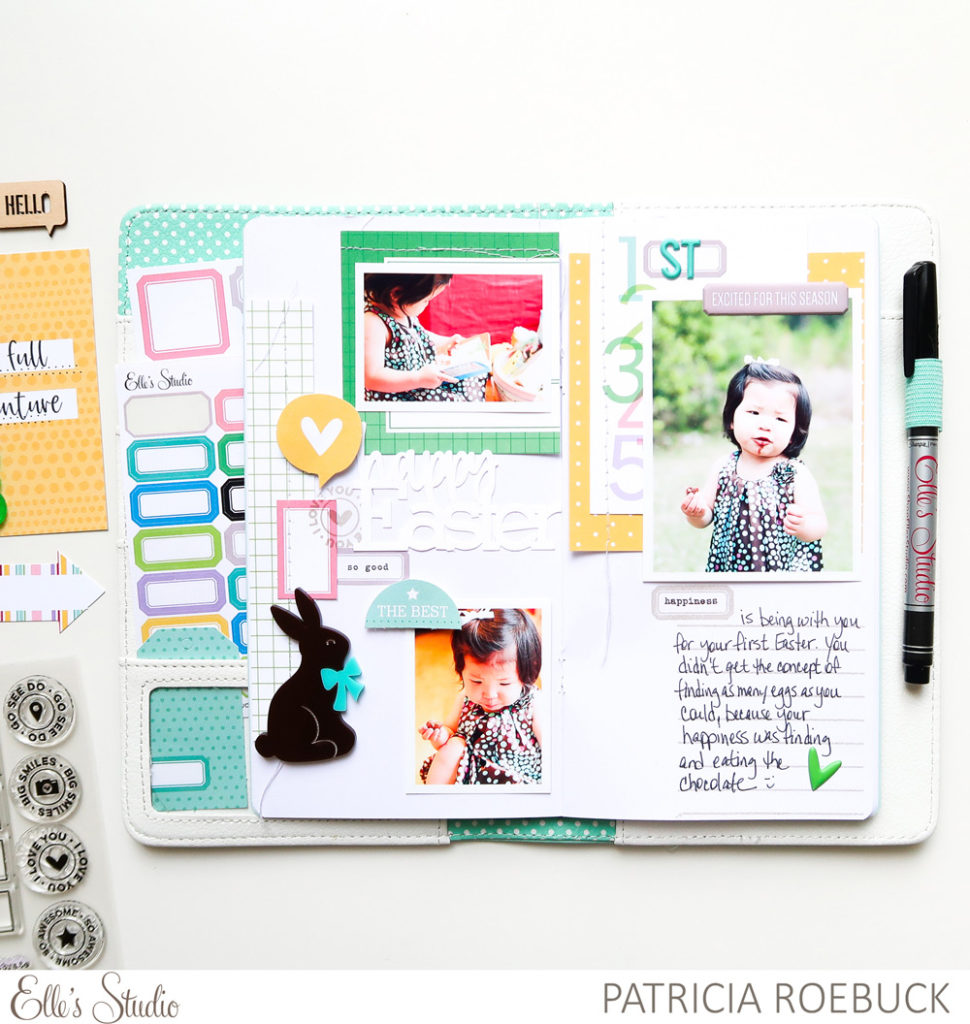
Hello everyone, it’s Wendy here today with a layout using the March 2019 Kit and extras! My daughter is a peep fanatic and when I saw the cute Little Acrylic Bunnies, I just had to create a page about her love!
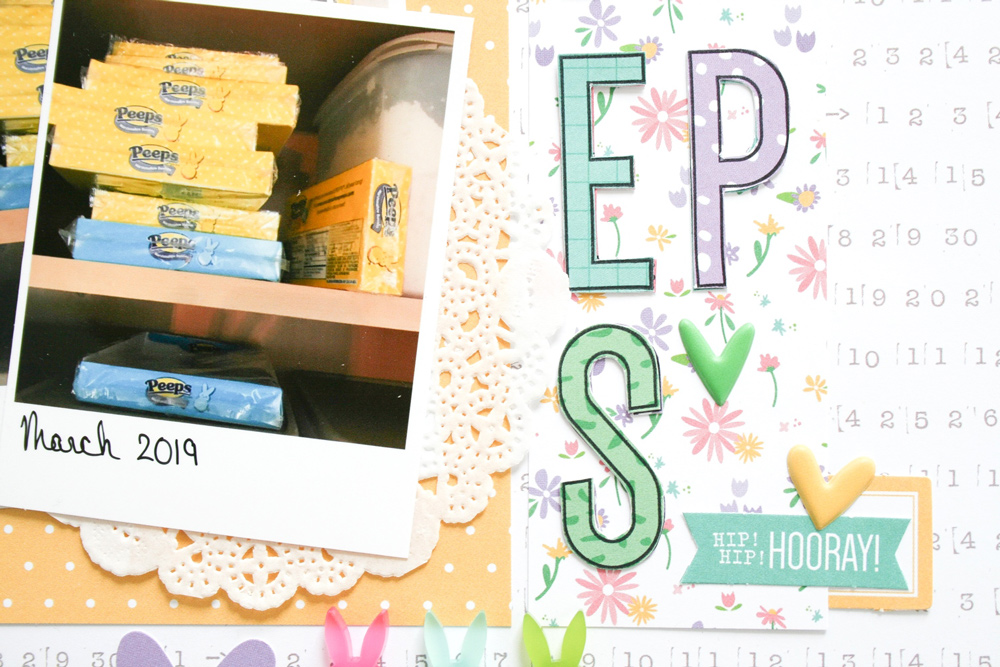
I began my page with a pile of pictures to represent the pile of Peeps that she has stashed in my cupboard. (Umm, really, can’t we find our own place to hide these?!) The yellow and aqua 6″ x 6″ patterns from the Springtime 6 x 6 Paper Stack just fit perfectly for this springy layout, and to continue the sweetness of the page, I added in a doily to house the pictures.
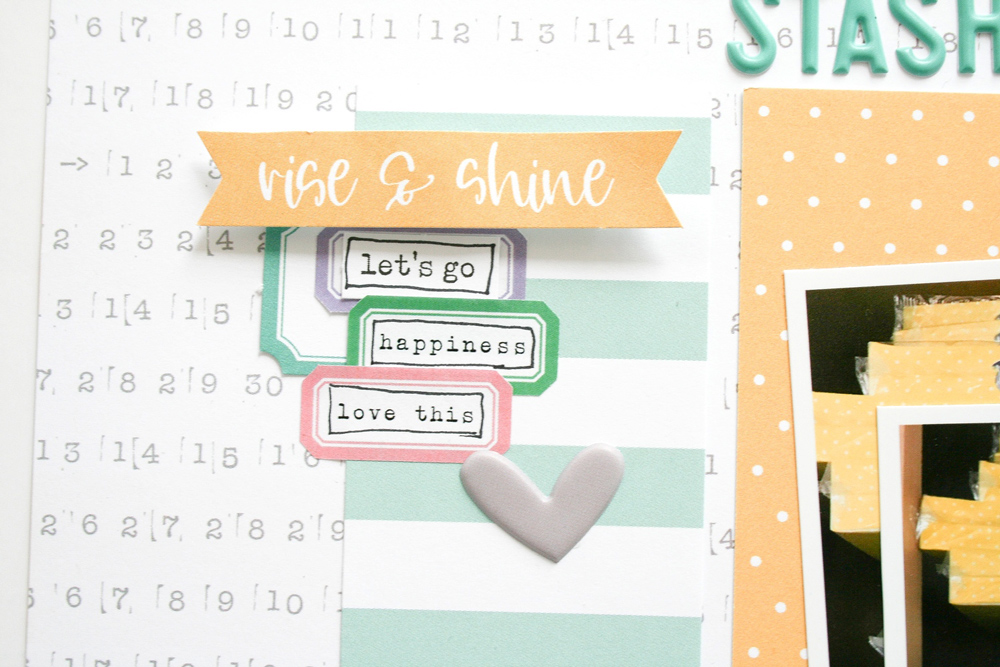
I made an embellishment cluster at the top of the pile of pictures to pull your eyes from the top to the bottom. In this cluster I focused on some fun die cuts from the March 2019 Kit and a pretty little bow to continue the sweetness of the page.[
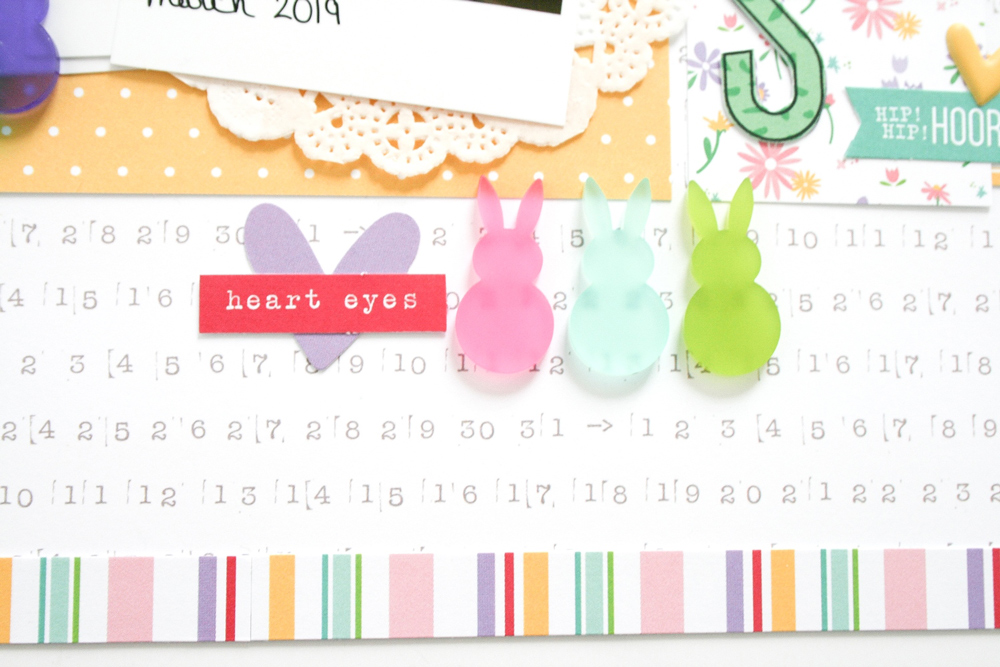
My next step in my layout was to lay out a few of the Peeps, or Little Acrylic Bunnies, to really establish the point of the page. I couldn’t resist the “heart eyes” die cut from the March Kit to get the whole point of my page across.
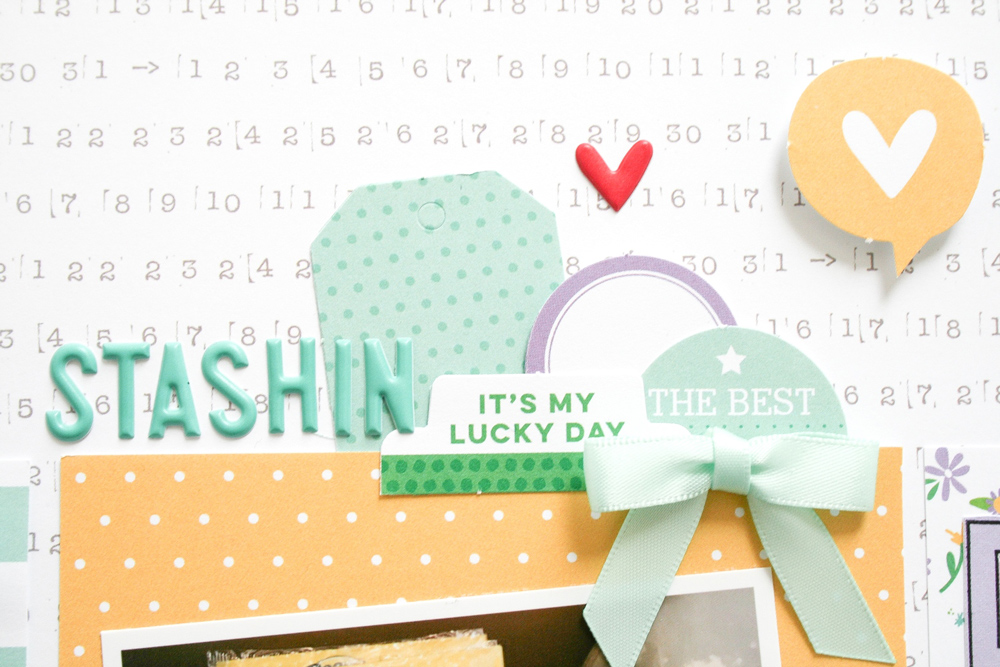
A cluster of tags and stickers were the next piece to my puzzle. I focused on using the Tiny Everyday Label Stickers to tell my story without ever writing a word!
Do you have an item that tends to show up on everything you create? My new-found favorite are the Large Jane Alphabet Stamps! I chose to use the Large Jane Outline and some of the pretty papers in the Noteworthy 6″ x 6″ Paper Stack to create my title. I ran my title vertically on my page to fit the big letters and make a statement!
A few puffy little heart stickers from the Spring Puffy Stickers finished up the sweetness on my page, leaving behind a sugary memory documented in the books, where all her brothers will find her stash!
What is your favorite springtime treat? Document it using our March kit and extras, and share on Instagram using the hashtag #EllesStudio or in our Elle’s Studio Facebook Group!
Comments Off on Documenting the Secret Stash with Wendy Antenucci | Share This
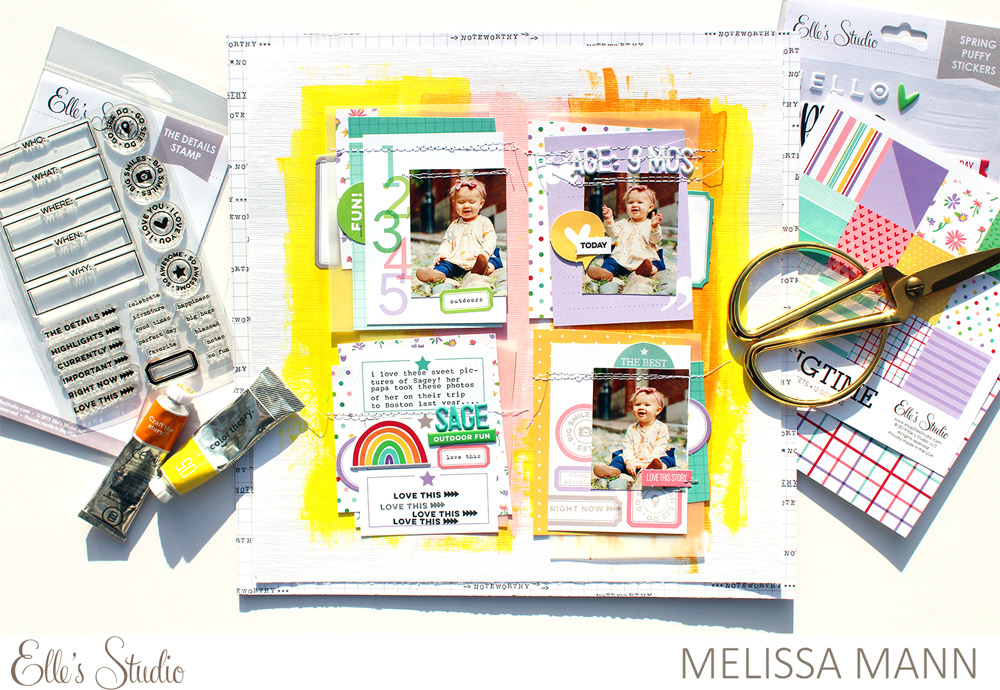
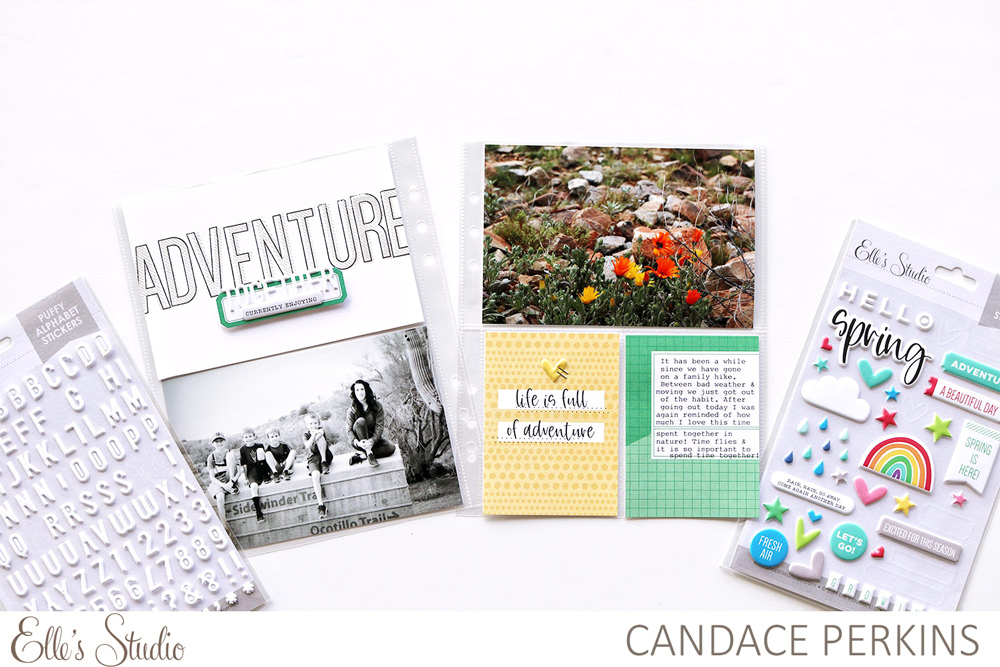
A new month brings along a new guest designer to “wow” us with her projects, and we know you will love what March guest designer Melissa Morrelli has in store for you this month! Mellissa creates graphic and BOLD traveler’s notebook and mini album projects, and has a keen eye for good design. The traveler’s notebook spread that she’s sharing with us today using our March 2019 kit and add-ons is no exception. Let’s take a look!
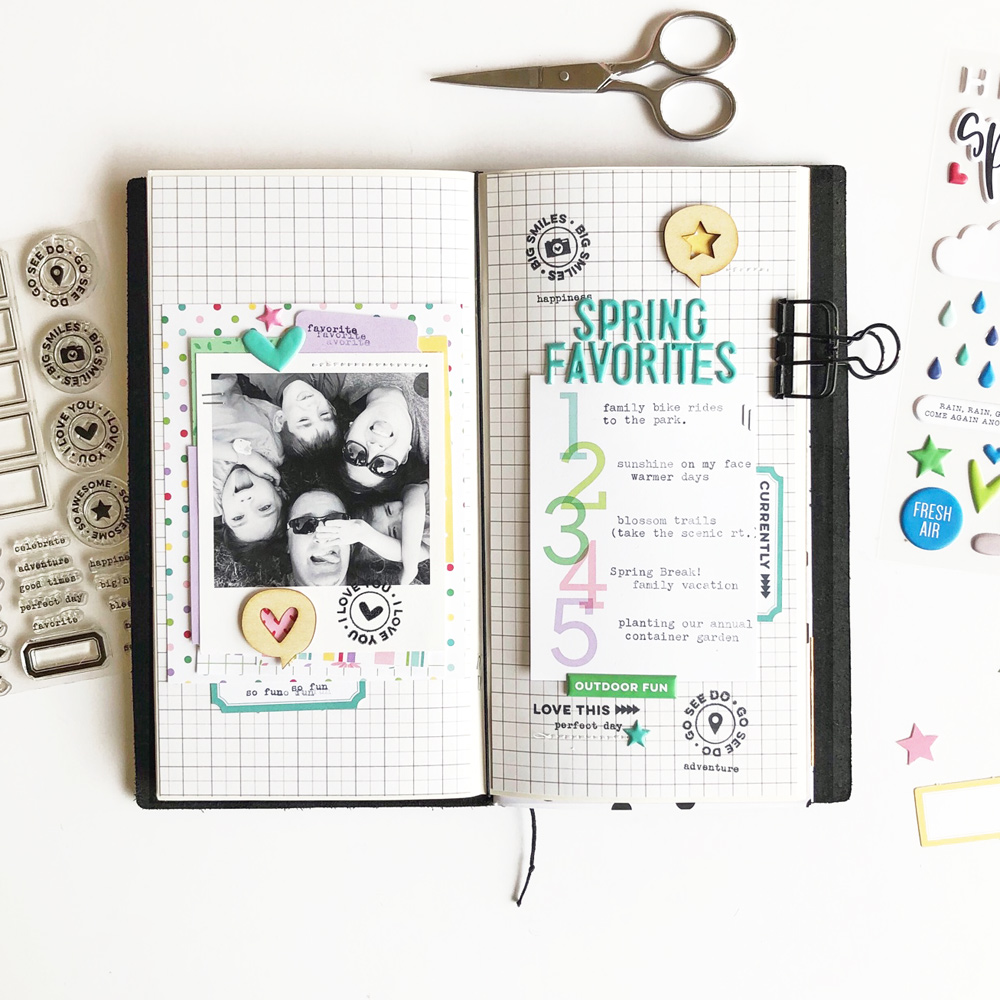
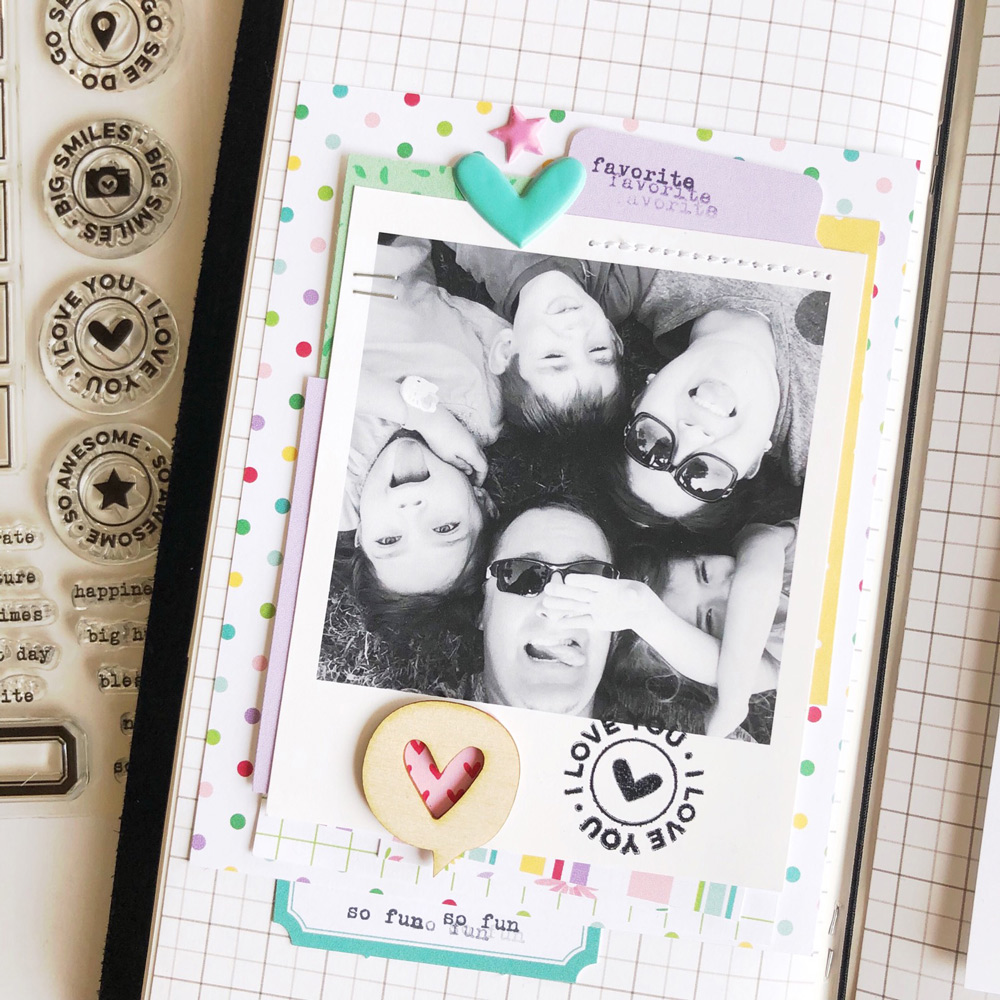
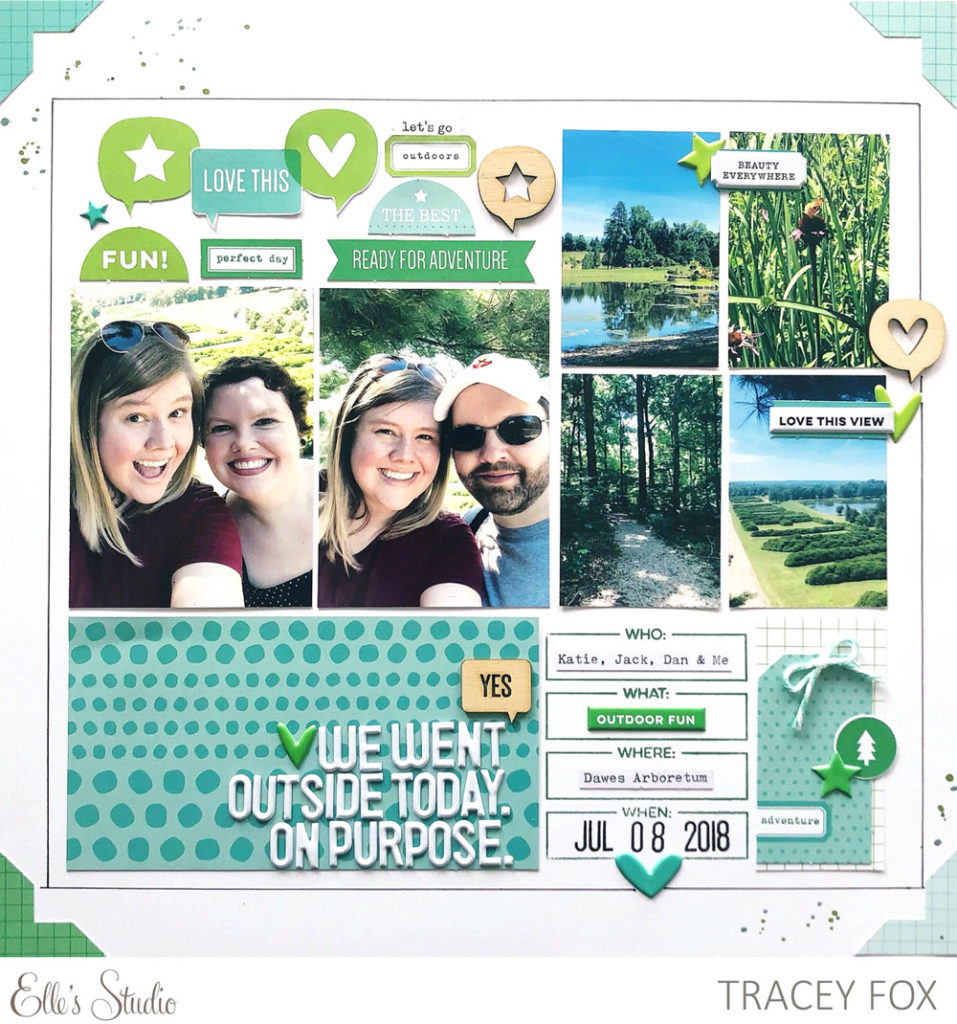
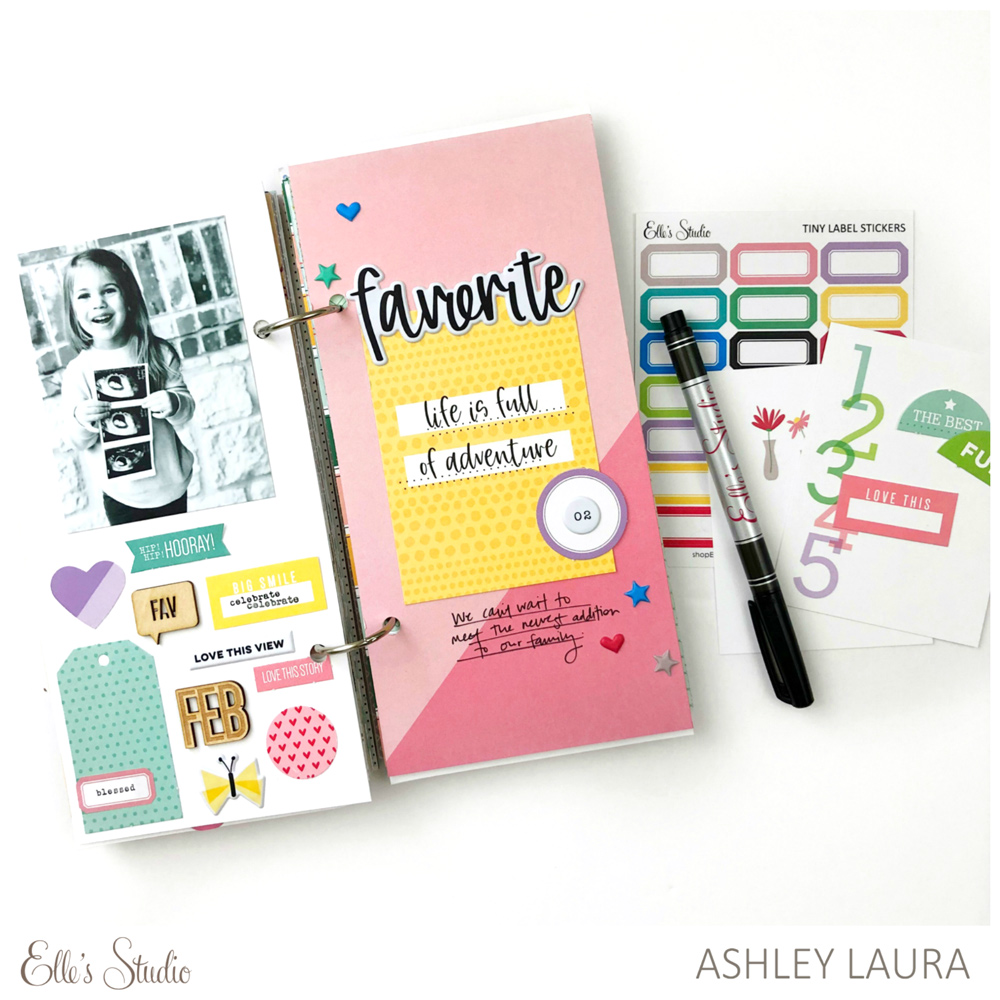
Hi friends! Melissa here today to share my first project as the March guest designer here at Elle’s Studio. I have created a traveler’s notebook spread using a silly family selfie my crew took a few springs ago, after a bike ride and picnic at the park—which happens to be one one our first and favorite activities we do when spring arrives!
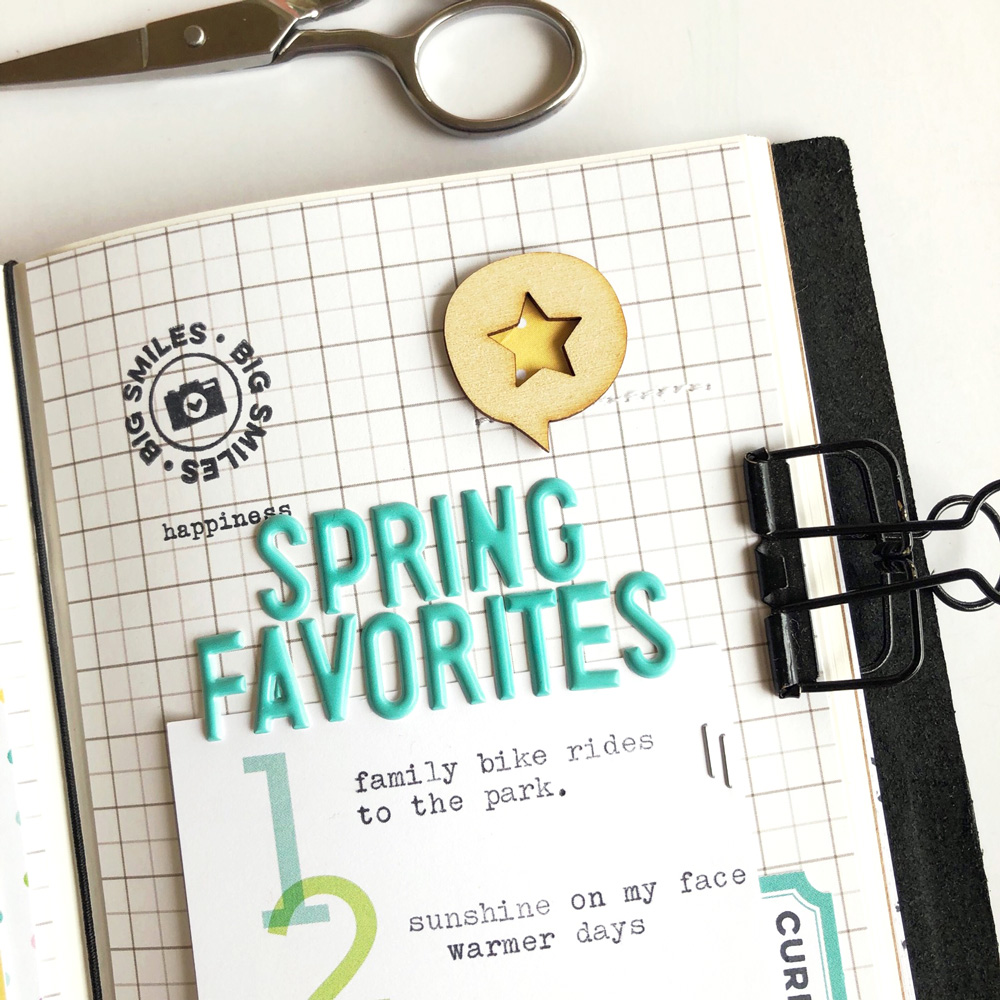
To start my layout I cut two pieces of grid paper to 4″x 8″ to use as my background for this layout. (I don’t adhere these pieces of paper into my traveler’s notebook until I’m completely done with my layout).
Working on the left side first, I printed my picture with a large white border. I then took several scraps from the Springtime 6 x 6 Paper Stack and just had fun layering all those bits and pieces behind my photo.
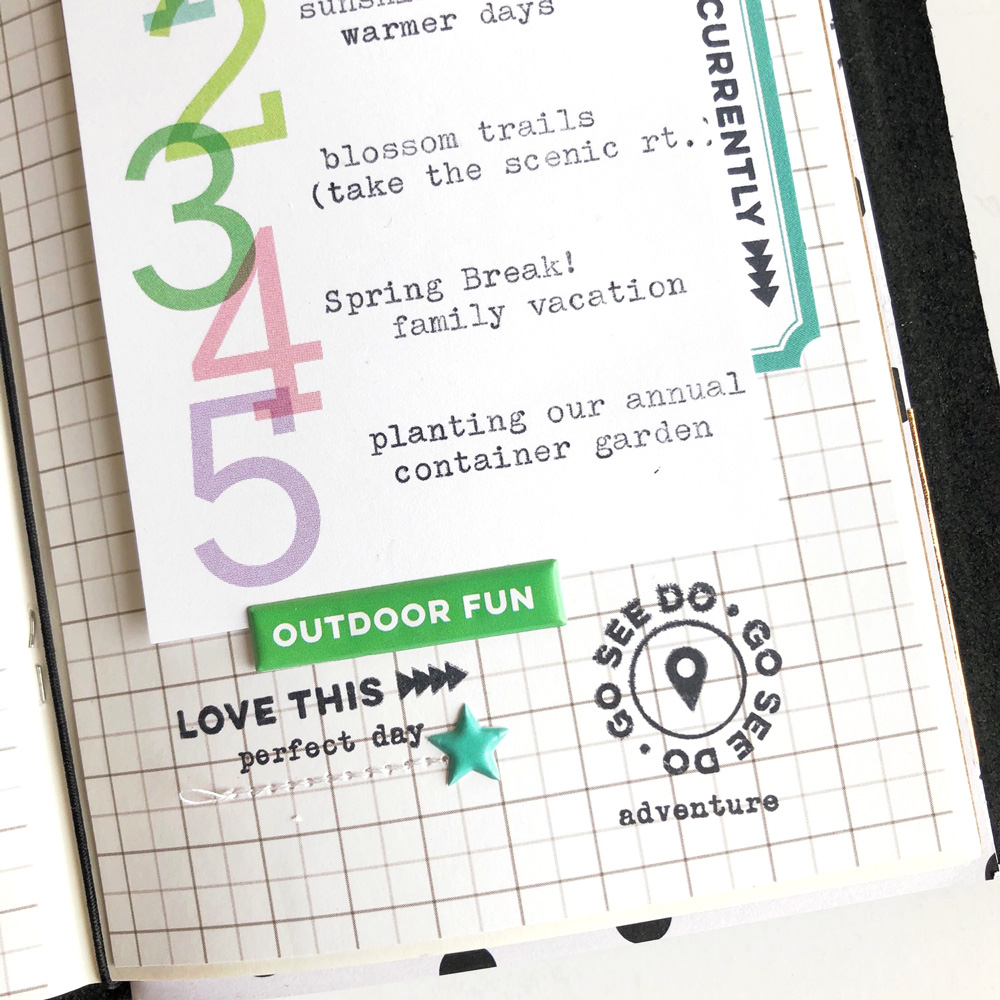
Moving on to the right side I used the numbered 3″ x 4″ card from the March 2019 Kit and I typed out some of our other favorite things about spring, using my typewriter. Then I added my “spring favorites” title with the Teal Puffy Alphabet Stickers.
Then, I started embellishing. I added stitching and staples to start with. Then I started stamping—I LOVE The Details Stamp! I stamped on the background of the right side of my spread and directly on my picture on the left. I added some Spring Puffy Stickers and die cut labels from the March Kit. Lastly, I backed the Wood Veneer Speech Bubbles with some paper and added those as the finishing touch.
I hope you enjoy my project and I hope I inspire you so make something fun, too!
Hello, Elle’s Studio fans! I’m Melissa Morrelli, an obsessed picture taker and story teller. I am so thrilled to be a guest designer this month for Elle’s Studio. My absolute favorite method for documenting my family stories is in a traveler’s notebook—I really appreciate the compact size! My other paper love is making mini albums for special occasions (birthdays, holidays and vacations.) I live in California with my family, my favorite subject to photograph and tell stories about. We are an active family and we love the outdoors (you can always find us where the wild things are!) There’s never a dull moment in my life and there is always a story to tell.
I really hope I inspire you to make something fun!
Tune in next week for Melissa’s second project! Until then, follow her at her Instagram account, @melissamorrelli, for more traveler’s notebook inspiration!
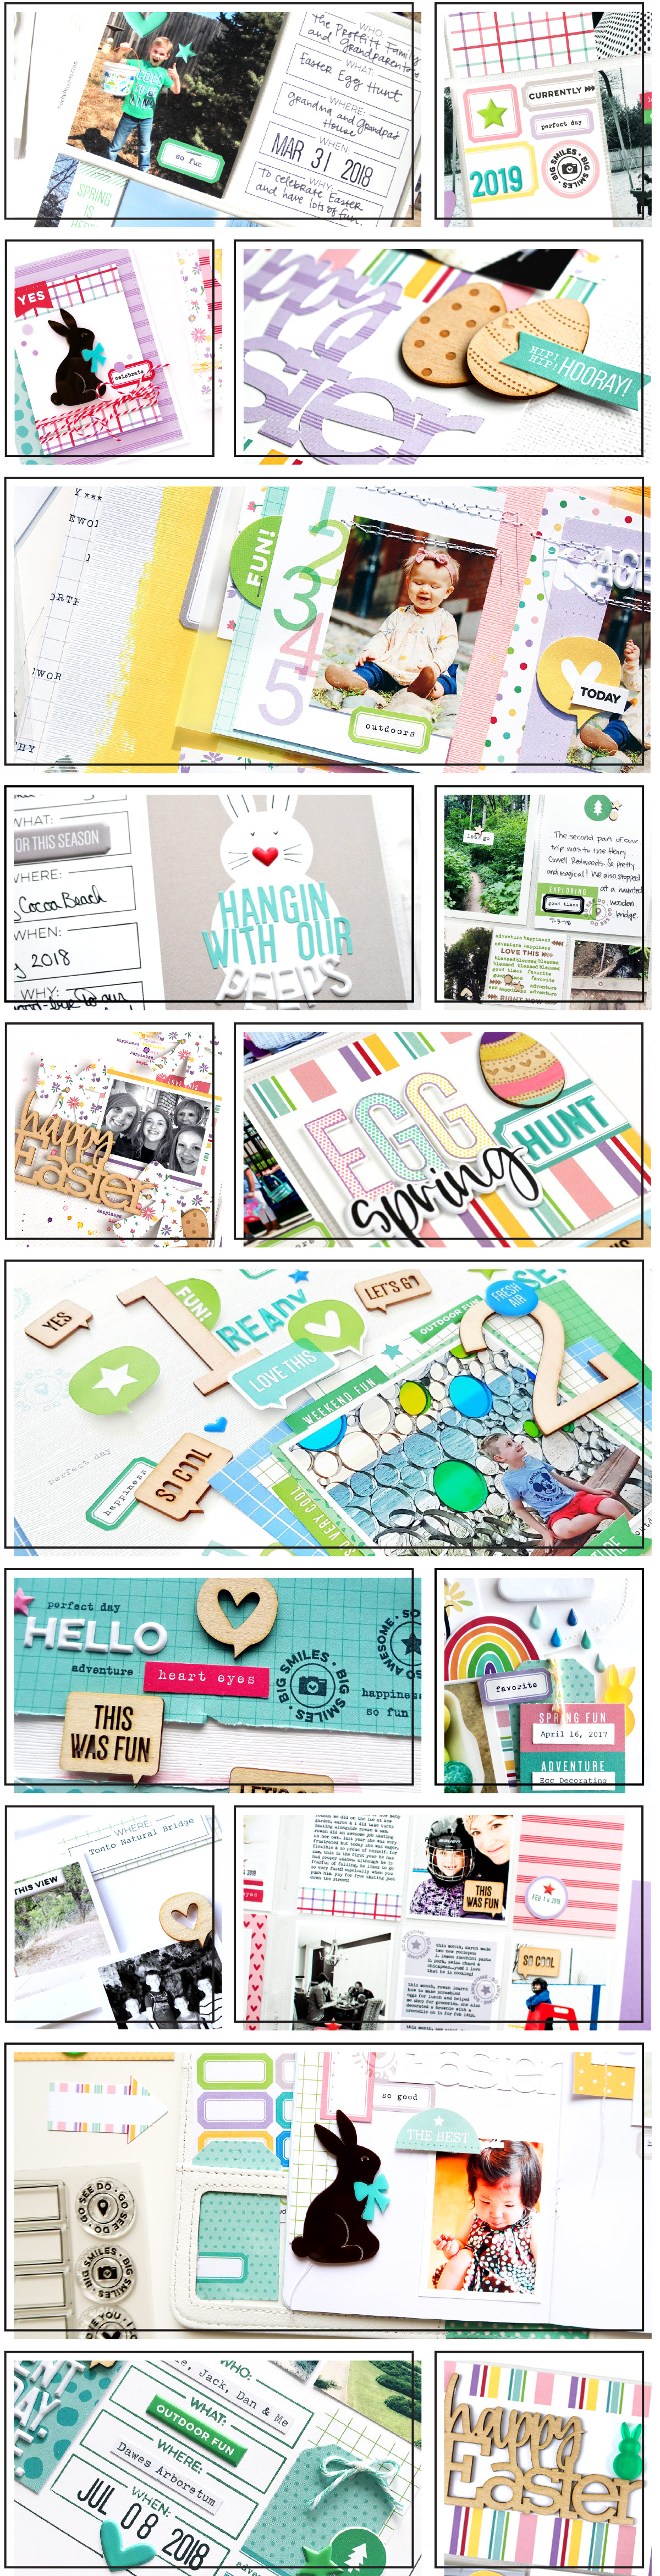
Hooray for March! We are celebrating our 12th birthday here at Elle’s Studio this month, and we have beautiful, new March 2019 kit and extras in the shop! Our design team has been busy creating with this perfect spring kit. Just take a look at their seasonal, colorful projects
We cannot wait to share all that the design team has in store with you this month! Keep watching our blog for more inspiration, follow us on Instagram and join our Elle’s Studio Facebook Group! Happy March!
Comments Off on March Reveal Design Team Inspiration | Share This
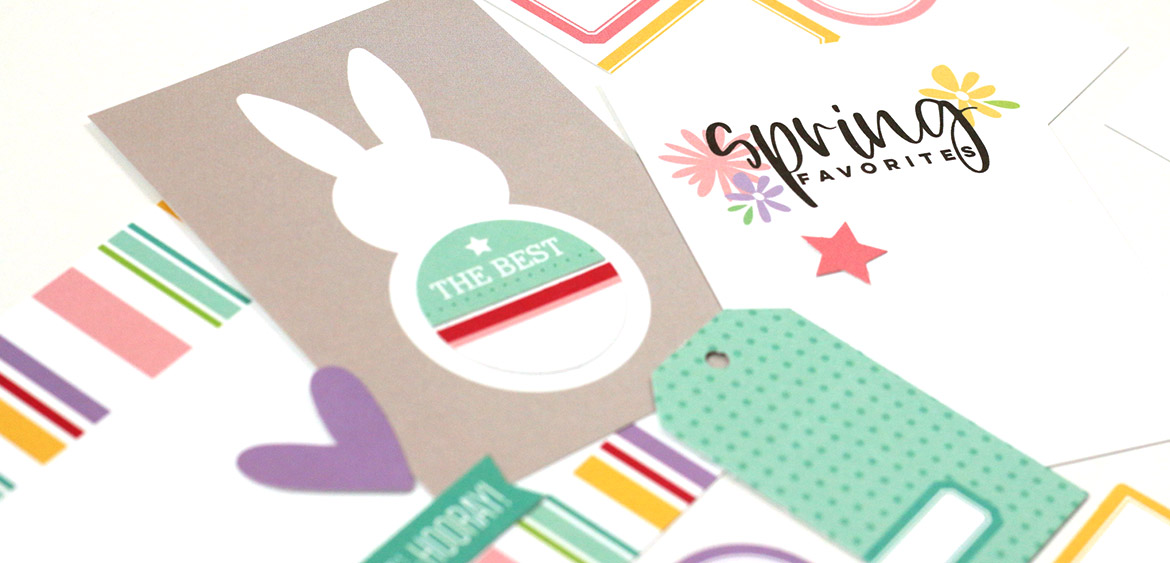
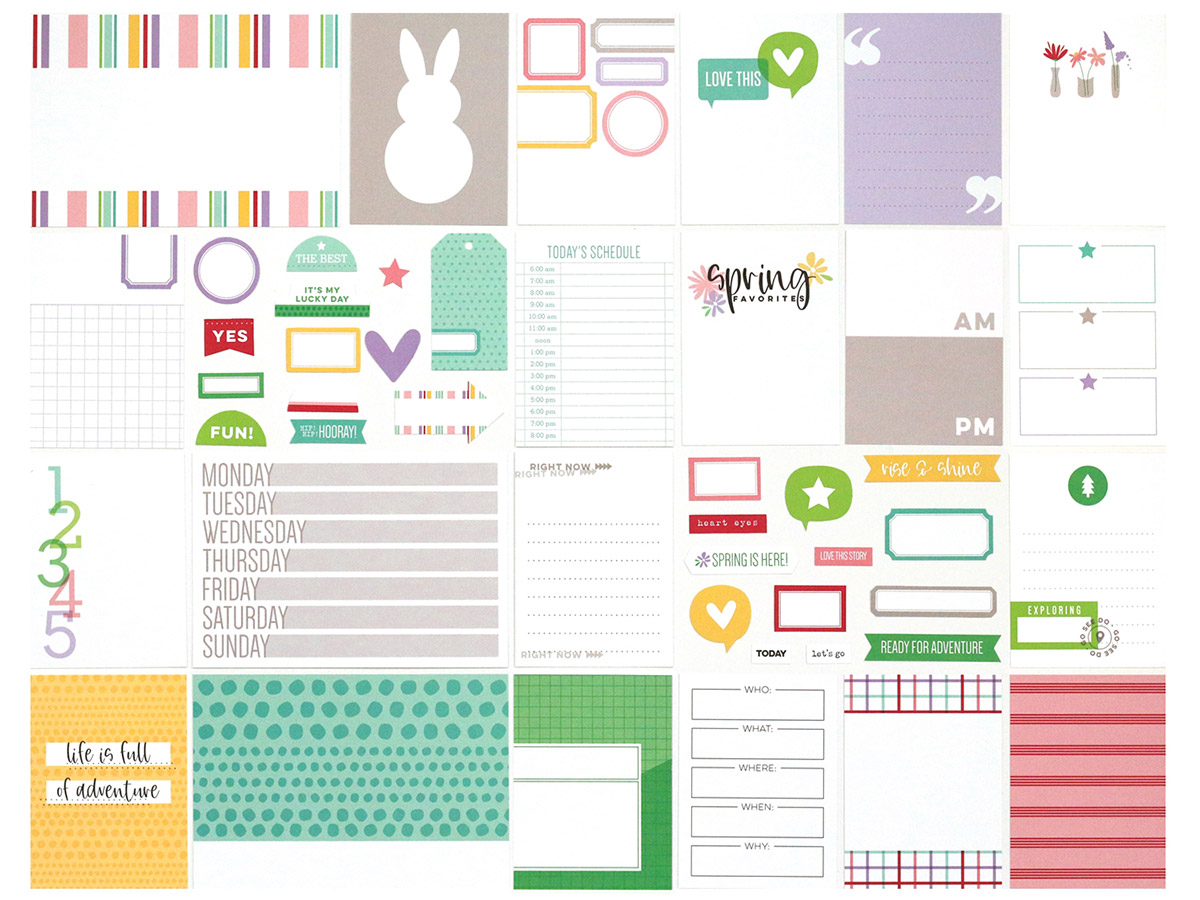
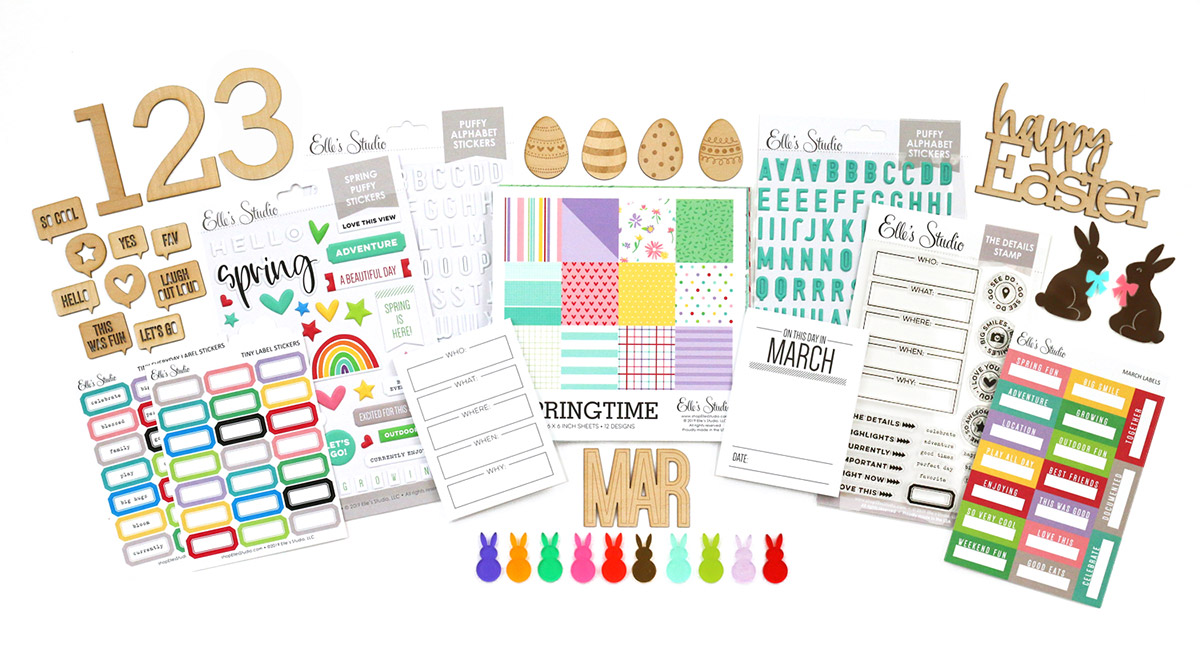
Our March reveal is here and we can’t wait for you to see all of the brand new and exclusive products that are now available in our shop today!
Our March kit includes 3 – 4 x 6 inch tags, 18 – 3 x 4 inch tags, and 26 die cuts, that will work great on your scrapbooking layouts, pocket pages, traveler’s notebooks, cards, planners, and more! When designing our kits, we love to think of tags that can be used as prompts to help make it easier for you to get your story started and documented, and this kit is full of those and so much more!
Here’s the first look at all of the fun tags and die cuts included in this kit:
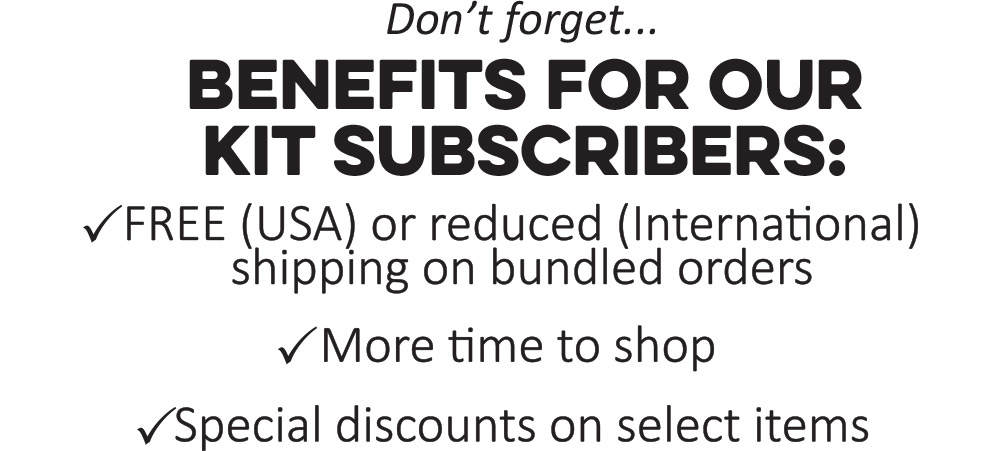
Our monthly kits are limited and once they sell out we will not be restocking! Look for a new kit each month on the 10th at 8:00 am PST, and as a special bonus to celebrate launch day, kits will be on sale for $9.99 for today only, regular price after that will be $11.99. Or, you can lock in our $9.99 price and receive FREE (USA) or reduced (International) shipping each month, on products added to your order with a subscription! If you haven’t started a subscription yet, you’ll want to read below for details!
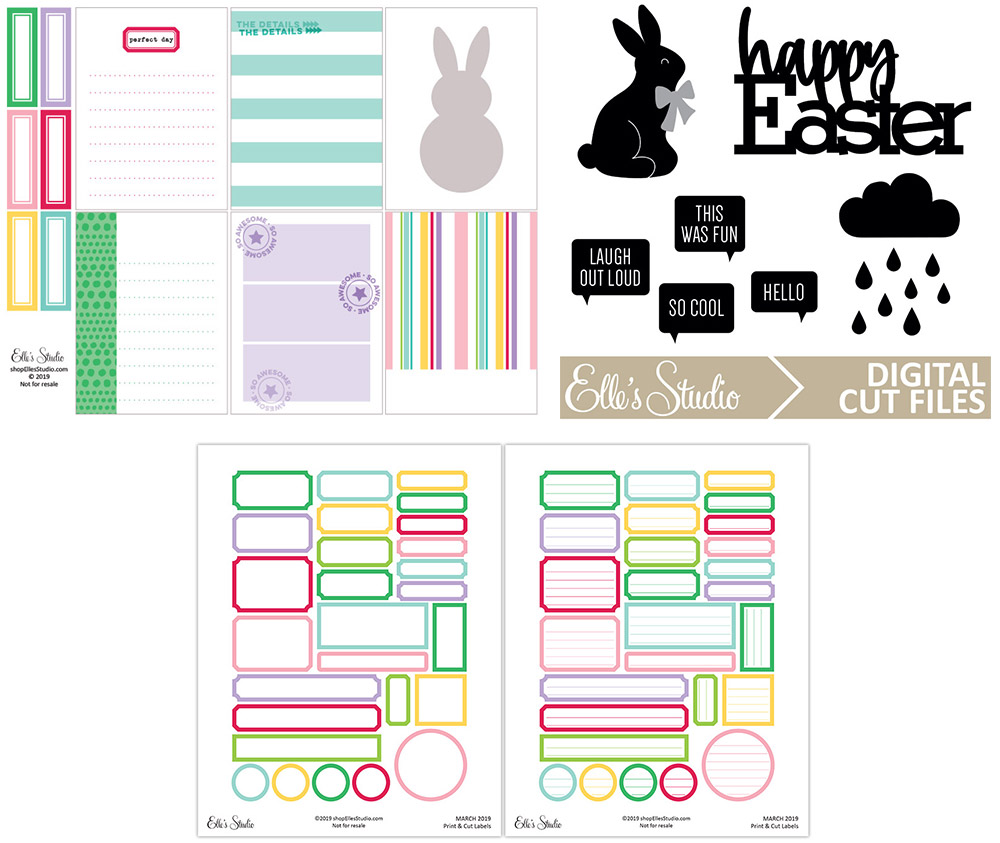
We also have coordinating printables, March cut files, and print and cut labels that coordinate with our kit – once you download these files, you can use/print them over and over again!
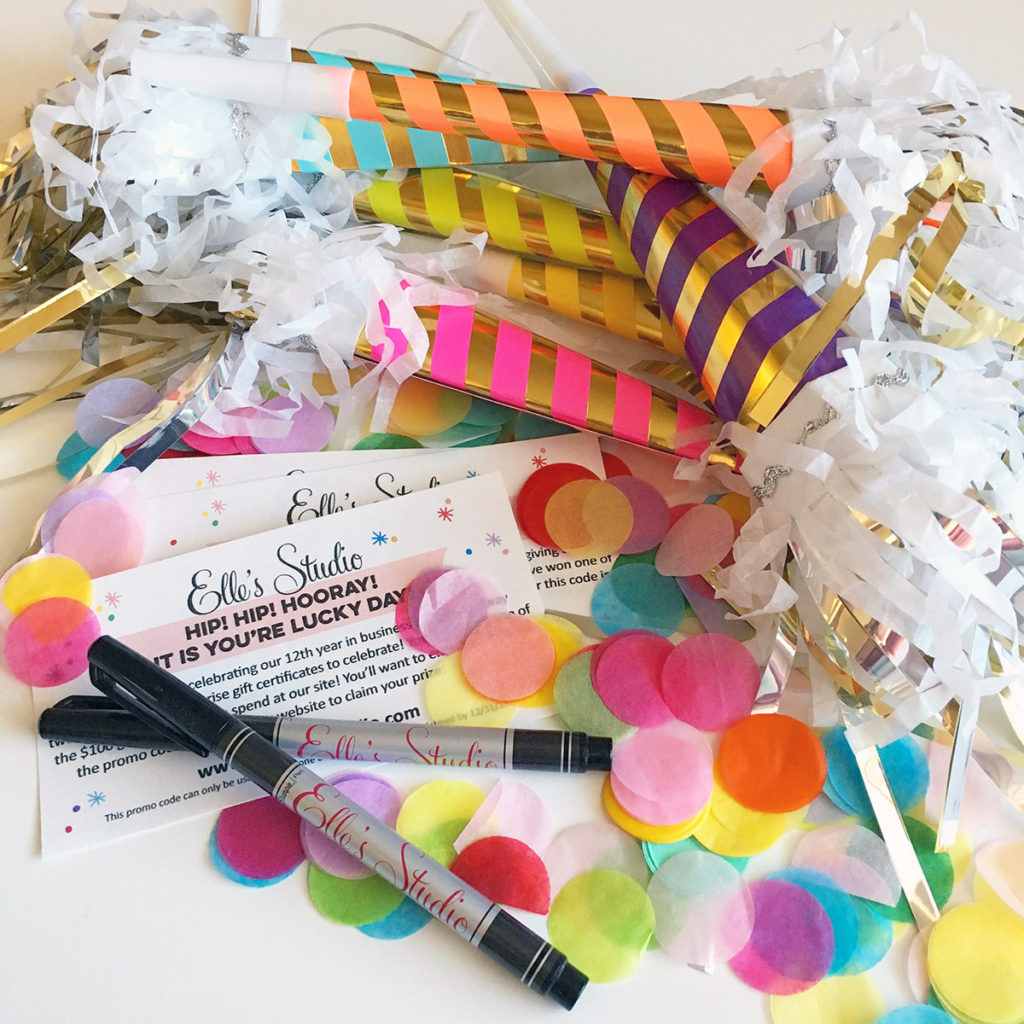
This month we have a special SURPRISE: We are excited to be celebrating 12 years in business this month and we are so thankful for all of your amazing support and friendship over the years! We love and appreciate you all so much!
We’ll be celebrating ALL month long: This month we are giving away twelve $100 ES gift certificates! When you get your order, open it up and look for one of our birthday horns! If you find one in your box, you will also find a $100 gift code attached so that you can start shopping right away! We will also be dropping free gifts in random orders throughout the month! PLUS! All our current and new kit subscribers in March will also receive an ES pen with their March kit!
Subscribers, you can start bundling now! Not a subscriber? Don’t wait any longer to sign up – Today is the perfect day to sign up and save on shipping! With a subscription, you will be guaranteed a kit each month, lock in our launch day special price of $9.99 + shipping, and receive FREE (USA) or reduced (International) shipping on anything added to your box each month during our 24 hour bundling period (starting on the 10th at 8:00 am PST and ending on the 11th at 8:00 am PST). Along with more time to shop, our subscribers will also have access to special discounts on select items during the 24 hour bundling period! These discounted items can be found in our SALE section during bundling, and you must be logged into your kit subscriber account to see them. Our subscriptions are risk free and can be cancelled at any time, too! Quick note: Our kits and add-ons are available without a subscription each month, too.
Please note: When starting a new subscription on the 10th, please allow up to 2 hours (during daytime hours from 8:00 am PST to 5:00 pm PST) for us to switch your account to a subscriber account. You will receive an email with directions on how to access the discounted items and bundle products with your kit subscription.
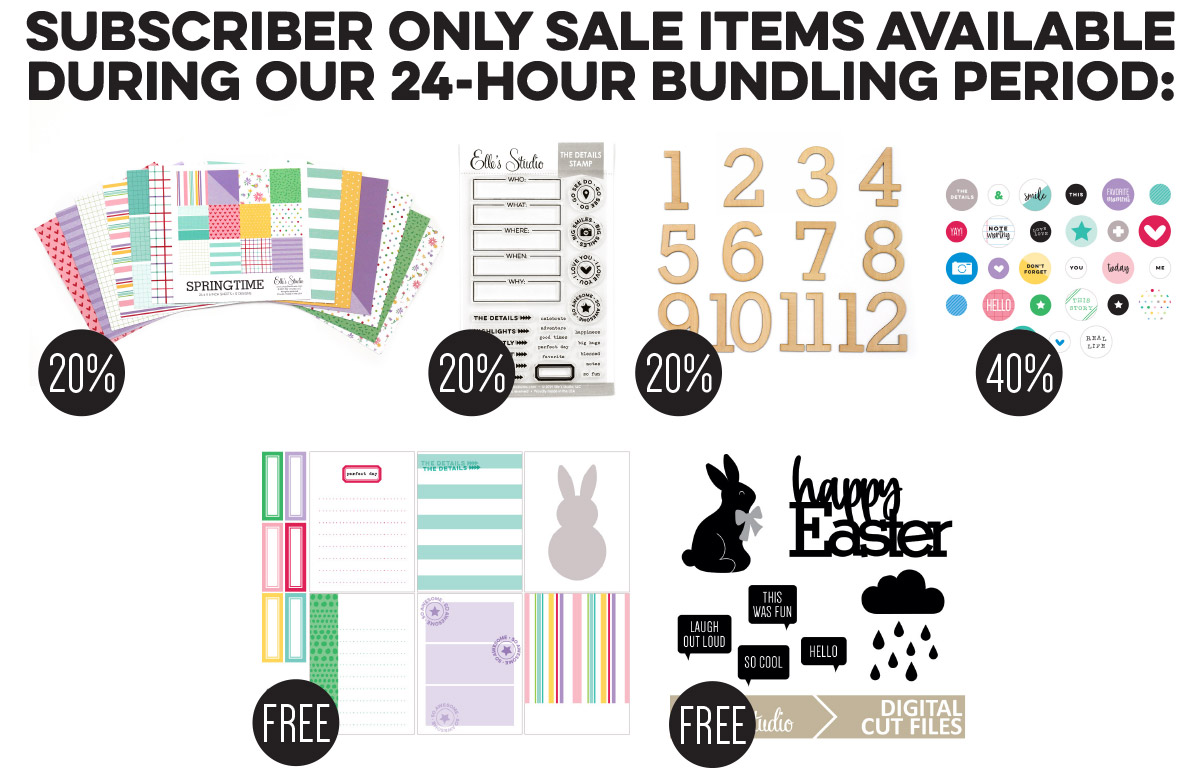
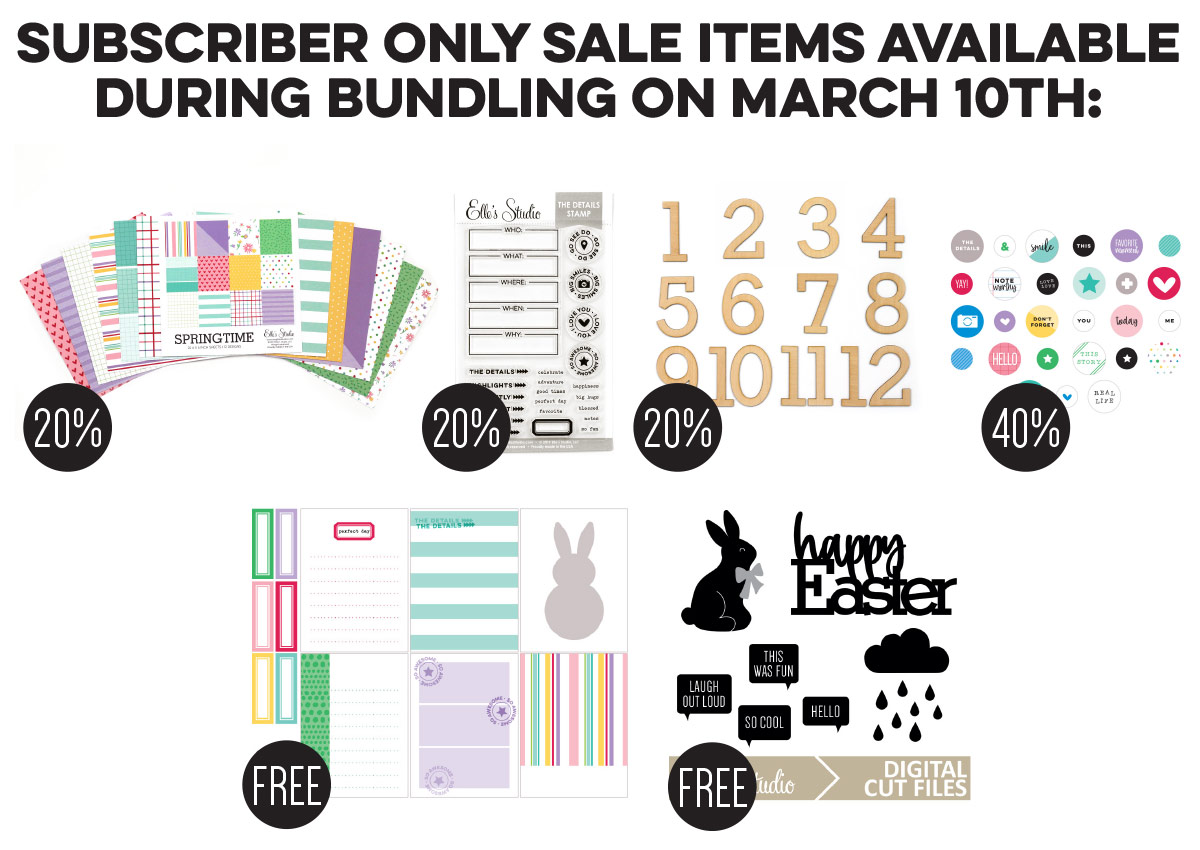
Here’s a look at the items on sale for our subscribers only this month:
Subscribers: Pick up these six items for FREE – 40% off during our 24 hour bundling period that is going on now and ends on Monday, March 11th at 8:00 am PST! Please make sure you are logged into your subscriber account, then click on the SALE section to see these items on sale! Once you are logged in, you’ll see your special discounted product listing that specifies Sub Discount.
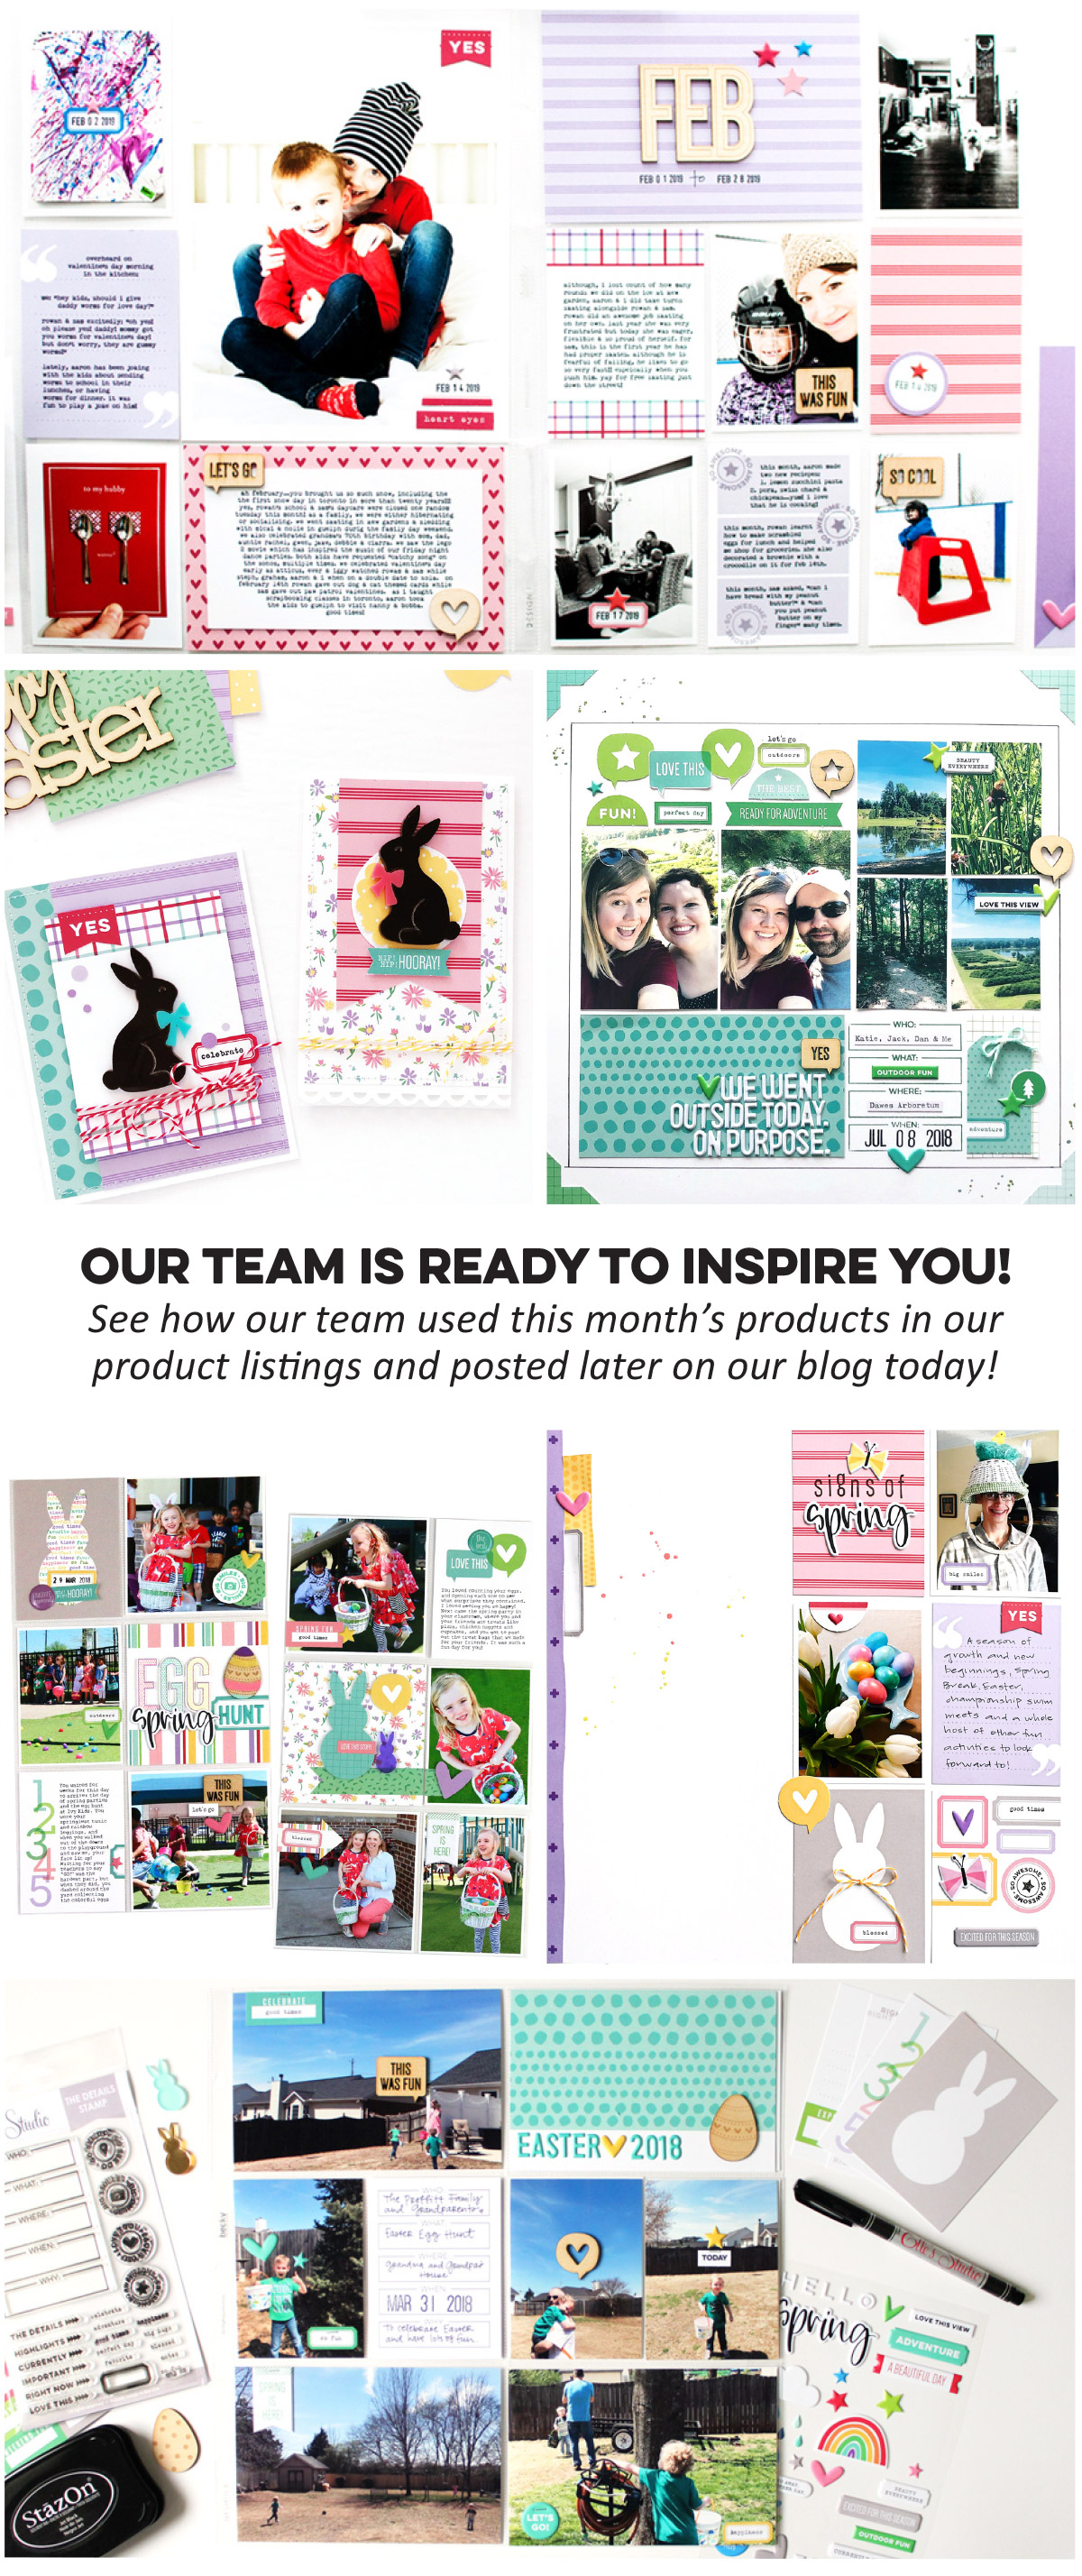
Looking for more inspiration? Our design team is ready to inspire you with brand new, fresh inspiration using the new products this month! You’ll be able to find our their amazing inspiration in our product listings so you can see their projects while you shop! You’ll want to click on the magnifying glass for a large view of the projects our team has created with all these new items. We will also be showcasing our team’s projects on the blog later today, and throughout the entire month!
Thank you so much for joining us today and for all of your support! We are excited to see how you use these new products! You can share your projects with us in our Facebook group and make sure you use the #EllesStudio hashtag when posting on Instagram for a chance to be featured on our feed and win a gift certificate to our shop!
Comments Off on Our March kit + add-ons have arrived! | Share This
It’s the final day of our birthday celebration before our March 2019 Kit and extras hit the shop tomorrow! Today we have design team member Jennifer McMurtrey with us, and you will love how she layered stamps, die cuts and even our largest alpha in the shop on these cards to create a statement! You may even spot some new products that will hit the shop on Monday with our March reveal! Can you guess what they are? Let’s take a look!
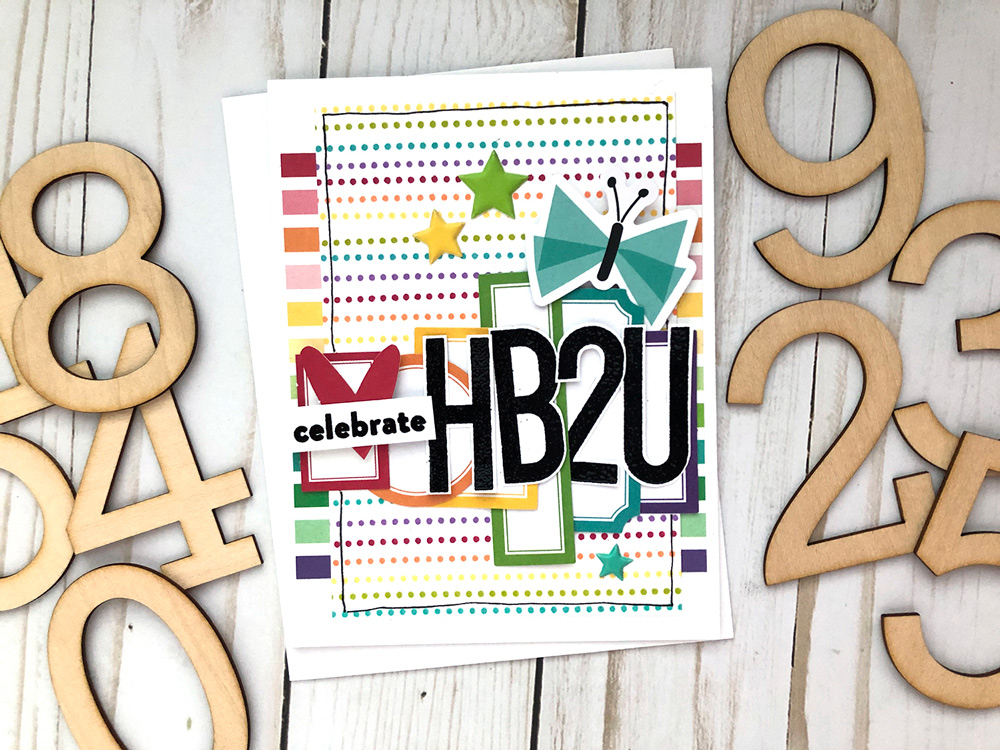
Hey everyone! It’s Jennifer today with two birthday cards: one that is perfect for the teen/tween girl in your life and another that is fitting for any friend on your list.
When I make cards, I always begin with white cardstock as my base. For these I used a 12” x 12” piece to make both cards, which measure 4.25” x 5.5” when folded.
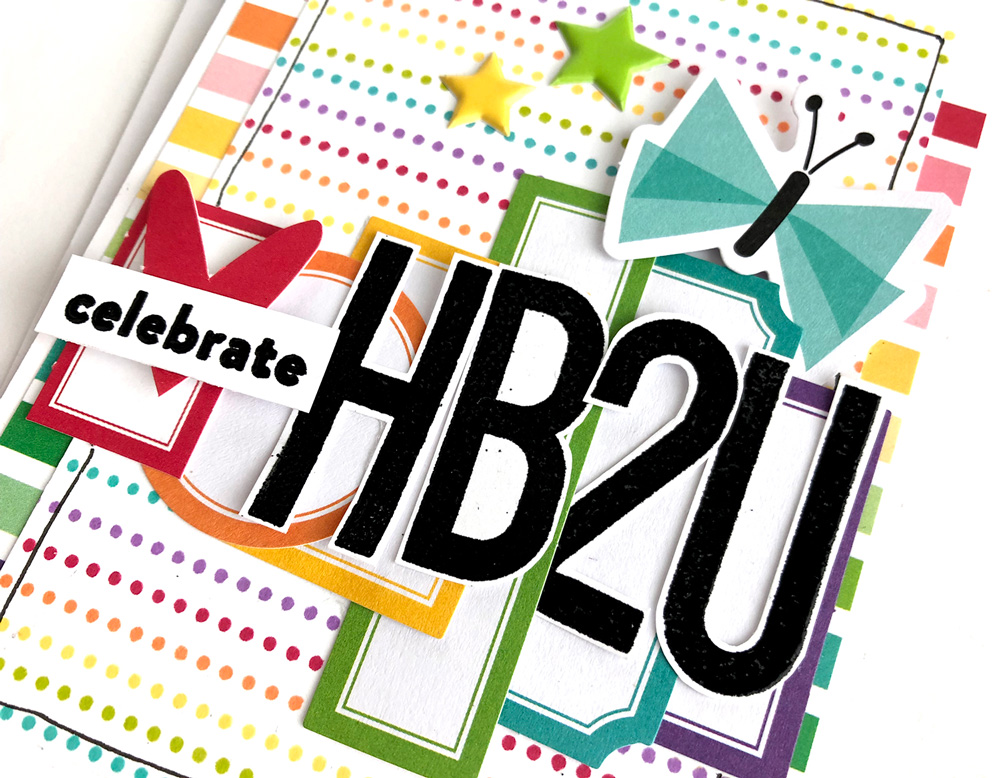
With the base of the card done, I went to work building the background. The first layer is a striped 4 x 6 journaling card from the Noteworthy Double-Sided Journaling Tags cut to fit the base. To create the rainbow dots, I used the Celebrate Stamp with colored inks. This was a bit time consuming, but totally worth it!
While the rainbow dots were drying, I stamped “HB2U” using the Large Jane Alphabet Stamp and Large Jane Number Stamp, as well as the “celebrate” sentiment from the Celebrate Stamp. I used black embossing powder here to give the title a punch of contrast and texture and then fussy cut everything.
To complete the card, I layered Bright Die Cut Labels along the bottom of the card and adhered the stamped sentiment on top. Last, I embellished with Noteworthy Bits and Pieces and doodled a border on the dotted paper. This card is so fun!
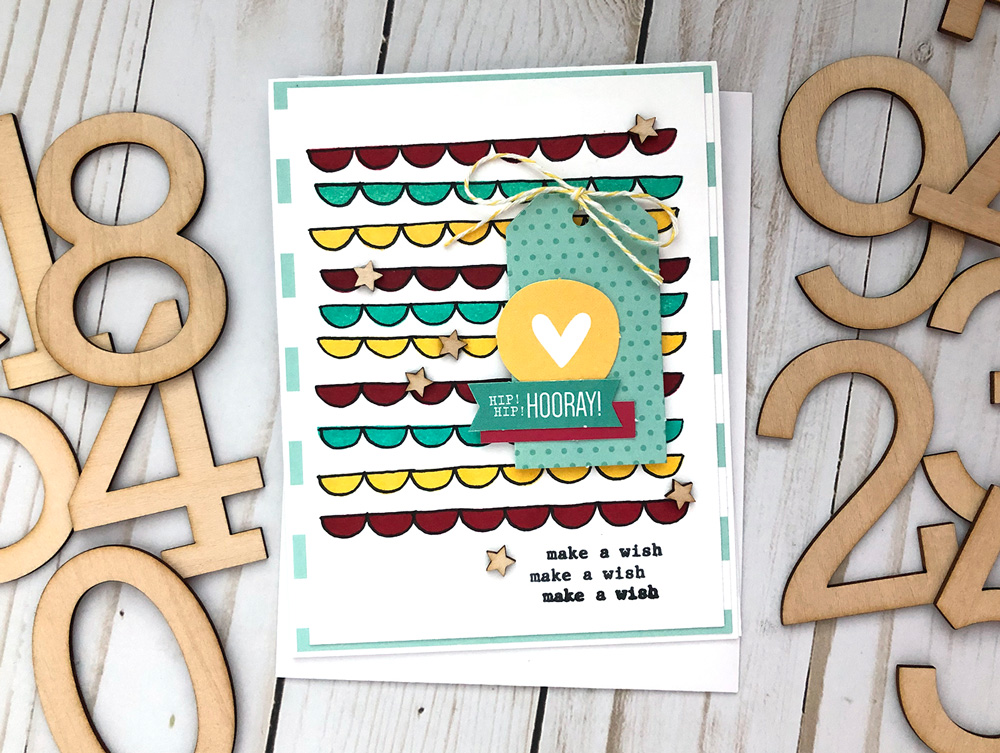
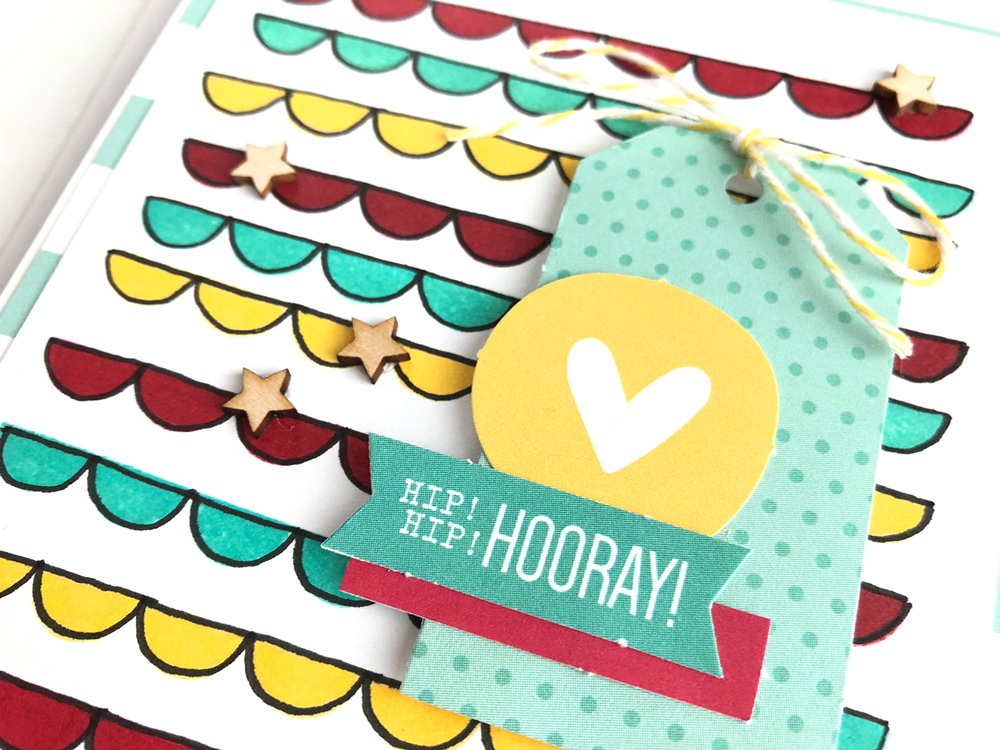
This card began with the same white cardstock base as before and a piece of striped patterned paper. To create the red, turquoise, and yellow banners, I used the Celebrate Stamp on white cardstock. Once the ink was dry, I outlined each one with the subscriber-exclusive Elle’s Studio Sharpie pen, which will be included in each subscriber’s March box!
I used soon-to-be-released die cuts to match the colors in the banners and created a cluster of embellishment along the right side.
To complete the card, I added the “make a wish” stamped sentiment along the bottom and stars from the Wood Veneer Confetti. I love how this one turned out!
I hope you have found a bit of inspiration from today’s cards! Please be sure to share your completed projects in the Elle’s Studio Facebook Group, or on Instagram using the hashtag #EllesStudio. It is so fun seeing everyone’s creations!
Thank you for stopping by today and I hope you are inspired to create!
Comments Off on Cheerful Celebration Cards with Jennifer McMurtrey | Share This
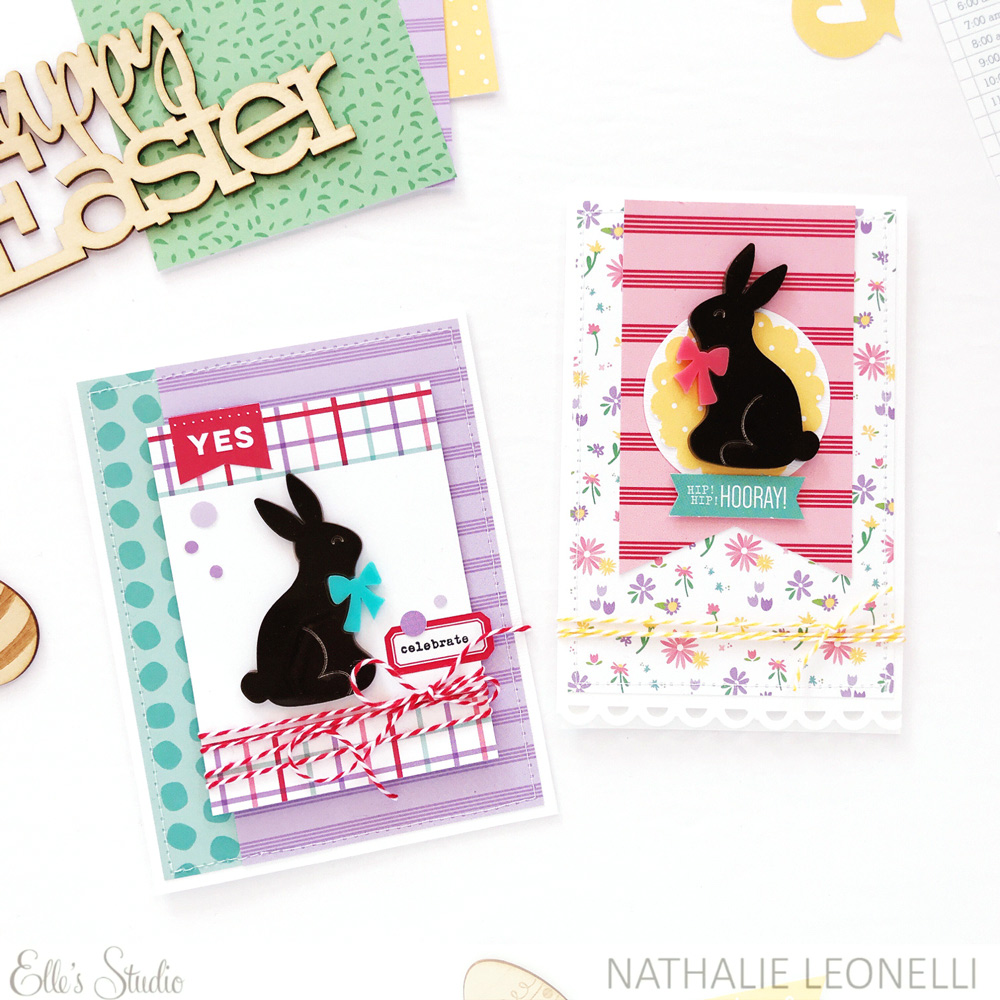
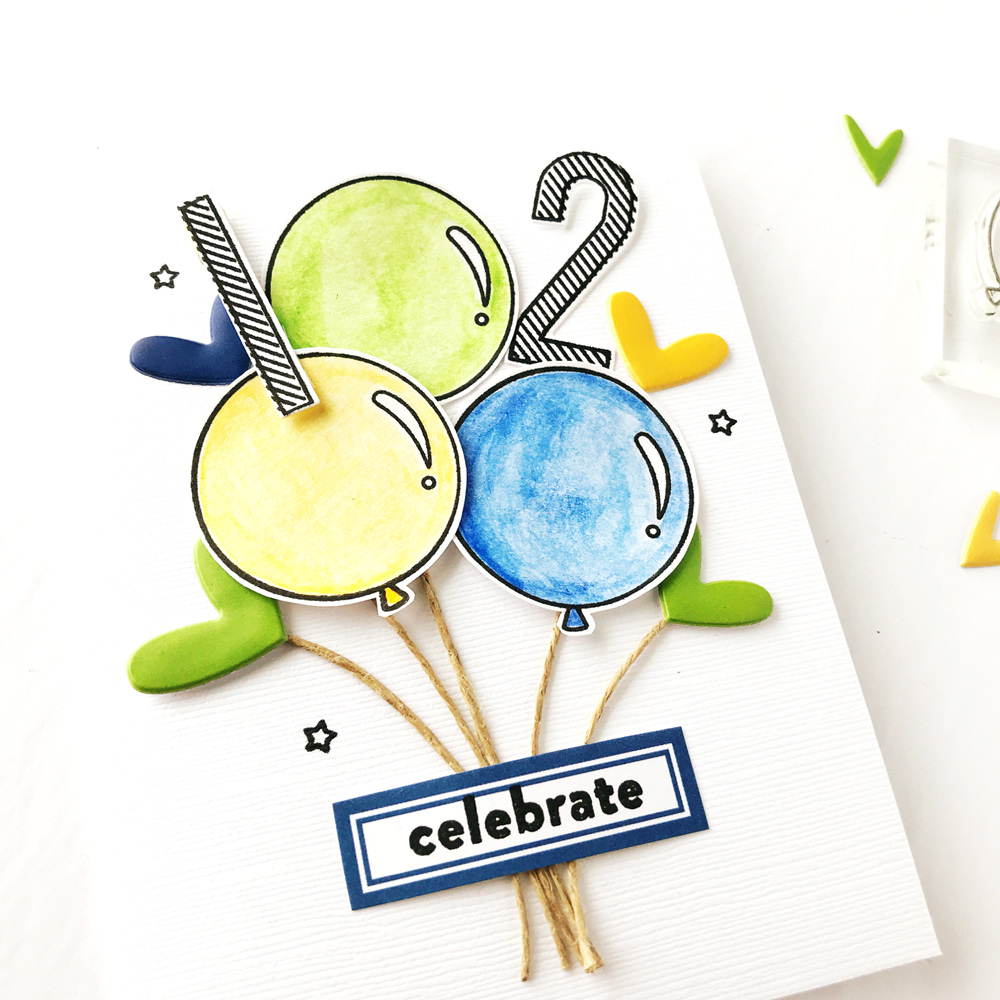
The Elle’s Studio birthday celebrations continue this weekend and today, we are lucky to have Nathalie Leonelli with us to share two amazing, graphic birthday cards, that we know will have you ditching your last-minute drug store card purchases! Let’s see what she created.
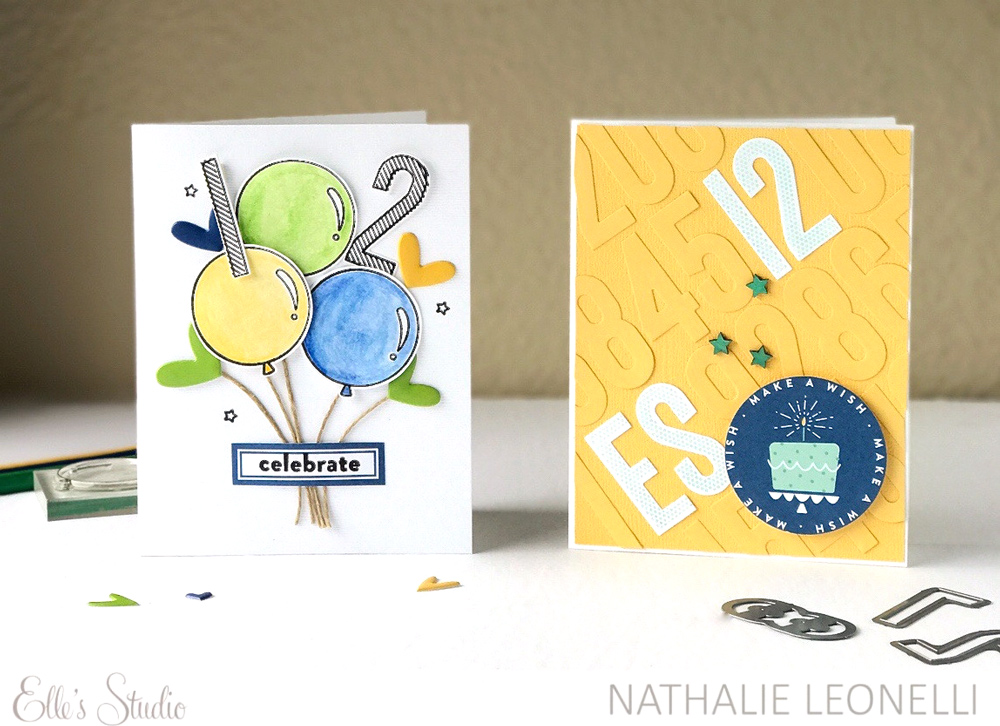
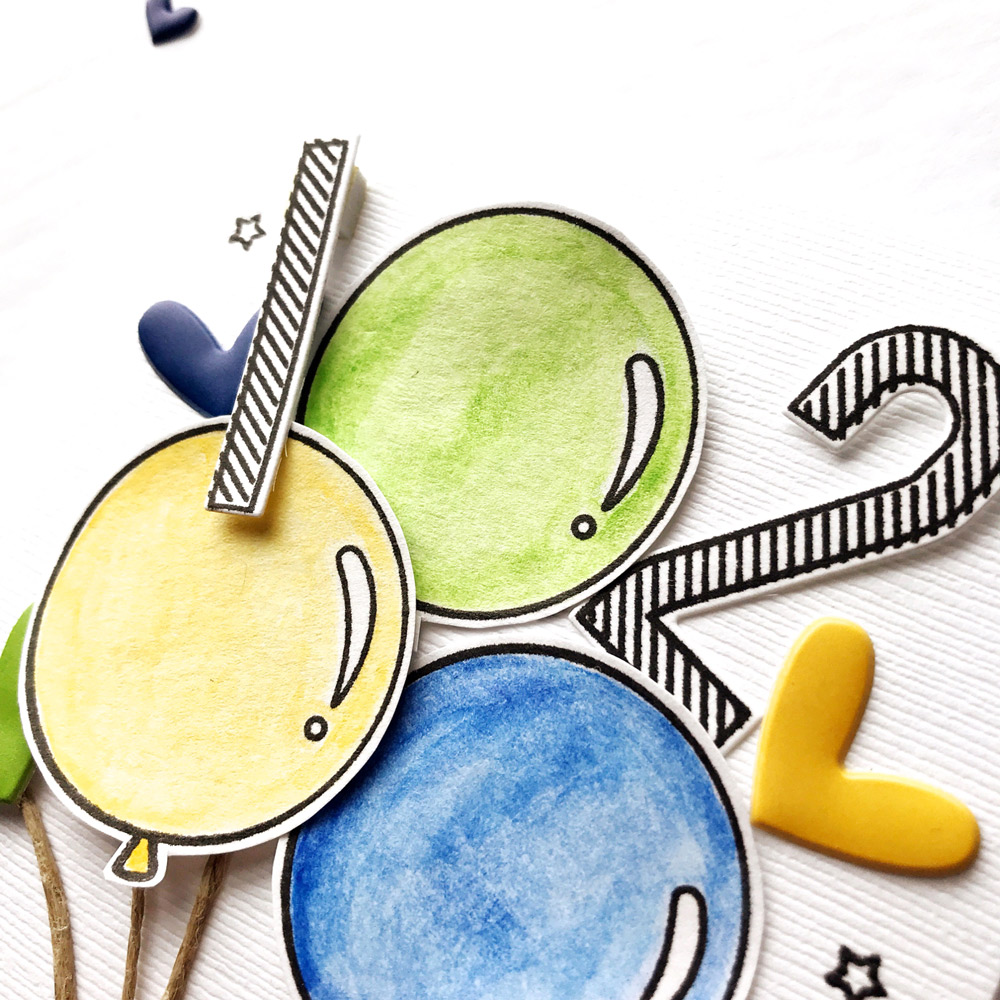
You can of course adapt the age and the initials to suit your recipient! For my first card, I layered stamped and water-colored balloons from the Celebrate Stamp mixed with matching Puffy Heart Stickers.
For a fun touch, I added Large Jane Numbers, stamped in the outline and stripe, then die cut using the Large Jane Number Metal Die. I love how they look like trendy balloons, and the strings that I added make the ensemble look like a party bouquet! Different types of foam dots were used to give extra dimension.
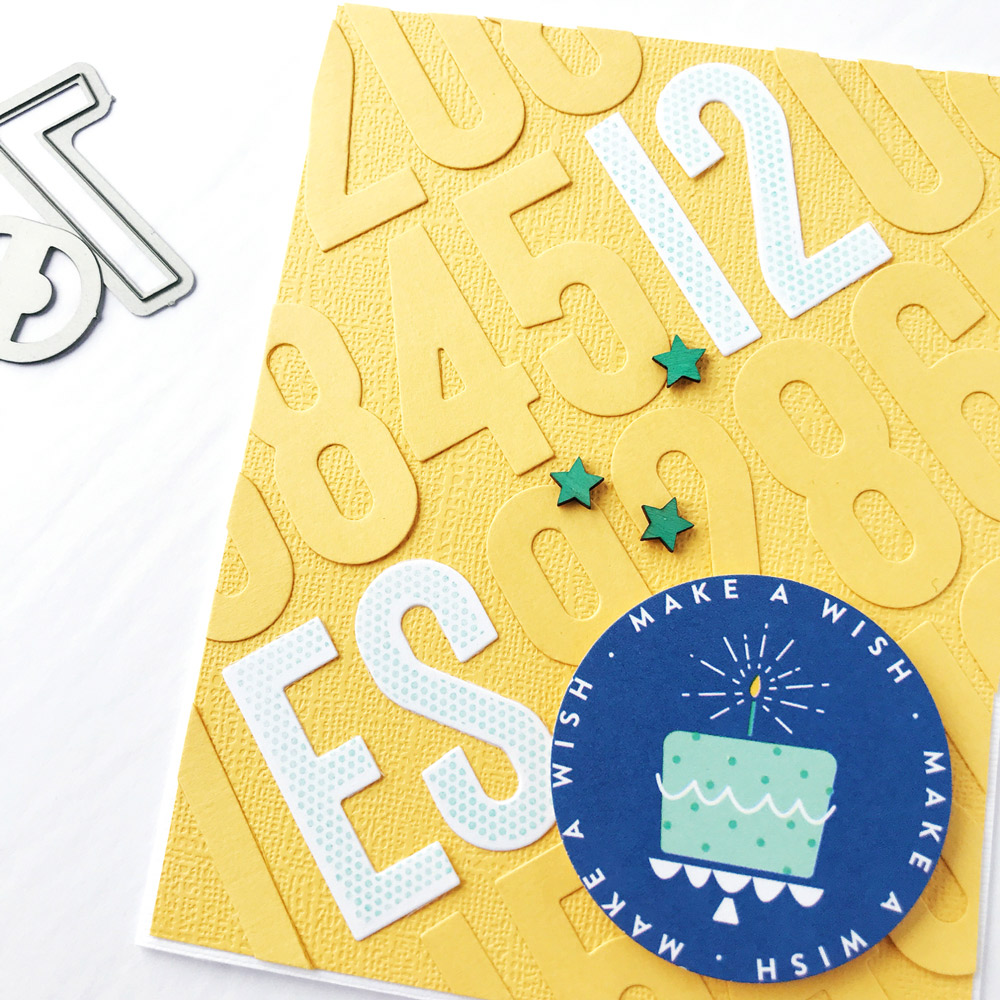
My second card is all about the much anticipated Large Jane Alphabet and Number Metal Die now available in the shop! I loved playing with them to create a tone-on-tone background, switching a few for numbers stamped with the Large Jane Polka Dot Number Stamps so that the birthday and initials pop.
The sentiment was punched out of a tag from the Celebrate Journaling Tagss and placed on more foam dots. The Wood Veneer Confetti stars were inked to match the birthday cake and adhered to give the card one last finishing touch.
I can’t tell you how much I love the different Large Jane alphabet and number stamps and dies! Measuring about 1.5 inches, their size is just perfect for layouts, pockets, traveler’s notebook and… even cards! I can see myself using them again and again for a multitude of projects!
Happy 12th birthday Elle’s Studio! I am so glad to be able to celebrate with you!
Show us your handmade birthday card creations on Instagram using the hashtag #EllesStudio to celebrate our 12th birthday with us during the month of March! You could be featured here on our blog and win a gift certificate to the shop, just for posting!
Comments Off on Beautiful Birthday Cards with Nathalie Leonelli | Share This
Our March reveal is right around the corner and we are so excited to be able to share these amazing sneak peeks of projects our design team made using all the new products that will be available soon! Our March reveal is going to be full of exclusive products that we’ve designed to coordinate with our March kit and this month our kit + add-ons will have you ready to document all your special memories and stories!
Get ready to pick up our March kit for our launch day special pricing of only $9.99 on Sunday, March 10th, at 8:00 am PST. After the 10th, our kits go back to their regular price of $11.99. Or, you can lock in the $9.99 price anytime by starting a subscription! And subscribers, don’t forget! You’ll be able to bundle anything from our shop (including the new add-ons) with your monthly kit for FREE (USA subscribers) or reduced (International) shipping!
Not a kit subscriber? Now is the perfect time to sign up! We have a handful of spots left were you can start with our February kit now! Or, wait until March 10th to sign up and start with our March kit! With our risk free monthly kit subscription, you will be guaranteed a kit each month, lock in our launch day special price of $9.99 + shipping, and receive FREE (USA) or reduced (International) shipping on anything added to your box each month during our 24 hour bundling period (starting on the 10th at 8:00 am PST and ending on the 11th at 8:00 am PST).
Along with more time to shop, our subscribers will also have access to special discounts on NEW and previously released items during the 24 hour bundling period! Above is a preview of our March discounts and savings that will be available for our subscribers starting on March 10th! These discounted items can be found in our SALE section during bundling, and you must be logged into your kit subscriber account to see them. Quick note: Our kits and add-ons are available without a subscription each month, too.
This month we have a special SURPRISE: We are excited to be celebrating 12 years in business this month and we are so thankful for all of your amazing support and friendship over the years! We love and appreciate you all so much!
We’ll be celebrating ALL month long: This month we are giving away twelve $100 ES gift certificates! When you get your order, open it up and look for one of our birthday horns! If you find one in your box, you will also find a $100 gift code attached so that you can start shopping right away! We will also be dropping free gifts in random orders throughout the month! PLUS! All our current and new kit subscribers in March will also receive an ES pen with their March kit!
Make sure you set your alarm and mark your calendar for this Sunday, March 10th at 8:00 am PST! If you haven’t signed up for our newsletter, make sure you do to receive a reminder of when everything is available for sale! We hope to see you there!
Comments Off on Design Team Sneak Peeks | Share This
This month brought a ton of inspiration from our fans who created a project using our products, then shared on Instagram using the #EllesStudio hashtag, and we are so excited to share the six that really caught our eye this month!
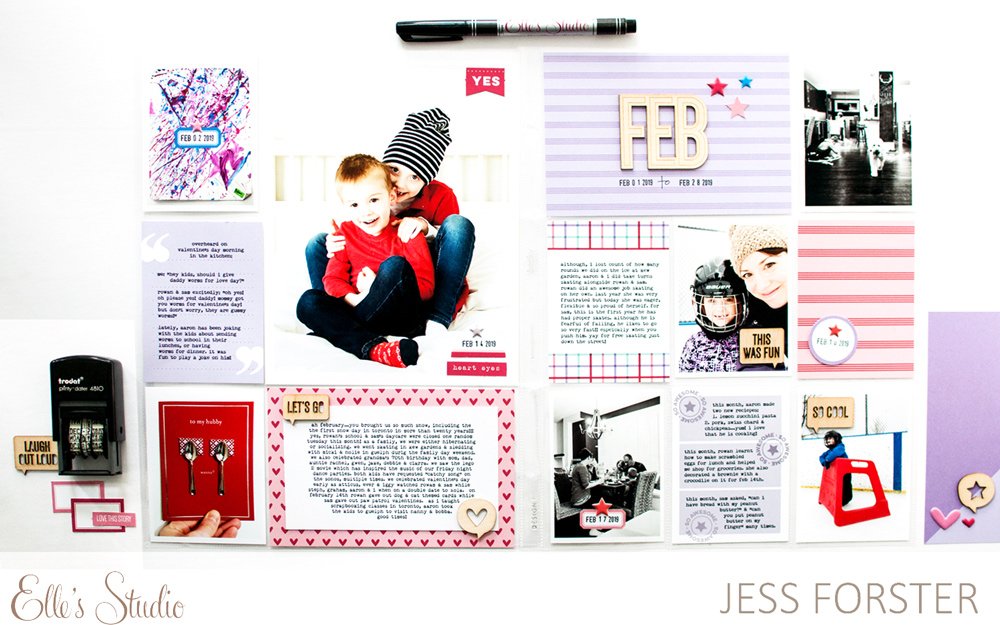
On the left, Christie (@christie_weiss) created some really beautiful pocket pages using our February kit and add-ons. We love all of the beautiful color that we’re seeing in her pockets! Next, Stephanie (@stephraek) created what she called a simple layout on the right using our Live Laugh Love collection, but we think it is SIMPLY beautiful!
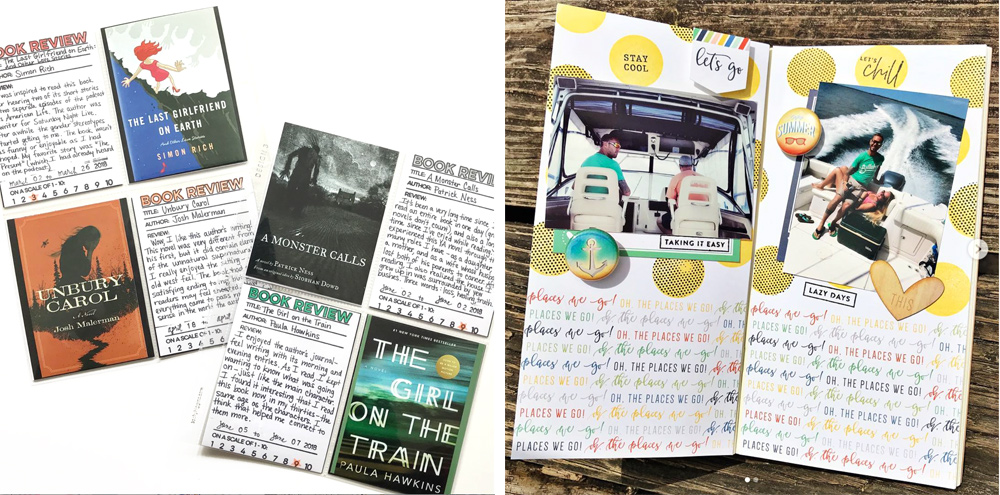
We absolutely love the way that Sharon (@s_gurlcreates) is documenting the books that she has read by creating custom journaling tags with our Read Stamp on the left. On the right, Danielle (@danielledunlop21) is documenting a super fun day on the boat using our Let’s Go Traveler’s Notebook Kit (which is a great deal at 60% off!) and our Let’s Relax Stamp (sold out).
Ren (@theredwren) used a journaling tag from our Icon Printables to make her pocket page project clean and beautiful, and we could not love it more! On the right, @ary.scraps used our February 2019 Kit to document everyday moments in her pockets, in such a lovely way!
Just for posting their projects on Instagram using the hashtag #EllesStudio, these six paper crafters will win a $10 gift certificate to the shop! Thank you so much for posting your projects and using the #EllesStudio hashtag, ladies! Please email us at info@shopellesstudio.com to claim your prize!
Which Elle’s Studio products will inspire you to create this month? Upload your projects to Instagram using the hashtag #EllesStudio for a chance to be featured here on the ES blog!
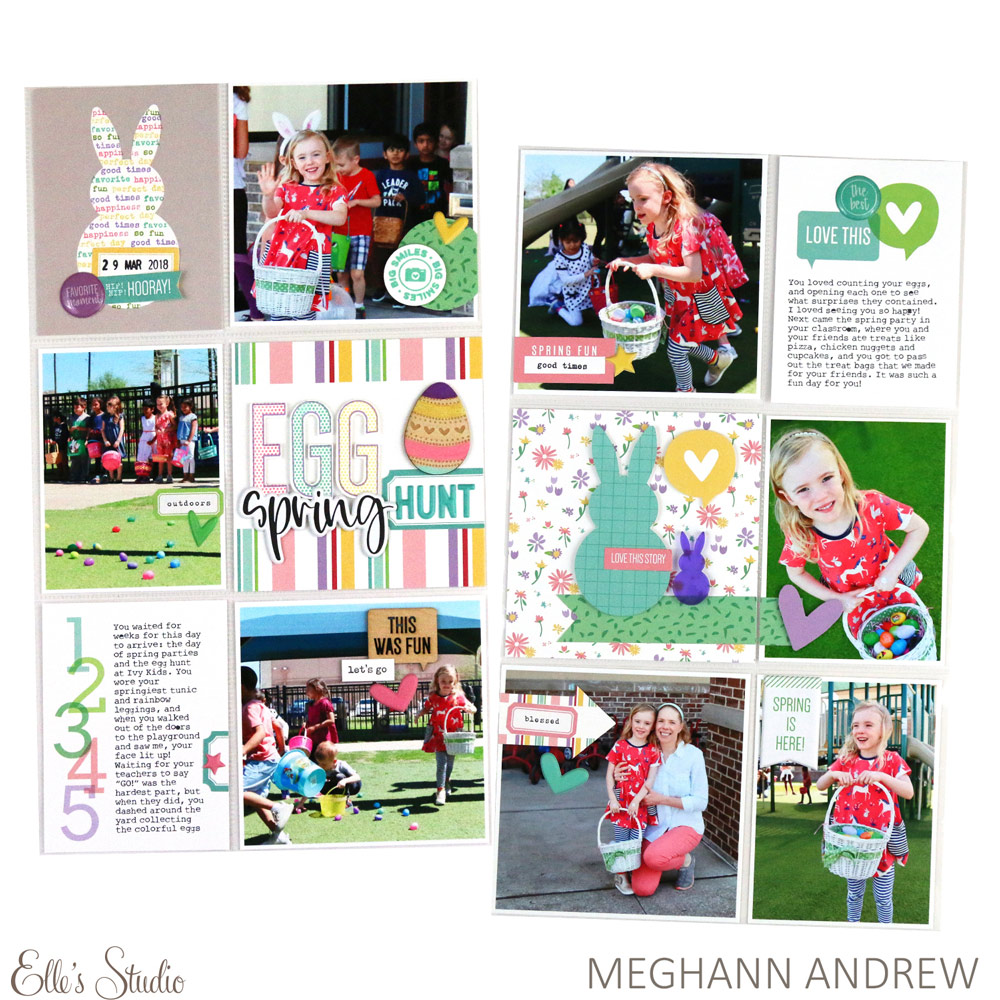
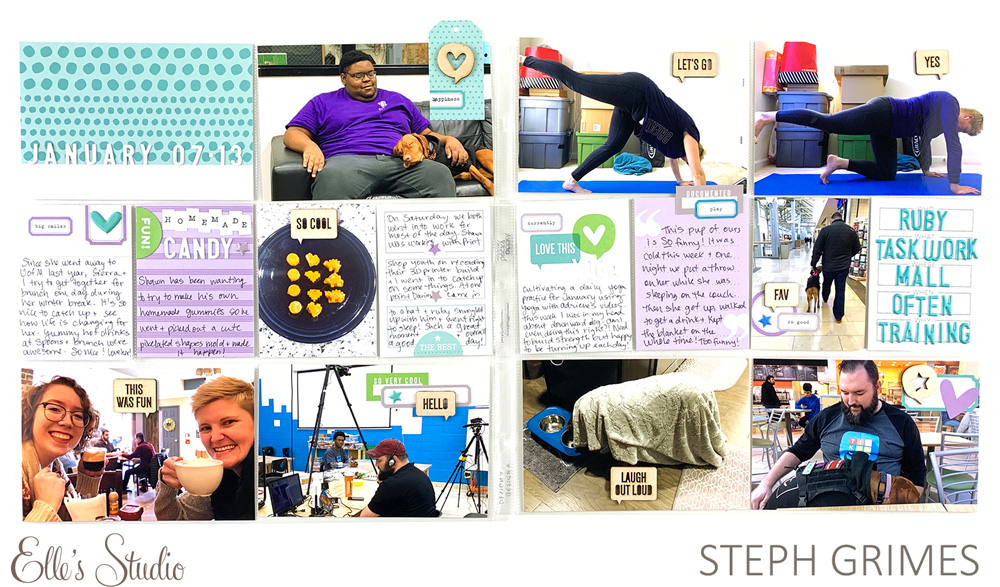
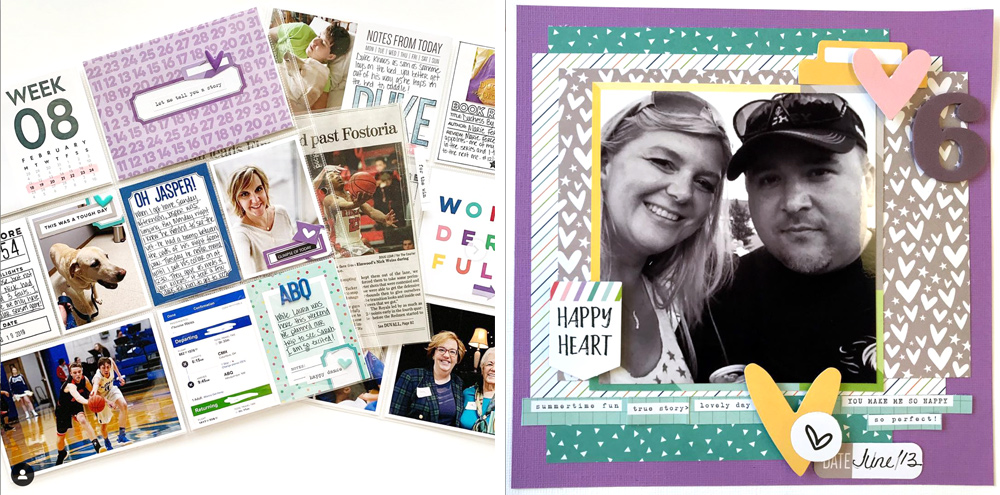
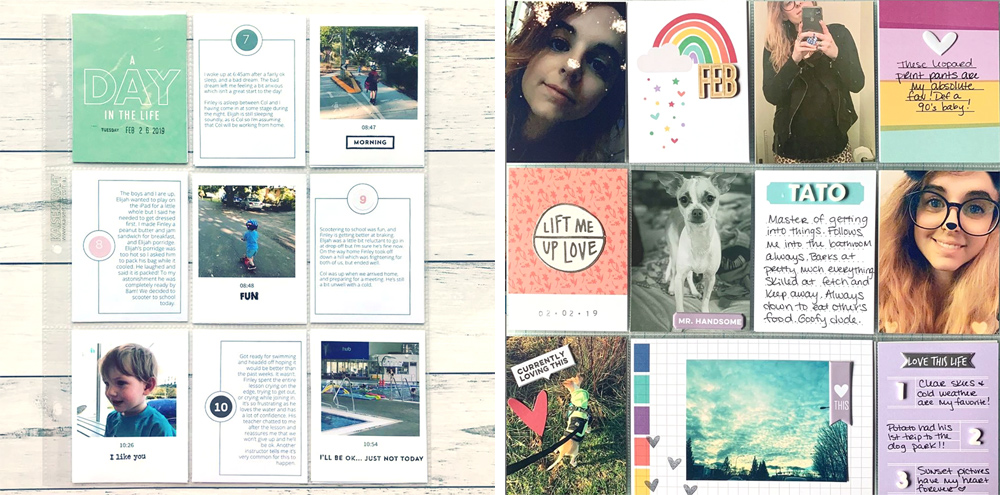
Hey there, Elle’s Studio friends! It’s Meghann Andrew with you today, and I’m so excited to be here just a few days before the March reveal! You may remember that for the February release, I created this layout, about a day at the Tate Modern Museum in London:
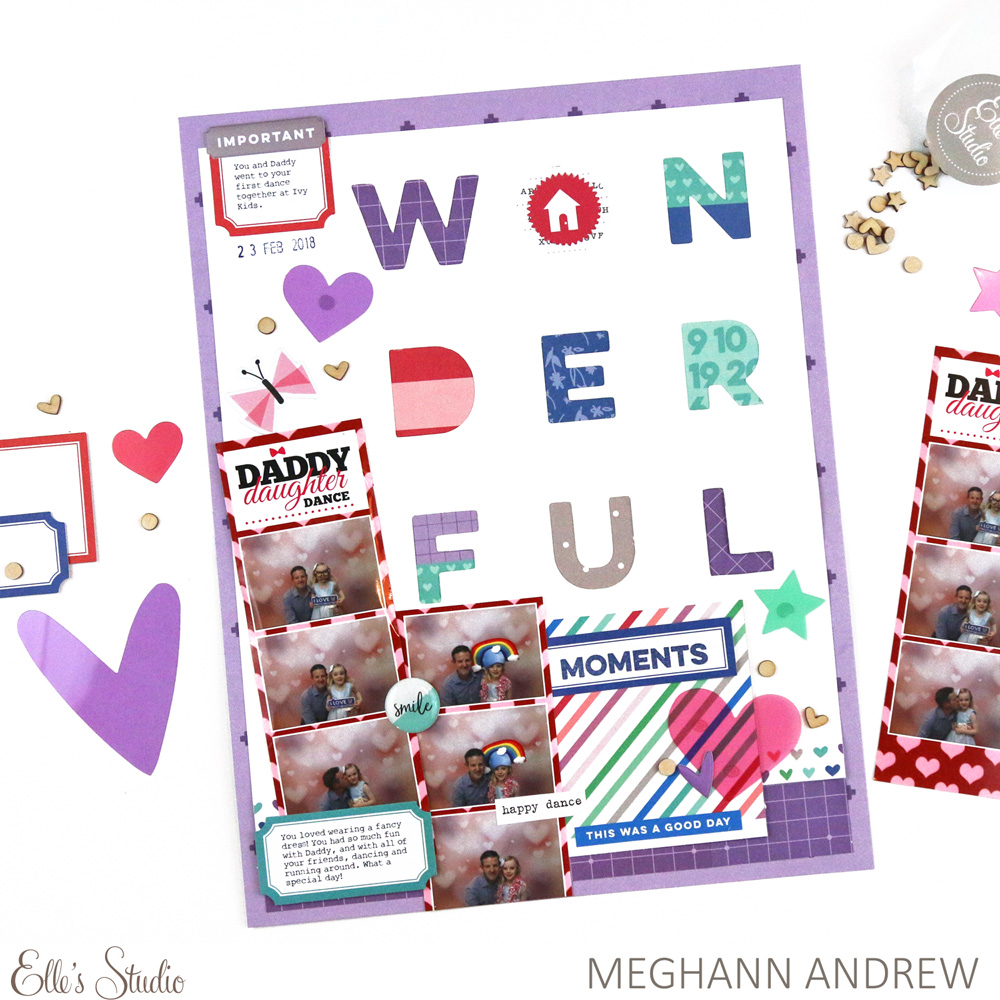
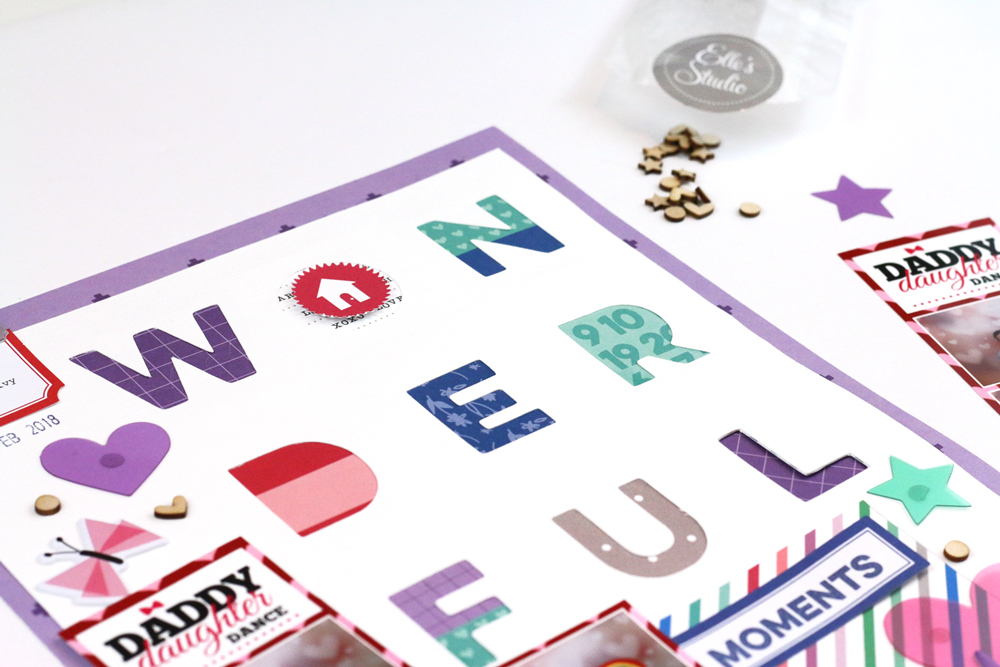
When I created this page, I cut several of the large, “wonderful” backgrounds from white cardstock. I love having die cuts on hand so that I don’t have to get on my computer when the mood to create strikes—it’s a big time-saver! With this extra “wonderful” die cut I decided to create another layout, this time at an 8-1/2″ x 11″ size, but I took some cues from my original 12″ x 12″ page to make creating my new page, documenting our first father-daughter dance, quick and easy!
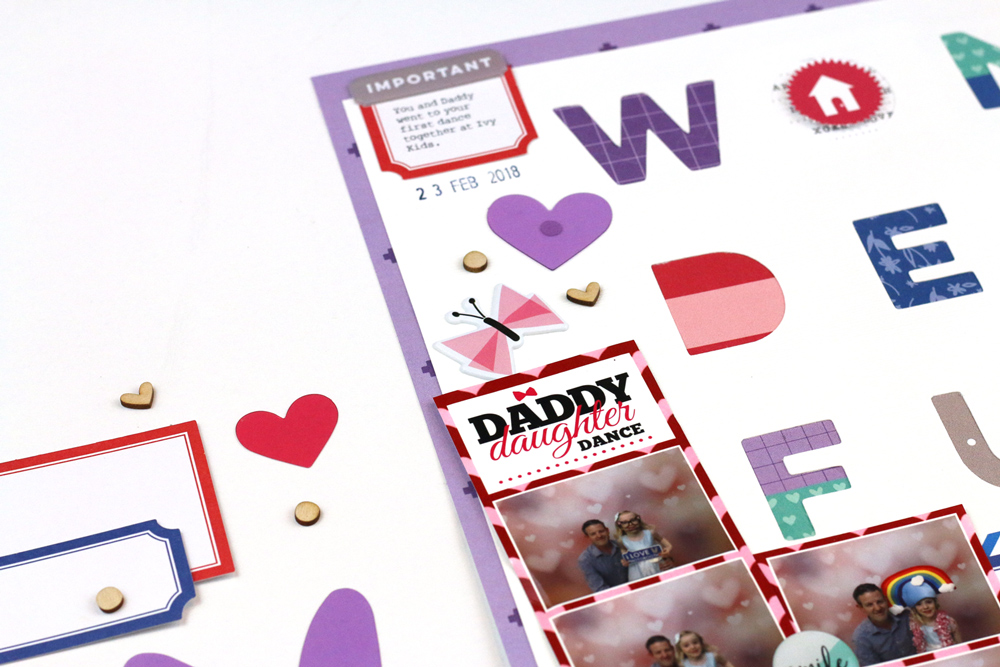
Instead of leaving my die cut background blank against my purple Noteworthy paper frame, I backed the letters with small pieces of paper from the All My Heart 6 x 6 Paper Stack. I chose bright, bold colors to get the maximum amount of contrast from the white background, just like on my original layout, which had a high-contrast black against white title.
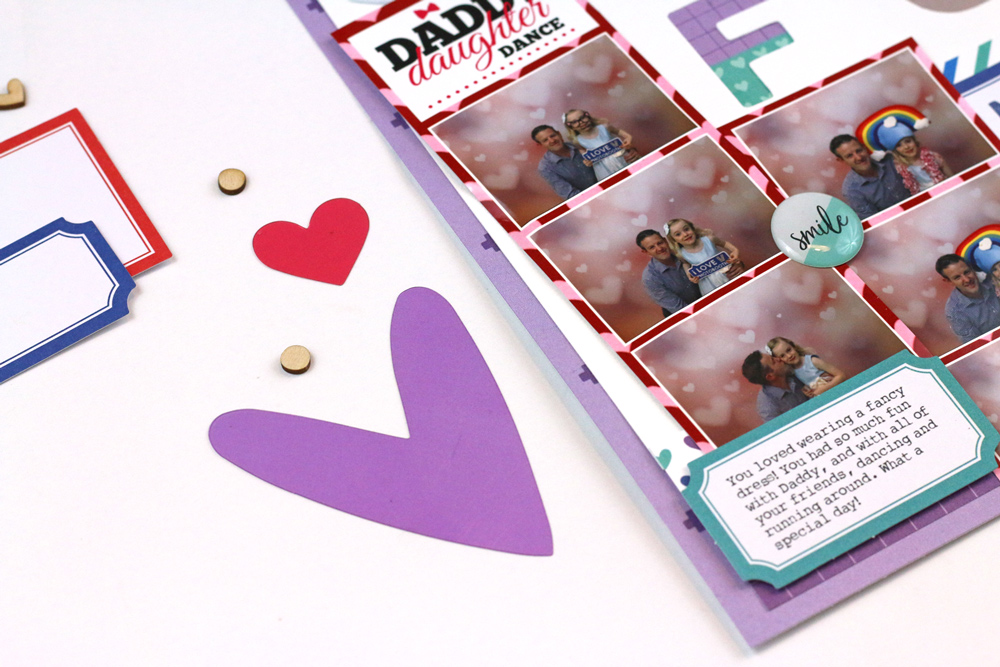
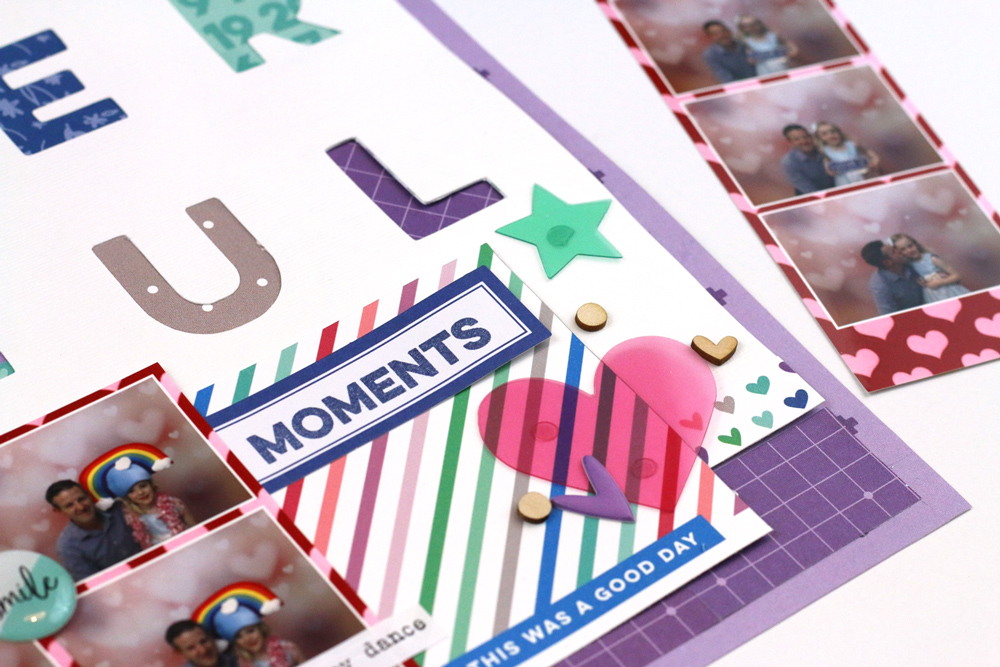
Just like in my previous layout, I used long photo booth strips—two on this layout. I placed these along the left edge of the page. Because I had less room with the smaller layout size, I was not able to line the left edge with labels, but I still arranged my embellishment along a “L” design on the page, starting with a cluster of a Bright Die Cut Label, Heart Acetate Die Cut, Noteworthy Puffy Sticker and Wood Veneer Confetti at the top left corner of the page.
Following down to the bottom left corner of the page, to create the bottom corner of the “L,” I added more journaling with another Bright Die Cut Label, the “smile” Noteworthy Epoxy Sticker to the center of the photos. Just like in my last layout, where I used a colorful row of hearts to then draw your eye across to the right of the page, I did the same on this layout using the diagonal striped 3″ x 4″ tag from the February 2019 Digital Cut File.
With the same versatile “wonderful” die cut background from the February 2019 Digital Cut File, I created a completely different layout, using cues from my original page. I loved being able to document another special memory in a quick, but beautiful way! Thanks for stopping by, and be sure to start cutting duplicate die cuts to save time creating!
Comments Off on Duplicate Digitals with Meghann Andrew | Share This