It’s the final day of our birthday celebration before our March 2019 Kit and extras hit the shop tomorrow! Today we have design team member Jennifer McMurtrey with us, and you will love how she layered stamps, die cuts and even our largest alpha in the shop on these cards to create a statement! You may even spot some new products that will hit the shop on Monday with our March reveal! Can you guess what they are? Let’s take a look!
Hey everyone! It’s Jennifer today with two birthday cards: one that is perfect for the teen/tween girl in your life and another that is fitting for any friend on your list.

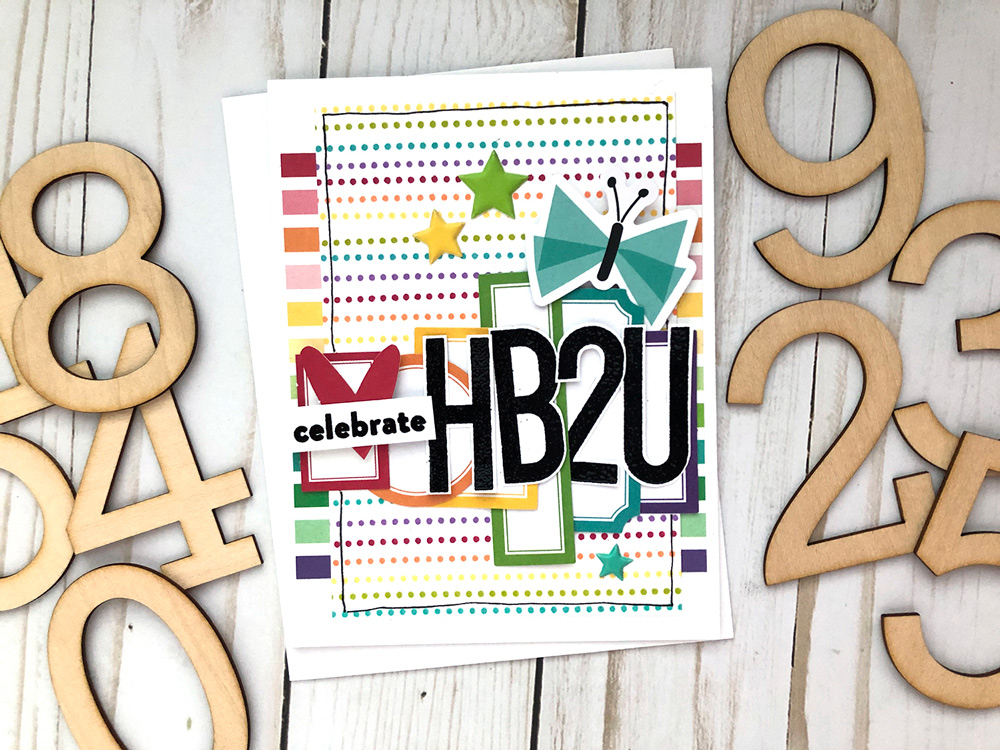
When I make cards, I always begin with white cardstock as my base. For these I used a 12” x 12” piece to make both cards, which measure 4.25” x 5.5” when folded.
Supplies | Bright Die Cut Labels, Noteworthy Double-Sided Journaling Tags, Noteworthy Bits and Pieces, Celebrate Stamp, Large Jane Alphabet Stamp – Solid, Large Jane Number Stamp – Solid and Outline
With the base of the card done, I went to work building the background. The first layer is a striped 4 x 6 journaling card from the Noteworthy Double-Sided Journaling Tags cut to fit the base. To create the rainbow dots, I used the Celebrate Stamp with colored inks. This was a bit time consuming, but totally worth it!
While the rainbow dots were drying, I stamped “HB2U” using the Large Jane Alphabet Stamp and Large Jane Number Stamp, as well as the “celebrate” sentiment from the Celebrate Stamp. I used black embossing powder here to give the title a punch of contrast and texture and then fussy cut everything.
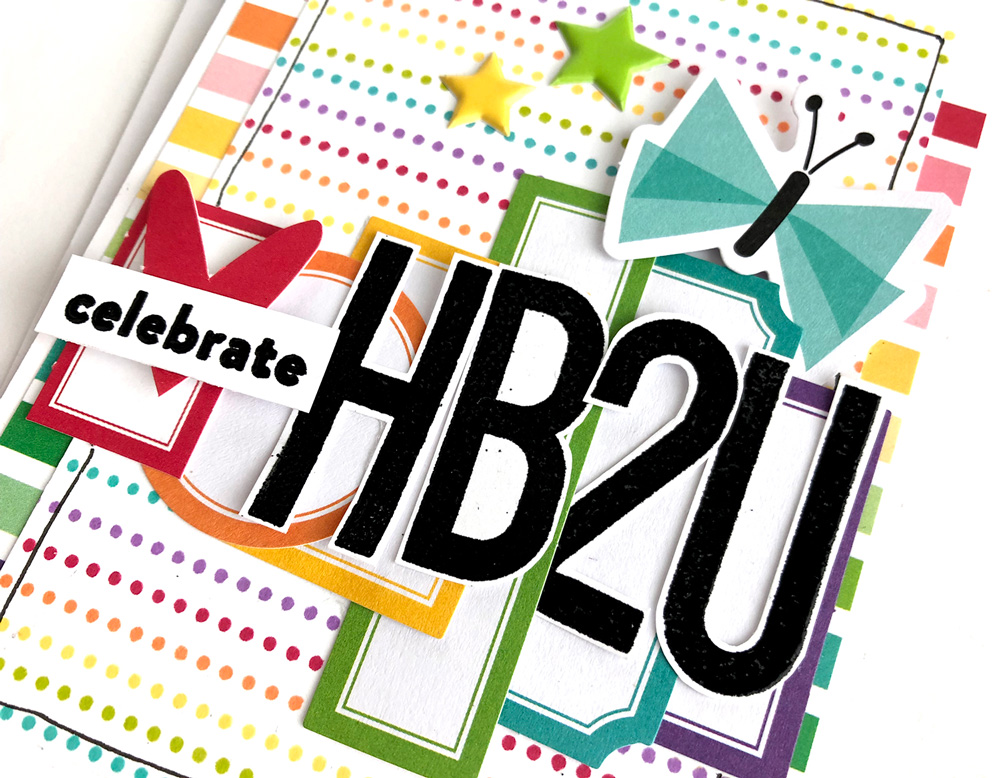
To complete the card, I layered Bright Die Cut Labels along the bottom of the card and adhered the stamped sentiment on top. Last, I embellished with Noteworthy Bits and Pieces and doodled a border on the dotted paper. This card is so fun!
Time for card number two!
Supplies | Celebrate Stamp, Wood Veneer Confetti
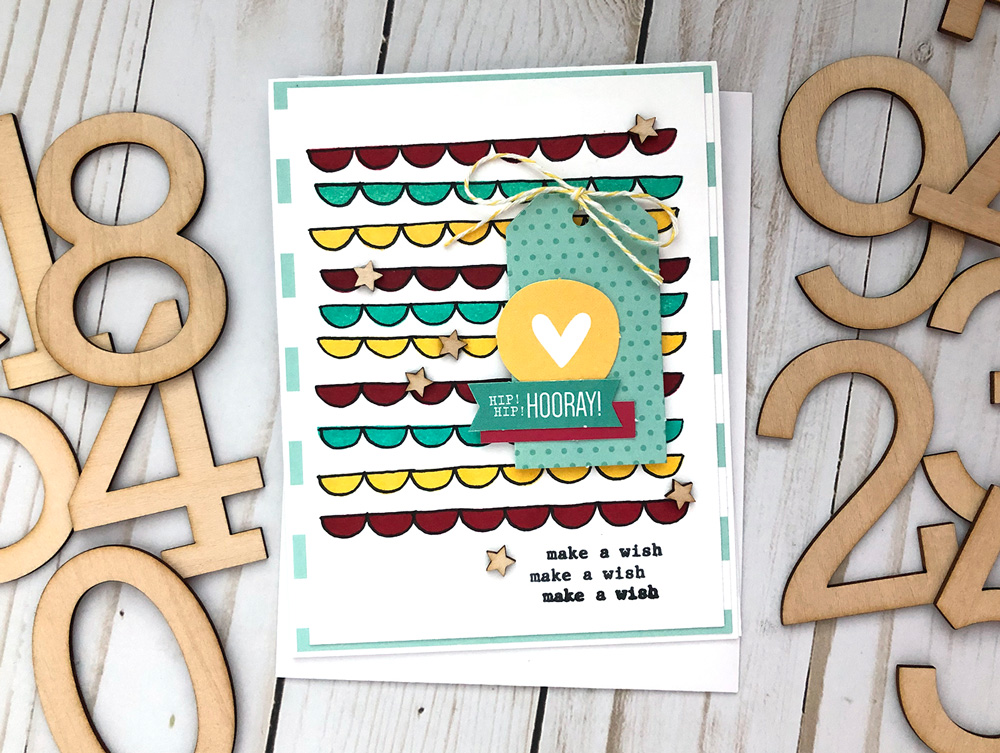
This card began with the same white cardstock base as before and a piece of striped patterned paper. To create the red, turquoise, and yellow banners, I used the Celebrate Stamp on white cardstock. Once the ink was dry, I outlined each one with the subscriber-exclusive Elle’s Studio Sharpie pen, which will be included in each subscriber’s March box!
I used soon-to-be-released die cuts to match the colors in the banners and created a cluster of embellishment along the right side.
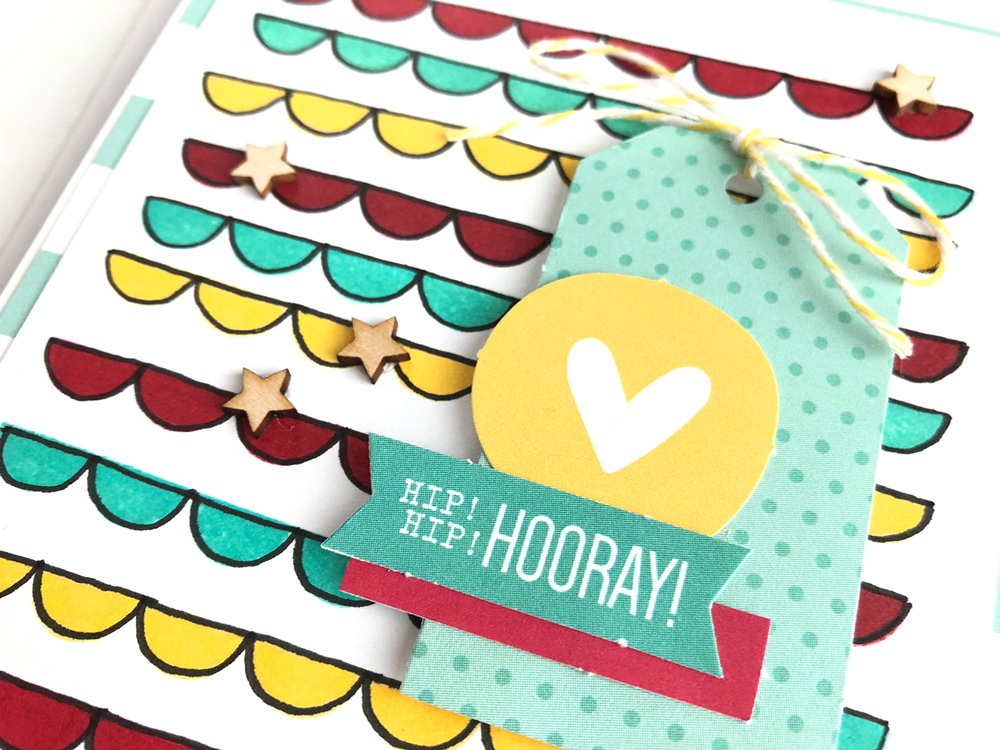
To complete the card, I added the “make a wish” stamped sentiment along the bottom and stars from the Wood Veneer Confetti. I love how this one turned out!
I hope you have found a bit of inspiration from today’s cards! Please be sure to share your completed projects in the Elle’s Studio Facebook Group, or on Instagram using the hashtag #EllesStudio. It is so fun seeing everyone’s creations!
Thank you for stopping by today and I hope you are inspired to create!
