
Hi, Elle Studio friends! Every year since we adopted our daughter, I have made a Halloween album. I love documenting the season and especially love the products that spark creativity and make albums come together so quickly. I will walk you through how this mini album came together in just one evening using the current October Kit and extras, as well as some Halloween treats from the shop!
Supplies | October 2020 Kit, October 2020 Cut Files, Happy Halloween Stickers, Thankful Chipboard Label Stickers, Autumn Tiny Shapes and Dots Puffy Stickers, Halloween Puffy Stickers, Fuchsia Puffy Alphabet Stickers, Navy Puffy Alphabet Stickers, Candy Corn Puffy Alphabet Stickers, Acetate Stars, Acrylic Leaves, Halloween Acrylic Treats, Autumn Days 6 x 8.5 Inch Paper Stack, Documented Stamp, Winifred Alphabet Stamp, Mini Days of the Week Stamp, Large Jane Number Metal Die
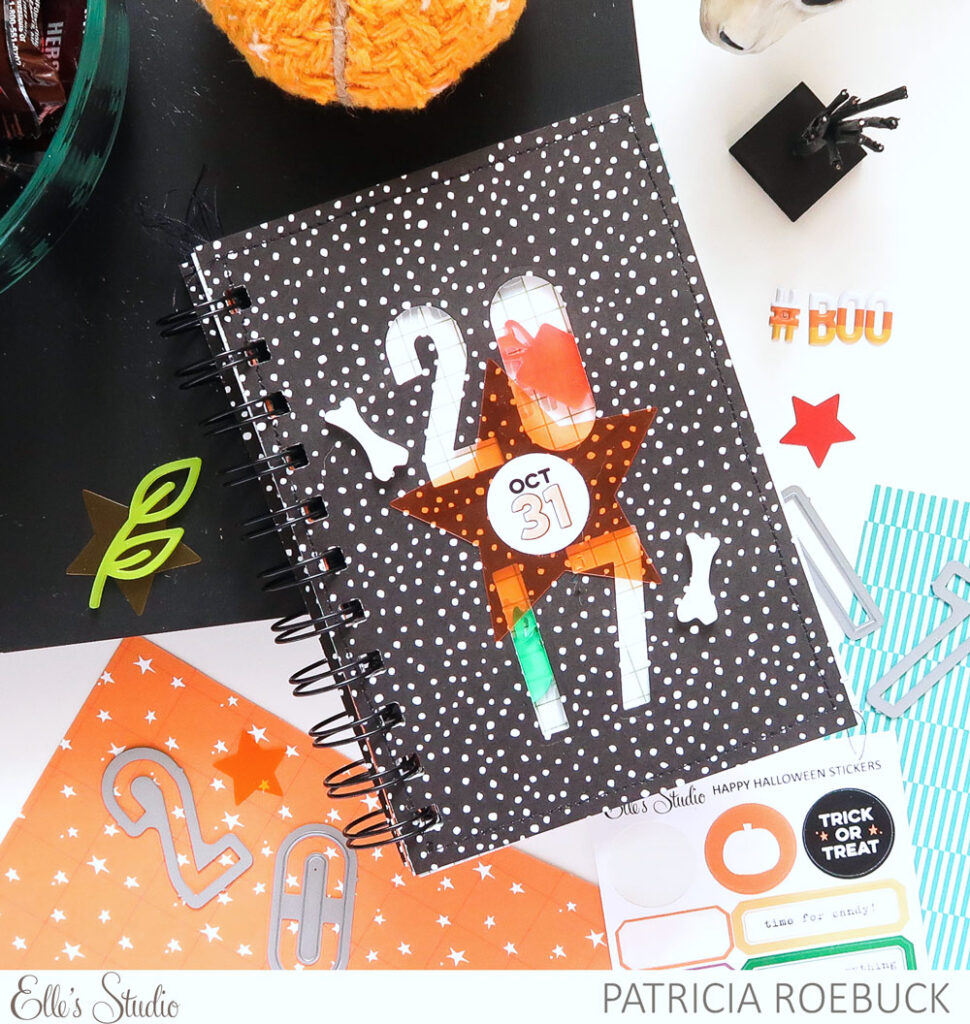
The cover and the base pages of my album are all from the Autumn Days Paper Stack. After deciding on how many photos to include in my album, I went through the paper stack and selected not just Halloween colors, but neutral and fun colors that would complement costumes or create a beautiful fall contrast to my photos. I trimmed all of my pages to 4 1/4″ x 6. To add the year to my front cover, I used the Large Jane Number Metal Die, and then clustered with an Acetate Star and a Happy Halloween Sticker. I had two Halloween Acrylic Treat bones that were perfect adhered to my cover.
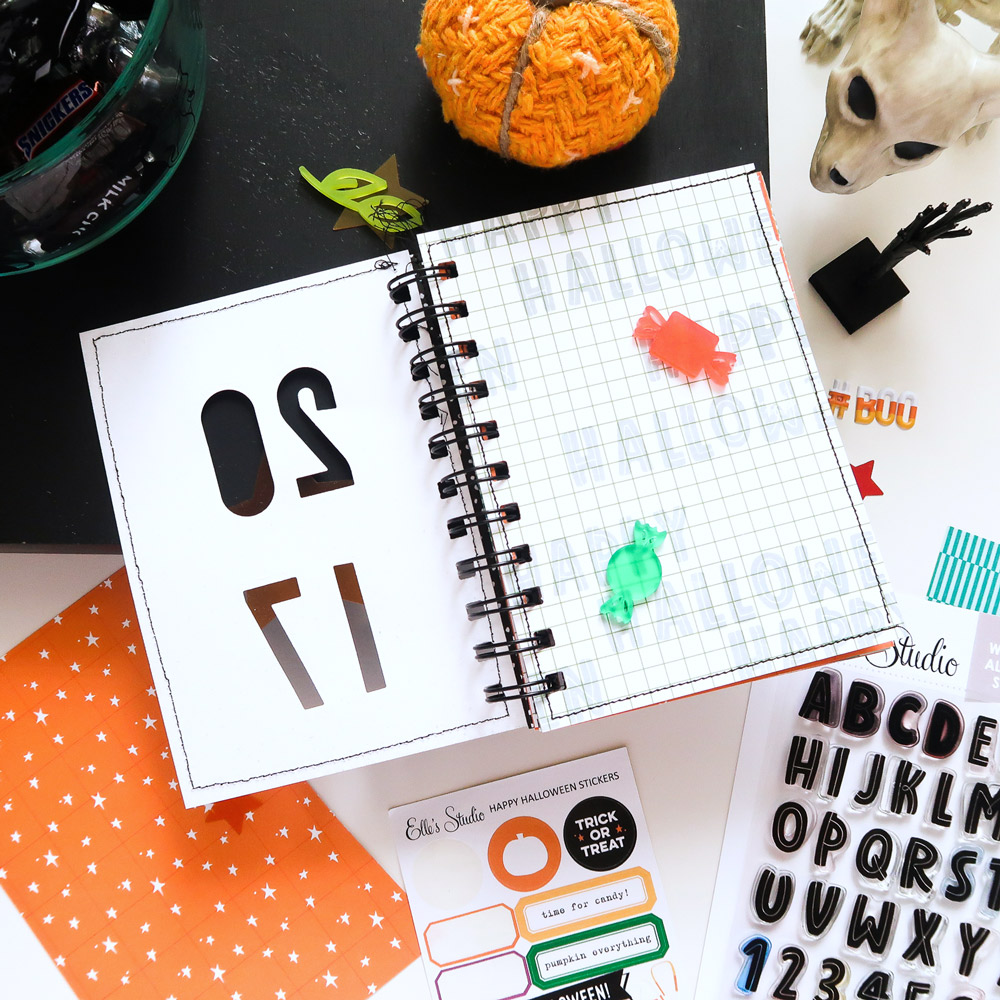
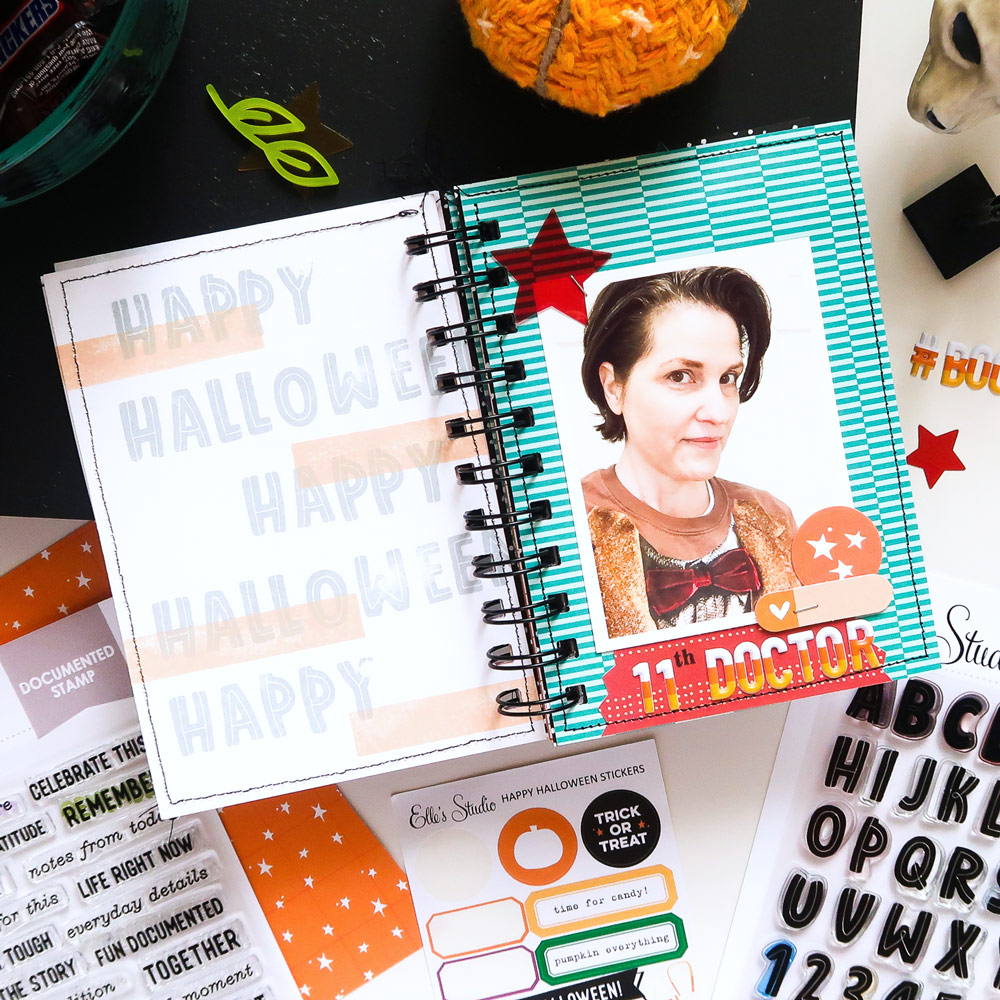
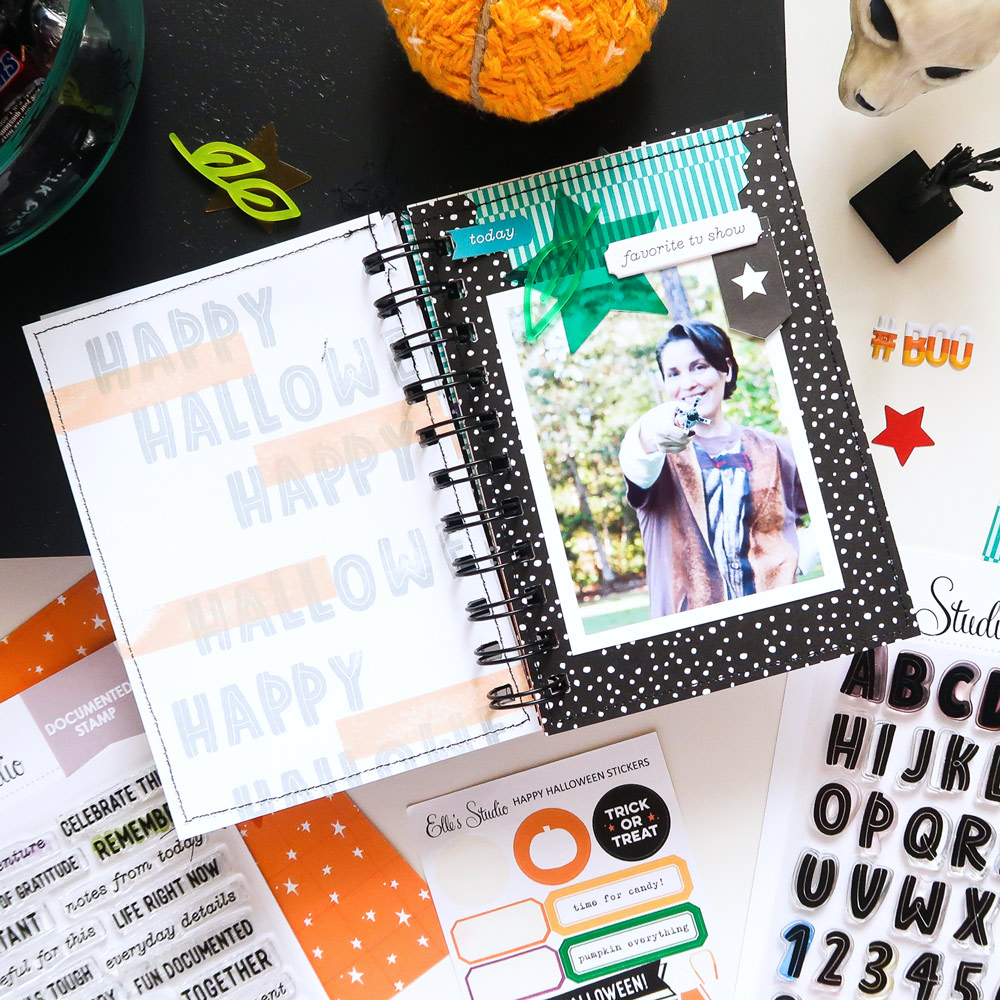
The first inside page is seen through my cover, so I used the Winifred Alphabet Stamp to stamp “Happy Halloween” in grey ink, then placed and adhered the two Halloween Acrylic Treat candies so that they could be seen through the cover. A quick way to put together a mini album is to create repetition and a pattern throughout the pages. I chose to make the left side of each spread the white backside of the patterned paper and the right patterned paper. On each white backside, I used the Documented Stamp to create horizontal lines in a pale peach color, and then used the Winifred Alphabet Stamp to add “Happy Halloween.”
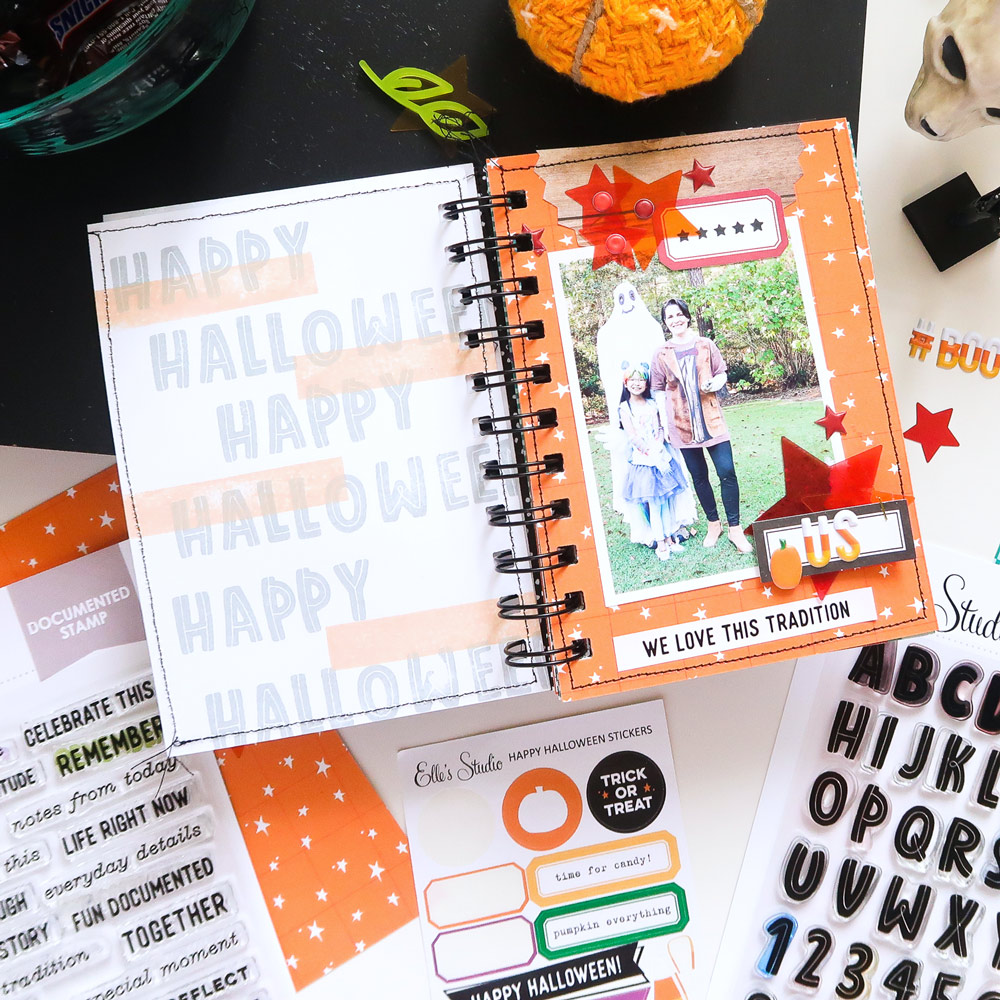
On the right side, a 3″ x 4″ photo tops the patterned paper, then half of a pinked circle from the October 2020 Cut Files, cut in half. I altered the placement of the half pinked circle on each page just to add a little interest. I chose the patterned paper color for the cut file to complement my photo and patterned paper background.

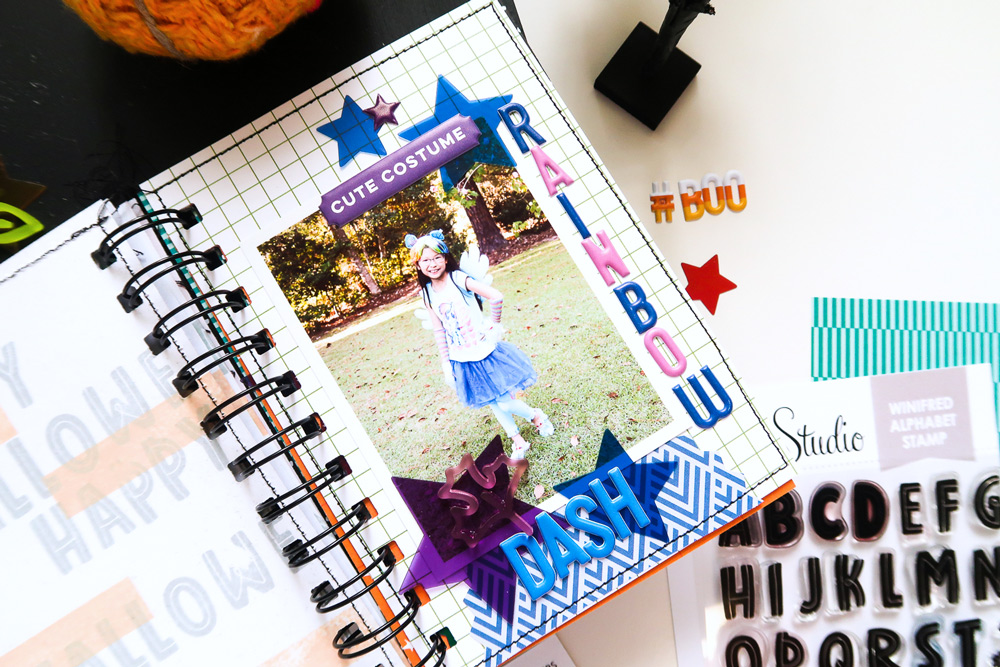
Depending on each photo, I used a combination of October 2020 Kit die cuts, the Acetate Stars, Acrylic Leaves, Autumn Tiny Shapes and Dots Puffy Stickers, Happy Halloween Stickers, puffy alpha stickers, in Fuchsia and Navy, and especially the wonderful Candy Corn Puffy Alphabet Stickers, as well as the Halloween Puffy Stickers. For this page, I used the Mini Days of the Week Stamp to add the ‘th’ after the 11.
Another element I repeated throughout the pages was adding black machine stitching around each page. Once my pages were prepped and I had my products and photos ready, I continued with the design of a 3″ x 4″ photo and added a cluster of embellishments to fit that photo. In some cases, like this page, I didn’t match my photo, but I used green, blue, black and white. It works well with the neutral colors of the photo!
This page is a perfect example of complementing the photo with products. I pulled out the puffy alphas in a combination of colors to go with my photo, along with the Acrylic Leaf, Acetate Stars, Autumn Tiny Shapes and Dots Puffy Stickers, and the Halloween Puffy Stickers.
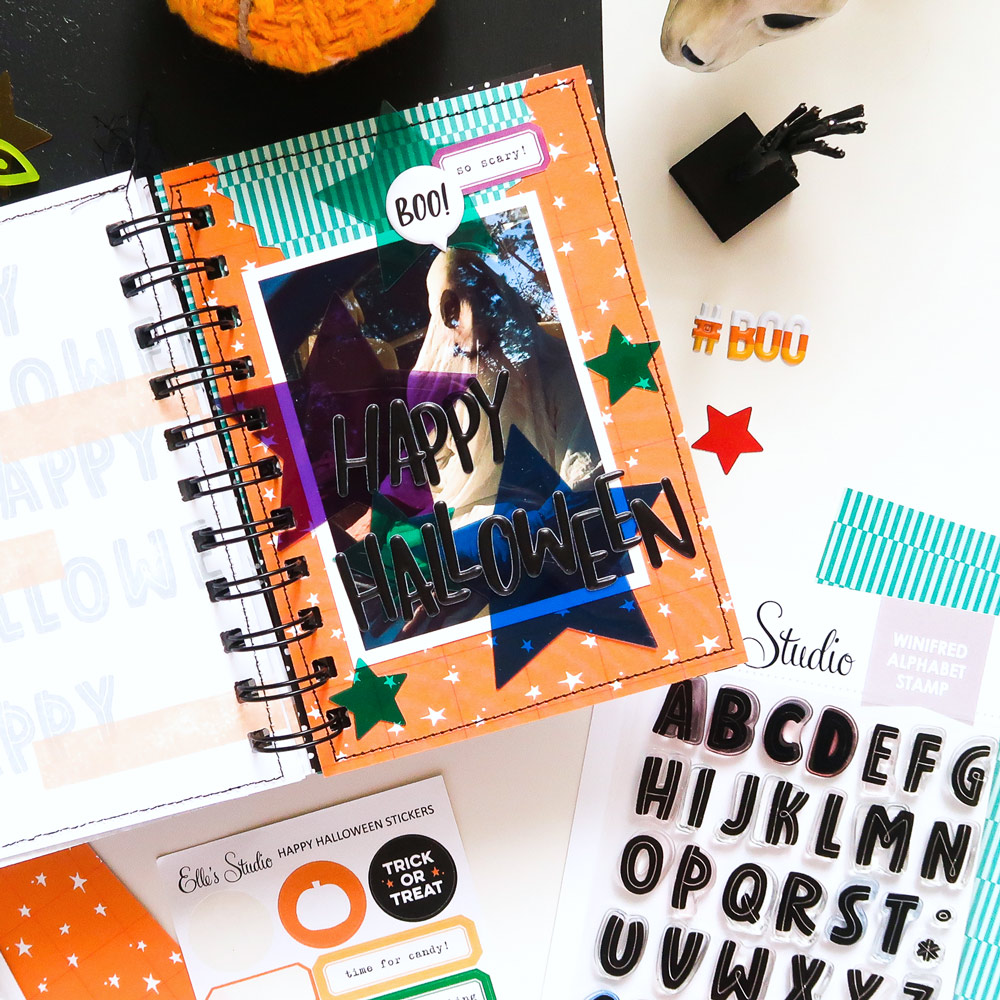
I am so happy to find a perfect spot for the Halloween Puffy Stickers on this page along with those wonderful Acetate Stars!
As well as having a repeated pattern for creating each page, creating with the products I selected made this come together so quickly and gave me the creativity to also make each page unique.

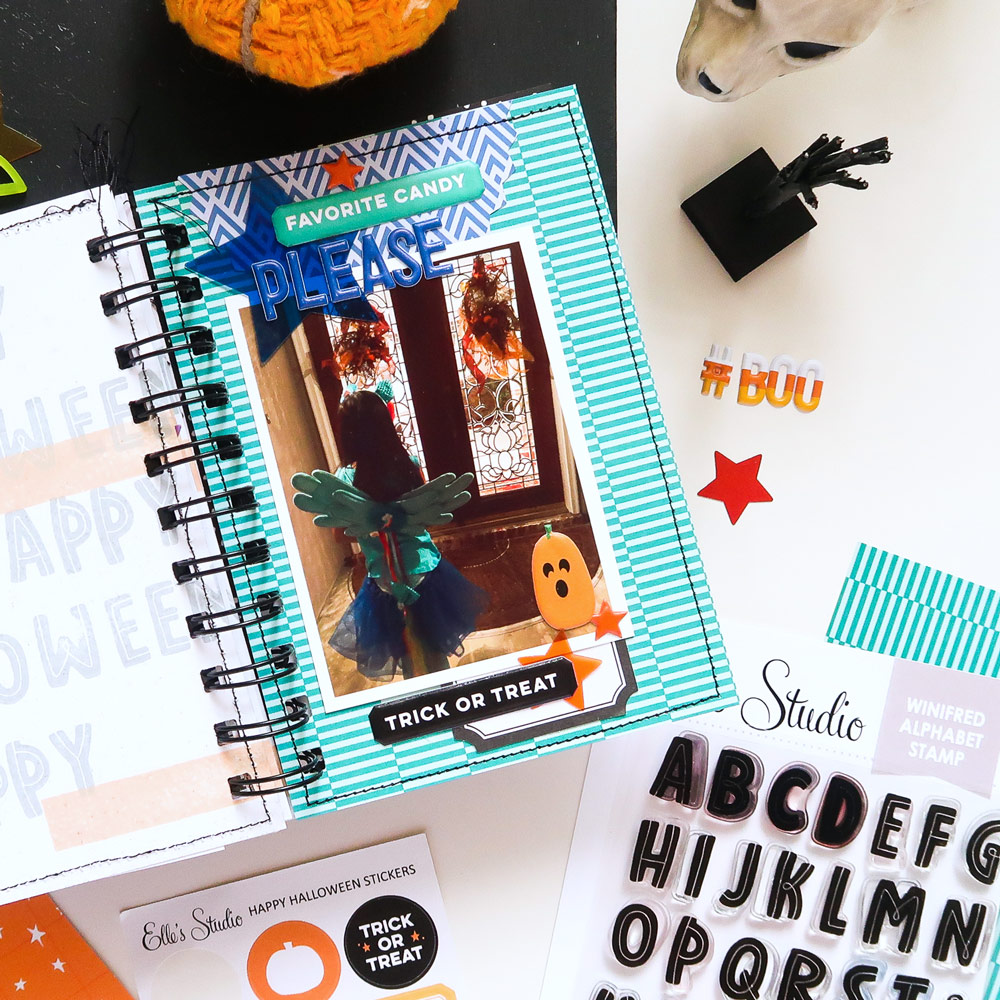
Pull out your Elle’s Studio Puffy Alphabet Stickers! They added fun personality to this Halloween Puffy Sticker and photo.
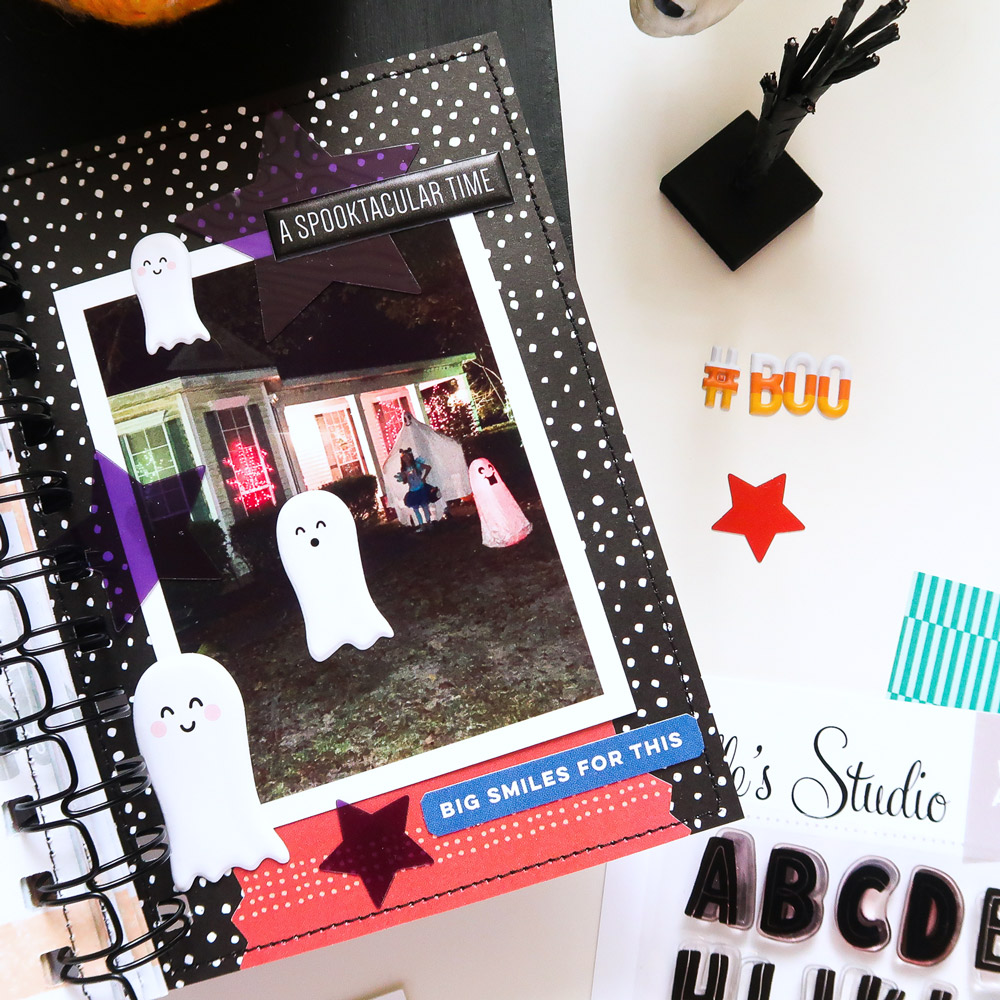
I may have hoarded these little ghosts from the Halloween Puffy Stickers, but I am glad I did, because this was the photo to add them to!
I used the Cinch tool to bind my album, but you could just punch holes and use rings or even ribbon to bind the pages. Whether you document Halloween by the year, or even group the years together to document in one album, start by choosing a design for the base pages to create repetition throughout each page, select your Elle’s Studio products that are versatile for your photos, and you will not only love your completed mini album, but you will enjoy putting it together! Definitely “big smiles for this!”

Share your Halloween mini, or any other Halloween project with us! Post to Instagram using the hashtag #EllesStudio, or post in our Elle’s Studio Facebook Group!