Sometimes it only takes a single item in your stash to inspire an entire project. Today, Maggie Massey is sharing how the Love Mix Sequins did that for her page, and how she took that inspiration and paired it with the January 2017 Digital Cut File to create something truly spectacular.
Hey hey everyone! It’s Maggie here, with a page I created using this month’s cut files!
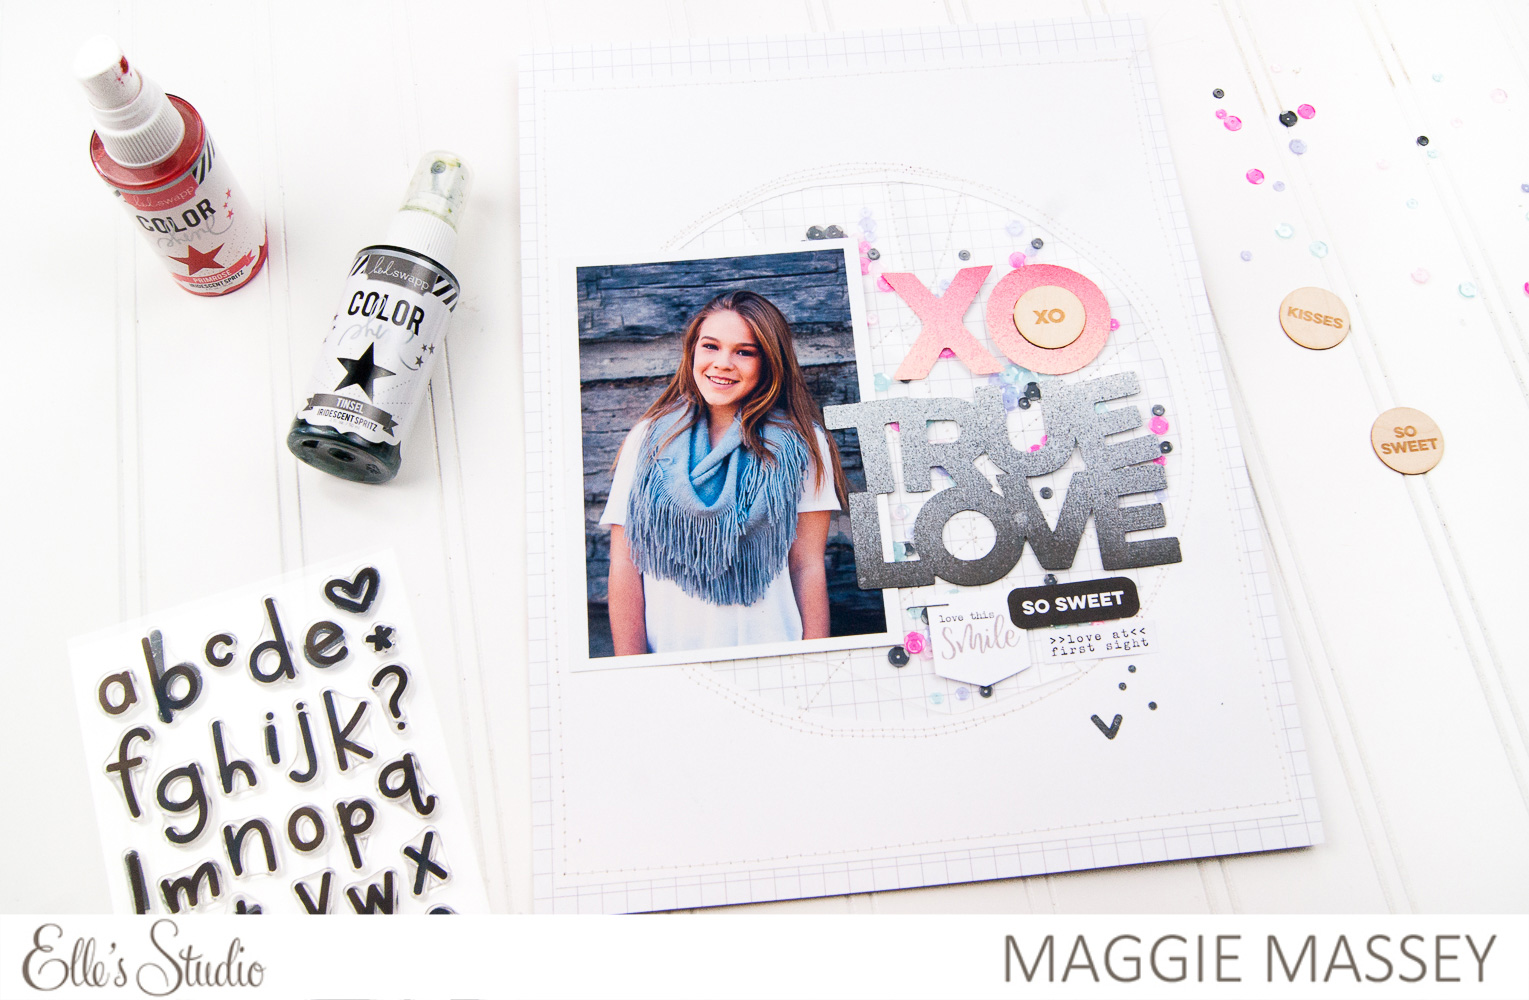
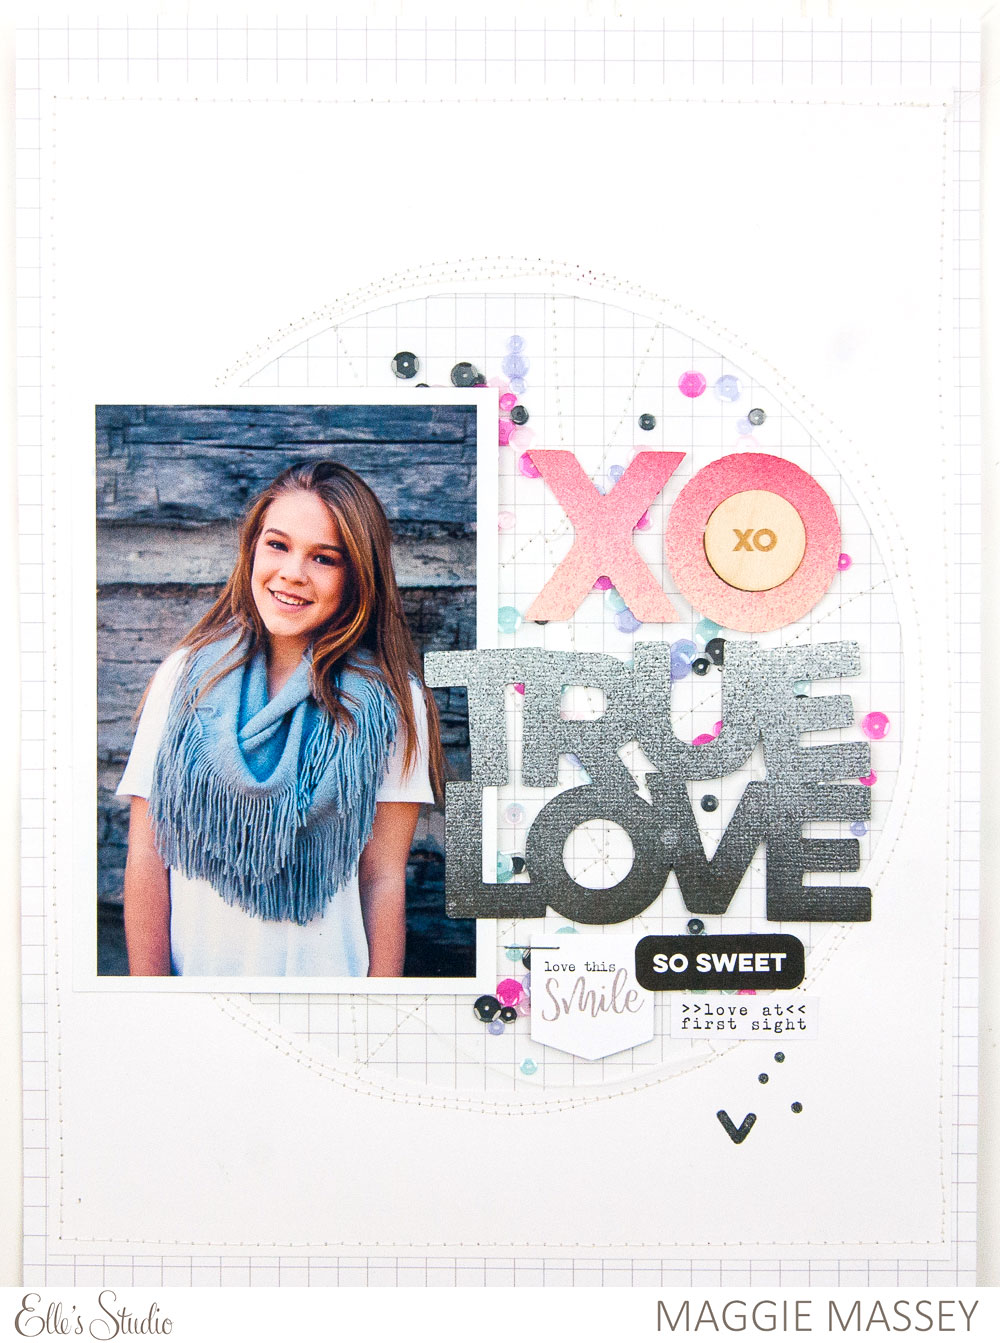
When I saw the colors of the sequins that came as part of this month’s extras, I knew that I wanted to use them… they are just gorgeous! I had recently taken some shots of my daughter and thought that the colors in the photos would be a perfect fit! I thought about doing a shaker box something-or-other with the sequins, but I wasn’t exactly sure what I wanted to do, until I saw the January Digital Cut File!
SUPPLIES: January 2017 Exclusive Kit, Sequins- Love Mix, Love Ya Wood Veneer Circles, January 2017 Digital Cut File, Malia Lowercase Alphabet Stamp, ‘Tis the Season 12″ x 12″ Paper Collection
I started by enlarging and cutting the “XO” circle and “true love” die cuts with my Silhouette from an 8.5″ x 11″ sheet of white cardstock. Then I adhered a sheet of transparency paper to the back of that cardstock to make the front of my shaker box. Next, I adhered just a small part (to keep the papers from moving) of that page to the b-side of a sheet of ‘Tis the Season Tree Trimming paper (cut to 9″ x 12″) from the ‘Tis the Season 12″ x 12″ Paper Collection. With my sewing machine, I began sewing around my circle and into my circle, pouring in sequins and stitching up little pockets. I made my way around the circle, completely randomly, and ended up with a background full of beautifully-colored sequins! I kinda love the way it turned out.
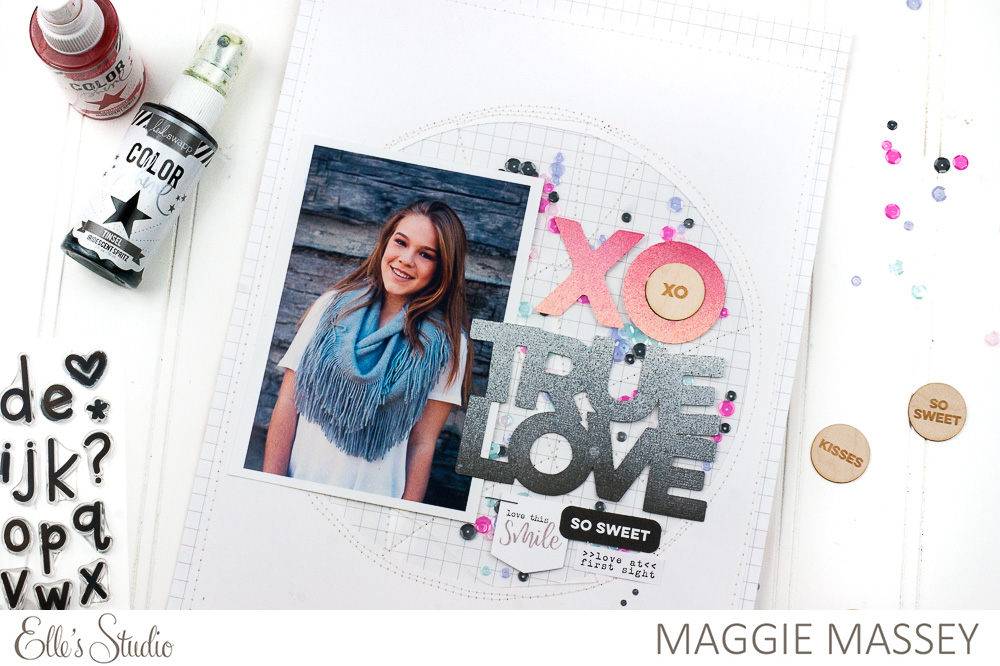
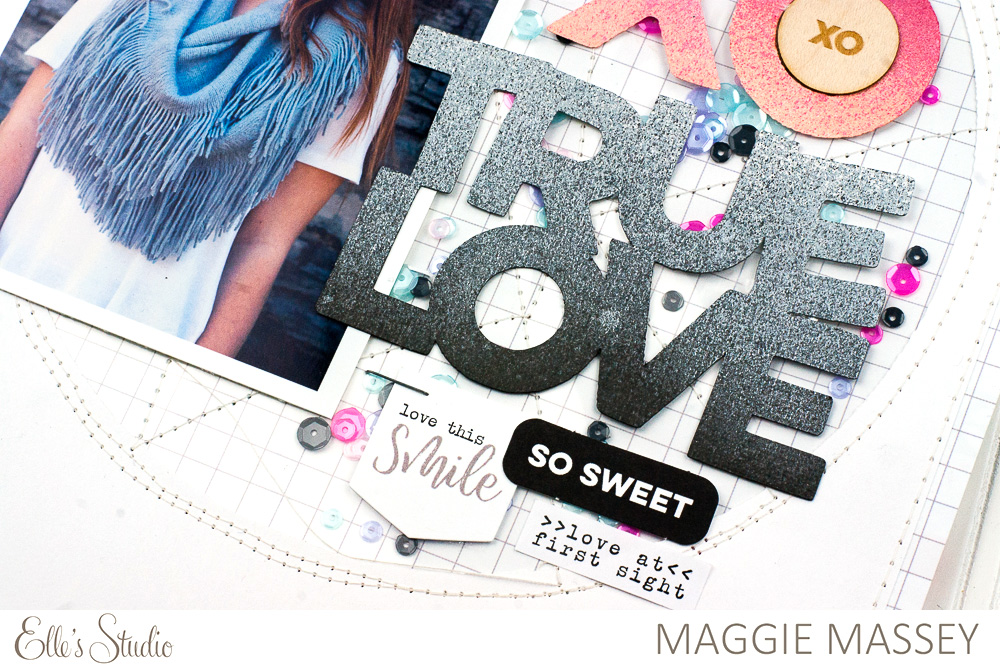
Once my background was done, I misted both the “XO” and “true love” die cuts. While I was waiting for them to dry, I adhered my photo and picked out my other embellishments.
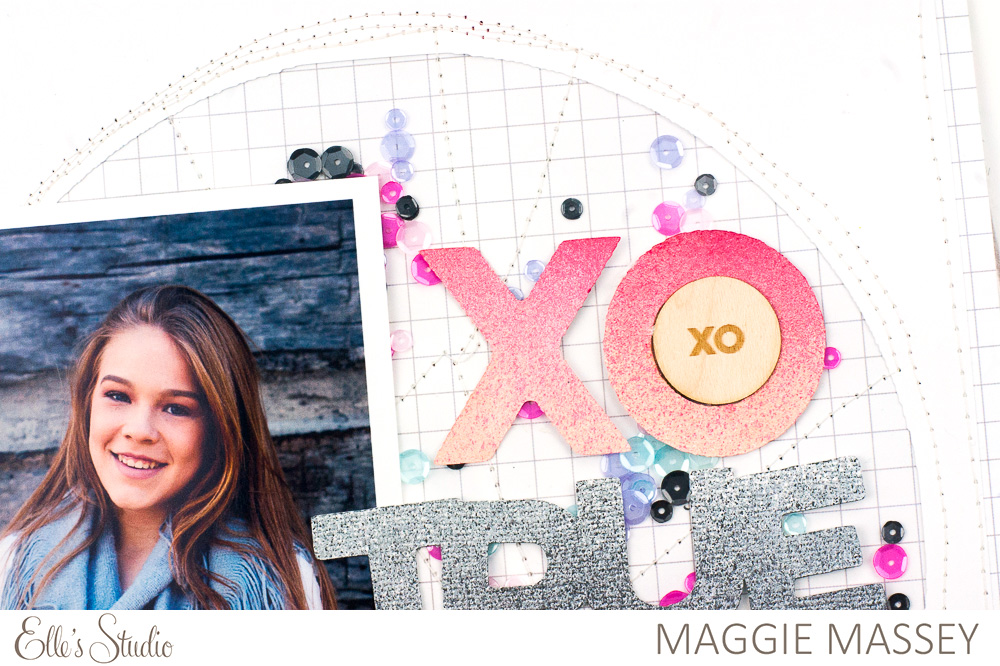
Once my cuts were ready to go, I added them to my layout, then I popped a little wood veneer circle from the Love Ya Wood Veneer Circles into the middle of my “O.” I finished my page with a few little decorative stamps from the Malia Lowercase Alphabet Stamp and some small tags from the January 2017 Exclusive Kit.
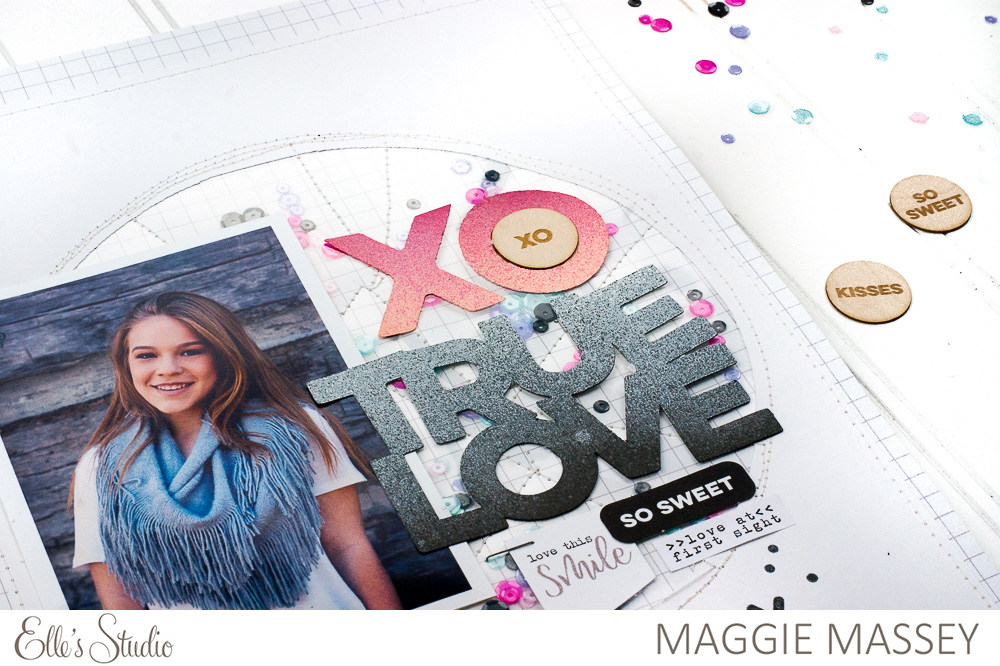
I love how my page came together… that background makes me so happy!
Thanks so much for taking a peek! I hope I’ve inspired you to play around with the January 2017 Digital Cut File!
Pingback: CraftCrave | DigiFree | CraftCrave