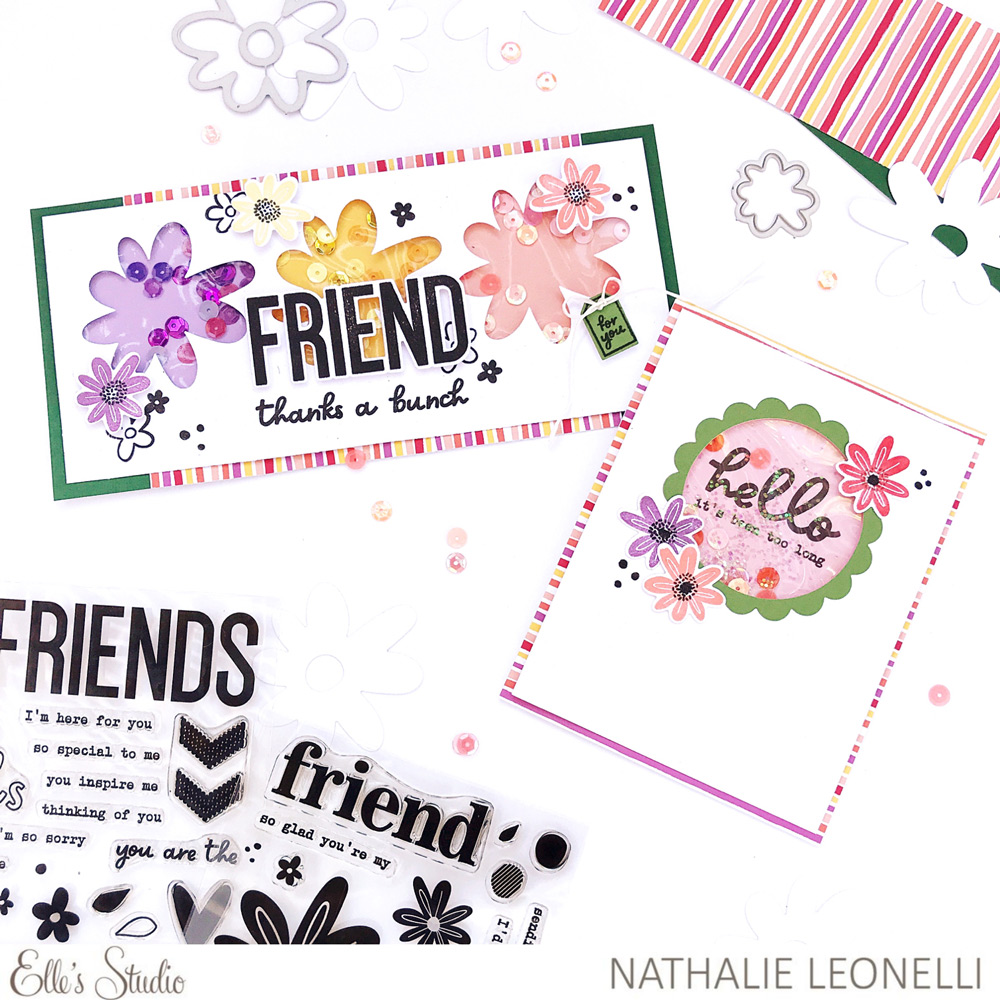
It’s Nathalie here and I am so excited to be opening our Sincere Sentiments Week with a set of shaker cards. I love this new Sincere Sentiments release; the stamps and metal dies have quickly become favorites of mine!
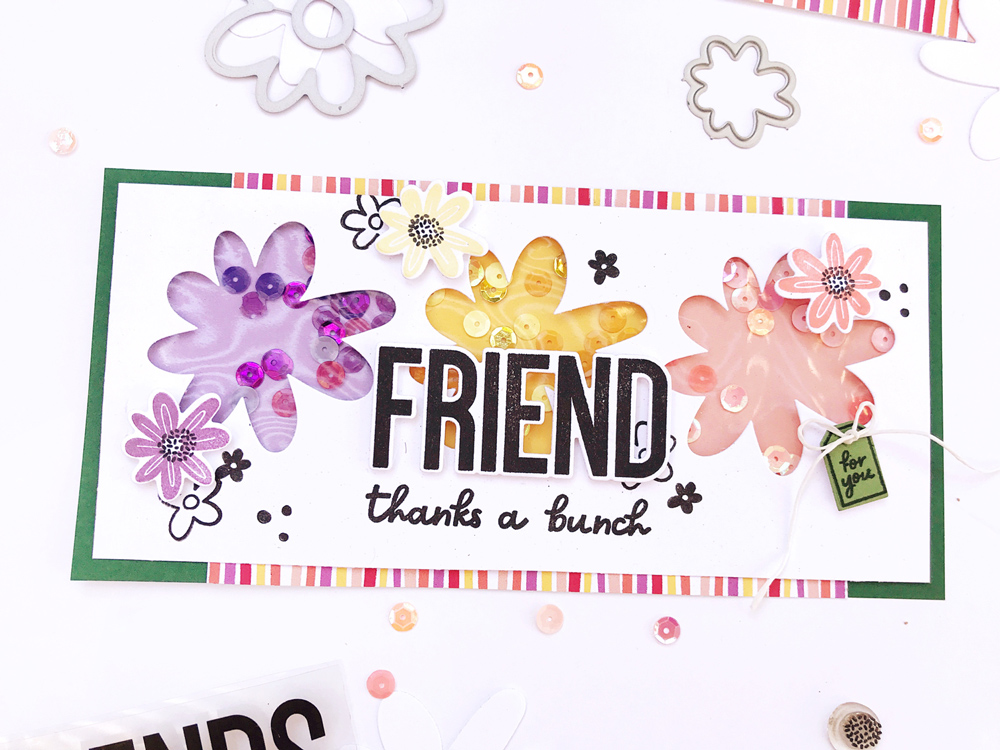
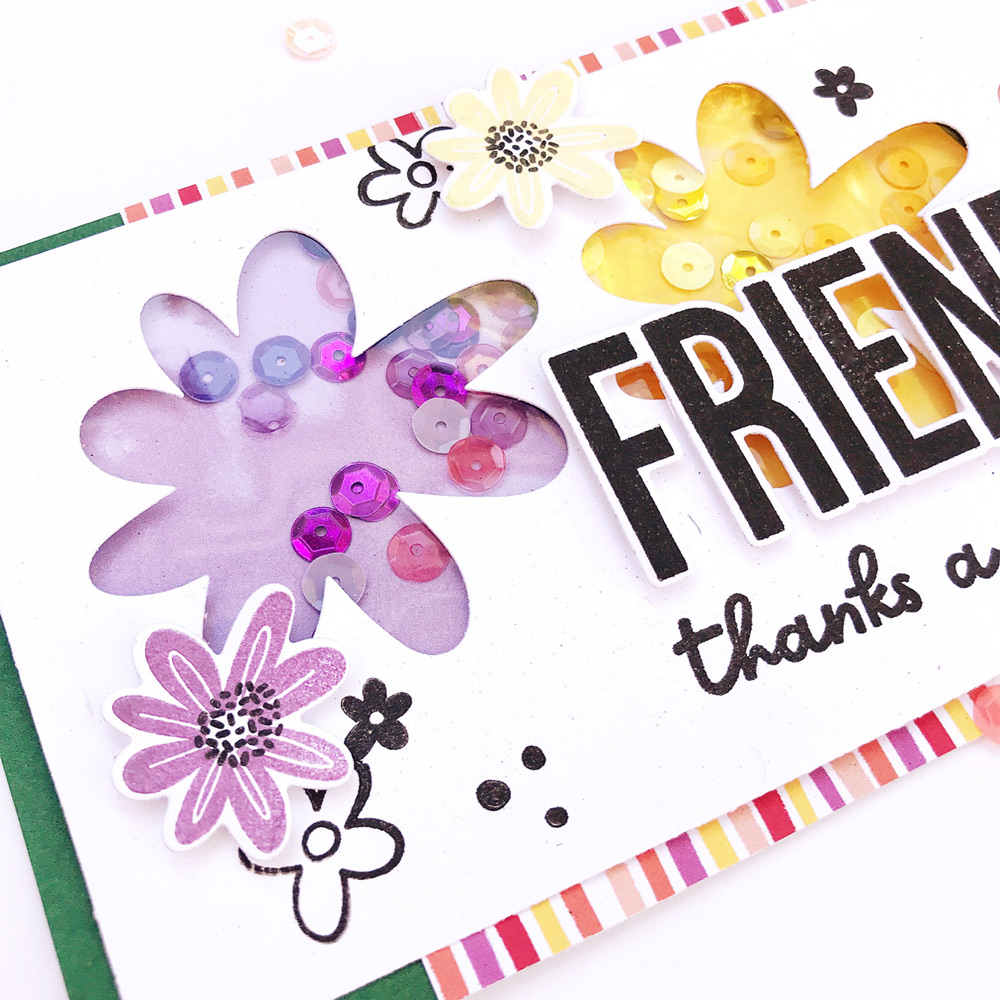
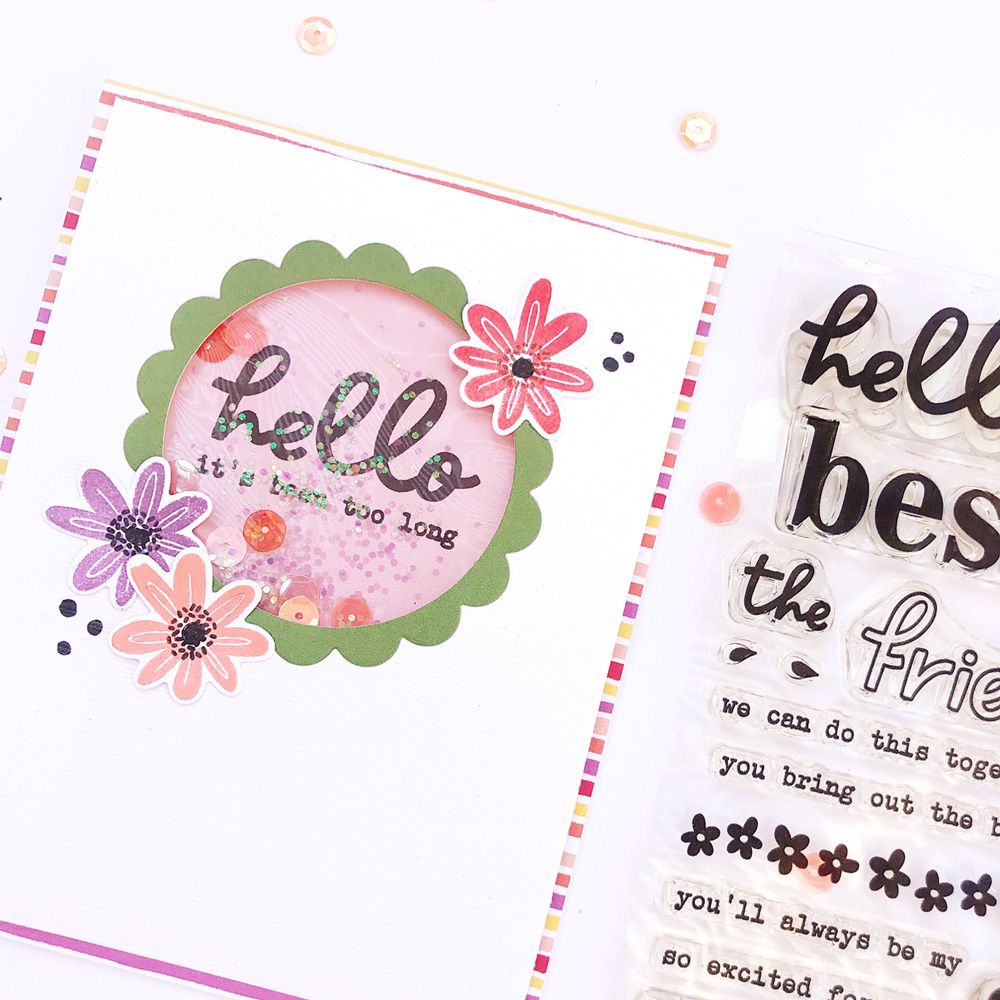
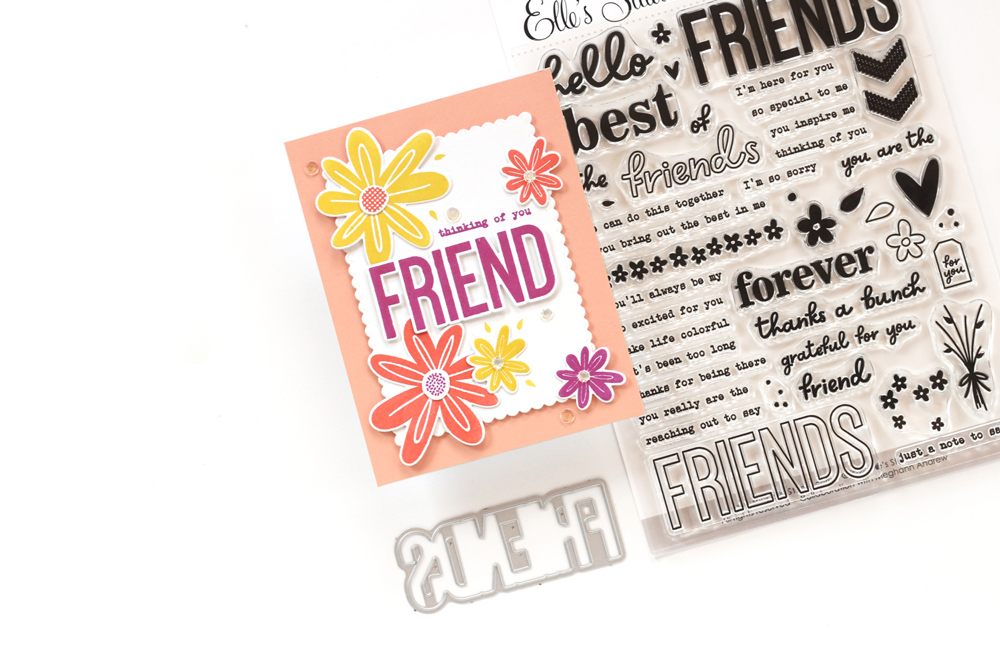
For this first card, I used the large flower die from the Best of Friends Add-on Metal Die set and put it through the machine three times eyeing the distance between them (like I did previously here). I backed each with solid cardstock from the Warm and Cool Solids Paper Stacks and filled each pocket with matching sequins.
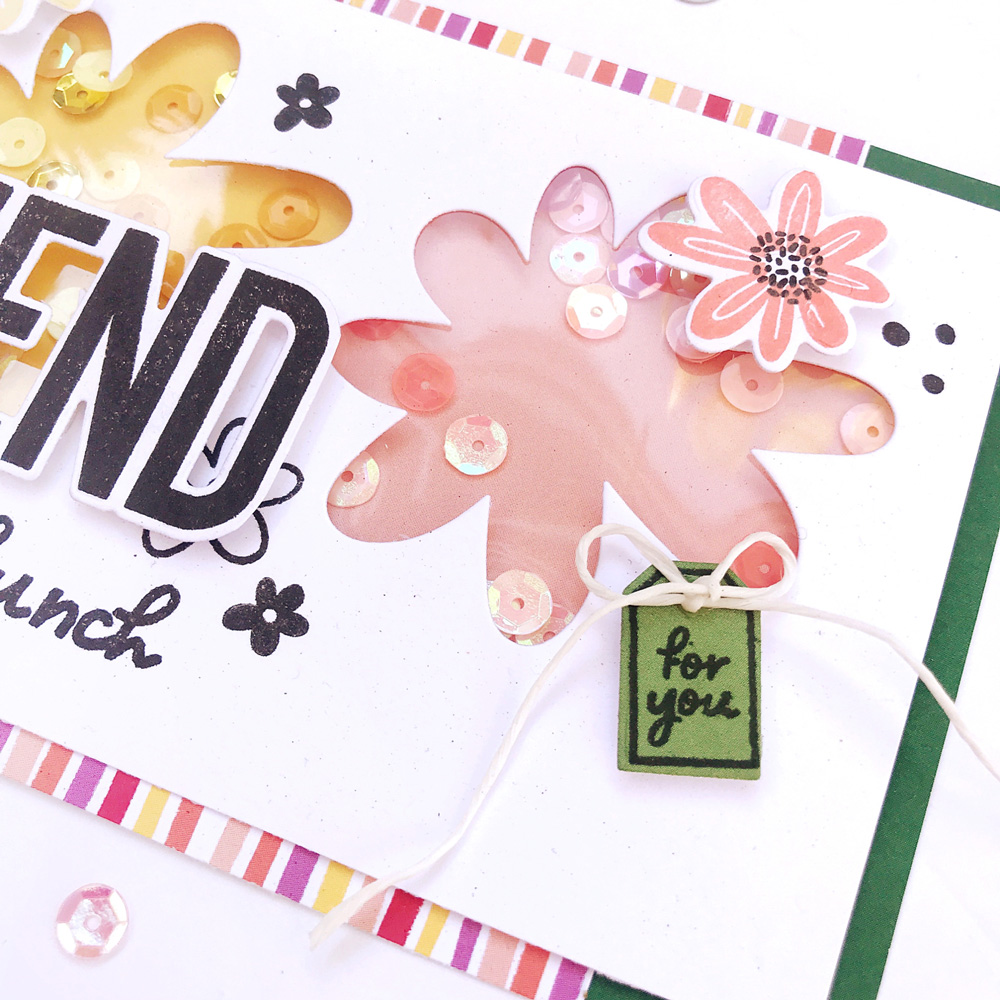
For the sentiment, I combined two stamps from the Best of Friends Stamp (then hand cut the ‘S’ from the “Friends” die-cut). I could not resist using the miniature “for you” tag which I stamped on green cardstock and adorned with a string bow. I love it!
To embellish the card, I added black stamping directly on the background, but also stamped flowers in colors matching the background of each pocket.
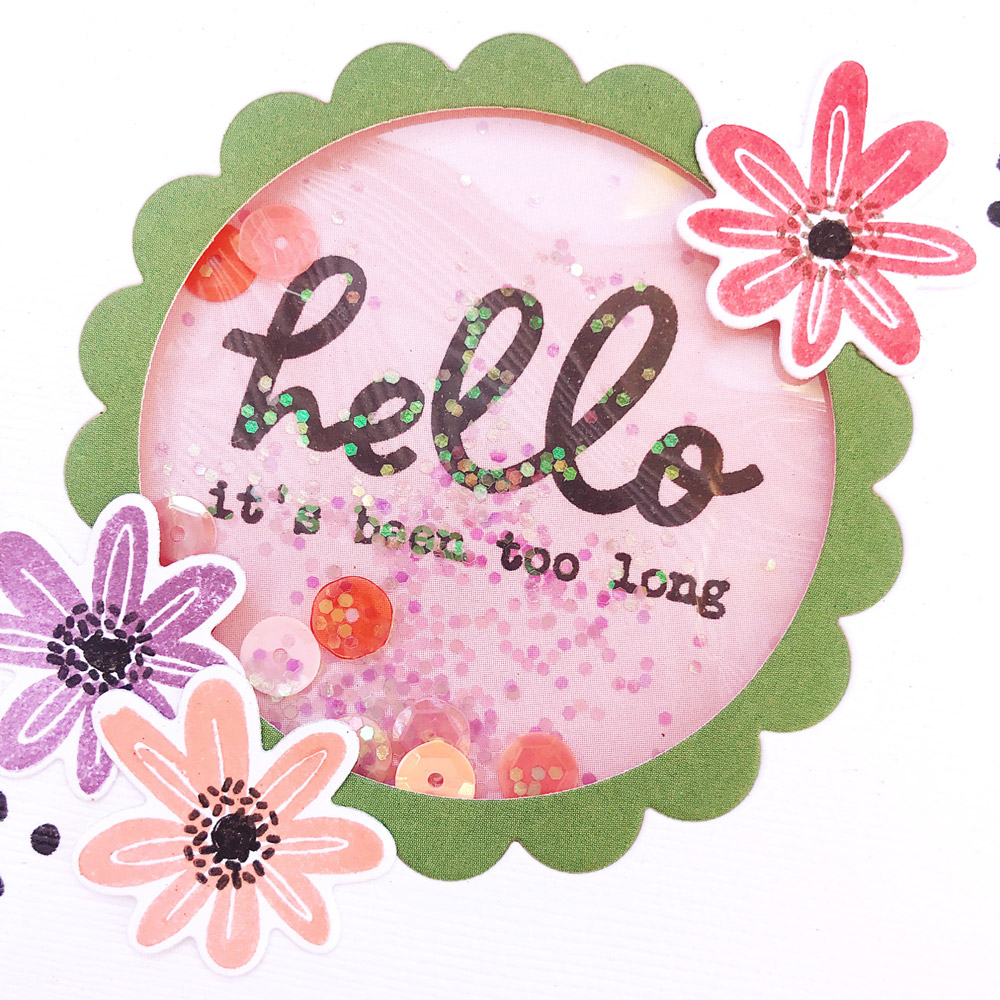
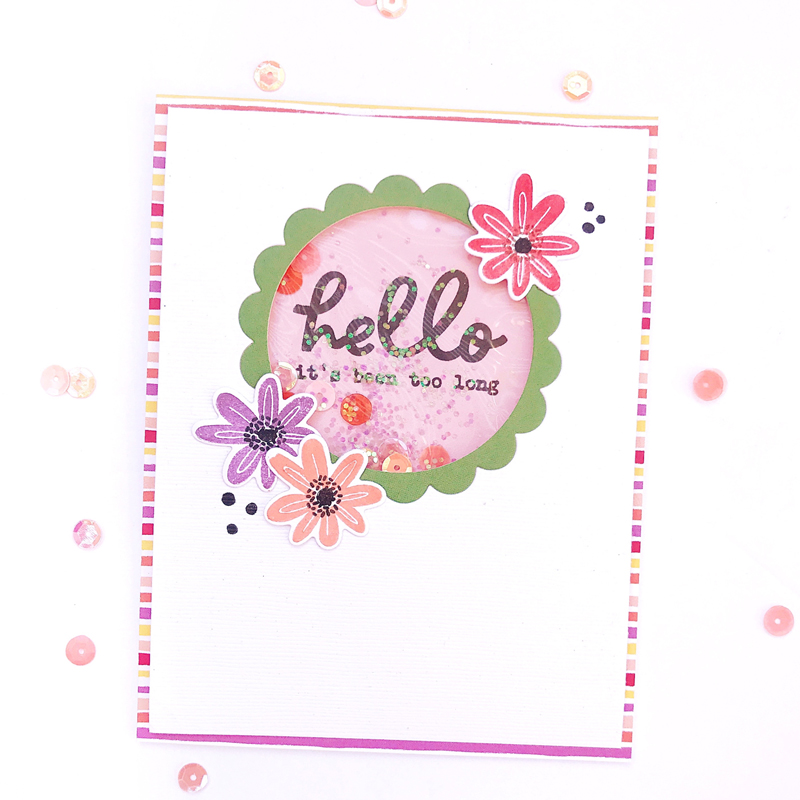
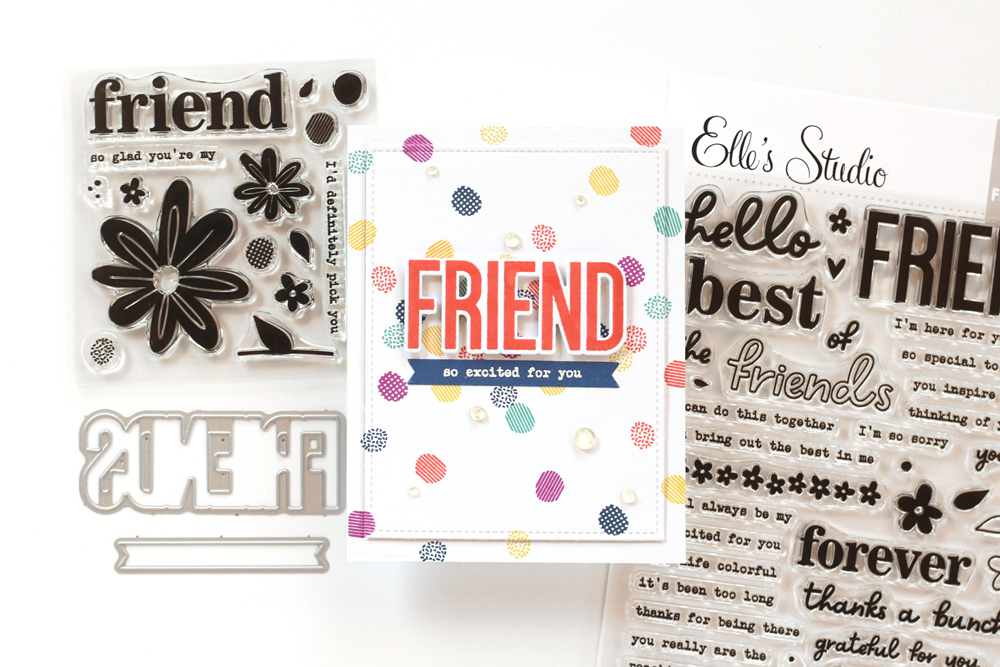
My second card has a simpler and cleaner design with a classic, central round shaker featuring the sentiment inside the shaker.
Again, I used papers from both the Warm and Cool Solids Paper Stacks, truly must-haves for any card makers, and stamps from the Best of Friends Stamp for the sentiment. The variety of fonts in this set makes for awesome combinations!
I really enjoyed making these shaker cards and I hope you now feel like making some too!
Make sure to come back here to the blog all week as other design team members will share more inspiration with these new additions to the Sincere Sentiments collection!
Comments Off on Best of Friends Week: Shaker Cards with Nathalie Leonelli | Share This
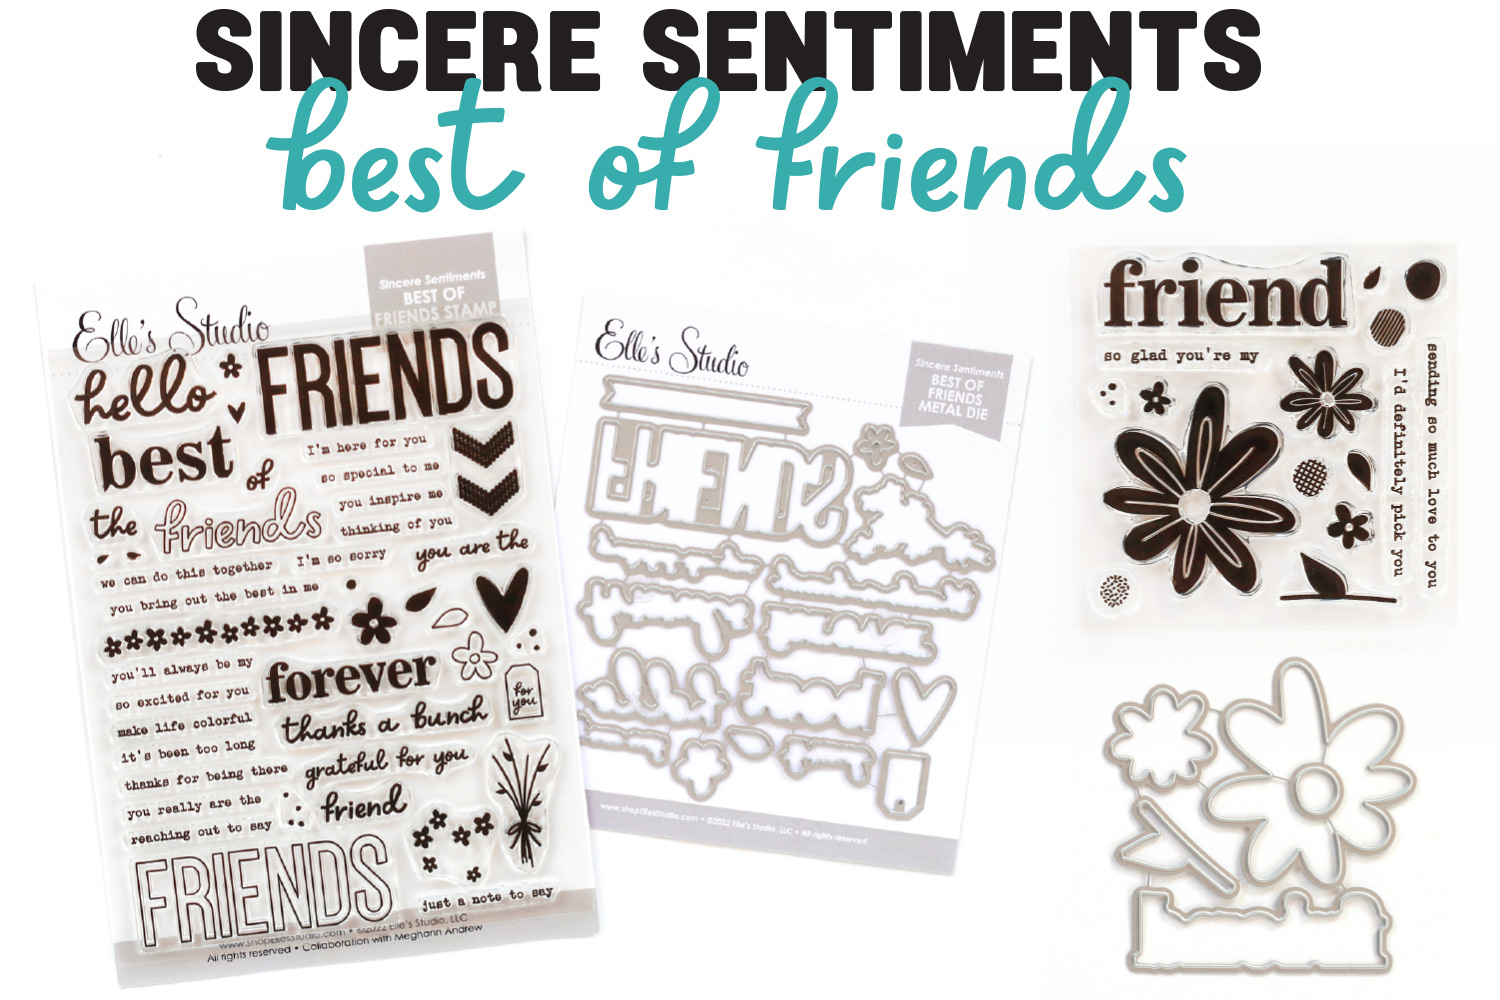
We are so excited to introduce our newest collection added to the shop, Sincere Sentiments: Best of Friends! With these new products designed in collaboration with Meghann Andrew, you’ll be able to create beautiful cards to send to your special friends!
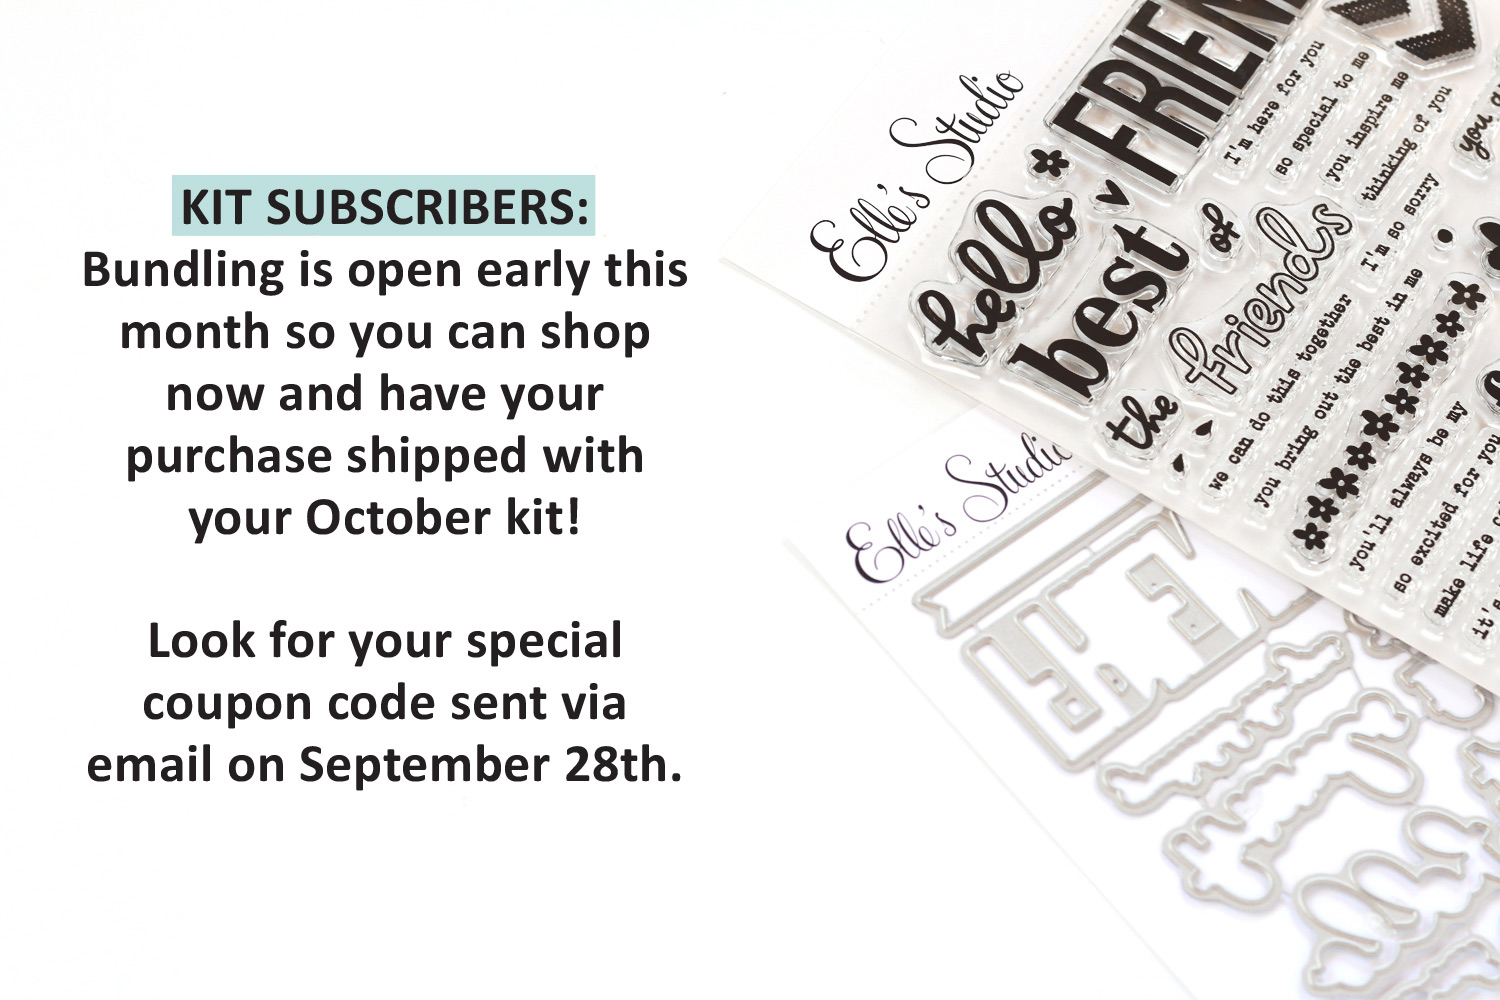
You can shop these new products in our new section or visit the Sincere Sentiments collection tab to see these new products, along with the coordinating products we recommend adding to your stash for easy card making! Kit subscribers: Bundling is open early this month so you can shop now and have your purchase shipped with your October kit! Check your email for your special coupon code sent on September 28th.
We are so excited to share beautiful card inspiration with you all week long from our design team! To start this week off, we have Meghann Andrew with us sharing what she created!
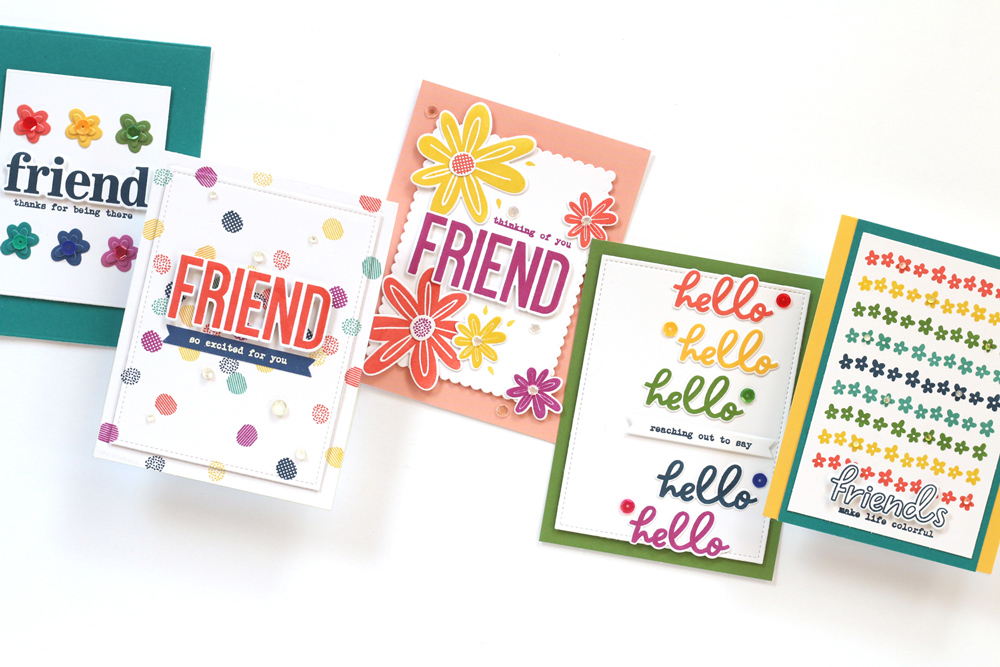
Hello, friends! I am so excited to share the new Sincere Sentiments: Best of Friends collection with you today! I have had so much fun creating with these new stamps and dies and it has been so hard not to share these new products, or my card creations! Take a look at a few of my favorite designs!
These stamps and dies are for all-occasion cards. They are perfect for just saying hello, sending motivation, sympathy or a simple thanks! Whatever reason you may need to send a card to a friend, the Sincere Sentiments: Best of Friends collection will have you covered!
Who else loves Elle’s Studio daisies?! Now you can stamp them in any color you wish! You’ll find these daisies on the Best of Friends Add-On Stamp, with coordinating floral designs on the Best of Friends Stamp, which also includes that awesome, bold “friend” sentiment that I used here. You can certainly create a bold card for any occasion like this one that will brighten your friend’s day! Oh, and don’t forget about the other cardmaking staples in our shop, like the Layered Card Metal Die and Warm and Cool Solids Paper Stacks! I can’t create a card without them.
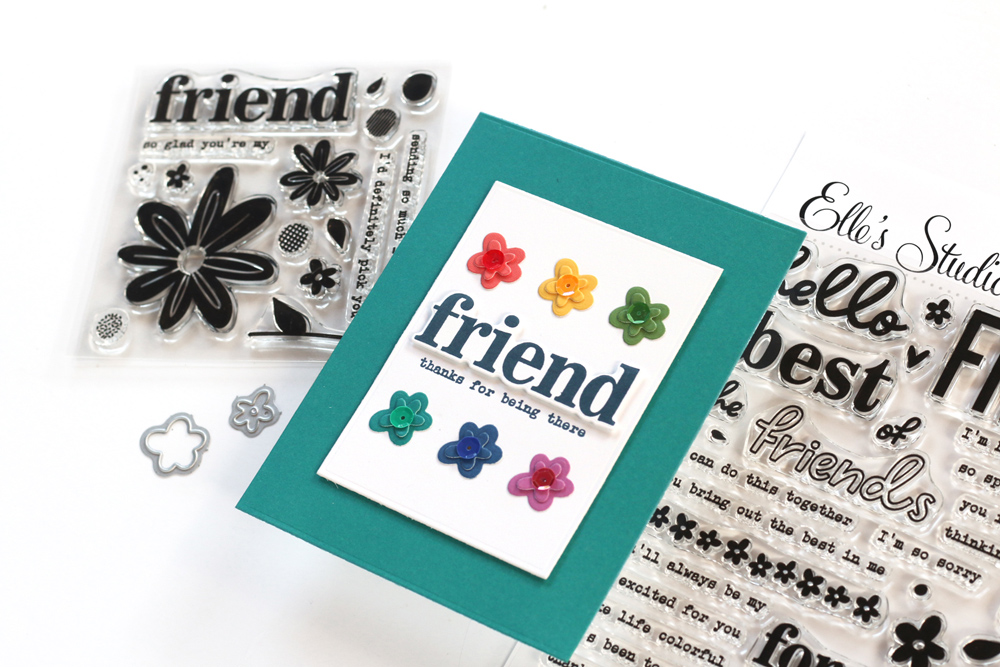
Another thing I love about the new Best of Friends products? Their versatility! The centers of the daisies included on the Best of Friends Add-On Stamp double perfectly as confetti on this card! With a bold sentiment, stamped and die cut using the Best of Friends Stamp and Metal Die, this simple design sends a party to your friend’s mailbox! I also elevated the design by cutting the center out using the Layered Card Metal Die stitched layer, then popped the center up using dimensional adhesive.
Want to see the entire collection, a fun card share and two of my favorites put together? Check out this video!
We can’t wait for you to use our Sincere Sentiments: Best of Friends collection and see how easy it is to send beautiful cards to your friends that are simple and easy to create! When you do, be sure to share your card creations with us using the #EllesStudio hashtag on Instagram, or in our Facebook Group! I hope you love these new products as much as I do, and get ready to see our design team share their creations with the new Sincere Sentiments: Best of Friends collection all week long!
Comments Off on Introducing Sincere Sentiments: Best of Friends! | Share This
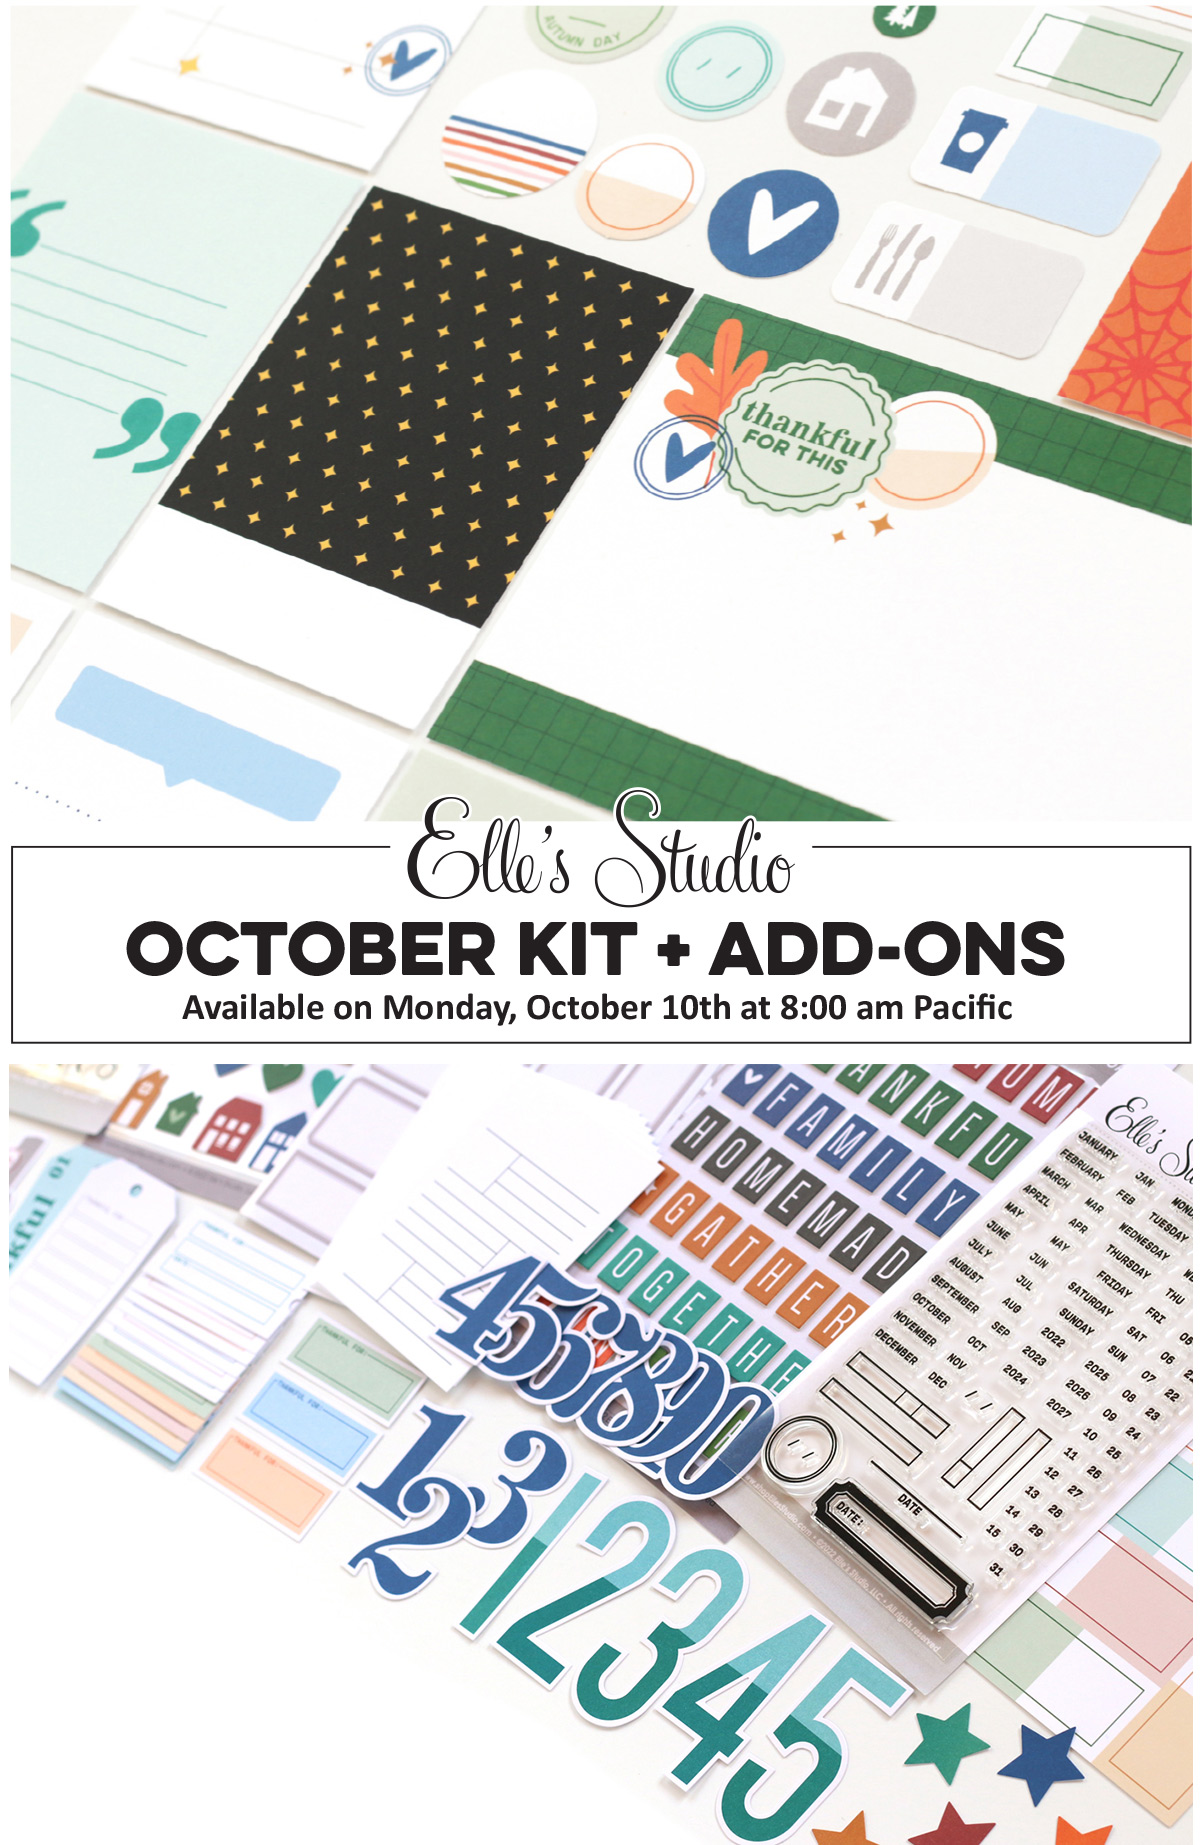
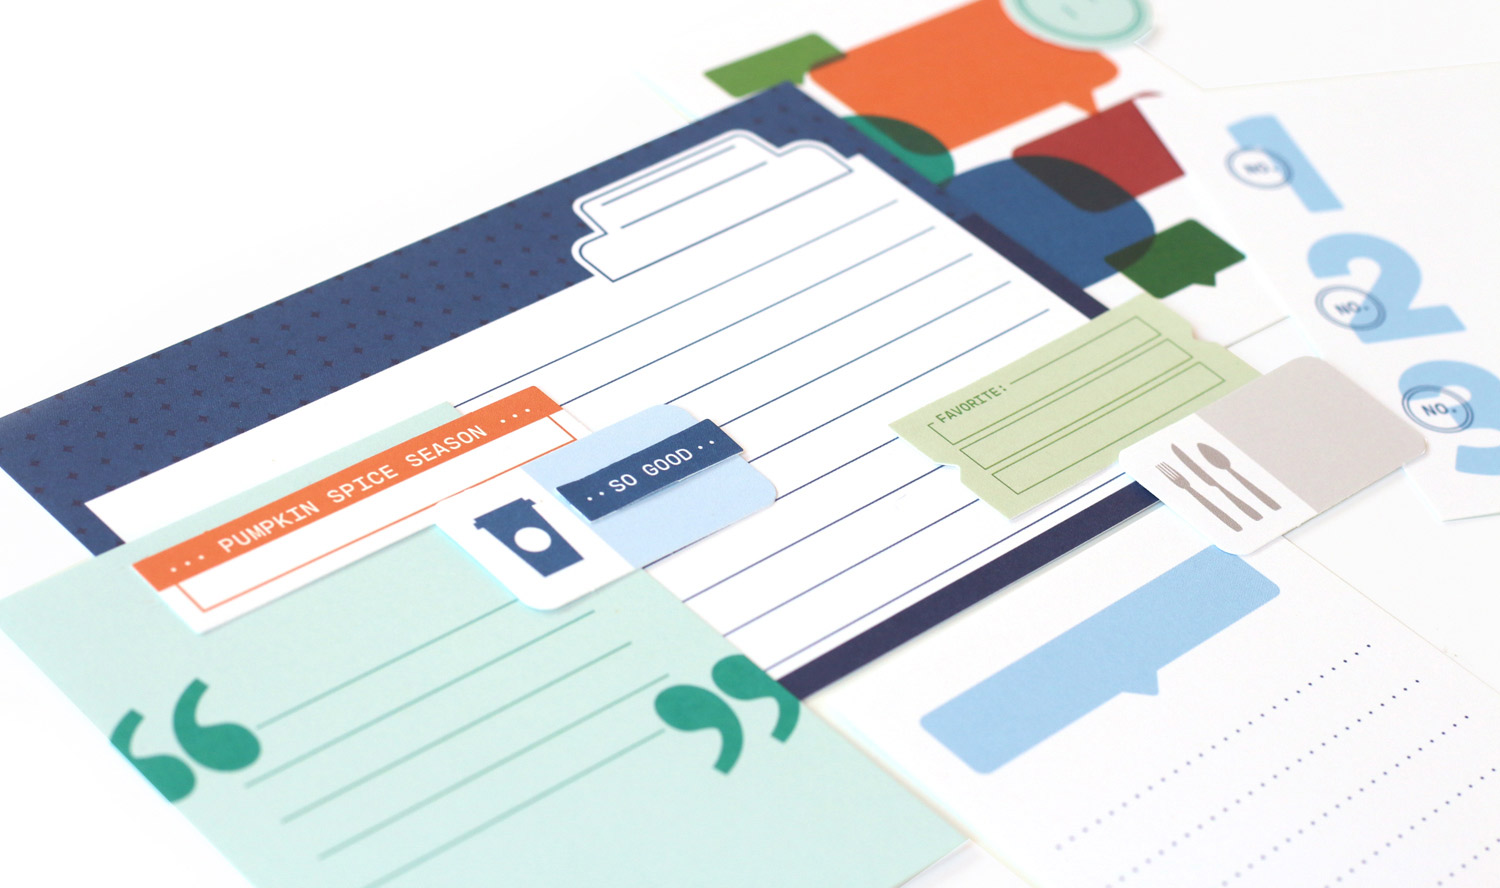
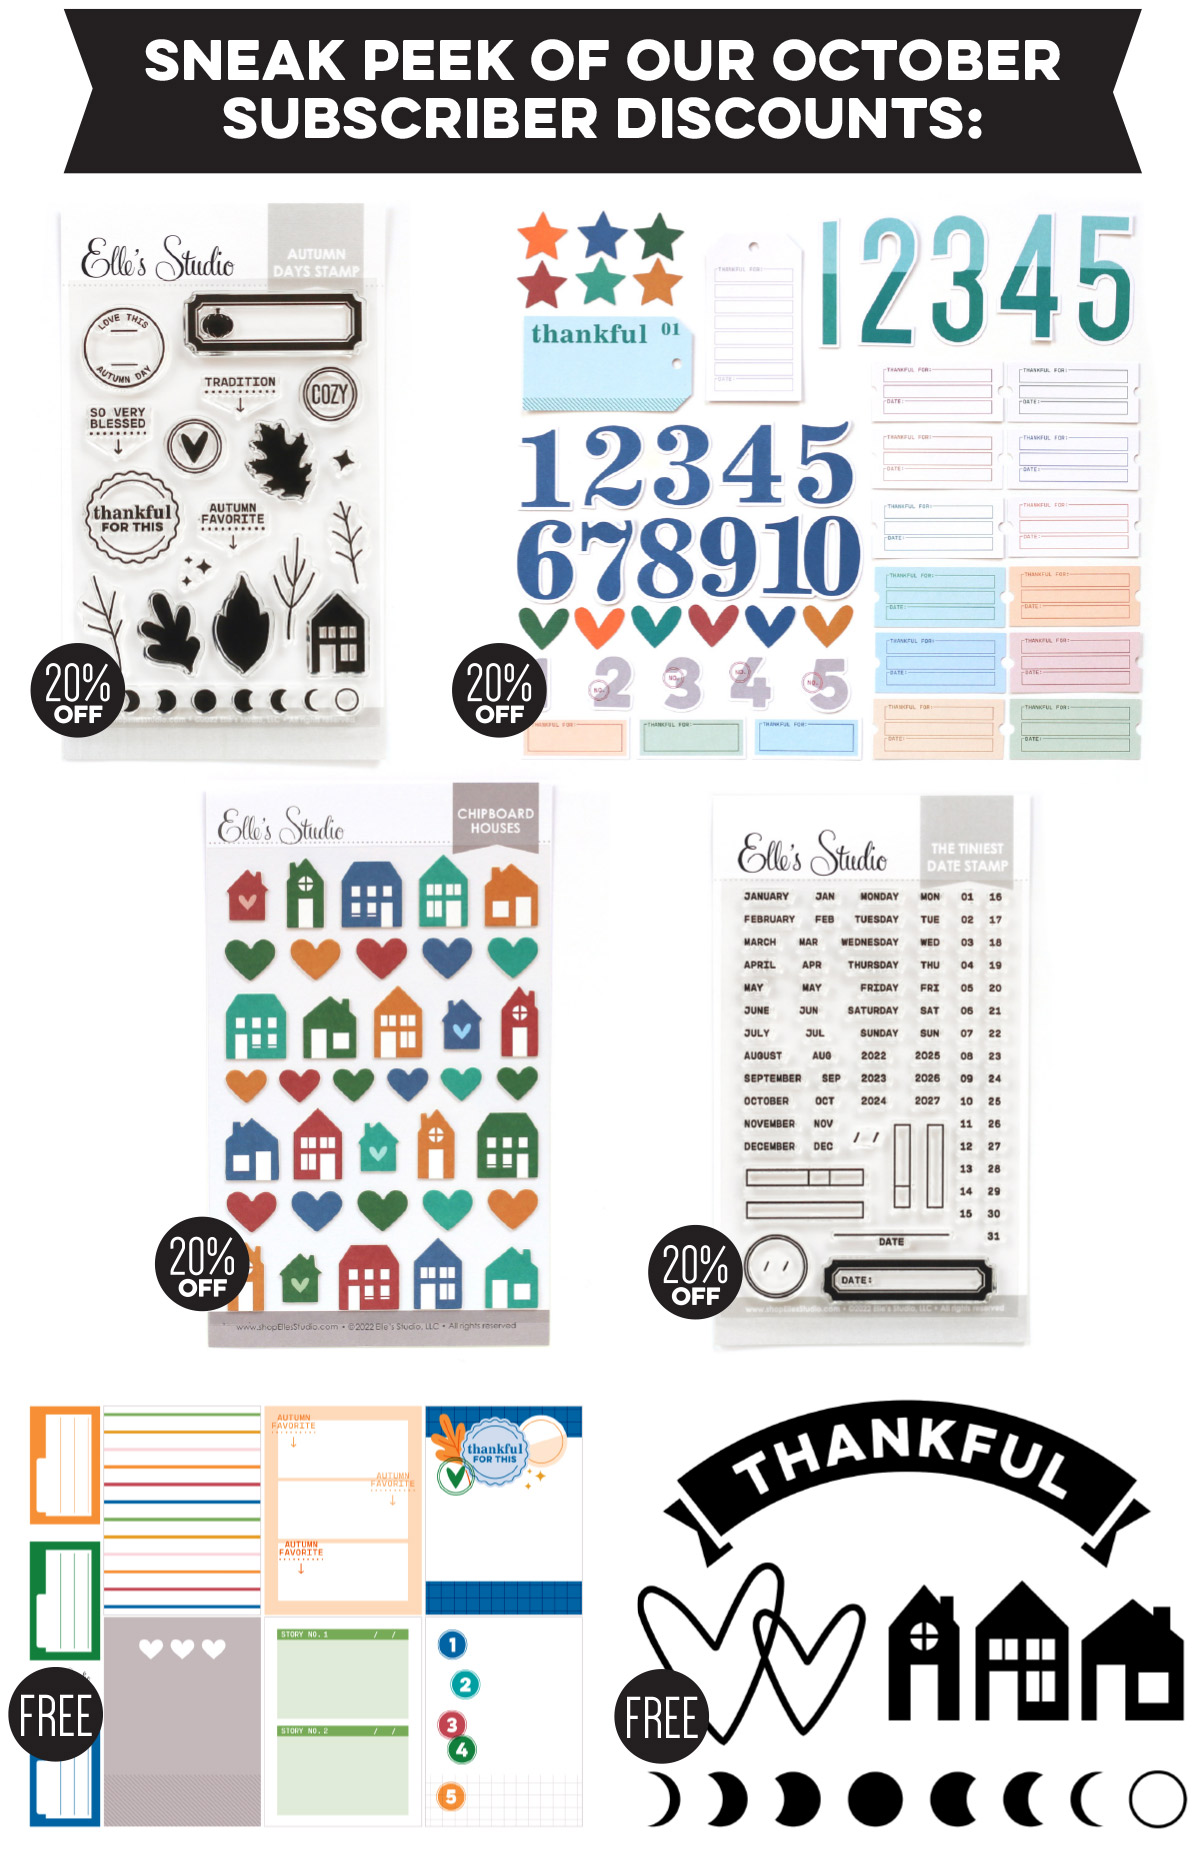
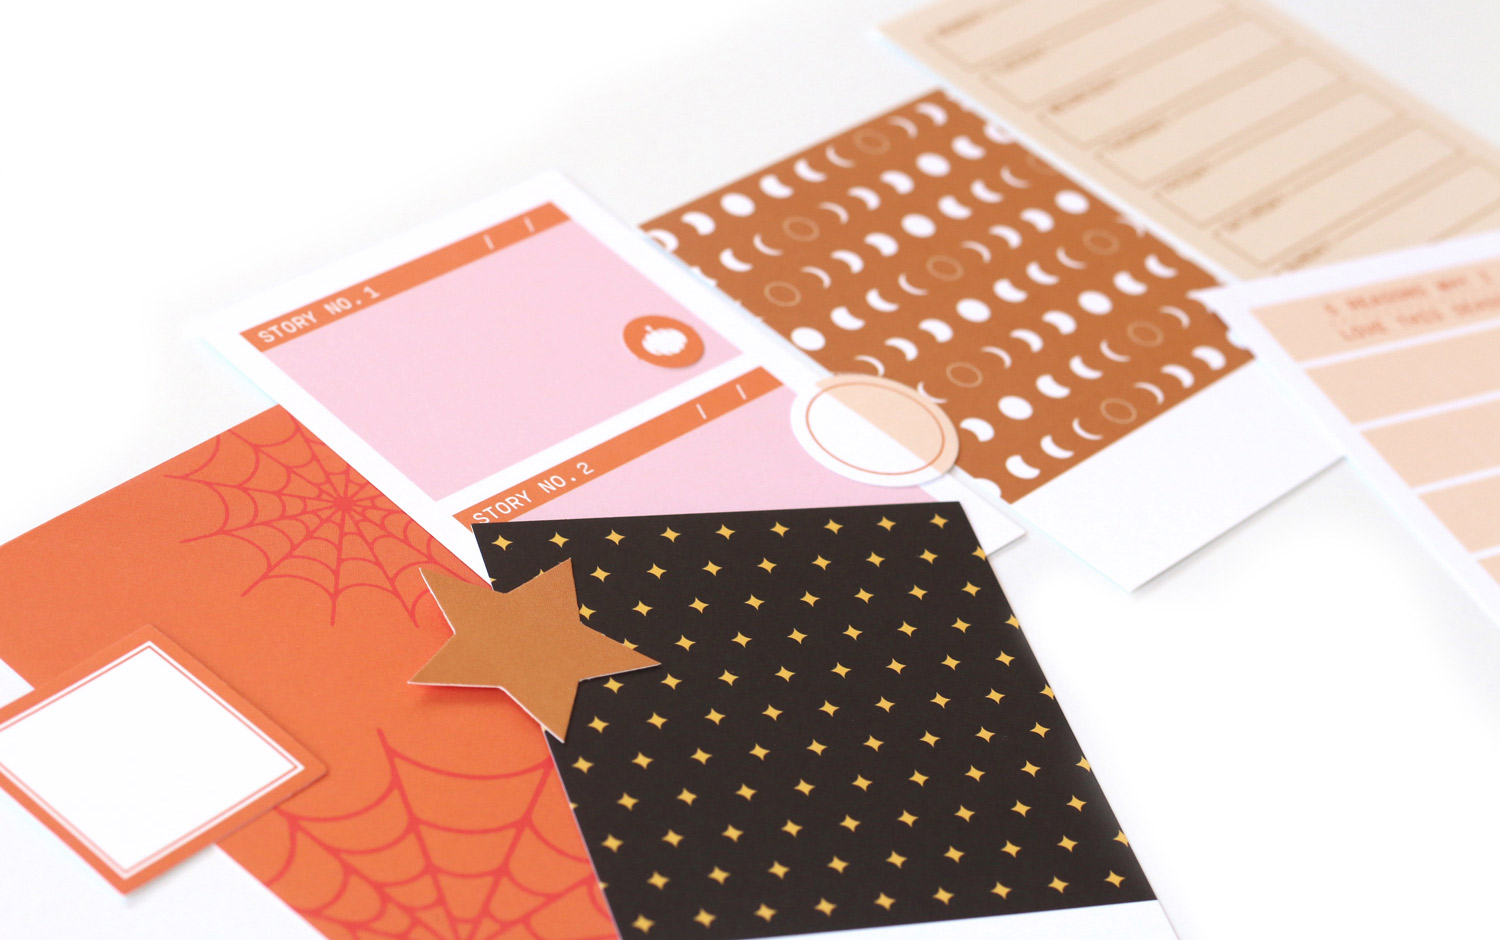
Our October kit + coordinating add-ons reveal is almost here and we can’t wait to share with you all the new and exclusive products that will be available soon! Our reveal will be full of the perfect products to document your October stories and take you right into the month of November! This month, our October Kit will include 3 – 4 x 6 inch tags, 18 – 3 x 4 inch tags, and 25 die cuts!
Not a subscriber? You can pre-order our October kit now and lock in our $9.99 kit price by starting a subscription today! You’ll want to choose our SUBSCRIBE & SAVE option to get signed up and start your subscription with our October kit. We will then hold your kit and you’ll be ready to bundle and save at our October 10th reveal! Details on how to bundle with your subscription order will be emailed to you once you have purchased this product.
Kit subscribers, don’t forget! Along with being able to bundle any products from our shop that will ship for FREE with your kit during our 24-hour bundling period, starting on the 10th at 8:00 am Pacific each month, our subscribers will also have access to special discounts on select items! These discounted items can be found in our SALE section during our 24-hour bundling period, and you must be logged into your kit subscriber account to see them. Quick note: Our kits and add-ons are available without a subscription each month, too.
We are so excited to share all of these new products with you and see how you use them on your projects! Make sure you set your alarm and mark your calendar for Monday, October 10th at 8:00 am Pacific for our October kit and add-ons reveal! We hope to see you there!
Comments Off on A sneak peek of our October 10th reveal! | Share This
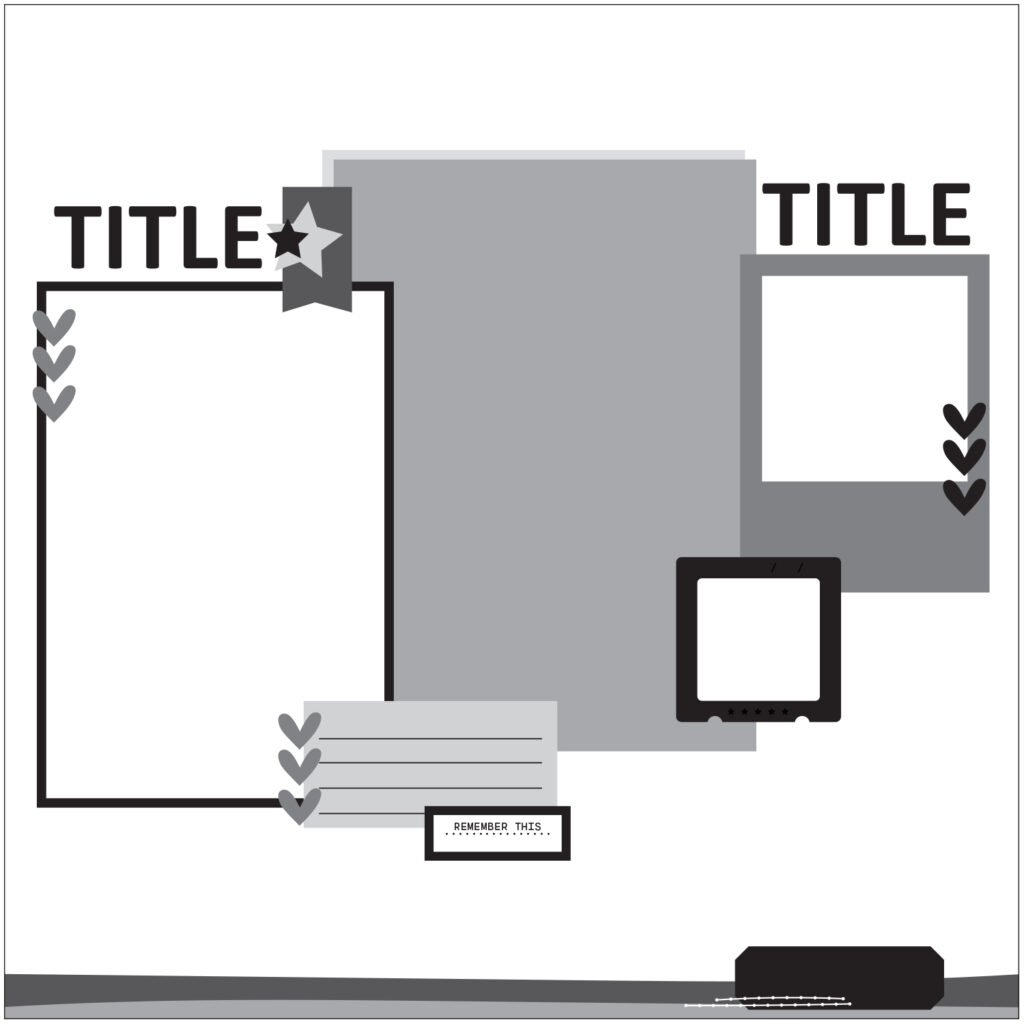
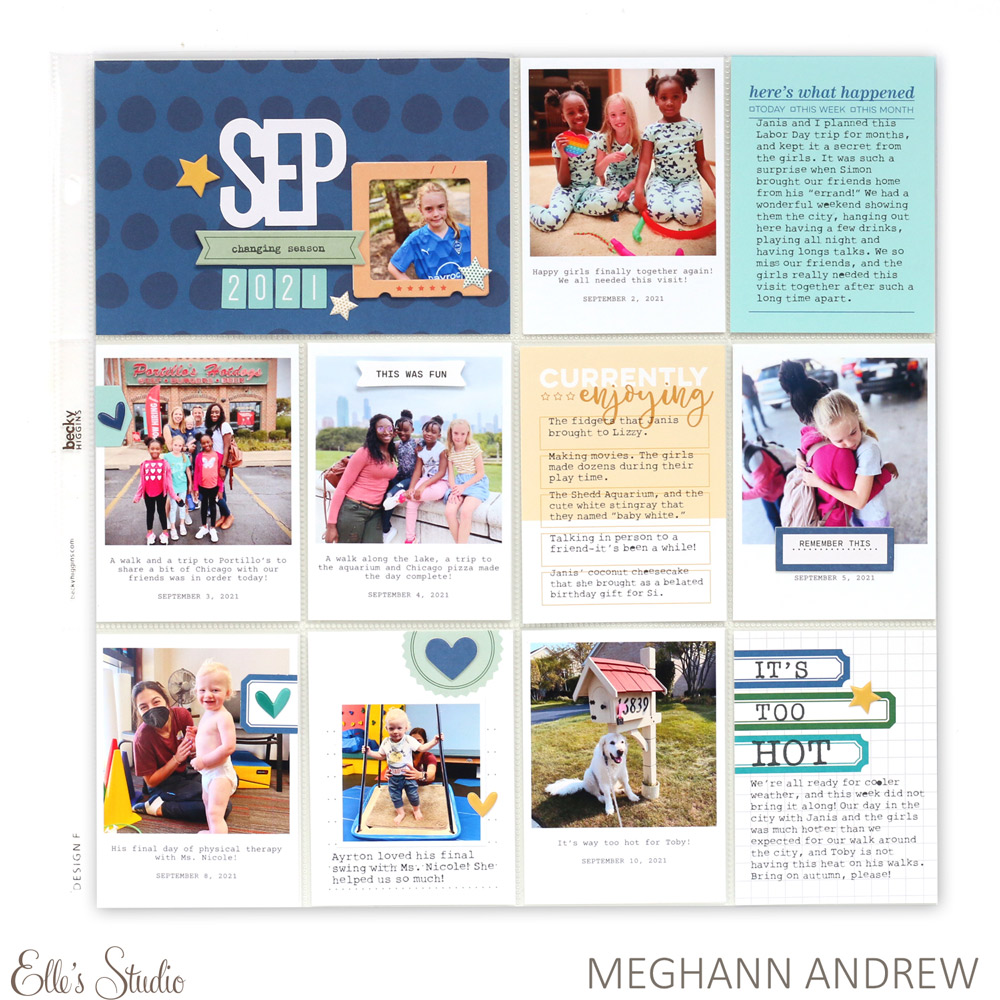
Hello! It’s Junell on the blog today and it’s Sketch Day! I’ve never met a scrapbooker who doesn’t like a good sketch! And this one is really unique. Let’s take a look!
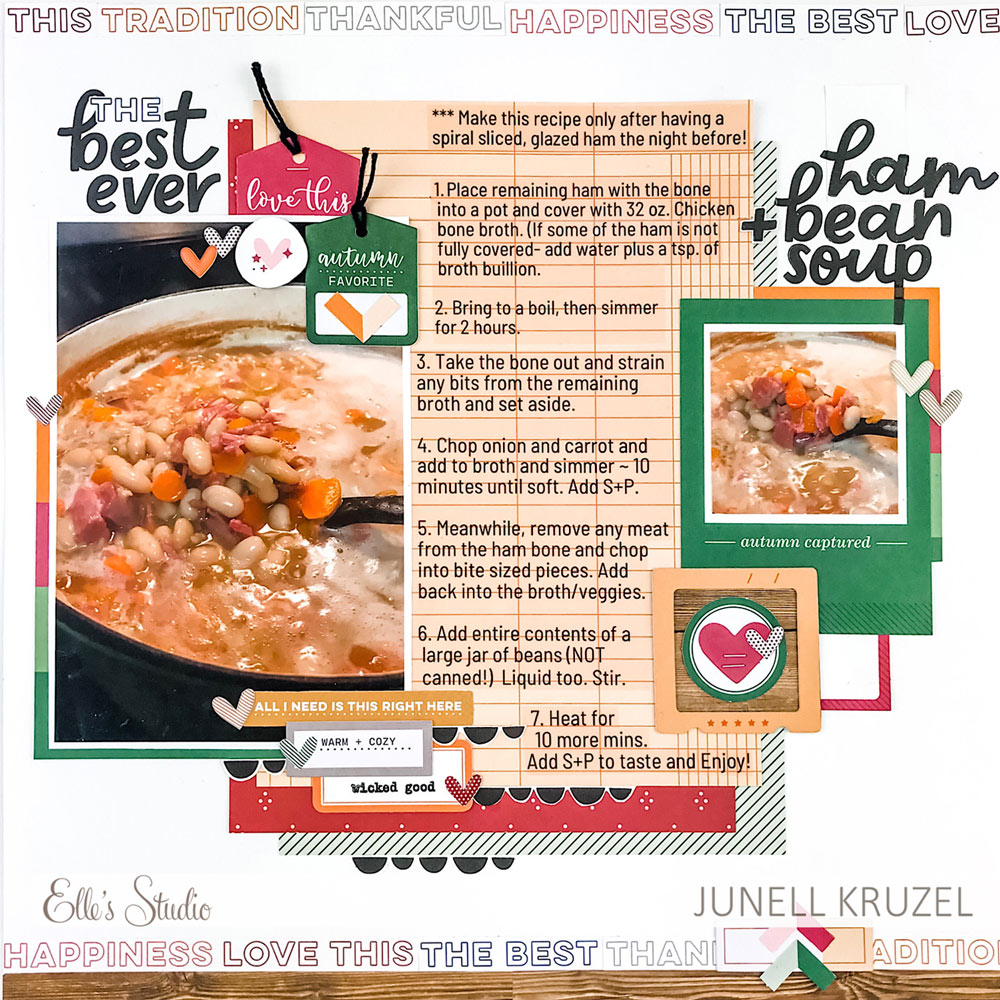
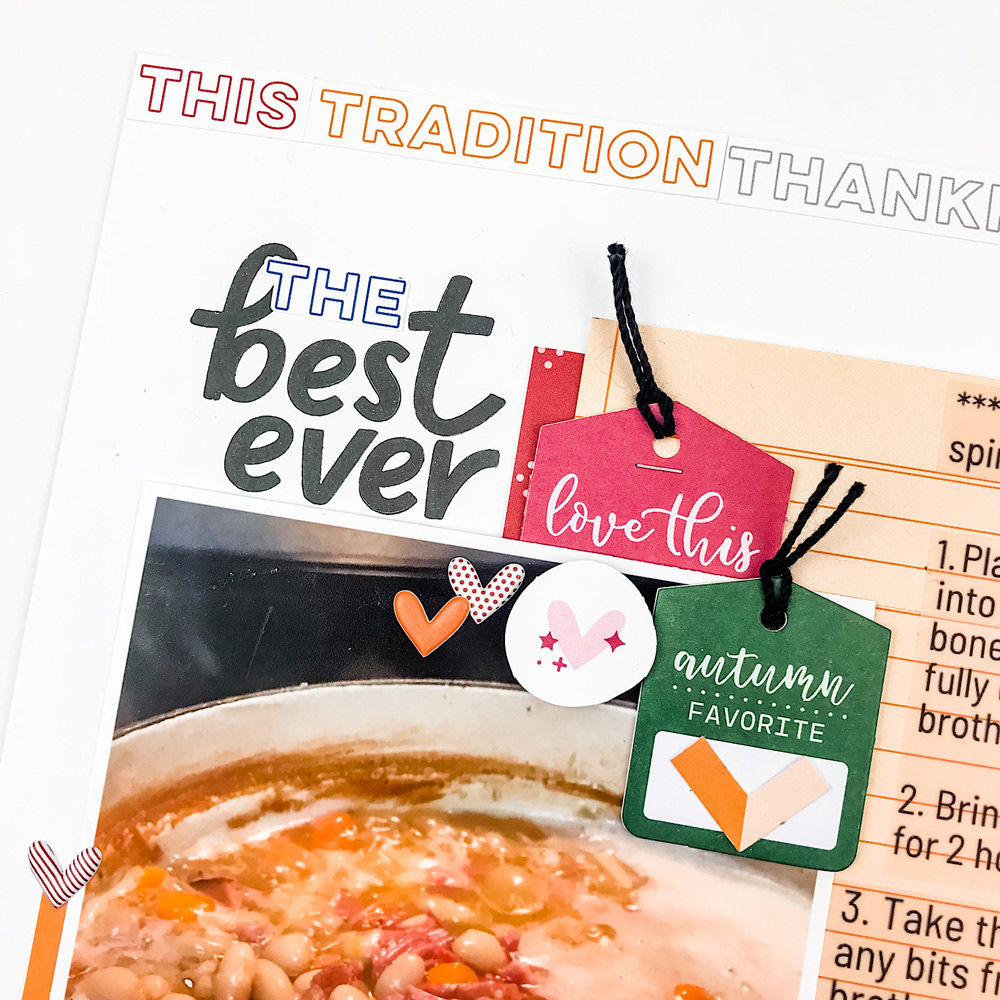
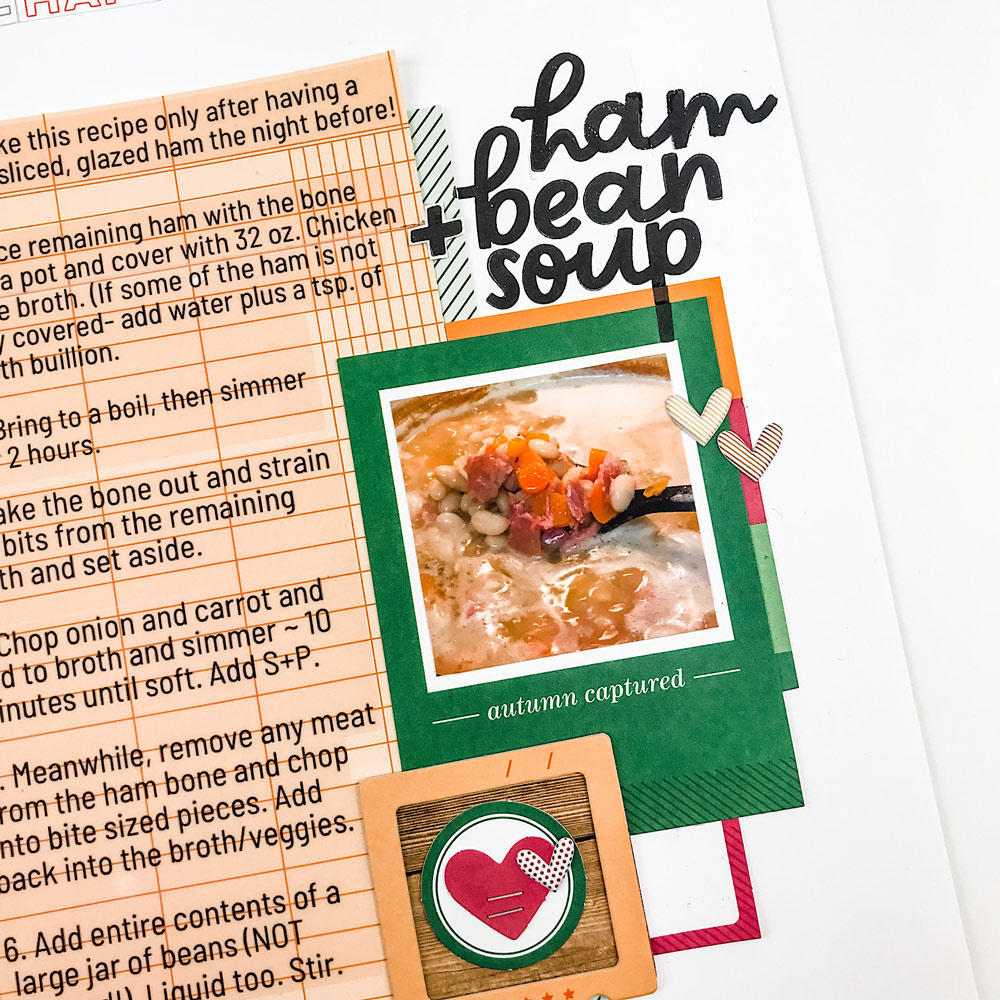
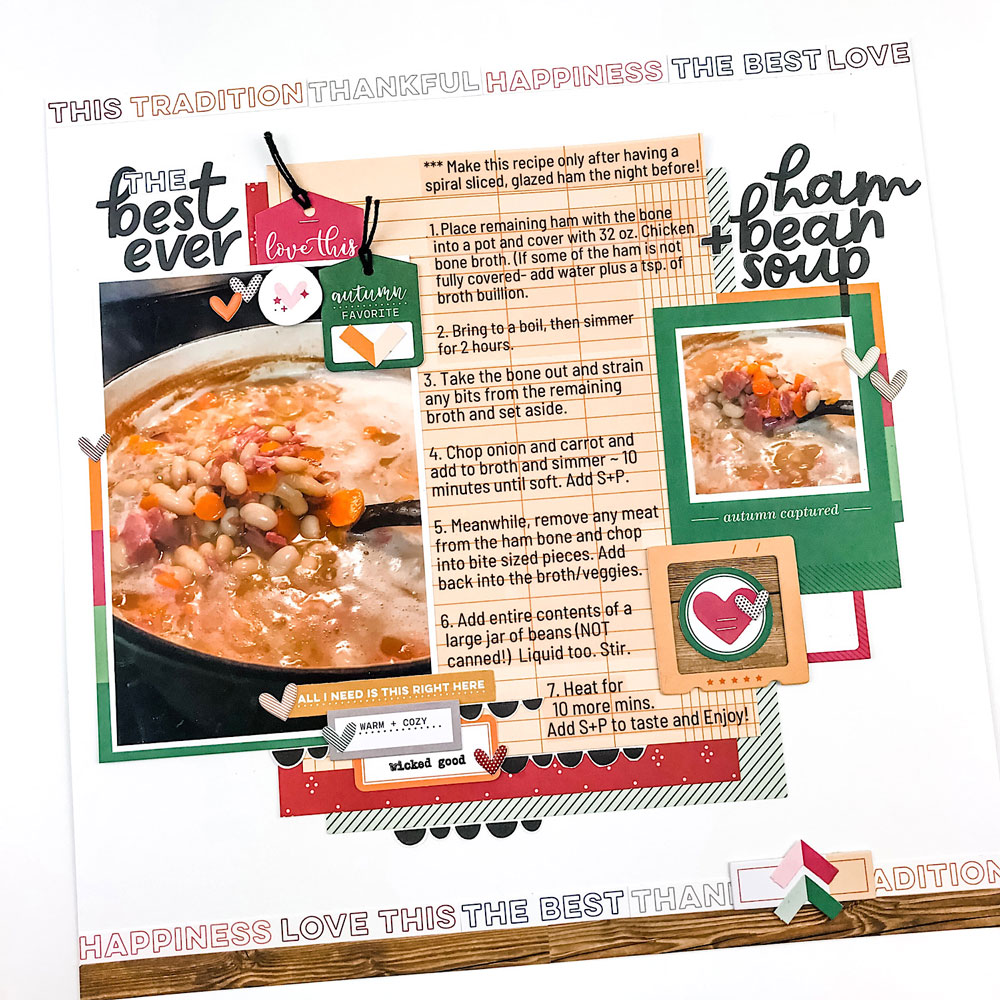
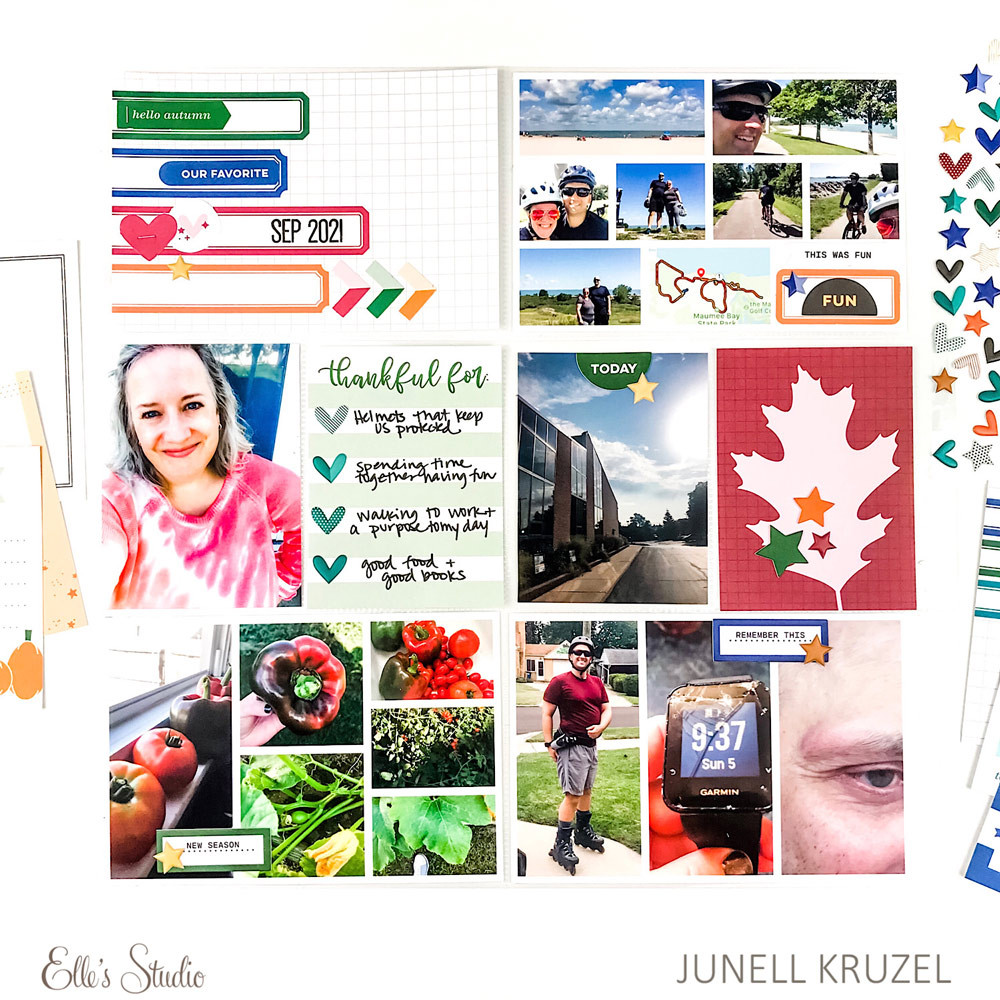
I pretty much stayed true to the original sketch. When I first saw the sketch, I immediately thought that the large center area would be perfect for some longer journaling, storytelling, or a recipe in my case. I just happened to have two pictures of my favorite soup recipe which is perfect for fall and the colors of this month’s kit coordinate so well! They would go on both sides of the recipe.
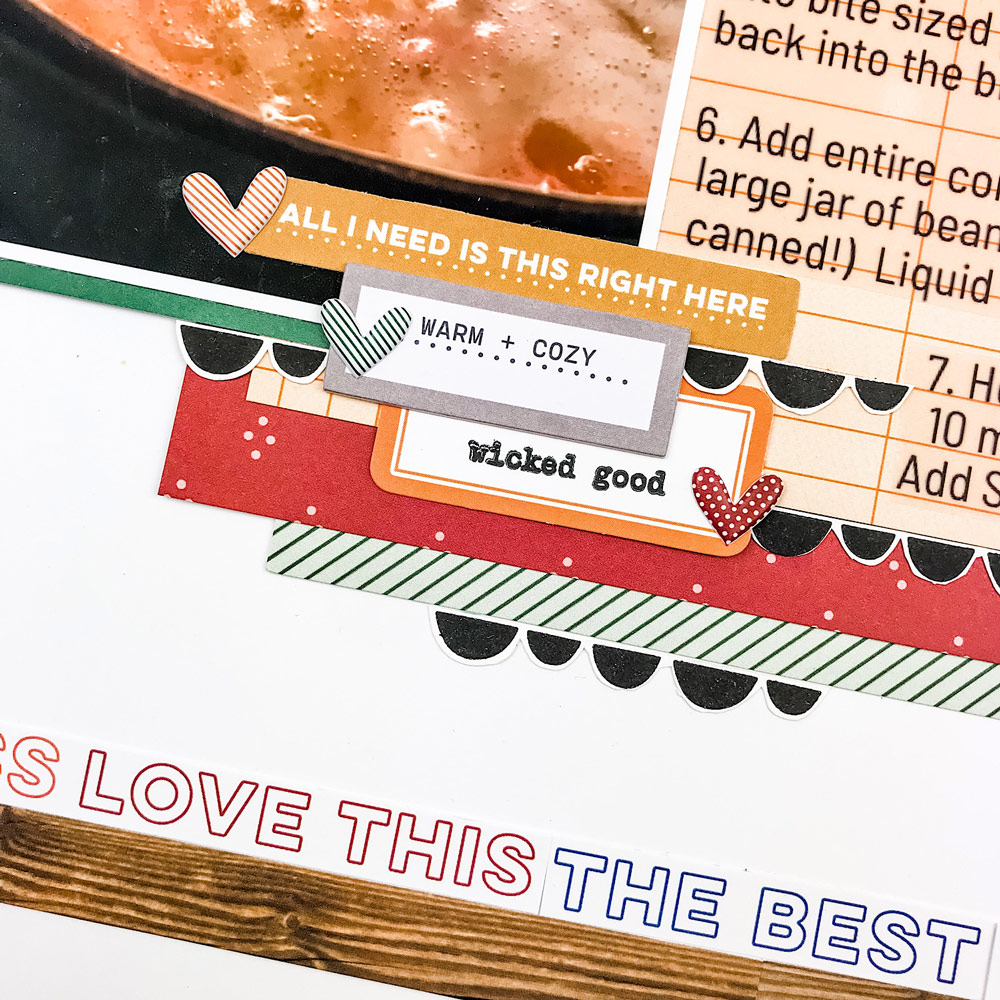
I love that the title is split between the left and right sides of the layout. This allowed me to have a longer title and the Lizzy Alphabet Stamp was the perfect size to fill the space I had for my title. I also used some of the scallops on the stamp set to add weight to the bottom of the page and to create our visual triangle.
Once I had the layout designed, I used the Canva app to get my recipe to fit the exact space I had reserved. I wanted it to fit around the corners of the embellishments and photos. It was super easy to do! I took a photo of my layout and uploaded it to the app, then I was able to add text on top in exactly the space I wanted. I then deleted the photo of the layout underneath the text, saved the journaling as a photo, and then printed it onto clear sticker paper making sure my size was correct. I printed it out, then cut it into four sections to make it easier to apply to the layout, since it would have been difficult to apply a huge sticker without getting bubbles underneath. I love how it turned out!
Hello, Elle’s Studio fans! You may have recently purchased one of our newest stamps, the Thin Labels Stamp, along with its coordinating Metal Die! If you need some inspiration to help you to take out those stamps and create, we think that these five ideas will give you that push that you need!
Create a column
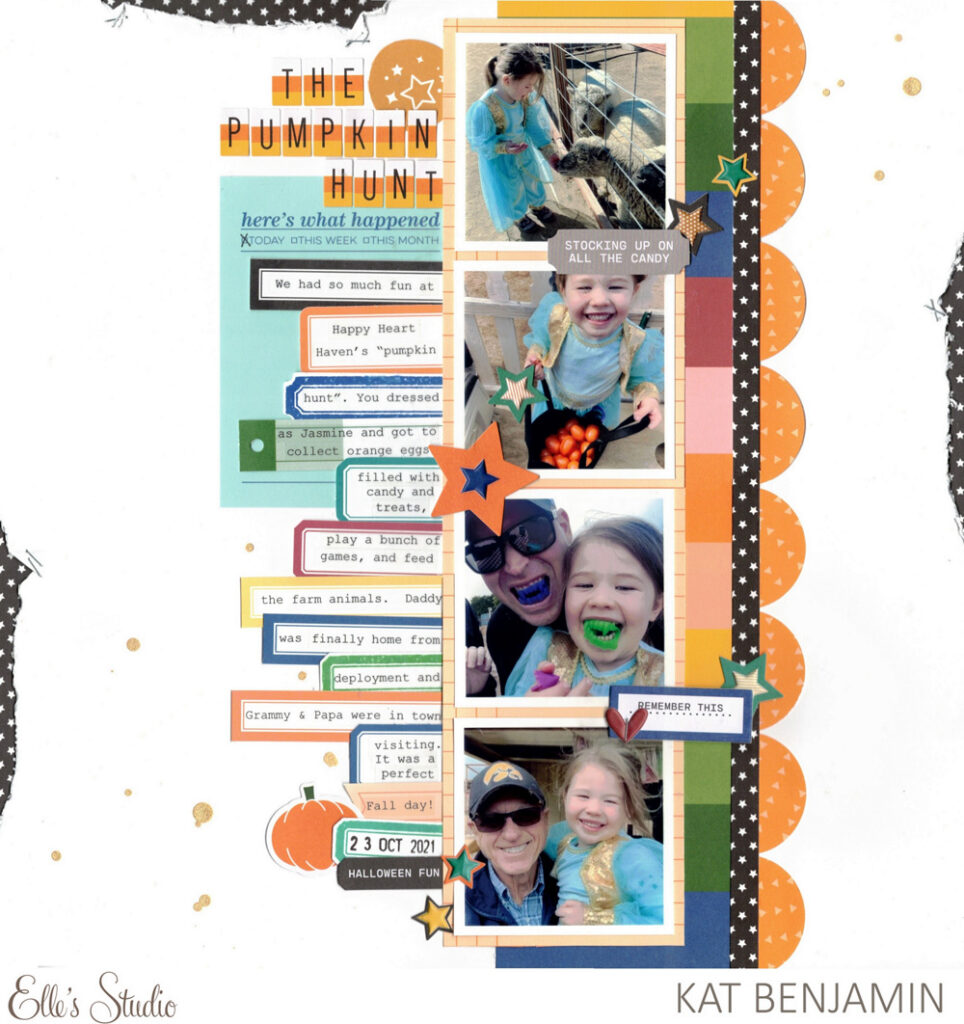
Design team member Kat Benjamin had the great idea to stamp the labels in the colors shown in her photos, then create a BIG column of labels to hold her journaling all of the way down the page. It creates a fun and playful look!
Add a background layer
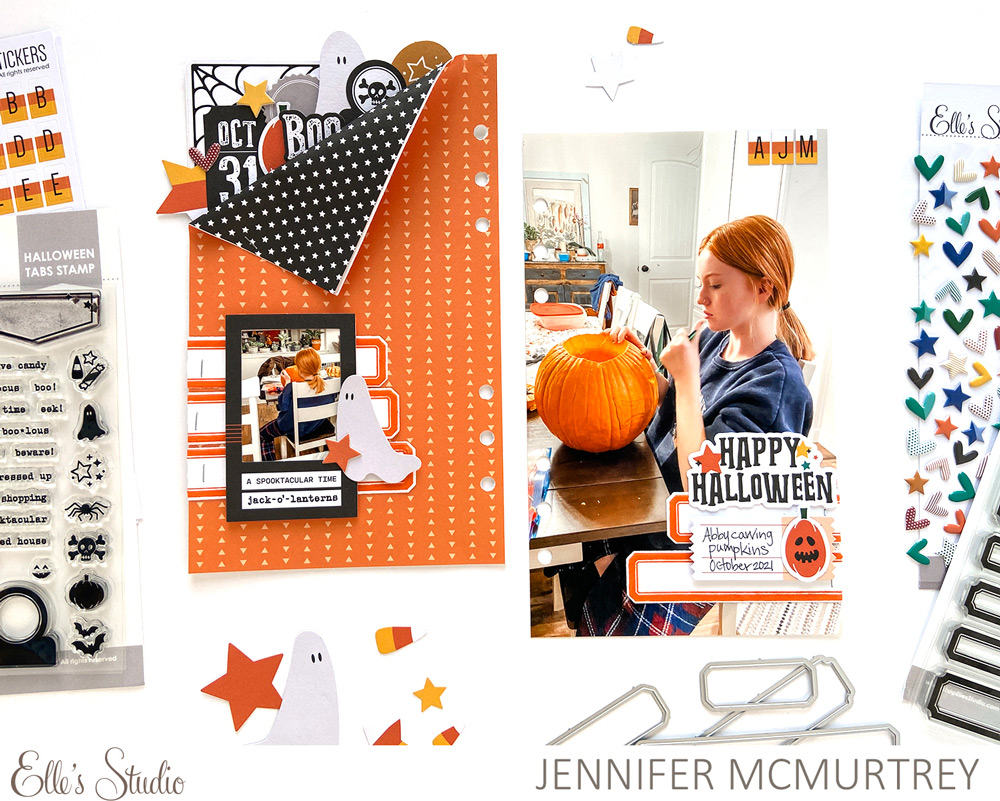
Who said that labels must include journaling or a date? There are no rules with these staples, and Jen McMurtrey shows us here just how perfect they are as a background layer to your embellishment or titles!
Color-block
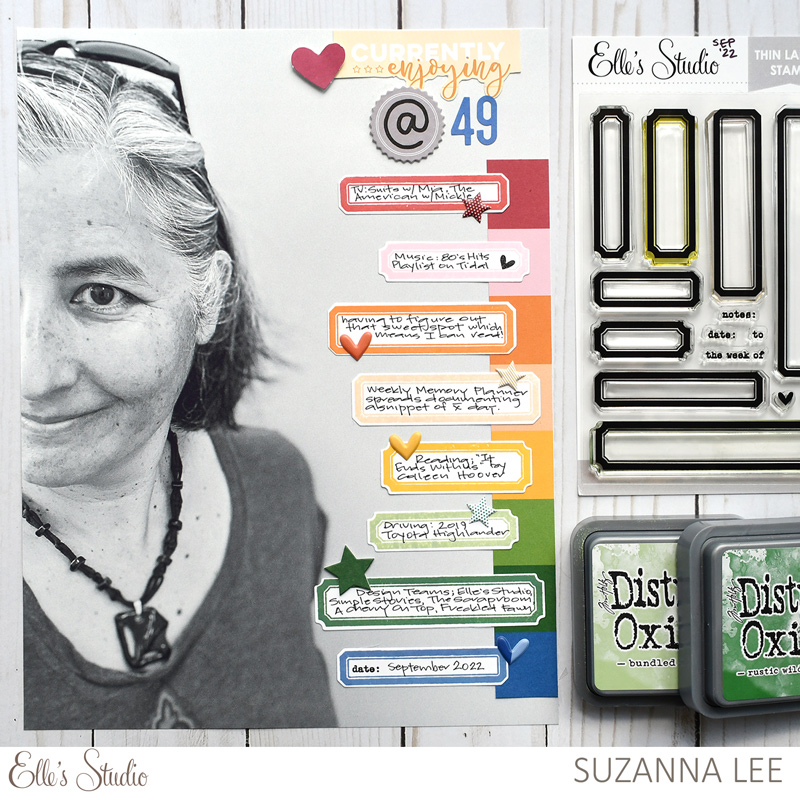
Color-blocking is a great design technique to use to keep your embellishments neat and orderly on your project, and we love the way that Suzanna Lee color-blocked her stamped Thin Labels with a patterned paper from our Thankful Paper Stack and embellishments from our September kit and add-ons.
Embellish the edge
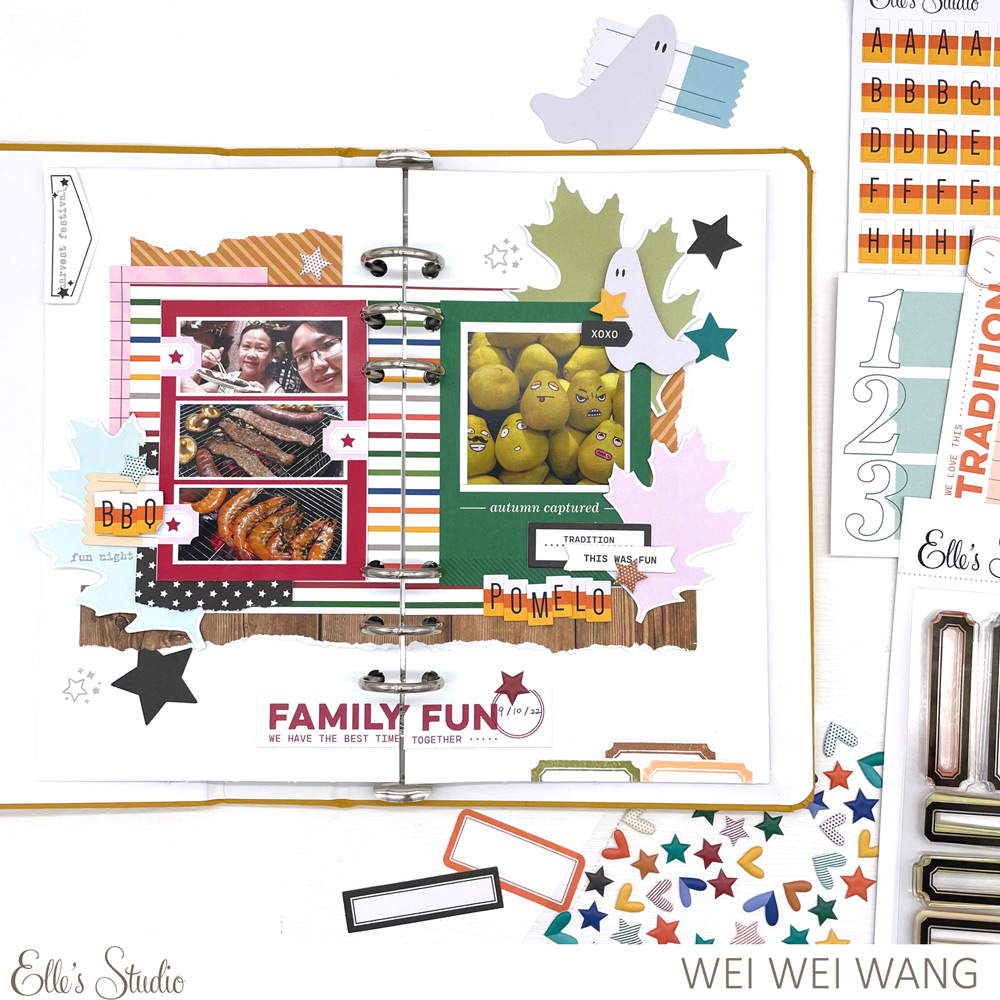
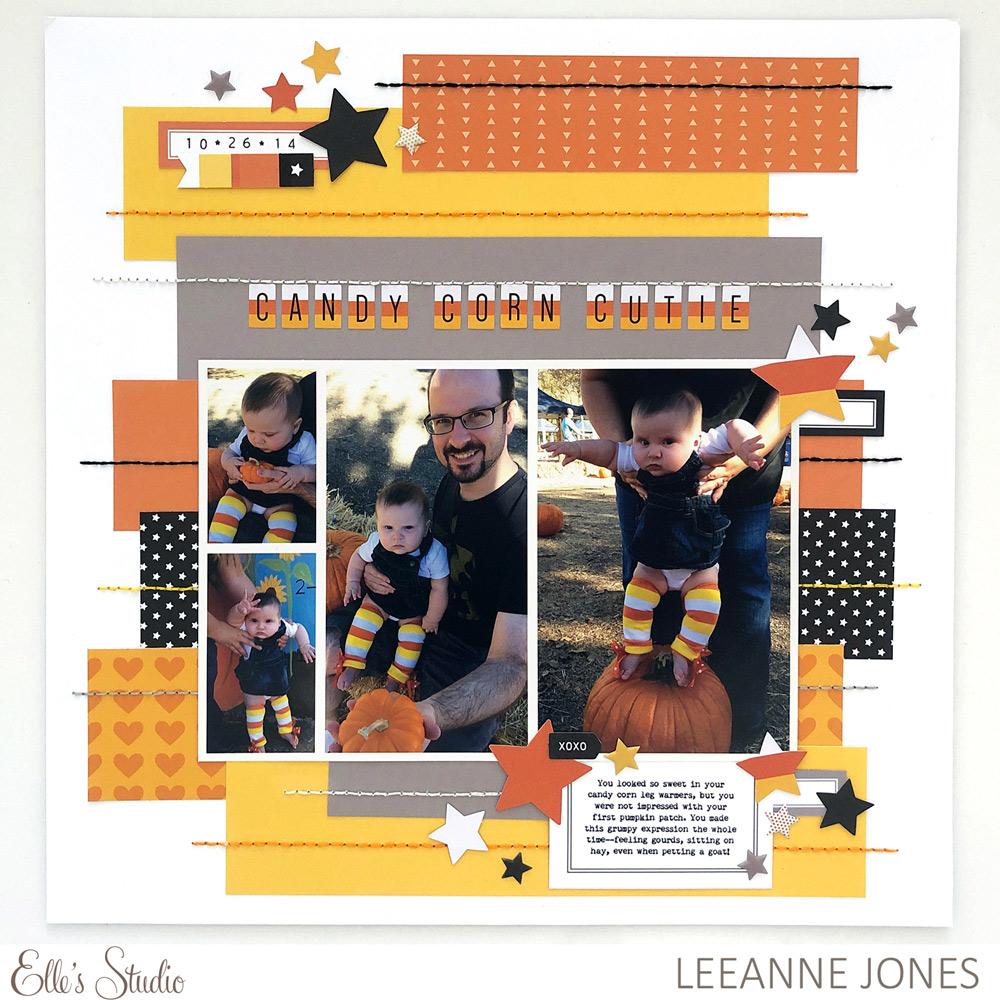
Stamp a few labels in colors to coordinate with your project and add to the edge of your page, cutting off the excess, as Wei Wei Wang did here. This not only adds a bit of extra embellishment but also delineates the edge of your page!
Create a cool background
Wei Wei had another great idea for these stamped labels: use them to create a cool geometric background! Come up with a unique color scheme as she did here, stamp a design, then embellish with simple shapes, like stars!
No matter how you choose to use them, we think the Thin Labels Stamp and Metal Die will quickly become staples in your stash and we can’t wait to see them on your projects! Be sure to share them with us on Instagram using the #EllesStudio hashtag, or in the Elle’s Studio Facebook Group!
Comments Off on 5 Ways With the Thin Labels Stamp and Die | Share This
Today we welcome Stephanie Aldaco back to the blog to share another Halloween project that we just love, and we think you will, too! If you need a great idea to put your September Labels to good use, Stephanie will share it with you, and help to inspire you to prep your October daily album, too!
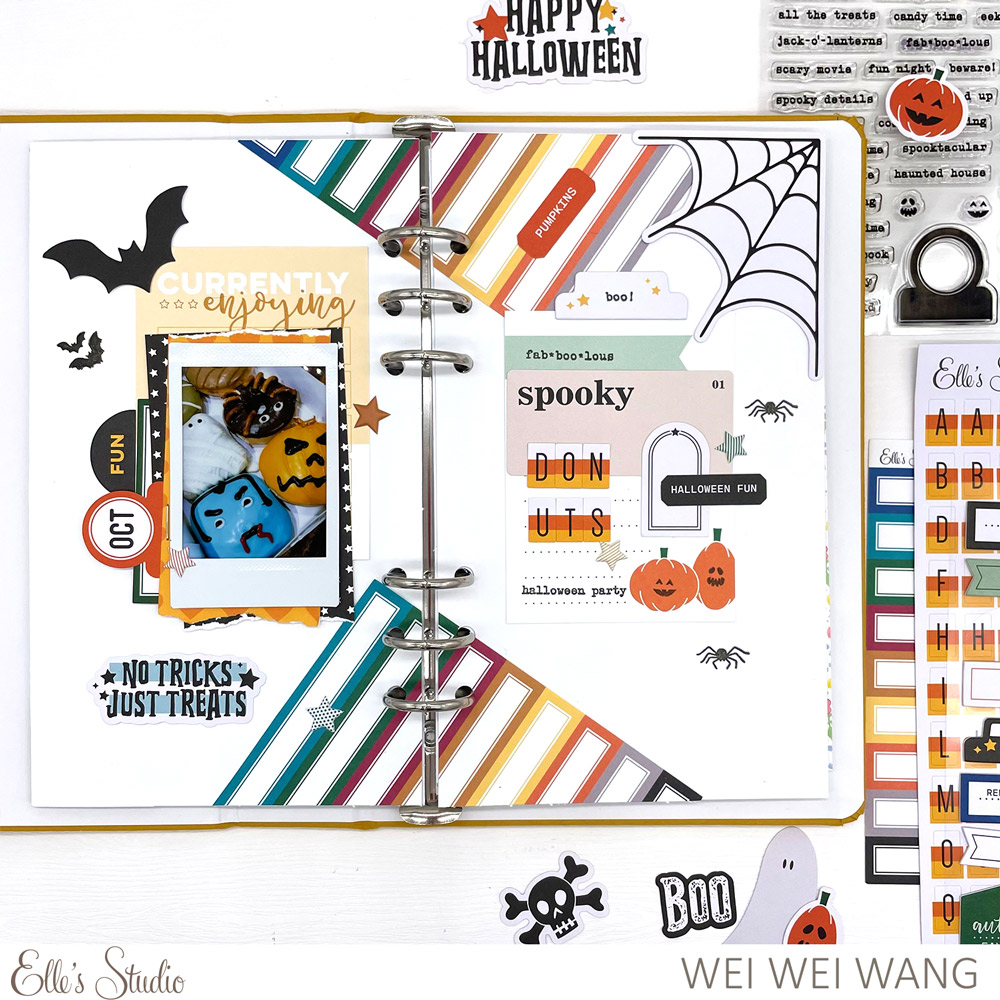
Hey fellow crafters! It’s Stephanie here, and I am back to share another spooky layout, this time in my 2022 October daily. I also completed three weeks in my monthly pocket page album using the September 2022 kit and add-ons. When I say I break down the monthly kit, I mean it! I use it throughout many different projects! I digress—let’s get back to the 6 x 8-inch double-page layout I’m sharing with you today!
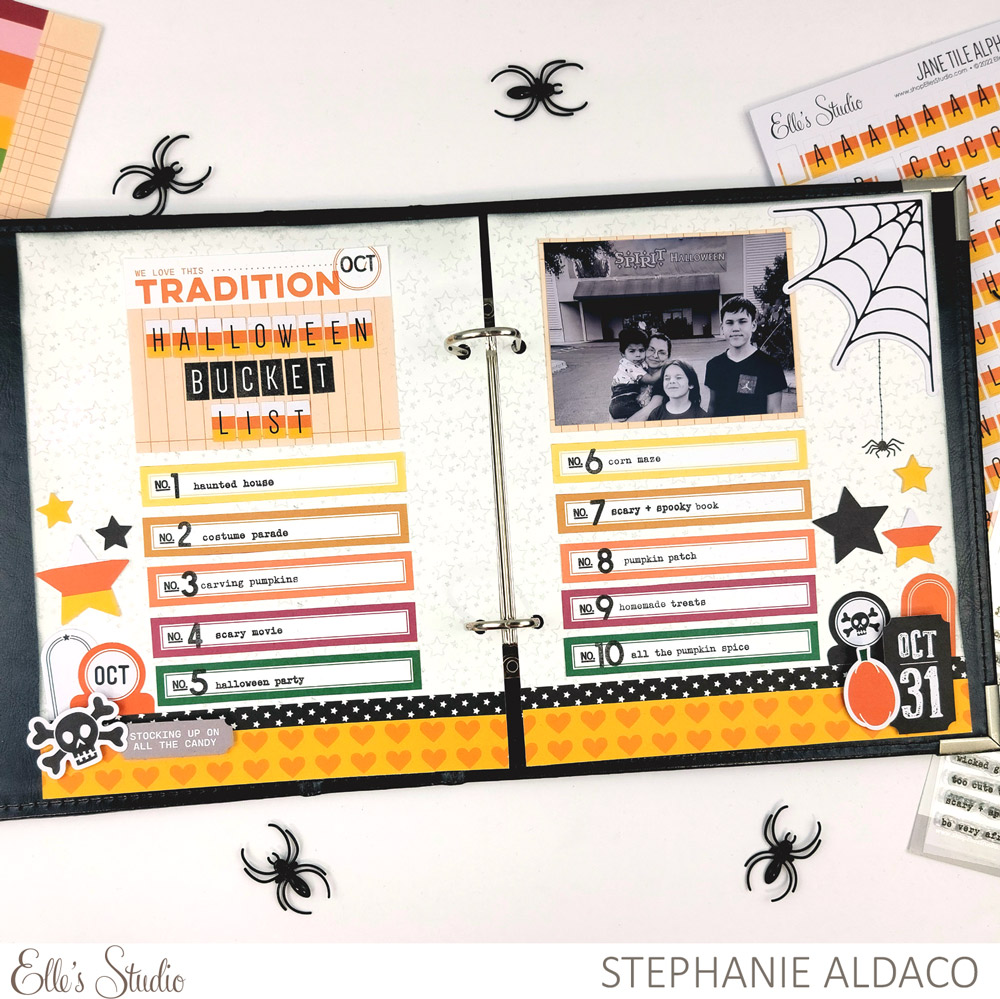
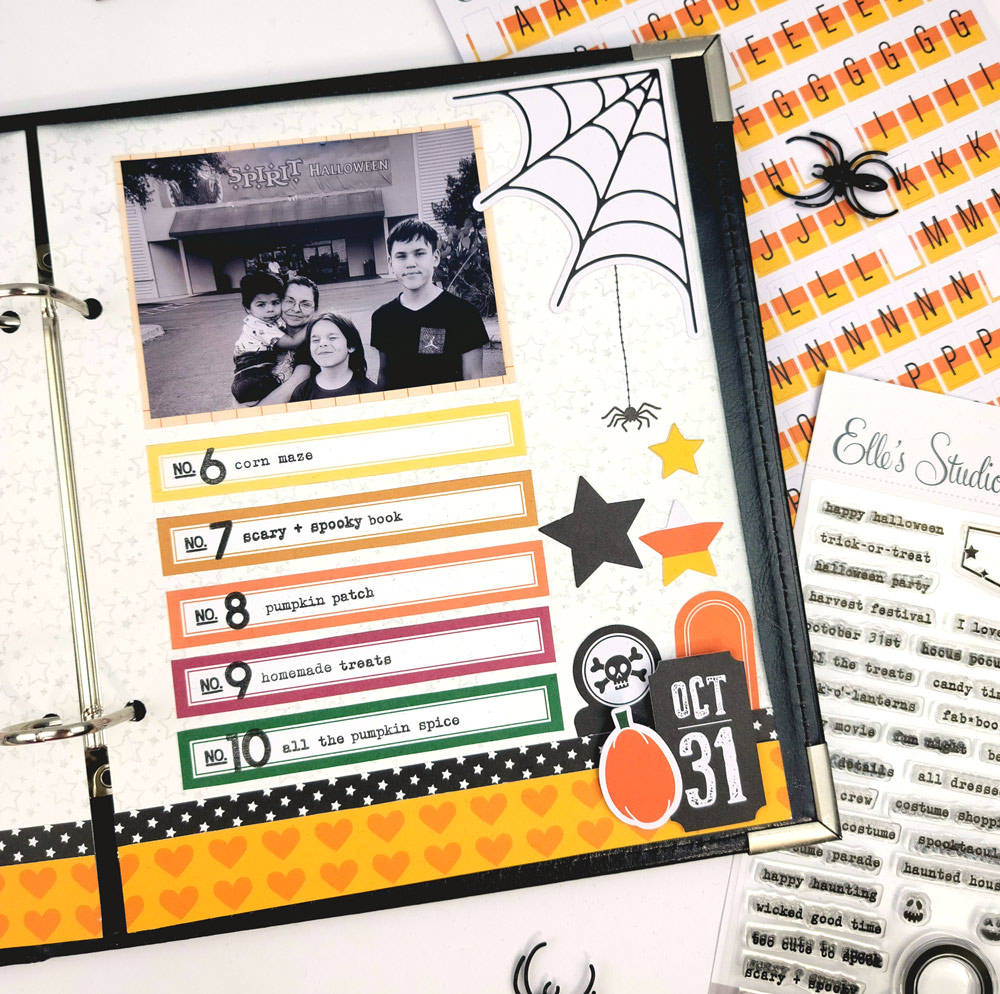
I knew I wanted to create a list with the September Labels and the iconic Halloween Tabs Stamp added perfect sentiments for this season. I love how my title on the 3 x 4-inch card came out using a mix of Black and Candy Corn Jane Tile Alphabet Stickers.
For my background, I went with white cardstock that I stamped the little star cluster from the Halloween Tabs Stamp all over the page in a light gray. I pulled in pops of color by creating two border strips from the Thankful Paper Stack. This gave me the perfect ledge for my two lower clusters.
I finished off this layout with a 3 x 4-inch black and white family photo and called it done. In the extra space on the September Labels I will place the date as we complete each activity! Thanks so much for stopping by and checking out this project! To see the others I created this month, be sure to follow me on Instagram at the link below!
Hi, my name is Stephanie. I am a wife and mother to three boys. I run on coffee and putting my life on paper. You can usually find me dabbling in all things crafty, or reading a book.
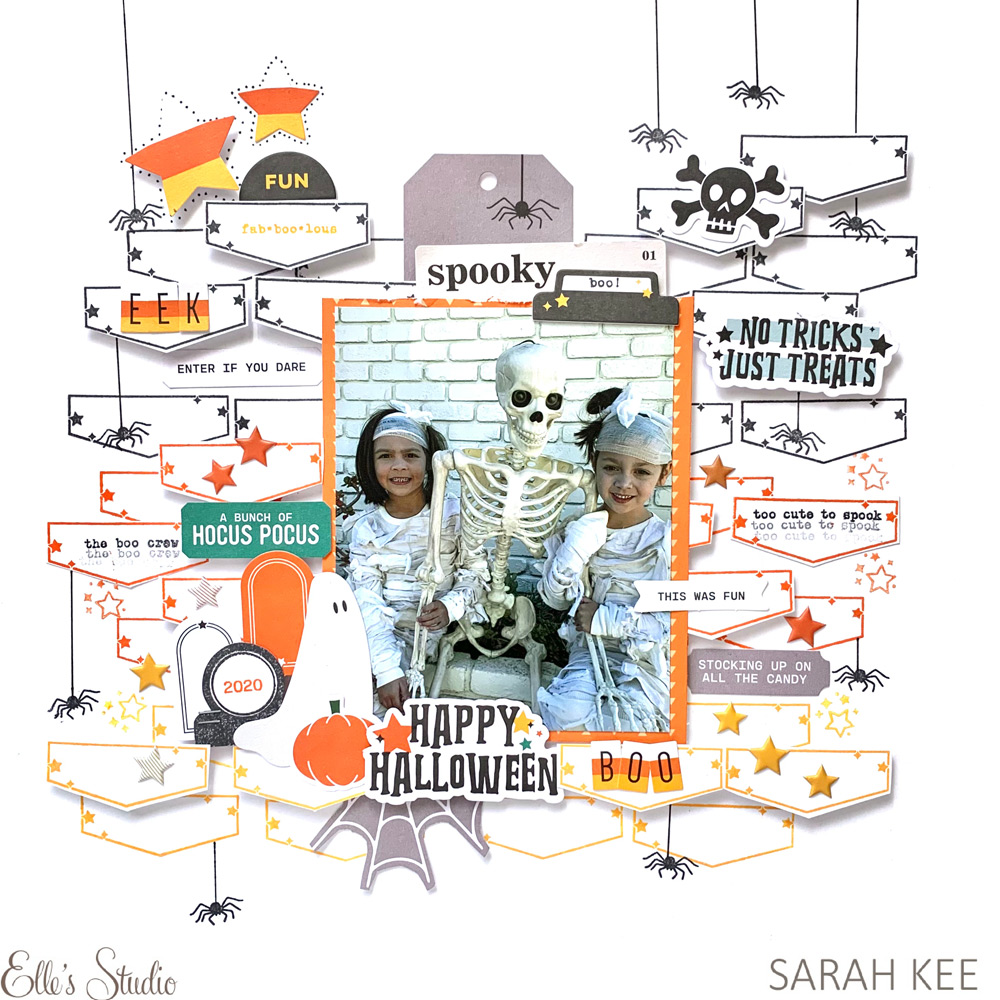
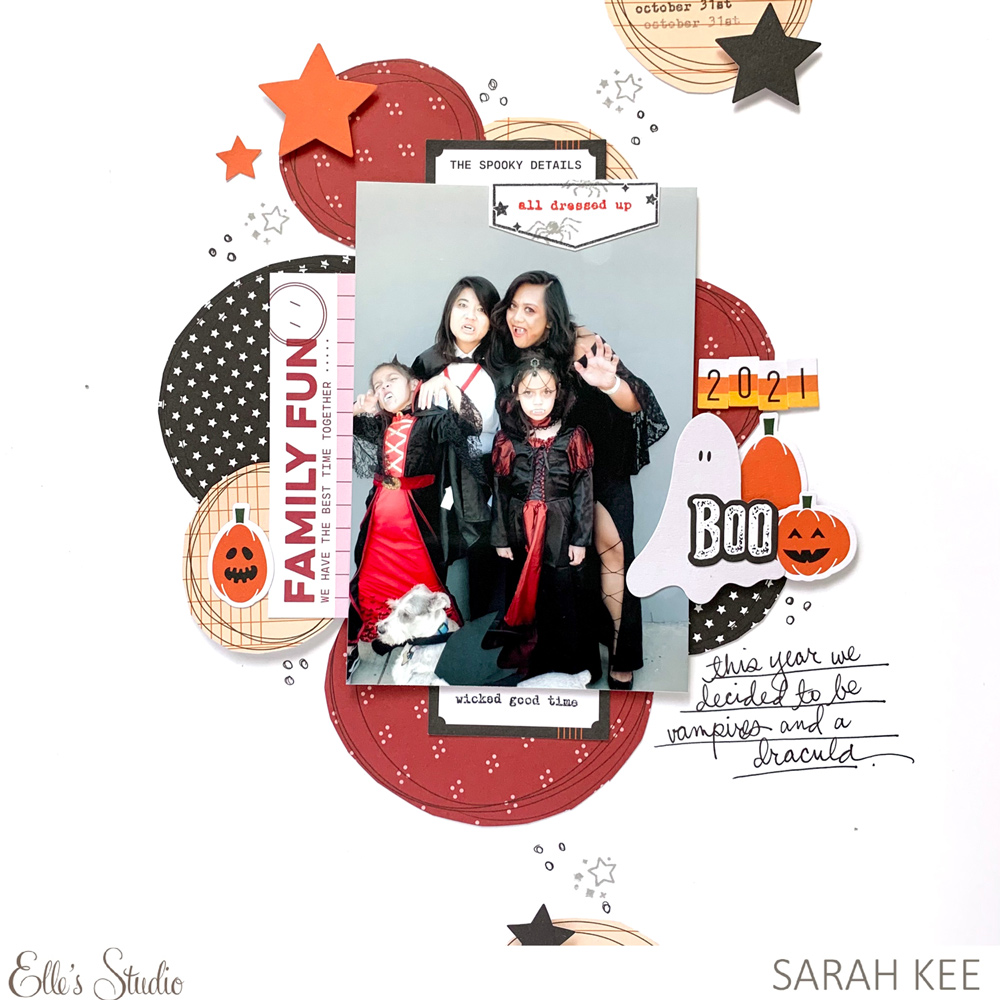
Boo! Eeeek! It’s me, Sarah, hosting today’s blog post, and the spookiest month of the year is just around the corner. With that in mind, I wanted to share a Halloween-themed 12 x 12-inch layout that I created using the September kit and some of the extras.
It’s no secret that I love Halloween month, so when Elle’s Studio released these Halloween-themed products, I couldn’t wait to create with all of these pieces!
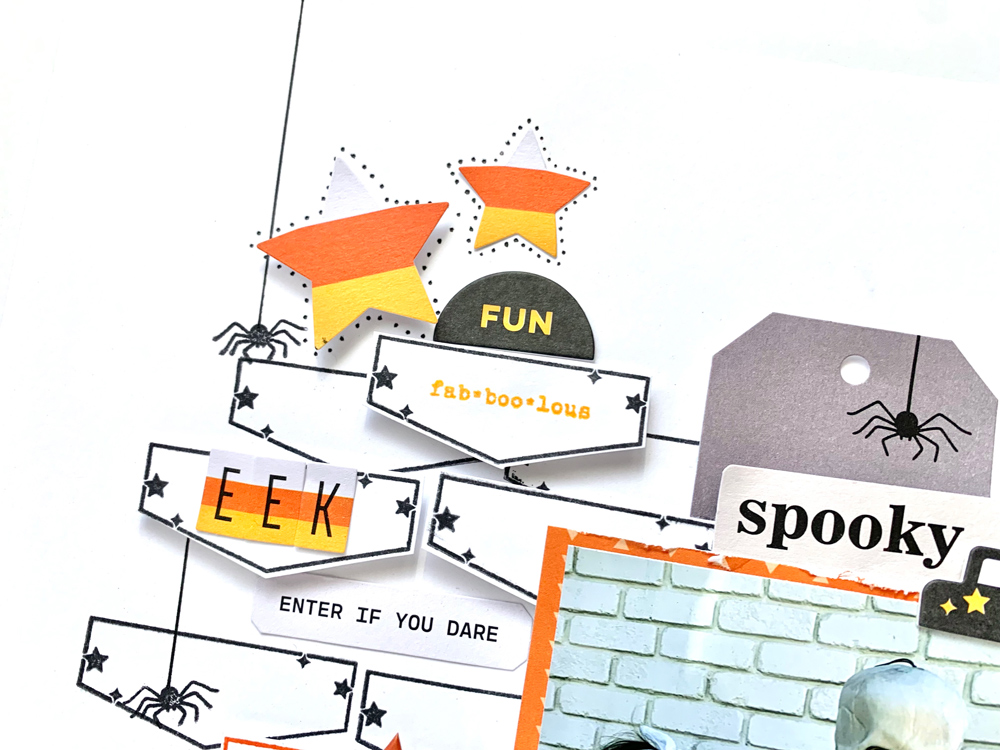
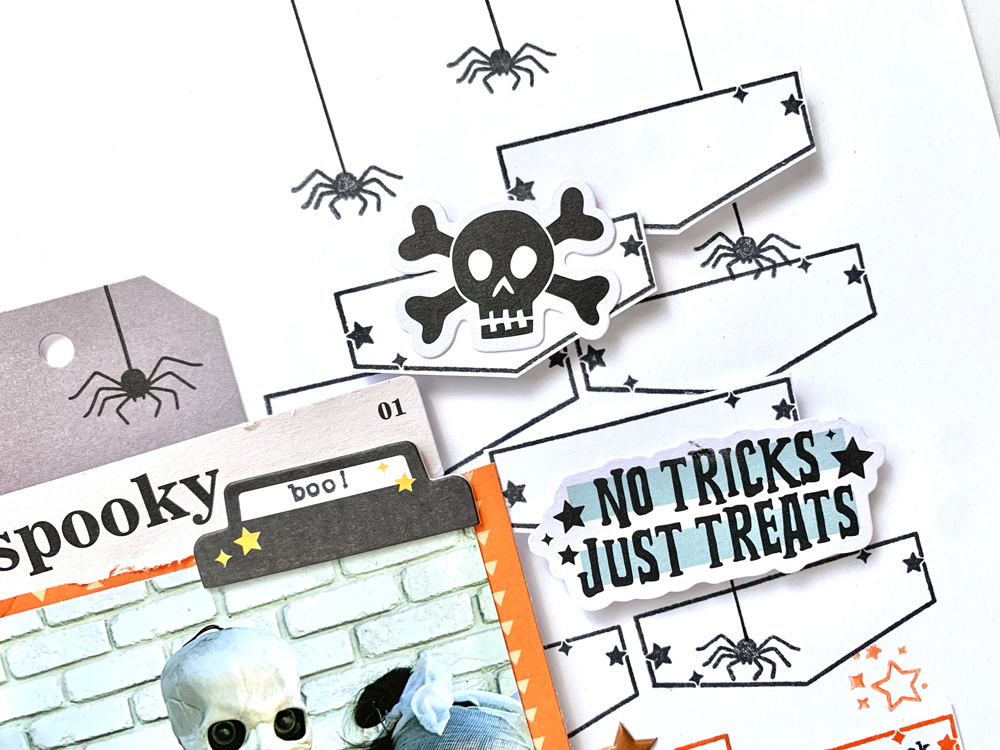
I felt inspired to use the Halloween Tabs Stamp. I repetitively stamped the tab shape directly onto my white cardstock using black, orange and yellow inks. Then, I stamped more tabs onto a separate sheet of white cardstock, and cut them out. I used these tabs later to embellish my layout.
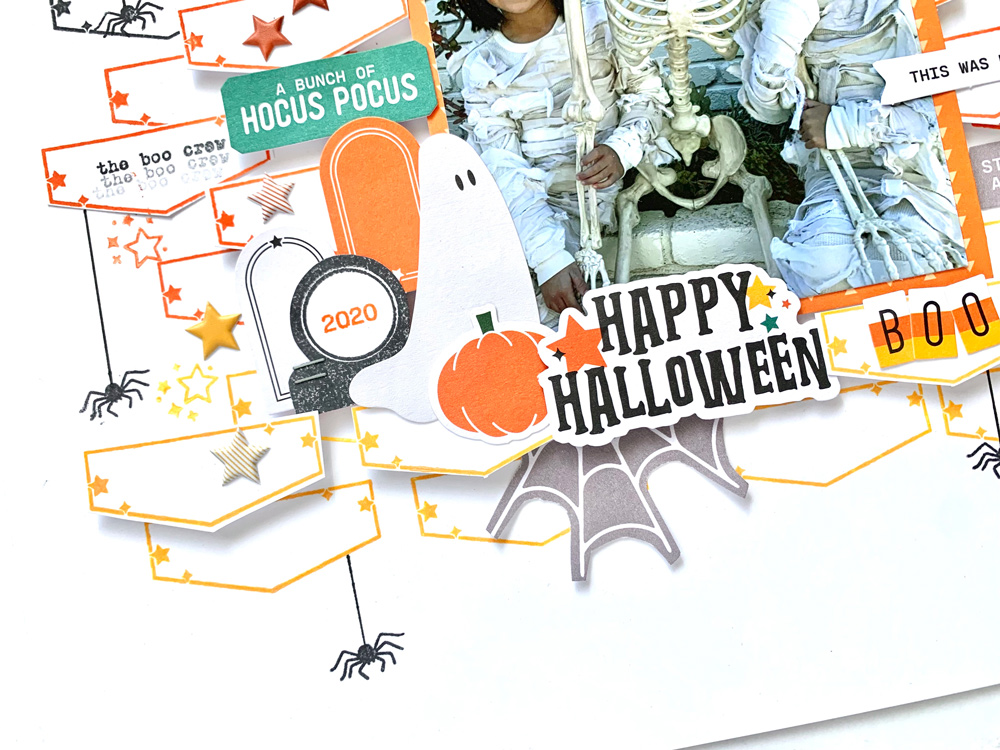
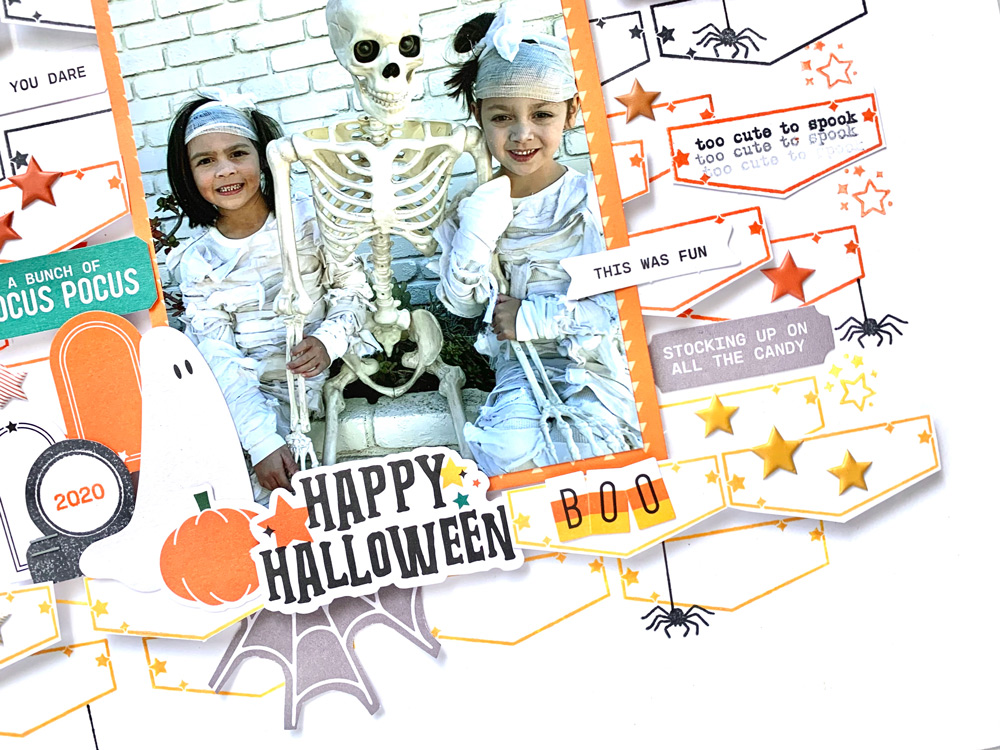
I focused on using one photo for this layout, and I embellished around my photo using various pieces from the Halloween Die Cuts. I love that there’s an assortment of Halloween graphics and sayings. The ghosts and bats are my absolute favorite!
After adding in those fun Halloween embellishments, I added the extra tabs that I cut out from earlier. I used foam adhesive to add dimension to my layout.
To give it that extra Halloween look, I stamped spiders all over my page. I used a black journaling pen to make it look like dangling spiders. I love how it looks – so creepy!
That’s it for today! Spook-tacular, right?! I had a blast using these Halloween-themed products that were released in this month’s kit. The add-ons were fab*BOO*lous too!
We’d love to see your Halloween projects using some of these products, so have at it. Join us, and share your projects with us over on our Elle’s Studio Facebook Group or on Instagram using the hashtag #EllesStudio.
And as always, thanks for reading and letting me share my work here!
Comments Off on A Bunch of Hocus Pocus with Sarah Kee | Share This
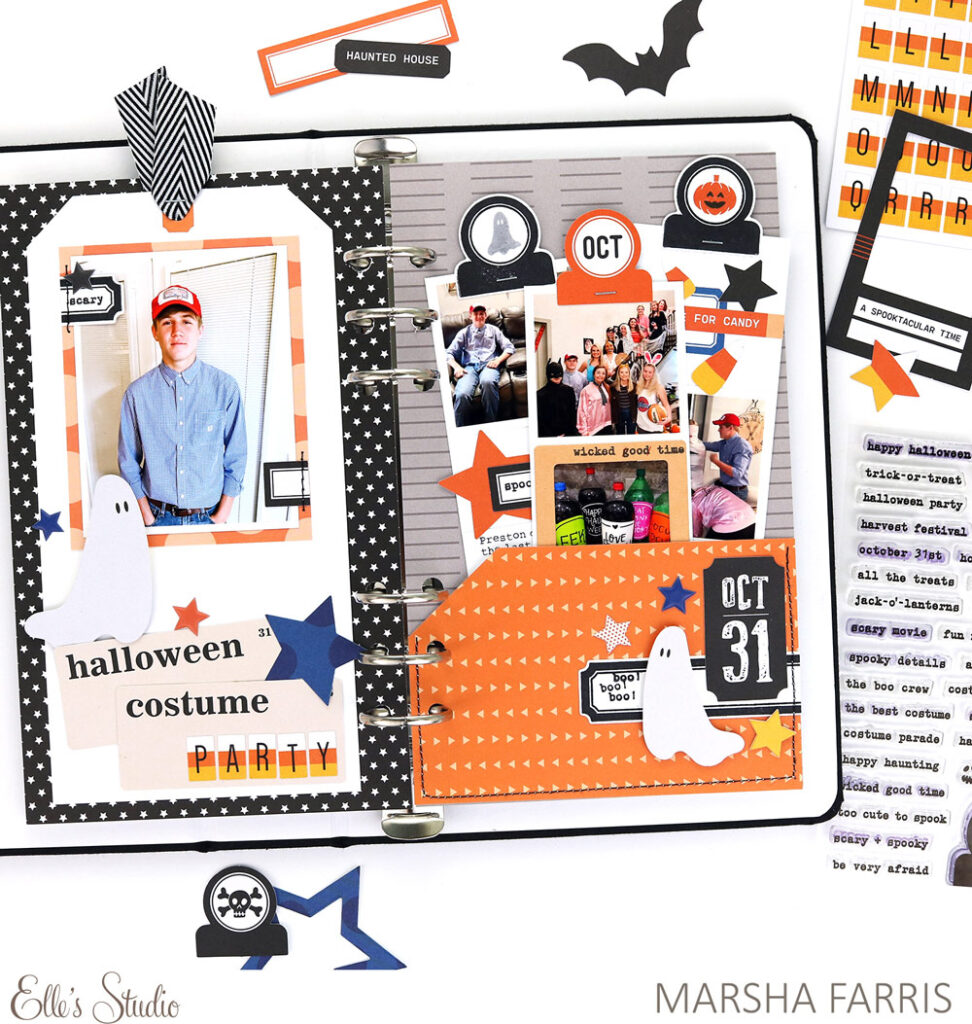
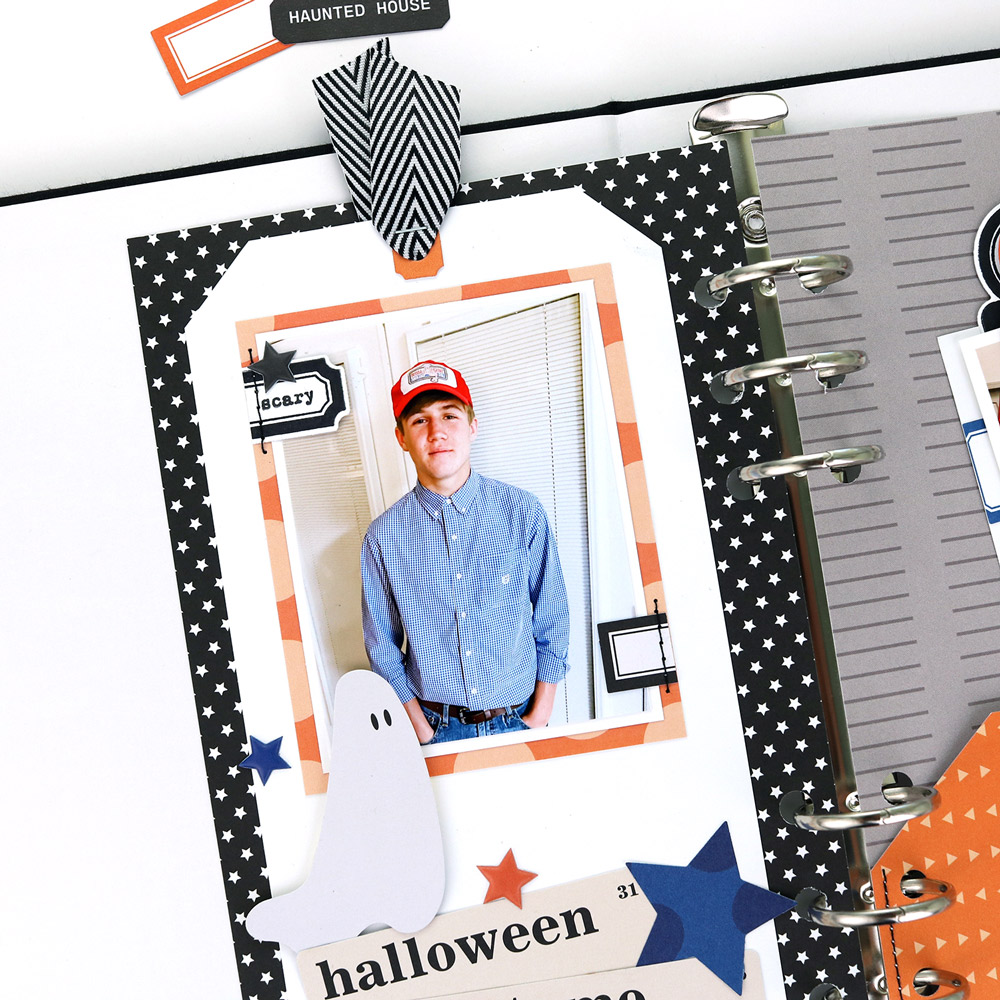
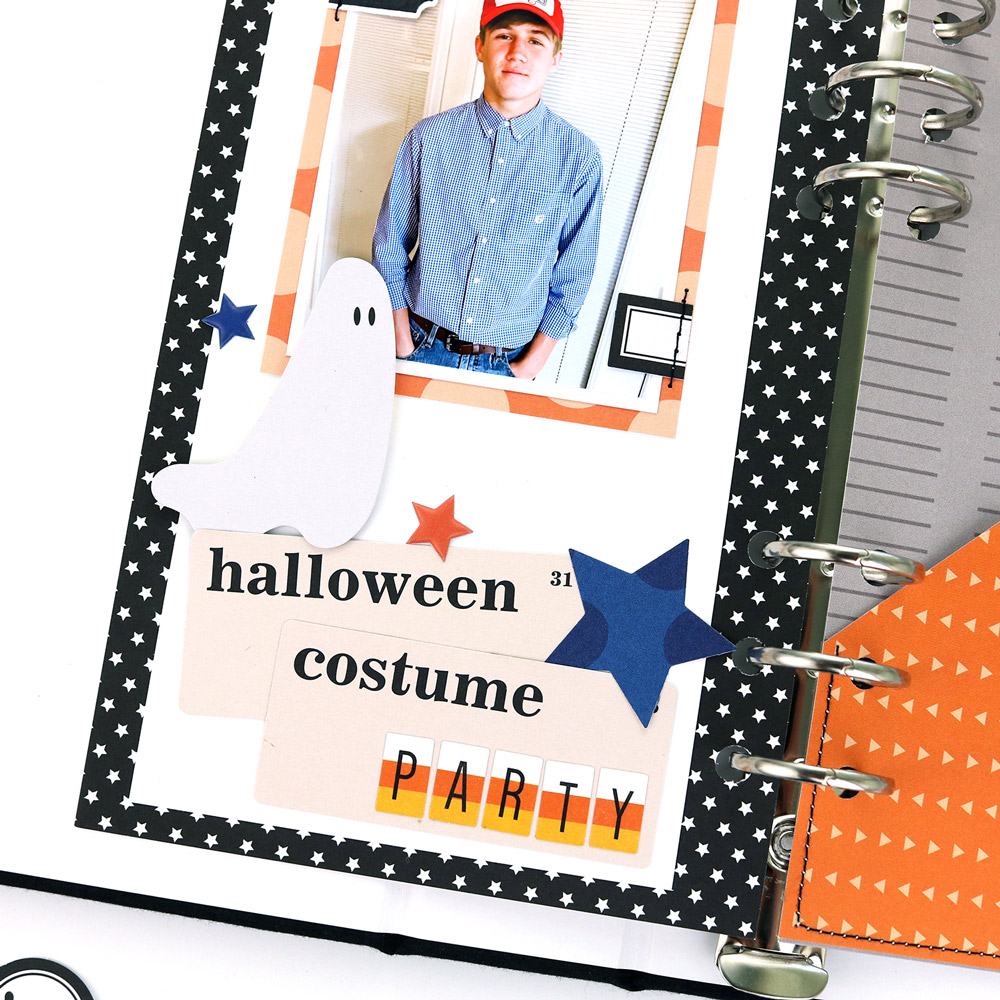
Hey, Elle’s Studio friends! It’s Marsha here today, and I’m excited to share a fun traveler’s notebook spread I created for my 2021 October Daily album! I used the September 2022 kit and add-ons to make this Halloween layout documenting a costume party my oldest son attended.
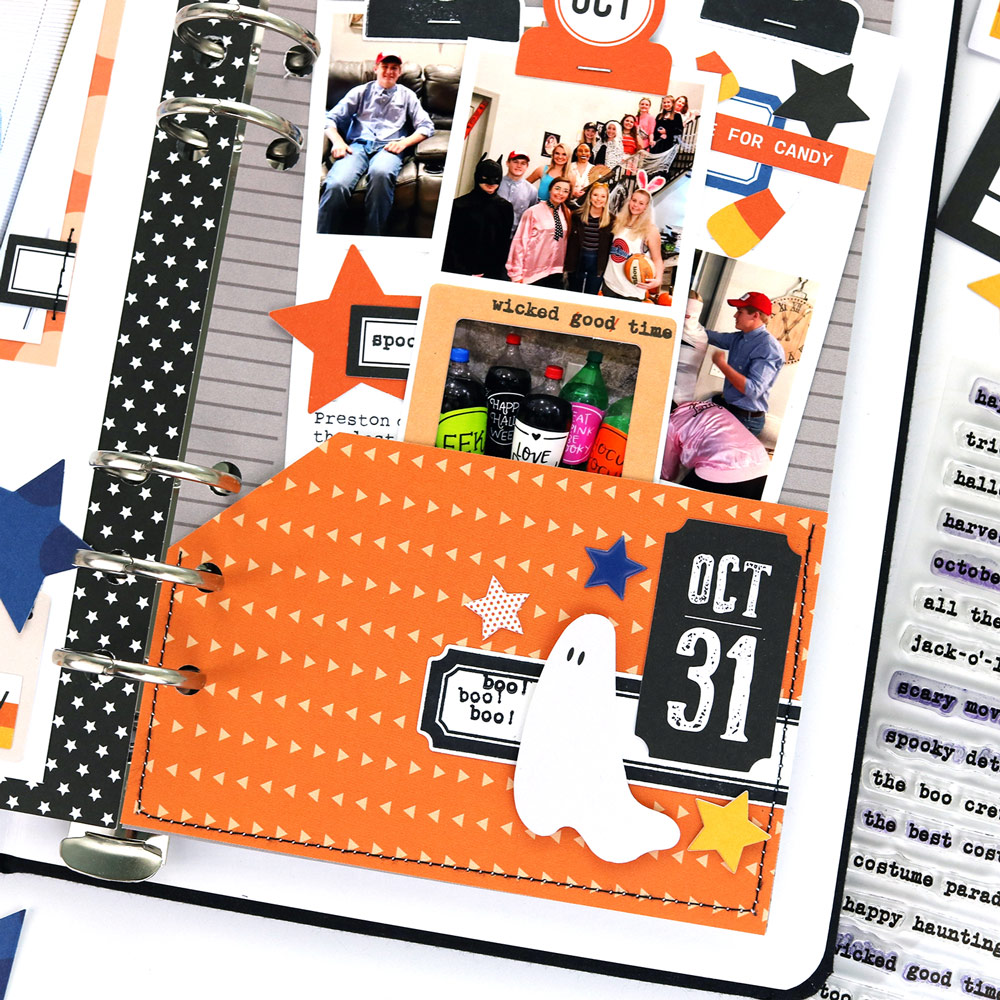
I began the layout by trimming a patterned paper from the Thankful Paper Stack to use as a background for the left page of the spread. I cut a piece of white cardstock into a tag shape and used the Nesting Tags Metal Die and a patterned paper from the Thankful Paper Stack to make a reinforcer for the top. Next, I trimmed a pocket tag from the September Kit and included it as a layer behind my photo. Then, I used the Thin Labels Stamp and coordinating Metal Die to create a label to embellish the photo. I stamped onto the label with the Halloween Tabs Stamp and added machine stitching with black thread to provide additional interest.
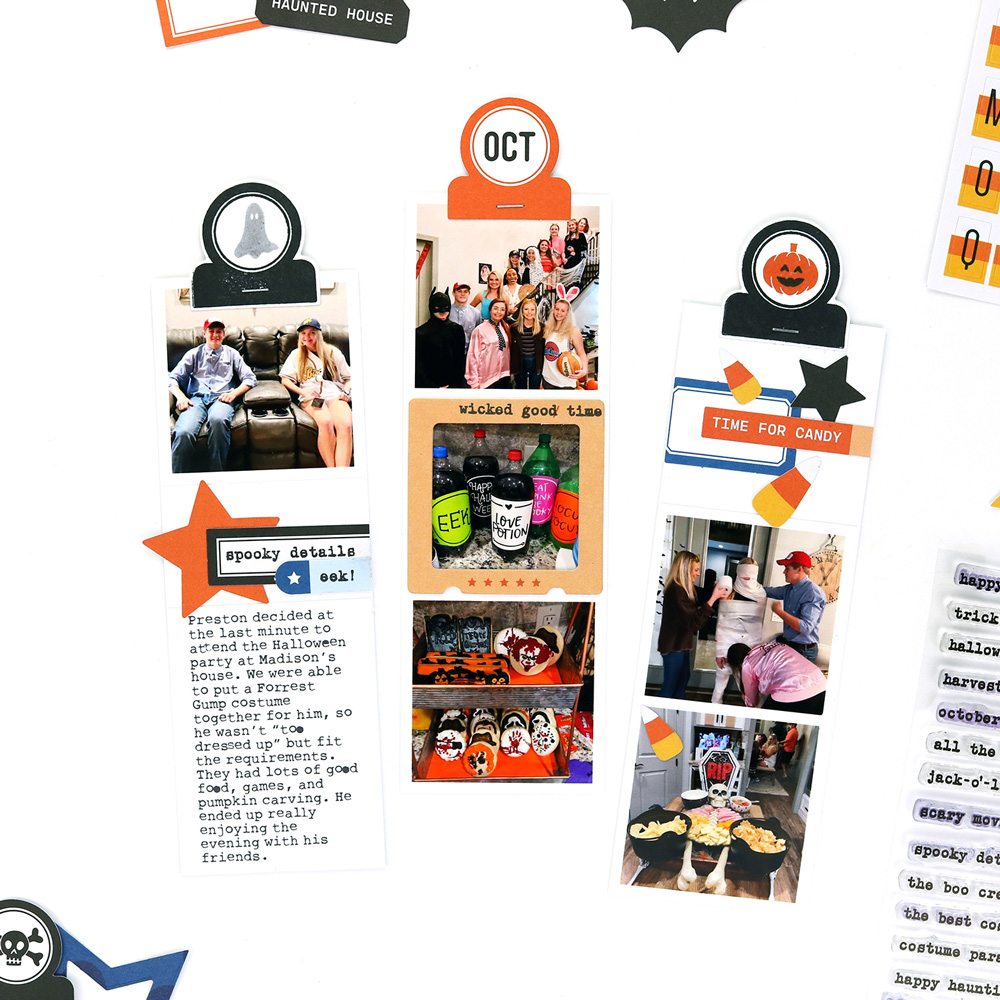
I had so many great pictures I wanted to include from the party, so I chose to create photo strips. This also allowed room for journaling and additional embellishments. I printed my photos in strips and embellished them with die cuts from the September Kit, Halloween Die Cuts, and Autumn Chipboard Stickers. I also stamped words and phrases with the Halloween Tabs Stamp and black ink. To complete the photo strips, I added a tab from the Halloween Die Cuts and two additional tabs created with the Halloween Tabs Stamp and coordinating Everyday Tabs Vol. 2 Metal Die. I am happy to have this memory documented in such a fun way!
Thank you so much for stopping by today! I hope I have given you some ideas for using the September kit and add-ons to create a spooktacular project! Please share your creations with us in our Elle’s Studio Facebook Group or on Instagram using the hashtag #ellesstudio. Happy creating!
Comments Off on Spooktacular Halloween Memories with Marsha Farris | Share This
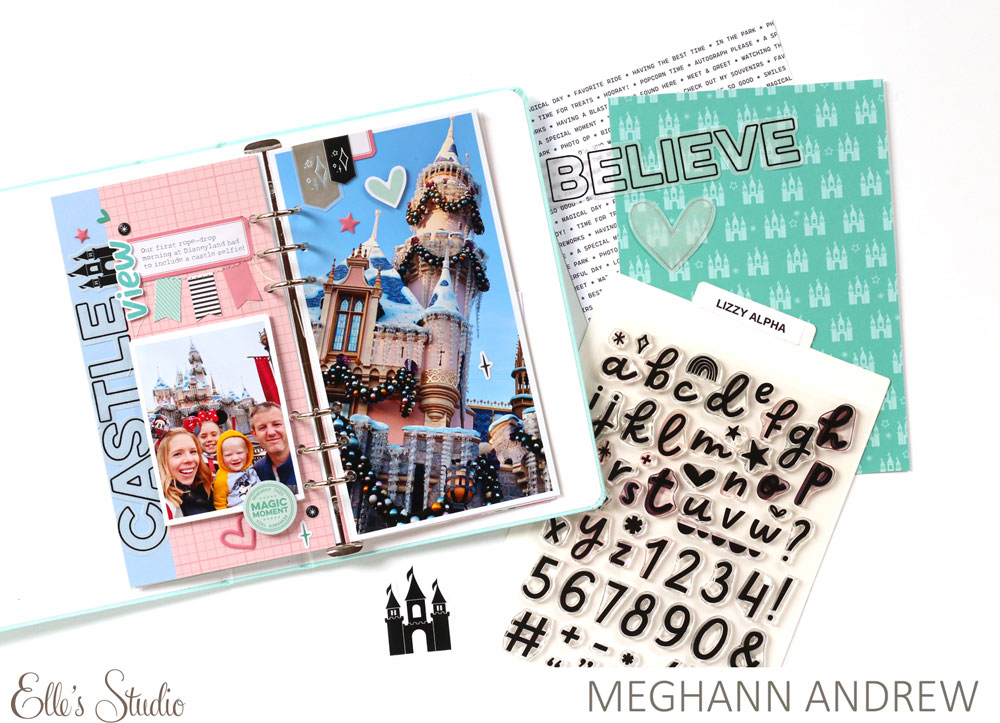
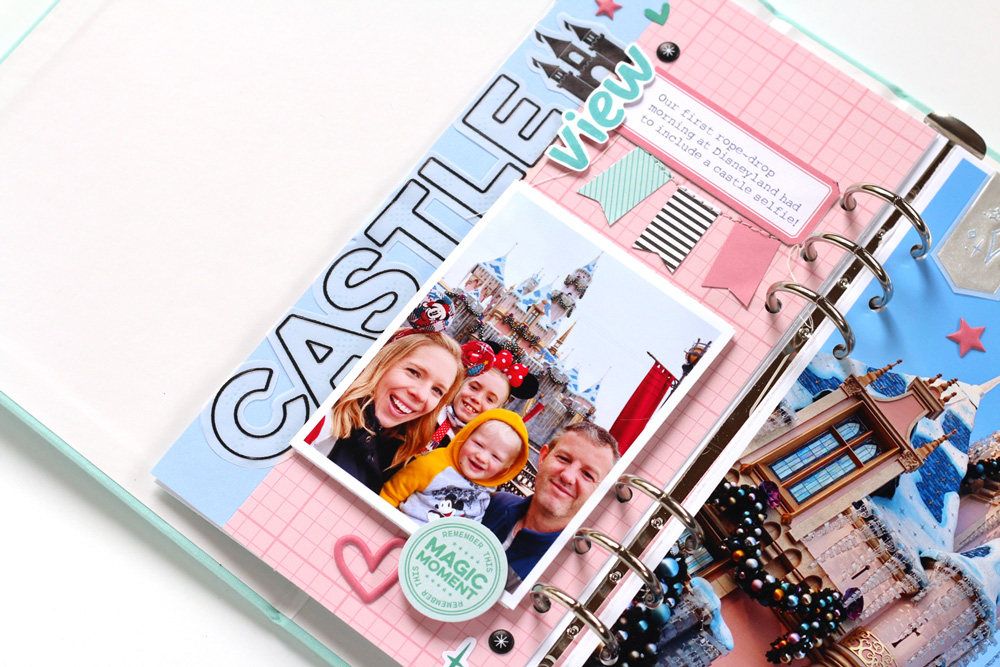
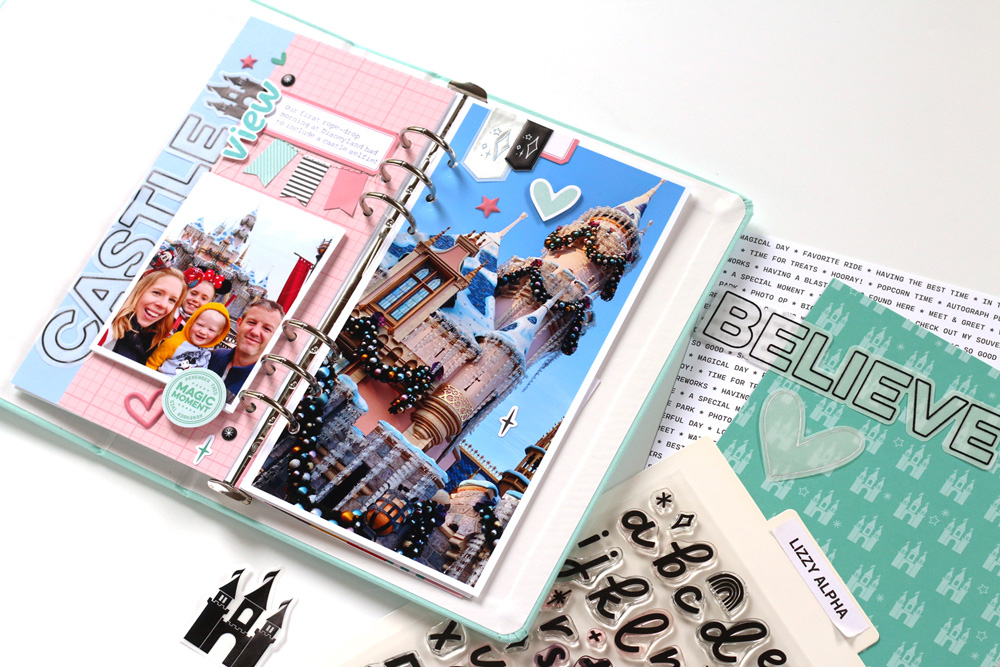
Hello there, Elle’s Studio friends! It’s Meghann Andrew and I’m excited to be here with you! I’m still plugging away at my Disneyland 2021 traveler’s notebook, and using the Magical Memories collection to create it has been so much fun! Take a look at my latest spread:
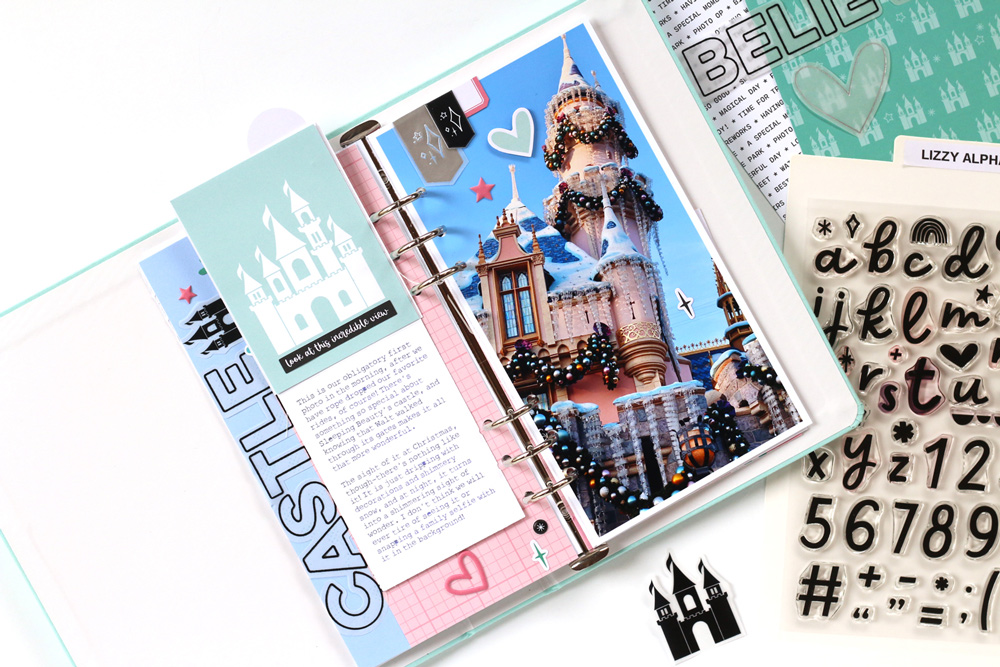
I had the prettiest photo of the castle, decorated for the holidays, that I wanted to add in a big way to this page, and I wanted to offset that with a photo of our family on the opposite side, and I wanted to pull out some of those pretty pastels from the castle facade, and the Magical Memories Paper Stack and blue cardstock from the Cool Solids Paper Stack perfectly matched those castle hues.
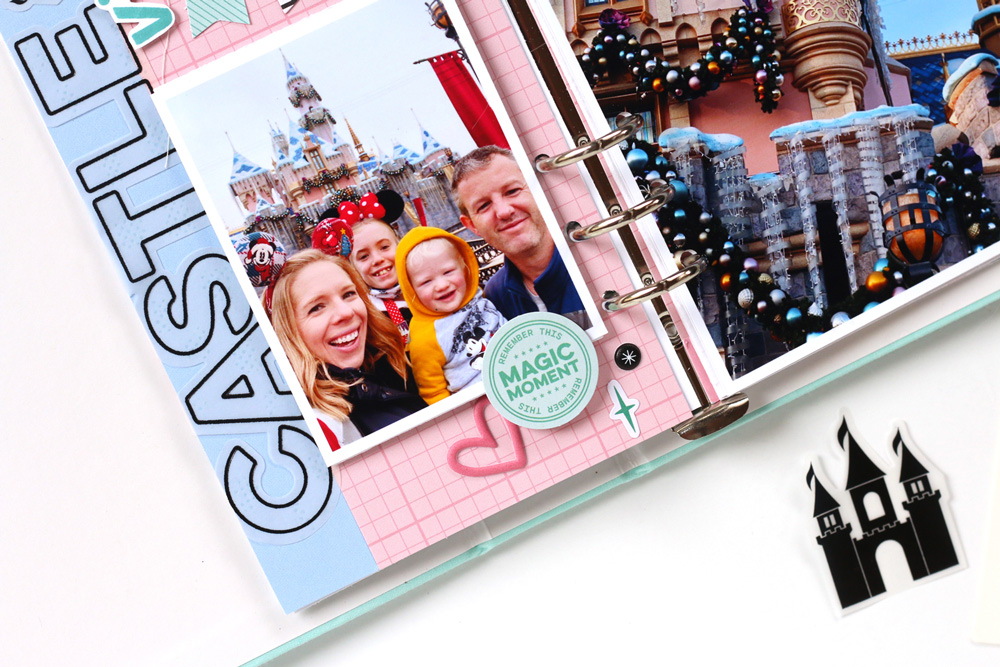
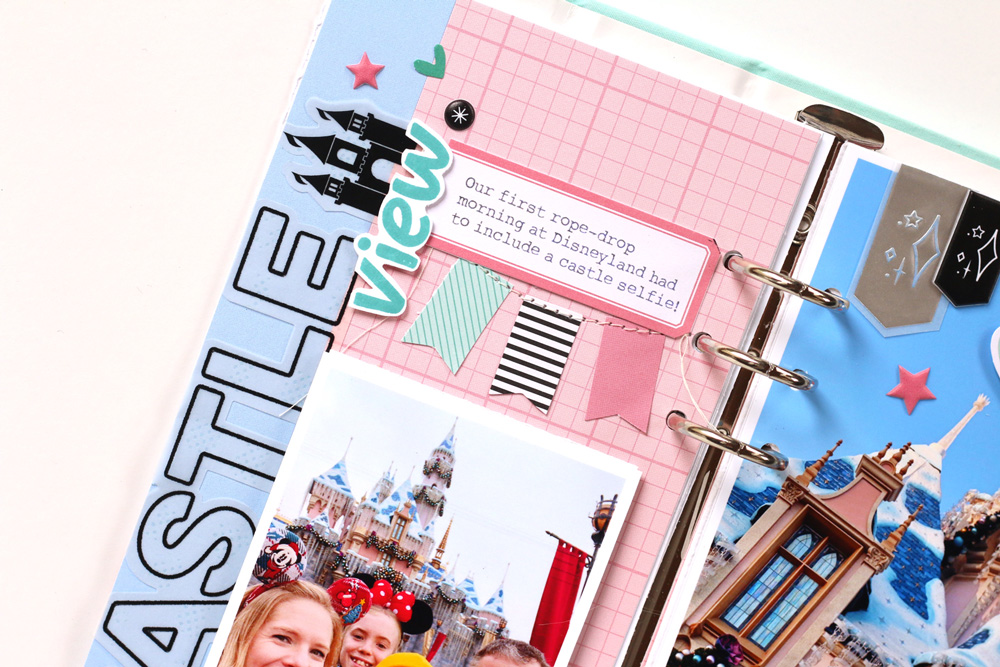
After my paper was in place, I got to work on my title, starting with the “castle” word in the Title Builder Vol. 6 Vellum Die Cut Words. It fit perfectly on the blue strip running up the left side of my spread. I offset that bold font with a castle icon from the Magical Memories Vellum Die Cut Shapes, which added the perfect amount of contrast, and the word “view,” stamped using the Lizzy Alphabet Stamp.
Adding this family photo on the left didn’t allow for much journaling, so I thought a flip-up was in order! I grabbed my Pocket, Frame and Flip-Up Metal Die and created the perfect interactive flip-up to hold my journaling, and the “magic moment” die cut from the Magical Memories Die Cuts added the perfect tab at the bottom.
The right side of the spread was my focal point—that beautiful shot of the castle that I snapped at the golden hour only needed a few embellishments. A vellum banner, heart die cut, the off-cut of my pink label and a black Puffy Sticker banner and a Heart and Star Puffy Sticker added the perfect touch! Now that my favorite castle view is documented, I can move on to the next magical memory!
I hope I’ve given you some inspiration to record your own magical moments in the parks! Be sure to share what you create using the Magical Memories collection with us using the #EllesStudio hashtag on Instagram, or in our Facebook Group. Be sure to stop by my Instagram feed later today to see me create this spread in a new Reel! We’ll see ya real soon!
Comments Off on Magical Castle View Memories with Meghann Andrew | Share This
Have you been having fun creating with our September 2022 kit and add-ons? Maybe you have a little bit of creative time carved out this weekend to dedicate to your kit, and we think that these eight projects may inspire you, whether you’re documenting the everyday, or spooky moments!