Mixing Up Your Pockets with Kim Chaffin

Hello, friends! It’s Kim here, and I’m so happy to share some pocket page inspiration with you! I think I should mention that my relationship with pocket pages is complicated. I first tried it in 2009, and I documented my whole year that way. By the end of that year, I missed traditional scrapbook pages and I felt limited by pocket pages, so I switched back and didn’t touch another pocket page for a very long time. It didn’t occur to me until many years later that I didn’t have to choose. There are no rules in scrapbooking! I could do both traditional pages and pocket pages. It is even okay to mix it up within the same layout. Let’s take a look at my example today!
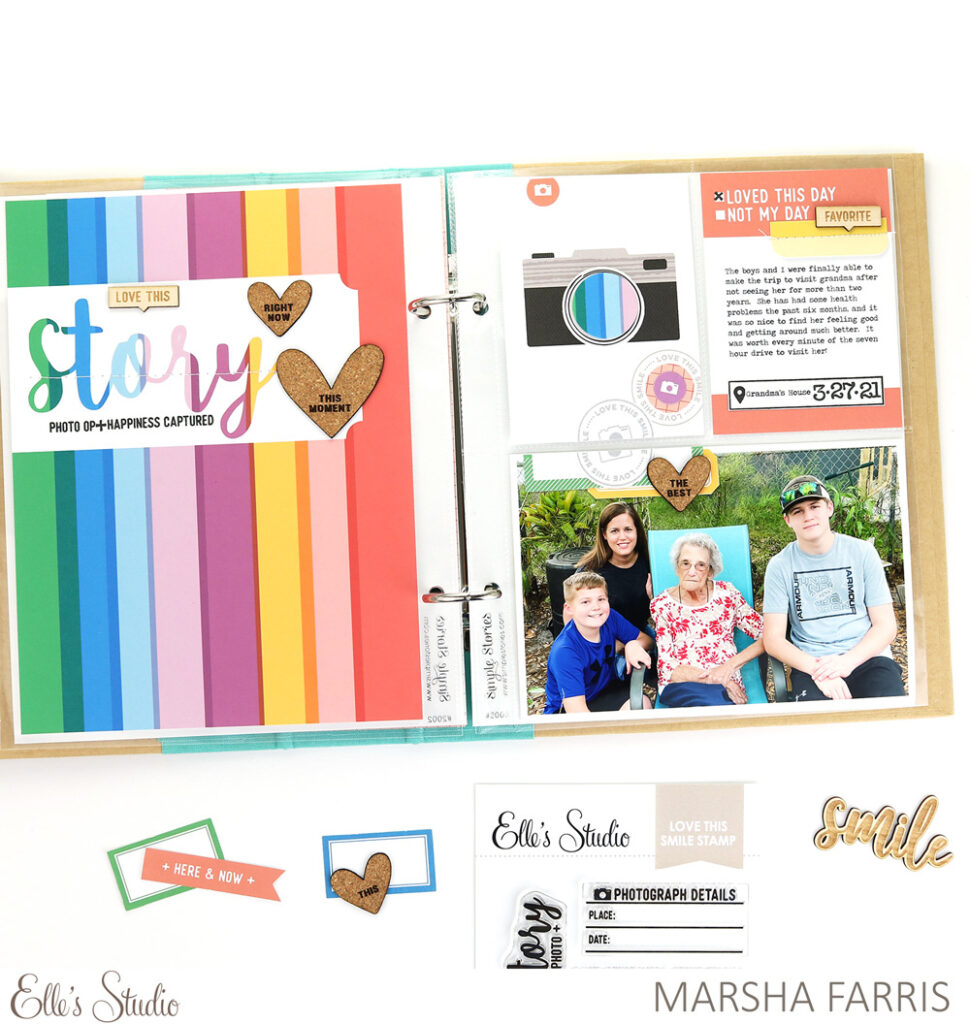
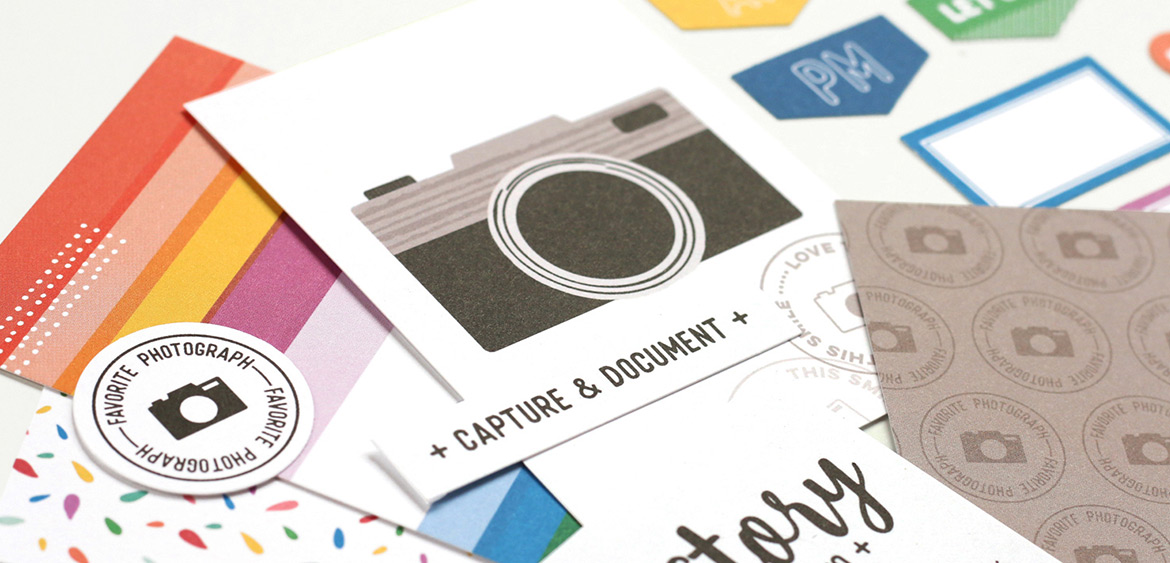
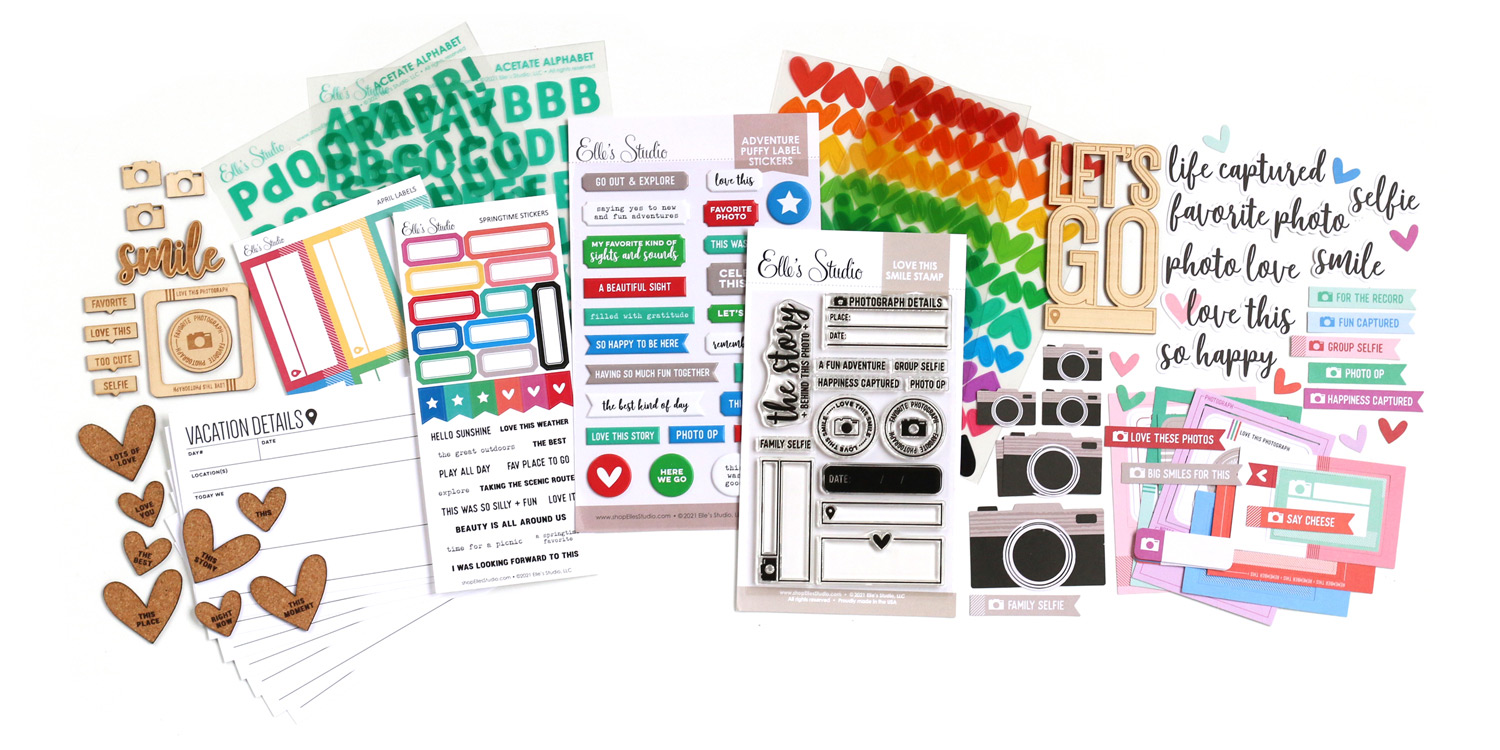
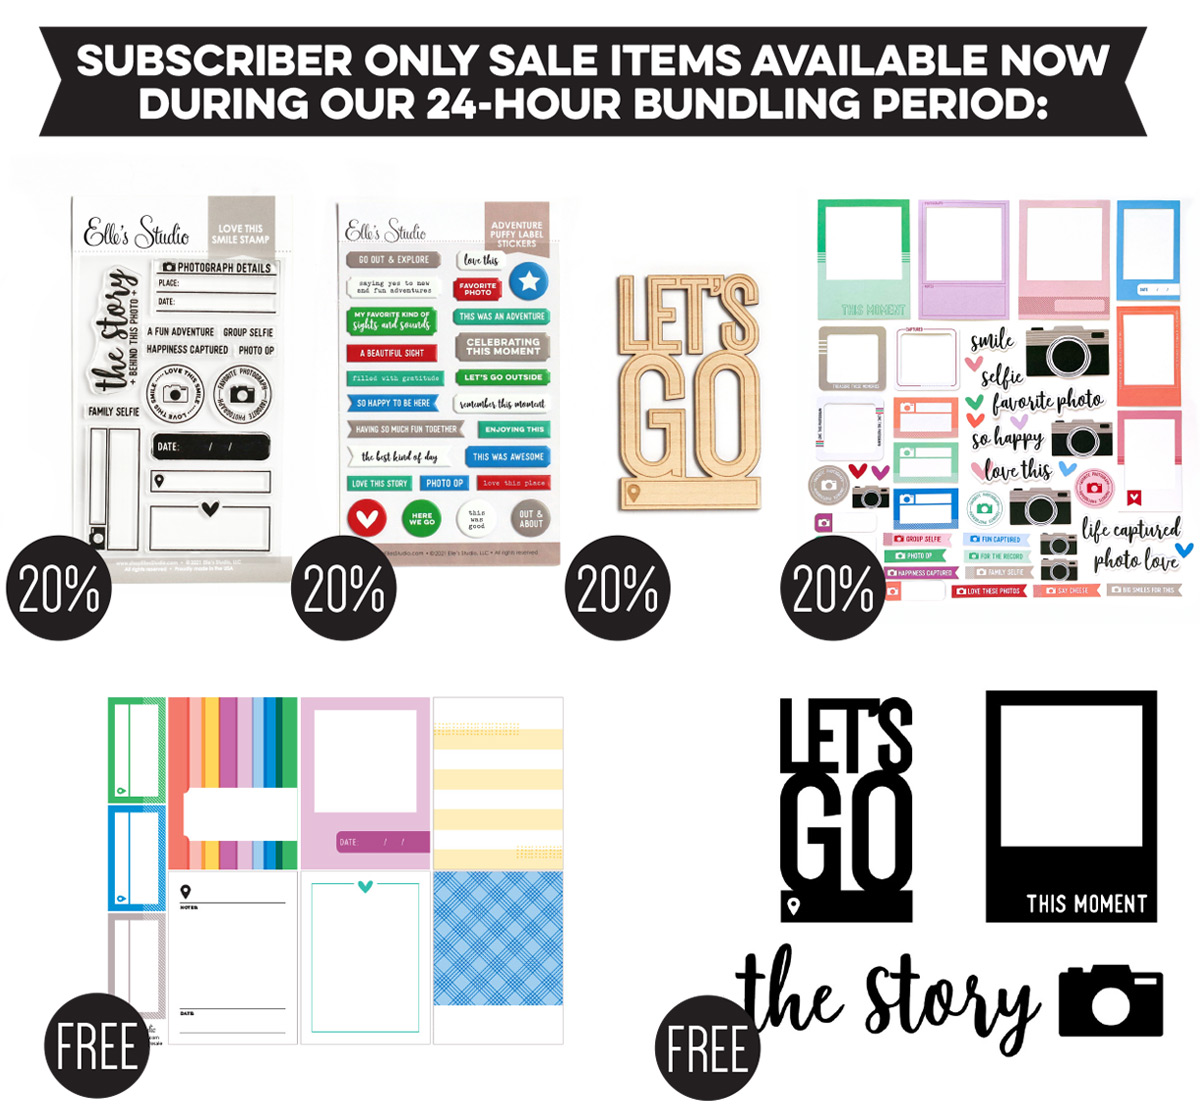
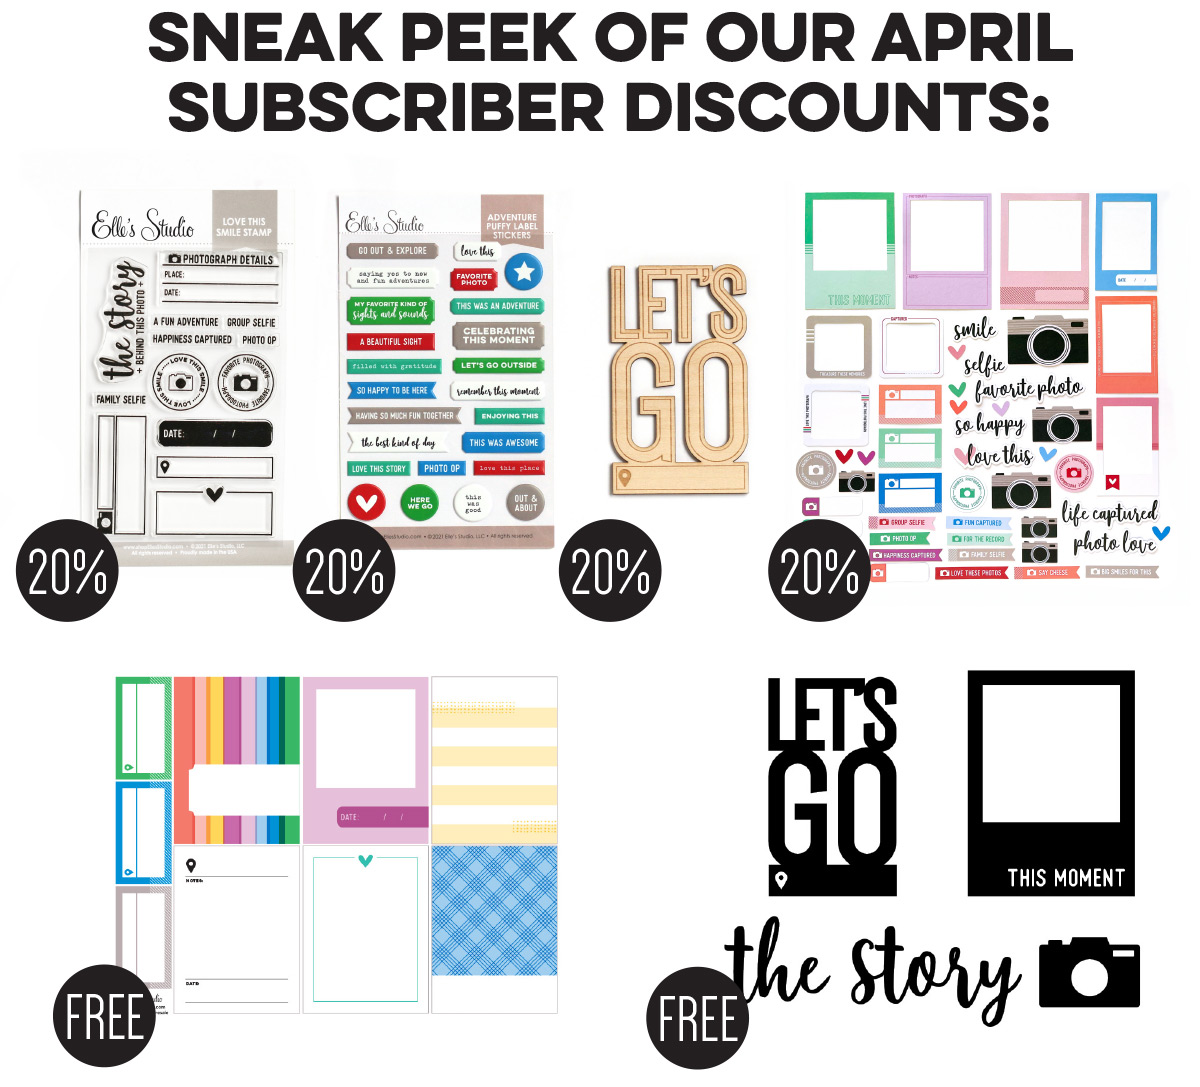
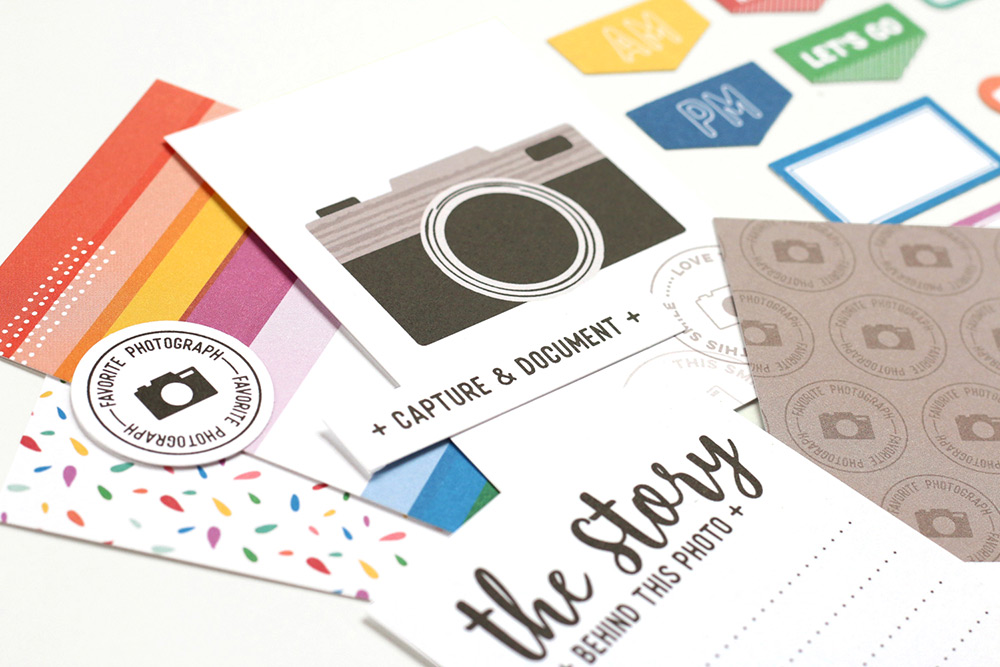
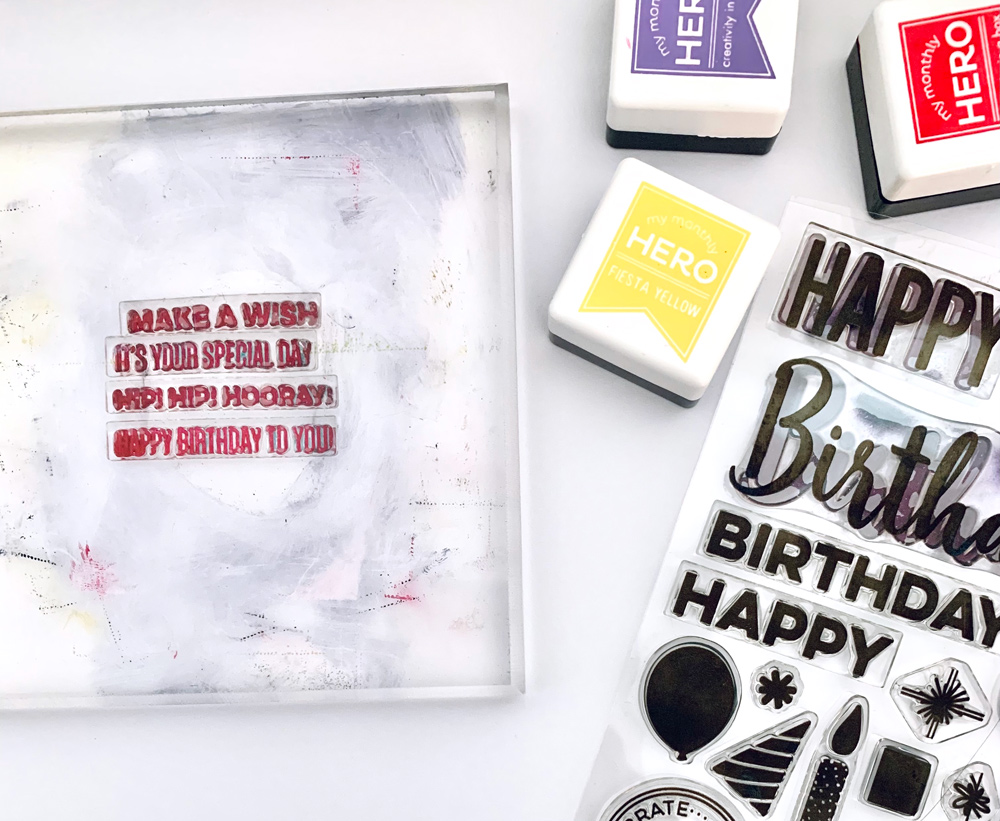

Supplies | April 2021 KitApril 2021 Print and Cut Labels, Cork Hearts

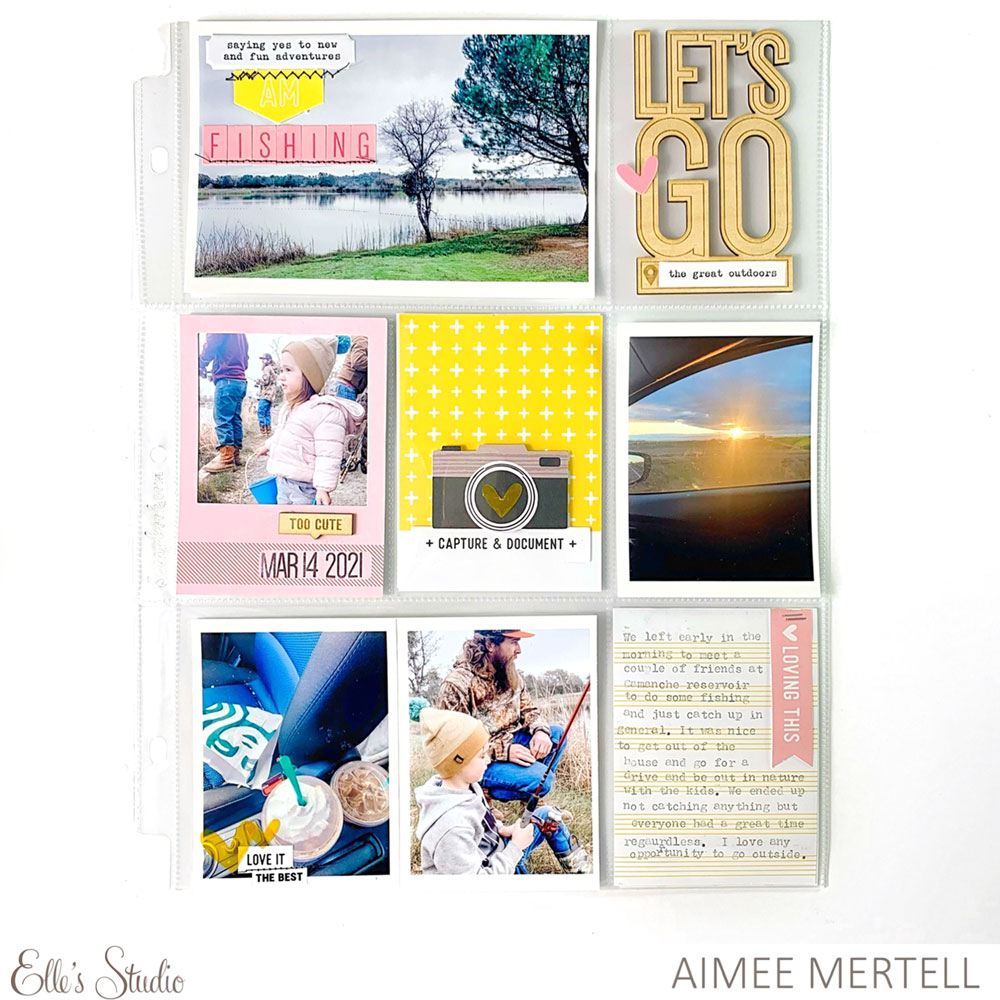
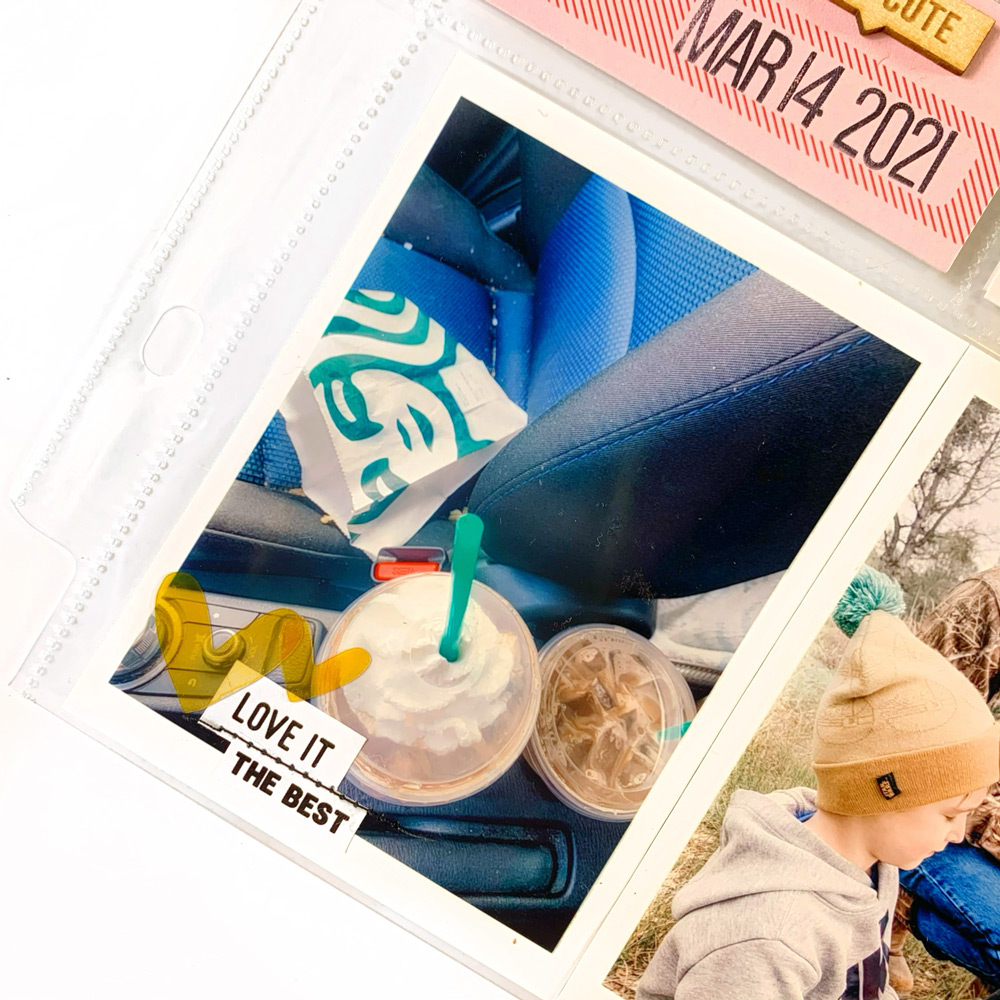
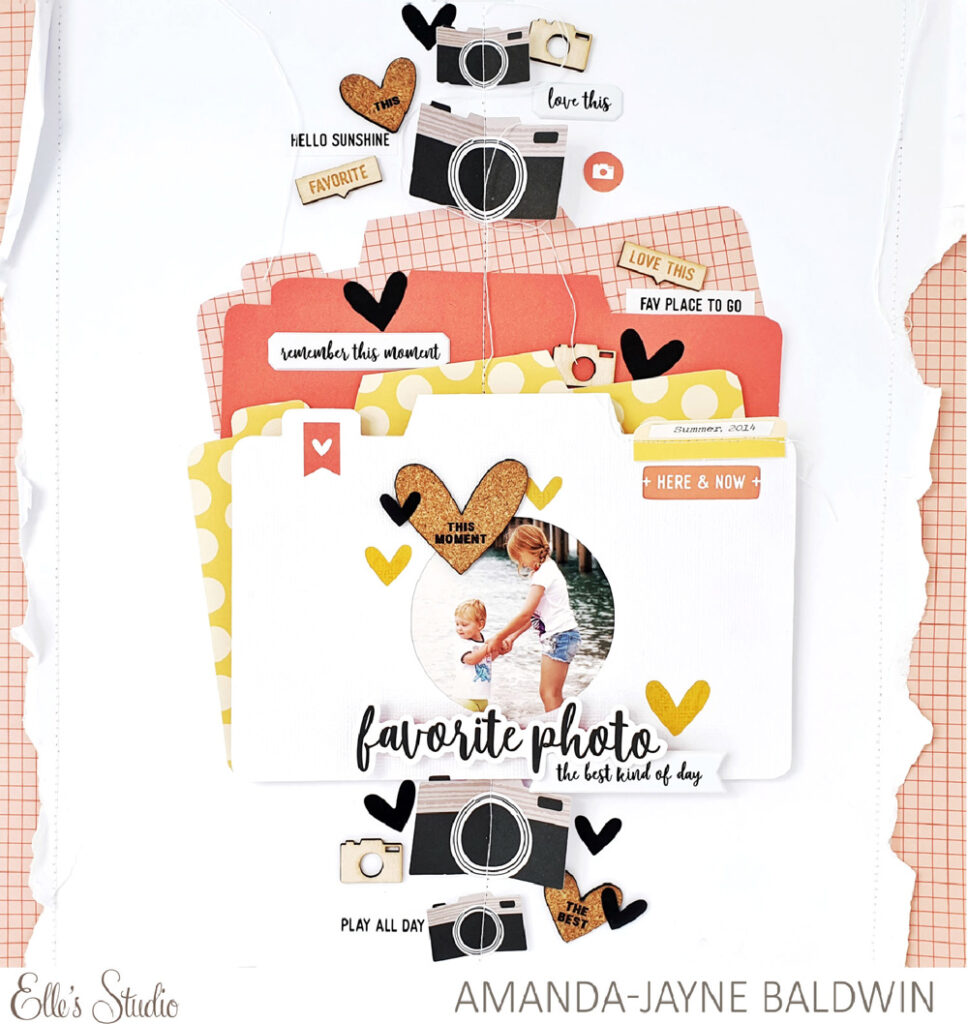
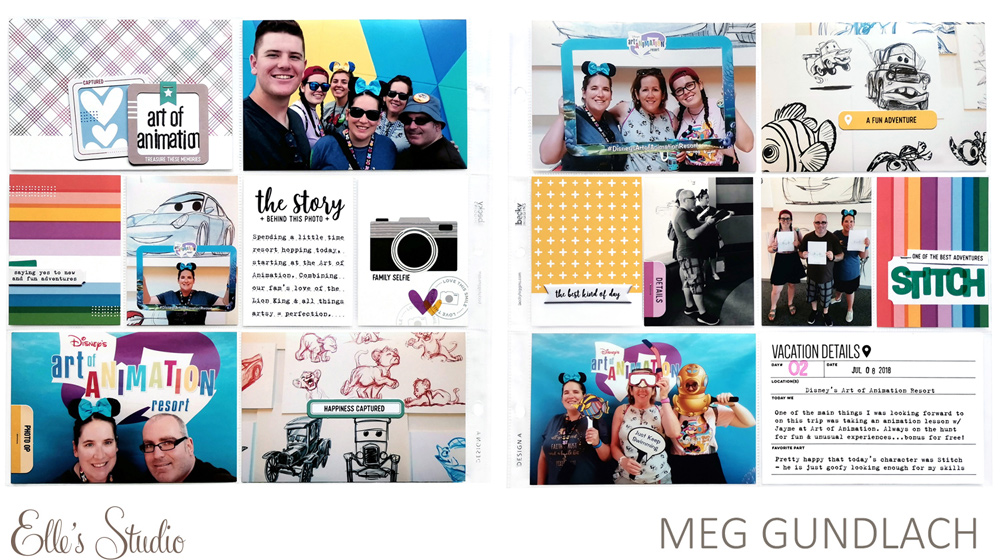
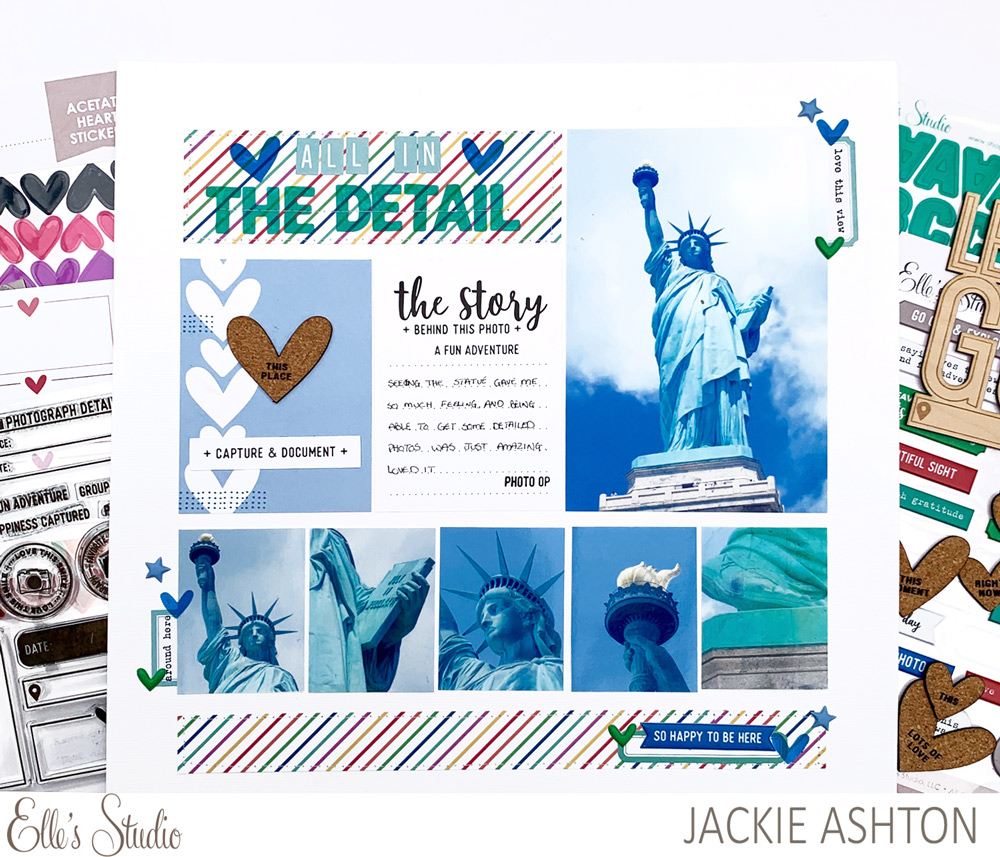
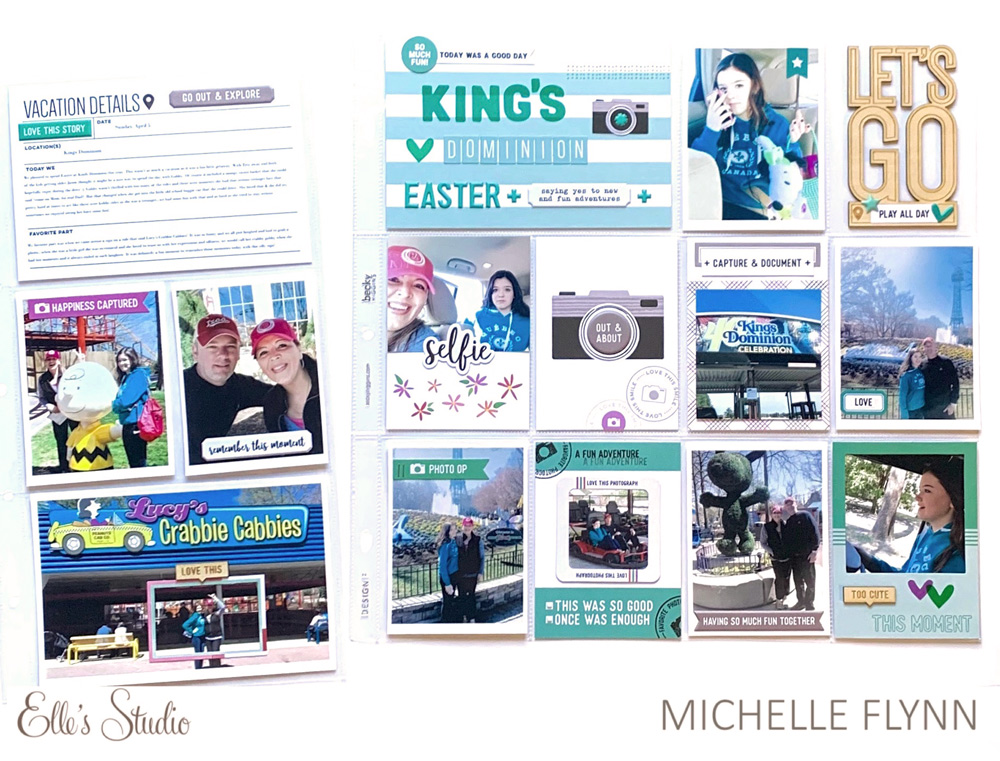
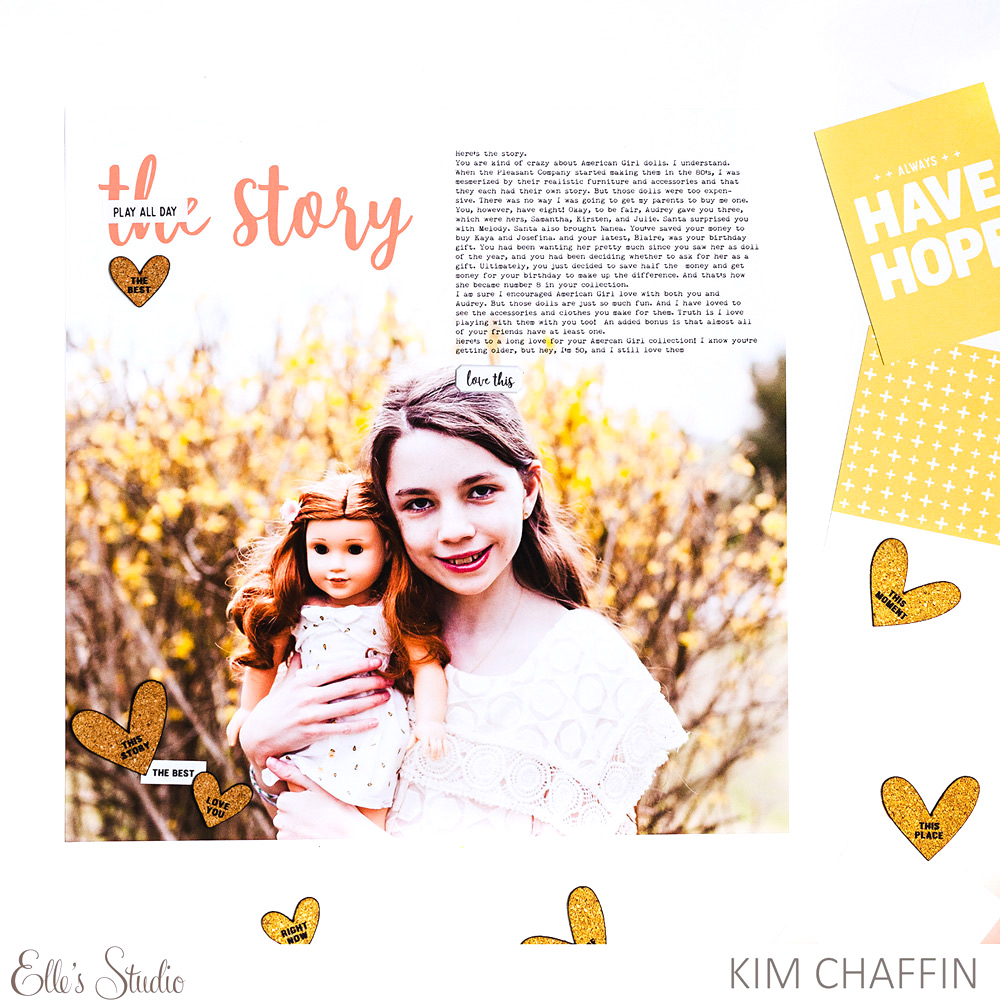
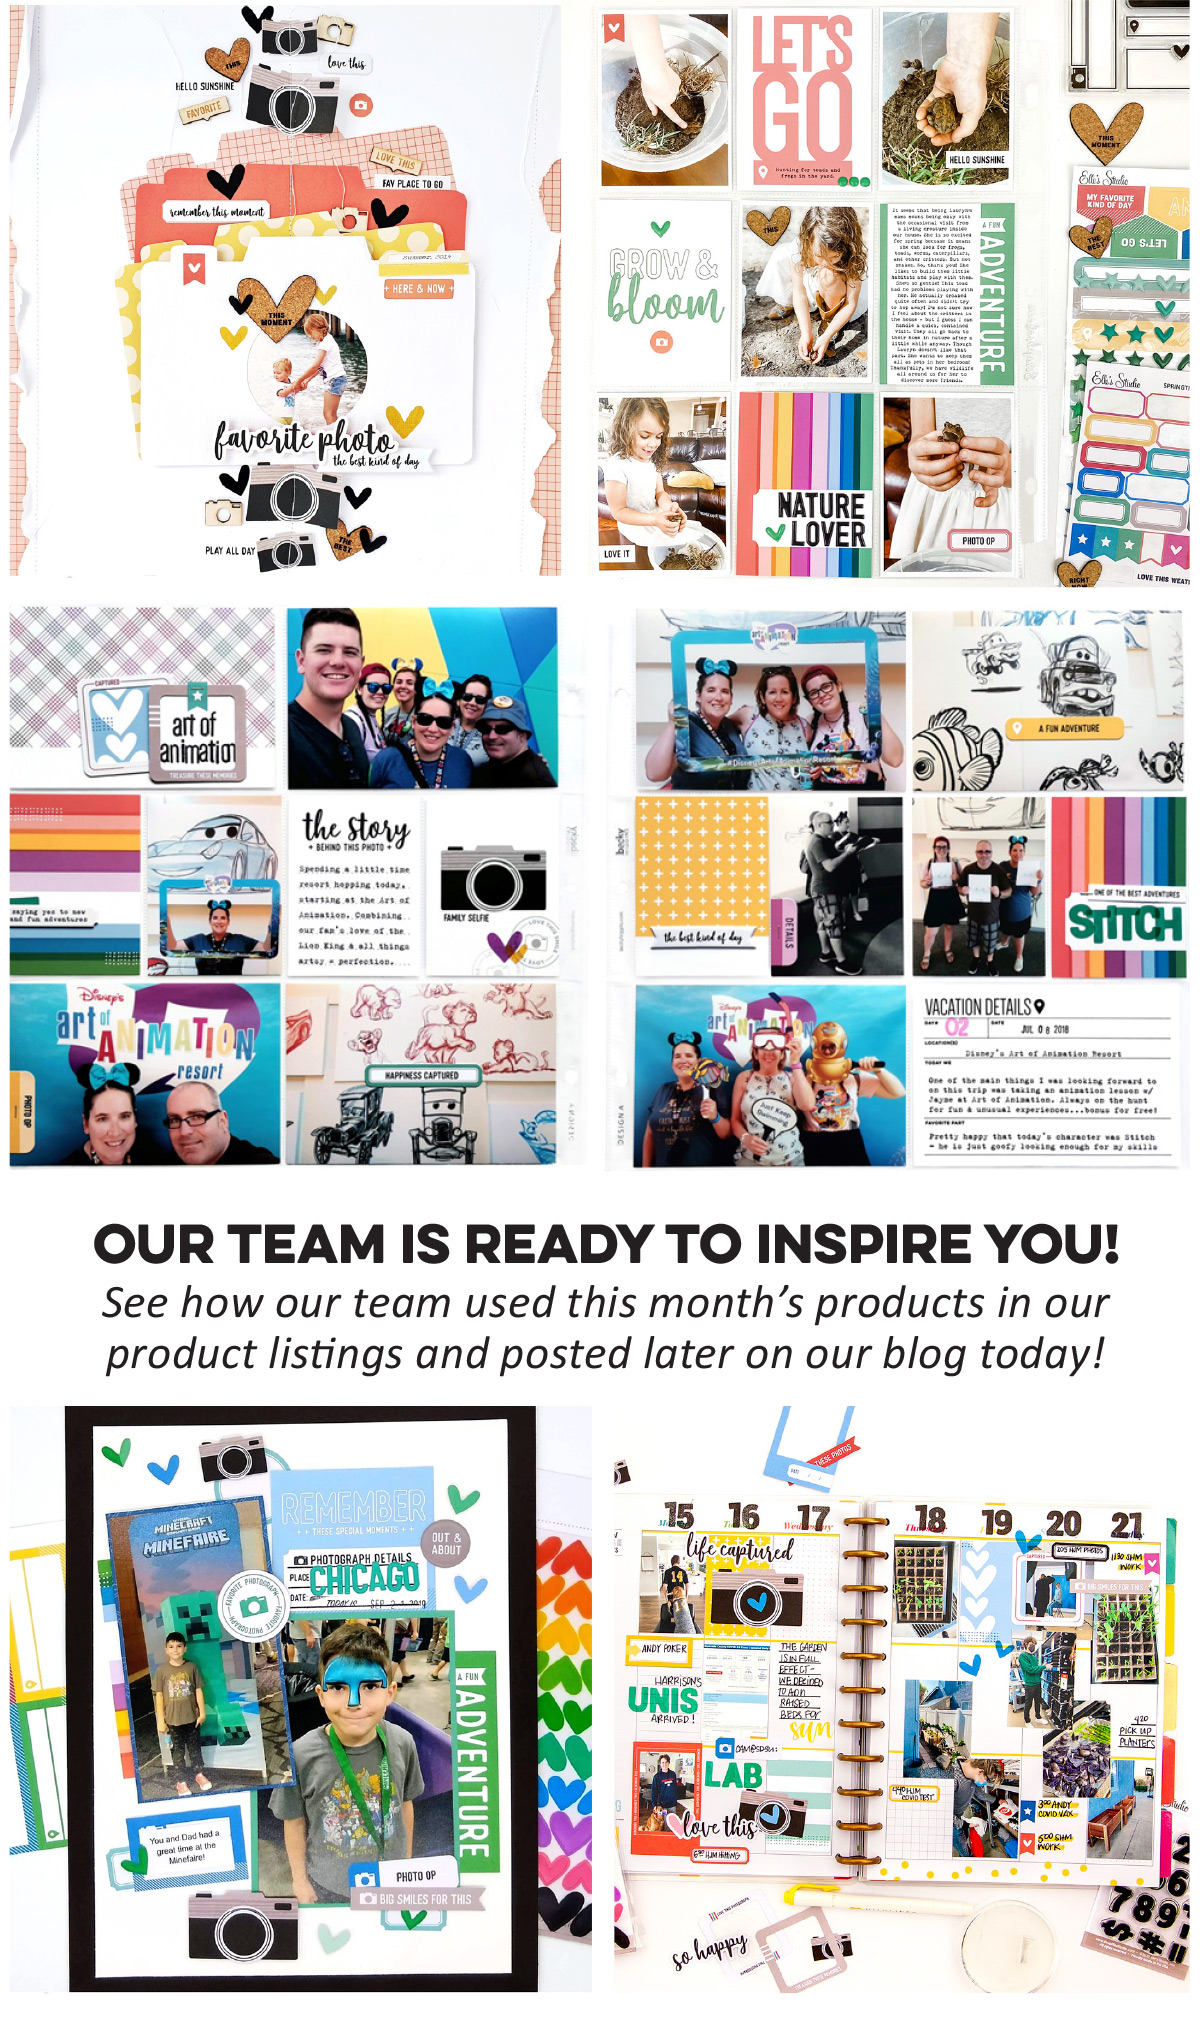
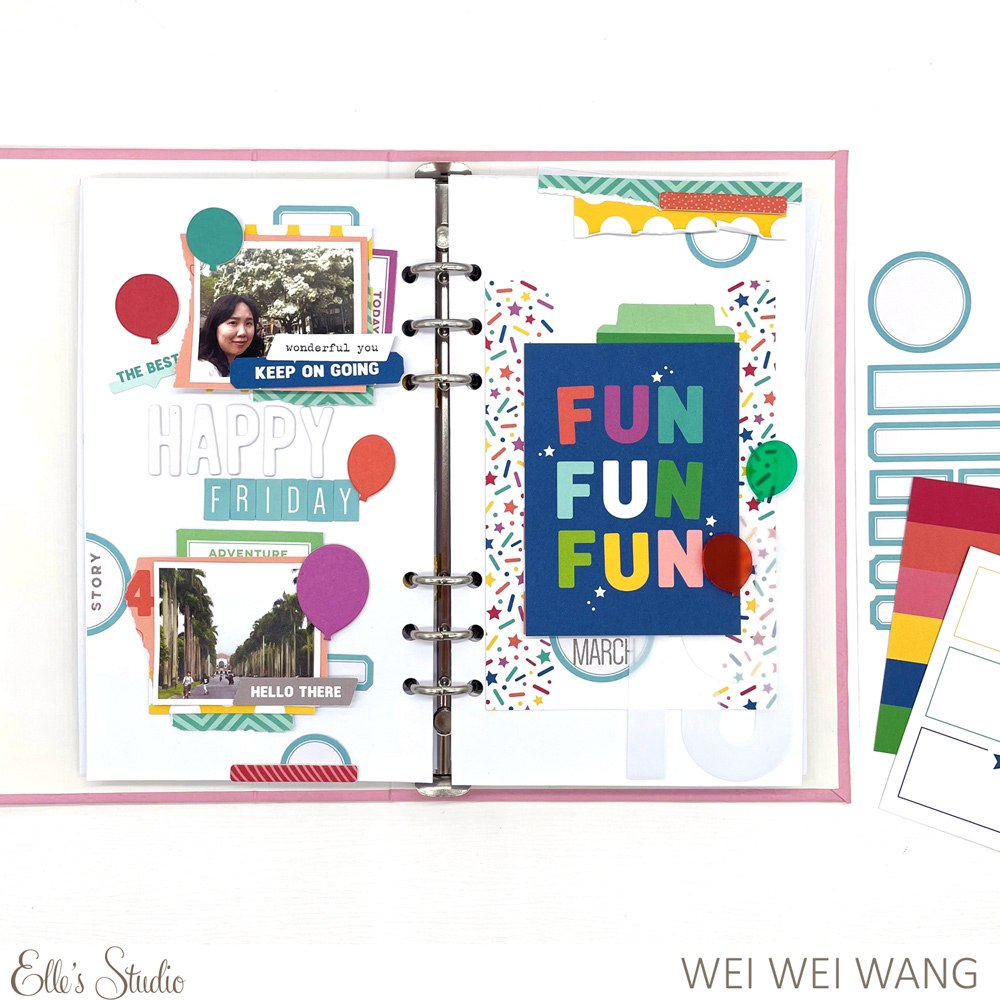
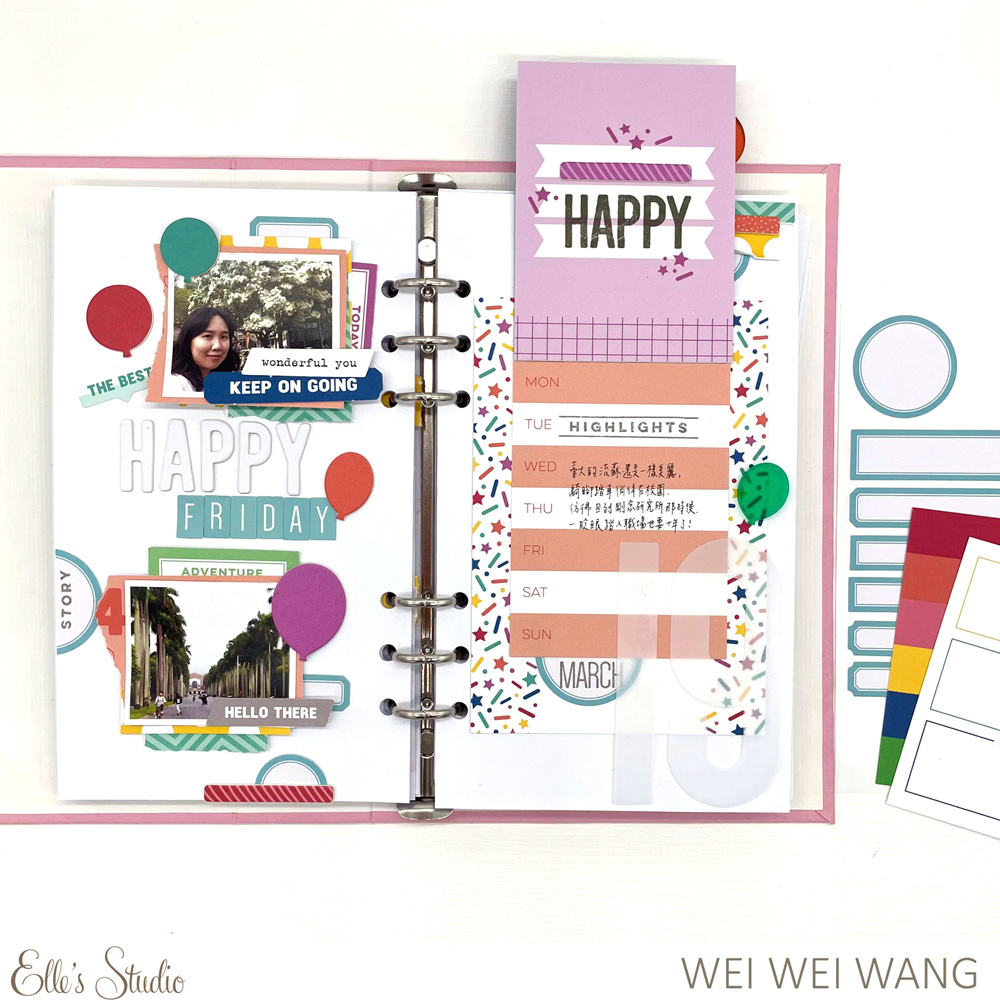
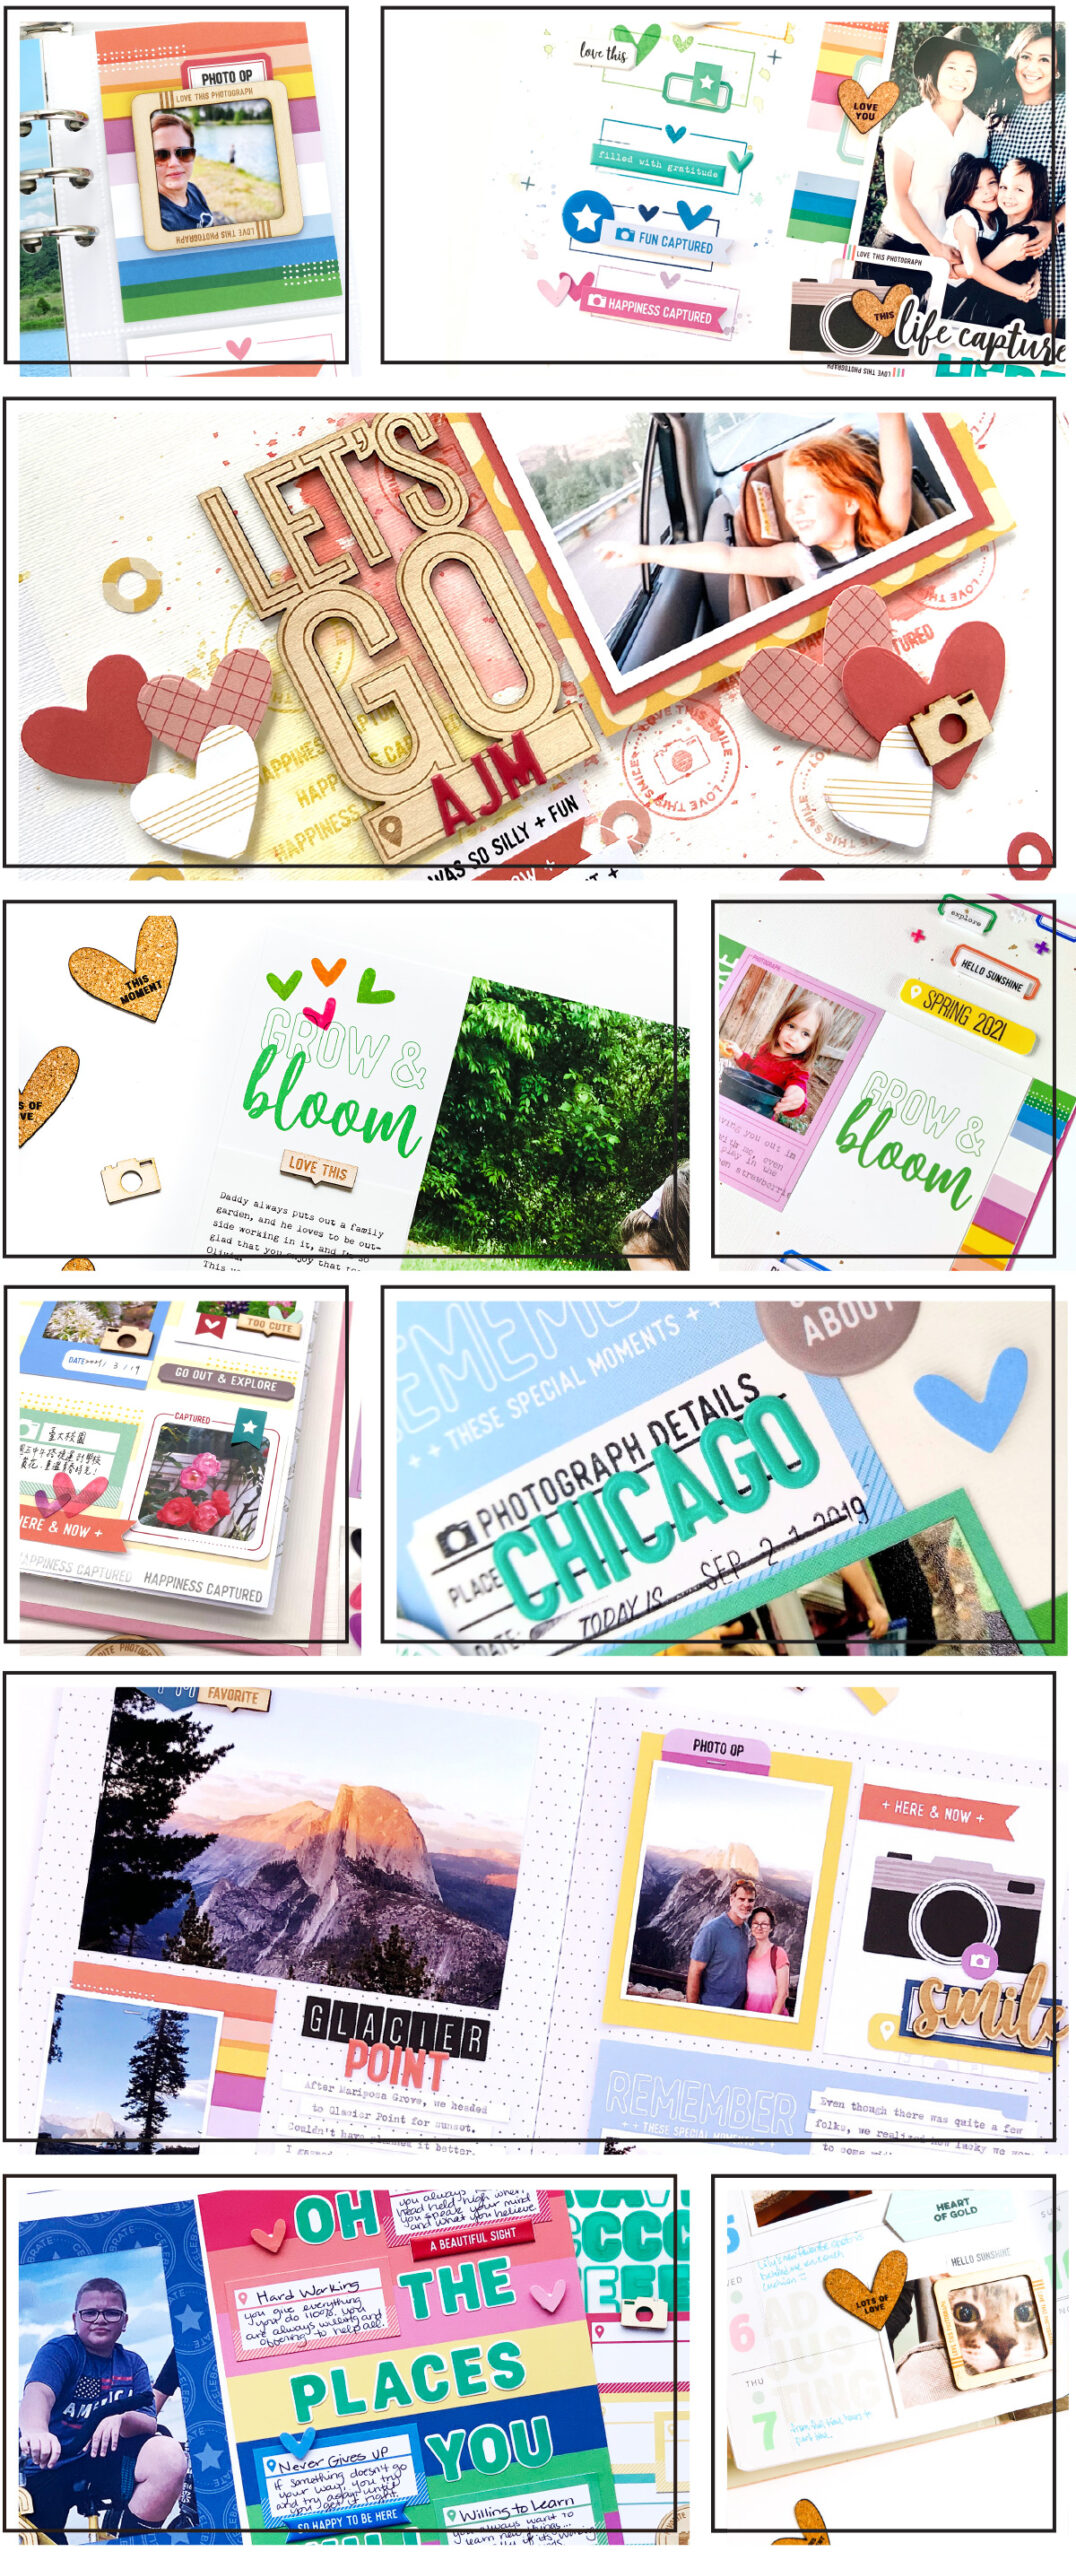
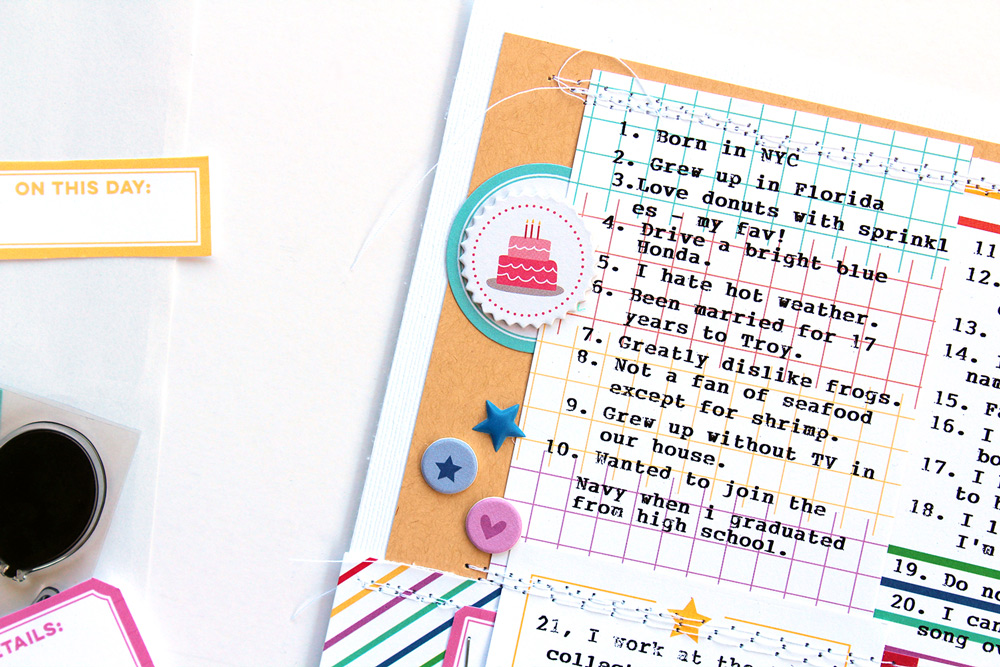
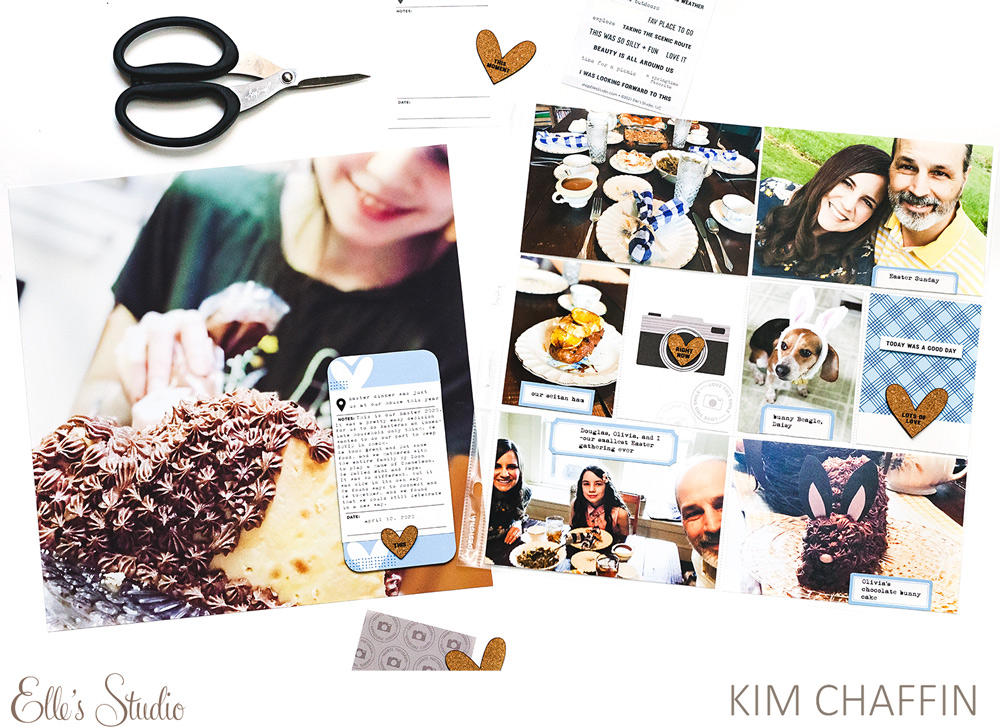
For this layout, I chose to pair a 12″ x 12″ pocket page with a 12″ x 12″ full-page photo. However, you can mix things up any way you like. You can mix up styles of pockets, traditional pages with pockets, even sizes! Don’t be afraid to have fun with it! I love the Elle’s Studio kits for pocket page layouts, because everything coordinates. You really can’t go wrong when choosing inserts and embellishments. For this layout, I chose pocket tags and labels in matching shades of blue, and I supplemented with neutral tags and embellishments. 

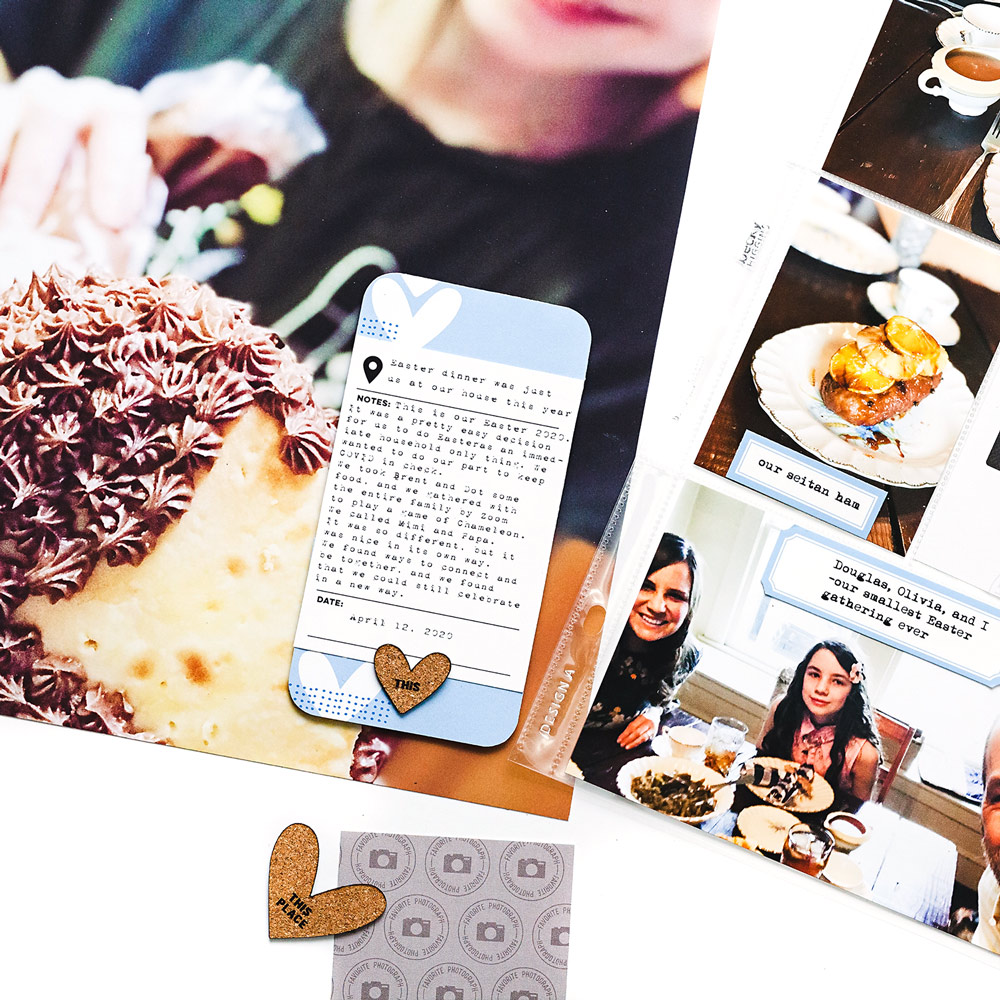
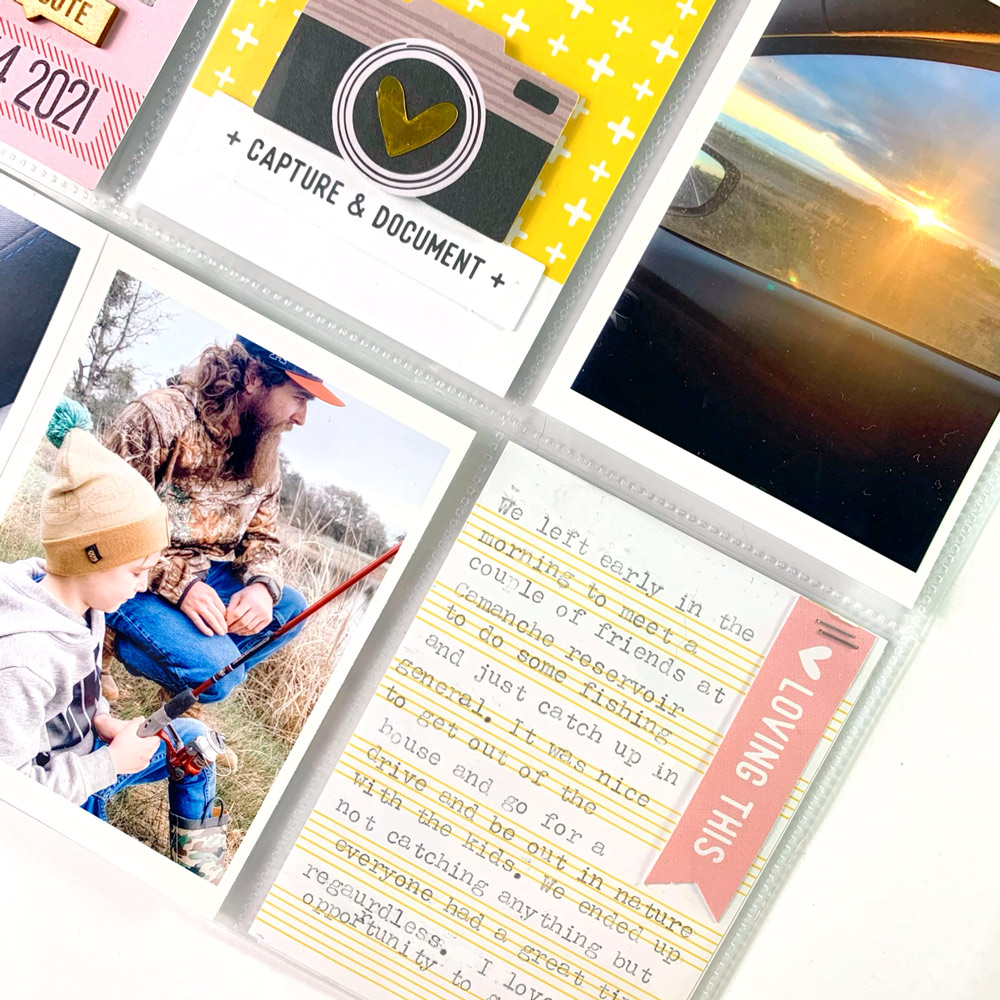
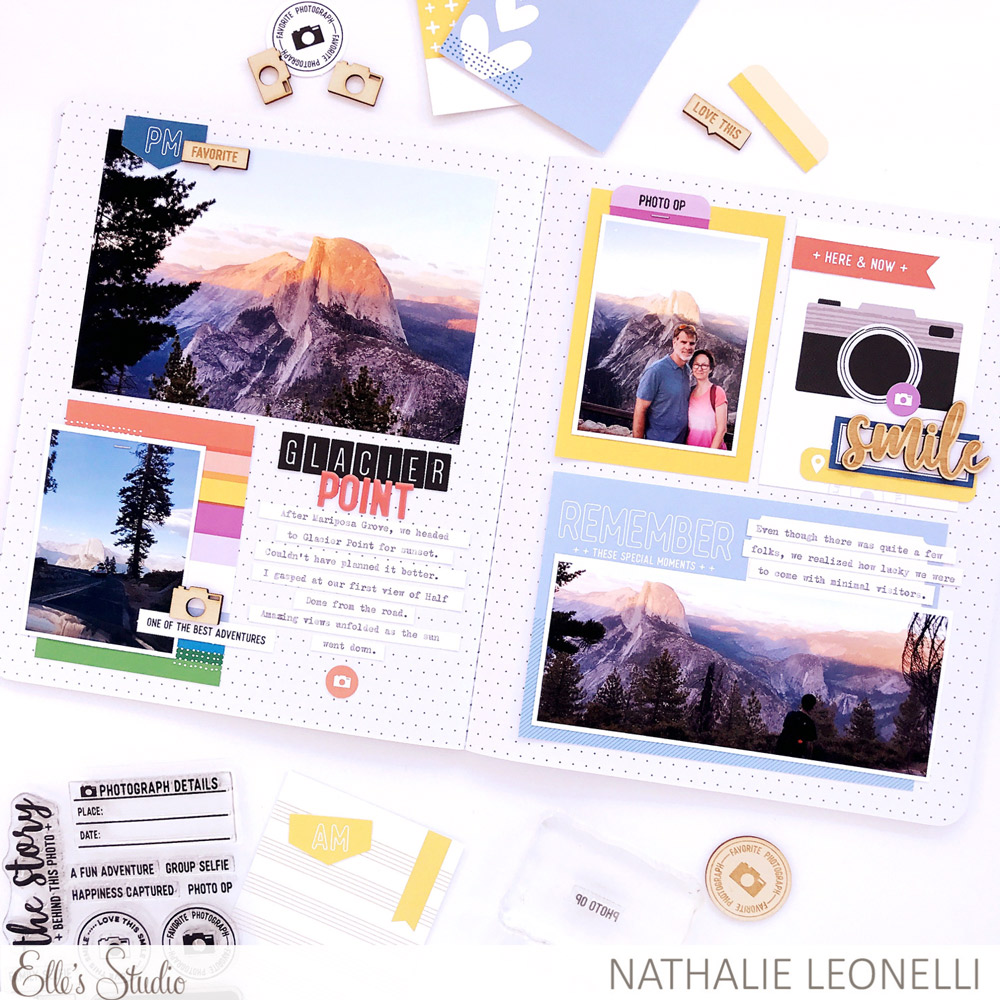
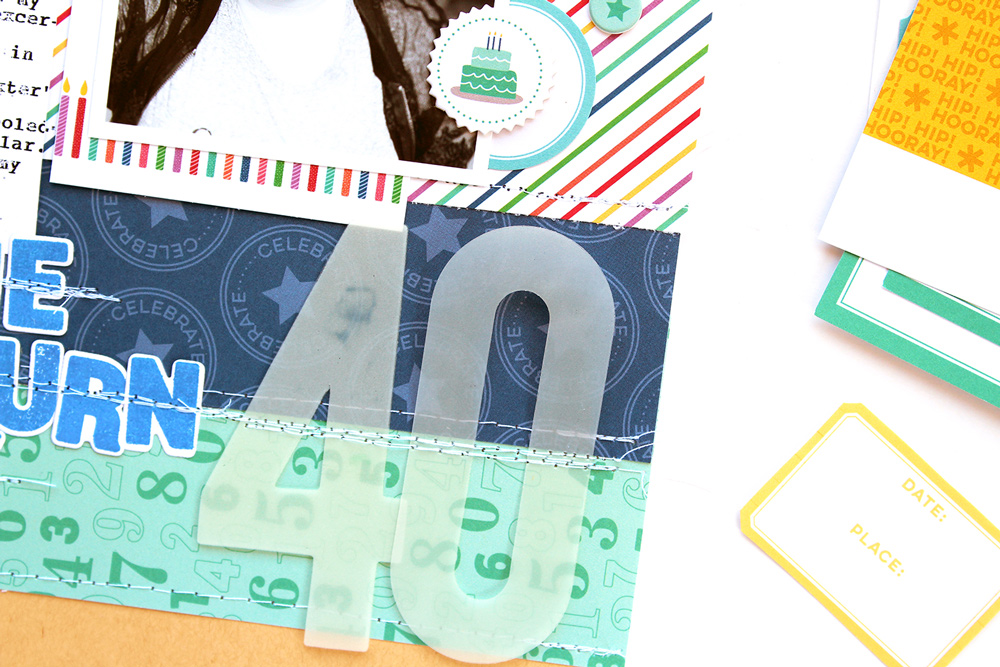
I created a journaling strip on the 12″ x 12″ photo using two pocket tags. This creates cohesiveness with the pocket page half of the layout because colors and themes coordinate. 

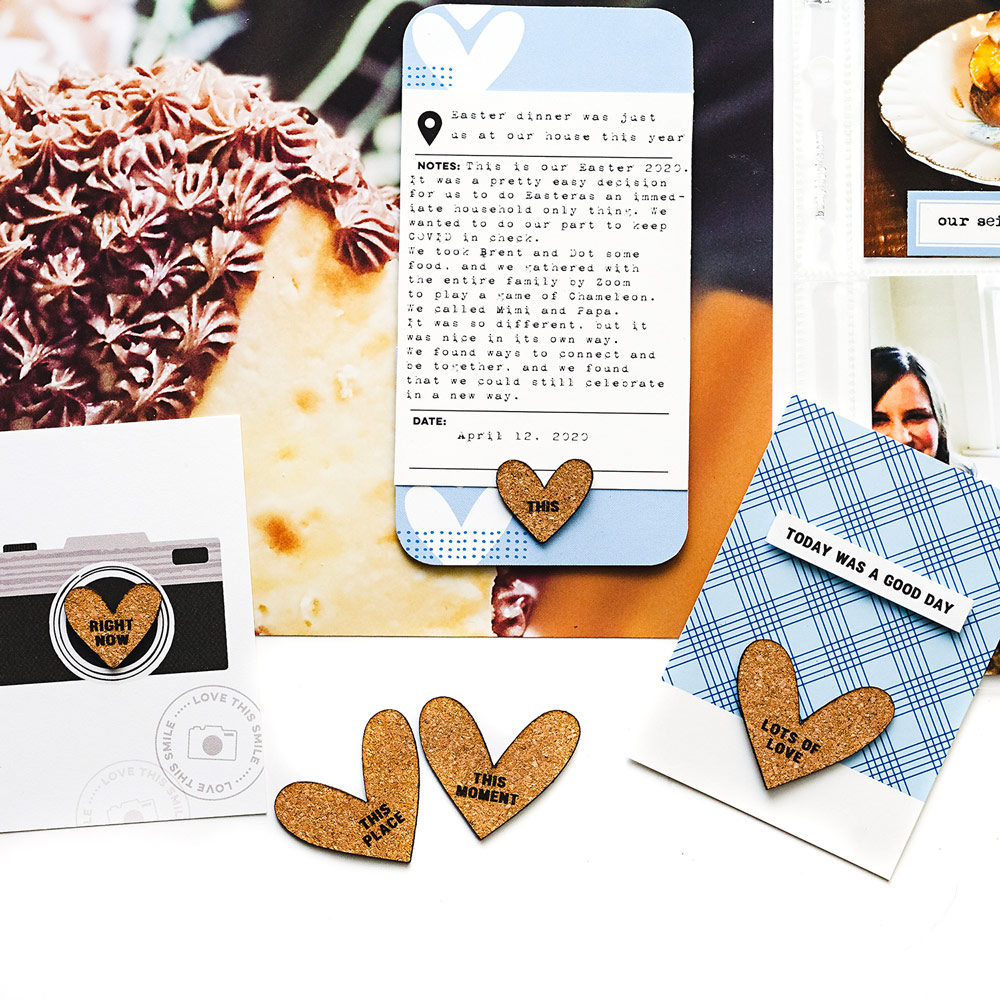
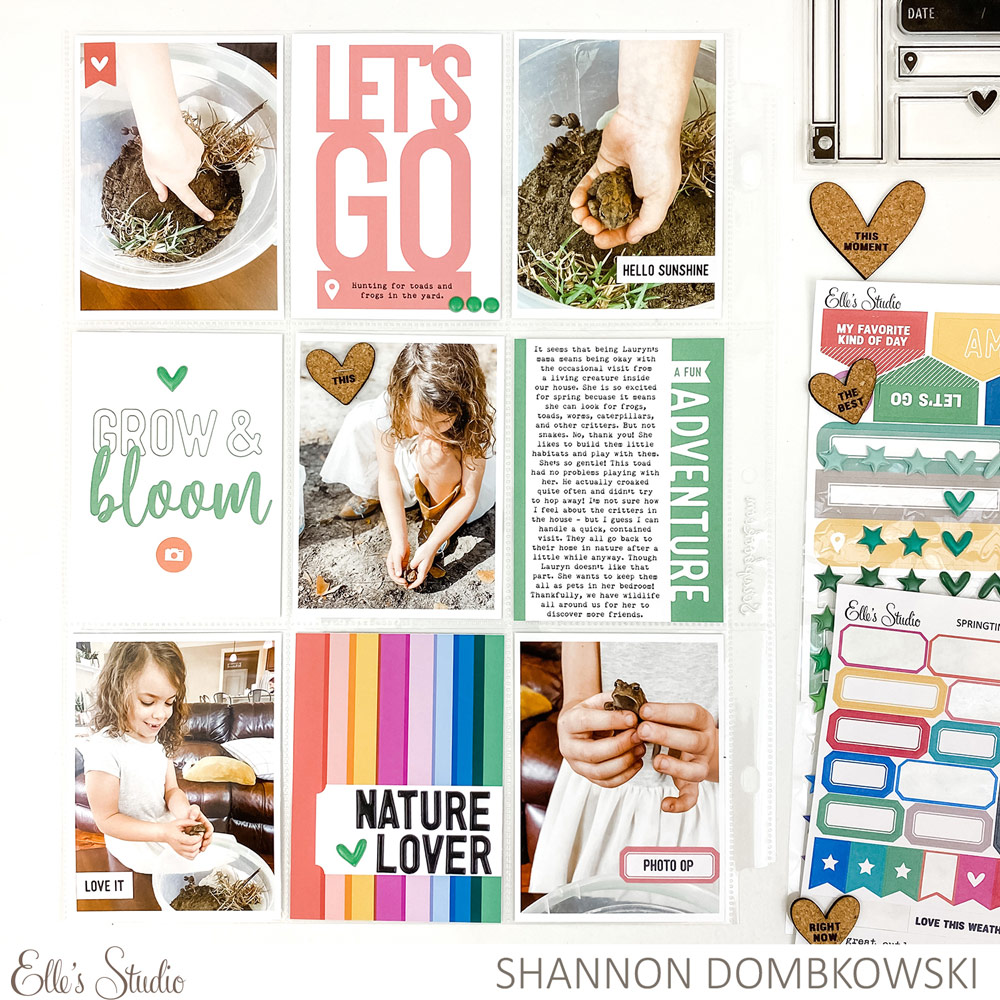
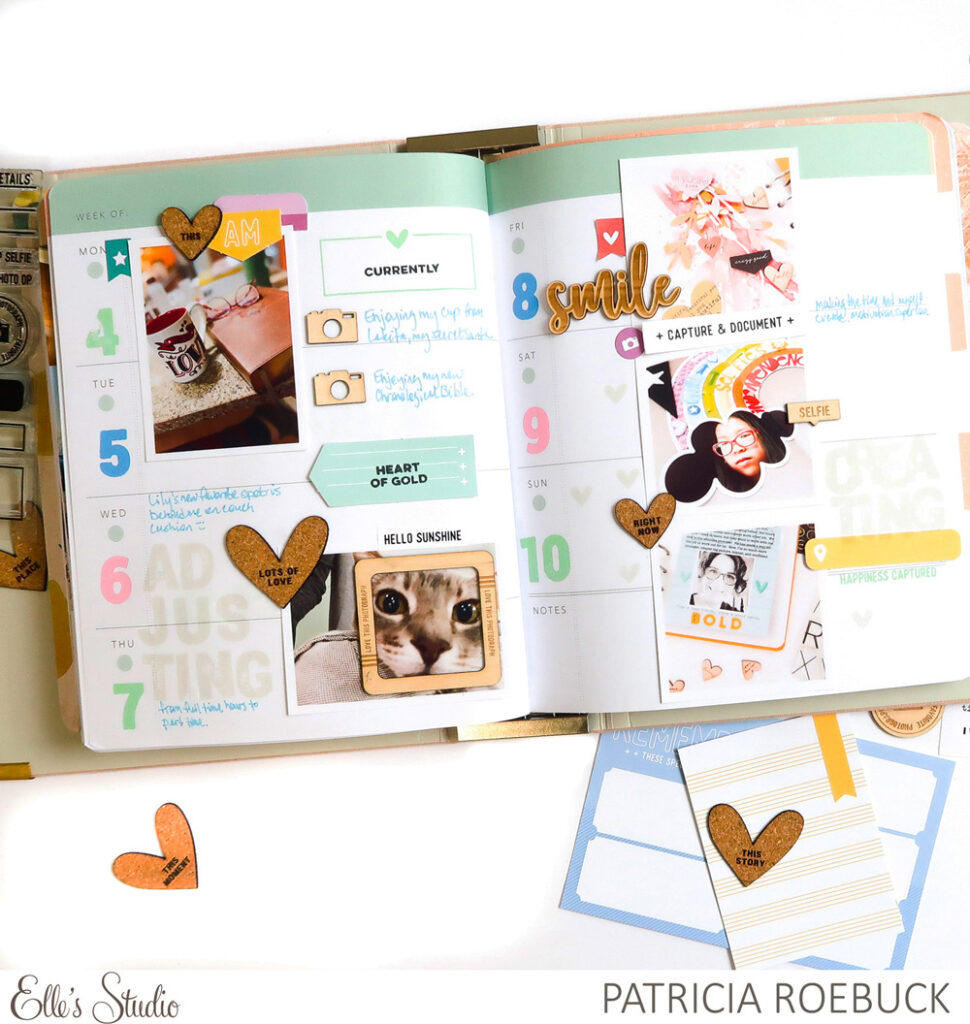
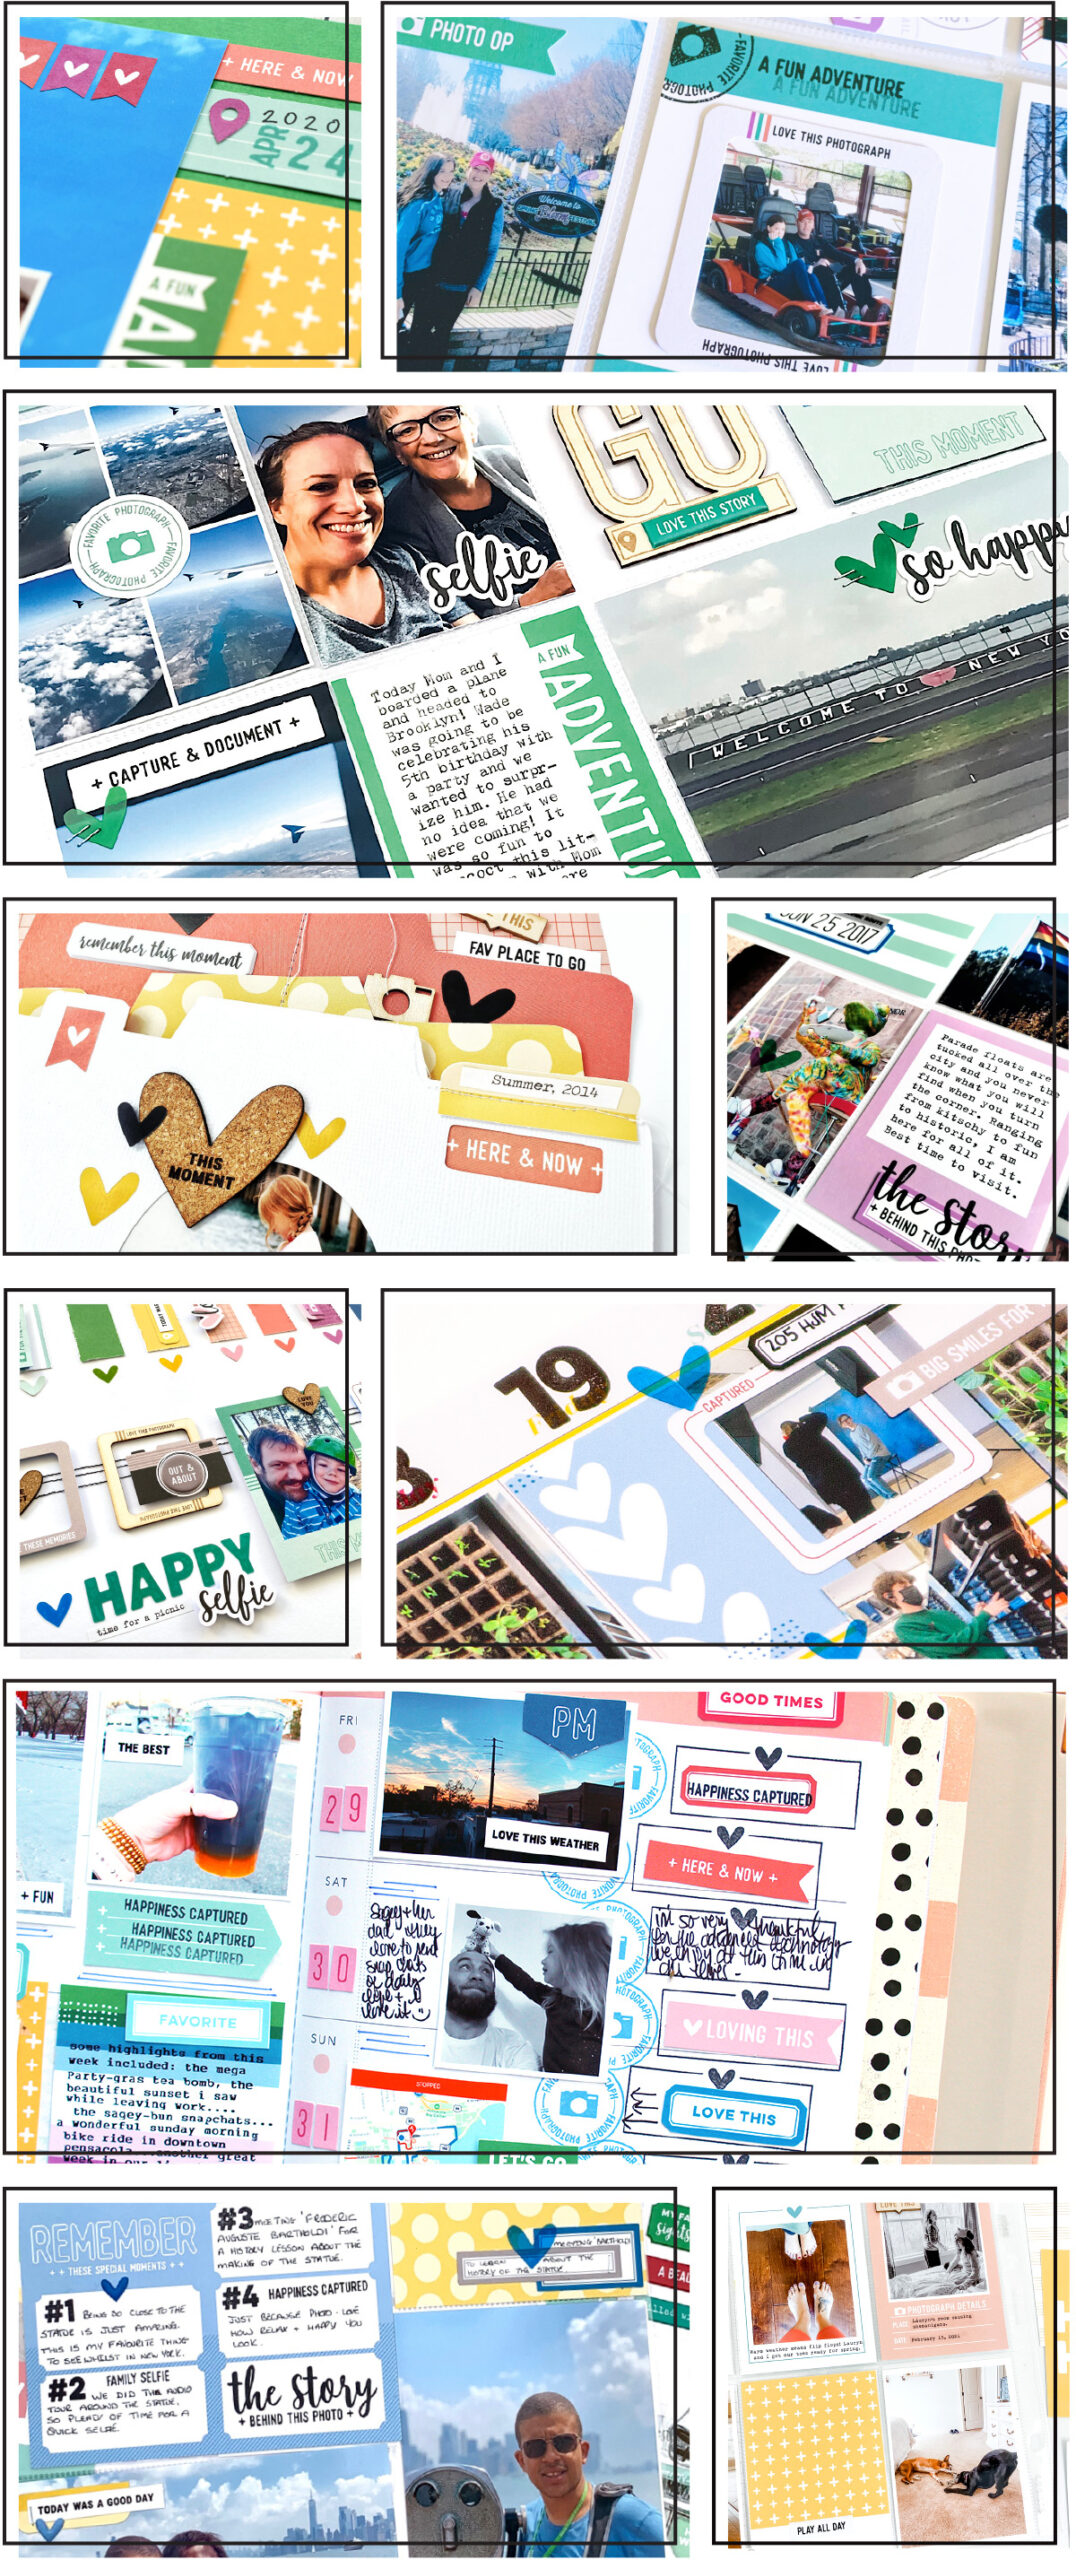
I adore the new Cork Hearts, and I knew I wanted to use them throughout the layout. Again, placing them on both the traditional half and the pocket page half ties everything together. 

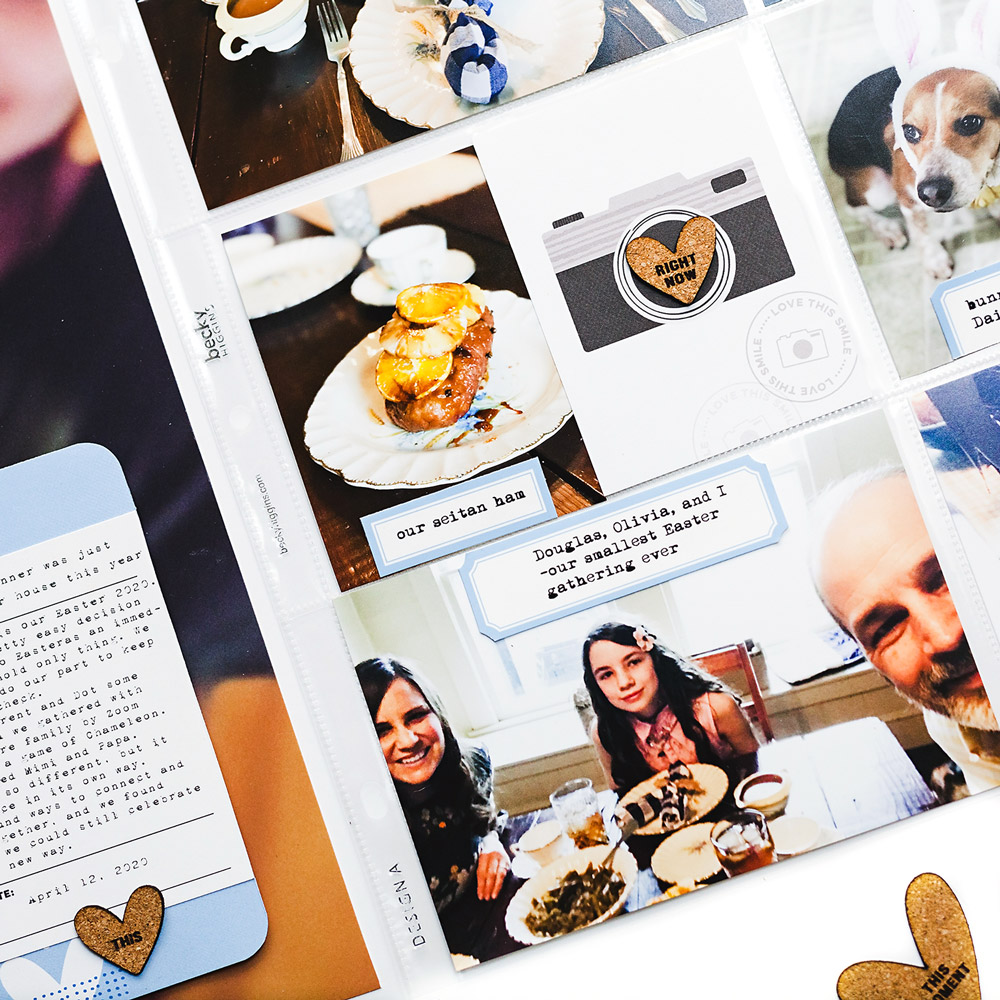
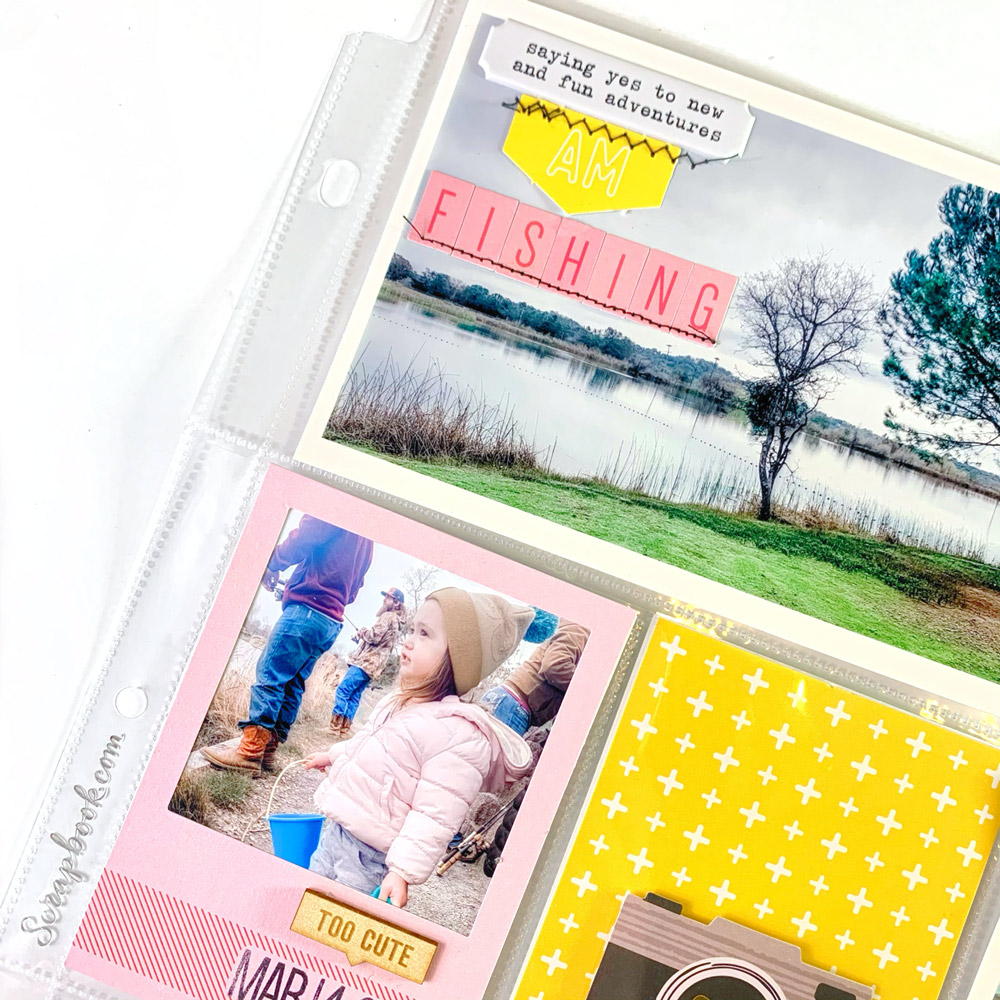
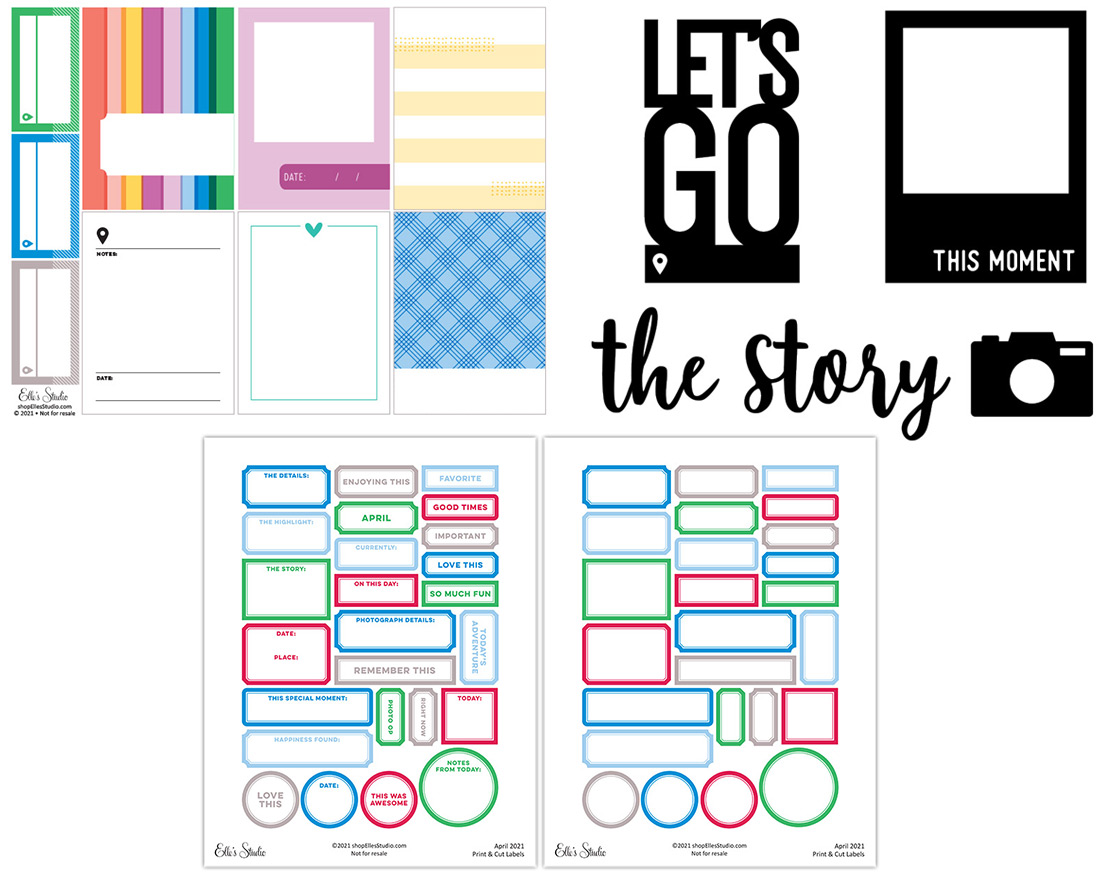
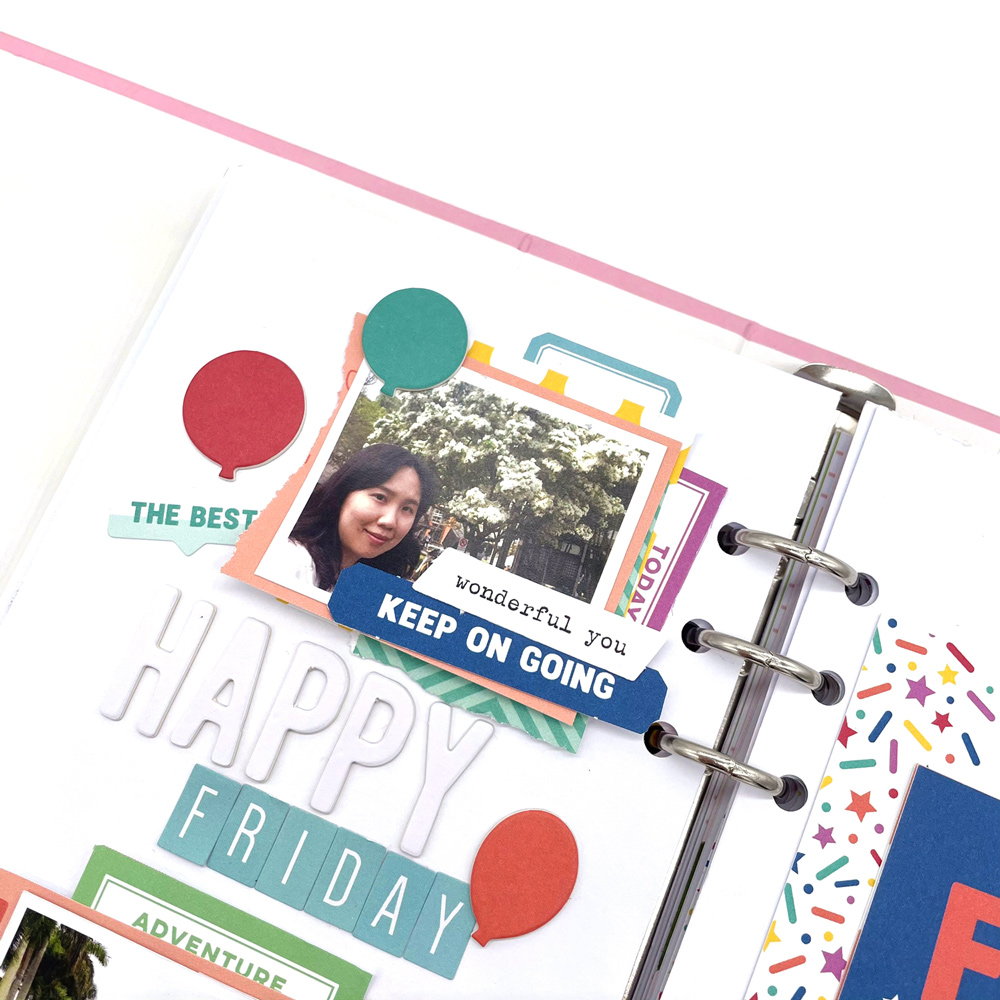
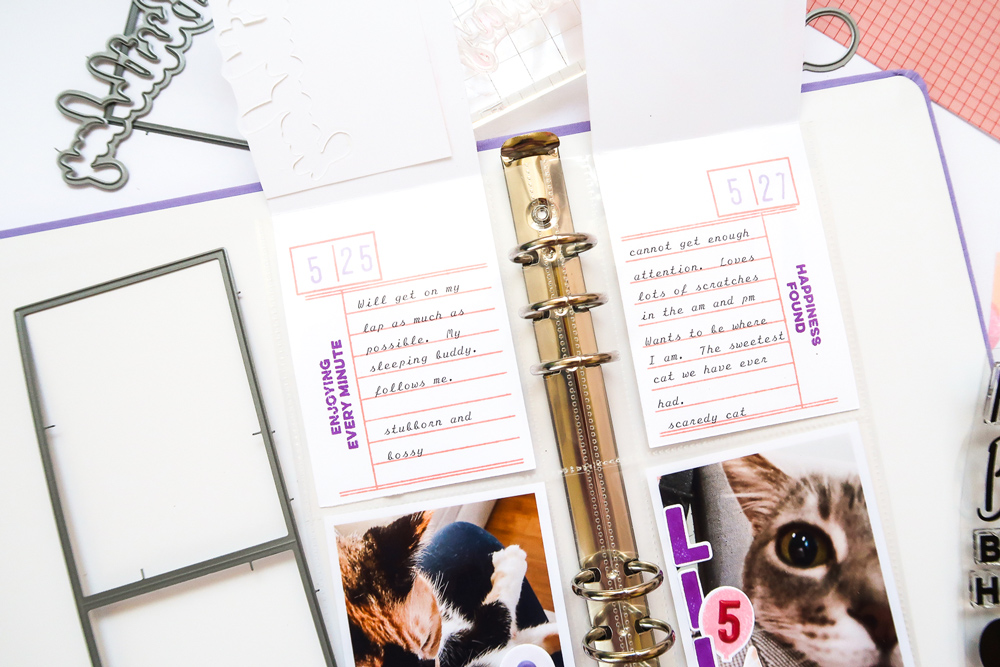
I added captions to the blue April 2021 Print and Cut Labels. After I printed them and cut them out, I placed them at the edge of the appropriate photo. I really love how all of the blue elements unify the layout! 

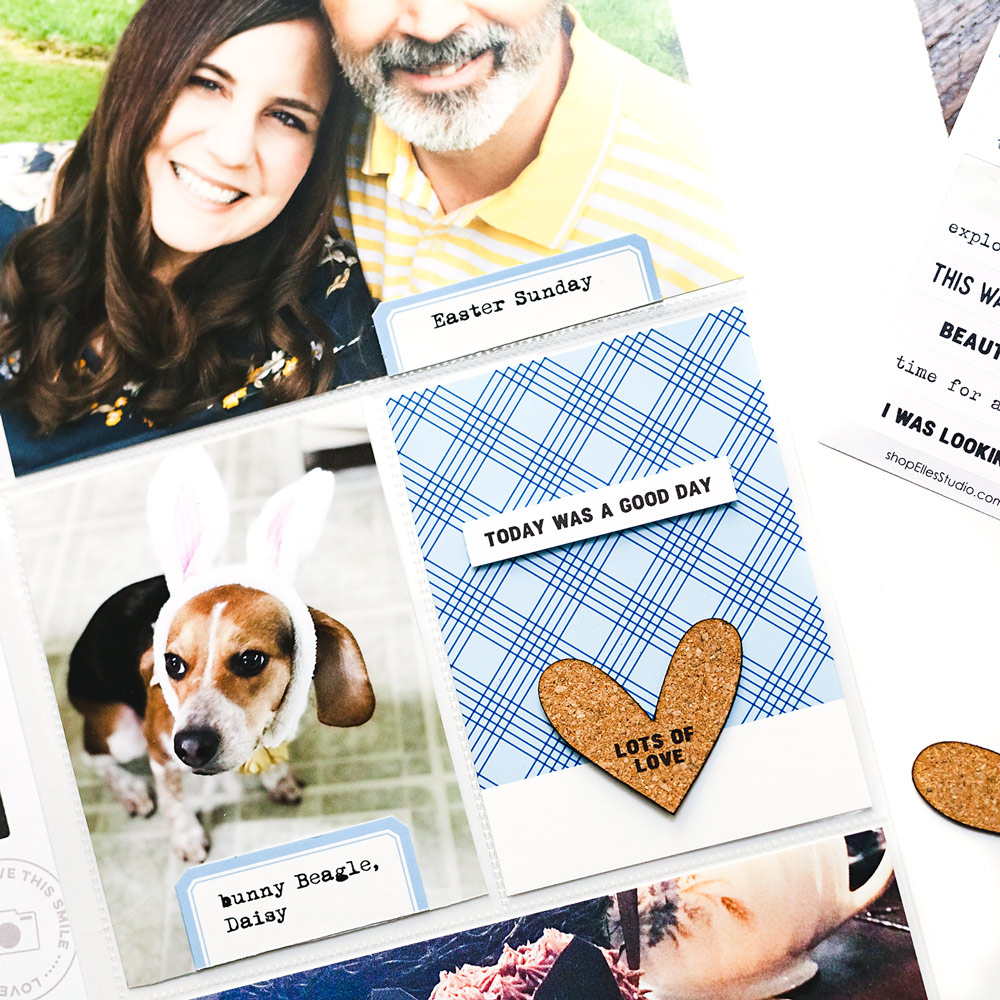
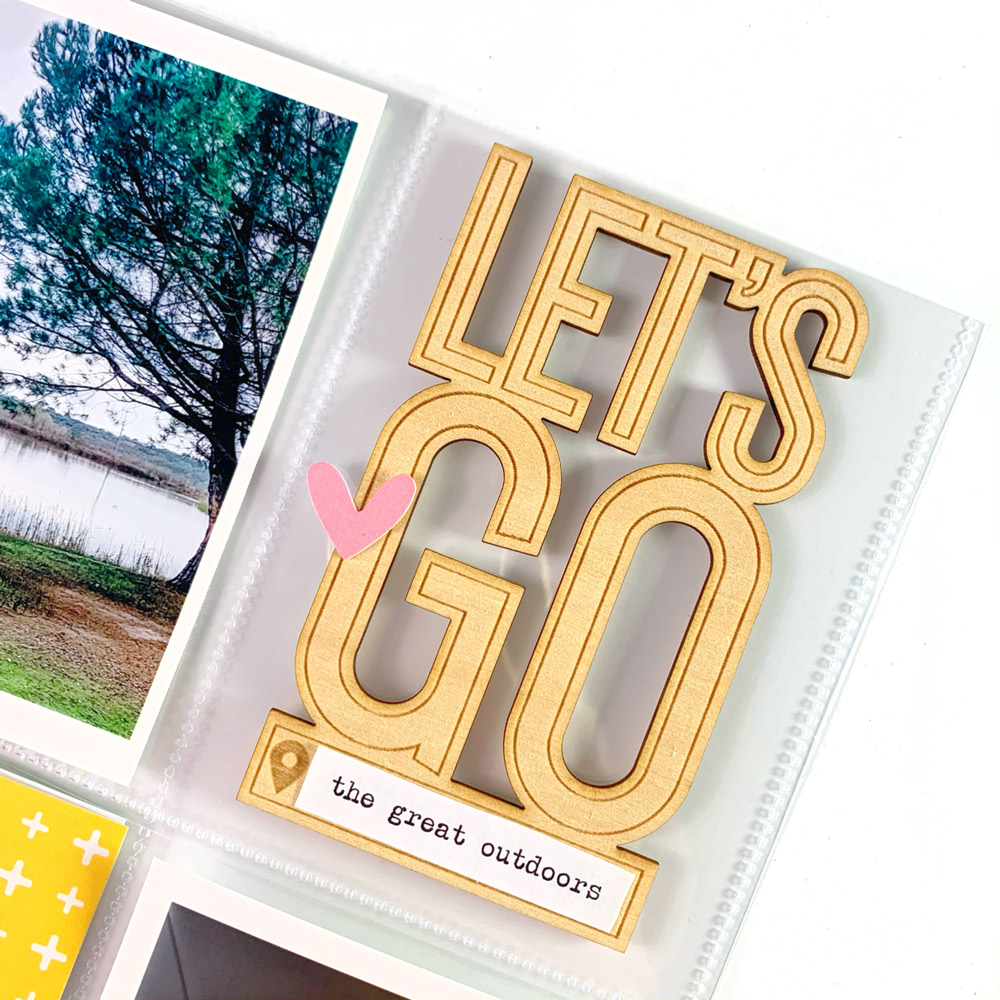
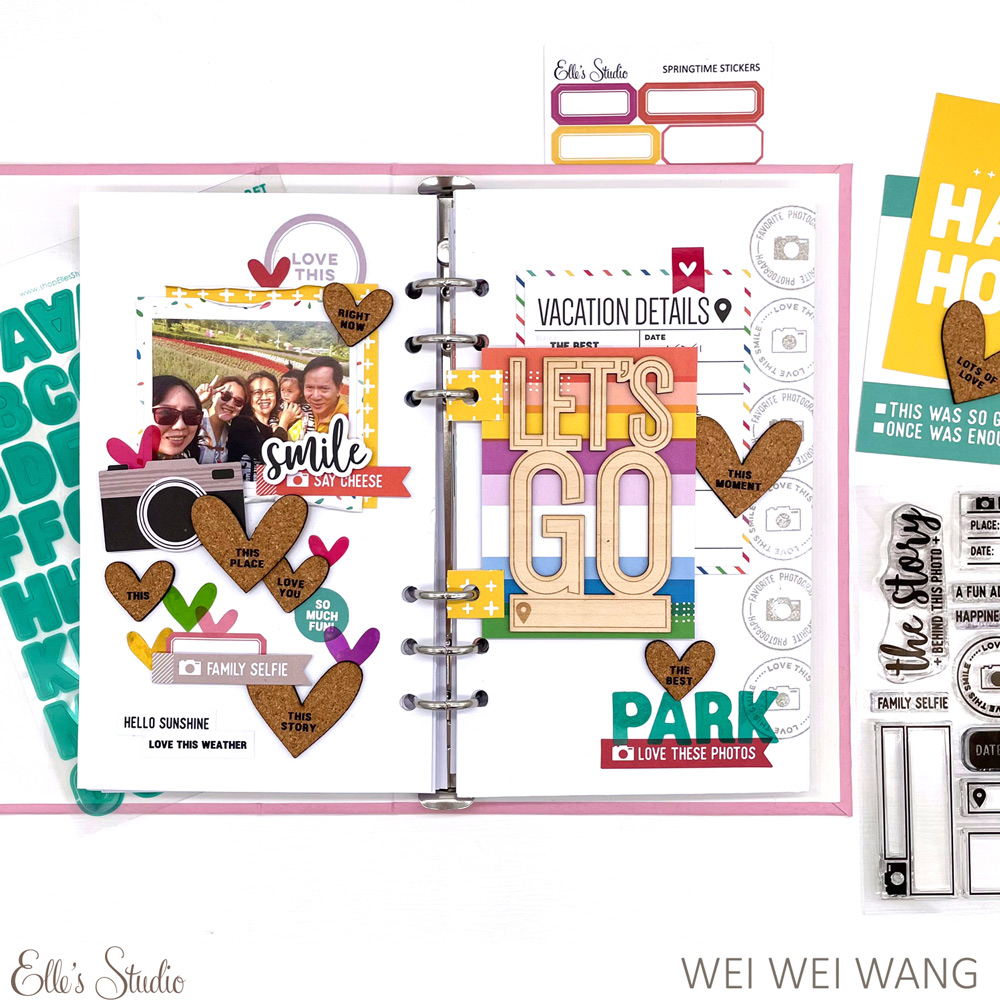
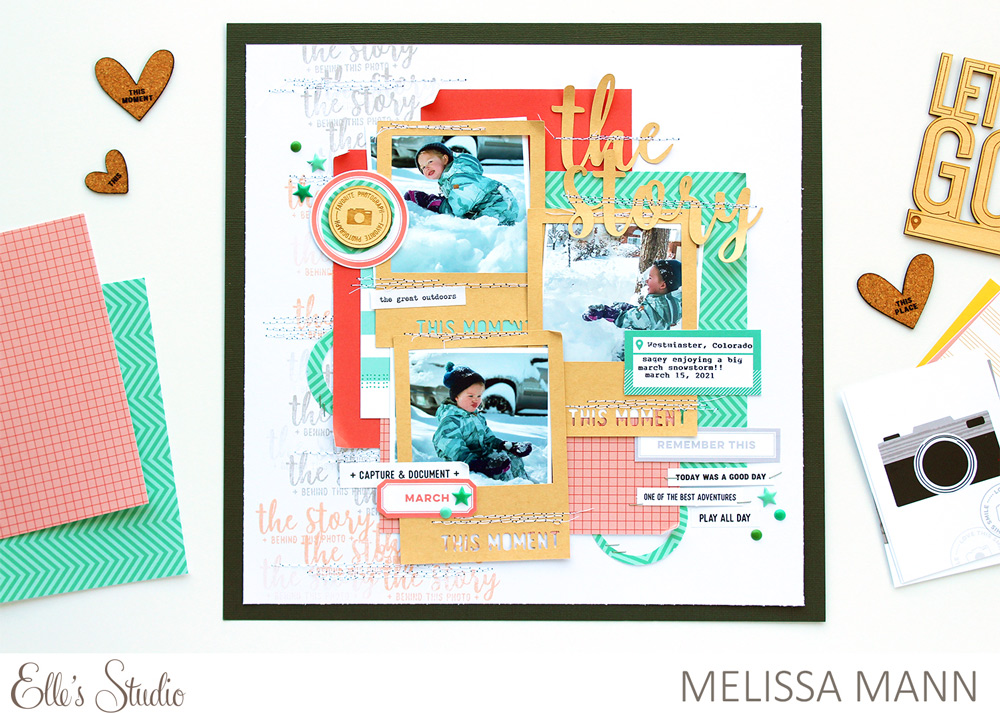
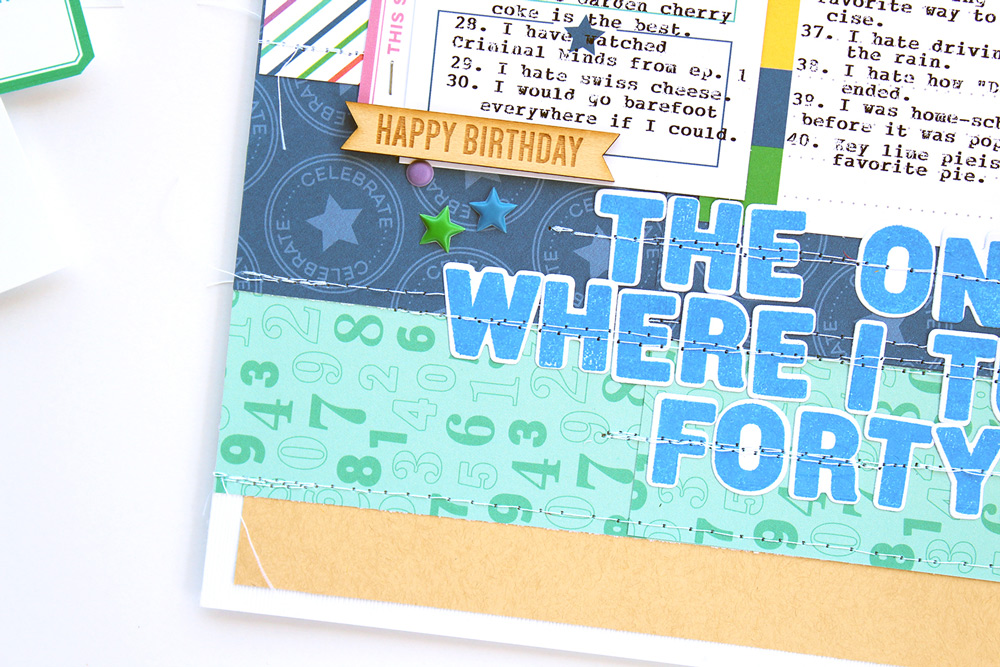
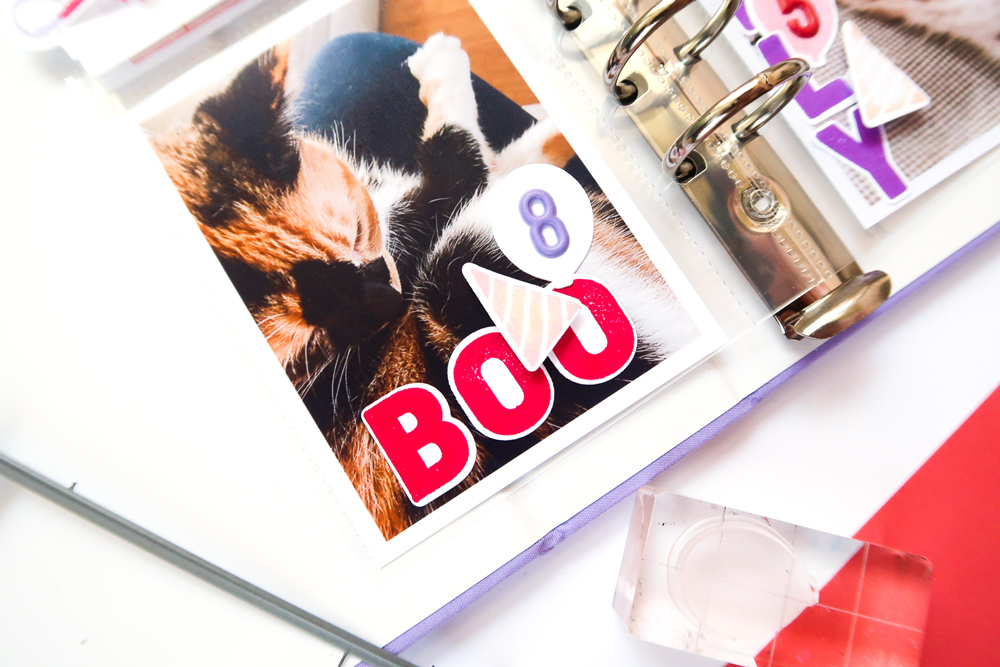
I wanted to add one last subtle bit of interest and depth to my pocket page layout. I did this by adhering a die cut phrase to the blue plaid pocket tag using foam pop dots. Again, for cohesiveness on both sides of the layout, I also adhered the journaling strip on the 12″ x 12″ page using foam pop dots. I really love how this Easter layout came together! I can’t wait to see what you create with your April 2021 Kit and add-ons!

Love pockets as much as Kim? Share how you’re filling them with your April Kit and add-ons by posting your project on Instagram using the #EllesStudio hashtag, or in our Elle’s Studio Facebook Group!

Adventures in Pockets with Aimee Mertell

Hi there, Elle’s Studio friends! It’s Aimee here to share a 9′ x 12″ pocket page using the new April 2021 Kit and extras. This release was a fun one — there was just so much to love! I especially loved the die cut frames included in the Smile Cardstock Die Cuts and the Let’s Go Wood Veneer. I knew I wanted to find a home for them on a pocket page! So let’s get started! 

Supplies | April 2021 Kit, Smile Cardstock Die CutsSpringtime Stickers, Jane Tile Alphabet Cardstock Stickers – Pink, Adventure Puffy Label Stickers, Acetate Heart Stickers, Let’s Go Wood Veneer

I wanted to document these photos from our family day of fishing. We woke up before the sun—not something we do often, picked up coffee and headed out to the lake for fishing. I used a die cut piece from the April Kit with the abbreviation “AM” along with the pink Jane Tile Alphabet Cardstock Stickers to create a title for the page that reads,
“AM Fishing”. I like to add machine stitching on my tags and photos sometimes for some extra texture. 

The Let’s Go Wood Veneer was the perfect size to slip right into one of 3″ x 4″ pockets and I love the “travel” vibe it brings to the page. It is a great addition to this page about getting out in nature! I enjoy that the wood veneer isn’t backed on anything and provides a see-through element in the pocket. I added a pink heart from the Smile Cardstock Die Cuts for a little pop of color too. 

Next up, the frames! The frames that come in the Smile Cardstock Die Cuts are so versatile. My first thought was to use them on a full page layout, which would also be outstanding, but then I realized that they also fit into the 3″ x 4″ pockets and I was excited to jazz up my pocket page. I love the way this frames (pun intended!) my daughter and really makes this sweet photo a focal point. 

Along with the frames, the Smile Cardstock Die Cuts also include fun cameras! I added one to a journaling tag from the April Kit and popped it up on foam to create my own filler tag with dimension. 

I made sure to get my journaling about the day down and added some finishing touches with Acetate Heart Stickers in coordinating colors, as well as phrases from the Springtime Stickers to pull it all together. 

I hope this inspired you to try something new with your pockets today. Show us how you’re using the new April products by using the hashtag #ellesstudio on Instagram or sharing your project in our Elle’s Studio Facebook Group. We can’t wait to see what you create! 

April Design Team Inspiration: Volume One

Hooray for a new month, filled with fresh products to bring on a fresh, new season! We are so excited about our colorful April 2021 Kit and add-ons, as well as the amazing projects that our designers have created with them. Take a look at the first twenty layouts, pocket pages, and traveler’s notebook spreads below, and let us know if a comment what product you’re most excited to create with!

The Story by Suzanna Lee – supplies used | April 2021 Kit, April 2021 Cut Files, Adventure Printables, Cork Hearts, Smile Wood Veneers, Love This Smile Stamp

Nature Lover by Shannon Dombkowski – supplies used | April 2021 Kit, Adventure Printables, April 2021 Cut Files, Springtime Stickers, Tiny Shapes and Dots Puffy Stickers – Cool Tones, Black Puffy Alphabet Stickers, Cork Hearts

Happy Selfie by Katarina Prevendarova – supplies used | April 2021 Kit, Smile Cardstock Die Cuts, Springtime Stickers, Adventure Puffy Label Stickers, Teal Parker Acetate Alphabet Stickers, Cork Hearts, Smile Wood Veneers, Celebrate 6 x 8.5 inch Paper Stack


Life Captured memory planner spread by Jennie McGarvey – supplies used | April 2021 Kit, April Labels, Smile Cardstock Die Cuts, Springtime Stickers, Acetate Heart Stickers, Teal Parker Acetate Alphabet Stickers, Parker Number Stamp

Favorite Photo by Amanda-jayne Baldwin – supplies used | April 2021 Kit, April 2021 Cut Files, Smile Cardstock Die Cuts, Springtime Stickers, Adventure Puffy Label Stickers, Acetate Heart Stickers, Cork Hearts, Smile Wood Veneers, Celebrate 6 x 8.5 inch Paper Stack, Love This Smile Stamp

Glacier Point by Nathalie Leonelli – supplies used | April 2021 Kit, Smile Cardstock Die Cuts, Springtime Stickers, Jane Tile Alphabet Cardstock Stickers – Black, Coral Puffy Alphabet Stickers, Smile Wood Veneers, Love This Smile Stamp

Chicago by Jody Compton – supplies used | April 2021 Kit, Smile Cardstock Die Cuts, Light Teal Cardstock Label Stickers, Acetate Heart Stickers, Adventure Puffy Label Stickers, Teal Puffy Alphabet Stickers, Celebrate 6 x 8.5 inch Paper Stack, Love This Smile Stamp

Let’s Go traveler’s notebook spread by Wei Wei Wang – supplies used | April 2021 Kit, Vacation Details 4 x 6 inch Journaling Tags, Smile Cardstock Die Cuts, Springtime Stickers, Acetate Heart Stickers, Teal Parker Acetate Alphabet Stickers, Cork Hearts, Let’s Go Wood Veneer, Celebrate 6 x 8.5 inch Paper Stack, Love This Smile Stamp

Art of Animation pocket page by Meg Gundlach – supplies used | April 2021 Kit, Vacation Details 4 x 6 inch Journaling Tags, Smile Cardstock Die Cuts, Springtime Stickers, Adventure Puffy Label Stickers, Acetate Heart Stickers, Teal Parker Acetate Alphabet Stickers, Love This Smile Stamp, Jane Alphabet Stamp, Monthly and Daily Tab Stamp

March Selfies by Junell Kruzel – supplies used | April 2021 Kit, Smile Cardstock Die Cuts, Springtime Stickers, Jane Tile Alphabet Cardstock Stickers – Pink, Black Puffy Alphabet Stickers, Smile Wood Veneers

The Story by Aimee Mertell – supplies used | April 2021 Kit, Smile Cardstock Die Cuts, Springtime Stickers, Purple Puffy Alphabet Stickers, White Puffy Alphabet Stickers, Celebrate 6 x 8.5 inch Paper Stack, Love This Smile Stamp

Life Captured Here by Sarah Kee – supplies used | April 2021 Kit, Smile Cardstock Die Cuts, Springtime Stickers, Light Teal Cardstock Label Stickers, Adventure Puffy Label Stickers, Acetate Heart Stickers, Teal Parker Acetate Alphabet Stickers, Cork Hearts, Celebrate 6 x 8.5 inch Paper Stack, Love This Smile Stamp

Oh The Places You Will Go by Nicole Kerr – supplies used | April 2021 Kit, April Labels, Smile Cardstock Die Cuts, Springtime Stickers, Adventure Puffy Label Stickers, Teal Parker Acetate Alphabet Stickers, Let’s Go Wood Veneer, Celebrate 6 x 8.5 inch Paper Stack, Love This Smile Stamp, Parker Alphabet Metal Die

Smile memory planner spread by Patricia Roebuck – supplies used | April 2021 Kit, Springtime Stickers, Cork Hearts, Smile Wood Veneers, Love This Smile Stamp, Parker Alphabet Stamp, Parker Number Stamp, Hugs and Kisses Stamp

All in the Detail by Jackie Ashton – supplies used | April 2021 Kit, Jane Tile Alphabet Cardstock Stickers – Light Teal, Adventure Puffy Label Stickers, Acetate Heart Stickers, Teal Parker Acetate Alphabet Stickers, Tiny Shapes and Dots Puffy Stickers – Cool Tones, Cork Hearts, Celebrate 6 x 8.5 inch Paper Stack, Love This Smile Stamp, Daily Tabs Stamp

Fun Adventure pocket page spread by Michelle Flynn – supplies used | April 2021 Kit, Vacation Details 4 x 6 inch Journaling Tags, Smile Cardstock Die Cuts, Jane Tile Alphabet Cardstock Stickers – Light Teal, Adventure Puffy Label Stickers, Teal Puffy Alphabet Stickers, Acetate Heart Stickers, Teal Parker Acetate Alphabet Stickers, Tiny Shapes and Dots Puffy Stickers – Cool Tones, Let’s Go Wood Veneer, Smile Wood Veneers, Celebrate 6 x 8.5 inch Paper Stack, Love This Smile Stamp, Daily Tabs Stamp

Love This Story traveler’s notebook spread by Marsha Farris – supplies used | April 2021 Kit, Adventure Printables, Cork Hearts, Smile Wood Veneers, Love This Smile Stamp, Hazel Alphabet Stamp

The Story by Jennifer McMurtrey – supplies used | April 2021 Kit, April 2021 Cut Files, April Labels, Cork Hearts, Love This Smile Stamp

The Story by Kim Chaffin – supplies used | April 2021 Cut Files, Springtime Stickers, Adventure Puffy Label Stickers, Cork Hearts

The Story by Melissa Mann – supplies used | April 2021 Kit, April 2021 Cut Files, April 2021 Print and Cut Labels, Adventure Printables, Springtime Stickers, Tiny Shapes and Dots Puffy Stickers – Cool Tones, Smile Wood Veneers, Celebrate 6 x 8.5 inch Paper Stack, Love This Smile Stamp

Thanks so much for stopping by the blog today! Don’t forget to “pin” your favorite projects from this post to inspire you when your April 2021 Kit and add-ons arrive on your doorstep, and be sure to check back here each day this week for more project eye candy from our talented team!

Our April kit + add-ons have arrived!

Our April reveal is here and we are excited to share all of the brand new and exclusive products that are now available in our shop today! Our April kit includes 3 – 4 x 6 inch tags, 18 – 3 x 4 inch tags, and 25 die cuts, that will work great on your scrapbooking layouts, pocket pages, traveler’s notebooks, cards, planners, and more! When designing our kits, we love to think of tags that can be used as prompts to help make it easier for you to get your story started and documented, and this kit is full of those and so much more!

Here’s the first look at all of the fun tags and die cuts included in this kit:

Our monthly kits are limited and once they sell out we will not be restocking! Look for a new kit on the 10th each month at 8:00 am Pacific! Our kits are available for single purchase or select our subscription option to subscribe and SAVE!

Here’s a peek of all the new and exclusive add-ons we have available this month! All of our coordinating add-ons can be purchased separately, so you have a chance to pick the products that work for your stash and what you’re documenting now, and if you need more than one, you can purchase multiples, too! The new items added to the shop for April are: Love This Smile stamp, acetate stickers (teal alphabet and hearts), wood veneers (Let’s Go and Smile), Smile die cuts, Adventure puffy stickers, Springtime stickers, cork hearts, Vacation Details journaling tags, and April labels.

Our digital files this month include coordinating printables, April cut files, and print and cut labels that coordinate with our kit – once you download these files, you can use/print them over and over again!

Our new Love This Smile stamp works great for all types of projects and also coordinates with our Pocket, Frame, and Flip-Up metal die! Both of these die sets are on sale now for our April reveal! Collect them both or complete your set and you’ll be ready to create cute frames and interactive flip-ups for your pocket pages and layouts!

Also, don’t forget to stop by our SALE section to see the products we just put on sale! Most of these products have a very limited supply left and will not be restocked once sold out.

Subscribers, you can start bundling now! Bundling is easy – just log into your account and use the “Bundle with my kit subscription” shipping option during checkout to receive FREE shipping on any extra items purchased from our shop that will ship with your kit. This option will only be available during our 24-hour bundling period.

Not a subscriber? Don’t wait any longer to sign up! Subscribe today to lock in our special kit price of $9.99 + shipping, and you’ll be able to bundle any additional products from our shop and have them ship for FREE with your kit subscription, during our 24-hour bundling period, starting on the 10th at 8:00 am Pacific!

When starting a new subscription: you’ll want to first check out with only the kit subscription in your cart. After you have subscribed to our kit, you will then be able to see your special discounts on select items in our SALE section during our 24-hour bundling period! You must be logged into your kit subscriber account to see your discounted items. Quick note: Our subscription is risk free and can be cancelled at any time by emailing us. Our monthly kit and add-ons are available without a subscription each month, too.

Here’s a look at the items on sale for our subscribers only this month:

Subscribers: Pick up these six items for FREE to 20% off during our 24 hour bundling period that is going on now and ends on Sunday, April 11th at 8:00 am Pacific! Please make sure you are logged into your subscriber account, then click on the SALE section to see these items on sale! Once you are logged in, you’ll see your special discounted product listing that specifies Sub Discount.

Looking for more inspiration? Our design team is ready to inspire you with brand new, fresh inspiration using the new products this month! You’ll be able to find their amazing inspiration in our product listings so you can see their projects while you shop! We will also be showcasing our team’s projects on the blog later today, and throughout the entire month!

Thank you so much for joining us today! We are so grateful to be a part of this amazing community and are excited to see how you use these new products! Make sure you share your projects with us in our Facebook group and make sure you use the #EllesStudio hashtag when posting on Instagram for a chance to be featured on our feed and win a gift certificate to our shop!

Using Up March Scraps with Wei Wei Wang

Hi Elle’s friends! It’s Wei Wei here, and today I want to show how to use your scraps and leftovers from your March Kit and extras to create some layers!

Supplies | March 2021 KitMarch 2021 Labels, Jane Tile Alphabet Cardstock Stickers – Light TealLight Teal Cardstock Label StickersHappy Birthday Chipboard Stickers, Large Acetate Numbers, Acrylic Balloons and PresentsCelebrate 6 x 8.5 inch Paper Stack, Mini Dated Extras Stamp

I had some little scrap pieces from the March Kit and Celebrate Paper Stack. Instead of throwing them away, I used them to layer my photos.

For this page, I stepped out of my comfort zone and decided to highlight my title on the middle of the page, and put my photos on the top and bottom of the page.

For the title, I used the “Happy” from the Happy Birthday Chipboard Stickers. I added the word “Friday” using the Light Teal Jane Tile Alphabet Cardstock Stickers. I love the way the title turned out using a mix of stickers!

As I looked through what I had left, I was inspired by the leftover Light Teal Cardstock Label Stickers and Happy Birthday Chipboard Stickers. I noticed that the balloon chipboard stickers would work well with circle label stickers, so I decided to use them as my main embellishments. I adhered the balloon chipboard stickers around my title and photos.

To balance my spread, I added circle label stickers in between some of the blank spaces, and then added the words from Mini Dated Extras Stamp over the labels.

For the right side, I made a flip-up using the March Kit journaling tags. Most of the time, I hide my journaling because I enjoy decorating my pages and then before I know it I’ve lost the room for journaling. Including a flip-up is a good way to create the extra journaling space that I need!  

I also added Large Acetate Numbers to the journaling tag to mark the “day”.

To finish my layout, I added little scrap pieces and the candle, turned sideways to create a border from the Happy Birthday Chipboard Stickers to the upper-right corner.

That’s all I have for today. We’d love to see how you use those March kit and add-ons ! Share your final projects with us in our Elle’s Studio Facebook Group or on Instagram using the #EllesStudio hashtag!  

April Design Team Sneak Peeks

We are just two days away from our April kit and add-ons reveal and we are so excited to be able to share these fun sneak peeks of amazing projects our team made using all the new products that will be available soon! Our April reveal will be full of exclusive products that we’ve designed and will have you ready to document your April stories and take you right into the month of May!

Not a subscriber? Don’t wait any longer! You can pre-order our April kit now and lock in our $9.99 kit price by starting a subscription today! You’ll want to choose our SUBSCRIBE & SAVE option to get signed up and start your subscription with our April kit. We will then hold your kit and you’ll be ready to bundle and save at our April 10th reveal! Details on how to bundle with your subscription order will be emailed to you once you have purchased this product.

Kit subscribers, don’t forget! Along with being able to bundle any products from our shop that will ship for FREE with your kit during our 24-hour bundling period, starting on the 10th at 8:00 am Pacific each month, our subscribers will also have access to special discounts on select items! Above is a preview of our April discounts and savings that will be available for our subscribers during our April bundling period! These discounted items can be found in our SALE section during our 24-hour bundling period, and you must be logged into your kit subscriber account to see them. If you haven’t subscribed to our kit, sign up now to take advantage of these special offers on April 10th! Quick note: Our kits and add-ons are available without a subscription each month, too.

We are so excited to share all of these new products with you and to see how you use them on your projects! Make sure you set your alarm and mark your calendar for Saturday, April 10th at 8:00 am Pacific! We hope to see you there!

Documenting a BIG Milestone with Melissa Mann

Good Morning, friends! This is Melissa here with you today and I’m bringing one more project to you using all the wonderful products that were available in our March release! My layout today features the super extra Large Acetate Numbers. When I was thinking about how I wanted to use these numbers, I thought immediately towards the big milestone birthday that I have later this year: 40! I can’t believe I’ll be forty years old this year! I thought it would be fun to have a list of sorts and came up with the idea of forty things about me. 


Supplies: March 2021 KitMarch 2021 Print and Cut Labels, Light Teal Cardstock Label Stickers, Happy Birthday Chipboard StickersTiny Shapes and Dots Puffy Stickers – Cool Tones, Happy Birthday Wood Veneers, Large Acetate Numbers, Parker Alphabet StampParker Alphabet Metal Die

I pulled out my favorite 3″ x 4″ journaling tags from the March 2021 Kit and typed up 10 random things per card. These were layered across the upper half of my layout along with my picture and one more journaling tag. 

I knew I wanted a big title to go along with the Large Acetate Numbers, and I stamped out “The One Where I Turn Forty” using the Parker Alphabet Stamp and cut using the Parker Alphabet Metal Die. This is such a great alphabet stamp for layouts and cards—it’s just the perfect size!

I finished off my layout with a few embellishments, like the Happy Birthday Chipboard Stickers and the Light Teal Cardstock Label Stickers. I kept my embellishments to a minimum to really let the journaling, title, and acetate numbers stand out. 

How have you been using the Large Acetate Numbers on your projects? We would love to see them! Post to the Elle’s Studio Facebook Group or share on Instagram using the hashtag #EllesStudio. Thanks for stopping by and checking out my project. Have a great rest of your week!

Stamped Sentiment Backgrounds with Sarah Lee

Hi, Elle’s friends! It’s me, Sarah, on the blog, and today I’m excited to share a fun little stamping technique using the March kit + extras.

So, you know how a lot of the Elle’s Studio stamps have fun, little sentiments or phrases on them, but sometimes you don’t know ever get around to using them? Have you ever considered stamping them to create a background?

Here’s how I used the sentiments on the Make a Wish Stamp to create a fun layout. 

Supplies | March 2021 Kit, March 2021 Labels, Happy Birthday Chipboard StickersTiny Shapes and Dots Puffy Stickers – Cool Tones, Acrylic Balloons and PresentsCelebrate 6 x 8.5 inch Paper StackMake a Wish Stamp, Parker Alphabet Stamp, Make a Wish Metal Die, Parker Alphabet Metal Die, Daily Tabs Stamp

I always love the sentiments and phrases on my stamp sets, but I’m not much of a card maker. Thus, I don’t get around to using those little stamps as much. No fret! When there’s a will, there’s a way. I wanted to give them some extra love this time around, so here’s what I did:

I lined the stamps right up and pulled out some coordinating ink pads.

Then, I went to town with it. I didn’t bother trying to keep everything aligned to my 12″ x 12″ cardstock paper. I knew I wanted to create a layering look, so I freely stamped on my paper.

After repetitively stamping the sentiments on my cardstock in various colors, I embellished right on top of it with papers from the Celebrate Paper Stack and some Happy Birthday Chipboard Stickers.

For the “HAPPY” in my title, I decided to stamp with watercolor using the Parker Alphabet Stamp.

The how-tos: basically, you just brush a little bit of watercolor right onto your stamp. Then, you stamp as you normally would.

Both “HAPPY” and “Birthday” were stamped and then cut out using their coordinating metal dies. Hooray for matching stamp and die sets!

My favorite part about creating this layout was using the sentiments in various colors to create a unique background. The possibilities are endless when you think about all the ways you can arrange your stamps to create backgrounds for your projects.

That’s all I have for today. What’d you think? We’d love to see how you use your stamps! Join us, and please do share your projects with all of us at our Elle’s Studio Facebook Group or on Instagram using the hashtag #EllesStudio.

And as always, thanks for letting me share my work with all of you! 

Make A Wish with Patricia Roebuck

Hello, Elle’s Studio friends! I am so excited for Elle’s Studio turning 14 and creating so many amazing products for us to also celebrate through our memories!  One fun new product from the March release is the Make a Wish Stamp. It has so many amazing images. Today, I will walk you through a traveler’s notebook 3″ x 4″ pocket page spread using it to create my own custom tags. I also have a process video to share with you at the end of this post, so let’s start!

Supplies | Red Puffy Alphabet Stickers, Purple Puffy Alphabet Stickers, Make a Wish Stamp, Parker Alphabet Stamp, Good Times Tab Stamp, Mini Dated Stamp, Noted Vol. 3 Stamp, Make a Wish Metal Die, Parker Alphabet Metal Die, Pocket, Frame, and Flip Up Metal Die

For this pocket spread, I wanted to create my own customized tags using the Make a Wish Stamp, but I also wanted to add journaling, so I used the Pocket, Frame, and Flip Up Metal Die to cut a folding tag from white cardstock. I used that same metal die set to cut out the smaller 3″ x 4″ rectangles and then I die cut again, using the negative of that metal die, being sure to trim the outside to fit my 3″ x 4″ tag. I used both of these cuts as masks. Trimming the negative to 3″ x 4″ allows me to see where I place it on my customized tag as I stamp.

I wanted these two customized tags to be different. I used the masks to stamp one with the balloon images, giving me a look of balloons floating in front or behind. I used the negative of the metal die to stamp the sentiment “hip! hip! hooray!” on one of the tags in addition to the balloons. To add enough color without being too bold, I chose peach, lavender, and pink ink. To use the “birthday” sentiment image, I needed to use it vertically to fit my 3″ x 4″ pockets. To get the multicolored effect, I inked the image with two inks, then used the asterisk image from the Make a Wish Stamp in the third ink color and stamped directly onto the inked image before stamping. This technique is known as the ‘kissing’ method. I used the coordinating Make a Wish Metal Die to do a partial cut and attached this to the left of my first customized card.

With the front of my customized cards stamped, I stamped the inside using the Noted Vol. 3 Stamp to add my journaling to the inside of each card.

As you can see, I used the Make a Wish Stamp to celebrate the birthdays of my fur babies. The stamp set really is perfect for all of our loved ones and friends. I hope you are inspired to grab this stamp to create your own customized tags using the masking technique, multiple inks, the kissing method (stamping or pressing another image to the inked image), and also grabbing the coordinating Make a Wish Metal Die to create a partial cut for a fun and quick way to use in your 3″ x 4″ pockets!  

To take a closer look into my process, you can watch the video below.  

Thanks so much for stopping by, and have fun stamping!

If you love this stamp as much as Patricia does, be sure to share what you create with it! Post your project to Instagram using the hashtag #EllesStudio, or share in our Elle’s Studio Facebook Group!

March #EllesStudio Spottings on Instagram

Hello, friends, and Happy Easter! We wanted to share a few projects with you this month that used the #EllesStudio hashtag on Instagram—each one used one of our products in a beautiful way!

First, we love the way that Laura (@lauraalbertscrafts) used our My Heart Stamp to create a beautiful, colorful background on her layout! It truly popped out at us in the feed! On the right, Sarah (@sassybagladysarahscraps) used our Autumn Rainbow Puffy Stickers and Tiny Shapes and Dots Puffy Stickers to embellish one fun layout!

We found a lot of pockets in the hashtag this month! On the left, Lynnie (@lynniebcrafts) created a fun, St. Patrick’s Day page using our monthly kits, Weekly Die Cut Labels, and new Acrylic Balloons and Presents! On the right, Emily (@emilyscrapbooks) used our February 2021 Kit and add-ons, that we just love!

We also love seeing your memory planner spreads! The one on the left was created by Taryn (@taryn_it_up_1990) and features our new March 2021 Kit! On the right, another pretty pocket page, created by Tatiana (@lifeonapaper) caught our eye with its use of our previous monthly kits and Puffy Alphabet Stickers!

Just for sharing their projects, these six paper crafters will each win a $10 gift certificate to the shop! Thank you so much for posting your projects and using the #EllesStudio hashtag, ladies! Please email us at info@shopellesstudio.com to claim your prize!

Use our products on your next project and post to Instagram using the hashtag #EllesStudio for a chance to be featured here on our blog, and win a gift certificate to the shop! We can’t wait to see what YOU create and share with us this month!