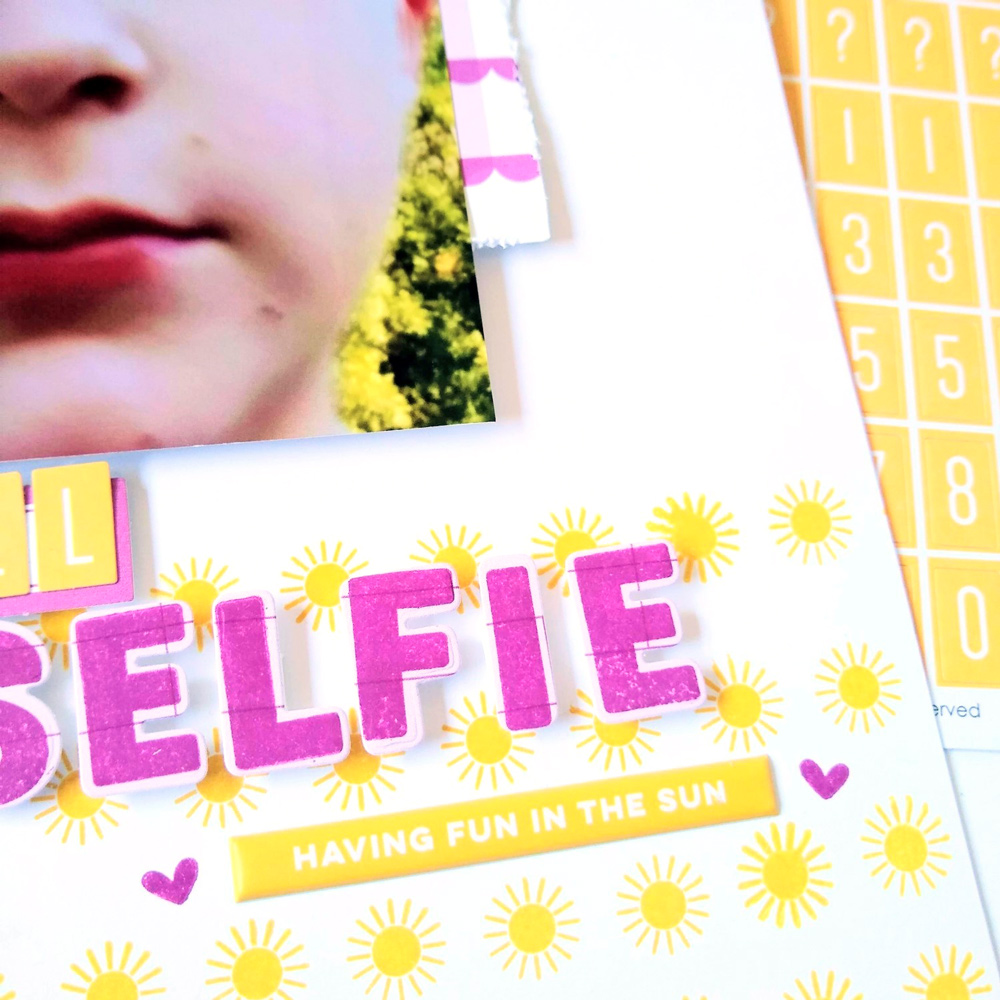
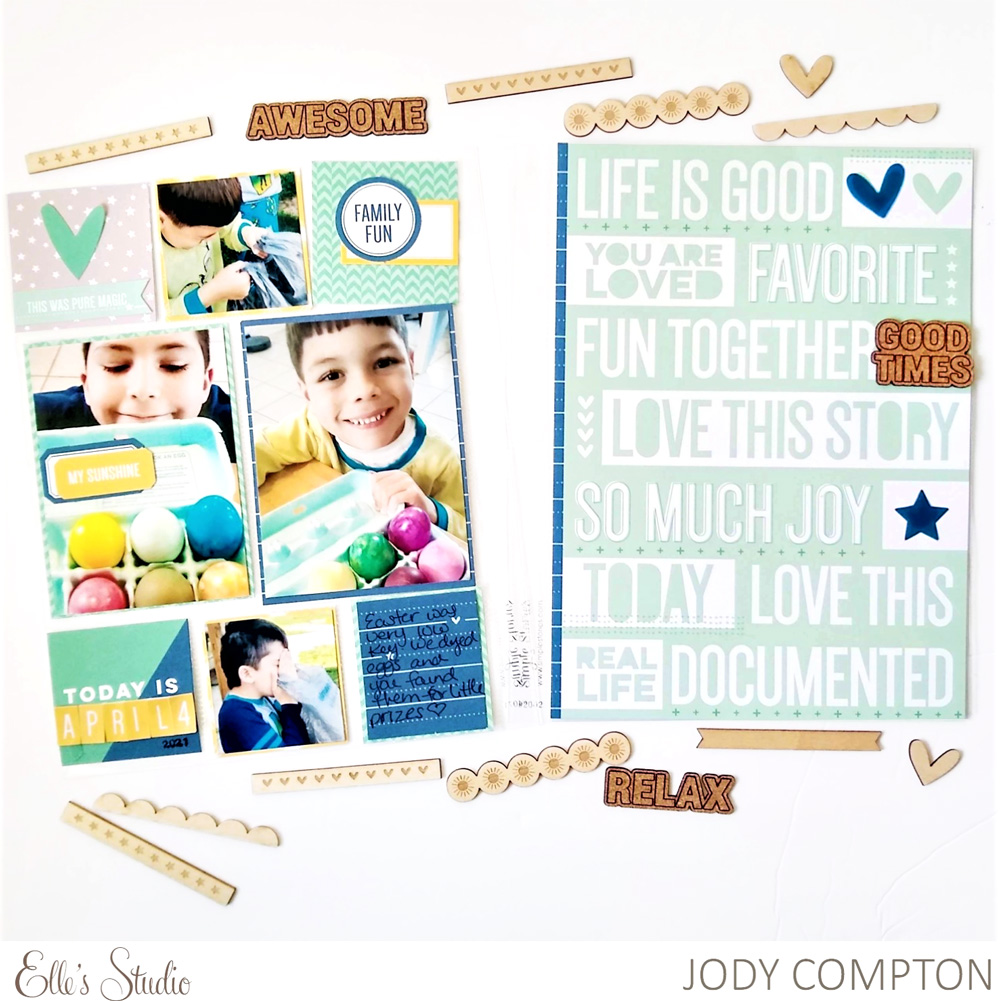
Hi everyone! It’s Jody here, sharing my latest project using the amazing new May 2021 kit and add-ons! The colors in this month’s kit are bright and fabulous! Yellow is such a happy color and I knew immediately I wanted to use it all over my page!
I started by using the Fun with Borders Stamp with my favorite yellow distress oxide ink. I wanted to create a ridge to rest my title and photo on.
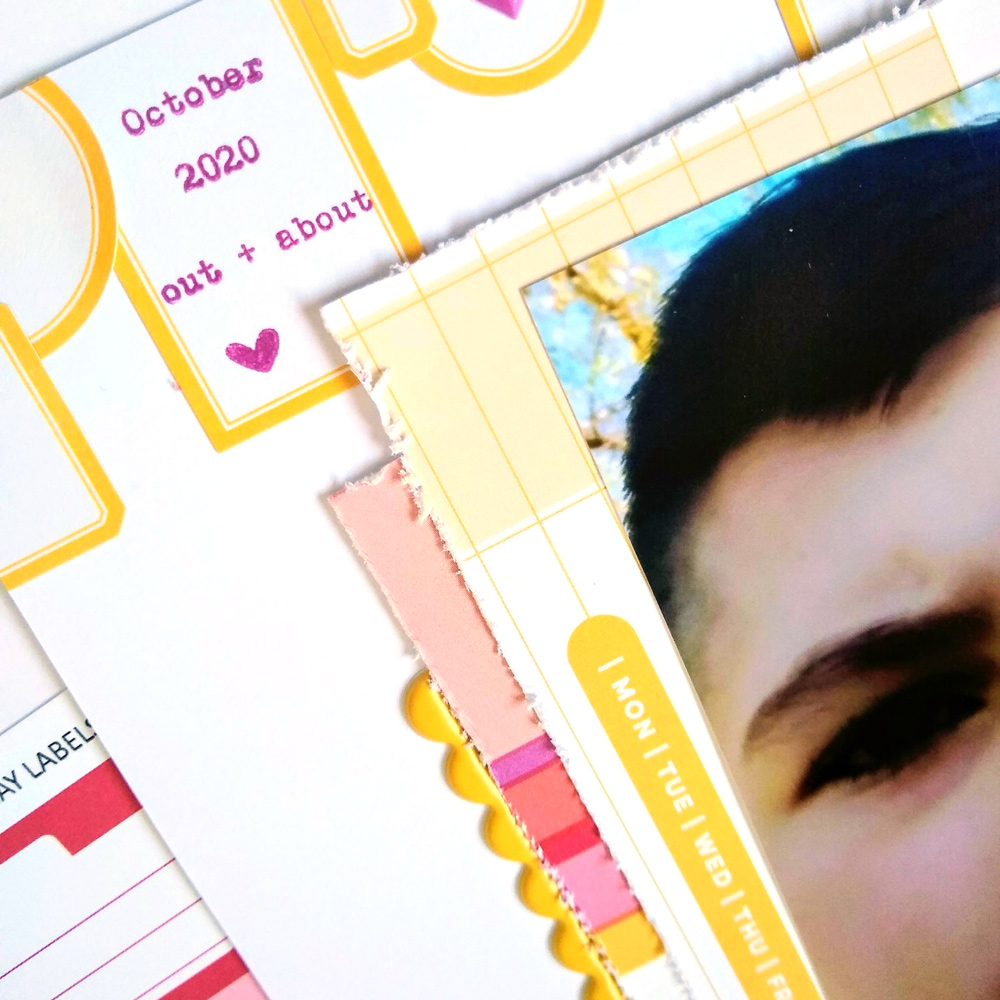
I also wanted to use some of the coordinating 3 x 4 and 4 x 6 inch tags from the May 2021 Kit. With my son’s fair skin, the warm colors definitely popped off the page! For a little texture, I used my distress edge tool to rough up the tag edges.
Hi friends, it’s Meg here! I don’t know about you, but I am more than ready for sunshine and warm weather. Unfortunately, that isn’t really the UK’s reputation. Until it catches up, I’m pulling out the beach photos and embracing the yellow infusion of the May 2021 kit and add-ons!
I am so excited to finally be working on my Mexico 2006 mini album—maybe a tad overdue but this feels like exactly the right time to be reliving these adventures. As an obsessive photo taker and collector of paper bits, these days I’d never get away with a 6 x 8 inch album for a 2-week trip; for the wanderings of a recent college graduate with a semi-broken digital camera, it is working out just fine.
I consider myself a relatively simple scrapper and sometimes find it stressful to maintain embellishment balance across a smaller canvas. I find it useful to instead consider the album as a whole. Because Elle’s releases always coordinate beautifully, I know that the pages I make in the future will look great with these made from the May 2021 kit and add-ons. Rather than hoarding my favorite supplies (I’m looking at you, Puffy Banners and Border Stickers) I am getting them straight onto pages. Luckily, stamps are a product I can love on over and over, so the Fun with Borders Stamp will keep me going for a while.
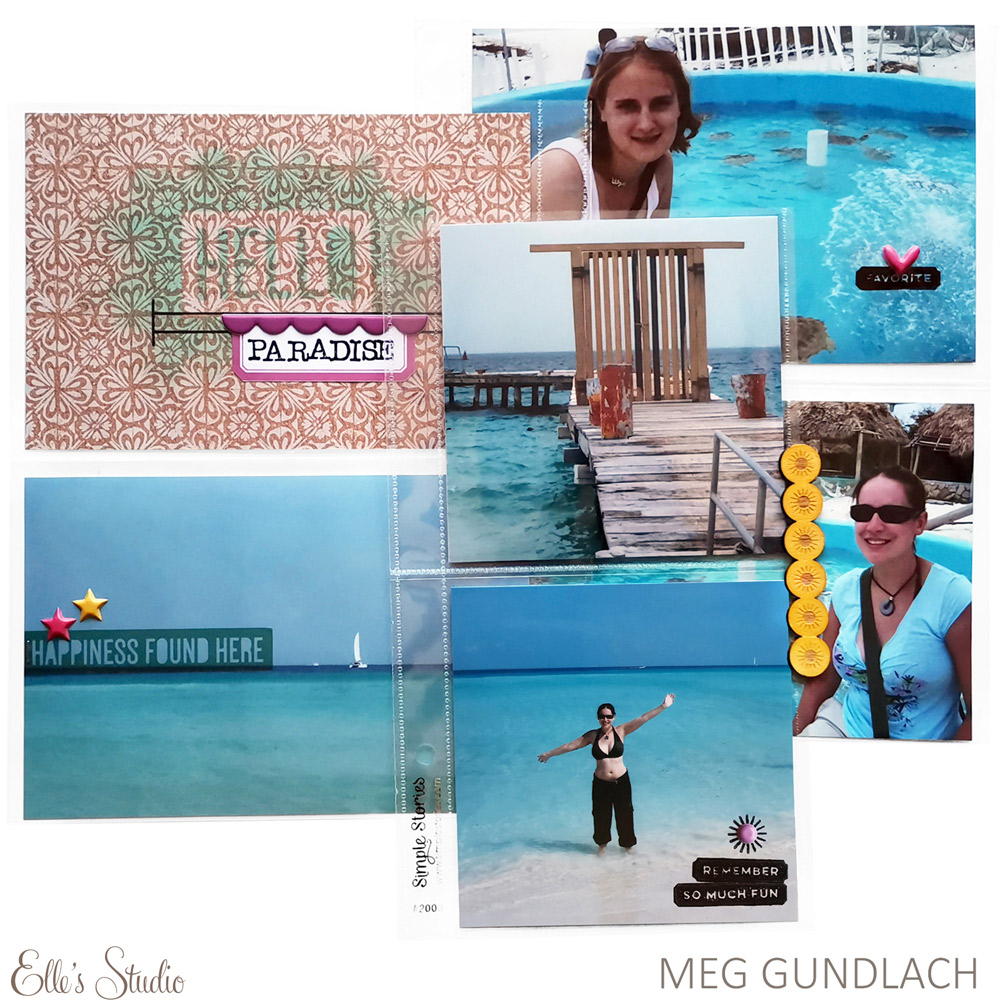
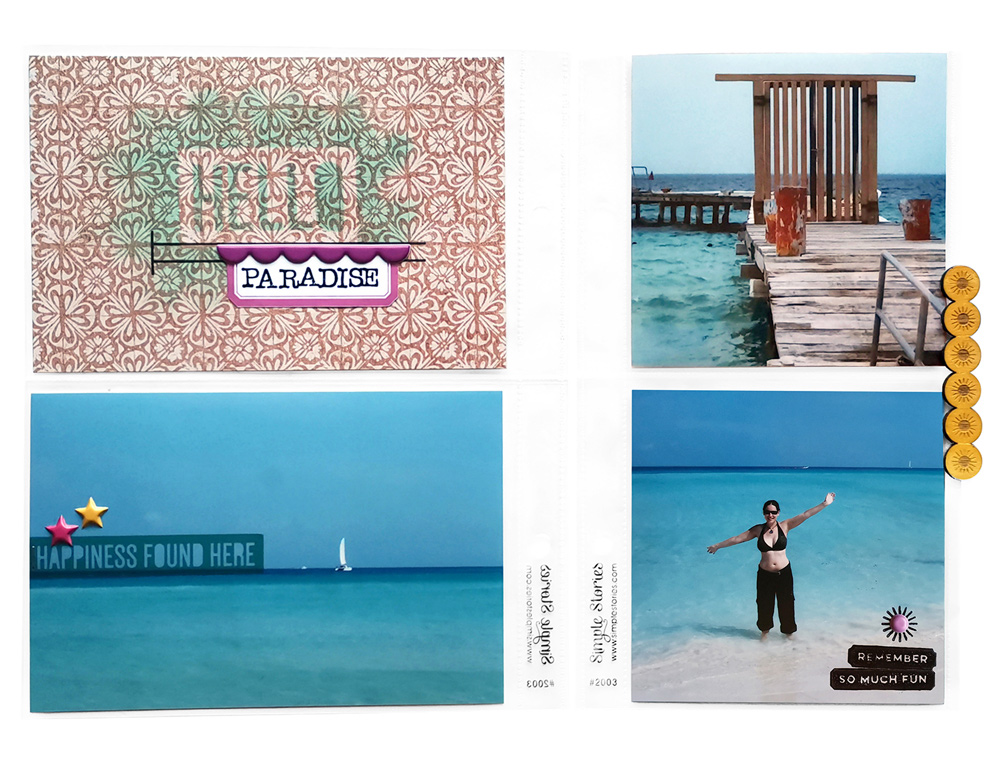
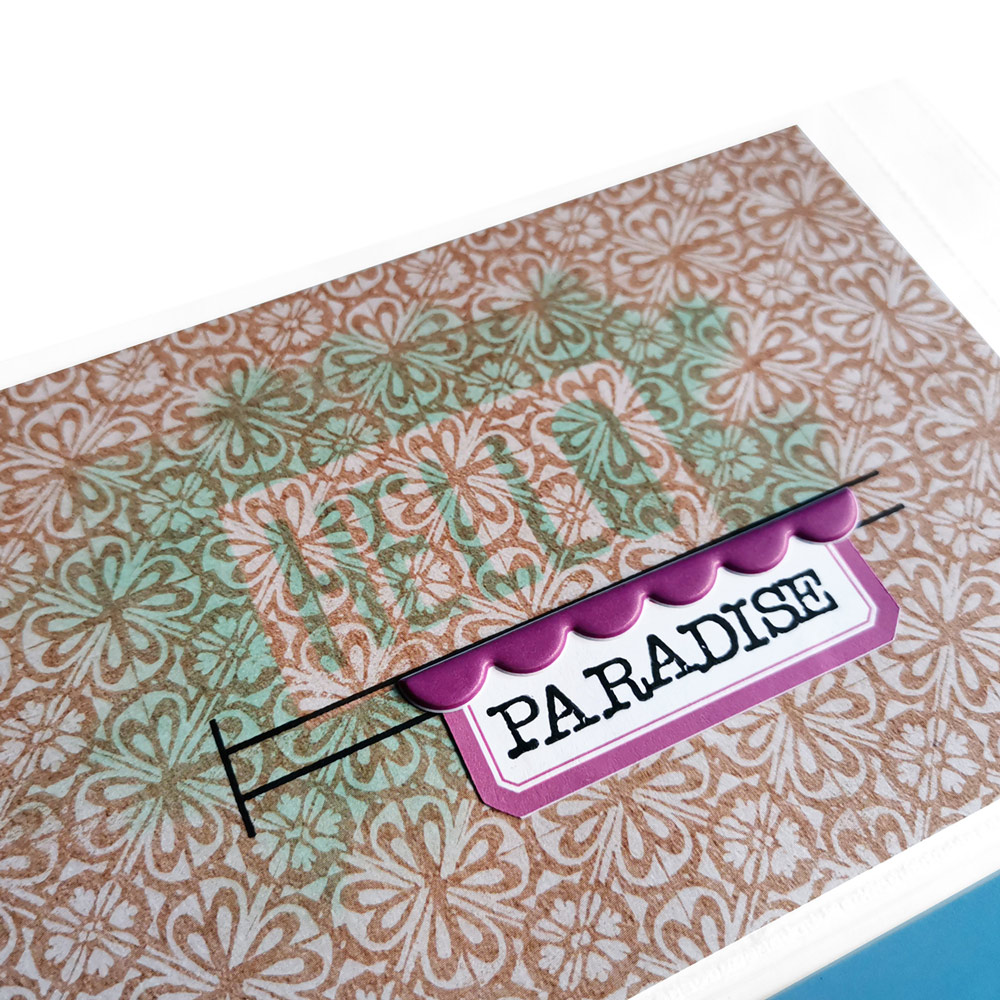
I loved the beachy vibe of this paper from the Good Times Paper Stackand I loved the Knockout Words Metal Die, but I didn’t want to distract from the few water photos I had to include. To mellow my title tag, I used the die to make a stencil from a scrap of sticker paper. Then, I sponged seafoam ink messily over the top and peeled the stencil off. Nothing better than a super versatile new tool to add to your supplies!
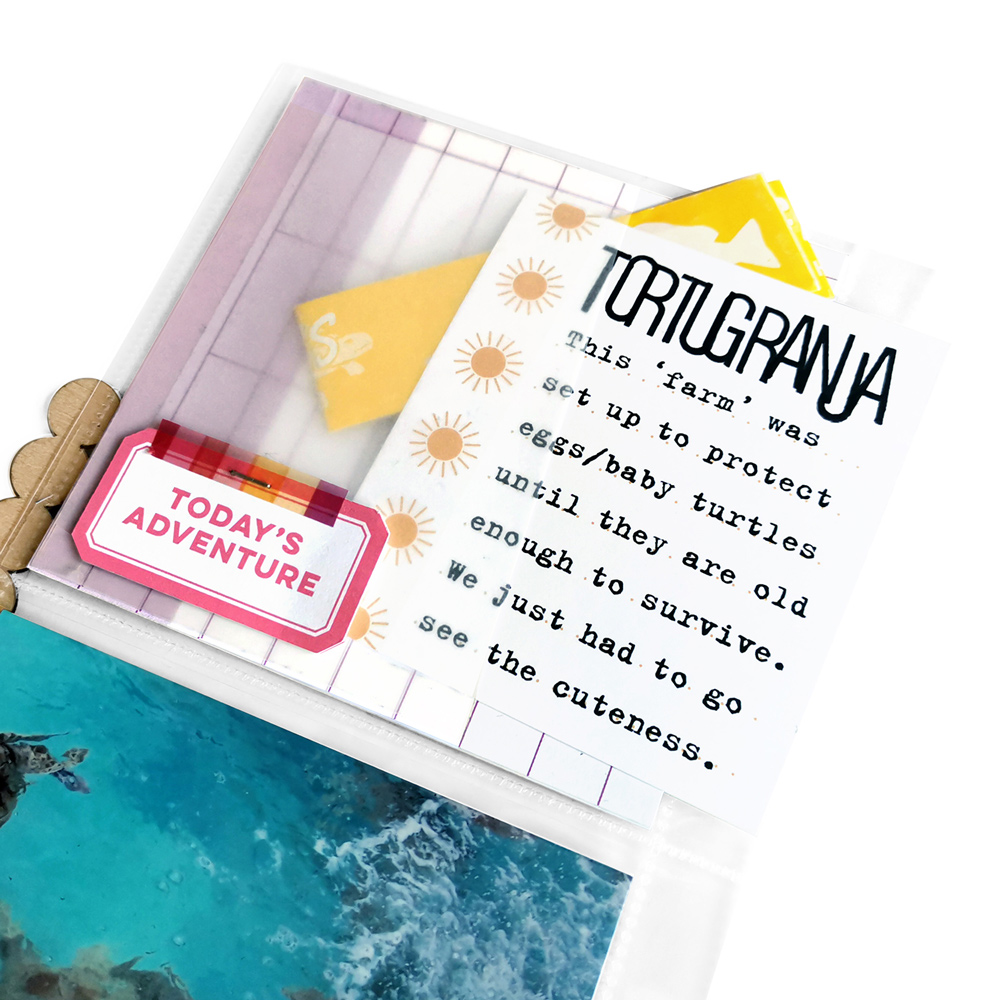
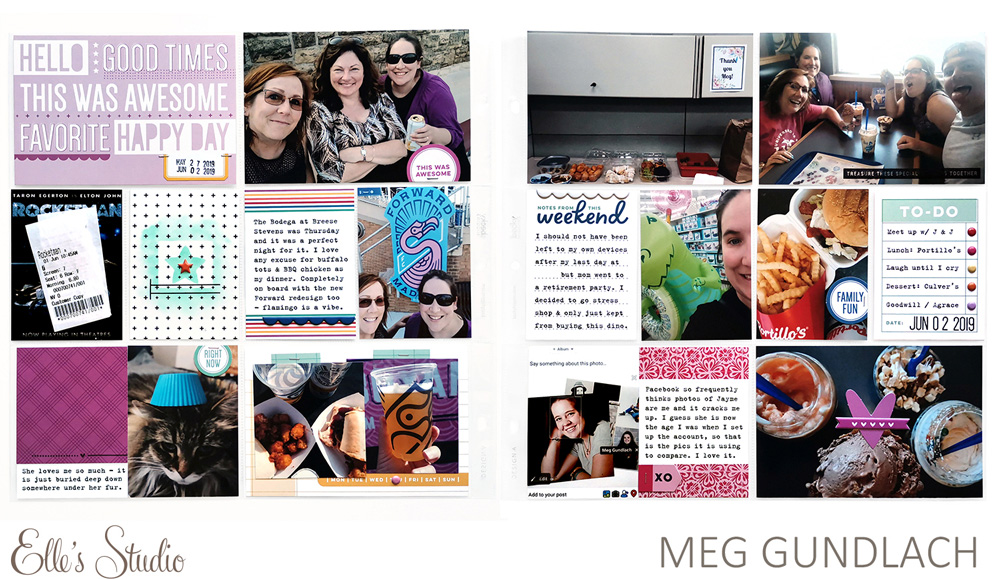
Having this whole spread full of bright blue photos was the best, because all the fun colors from the May 2021 kit and add-ons just bounced right off. This side of the spread included journaling and memorabilia, a wristband and a ticket, so I kept the embellishments to scaled-back versions of what appeared on the other half. Carrying on my love affair with borders this month, I added one of the Wood Veneer Borders along the edge of the insert, but only inked the front.
Because I’m working with the 4 x 6 inch photos I printed in 2006, 4 x 8 inch is my insert size of choice for extra photos. This is also great because it can easily accommodate any of the tags or patterned papers included in Elle’s releases. I cut down my journaling tag slightly so that I could corral everything I needed into one pocket. This was an easy place to tie together the pink, yellow and purple color scheme I have been using across the spread.
Another fun fact? This is one of the last spreads for this trip and NONE of the others are done. Does not bother me one iota; they will get there eventually. Are you a ‘do it all in order’ or a ‘follow your whim kind of scrapper’? I’d stay to discuss it longer but I hear the siren call of a completely different project, so… until next time, friends!
Show us what you’re creating in pockets using your May 2021 kit and add-ons! Join our Elle’s Studio Facebook Group and post on the discussion board, or share on Instagram using the #EllesStudio hashtag! We’d love to see your pages!
Comments Off on Past Travels in Pockets with Meg Gundlach | Share This
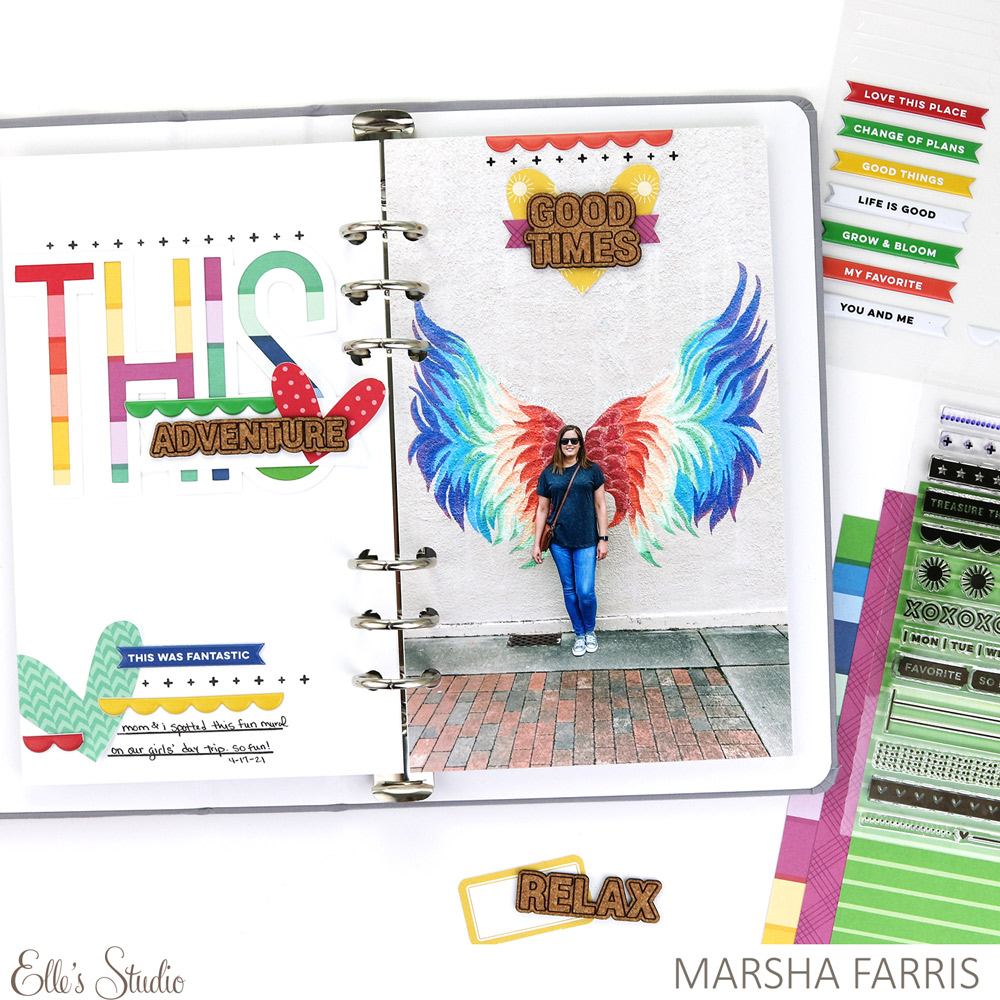
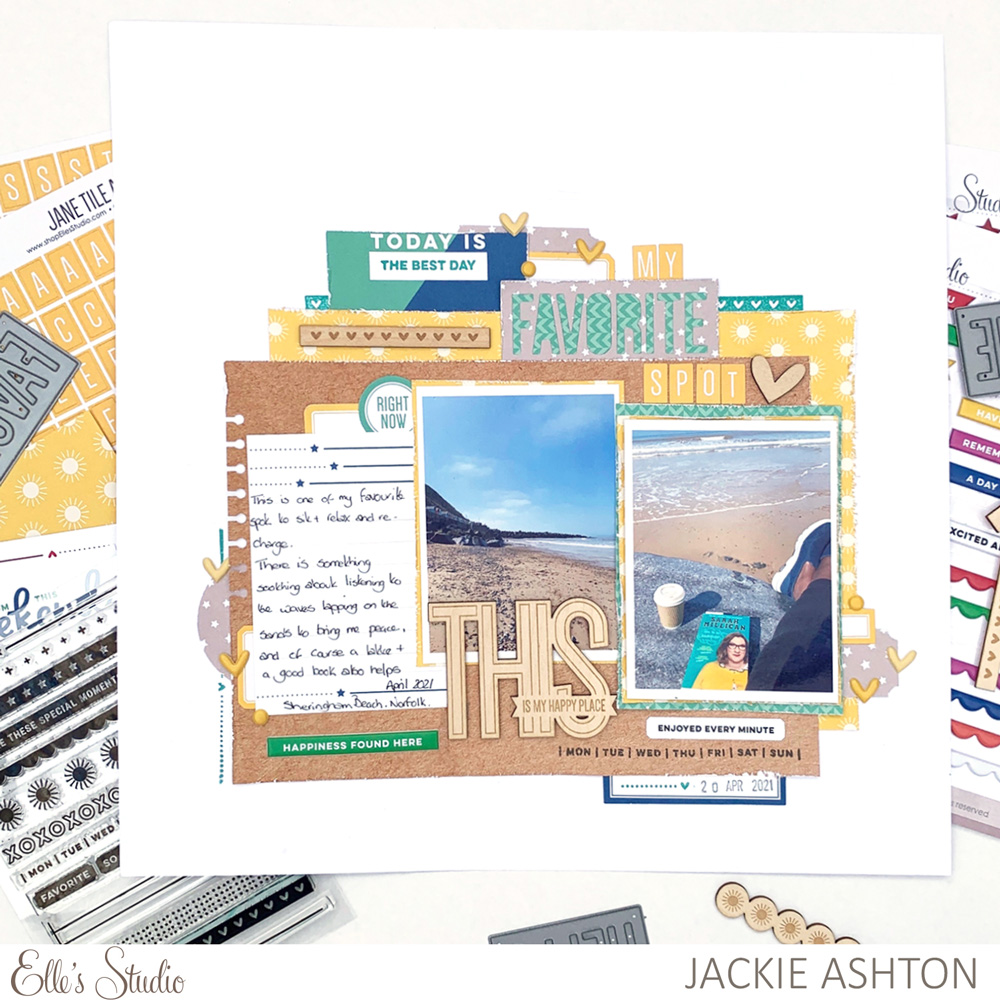
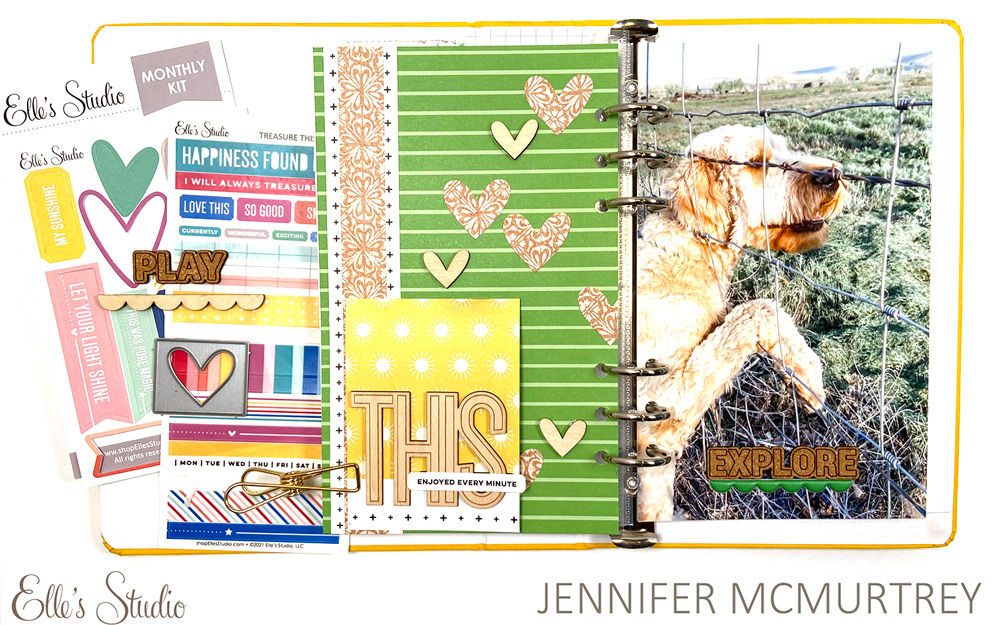
Hey, Elle’s Studio friends! It’s Marsha, and I’m excited to be here today sharing a fun and colorful traveler’s notebook layout for Five on Friday! It was quite a challenge to use only five products from the May 2021 kit and add-ons because there are so many amazing goodies in this month’s release!
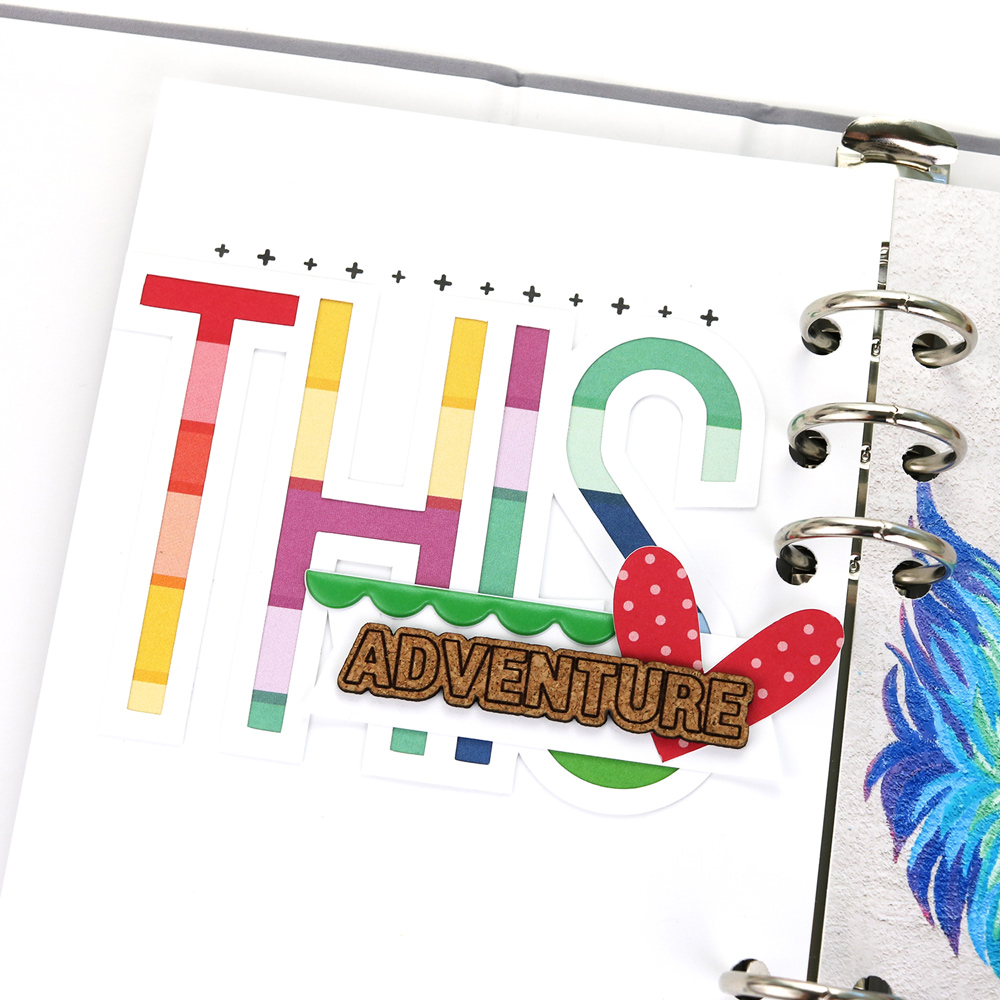
To begin the project, I resized “this” from the May 2021 Cut Files to serve as the title for my layout and cut it out with my digital die-cutting machine and white cardstock. Using cut files is such a great way to stretch your supplies and make a big impact on your layout! I chose to back the cut file with a striped patterned paper from the Good Times Paper Stack. I backed each letter separately, so all of the colors were represented. One of the Cork Words was perfect to complete the title.
For the other side of the layout, I printed my photo at 5 x 8.25 inches to fit as a full page in the album. I love using photo enlargements in my traveler’s notebook. It is the perfect way to feature a favorite photo! On the negative space at the top of the photo, I layered the “good times” Cork Word over one of the hearts I created earlier using the cut file. I embellished the page simply with the Fun with Borders Stamp and a sticker from the Puffy Banners and Border Stickers.
I hope you are inspired to play along with Five on Friday! Join in by selecting only five products to use on your next project! Be sure to share with us using the hashtag #EllesStudio on Instagram or in our Elle’s Studio Facebook Group. We can’t wait to see what you create!
Comments Off on Five on Friday with Marsha Farris | Share This
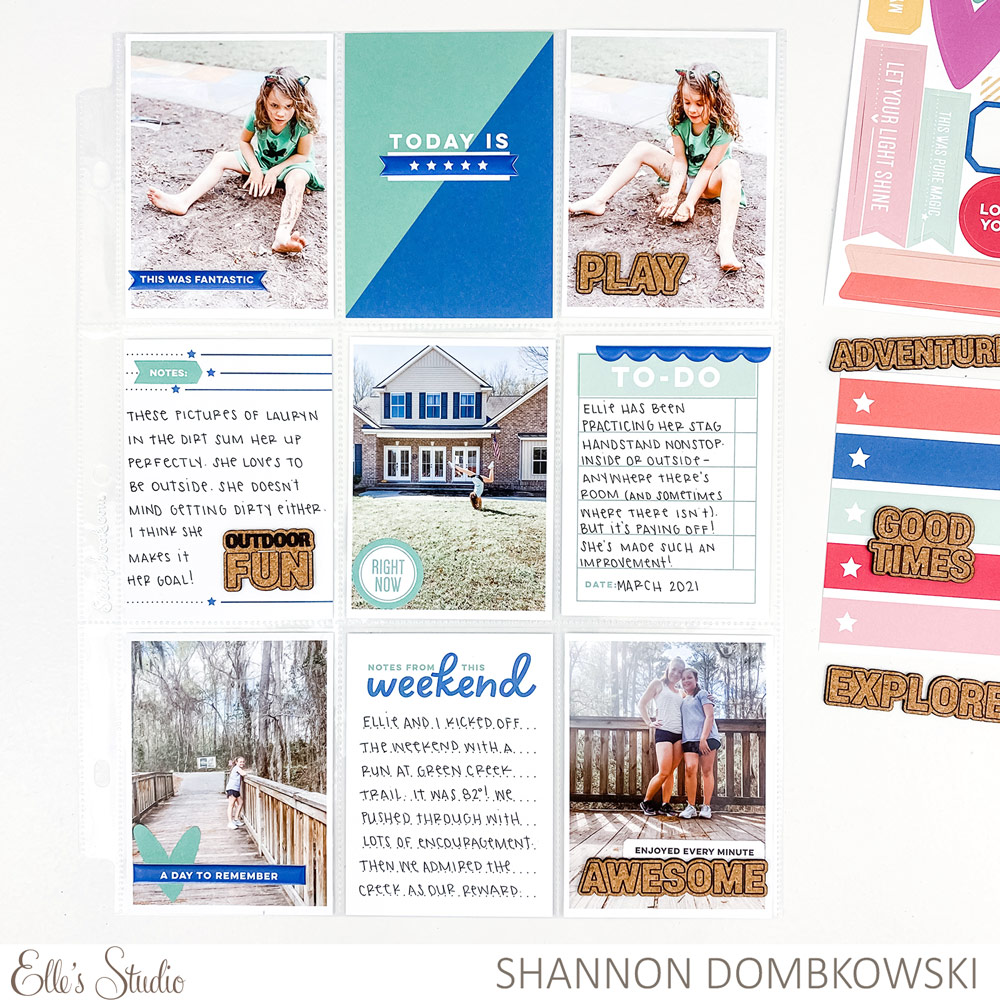
Hello! It’s Jennie McGarvey joining you on the blog today with a Throwback Thursday project. How far are we throwing it back? ALLLLLLL the way to May 2020 and if we’re being honest, I highly encourage you to check out the Elle’s Studio blog from May 2020. The United States was in full social distancing mode, unsure of where the COVID-19 pandemic would go and do the projects ever reflect that! It’s such a cool time capsule into an unprecedented time.
I used a couple of different layouts from the design team to inspire me for my project. If I’m going to be honest, this was the most fun I’ve had in a while. I wasn’t creating my norm and I wasn’t stressing over a sketch. (Yes, sketches kind of stress me out!) It was so fun to pick and choose projects and what from those projects to use was the most fun for me.
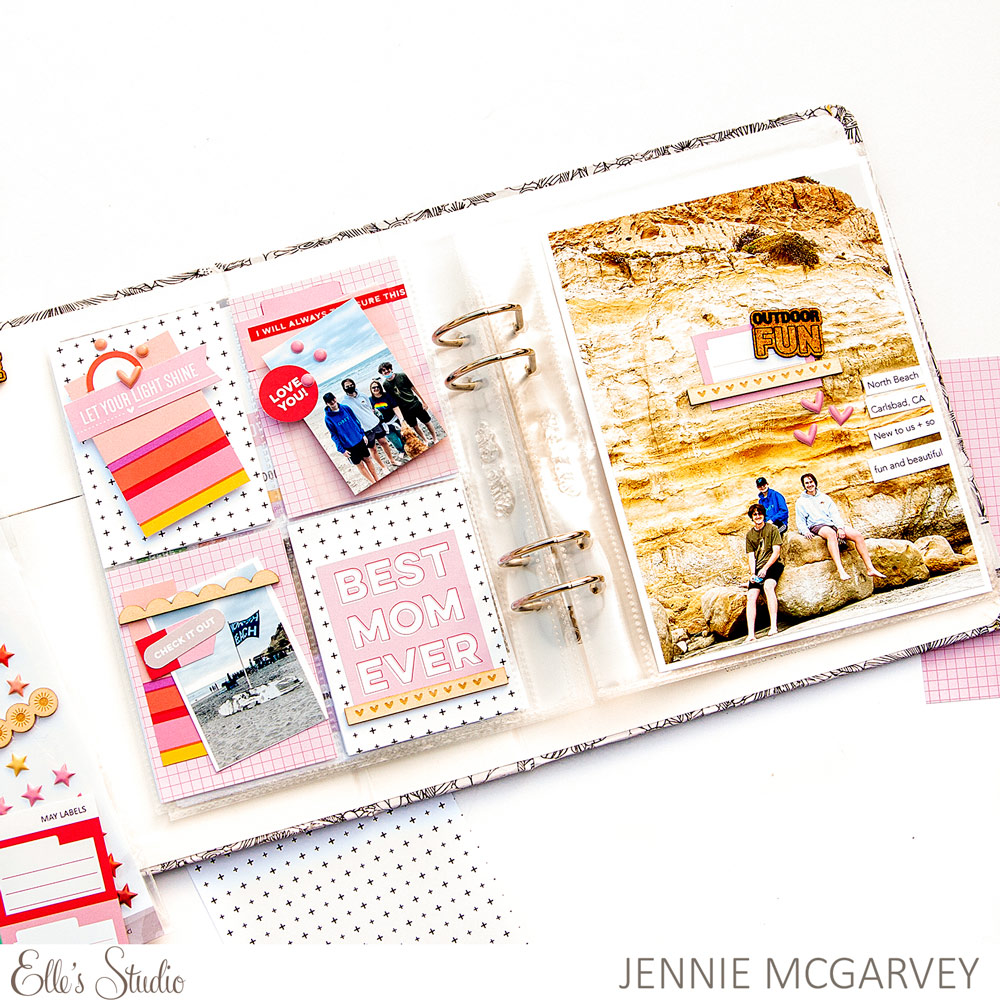
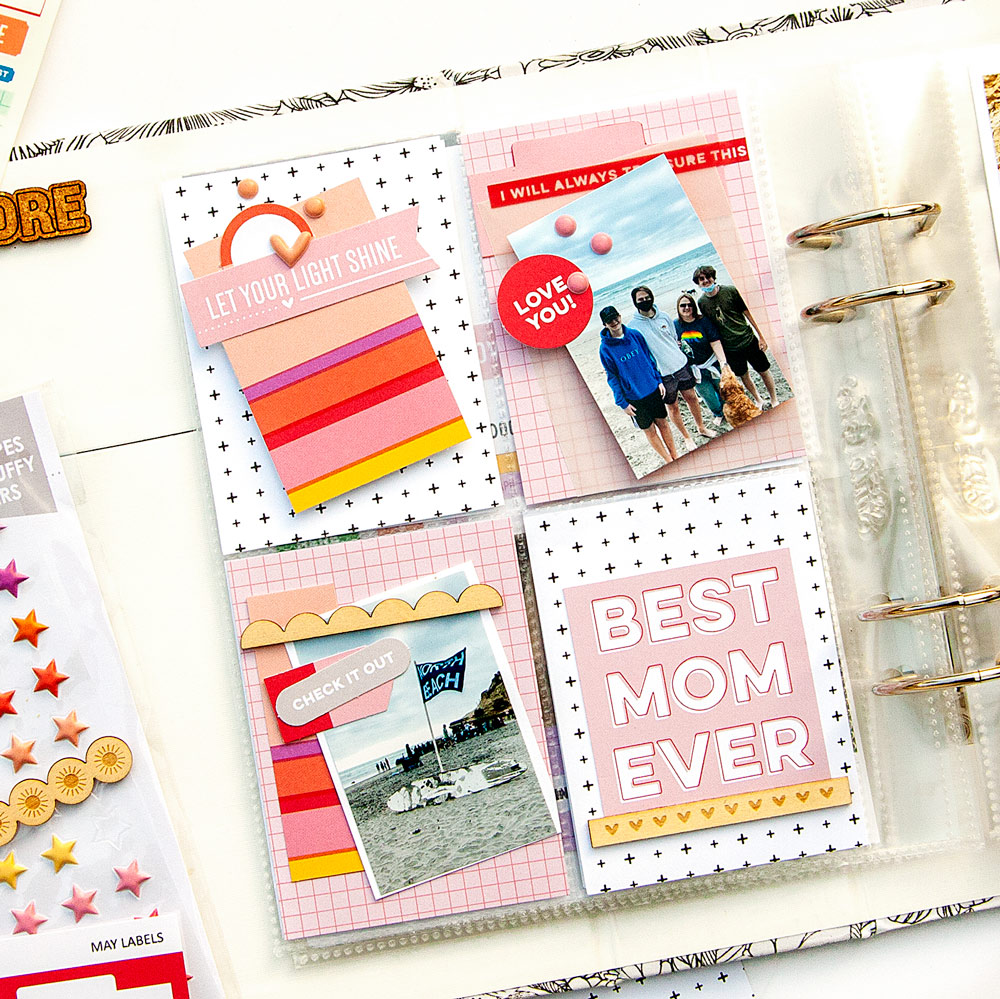
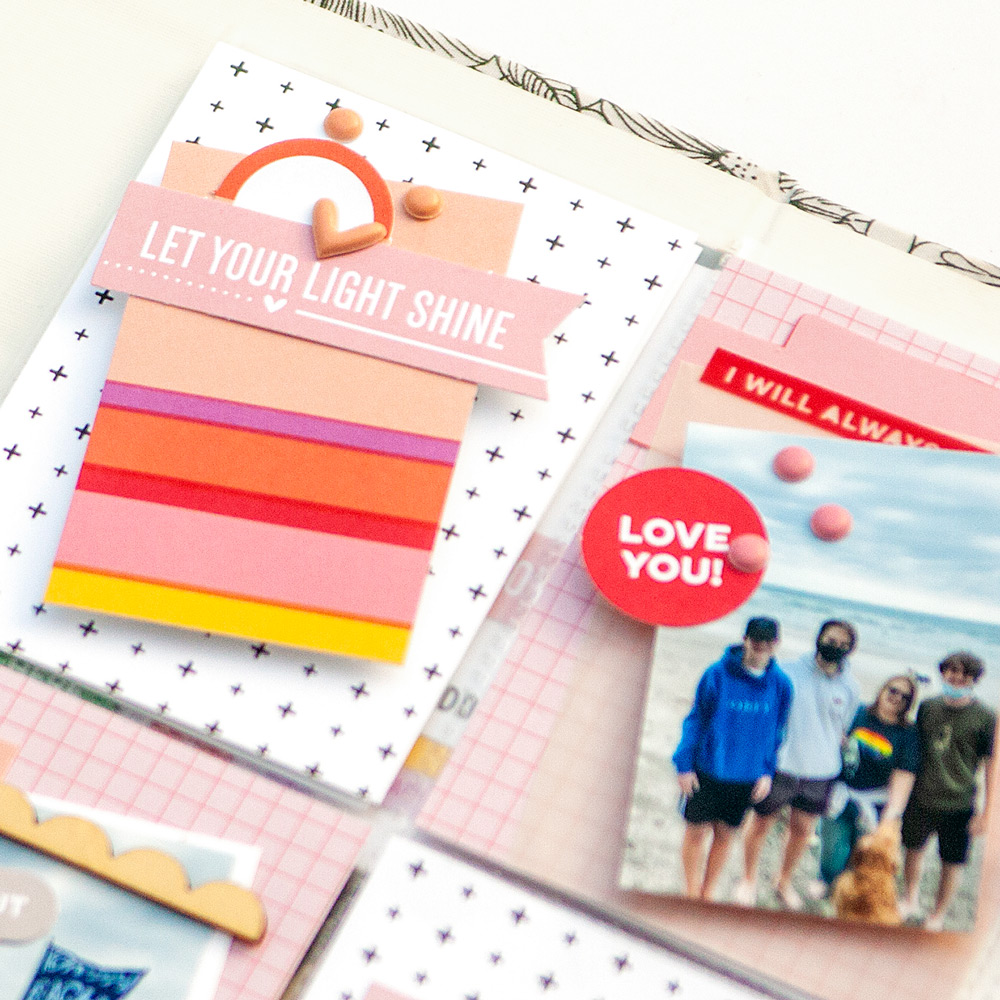
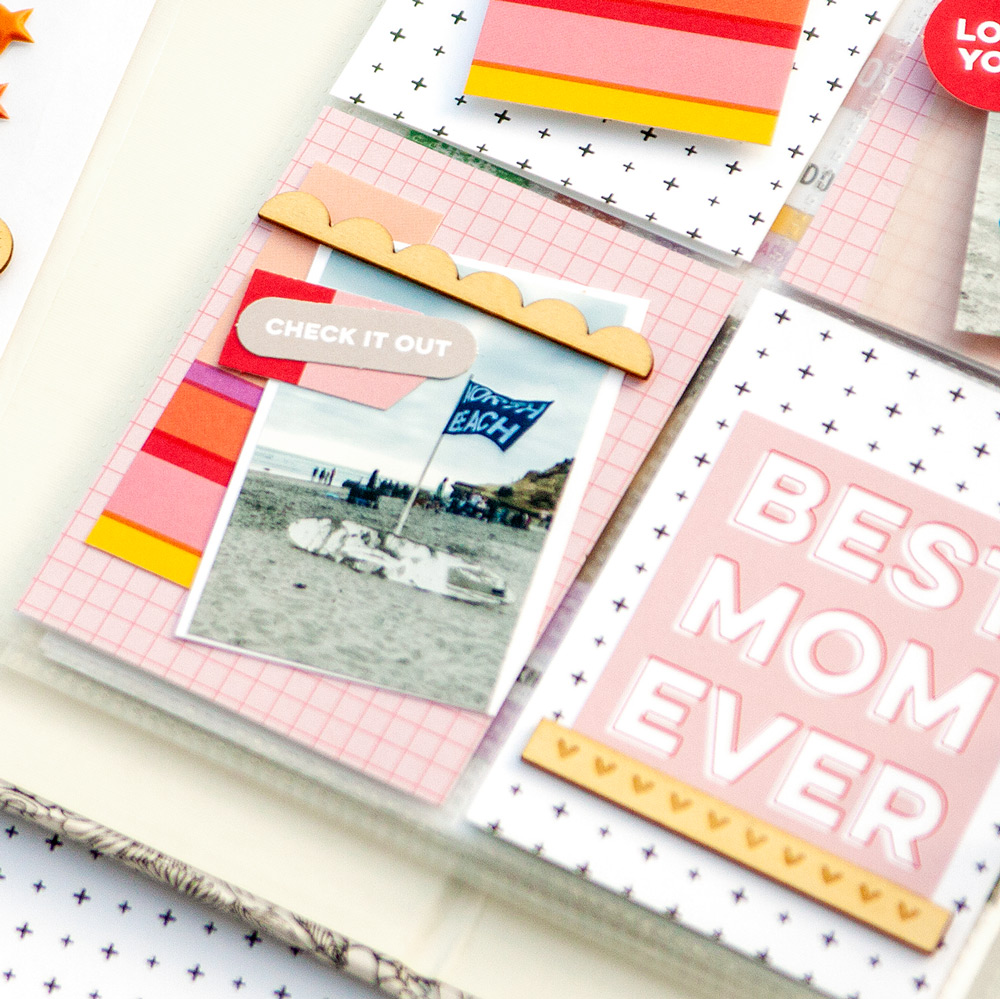
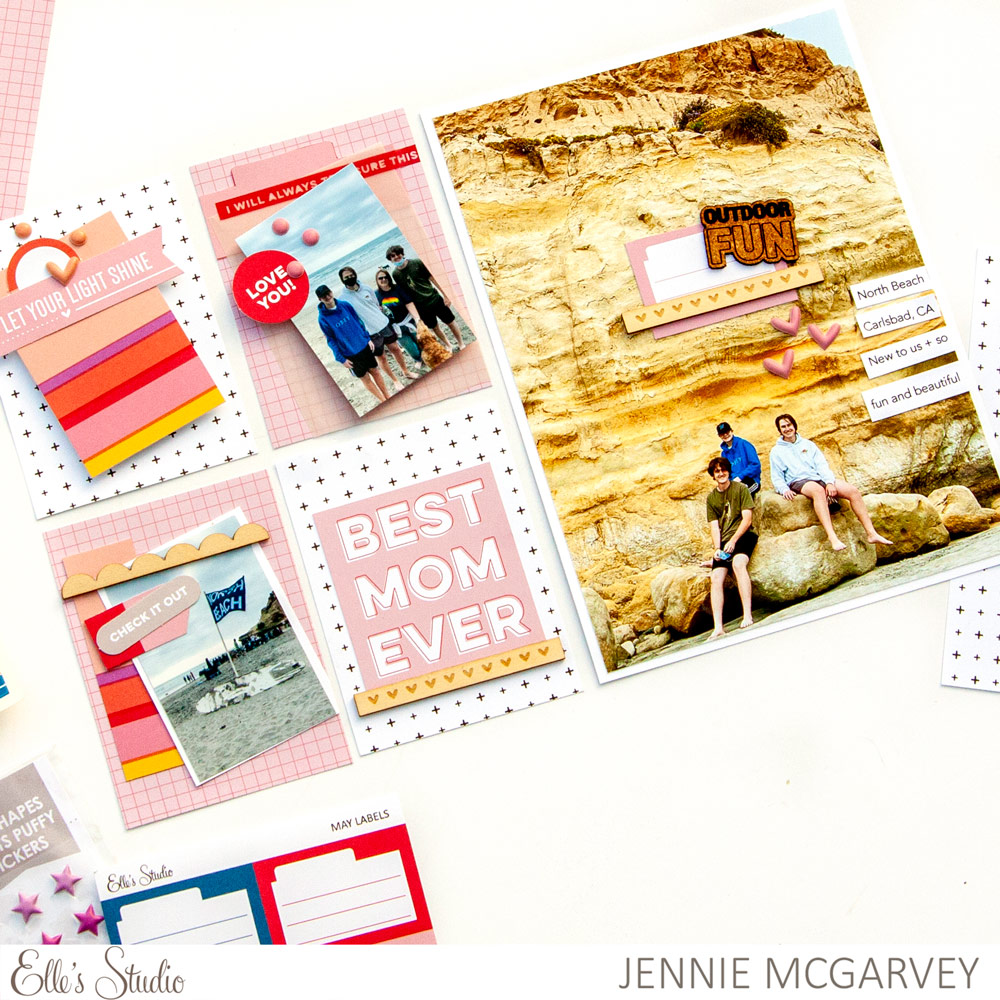
The left side of my layout is made up of four 3 x 4 inch pocket tags and I was obsessed with Amanda-jayne Baldwin’s “Story” layout from the May 2020 design team gallery. I absolutely loved the grid and the incredible amounts of layering upon layering within that grid. I decided that I wanted to do a four 3 x 4 inch pocket page in my 6 x 8 inch album and that I wanted to layer in each pocket. It was easy to do and the only thing I pulled from my stash was a scrap of vellum and a scrap of white cardstock to mat my photo.
The May 2021 Kit had a few pocket tags that I used to cut up and layer, but the bases were all created with patterned paper from the Good Times Paper Stack.
I decided that I would stick to a mostly pink color palette, and it made choosing items easy. Of course, there are other colors represented, but by sticking to pink in the choices, it was easy to make each section feel cohesive. Another trick that helped the layout feel really tied together was to choose three of the tags to place at an angle on the top layer and then leave the fourth straight. It gives the page a playful feel, but the “BEST MOM EVER” tag from the May 2021 Kit helps ground the left side of the layout.
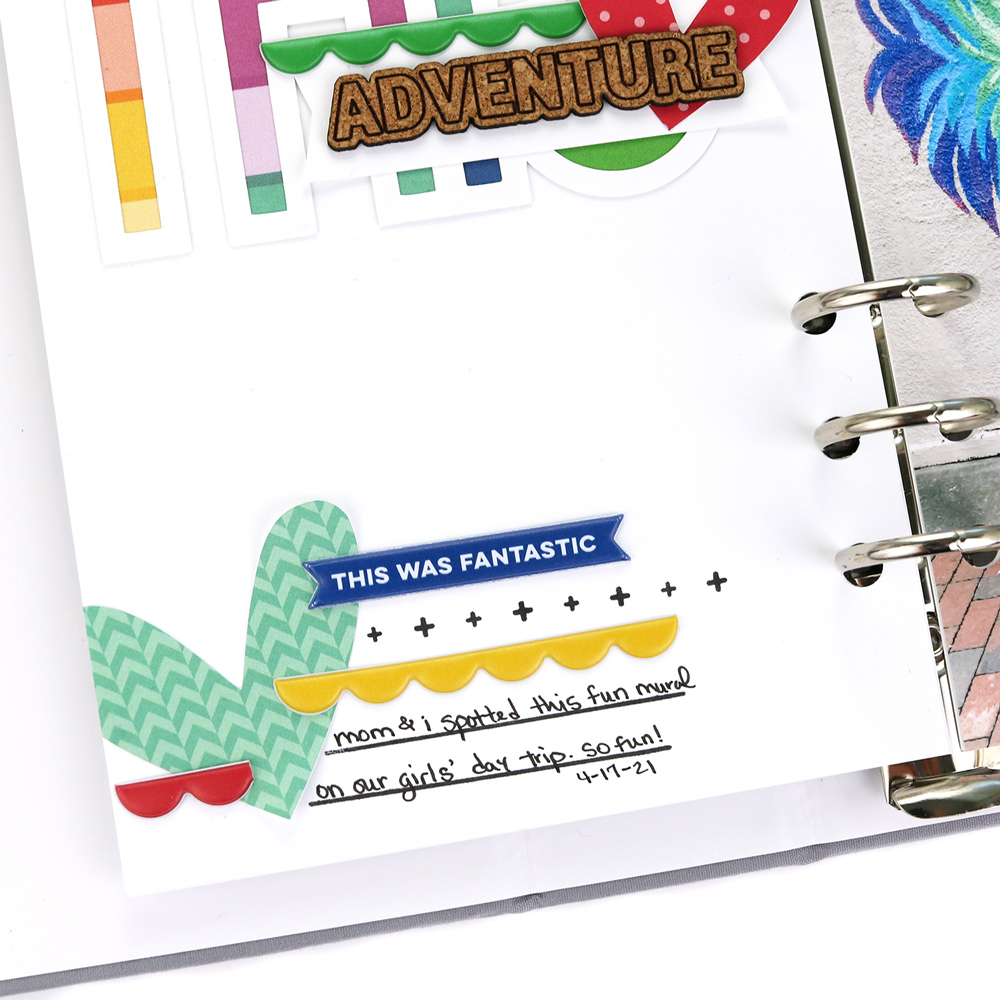
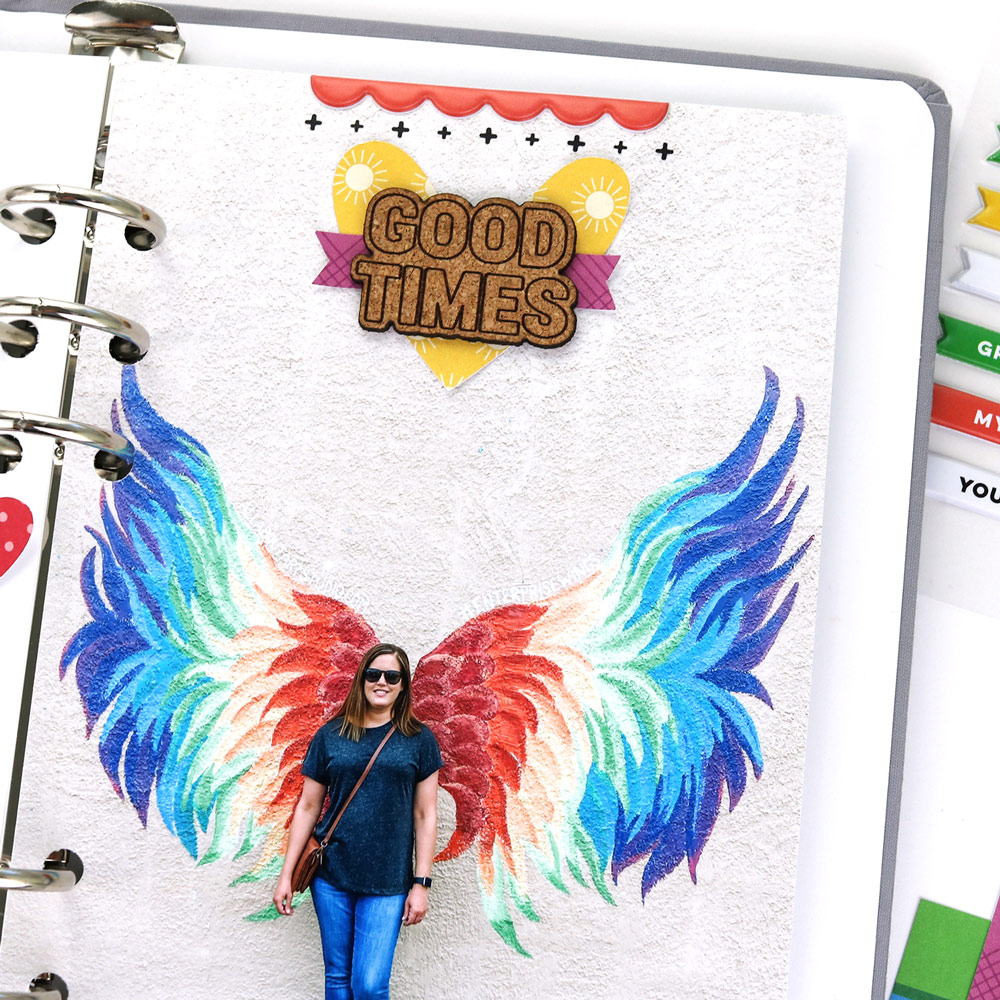
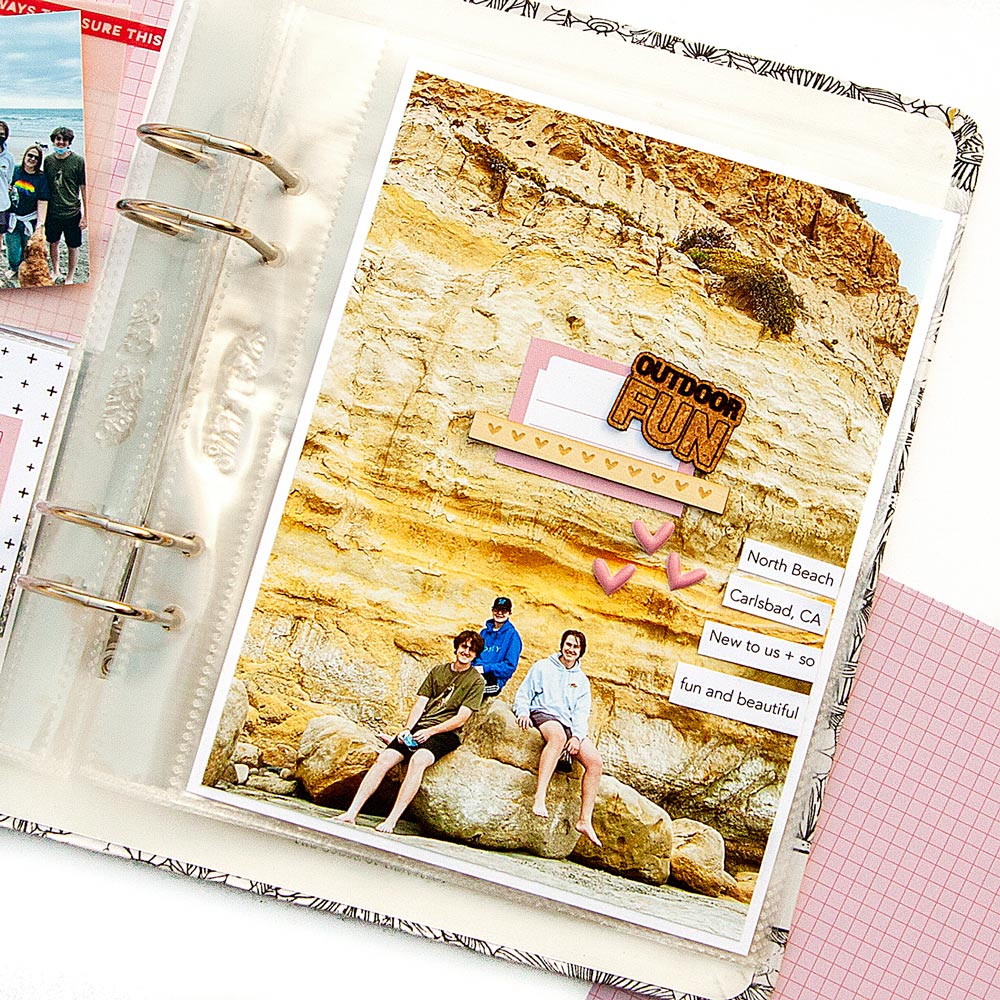
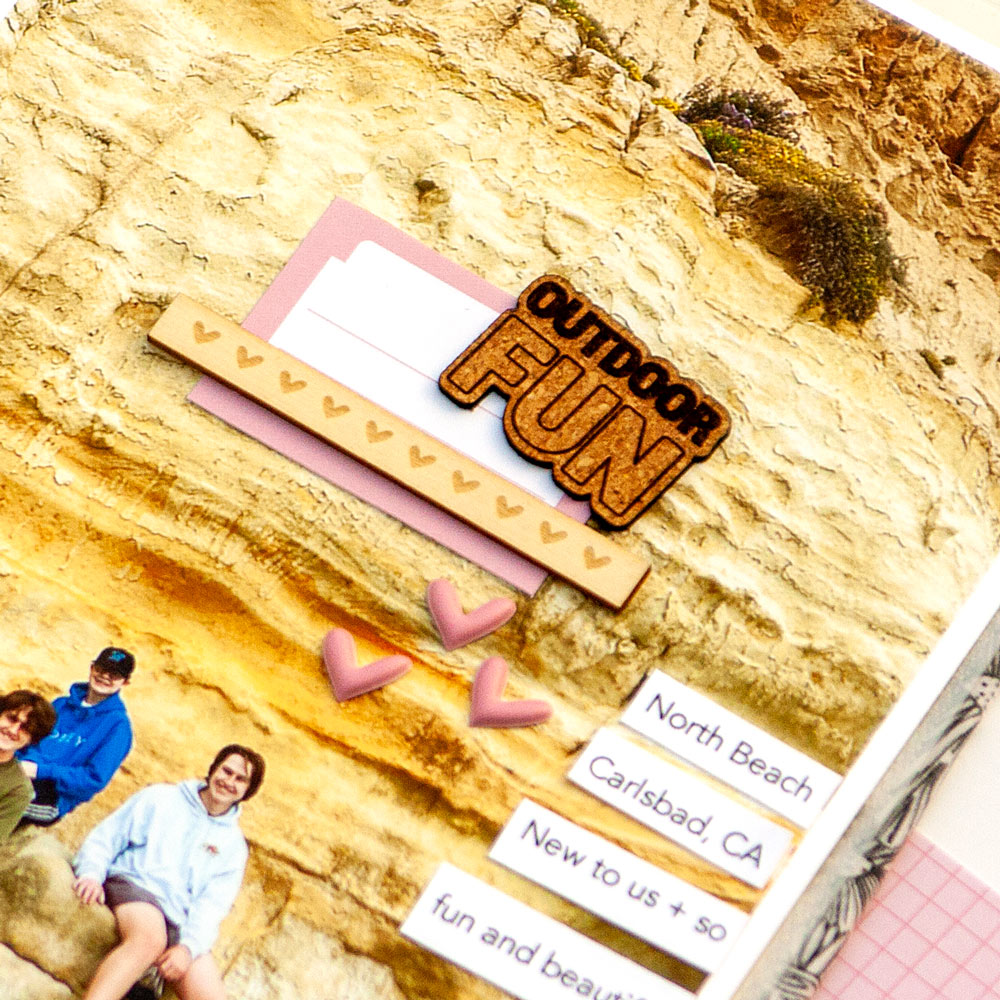
On the right side, I decided I would choose a second layout to inspire me. Again, this was easy as the Design Team Inspiration posts are full of amazing projects! I chose the “Simple Adventure” page that Jess Forster created to pull inspiration for my own project.
I used the full-page photo, matted with plain white cardstock from Jess’s layout. However, I wanted to use the wide-open space on my photo to add a bit of embellishing. I really do love how I was able to be inspired by Jess yet put my own unique spin on her project to make a page of my own.
How do you use the design team to inspire your projects? Do you take full projects to inspire you, or do you pull bits and pieces from their designs? We’d love to see what you are creating based on our designer’s projects, so make sure to share with us in the Elle’s Studio Facebook Group or on Instagram using the #EllesStudio hashtag!
Comments Off on Throwback Thursday with Jennie McGarvey | Share This
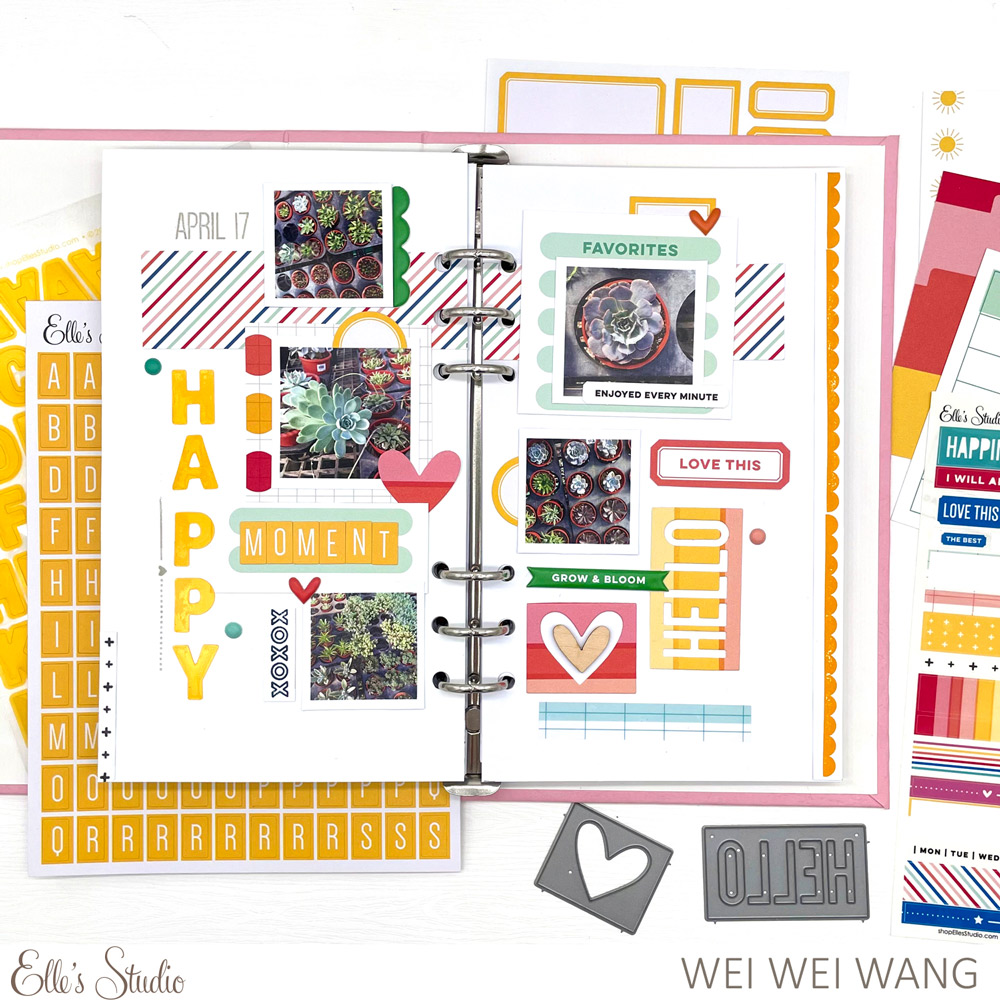
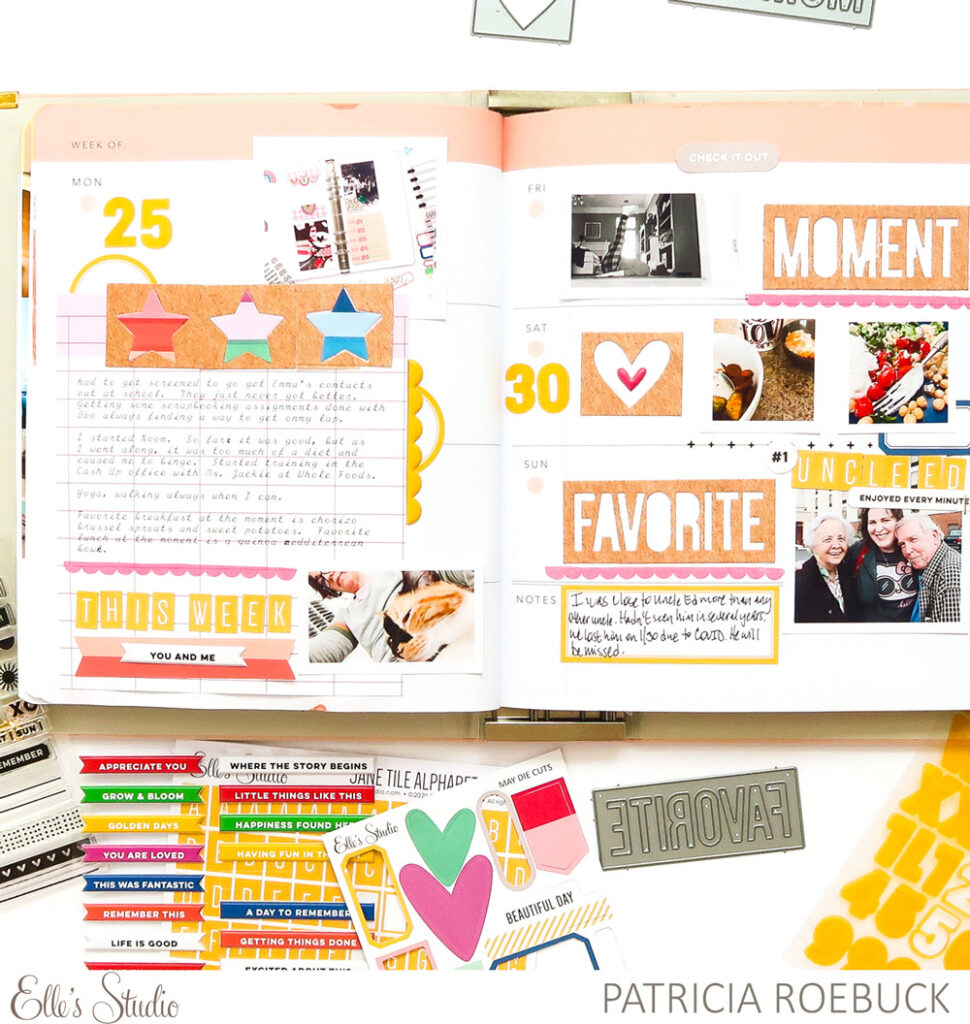
Hi, Elle’s Studio friends! Welcome back for more May 2021 kit and add-on awesomeness! It’s Amanda here, and today I’m shining the product spotlight on one of my favorite, must-have items from the May release: the fabulous Knockout Words Metal Die! This metal die set is absolutely aaah-may-zing and perfect for all types of crafty projects! The Knockout Words Metal Die is great for creating shaker pocket words and titles, card sentiments, making your own star and heart embellishments, and even decorating pocket pages! For today’s post, I’m sharing how simple it is to incorporate this metal die set into your everyday memory keeping pages!
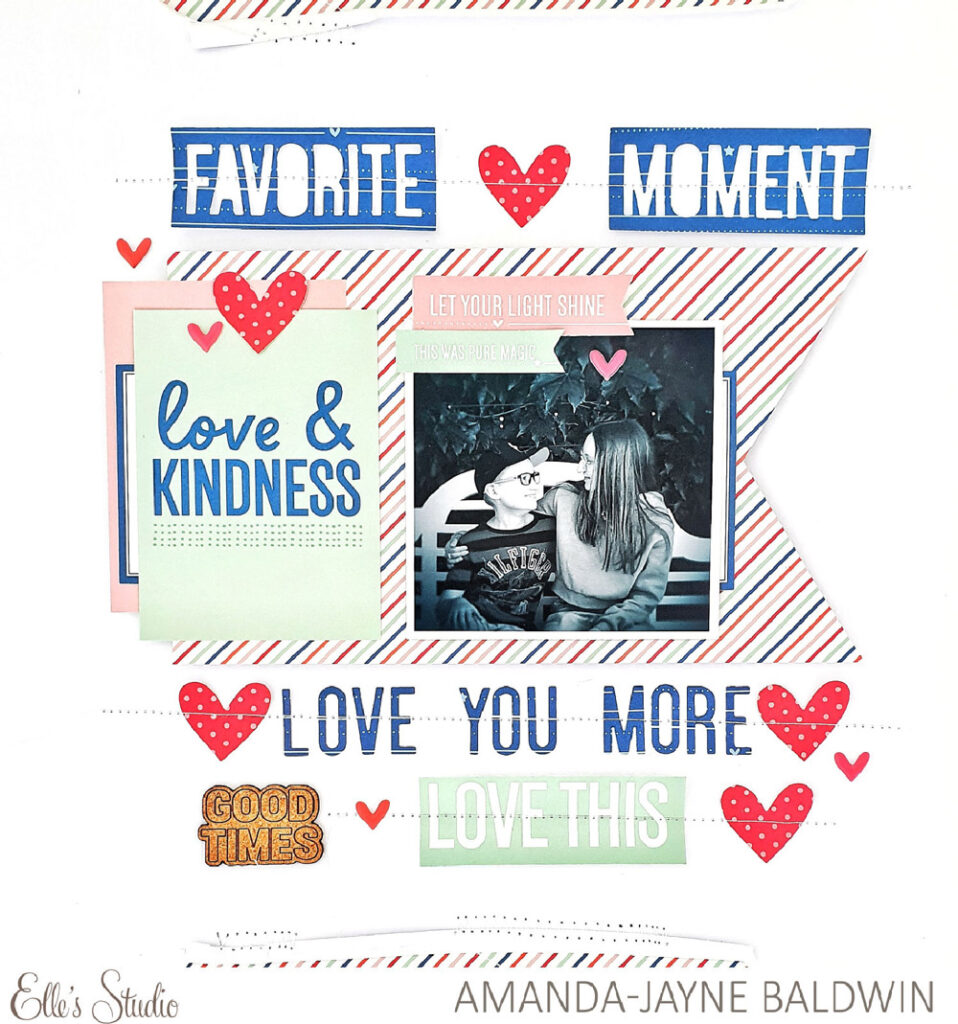
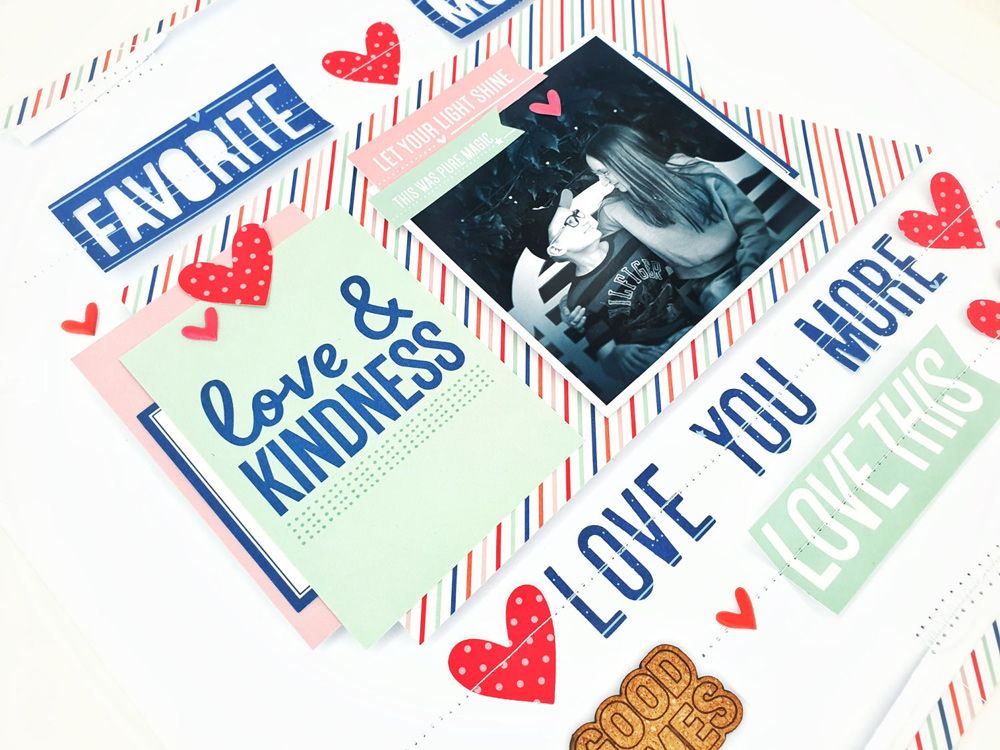
Oh how sweet and fun! Favorite moment, indeed! Let’s take a closer look at how I’ve used the Knockout Words Metal Die in three different ways on my layout!
1. Create a big title that packs some punch!
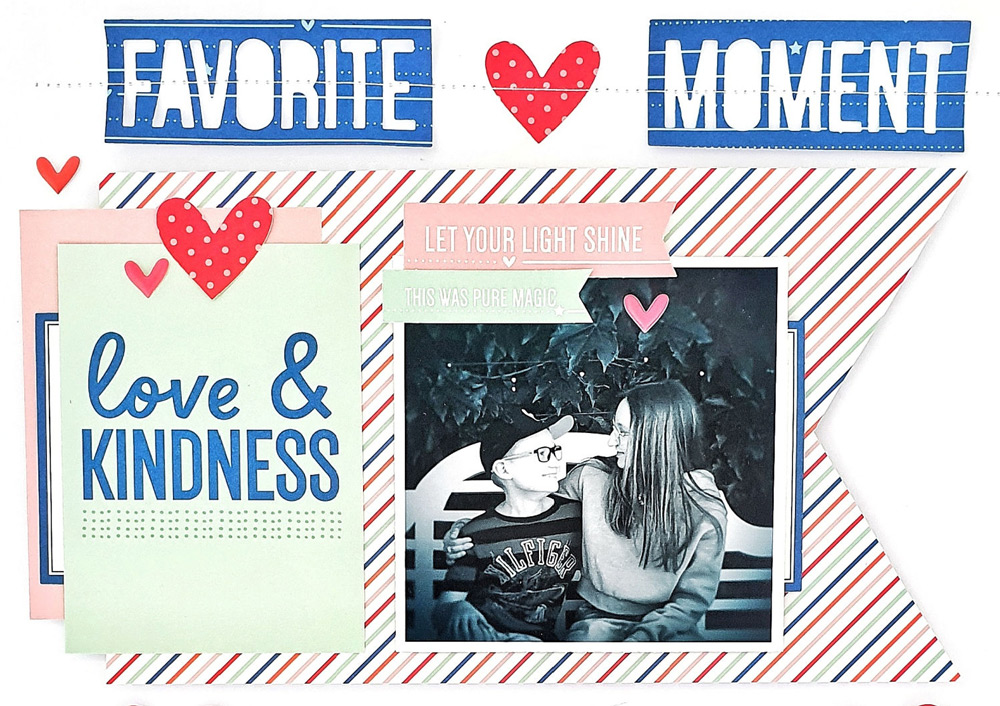
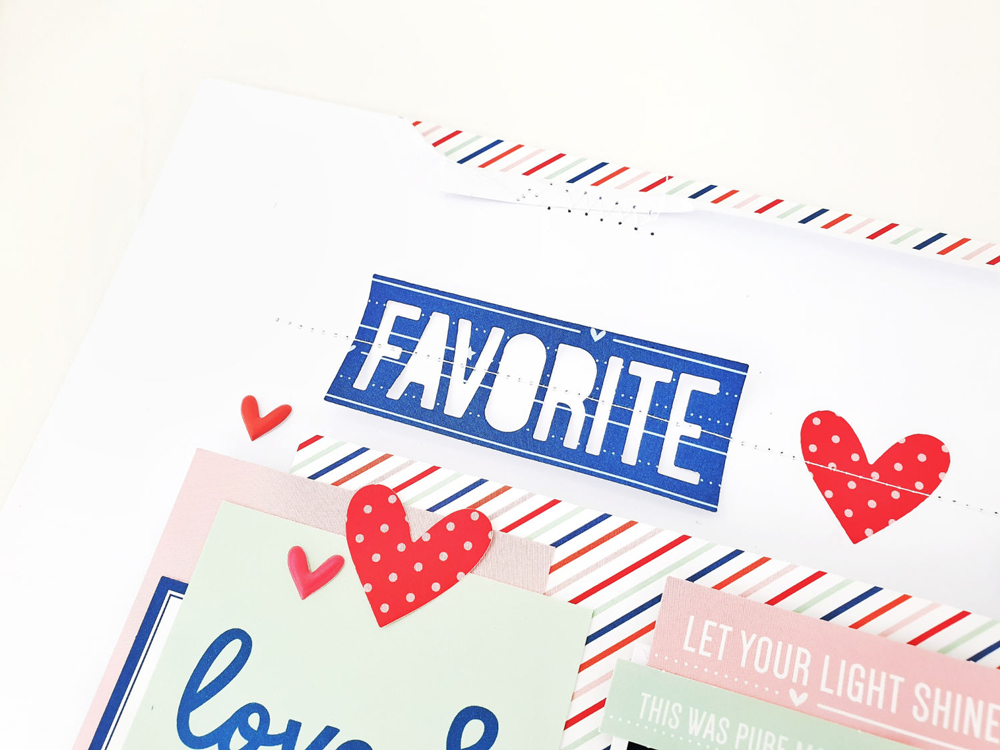
I couldn’t resist using the negative cuts from the Knockout Words Metal Die to form my “Favorite Moment” title with the Good Times Paper Stack. I used the deep blue patterned paper to make this punched-out title look even more striking and effective! I could have also backed these die cut words with another patterned paper or even some clear acetate, but instead I opted to messily machine stitch through mine to compliment my overall page design.
2. Create your own custom embellishments!
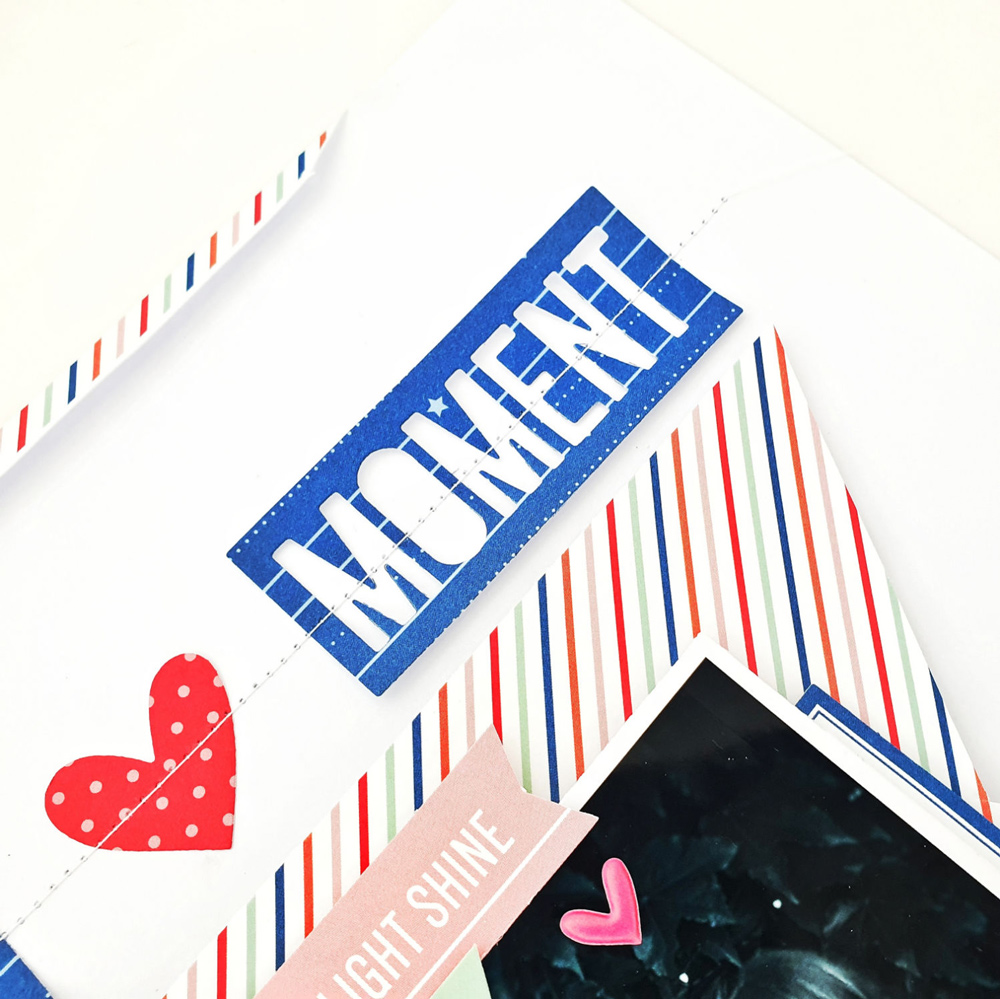
With such a loving theme to my page’s story, it was an obvious decision to make my own heart die cuts from the heart-shaped die. Again, I used a Good Times Paper Stack patterned paper with the die set, but cork, vellum and fabric would have been a terrific option for this too! The star in the Knockout Words Metal Die could also be incorporated this way.
In keeping with my distressed and messily machine-stitched page, I also stitched the custom created hearts onto my layout. Repetition and continuity in design is everything to me!
3. Use the Knockout Words alphas to create your own sentiments!
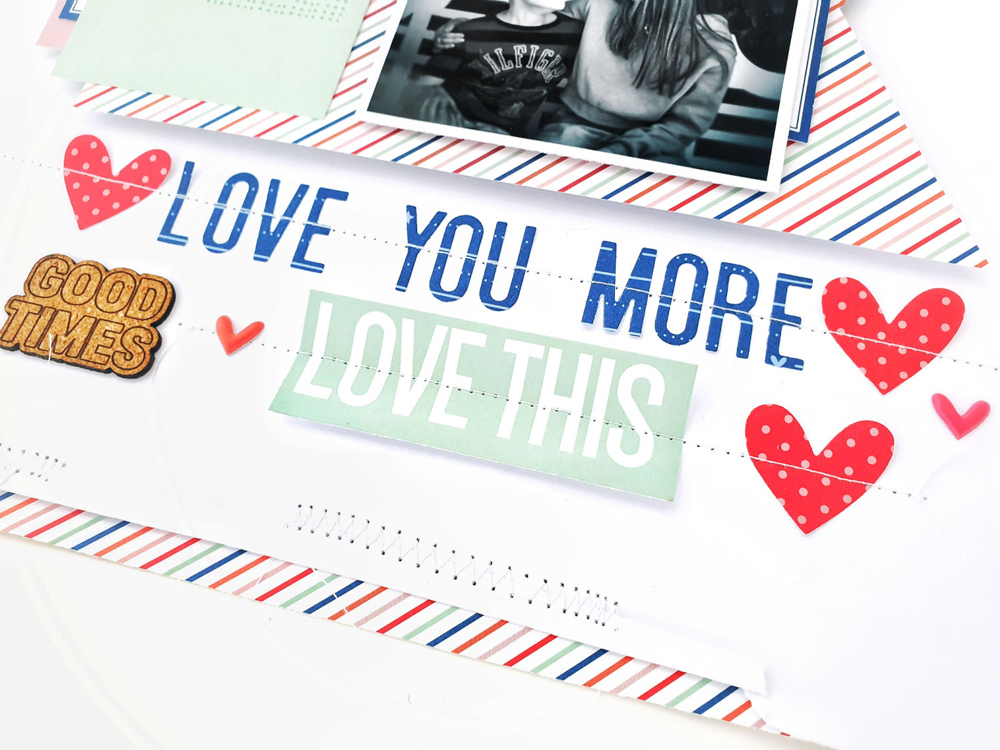
Beneath my photo cluster is the machine stitched and die cut sentiment “love you more,” which I created from combining the “Love You,” “Favorite,” and “Moment” word dies. I rearranged the die cut alphas to make a sentiment that suited my story and needs—simple, but such a great way to maximize this versatile metal die set!
These are simple, striking and really easy ideas to use the Knockout Words Metal Die in your everyday scrapbooking projects! I hope my layout has inspired you to get creating with this awesome die set today!
Hello friends! It’s Michelle here, and I am so happy to be with you today using the May 2021 kit and add-ons to share some fun New York City pocket pages! We love to travel and explore, but lately travel has been a bit more limited for all of us. The bright side of this is that we have extra time to remember and appreciate those travel moments even more! I think you experience the joy from those moments that much more when you are going through the process of documenting those memories.
I was really inspired by the colors and the products in this month’s release and it was quite easy to choose this spring day in NYC to document. For me, the best part about monthly kits are that it takes a lot of the decision making out of the way and it allows your inspiration to flow much easier using what has already been curated for you. My favorite part is always the process of going through it with my hands and then making notes as I go along of what stories I want to document. Combine that with the fun of pairing the pocket tags and embellishments up with my photos and I am one happy memory keeper!
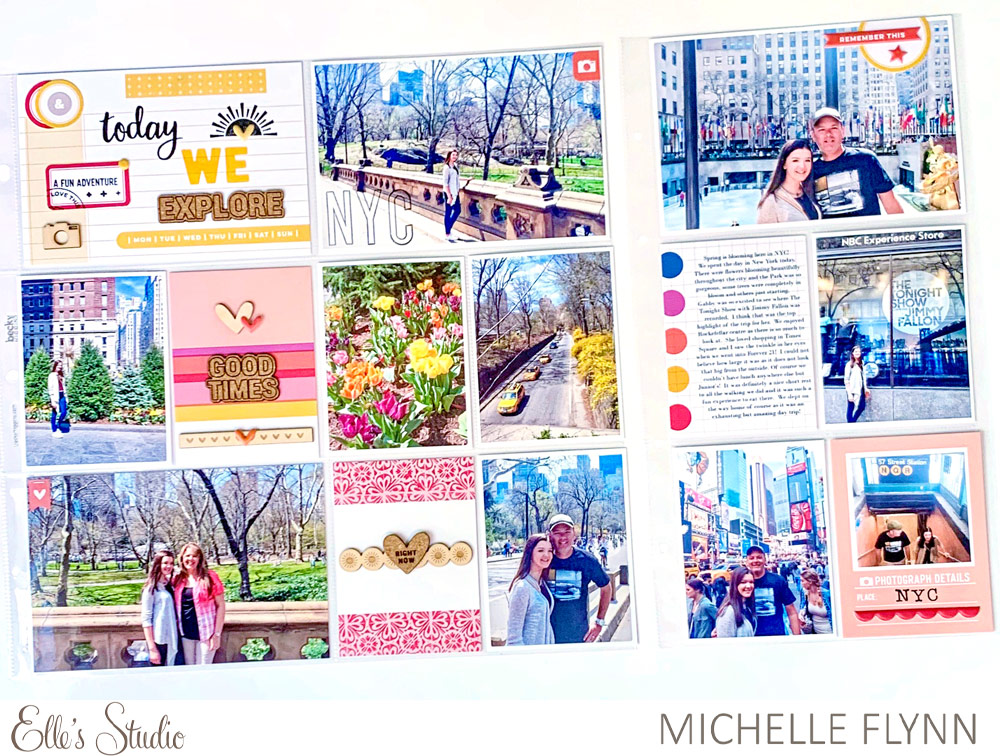
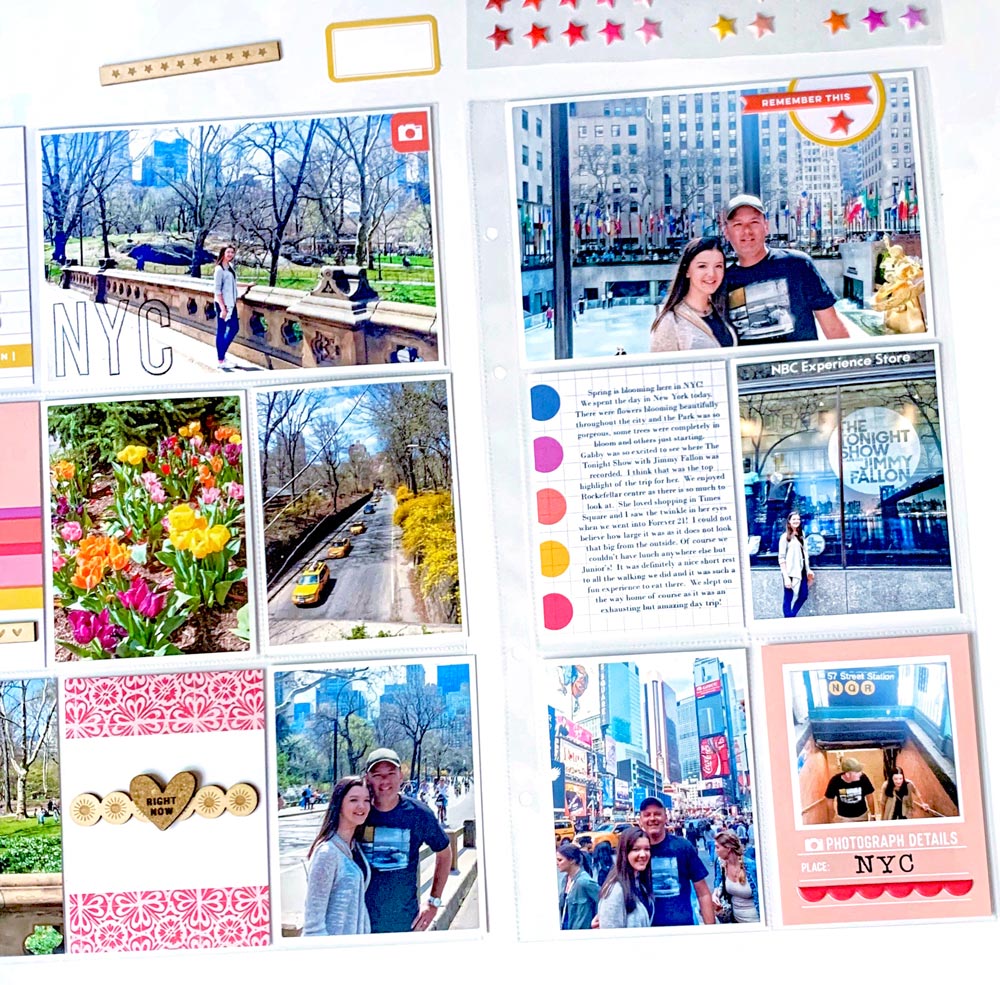
This is the completed layout I added to our album using this month’s release. Join me further below to see how it all came together using the May 2021 kit and add-ons!
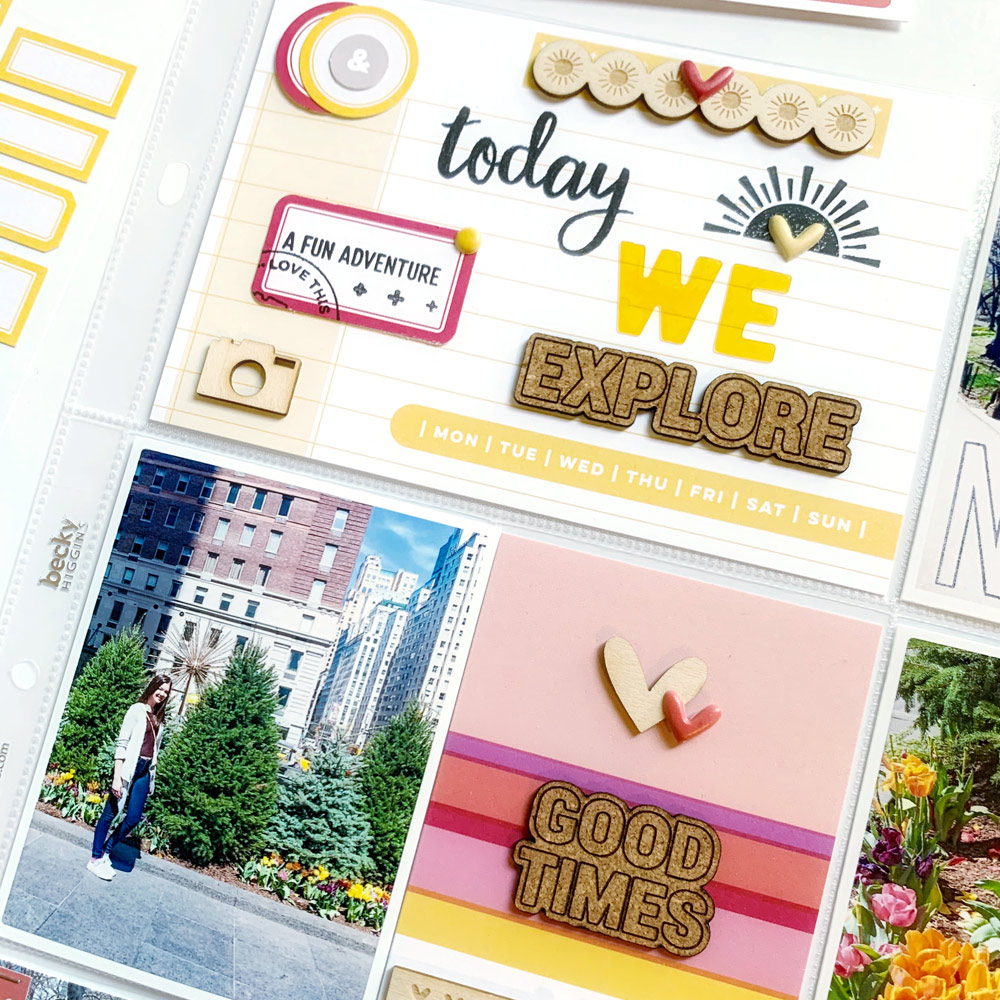
I just love all of the vibrant colors in this release and I immediately pulled out all the bright and cheerful pocket tags that I felt would coordinate with our NYC photos. I thought that fun yellow and white 4 x 6 inch pocket tag would be perfect to embellish as the opening title for the layout. here is so much to do in NYC that you could explore it every day of the week and that pocket tag with the days of the week is amazing! I am definitely not a minimalist, as I actually get a lot of joy from embellishing, and I have the most fun adding little touches to my pocket page layouts. I had such fun making this pocket tag and I decided on the title “& today WE EXPLORE.”
I wanted to use different elements to create the title so I started by using the circle die cuts from the May 2021 Kit and that sweet little gray ampersand die cut for the corner of the title. I then used the Title Builder Volume 4 Stamp and black ink to stamp the word “today.” Before I put the stamp away I noticed the sunshine stamp and quickly decided to use that one as well! I then used the new, bright and fabulous Yellow Parker Acetate Alphabet Stickers to spell out WE and wrapped up my title using those amazing Cork Words for the word EXPLORE. I am just loving the cork as you will soon see because I used a few of them from both the May and April add-ons! I then used a Treasure This Vellum Sticker to back behind the sunshine Wood Veneer Border. I added the red die cut from the May Kit and a few stamping touches using two different stamp sets; Fun with Borders Stamp and Love this Smile Stamp. I finished up this pocket tag with the wooden frame from the Smile Wood Veneers and the Tiny Shapes and Dots Puffy Stickers. I definitely didn’t hold back on embellishing this fun pocket tag and I really love the way it turned out.
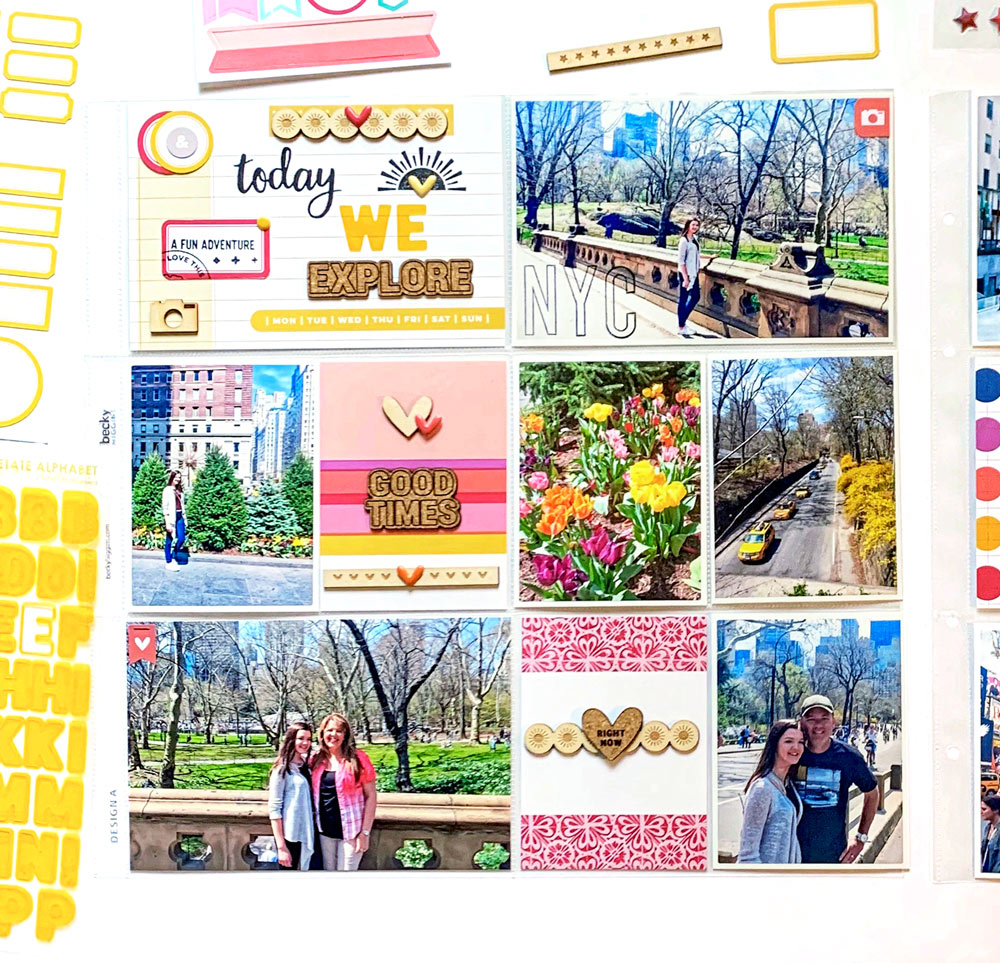
Now that my intro pocket tag was complete I then moved onto the remaining pockets for this 12 x 12 inch page. I placed a 4 x 6 inch photo of my daughter next to the title pocket and I then had the idea to expand my title from that first pocket tag into this pocket! I used the outline Large Jane Alphabet Stamp to directly stamp in the corner of that photo. That change brought my title to expand into both pockets and now reads, “And Today We Explore NYC.”
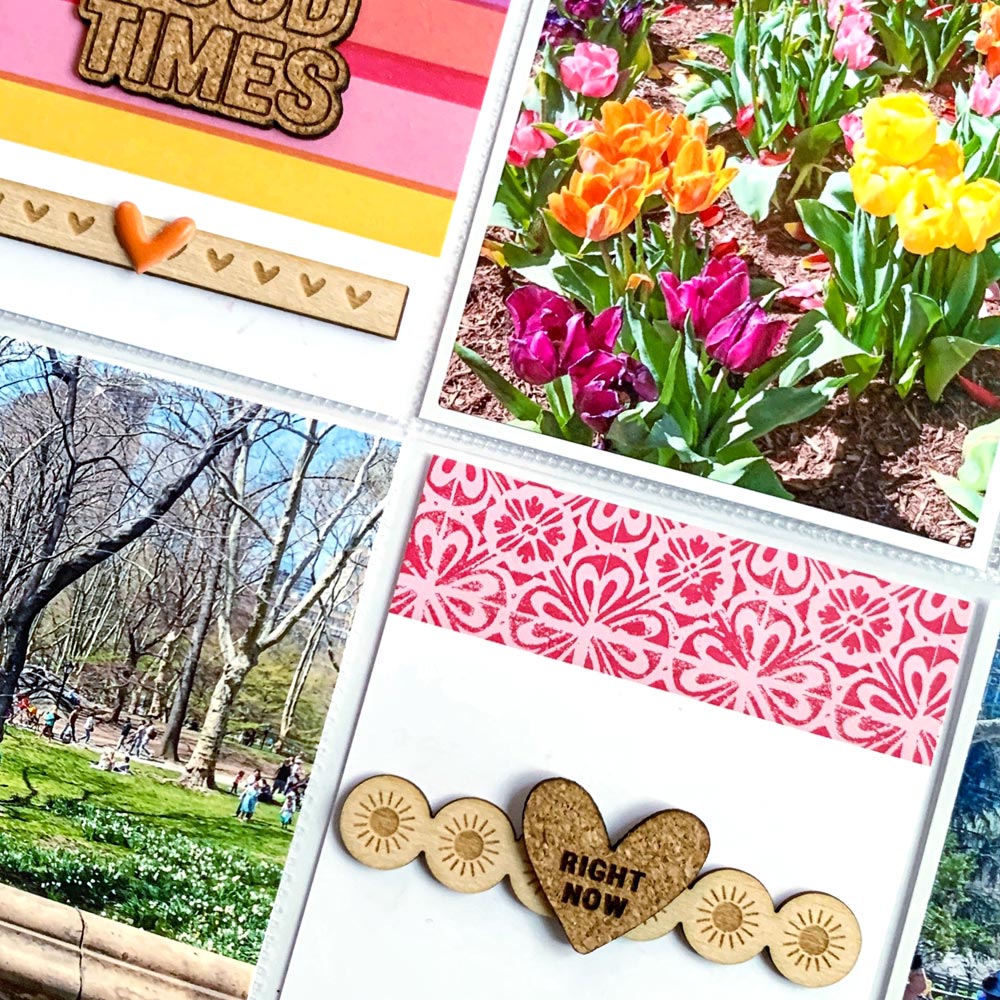
In the opposite corner of that same photo I added a tiny die cut from the Smile Cardstock Die Cuts,. I used the bright and cheerful 3 x 4 inch striped pocket tag below the title and paired up the “good times” Cork Word with a wood veneer heart from the Happy Place Wood Veneer and a few finishing touches using the Tiny Shapes and Dots Puffy Stickers. I used another 3 x 4 inch pocket tag on the third row of the layout and simply added another Wood Veneer Border with a Cork Heart. Before I called this page complete, I stapled the heart banner from the Springtime Stickers to the corner of my 4 x 6 inch photo for an added embellishment.
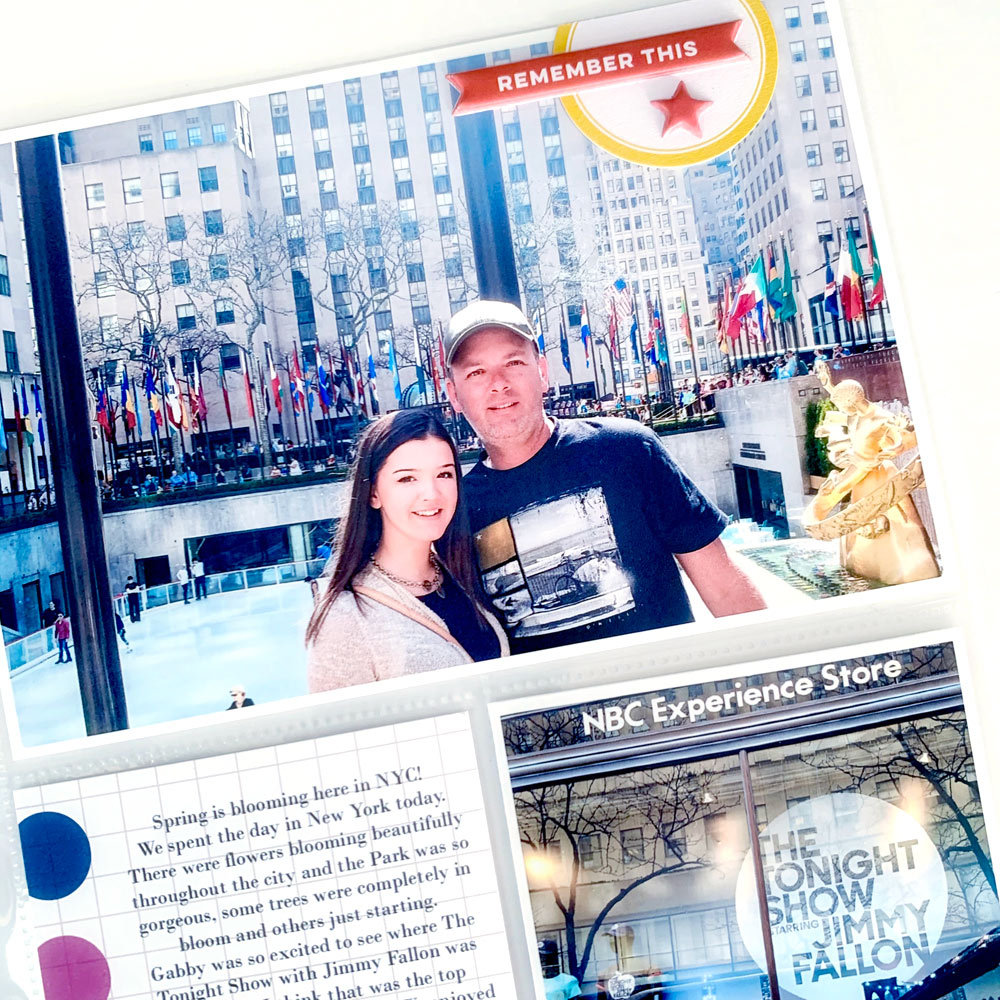
I had a few more photos I wanted to add with some journaling but not enough for another 12 x 12 inch layout so I added a 6 x 12 inch pocket page. I used one of the Yellow Cardstock Label Stickers to the 4 x 6 inch photo on this pocket page and added that sweet “remember this” sticker from the Puffy Banners and Border Stickers. I then added a star for emphasis using the Tiny Shapes and Dots Puffy Stickers.
I printed my journaling onto one of the pocket tags from the May Kit and love the added color of this pocket tag with those circles and that amazing shaded grid design! I had another, smaller photo of my husband and daughter walking up from the subway and I had a few leftovers from my April Kit and decided that awesome peach pocket tag was just perfect for this. I then added that fun scalloped border using the Puffy Banners and Border Stickers and used the fabulous Hazel Alphabet Stamp to again note that NYC title.
Thanks so much for sharing your time with me again today! I just love how this release helped me document these memories and I can’t wait to see your own memories documented using all of these beautiful products in the shop! I hope you will share your creativity and inspiration with us using the #ellesstudio hashtag on Instagram and in the Elles’s Studio Facebook Group! Until next time, happy creating my friends!
Comments Off on A Spring Adventure in Pockets with Michelle Flynn | Share This
Hello, Elle’s Studio fans, and welcome to a new week of inspiration! Today we have ten new projects to share with you created by our talented design team using our new May 2021 kit and add-ons! Take ideas from these projects to create with when your kit arrives, or if it is already on your desk, “pin” these for your crafty time this week!
We can’t wait to see what YOU create! Be sure to share how these projects inspire you on Instagram using the hashtag #EllesStudio, or in our Elle’s Studio Facebook Group!
Comments Off on May Design Team Inspiration: Volume Two | Share This
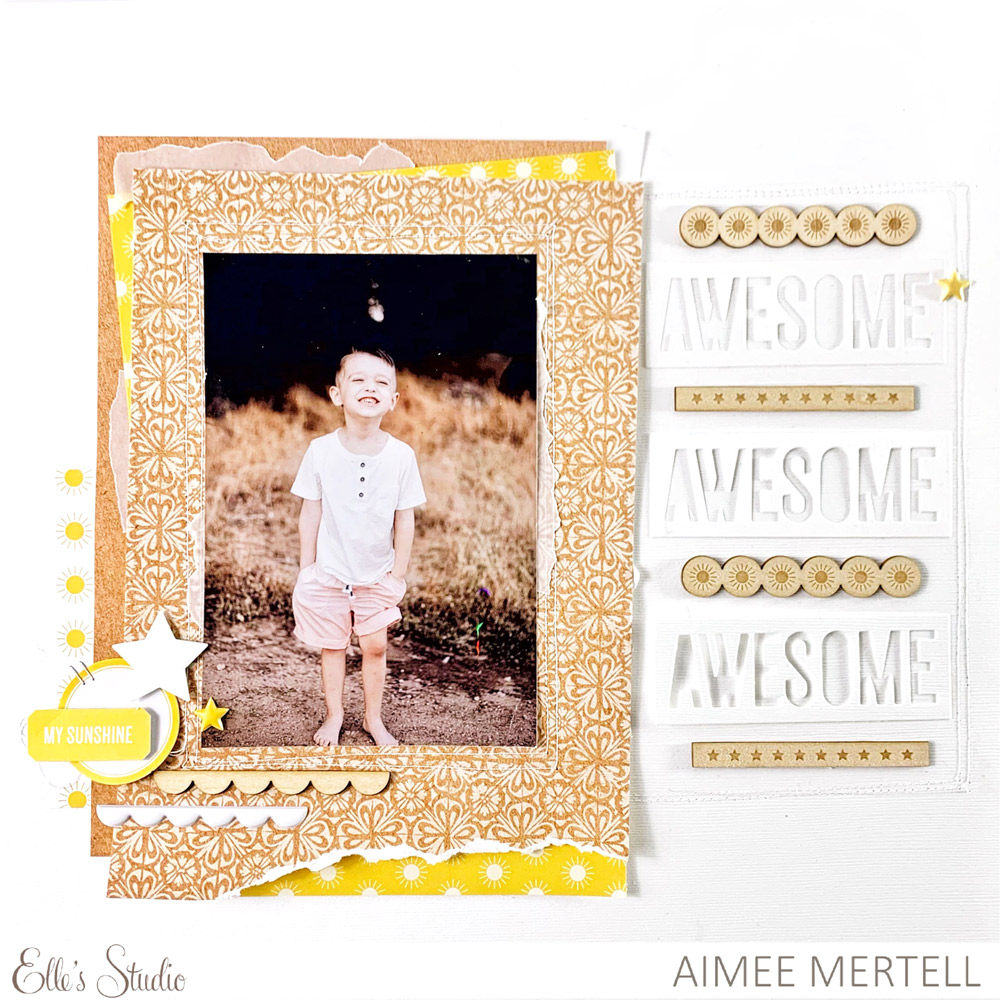
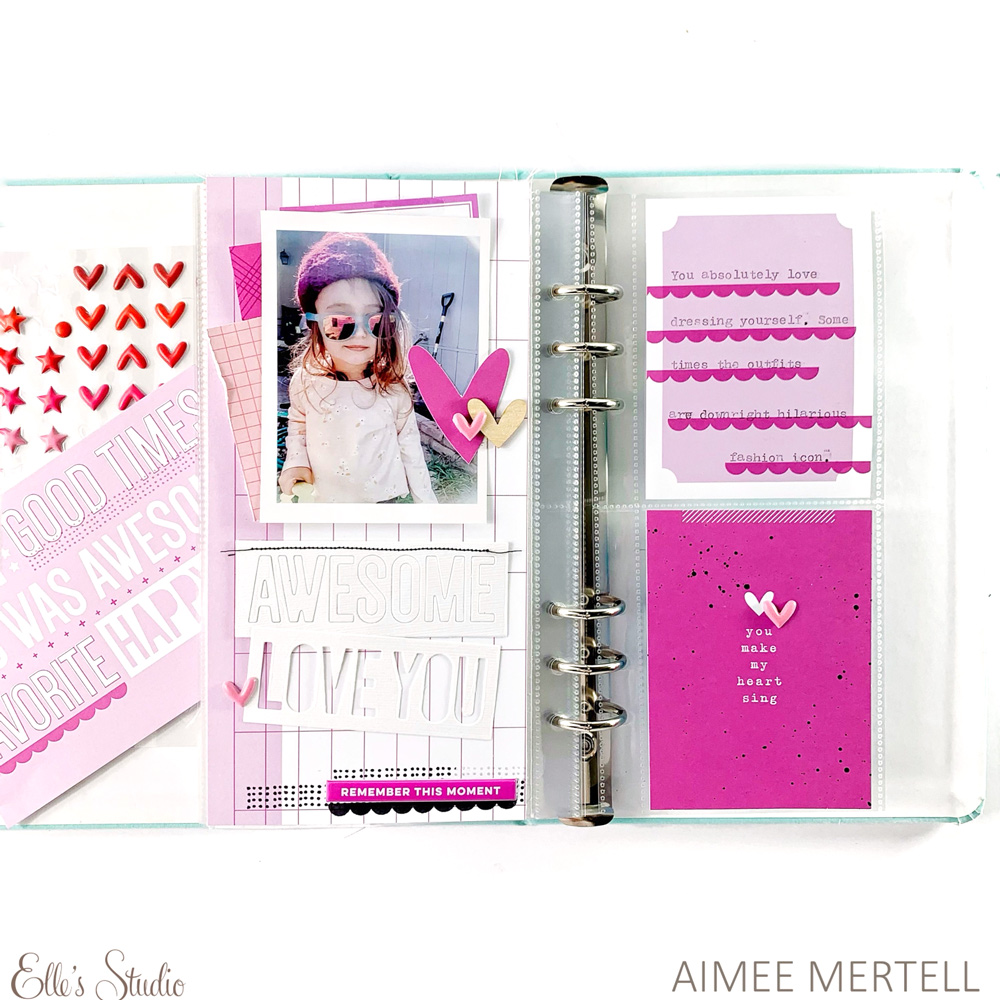
Hello Elle’s Studio friends! It’s Aimee here to share a very purple, yet very fun travelers notebook layout with you all today. I used the new May 2021 kit and add-ons, but also dug into my Elle’s Studio stash to help me pull off my monochromatic design. Let’s take a look!
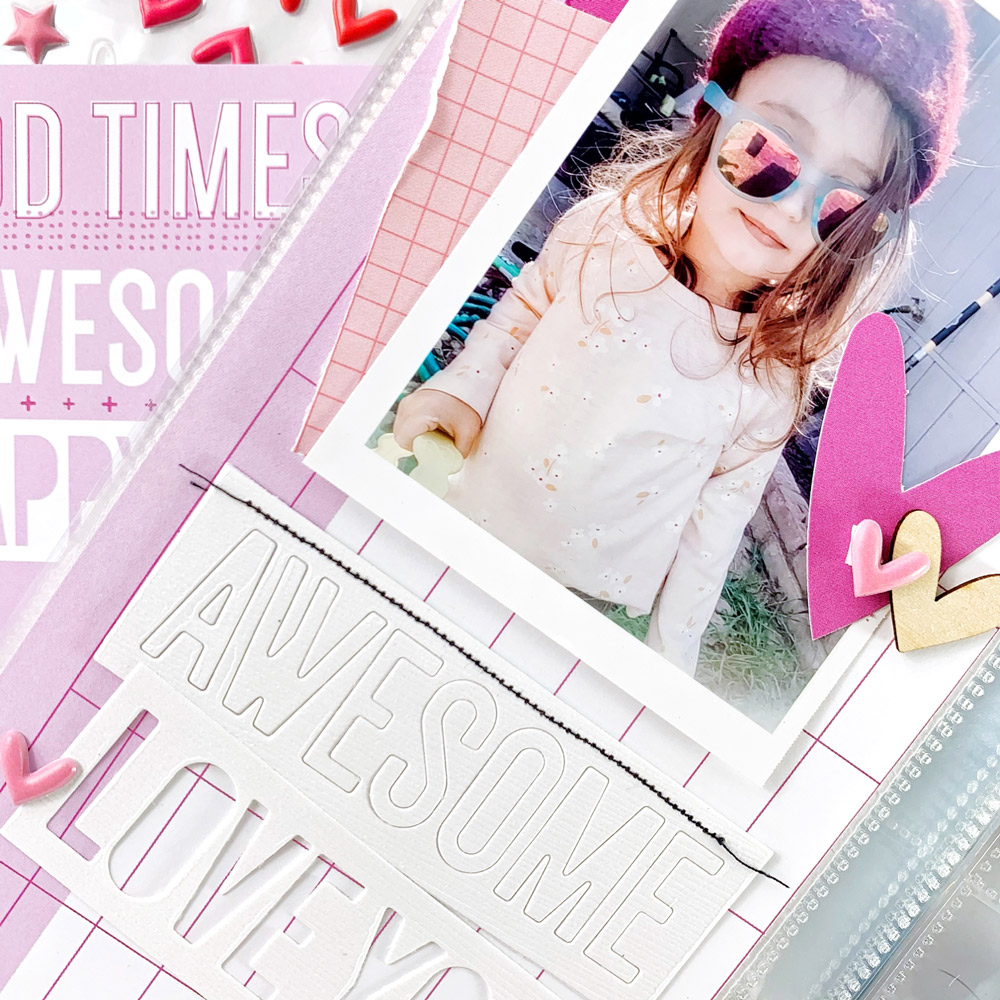
I started off by looking at my photo and thought about playing off of the color of my daughters hat — purple! Purple is not a color I typically reach for when scrapbooking, but I saw plenty of purple to choose from in the May 2021 Kit and I decided to go all in.
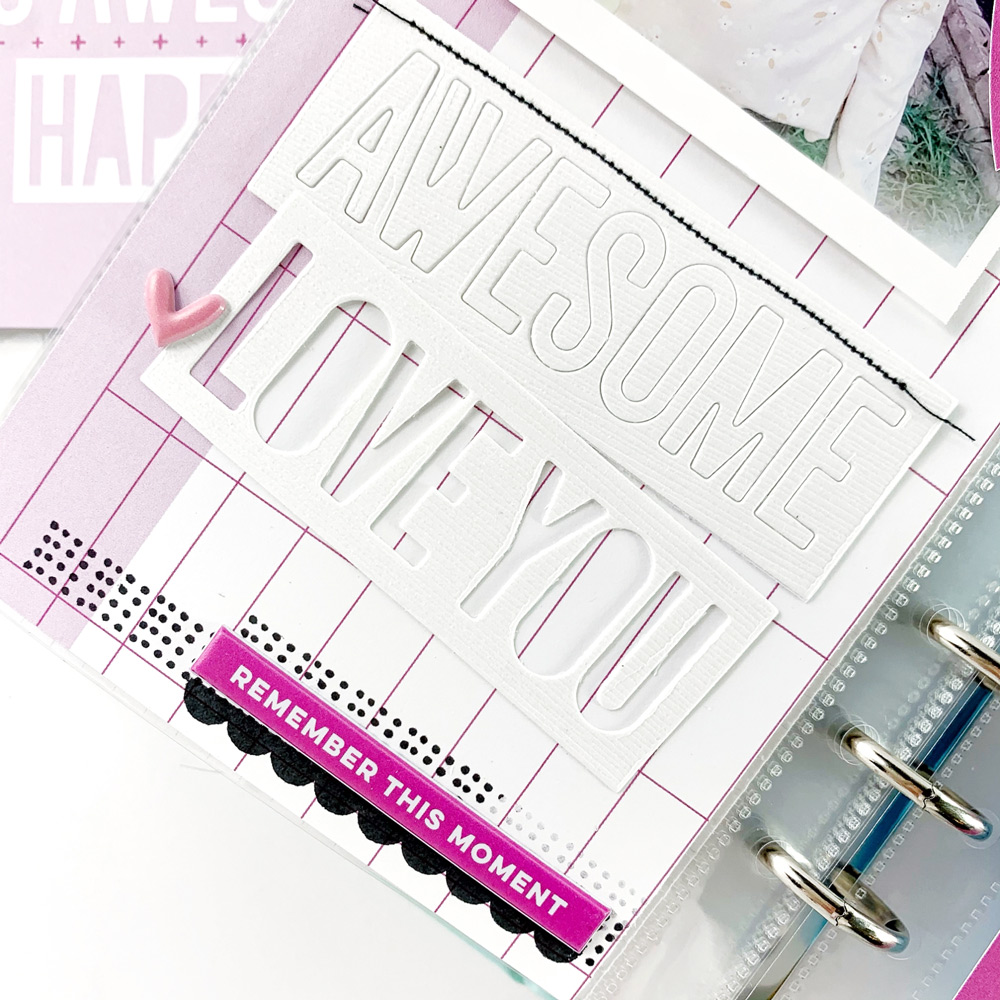
I selected the purple ledger pattern from the Good Times Paper Stack and trimmed it down to travelers notebook size (roughly 4.25” x 8.25”) to use as my background. To create a fun title for this page I used the Knockout Words Metal Die on thick, textured white cardstock to cut out the words, “Awesome” and “Love You”. I love the boxy look of the die cut words and I stacked them haphazardly for a funky feel.
When creating a monochromatic spread, I feel that it is important to add depth to the page. The simplest way to do this I find is to add black. I used the Fun with Borders Stamp set with black ink to build up a cluster of scallops and dots. It was the perfect anchor for a purple puffy word phrase from the Puffy Banners and Border Stickers, too!
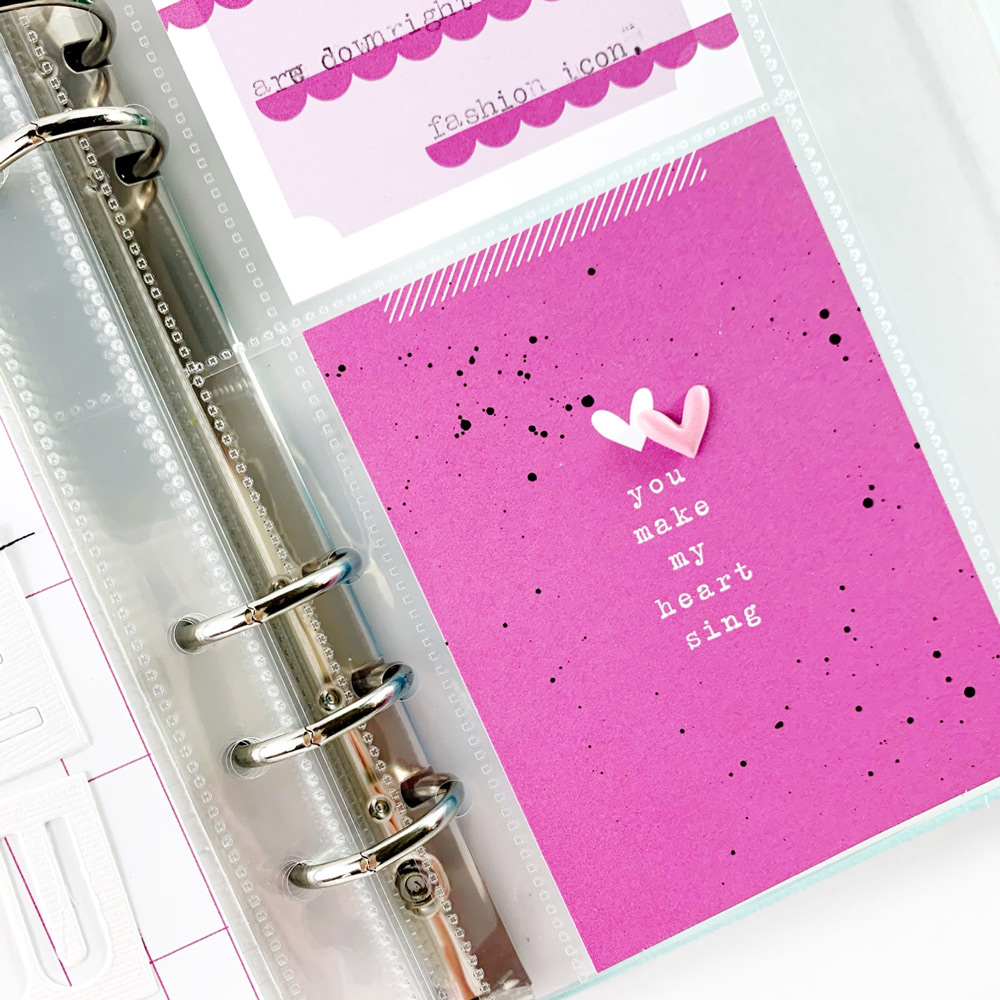
This purple scalloped journaling tag was the perfect match for my page and holds all of my thoughts about my daughter’s hilarious wardrobe choices.
To fit my design, I rummaged through my stash of Elle’s Studio 3×4 tags and found the perfect filler tag from the March 2021 Kit. It says, “you make my heart sing” and boy, does she! I added some black acrylic paint splatters for a cohesiveness and you guessed it: depth!
I love how versatile Elle’s Studio kits are and how they coordinate from month to month! How do you feel about purple? Would you give a monochrome layout a try? I hope I have inspired you to do just that! Until next time— happy creating!
Share how Aimee’s spread inspired you by tagging us on Instagram using the #EllesStudio hashtag, or in our Elle’s Studio Facebook Group!
Comments Off on Monochromatic and Marvelous with Aimee Mertell | Share This
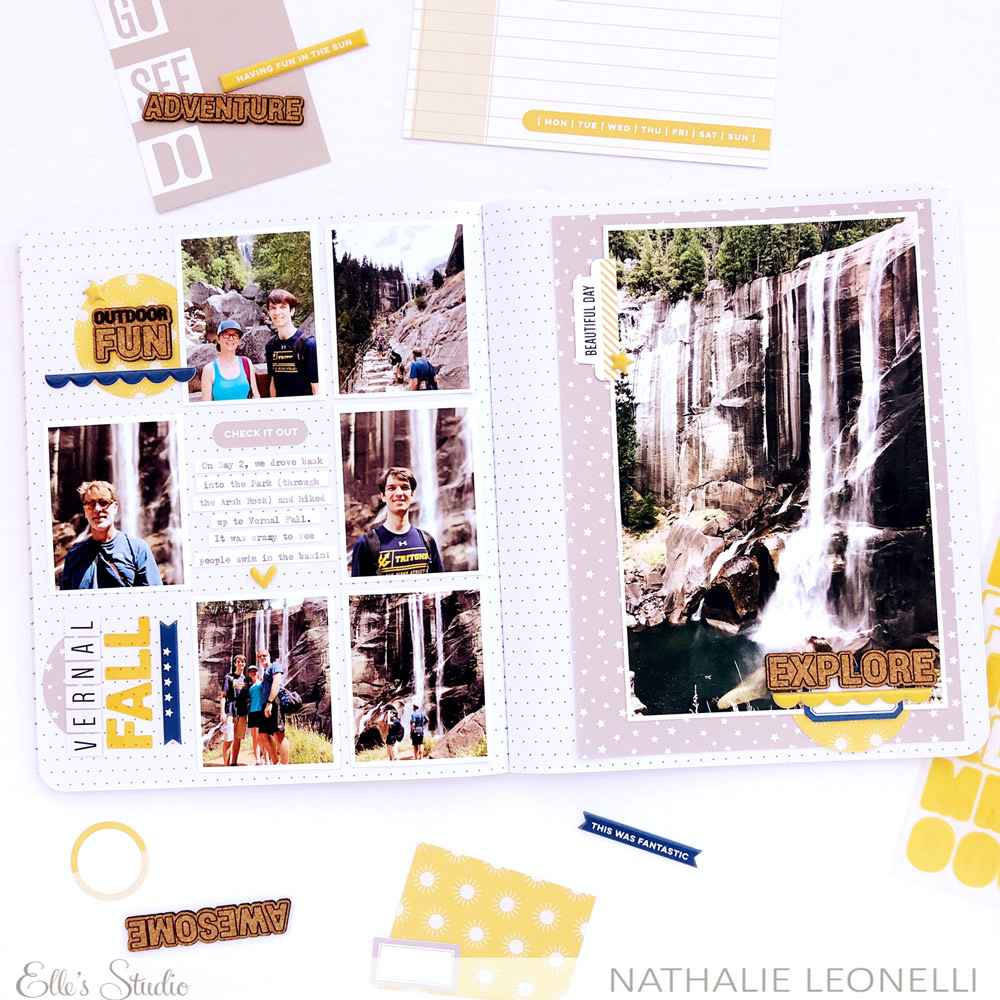
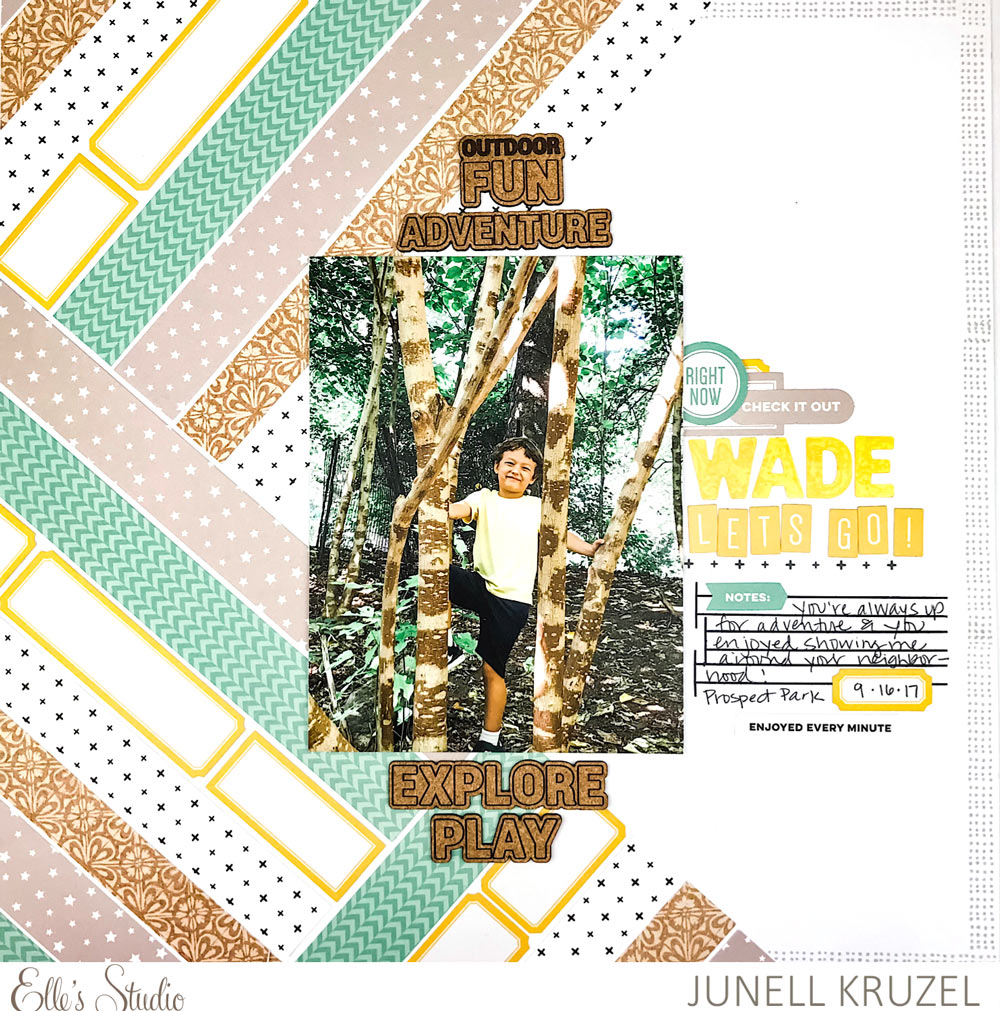
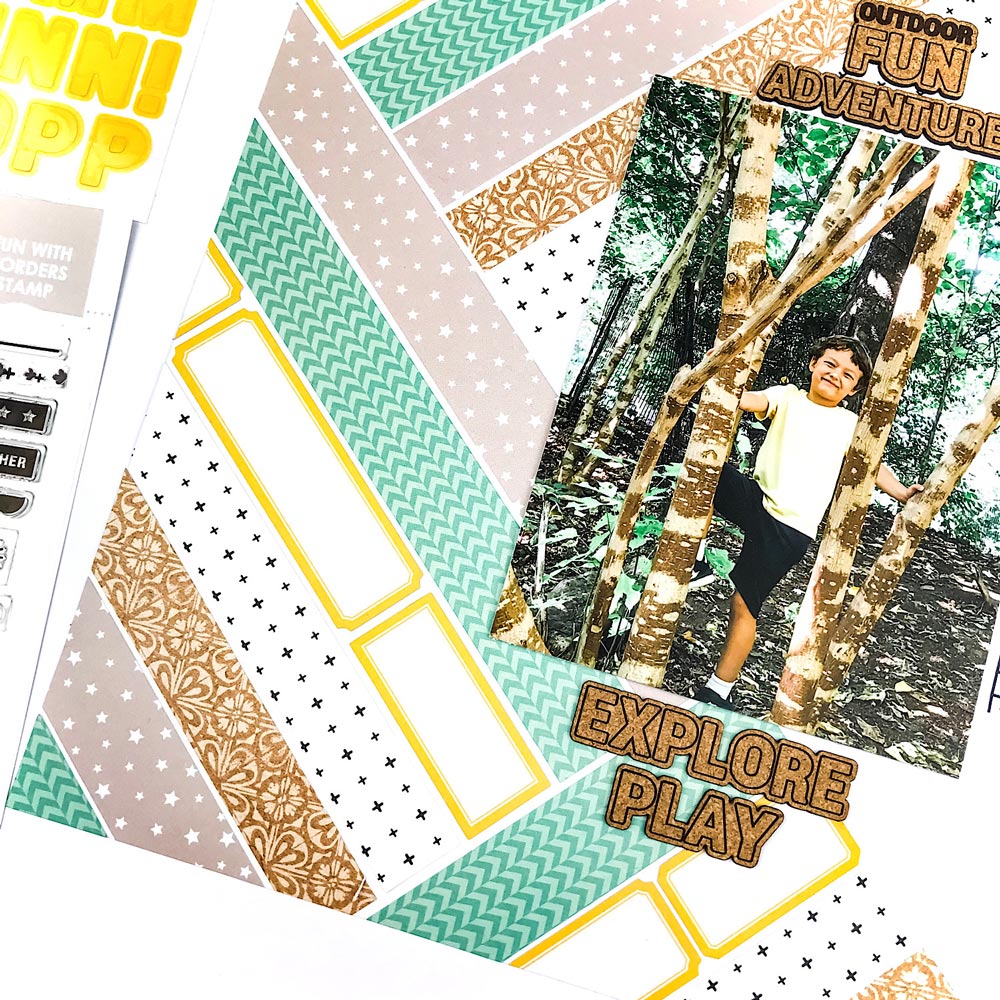
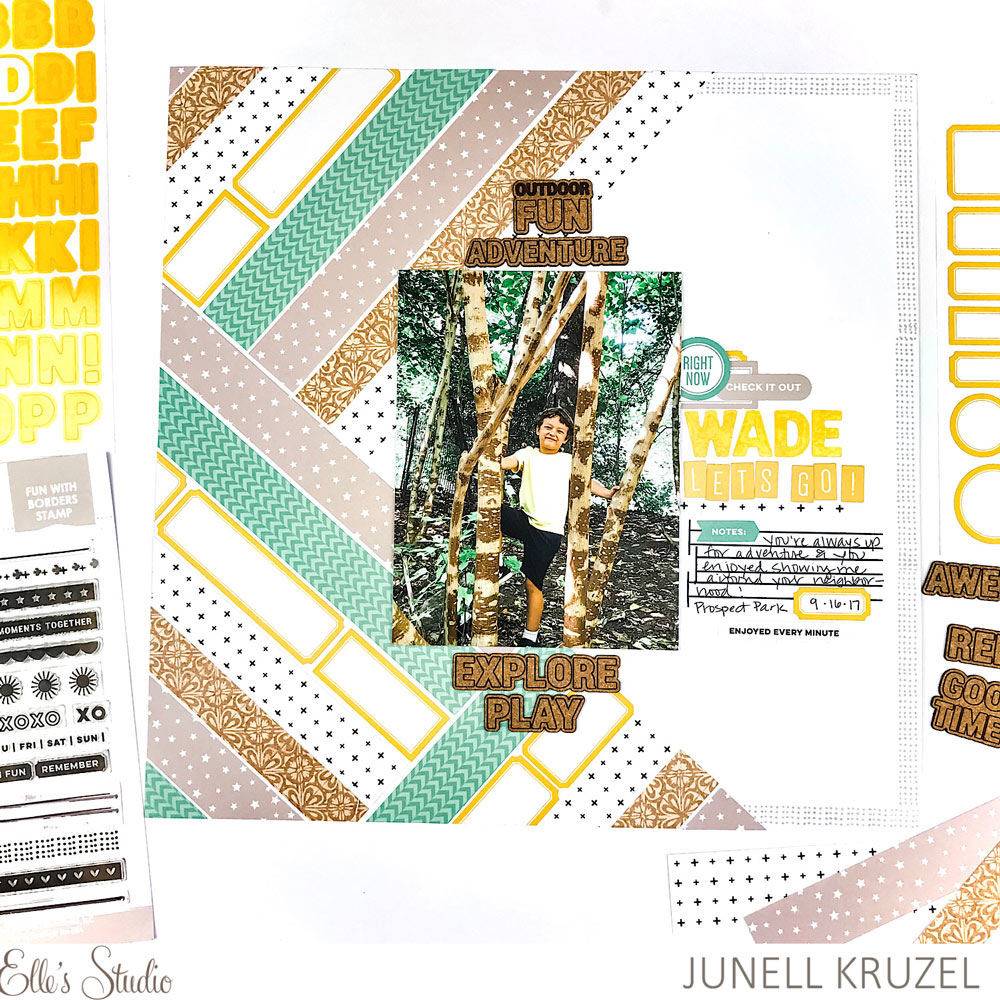
I am such a sucker for all of the paper stacks that Elle’s Studio comes out with! I love all the fun colors and patterns and the Good Times Paper Stack was no exception. There is a good mix of colors and neutrals in this stack. I knew I wanted to have fun with the paper on my layout this month and I chose patterns and colors that went well with my photo and cut them into 1 inch and 0.75 inch strips before I even had a layout idea in my head.
I started playing with the strips of paper, arranging them in different configurations and patterns until I settled on one I liked the best. I adhered the strips with a tape runner, but then I thought what if I removed one of these paper strips and replaced it with a row of Yellow Cardstock Label Stickers!? They are approximately the same width and it worked perfectly! There’s a clever new use for label stickers for you!
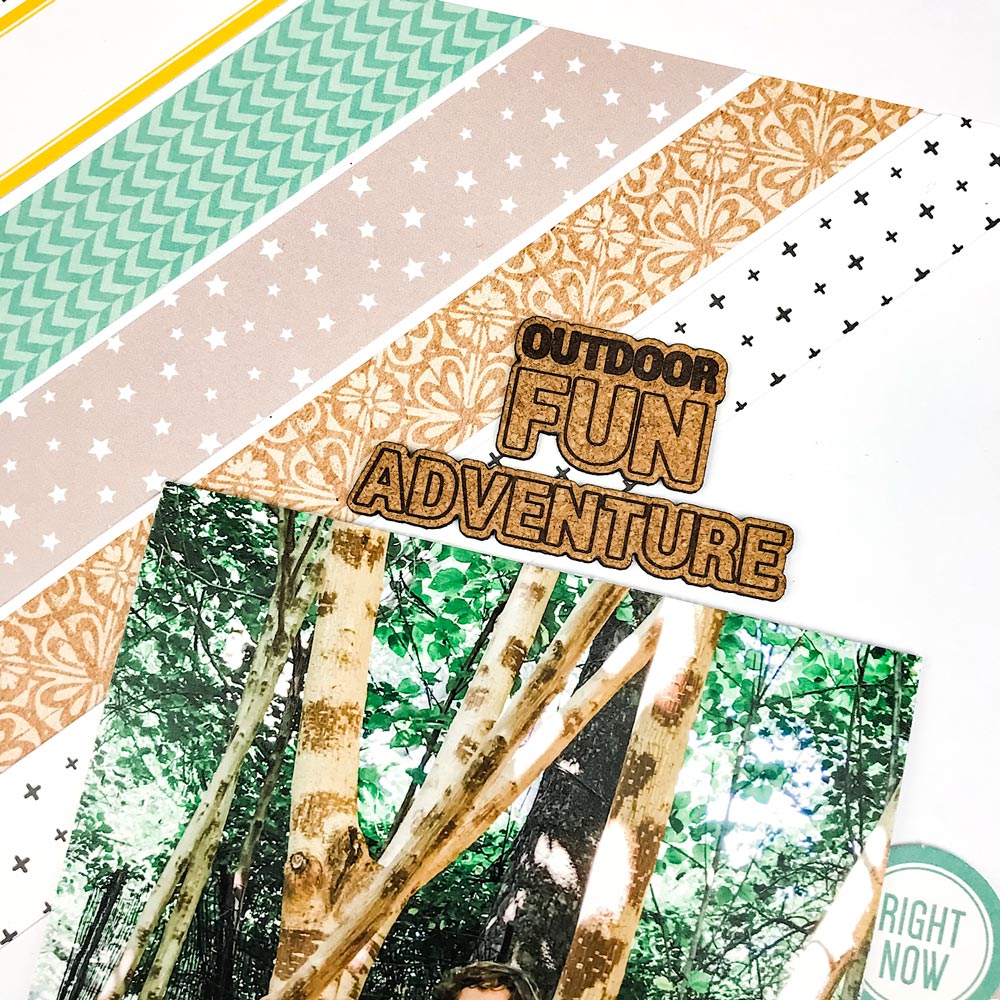
I adhered foam to the back of my photo to give it some height and centered it on my page. I just had to use the Cork Words to help give my layout that outdoorsy feel. I put the nouns at the top and the verbs at the bottom. It draws your eye to the picture and makes it the focal point.
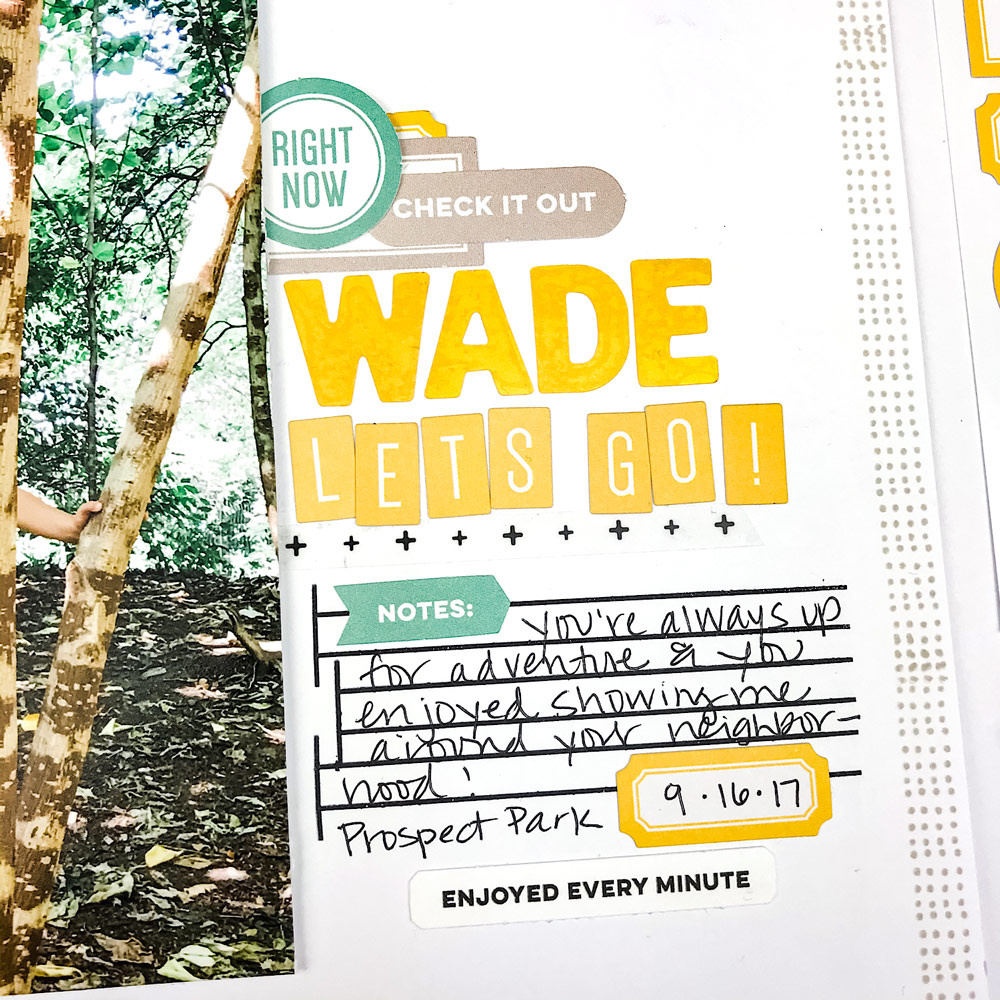
Because there is so much visual weight on the left side of this layout I needed to have the title and journaling on the right side of my page to give it some balance. I used the Yellow Parker Acetate Alphabet Stickers and the Jane Tile Alphabet Cardstock Stickers in yellow to create my title. That also helped to bring some of that yellow from the left side over to the right side.
I used a stamp from the Fun with Borders Stamp to stamp journaling lines. I did not want the stamp to run off my page, so I used a Post-It note to mask off the area I didn’t want stamped, then I wrote my journaling. I used some of the die cuts from the May 2021 Kit to create a little cluster above my title by my journaling.
The last thing I did was stamp a border around the right side of my page with a stamp from the Fun with Borders Stamp using Ranger Distress Oxide in the color Pumice Stone to give it some definition.
This was such a fun layout to make with all the pretty patterned paper and I loved using the Yellow Cardstock Label Stickers in place of a strip of paper! The layout is balanced and has that outdoorsy feel. I cannot wait to see how you use the May 2021 kit and add-ons and if you can come up with any clever, new uses for the products! Thanks for reading!
Comments Off on Good Times With Paper and Junell Kruzel | Share This
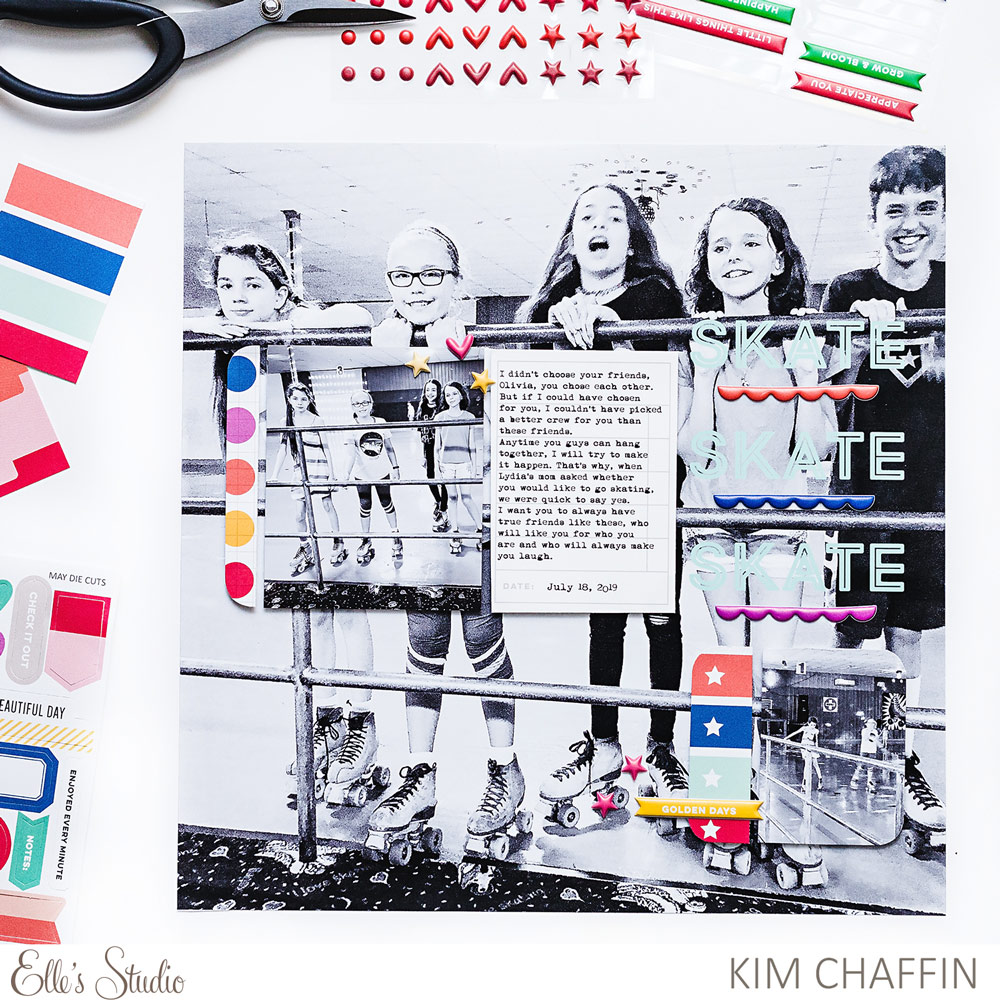
Hello, fellow scrapbookers! This is Kim, and I’m happy to be here on sketch day! I will let you in on a little secret. I use a sketch almost every time I scrapbook. I keep a sketch notebook to collect my sketch ideas, and I also love to try my hand at Elle’s Studio sketches. I had so much fun using the May 2021 kit and add-ons with the new sketch to tell a story about a skating outing with some of my daughter’s friends. Let’s get rolling!
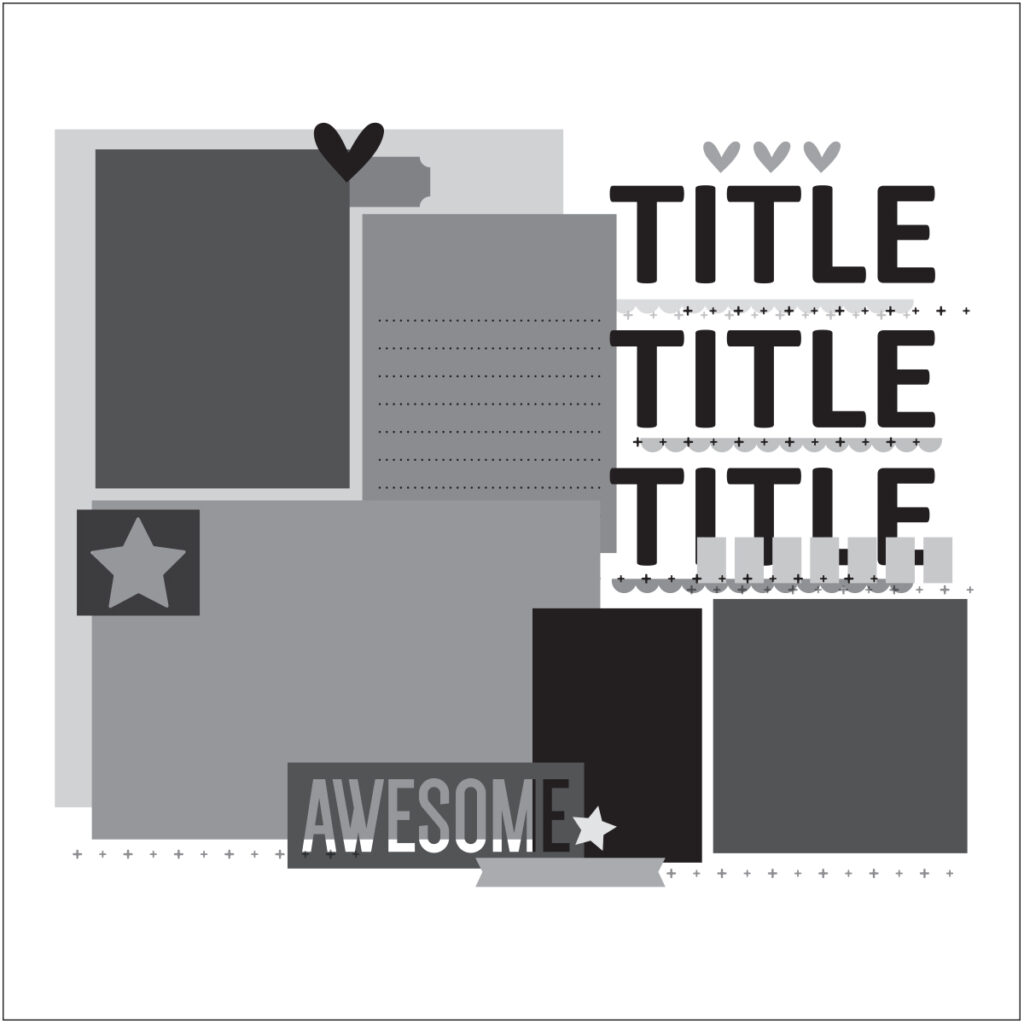
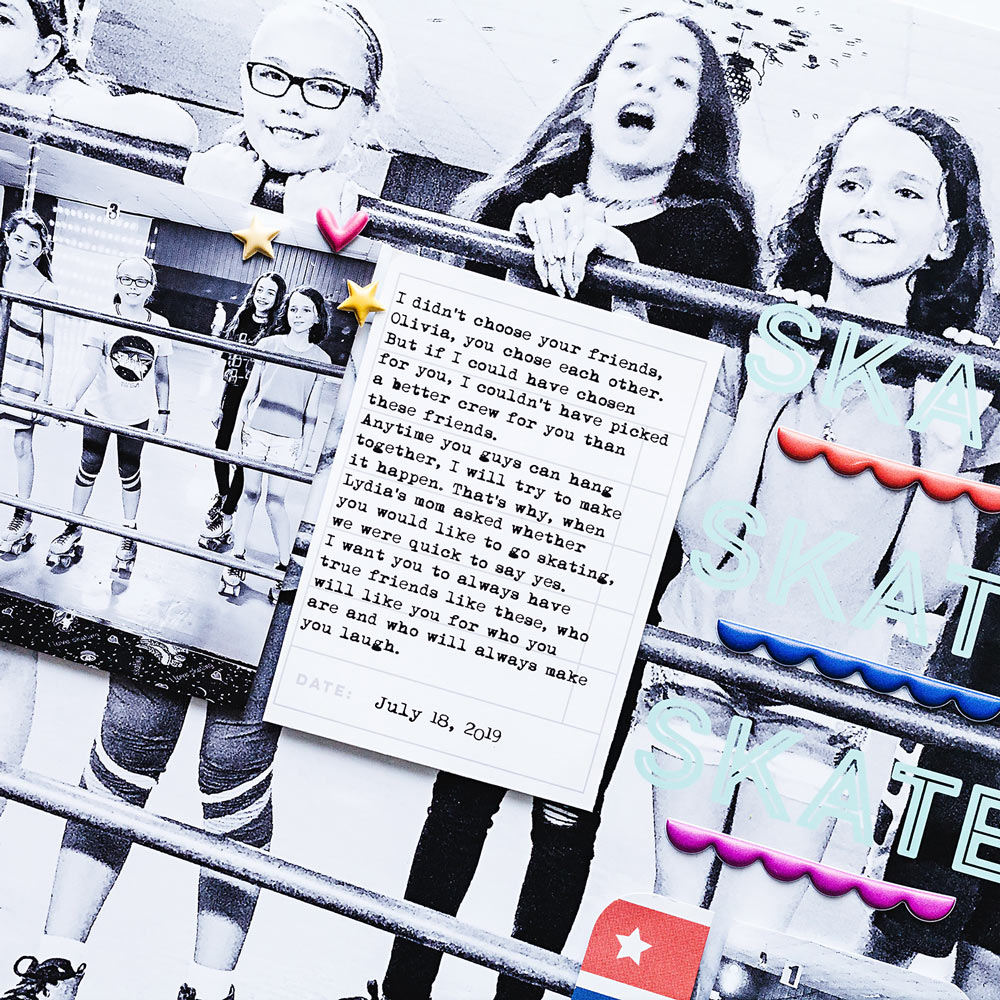
This sketch has space for several photographs, journaling, embellishments, and a large three-line title on the left. The great thing about a sketch is that it can be altered to suit your needs. A sketch simply provides a road map so that you know which direction you want to go. For my take on this sketch, I didn’t change much except the scale on some items, and I chose to use an enlarged photo for my background.
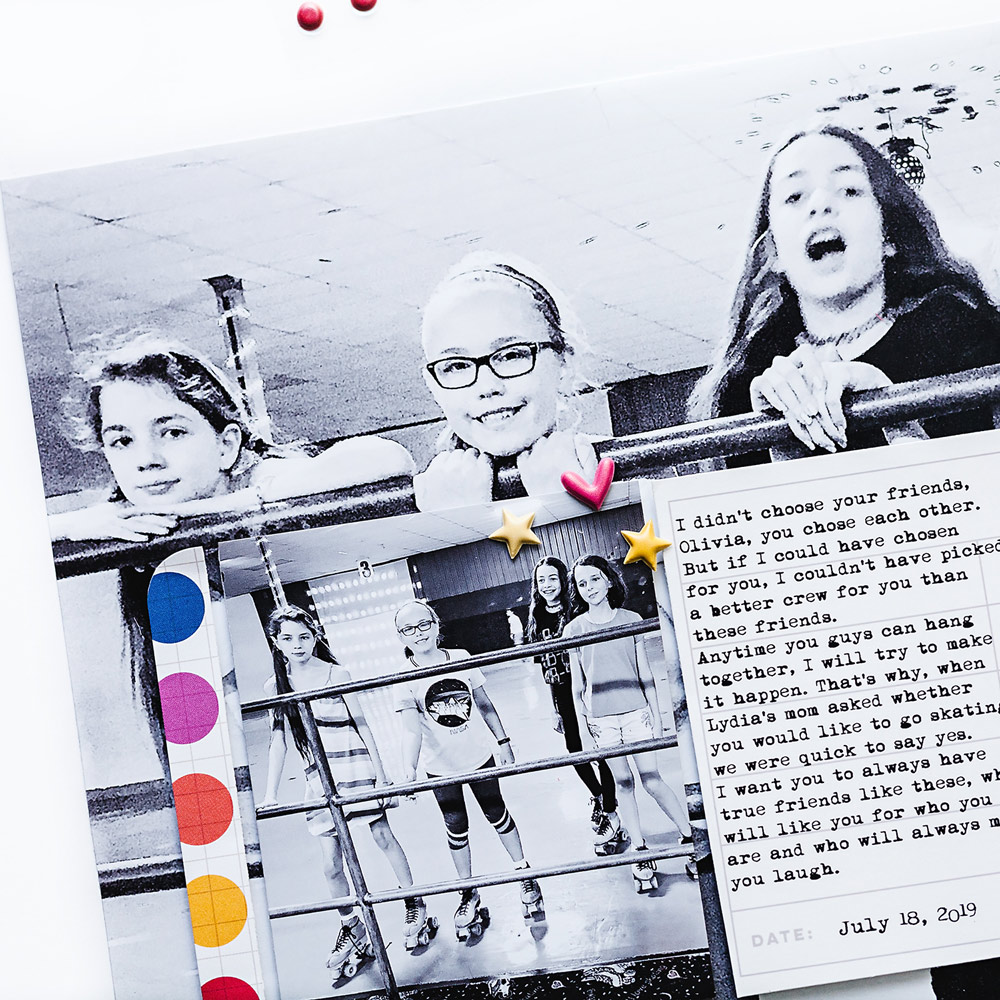
I wanted to recreate the fun and bright vibe of a skating rink, and I knew the colors of this kit would do just that. Looking at my photos, however, I realized that they were full of color already, and I didn’t want my layout to be overwhelmed with too many competing hues. Therefore, I opted to make my images black and white, and to let the kit’s colors really shine. I love the result!
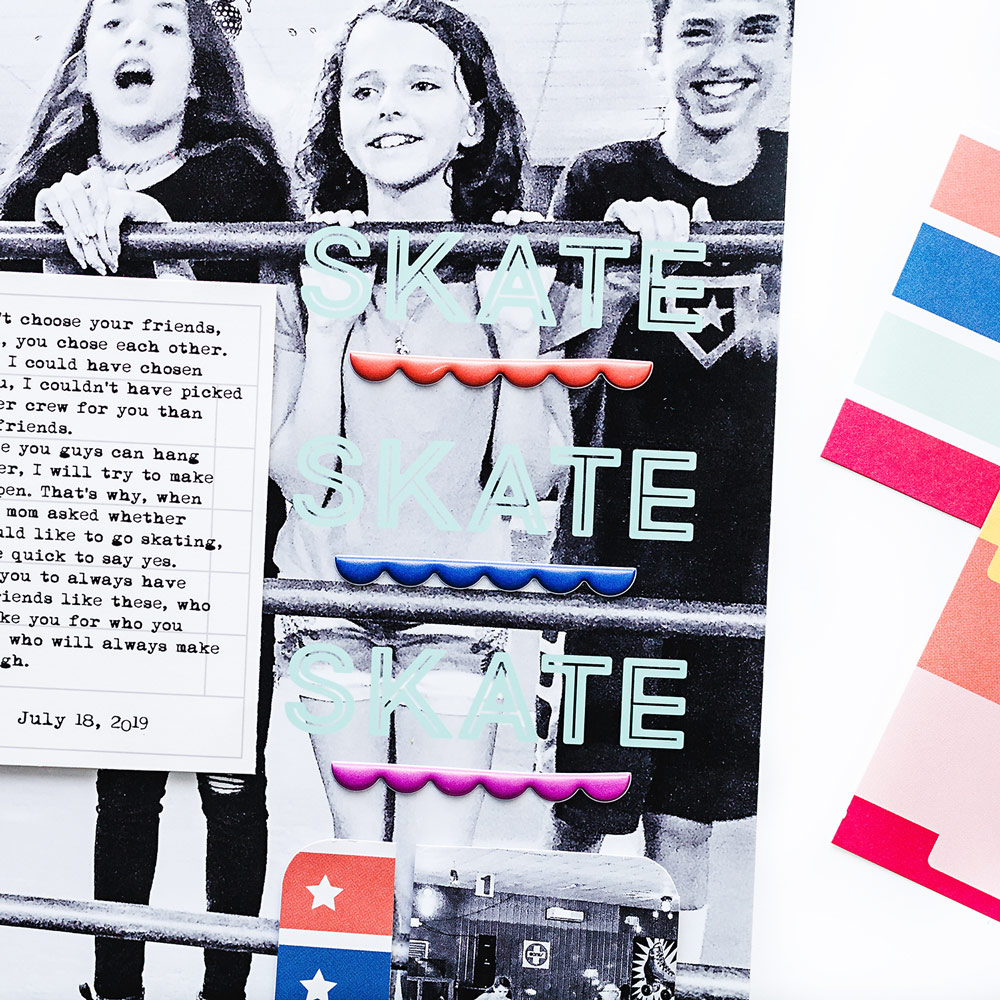
The title in the sketch is bold and playful, with three lines of large text divided by borders. You could use alphabet stickers here, but I opted for a digital font, which I colored to coordinate with the kit, and I used those adorable Puffy Banners and Border Stickers to embellish. I know I am going to use all of those cute stickers up too quickly!
I placed my journaling to the left of the title as it is in the sketch, and I printed it onto one of the Noted Printables.
I also kept the photo to the left of the journaling, but I scaled it down and added a border that I trimmed from one of the journaling tags in the May 2021 Kit. Here’s where it becomes important to customize a sketch and make it work for you: If I had kept the photo in the proportion shown in the sketch, it would have concealed my daughter’s face in the larger photo.
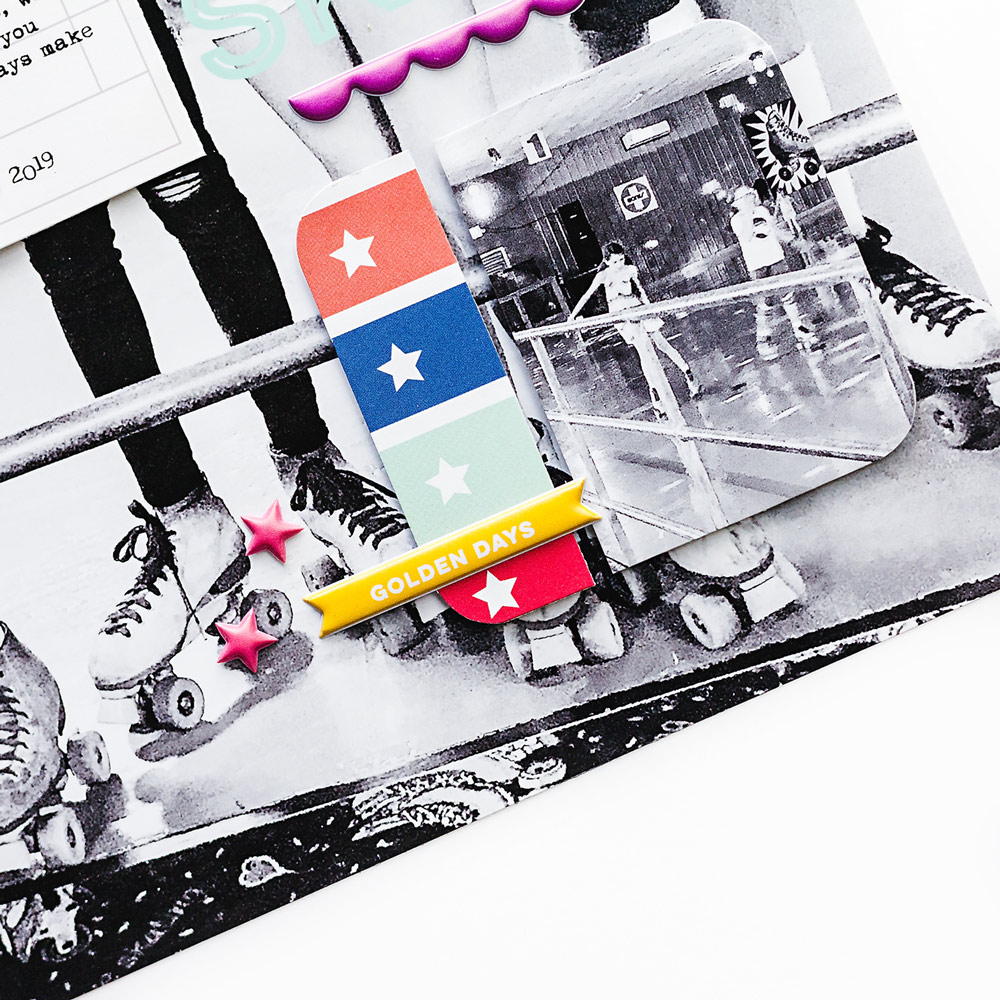
There is space for more elements below the title, or it could be two photographs. In this case, I chose to use a photo and another strip cut from a journaling tag in the May 2021 Kit, which I positioned as a border. Again using the sketch as a guide, I added finishing touches using the Puffy Banners and Border Stickers as well as the Tiny Shapes and Dots Puffy Stickers.
I challenge you to try starting with a sketch next time you make a page! I’d love to see what you do with this one and the May 2021 kit and add-ons!
Show us your sketch project! Whether a layout, traveler’s notebook spread or something else, we’d love to see how this sketch inspired you! Share your project in our Elle’s Studio Facebook Group, the perfect place to connect with other Elle’s Studio fans, or on Instagram using the hashtag #EllesStudio!