Sketch Thursday : 6.2.11

Thanks to the short work week here in the United States, it’s hard to believe that it’s already Thursday and time for another sketch!  From the first moment I saw this layout from Design Team member Mandie Pierce  I was smitten.  I still haven’t quite put my finger on why.  Perhaps it’s the eye catching blue polka dot patterned paper.  Or that fabulous scripty font she used for her title.  Or her strategic placement of embellishements.  And then of course there’s the adorable little boy featured as the layout’s subject.
This week’s sketch features two photos, one horizontal and one vertical.  The photo placement gives you the perfect opportunity to tuck your journaling in between them.  The strength of this sketch is the placement of embellishments.  There’s plenty of room to adorn your layout as you’d like this week!

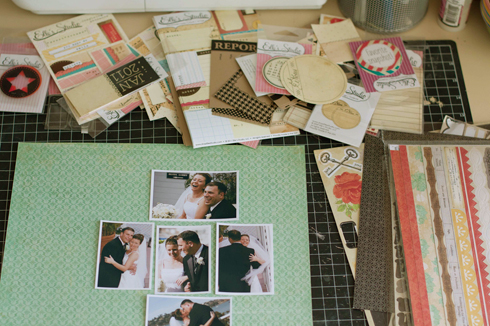
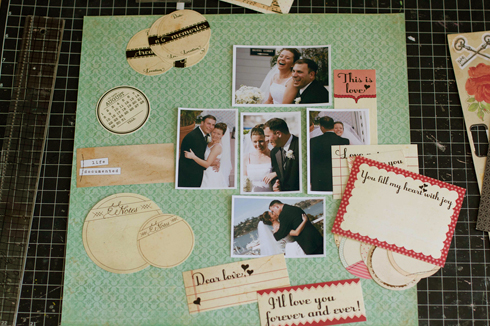
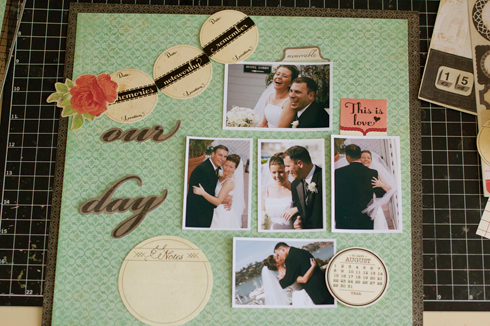
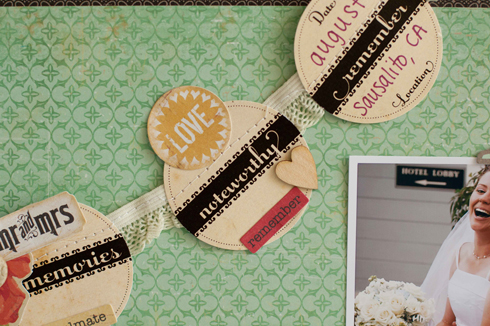
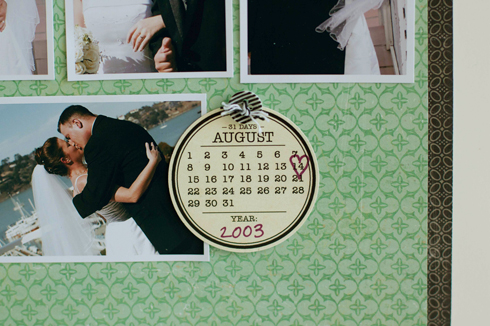
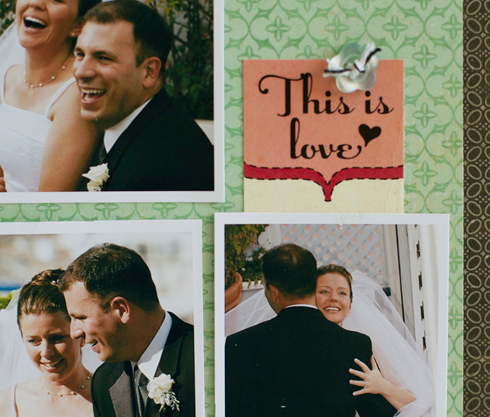
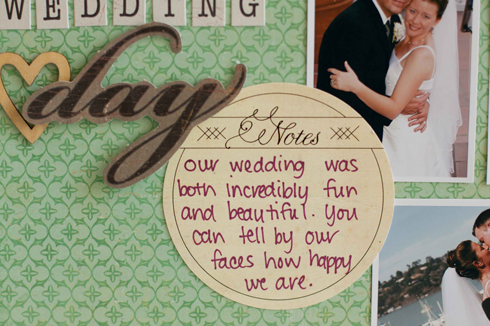
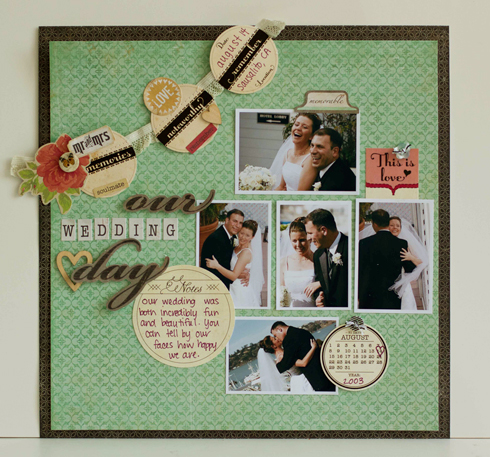
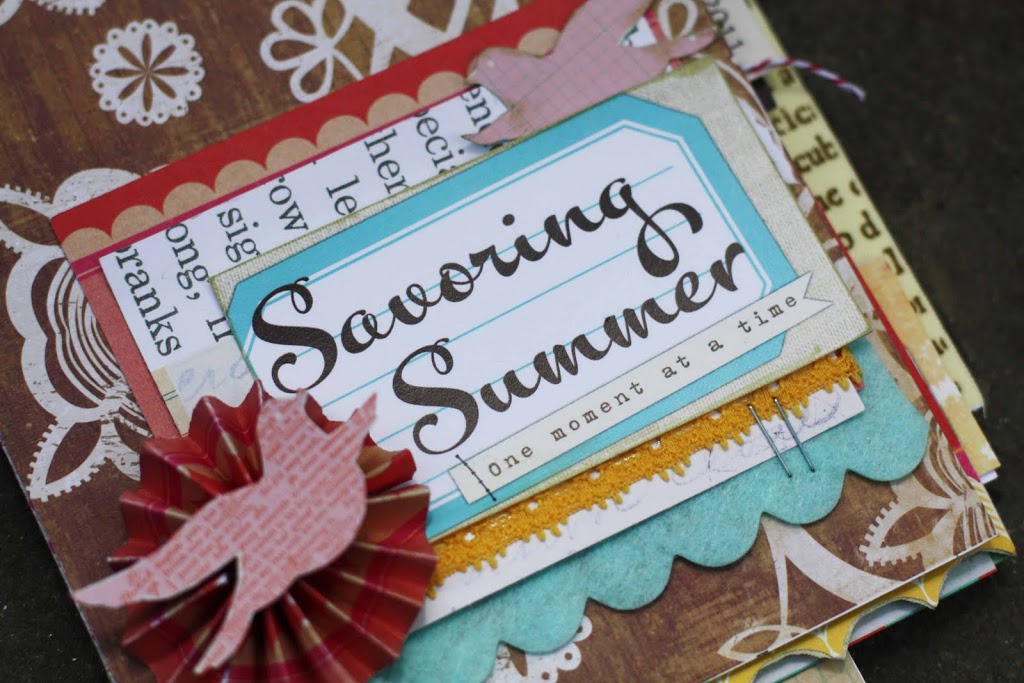
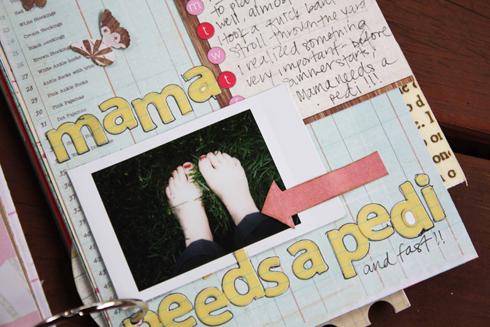
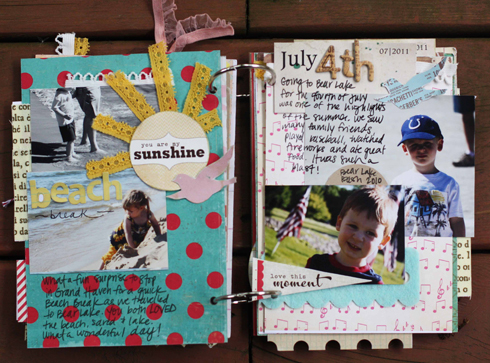
I used this week’s sketch as inspiration for photo arrangement – although I flipped the arrangement so it worked better with the photos I selected – and patterned paper placement.  I also let the sketch be my guide as to where I placed embellishments although I did stray a bit.  The only real difference between the sketch in my layout is that I moved the location of my title.
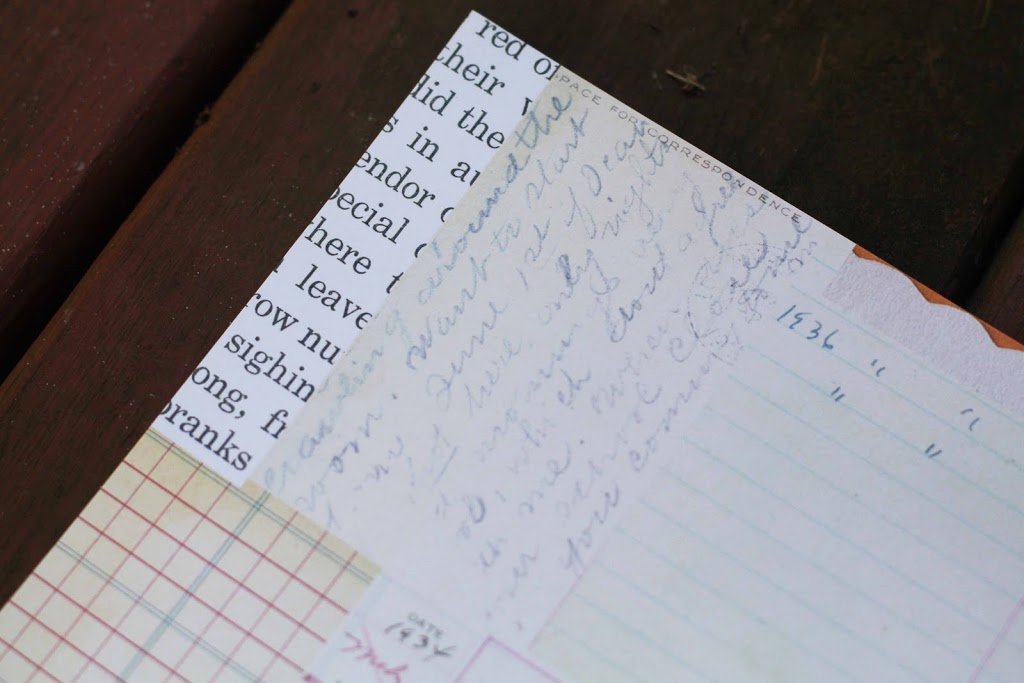
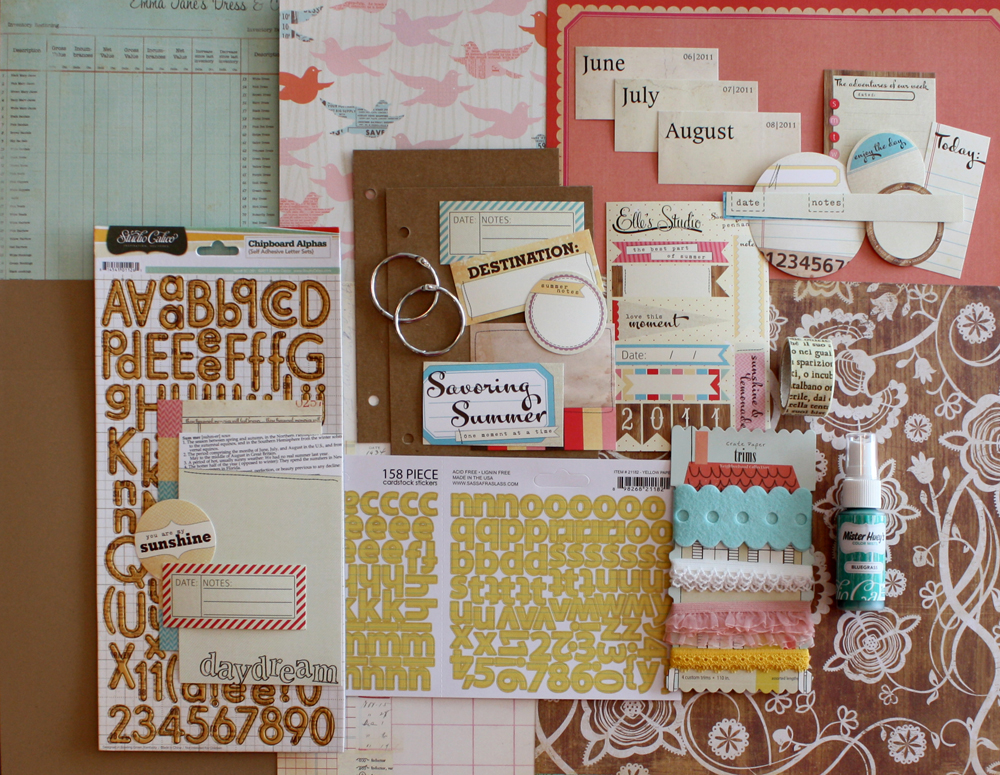
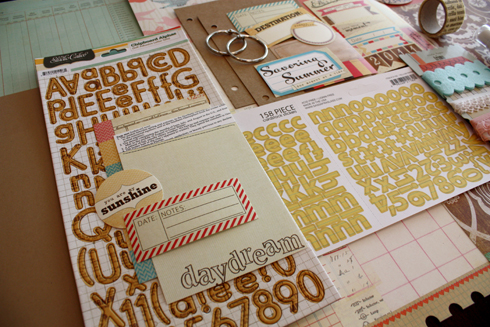
Other product used : Studio Calico’s Lawn Party kit.
Design Team member Jennifer Chapin created this multi-layered layout based on this week’s sketch.  She chose to highlight two vertical photos instead of utilizing a horizontal photo but her layout is balanced by the large patterned paper block holding her title work.   
Although I chose her layout as the inspiration for this week’s sketch, Mandie was able to create a second layout that looks nothing like her original.  Don’t you just love that about sketches?  Her second layout still utilizes two photos and many embellishments but you’d never guess they were inspired by the same sketch.
Design Team member Rebecca Keppel followed the sketch closely.  Ironically, she also chose to ultilize polka dot patterned paper as in Mandie’s original layout to make her layout shine!  Did you also notice that Jennifer, Mandie and Rebecca all used stick pins with an ES tag to create a banner style embellishment?  Clever girls!
Last but not least, Design Team member Melissa Mann went with a literal interpretation of the sketch.  She flipped her photo arrangement from the sketch but otherwise stayed true to the original design.  I love that the tags along the edges of the patterned paper draw your eye around the entire design.
Looking for an incentive to use our sketch this week?  We can help with that!  Post a link to your layout created using this Sketch Thursday sketch for your chance to win a $5 ES gift certificate.  Link must be posted by 11:59p on Wednesday, June 8, 2011.
Gift certificate can be used towards purchase of products only and can NOT be used for shipping charges. Gift certificate balance must be used in a single transaction.

Congratulations to last week’s winner :

corrie said…

Way to go Sophie! Beautiful job!

I went scrapping last night and am ready for this today!! Here is mine!

Corrie, please e-mail me the following information to : melanie [at] shopellesstudio [dot] com  by 6.7.11 and I’ll get you your gift certificate!
Name :

Contest : 5.26 Sketch Thursday

Tutorial: Not Just For Journaling with Rebecca Keppel!

One of the main reasons I love Elle’s Studio tags and use them on all my projects is that they are so versatile. They are definitely NOT just for journaling! When starting a layout or other project I start by laying out my photos on paper and pulling out every Elle’s Studio tag and journaling spot that even remotely coordinates.

Then I start to narrow down to the ones that really go along with the theme or story.

Once I have it narrowed down I start to move them around and think of ways to use them besides just journaling.

You can see I’ve placed several together in the upper left corner in a banner shape. To attach the tags together, I sewed them right onto some trim.

After layering some stickers, die cuts and buttons over the tags they become a fun banner.

Another tag marks the date of the occasion.

Yet another draws attention to my favorite photo in the grouping.

And yes, one is indeed used for journaling!

These are just a few ways to think outside the box and use Elle’s Studio tags all over your layouts and other projects. I hope this shows that Elle’s Studio tags are truly NOT just for journaling and can be used for embellishing, too!

One Buck Wednesday!

It’s One Buck Wednesday at JessicaSprague.com today and we have two digitals up for just $1 each, today only! They are:

Just in time for Father’s Day – these tags will help you top off that perfect project for dad! Today $1 only, regular price $2.99.

And, how about some fun goodie bags! We’ve designed them so they will work for more than just birthdays! How about pool parties, BBQs, picnics and more! Today $1 only, regular price $3.99.

Happy One Buck Wednesday, everyone!

Take Out Tuesday : 5.31.11

Today’s Take Out Tuesday is all about making that stack of event photos you have hanging out on your table just a bit smaller.  This two page layout uses six photos and has plenty of room for journaling to insure you get your story told.
Ironically, my event photos are from last year’s Bratfest – and I just attended this year’s event yesterday.  Bratfest is a bit hard to explain because you think about it, it’s a bit ridiculous.  Basically it’s four days where people come to enjoy eating bratwurst, hear live music and perhaps enjoy a few carnival rides.  It’s a spectacle, but it’s for charity.  And my husband happens to think it’s the greatest event ever.
LEFT PAGE | On this page, I used two tags simply as placeholders and design elements and used the third to actually contain information, in this case, the date.  I love how versatile these tags are and never take away from your personal style but instead always seem to add to it.
RIGHT PAGE | I’ve become a big fan of the Handmade Layers Large Journaling Tags.  After this page, my love for them has grown even larger.  I had this small Journaling Tag strip leftover from a previous project and it worked perfectly here to contain my title.  By cutting a notch from the right hand side of the strip, it looks more like an embellishment rather than an afterthought.
Other product used : Studio Calico’s Metropolitan kit.
Click here to download this Take Out Tuesday PDF file, including a photo and step by step instructions of the project. Please click “Save” when prompted.
You must have Adobe Reader to open this file, if you do not have Adobe Reader, you can download it for free, here. If you are having problems downloading or opening, please make sure you have the latest updates for Adobe Reader.

Savoring Summer Cover Tutorial

Hello Everyone!

It’s Jenni here to share step-by-step instructions for creating the cover of the Savoring Summer album. We are so excited to see many of you receiving your kits, and we want to help you get started!!

  1. Cut a 5×7 piece from the Bridesmaids (Crate Paper) paper.
  2. Cut a 4 x3 square from the top center of the Sassafras Head over Heals paper (include the scallop as seen on cover. Note: Do not cut the trim off the paper!!). Be sure not to cut the corner edges — you will use the corner pieces later in the album.
  3. Using the Sassafras Starters Intro paper, you will cut the text design in the top left corner of the paper. The dimensions are approximately 4″x”3.
  4. Cut a 4.5″ piece of the blue Crate Paper Neighborhood Trim, and a 3.5″ piece of the yellow Crate Paper Neighborhood Trim.
  5. To create the layered pieces: First place the blue trim on the paper (The top of the trim is 2 inches from the bottom of the paper). Center the Paper Crush (pink) paper over trim. Center the Sassafras Starters Intro paper over pink paper. Layer the “Savoring Summer” tag over the papers (I had the edge of my tag overlap ping the papers.). Layer the yellow trim underneath the Savoring Summer Tag. I allowed for half of the width of the trim to peek out from under the tag. Staple the corner if desired.
  6. To create the pin-wheel: First, punch a circle punch from provided craft paper. Second, Cut a 3/4″ x 12″ piece from the center of the Sassafras Paper Crush paper (hand cut the bottom portion- you will want to leave the trim on the paper). Begin folding the paper according style, with the folds very small (about 1 centemeter folds). When you have completed folding, you will take your punched circle, and place a glue dot in the middle. Fan the paper out and apply adhesive to the two folded ends. Next you will bring the two ends together on top of the punched circle, placing the center of the pinwheel over the glue dot . You will need to adhere the ends together, and bring the center together. You may need to add a glue dot here or there underneath the edges of the pinwheel to secure it into place.
  7. Choose two birds from the Studio Calico Barn Swallow Paper. I choose two pink birds from the right hand side of the paper (remember to choose a bird that’s on the edge!). I cut one out that would be tucked under the title. The second bird (that appears on the the pinwheel), I cut around it (not too precisely) and adhered it to the kraft paper. Once adhered to the kraft paper, begin to cut the bird from the kraft. This will give the bird cutout more durability if it’s backed on kraft paper.
  8. Adhere the cover to the cardstock provided, and punch holes.
  9. Congrats! You finished the cover!!

P.S. Guess what?! Waleska bought an extra kit to giveaway on her blog today! Head on over to her blog and leave a comment to be entered! How sweet of her was that?! Thanks so much, Waleska!

Project Kits are Sold Out!

{Bloggers not letting me post a pretty picture 🙁 }

WOW! You guys are amazing – our very first project kit sold out yesterday, in only 4 days! That is incredible 🙂 Thank you all so much for purchasing a kit. We are so excited about this new adventure and can’t wait to see the mini albums you put together!

We are shipping them as fast as we can, we will be caught up by Monday for sure, so if you haven’t received your shipping notice, you should soon! And, be on the look out for the instructions – those will also be emailed to you. If you haven’t received them yet, please let us know!

Also, Jenni is already planning on posting the first post related to the project kit next week… and there might be a giveaway with it 🙂 So if you missed out on purchasing a kit, make sure you stay tuned! Also, don’t forget to check out Steph’s blog and be on the look out all summer long. We had planned in advance to give away some kits, but now that this kit is sold out, it makes these giveaways extra special!

Thank you all for an amazing week – we are absolutely thrilled that you loved our first kit so much! We are already brainstorming for the next kit!

xo, Elle

Sketch Thursday : 5.26.11

Welcome to the second installment of our weekly Sketch Thursday series!  We loved seeing how last week’s sketch inspired you to scrapbook and enjoyed looking at your layouts.  We hope you have the same success this week.
For this week’s sketch, I chose Melissa Mann’s “1 Fine Day” layout.  I loved the strong vertical lines that she used to divide her layout into two distinct halves, as well as the way she used four photos on a single page layout.
The sketch features one large photo and three smaller ones – this is a great opportunity to get numerous photos on a single page layout!  It also creates several areas to place embellishments.
I stuck pretty close to the original sketch.  Since I find my time is limited when scrapbooking, I typically don’t utilize atypical sized photos.  Instead of printing smaller photos for this layout, I was able to simply crop photos that had been printed in larger sizes.  This is where I’ll note that these aren’t the best photos ever but I wanted to get them on a layout.  My husband took the two smaller photo thus I was able to crop them easily as he most times he doesn’t really think about doing it in camera.  The only real change I made on my layout was moving my journaling under my title instead of the original journaling strips on the left side of the sketch.
Other product used : Studio Calico’s Lawn Party kit.
Design team member Mandie Pierce used this week’s sketch to create this layout.  I love that she rotated the original sketch so that the three strips became horizontal bands – I love the end result!  The absolute perfect birthday layout.  I think I’m going to have to give this sketch a whirl again with this orientation!
Design team member Rebecca Keppel also used this week’s sketch to create an event layout.  She substituted a die cut for one of the three photos on the left side of the layout and included her journaling below it.  The three vertical strips were the perfect place to add a pop of color to this holiday layout.
Looking for an incentive to use our sketch this week?  We can help with that!  Post a link to your layout created using this Sketch Thursday sketch for your chance to win a $5 ES gift certificate.  Link must be posted by 11:59p on Wednesday, June 1, 2011.
Gift certificate can be used towards purchase of products only and can NOT be used for shipping charges. Gift certificate balance must be used in a single transaction.

Congratulations to last week’s winner :

Blogger sophie said…

hey!! happy monday!! here is my take on the sketch!! I had such a blast using it ! I rotated it!! and used 3 of your amazing tags!
Sophie, please e-mail me the following information to : melanie [at] shopellesstudio [dot] com  by 5.31.11 :

Name :

Contest : 5.19.11 Sketch Thursday

Thank you! Plus, we have a winner for the Fujifilm Instax!

We want to thank you all for your enthusiasm over our new kit! We appreciate your orders, comments, emails, tweets, and facebook comments more than words could ever express! We love you all so much and are so excited about this new adventure!

We still have a couple of our limited edition Savoring Summer Project Kits left – but quantities are very, VERY low! This will be the only time this kit is available – so if you want it, please don’t wait!

And, for some more exciting news… Everyone who purchased a kit yesterday was automatically entered to win a Fujifilm Instax Mini! The winner of the camera is: Cheryl Furey! Cheryl, we will be contacting you today!

This is going to be one amazing summer! We have a ton of fun things planned and cannot wait to see all of your Savoring Summer albums come together in our flickr group!

p.s. We are giving away one of these kits at Stephanie’s blog today – make sure you leave a comment to be entered, even if you bought the kit! Because if you win and you already purchased the kit from us, we will reimburse you OR you can send it to a friend as a gift! How awesome is that?!

Elle’s Studio Limited Edition Savoring Summer Project Kit is here!

Our very first exclusive and limited edition Project Kit is here! This kit has all the supplies you need to create a super cute mini album titled “Savoring Summer”. So, get ready to slow down and savor your favorite summer memories! Catching fireflies, running through the sprinkler, sipping lemonade, traveling and more can be savored for years to come in this special kit.

This kit features papers, ribbons, tape, mist and more, from popular manufactures, along with 26 limited edition and exclusive Elle’s Studio tags that were made just for this kit.


The Elle’s Studio Savoring Summer kit is $27.99 and is extremely limited – once they are sold out, they are gone forever! And, the exclusive Elle’s Studio tags that are in the kit will not be sold anywhere else, or printed ever again! You’ll only be able to get them in this kit, and once the kit is gone, so are the tags – so you won’t want to miss out on these!

The kit also comes with full instructions on how to put the cover and base of the mini album together just like Jenni Hufford has her album – here’s a tiny peek inside her 22 page album she made with our kit:

The instructions will also give you some inspiration and tips for how you can take your completed base of your mini album and add photos, journaling tags, ribbons and more to create fun pages all summer long!

We also some other fun things planned for this kit for during the summer- like a flickr group that you can upload and show off you mini album in! We will be highlighting and posting some of them from the flickr group, on the blog, all summer long! And, we will get to watch how Jenni’s album grows throughout the summer, right here on our blog! So, if you ever get stuck or need a little extra inspiration, you’ll know right were to find it!

TODAY ONLY: Because we are so, SO excited about our very first project kit release, we are also having a bonus giveaway! Everyone who purchases a kit, today only (Monday, May 23rd), will be entered to win a Fujifilm Instax Mini! These are so fun to play around with!

Thanks so much for stopping by today and joining us for launch of our new kit!

May’s Inspiration Gallery is LIVE!

May’s Inspiration Gallery is now live and the design team has done it again! This gallery is truly stunning! There is a ton of layouts and projects to see and get inspired by! After looking at this gallery I was running to my scrap room!

We want to give our design team a HUGE thank you for their amazing inspiration month after month! These ladies are awesome and we feel so blessed to have them making these great creations with our tags!