Sketch Thursday

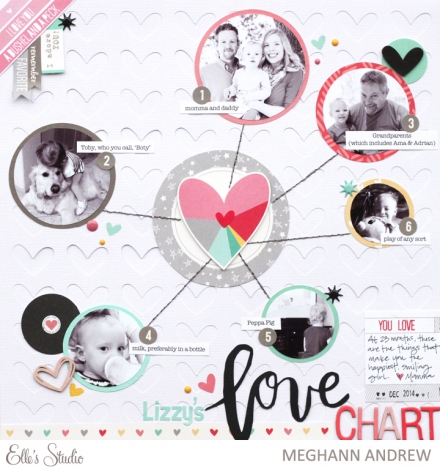
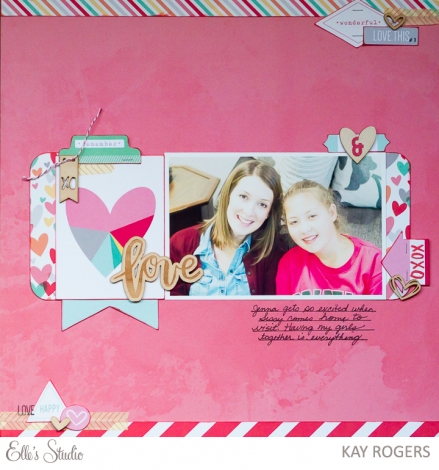
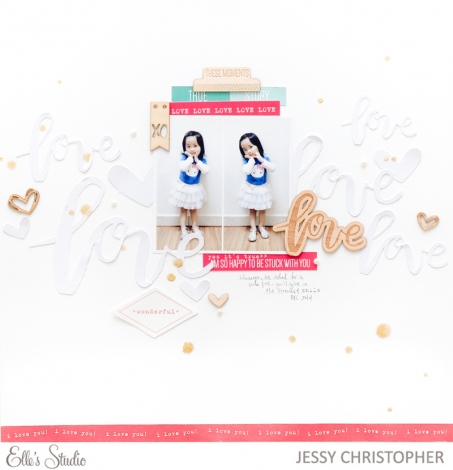
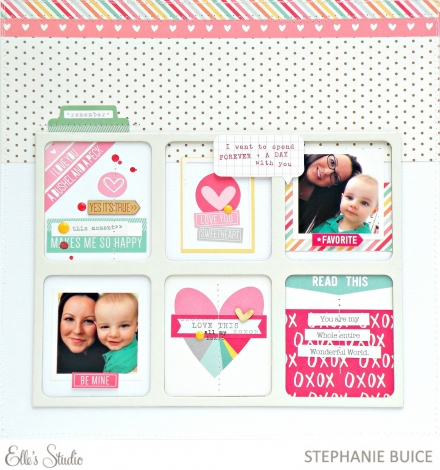
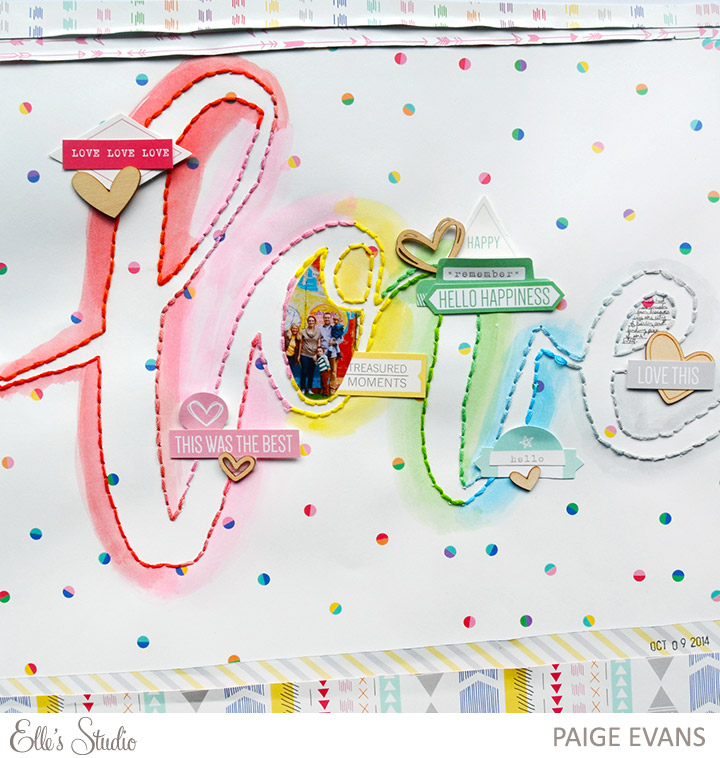
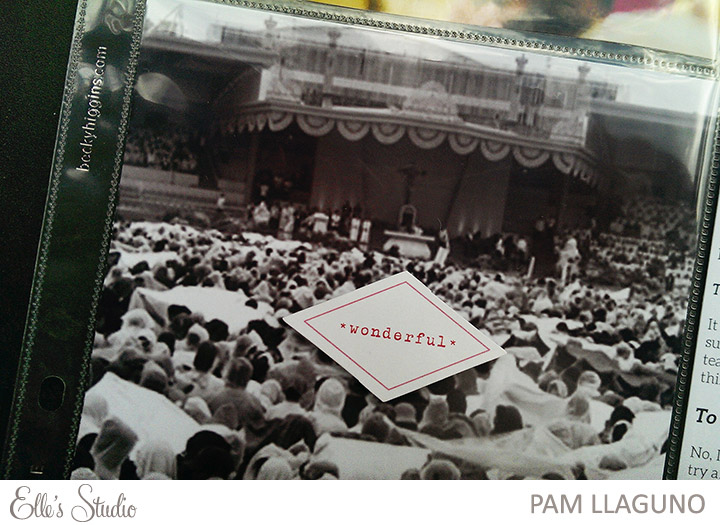
Today’s sketch was inspired by Jessy’s Treasured Moments layout.Sketch 1February2015

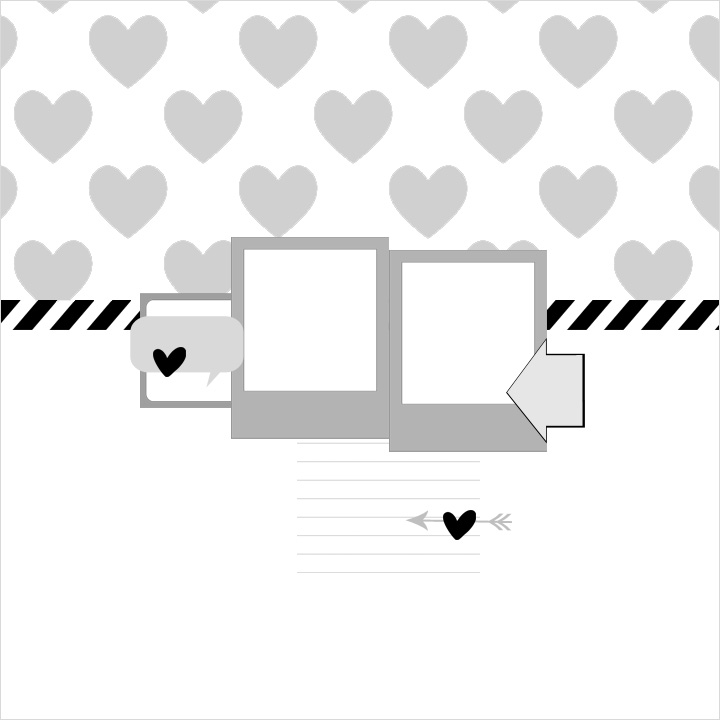
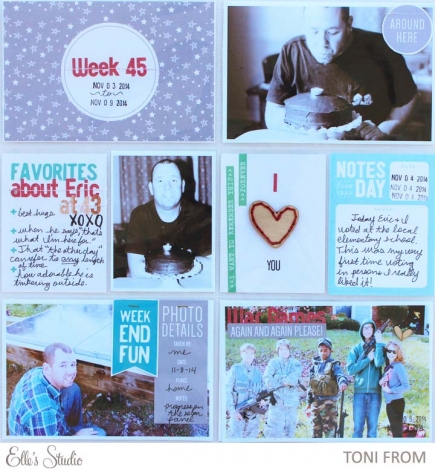
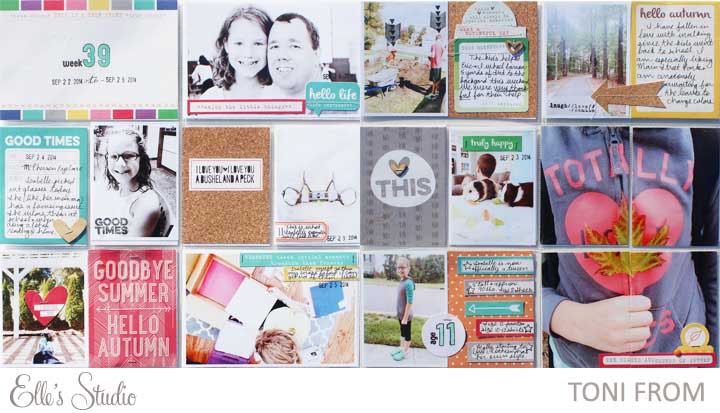
DT member, Toni is joining us this week with her take on the sketch!

Hello2015NFCchamps

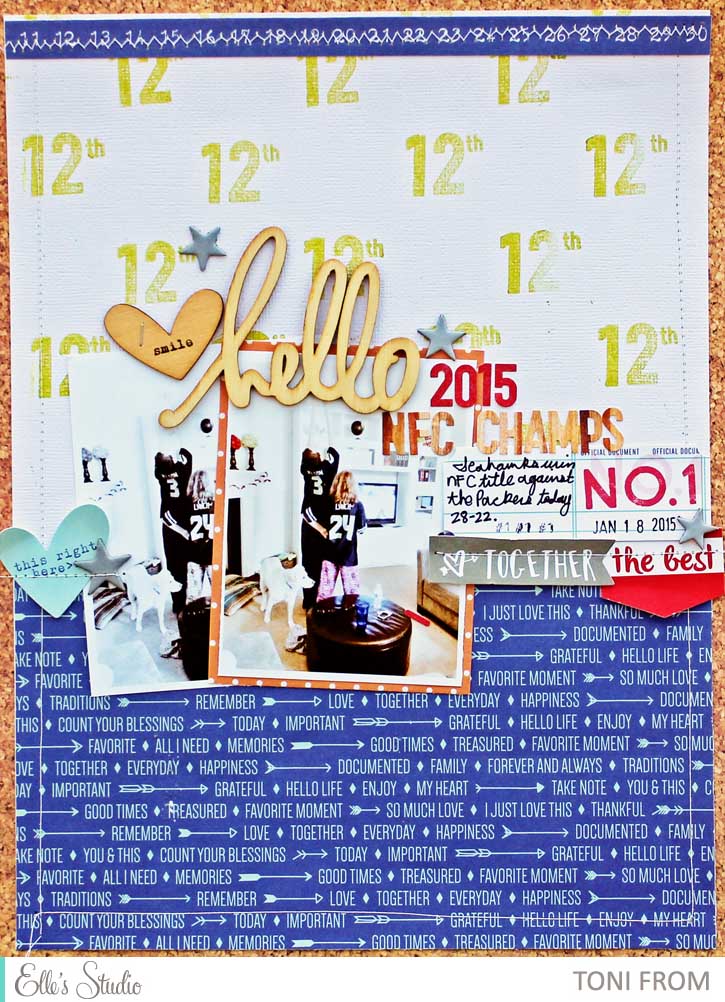
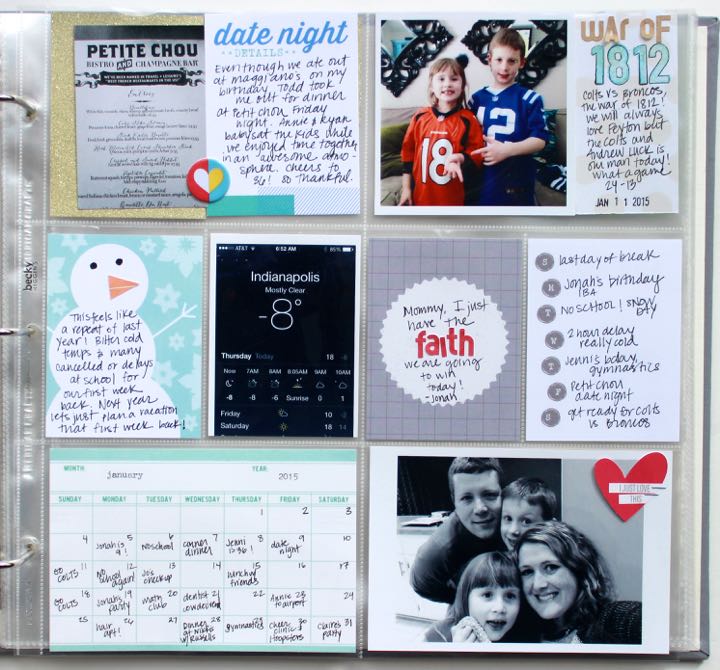
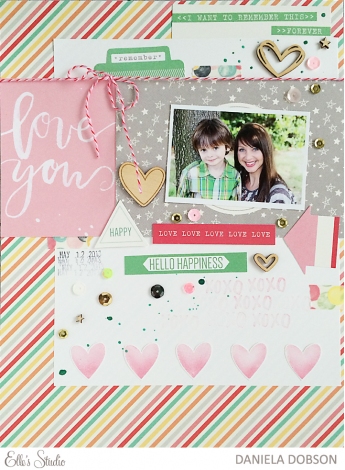
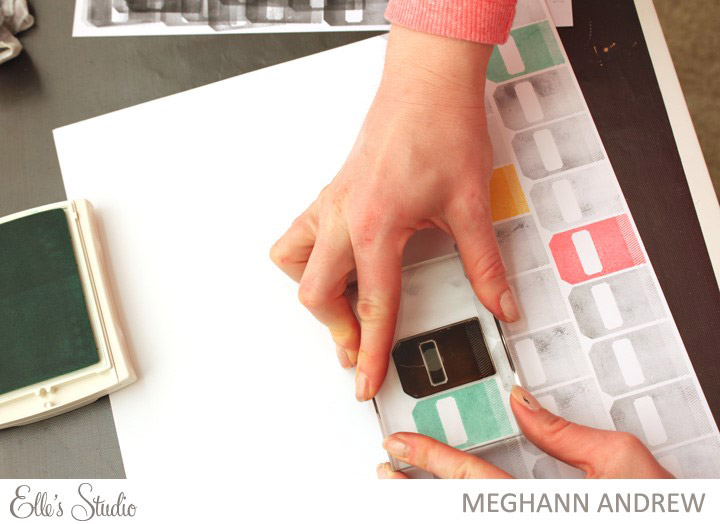
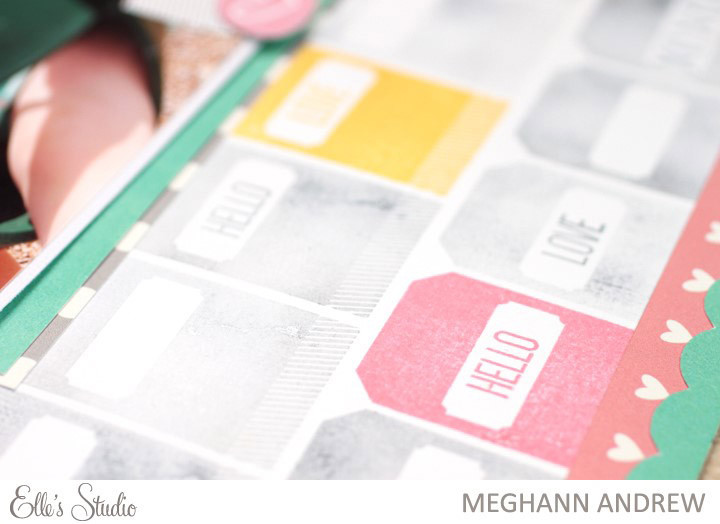
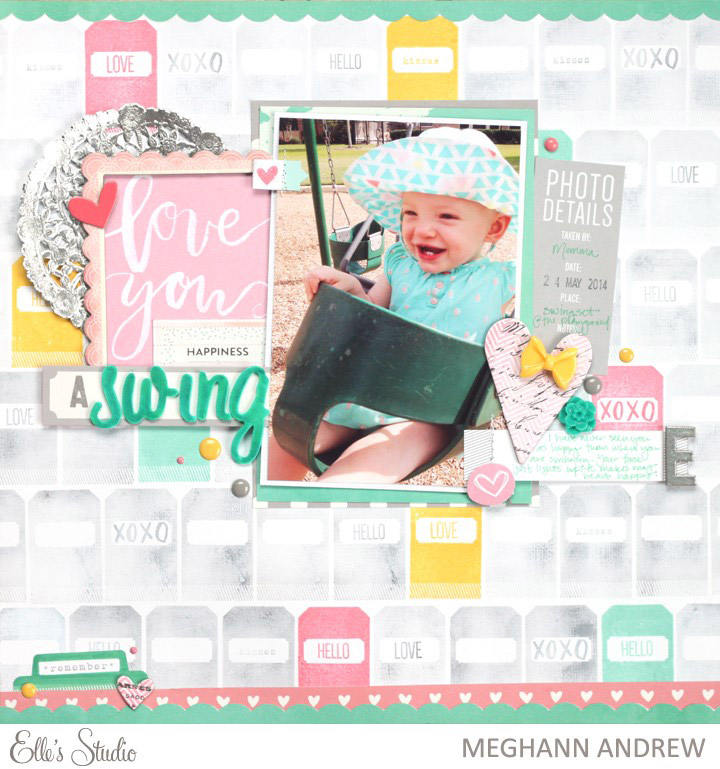
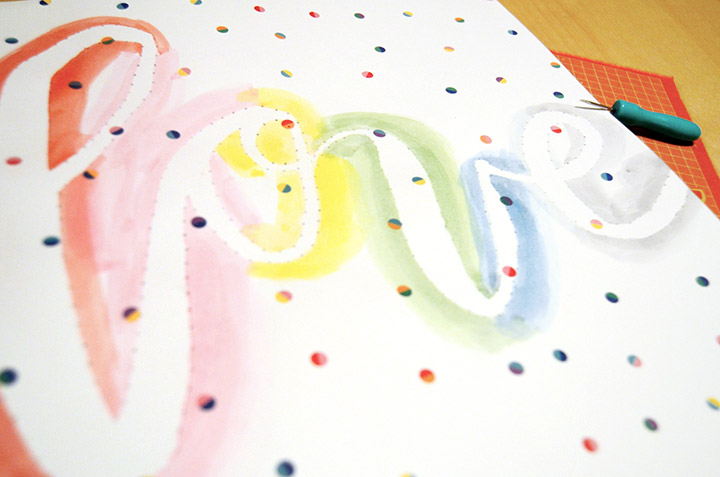
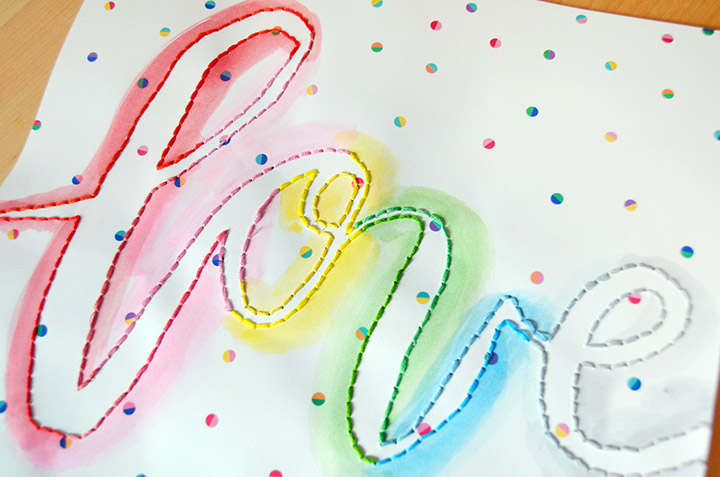
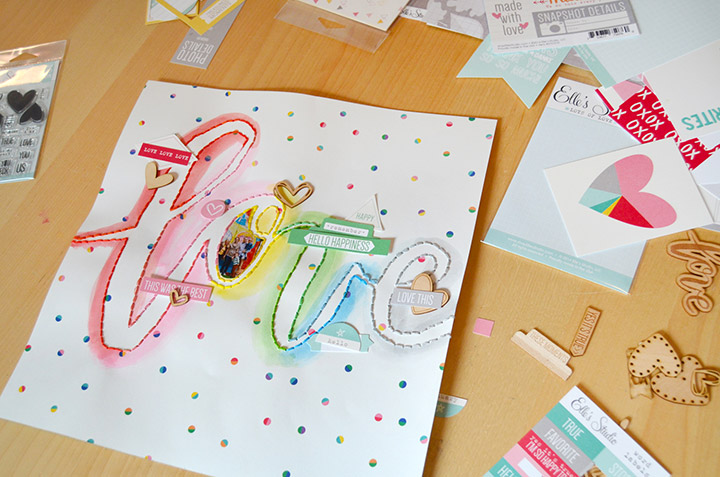
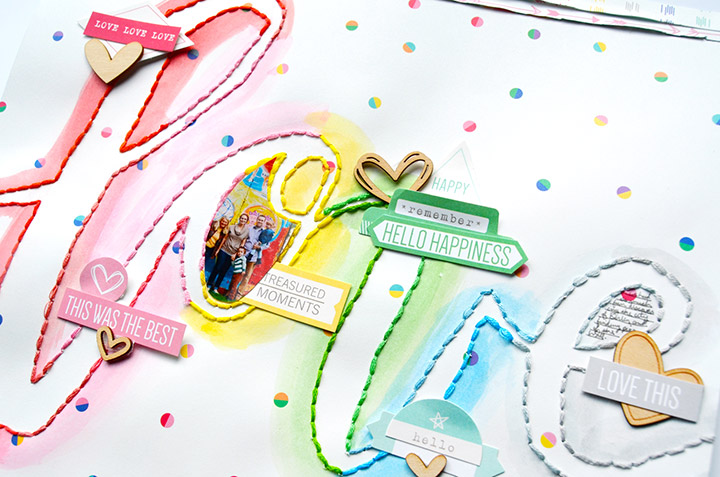
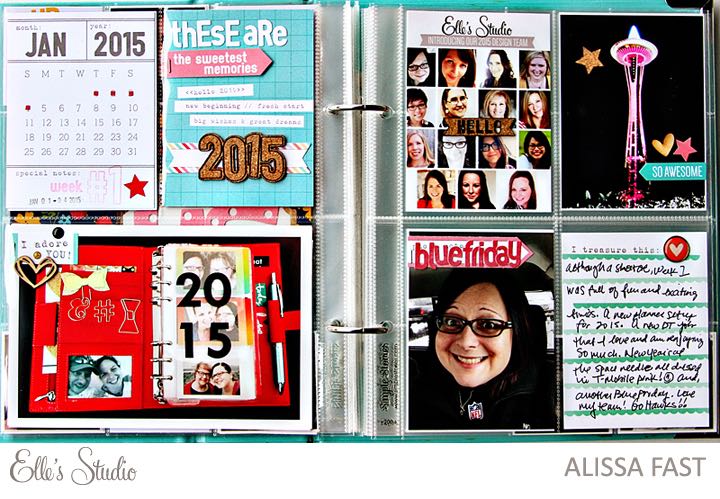
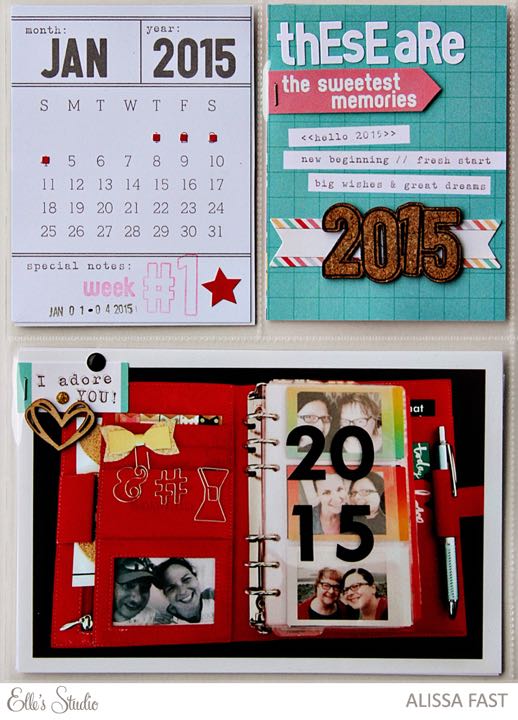
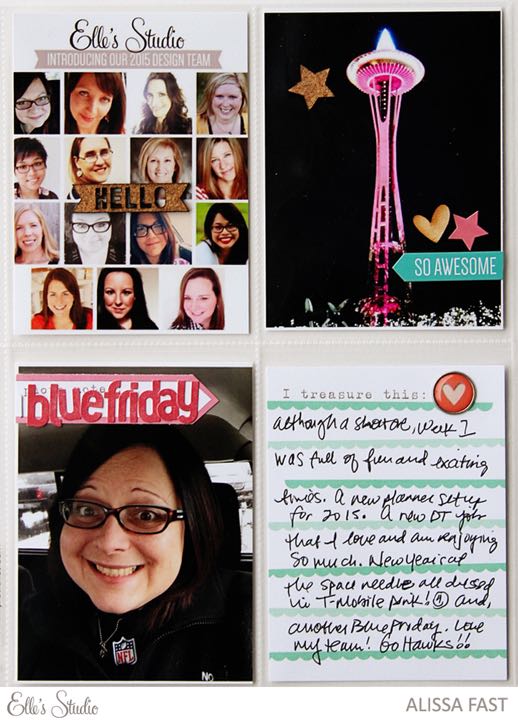
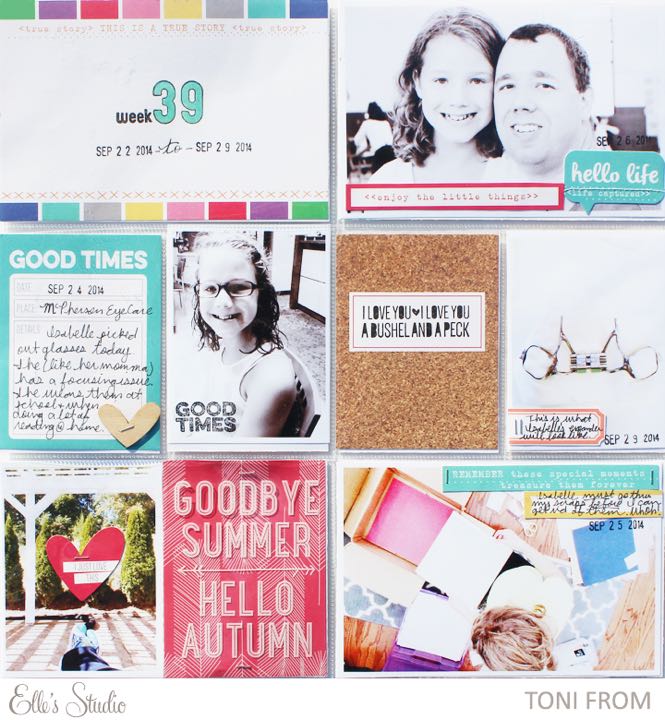
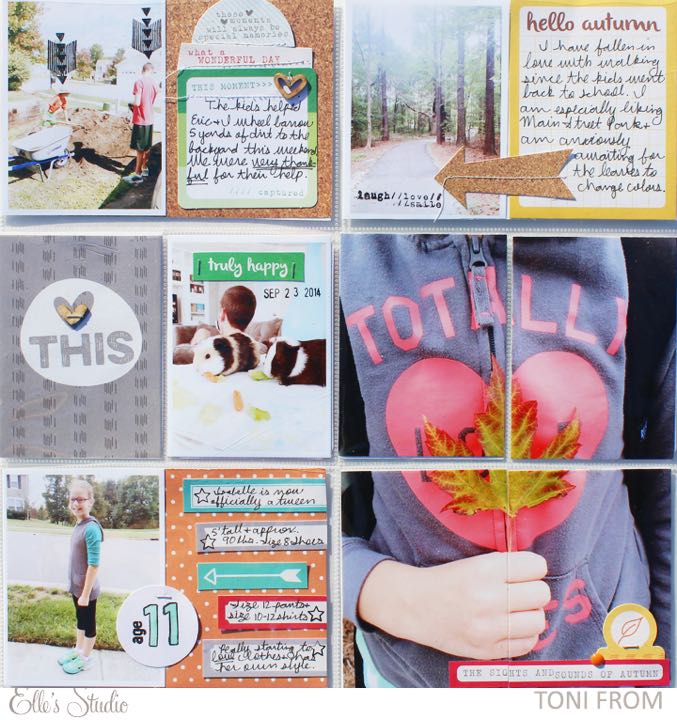
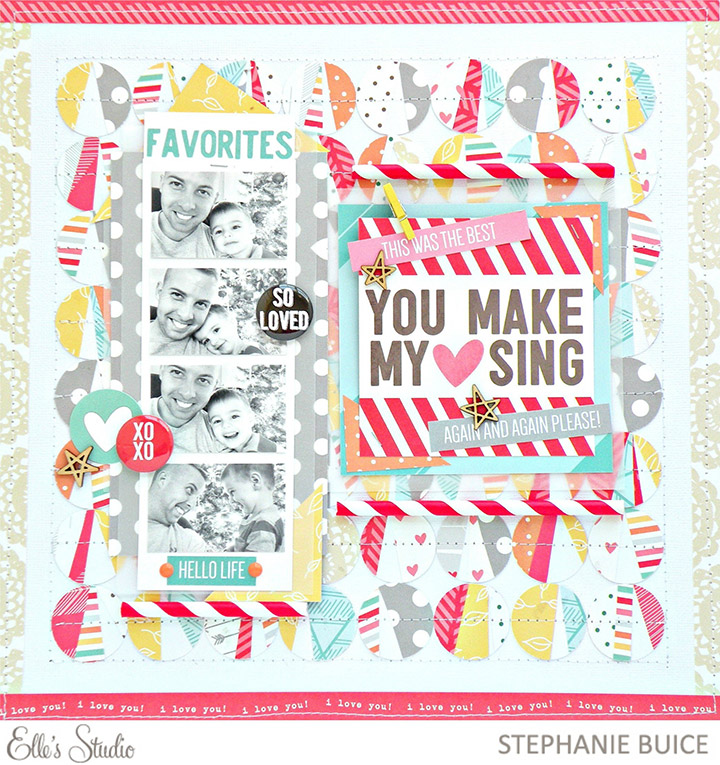
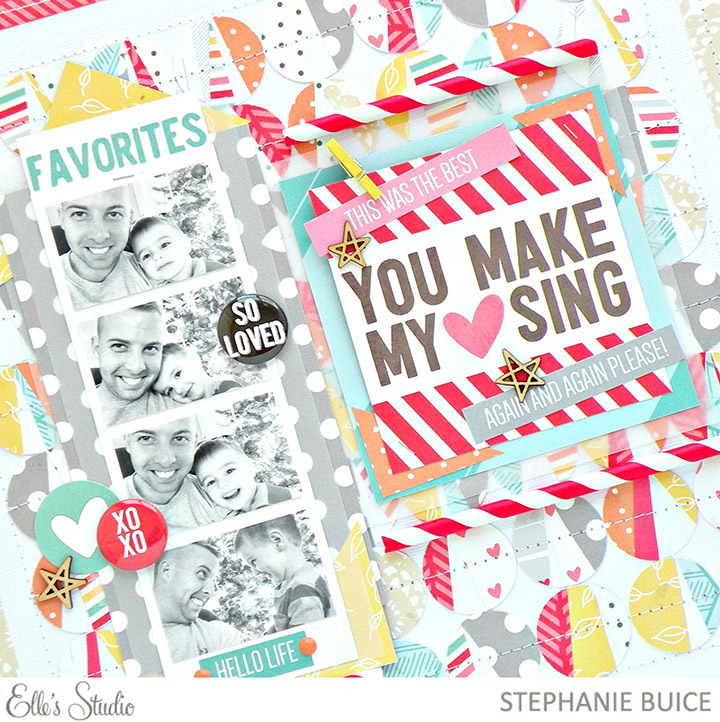
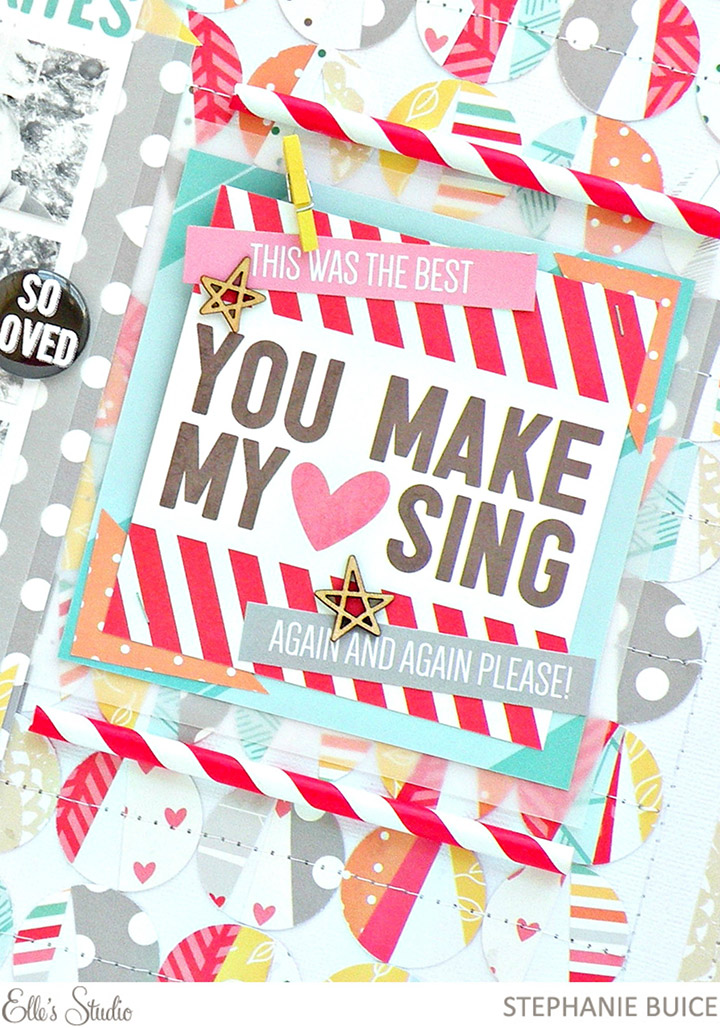
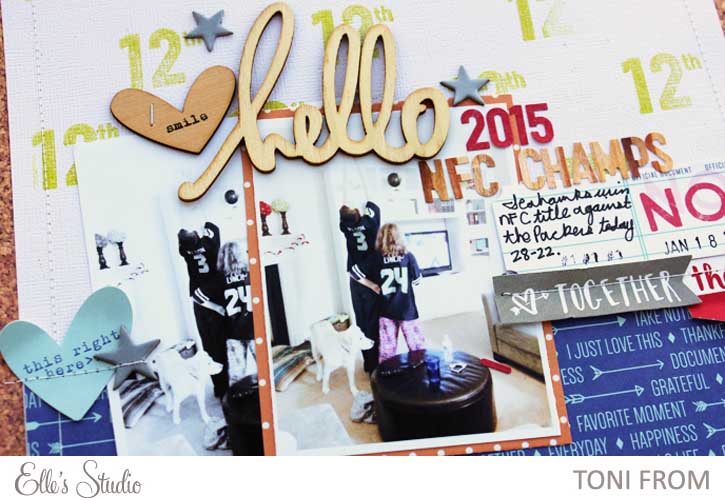
This sketch was fun to work with and could be incorporated easily for just about any occasion you would like to document. I used multiples of the same image (since it is a favorite of the kids celebrating a football win.) I chose to make one of the photos black and white and the other in color for some added interest. Die cut embellishments from the February 2015 kit (coming soon!) and the December 2014 Kit for the horizontal line in the sketch worked perfectly. I love that the sketch has a pattern on the top portion of the layout. I chose to make my own pattern using the Numbers stamp set. I repeated the stamp “12th” to signify the 12th man (that is what us Seahawks fans call ourselves.  🙂  Some machine stitching, a bit of patterned paper, a few more embellishments, and some letter stickers, and this layout was complete. I know you will love working with this versatile sketch, and I cannot wait to see what you come up with!

Hello2015NFCchamps-1

Products Used: Sycamore Lane paper collection, Letter & Number stickers- Red, Letter & Number stickers- Woodgrain, December 2014 KitNumbers stamp, Lots of Love wood Veneers, A Bushel and a Peck Stamp

Thank you so much, Toni! I love how you created your own background with the number stamp, and seeing a sneak peek of the exclusive February kit! Awesome!

For a chance to win a $10 gift certificate to the Shop, create a project inspired by today’s sketch, upload it to the Member gallery and leave a comment here with the link by February 18th. A random winner will be selected and posted with the next sketch on February 19th.

Congratulations, Padni and thank you so much for participating! You are last week’s randomly selected winner. Please email info@shopellesstudio.com the following info:

Name & Address:
Contest: Sketch 01.22.2015
Prize: $10 Elle’s Studio gift certificate

Valentine Banner

Today I’m sharing a banner I created with a few things I had laying around my craft space.meganklauerphotography-9431-copy

I started with a roll of burlap material that I had left over from a past birthday party. I cut 5 banner pieces. In order to make sure they were all the same size, I made a stencil out of a cereal box and traced each one before cutting out with pinking shears. meganklauerphotography-9424-copyI then used the January cut files to cut a heart out of the center of the doilies. EllesStudio-JanuaryDigitalsI backed each doily with the Hugs pattern paper from the Love You More collection. I wanted a soft subtle feel and something I could leave out passed Valentines Day too but you could easily swap out this part for a brighter pattern paper to create a custom look!  meganklauerphotography-9437-copy Using fabric adhesive I attached the doilies to the fabric and hung it on a strand of hemp string using my tiny attacher.  meganklauerphotography-9429-copy I hope this sparks inspiration in you to create a banner for your Valentine or Everyday celebration!

PROJECT LIFE

Today I am sharing the week of January 5- January 11 in my Project Life album.IMG_9198

Two weeks ago, I shared an entire spread that only covered one day (my son’s birthday) on January 5th, but wanted to keep the solid week grouped together in the title!  This week was all about WINTER weather.   Ironically, we had similar weather on the exact same dates last year (and I know this because it was documented in last years album!).

IMG_9201

I used a mixture of January’s Monthly Kit along with the Winter Ephemera Pack to create this bright layout against a white snowy backdrop.   My daughter was practicing making stars this week so I decided to add her paper in as my title page.

IMG_9204

A few extra items I added to provide a feel for what our week was like was a screen shot of the LOW temperatures, and also the Taylor Swift album cover- that’s all we hear around here these days!   I love adding these extra bits of life to my album.  Showcasing the things we enjoy in life is just as important as highlighting the things we do.  I want to focus on more of that this year!

IMG_9207Products Used:  Elle’s Studio Exclusive January 2015 Kit, Elle’s Studio Exclusive December 2014 Kit, Letter and Number Stickers- Kraft, Letter and Number Stickers- Red,  Hello 2015: 3×4 Calendar Cards, Christmas Ephemera Pack, Winter Ephemera Pack, Numbers Stamp, Foodie Journaling Tags, Good Cheer Paper Collection Pack, Sycamore Lane Journaling Tags, Sycamore Lane- Cork Shapes

We’d love to see your Project Life album! Make sure you upload what you are working on to our gallery and tag the Elle’s Studio products that you used. We feature our members projects every Sunday, so make sure you check back to see if you project is being spotlighted in our “Project Spotlight” blog series. Each person that is spotlighted will also receive a $10 Elle’s Studio gift certificate to use in our shop!


Love is in the air

Love is in the air and we wanted to highlight some love themed projects from our Design Team Gallery. Most of these projects even feature our exclusives – like our January kit, Lots of Love wood veneers, A Bushel and a Peck stamp, Lots of Love printables, 12 x 12 heart cut file, and January cut files! To see our designers’ notes and product list you can click on the titles and you’ll be taken directly to the gallery page with all the details:

1427_3478_14206966134909_bigLizzy’s Love Chart by Meghann Andrew

2018_3448_14200801605211_bigMy Girls by Kay Rogers

2083_3424_14199860627131_bigCookie Love by Jill Sprott

2269_3464_14203017236856_bigLove You by Jennifer Chapin

4012_3423_14199813686839_bigWonderful You by Michelle Wedertz

4339_3452_14201410910433_bigProject Life by Toni From

4982_3449_14201323900142_bigI Love You by Melissa Mann

5046_3467_14203404005483_bigLove You card by Danielle Flanders

5557_3453_14201676847218_bigMom & Me 2014 by Alissa Fast

5558_3428_14199896317627_bigLove by Jessy Christopher

5559_3456_14202194564236_bigLove This by Lisa Dickinson

1441_3463_14202320748305_bigLove You by Daniela Dobson

5561_3404_14199580929983_bigLove This by Stephanie Buice

5568_3443_14200376970145_bigForever and a Day card by Rachel Izakowicz

Aren’t they all incredible? We are so thankful for such an inspiring team! Don’t forget, there are 30 projects to see in our Design Team Gallery, plus you can bookmark your favorites and leave comments for them to see if you log in at our site. And, stay tuned for our next big gallery reveal on February 10th, along with the February exclusive kit launch + extras!

Valentine Pockets | Stamping with Paint

With Valentine’s Day just around the corner I wanted to come up with something fun yet simple for my frame with clips that hangs in my kitchen. Throughout the year it holds photos and drawings and of course during December it’s the center of our Countdown to Christmas fun.meganklauerphotography-9120-copyI started with some paints, Elle’s Studio Stamps, washi tape, and little brown bags that I bought off of my local hardware store years ago. You know the little ones back in the bolt & screw section. They were willing to sell me a few dozen and they’ve been great for little projects like this!meganklauerphotography-9136-copy

I folded the bags in half, stamped the hearts using the paints, added some LOVE themed sayings, and finished them off with a fun polka dot washi tape. meganklauerphotography-9123-copyIn each baggie their is a little packet of conversation hearts (one of my faves) and either a note or some cold hard cash (like a dollar, nothing too extreme here). Hee!meganklauerphotography-9420-copyIt’s a fun and inexpensive way to count down to Valentines Day! Or create your own theme and it use it as a good behavior board! I’m thinking of combining the two ideas!

I used these stamp sets to complete my project :: A Bushel & A Peck,  Love You More, & Good Cheer – Merry Christmas set.

What are you creating for this Valentines Day? We would love to see! We’d love for you to share your creations with us in the Member Gallery!

Fun with Patterns!

Have you ever used your stamps to make a repeating pattern? It’s a really fun way to get even more use out of your stamps and create something custom in the process! Today we have two design team members sharing projects with us and using this technique!

First us is Daniela’s card:
Love-you-more-by-Daniela-DobsonDaniela says “I created a pattern on the bottom of the card by stamping the arrows and “I Love You More” stamps from Love You More stamp set. I added little polka dots from Hello 2015 stamp set. ”

Love-you-more-close-by-Daniela-DobsonProducts used: Love You More Bits and Pieces, Paper Collection Pack, stamp, wood veneers; Sycamore Lane Blank Labels; Hello 2015 Stamp.

Next up we have a layout by Meghann and she says “When I sat down with the intent to create a patterned background for my layout, I immediately reached for my ES stamps, and settled on the tag from the ‘Bushel and a Peck’ stamp. It is an easy stamp to repeat since it has straight sides that can easily be lined up and I loved that I could customize what sayings I put in each tag on my background.” 1“Before I began to stamp on my 12”x12” white cardstock, I practiced a bit on a piece of scrap cardstock. I found that my grey inkpad wasn’t stamping the best, but I decided that I liked that the tags looked a bit ‘distressed’. I decided to ‘stamp-off’ on all of the grey tags, meaning that I inked up my stamp, stamped on a piece of scrap paper first, then stamped on my project background, so that the image wasn’t as bold. Using a photopolymer stamp makes it so much easier to stamp in a straight line when repeating an image. ”

2“While I was stamping my rows, I added a colored tag in between the grey tags. The placement of the colors may appear to be random, but I was ultimately creating three visual triangles on my 12”x12” page with each of the green, pink and yellow tags. After I was finished stamping the tags, I added some sayings from the same stamp set into the blank spaces.”

3Project supplies: Elle’s Studio January 2015 exclusive kit, A Bushel & A Peck stamp, Love You More paper collection pack and wood veneer; letter & number stickers- dark gray.

“After I completed my background paper, it was a simple process of adding layers in colors to match my tags that completed my layout. I love that, using stamps, I can create a custom patterned paper to use on any type of project!”

These are amazing ladies – we are loving how you used those stamps and the cute projects you created! Thank you for sharing and inspiring use today!

We’d love to see how you use our stamps in your projects, too – Make sure to share your projects by uploading them to our Member Gallery. We feature projects from the gallery, here on our blog, every Sunday, and those who are featured also win a $10 Elle’s Studio gift certificate to spend at our shop!

Love Layout Tutorial by Paige Evans

Love-by-Paige-EvansPaige has put together this amazing layout and a step-by-step tutorial to go along with it! There are so many things to love about this layout – the watercolor, stitching, layers, and tags added – so we are excited to see how it came together. Here are Paige’s steps:

11. Die cut the “love” from the January digitals from scrap cardstock.

22. Lightly adhere the “love” over the HAPPY paper from the Sycamore Lane collection.

33. Watercolor over the “love” using colors pulled from the January kit – I started with red then changed to pink, yellow, green, and blue.

44. Remove the “love” template and let the watercolors dry or speed up the process with a hair dryer.

55. Poke a hole every 1/4″ all the way around the outlines.

676. Back-stitch through the holes using colors of thread that match the watercolors.

87. Embellish the layout with die cuts and sentiments from the January kit, placing colors on like colors, as well as wood veneer hearts. Edge the top and bottom with a couple of patterned papers. Trace the inside piece of the “o” onto a photo and trim to fit.

Love-Detail-by-Paige-EvansProducts used: Sycamore Lane Papers, exclusive January Kit, Love You Lots wood veneers, January Digital Cut Files

This is such an amazing technique – we love how the colors move throughout the layout. Thank you for sharing your step-by-step process with us and inspiring us today, Paige!

Cards: Valentine’s

Valentine’s day is just a few weeks away so today we are sharing a few lovely cards with you!

First, we have a beautiful and colorful heart background card from Lisa:MySweetCard1

I loved the 12×12 Heart Pattern cut file, but wanted to use a smaller version for this card. I deleted some of the rows of hearts and reduced the overall file slightly to fit in a 5×5 square before I cut it out.  Then I used small scraps of papers from Love You More and Sycamore Lane to fill many of the hearts. I adhered the die cut to a card stock base using foam adhesive for added dimension. A few of the small tags from the Love You More Bits & Pieces finish off this simple card!

MySweetCard2Supplies: 12 x 12 Heart Pattern Cut FileLove You More Paper Collection PackSycamore Lane Paper Collection PackLove You More Bits & Pieces

Next, we have Danielle with a gorgeous card set using a stamped resist technique:watercolor embossed cards2 720withsig Thank You card detail2 - 720withsig Kiss Me card detail- 720withsig

On these two cards, I used a resist technique with heat embossing by stamping the hearts first from the January stamp set onto watercolor paper with Versamark ink, then pouring on white embossing powder over the hearts. I shook off the excess powder and heated the powder up with a heat tool. Next, I added watercolor paint over the top of the hearts with a paintbrush. The embossed hearts resist the paint, creating such a pretty look! I tried to get more of an ombre effect by starting out at the top with more saturation with the watercolor paint, then adding water to my brush as I went down the card to get a lighter color of paint. When dry, I added a few layered die cuts, wooden veneer that was painted and some twine and sequins over the top. I love layering, and this technique really gives you that look without a lot of bulkiness to your cards!

Supplies: A Bushel and a Peck Stamp Lots of Love wood veneer, Love You More – Bits & Pieces, Love You More – Lil’ Snippets: True LoveLove You More – Lil’ Snippets: Labels, Hello 2015 Stickers

And finally, I created a simple card using the love cut file:love card 0128I cut out the word ‘love’ directly on my card base, then covered each letter with a different patterned paper. I then stitched around the word with the sewing machine. This turned out a little messier than I would have liked but the more I looked at it then more I decided to just embrace the messy stitching (it adds character, don’t you think? ;)). Finally, I stamped the word you and added some little wood veneer and hand cut hearts.

love card detail 0128Supplies: January Digital Cut Files, A Bushel and a Peck Stamp, Love you More Paper Collection Pack, Lots of Love Wood Veneers

Thank you so much for these amazing cards, ladies!!

Have you made some lovely cards or Valentine’s yet? We love to see what you create. Please share your projects in our Member Gallery.

PROJECT LIFE

Today we have Alissa Fast and Toni From sharing pages in the Project Life albums!

alissa week 01 05Alissa shares “This year I’ve decided to mix up my Project Life album size. After 2 years of 12×12, I decided 6×8 might be a fun change.

alissa week 01 01So far, it’s working out. I love the smaller size and I can add pages if I have more I want to include.

alissa week 01 02

I love including full pocket sized photos in my Project Life and that means I need to add the fun stuff on top of the photos. Elle’s embellishments, tags and cutout sheets are perfect for adding to the white space of my photos. I love that I can use a lot of photos and still add the embellishments that make my heart happy.”

alissa week 01 03

Products used: Hello 2015 calendar tags, stickers, cork shapes; Love You More journaling tags, bits and pieces, cutouts; and Numbers Stamp

And Toni is sharing a 12×12 spread today!  She shares, “Today I am sharing a Project Life layout from the first week of fall. I don’t know about the rest of you, but I spent quite a few days in early 2015 catching up on my Project Life pages from 2014. In an effort to streamline my process, I pulled out some of my favorite Elle’s Studio products and just went to town!

2014ProjectLifeWeek39Blog

This was one of those weeks where a lot of little things happened, and I am so grateful that I have these memories documented. The “Good Times” journaling card from the Sycamore Lane Journaling Tags set was the perfect journaling tool to document my daughter Isabelle’s new glasses. Some simple stamping using the Sycamore Lane Grateful Stamp set and the Numbers Stamp set added some fun little details to this page.

2014ProjectLifeWeek39Blog-LeftFor this page, I used a large photo of my daughter to span across multiple pockets. I sized the photo of my daughter holding a leaf to 6 x 8 inches and embellished it simply using a piece of ephemera from the Sycamore Lane Bits and Pieces package, a sentiment cut out from the Sycamore Lane Paper Collection Pack, and an enamel dot from my stash.

2014ProjectLifeWeek39Blog-Right

I used the transparency “Goodbye Summer Hello Autumn” from the September monthly kit because it was just too perfect not to include. This was the first week of autumn after all. 🙂 I love how the transparency looks over the awesome red feather paper in the Sycamore Lane Collection Pack.

2014ProjectLifeWeek39Blog-CloseUp1

I incorporated labels from the Good Cheer Blank Labels on this spread to includes some journaling about my daughter in a list format. The Numbers stamp set and a circle punch allowed me to add the perfect finishing touch to a photo of Isabelle at the age of eleven.

2014ProjectLifeWeek39Blog-CloseUp2

Products used: Sycamore Lane Paper Collection, bits and pieces, blank labels, stamp, and journaling tags; Numbers Stamp; Good Cheer blank labels; A Bushel and a Peck Stamp; Exclusive September Kit

I hope this Project Life layout inspired you to pull out some of your favorite Elle’s Studio supplies and create something that you will cherish for many years to come!

Thanks for your inspiration ladies!


Pin-Inspired Projects!

Do you guys love Pinterest as much as we do? We have so much fun browsing all the amazing inspiration and pins that can be found there! We also love pinning projects, quotes, and more, so make sure you follow us if you’re on Pinterest!

We asked our team to share some Pinterest inspired projects with us and we can’t wait to share what they came up with! Let’s take a peek:

EllesStudio-PinInspired-Stephanie01First up is Stephanie’s layout and she was inspired by this pin – she says “I chose this pin because I LOVE the pattern and I thought that it would make an amazing background for my layout. Although it was a little time consuming making each individual circle with different cuts and patterns, it was really worth it.”
EllesStudio-PinInspired-Stephanie02 “I pulled some of my favorite papers from the three collections and they mixed and matched perfectly. I added some other embellishments and cut up a few paper straws to pull your eye into the center and kept my pictures the focal point.”EllesStudio-PinInspired-Stephanie03Products used: Love You More Papers, Bits and Pieces; Exclusive Christmas Ephemera Pack; Good Cheer Papers; Sycamore Lane Papers, Bits and Pieces; and Exclusive January Kit, and Love You Lots Printables.

JAN-3-01Next up is Pam and she was inspired by this pin – she says “For this layout, I was inspired by the Papal Visit in the Philippines. Pope Francis is the first Jesuit pope and truly, he was a symbol of everything I’ve learned about liberation theology from my university (a Jesuit university). I wanted to document how I felt during his visit :)”

“I was inspired by this simple layout from Pinterest which featured a large image + lots of journaling on the side. I flipped the layout to have the photo on the upper half and the journaling on the lower portion.”JAN-3-02“I used minimal + intentional embellishments since I wanted the focus to be on the journaling and my favorite photo of the Pope during his visit.”JAN-3-03Products used: Exclusive January Kit, and Hello 2015 stickers.

Thank you for sharing with us today, ladies! We are loving both projects so much – Stephanie, the background you made was beautiful and all those layers look amazing, plus the stitching adds the perfect finishing touch! And, Pam, we love the large images and perfectly placed embellishments that add to your story. Thank you so much for inspiring us today!

Do you have a favorite pin that has been inspiring you lately? We’d love to see it – please share it with us in the comment section, below!