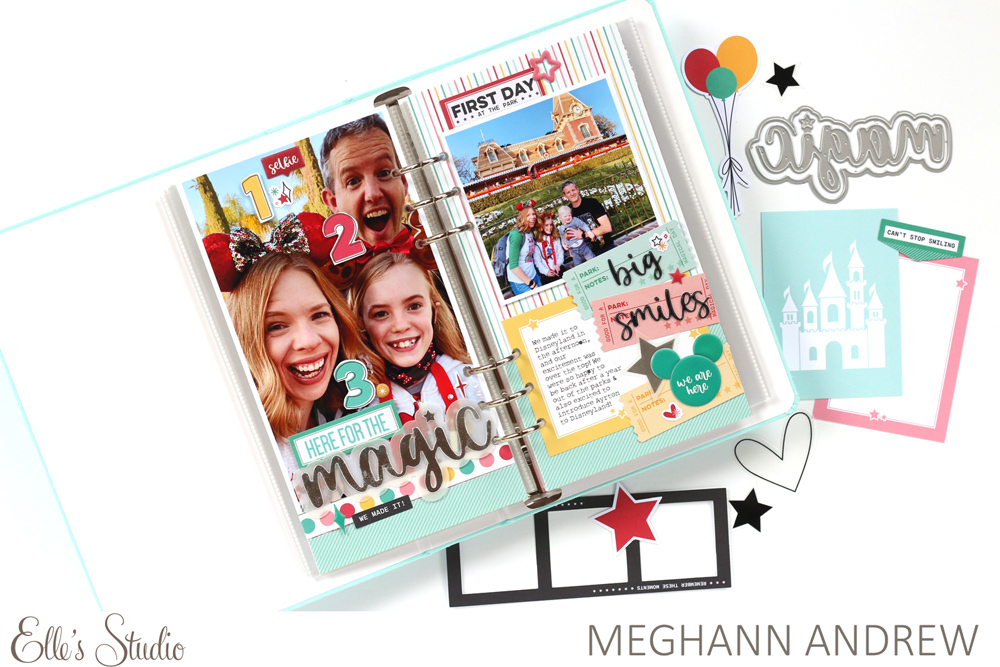
Hello there, friends! I am so excited to be back with you on the blog today to share my latest notebook spread documenting my Disneyland adventures! The latest Magical Memories and Title Builder Vol. 6 Simply Magic release has inspired me to document our trip to the parks last winter, and I am having so much fun getting these memories recorded. Today’s spread is all about our first moments in the park. Take a look!
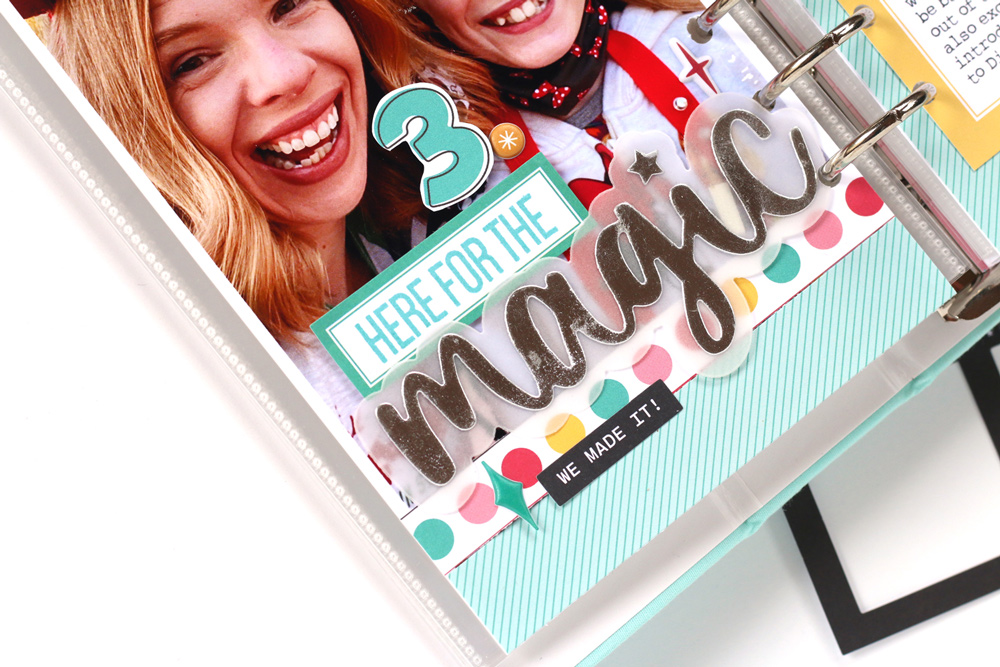
Adding the patterned paper from the Magical Memories Paper Stack below brightened up the left side of the spread and gave the title a perfect place to rest.
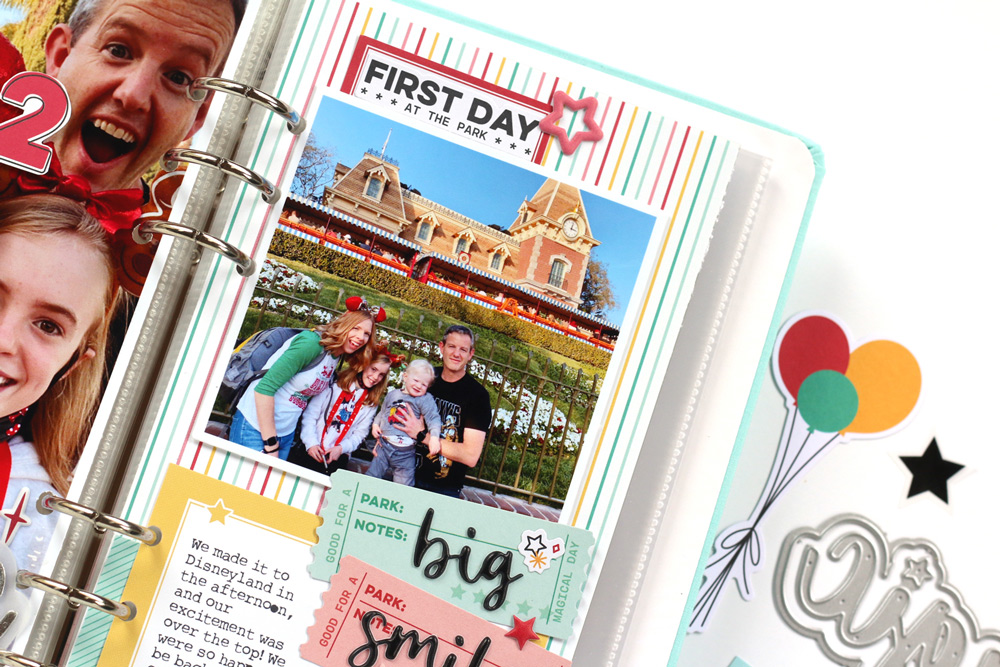
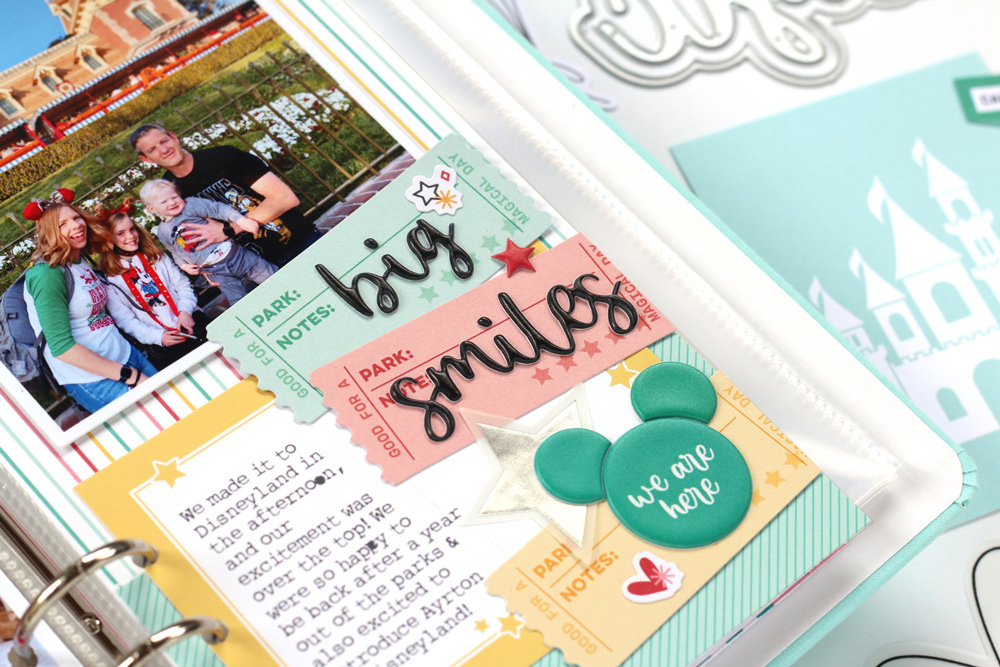
On the right, I echoed the colors in the papers that I used on the left side, but decided on this multi-colored striped pattern from the Magical Memories Paper Stack to back my square photo. I just love all of the wonderful patterns in this stack!
You can see exactly how this simple and fun spread came together in my process video below:
Thanks so much for stopping by today. I hope if you’re putting off documenting your magical memories just like I did, you’ll grab the Magical Memories and Title Builder Vol. 6 Simply Magic collections and get started. Your creative time will be almost as fun as the trip to the happiest place on Earth itself!
Comments Off on Here for the Disneyland Magic with Meghann Andrew | Share This
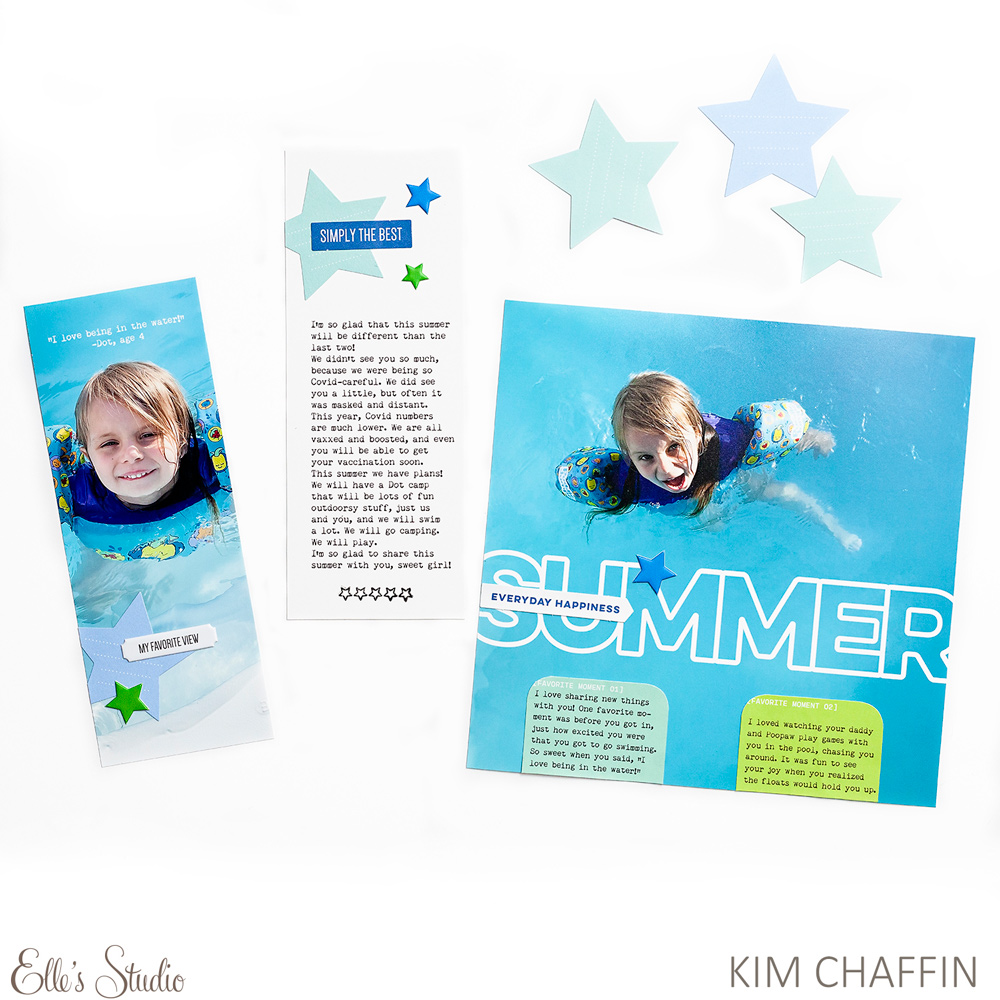
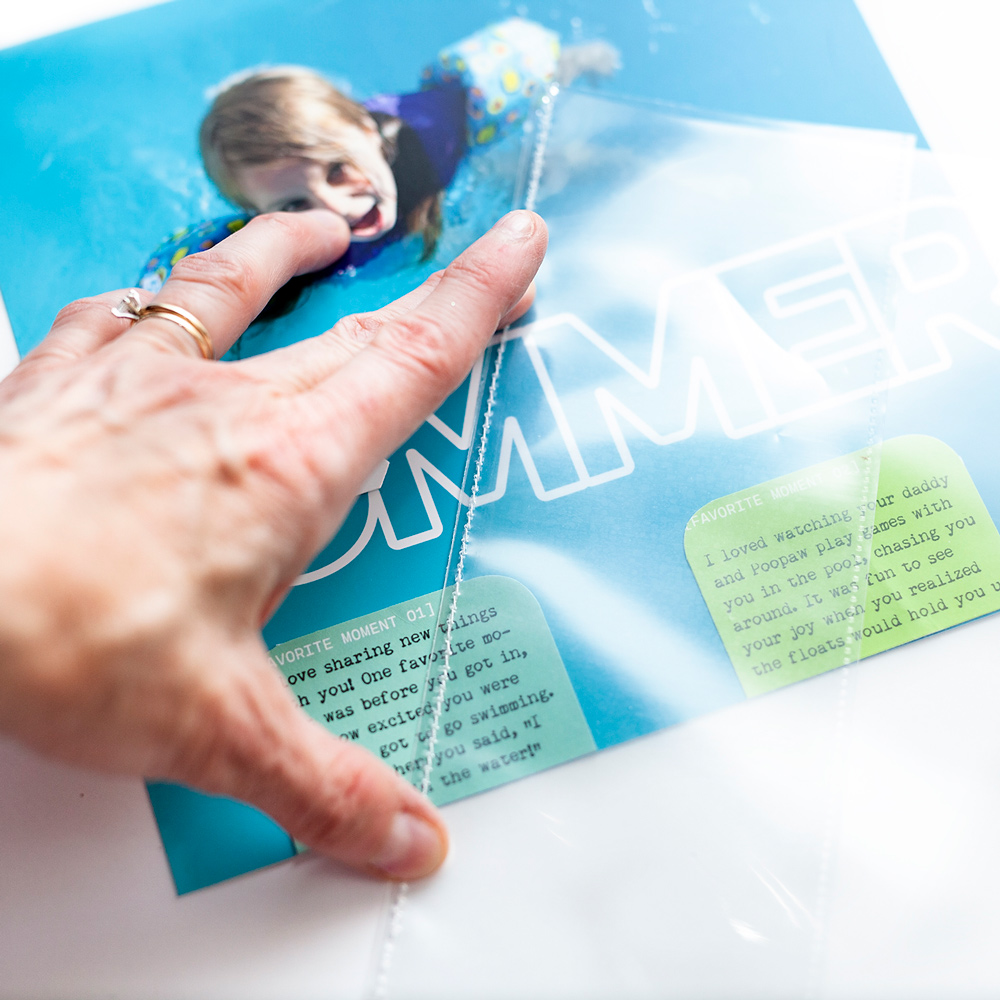
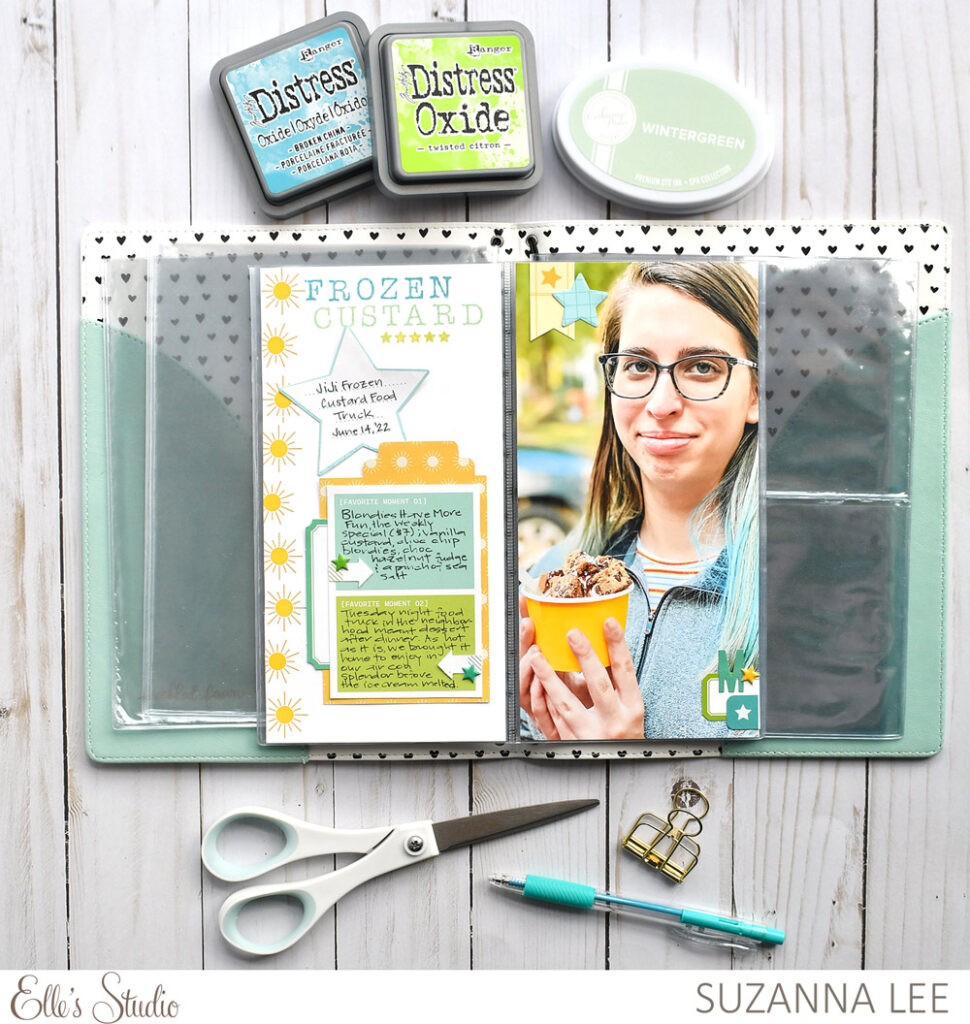
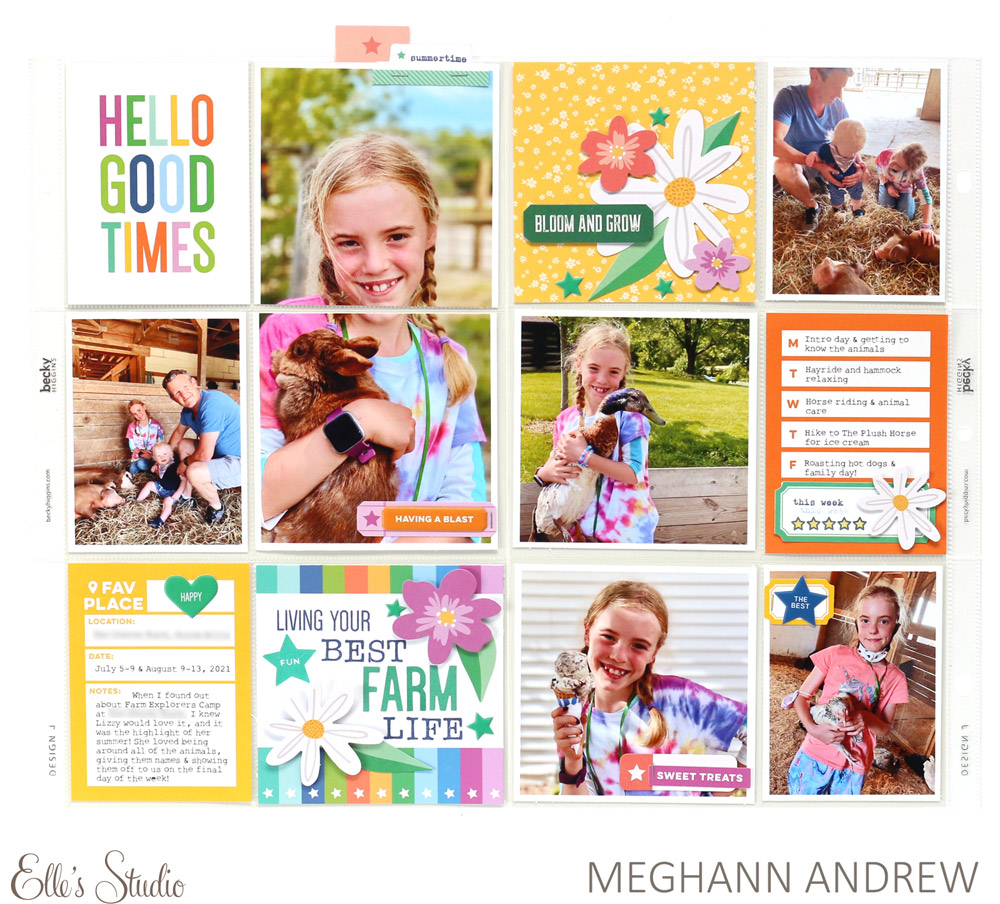
Hello, crafty friends!, It’s Kim Chaffin, and I’m so happy to be back with you to share a Tuesday Tutorial! I’d like to show you how I create a flip-out addition to my page when I want to add a bit of room for journaling or extra photographs. First, let’s look at the layout I’ve made!
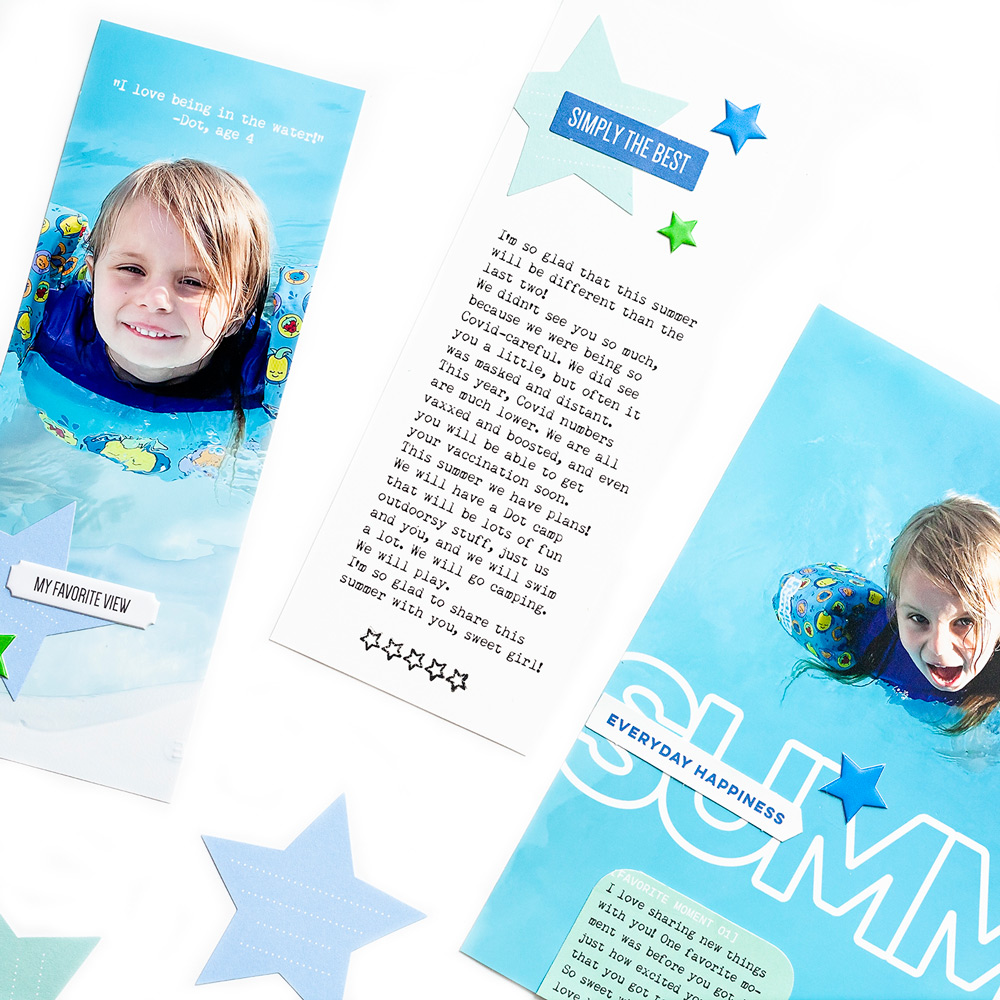
The large photo is 8″ x 8″, and I added a 3″ x 8″ flip-out addition to hold a strip of journaling and another photograph.
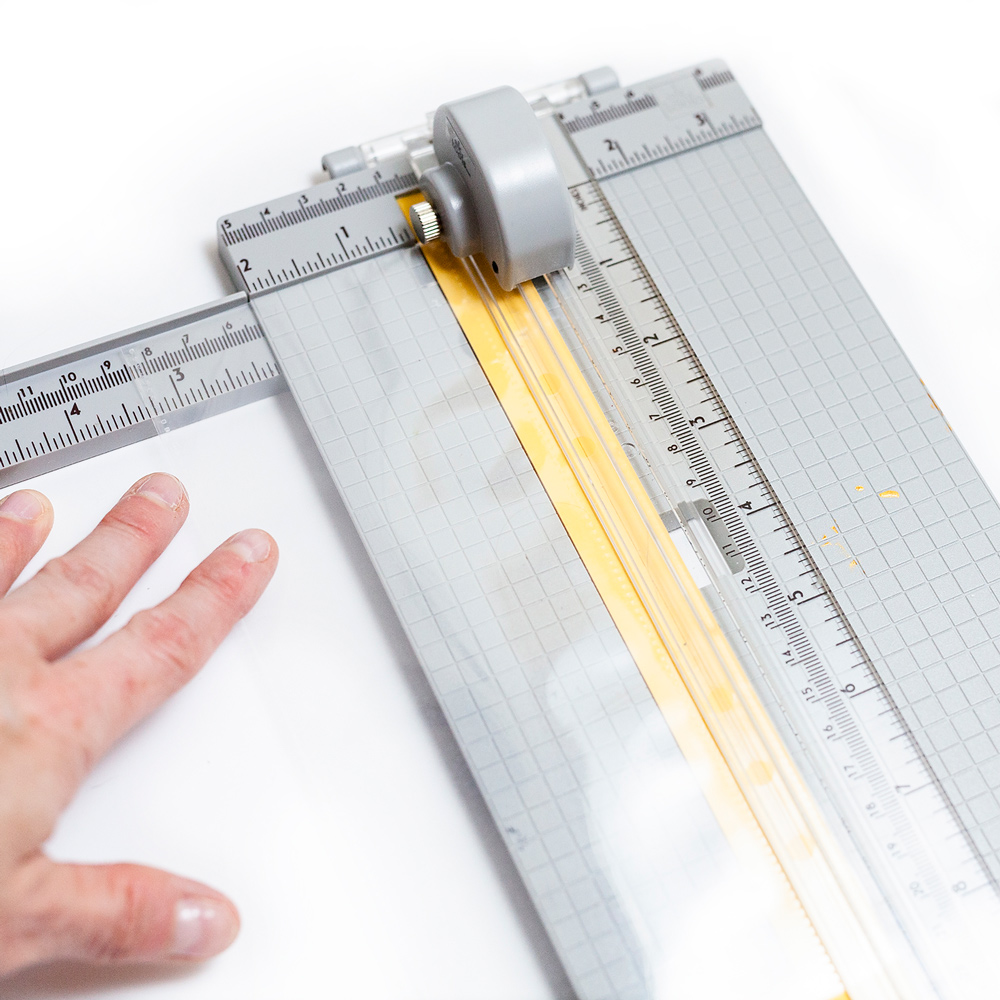
I used an 8″ x 8″ and a 3″ x 8″ page protector, but you can do this using whatever size works for your project. The first step is to trim the holes off of the smaller page protector. I just use my paper trimmer. Trim close to the fused edge without cutting into your photo pocket.
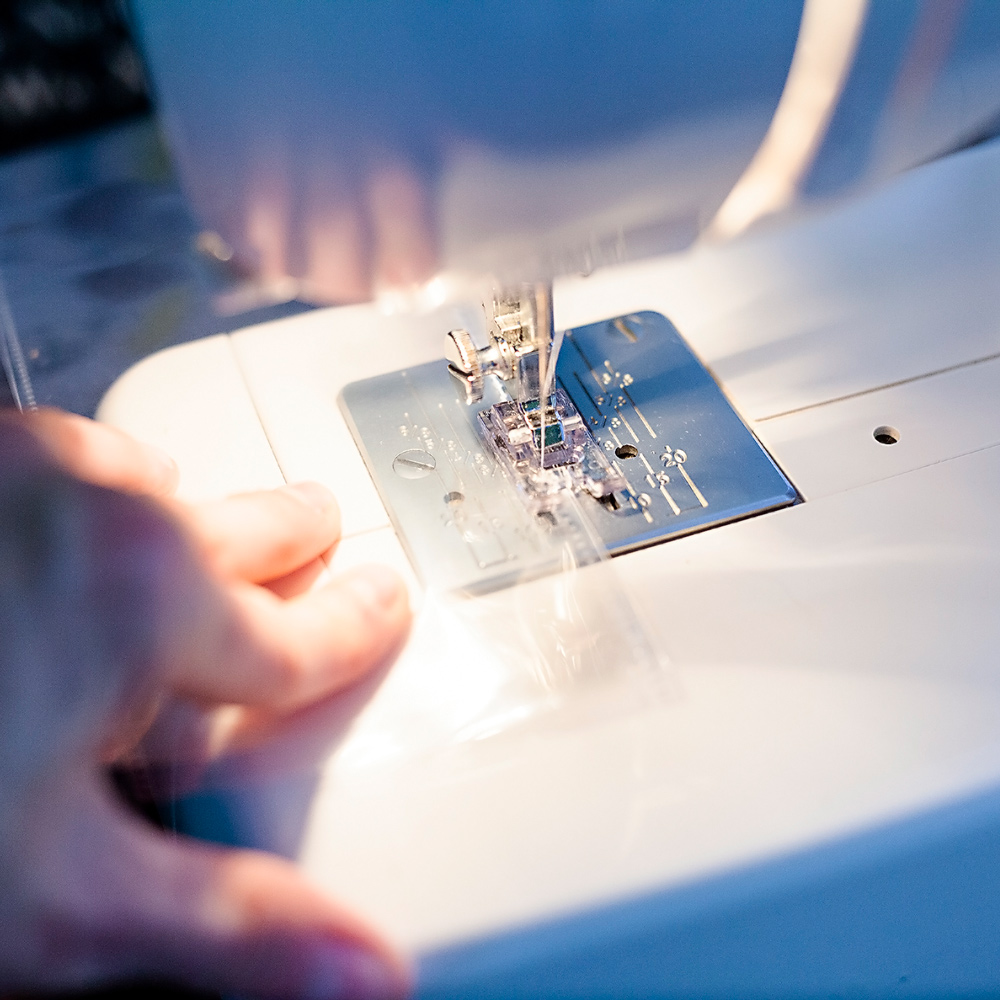
Next, you’ll sew the page protectors. Layer the two page protectors together with the smaller one on top, lining up the left sides. The holes on the larger page should be on the right side. You could reverse that if you want your flap to open on the right side of your page. Try to sew directly through the fused edge of both page protectors.
After sewing, simply trim the hanging threads, and it is ready to use!
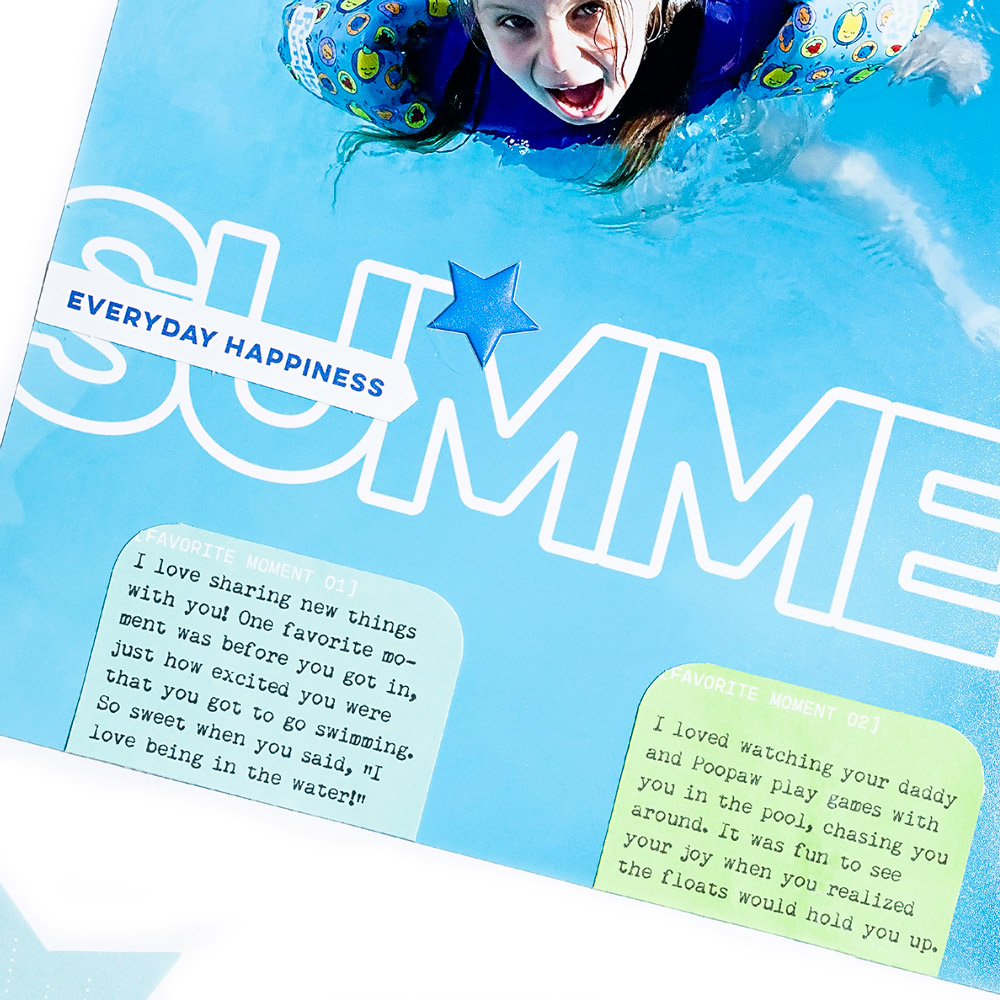
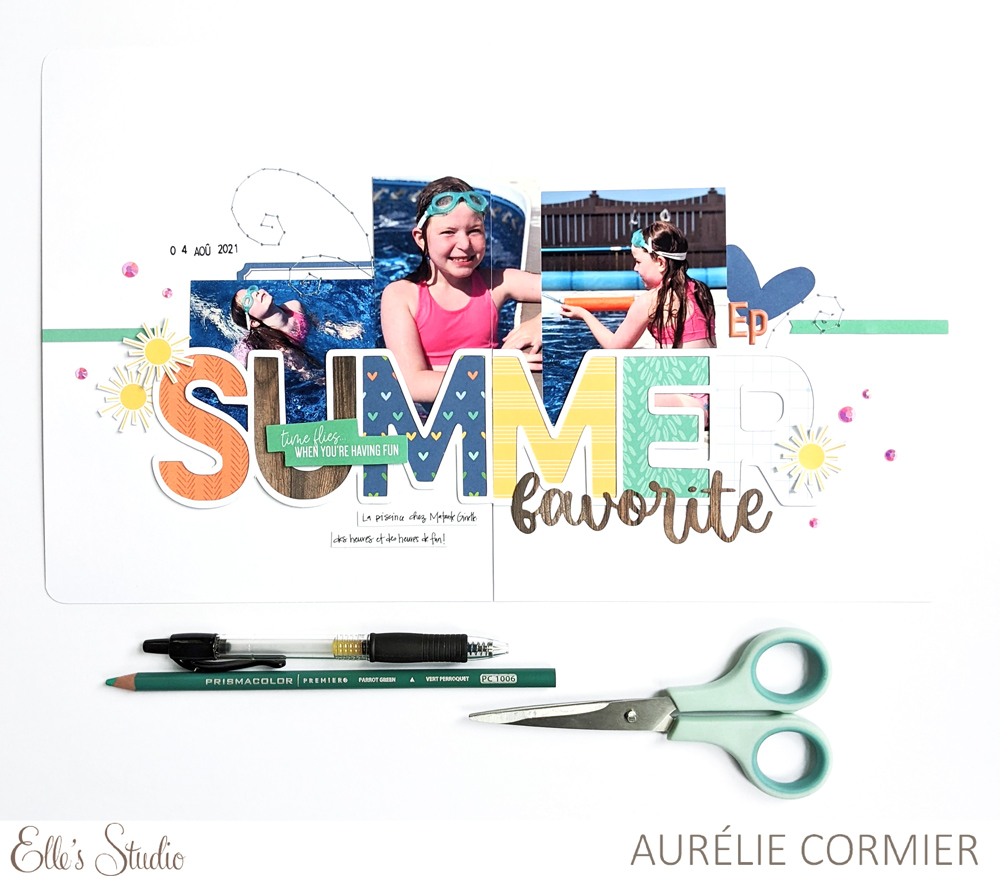
To create my layout, I added the “summer” July 2022 Cut File as a digital title, and I used a pocket tag from the July 2022 Kit trimmed in two to house a portion of my journaling. All that remained was to add a bit of embellishment, and my layout was done.
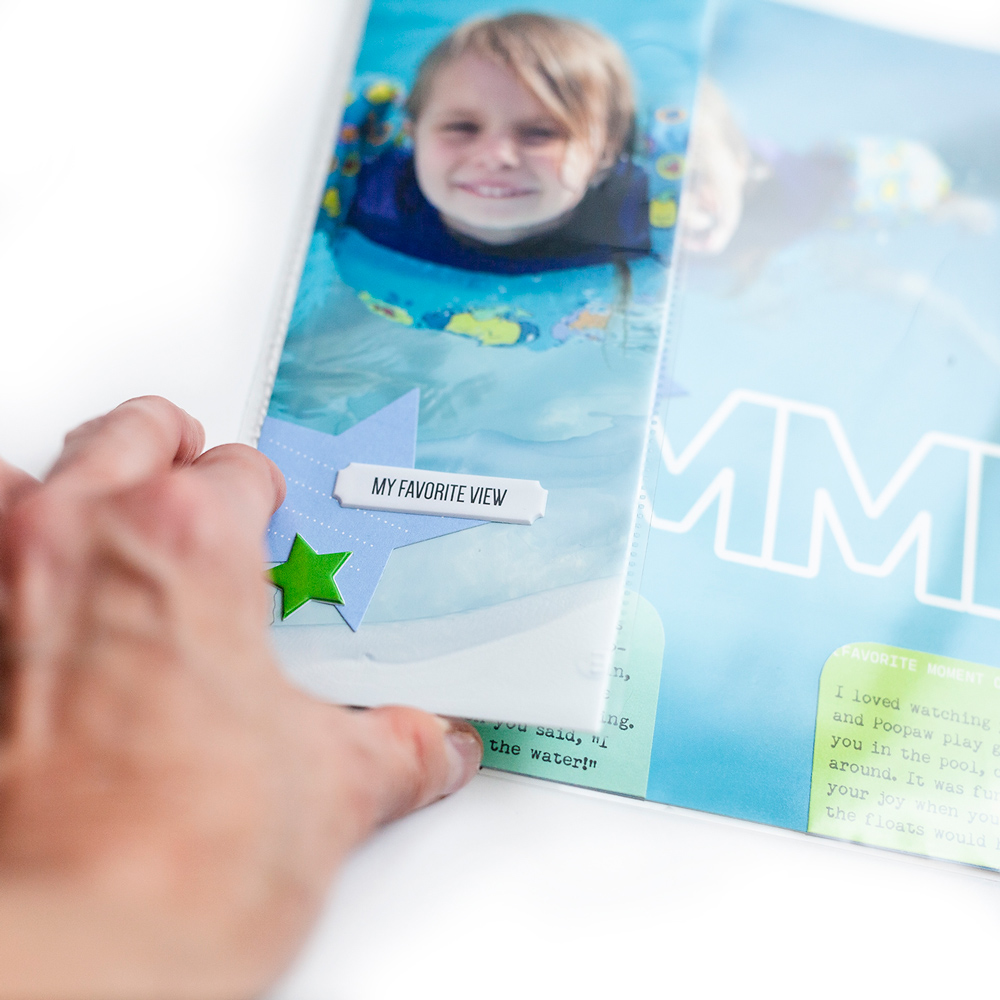
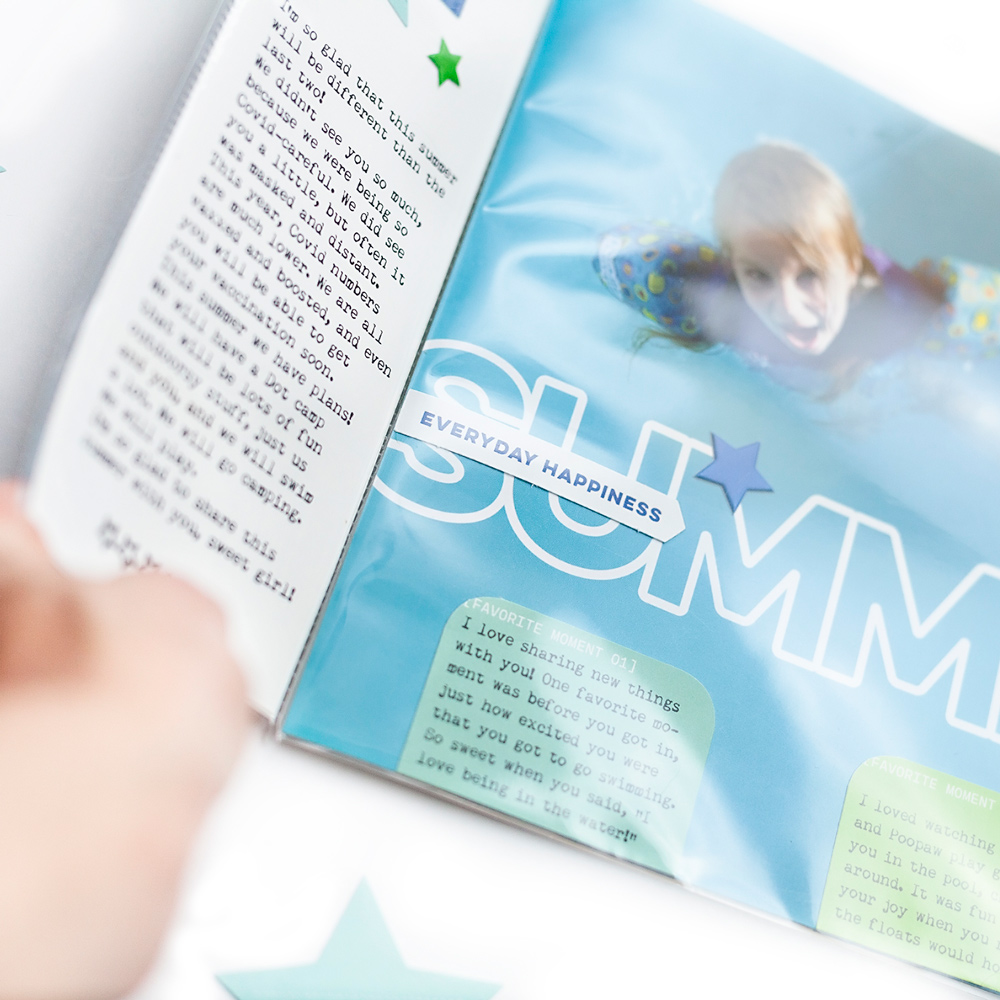
I inserted the completed layout into the page protectors, and now I have a fun flip-out that adds an interactive dimension to my page and extends the layout’s capacity! I’d love to see the way you create interactive elements using the July 2022 kit and extras! Be sure to share your projects with us in our Facebook Group and on Instagram using the #EllesStudio hashtag!
Comments Off on Tuesday Tutorial: Flip-Out Fun with Kim Chaffin | Share This
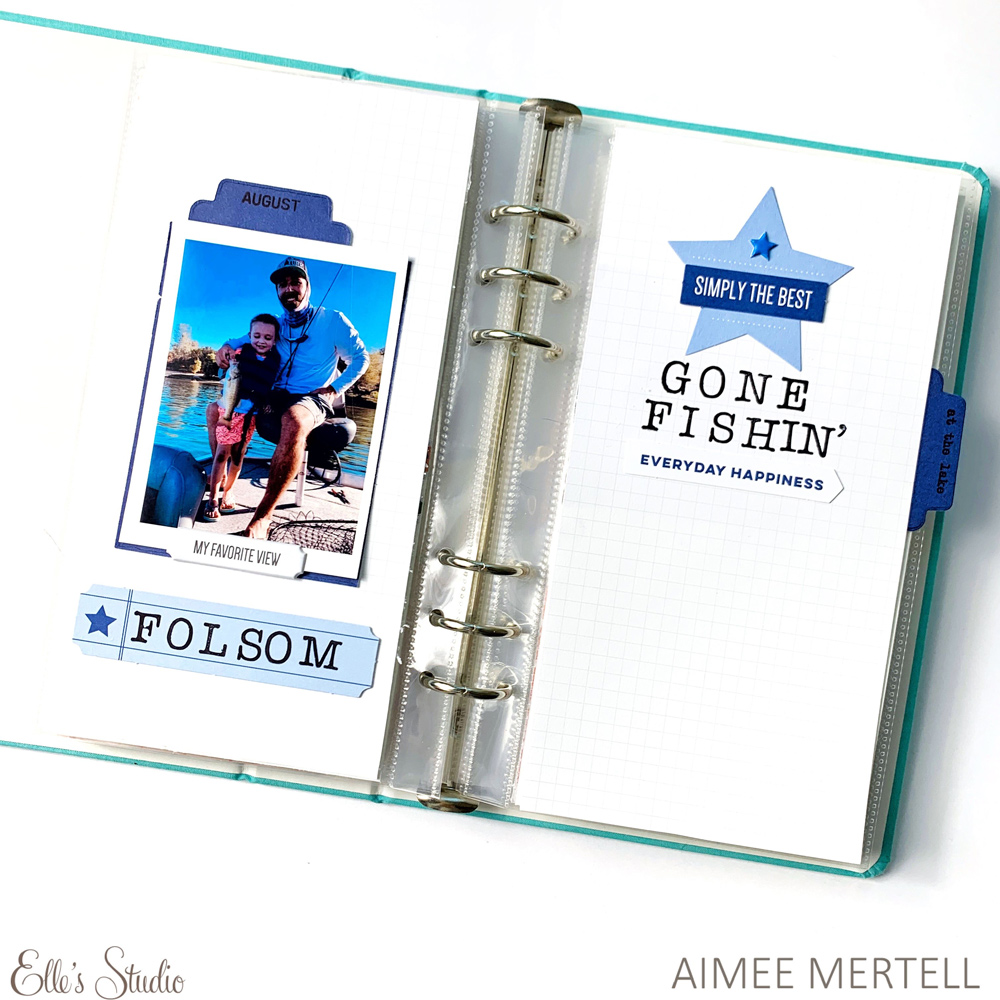
Hey there Elle’s Studio friends! It’s Aimee returning today with a travelers notebook layout using the new July 2022 Kit and add ons. Let’s take a look at what I created and I’ll walk you through the process and products!
I was really feeling the blues in this month’s kit so I dug back into my photo stash and found this photo of my husband and son fishing, surrounded by blue sky and water. This worked perfectly for the monochromatic look I was going for.
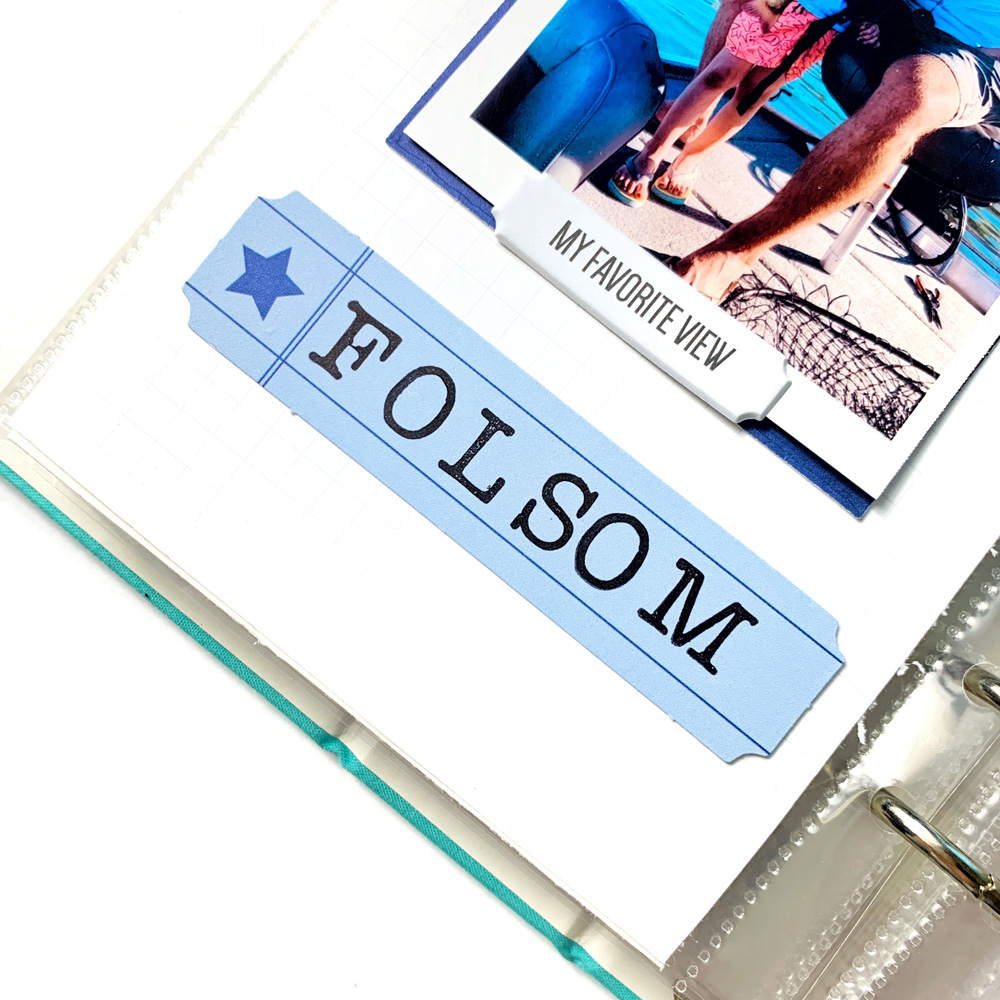
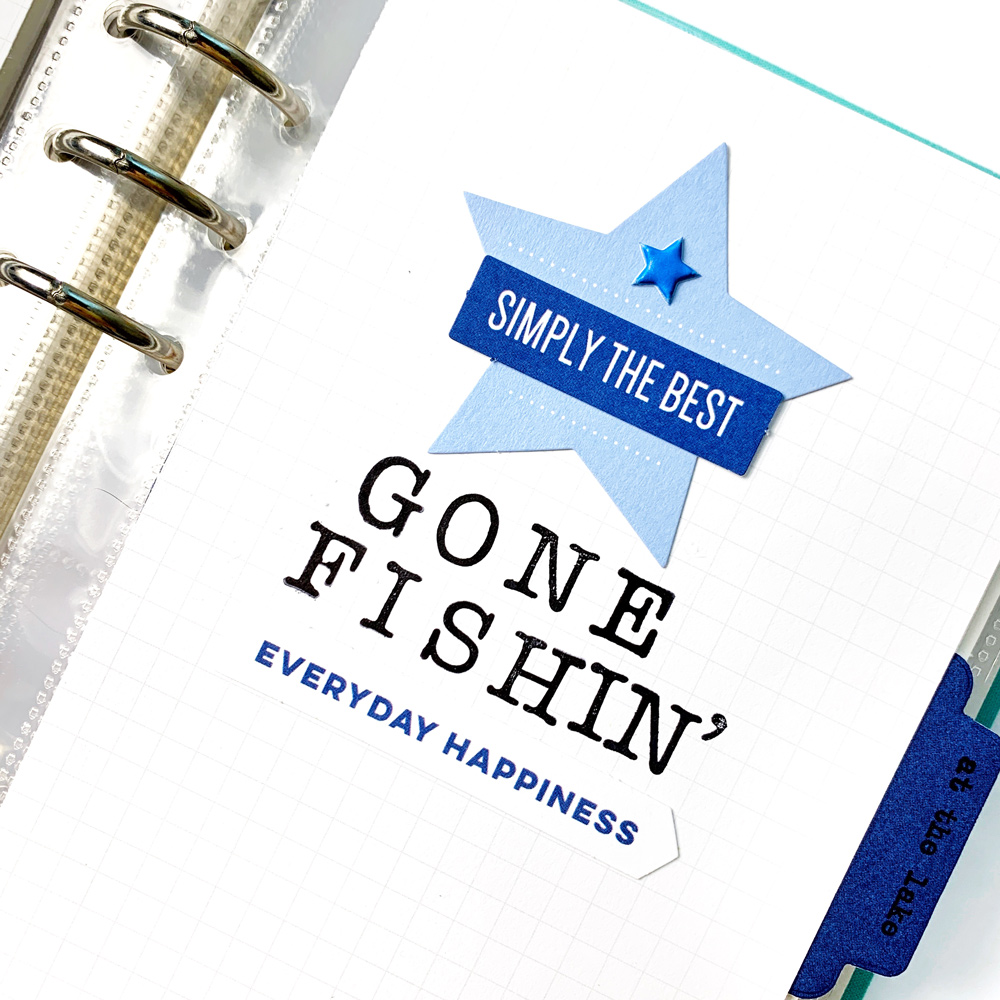
The real star of the show here is the Medium Hazel Stamp! I absolutely love this font! It’s a perfect size and just my style—definitely an instant favorite! I used it to create a title for my layout as well as denote the location of the fishing trip.
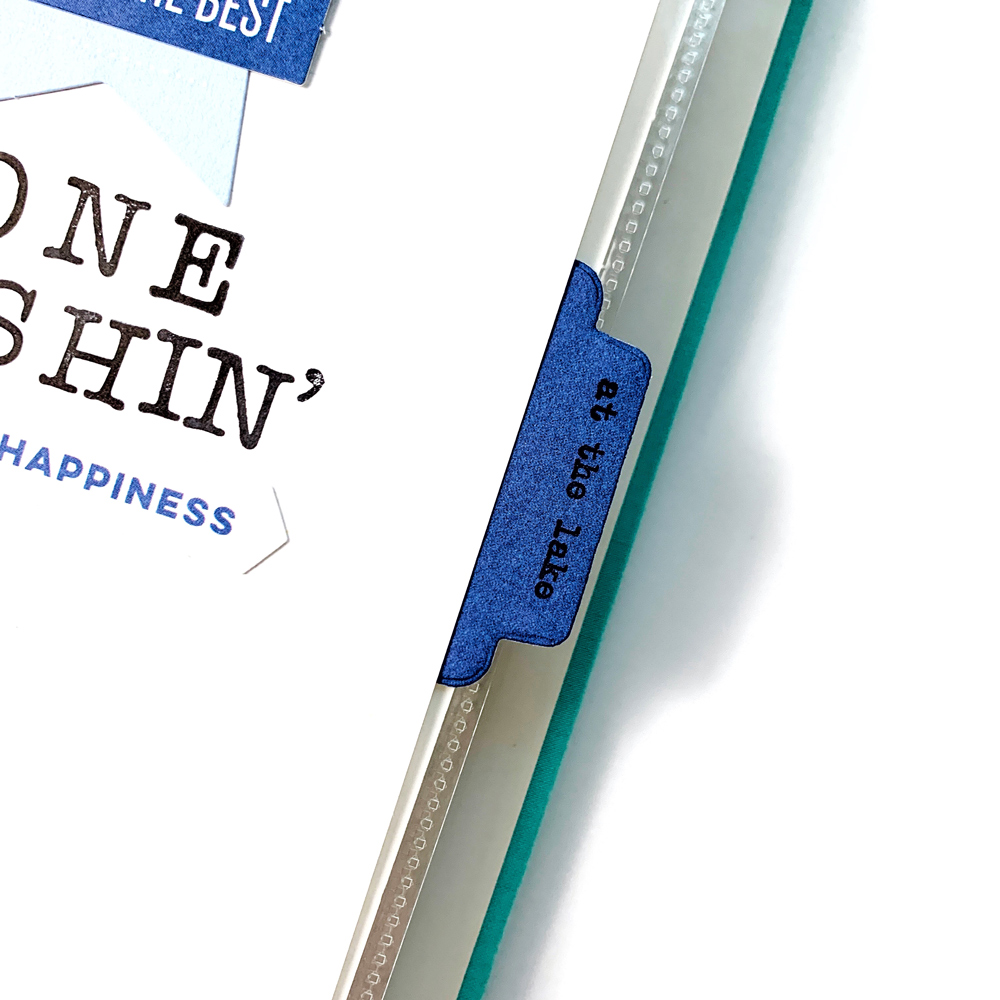
Lastly, I decided to use the Pocket Tabbed Metal Dies and the Cool Solids Paper Stack to add a tab to each side of my spread. This not only adds layers, but also ties in that beautiful navy color and creates cohesion on the layout.
This travelers notebook page was super fun to put together and I see a ton of use coming from the new Medium Hazel Stamp in my future. What do you think? Will you be snagging this stamp? Thanks for stopping by and I’ll catch you next time! Happy creating!
Comments Off on Monochromatic Memories with Aimee Mertell | Share This
Hello, friends! Welcome to our second volume of design team projects featuring the new July 2022 monthly kit and add-ons! We think you’ll love how our team has used our latest products in these seven different projects featuring precious memories in their own signature styles! Take a look!
Be sure to share what you create with your July 2022 kit and add-ons when they arrive by posting your projects in our Facebook Group or on Instagram using the #EllesStudio hashtag! We can’t wait to see what you document!
Find this month’s bright and summery kit and add-ons available now in our shop!
Comments Off on July Design Team Inspiration: Volume Two | Share This
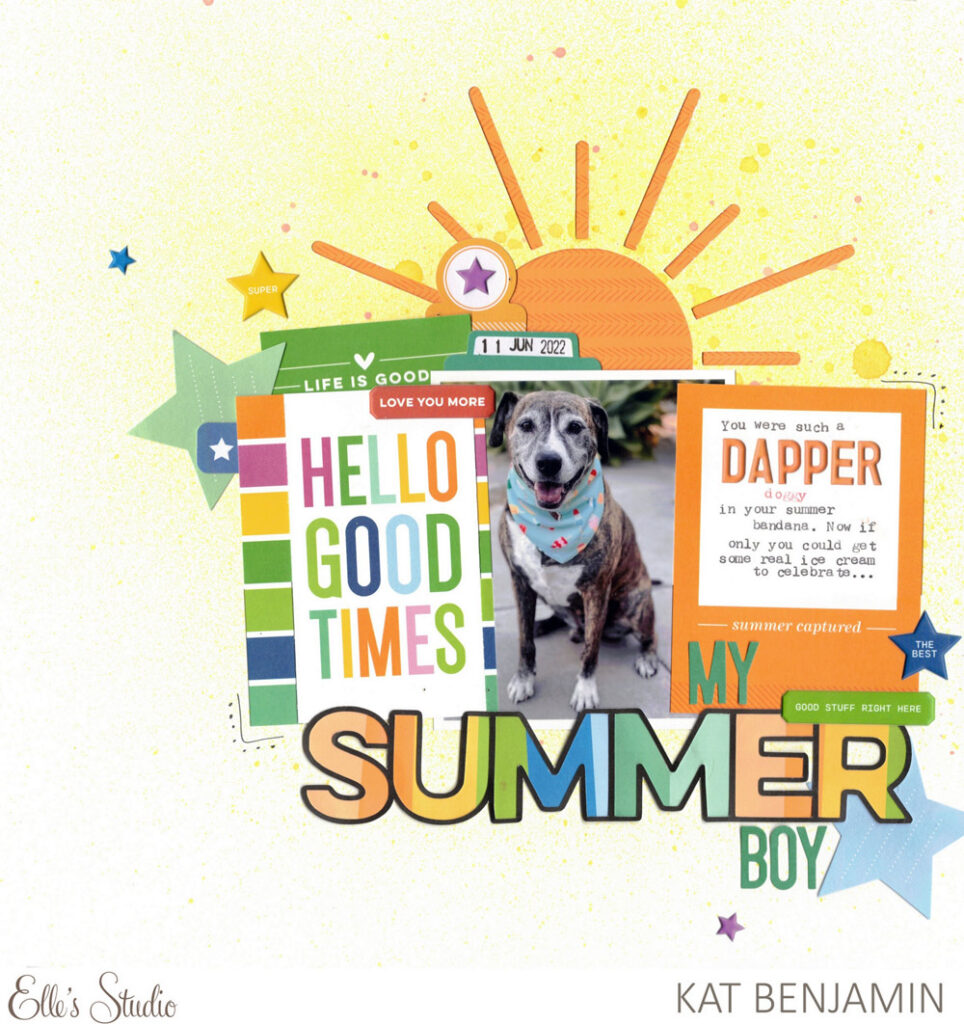
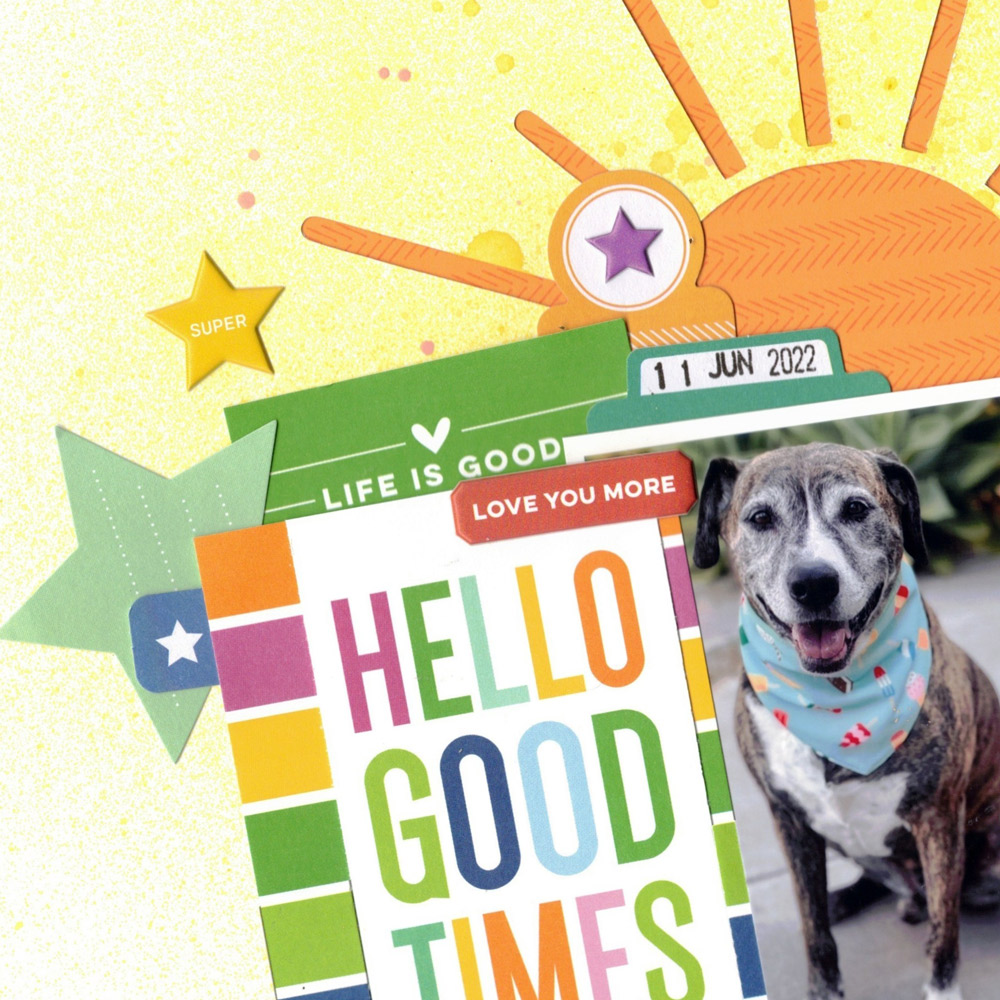
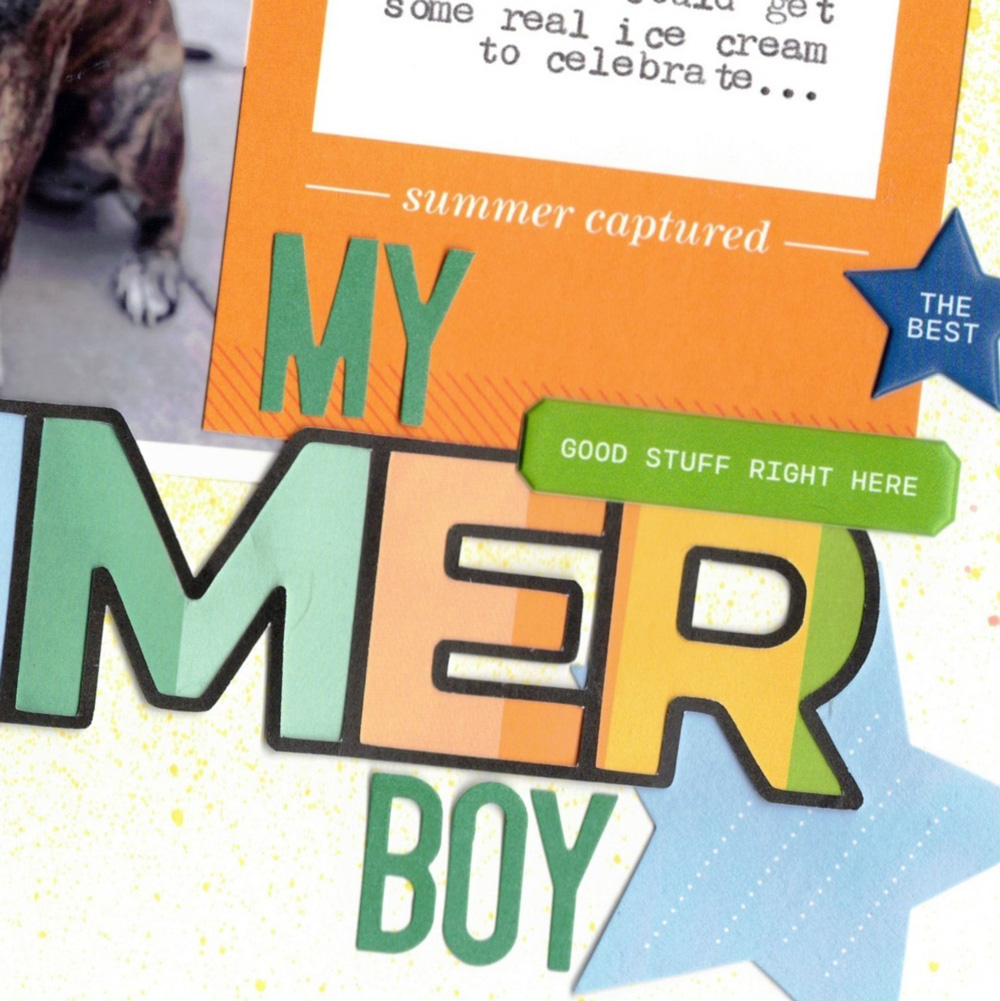
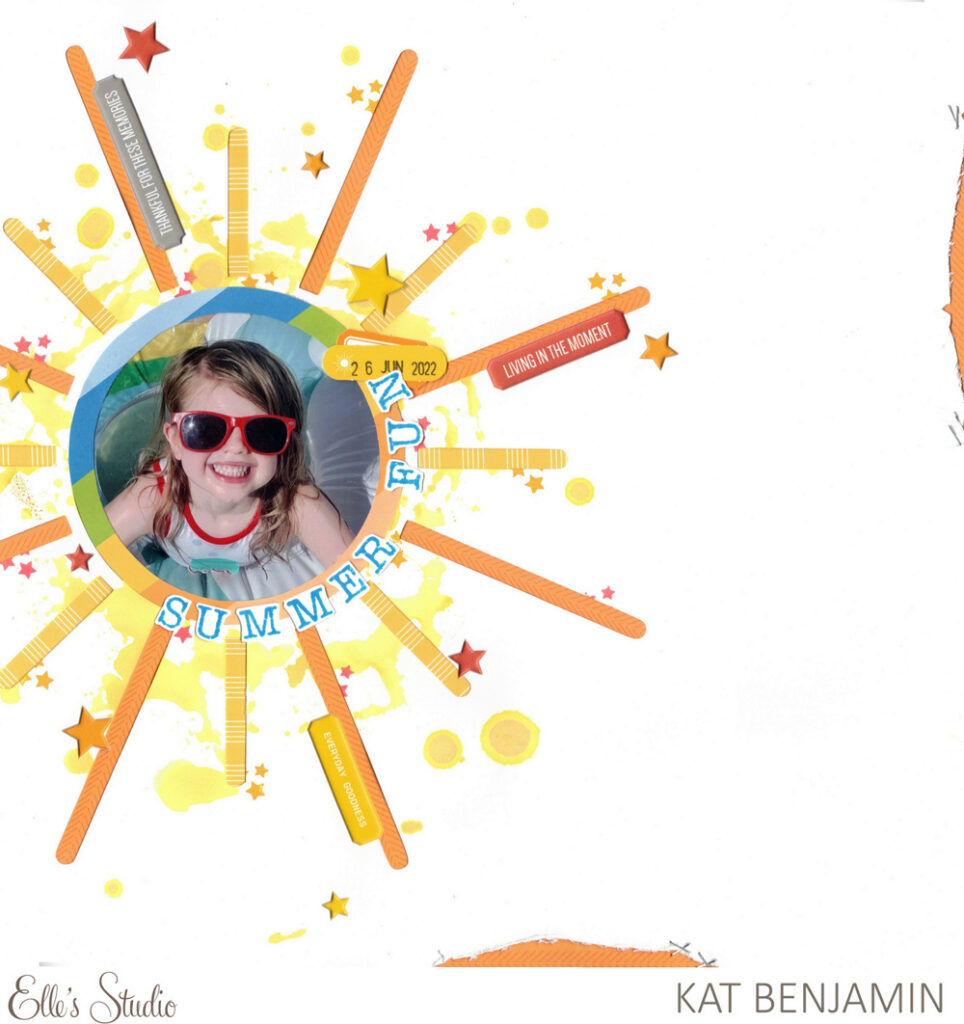
Happy Friday, friends! It’s Kat here, and I am so excited to share a new layout that I recently created with the July kit and extras. I love how bright and summery this kit is, so I knew it would be perfect for documenting a photo of my dog, Moose, all ready for summer:
I began by cutting the July 2022 Cut Files first. I knew I wanted a sun in my background, since I was highlighting my pup’s summer look. I misted around the file while it was still on the adhesive mat and let it dry there. I’ve always found this keeps the cardstock from getting wrinkled as the mist dries. I also cut out the “summer” die cut file from a piece of black adhesive cardstock and backed it with the striped paper from the Adventure Paper Stack.
I then picked out some of my favorite 3 x 4-inch tags from the kit to add on either side of my photo. I also cut the green “life is good” tag from the July 2022 Kit down a bit to add it as a tab at the top of my cluster.
I finished the layout by adding my title along the bottom of my photo and then sprinkled around a variety of stars using the Star Notes Die Cuts and the Puffy Star Stickers.
Thanks so much for stopping by today! Don’t forget to share your July 2022 monthly kit and add-ons creations with us on social media using the #EllesStudio hashtag!
Comments Off on Dapper Dog Days of Summer with Kat Benjamin | Share This
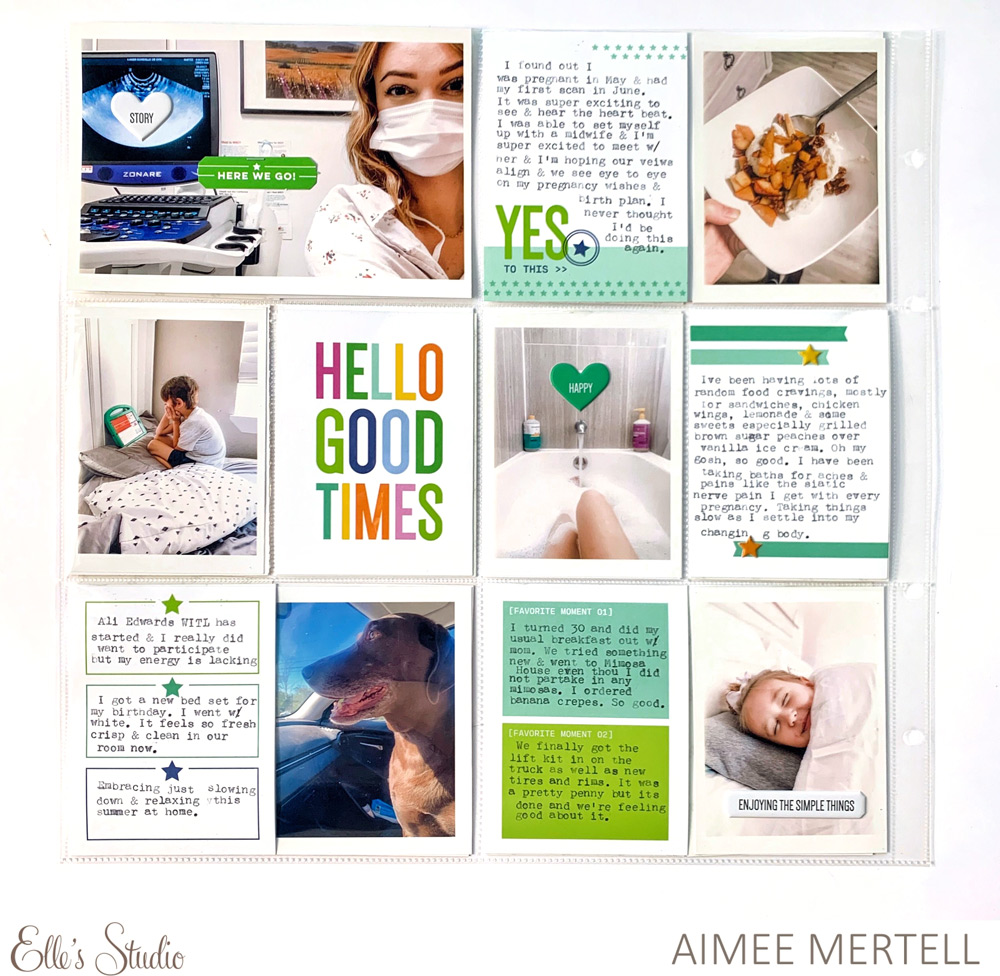
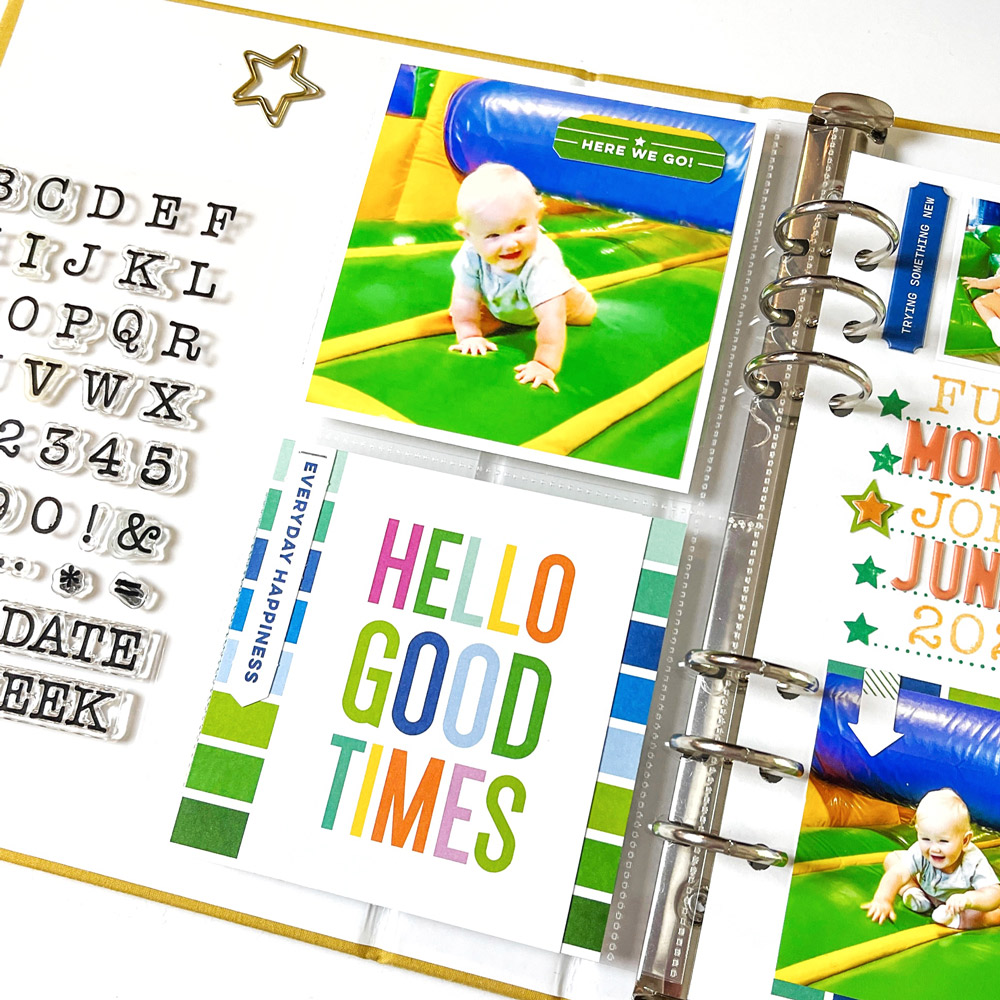
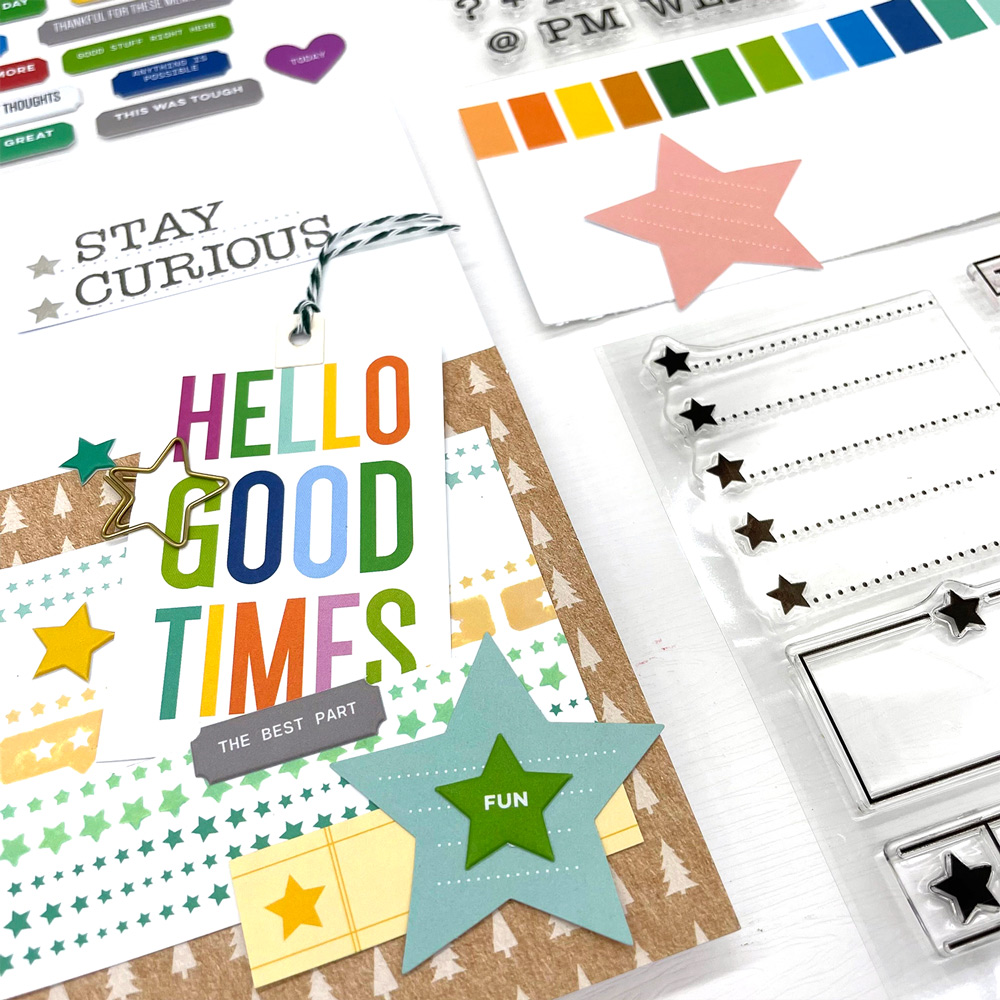
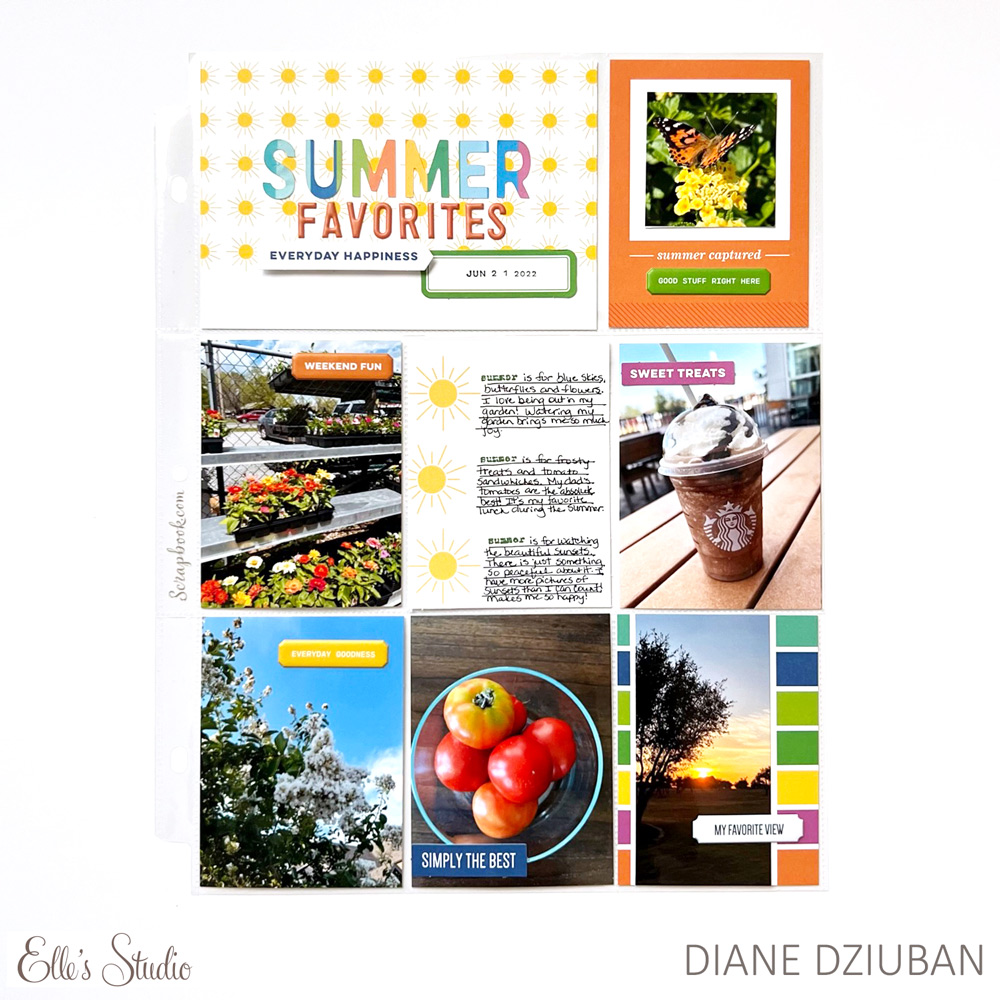
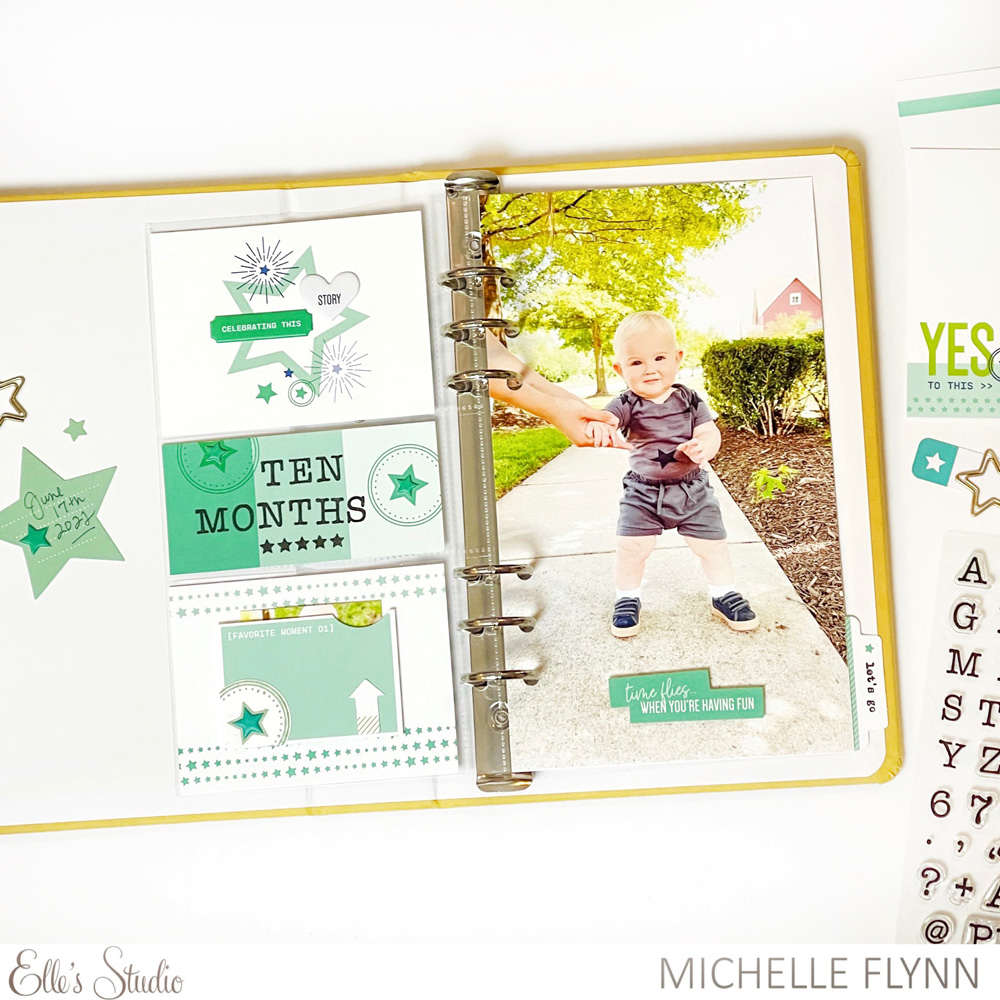
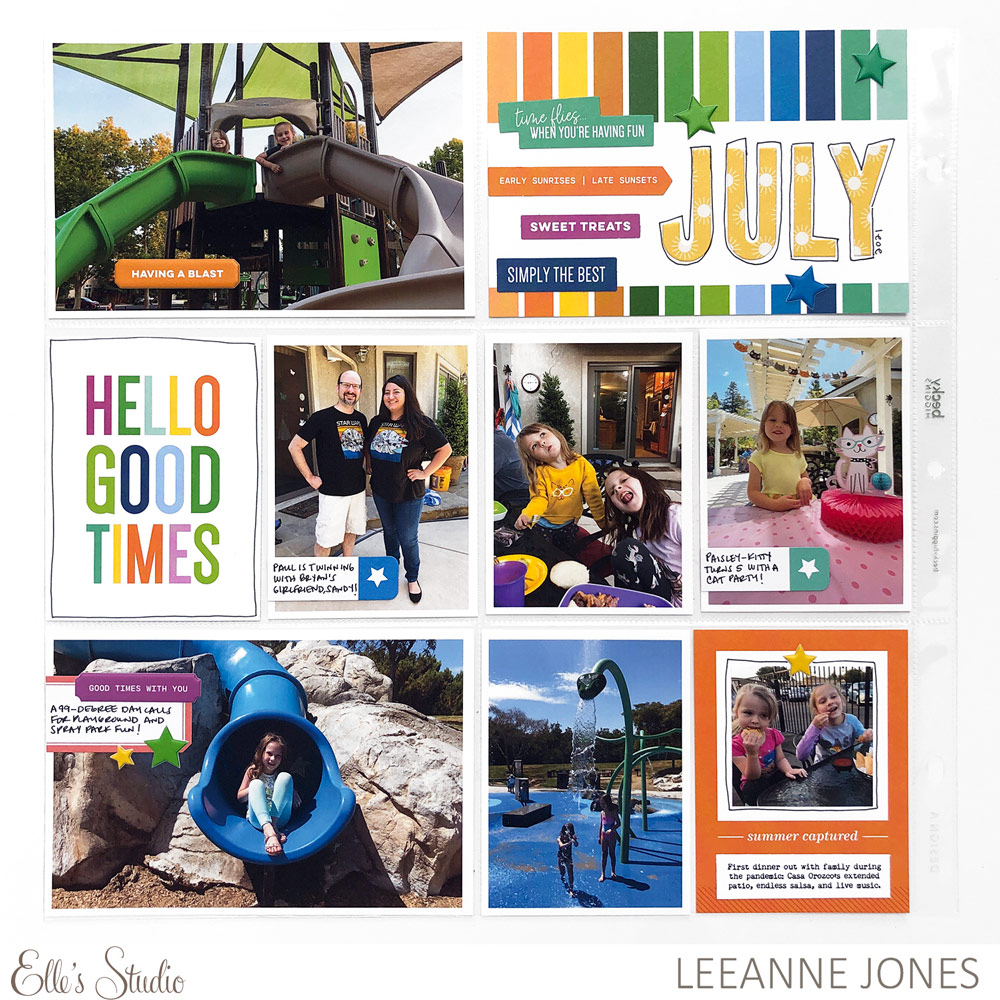
Happy summer, friends! It’s Michelle, and I’m so happy to be on the blog today using the colorful July 2022 monthly kit and add-ons, perfect for all those summer memories, both indoors and outdoors! Today I’m sharing a traveler’s notebook-sized pocket page I made using the new release to document a little indoor fun. I had so much fun with all the colors and designs in this release and I’m loving how it brought this day to life!
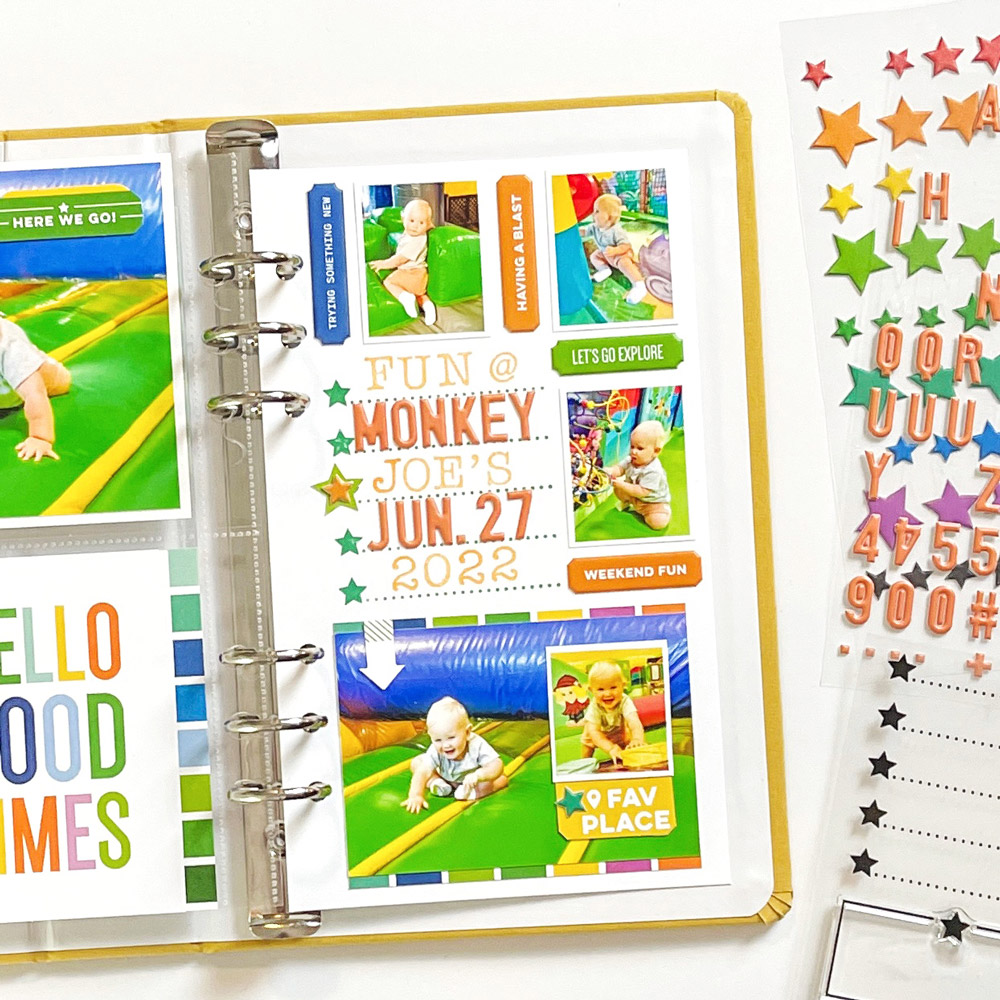
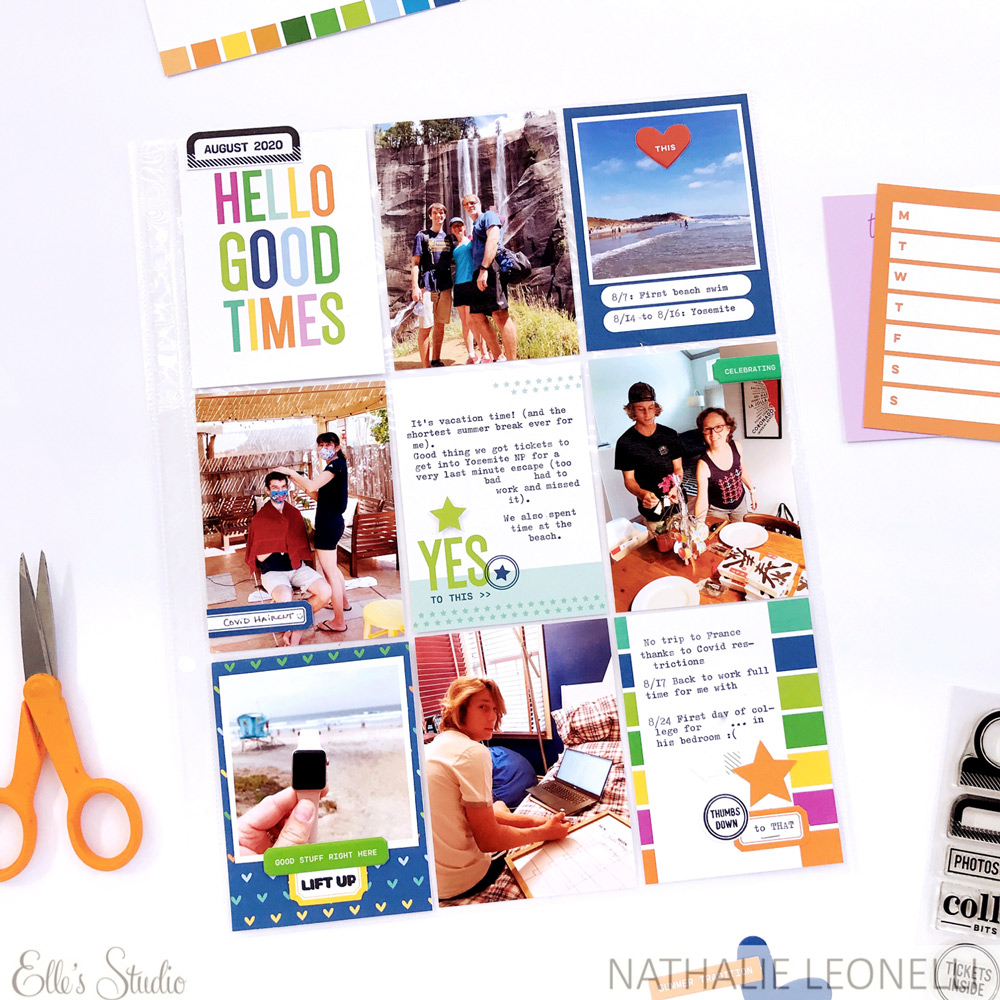
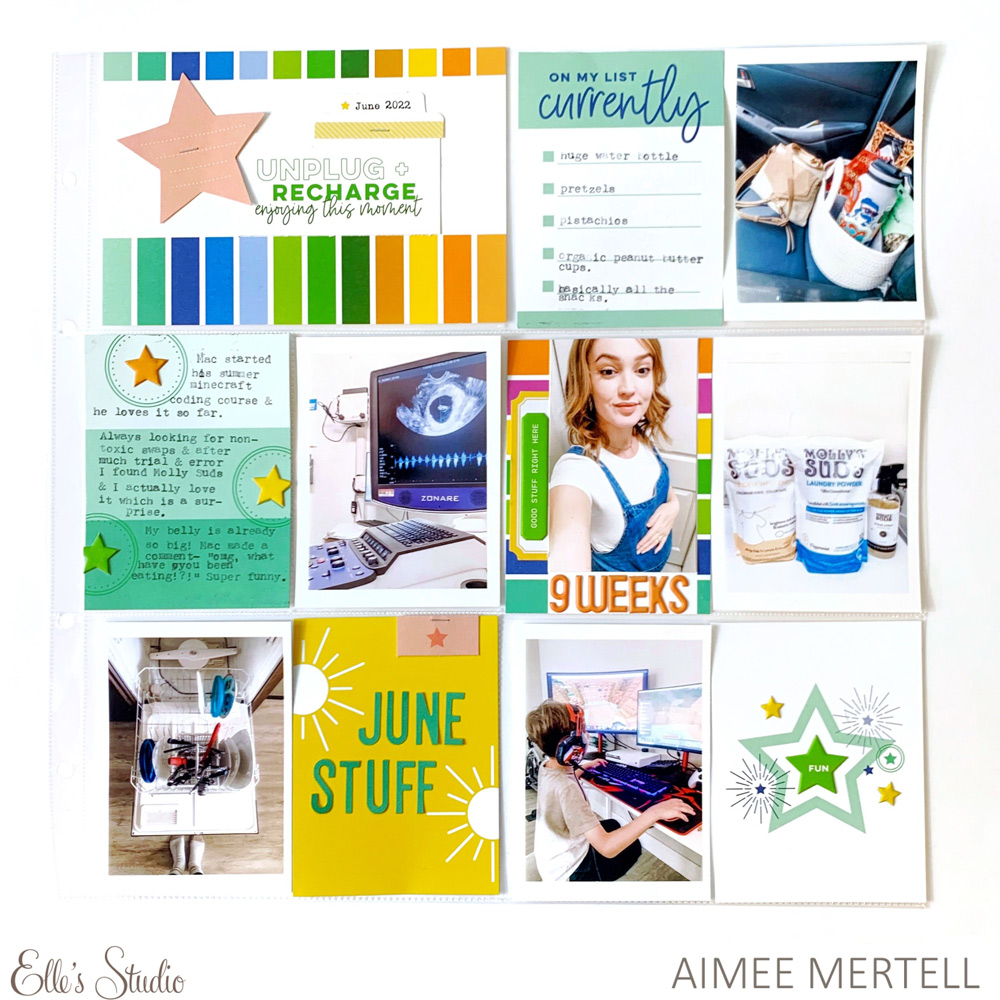
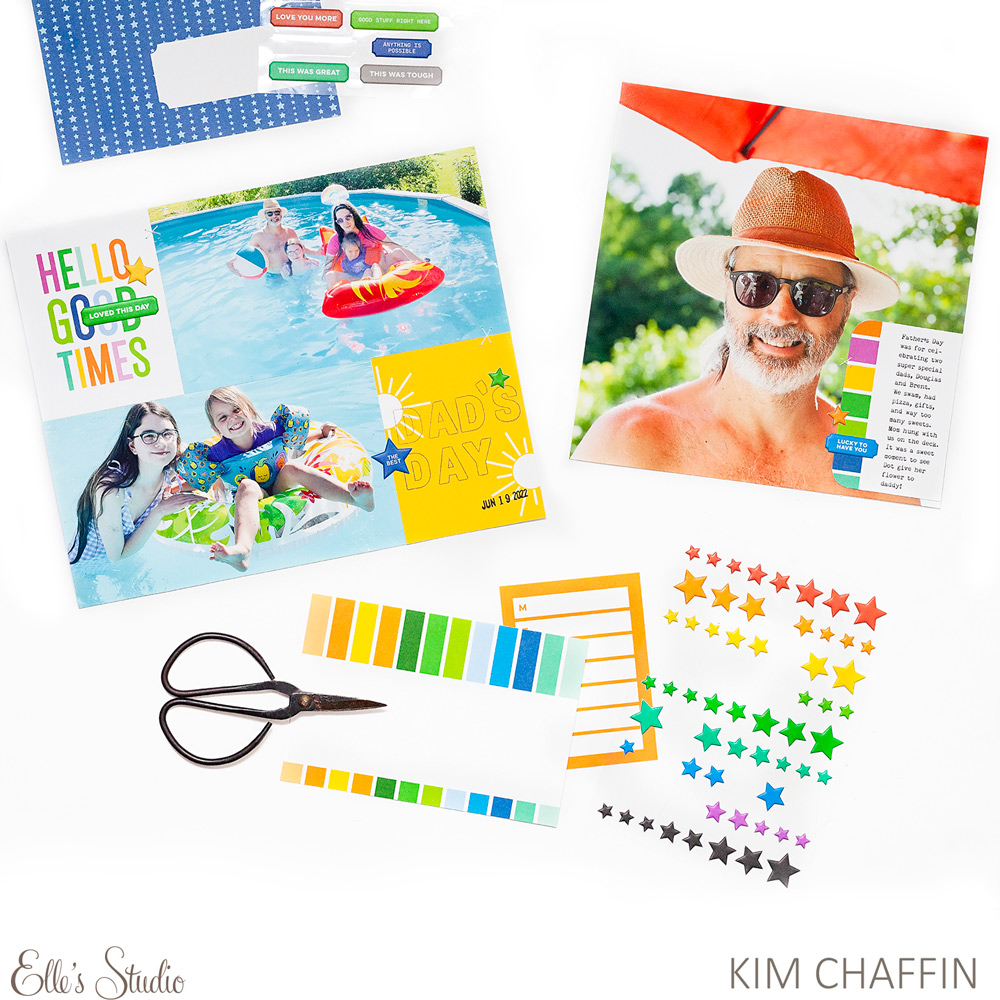
Pocket page memories are such a favorite of mine and the variety of die cuts and pocket tags that come in the monthly kits are always the perfect inspiration for memories in pockets. I love that your aren’t limited to how you can use your pocket tags, and as you’ll see in this layout I used them a bit different than the traditional way. I started this layout of our grandson’s visit to a play gym with his photo sized for the top 4 x 4-inch pocket and adhered two cute die cuts from the July 2022 Kit. I selected the 3 x 4-inch “Hello Good Times” pocket tag and thought it would be fun to pair it with the multi-colored 4 x 6-inch pocket tag. I flipped the 4 x 6-inch pocket tag upright and trimmed it to a 4 x 4-inch size while adhering the 3 x 4-inch tag to the front. I left a little space on the left side so I could add that blue and white sentiment die cut with a tiny stapler. Super easy, full of color, and quite fun!
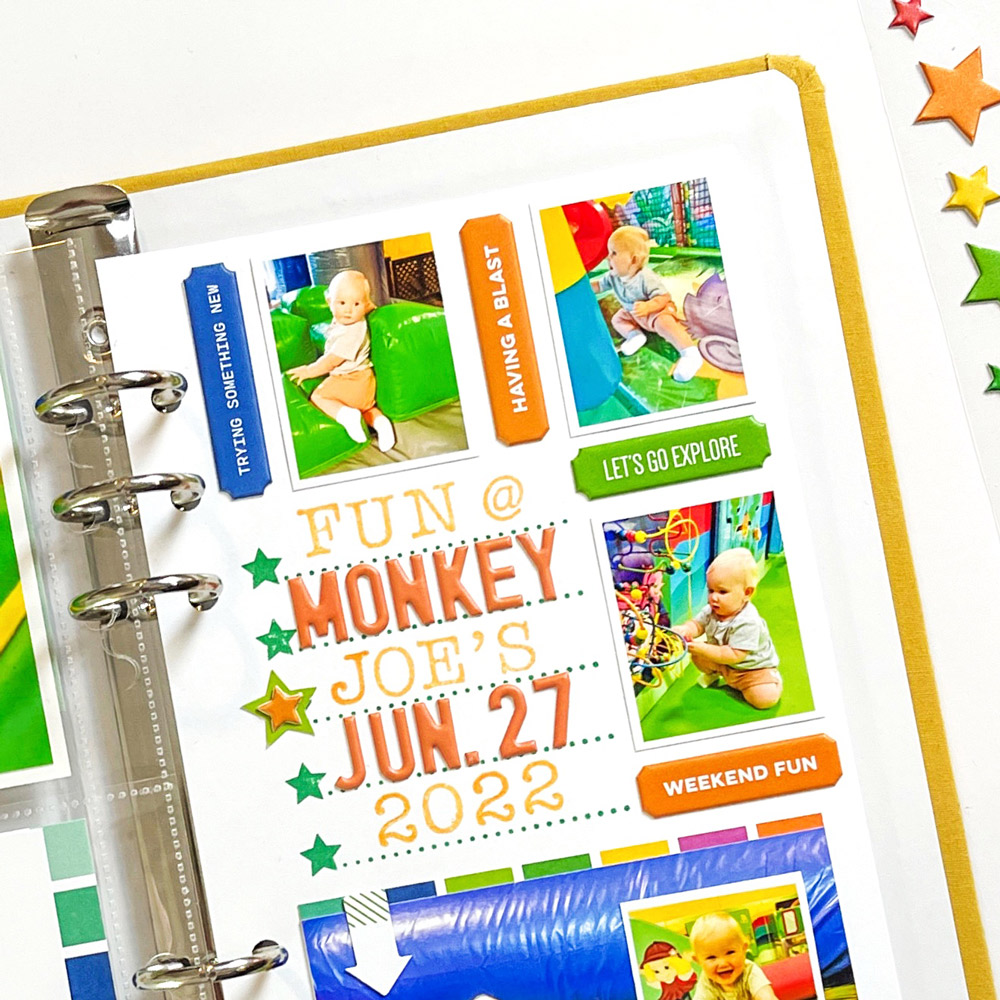
I left the right side of my pocket page as an open layout since I had many photos I wanted to include. I did a simple sketch of my idea and went with somewhat of a grid-type layout that would allow for a good mix of tiny photos, journaling, and one slightly larger photo. I sized the tiny photos at 1.25 x 1.65-inches and cropped them with a small white border. I placed those photos around the top and down the right while trying to leave room for journaling on the middle left. I was so excited to use the Everyday Label Puffy Stickers and once I placed my tiny photos I thought it would be fun to coordinate the puffy stickers into that photo grid. I collected puffy stickers in photo albums when I was a little girl and using them on this layout of my grandson was one of my favorite highlights of making this. I adhered the photos and then placed the puffy stickers to almost float around the photos while leaving space for journaling.
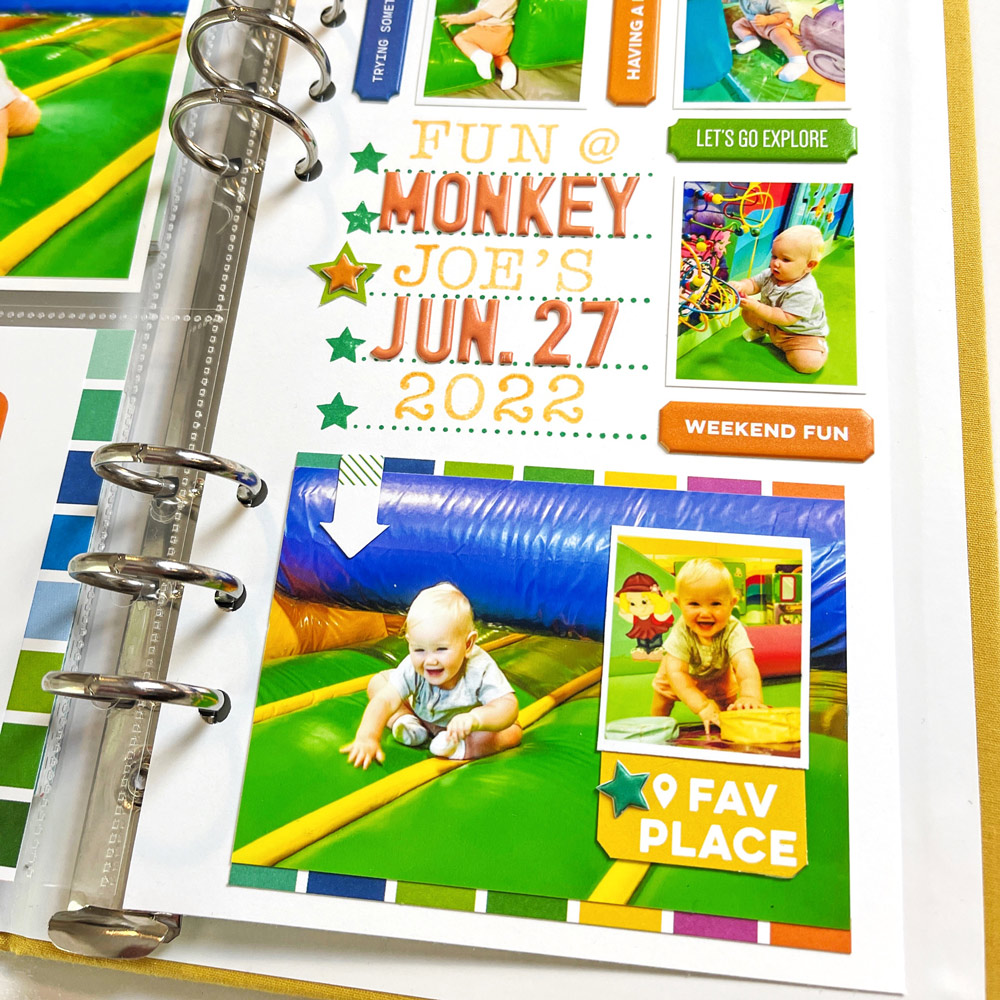
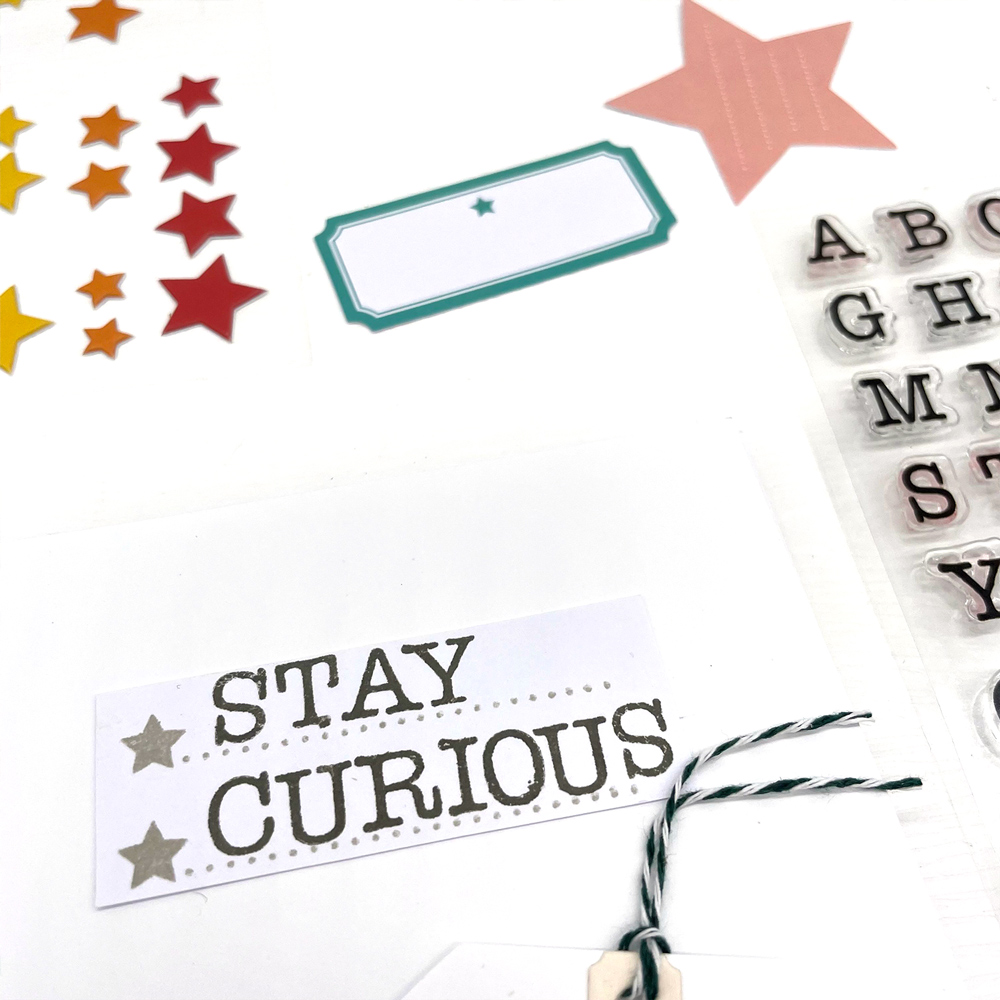
I was super excited to use the awesome Star Notes Stamp for journaling space on the left middle of the page. I used the Medium Hazel Stamp, definitely a new favorite of mine, to combine a mix of both stamping along with those adorable Orange Puffy Alphabet Stickers. I finished the journaling spot off by using a green die cut from the July Kit paired with a tiny star using the Puffy Star Stickers.
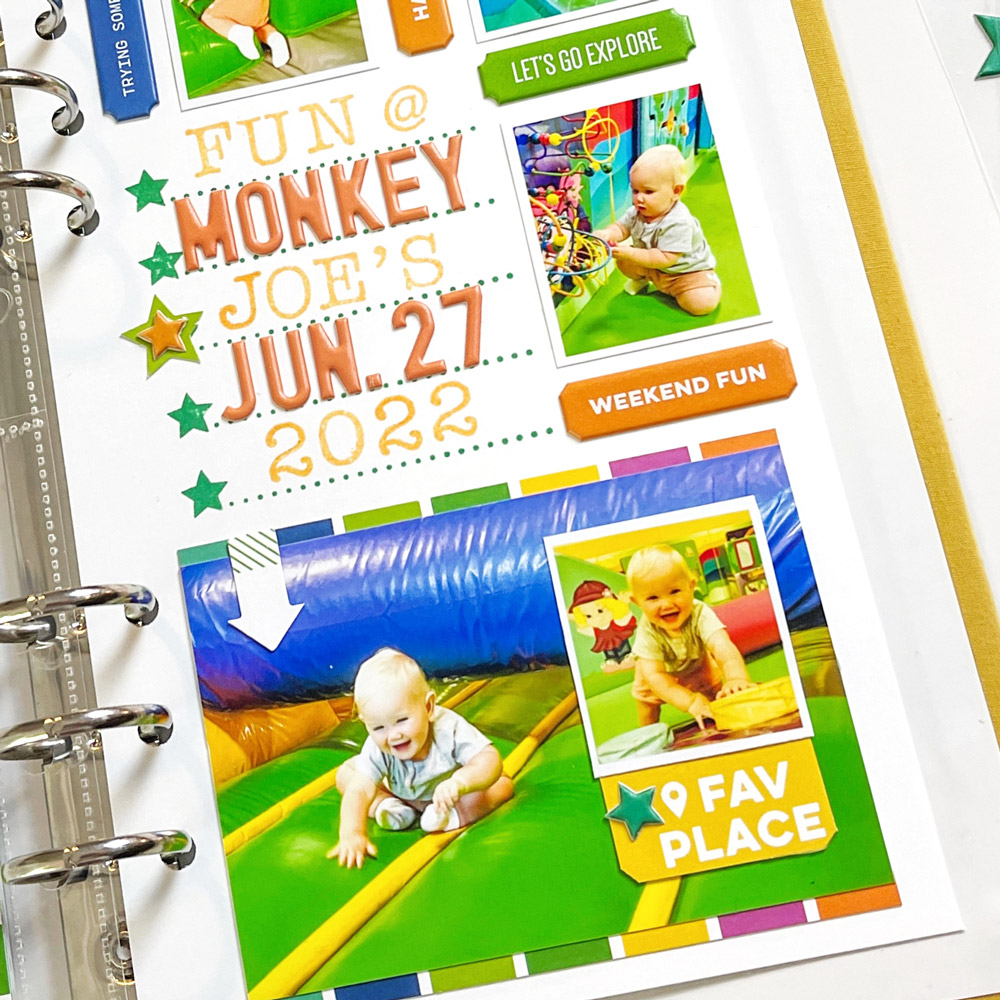
For the bottom of this page, I had a larger photo sized at 3.9 x 2.7-inches, but it needed something. As I was going through my pocket tags in the July Kit there was a 3 x 4-inch pocket tag that was quite similar to the multi-colored pocket tag I had used earlier in my 4 x 4-inch pocket. I was a bit worried if I backed the photo against it that it might be a strange contrast against the other pocket tag, perhaps too busy. I reminded myself that this layout was about fun and smiles and colors, all representing the memory, and sometimes you just have to get out of your head and play with ideas! I turned the tag sideways, cropped a tiny bit from each end, and adhered it to the back of the photo. I’m actually glad I went for it because I really am loving the ending result.
This same larger photo had some blank space, but I did have one more photo I really wanted to use. The problem was it had a yellow tint to it that I wasn’t able to lighten up without distorting the photo. My grandson’s pose and expression in this photo was just too cute and that in itself absolutely required that I include it. I decided to size it super small at 1.2 x 1.3-inches and used it as a photo in a photo. I adhered it to the negative space on the right side and ended up using that tint issue to my advantage. I remembered the yellow “fav place” pocket tag in the July Kit—the perfect sentiment for this spread. I cropped out only the title so I could attach it to the bottom of the tiny photo and added a cute puffy green star from the Puffy Star Stickers. Don’t let your pocket tags go unused or be worried about cutting them down—it feels really good to find other ways to use them. I loved that I used a few pocket tags differently than I typically would and all these little pieces came together in a fun way. My last little bit to finish was to adhere one of the cute arrow die cuts from the July Kit to the top corner.
Thanks so much for your time today! I had so much fun with the July release and I’m looking forward to seeing your inspiration using the new kit and add-ons! Share your projects using the #ellesstudio hashtag on Instagram and over in the Elle’s Studio Facebook Group, too! Happy summer and happy creating, friends!
Comments Off on Hello Good Times with Michelle Flynn | Share This
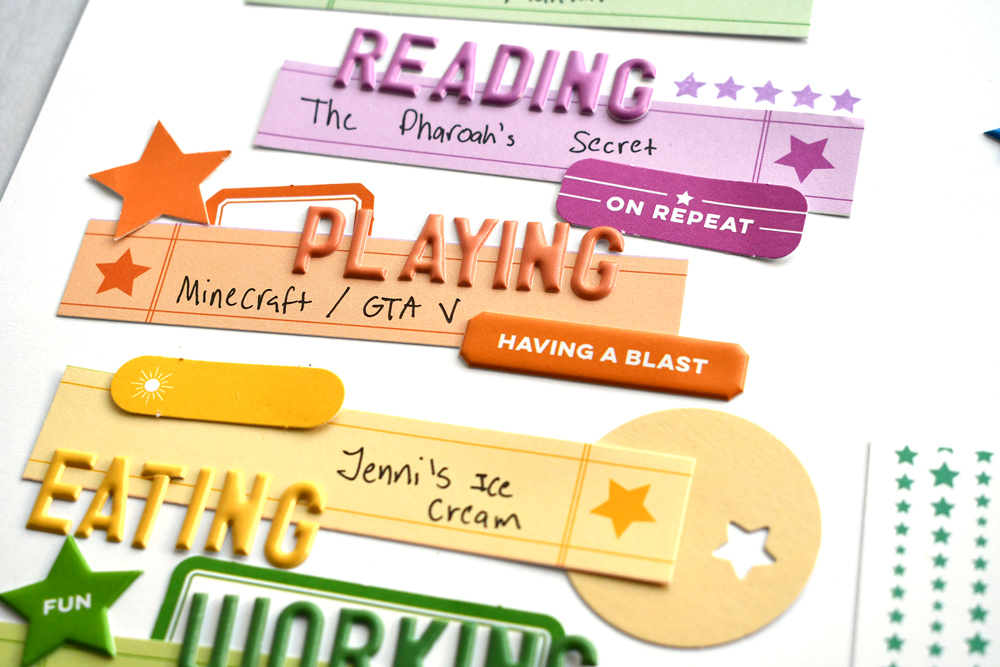
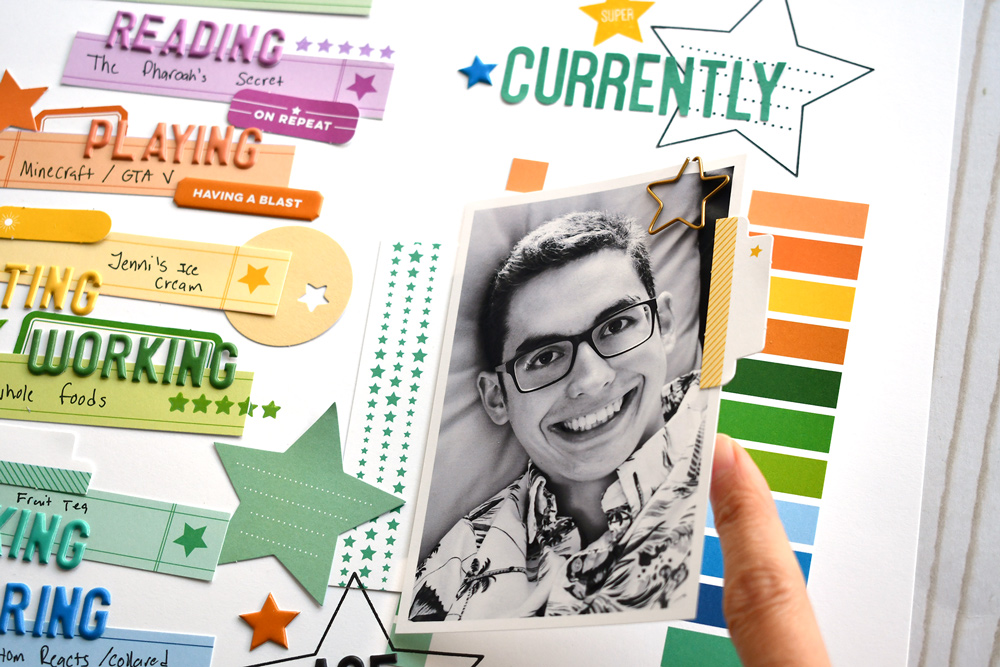
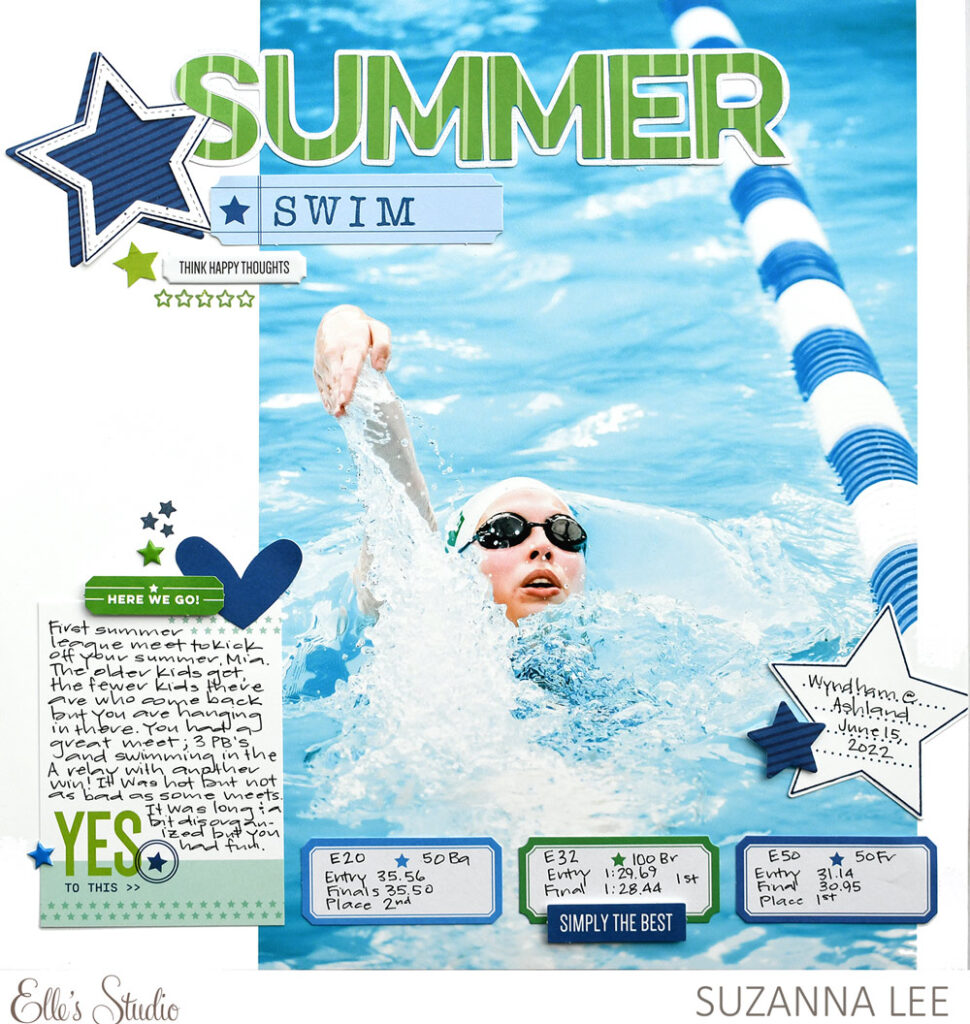
Hello there Elle’s Studio fans! It’s Suzanna here today to share a colorful layout featuring the awesome Puffy Alphabet Stickers! Did you see that, at long last, there are now ORANGE letters available? YIPPEEEE!!!
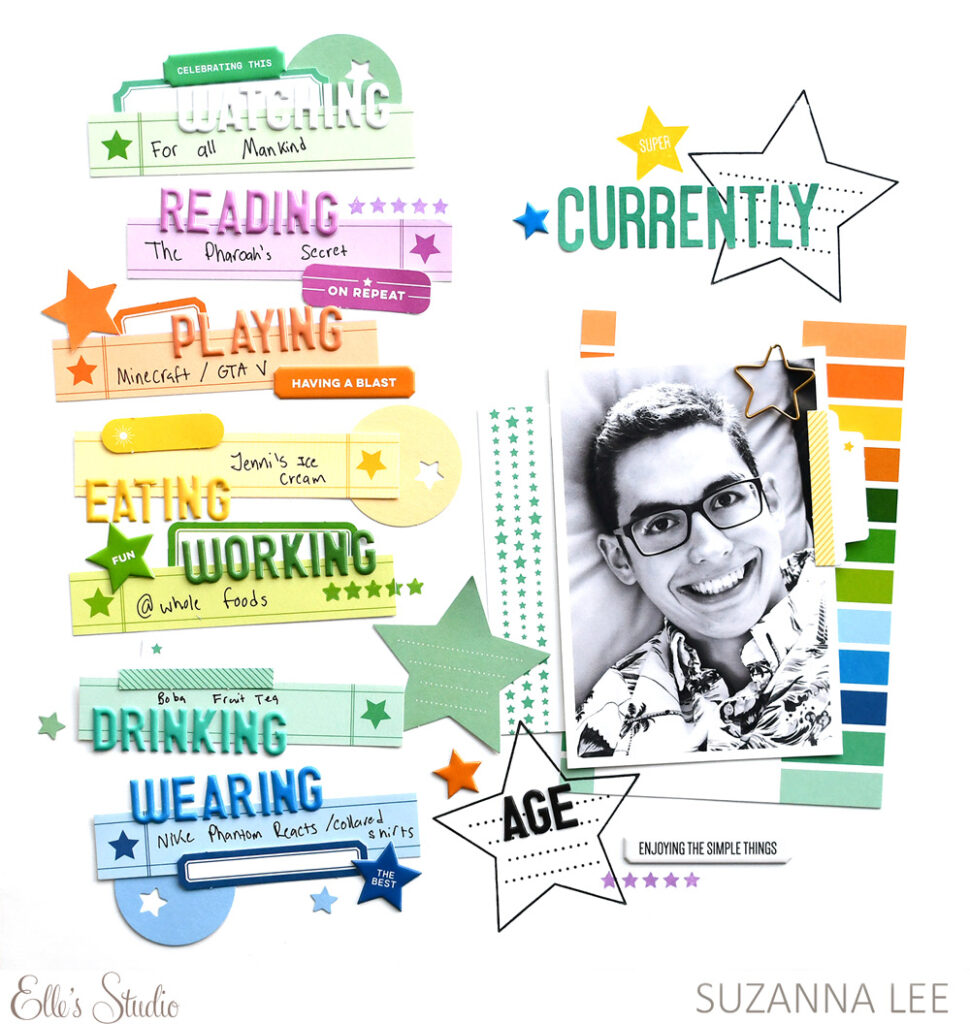
Each July Label served as a “Currently” topic that is titled using the corresponding Puffy Alphabet other than the top green. The top green label got White Puffy Alphabet Stickers.
Black is always a handy color to have on hand as it is often times that dark contrast that I’m missing in a layout when considering dark/light and balancing contrasting elements. The Black Puffy Alphabet Stickers provide the needed contrast to balance out the black and white photo of my son. And yes, I just noticed that he never wrote in his age—must remedy that!
Layered beneath the photo are a 3 x 4 and 4 x 6-inch pocket tag. The photo is secured to the 3 x 4-inch tag along the left edge to create a flip-out for additional journaling. The yellow tab die cut from the July Kit, and the Gold Star Paper Clip made for the perfect functional embellishments to indicate lifting the tab as well as the weight that holds the photo down.
Were you as excited to see the Orange Puffy Alphabet Stickers as I was?! I need to pick up a few more packs as this “child” (he’s 19) is at Virginia Tech for at least 3 more years and his school colors are maroon and orange. AND, the rainbow is complete!
Thanks for stopping in today!
Comments Off on A Rainbow of Puffy Alphabet Stickers with Suzanna Lee | Share This
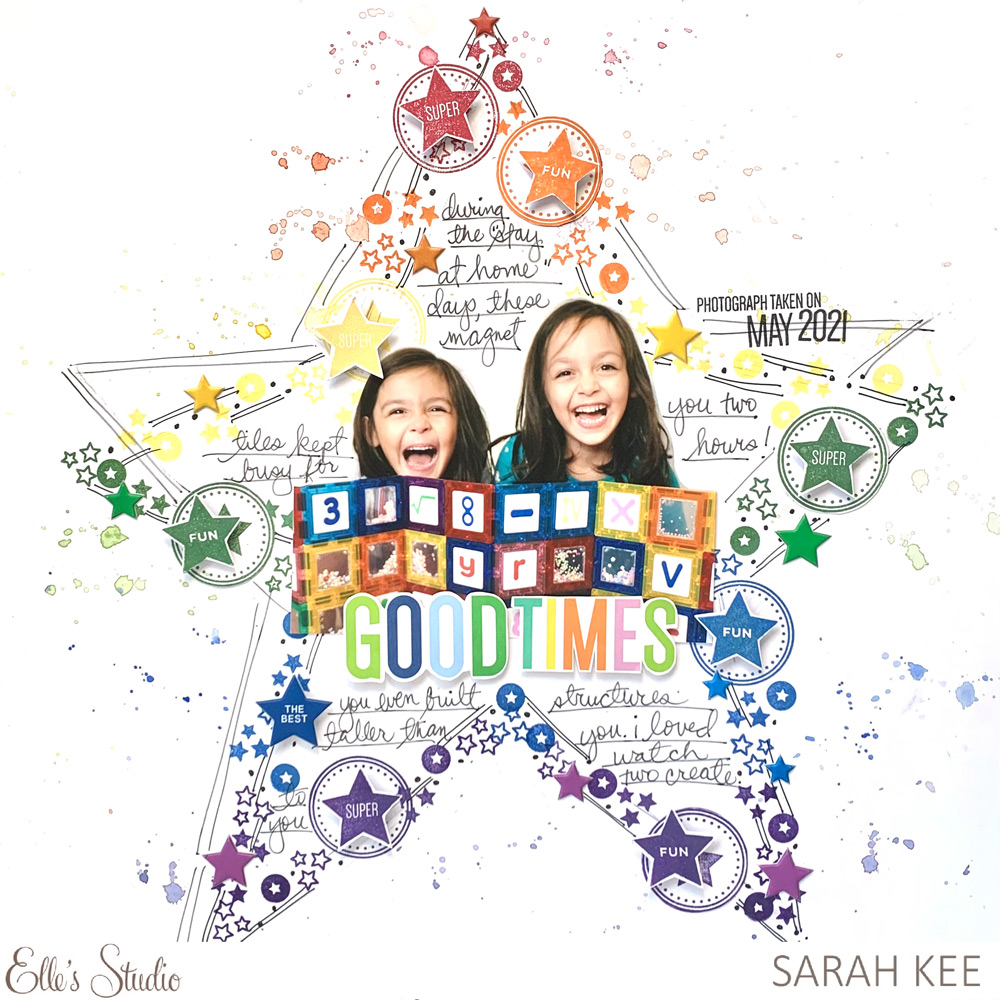
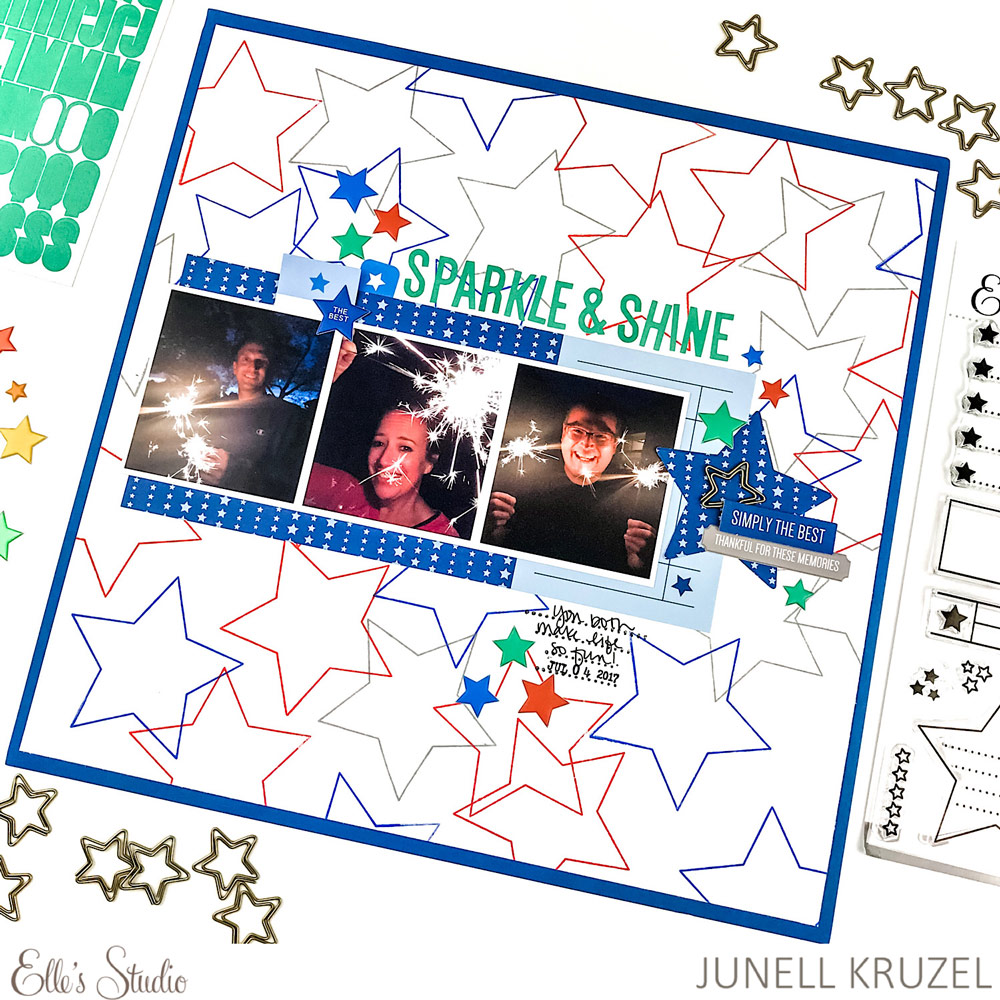
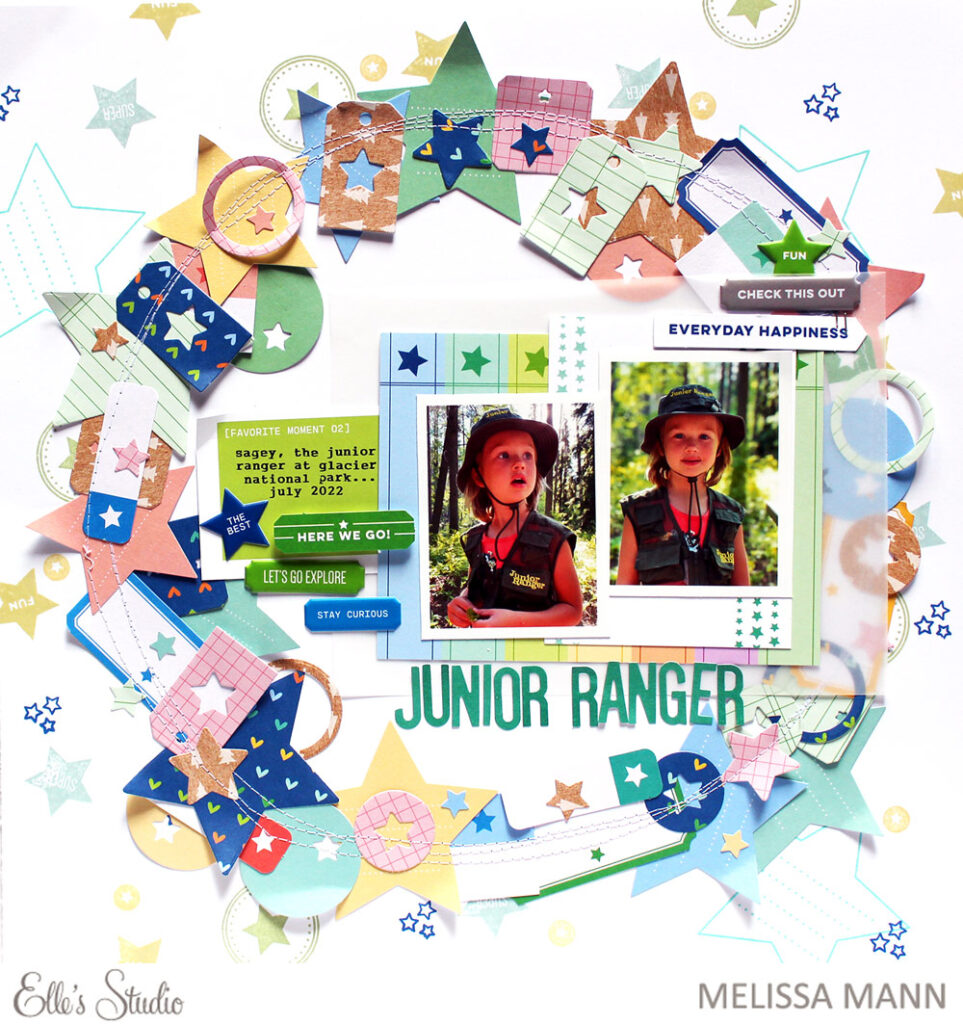
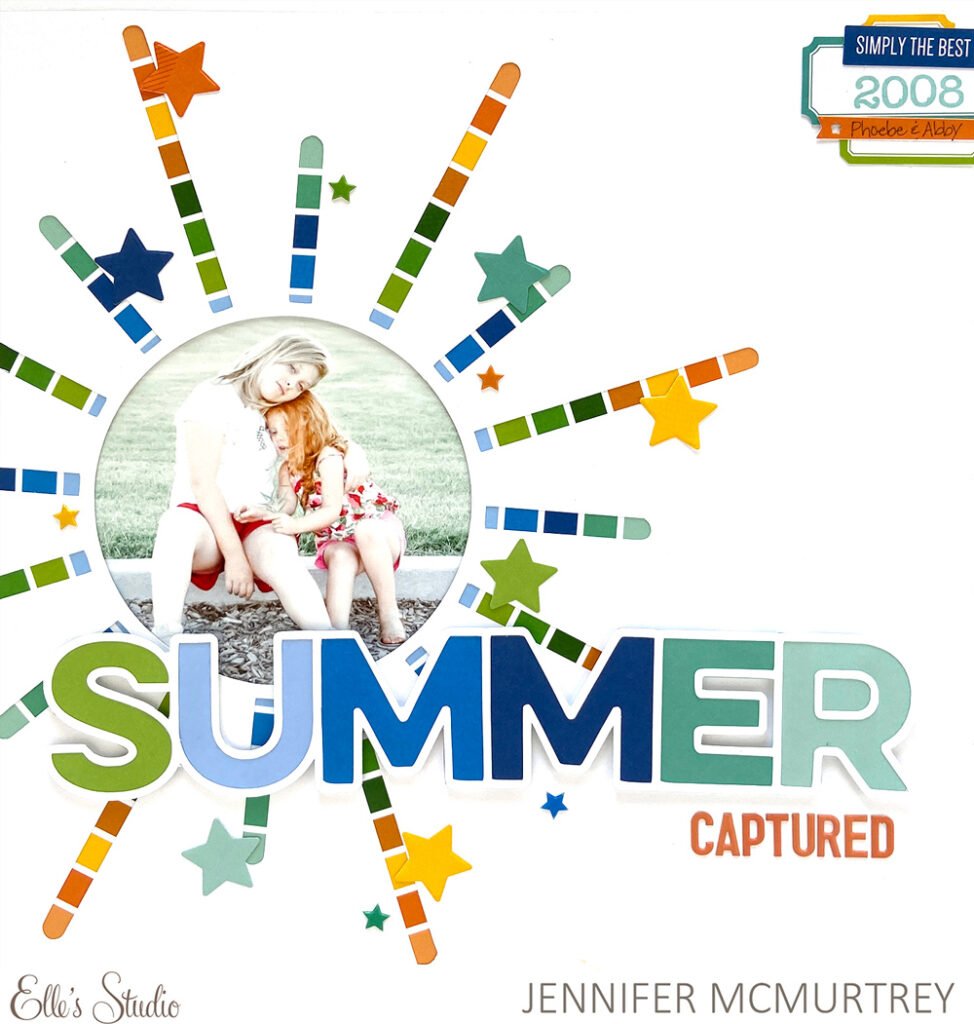
Hello! This is Melissa with you today, and I’m sharing a new project featuring the new Star Notes products just released with the July 2022 monthly kit and add-ons!
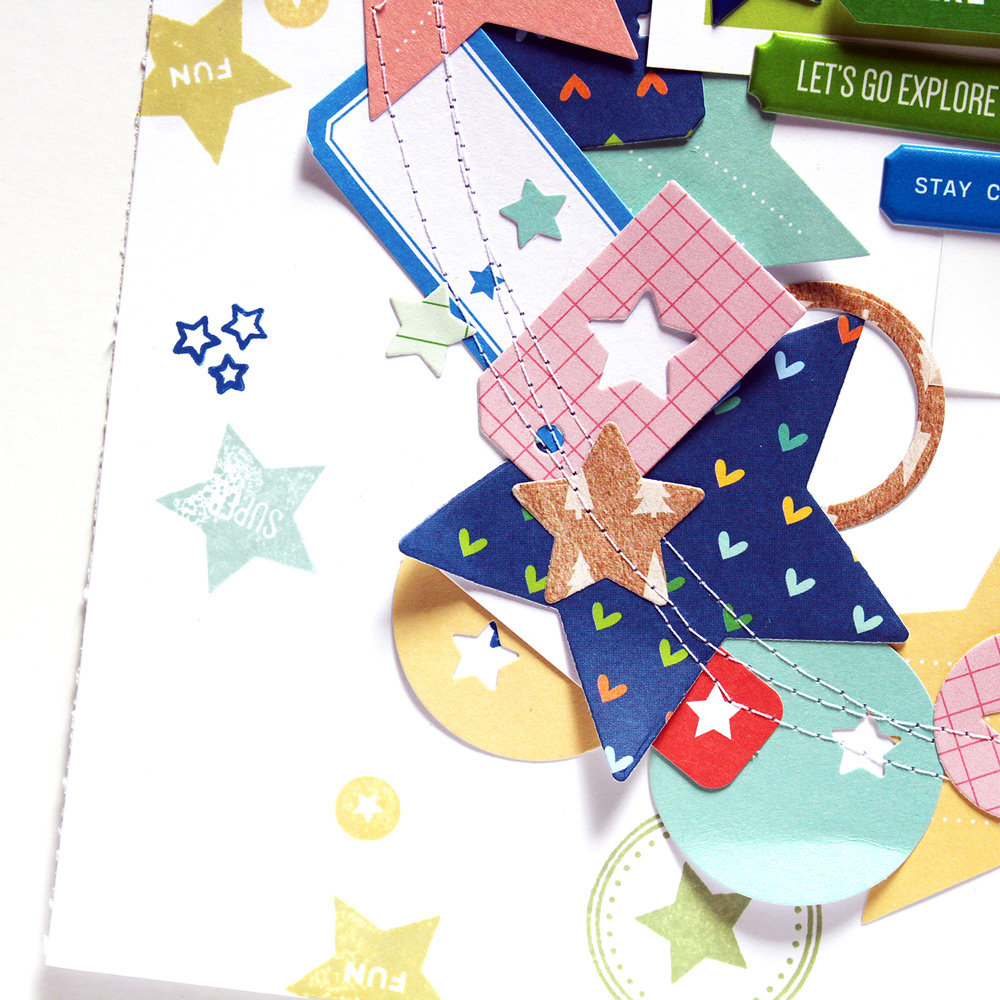
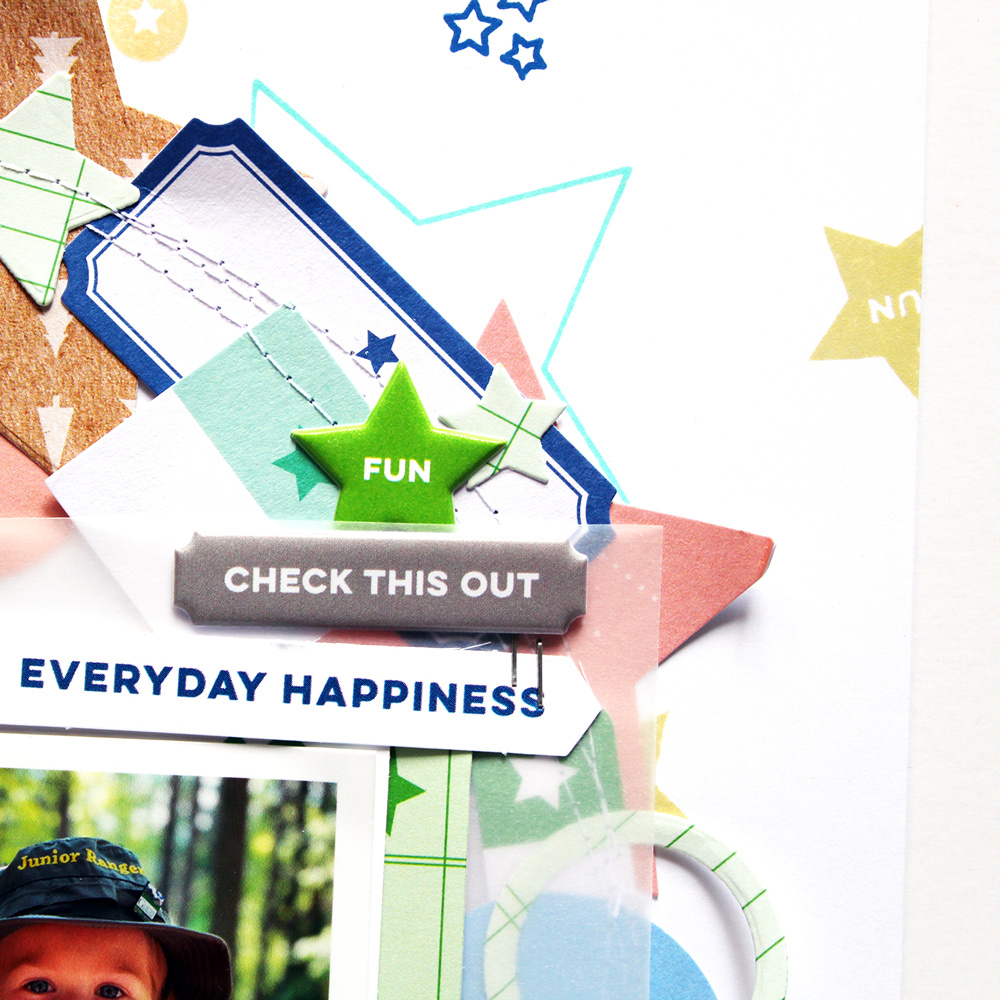
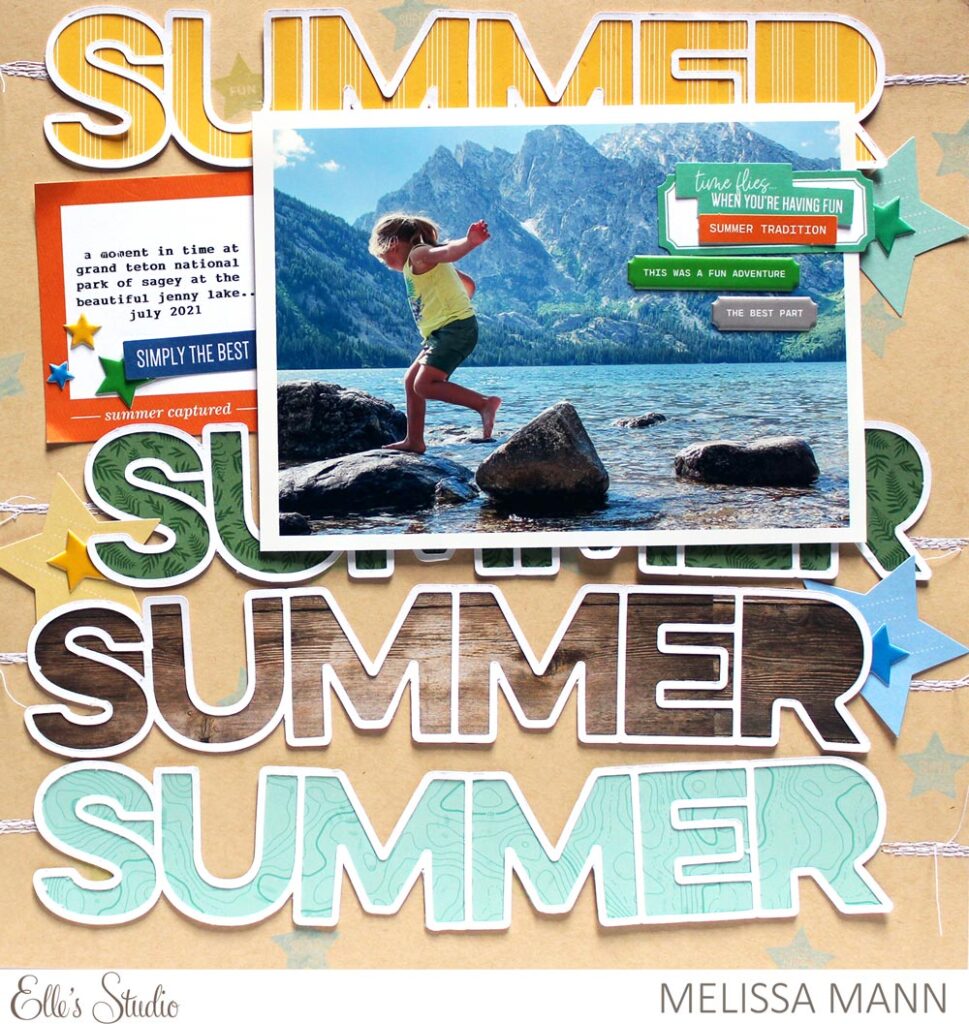
When I started to plan this project, I knew that I really wanted the Star Notes Die Cuts to be the “star of the show” and didn’t want them to get lost with patterned paper. I decided to create my own custom background paper by using a sheet of 12 x 12-inch smooth, white cardstock and the new Star Notes Stamp.
I selected some muted ink tones and randomly stamped various images from the stamp set all over the white cardstock. Then, I lightly sketched a circle in pencil in the middle of the paper and started laying out the die cuts. I also cut out a few tags from the coordinating Star Notes Metal Die and used these to also build up my layered die cut circle. I stitched most of these die cuts down using my sewing machine. I tucked a few around to build up some bulk where needed and glued those die cuts down.
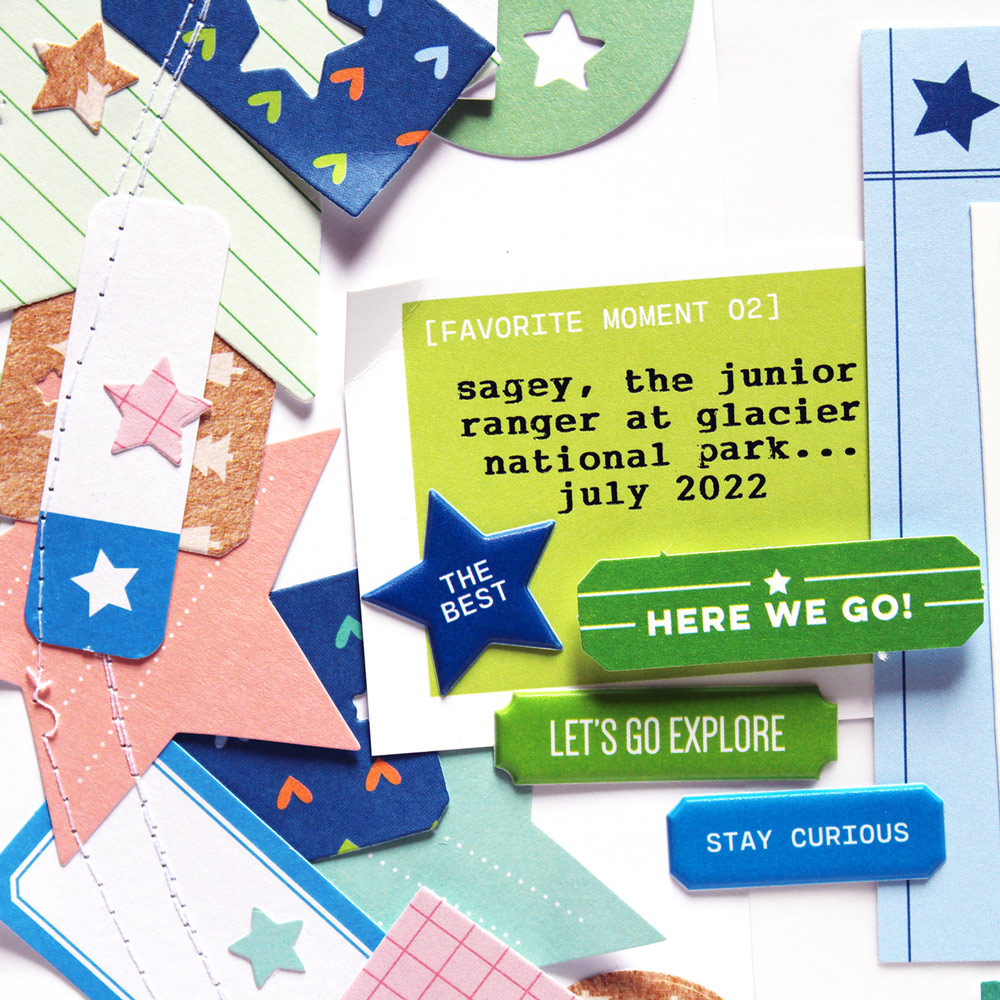
I printed out two pictures of my niece and layered the July 2022 Labels, vellum, and a 3 x 4-inch journaling tag from the July 2022 Kit. I used another 3 x 4-inch journaling card that I cut down to a smaller size for my typed journaling. A few puffy stickers from the Everyday Label Puffy Stickers were placed on either side of the photos before I adhered a couple of die cuts from the July Kit.
You’ll definitely want to have the , Star Notes Stamp, Metal Die and Die Cuts in your stash! I can’t wait to see how you will use these products in your paper projects!
Thanks for stopping by!
Comments Off on Star Notes in the Spotlight with Melissa Mann | Share This
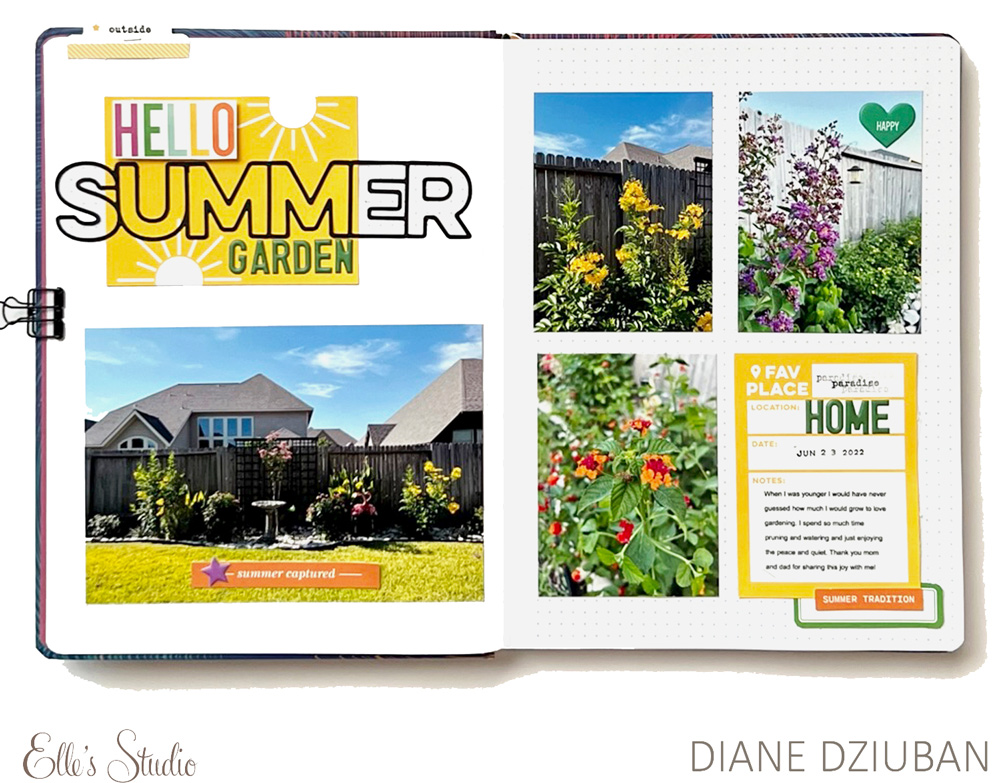
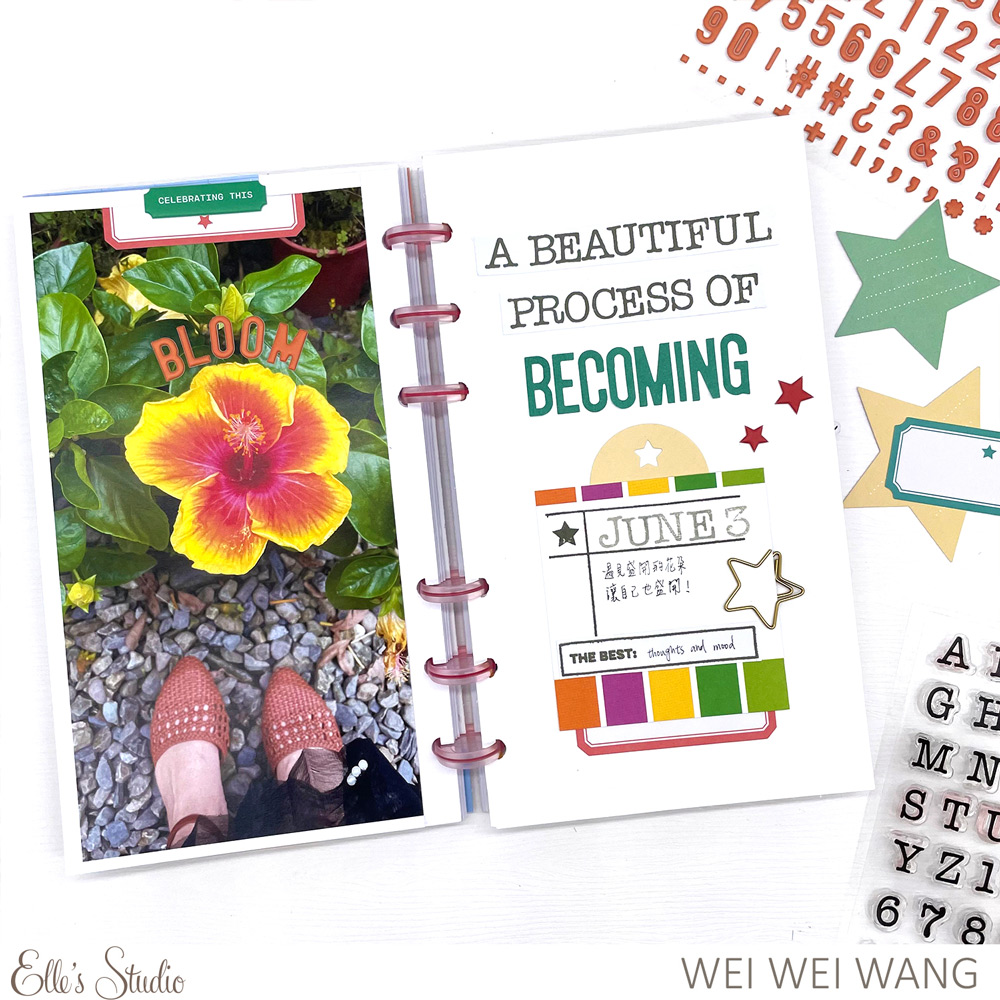
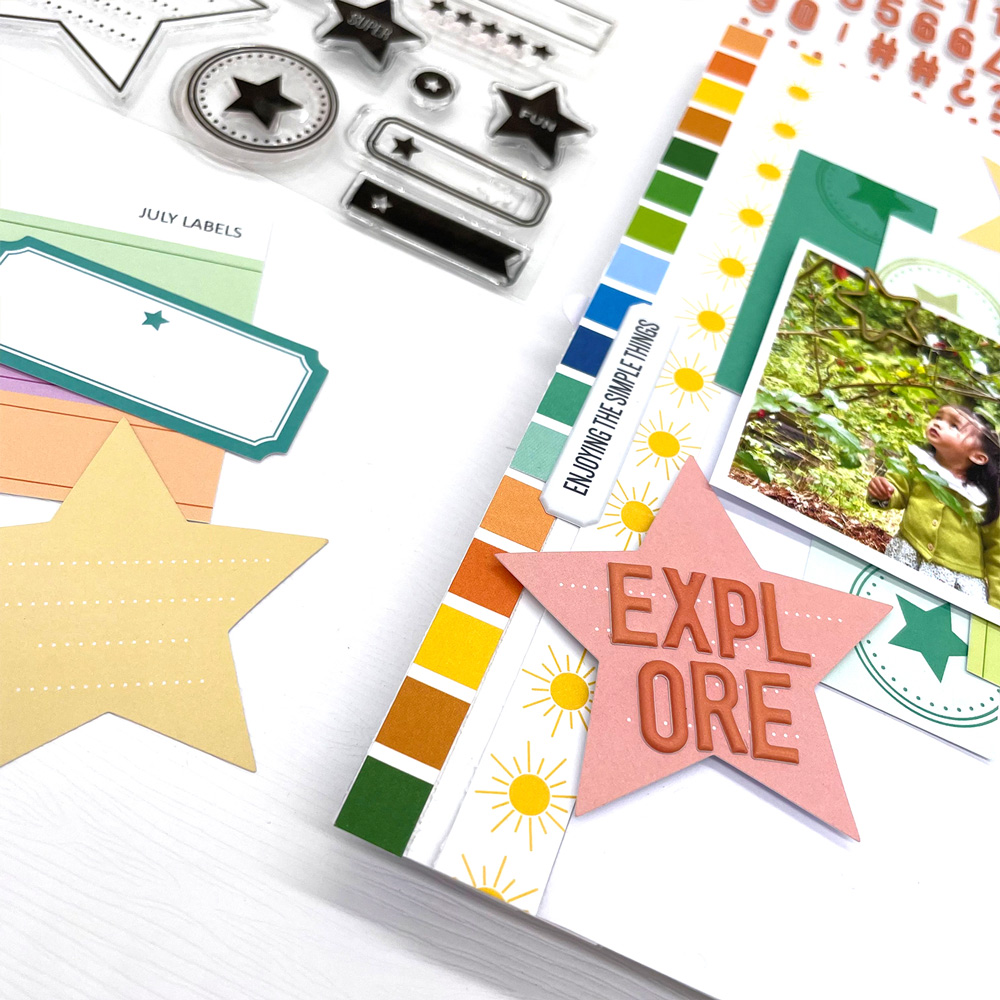
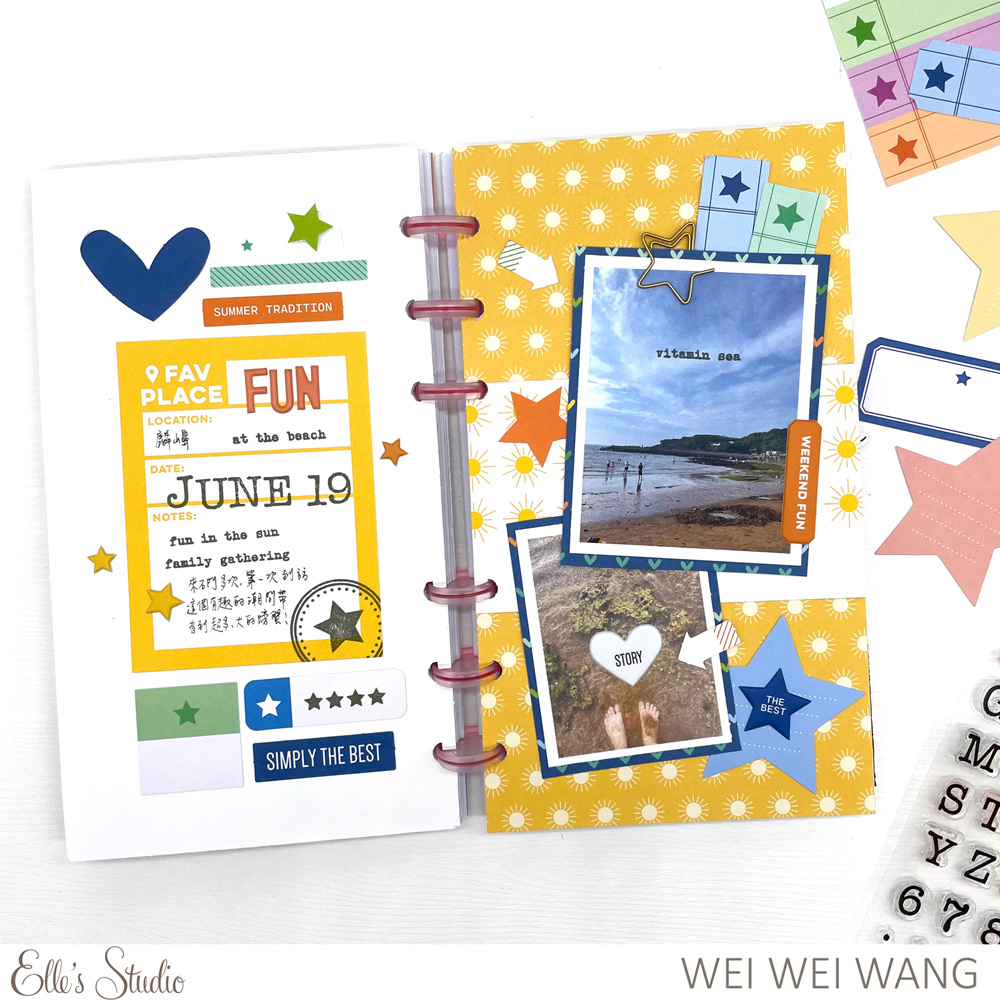
Hi friends, it’s Wei Wei, and I’m so happy to be here today to share how I am using the beautiful July 2022 kit and add-ons to document the lovely garden girl in my traveler’s notebook.
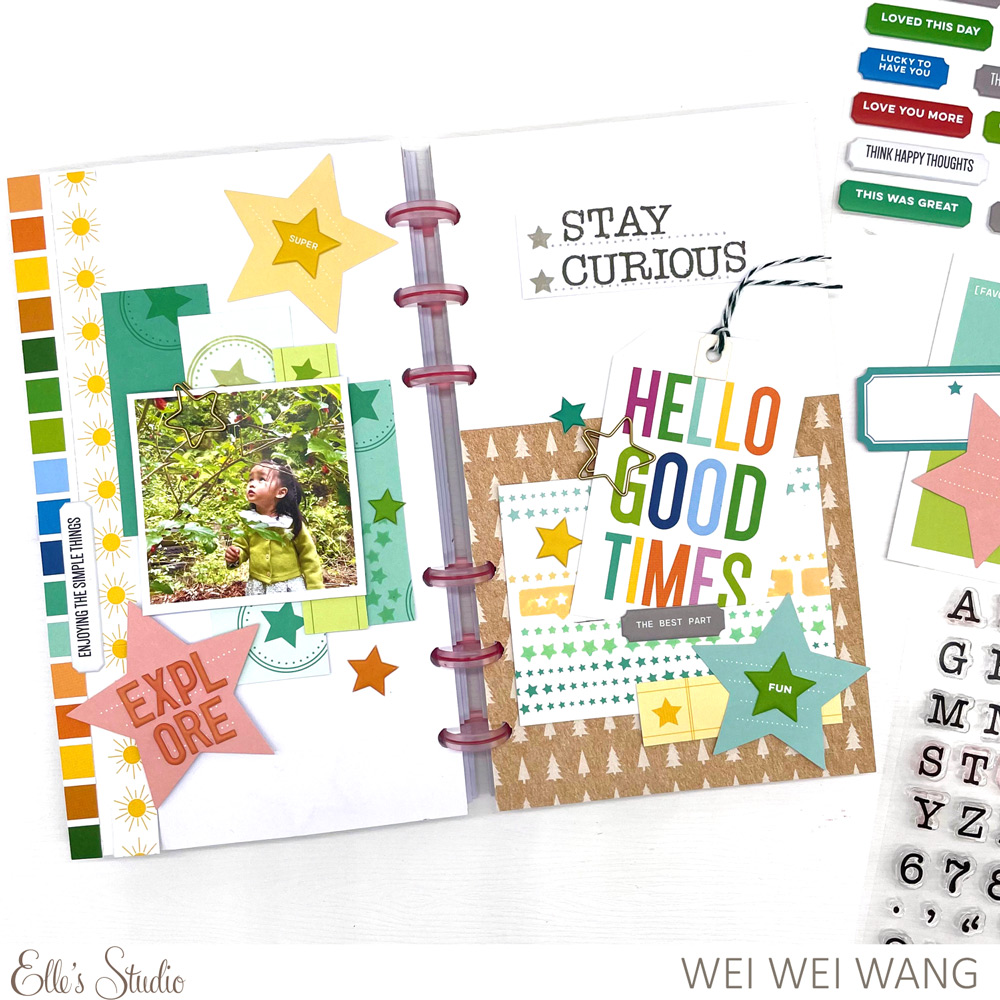
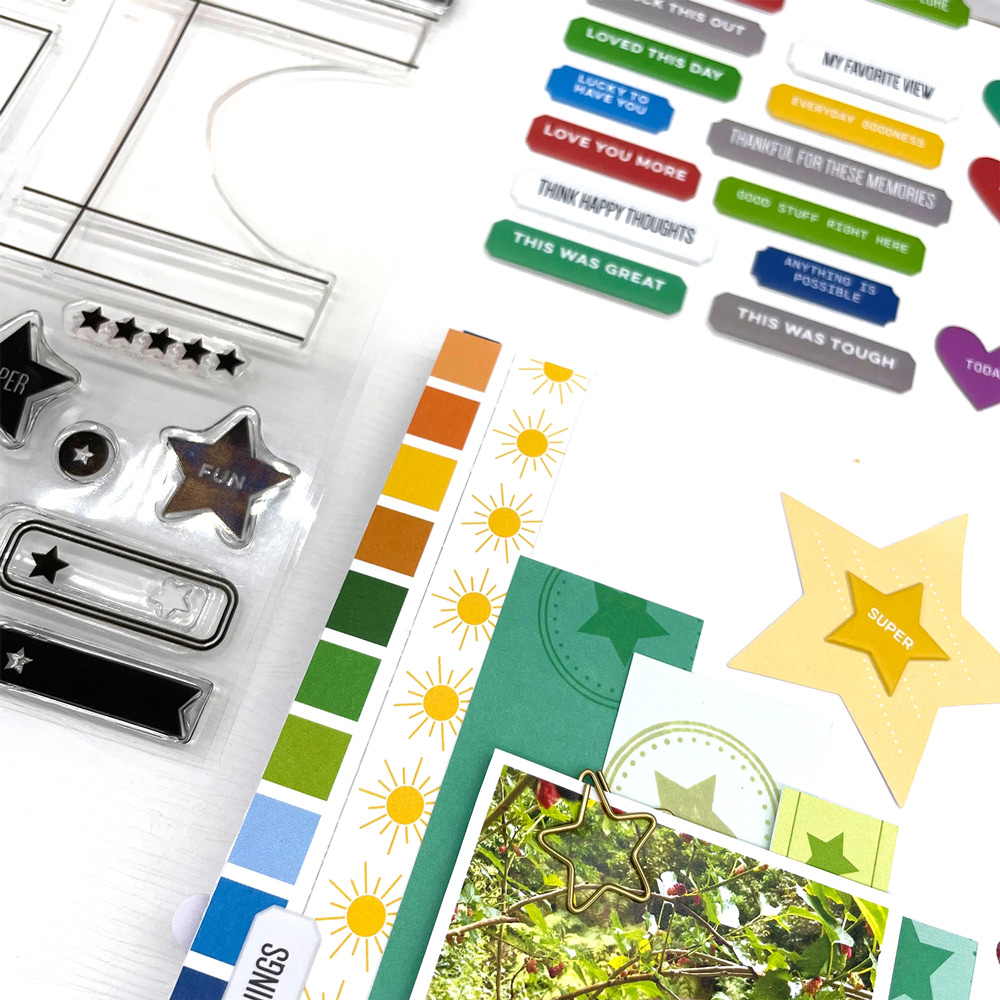
For the left side of the spread, I selected the lovely colorful stripe and the sun patterned journaling tags from the July 2022 Kit, trimmed them down and arranged them on the edge of my page. I selected the tag which has three kinds of green tones, and stamped some stars with the Star Notes Stamp to get more interest. Then, I trimmed it into three parts to fit as layering elements behind this adorable photo of my niece. To add more layers, I also tucked in a light green label die cut from the kit. All the green elements worked very well together.
On the right, I chose a brown wood patterned paper to create the base of my page from the Adventure Paper Stack which really matched my photo. I created a pocket and repeat stamped with the Star Notes Stamp onto it.
The ”hello good times” journaling tag from the July 2022 Kit is my favorite! I die cut it with the Nesting Tags Metal Die and decorated it with a Gold Star Paper Clip. I really love how the sentiment on the tag acts as a title for my spread.
To create this title, I used the Medium Hazel Alphabet Stamp, along with the dotted line that is found in the Star Notes Stamp. I love how all of these elements came together!
Are you ready for some fresh, summer project inspiration from our design team? They’ve been busy creating with our new July 2022 monthly kit and add-ons, and we think you’ll love their bright and colorful projects! Let’s take a look!
Get ready for more July 2022 kit and add-ons inspiration all week long, starting tomorrow here on the blog! Don’t forget to “pin” your favorite projects to inspire you when your kit arrives, and be sure to hop over to the Facebook Group to share what products you’re most excited to create with! We’ll see you there!
Comments Off on July Design Team Gallery: Volume One | Share This