A sneak peek of what is coming on November 10th!

Our November kit + coordinating add-ons reveal is right around the corner and we can’t wait to show you everything we will have in store – This month our kit will have you ready to document everyday life moments, holidays, and more! November’s kit will include 3 – 4 x 6 inch tags, 18 – 3 x 4 inch tags, and 25 die cuts!

Get ready to pick up our November kit for our launch day special pricing of only $9.99 on Saturday, November 10th, at 8:00 am PST. After the 10th, our kits go back to their regular price of $11.99. Or, you can lock in the $9.99 price anytime by starting a subscription! And subscribers, don’t forget! You’ll be able to bundle anything from our shop (including the new add-ons) with your monthly kit for FREE (USA subscribers) or reduced (International) shipping!

Not a subscriber? Don’t wait any longer! We only have a handful of spots left were you can start with our October kit now! Or, wait until November 10th to sign up and start with our November kit! With a monthly subscription, you will be guaranteed a kit each month, lock in our launch day special price of $9.99 + shipping, and receive FREE (USA) or reduced (International) shipping on anything added to your box each month during our 24 hour bundling period (starting on the 10th at 8:00 am PST and ending on the 11th at 8:00 am PST). Along with more time to shop, our subscribers will also have access to special discounts on select items during the 24 hour bundling period! These discounted items can be found in our SALE section during bundling, and you must be logged into your kit subscriber account to see them. Quick note: Our kits and add-ons are available without a subscription each month, too.

Make sure you set your alarm and mark your calendar for Saturday, November 10th at 8:00 am PST! If you haven’t signed up for our newsletter, make sure you do to receive a reminder when everything is available for sale!  We hope to see you there!

Prepping Your Document December Project : Week One

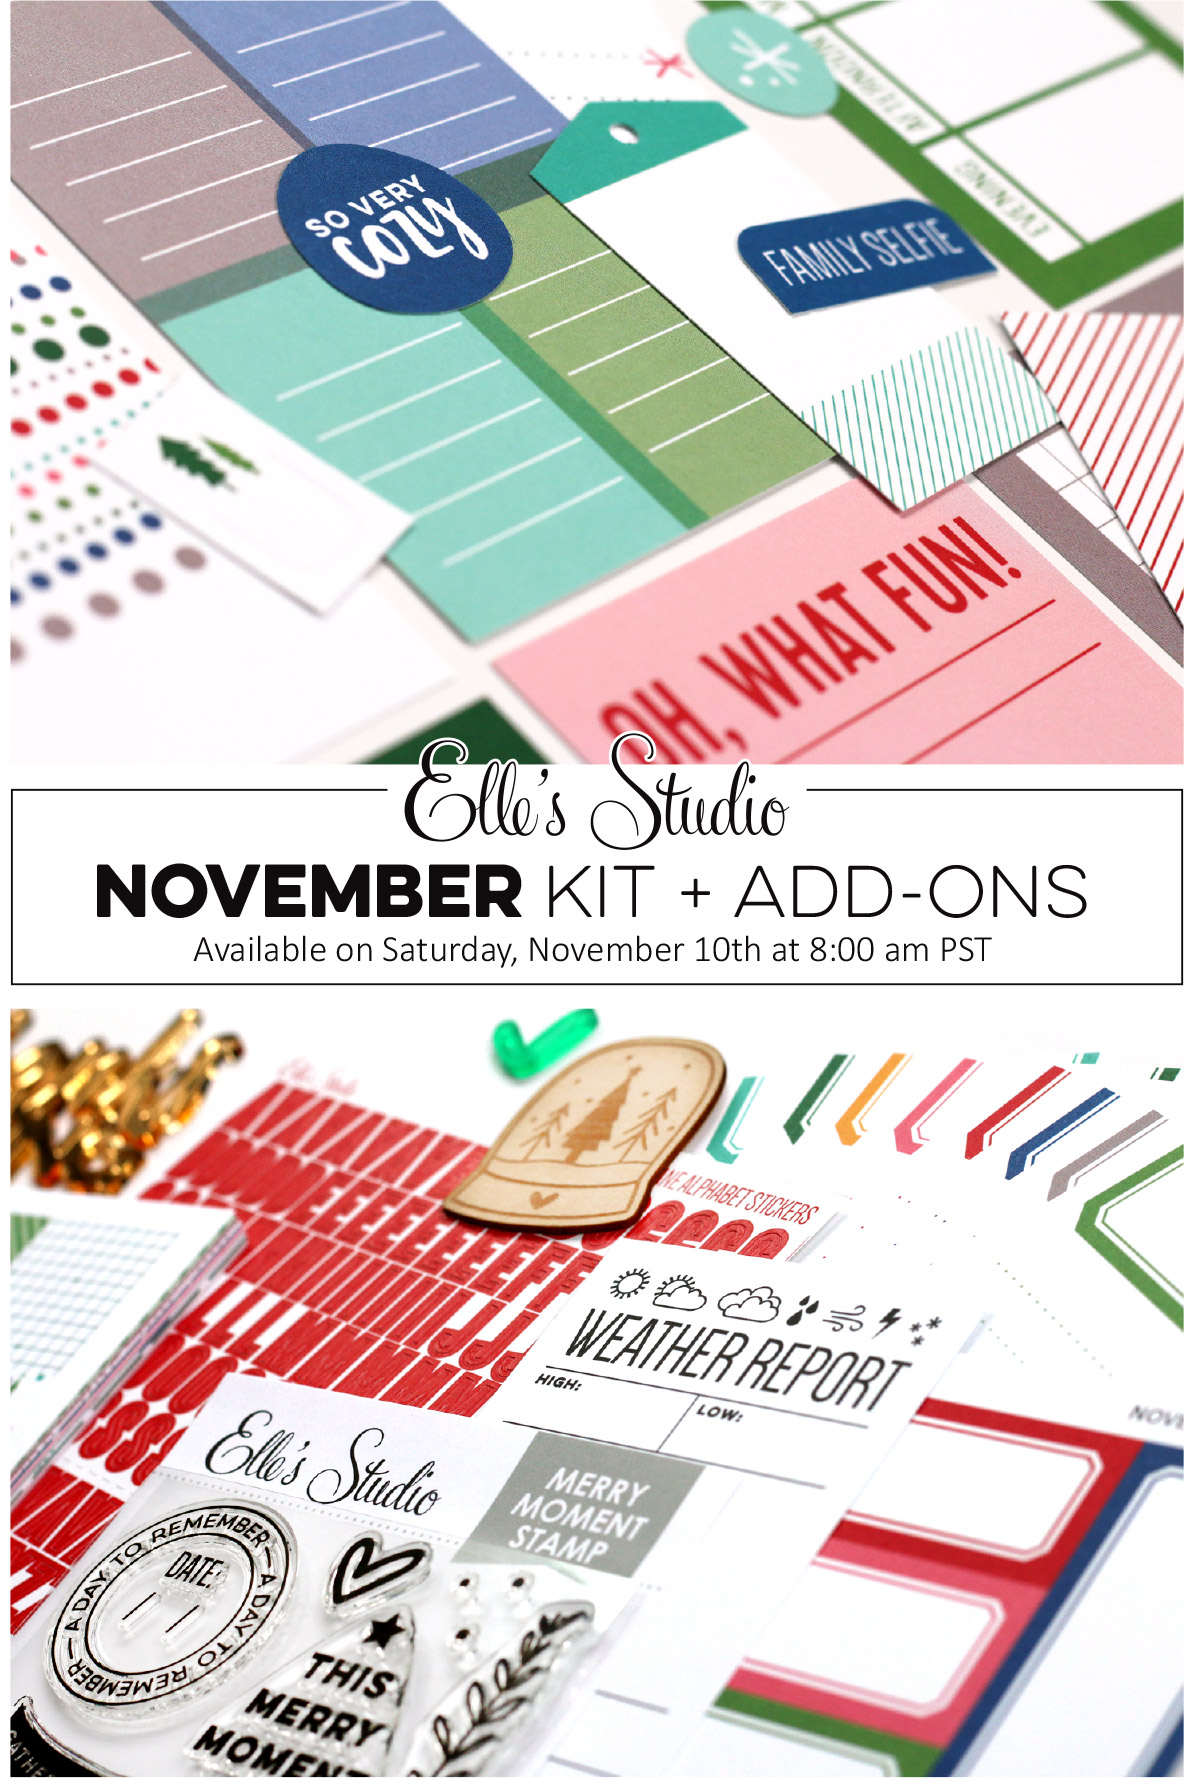
Hello there, friends! November is here and we’re less than 30 days away from the first day of our Document December project! If you haven’t even taken your DD contents out of their box yet, we are ready to inspire you to do so, and get your project prepped for the busy month of December. Chances are, if you do some of the leg-work ahead of time, your project will be more successful, and (dare we say it?) even complete this year at the end of December? Today and the next three Fridays will bring a new post of inspiration from our DT members on how you can make the most of your kit, prep your project and build a successful Document December. Today, we’re kicking it all off with Susan Brochu, Amanda-jayne Baldwin, and our owner, Elle Price! 
 
Elle | Hey everyone! I am so excited to be able to share my Document December album with you next month! This year I will be using a 6″ x 8″ pocket page binder and telling a story from each day in December. I was able to find a storage container at Michaels that holds our entire Document December Kit, along with some add-ons, stamps, and the entire album itself! I love how this will help me keep everything in one spot, and allow me to move to a different area of the house when working on it.


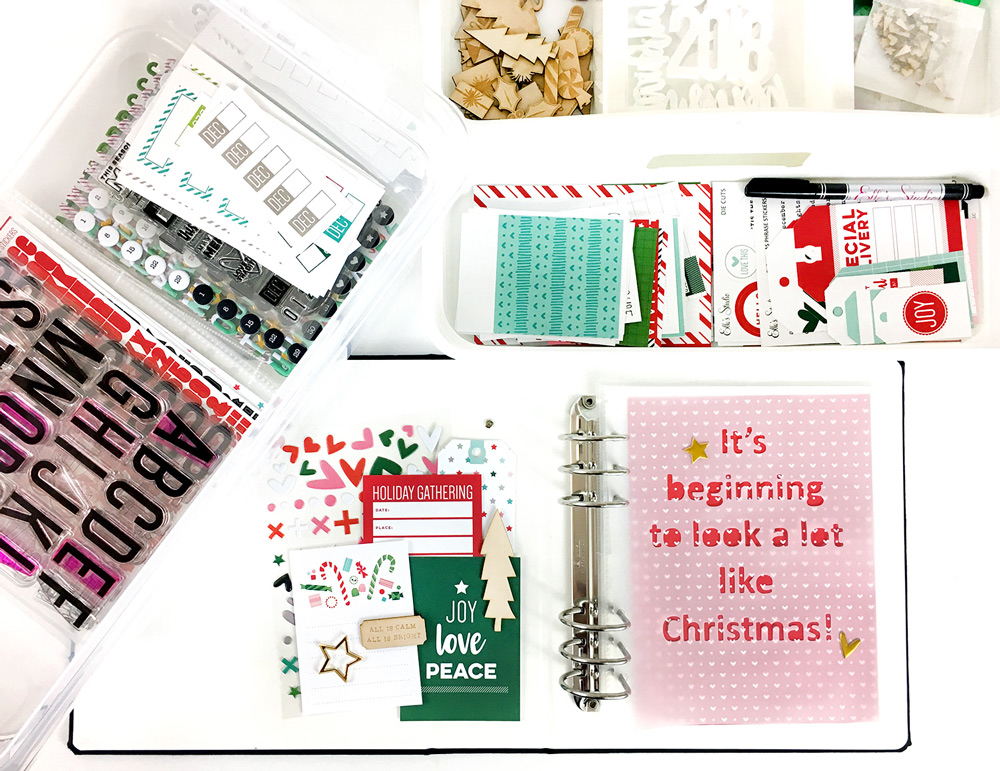
This year I decided to not prep any pages in advance and work on them as I go, but I did put together a cover page using our Holiday Pages Cut File and some vellum. I then added a gold heart and star from our Gold Shapes and Dots Puffy Stickers. I love this being the first thing you see when you open the album!


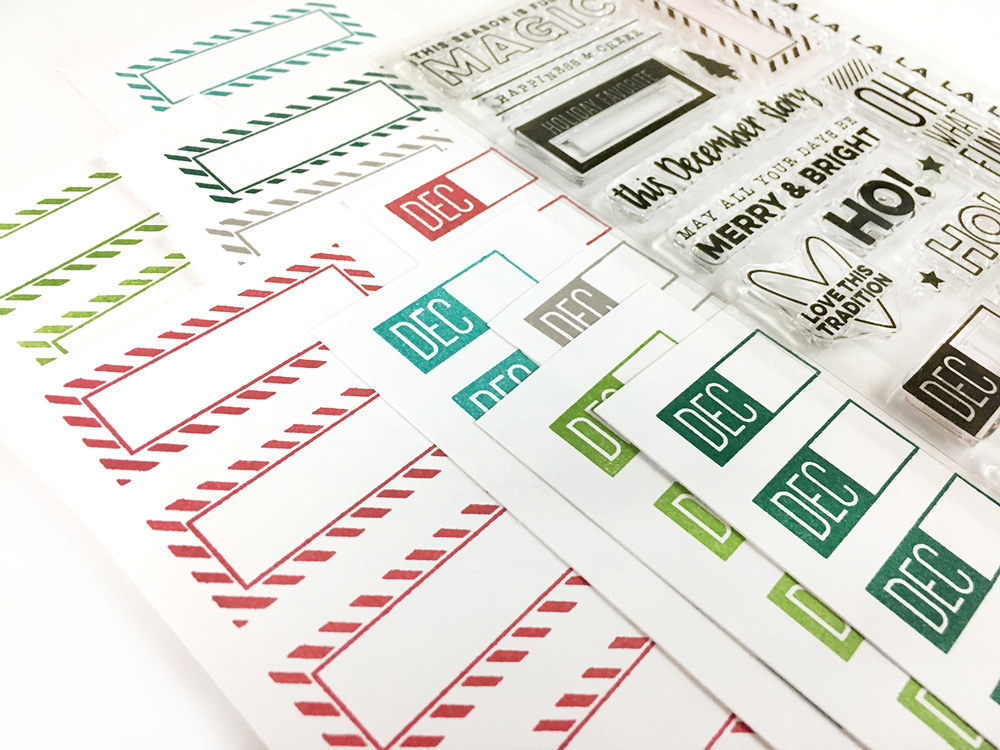
The Oh What Fun Stamp has a fun striped label on it that I plan on using quite a bit for adding little notes to photos, so I did pre-stamp these in five different colors, along with the December label! I love pre-stamping something that I know will get a lot of use–especially for a daily project like this. It makes them easier to use when they are already ready for you!


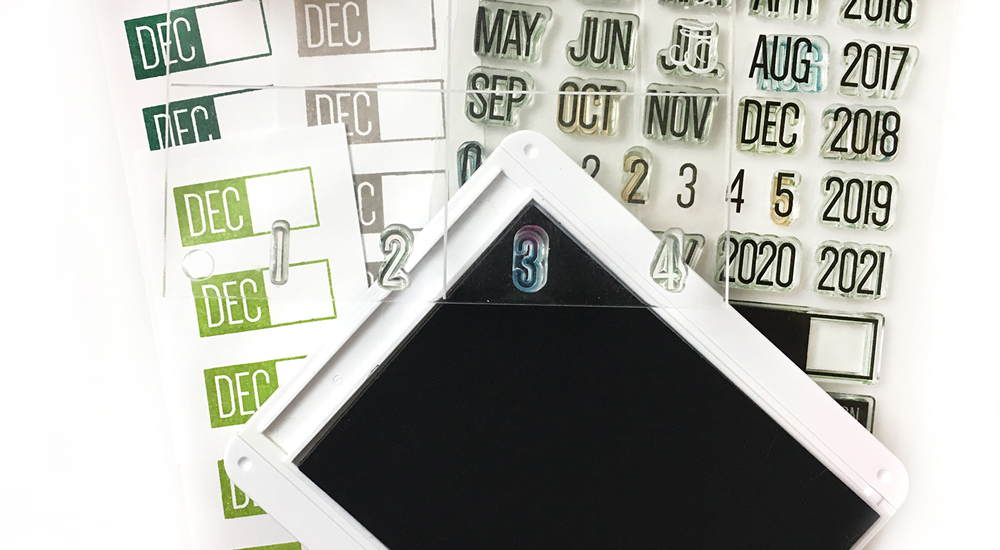
I also plan on using the puffy numbers from our Document December Kit and the Mini Dated Stamp to date each story and/or photo, and I wanted to show you how I have my acrylic block set up for that! The photo above shows how you can space the number stamps out on a clear block and be able to ink just the number you need by using the corner of the ink pad! You can then leave the numbers on the clear block for the entire month—this saves so much time from having to pull them off and reset for each date! Just make sure you clean your stamp well before stamping the next number. I recently started using a Lawn Fawn Shammy and that works great! Look for some 6″ x 2″ inch acrylic blocks in our shop on November 10th that this set up will be perfect for putting the numbers on one side and the months on the other!
 
Supplies | Document December KitHoliday Pages Cut FileGold Shapes and Dots Puffy StickersOh What Fun StampMini Dated Stamp


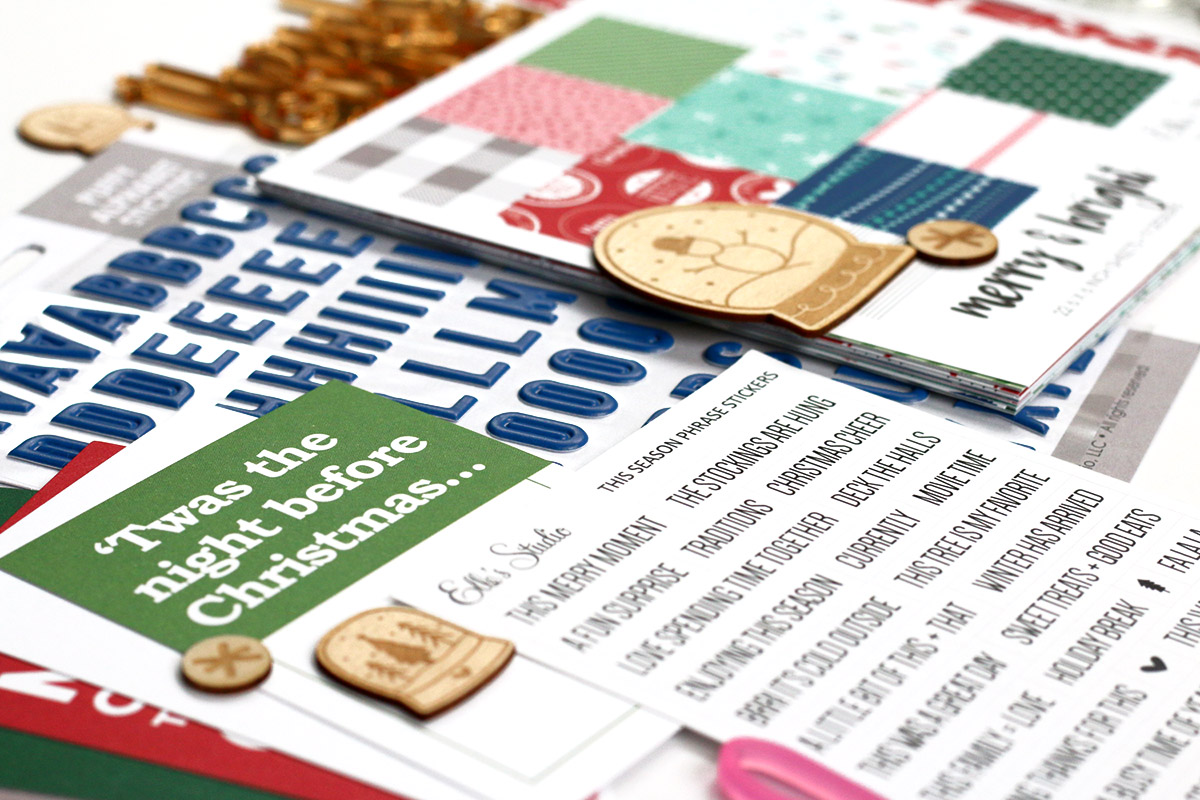
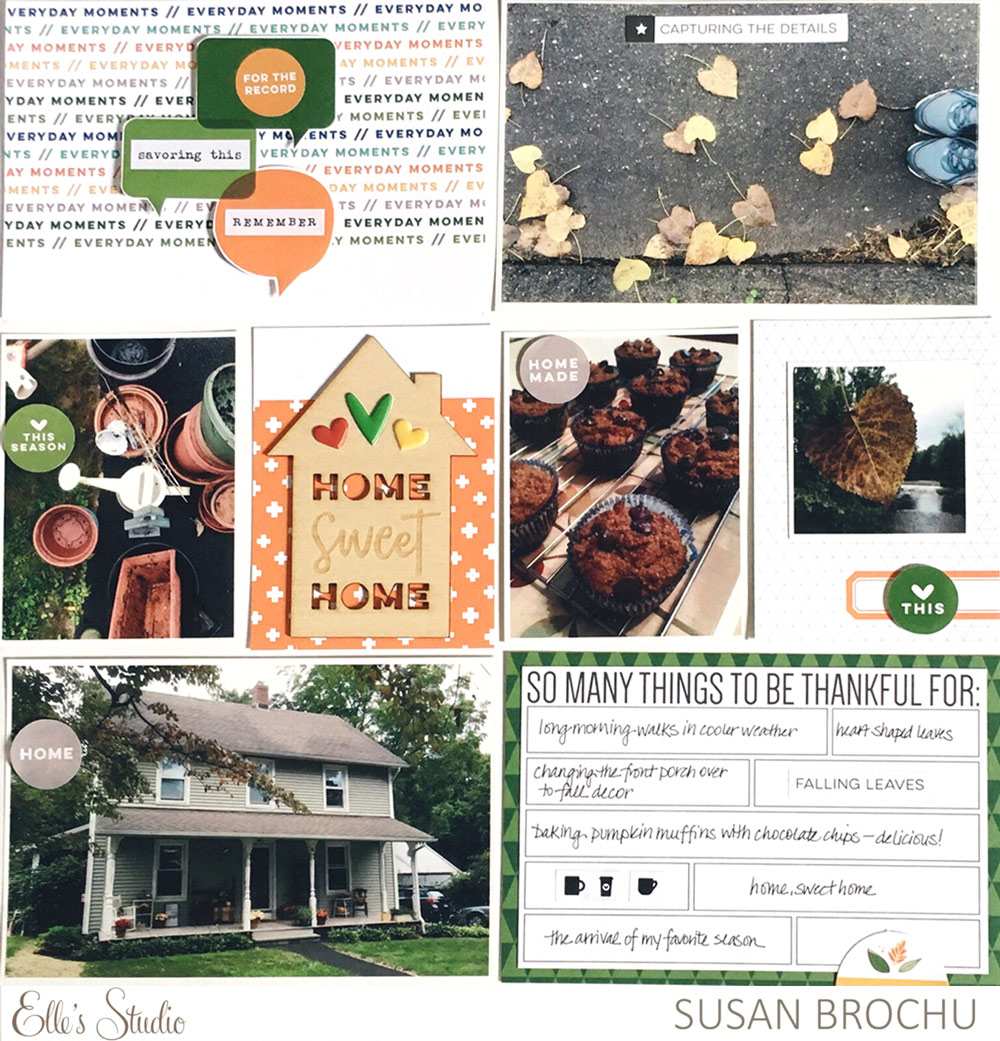
Susan | Hello everyone! Are you ready to start documenting your December?  I know that the beginning of December is still a few weeks away but I like to help myself out by jazzing up some of my pocket tags before that busy holiday season begins.  The tags in the Document December Kit are already completely appropriate for the holiday and can certainly be used as is, but I like to change them up just a little bit—it helps get me into the spirit of the season! Today I’m going to share a couple of the updates I made to the tags.


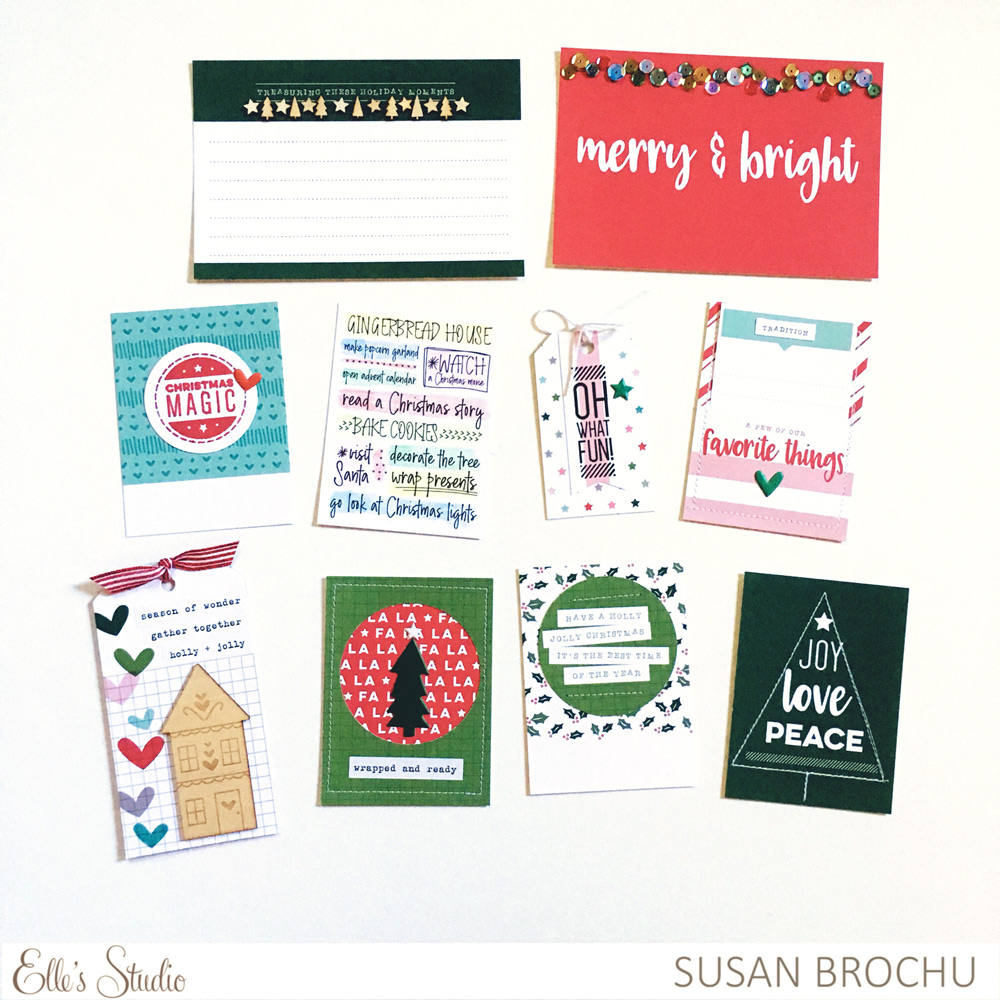
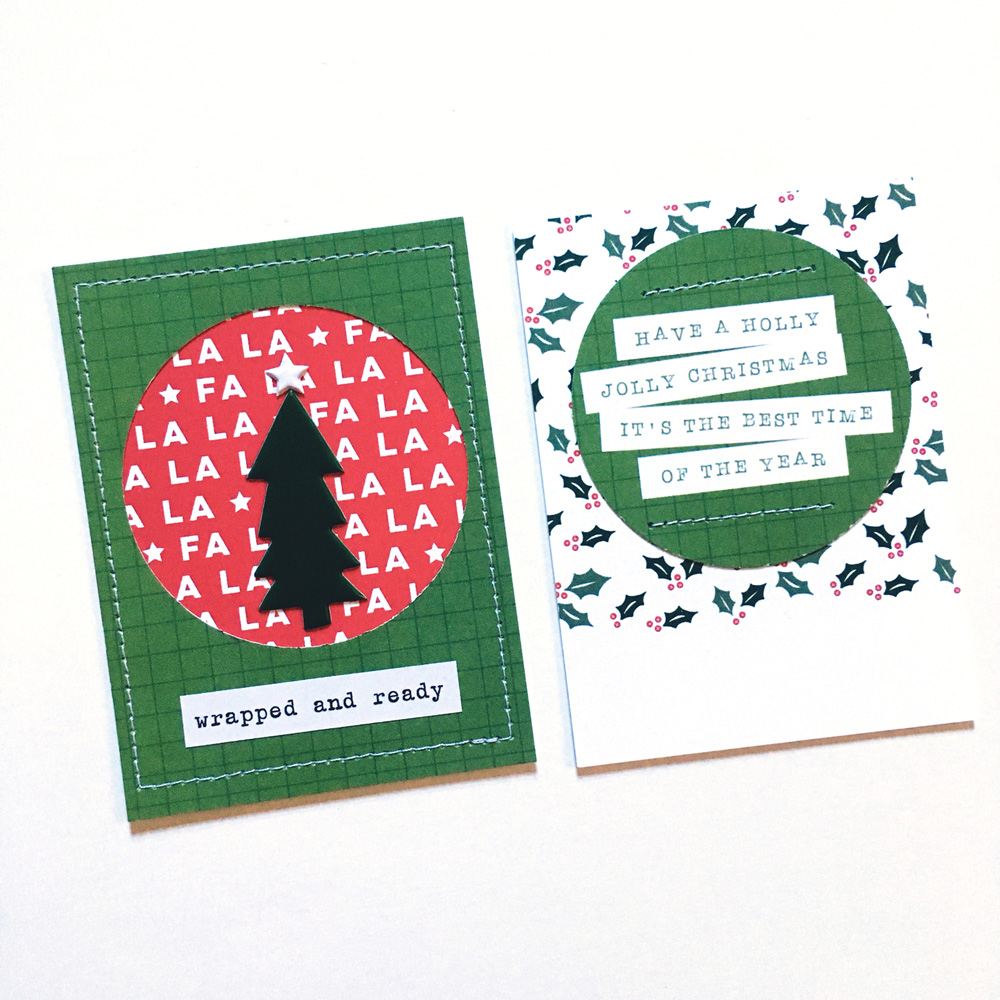
I punched a large circle out of the 3×4 green grid card and stitched it onto the 3×4 card with the holly pattern. Then I placed the negative from the green grid card on top of the “fa la la” 3″ x 4″ tag, added a puffy tree from the Fa La La Puffy Stickers found in the kit, and a heart from the Christmas Shapes and Dots Puffy Stickers, along with one of the Christmas Phrase Stickers.  A little stitching around the edge was the finishing touch.


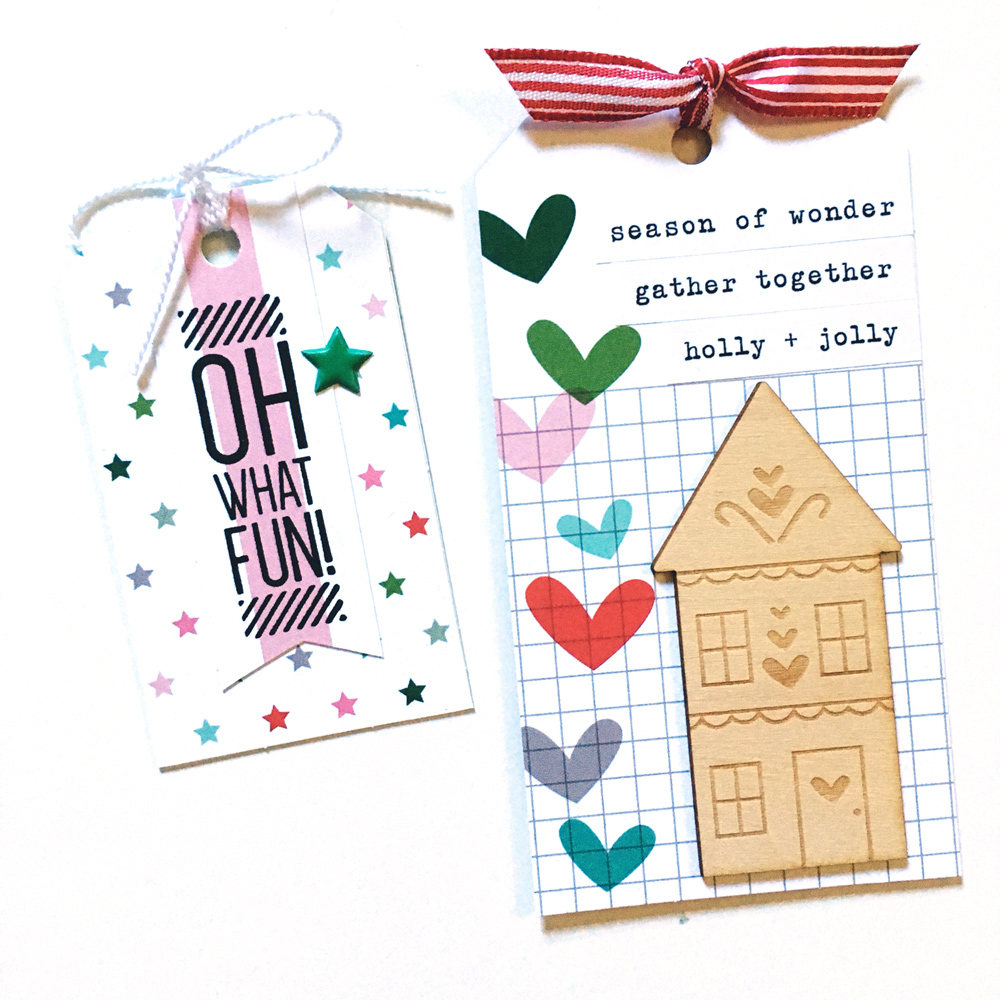
I embellished two of the tags from the Document December Kit by stamping the “oh what fun” sentiment from the Oh What Fun Stamp on the pink striped piece I had left over from making a pocket card, trimming it into a banner shape and adding it to the top of the tag with the tiny stars. A house from the Sweet Christmas Treat Wood Veneers and three more Christmas Phrase Stickers were the perfect additions to the large tag with the heart border.


Adding just a little more embellishment to some of the pocket tags from the Document December Kit really didn’t take much time, and now I’ve got a little stack of personalized cards handy when I’m ready to start my project.  I hope I gave you some ideas to help you prep your Document December project!
 
Supplies | Document December KitChristmas Phrase StickersChristmas Shapes and Dots Puffy Stickers, Christmas Wood Confetti, Sweet Christmas Treat Wood Veneers, Oh What Fun Stamp, Christmas Seals Stamp


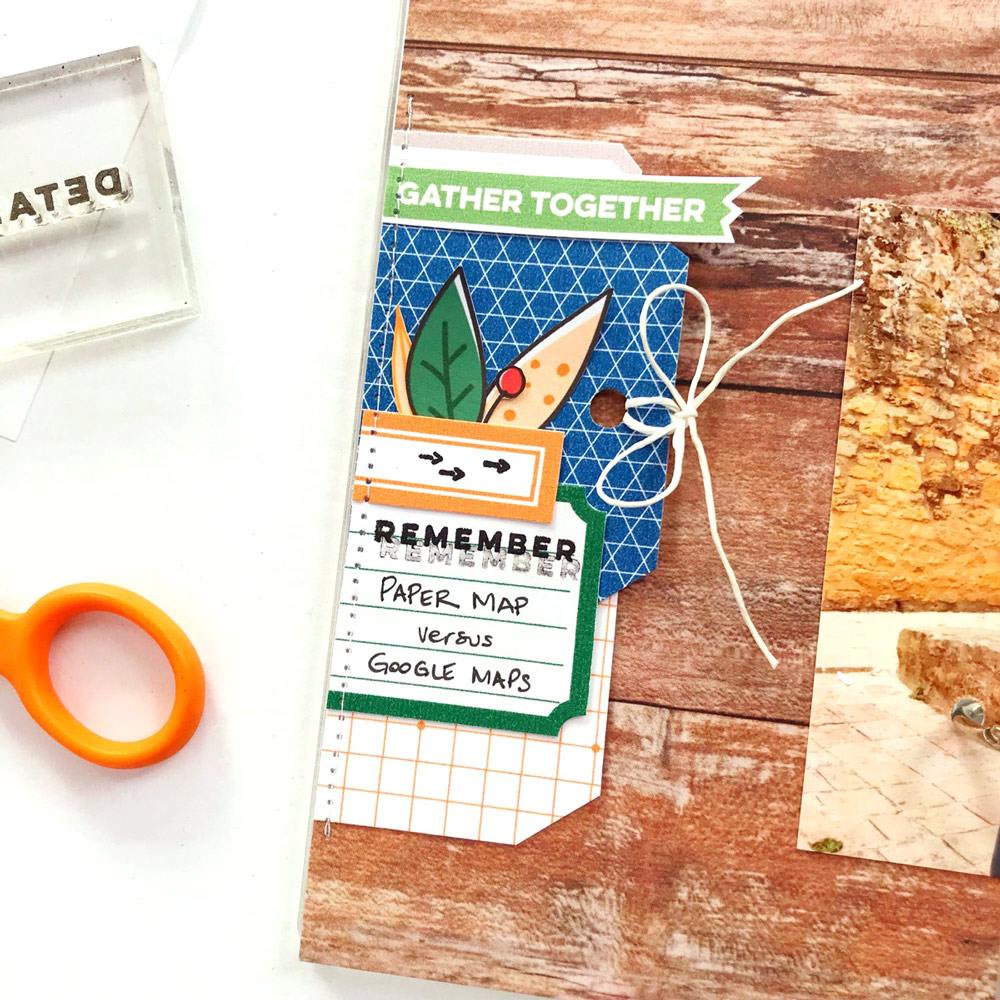
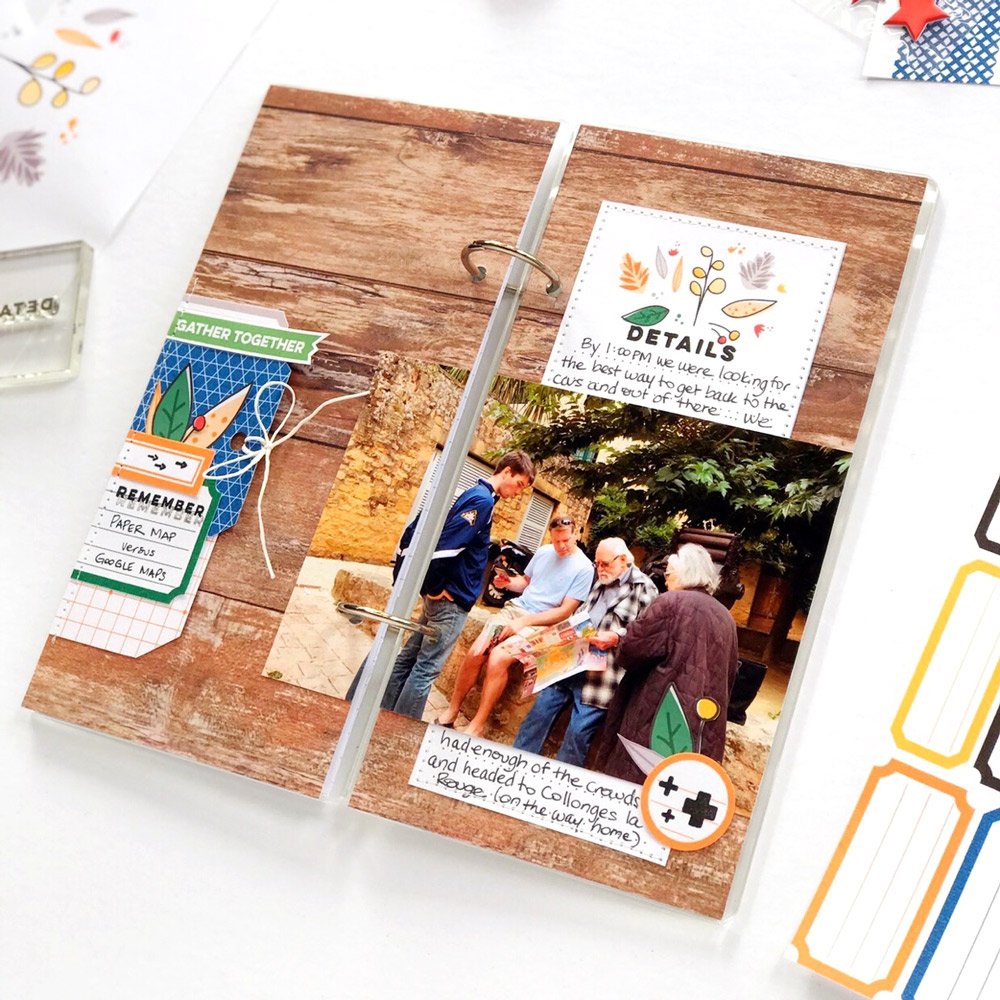
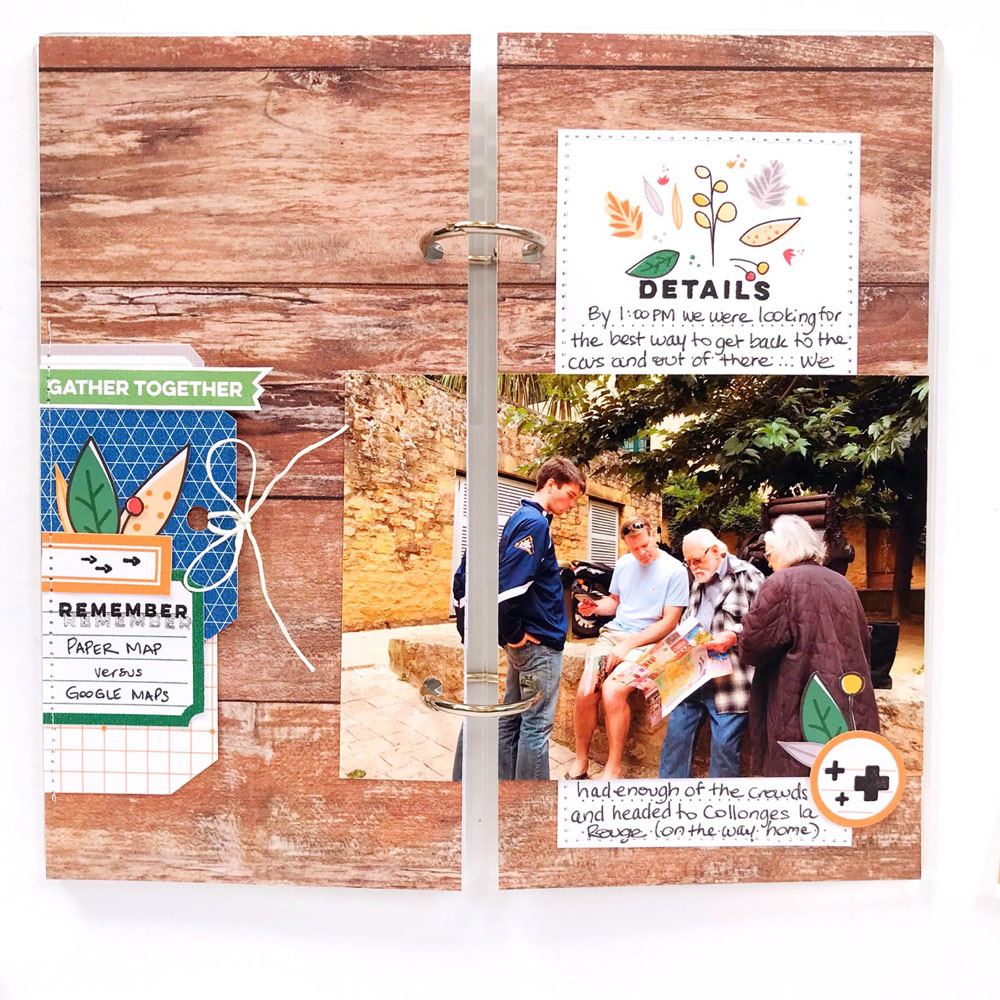
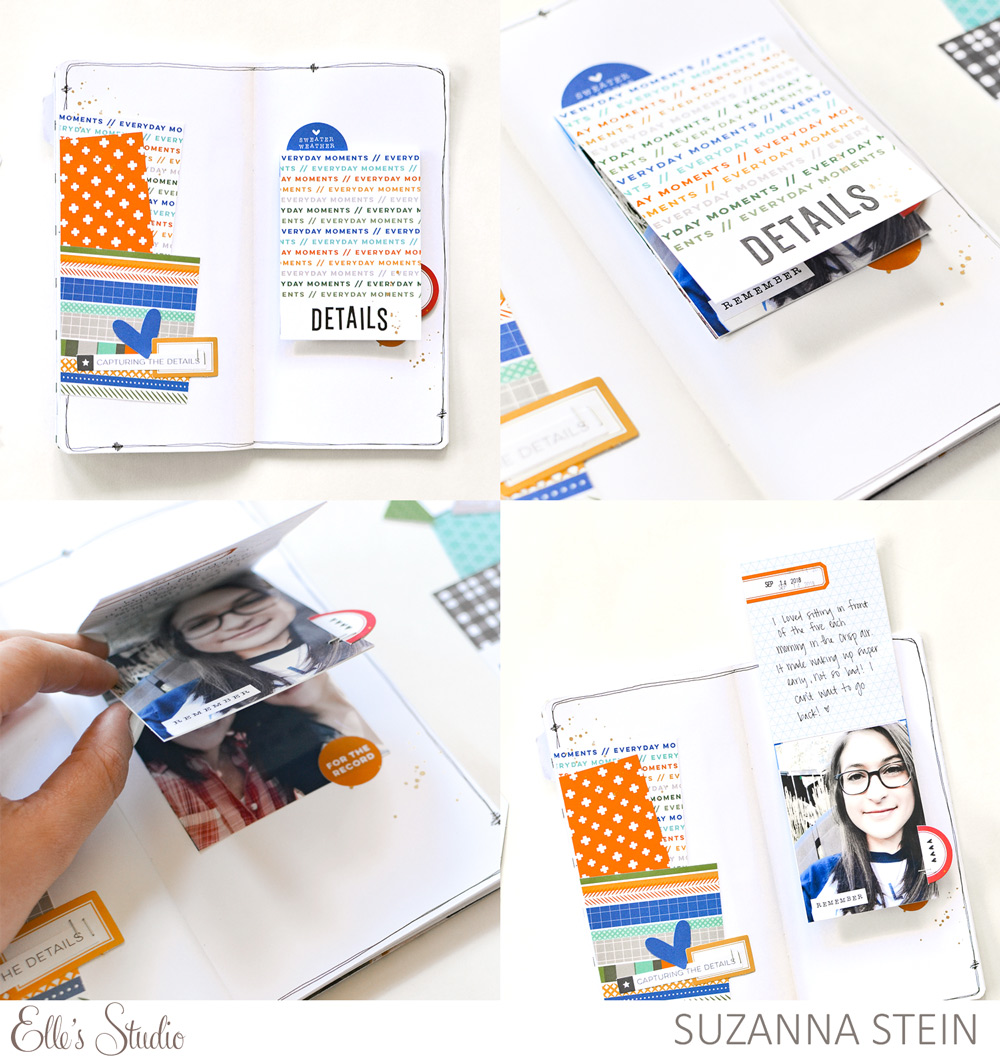
Amanda-jayne | I can hardly wait for Christmas, and I am SO excited to be prepping my December album with the gorgeous Elle’s Studio Document December Kit! For this year’s album, I am using an old journal that I picked up from my local scrapbook store. It has a beautifully bound spine and most importantly, pre-cut photo pockets on every single opening! (I know, how awesome is that?!) This is a huge time saver for me, and means minimal prep time. Yay!


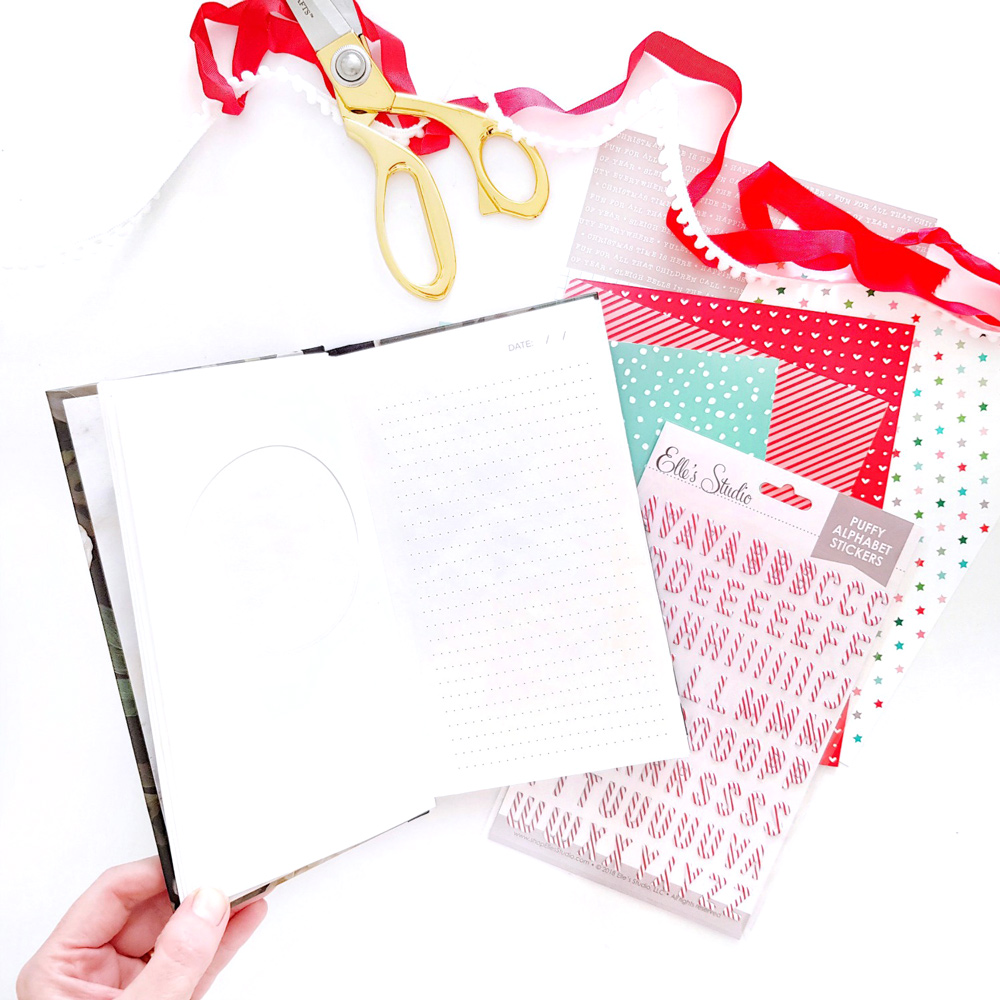
Pockets are fantastic in any DD album, as they’re not only perfect for housing our precious photographs, but also ideal for storing memorabilia & creating shaker pockets too! With so little to prepare, I got straight onto decorating my journal cover.


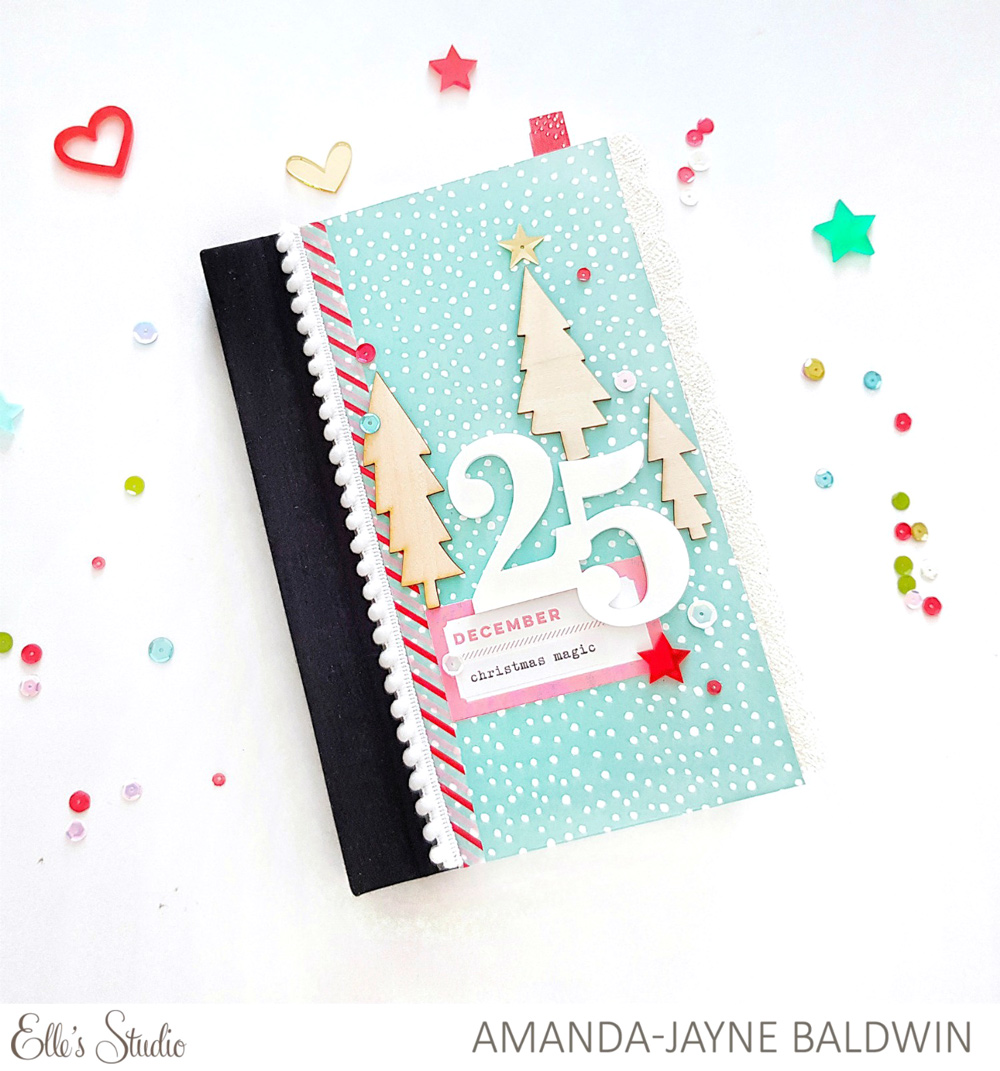
Isn’t this festive & fun?! I adore that snow drops patterned paper—it’s so crisp and fresh for Christmas! I couldn’t resist teaming it with the wood veneer trees and that giant ’25’ acrylic—so effective! Here’s a little peak at my inside opening page:


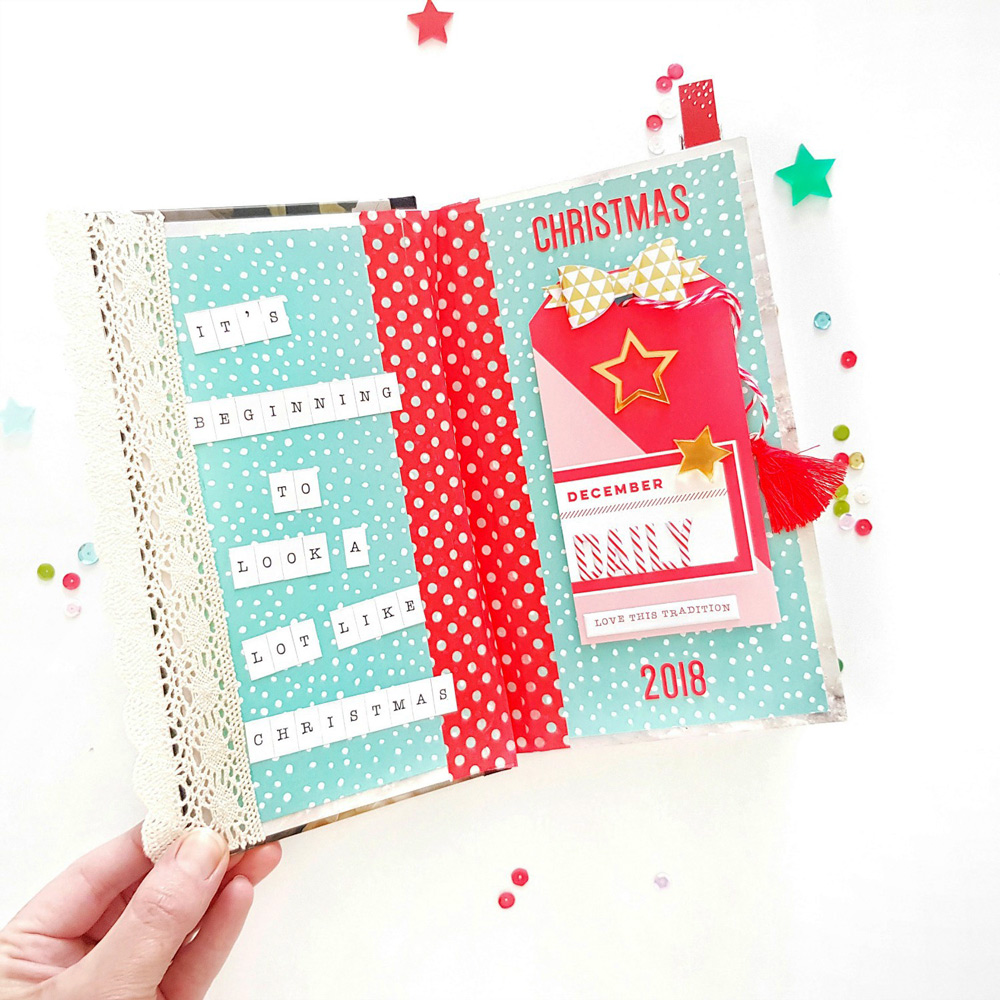
I have used more of that divine snow drops pattern paper to line my pages with, and added a thick line of washi tape down the center to strengthen the album’s spine. On the left hand side, I feature the white Hazel Alphabet Stickers found in the Document December Kit for my “It’s beginning to look a lot like Christmas” quote. On the right, I foam mounted one of the tags found in the kit, and embellished with the Candy Cane Puffy Alphabet Stickers and the gold acrylic stars!
 
I hope I’ve inspired you to make a start on your DD album today!
 
Supplies | Document December KitCandy Cane Puffy Alphabet StickersUnder The Tree Wood Veneers25 Acrylic


What great ideas! We’ll be back next week for a fresh round of Document December inspiration! Don’t have your Document December Kit yet? A limited quantity is still in stock in our shop! Be sure to get yours today to give yourself enough time to prepare for this merry project! 

Printable Perfection with Nathalie Leonelli

Today, design team member Nathalie Leonelli is here with an important reminder: Our monthly digital files that coordinate with our kits are perfect for using in conjunction with your kit, or on their own to create something truly special—even if you’re not a techie! Let’s see what Nathalie created! 
 
Hello crafty peeps! I am back to share with you how easy to use and convenient the Elle’s Studio printables are, even if you are low tech like me! I didn’t use any special machine or program. Today I am focusing specifically on the Gather Together Printables and the October Print and Cut Labels. I love that the printables always coordinate with the monthly kit, but with this project, you will see that you can use the digital files with great results without using the kit at all!


Supplies | Gather Together Printables, October Print and Cut Labels, Family Fun 12″ x 12″ Paper Collection, Noteworthy Stamp
 
To start, I printed one PDF sheet (on white cardstock cut to 8-1/2″ x 11″) of each of the Gather Together and Print and Cut Labels. I decided to use a bunch of elements on one edge of my traveler’s notebook spread, cutting a couple of tags into shipping tag shapes:


I also layered in a few labels, making sure that I would include different shapes, colors and lengths. I used another printed tag as a decorative journaling spot for my right page:


I cut the journaling tag in half so that I could have it on top and bottom of my photo (I like to split my journaling that way). Then, for my next step, I grabbed my Noteworthy Stamp to add a contrasting title in black ink, but also to create an eye catching visual triangle.


For my last touches (and my most tech advanced move!), I placed the individual digital “Leaves” tag (which is the same one I used for my journaling) into a Word document and made it so big that it would be almost 8-1/2″ x 11″. I printed two copies of them just so that I could hand cut some of the drawings (leaves and stems) to use as embellishments, creating another visual triangle on the page.


Finally, a few machine stitches, before adhering the photo, add a bit of texture.
 
So as you can see, all you basically need to use those digital files are a computer (no fancy program) and a printer. If you haven’t yet, I hope you’ll give them a try, with or without a kit.
 
If you use the Elle’s Studio digitals and share your creations online make sure to let us know by using the tag #EllesStudio on Instagram or leave us a comment with a link! Thank you for stopping by today!
 

How to Document Halloween with our October Kit + Add-Ons!

Since the final day of the month falls on our favorite spooky holiday, we thought we’d inspire you to get your trick-or-treating ghouls and ghosts documented quickly with some ideas from our fabulous design team:


1. Color your Trick or Treat Wood Veneer to create a bold title, the way that Amanda-jayne Baldwin did on this layout using spray mist. We love the way it stands out against the black and white background!


2. Create homes for your photos with our Autumn Shipping Tags. We love the way that Heather Leopard layered multiple tags to create three distinct areas for her photos on this layout!


3. Use a simple and classic color scheme of black and orange, the way that Jess Forster did here with our October 2018 Kit, which she accented with our fun Stars and Dots Puffy Stickers and Halloween Wood Veneer.


4. Stamp spooky details, like Meghann Andrew did on this layout to mimic her favorite character’s ghastly stitches using our Thankful Stamp.


5. Layer, layer, layer! We love the way that Daniela layered multiple patterns from our Sweater Weather 6″ x 6″ Paper Stack to create the colorful base for her bright and highly-contrasting layout!
 
Be sure to shop our October Kit and extras before they’re gone to document your spooky memories before they’re forgotten. Have a safe and happy Halloween!

October Sketch Day with Daniela Dobson

We love sketches, and we’ll bet that you do, too! They help us to take the guesswork out of the design process to just have fun creating! Today, Daniela Dobson is with us to share a new layout that she created with our October sketch. Let’s take a look:
 
Hi! It’s Daniela Dobson here to share a new layout with you that started with a sketch, inspired by the “Read Me a Story” layout created my Meghann Andrew. I absolutely fell in love with this layout from the September gallery and was pretty excited to work with the sketch:


I love that the layout is 8-1/2″ x 11″ since that is my preferred size of scrapbooking, but what really caught my eye was the large photo.


Supplies | October 2018 KitOctober Digital Cut FileAutumn Shipping TagsPuffy Stars and Dots StickersSweater Weather 6″ x 6″ Paper StackNoteworthy Double-sided Journaling TagsNoteworthy Bits and PiecesNoteworthy Epoxy StickersNoteworthy Puffy StickersNoteworthy StampNoteworthy 12″ x 12″ Paper Collection
 
For my layout, I wanted to change it up a bit and use three small photos. The photos are layered over patterned paper from Noteworthy collection and journaling tags from October 2018 Kit. I added a large title from the Noteworthy Puffy Stickers under the photos, just like in the sketch. In addition to my background, I added stamping from the Noteworthy Stamp: “so much fun” and “details”.


I love how Meghann layered various journaling tags, patterned paper and tags under the photo and down the page. I used the same idea with the October 2018 Kit and Sweater Weather 6″ x 6″ Paper Stack. These colors worked perfectly with my photos and made them stand out. In addition, I embellished my layout with Puffy Stars and Dots Stickers and Noteworthy Epoxy Stickers. The colors of the embellishments are a perfect match to all the tags I added from the kit and Noteworthy collection.
 
One of the Autumn Shipping Tags held my journaling that I tucked behind layers of tags and paper. I made sure I didn’t use any adhesive in that area so that the tag can easily be pulled out.


Sketches are great to use as a starting point for any layout! I hope this project inspires you to make the October sketch your own on your next layout!


Do you want to have 50 more sketches at your fingertips to help you create quick and beautiful layouts? Check out our latest class, From Sketch to Finish Vol. 4! All next month, our design team will be choosing sketches from our new class to create new layouts, so follow along with them and get even more inspiration! 
 

Happy Haunting Inspiration with Amanda-jayne Baldwin

Just in case you needed another reason to celebrate Halloween, our latest October kit and extras in the shop will make your Halloween documenting simple and fun, as design team member Amanda-jayne Baldwin is going to show us today. Let’s take a look:
 
Hi Elle’s Studio friends! Do you have some boo-tiful photos and memories to document? Well, this month’s kit and new releases are perfect for all your spooktacular Halloween projects! Here’s a little happy haunting inspiration for you…


Supplies | October 2018 Kit, Autumn Shipping TagsAutumn Fun StickersJane Alphabet Stickers — BlackPuffy Stars and Dots StickersTrick or Treat Wood VeneerHalloween Wood Veneer, Sweater Weather 6″ x 6″ Paper StackNoteworthy Epoxy Stickers
 
All the happy haunts here! Such a fun layout! You’ll spot that I trim the moon & stars pattern paper Sweater Weather 6″ x 6″ Paper Stack into one inch strips. I connect the strips together to create the appearance of 12 inch paper at both the top and base of my layout design. Such a great way to maximize your six inch papers!


To enhance the spooky starry background, I fussy cut the stars & moon journaling tag from the October 2018 Kit, and add a star die cut or two. I further add to this look with the inclusion of the Puffy Stars and Dots Stickers—so cool!
 
I feature the Halloween Wood Veneer in the top corner of the layout, coating the “OCT 31” in yellow ink. The colored veneer really pops!


I use the same ink to hand color the Trick or Treat Wood Veneer in the opposite corner at the base of my page, and add more of those fabulous stars! Here’s a closer look for you:


That title is errrrything!!! Whether you use it on layouts, pocket pages or even cards, the Trick or Treat Wood Veneer is a must-have! When it comes to Halloween, we need a pumpkin or two, right?!


The Jack-o-lantern veneer from the Halloween Wood Veneer is super cute! A perfect embellishment for my two trick or treaters in the photo! (And yes, they sure do love candy!) The second pumpkin is one which I drew and cut out from black cardstock. I back it with more of the Sweater Weather papers and position my layered photo onto it.


The layers beneath my photo are created with the Autumn Shipping Tags, October 2018 Kit, and more of the Sweater Weather papers. Wood Veneer & Autumn Fun Stickers complete the photo cluster, and add that extra BOO! factor. For finishing touches, I add the “Happy Haunting” subtitle with the black Jane Alphabet Stickers and fussy cut some bats from my left over one inch pattern paper strips.


Totally spook-tacular!!! I hope I have inspired you to document your Halloween memories with our fabulous October products! Happy haunting!
 

Halloween Fun Documented with Daniela

Halloween is just around the corner and today design team member Daniela is here to share how she documented her past Halloween memories using our new October kit and spooky extras! Let’s take a look at her new project:
 
Hi crafty friends, it’s Daniela again and I’m super excited to share my first Halloween layout ever. In Germany, we usually don’t celebrate Halloween, but wear costumes in February instead when we celebrate carnival. This is also the time when German kids go from house to house to collect candy. Due to American movies, Halloween became more popular in Europe over the last couple of years, so more and more German kids collect candy on October 31st, too, and I must admit that I love this tradition!
 
When I saw the Halloween Wood Veneer, I knew right away that my time had come to document my kids in their Halloween costumes, so I created a fun page with lots of these awesome wood veneers.


Supplies | October 2018 Kit, October LabelsAutumn Shipping TagsAutumn Fun StickersJane Alphabet Stickers — Black, Puffy Stars and Dots Stickers, Yellow Puffy Alphabet Stickers, Halloween Wood VeneerTrick or Treat Wood Veneer, Sweater Weather 6″ x 6″ Paper Stack, Family Fun 6″ x 6″ Paper StackFamily Fun 12″ x 12″ Paper Collection
 
I started my page by cutting three circles in different sizes from papers found in the Family Fun and Sweater Weather 6″ x 6″ Paper Stack, then created clusters on top of them. I used one of the Autumn Shipping Tags and placed the big Trick or Treat Wood Veneer on top of it. The black and white twine builds a nice contrast to the wood veneer and the paper.


To include smaller details on my page, I fussy cut all the stars and the moon from one of the tags included in the October 2018 Kit and arranged them around the picture along with some color splashes and Autumn Fun Stickers. I also used some of the Puffy Stars and Dots Sticker to add even more dimension to the page. The paper stripes I used at the top and the bottom of the page have the same colors as these little details as well.


My color scheme for this page was orange, yellow and black, so I used bits and pieces in these colors all over the page and also created the title by using the black Jane Alphabet Stickers and the Yellow Puffy Alphabet Stickers.


I really like the black and white photo in combination with the star patterned paper and the bright yellow and orange bits and pieces.


Have you documented your past Halloween memories? If not, now is the time to start! Thanks for stopping by and have a great day!
 

The Perfect Cup with Guest Designer Lorilei Murphy

We have SO loved having guest Lorilei Murphy with us this month, and today she has one more project to share with us! In case you missed it, see her Halloween pocket page spread and layout all about her home in autumn before you feast your eyes on her final layout as our guest designer, all about a perfect cup of coffee:
 
Hello! Hope you are having a great week! I am back with my last layout for my guest spot with Elle’s Studio! I have thoroughly enjoyed myself, I loved using the October 2018 Kit and want to thank Elle, Meghann and you all for having me!
 
For my 8-1/2″ x 11″ layout, I wanted to use the super cute coffee-themed items new to the shop this month! I got out my Vicki Boutin mixed media products to mix and make all sorts of painty puddles and splatters on my background. Then I used the bottom of a jar dipped in paint to make coffee circle stains!


Supplies | Coffee Journaling Tags and Wood VeneerCoffee Phrase StickersPuffy Stars and Dots Stickers
 
I chose a photo to document that I took late this summer while we were out for lunch. I added a bit of text in photoshop before I printed it. It occurred to me that I only take coffee photos when I am out and about, so I decided to make my page about that! I typed my journaling in Photoshop, printing it out before cutting it into strips.


To embellish, I added the Coffee Phrase Stickers (so many great sayings on this sheet!) Puffy Stars and Dots Stickers, in grey and black, and the wood veneer coffee cups, from the Coffee Journaling Tags and Wood Veneer, which I LOVE!!


I backed my photo with two of the journal tags included in the Coffee Journaling Tags and Wood Veneer and tucked in “the perfect cup” label at the top of my photo, along with the cream + sugar sticker from the Coffee Phrase Stickers! I love how my page turned out. I quite possibly wouldn’t have made a page about this photo, but Elle’s unique designs inspired a story to be told!!


Hello! My name is Lorilei Murphy (pronounced Lauralee) and I live with my husband and teenager daughter on a farm about an hour north of Calgary, Alberta. I have always been a crafty girl and the last 4 years I have spent lots of time exploring memory keeping in different forms. I started out by delving into Pocket Page albums and I went back to 2009. It was a big job but well worth the effort! I have been scrapbooking for just over a year and love the creativity and the community! You can find all my projects on my blog and I post all the time on Instagram!
 
We want to thank Lorilei for inspiring us this month using our October Kit and add-ons! Be sure to follow her on Instagram, Facebook, her blog for more paper crafting eye candy!

October Design Team Inspiration: Volume Three

It’s the end of the month already, which means that our November exclusive kit is just around the corner! Let’s use up our new October goodies! Take some inspiration from our talented design team members who are sharing these brand new projects with us:


Wonderful by Laura Wonsik – supplies used | Puffy Stars and Dots StickersThankful Stamp, Jane Alphabet Stamp, Family Fun 12″ x 12″ Paper Collection


Thankful for This pocket page by Nancy Damiano – supplies used | October 2018 Kit, Coffee Journaling Tags and Wood VeneerAutumn Shipping TagsPuffy Stars and Dots StickersThankful Stamp


Heart of our Home by Amanda-jayne Baldwin – supplies used | October Digital Cut FileAutumn Fun StickersPuffy Stars and Dots StickersHome Sweet Home Wood VeneerSweater Weather 6″ x 6″ Paper Stack, Thankful StampNoteworthy Epoxy Stickers


Lost in a Good Book by Jamie Leija — supplies used | October 2018 Kit, October LabelsAutumn Fun Stickers, Halloween Wood VeneerOrchid Pink Puffy Alphabet StickersPuffy Stars and Dots StickersSweater Weather 6″ x 6″ Paper Stack, Hazel Alphabet StampMini Dated Stamp, Noteworthy — Double-sided Journaling TagsNoteworthy Puffy StickersNoteworthy Epoxy Stickers


Shoot for the Stars by Heather Leopard — supplies used | October 2018 KitOctober LabelsOctober Print and Cut LabelsAutumn Shipping TagsAutumn Fun StickersJane Alphabet Stickers — BlackPuffy Stars and Dots StickersHalloween Wood Veneer


Home Sweet Home by Susan Brochu – supplies used | October 2018 Kit, Coffee Phrase StickersAutumn Fun Stickers, Home Sweet Home Wood VeneerPuffy Heart Stickers — Summer MixPuffy Heart Stickers — Spring MixSweater Weather 6″ x 6″ Paper Stack


Details by Suzanna Stein – supplies used | October 2018 Kit, Autumn Fun Stickers, Jane Alphabet Stickers — Black


52 Favorites: Week 15 traveler’s notebook spread by Wendy Antenucci – supplies used | October 2018 Kit, Movie Time Journaling TagsJane Alphabet Stickers — BlackPuffy Stars and Dots StickersSweater Weather 6″ x 6″ Paper Stack, Thankful Stamp


Jack Sparrow by Candace Perkins – supplies used | October 2018 Kit, October LabelsJane Alphabet Stickers — BlackHalloween Wood Veneer, Sweater Weather 6″ x 6″ Paper Stack
 
Our November Kit is just around the corner, but we’d love to see what you’re creating with your October 2018 Kit until then! Share your project on Instagram using the hashtag #EllesStudio for a chance to be featured here on our blog and win a gift certificate to the shop!

Journaling Three (More!) Ways with Jess Forster

Sometimes we get so overwhelmed, that we can get hindered with the small details of how we will document our stories. Today, Jess Forster is challenging us to think “SIMPLE” and get your stories told using the October 2018 Kit. Let’s see what she’s recording:


Overwhelmed by journaling in your pocket pages? I’ve said it before and I will say it again: Sometimes we are afraid of missing ALL the details that we don’t record ANY of our details of our story. Today I am sharing how Elle’s journaling tags from the October 2018 Kit can help you to record your everyday moments in simple, manageable ways!


In this double page 9″ x 12″ monthly spread, I included a 3″ x 4″ photo of my kiddos at the Toronto Zoo, watching a polar bear. The colourful journaling tag numbered 1 to 5 below helped to list all the animals we saw during our outing that day. Hooray for bullet points! Simple lists can summarize an exciting experience with details from your week, or in my case, month.


Instead of including facts, consider documenting your feelings. Here I used the 3″ x 4″ orange label journaling tag to write a letter to my kids about the transition from summer to fall. A letter can be a fun way to simply outline your personal perspective on a situation. It doesn’t have a be profound to get your thoughts across.


Lastly, recounting simple conversations are a great way to document an age or developmental stage. I am a fan of the 3″ x 4″ speech bubbles tag in the October 2018 Kit. Here I used it to document a funny conversation that my three year-old son said during our bedtime routine. I love his sense of humour and can remember how he said the word “piglet”. Include small details that will set the tone of when the conversation occurred.


Supplies | October 2018 Kit, Stars and Dots Puffy Stickers, Autumn Fun StickersOctober Labels
 
If you are looking to add some simple ways to add journaling to your pocket pages, there are many different ways to document your story. I hope this layout inspires you to write and record some of your everyday moments using the October 2018 Kit and add-ons!