Whether you’re busy finishing up your work week, shopping each day to finish off your holiday list, or baking up a storm, we know that you’ll love what our design team is sharing with you this weekend! Let’s start off with these six designers!
Stop by tomorrow for round two of inspiration this weekend! How is your Document December coming along? Share it with us on Instagram using the hashtag #EllesStudio or in our Elle’s Studio Facebook Group!
Comments Off on Document December Inspiration: Week 03, Day 01 | Share This
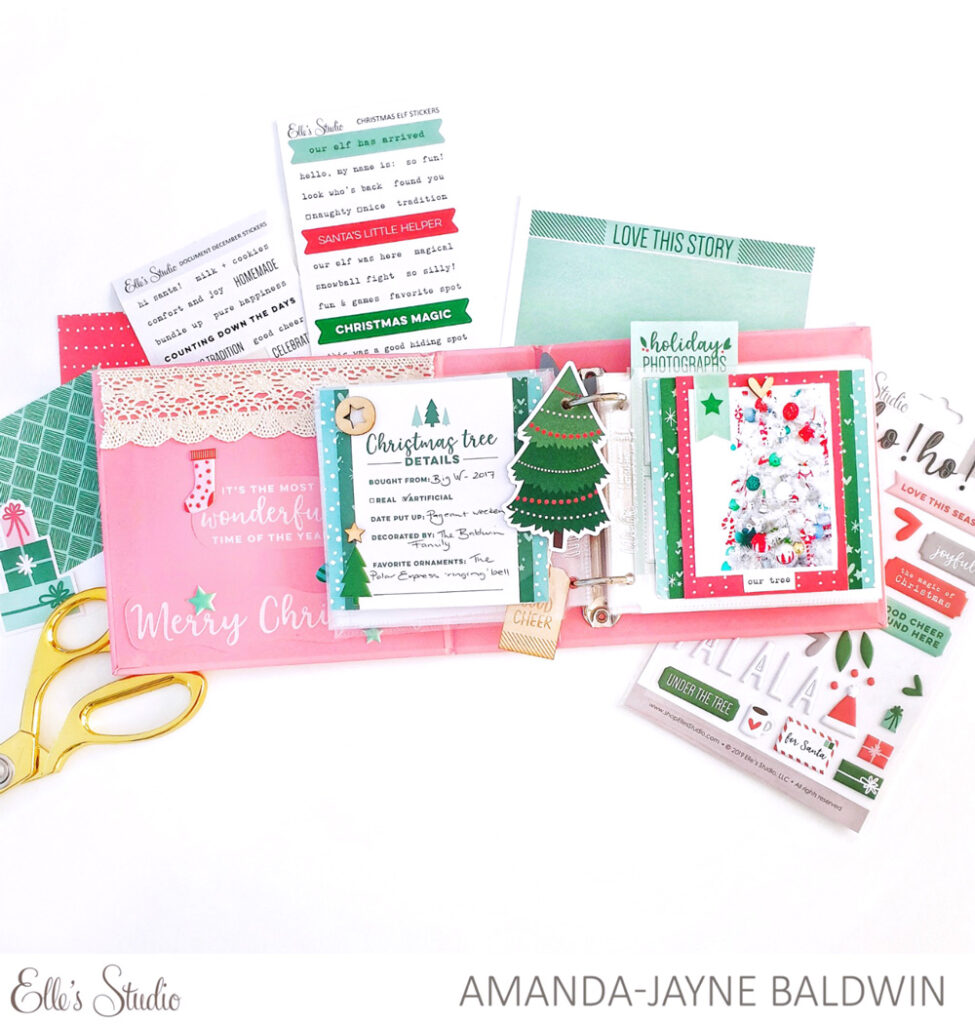
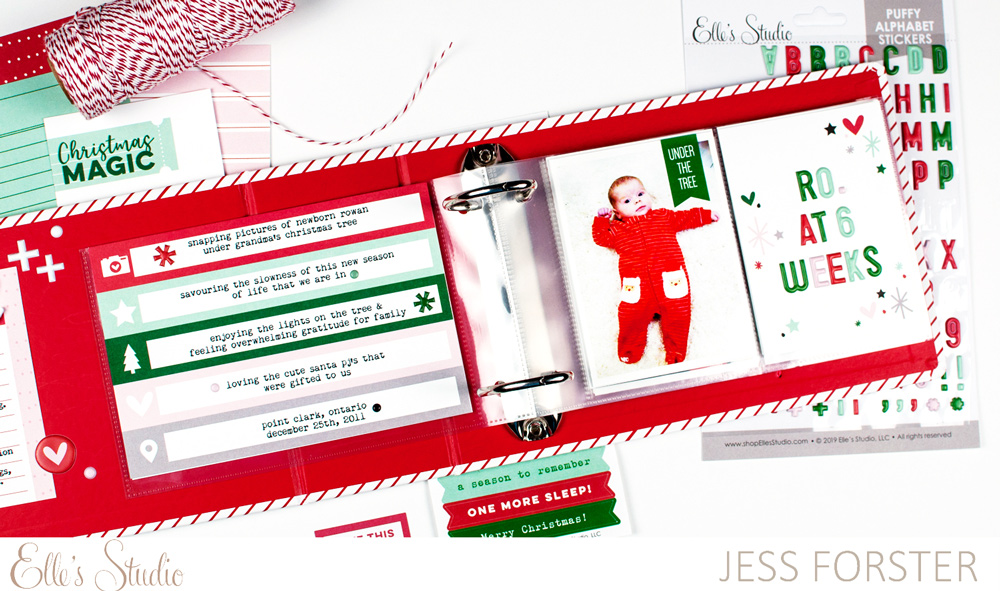
There are so many different ways to create a wrap-up project to record the best moments of the year, and today, Steph Grimes has a fun, hands-on solution for you using our December 2019 Kit and add-ons that includes a tutorial! Let’s check it out!
Hello friends! It’s Steph here and I’ve got a little tutorial for you today as my last blog post of 2019. It’s been such a great year being part of the Elle’s Studio Design Team and, while my personal life has been challenging this year, it’s also been full of so many awesome things.
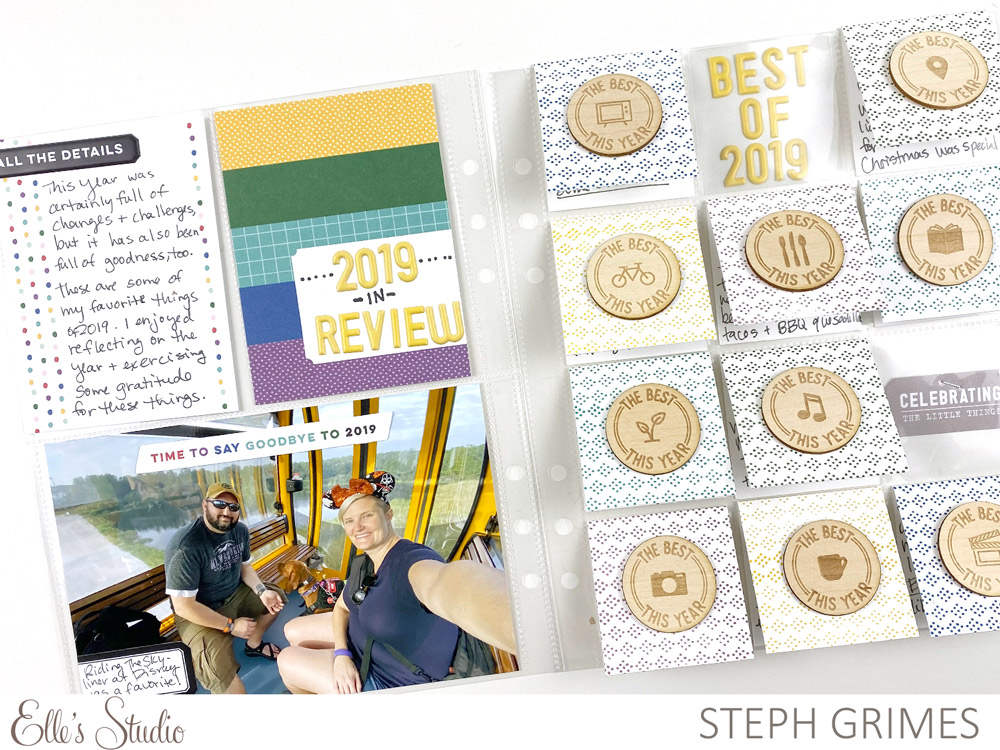
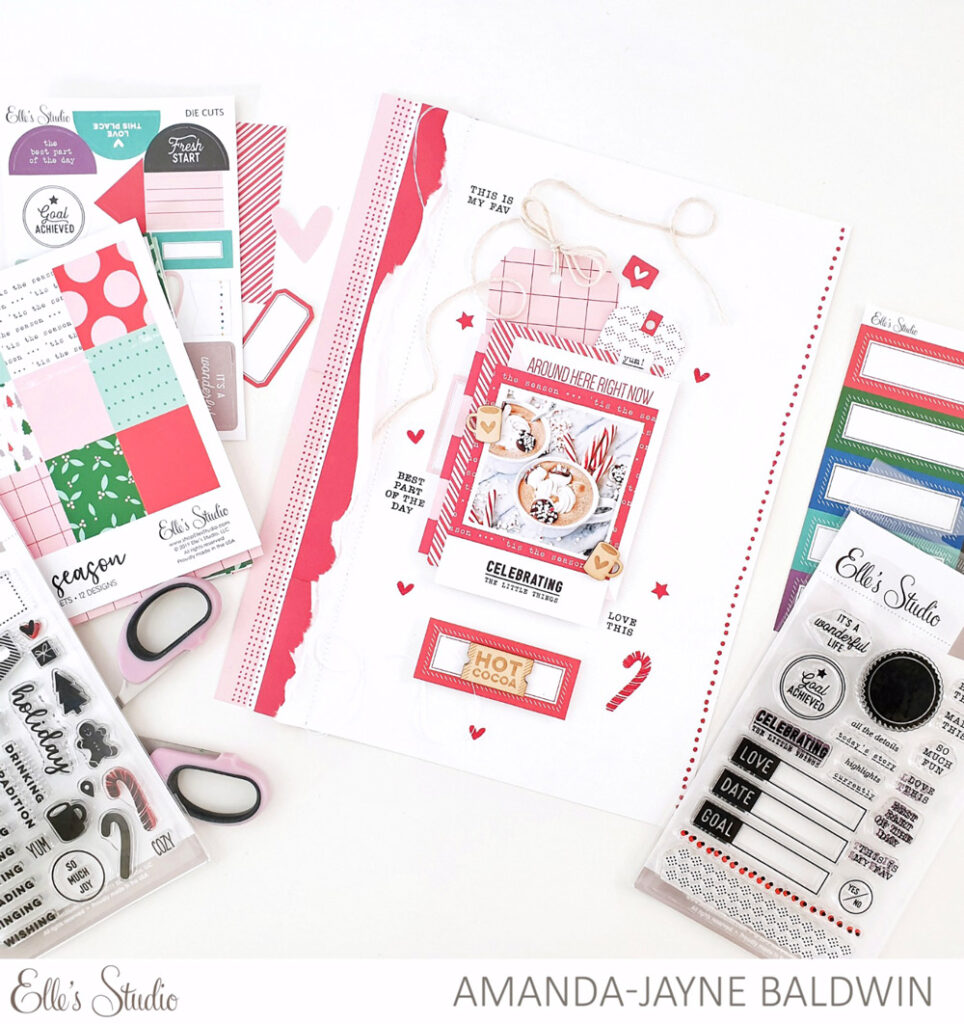
As soon as I saw this month’s kit add-ons I knew I wanted to create some sort of year in review page. My tutorial will walk you through my process for creating this 6” x 8” flip up page.
For starters, you will need to decide on the format of your layout. I used a 6” x 8” pocket page that has all 2” x 2” pockets, but you could also adhere the back of each flip-up to a piece of patterned paper or cardstock if you wanted to work outside of the page protector or do this more as a traditional layout.
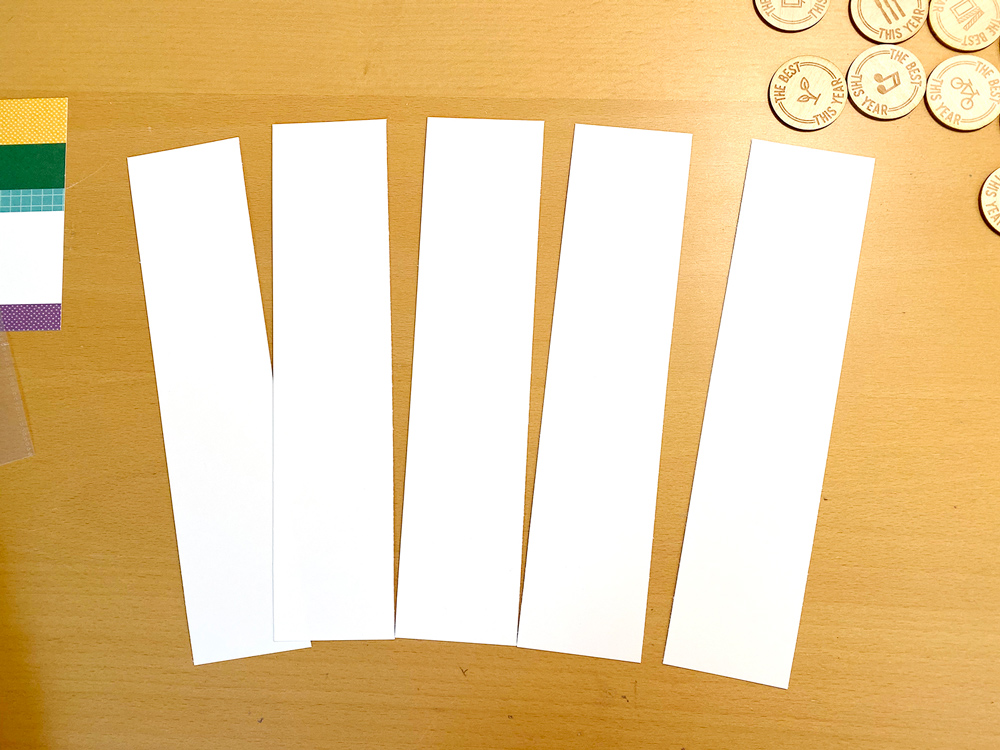
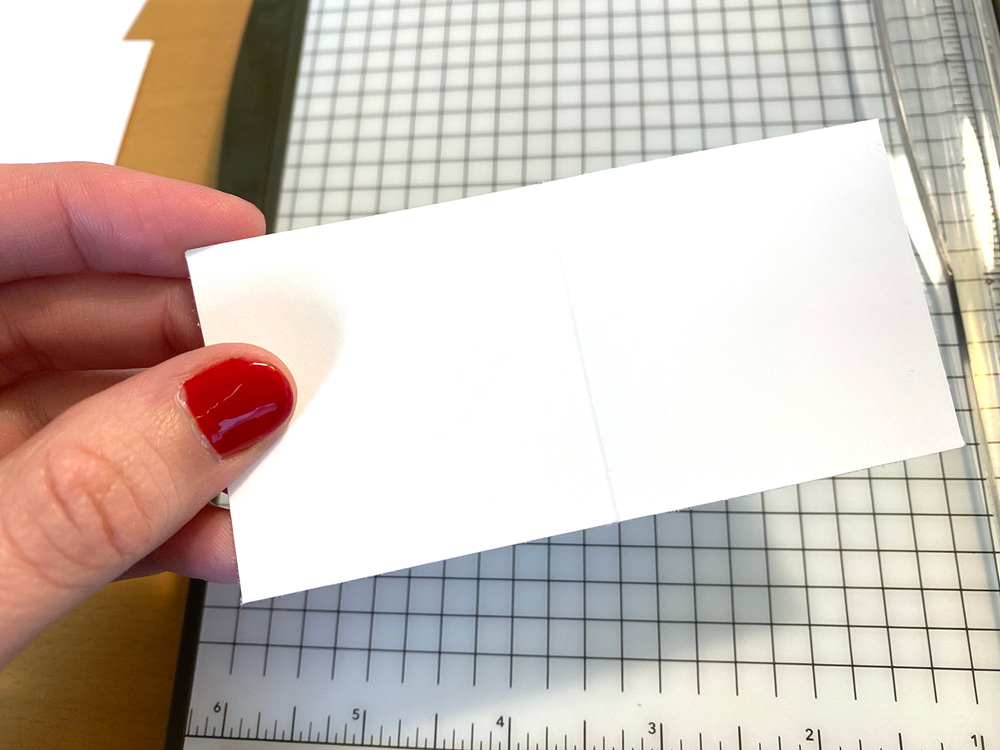
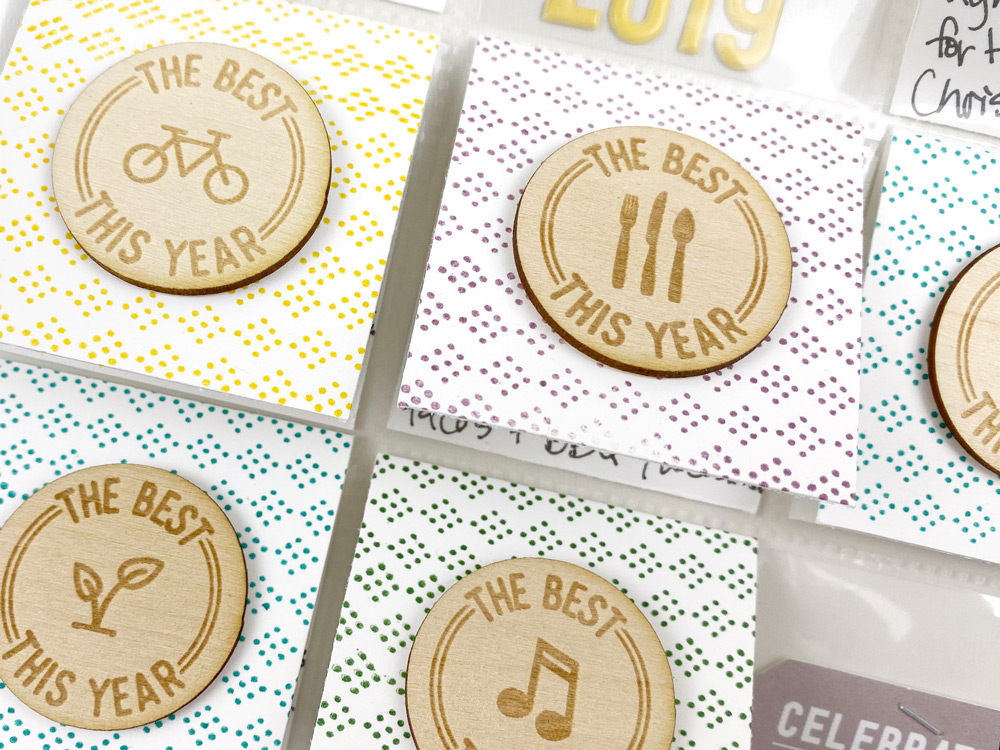
First, begin by cutting smooth white cardstock into five strips measuring 2” x 8”. Trim each strip to measure 2” x 4”, which will create 10 flips, which is exactly the amount of pieces in The Best This Year Wood Veneers. Then, using a scoring blade on your trimmer, a scoring board and tool, or just a bone folder, score each strip at the 2” mark.
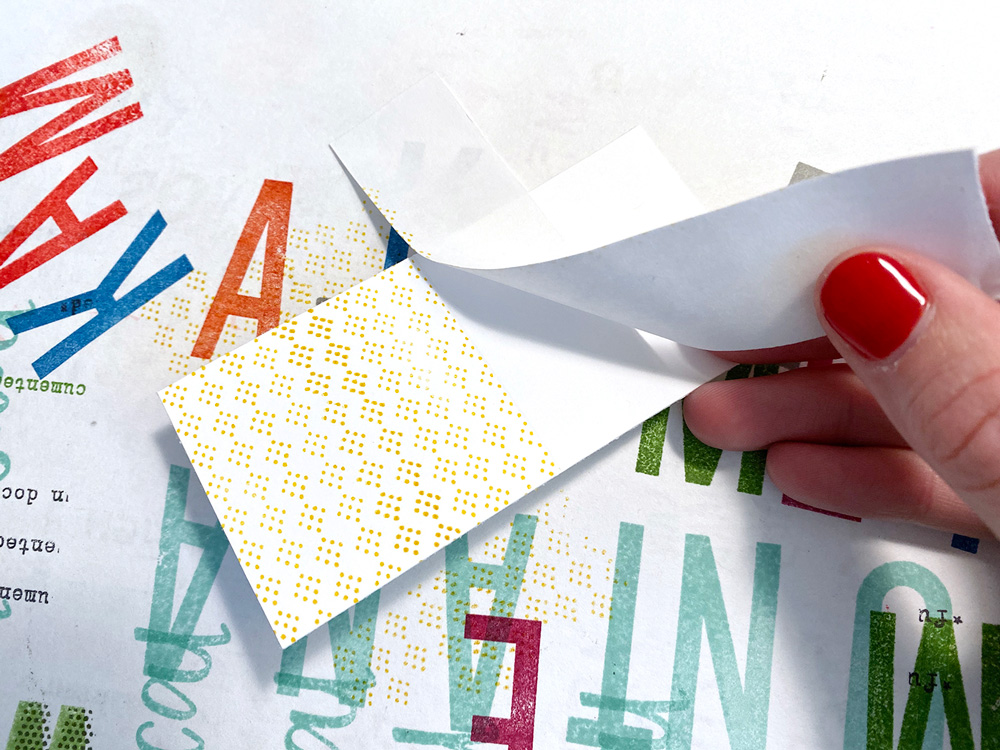
Next, we will tackle the stamping. I love the dotted pattern in the Wonderful Life Stamp and I wanted to use that on the front of each of my flips. I also like that it’s a pretty subtle pattern. I chose my ink colors based off of the striped tag from the December 2019 Kit on the page opposite, so I used blue, teal, green, purple, and yellow for my stamping. I made two flips in each color.
You only need to stamp one side of your scored strips. Before stamping, I used a piece of Post-It Tape along the scoreline to mask the area where I DID NOT want to stamp and to help secure the strip in place while I stamped. (If you don’t have Post-It Tape, that’s okay! You can also use masking tape, washi tape, or a Post-It sticky note). Also, because the stamp is wider than the 2” strip, I used a piece of scrap cardstock to stamp on top of so that the excess ink didn’t get all over my workspace. For each strip, I just repeat stamped the image until I covered the full 2” x 2” space. You can stamp yours however you’d like, or use patterned paper to decorate the front of each of your flip ups.
When my stamping was complete, I carefully removed the Post-It Tape, revealing a crisp clean line along the score in each of my strips. Which, let’s face it, might just be one of the most satisfying crafty achievements ever!
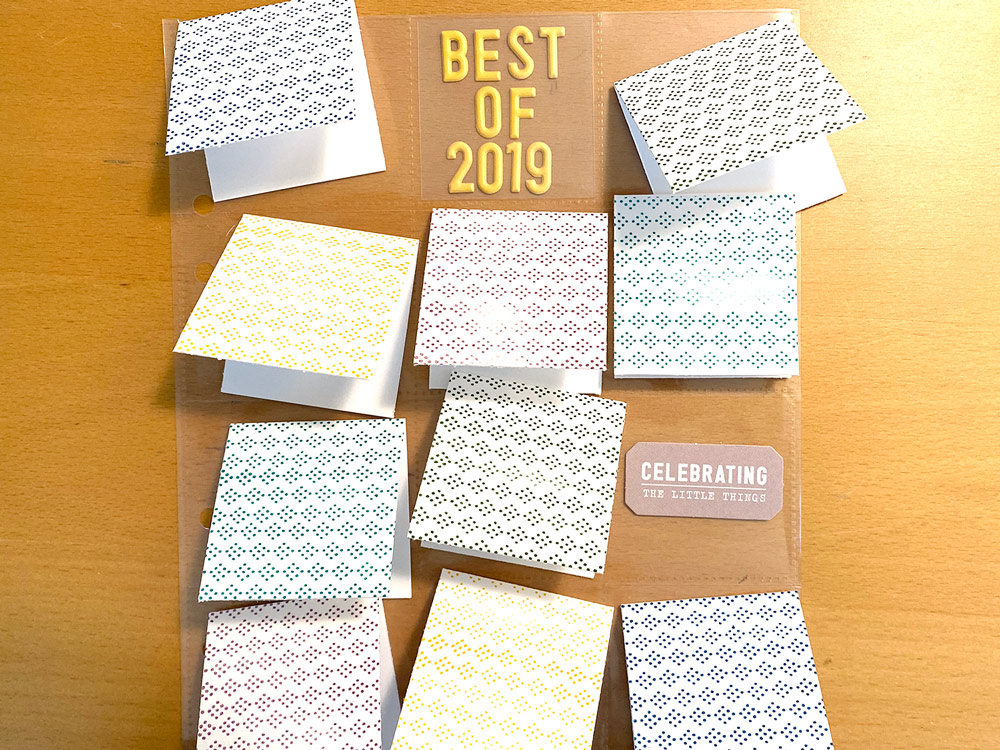
To create the fold in each strip, I used a bone folder to fold each in half along the scoreline. I did this a few times each to make it as flat as possible. The next step is to figure out your layout and placement of each flip up. If you use multiple colors in your stamping, you will need to consider that when laying everything out. For example, I didn’t want any of the same color adjacent to each other and wanted to break up the darker colors as much as possible in the grid.
To fill the two pockets that were leftover, I used a transparency cut down to 2” x 2” and added the Yellow Puffy Alphabet Stickers to spell out “Best of 2019” and used one of the labels from this month’s die cuts included in the December Kit.
Next, I adhered one wood veneer from the The Best This Year Wood Veneers to each flip up on top of the stamping using glue dots, or another heavy adhesive.
On the inside of each little flip up, I wrote my response to each category prompt on the wood veneer. On the top side of the flip up (the backside of the front) I wrote one word to indicate what each category was. For example, for the music note, I wrote “Music” on the top and a tiny amount about some of my favorite music this year.
To finish out the double page spread, I added the Yellow Puffy Alphabet Stickers spelling out “2019 in Review” to the striped 3” x 4” journaling tag and wrote more journaling on another 3” x 4” tag and added that into the opposite pockets. Then, I added one of my favorite photos of our family from this year doing my favorite activity of the year: riding the Skyliner at Disney World! It just happened to match the colors of the layout perfectly, which was a nice treat. I added another die cut from this month’s kit to the photo and one of the December Label Stickers so I could include a little extra context to my photo.
I am really thrilled with the way this turned out and how I executed the idea pretty quickly. You’re invited to try this technique for your end of the year wrap up pages. If you try it, please tag #EllesStudio on Instagram so we can see how yours turns out! I hope you all have a wonderful end of the year and start of the new decade!
Comments Off on Year in Review Flip Up Tutorial with Stephanie Grimes | Share This
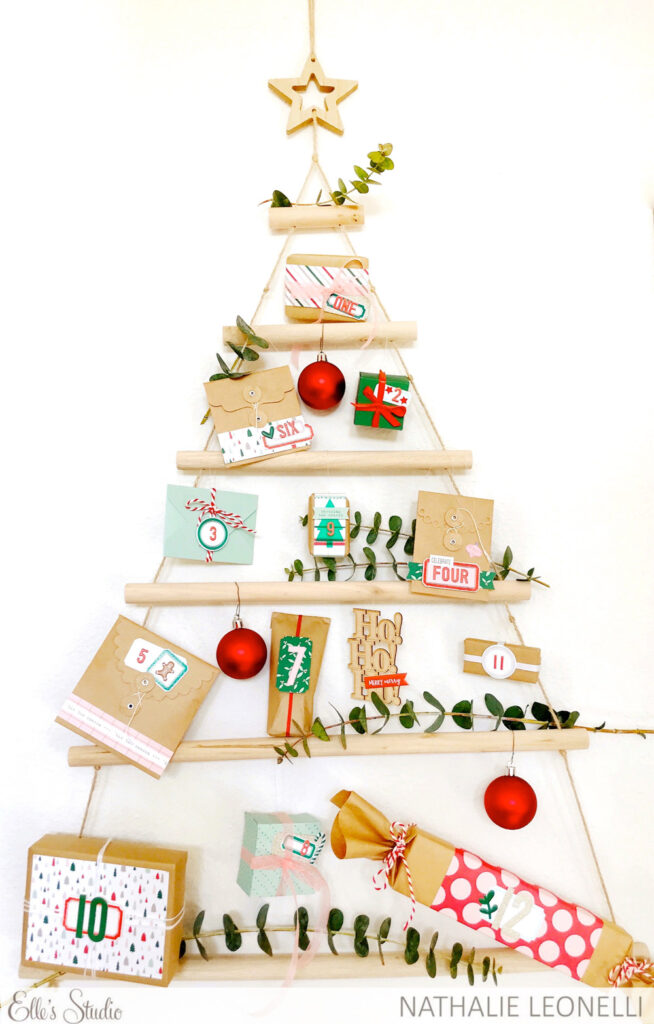
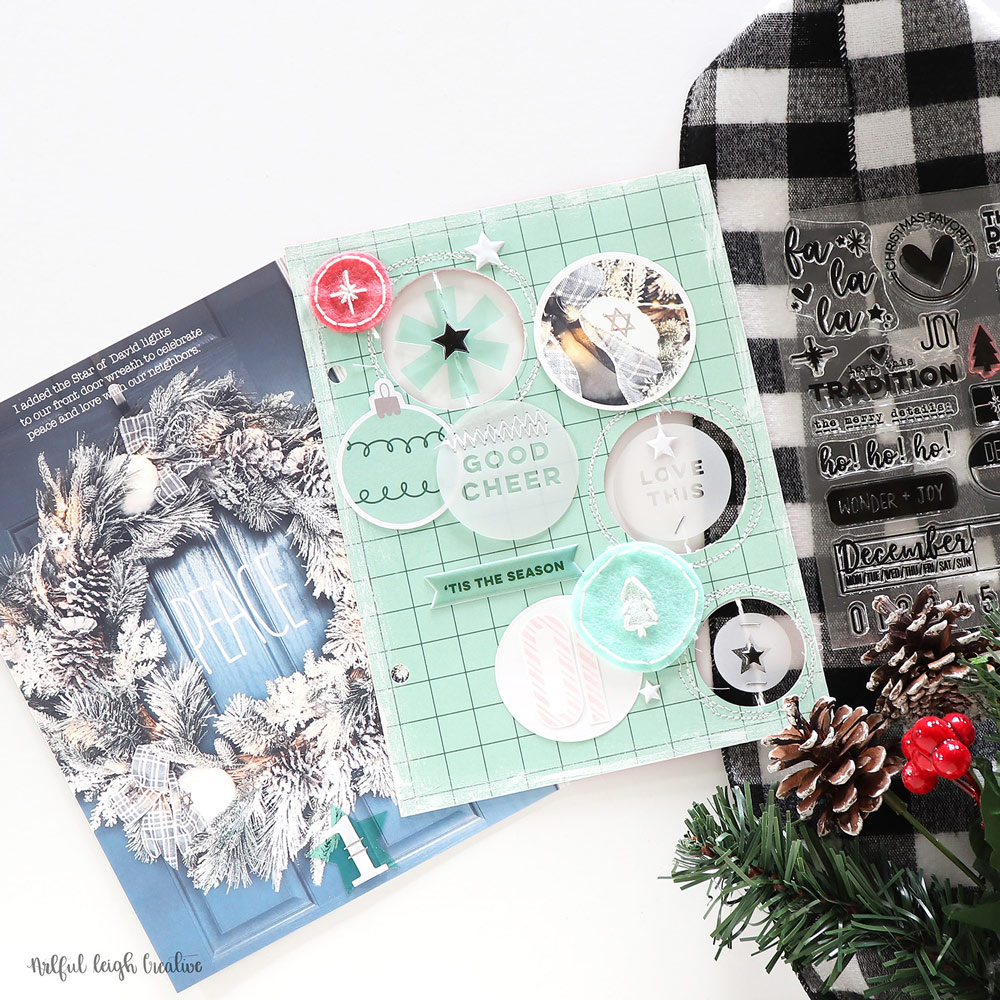
If you didn’t have enough time to create or purchase an advent calendar this year, why not create an abbreviated version to celebrate the 12 days of Christmas? Design team member Nathalie Leonelli is with us today to share how she did just that using our new monthly kit and add-ons, and as a bonus, it doubles as holiday decor! Let’s take a look and get inspired!
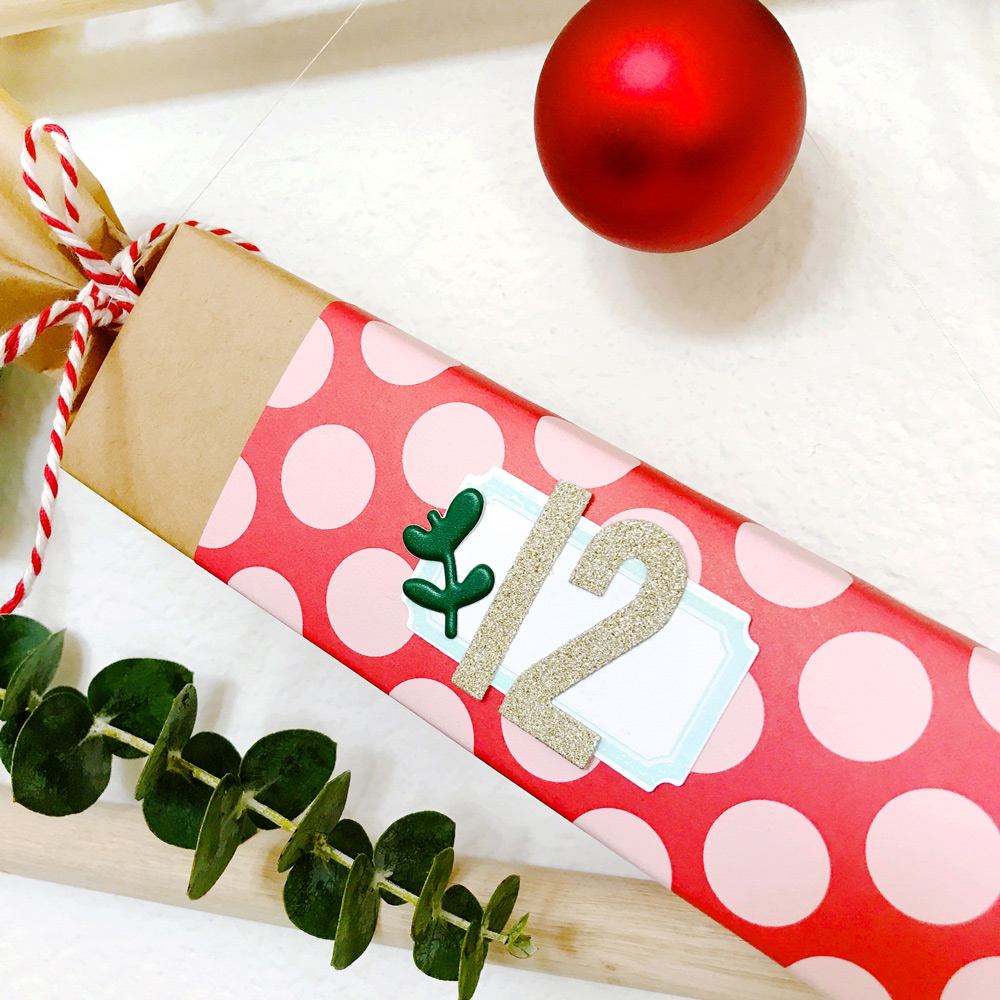
Hello, this is Nathalie and I am here to share a new and festive project. Inspired by the fabulous combination of Labels Stamp and matching Labels Metal Die, I decided to create a 12 Days of Christmas “tree” for my family room. I wrapped twelve gifts and used the stamps and dies to add the numbers on each one:
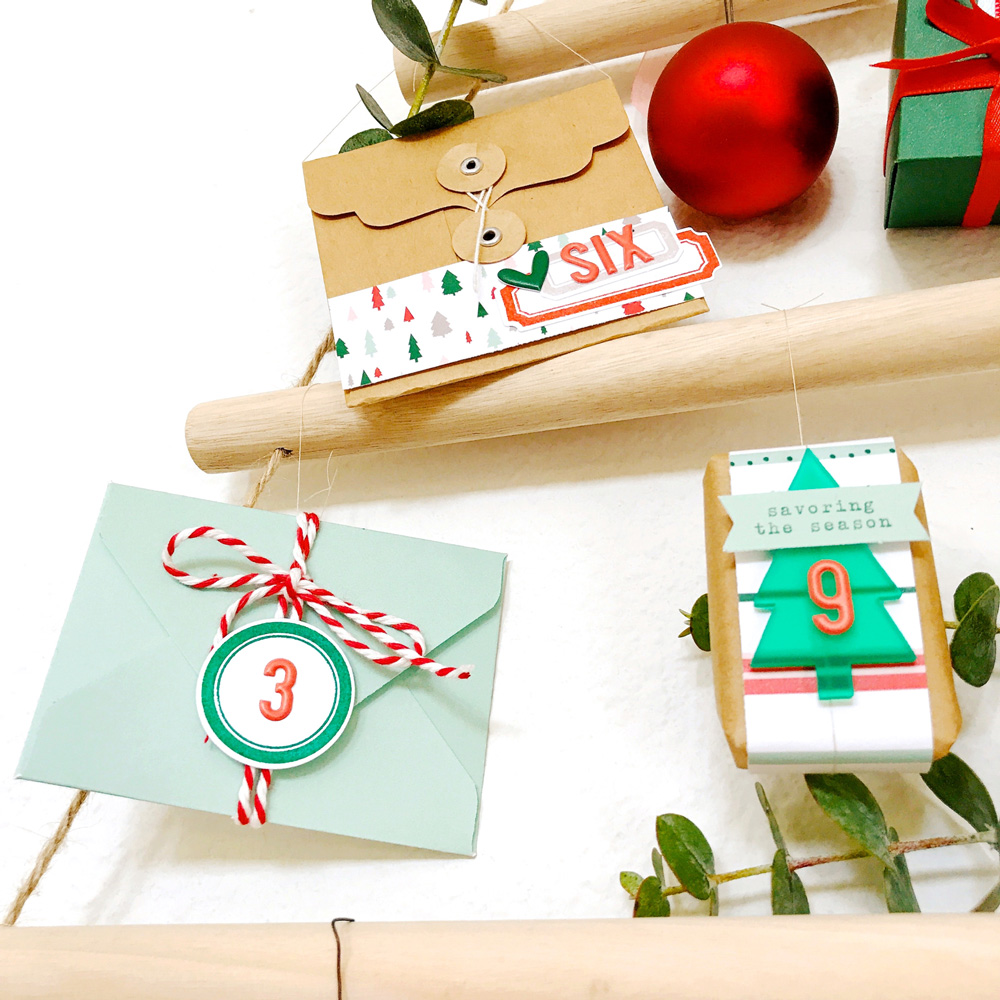
The beauty of the Labels Stamp and Metal Die is that you can create an unlimited amount of labels in the colors of your choice. I picked ink colors that matched the ‘Tis the Season 6 x 6 Paper Stack since I used a lot of its papers to wrap and decorate my small gifts.
I heat embossed most of them, even though I had never done heat embossing before. I dove in, made a mess and had tons of fun in the process! It was great to have such a variety of sizes and shapes in the set.
I played with different techniques like negative cuts and combining two metal dies, like below where I cut a number inside a label. I also created layers using several stamped labels in different colors and sizes.
I love this project so much, I believe I will make one every Christmas! And with the Labels Stamp and Metal Die now in my permanent stash, I will always be able to create labels that match, no matter what I wrap my gifts with! Plus, it’s been fun to have my kids open a package or envelope each day.
I wish you all a wonderful Christmas and crafty New Year!
Comments Off on 12 Days of Christmas Tree DIY with Nathalie Leonelli | Share This
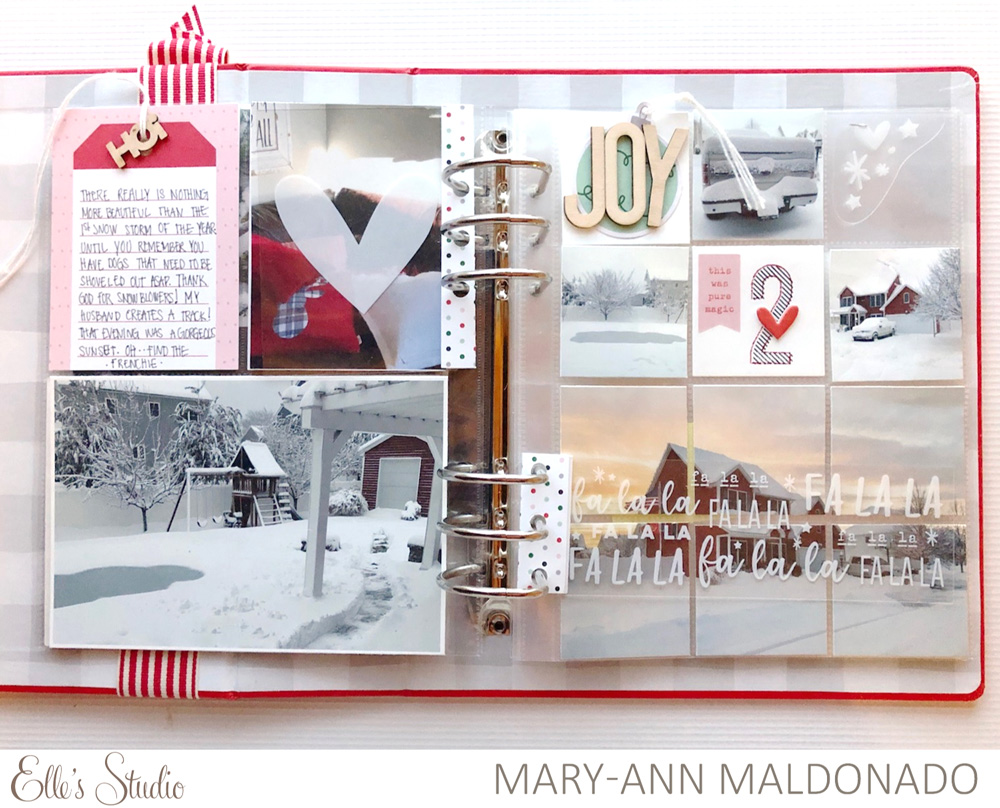
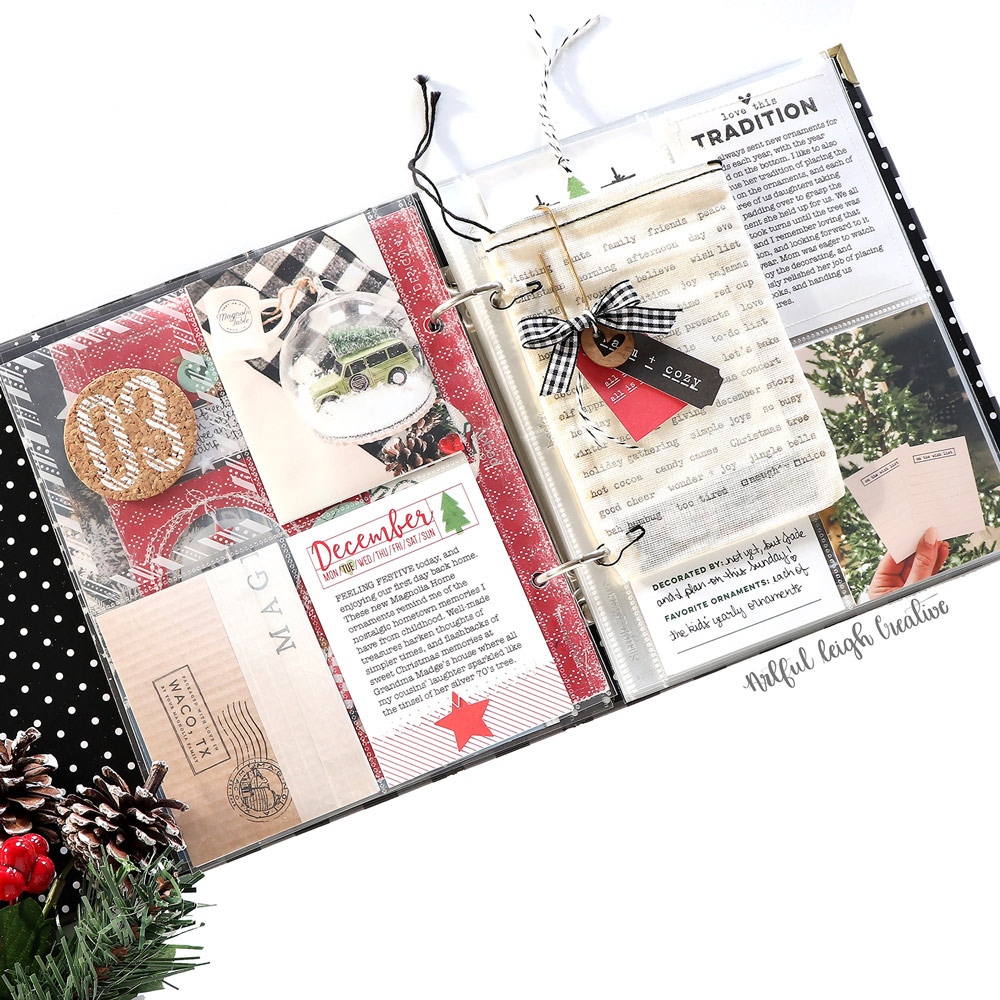
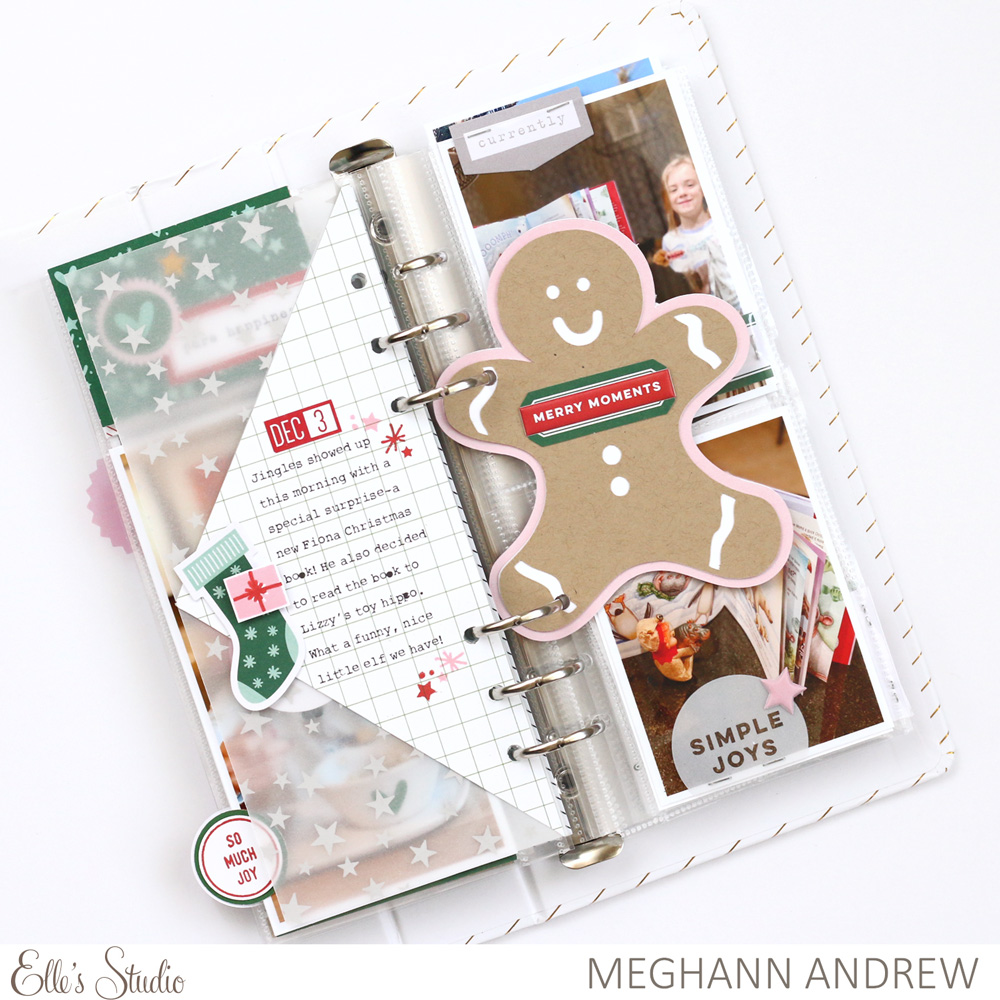
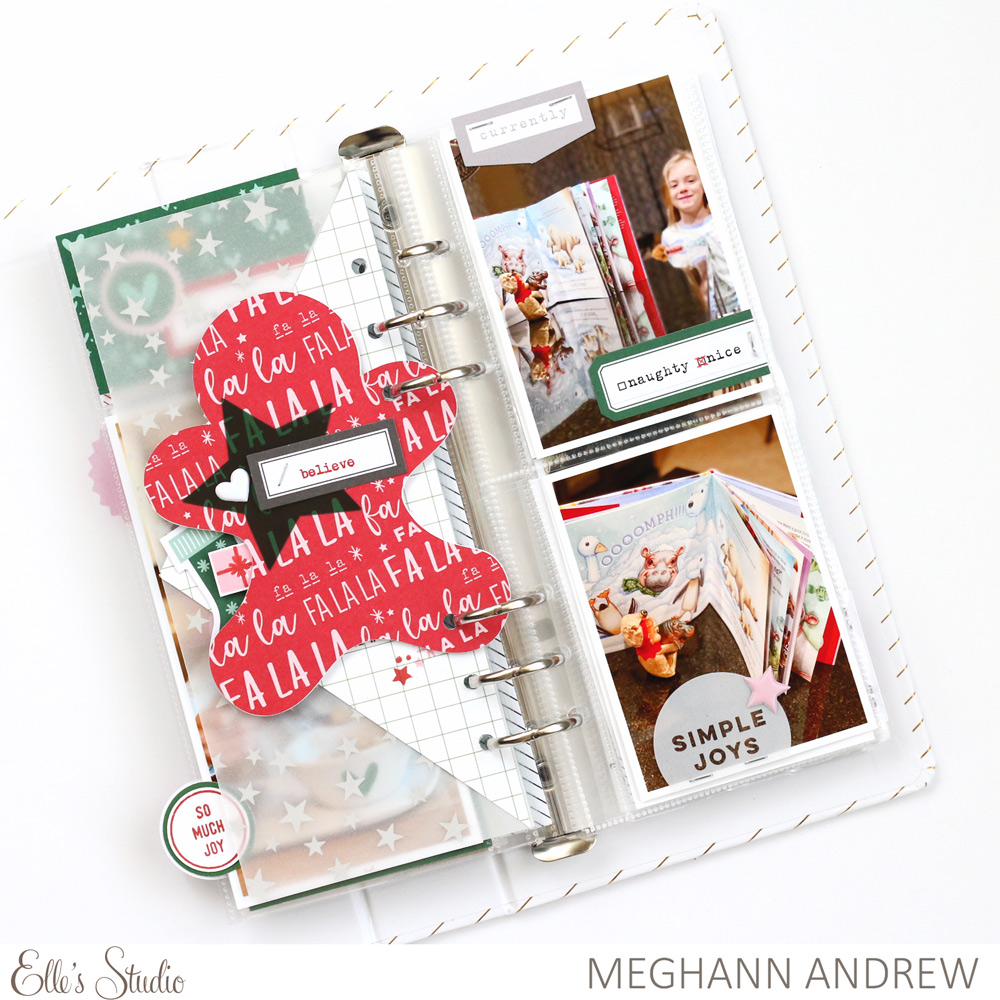
We’re all busy with our holiday preparations, but we can still make time to record the memories we’re making along the way this month with our latest monthly kit and add-ons, which coordinate beautifully with the Document December collection! Today Mary-Ann Maldonado is here to share a spread from her December so far. Let’s take a look!
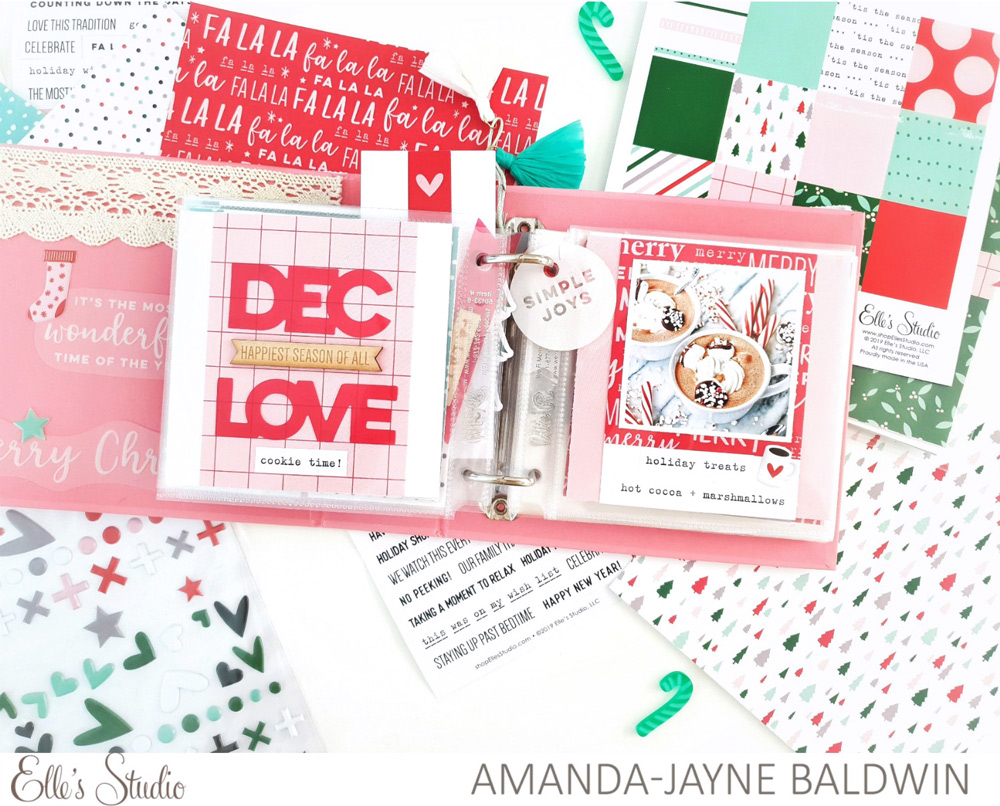
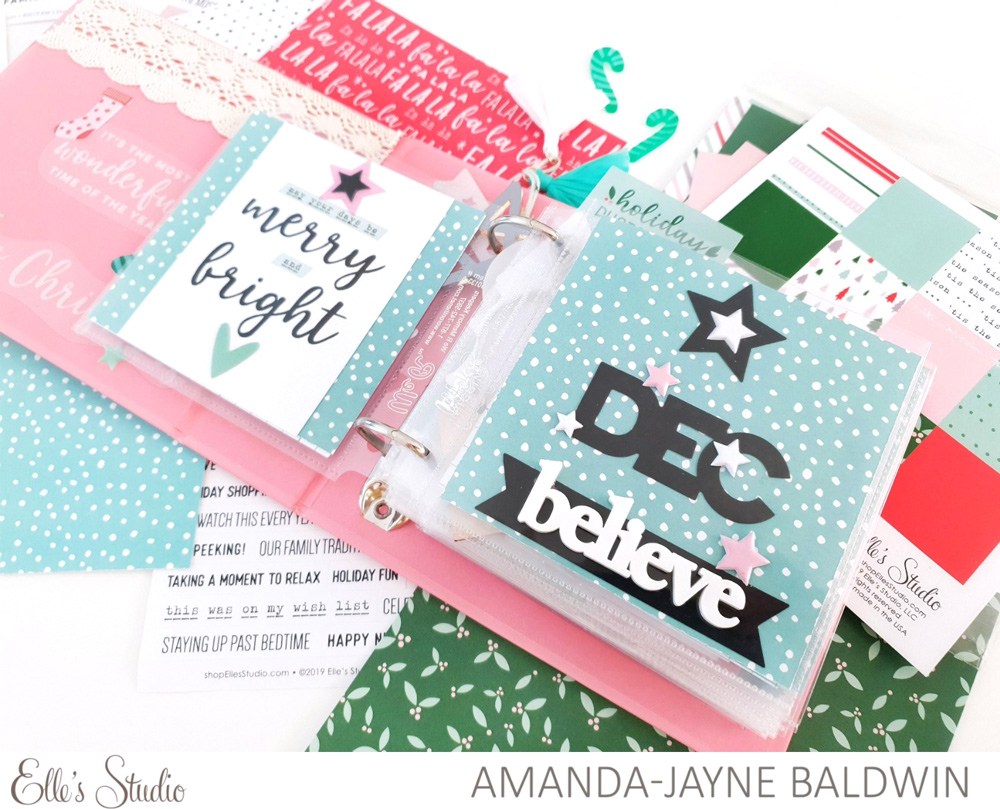
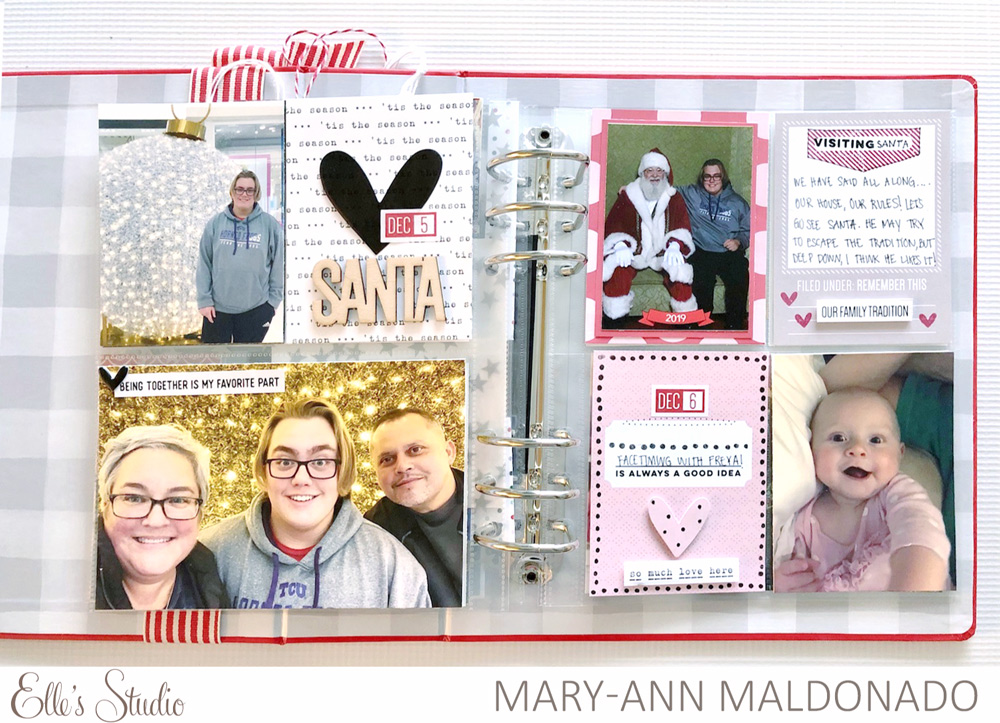
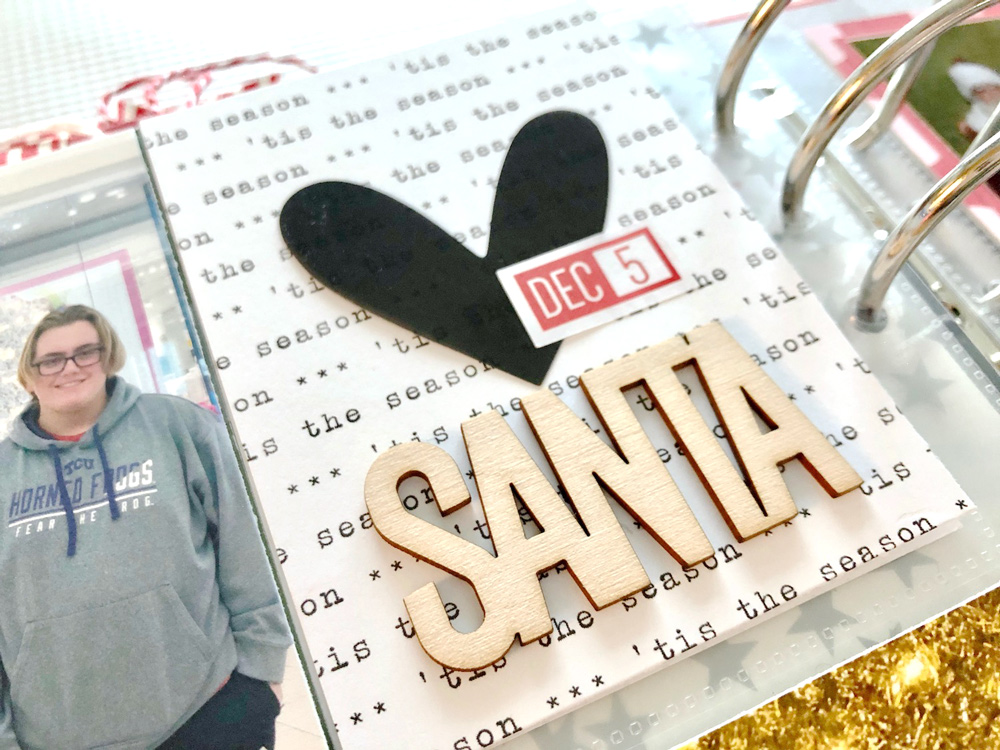
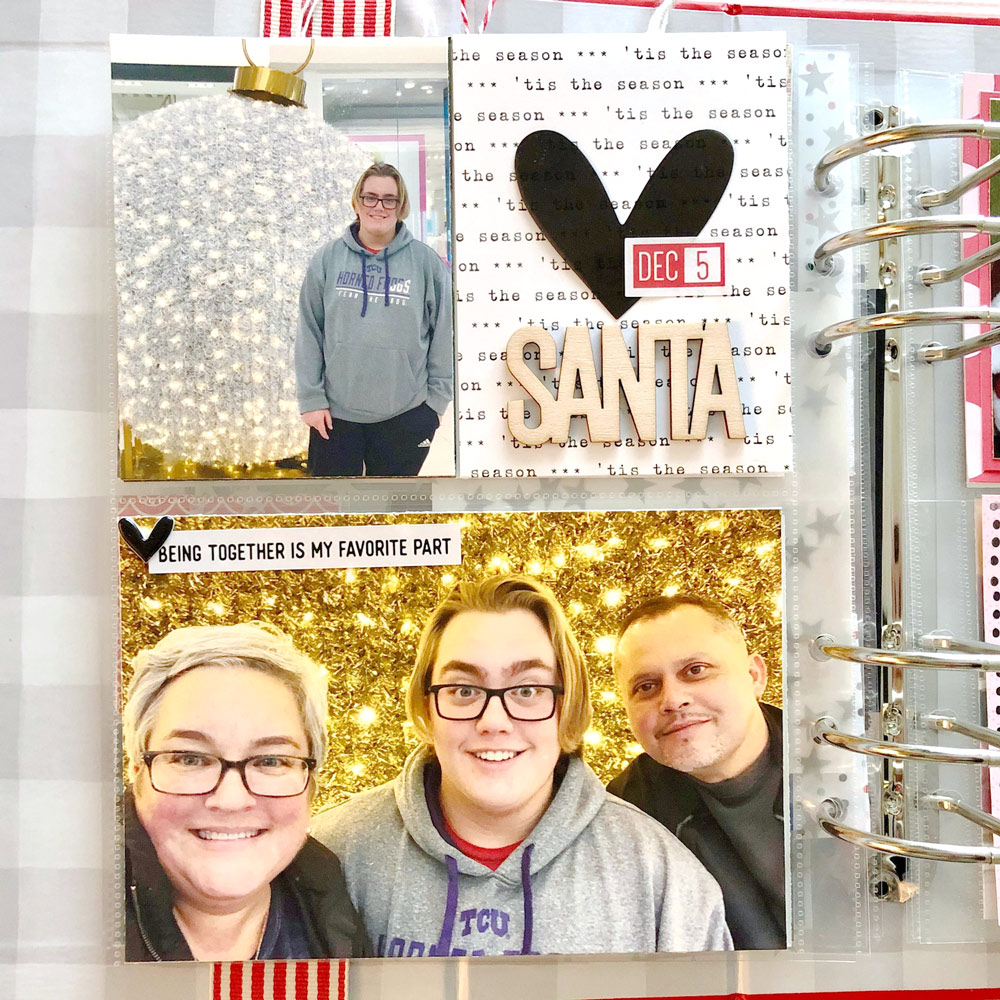
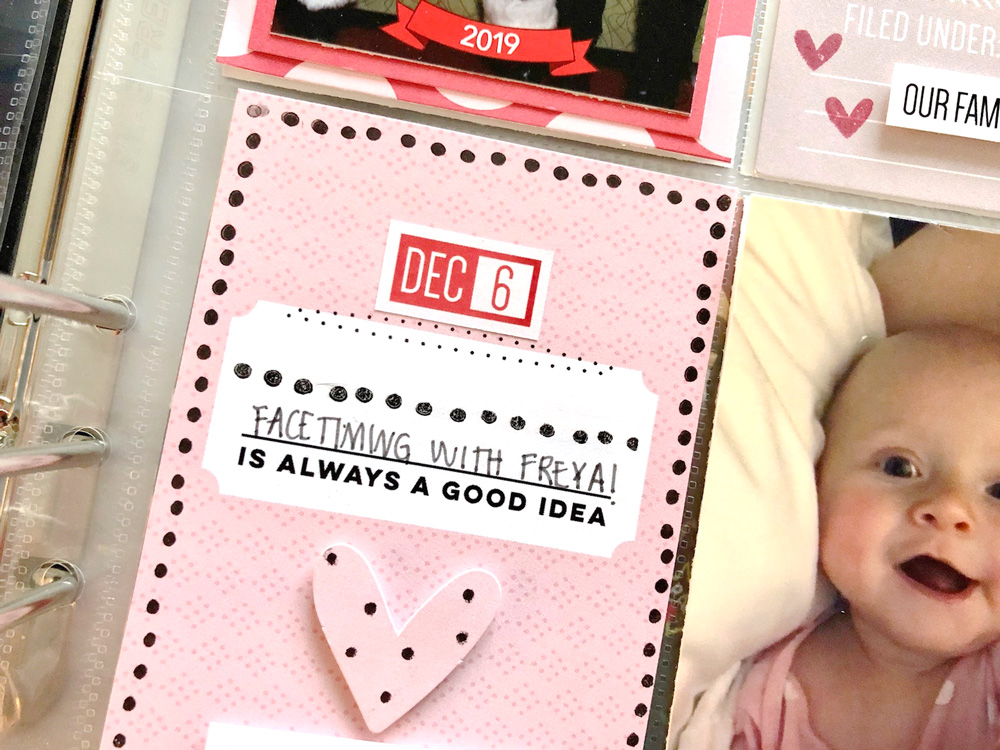
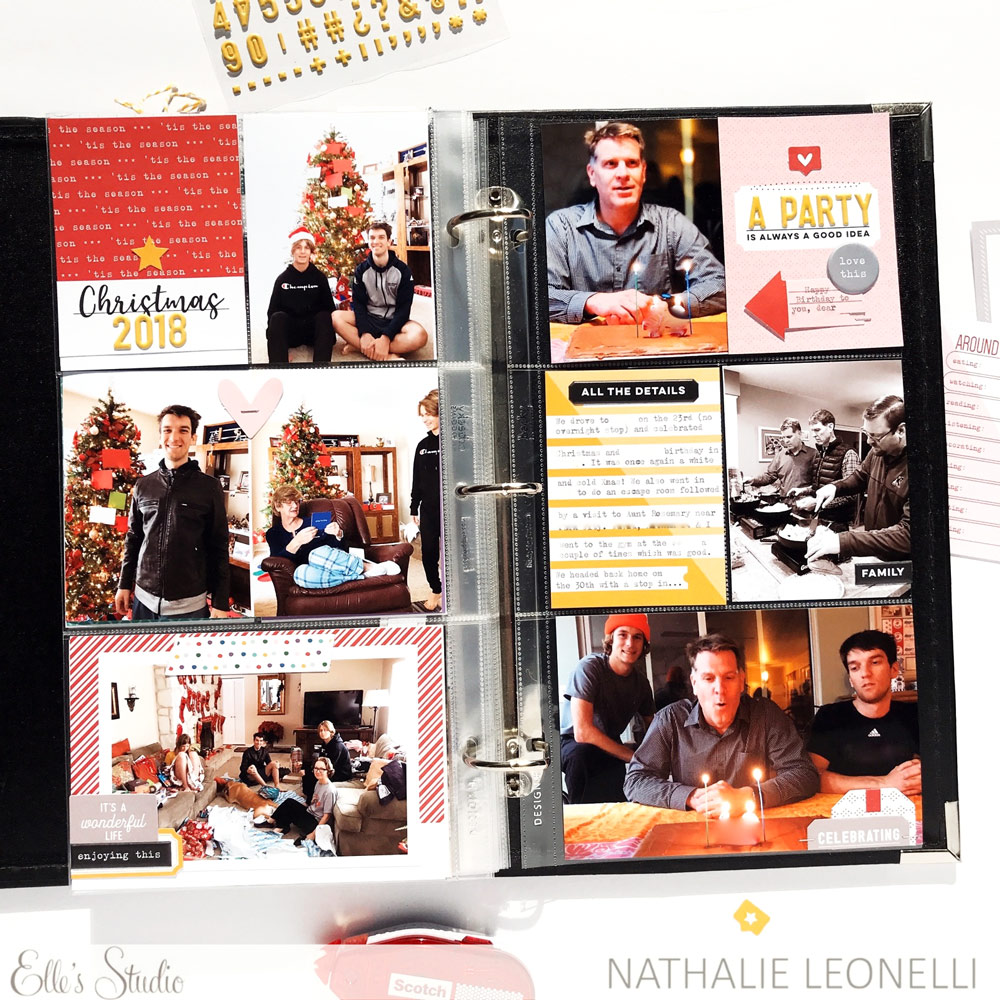
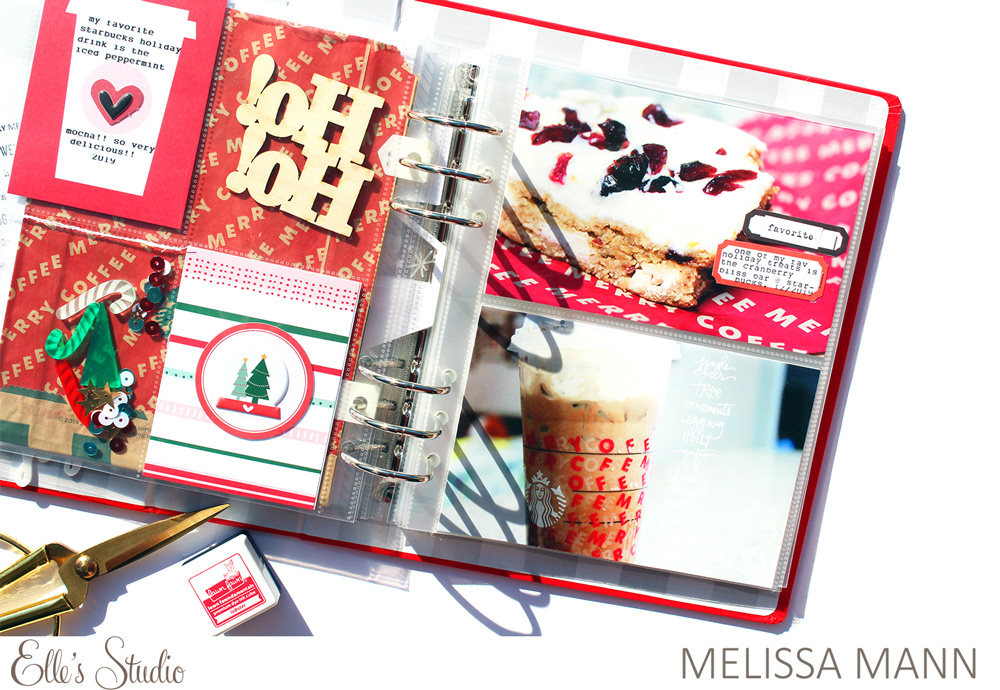
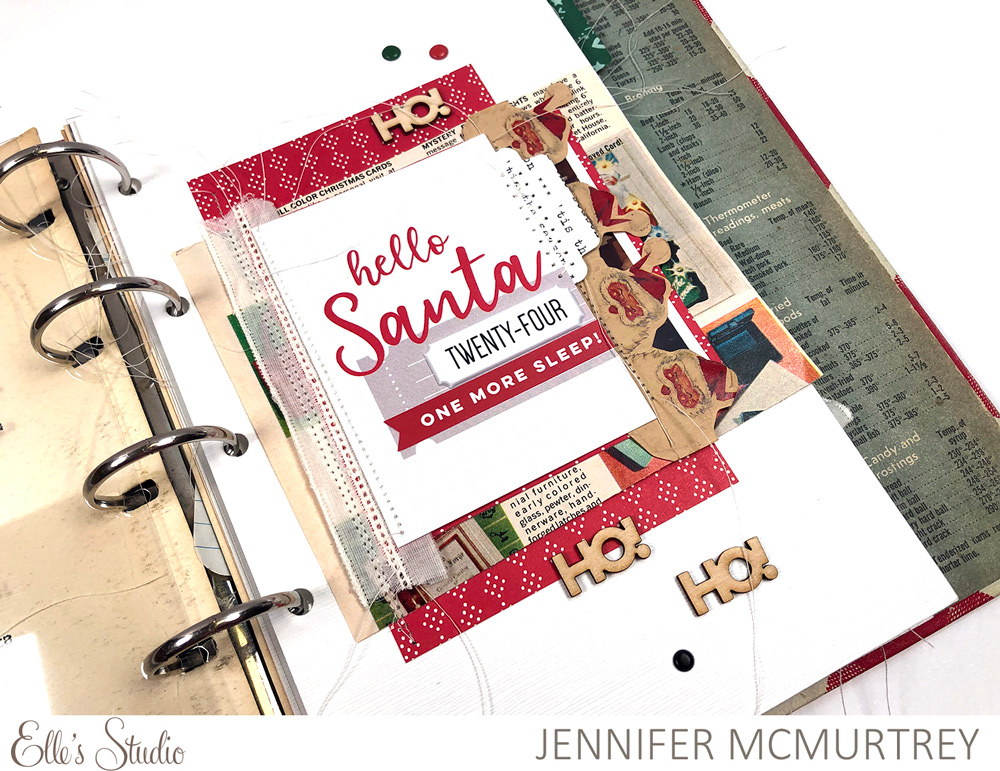
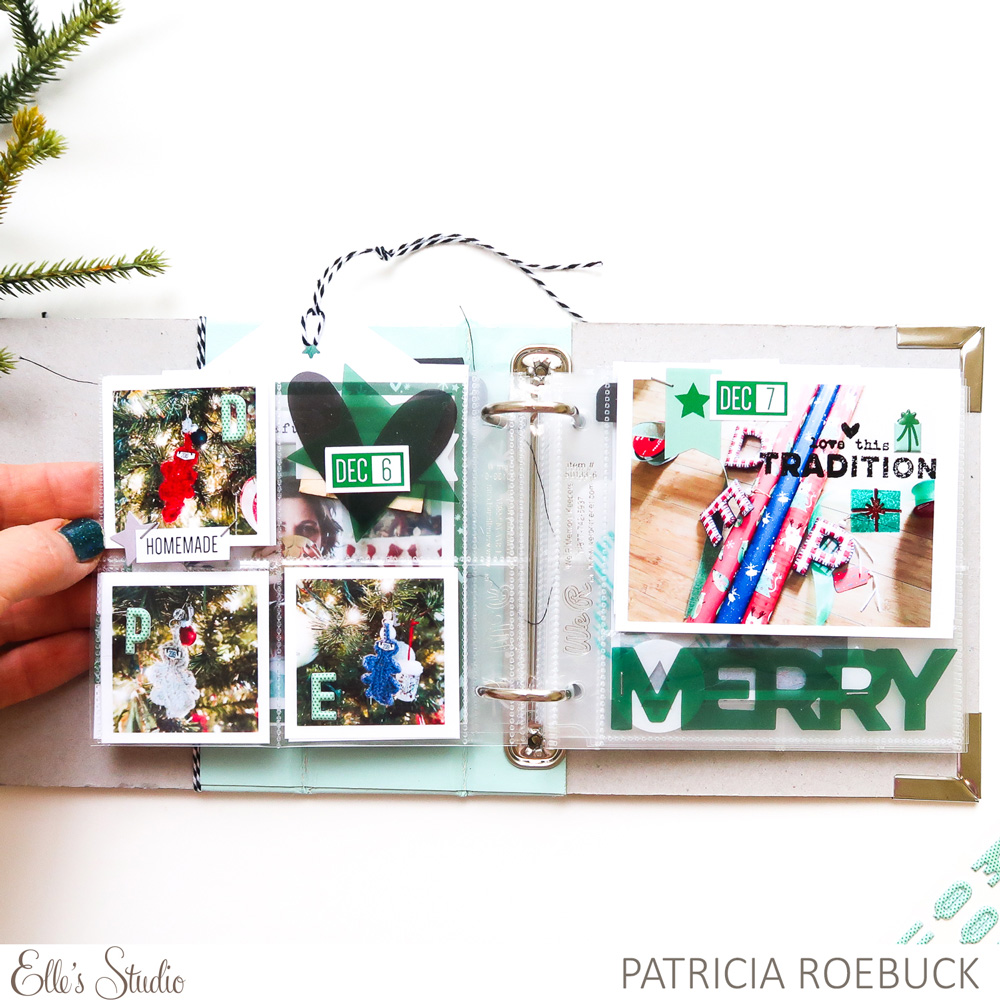
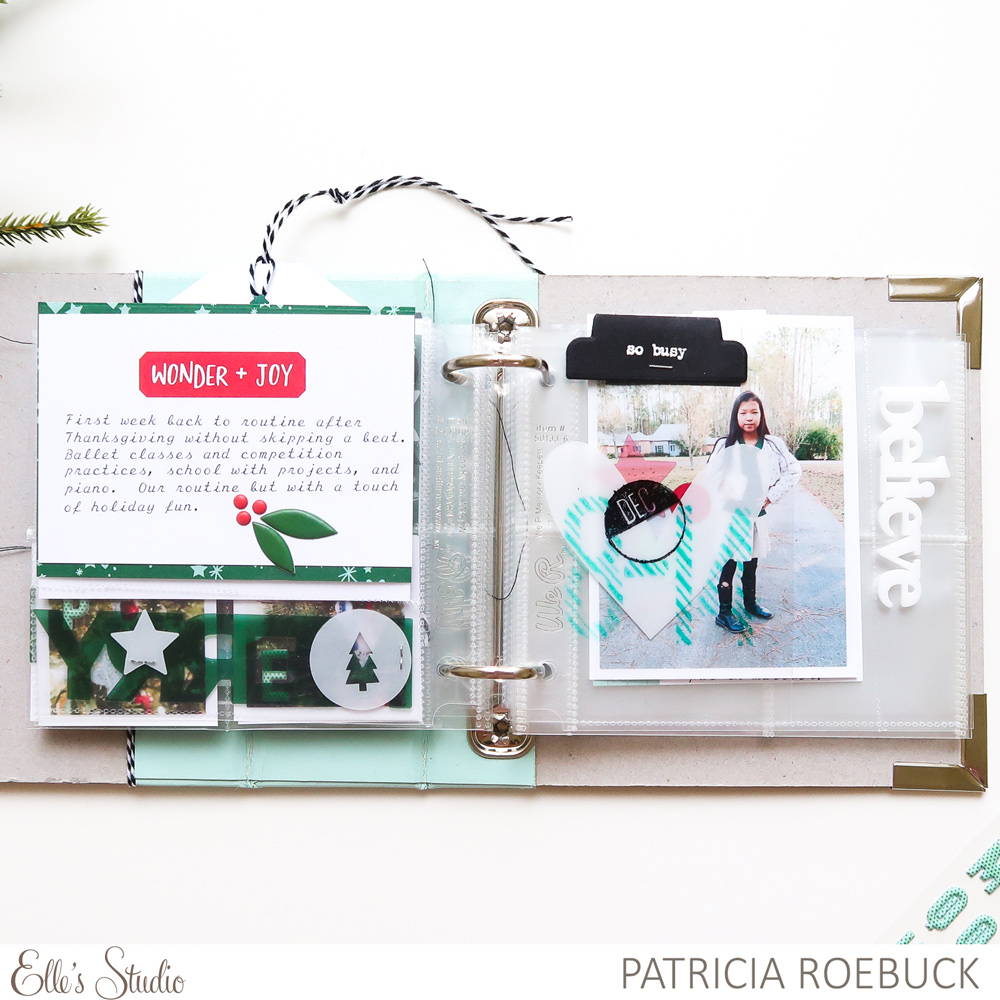
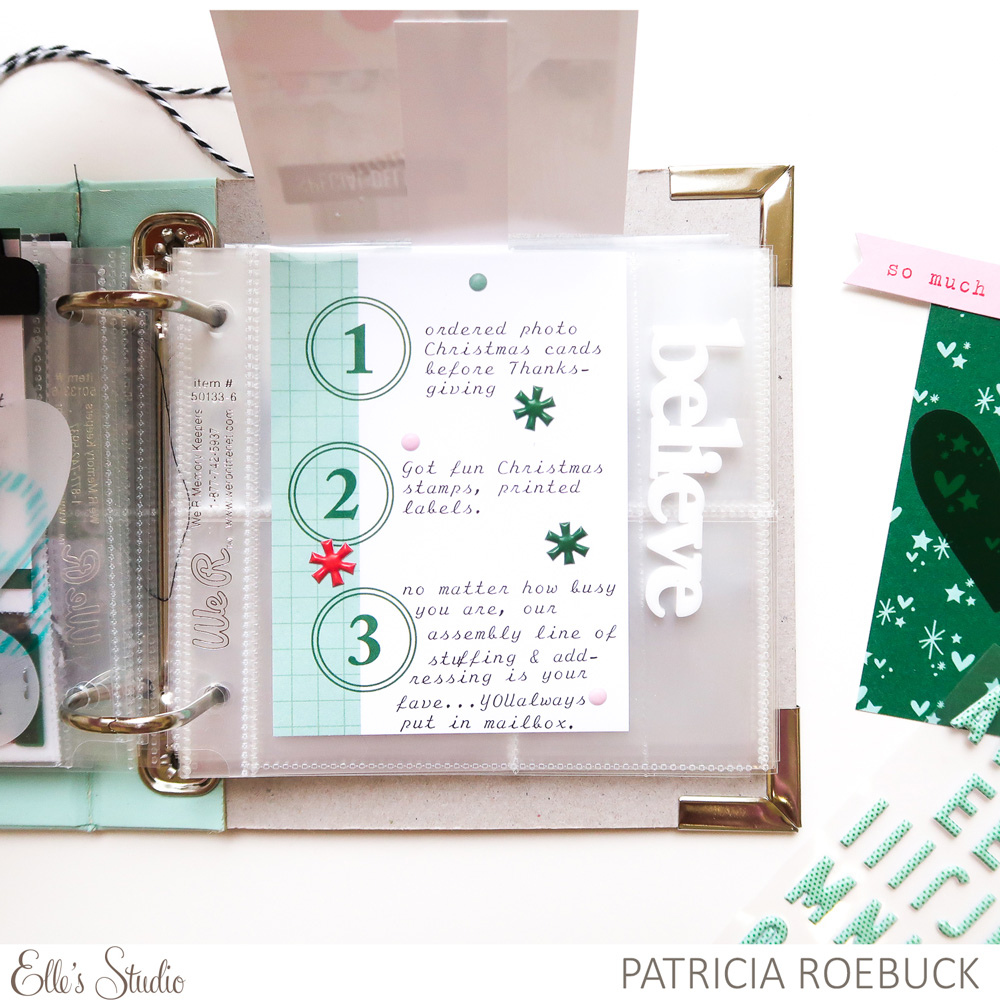
Hey everyone! Today I am sharing a spread from my Document December album. I had a lot of fun creating this spread with fun holiday photos and pinks hues because of my niece!
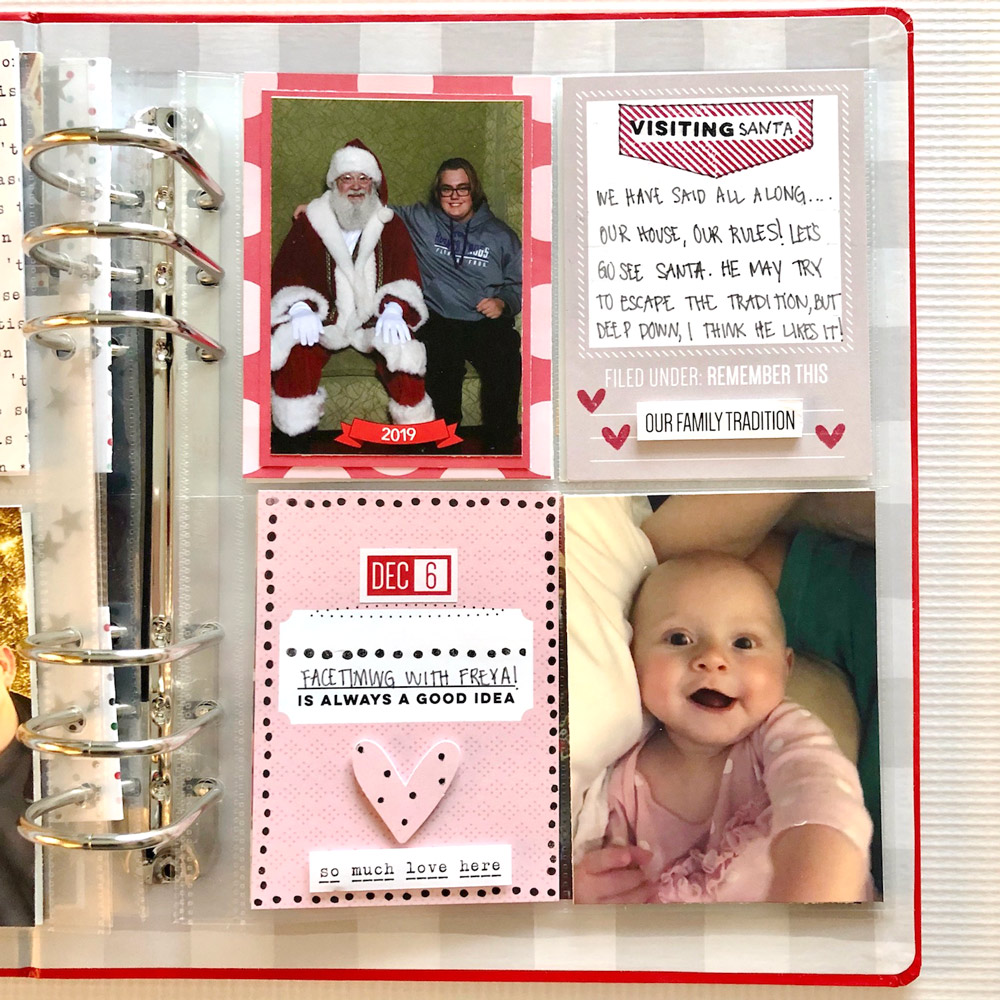
On the right side of my page, I used a photo of my niece during one of our Face-Timing sessions. I’ll take any opportunity to use pink, so I grabbed the “_____ is always a good idea” journaling tag from the December 2019 Kit and paired it with the red and pink polka dot paper in the pocket above.
To be honest, I added polka dots to the heart die cut because I accidentally stamped black ink on it when creating the border on the journaling tag using the Wonderful Life Stamp. By adding my own dots, you can not even tell I had made a mistake!
Today is my last post with Elle’s Studio. I have really enjoyed creating with such fun product, and I hope the project that I created shows that! I hope I have inspired you over the past year and I thank you for your kind words and support!
Comments Off on Merry Moments with Mary-Ann Maldonado | Share This
December may be a busy month, but we hope that these eight projects inspire and encourage you to find some time to create this month, using our new monthly kit and add-ons! Let’s take a look at what the team created.
Share your projects with us! Simply post to Instagram using the hashtag #EllesStudio or share with fellow Elle’s Studio fans in our Facebook Group! We’d love for you to join us there!
Comments Off on December Design Team Inspiration: Volume Two | Share This
Personalized wrapping puts that special touch on any present, whether store-bought or handmade, and today design team member Kristina Proffitt is with us to share how you can make three different sweet and simple tags with product you have on hand for your Christmas gifts! Let’s take a look:
One of my most favorite things to do during the holidays is to give handmade gifts. Not only are they super sentimental, but I feel like they are just so much more cherished and treasured than something that you could buy at the store. So every opportunity that I get to make something for someone, I do—just ask my family! I also love to make gift tags, too! Today I’m using some goodies from the December kit and add-ons along with some other goodies from the Document December collection. It was easy and so much fun!
I decided to create three different types of tags. The first, and simplest idea is to use a regular shipping tag as a template for handmade tags. For the first tag, I used this method using white cardstock, which I covered with three different patterned papers. Along the bottom I used a solid red paper from the ‘Tis the Season 6 x 6 Paper Stack, cutting fringe along the bottom edge. That stack is SO versatile and I just love it! I placed a couple of stickers on it, punched a hole in the top and threaded a large grosgrain ribbon through it. It is simple, but so pretty!
To create this tag I used a smaller shipping tag that I had on hand as a template, cutting the 3″ x 4″ polka dot journaling tag from the December 2019 Kit. I added a red banner sticker, along with wood veneers from the Document December 2019 Kit and the Winter Wood Veneers to the twine that I threaded through the top. The last thing I did was use the super cute Mint Green Polka Dot Puffy Alphabet Stickers to say FOR YOU. This tag would be perfect to add a pocket to the back and stuff with a gift card to a favorite cafe!
For the last gift tag, I decided to do a circle shape and just love the way it turned out—almost like it’s a Christmas ornament! I punched a large 3″ circle out of white cardstock and patterned paper, adhered them together, then added a strip of the mint green paper near the bottom of the tag. Next, I added a phrase sticker from the Document December 2019 Kit to the mint strip with a star wood veneer next to it before punching a hole in the top and threading with twine. It’s super simple, but so sweet looking!
To personalize these tags even more, you could add a photo to any of these designs. You could also create a larger tag and include it in your Document December album, creating a super cute addition!
I hope this encourages you to add a handmade touch to the gifts that you buy this holiday season. I encourage you to pull out your products and use them to whip up some simple, beautiful gift tags for your loved ones. They will love the extra special touch and you will love that you found even more great uses for the beautiful products that you buy from Elle’s Studio!
Show us how you’re creating handmade with Elle’s Studio products! Share your creation on Instagram using the hashtag #EllesStudio or in our Elle’s Studio Facebook Group!
Comments Off on Simple Handmade Gift Tags with Kristina Proffitt | Share This
Welcome to the second day of our Document December weekend inspiration posts! Today we have six more design team members sharing their projects with you, using our Document December products and more from our monthly kit and add-ons! Here’s what they created this week:
Share how your Document December project is taking shape by posting it on Instagram using the hashtag #EllesStudio, or in our Elle’s Studio Facebook Group! We’d love to see how you are documenting your holiday!
Comments Off on DOCUMENT DECEMBER INSPIRATION: WEEK 02, DAY 02 | Share This
Hello and welcome to week two of our weekend Document December inspiration posts! Our design team has been hard at work documenting the first week of their December, and we hope what they have to share with you helps you get yours documented, too! Let’s take a look:
What wonderful projects, and how fun to see how everyone is prepping for the holiday! Come back tomorrow for the other half of our Document December project inspiration, and until then, go wrap some presents!
Comments Off on Document December Inspiration: Week 02, Day 01 | Share This
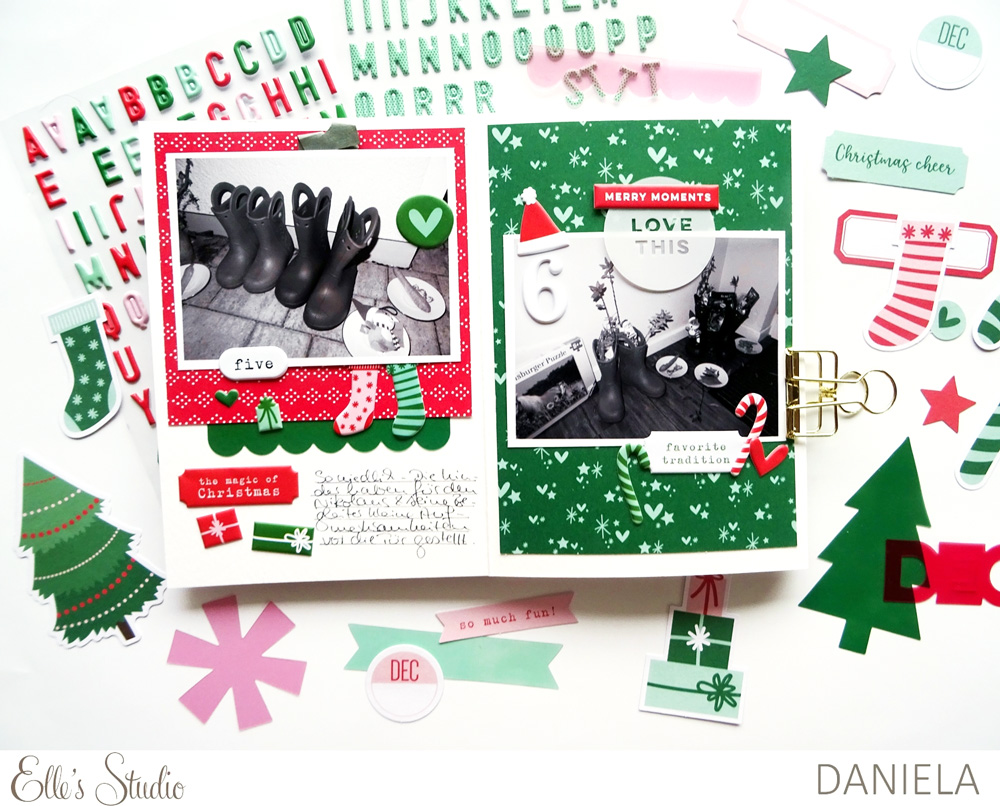
A handmade card certainly tops one purchased from a store, and design team member Daniela is here to share just how easily you can create a duo of cards using our newest products in the shop! Let’s take a look at her beautiful card designs!
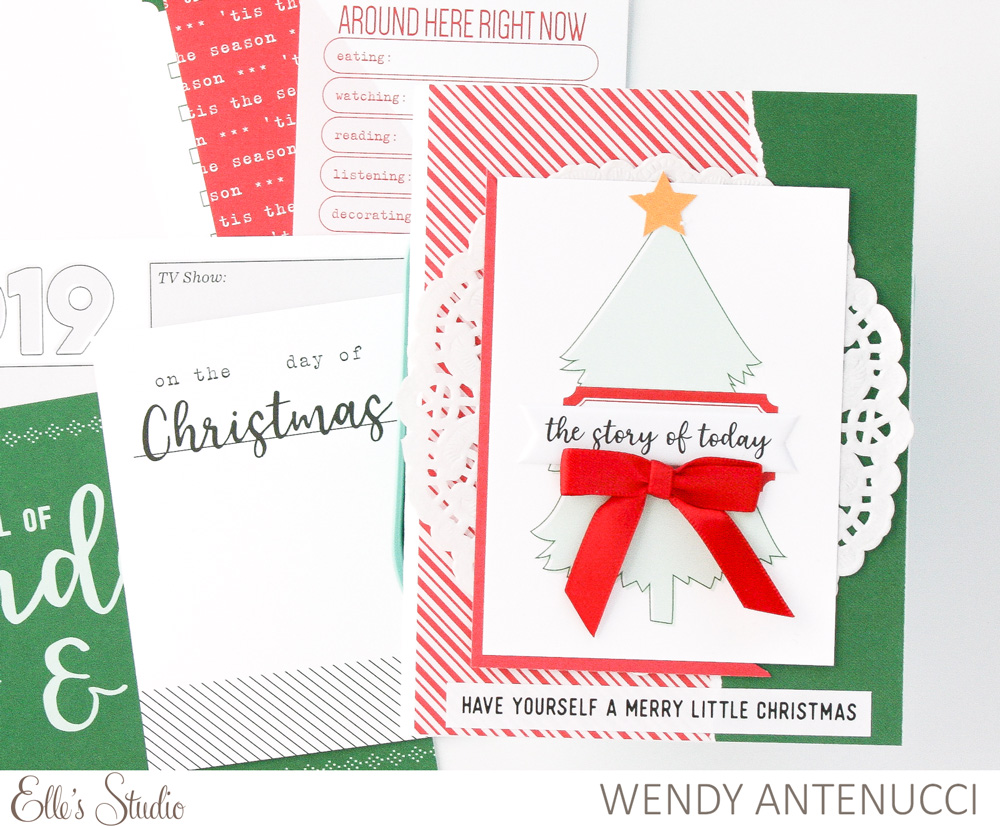
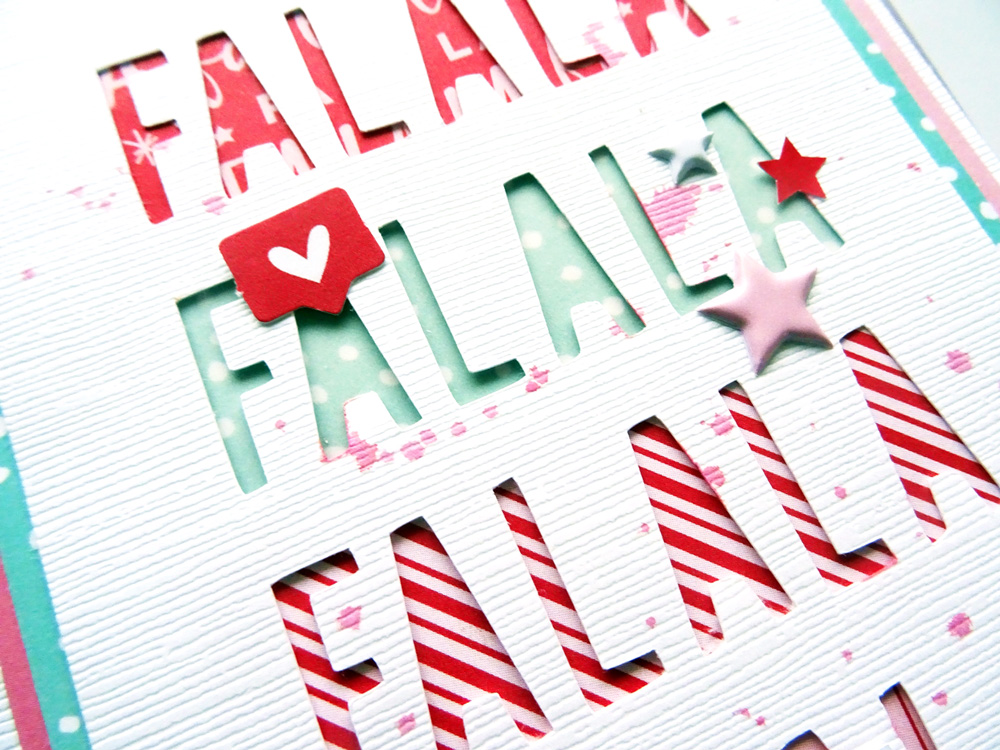
I friends, it’s Daniela here and I’m happy to share my very last blog post for 2019 today! I can’t believe it’s the end of the year already. Time flies and I have made so many great memories this year. Of course, I want to give some love to all my dear friends who spent this year with me and who doesn’t love a handmade Christmas card? I love creating cards following a certain scheme. Still each one is unique due to the choice of colors and other little details. I created two cards using the December 2019 Cut Files and other Christmas-themed goodies from the shop!
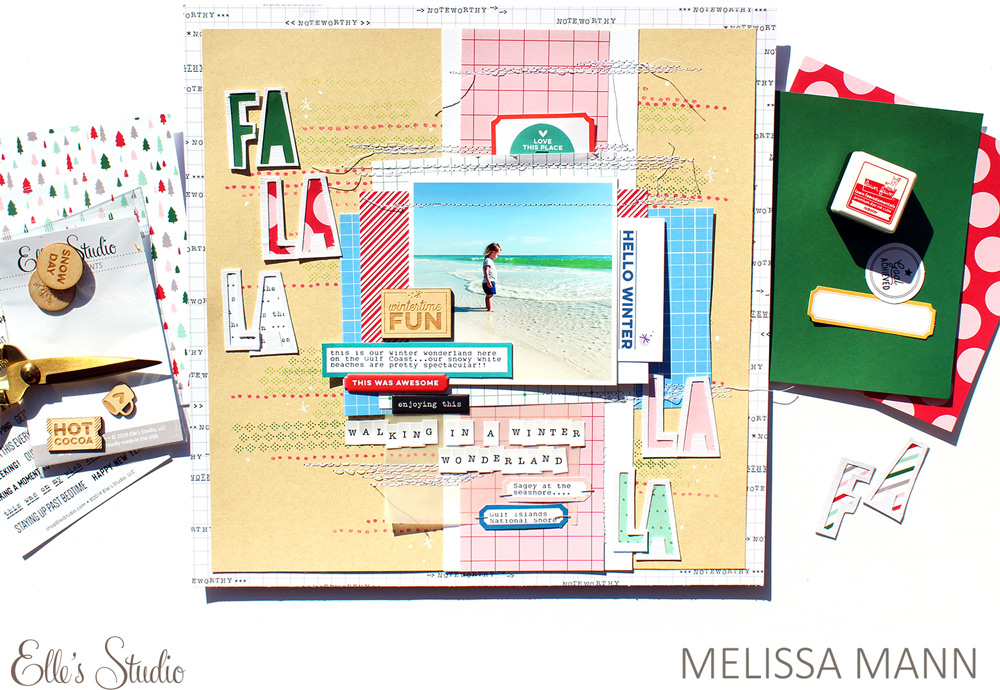
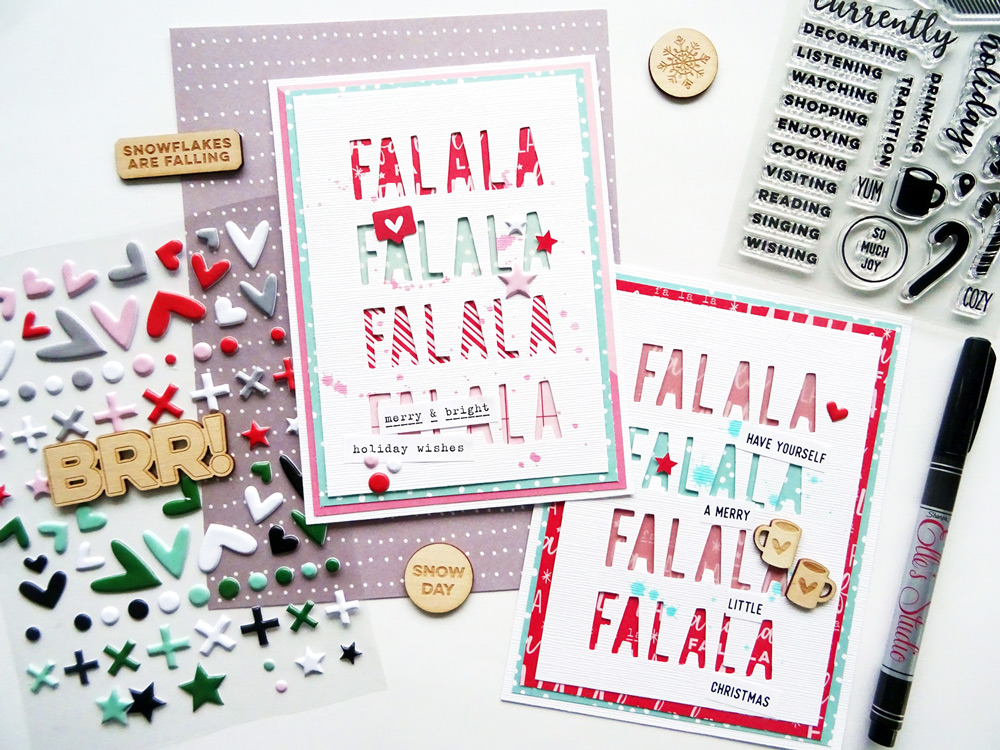
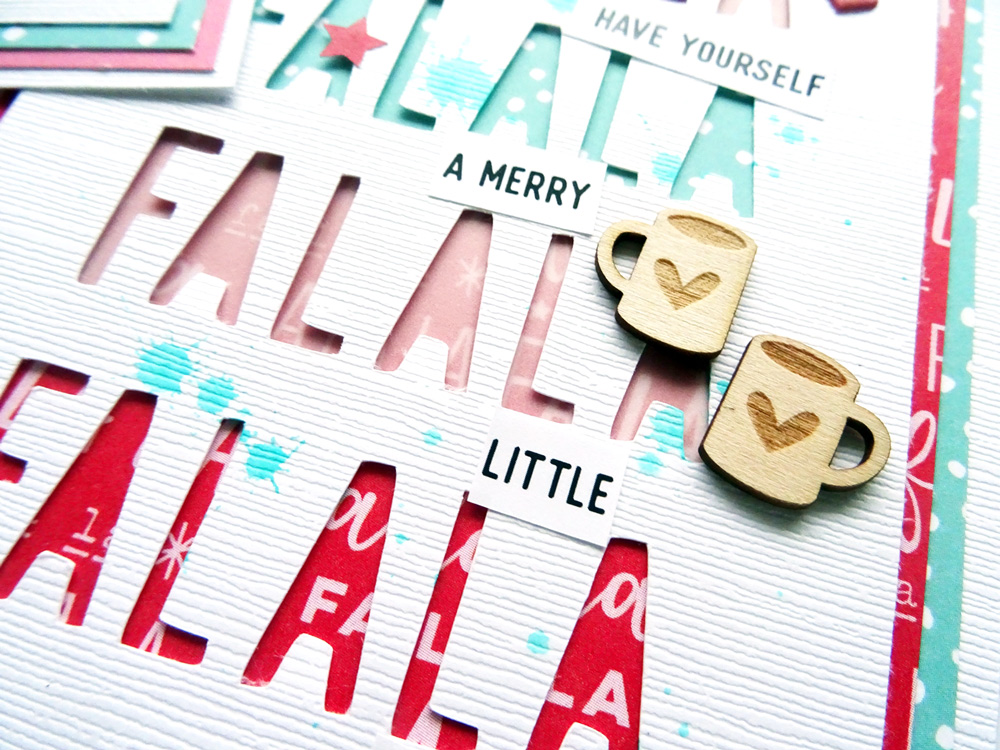
I used a simple color scheme for my set of cards: teal, pink and red. Cut files offer so many possibilities. I cut the “fa la la” sentiment four times on each card and backed the back side of the white cardstock with different patterned papers using the Document December 2019 Paper. To add a special touch, I also added some vellum and ink splashes in either pink or teal.
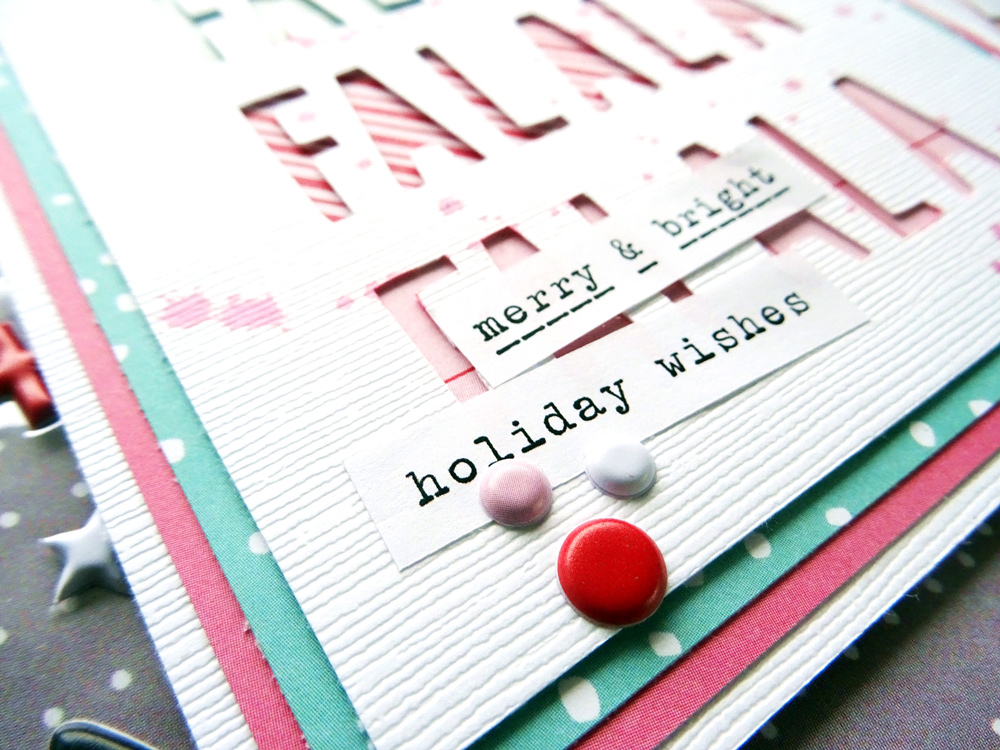
If you know my work, you might have realized that I love layering and of course I used this technique on my cards as well. White cardstock, two layers of patterned paper plus white cardstock again: that’s the basic composition of each card. Tiny details like puffy stickers and phrase stickers function as eye catchers and the little wood veneer cups from the Winter Wood Veneers are cute embellishments for the coziest time of the year!
I like to putting embellishments on top of the cut file blanks or pieces, creating even more dimension. Elle’s phrase stickers are perfect for adding information, feelings or just some kind words. I’ve used them on so many projects during this year and I can’t wait to see the next ones to come.
I already know who I’m giving these cards to; both are for dear colleagues of mine and they will be accompanied by some handmade chocolates with Christmas toppings.
Are you a Christmas crafter, too? Don’t forget to share your work on social media using the hashtag #EllesStudio.
Thanks so much for stopping by and all your support over the year!
We at Elle’s Studio love stamps, and we love seeing our design team members and customers using the stamps that we design in so many creative ways! Today design team member Suzanna Lee is with us to share how she is using one of our newest stamps to add color, movement and FUN to her latest page! Let’s see what she created!
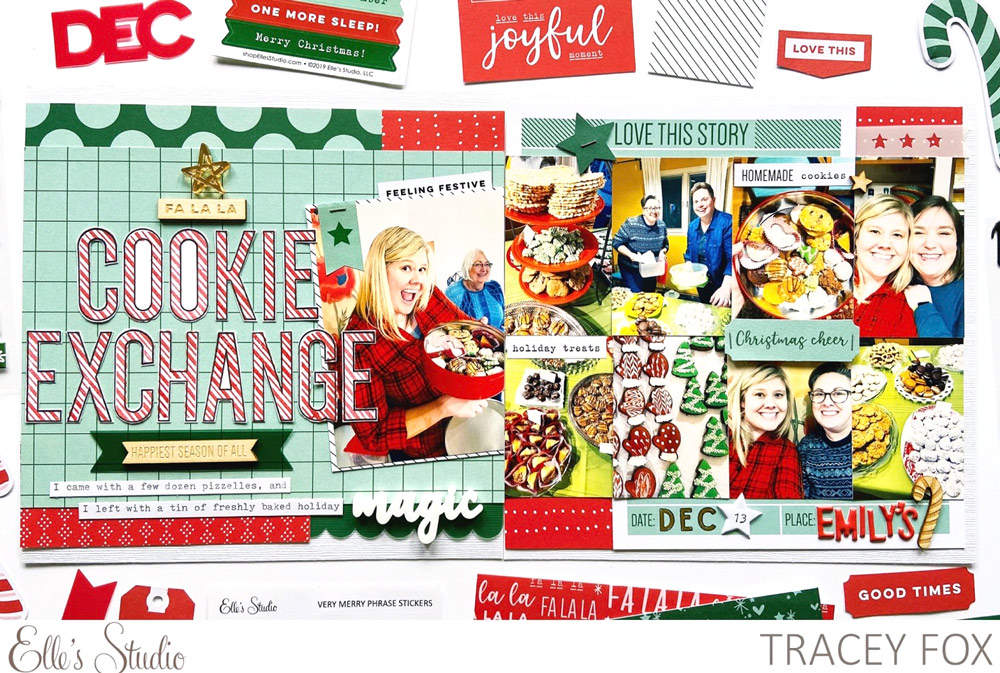
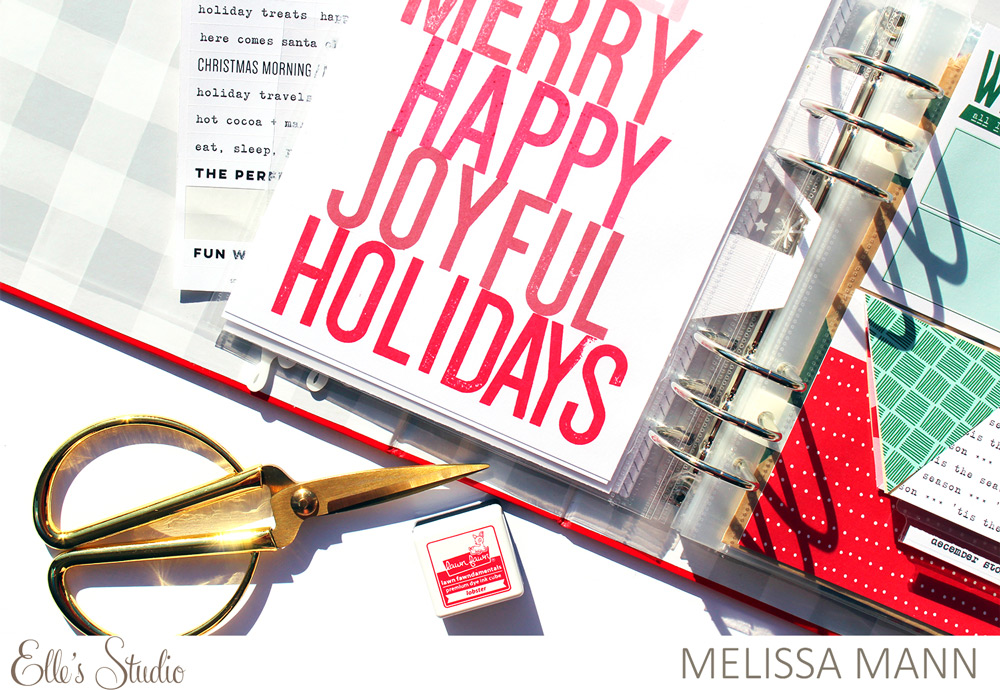
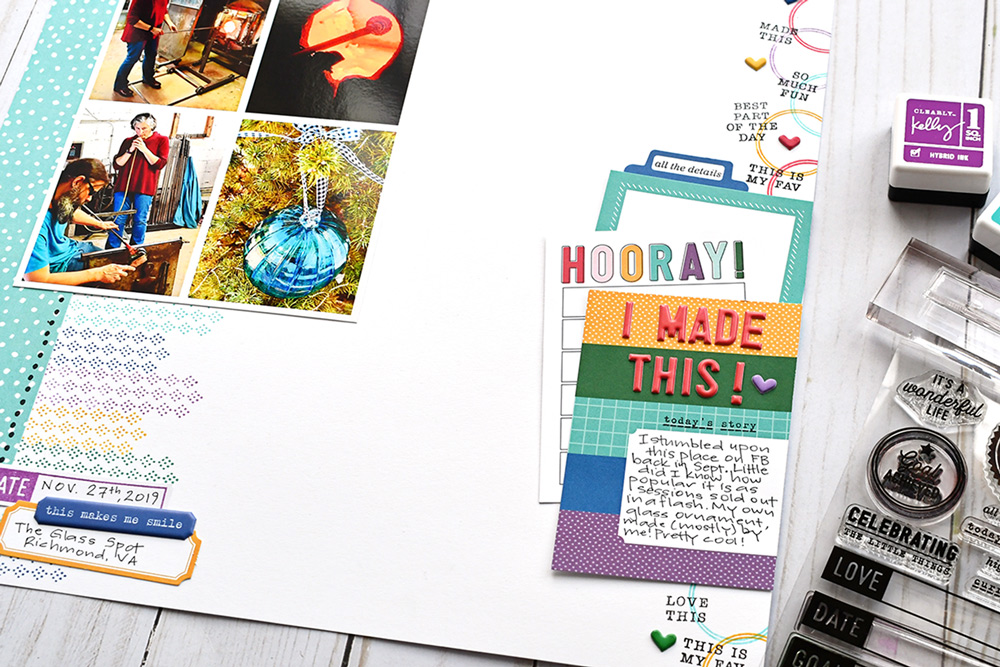
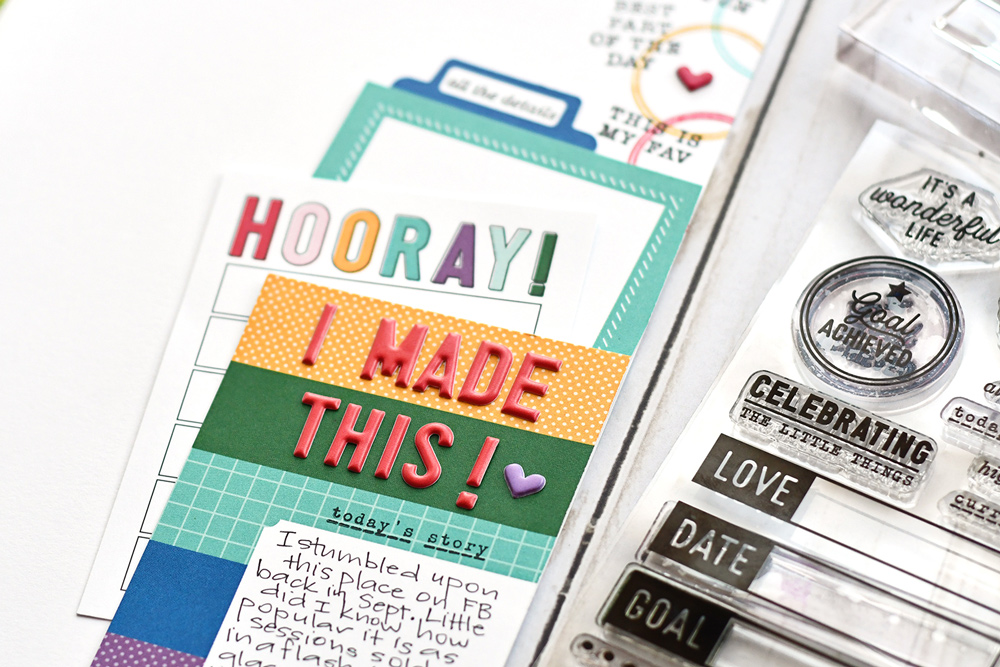
Hiya scrappy peeps! It’s Suzanna here today! Scrapbook stamping is a fantastic way to add titles, sentiments, outlines, color and more to your layouts with ease! The beauty of stamping is that anyone can do it! Today I used the new Wonderful Life Stamp and other pieces from the December 2019 Kit and add-ons to create a fun, colorful page! Take a look:
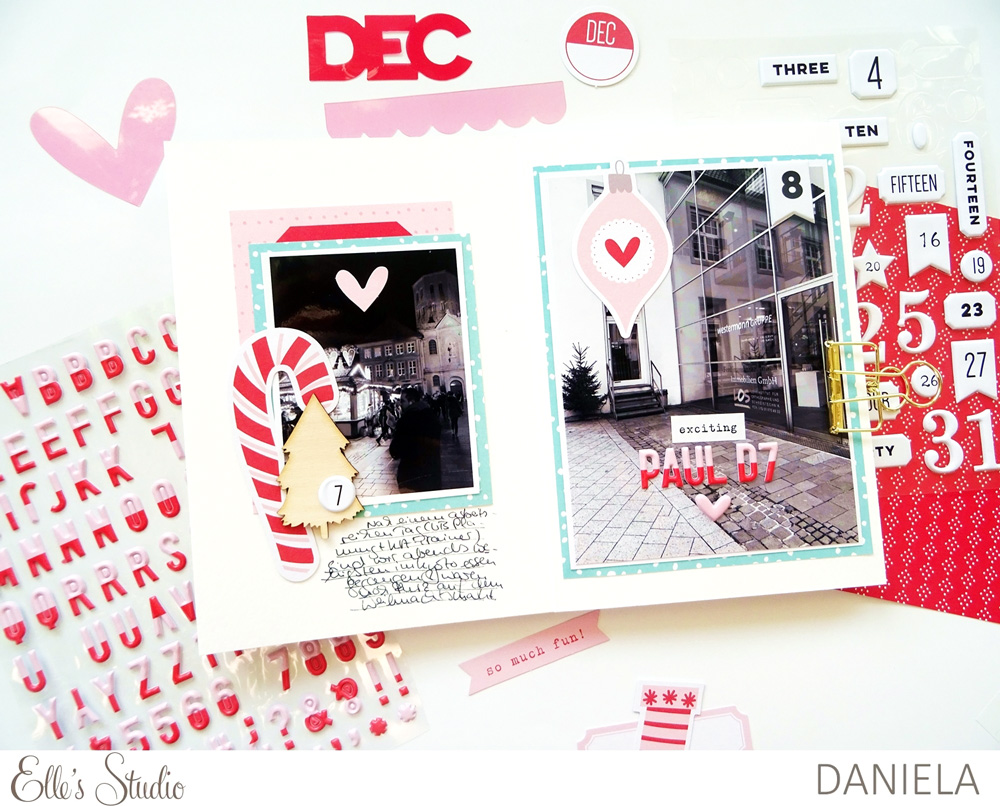
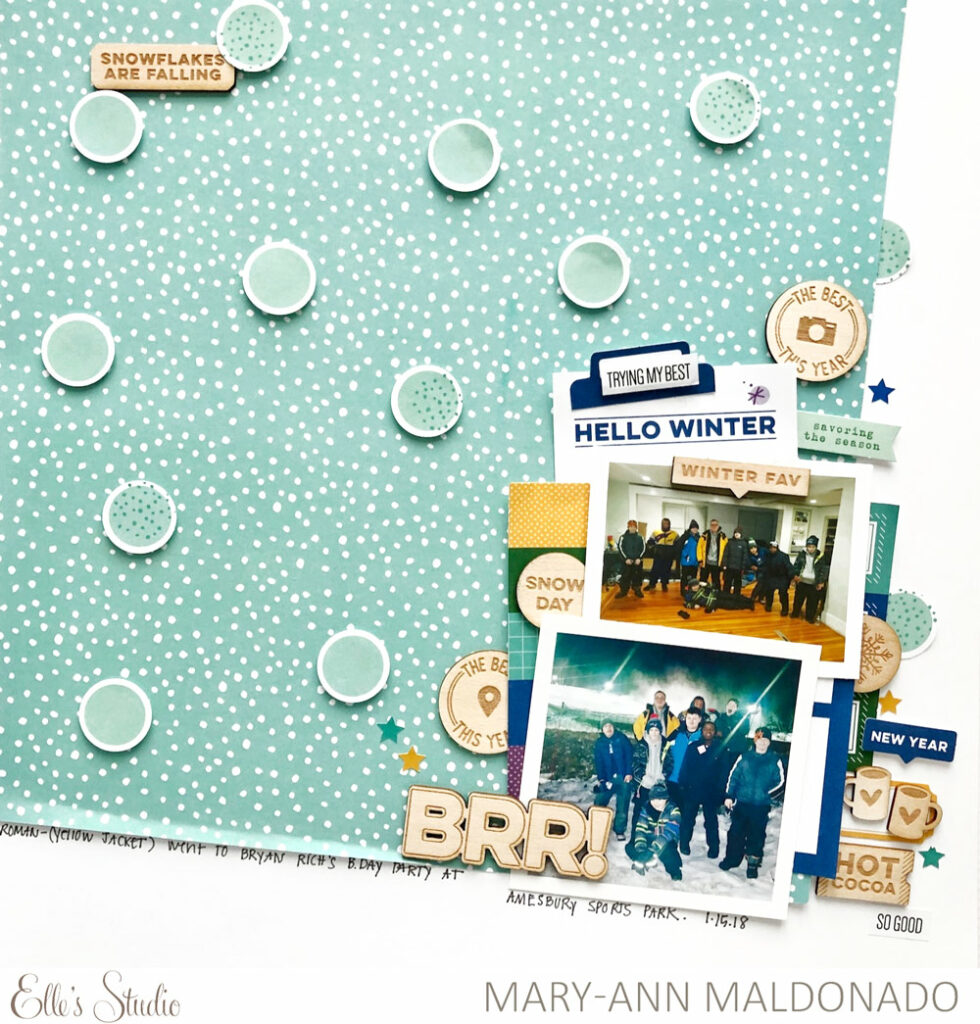
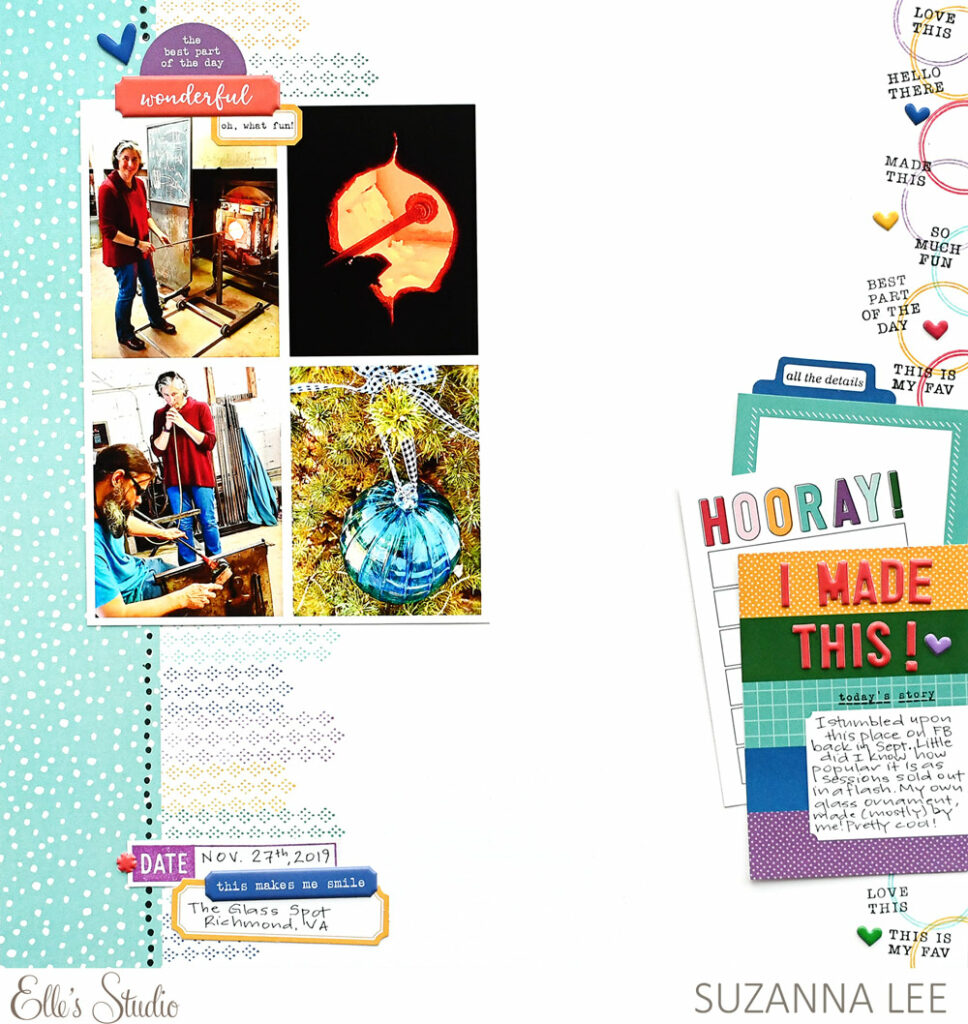
This layout was created using 12 of the stamps for this month’s Wonderful Life Stamp—TWELVE!
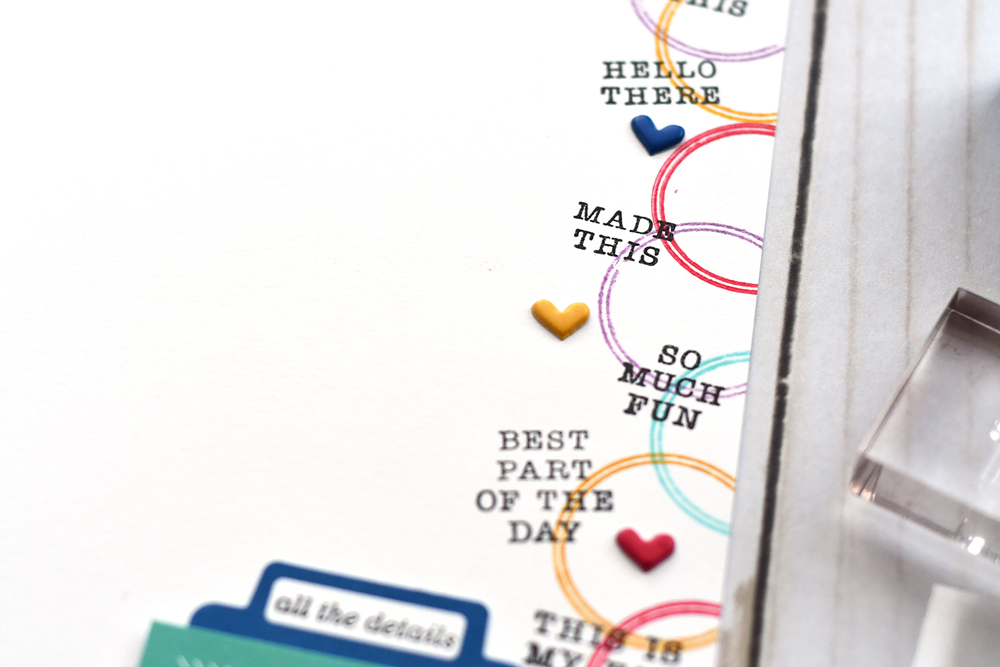
There are two portions of the layout that are stamped; the right edge of the page with multiple colored circles and phrases and the left border. In both cases, the color palette is based on the colors present in the 3″ x 4″ tags from the December 2019 Kit.
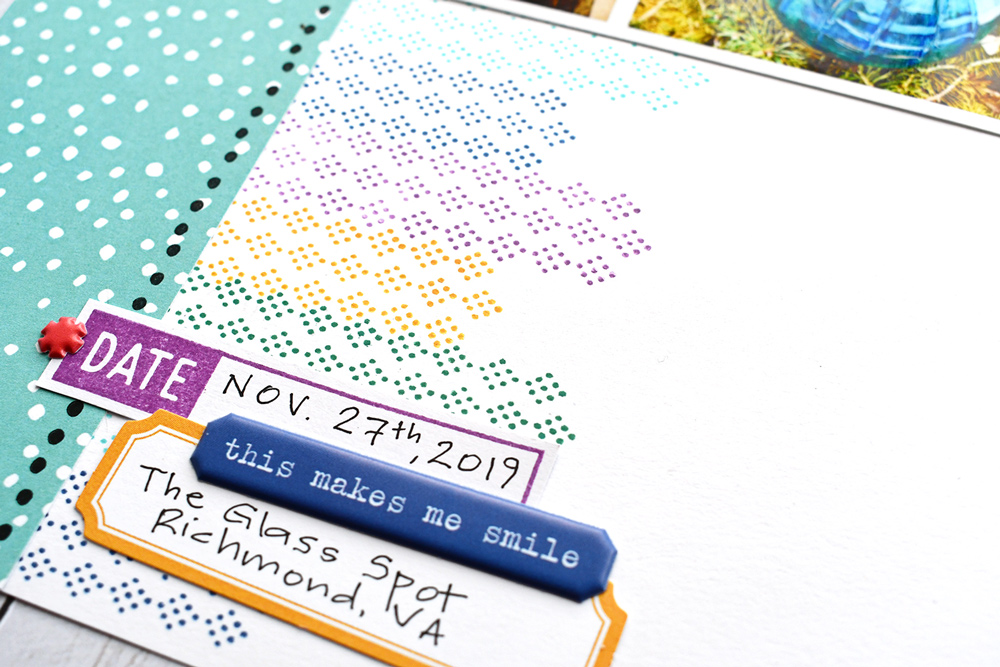
The left stamped border has the horizontal component that matches the horizontal flow of the striped 3″ x 4″ tag and was created quickly and easily with the dot geometric in the stamp set from the Wonderful Life Stamp. I did the same on my “Fa La La La” layout that you may have seen in the December reveal post. It’s a great subtle way of adding color and pattern to a page. For a darker border, the random line of dots make a great substitute for a stitched border!
I also stamped the “date” label. Wanting something else to tie the teal border to the stamped border, I stamped on another piece of white paper and then cut it out with scissors, creating my own date label. This nestles in nicely with the yellow die cut label from the kit and a Everyday Puffy Label Sticker.
Did you know that Elle’s Studio releases at least one new stamp set a month? Every month I receive it and am wowed by it. What draws me to these stamps is their versatility! I was working on my Document December album the other day and used the Summertime Stamp—it was perfect!
Be sure to swing by YouTube channel for the process video and see how all that stamping happened! Thanks so much for stopping by!