There are so many different ways to create a wrap-up project to record the best moments of the year, and today, Steph Grimes has a fun, hands-on solution for you using our December 2019 Kit and add-ons that includes a tutorial! Let’s check it out!
Hello friends! It’s Steph here and I’ve got a little tutorial for you today as my last blog post of 2019. It’s been such a great year being part of the Elle’s Studio Design Team and, while my personal life has been challenging this year, it’s also been full of so many awesome things.
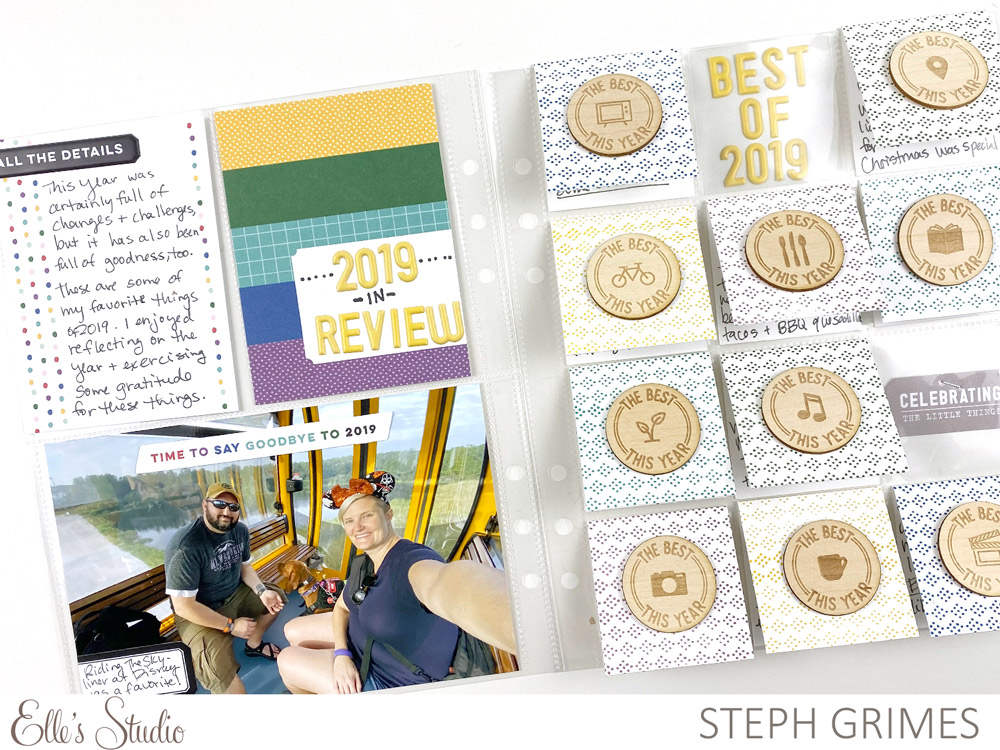
As soon as I saw this month’s kit add-ons I knew I wanted to create some sort of year in review page. My tutorial will walk you through my process for creating this 6” x 8” flip up page.
Supplies | December 2019 Kit, December Label Stickers, Yellow Puffy Alphabet Stickers, Everyday Puffy Label Stickers, The Best This Year Wood Veneers, Wonderful Life Stamp
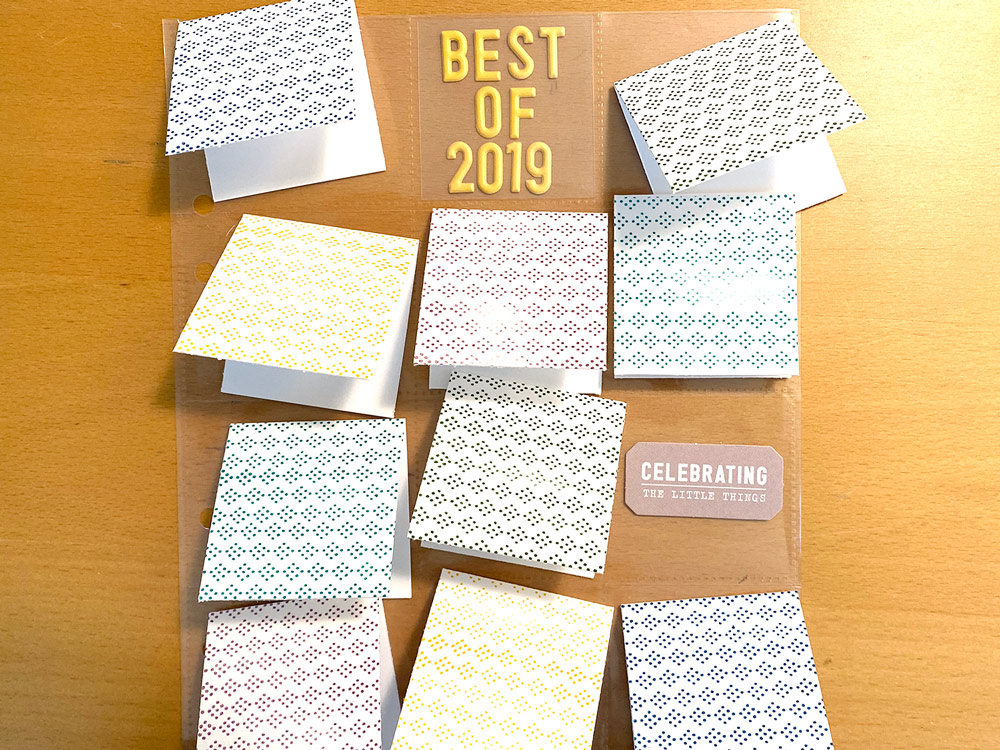
For starters, you will need to decide on the format of your layout. I used a 6” x 8” pocket page that has all 2” x 2” pockets, but you could also adhere the back of each flip-up to a piece of patterned paper or cardstock if you wanted to work outside of the page protector or do this more as a traditional layout.
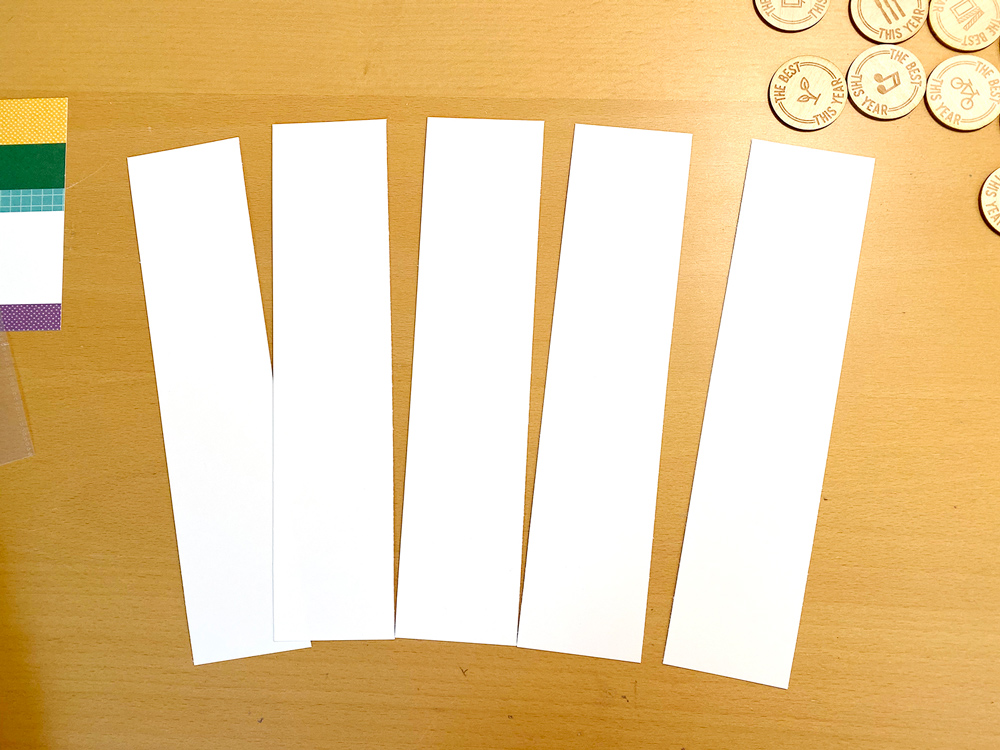
First, begin by cutting smooth white cardstock into five strips measuring 2” x 8”. Trim each strip to measure 2” x 4”, which will create 10 flips, which is exactly the amount of pieces in The Best This Year Wood Veneers. Then, using a scoring blade on your trimmer, a scoring board and tool, or just a bone folder, score each strip at the 2” mark.
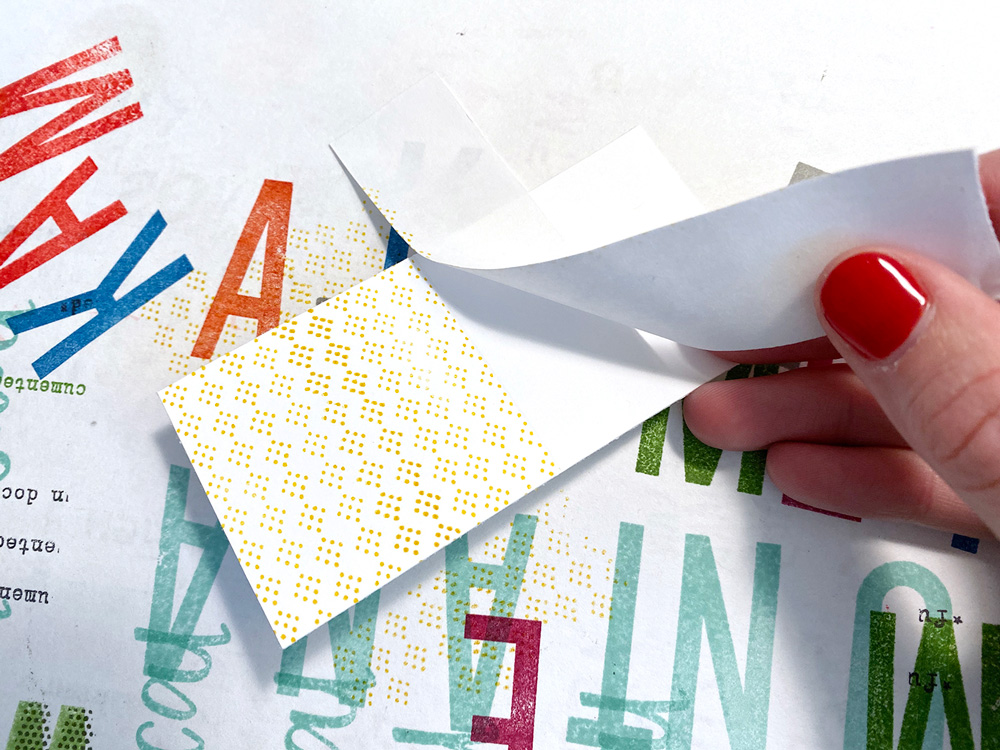
Next, we will tackle the stamping. I love the dotted pattern in the Wonderful Life Stamp and I wanted to use that on the front of each of my flips. I also like that it’s a pretty subtle pattern. I chose my ink colors based off of the striped tag from the December 2019 Kit on the page opposite, so I used blue, teal, green, purple, and yellow for my stamping. I made two flips in each color.
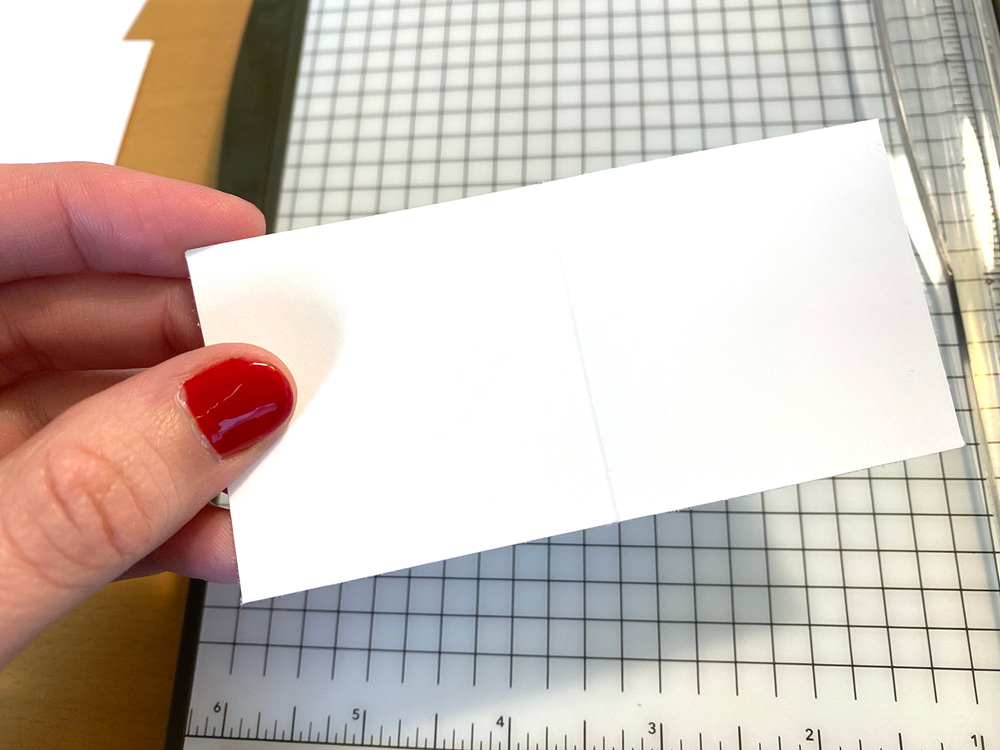
You only need to stamp one side of your scored strips. Before stamping, I used a piece of Post-It Tape along the scoreline to mask the area where I DID NOT want to stamp and to help secure the strip in place while I stamped. (If you don’t have Post-It Tape, that’s okay! You can also use masking tape, washi tape, or a Post-It sticky note). Also, because the stamp is wider than the 2” strip, I used a piece of scrap cardstock to stamp on top of so that the excess ink didn’t get all over my workspace. For each strip, I just repeat stamped the image until I covered the full 2” x 2” space. You can stamp yours however you’d like, or use patterned paper to decorate the front of each of your flip ups.

When my stamping was complete, I carefully removed the Post-It Tape, revealing a crisp clean line along the score in each of my strips. Which, let’s face it, might just be one of the most satisfying crafty achievements ever!
To create the fold in each strip, I used a bone folder to fold each in half along the scoreline. I did this a few times each to make it as flat as possible. The next step is to figure out your layout and placement of each flip up. If you use multiple colors in your stamping, you will need to consider that when laying everything out. For example, I didn’t want any of the same color adjacent to each other and wanted to break up the darker colors as much as possible in the grid.
To fill the two pockets that were leftover, I used a transparency cut down to 2” x 2” and added the Yellow Puffy Alphabet Stickers to spell out “Best of 2019” and used one of the labels from this month’s die cuts included in the December Kit.
Next, I adhered one wood veneer from the The Best This Year Wood Veneers to each flip up on top of the stamping using glue dots, or another heavy adhesive.
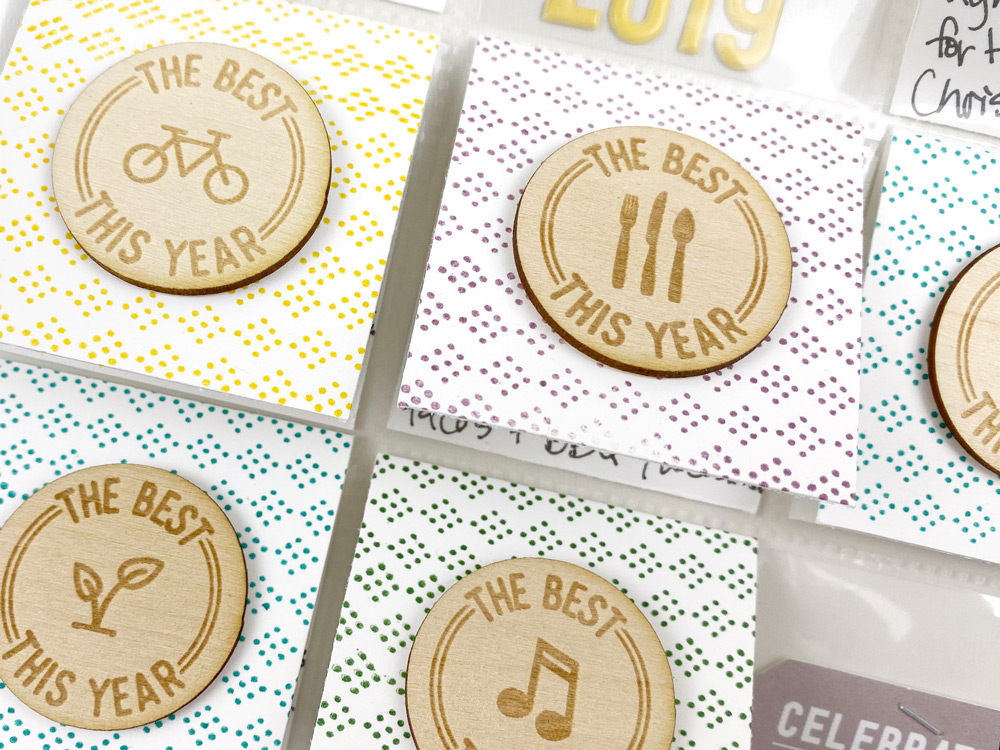
On the inside of each little flip up, I wrote my response to each category prompt on the wood veneer. On the top side of the flip up (the backside of the front) I wrote one word to indicate what each category was. For example, for the music note, I wrote “Music” on the top and a tiny amount about some of my favorite music this year.

To finish out the double page spread, I added the Yellow Puffy Alphabet Stickers spelling out “2019 in Review” to the striped 3” x 4” journaling tag and wrote more journaling on another 3” x 4” tag and added that into the opposite pockets. Then, I added one of my favorite photos of our family from this year doing my favorite activity of the year: riding the Skyliner at Disney World! It just happened to match the colors of the layout perfectly, which was a nice treat. I added another die cut from this month’s kit to the photo and one of the December Label Stickers so I could include a little extra context to my photo.

I am really thrilled with the way this turned out and how I executed the idea pretty quickly. You’re invited to try this technique for your end of the year wrap up pages. If you try it, please tag #EllesStudio on Instagram so we can see how yours turns out! I hope you all have a wonderful end of the year and start of the new decade!