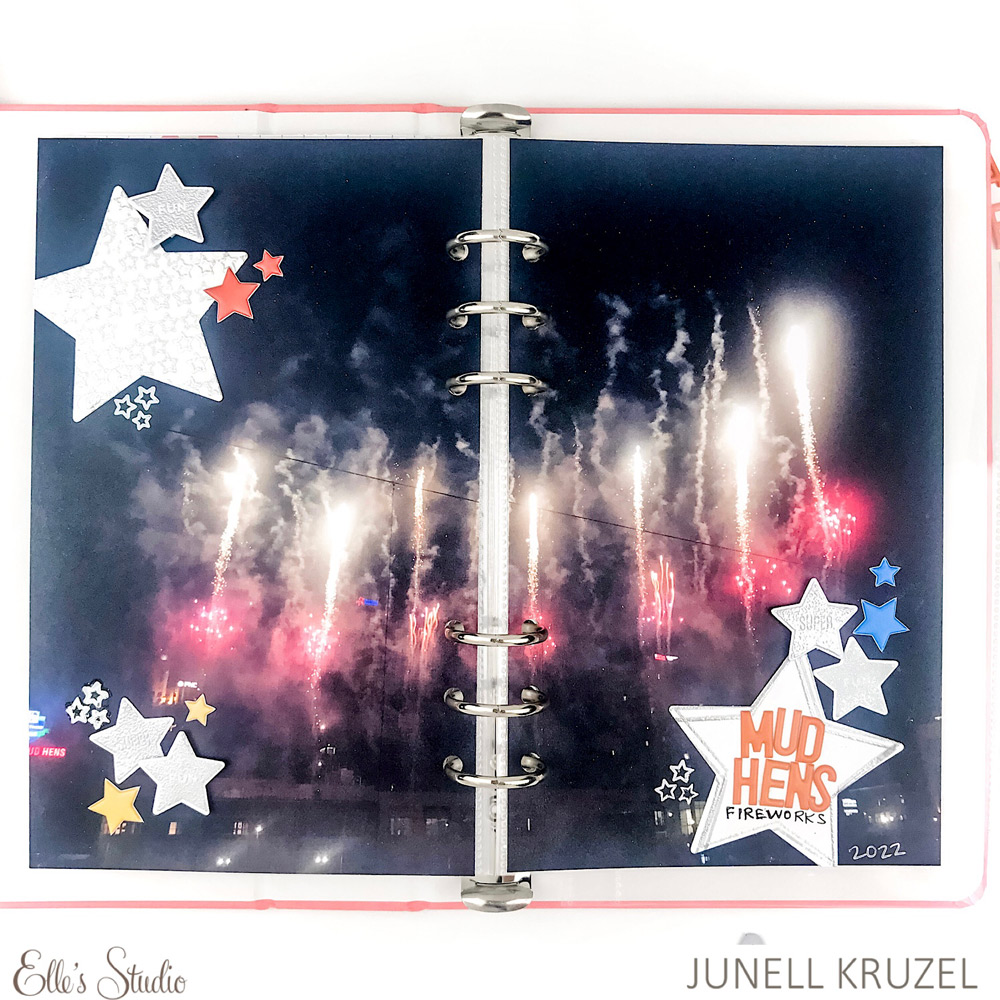
Hey everyone! It’s Junell here on the blog today, sharing how I made this quick layout for my Life Crafted album using the Star Notes Stamp and Metal Die.
Supplies | Orange Puffy Alphabet Stickers, Puffy Star Stickers, Star Notes Stamp, Star Notes Metal Die

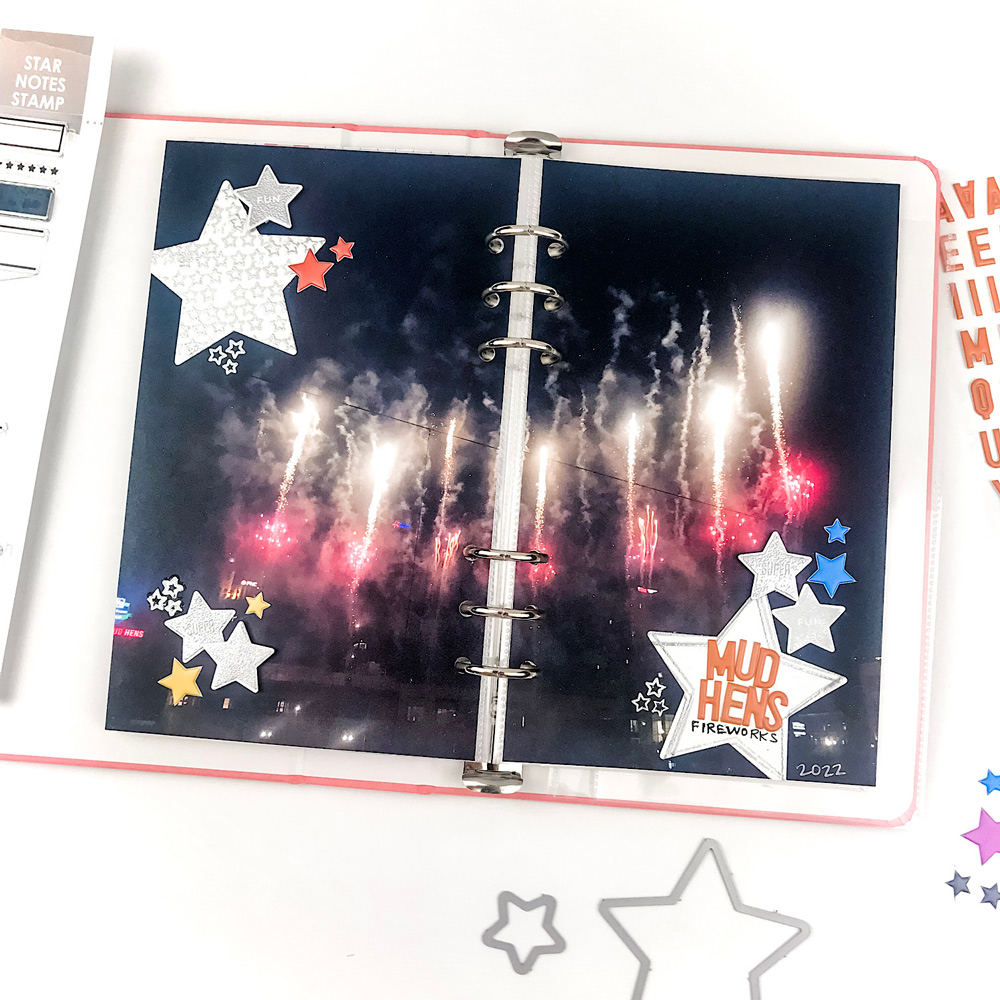
I knew I wanted to use just one large photo as my background, so I would just need some simple star embellishments to go along with the theme.
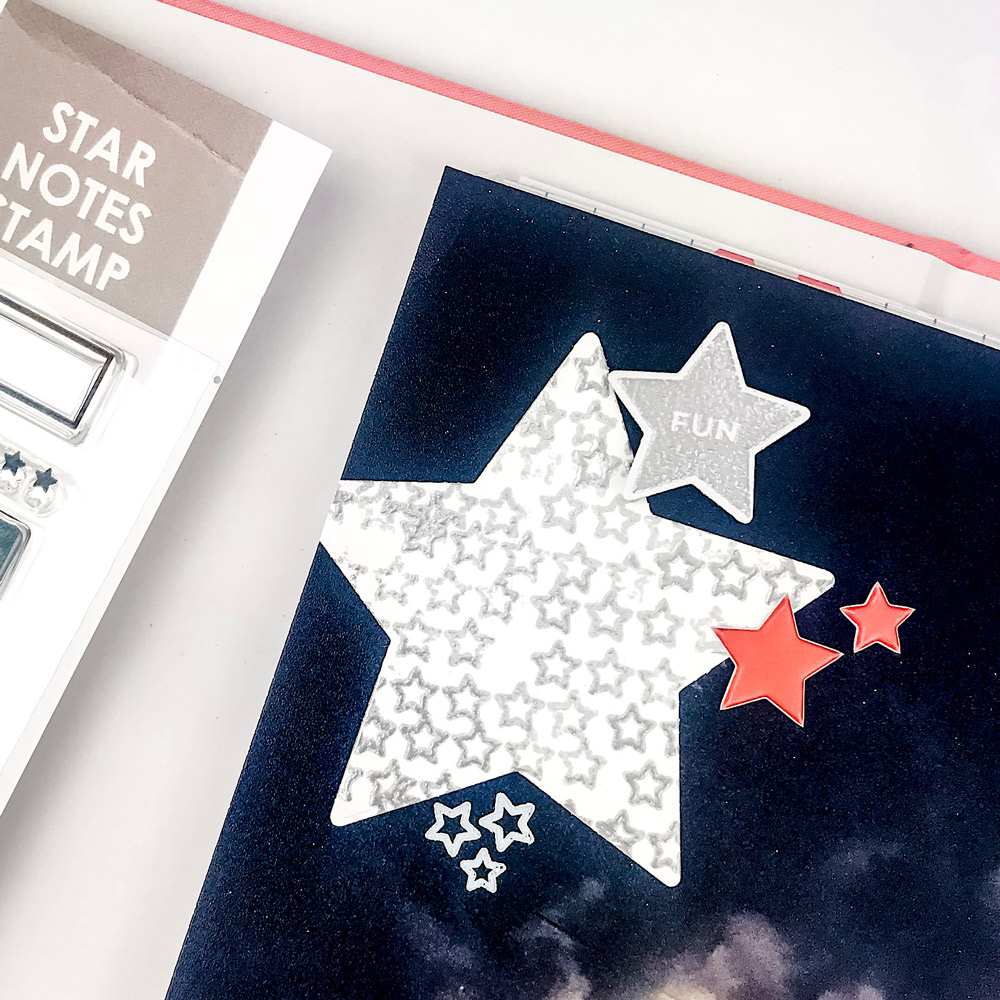
I wanted to play around with my heat gun and embossing powders. I used stamps from the Star Notes Stamp to stamp out some patterns and then I heat embossed them with silver powder. I then used the large star die to cut out a larger star. You can get a lot of texture and shine using this method!
I also embossed and die cut out some other stars to add around the layout.
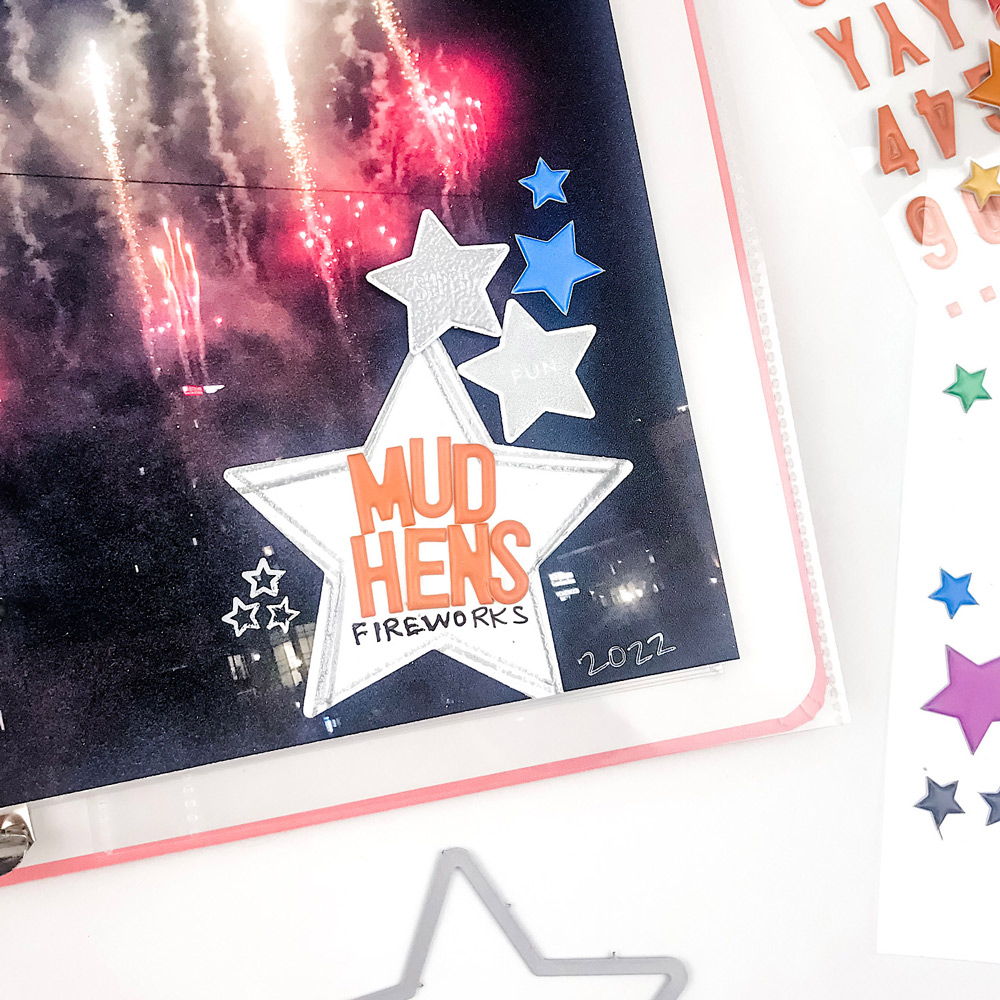
I wanted my title to be inside an embossed star, but I did not want the dots on the inside, so I grabbed my craft knife and just cut the dots out. Now I have two stamps that I can either use together or separately. I used the Orange Puffy Alphabet Stickers for my title and just hand-wrote the rest.
After I had all the stars and my title created, I placed them on the photo in a triangle and adhered them down. Some are on foam dots to give dimension. I also added some colored stars from the Puffy Star Stickers.
Thanks for reading! I hope this gives you a couple ideas on how to use your new Star Notes Stamp and Metal Die!