Happy Friday, friends! We just had a big release of the most magical products to the shop, but today we wanted to go back to our May 2022 monthly kit and add-on release to give you some great ideas on how you can create with your Photograph Stamp and Metal Die this weekend!
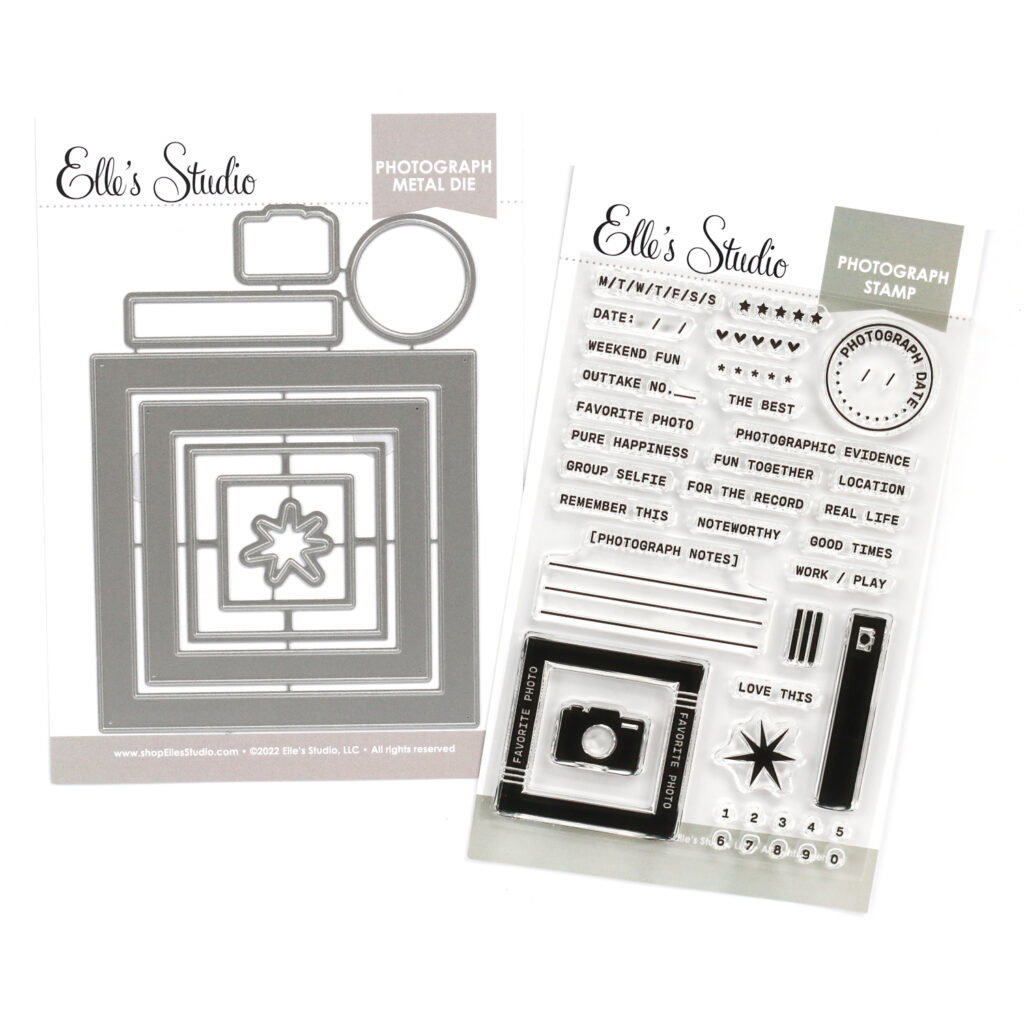
Let’s check out five ways our team has used these awesome products:
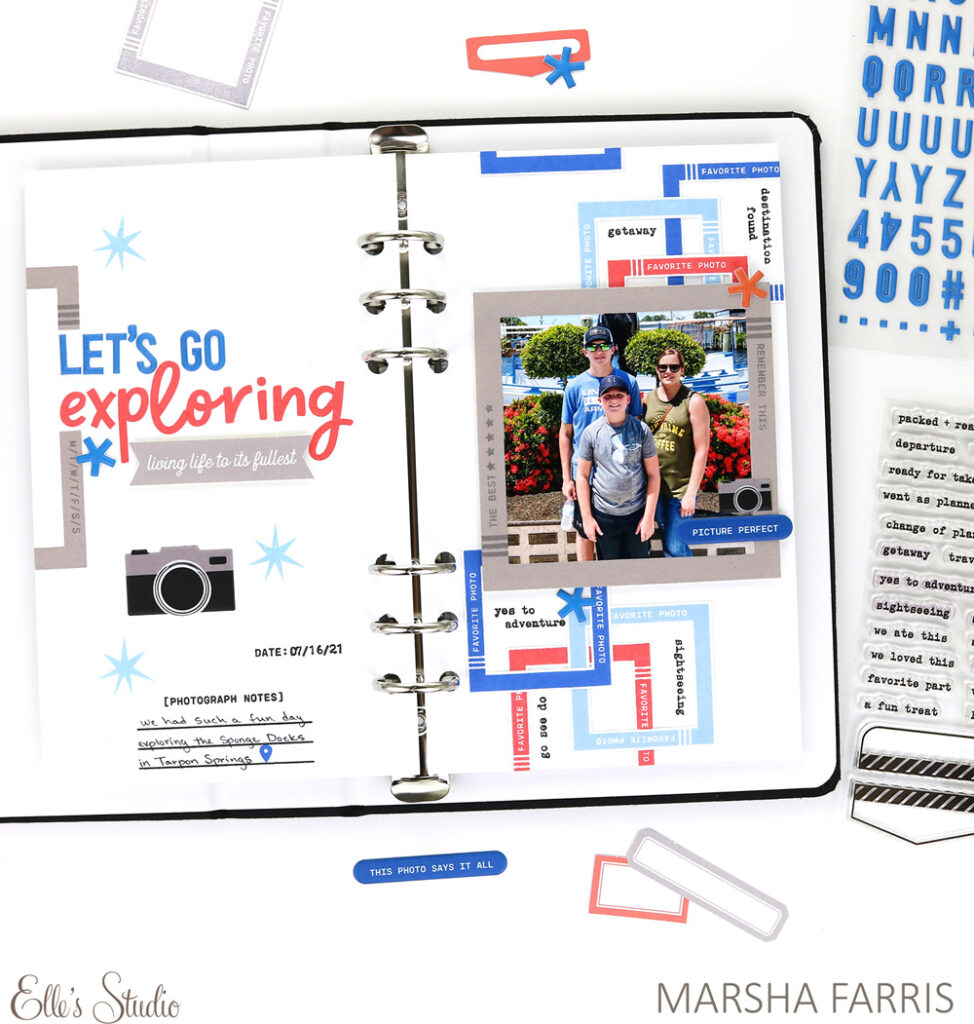
1. Create a colorful background
Marsha had a great idea to use these stamped and die cut frames to not only frame a favorite photo, but also add a colorful background to her notebook spread as well! We also love the clever way that the frame on the left draws attention to Marsha’s beautifully designed title!

2. Color-block your page
Kat may have used a lot of colors on her page, but they all stayed organized with color blocking! Kat used the color of each frame for her five photos to determine what colors would be stamped around it, and added around it it with our monthly kit elements and add-ons. Our Cool Solids and Warm Solids Paper Stack make color blocking an easy task, too, since they coordinate perfectly with our monthly kit colors!
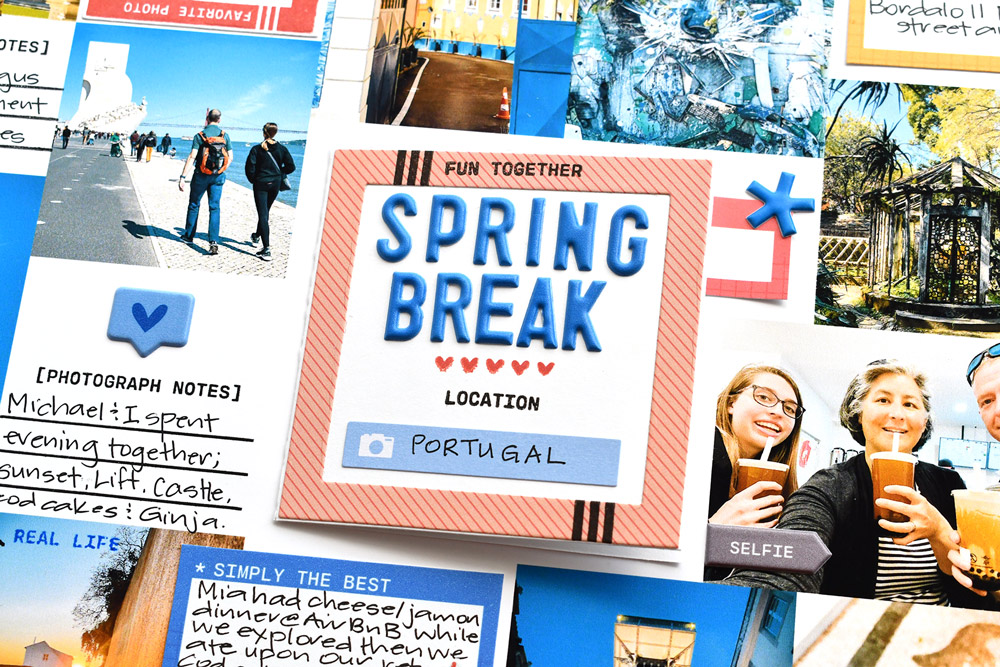
3. Add an interactive element
On this page shared here on the blog, we love how Suzanna created a frame for her title, and an interactive element, too! Be sure to check out the post to see how easy this was to create!
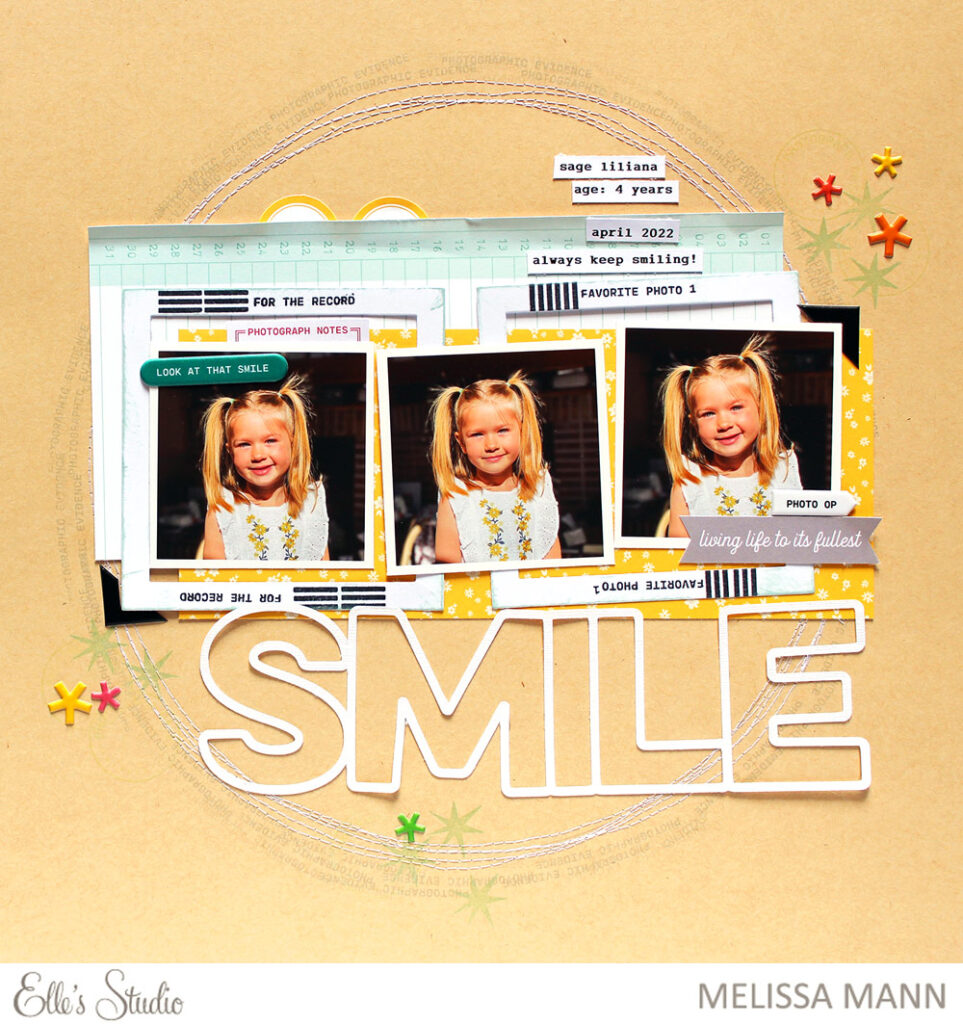
4. Layer, layer, layer!
Who says that the frames have to fit your photos perfectly? If the sizes don’t match up, simply use the frames to layer with patterned paper and your photos for a less-formal look, as Melissa shows us here!
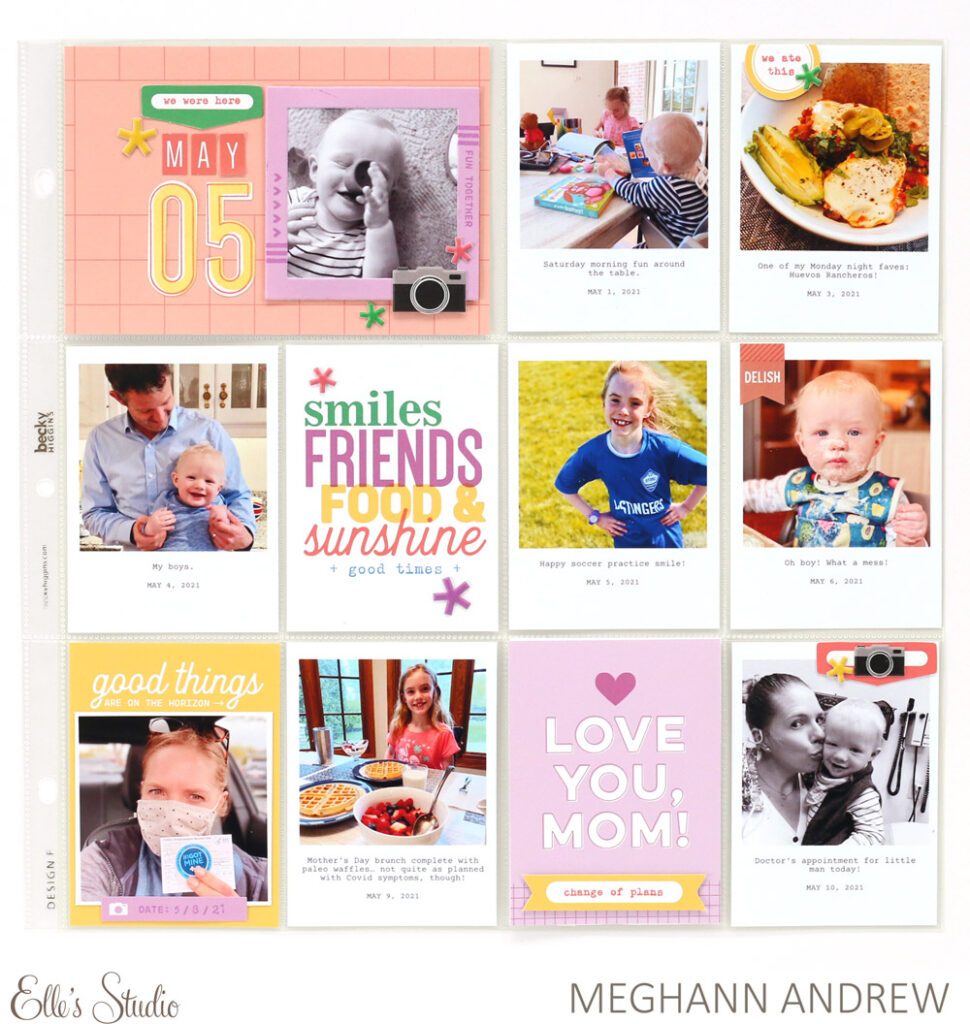
5. Don’t forget about pockets!
Meghann shows us here that square, framed photos have a place in our pockets, even if the pockets aren’t square! Adding a framed photo to a 4 x 6-inch pocket can break up the lines on your page and add an extra, special photo to the page.
We can’t wait to see how you are using the Photograph Stamp and Metal Die! Share with us by posting in our Facebook Group, or on Instagram using the #EllesStudio hashtag! Happy creating this weekend, friends!
