Hello friends! It’s Shannon here with a page that was inspired by the brand new From Sketch to Finish Vol. 6 Digital Class, just released yesterday in the shop! This class is packed with fantastic sketches to get you started on your pages and the contributors for this class have provided some fantastic samples to jumpstart your creativity. Be sure to add this to your toolbox—you won’t be disappointed!
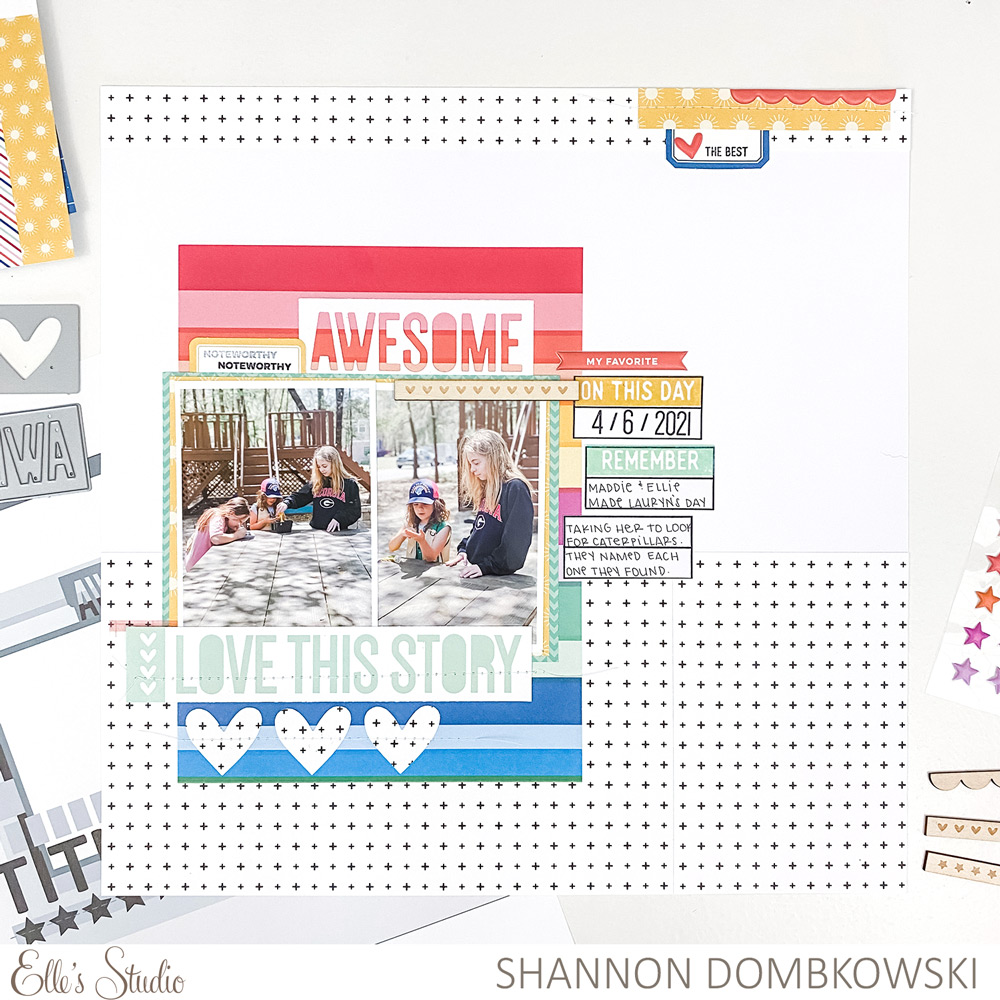
I absolutely love starting with a sketch. It takes so much guess work out of the process while still allowing me to be creative and add my own touches. Here’s my take on Sketch 7 using the May 2021 kit and add-ons:
Supplies | May 2021 Kit, Treasure This Vellum Stickers, Puffy Banners and Border Stickers, Tiny Shapes and Dots Puffy Stickers – Warm Tones, Wood Veneer Borders, Good Times Paper Stack, From Sketch to Finish Vol. 6 Stamp, Mini Dated Stamp, Knockout Words Metal Die
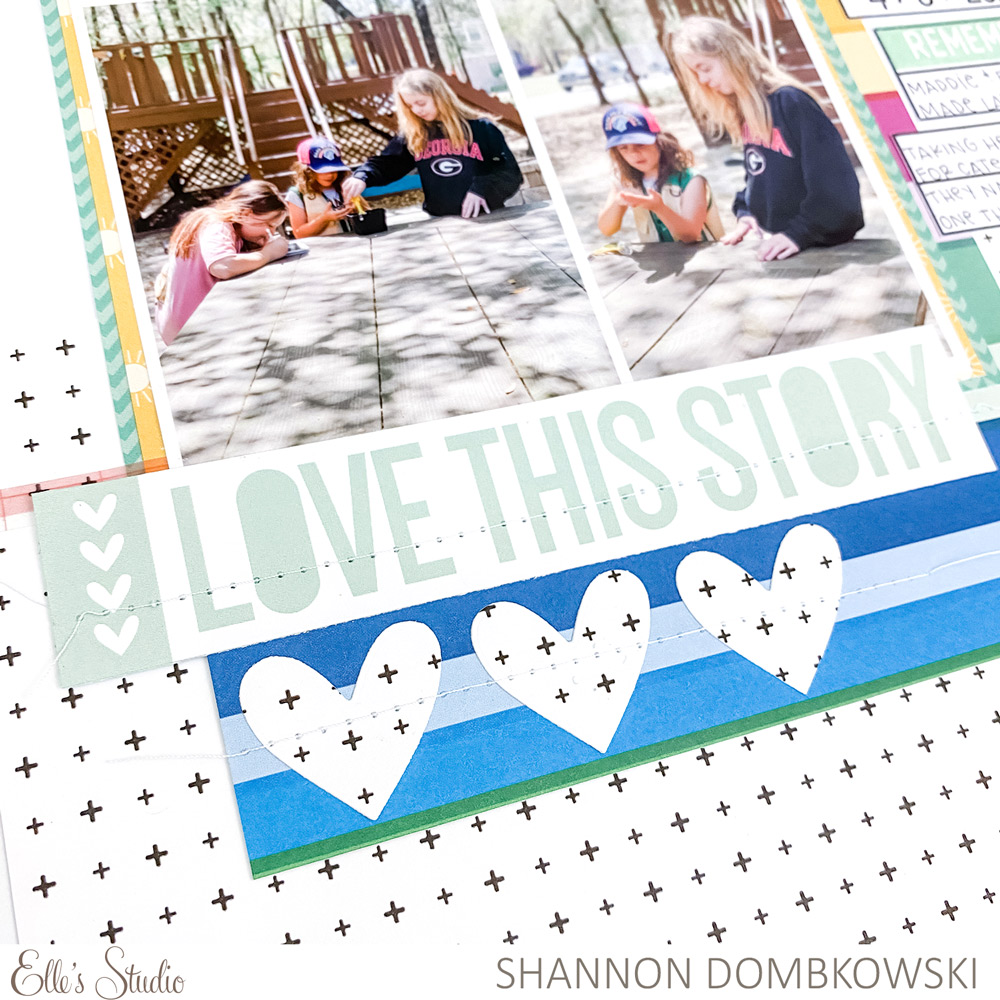
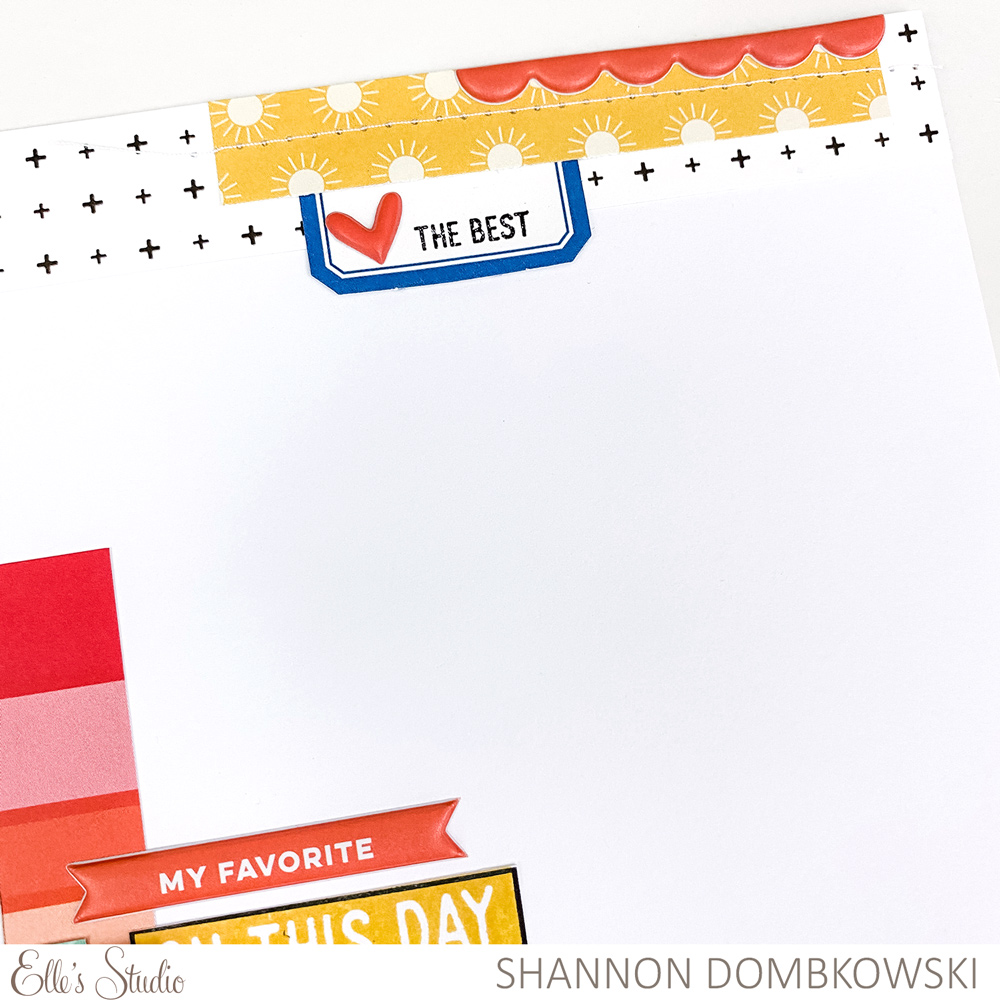
Let’s start with the photos and the tile. The sketch has one horizontal photo, but I’m terrible at taking photos in landscape orientation! I decided to look for two vertical photos to use in that space instead. I kept the title in the same place as the sketch. Instead of using alpha stickers or die cuts, I opted to cut a strip of a piece of patterned paper from the Good Times Paper Stack to use as my title. Finally, I use the Knockout Words Metal Die to cut out hearts using the same patterned paper that I used for the background. I added a little stitching to finish off this portion of the page.
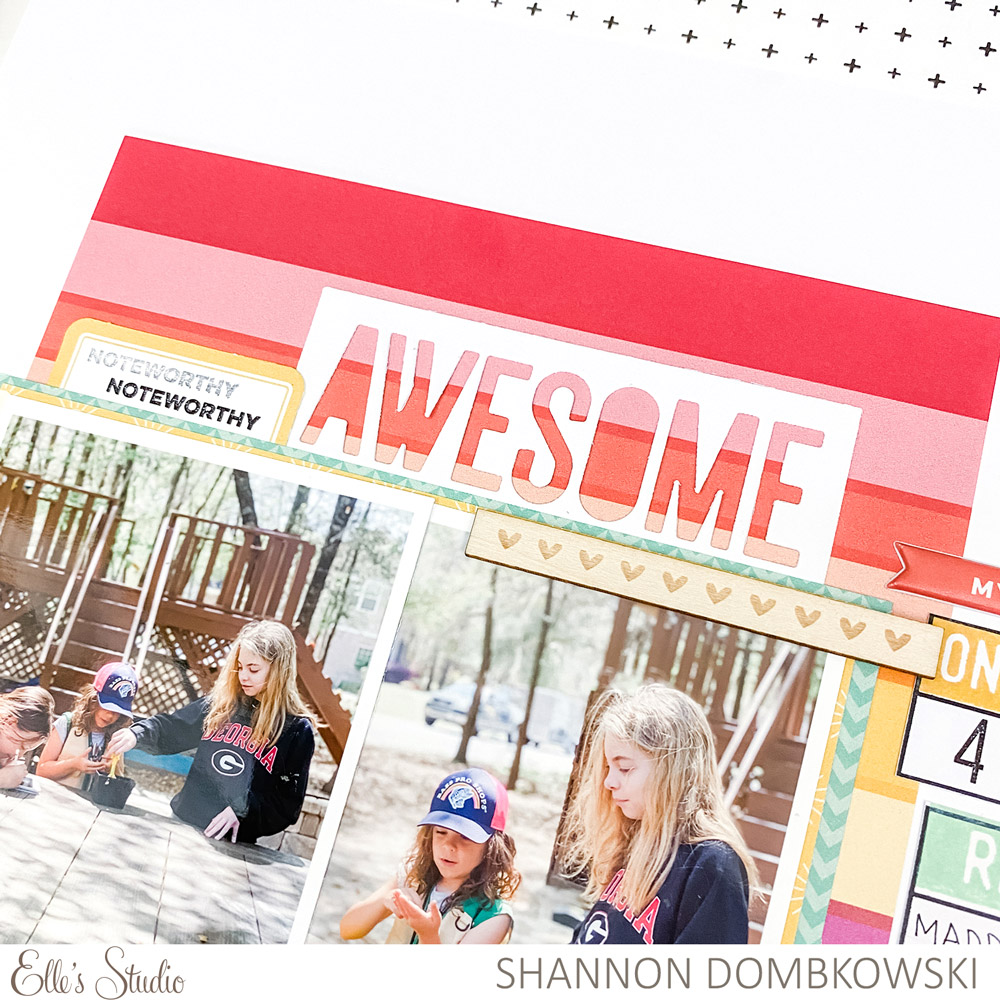
Next, I embellished the top of my photos. I stuck pretty close to the sketch here. I love striped paper behind bold cut out letters like this. I used the Knockout Words Metal Die with a scrap piece of the same white cardstock that I used for my background. You may notice that I’m using a lot of whites for my accents. That’s because I chose a bold, colorful patterned paper to use as the base behind my photos. I don’t want to overwhelm the page with too much color.
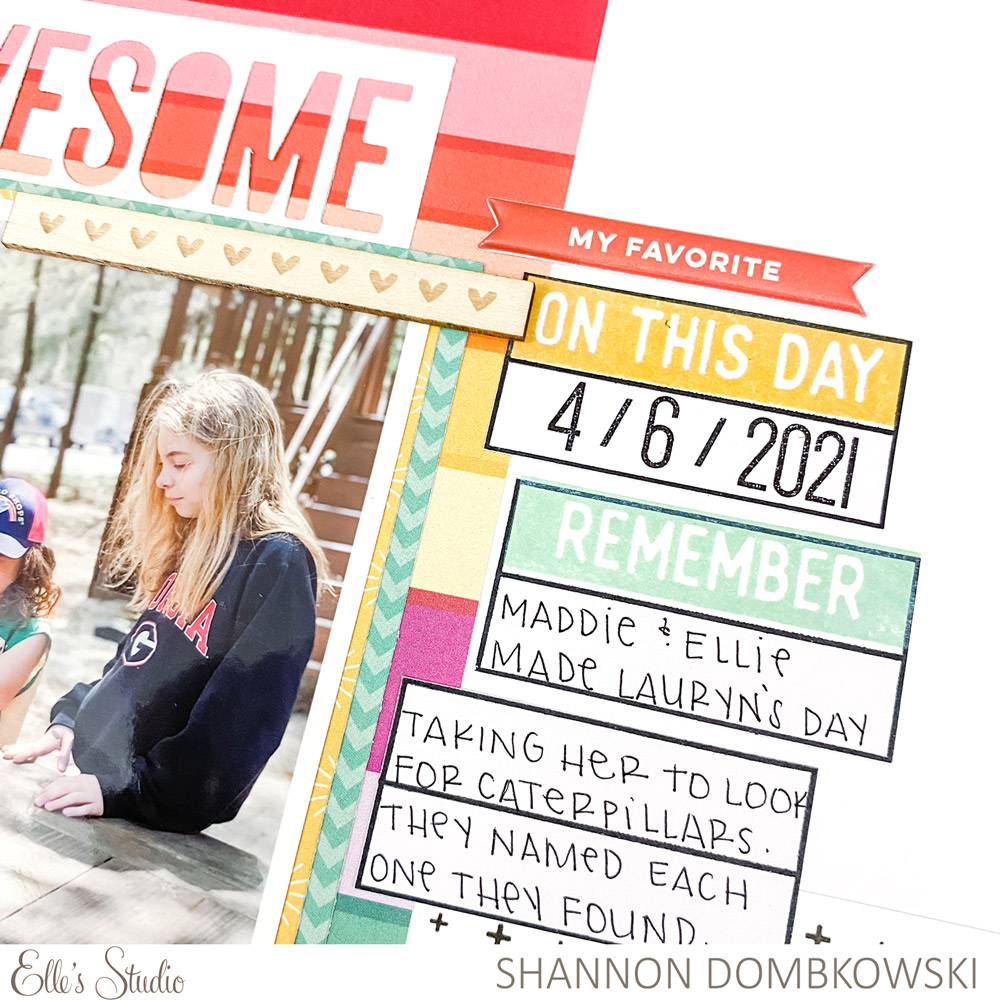
Now, let’s look at the journaling. These split rectangles in the From Sketch to Finish Vol. 6 Stamp are perfect for little bits of journaling! You could stamp them right on your background, but I was too nervous that I would mess up the whole page, so I opted to stamp them onto scrap paper instead. That way, I could also layer them over my patterned papers. The From Sketch to Finish Vol. 6 Stamp also has those great title rectangles that fit into the boxes. I picked out a couple of ink pads that match the colors on my page to make my journaling boxes stand out.
Finally, I added a few colorful touches in the upper right corner of my page. I looked at what colors I really wanted to pull out of the patterned paper and my other embellishments. Then, I set to find products with those colors in my supplies. I like the balance that this cluster brings in pulling the whole page together.
Thank you for coming along to see my take on Sketch 7 from the newest From Sketch to Finish Vol. 6 Digital Class. I hope I’ve inspired you to pick up the class and let yourself be inspired by the amazing sketches!

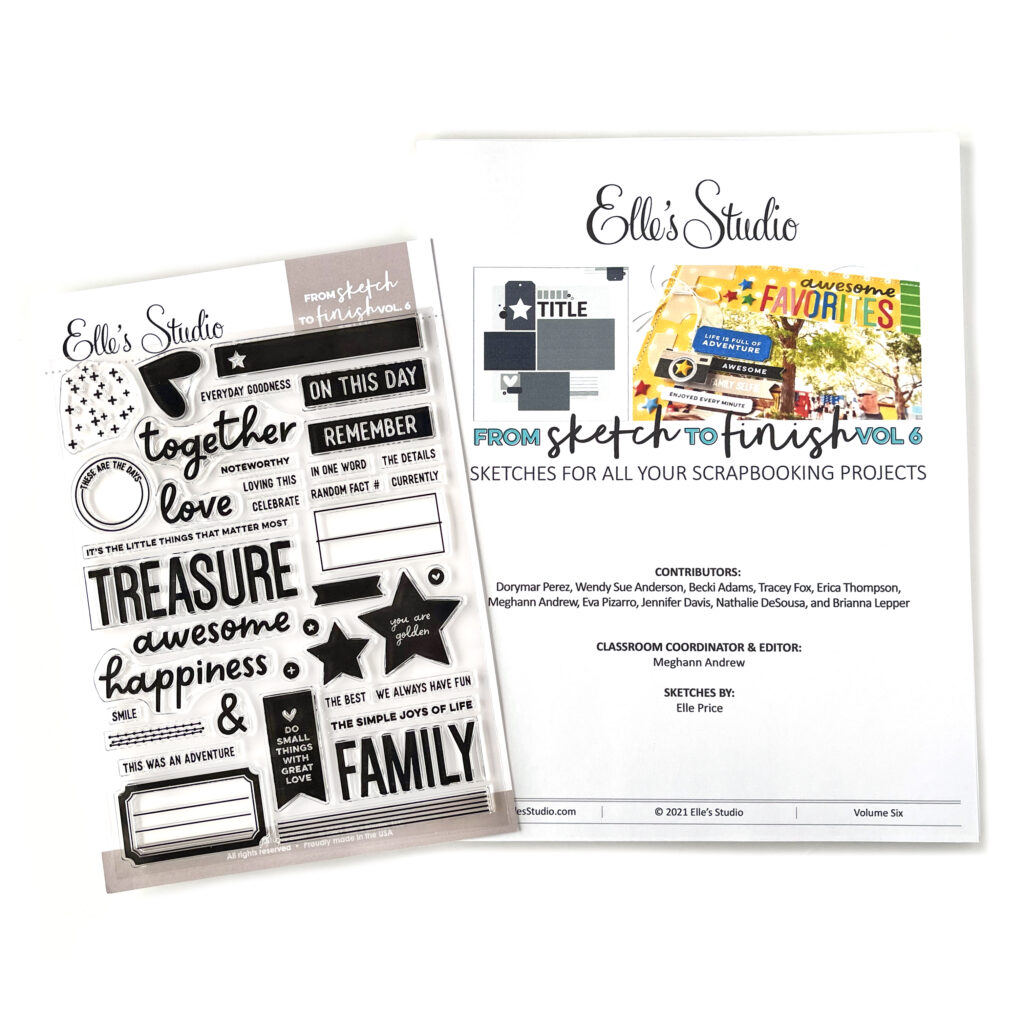
Be sure to grab our new From Sketch to Finish Vol. 6 class + 6 x 8 inch stamp bundle for our special introductory price, only available while supplies last! Plus, save on all of our previous editions of From Sketch to Finish now to celebrate the release of volume 6! This sale ends on 5/29/2021, so don’t miss out!