Let’s talk Halloween pockets today to continue Halloween week! Halloween memories bring a LOT of photos—blame it on cute costumes and trick-or-treating moments—and pockets are the perfect way to document them quickly and easily! Today Steph Grimes is with us to share how you can take those pockets to the next level by creating a BIG statement title on an overlay, and we could not love it more! Let’s take a look!
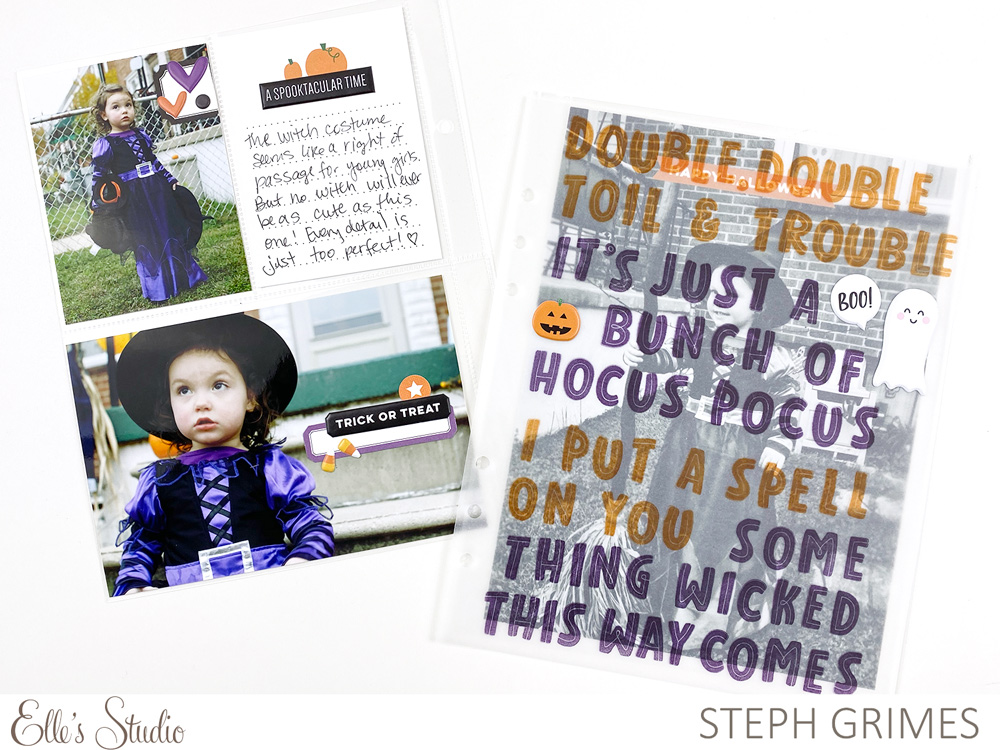
Happy Halloween, friends! It’s Steph here to share with you a Halloween pocket page I created. I felt really inspired by the Winifred Alphabet Stamp released this month and wanted to create a large statement title using those stamps, but I was working in a 6” x 8” pocket page, so I found a fun, interactive way to make it work!
Supplies | October 2019 Kit, Halloween Journaling Tags, Halloween Puffy Stickers, Thankful Stickers, Puffy Autumn Heart Stickers, Winifred Alphabet Stamp
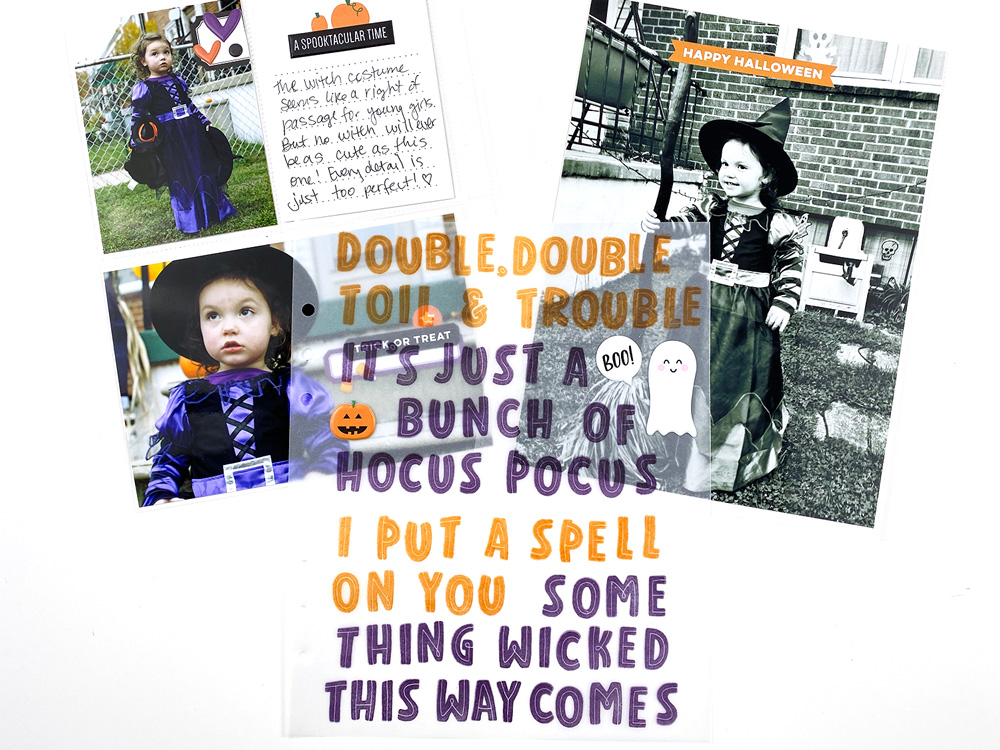
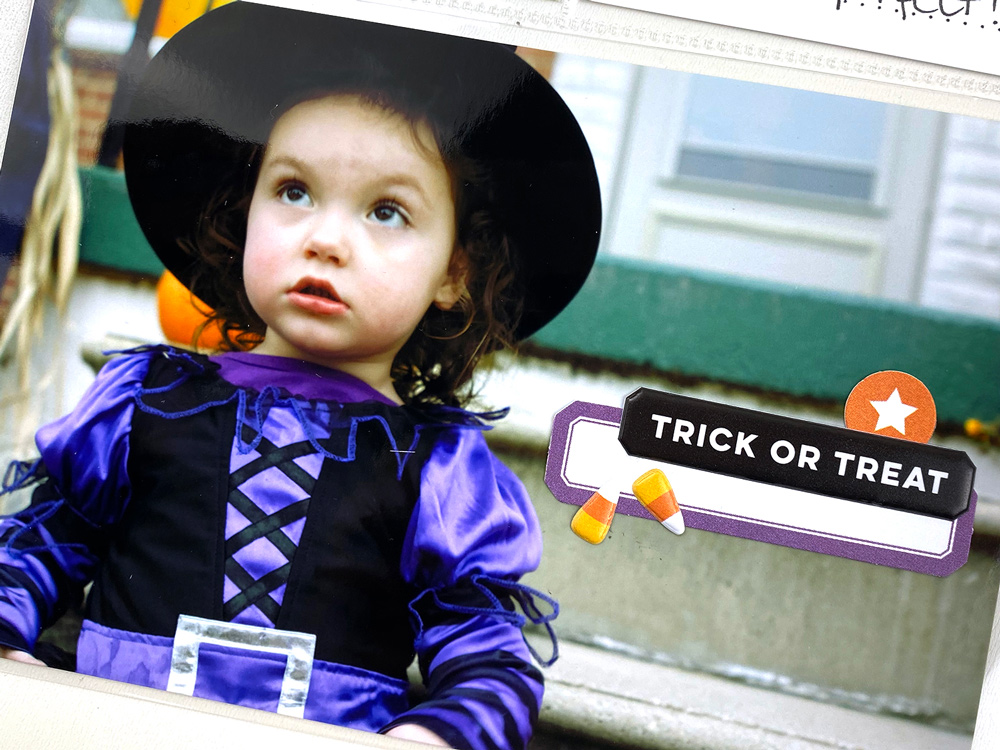
First, I knew that I wanted to use these adorable photos of my niece in her witch costume from a few years back because I had never actually scrapped these photos. I printed a full-sized 6” x 8” photo in black and white and printed the others in color: a cropped 4” x 6” and a 3” x 4” to fill the pockets on the opposite page.
Creating and stamping out a statement title takes a little planning, so you want to be sure not to skip this step! Here are my tips for planning out your title BEFORE you get started:
- Decide on the method for creating your title. In this case, I knew I wanted to use the Winifred Alphabet Stamp to add a full page title on a 6” x 8” piece of vellum that would be inserted directly into the rings of my album as an overlay on the full page photo.
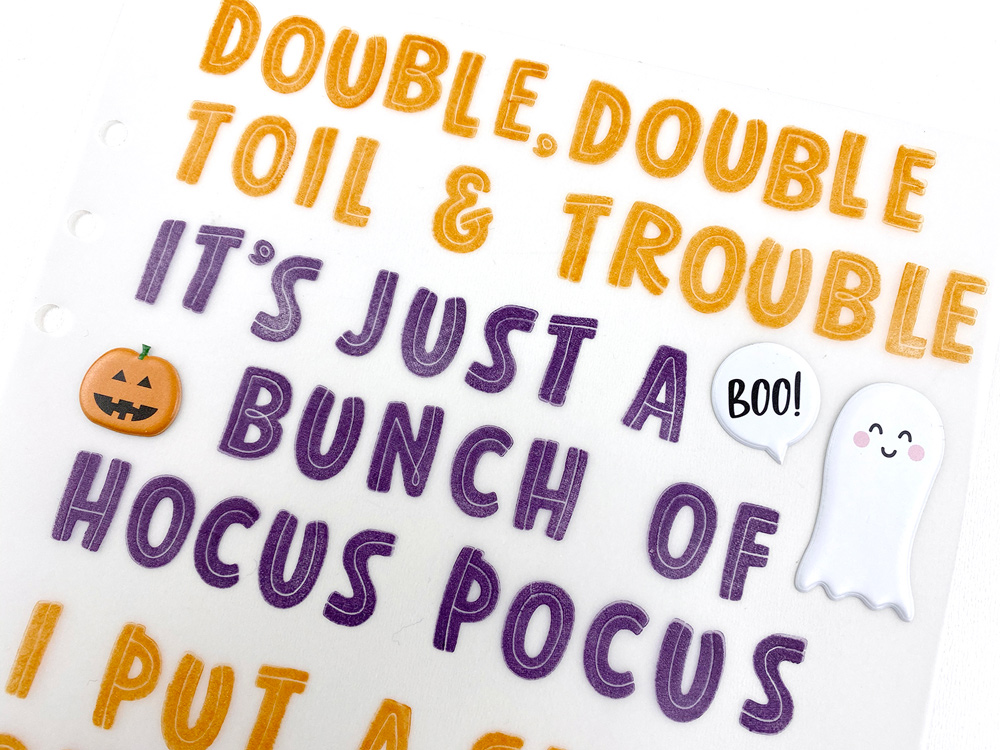
- Select your title. For my title, I knew I wanted to use something witch-related to go along with my photos. The first thought that popped into my head was the phrase “Double Double Toil and Trouble,” from Macbeth, which was totally perfect for my little witch photos, but wouldn’t be long enough using the Winifred Alphabet to fill the whole page. One option would have been to repeat the same phrase over and over to fill the page, but instead, I decided to find some other witchy phrases to add. After a quick Google search, I had three more kid-friendly witch-inspired phrases to use in my title.
- Lay it out. For this step, it’s important to get at least a rough idea of the spacing for your title. I did this by removing the individual stamps from the acetate sheet and laying them out on my vellum to get a sense for how to space out my word as I was stamping. I find that this is never a perfect approach, so just be prepared to be okay with some imperfection. If you want something a little closer to perfection, I suggest typing your title and printing it out. You will have a lot more control that way. For me? I prefer the imperfect, sometimes messy style of stamped words.
- Create your title! I chose an orange and a purple ink to stamp each phrase, alternating between the two colors. My original plan was for each of my four phrases to take up and fill an even amount of lines, however, I ended up with the spacing a little off. But I was able to make it work! For the last two phrases, one was short, and the other a little longer, so I just started the second one on the same line as the end of the first. I thought it would bother me that they weren’t color-blocked better, but I actually really like how it turned out.
To fill in some of the awkward spaces around my phrases on my title page, I added in a few character stickers from the adorable Halloween Puffy Stickers—a ghost, “Boo” speech bubble, and jack-o-lantern.
I wrote out my journaling on a 3” x 4” journaling tag from the Halloween Journaling Tags, which were an extra in this month’s release. To round out that tag, I added the “a spooktacular time” phrase sticker from the Halloween Puffy Stickers to cover just the bottom of the pumpkins on the card.

I completed the layout by adding a few more embellishments from the die-cuts included in the monthly kit, the “Happy Halloween” sticker from the Thankful Stickers, and candy corn and “Trick or Treat” stickers from the Halloween Puffy Stickers. Have I mentioned that between my three projects for this month’s kit I have already used every single one of the Halloween Puffy Stickers? I loved them THAT much!
Overall, I’m really tickled with how this pocket page spread turned out! I really love the statement title and it made me fall in love with the Winifred Alphabet Stamp. I hope this provided some guidance on creating your own statement titles. I can’t wait to see what you’re making using this month’s kit, specifically for Halloween projects! Be sure to share on Instagram using the hashtag #Ellesstudio, or in our Elle’s Studio Facebook Group, so we can all see your awesome creations!