Digital printables and cut files are perfect for adding to your projects again and again, but what if you could alter them to make them truly unique—helping your projects to stand apart from the others? That’s what design team member Jen McMurtrey is teaching us today for day three of Back to School week, and we know that you’ll love her simple, yet so effective digital trick!
Hello Elle’s Studio friends! It’s Jennifer today with a layout about my favorite time of year—back to school! The smell of freshly sharpened pencils and college-ruled paper is in the air, along with the excitement of new classes and fun memories to be made. Perhaps spending my days with high school students has made me slightly dramatic, but I love the fall and the beginning of school. I can’t wait for football games, Homecoming and pep assemblies—it must be why I chose to be a teacher!
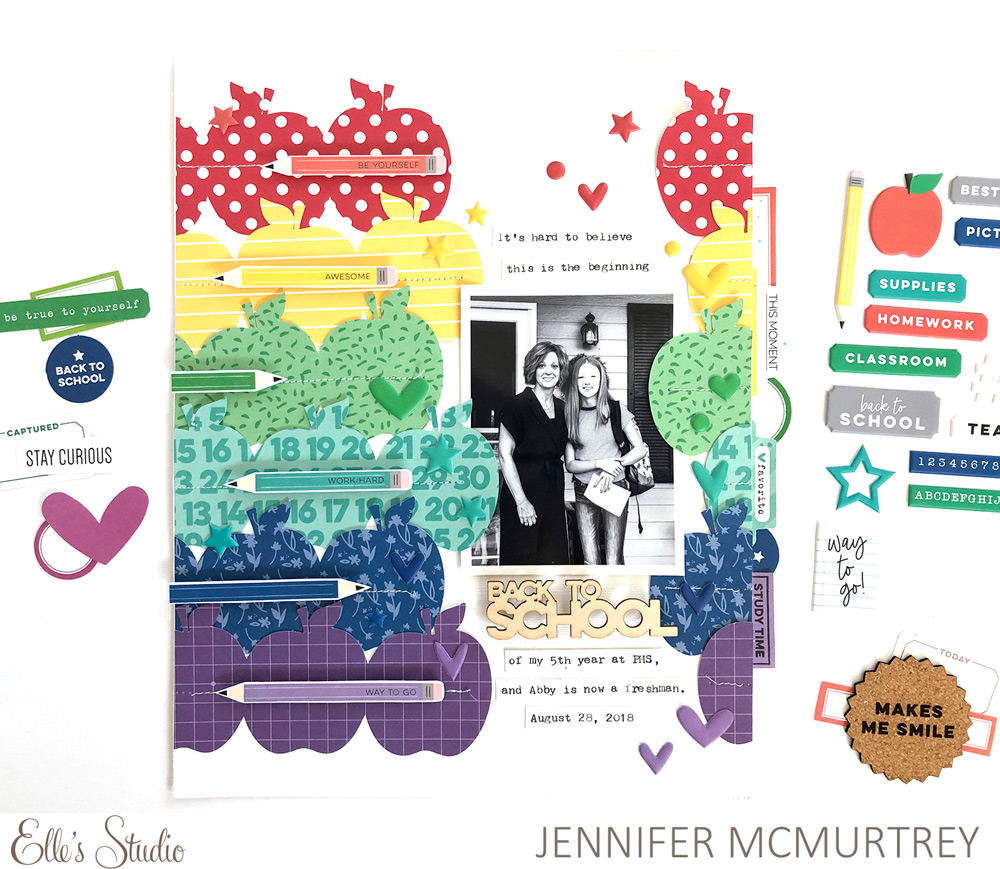
One of my go-to favorites when creating layouts is cut files. I love the August 2019 Digital Cut Files and want to share with you how I altered the apple cut file to fit my project. First, let’s take a look at what I created:
Supplies | August 2019 Kit, August 2019 Digital Cut Files, Back to School Puffy Stickers, Puffy Heart Stickers — Summer Mix, TGIF Wood Veneers, Shapes and Dots Puffy Stickers, Springtime 6 x 6 Paper Stack, All My Heart 6 x 6 Paper Stack, Magical Memories 6 x 6 Paper Stack, Back to School Stamp
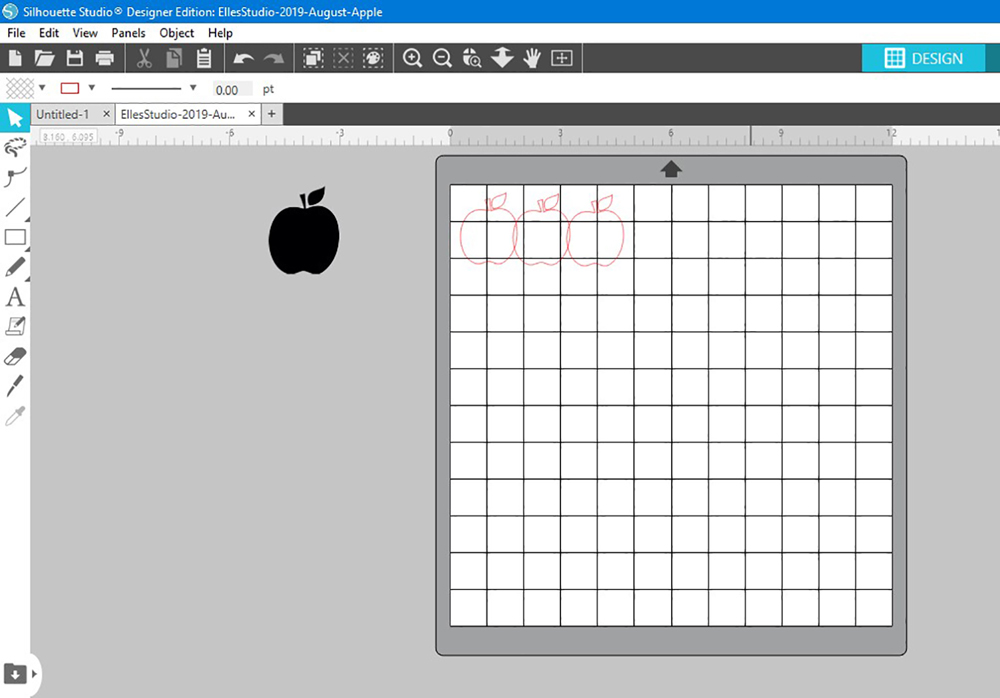
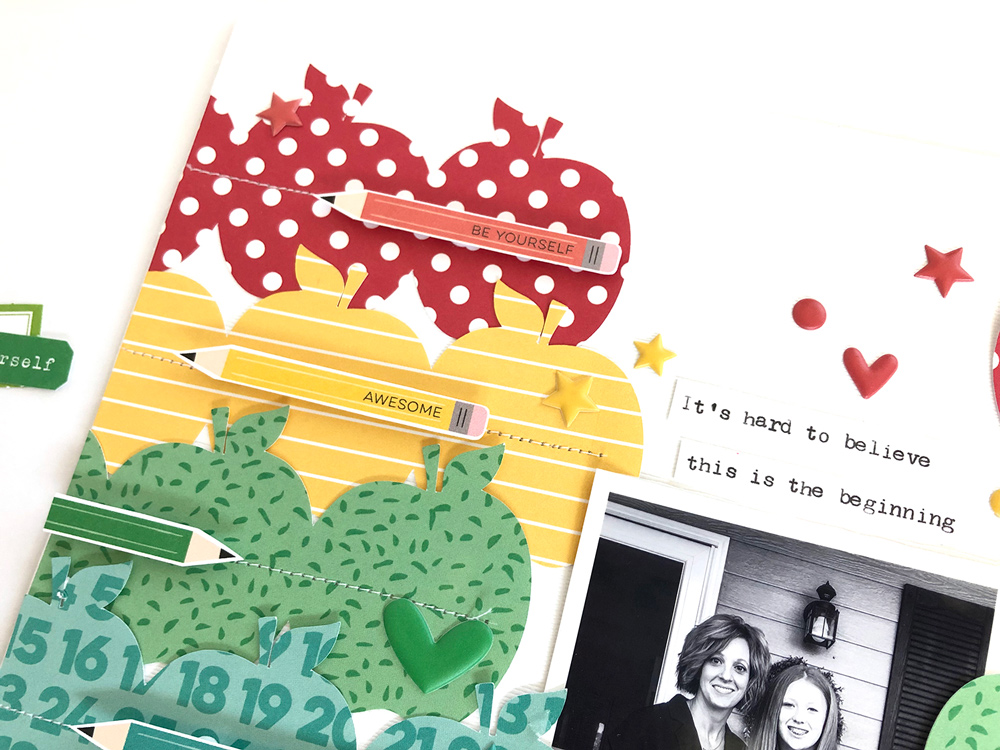
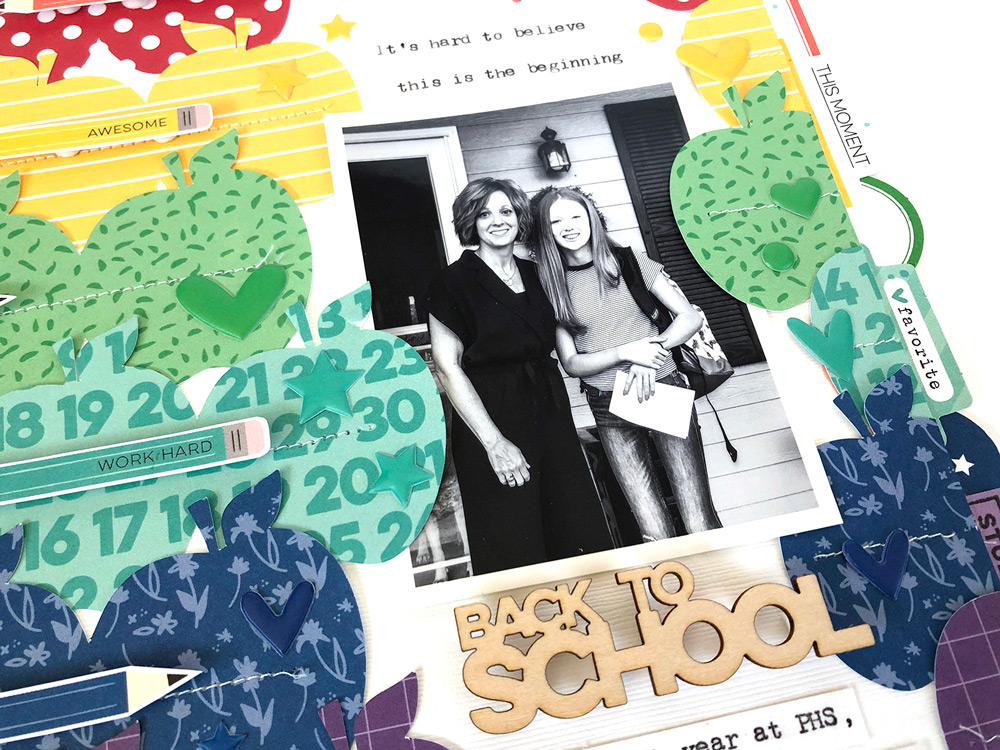
This 8 ½” x 11″ layout uses several papers from my Elle’s Studio stash along with elements from the August Kit and add-ons. However, the main points of interest are the apples down either side of the page, and these were created using a simple welding technique with my Silhouette CAMEO. To get this effect, the first step is to open the cut file and adjust the size of the object to fit your design as I did below.
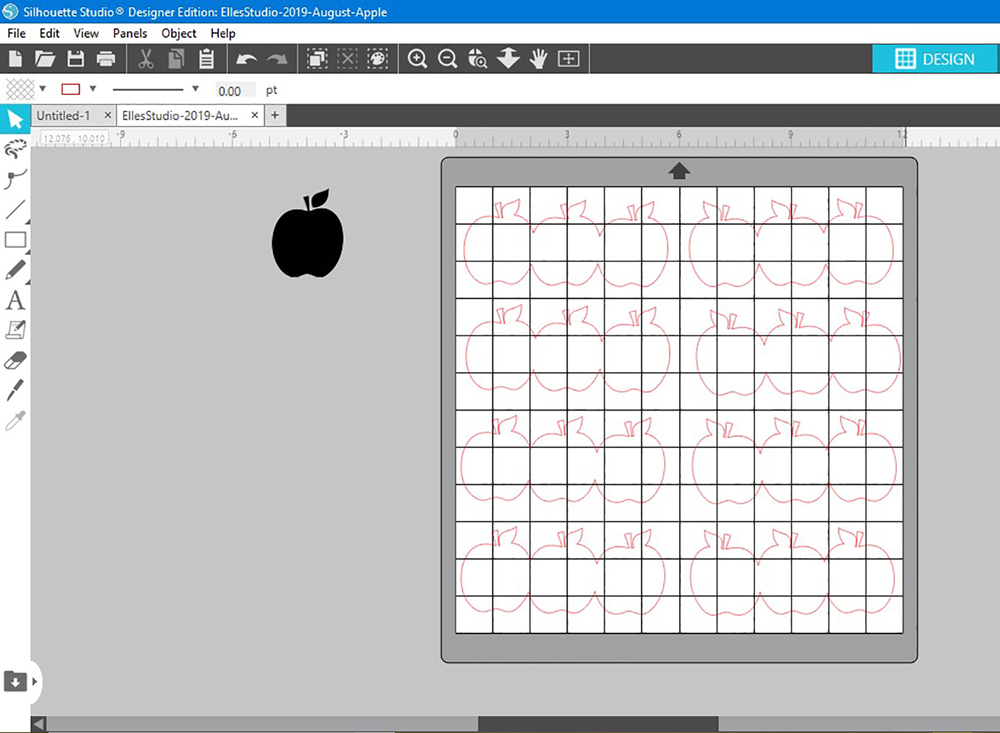
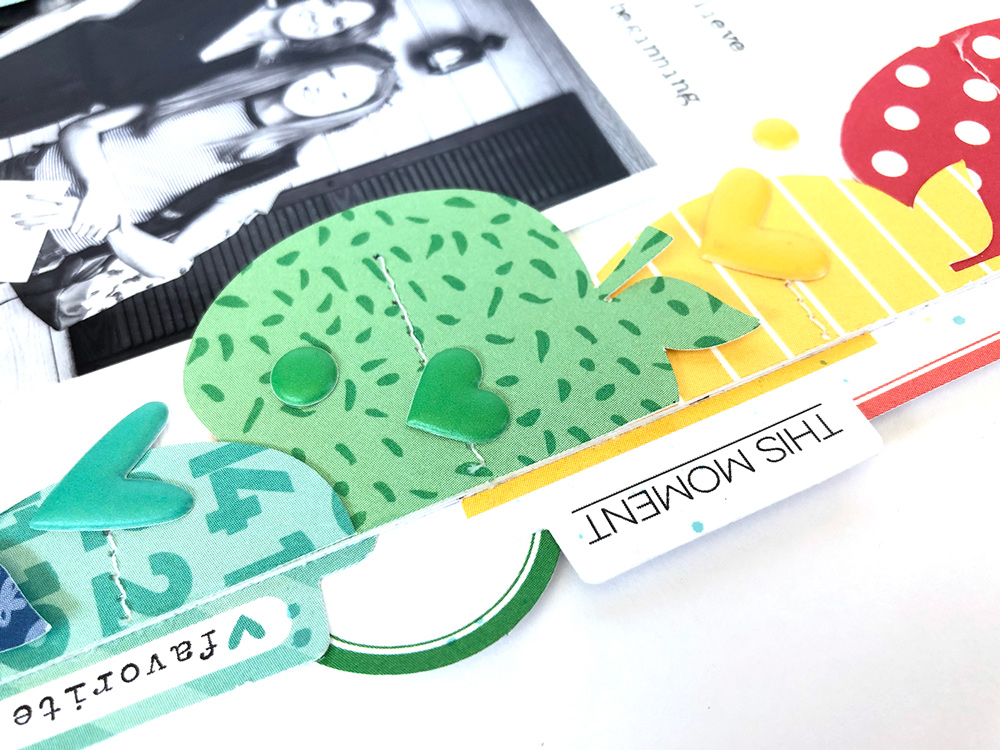
Once I had the apple just right, I duplicated it twice, and moved each piece so they overlapped one another in a straight row. With the apples overlapping, I simply selected all three and used the “Weld” function on the Silhouette to create a border. I was able to cut all six of them at the same time by duplicating the apple border object six times. Next, I moved them within the 12” x 12” design space, which allowed me to cut six 3” x 6” pieces of patterned paper simultaneously. Having the ability to cut each of the borders at one time is a definite time saver!
If you ever find yourself struggling with digital files or are overwhelmed with the functions on your die cut machine, YouTube is a great resource. I have had my Silhouette for several years, but still need a tutorial from time to time. I always find what I need online.
Now that I’ve shown you how to alter the cut file, let me walk you through the project. Originally, I planned on having the rows of apples cascading down the center of the page. However, I began experimenting with the placement and found I loved the idea of having the apples on either side of my photo. So, after machine stitching down the center of each of the apple borders, I adhered them along the left edge of the cardstock and cut off the excess.
On the right side of the cardstock, I placed the selvage from each of the previous cuts. I really loved adding unexpected elements to projects and decided to insert die cuts from the August Kit behind the apples in coordinating colors. Doing this did make the layout bigger, but I’ll just pop it into a larger page protector.
My photo was tucked in behind the edges of the apples, which I think looks super cute. I used the “Back to School” TGIF Wood Veneer as the title and popped off the page with foam adhesive.
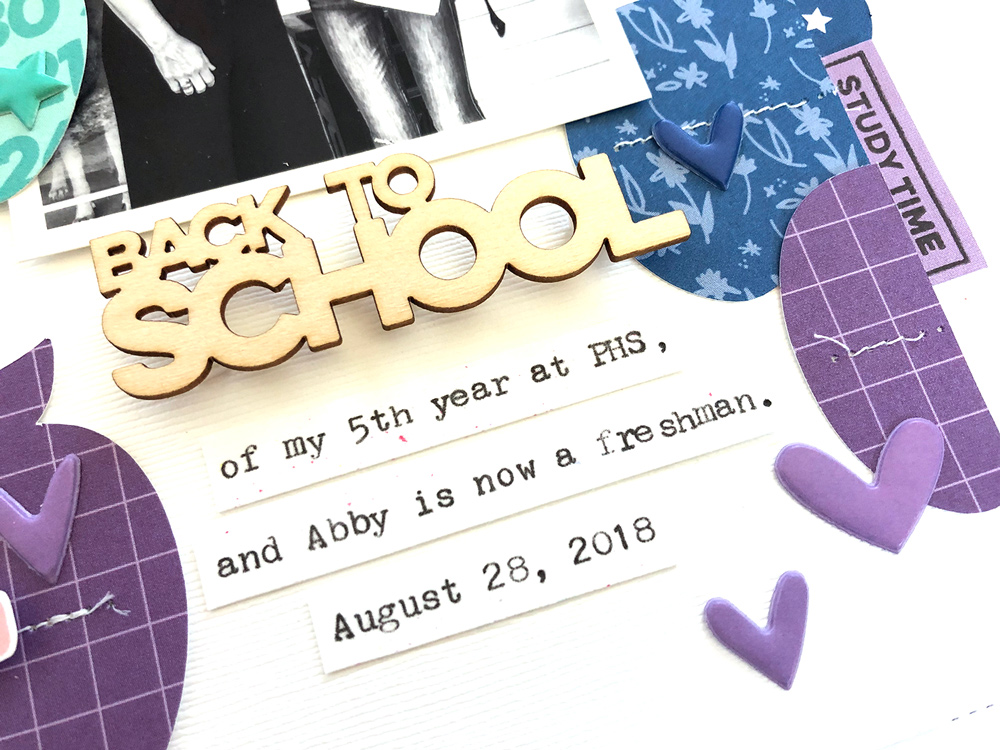
I completed the project with journaling strips typed on my manual typewriter, which I placed above and below the photo. You’ll also notice the pencils popped off the page with foam dots, which I fussy cut from a 4″ x 6″ journaling tag in the August Kitt. Last, I added Back to School, Puffy Heart, and Shapes and Dots Puffy Stickers on the apples to give them a bit more texture.
This layout has me all kinds of excited for school to start next week. I’m looking forward to being back in the classroom doing what I love . . . besides scrapbooking that is!
Thanks for stopping by today! Please be sure to use #EllesStudio on social media so we can see what you’re creating with the August Kit and add-ons, and what you’ve been inspired to create during Back to School week!
