Stamping is such a great technique to create custom embellishments, sayings, titles and more on your projects, and Steph Grimes is here to share some ideas on how to get creative with them! We know you’ll love these ideas, as well as the patriotic project that she’s sharing using our July 2019 Kit and extras!
Hi everyone! It’s Steph here and I’d like to share a layout with you that uses the new July 2019 Kit and extras. For this project, I had this adorable photo of my pup and our “nephew pup” Benny in their patriotic hats from 4th of July. I was really inspired by one of the 3” x 4” tags in the July 2019 Kit that had a few star banners running across it and had the idea to replicate this with the line of stars stamp from the You Are My Sunshine Stamp. That was the starting point for this layout, and it lead me to think of all the ways I could use the stamps on this layout. Today I’d like to share a few of those ideas with you!
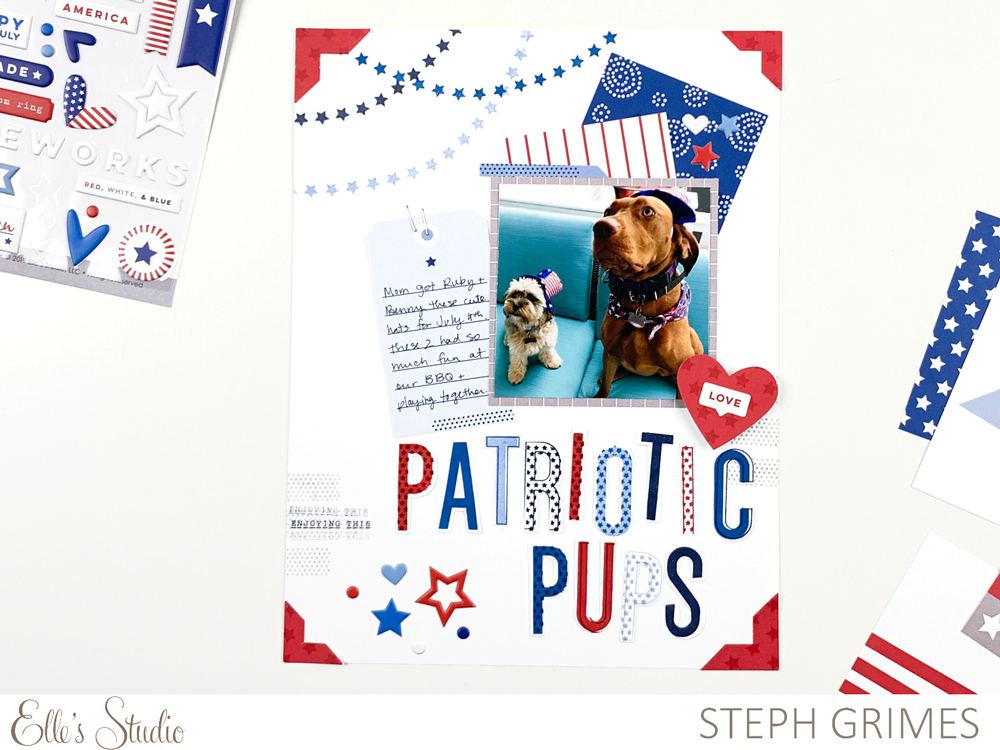
Supplies | July 2019 Kit, 4th of July Puffy Stickers, You Are My Sunshine Stamp, Large Jane Alphabet Stamp – Outline, Large Jane Alphabet Stamp – Stars, Large Jane Alphabet Stamp – Solid, Large Jane Alphabet Metal Die
1. Mix and Match and Layer Them Up
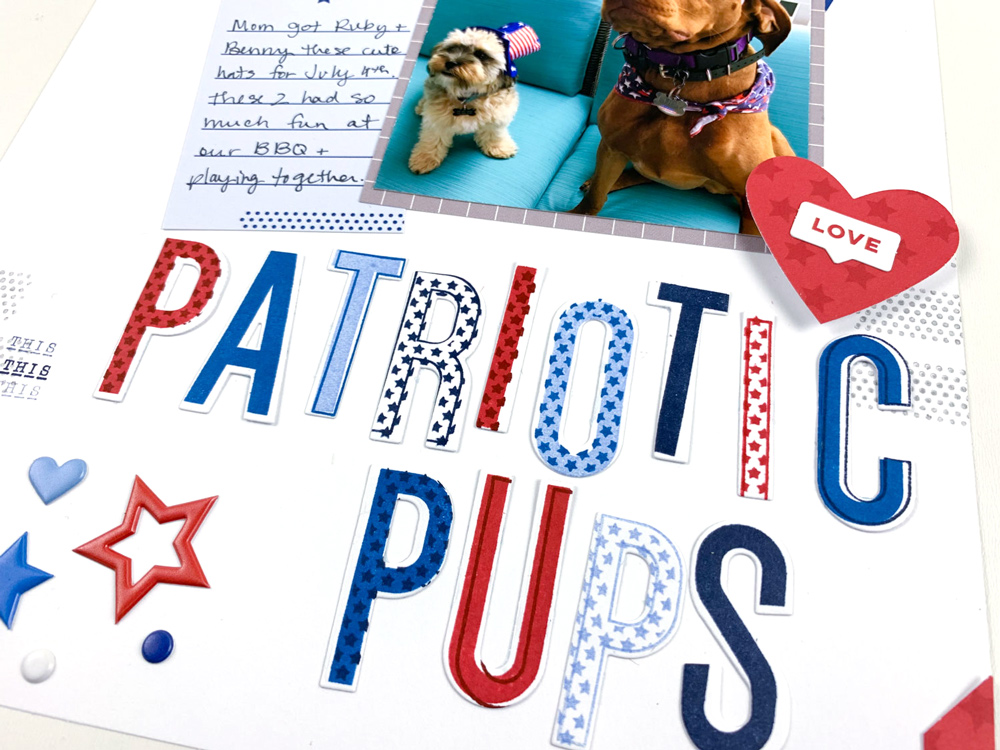
One way to use your stamps to create interesting looks and effects is to mix and match and layer them together. Here, I used the Large Jane Alphabet Stamps (solid, outline, and stars) to create a visually interesting title. I used multiple colors that matched my layout to create each letter in the title, but I also could have used one or two colors only and achieved a totally different look! The Large Jane Alphabet Stamps lend themselves perfectly to this creative use of stamps, especially with so many awesome coordinating sets, but I also did some stamp layering along the edge of the layout with the “enjoying this” phrase from the You Are My Sunshine Stamp. What stamps do you have in your stash that you can mix and match and layer to create new unique looks?
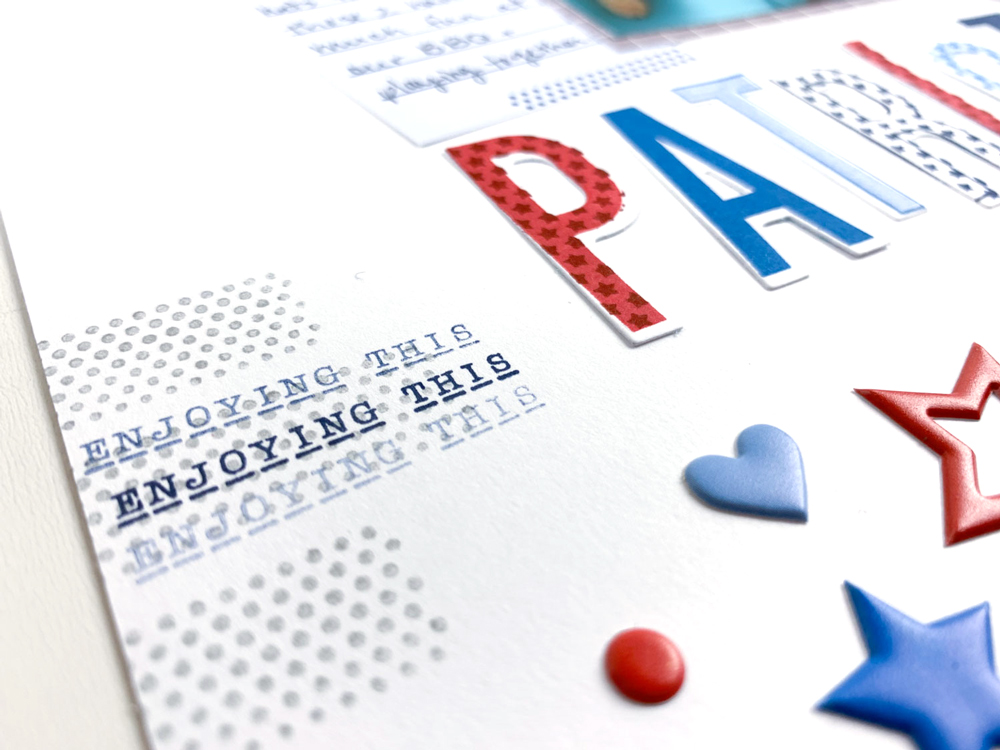
2. Try Second and Third Generation Stamping
This technique is a great way to add a little interest to your layout! Multi-generation stamping is when you ink your stamp and stamp it once, then stamp it again multiple times without re-inking. The effect is that each time you stamp the image or words show up lighter and lighter. I love to use this technique with sentiment and phrase stamps to really drive home a message. BONUS: I also mixed this technique with the first and did my multi-generation stamping layered on top of a graphic stamped image!
3. Reconfigure Your Stamps
I’ve been stamping for a long time (about 18 years!) and stamp manufacturing has come a long way in that time! When I first started stamping, stamps were all rubber, mounted on wood blocks, and this technique was simply not possible with wood-mounted stamps. However, many stamps now are manufactured as clear acrylic stamps which makes it easy as pie to reconfigure and manipulate your stamps to create new looks.
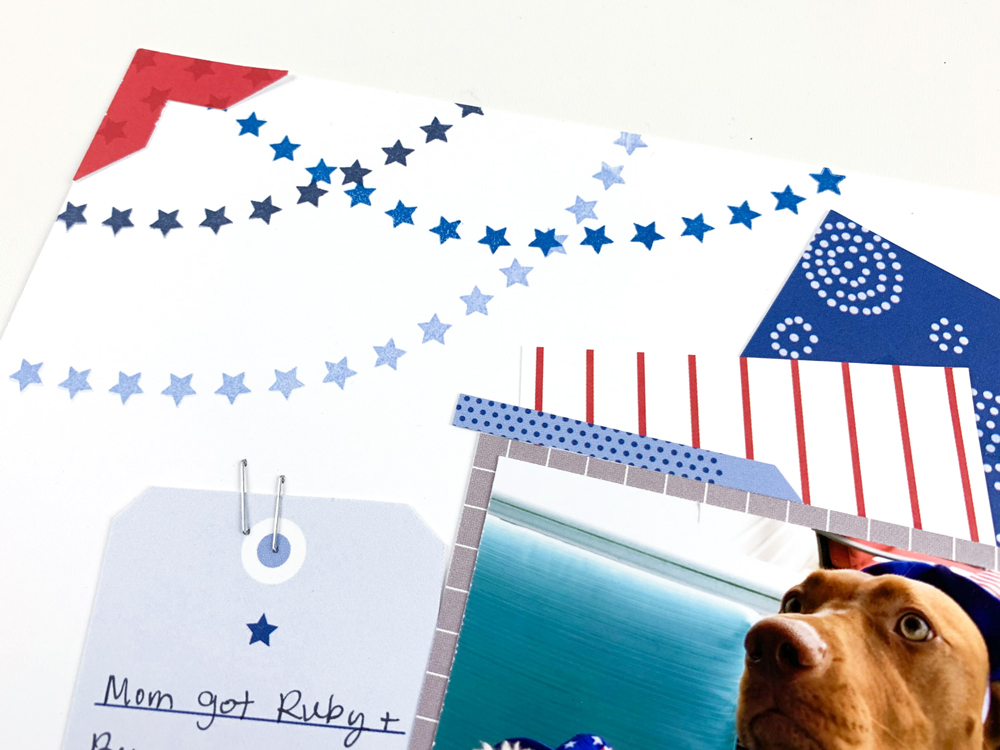
As I mentioned at the beginning of this post, I was inspired by the tag in the July Kit with the star banners running across it. I wanted to recreate this look on my page, but didn’t want to fussy-cut those stars out of the tag. The You Are My Sunshine Stamp includes an awesome straight line of stars that I knew I could manipulate to make my banners. When I mounted the clear stamp to my clear stamping block, I just bent it into a curved shape, like so:
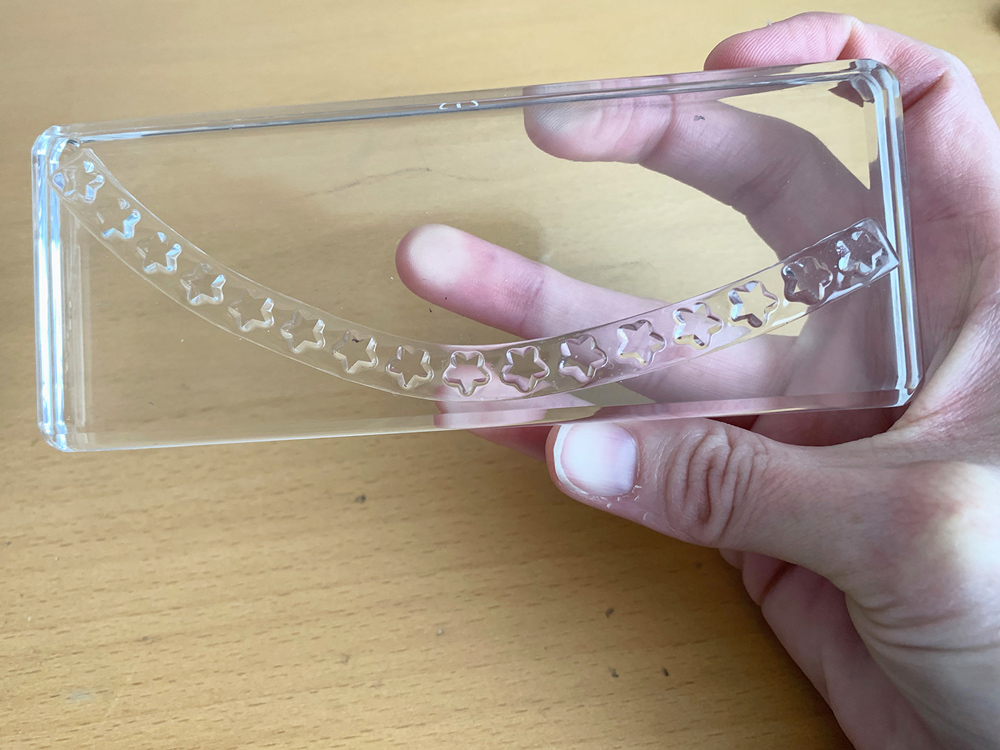
This allowed me to stamp my banners just as I wanted to and when I was finished, I put my stamp back into the envelope as it was originally! For other ways to reconfigure your stamps, you can add multiple stamps to a single block or cut stamps apart and use them separately to create new images. This last method is definitely permanent, so it’s not my favorite option, but if you’re brave, go for it!
What are your favorite ways to use stamps? I hope you will try some of these techniques on your upcoming projects and share on Instagram using the hashtag #EllesStudio to let us know how it goes!

