Our March stamp, The Details Stamp, includes an array of stamps that help you get your stories on your project or add tiny labels or punched die cuts for embellishment! Today, Tracey Fox has taken this fun stamp set to the next level with a new scrapbook layout that we know you will love! Let’s see what she created!
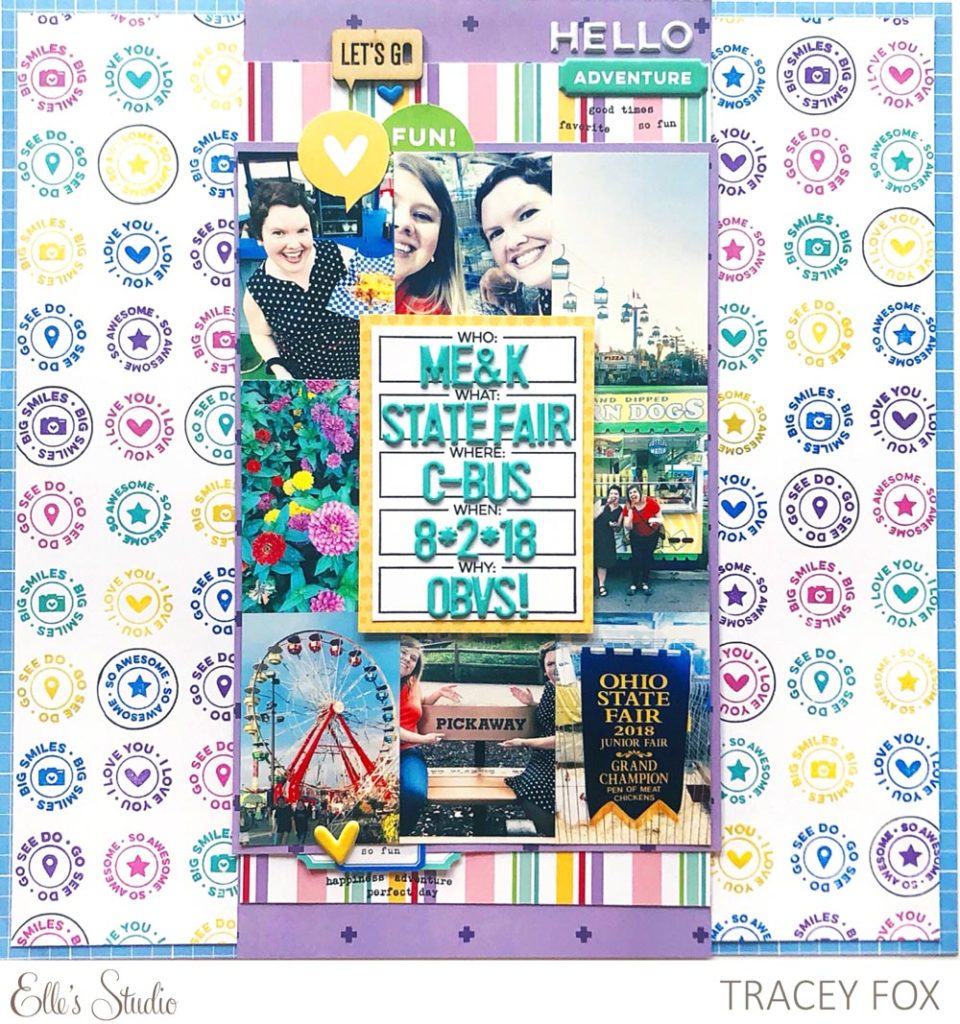
Hi there! I’m so excited to share this colorful layout that I made using The Details Stamp that was released this month. It’s such a versatile set that lets you document the main highlights of an event or story with ease.
Supplies | March 2019 Kit, Tiny Everyday Label Stickers, Spring Puffy Stickers, Teal Puffy Alphabet Stickers, Wood Veneer Speech Bubbles, The Details Stamp, Noteworthy 12″ x 12″ Paper Collection
I knew immediately that I wanted to play with the circle stamps in the set. The sentiments and icons are so cute, and they perfectly fit the story of my day at the state fair with my best friend! I decided to stamp them in lots of colors in a repeating pattern to make my own patterned paper.
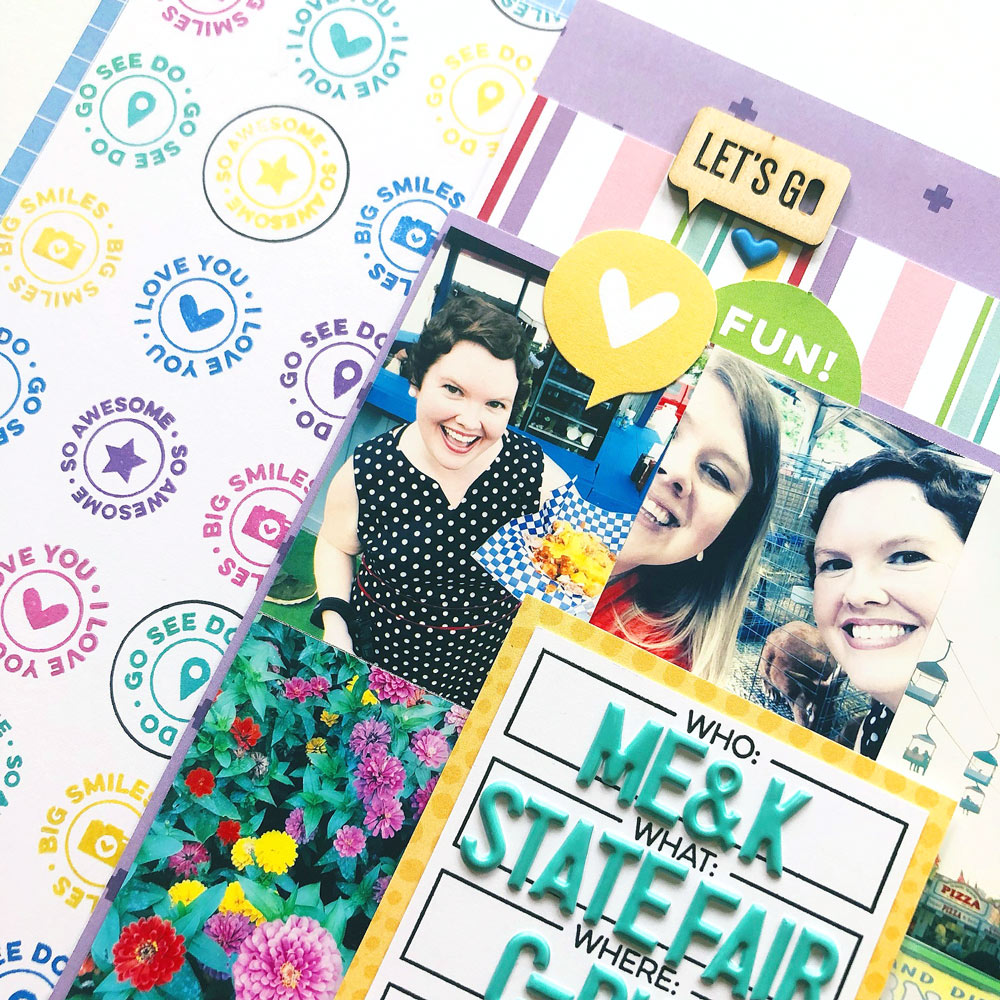
To help me line the stamps up neatly, I used my Silhouette Cameo to cut a grid of small circles into a piece of cardstock I could use as a template for my stamping.
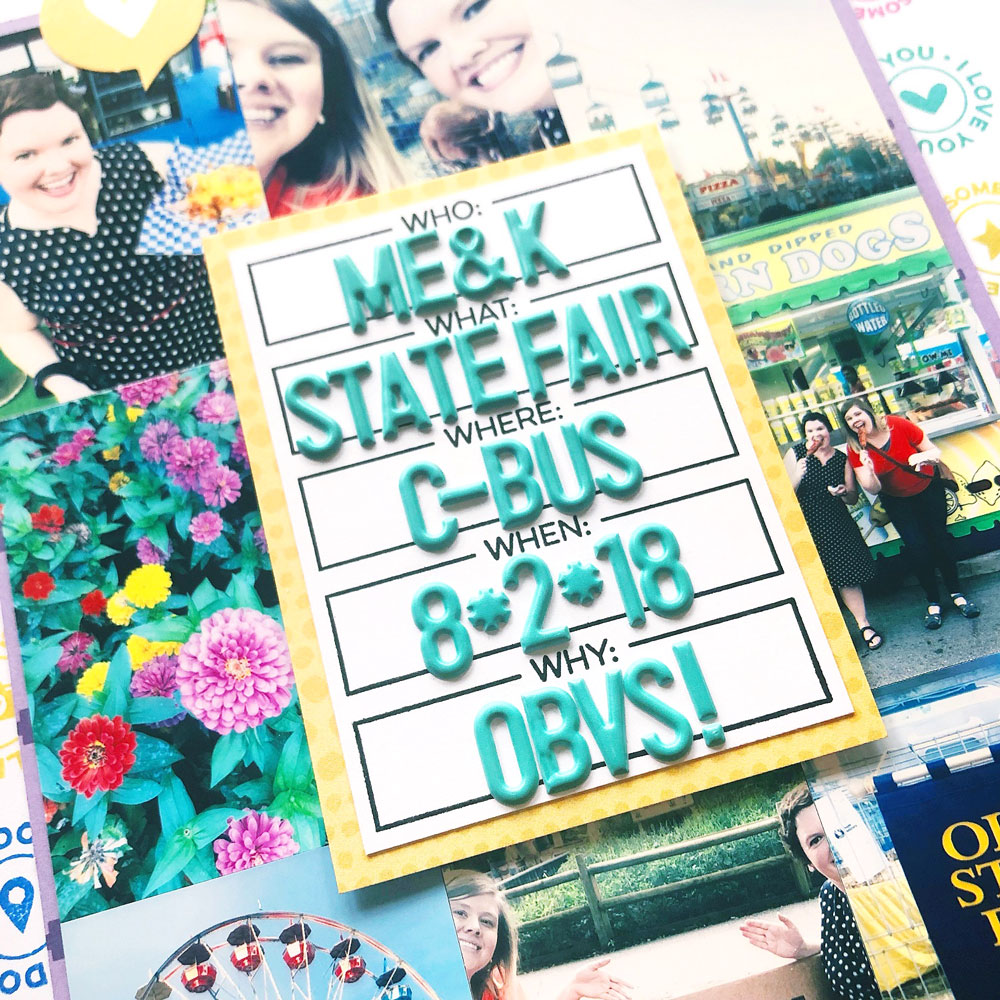
Next, I focused on the “Who, What, Where, When, Why” stamp in the set. I stamped it on white cardstock, which I matted onto a yellow tag from the March 2019 Kit, and I placed it at the center of a grid of photos I arranged showing details from our trip to the fair. I used the Teal Puffy Alphabet Stickers to fill in the blocks with my simple journaling. I love how this stamp can be used on so many different types of projects—layouts, pocket cards, traveler’s notebooks, planners, and mini-books—to capture the important details of just about any event or story.
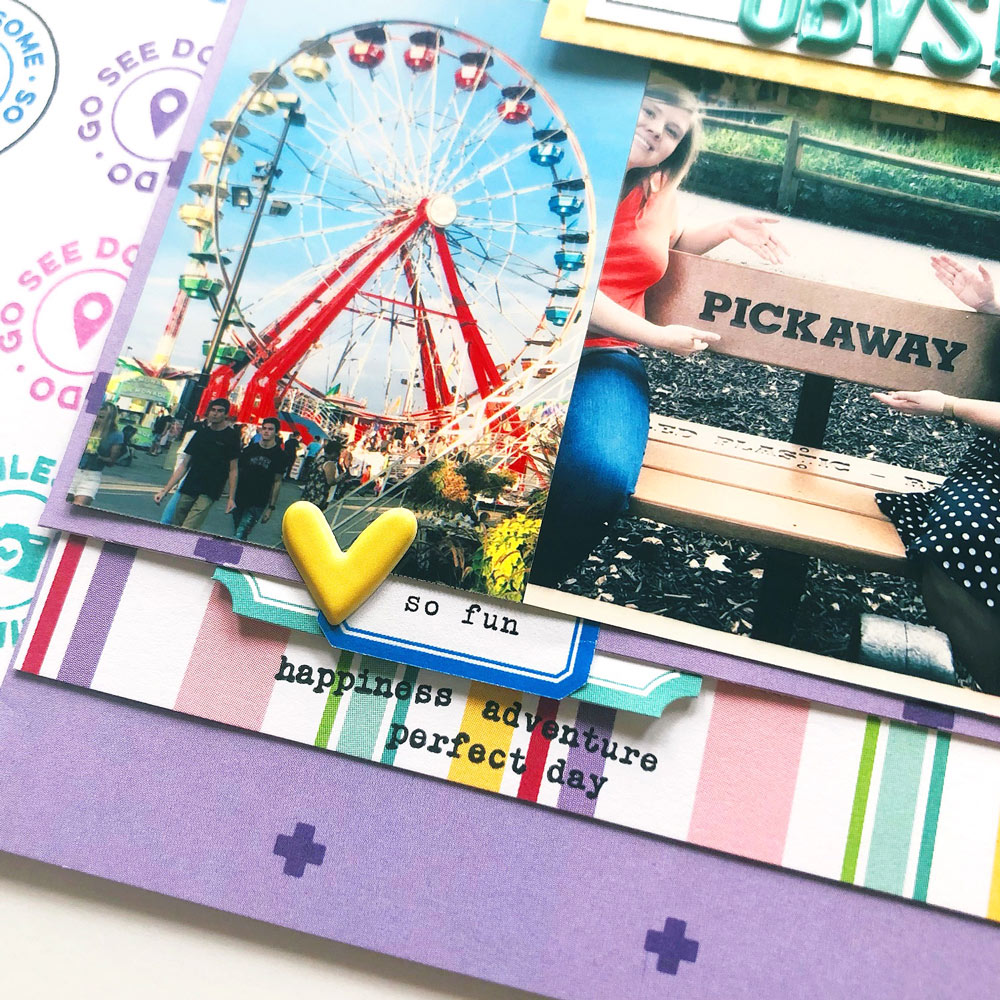
I adhered my photo grid down the center of the layout with a couple of patterned layers using the Noteworthy 12″ x 12″ Paper Collection and a tag from the March Kit. Then, I added a few simple embellishments from the March kit die cuts, the Spring Puffy Stickers, the Wood Veneer Speech Bubbles, and the Tiny Everyday Label Stickers. I also added a few of the tiny word stamps from the stamp sets around my areas of embellishment.
Finally, I used my home-made circle stencil to trace a few of circle stamps with my trusty Elle’s Studio black pen. I like how it added some interest to the patterned stamping and echoed the black outlines on the journaling boxes in the center of the page. Thanks so much for taking a look today! I’m already excited to put this stamp set to use to tell more of my stories.
Show us how you are using your The Details Stamp on your projects! Post your project on Instagram using the hashtag #EllesStudio, or in our Elle’s Studio Facebook Group!