A trip full of special moments deserves its own special project to keep those photos and words in your memory, and today we have a special guest with us, the lovely Diane Williams, also known as Dearly Dee, to show off her latest traveler’s notebook insert, created using our first product made especially for your traveler’s notebooks: the Let’s Go Traveler’s Notebook Kit!
Hi everyone! It’s Diane here and I am so excited to share the traveler’s notebook insert that I created using the amazing new Let’s Go Traveler’s Notebook Kit!
In December of last year, I took a trip to Wellington with my sister and our husbands. Because I was already doing my daily December album at the time, the photos and memories from this trip got pushed aside, into the ‘must do later’ pile, so this kit came at the perfect time! I have finally got this trip documented in my traveler’s notebook and can look forward to the next one.
I started by creating my own insert using 120gsm white paper for the inside pages and a plain cardstock cover, chosen to coordinate with the gorgeous, bold colours in the kit. It is super easy to create your own inserts, and by doing so, you can make sure your insert has the exact amount of pages for the photos you want to document.
Supplies | Let’s Go Traveler’s Notebook Kit, Stanley Jr. Alphabet Stamp — Outline, Mini Dated Stamp
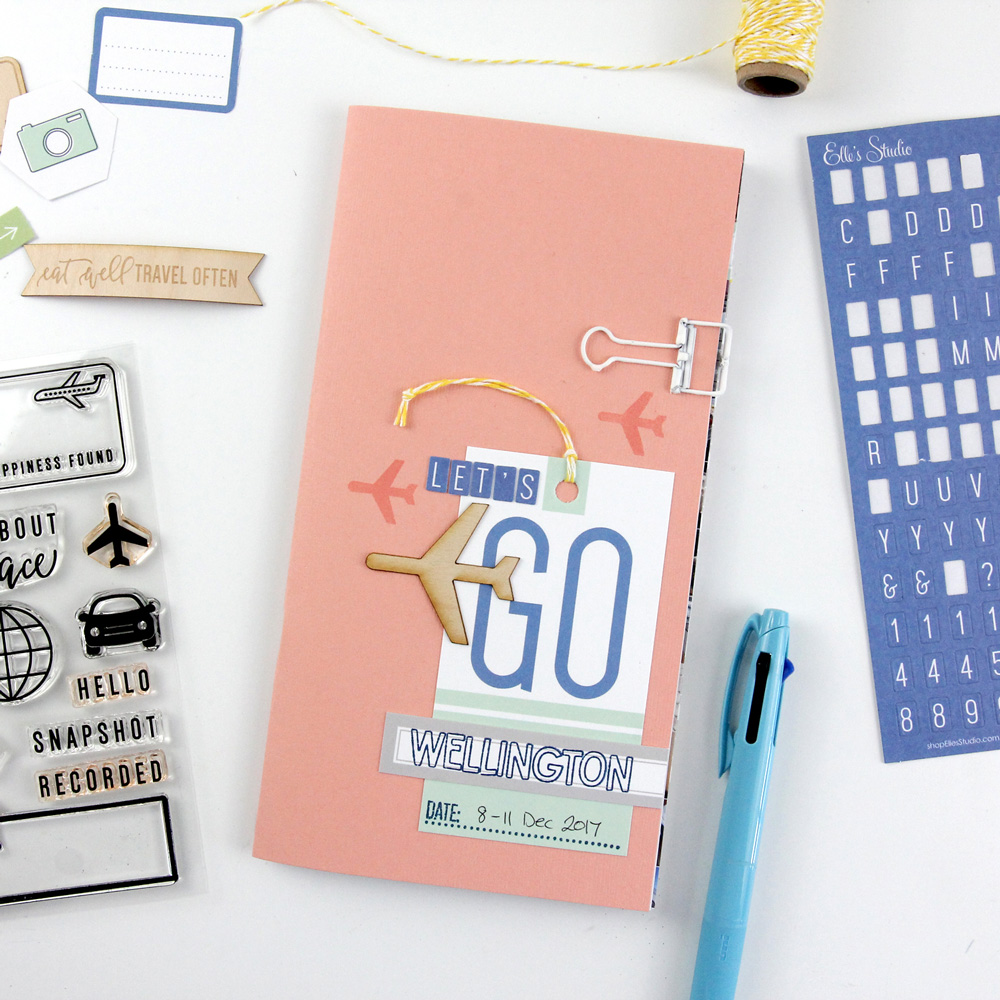
I always like to start with my cover as it gives me a jumping off point for the theme and style of my pages. I added the “go” tag as a base and titled my insert after the kit—it couldn’t have been more perfect! I used those cute little navy blue alphas included in the kit and added a gray cut-apart label so I could stamp our destination using the Stanley Jr. Outline Alphabet Stamp.
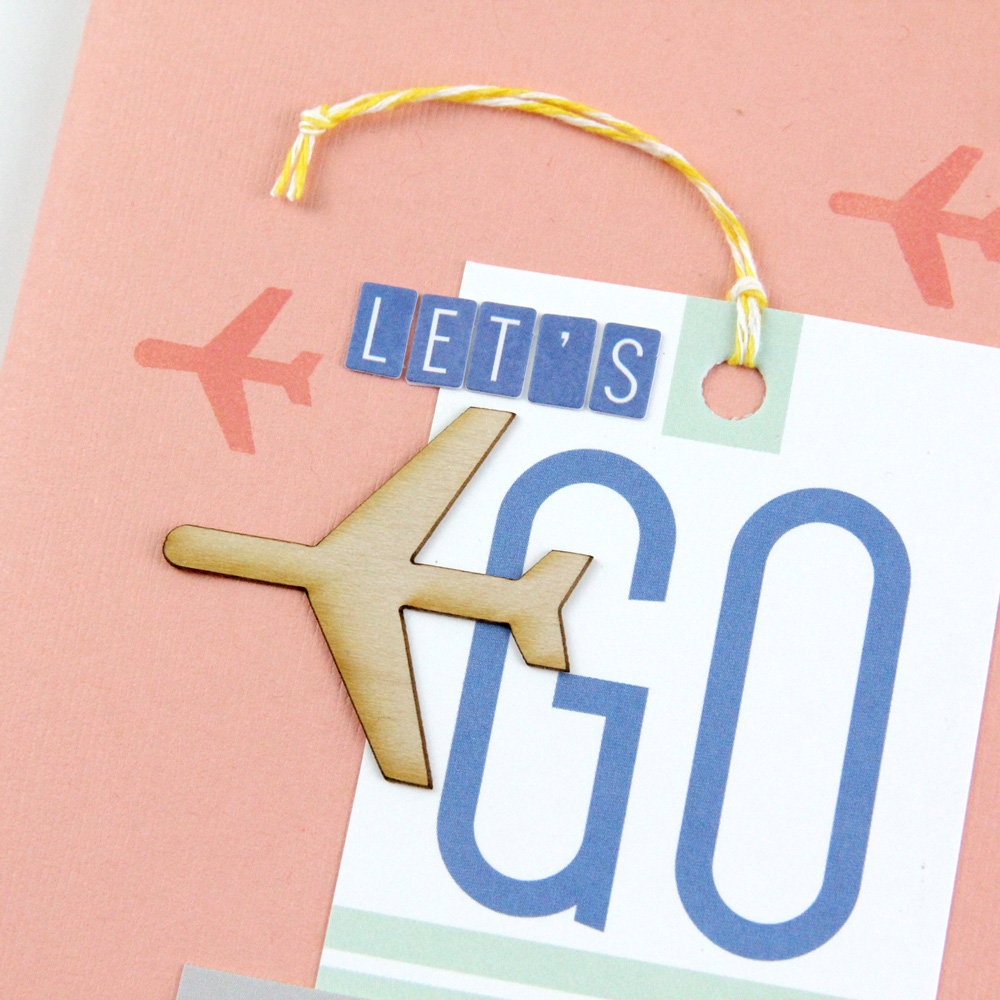
I love tone-on-tone stamping, so I stamped the airplane icon from the Let’s Go Stamp included in the kit a couple of times in a similar coloured ink to my cardstock before adding the wood veneer plane to complete my cover.
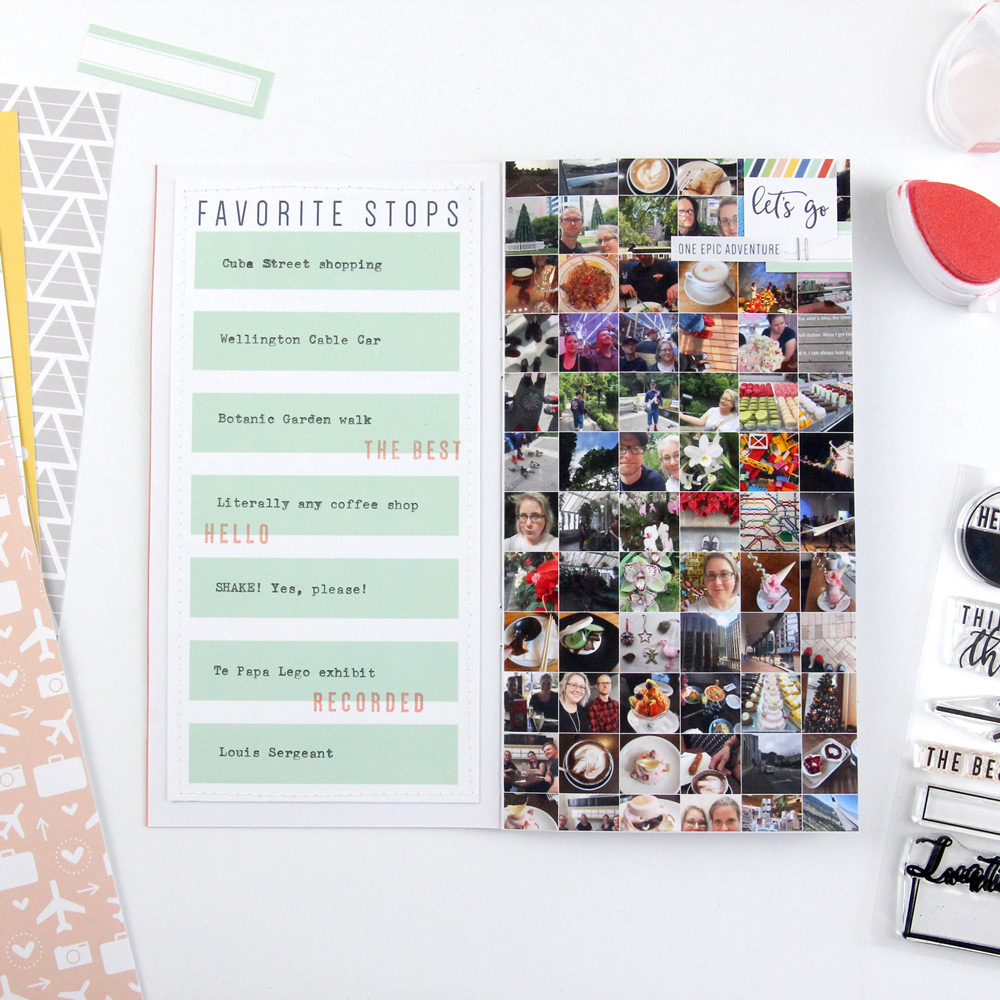
On my first page, I just had to include this “favorite stops” paper; it is the perfect way to sum up a holiday in one page. I simply ran it through my typewriter, typing in our favourite places and memories from our trip. I then stamped three sentiments from the Let’s Go Stamp onto my personal top three places!

Instead of choosing one, or a few, photos to go with this page, I decided to add ALL the photos from our trip. I simply screen-captured my camera roll and stitched all the photos together in Photoshop. Because it is a very busy page, I kept the embellishment to a minimum and just added the “let’s go” die-cut banner, a label and a tiny word sticker to the top corner.
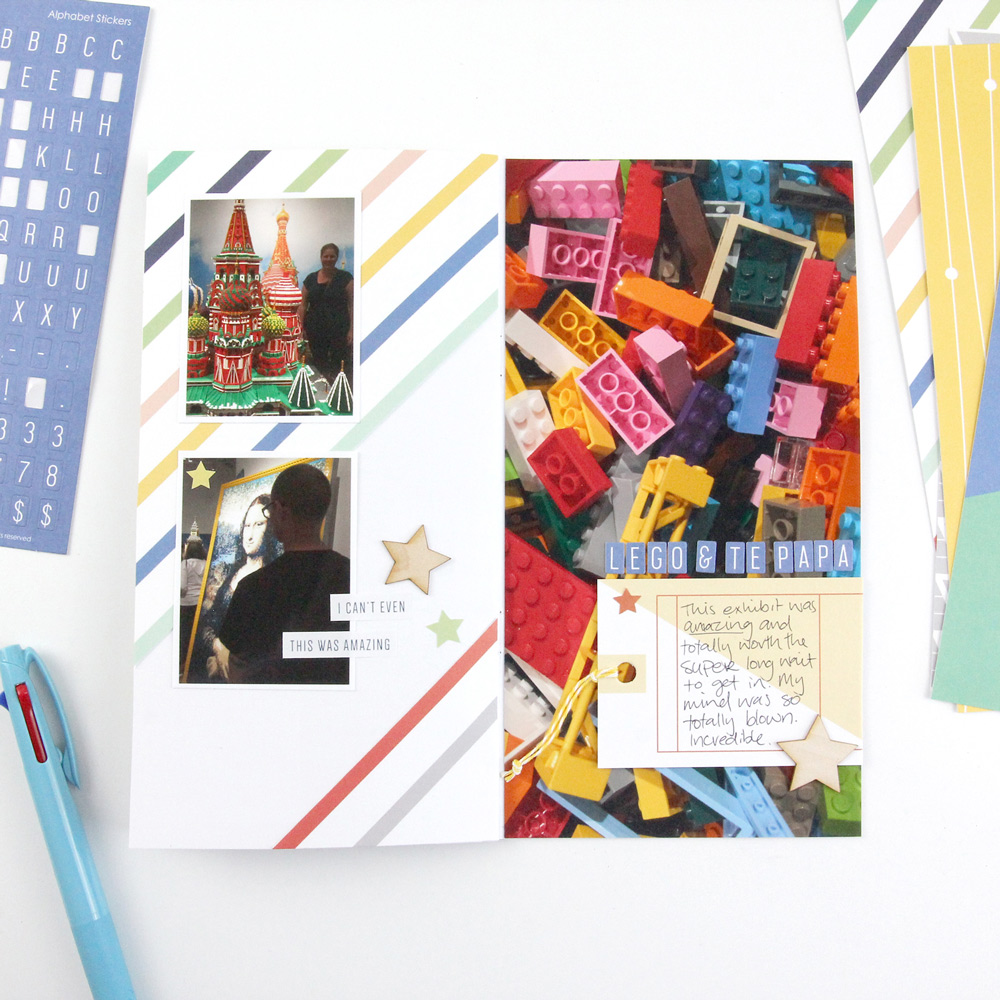
I knew I wanted to use this Lego photo as a full-page photo, but I also wanted to add a couple of pictures of us at the actual exhibit, too. So I needed a paper that complimented the busy colour scheme but was simple enough not to compete with my photos. This diagonal stripe was perfect, apart from the fact it had an airplane in the middle of it! Simple solution, I used the stripes as a guideline and cut out the part of the paper with the airplane, leaving me nothing but gorgeous stripes!
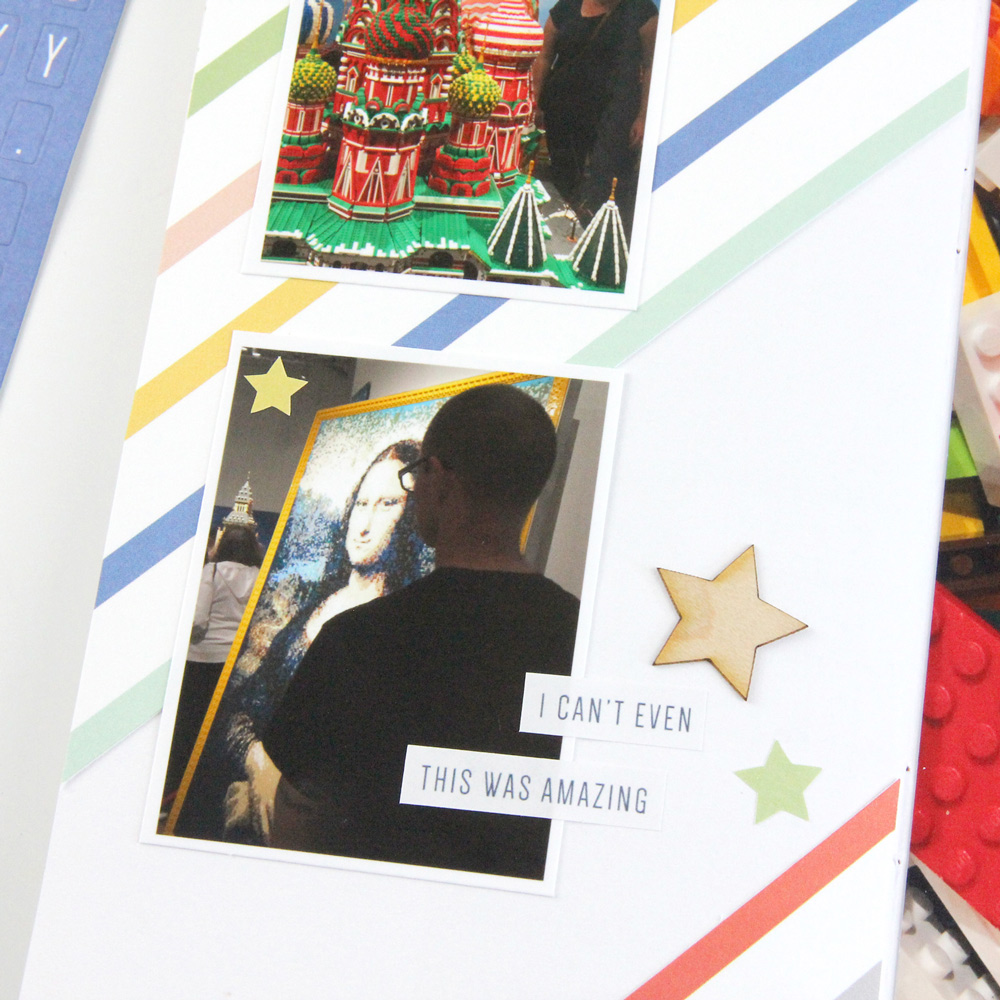
Because my full-page photo is more abstract in nature, I had no problem placing a tag over top of it so I could add my journaling. A wood veneer star and some star stickers helps to tie the two sides of the page together. I couldn’t resist adding a couple more tiny phrase stickers!

This page was so simple to create, because this lined paper gave me SO much room to tell a lengthier story. Again, I popped it straight into my typewriter and typed out my journaling directly onto the page. I used the space at the top to stamp the “location” stamp from the Let’s Go Stamp, included in the kit, which also allowed me to add the location of this memory. I had so many photos from this amazing patisserie, so I created a couple of fake photo booth strips and glued them both down on the right side before adding a paper clip from my stash. There was a bit of an odd space at the bottom so I filled it with a wood veneer heart and then stamped little hearts across both pages, tying them together.

Want to know a secret? I used some sharp scissors to cut that tiny heart out of one of the larger stamps in the set. It doesn’t damage your stamps at all, and you can always place them back together like a jigsaw when you want to use the whole stamp again. It’s just one more way to make your stamps more versatile!
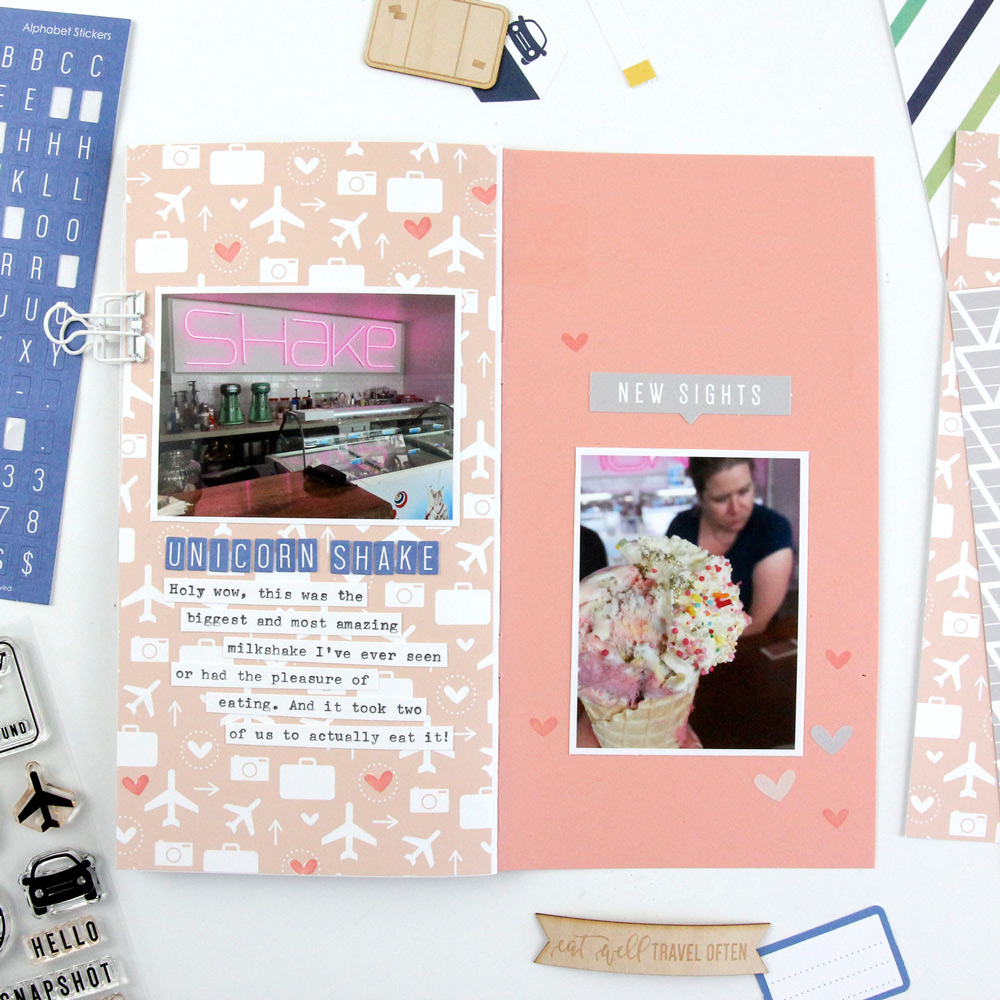
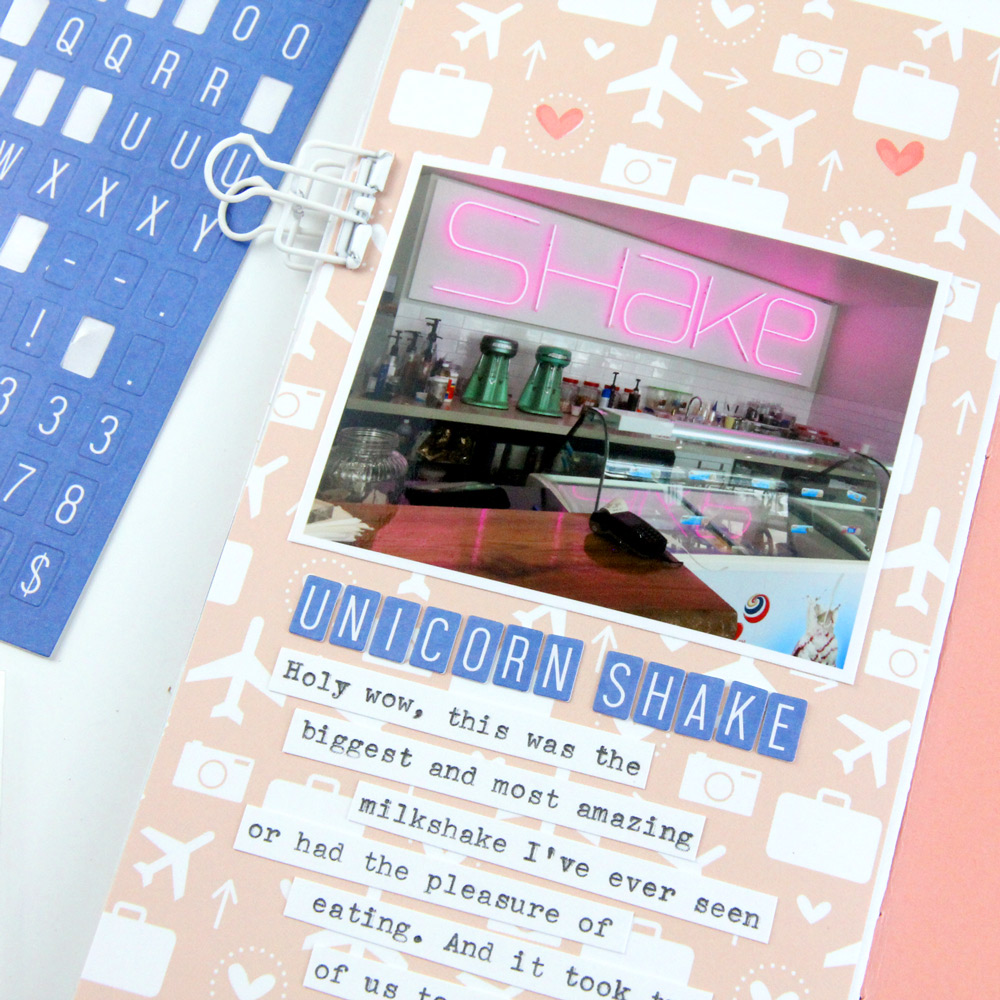
Despite the fact that this pretty coral airplane paper had very little to do with milkshakes, it was still the perfect paper to go on my inside back cover! It matches so well with my coral cardstock cover and the touches of grey and blue. I used that same coral ink to stamp some more tiny hearts all over this page. It really helps to tie your whole insert together if you can keep using the same elements over again.
I am so in love with these tiny alphas, and luckily, I had enough to create a title for nearly every page in my insert! Again, I love using the same elements throughout my pages to tie it all together.
This kit included the perfect product to create a gorgeous insert with all my favourite memories of our trip. Having everything so beautifully co-ordinated meant I was able to sit down and create this whole insert in just 3 or 4 hours. I’m sure you’ll love it just as much as I do!

Hi, I’m Diane. I’m a paper-loving, donut-eating, to-do-list making, photo-taking designer from New Zealand. I live with my husband and our two fur-babies. I’ve been scrapbooking since I was 14, and six years ago I started Project Life and I’ve never looked back. I love colour and coffee and brush script and sequins and gold and puppies and polka dots and my love of traveler’s notebooks continues to know no bounds! You can find more of my work at: Instagram, YouTube, and Facebook.
A Let’s Go Traveler’s Notebook Insert with Special Guest Diane Williams!
Comments