Hold on to your seats, because this post by Laura Wonsik may just blow you away if you’re an avid stamper. Even if you’re not, we think you will be inspired to give it a try after you see how Laura used the pieces of our Happy Moments Stamp on this layout. Let’s take a look:
Have you ever fallen in love with a holiday or otherwise “themed” stamp set but been too concerned about it’s versatility to buy it? Well, I’m here to share a few ideas that will help you think outside the box when it comes to stamp sets and stretch them for use outside of their originally intended purpose.
Whenever I work with a stamp set, I think of three things: how stamps can be used together, how I can use a part instead of a whole, and how I can create a pattern. I did all three of these things with this stamp set for this non-Easter themed layout and love how it turned out.
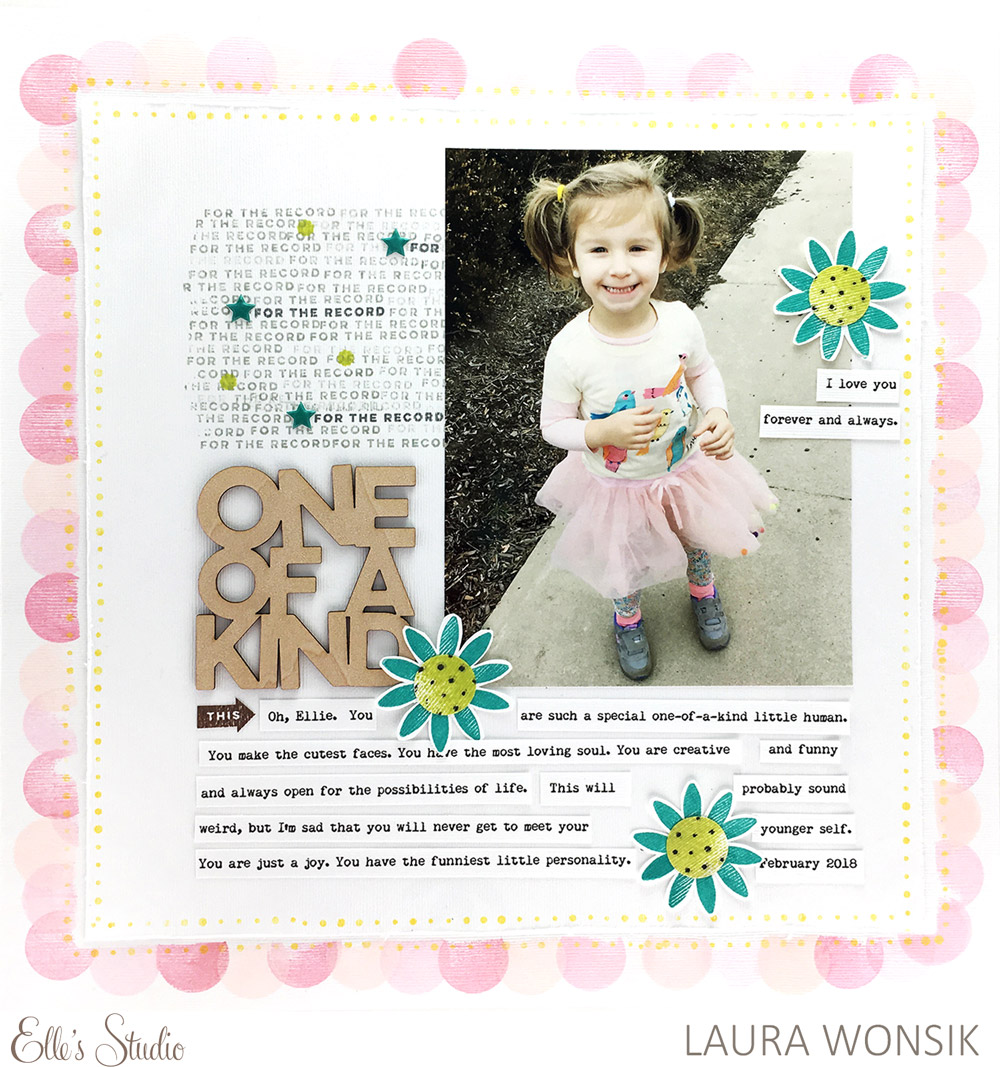
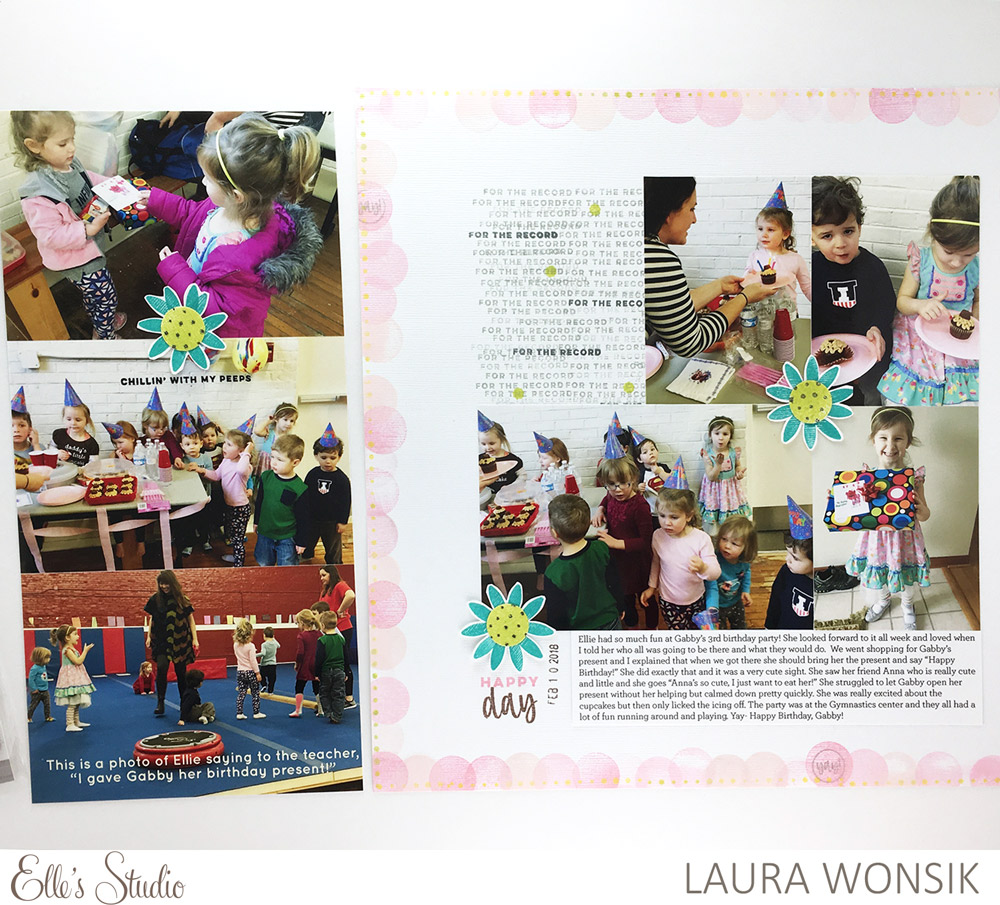
Supplies | One of a Kind Wood Veneer, Shapes and Dots Puffy Stickers, Happy Moments Stamp
First, I thought of how I could use just parts of these stamps to make a different image. When I looked at the bunnies I noticed three distinct parts: the ears, the head and the bottom.
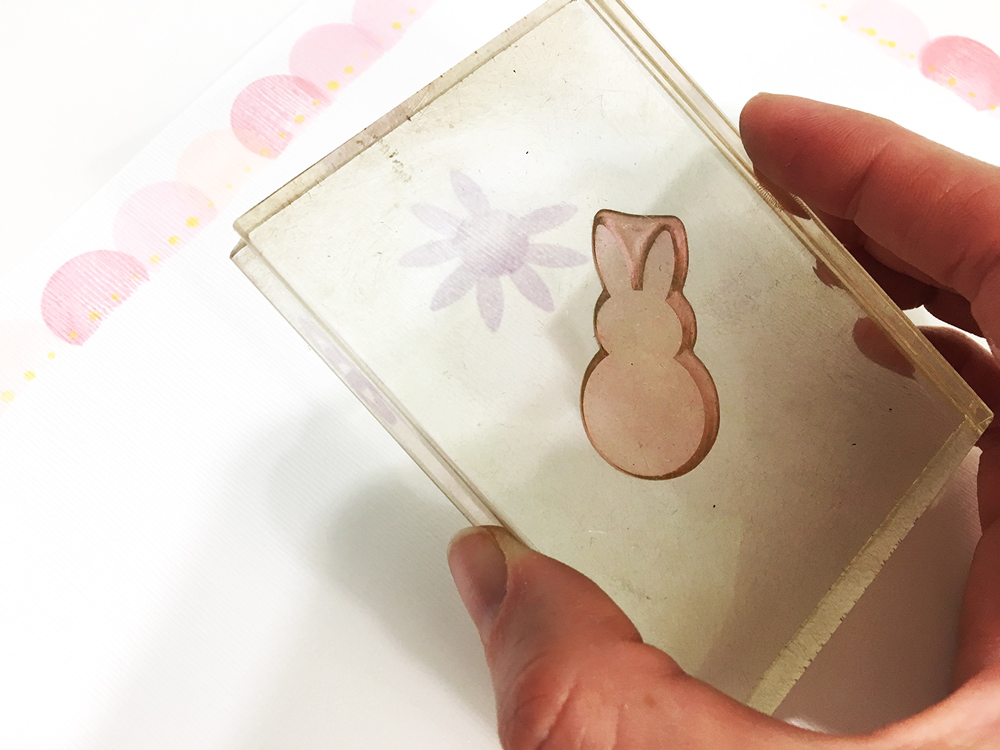
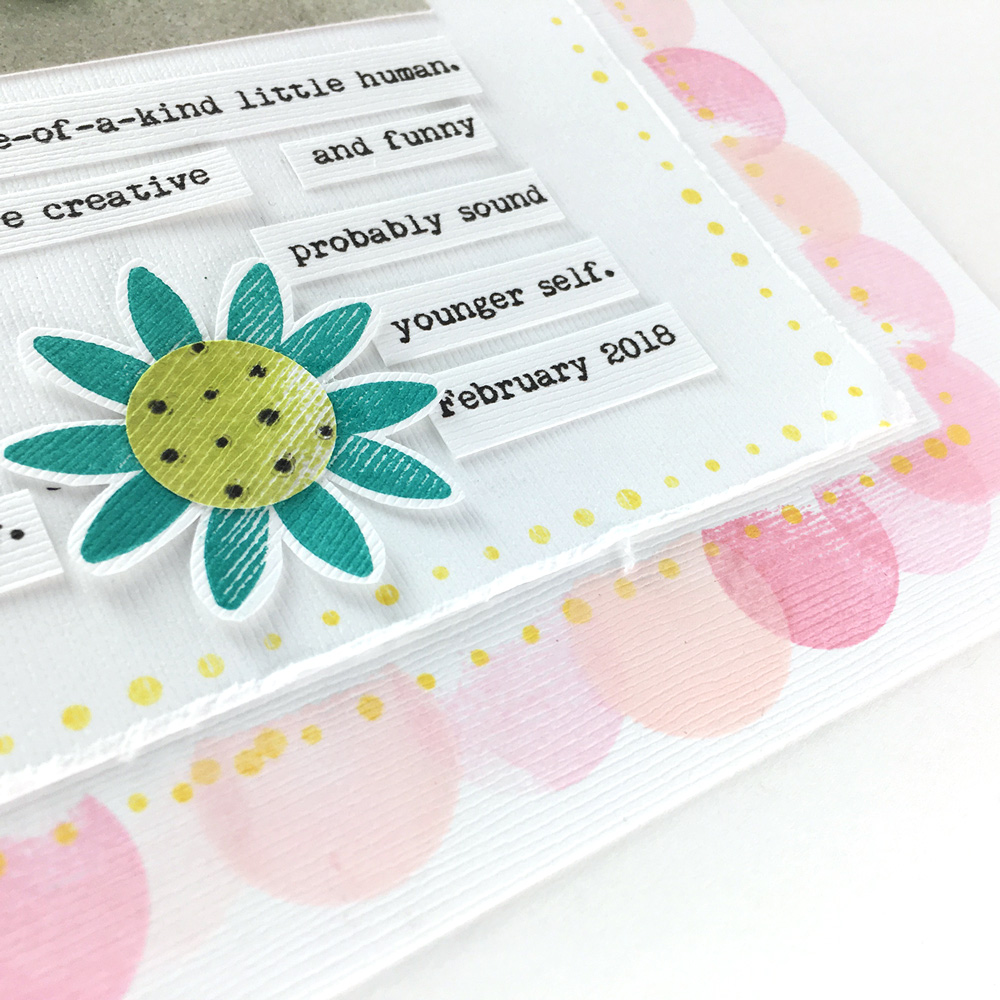
Using just the ears, I realized I could make them look like petals of a flower. And if I repeated the petals, I could make an entire flower!

Then, realizing I needed a center for the flower, I decided to use a technique called “stamp kissing.” This is where you ink one stamp and then stamp that onto another stamp, making them “kiss” each other. So, I stamped the dots with black ink and then stamped that onto the bunny’s bottom and then stamped that onto the paper that had already been stamped with a half circle from the bunny. I punched that out and then put it in the middle of a repeated circle of bunny ears and voila—a flower!

I noticed if I just used the bottom of the bunny I could make a half circle- and if I repeated those half circles I could make a scalloped edge!
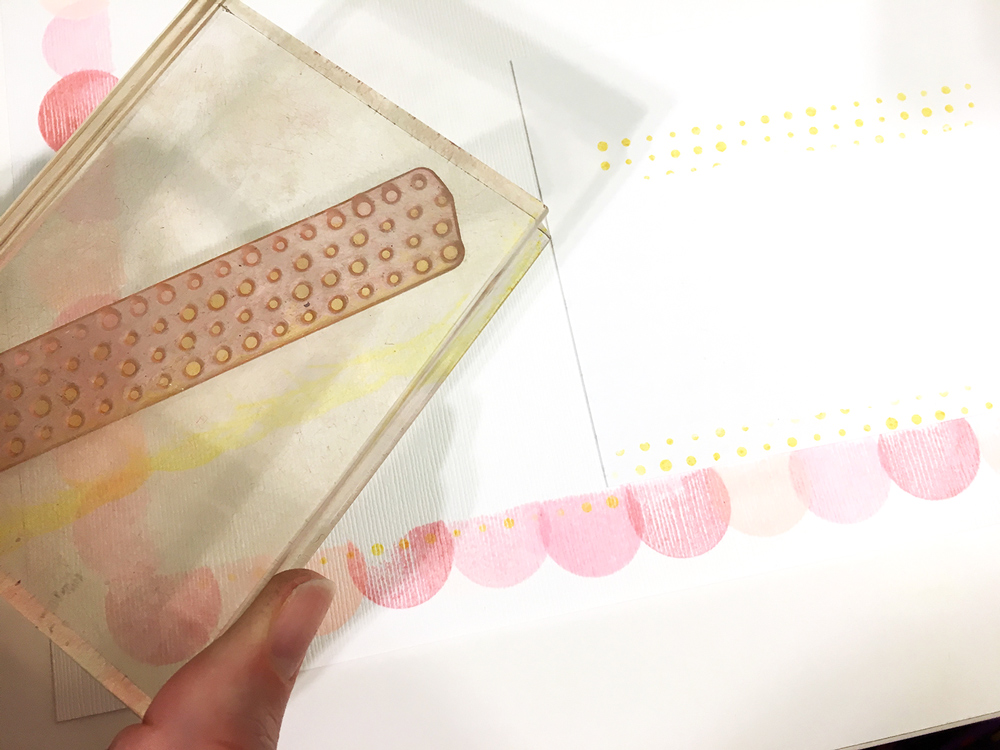
Looking at the dots, I thought of how using only one of the lines as a border could look like little lights along the edge- so I used a scrap paper along the edge as a mask and stamped yellow dots along my scalloped border.
For a little added texture, I layered another piece of white paper in the middle of the layout and distressed the edges using a nail file. It’s a subtle technique, but I like the way it adds another textural element. I then repeated the dot masking technique on the border of that paper.
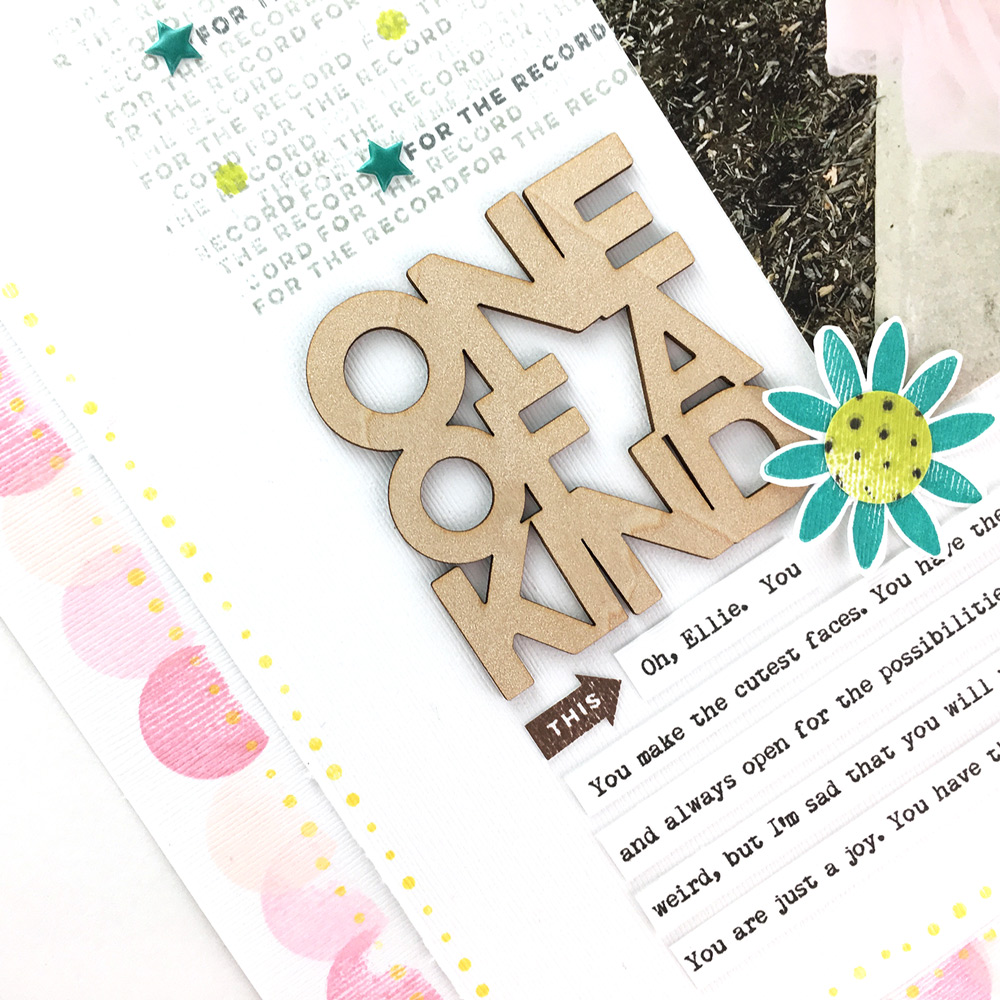
I placed the One of a Kind Wood Veneer title next to the photo and repeated the “for
the record” stamp as a pattern above it. I stamped a few random bunny tails in green,
scattered with puffy stars from the Shapes and Dots Puffy Stickers as well.
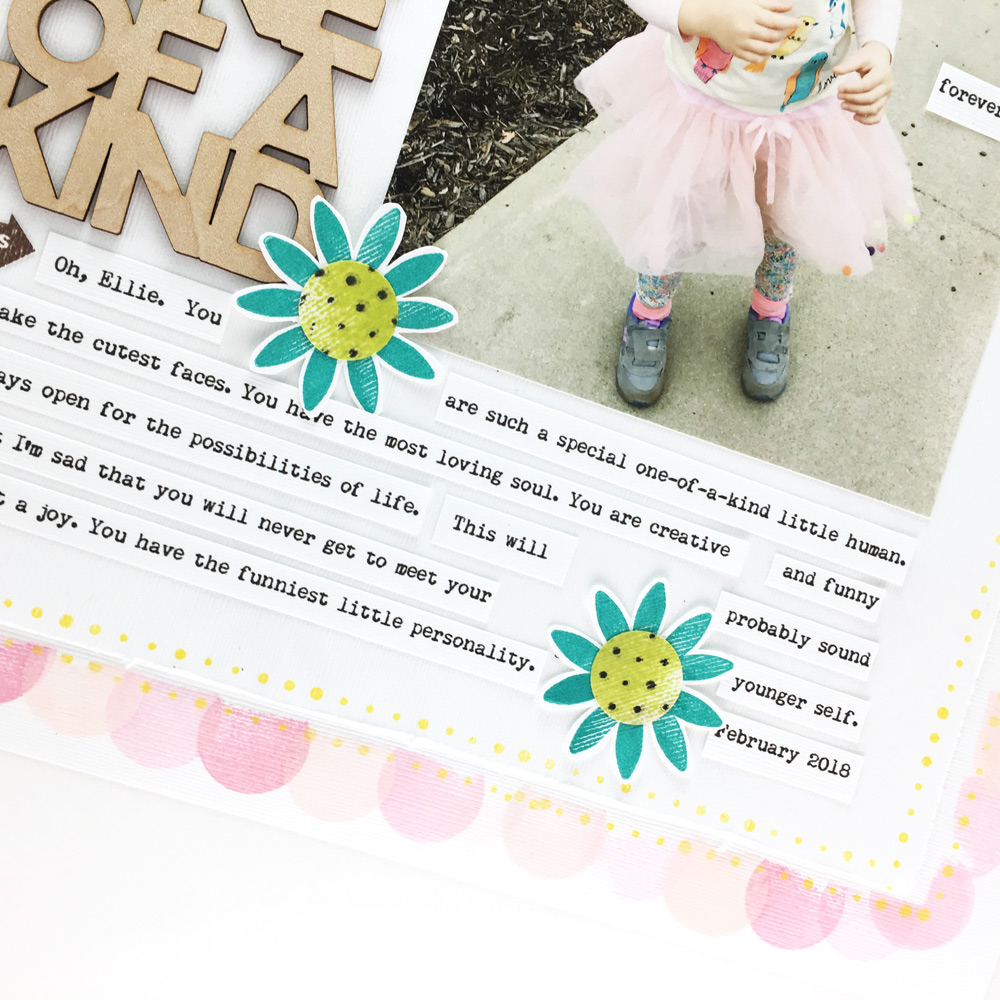
Last, I added word strips as my journaling so that I could easily work around the flowers I had placed.
As a variation- you could also stamp the circles coming from the outside of the page to make a scalloped edge going toward the inside of the layout.
Thanks for reading and hope you have a “hoppy” day!
Creative Stamping with Laura Wonsik