We’re always trying to bring you new inspiration here to the Elle’s Studio blog, but this year, we’ve decided to show you how our design team members have been inspired by each other each month! Our newest blog series is called “Inspired By.” One design team member will choose another design team member’s project from the kit reveal design team gallery post, and create their own project based off of it. To kick off this exciting new series, we have the lovely Susan Brochu, who has selected a completely different project to be “inspired by!” Let’s see what she created.
Hello everyone, it’s Susan and I’m happy to be bringing you the first installment in our brand-new “Inspired By” series. Each month, one of the team members will be creating a project inspired by another team member’s gallery project. I selected Nathalie’s “In the Desert” traveler’s notebook spread
as the inspiration for my own project.
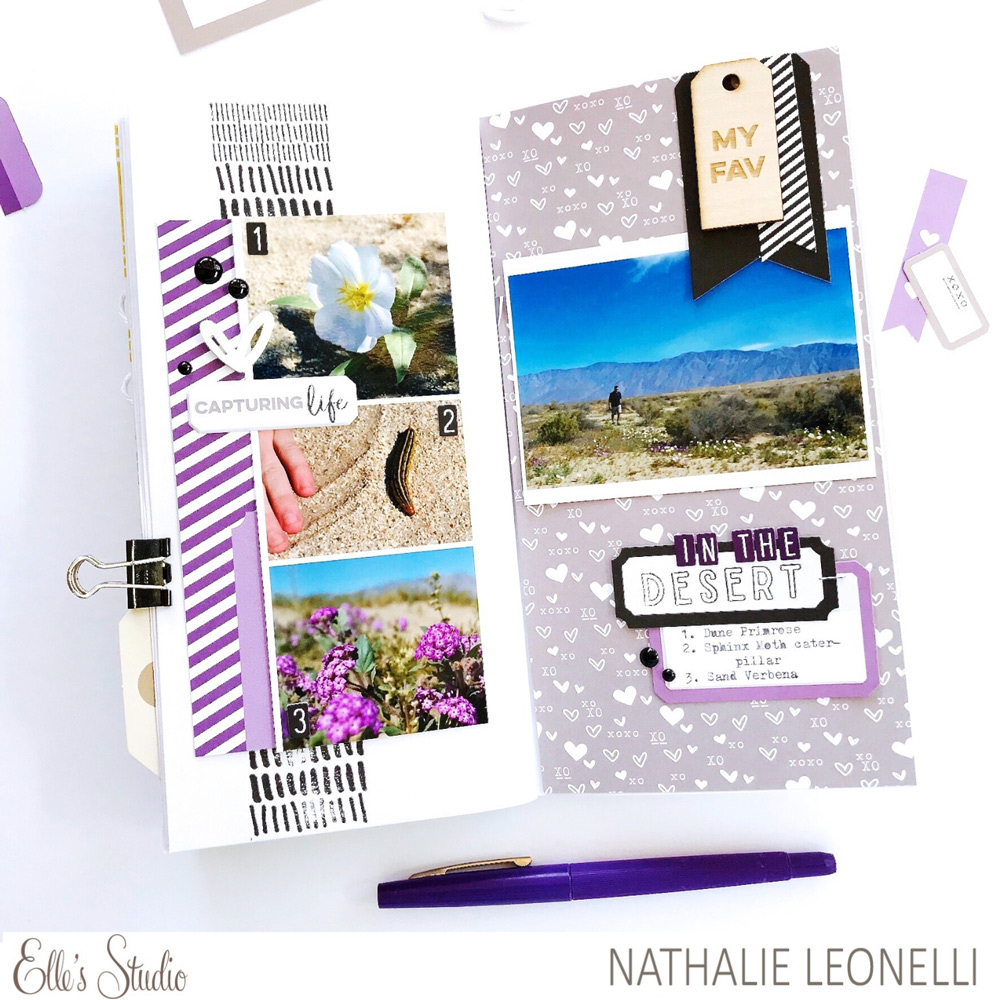
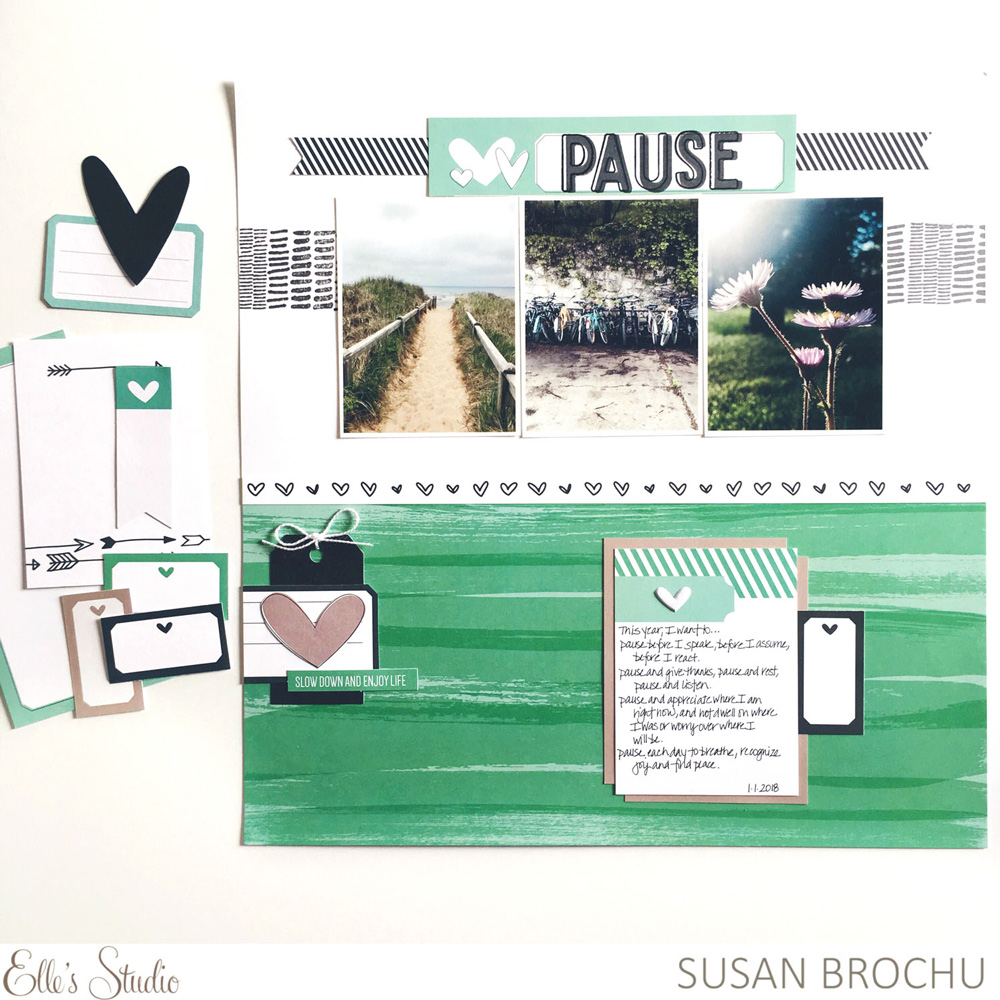
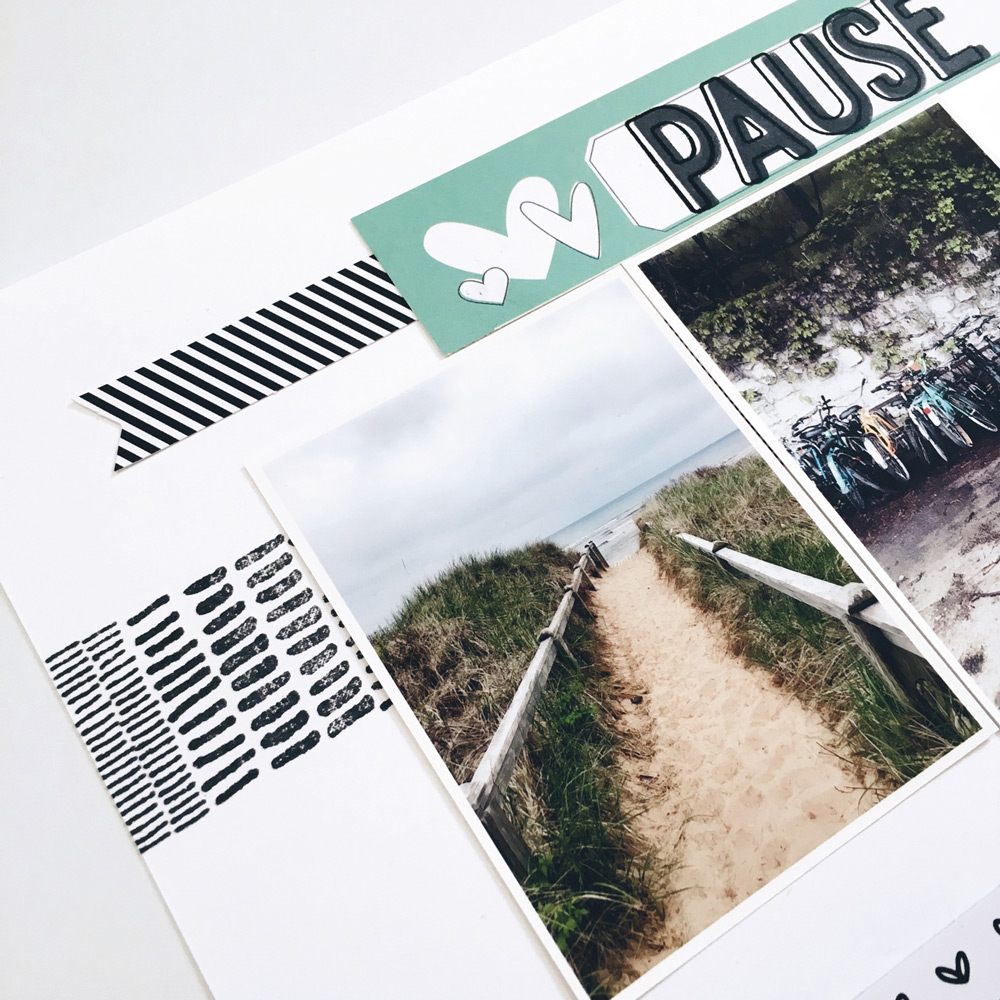
The dimensions of a full traveler’s notebook spread easily translate to a 12″ x 12″ page so I had a nice starting point. I then rotated Nathalie’s design 90 degrees to the right and created this page about my one little word for 2018.
Supplies | January 2018 Kit, January Labels, Love You Die Cuts, Hugs and Kisses Puffy Stickers, XOXO Stamp, Stanley Alphabet Stamp – Outline, Stanley Alphabet Stamp – Solid, Live Laugh Love 12″ x 12″ Paper Collection
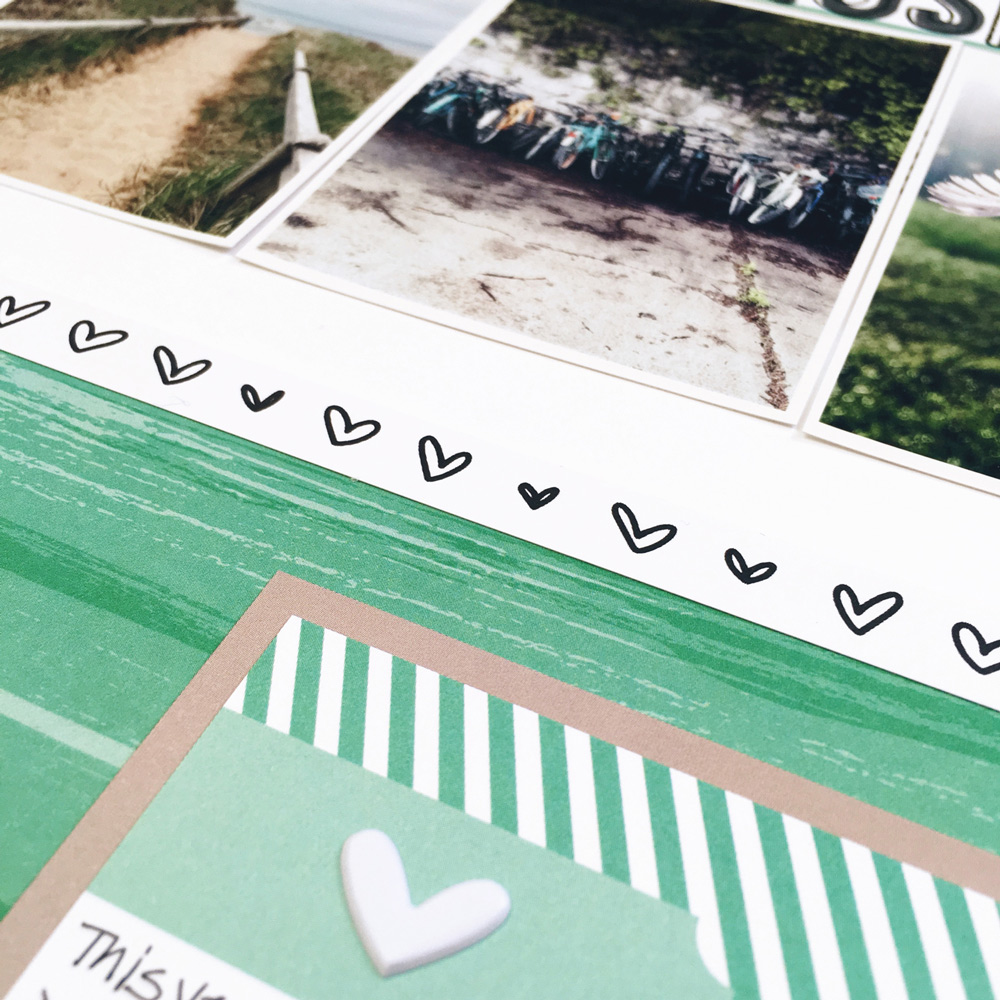
Like Nathalie, I used one main color and then supplemented it with black, white and gray. Since my one little word, “pause,” and photos have a restful connotation, I didn’t want the colors of my layout to be distracting. The “B” side of the “Petal” patterned paper in the Live Laugh Love 12″ x 12″ Paper Collection had a lovely teal/green design that was perfect. I cut a six-inch piece of it, added it to white cardstock and then used the branding strip to give the border between the patterned paper and cardstock a finished look.
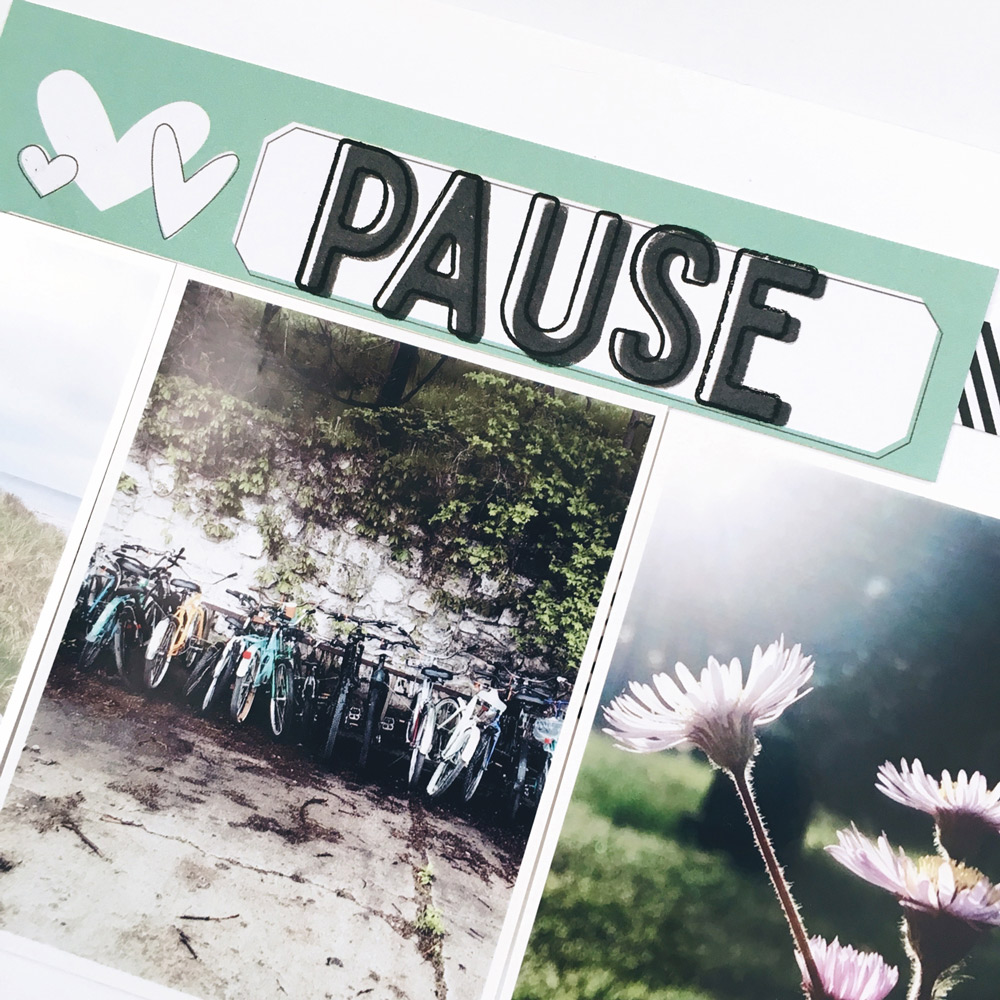
Now I am far from being the world’s greatest stamper, but the Stanley Alphabet Stamps made it so easy to give my title a three-dimensional look. I first stamped each letter in black with the outline set and then stamped over each one using the solid stamp in a dark gray, just slightly offsetting the letters to get that 3-D effect.
I stamped the broken lines pattern from the XOXO Stamp for a horizontal line to anchor my photos along the top of the page, echoing Nathalie’s design.
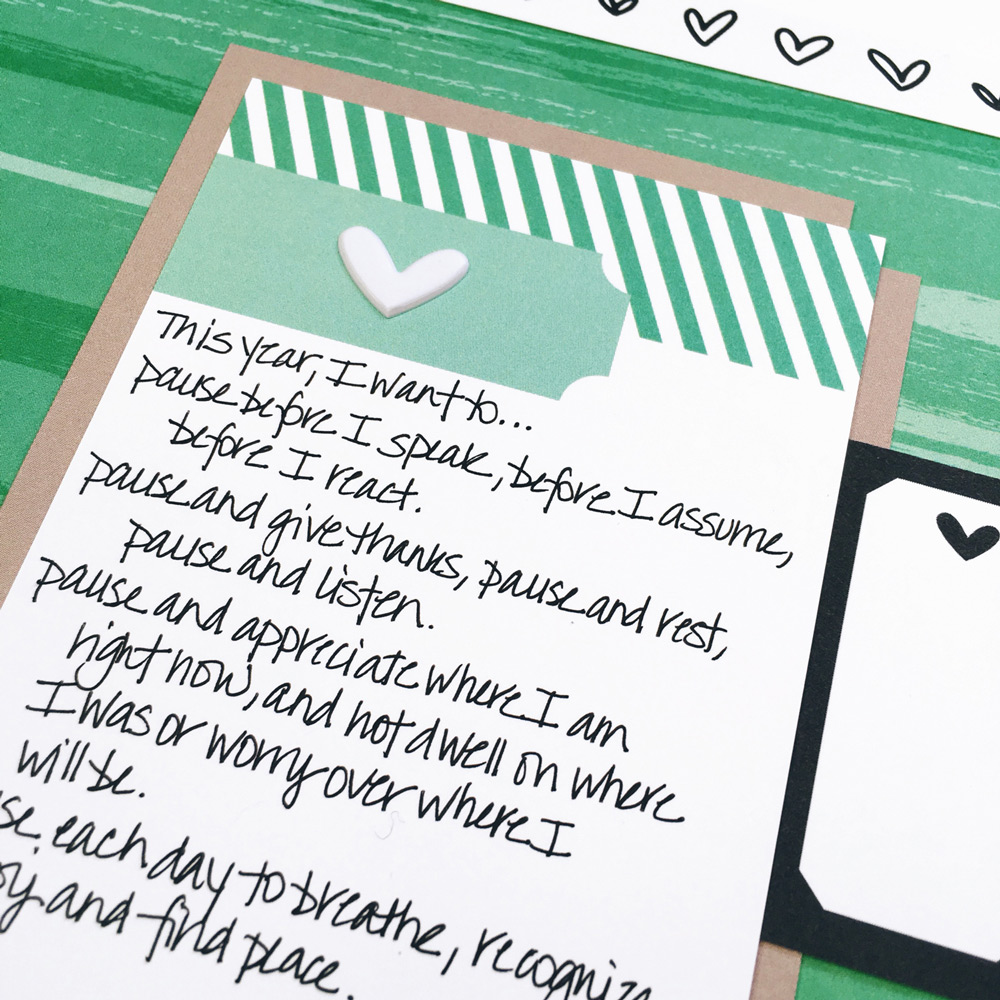
The January Kit had a 3″ x 4″ tag with a teal label and diagonal stripe that was ideal for holding my journaling. I matted that card with two 3″ x 4″ gray tags, also from the kit.
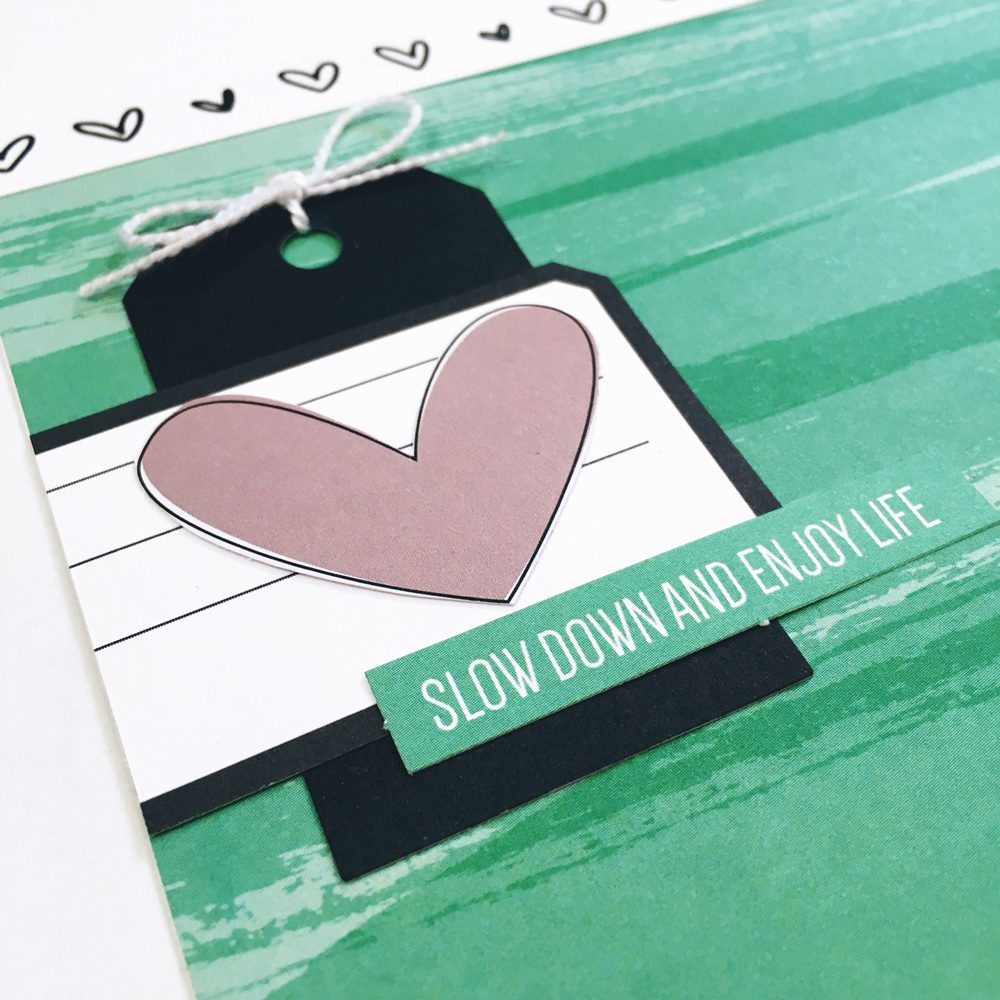
I want to encourage you to cut or alter cards, die-cuts or other embellishments to make them work for your project. The cluster of embellishments on the bottom left of my layout includes a black tag from the Love You Die Cuts. I wanted something black for that section of the page, so I just disguised the XO in the center of the tag by covering it with a few embellishments. The large black-bordered label in that cluster is something I cut from one of the 3″ x 4″ tags in the January Kit, and the gray heart was cut from a phrase in the Love You Die Cuts.
My title was stamped on a 4″ x 6″ tag from the January Kit—I cut off just the top portion to make it look more like a label and now I’ve got the bottom of the card to use on another project. Don’t be afraid to change those embellishments—it might be hard to make that first cut but once you do, you’ll see how easy it is to get a customized look!
Thank you to Nathalie for inspiring my page. I hope you’ll take another look in the design team gallery and choose a project to be “inspired by”!
“Inspired By” with Susan Brochu
Comments