The new products in the Elle’s Studio shop have been live for a few days, and Candace Perkins is here with us today to share how she used one of our newest releases, the All My Heart Stamp. Her clean and original take on this layout about those closest to her heart is sure to have you adding flaps to your next project! Let’s take a look:
Hello! It’s Candace here today to share my very first design team project. I am so excited to be spending the next year with you sharing how I document my family’s memories using the fabulous Elle’s Studio goodies!
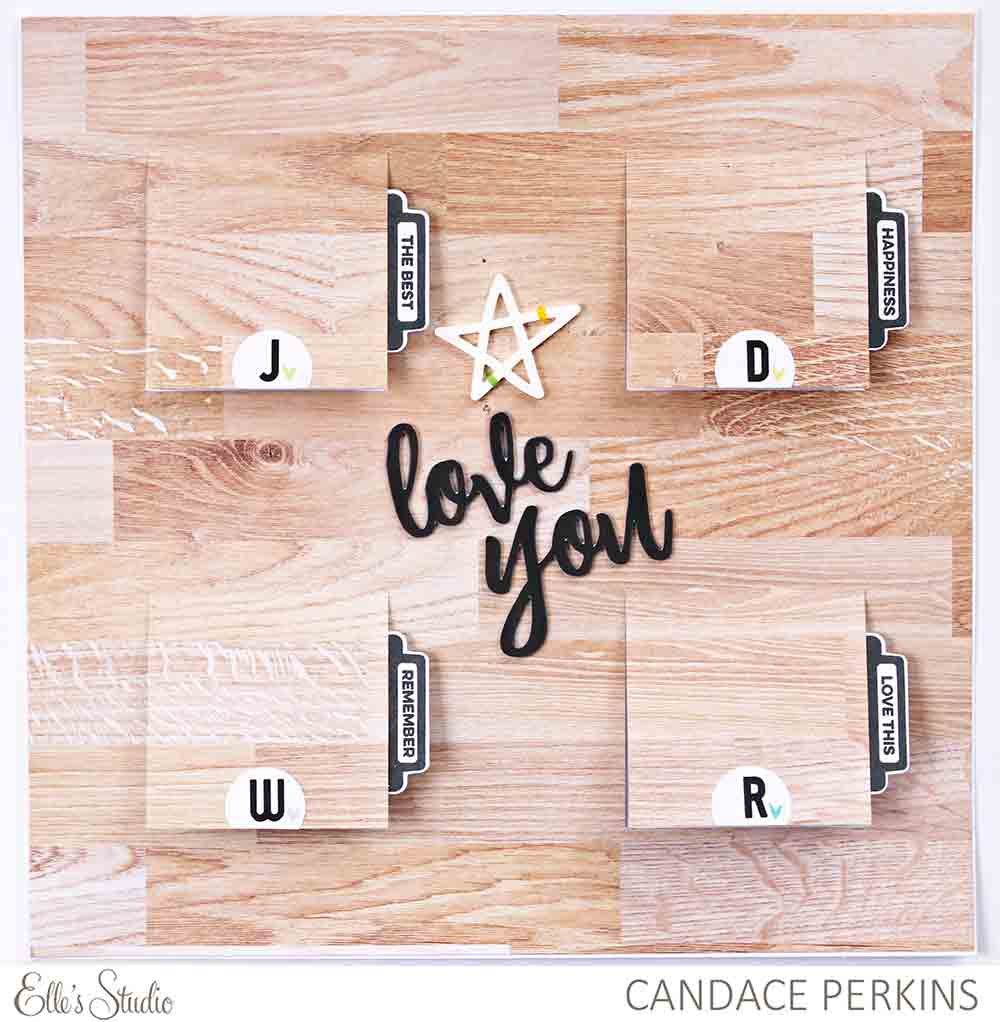
For today’s project I wanted to focus on the adorable coordinating stamp set available this month, the All My Heart Stamp. I adored the script “Love You” sentiment and wanted to use it as a title on my layout.
Supplies | All My Heart Stamp, Love Ya Wood Veneers, Tab Die, Celebrate Stamp, Sunny Days 12″ x 12″ Paper Collection, Sunny Days 6″ x 6″ Paper Stack, Letter & Number Stickers- Black, Large Acrylic Stars, Malia Number Stamp
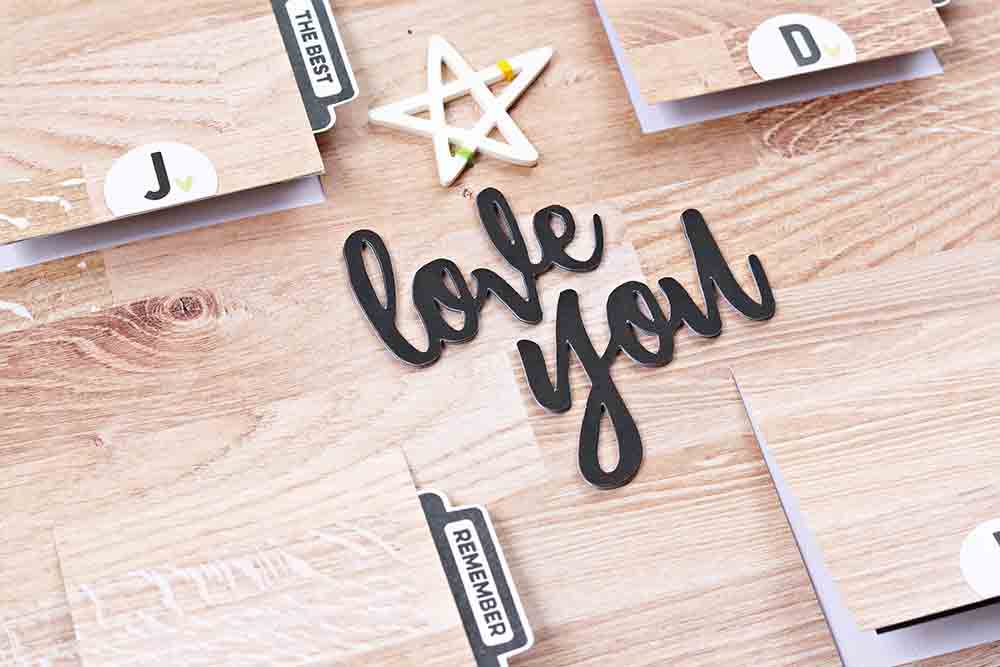
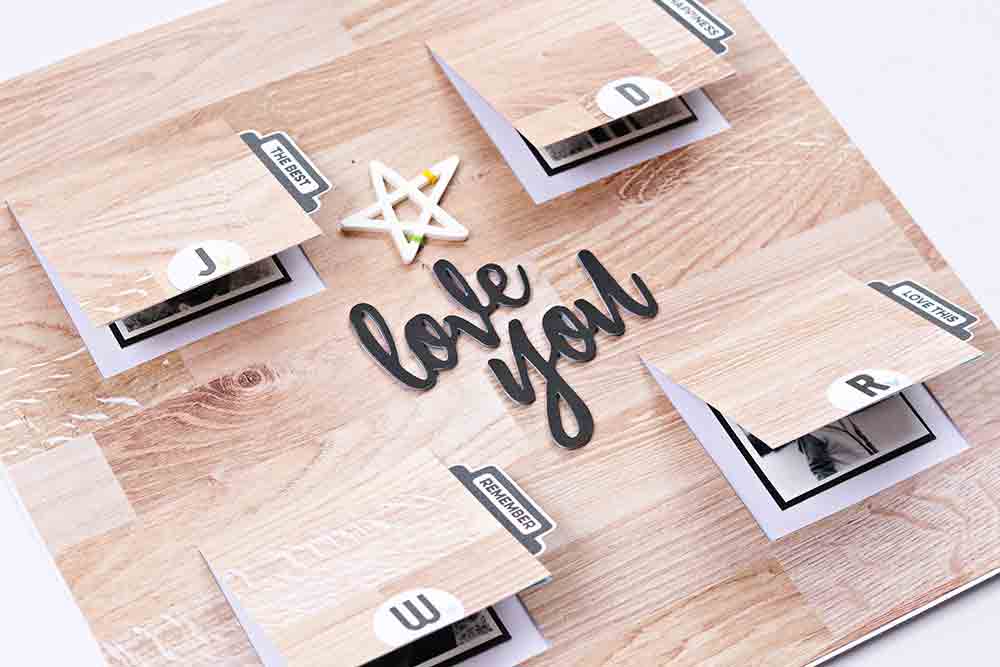
Instead of just stamping “love you” on my layout I wanted to add a little dimension, so I decided to create a cut file from the stamped image. To do this, I simply stamped the sentiment on white cardstock with black ink. Next, I took a photo of the sentiment and opened the JPG file in my Silhouette software. I traced the stamped image and cut it out normally on black card stock six times. I layered the cuts on top of each other to create dimension and adhered it to the center of my layout.
To create the interactive flaps on the layout I created four boxes on a 12″ x 12″ page in the Silhouette software, then erased the top cut lines from each box. I cut the flaps out of the beautiful woodgrain paper in the Sunny Days 12″ x 12″ Paper Collection and adhered it down to a 12″ x 12″ white cardstock base.

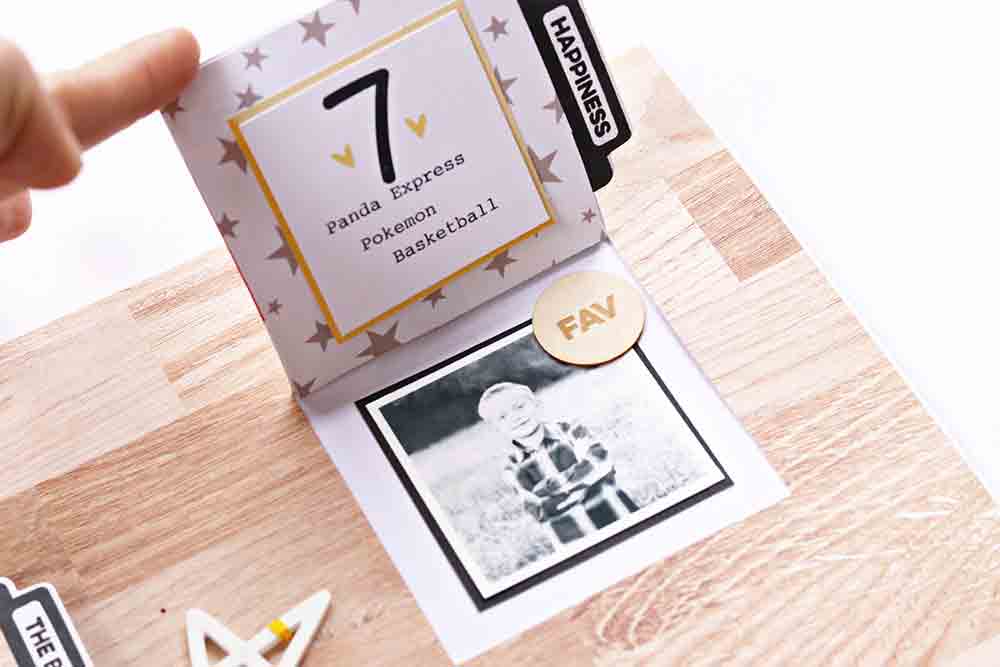
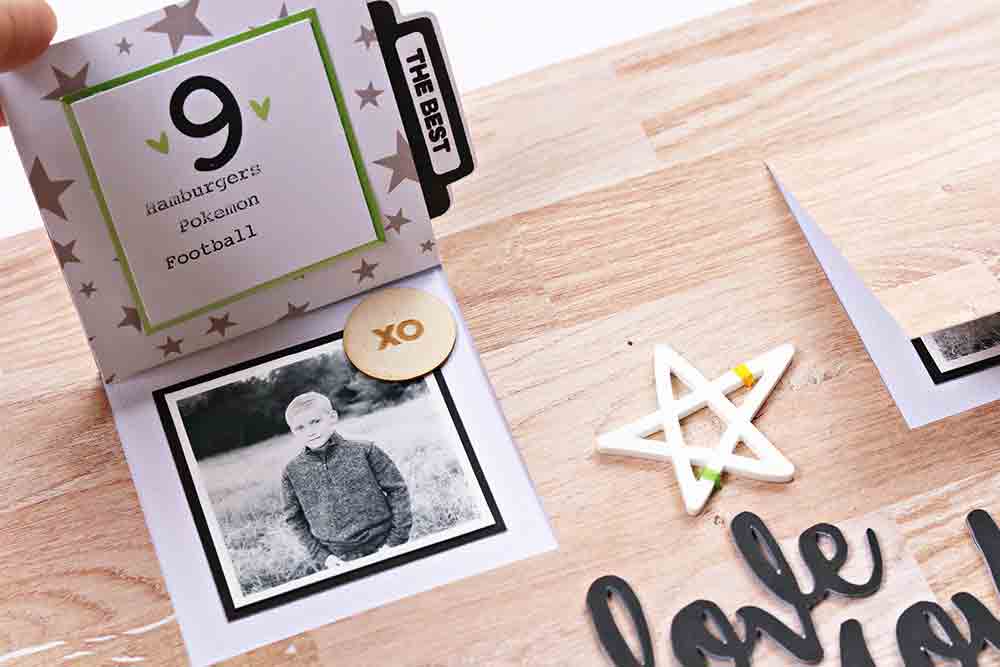
I used the tag die and Celebrate Stamp to make flipping up the boxes easier and a little more cute! Under each flap I used the Malia Number Stamp to document my boys age and then typed a few of their favorites right now.
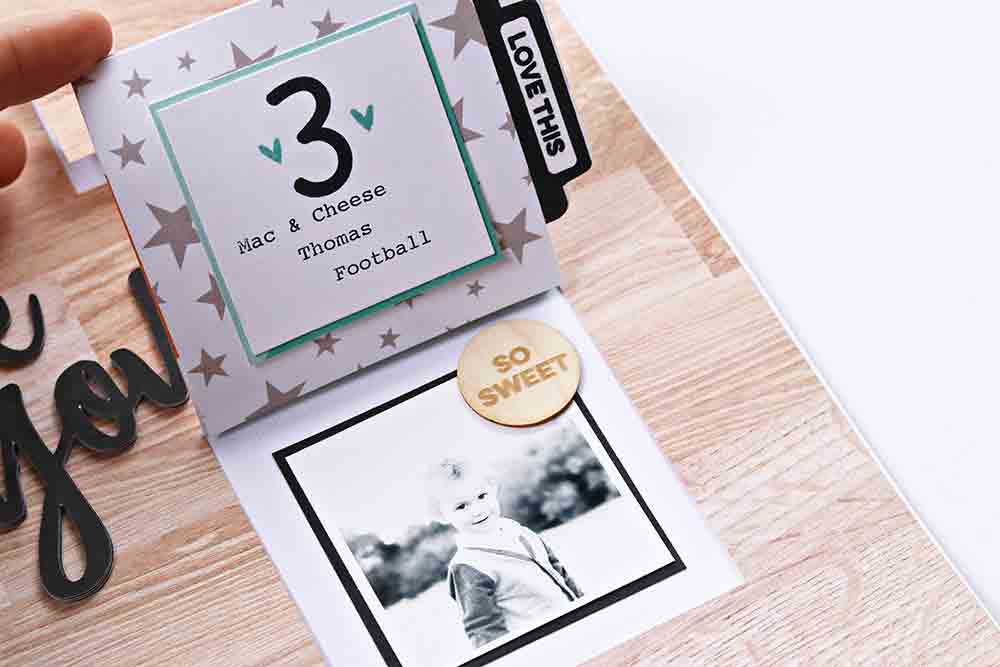
I added a photo of each of my boys and embellished the box with one of the cute Love Ya Wood Veneers.
To bring a little more color and interest to the front of the layout, I stitched an acrylic star from the Large Acrylic Stars to the layout with yellow and green thread just above the title.
On the front of each flap I punched out a one inch circle from white cardstock, then used the black letter and number stickers to place my boys first initial in the center. I added two little hearts from the All My Heart stamp in the same color of cardstock backing the journaling on the inside of the flap.
I love the final spread! I love adding interactive projects into my memory keeping, and my boys love it too! Thanks so much for stopping by today. Have a beautiful day!
Save
Comments