Trying something new creatively is a great way to get out of your comfort zone and and switch up your typical standard, and today for Teach Me Tuesday, design team member Nathalie Leonelli is showing us how to create custom embellishments that look like they cost a lot, using our latest Word Circle Stamp and a few simple supplies! Let’s take a look and check out her tutorial video!
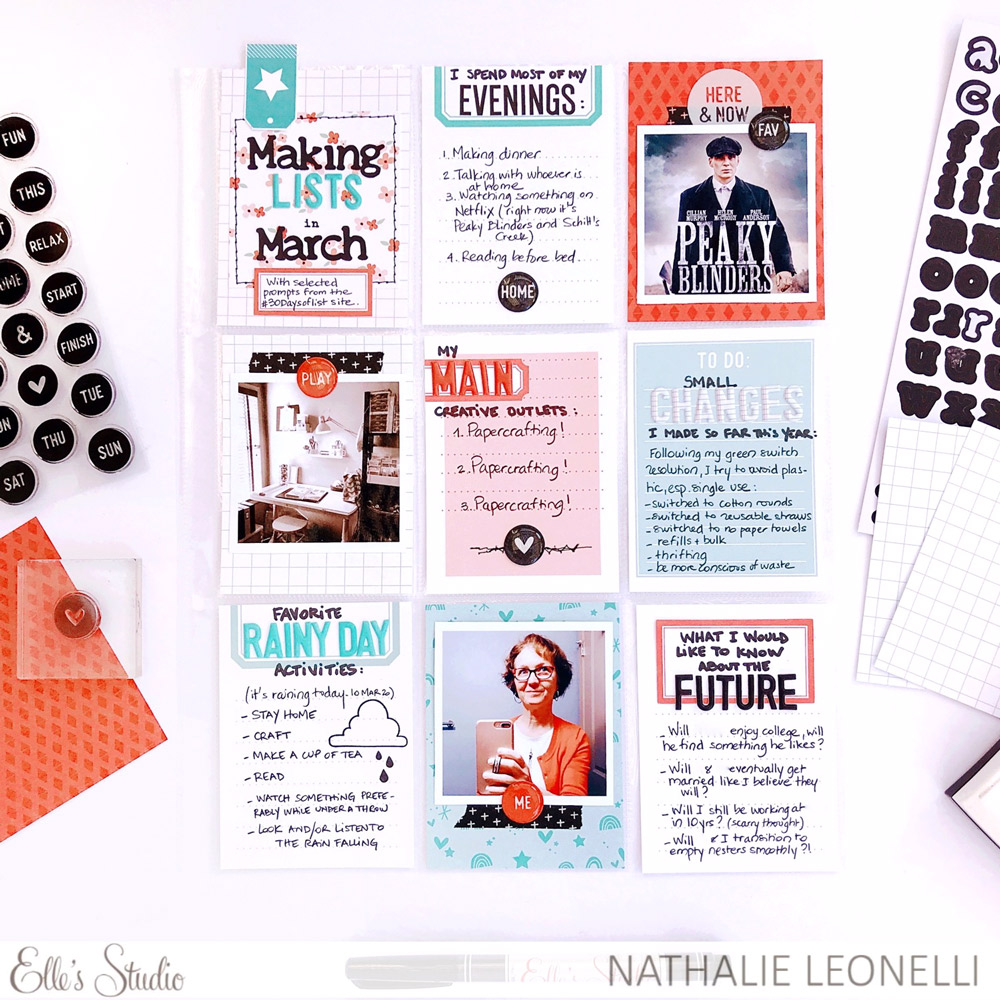
Hello! It’s Nathalie, and I am here today to share a new pocket page and an easy tutorial on how to make the fun, custom epoxy embellishments that I created for it.
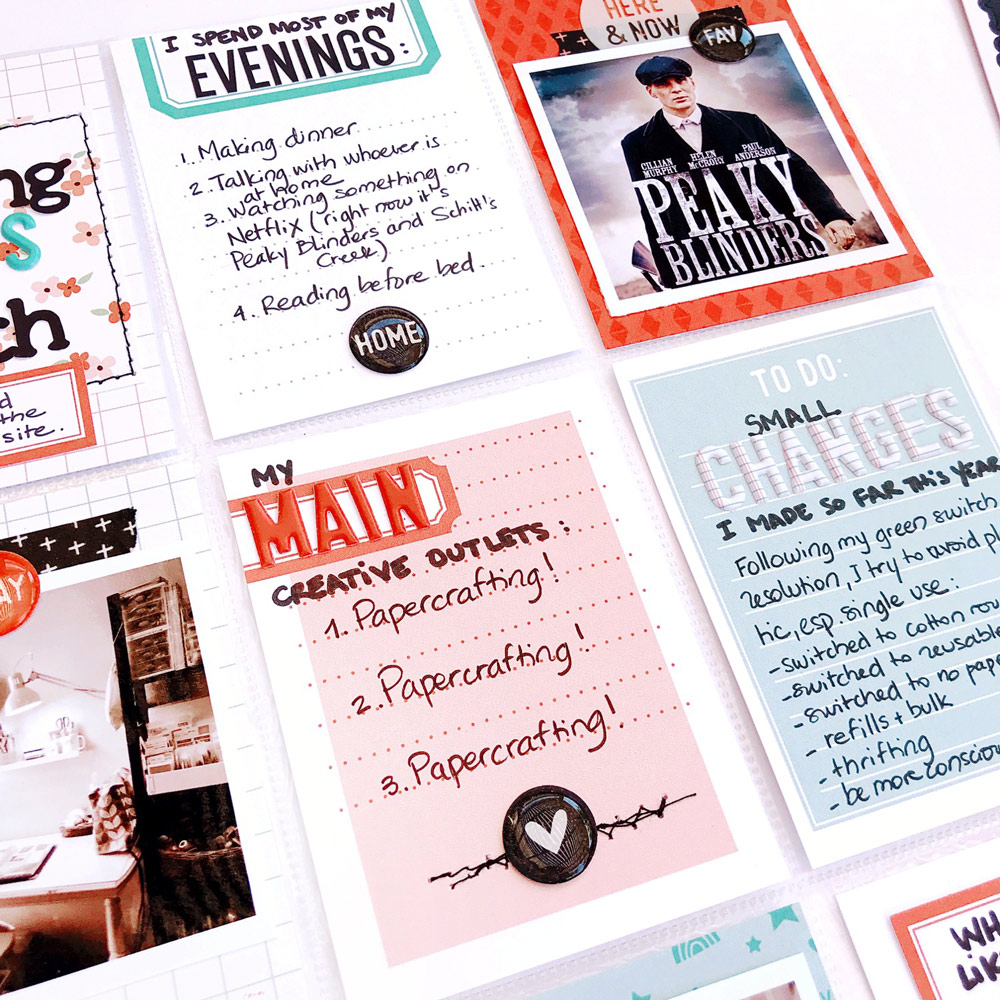
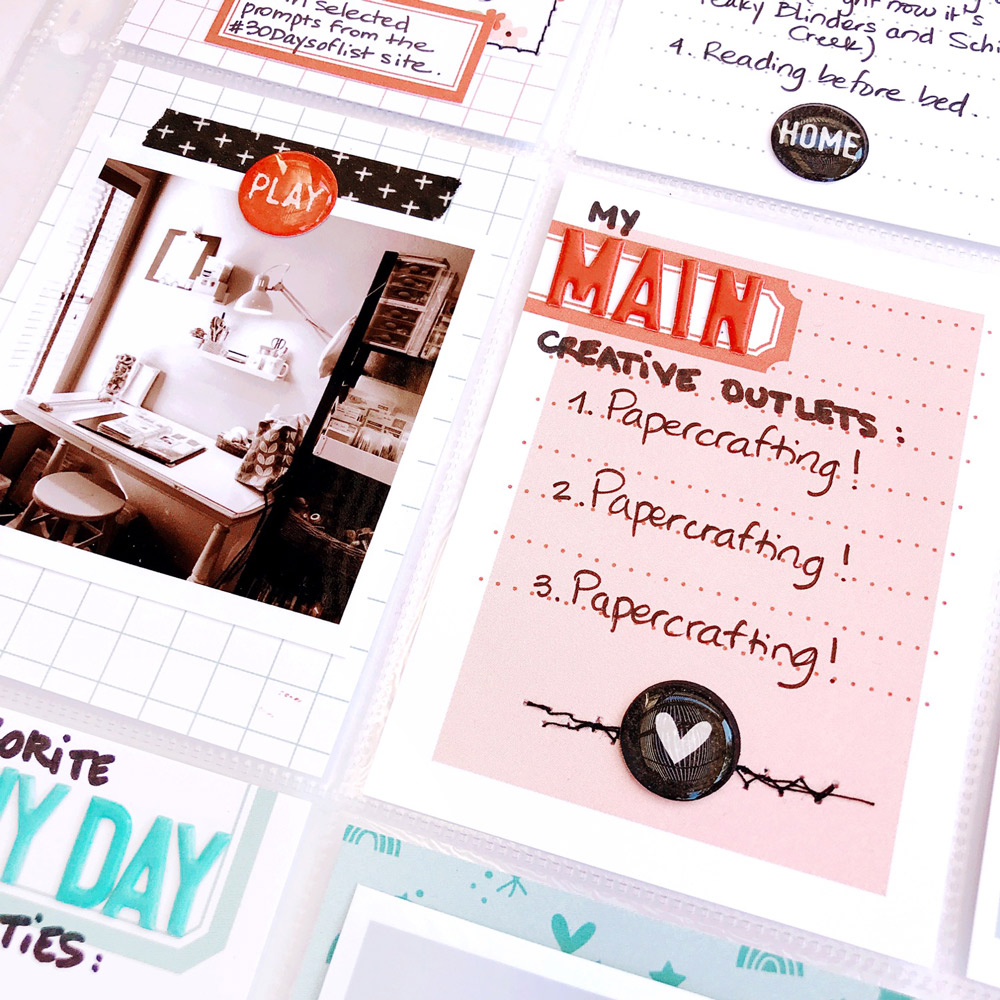
The inspiration for these self-made epoxy buttons came directly from the Word Circle Stamp, and I love how they add a shiny texture and depth to my page!
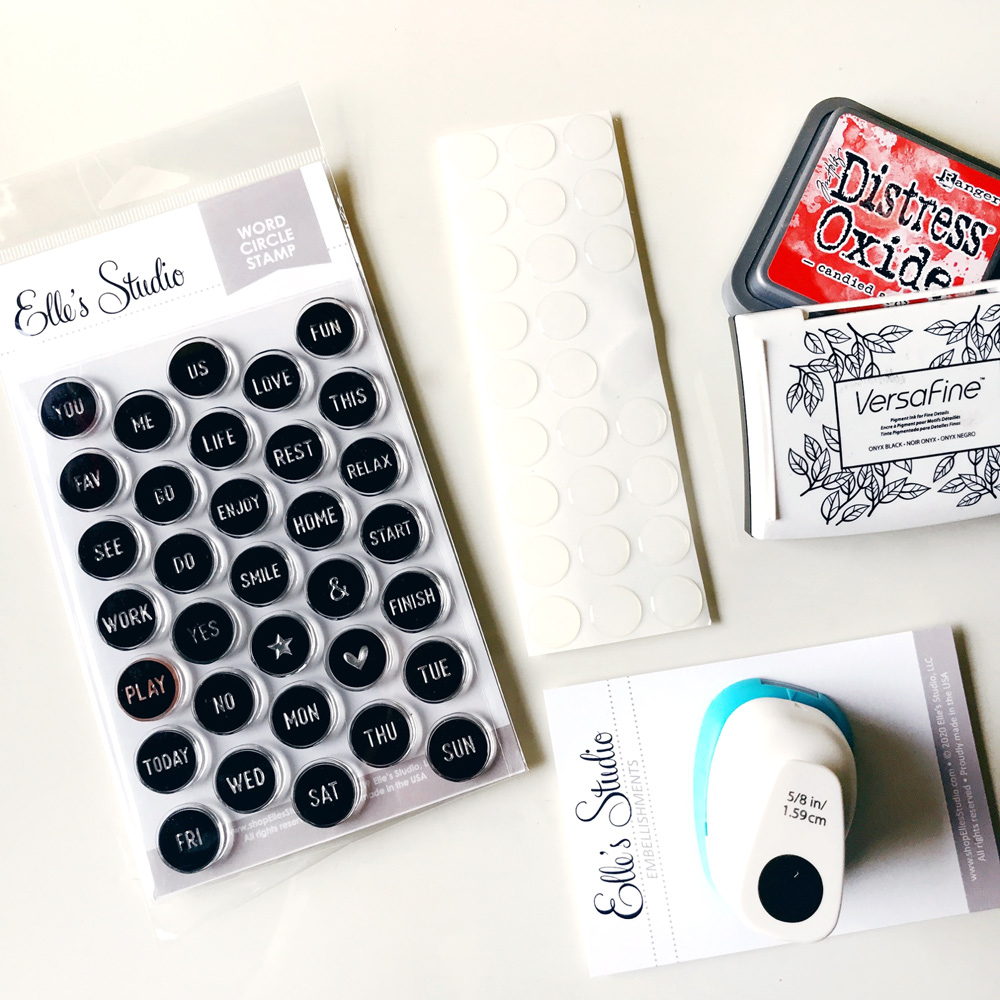
These are the supplies you will need for this tutorial:
Other than your Word Circle Stamp, you will need a circle punch (or metal die) measuring 5/8″, ink pads in your choice of colors and 5/8 in. clear epoxy dome stickers (I found these on Ebay!) Watch how I create these custom embellishments in my video:
Aren’t they fun? You can customize them by changing up words and colors to match your project!
If you are wondering about my page, I joined the March #30daysoflists challenge, and I am selecting some of the prompts to journal in pockets throughout the month. It’s my first time participating, and my Elle’s Studio March 2020 Kit plus stash of tags are perfect for it!
I will be giving away a few of those clear epoxy stickers on my Instagram account so if you’re interested in making some yourself, follow me at @anounceofcreativity! Happy scrapping!
Try out Nathalie’s custom embellishments yourself and share with us! Post your own embellishments on Instagram using the hashtag #EllesStudio, or in our Elle’s Studio Facebook Group!
Comments Off on Teach Me Tuesday: Custom Embellishments with Nathalie Leonelli | Share This
Spring is a time when we usually document getting outdoors after the thaw of winter, but in this season, it may be our only escape! Get outside, and don’t forget to document these moments, too! That’s what design team member Katarina Prevendarova did in a new traveler’s notebook spread that she’s sharing with us today, using our March kit and extras! Let’s take a look at what she created!
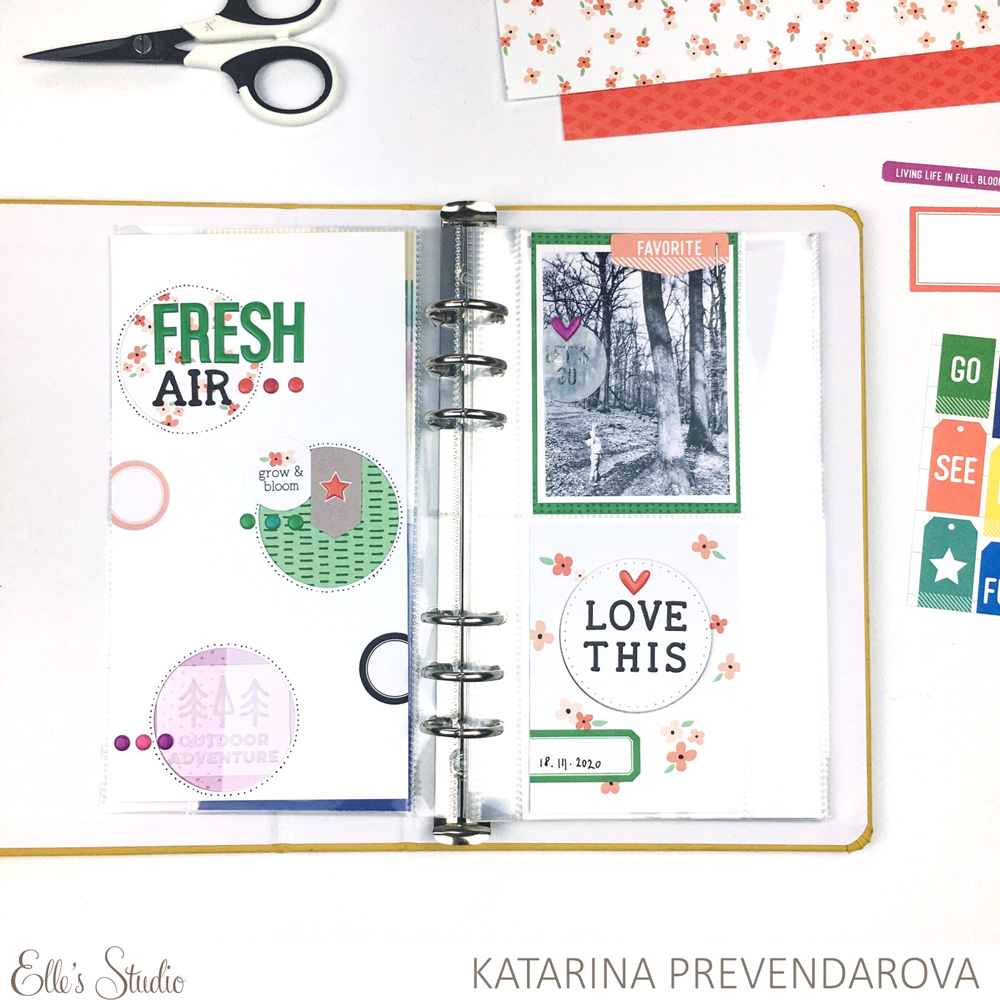
Hey friends! It’s Katarina here and today I am going to share with you a traveler’s notebook spread documenting what we need and enjoy the most these days—time spent out in the fresh air. To create it I used the gorgeous March 2020 kit and add-ons, perfect for any outdoor or spring project.
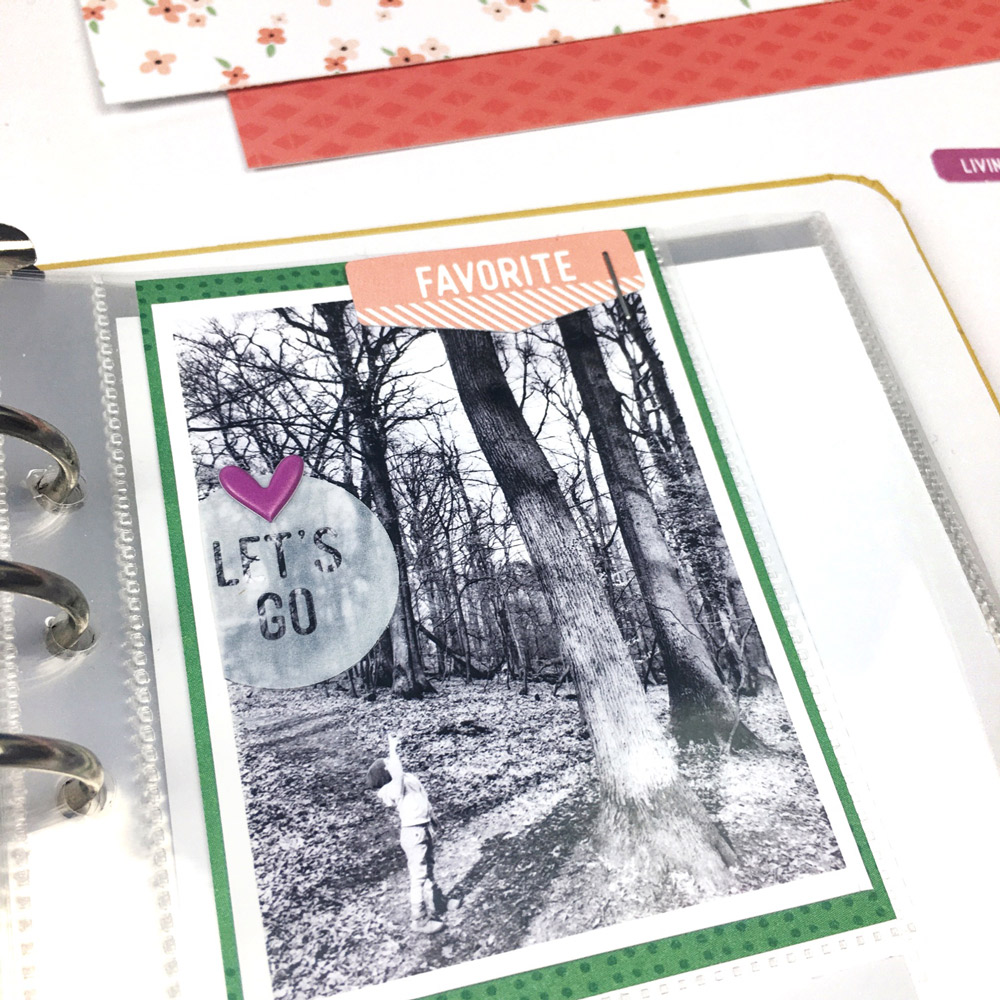
We are very lucky to live close to a forest which means that it’s really easy to get to a place with fresh air and almost no people—the best place for our son to spend time, play and explore nature. I love this photo of him admiring a huge tree.
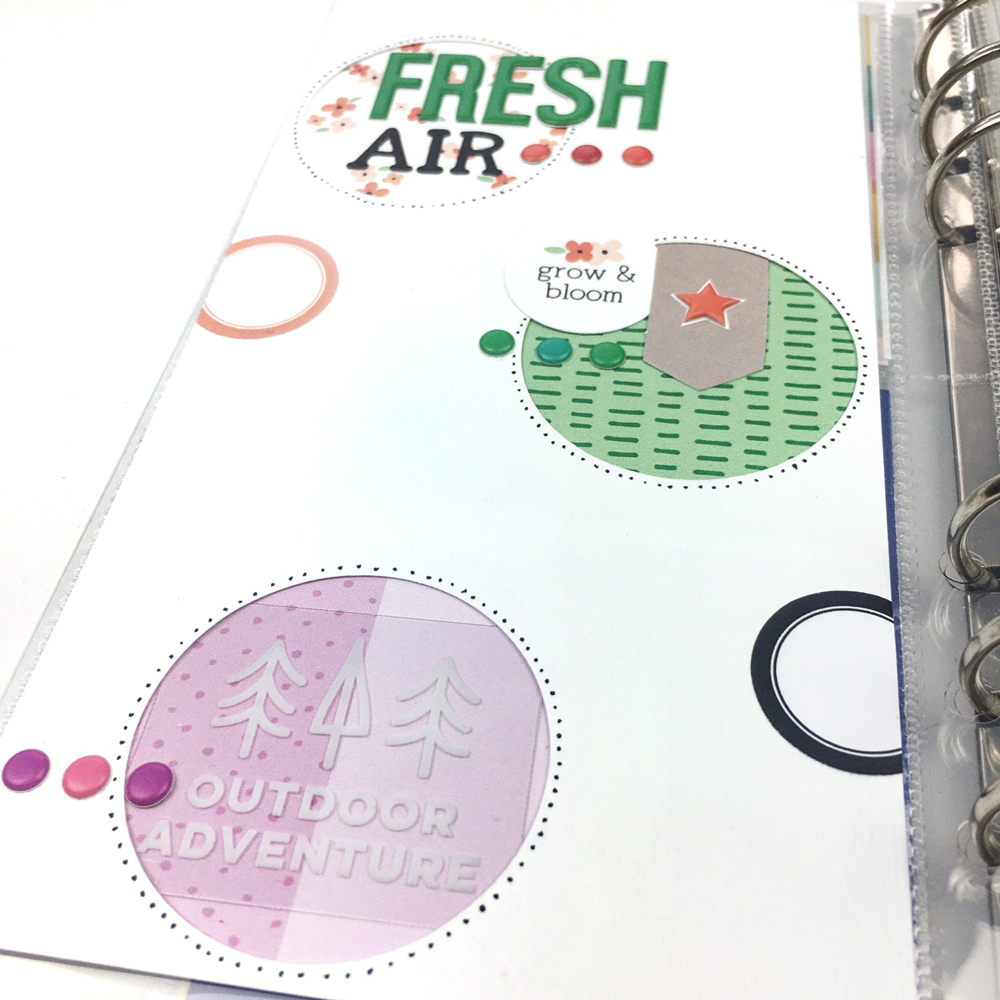
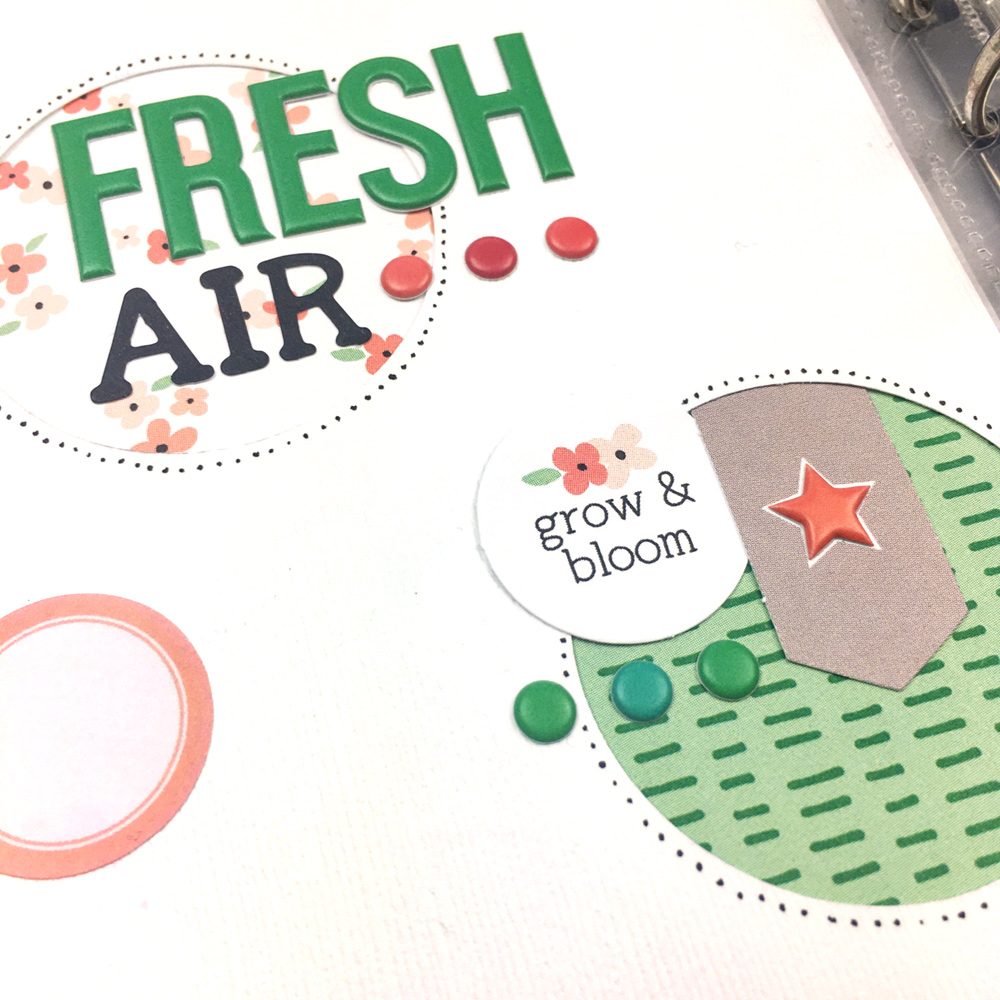
I decided to create with circles because, you can never go wrong with circles, right? I chose three main colors: green, coral and purple, with pops of black. On the left side, I took my big circle punch and punched three circles into a piece of white, textured cardstock, backing them with three pieces of patterned paper from the Flourish 6 x 8.5 Paper Stack. This is always a good way to create little nests for your title, embellishments or journaling.
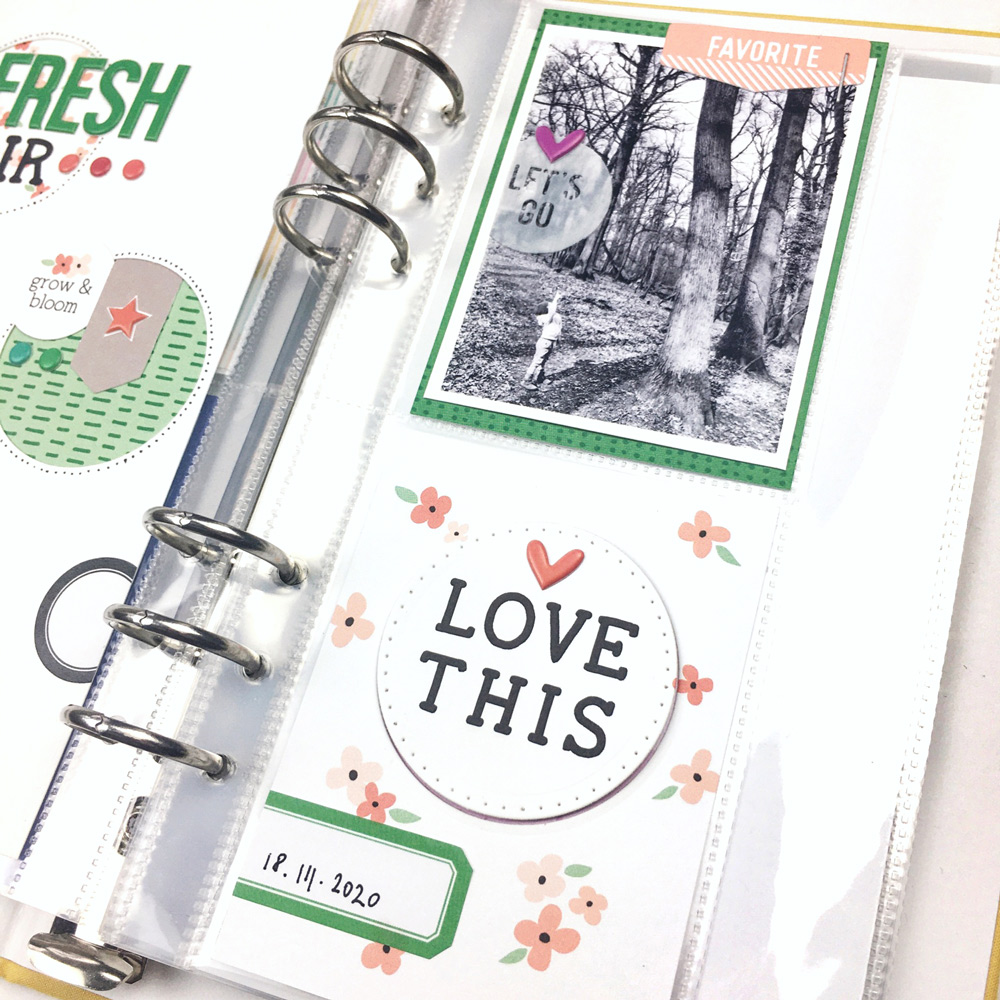
On the right side of the spread I decided to use two 3″ x 4ʺ pockets. To stay cohesive, I continued with the same colors as the left side. Two of the journaling tags from the March Kit were perfect for this purpose. I used the green tag to back my photo, over which I layered the “Let’s Go” Go See Do Acetate Die Cut and a purple heart from the Tiny Shapes and Dots Puffy Stickers. I also stapled the “favorite” banner die cut from the March Kit.
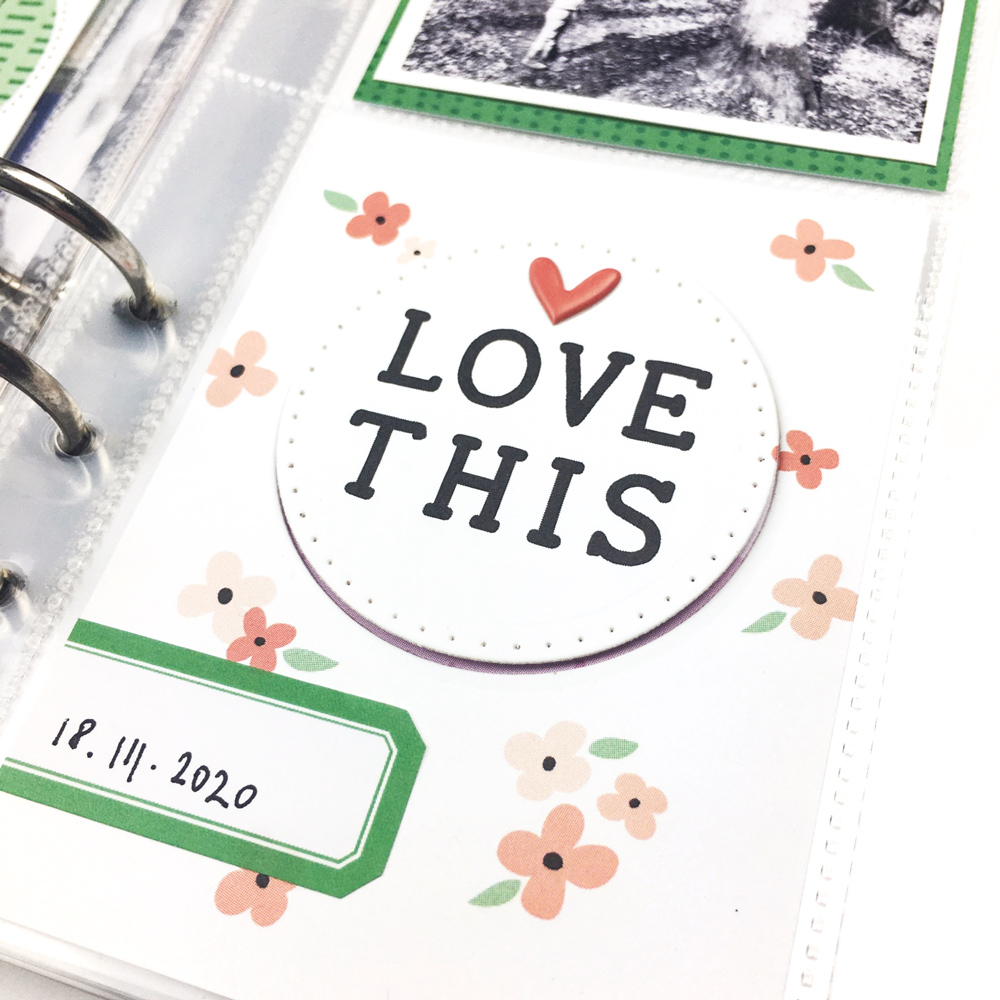
To better connect the left and right sides, I used the floral journaling tag and repeated the circle element. I cut out the “Love This” title with a stitched circle die and raised it with a piece of adhesive foam. Next I embellished the tag with a tiny coral heart and a green label sticker with date. To bring the stitched effect to both parts of the spread, I added dots around each of the big circles with my black gel pen.
This spread came together so easily with all of these beautiful products and I love how it turned out. I hope that I have inspired you to use the March 2020 monthly kit and add-ons in your travelers notebook. Have fun creating!
Comments Off on Fresh Air and Traveler’s Notebooks with Katarina Prevendarova | Share This
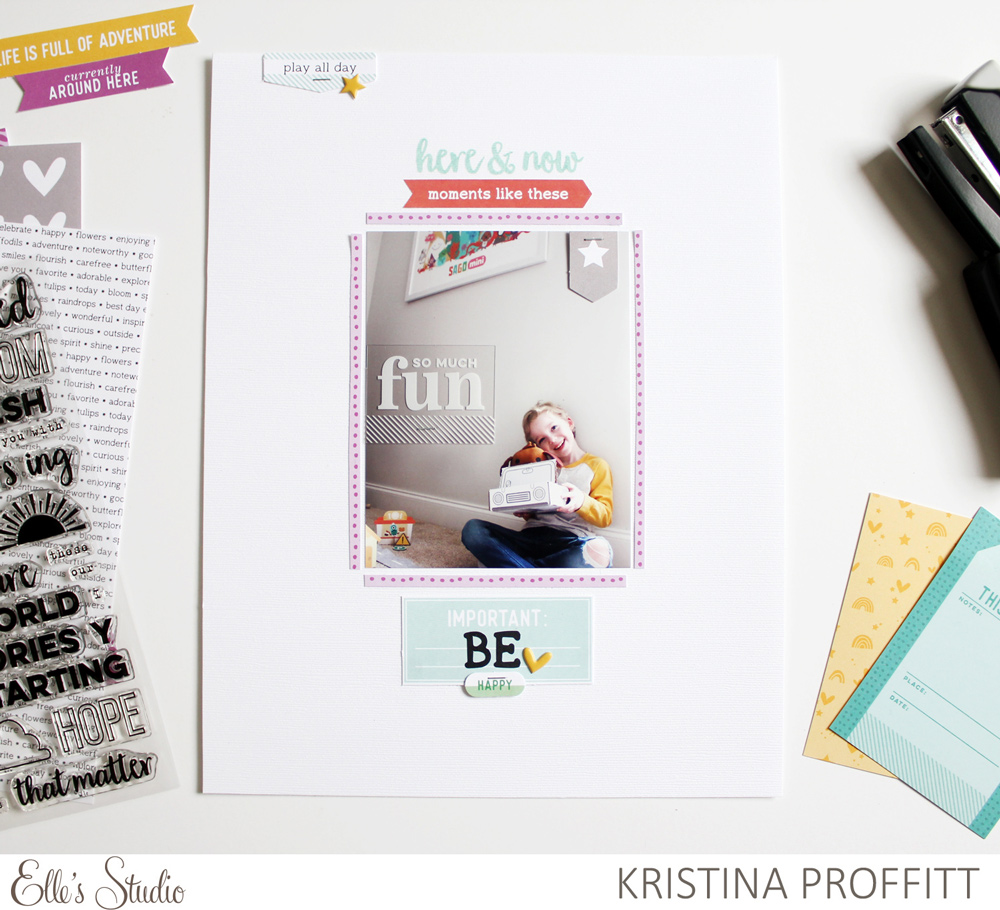
We all need some cheer in our lives at the moment, so why not spread some and create a card!? Even if you don’t consider yourself a cardmaker, design team member Kristina Proffitt is with us today to share just how easy they can be to create using our March 2020 kit and add-ons! Let’s see what she made!
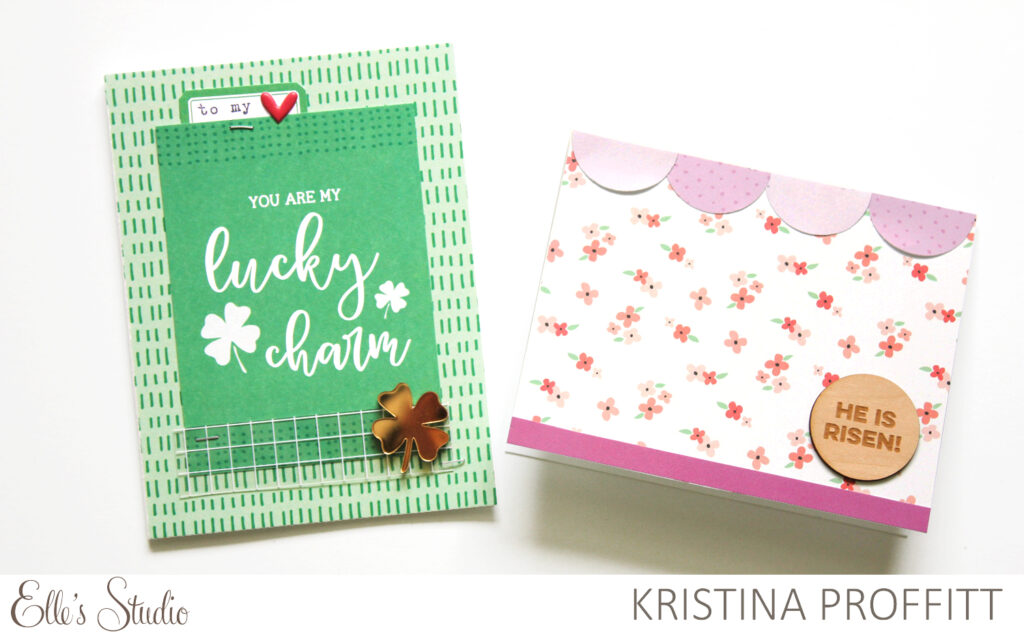
Happy Spring, friends! I hope you all are doing well despite this uncertain and crazy time we’re living in right now. I know one thing that has helped me so much is memory keeping and creating handmade cards for people. Who wouldn’t love a little happy mail nowadays, right? So this month I used some of the beautiful products from the March kit and some extras, to create two very simple cards. One is a St. Patrick’s Day card (but you could give this to someone on any day) and then another card for Easter.
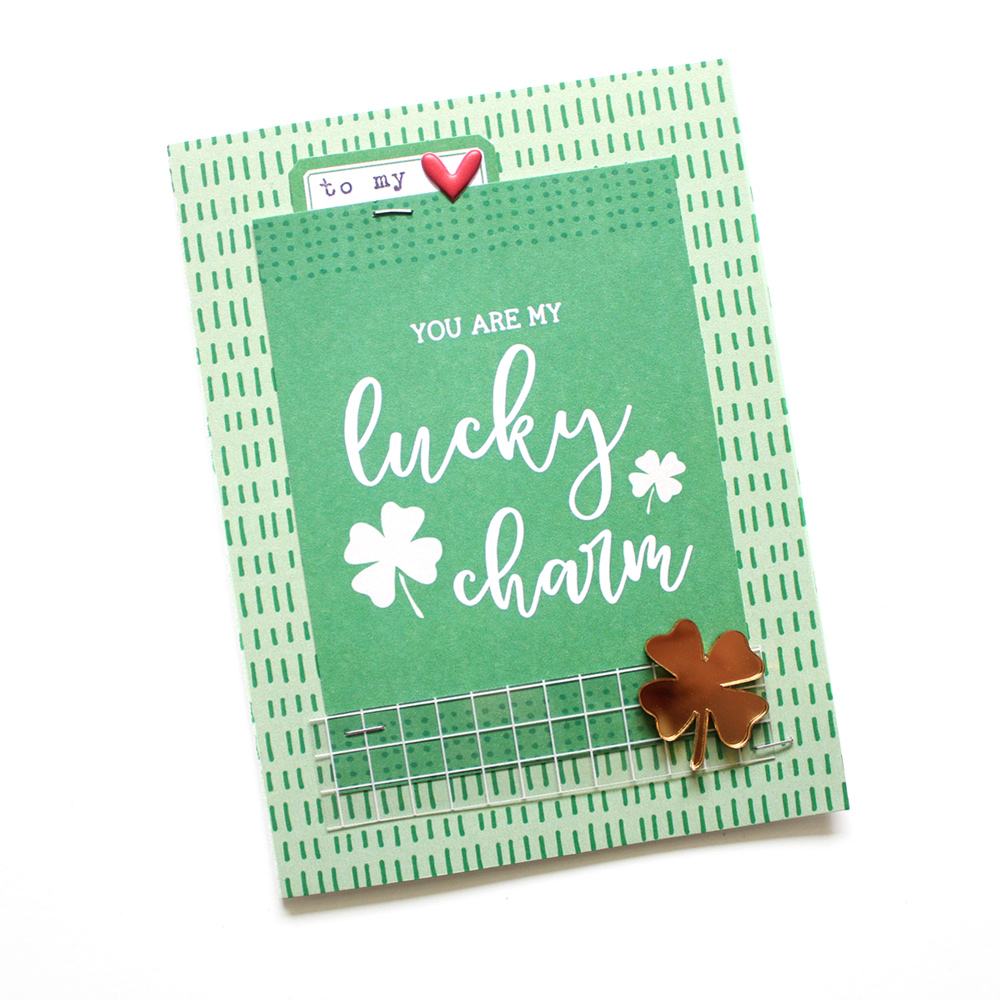
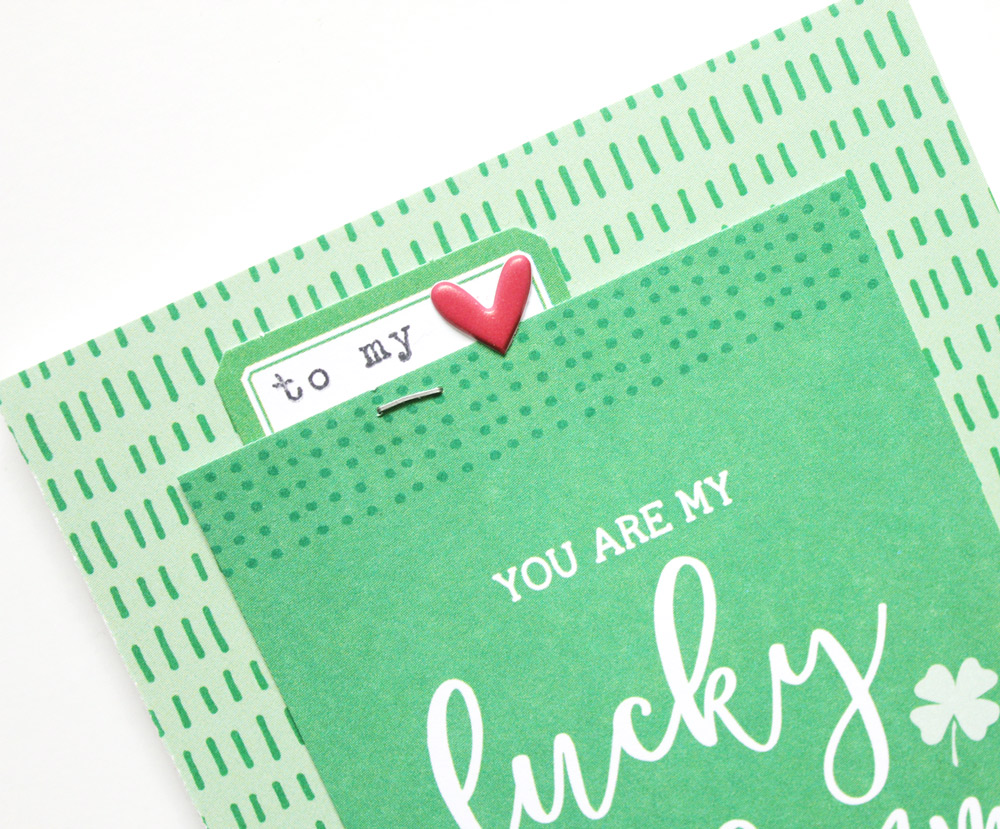
The journaling tags from the monthly kits are great for adding to card fronts, and that’s exactly what I did here on this “Lucky Charm” card. For the background I used patterned paper from the Flourish 6 x 8.5 Paper Stack and then placed a tag from the March Kit directly in the center on top of that paper. I cut a piece off of one of the Go See Do Acetate Die Cuts and stapled it to the bottom of the journaling tag. I loved the layered look and the grid marks on top, too. Then I placed one of the really cool gold Acrylic Clovers on top.
Behind the journaling tag, I tucked in a little tag from the March Kit, stapled it with my tiny attacher and stamped the “to my” using the Title Builder Vol. 4 Stamp on the tag, placing a little red puffy heart from the Tiny Shapes and Dots Puffy Stickers on the end. I love how it’s like a sweet little love note to someone.
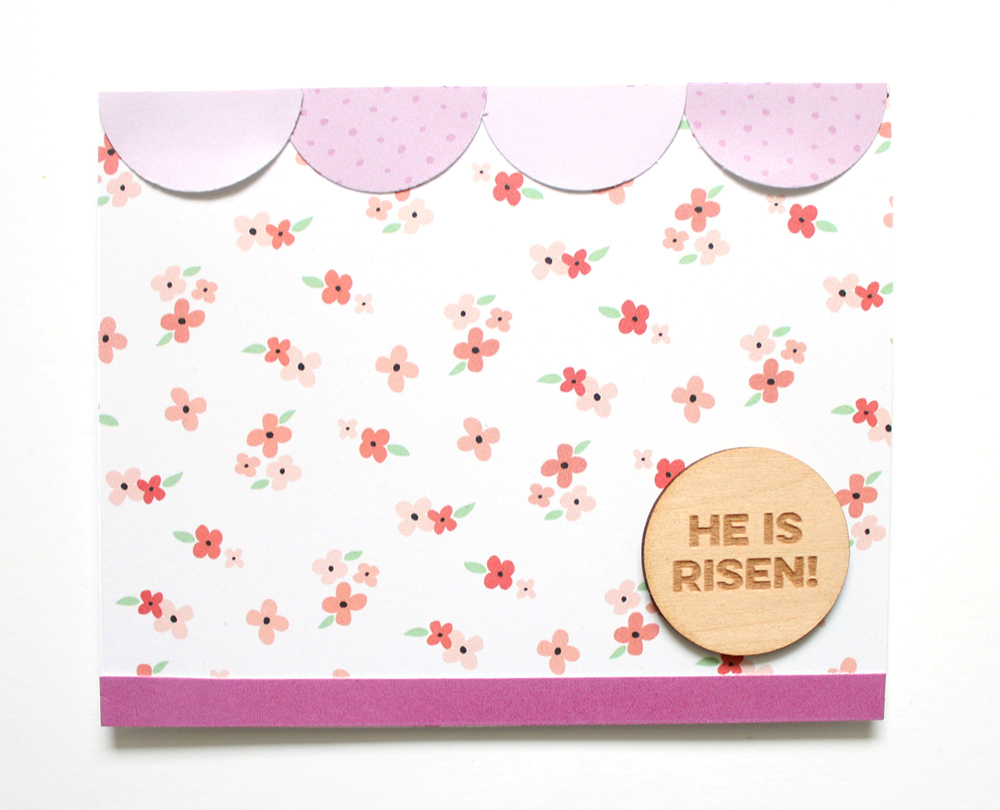
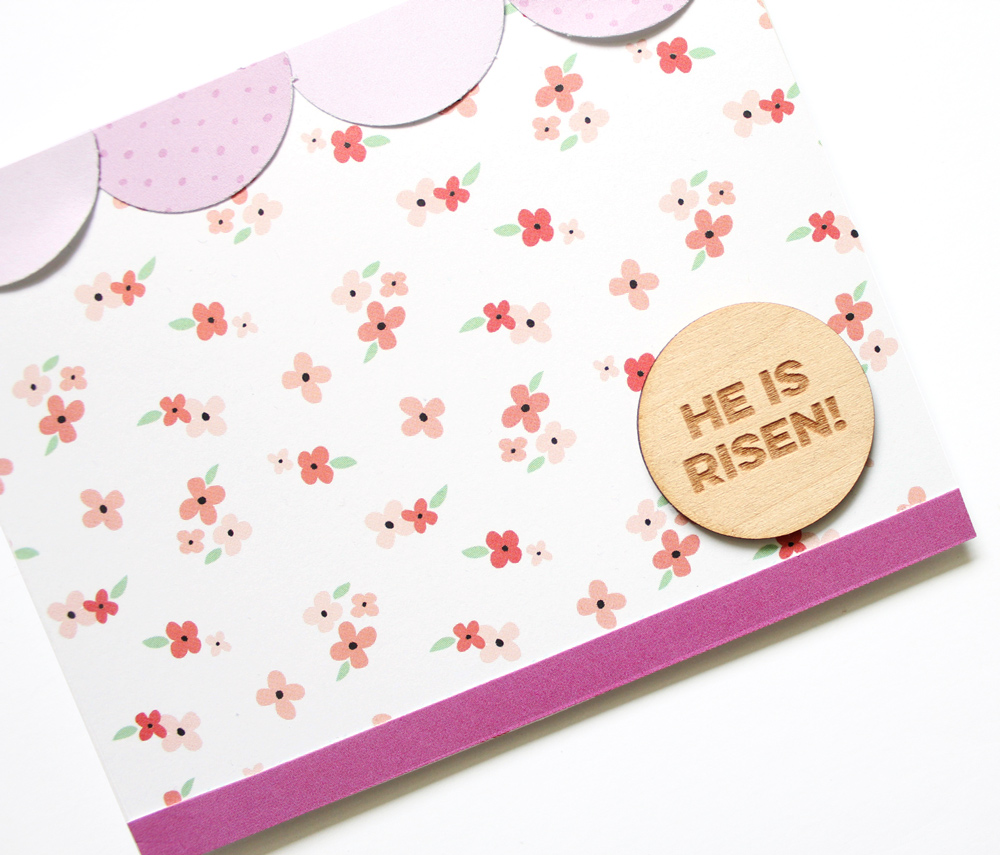
For my second card, an Easter card, I used another piece of patterned paper from the Flourish 6 x 8.5 Paper Stack, cutting it to A2 size and adhering it to the front. I really love how sweet and soft this floral paper is. It’s perfect for spring and Easter! Then I took another sheet of patterned paper from that stack and punched circles from it.
I cut the circles in half, adhering them across the top slightly layered, and alternating the patterns. Then I took a strip from another pattern and adhered it along the bottom. Lastly, I added the “HE IS RISEN” wooden embellishment from the Easter Wood Veneers.
The last thing that I did was adhere the “happy Easter” Easter Wood Veneer to the inside of the card, adding a little pink puffy sticker above it. I love having a sweet, simple message on the inside. Who says you can’t keep on embellishing the inside of a card, right?
These cards and their sentiments might be super simple, but the impact and power they could have in someone’s life could be big. I think that’s what this time is all about right now—doing as many acts of love and kindness that we can! So pull out those March 2020 kit and add-on goodies that you have on hand and don’t only document your memories, but take some time to create some simple cards that you can send to those that you love to brighten their day. We need more of that right now!
Show us how you are brightening someone’s day with a card created using our products! Share in our Elle’s Studio Facebook Group, or on Instagram using the hashtag #EllesStudio!
Comments Off on Simply Perfect Spring Cards with Kristina Proffitt | Share This
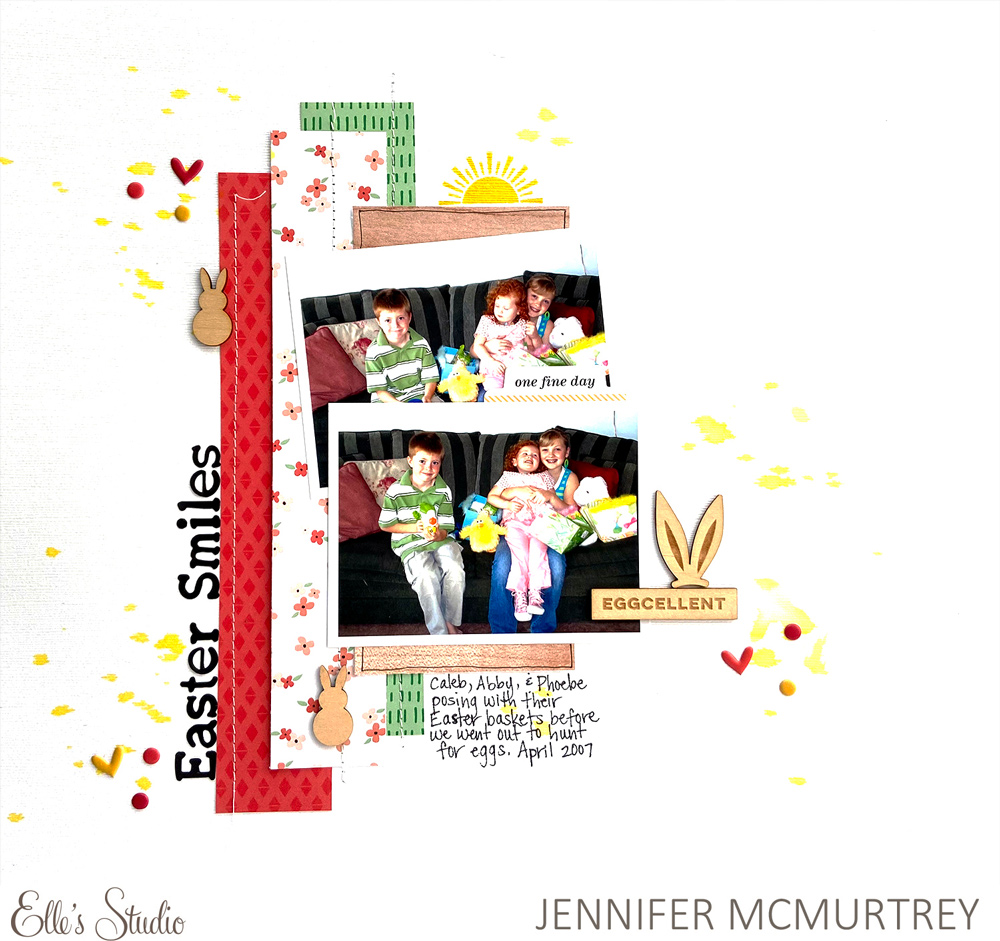
Today we have a new sketch for you, designed to help you get creative with our newest March 2020 products, or whatever else you have on hand to inspire you! Let’s take a look at the sketch, and how DT member Daniela is using it to document a fun memory!
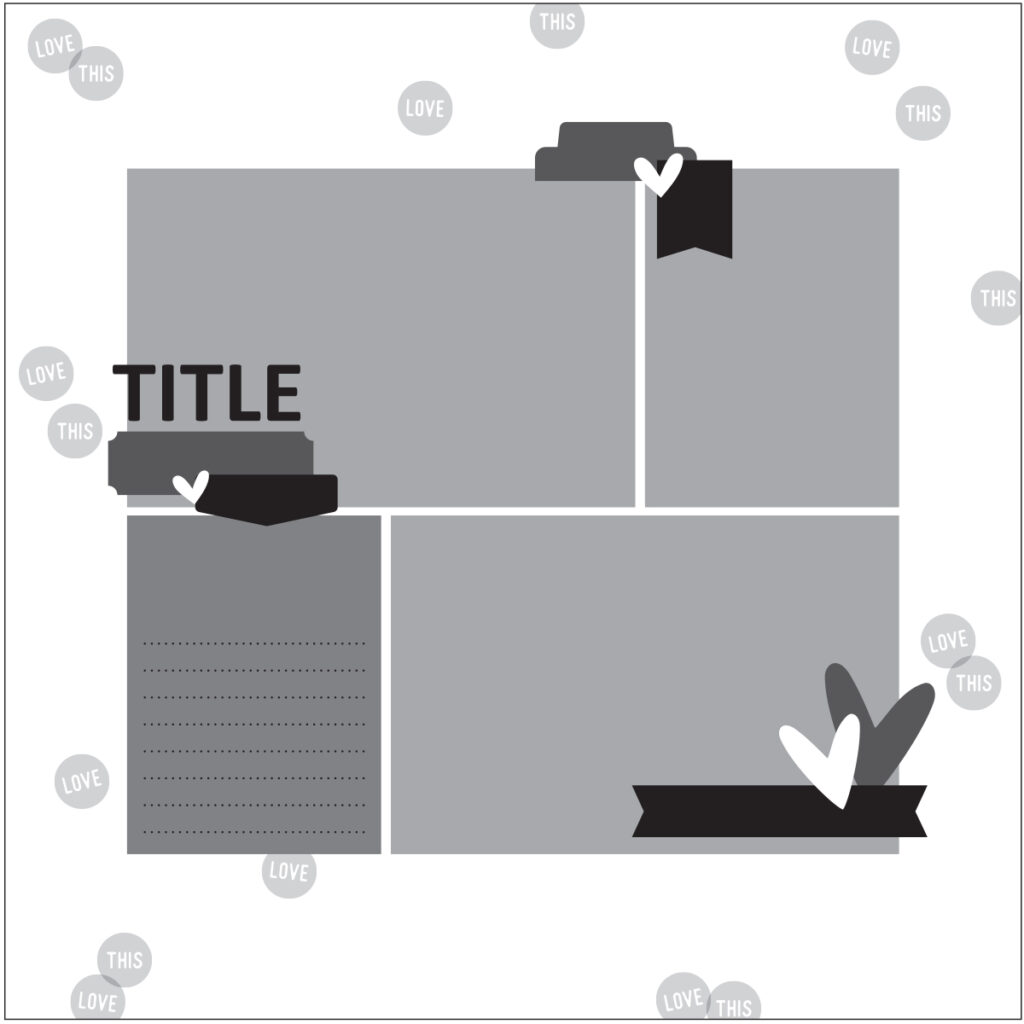
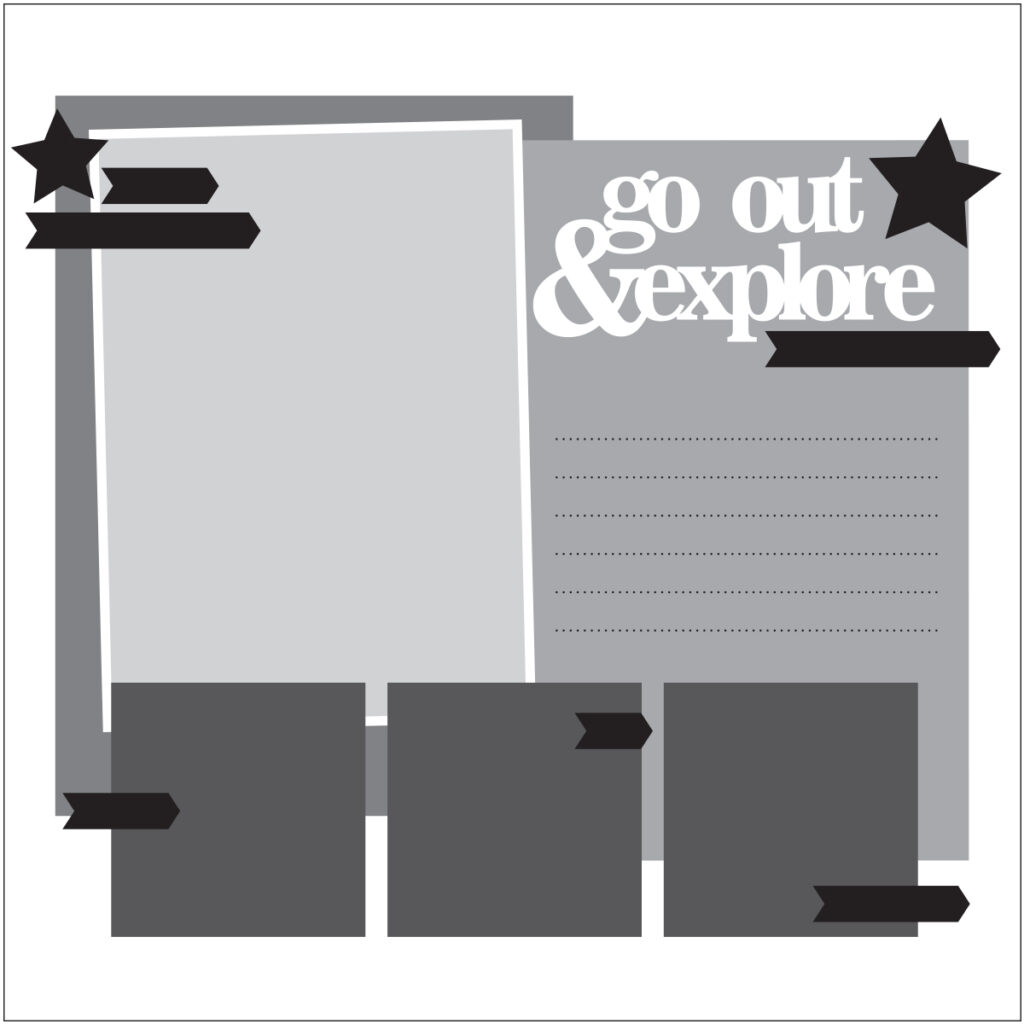
Hi, friends! It’s Daniela here with a new sketch-based layout. I love using sketches because they give you an idea of what the layout could look like in the end. You can just follow this basic composition and creating becomes so easy! Let’s take a look at this week’s sketch:
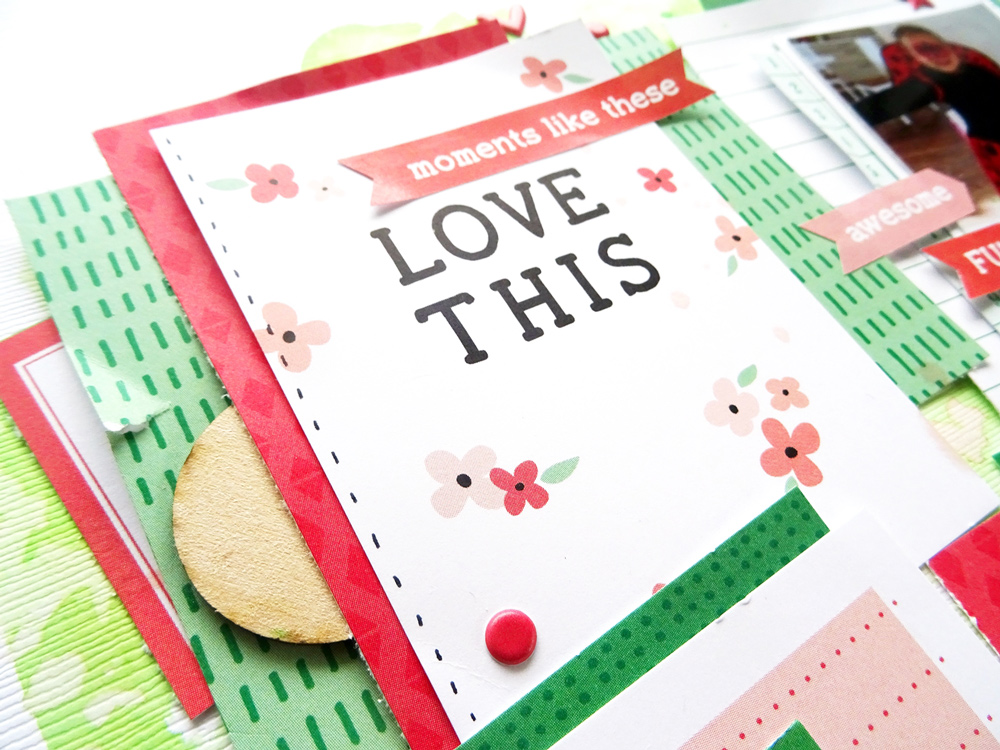
I think scrapbooking is the thing to do right now. It takes off your mind from all the scary news and obligation we’re all coping with, and it helps to focus on something good. I wanted to highlight a picture taken during carnival last year. My daughter was a ladybug, so I wanted to create in a cheerful and playful style. Here is my page:
When I saw the sketch, I knew right away that I wanted to build four paper clusters. I decided on a color scheme first, which is red and green in this case. Then I went through my March 2020 kit and add-ons and picked all the green and red papers and tags and started layering. I also ripped the paper here and there and added tiny details like the Tiny Shapes and Dots Puffy Stickers and Adventure Stickers. The “Love This” tag from the March 2020 Kit is one of my all time favorites, honestly, I had to use this one, so it is the highlight on my first cluster.
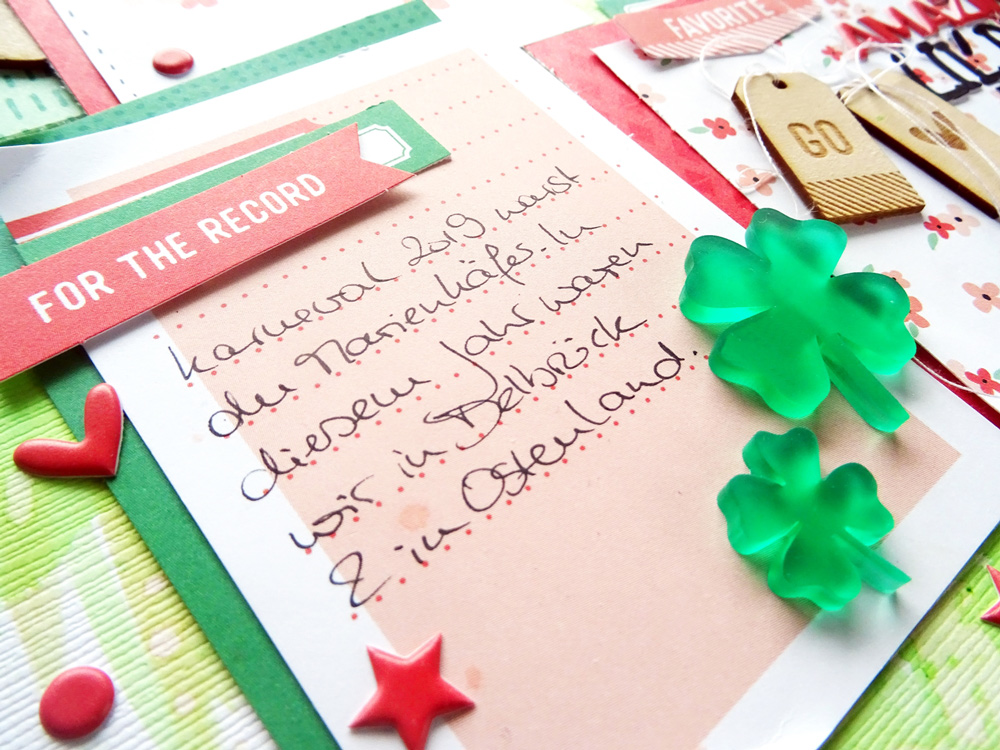
Combining different textures always is a fun thing to do. I love the Acrylic Clovers from the kit, so I picked the green ones and used it on one of the clusters. The page holds a mixtures of different embellishments: wood veneers, puffy stickers, die-cuts, stickers and these awesome acrylics.
I hope you like my cheerful take on the sketch! Thanks so much for stopping by today and don’t forget to share what you create with this sketch using the hashtag #ellesstudio on Instagram, or in our Elle’s Studio Facebook Group!
All the best for you and stay safe!
Comments Off on Sketch Day with Daniela! | Share This
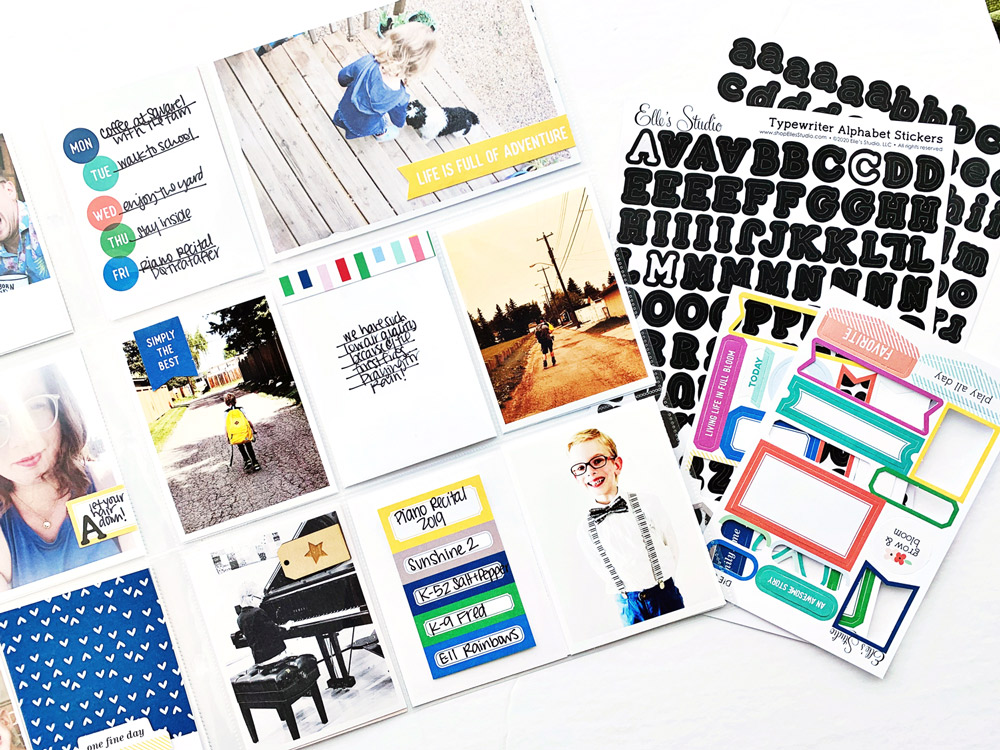
Hello and Happy Thursday, friends! A lot has changed in the world since the release of the March kit and add-ons on the 10th. If you are reading this, there is a strong probability that you are at home and potentially have way more crafting time on your hands than before. With that in mind, today, I am going to share three ways that you can use your alphabet stickers like the Black Typewriter Cardstock Alphabet Stickers from the new release. Have a look!
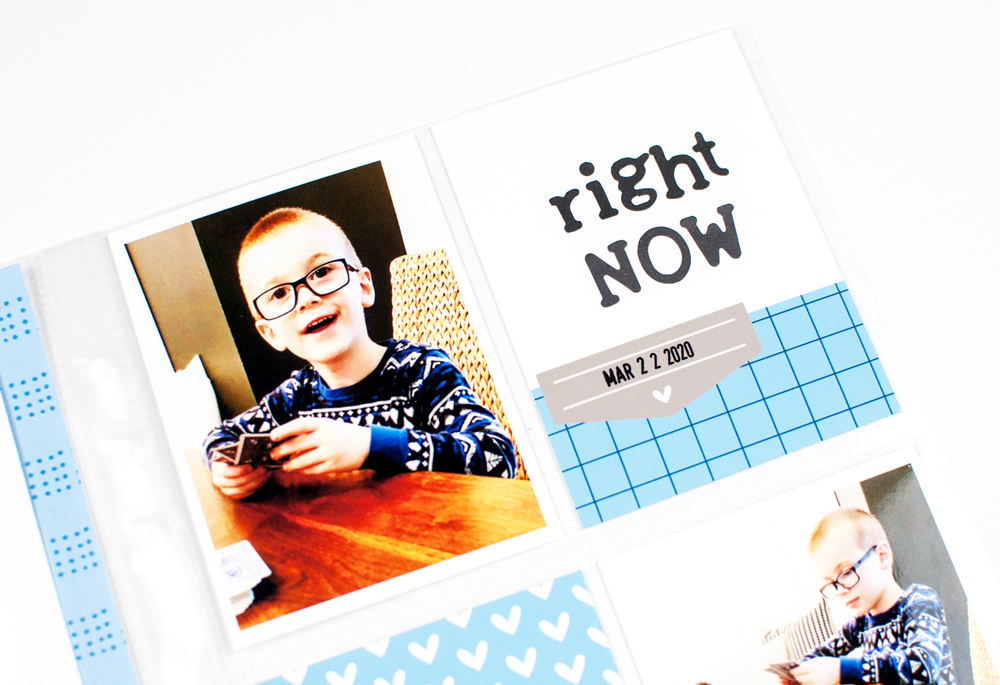
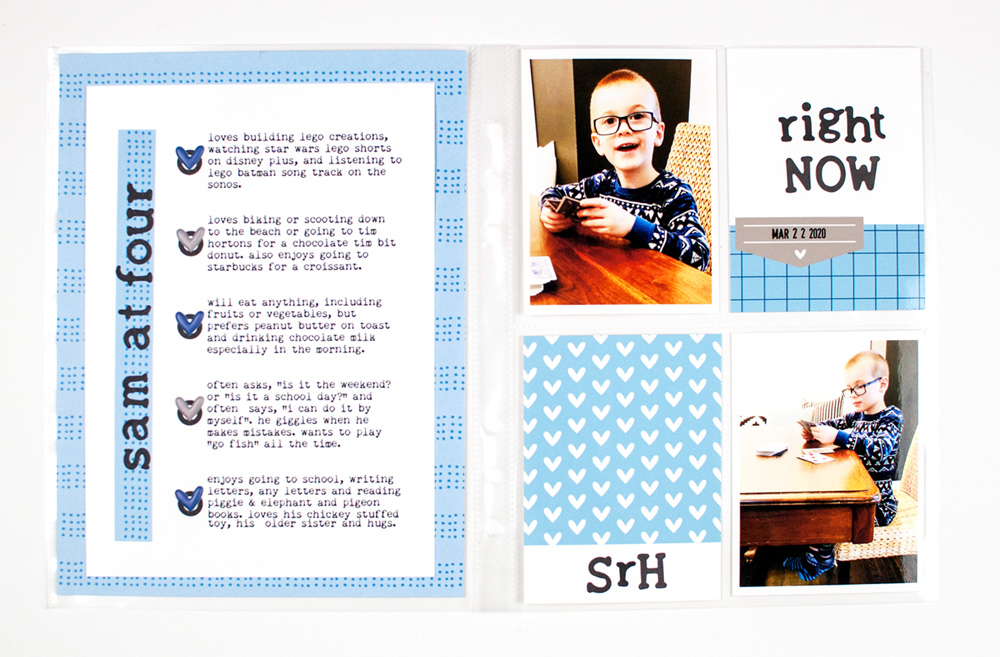
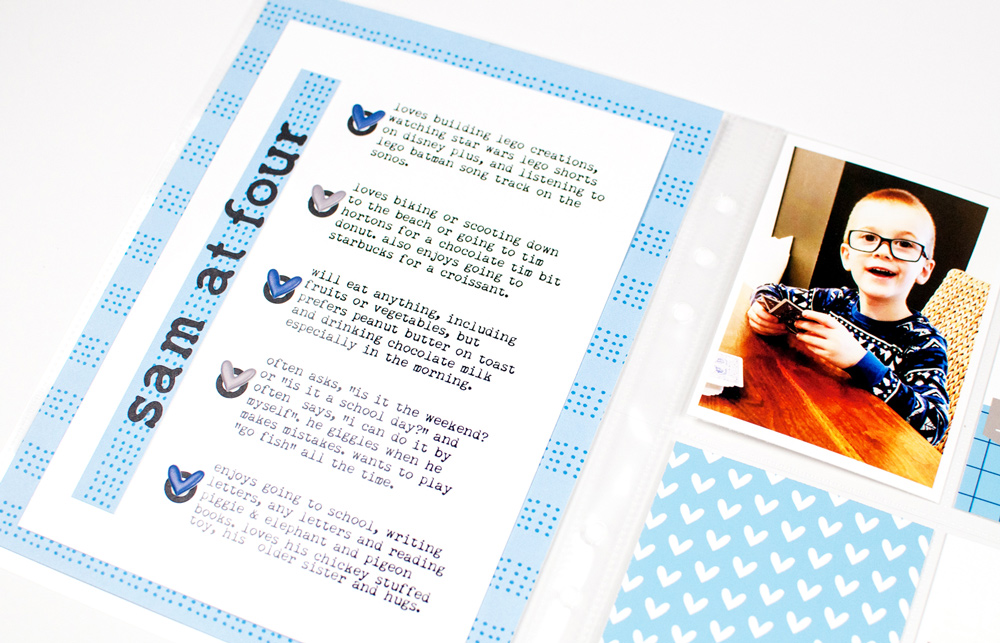
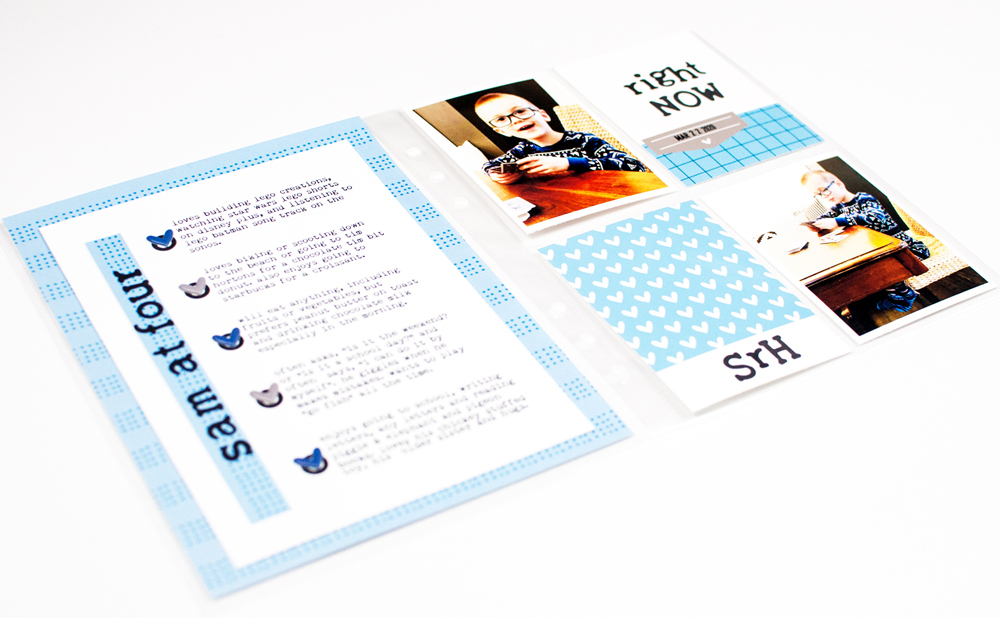
In this 6″ x 8″ double page spread, I documented some of the details about my son, Sam. Currently he is four years old and in a really fun phase of life. Sometimes, I catch myself smiling from ear to ear at some of the things he says and I marvel at his current interests and likes.
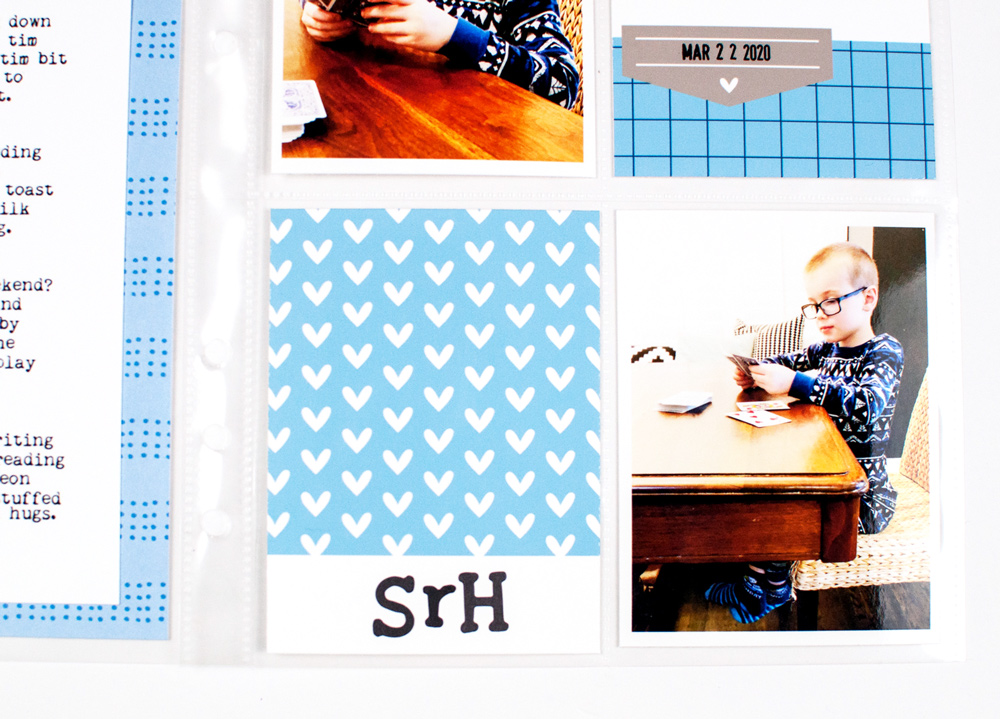
The first two ways I used my Typewriter Cardstock Alphabet Stickers are fairly common. They include using your stickers to create a title for your layout and personalizing your pocket page with a person’s initials. Although there is nothing earth-shattering about these tips, what I will say, is to try something a little different. With the title that reads “Sam at Four”, I used the alphabet stickers vertically to contain my journaling on the left side while I created a personalized tag with Sam’s monogrammed initials using both the uppercase and lowercase letter stickers. Although you may already know the standard ways to use letter stickers, try switching up the size and direction of your stickers.
Lastly, I repurposed the zeros from the Typewriter Cardstock Alphabet Stickers and made them bullet points. I then added the new Tiny Shapes and Dots Puffy Stickers to dress up the circles and to add extra layers and texture to my pocket page. This is a great way to use up some of those last letters stickers you are not sure how to use.
That’s it friends: three simple ways to use alphabet stickers on your page. Stay safe + stay at home! There is no better time to craft or use up your alphabet stickers. Thanks for reading!
Show us how you are using your alphabet stickers in new ways! Post on Instagram using the hashtag #EllesStudio, or in our Elle’s Studio Facebook Group!
Comments Off on Three Simple ways to Use Your Alphabet Stickers with Jess Forster | Share This
Spring is a great time to get out and explore—the weather isn’t too cold or too hot, the grass is getting greener and we’re coming out of our winter hibernation period! Guest designer Shannon Dombkowski is with us to share her third and final project this month, documenting a fun day out at a nearby museum. Whatever the adventure, our March kit and extras can help you document it, as Shannon shows us today! Let’s take a look:
Hello crafty friends! This is Shannon and I’m back with my third and final guest designer project for the month of March. I’m so thankful that I had the opportunity to share my projects with you! I love Elle’s Studio and the products they put out.
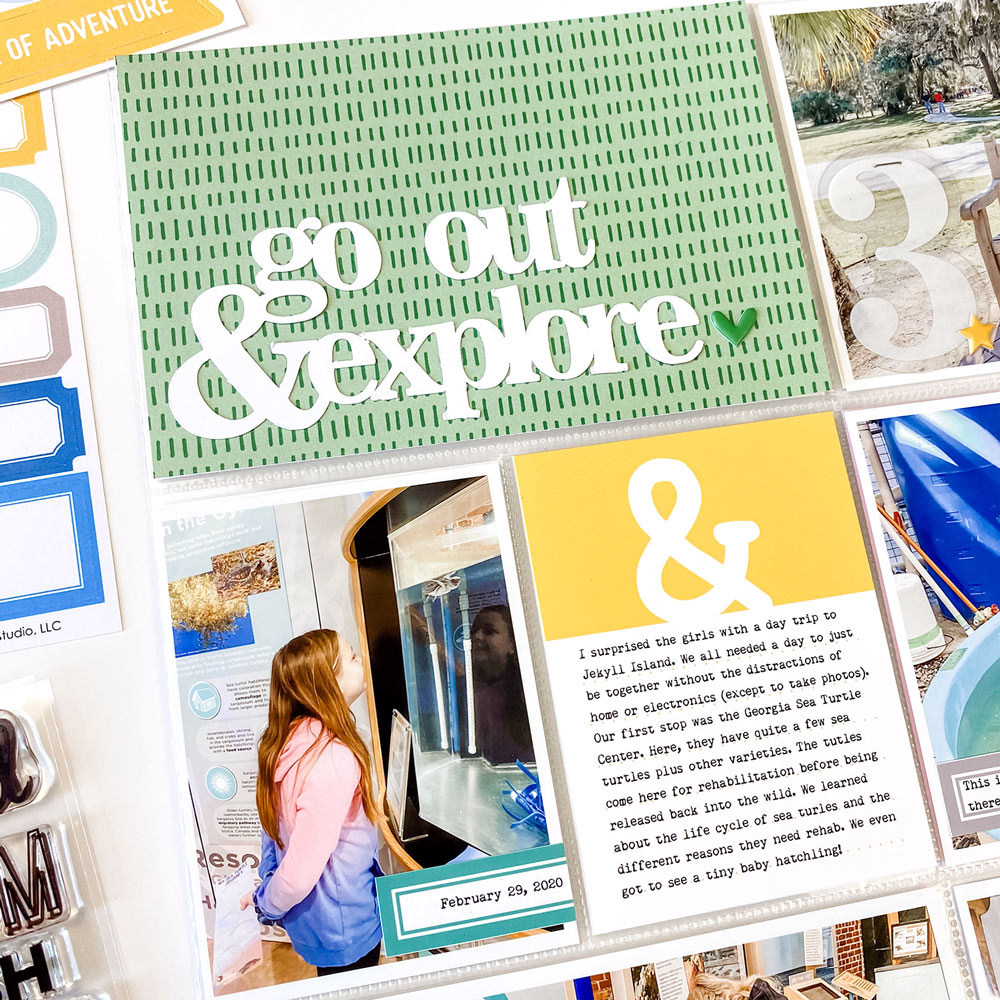
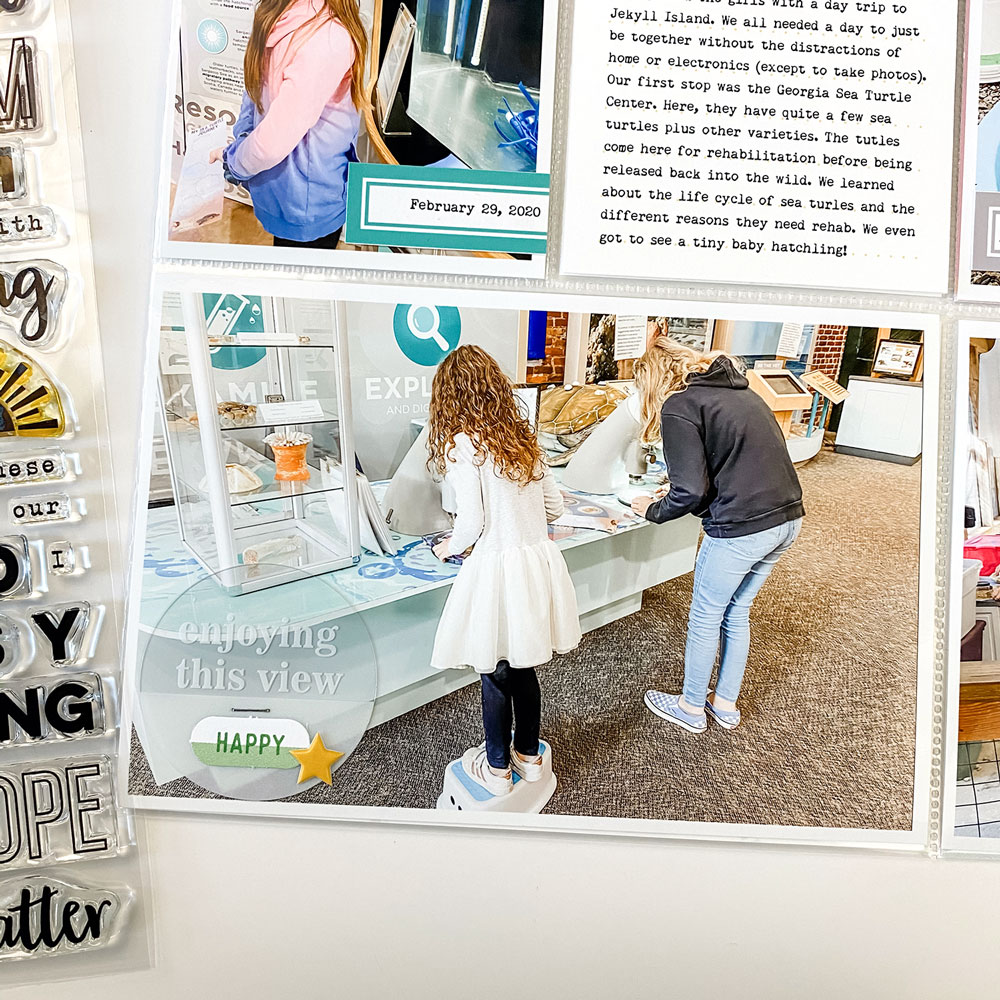
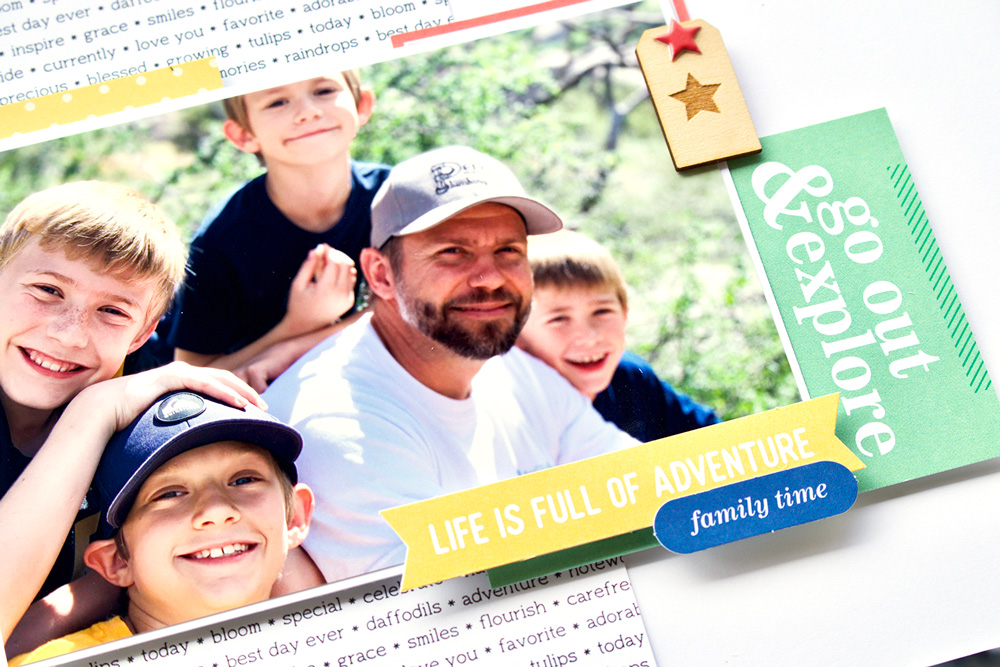
We like to do a lot of exploring. Big or small adventures: we like them all! It’s no surprise that the theme of my third project is exploration again. This page documents our trip to the Georgia Sea Turtle Center during a day trip to Jekyll Island in Georgia.
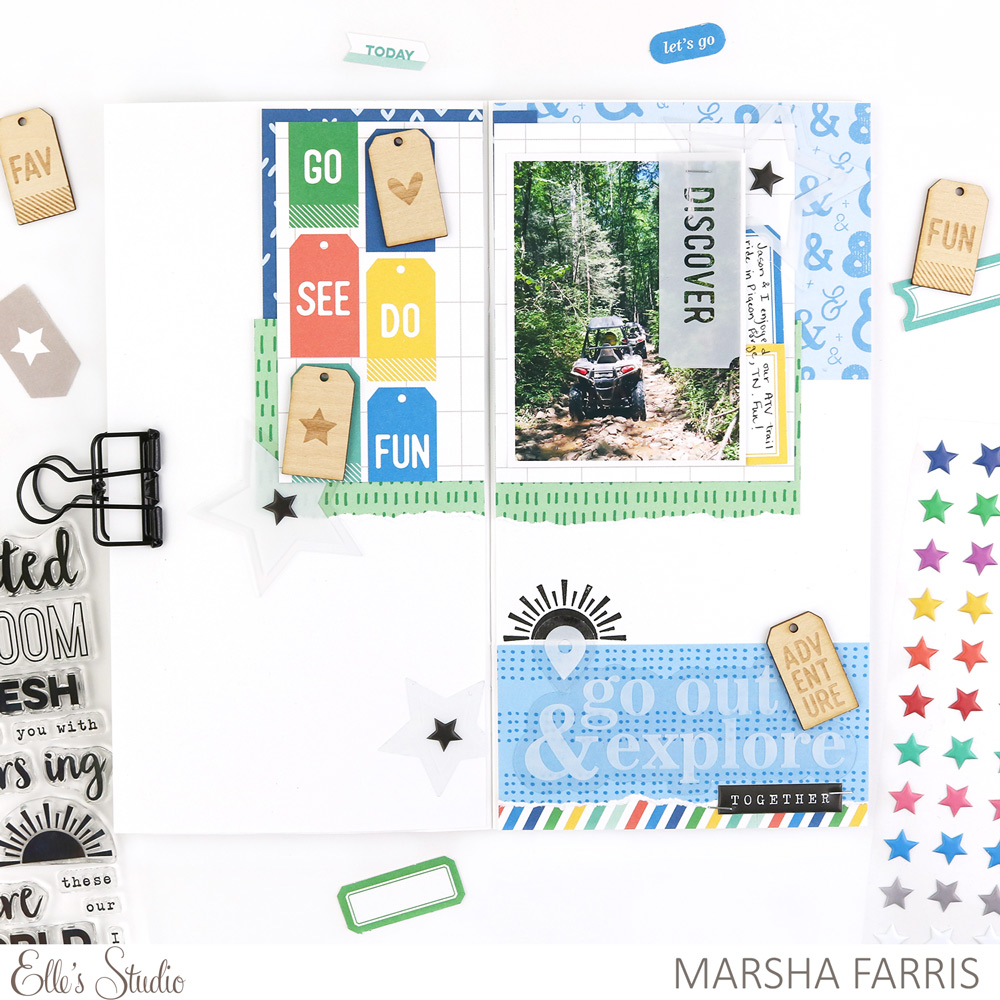
I created a title for the page using the “go out & explore” die cut from the March Cut Files. I kept the background pattern simple using a piece of patterned paper from the Flourish Paper Stack. I didn’t want it to be too busy, which would have made my title difficult to read. The puffy heart adds a subtle, monochromatic touch.
I just love the variety of shapes and phrases in the Go See Do Acetate Die Cuts. They come in a great variety of sizes. Since I used them on my 4″ x 6″ photos, I was able to go with a larger shape. Despite the large size, it doesn’t overwhelm my photo because it’s translucent. I did want to draw the eye to the acetate so I added a die cut from the March 2020 Kit and a Tiny Shapes and Dots Puffy Sticker to each of the pieces around my page.
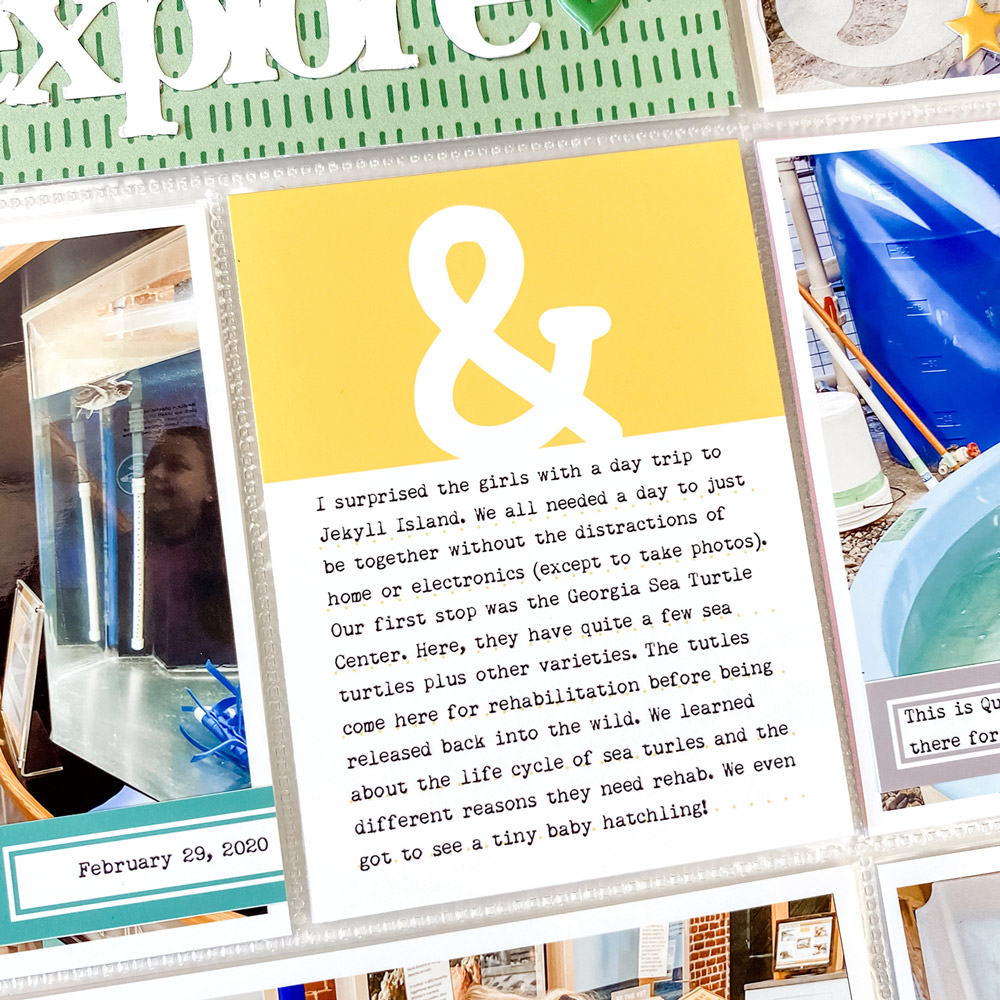
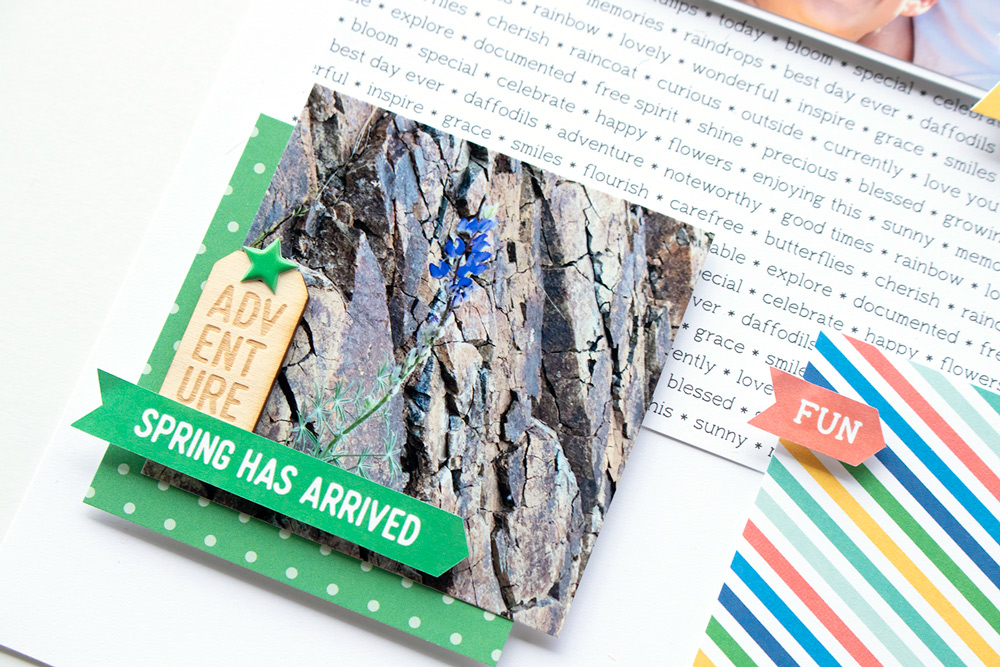
Of course, I had to pull out my Title Builder Vol. 4 Stamp again for this page! This 3″ x 4″ journaling tag is from the Flourish Printables. I used the stamp set, die cuts, and a puffy heart sticker to add my own design to the page. I wanted to make them look like they’re fluttering up out of my sentiment. It leaves plenty of white space, but also acts as a guide for the eye to move around the page.
Finally, let’s talk about typing on the journaling tags! Both 3″ x 4″ tags on my page, along with the labels on my photos, are from the Flourish Printables. I pulled the entire PDF into Photoshop so I could add my journaling before printing. The tags and labels that I didn’t use on this page were added to my stash with the rest of the kit. If I have a lot of journaling, as I did on this tag, I like to type it out.
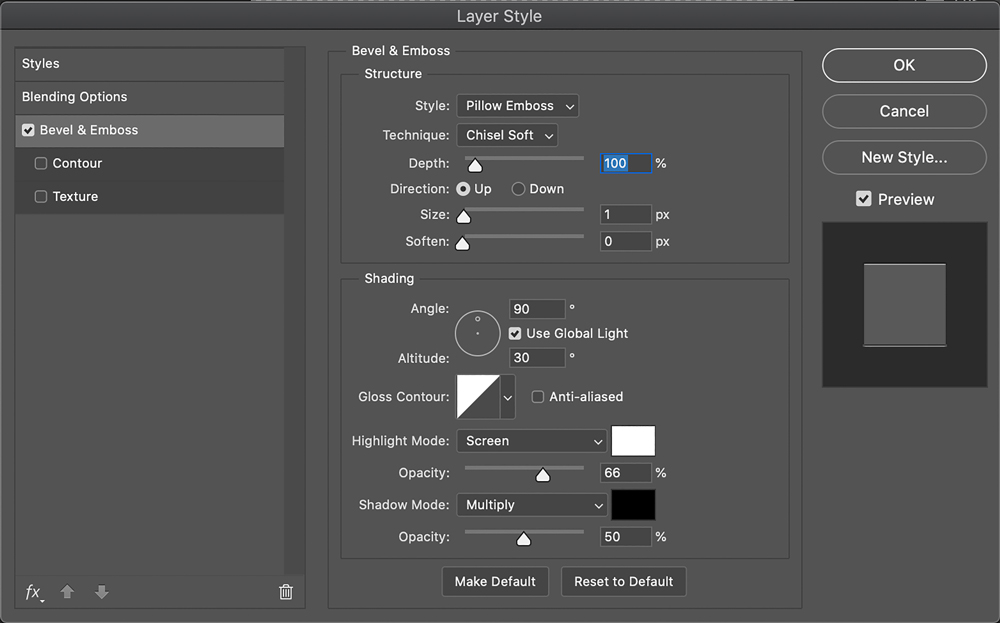
I prefer a typewriter font for my journaling. I also like that it has that kind of embossed or stamped into the page look when it’s printed. It’s subtle, but it’s there. It helps the font have that realistic typewritten look. This is a trick I learned many years ago when I was a digital scrapbooker and I’ve carried it with me to my traditional/hybrid days. Once you’ve typed your journaling, make sure your layer is selected. Then choose Layer —> Layer Style —> Bevel & Emboss. Change the settings to match the screenshot below and you’ll have a slightly embossed look to your journaling!
I hope you’ve picked up a few ideas, and maybe you’ll even try typing on your digital journaling tags! Thank you for following along with me this month!
Hello there! I’m Shannon. I was born and raised in New England but now live in coastal Georgia with my husband, our 3 daughters, and our rescue dog. I’ve been crafty for as long as I can remember – always creating journals, collages, and photo books. I created a scrapbook of our wedding in 2007 and then jumped right into scrapbooking again when our first daughter was born in 2008. Between 2008-2015 I dabbled in both digital and paper scrapbooking and was published in several scrapbooking magazines. Then I stopped – abruptly and completely. It wasn’t until 4 years later, in August 2019, that I decided it was time to start scrapbooking again. My creativity was dormant for 4 whole years and it feels great to be back! Now, I’m a happy hybrid scrapbooker and I work in pocket pages of all sizes, travelers notebooks, and memory planners. When I’m not scrapbooking, I can often be found running, reading, or sipping coffee. I love being outdoors and discovering new adventures with my family.
Be sure to follow Shannon’s Instagram feed to keep being inspired by her pocket pages and traveler’s notebook spreads. Thank you so much forsharing your beautiful projects with us this month, Shannon!
Comments Off on Go Out & Explore with Guest Shannon Dombkowski | Share This
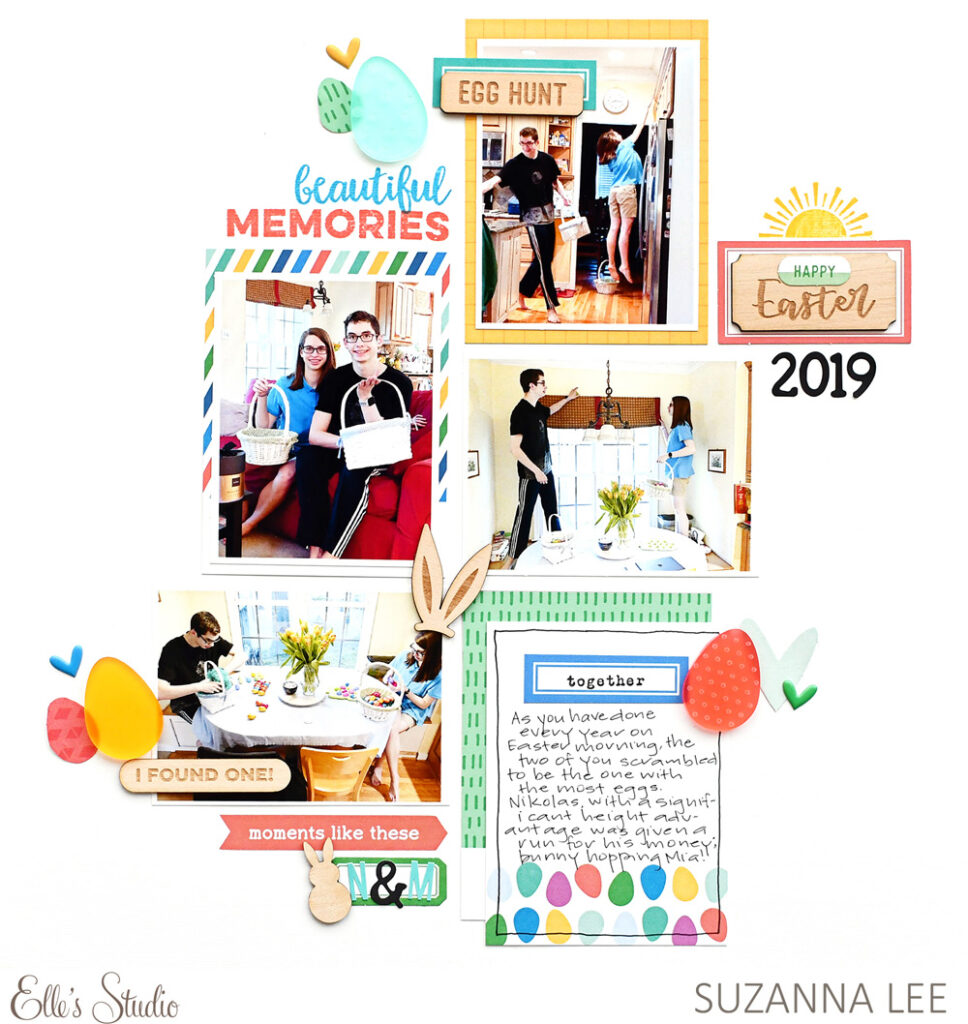
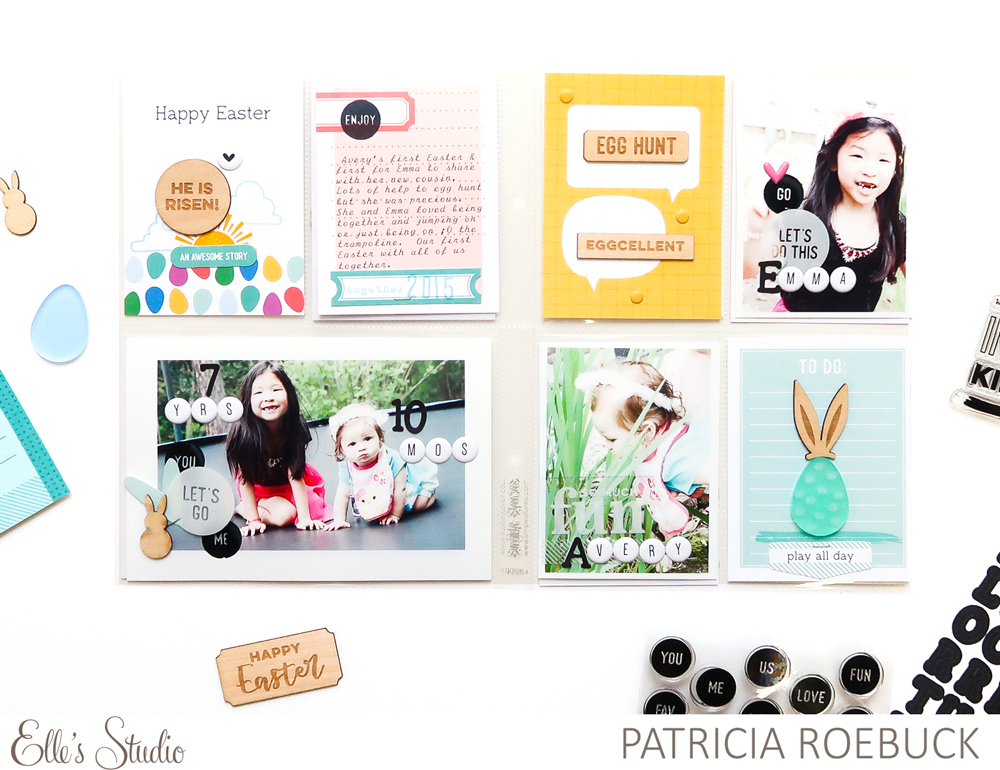
Whether you’ve been celebrating St. Patrick’s Day, or are looking forward to your Easter traditions, our March kit and extras have you covered with beautiful products to record your special memories! Let’s take a look at nine more design team projects which highlight our newest products in the most beautiful way!
Show us how you are documenting your spring memories with our newest products! Share your projects on Instagram using the hashtag #EllesStudio, or post your project in our Elle’s Studio Facebook Group! We’d love to see what you’ve created!
Comments Off on March Design Team Inspiration: Volume Three | Share This
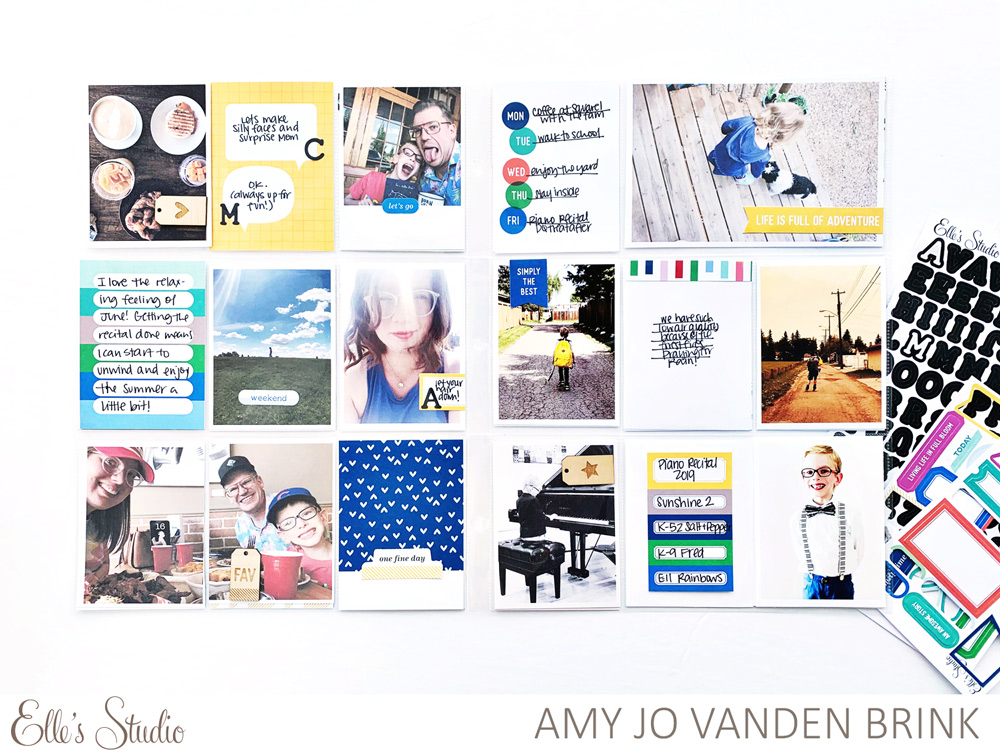
Our colorful kit and extras always allow for several color scheme options, or you can choose to use the full color spectrum of the kit to create with! Let’s take a look at which direction design team member Amy Jo went with on the new pocket page she’s sharing today, using our March 2020 kit and add-ons.
Hello! It’s Amy Jo, and I’m excited to be back this month sharing a pocket page with all of you. I still love creating big double-sided pocket page spreads, and this month’s coordinated kit and extras made it so easy to pull together!
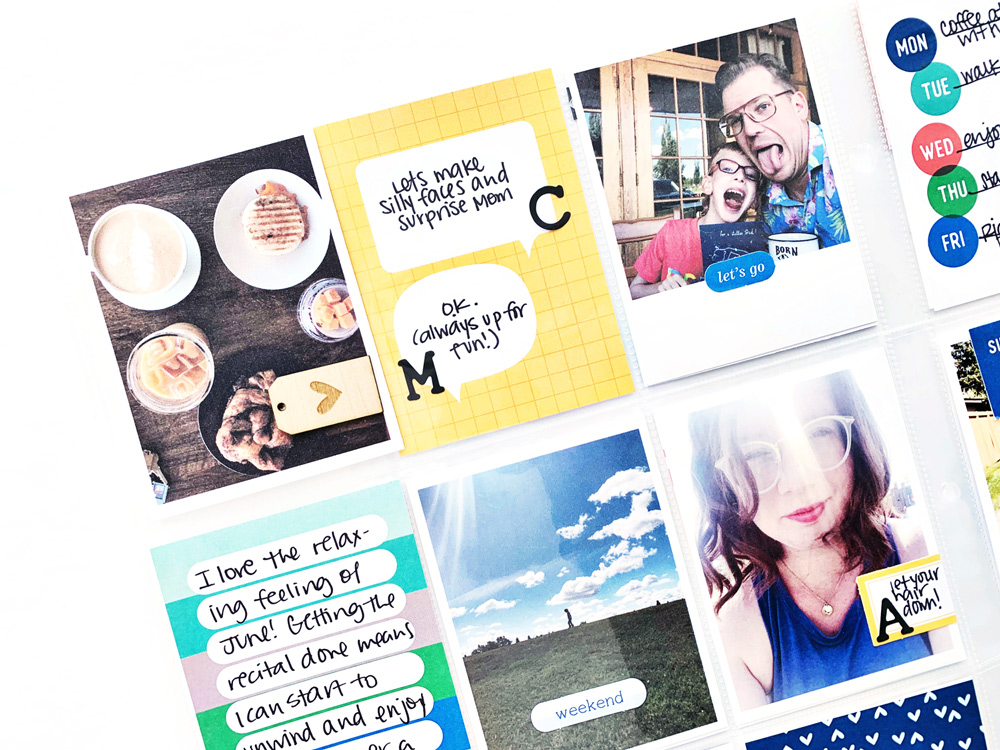
I always like to start my pocket pages with a color scheme in mind, and it is so easy to go many different ways with the March 2020 Kit! I decided to use the blues, greens and yellows for this particular spread.
I cut five labels from the March Labels sheet, leaving them together rather than separating them, and used it mounted on a white card as a spot to fill in some information about my little guy’s piano recital and the songs he played. It served a couple of purposes, and helped get my color scheme across to the right side of the spread.
I really love the opportunity to record conversations, and I like to use alphabet stickers to make sure I remember who said what! This fun, yellow tag from the March Kit made that easy do to inside the speech bubbles and the Black Typewriter Cardstock Alphabet Stickers!
That’s another week recorded, thanks to the help of the latest Elle’s Studio exclusive kit and add-ons! Thanks so much for stopping by!
Show us how you’re documenting in pockets using our monthly kit! Share your project on Instagram using the hashtag #EllesStudio, or in our Elle’s Studio Facebook Group! We can’t wait to see your filled pockets!
Comments Off on Pocket Page Inspiration with Amy Jo Vanden Brink | Share This
Hello friends! It’s Candace here with you to share a fun sketch and the layout that I was inspired to create using it. I LOVE working with sketches! I can take the time to just play with paper and embellishments and not have to worry about creating a balanced design; all the work is already done! Let’s take a look at this week’s sketch:
Using the sketch, the March 2020 Kit, along with the everyday-themed papers and embellishments, I created this layout about a recent family hike. I knew I wanted to make a bright, colorful and fun layout, therefore I wanted to keep the base of the layout simple and monochromatic. I used a basic word sentiment paper from the Flourish Paper Stack to act as the base to the main photo stack. To bring color to the photo and make the layout pop, I added various papers and journaling tags to back the photo. I love the different angles and patterns this created.
To create the title on layout, I combined a tag from the March Kit along with die cuts and the adorable Wood Veneer Adventure Tags. I chose to vary the angles of the tags to create more variety. I love the final look!
For the three blocks on the sketch, I choose to create blocks of patterned paper, photos and embellishments. I focused similar colors on each block, adding dimension and interest with contrasting shapes and textures.
I had so much fun creating this layout & it came together in a snap using the sketch! I can’t wait to see how you use the it to create a layout, card or travelers notebook spread! Get super creative, have fun and tag #EllesStudio when you share!
Have a beautiful day!
Comments Off on Sketch Day with Candace Perkins | Share This
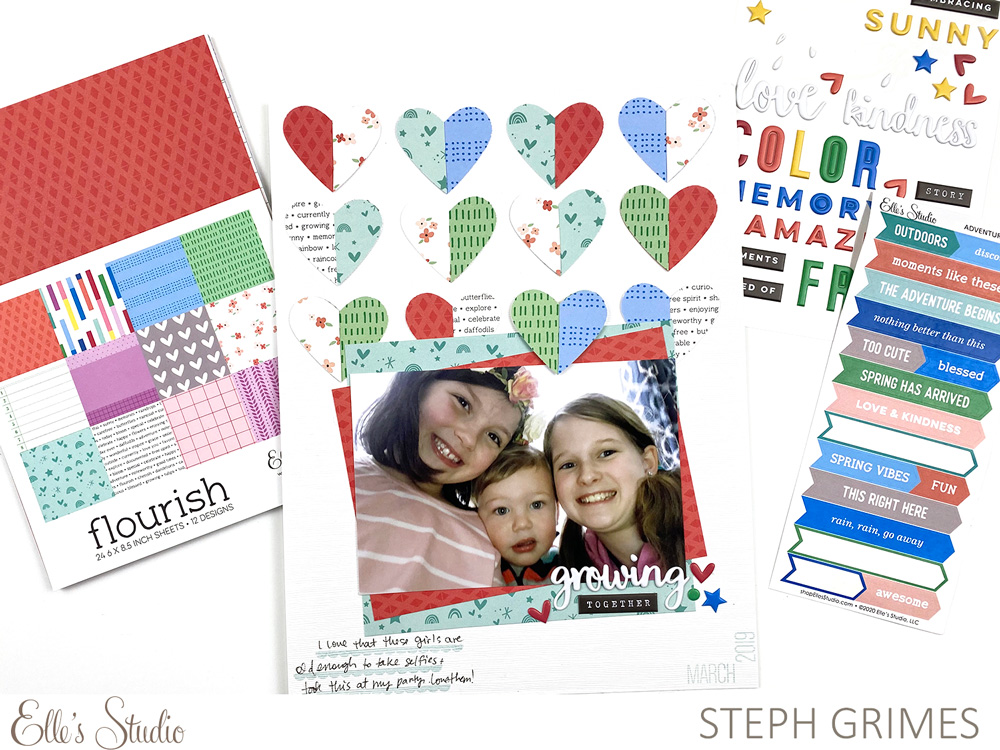
What do you do when your scrapbooking stash is limited? Or maybe you don’t have the budget this month to include all of the add-ons to your cart? Take a cue from design team member Steph Grimes and use what you have in a BIG way! Let’s take a look at the amazing new spread that she is sharing with us today that uses only three products from our March 2020 monthly kit and add-ons!
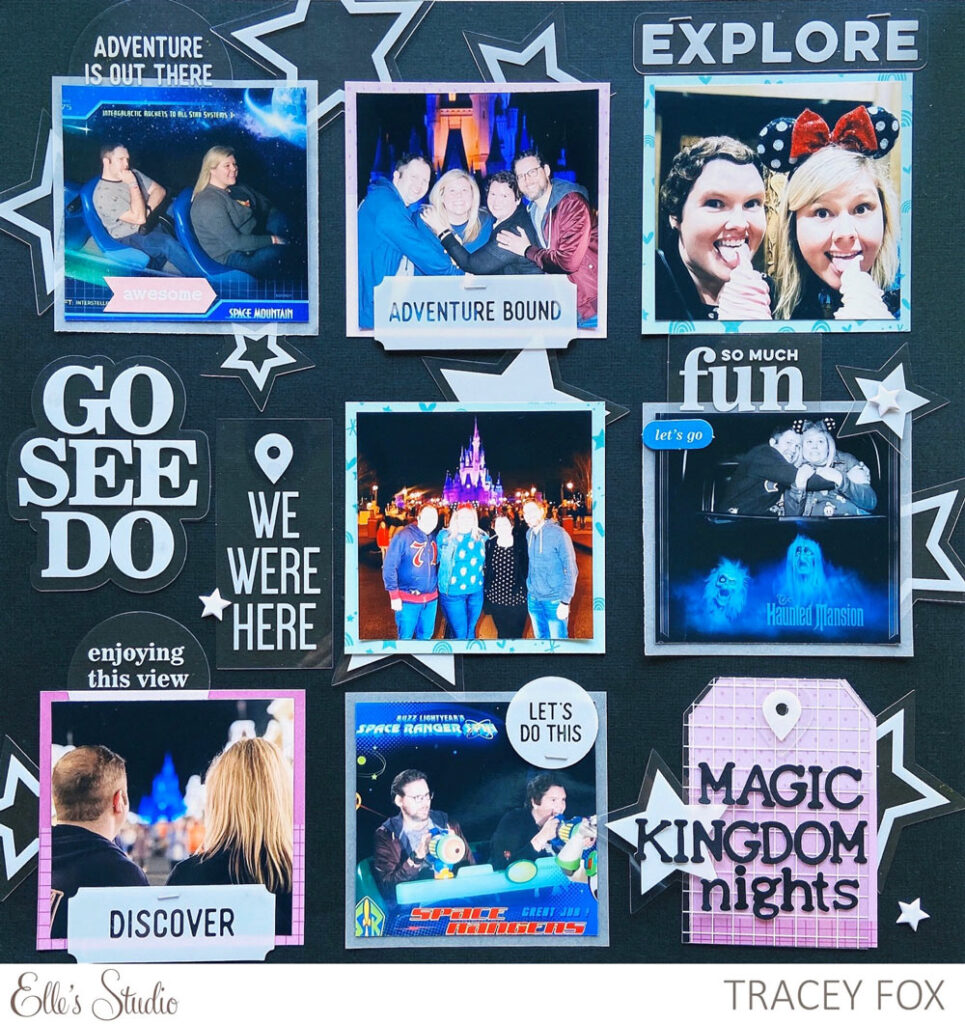
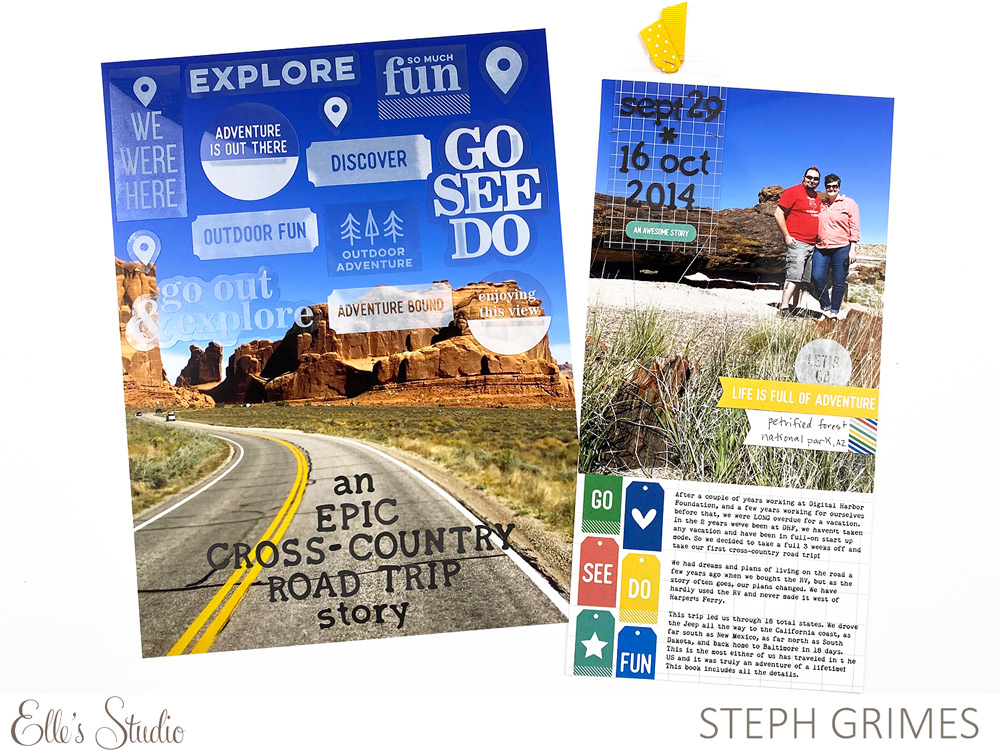
Happy March everyone! This month’s kit is so awesome and I am really excited to be featuring one of the extras included in this month’s release on my project today. The Go See Do Acetate Die Cuts are my featured product for this spread and I used them in a BIG way!
This pair of layouts, one 9” x 12” layout and one 6” x 12” layout, will be part of the opening pages for a travel album I am just starting from a 2014 trip. In September and October of 2014, my husband and I packed up our Jeep, took three weeks off of work, and headed West on the first of many cross-country road trips. We had a short list of places we wanted to visit and tickets to a concert in Colorado, but other than that it was just us and the wide open road and we would figure it out as we went. It was, without a doubt, the most epic adventure either of us had ever been on!
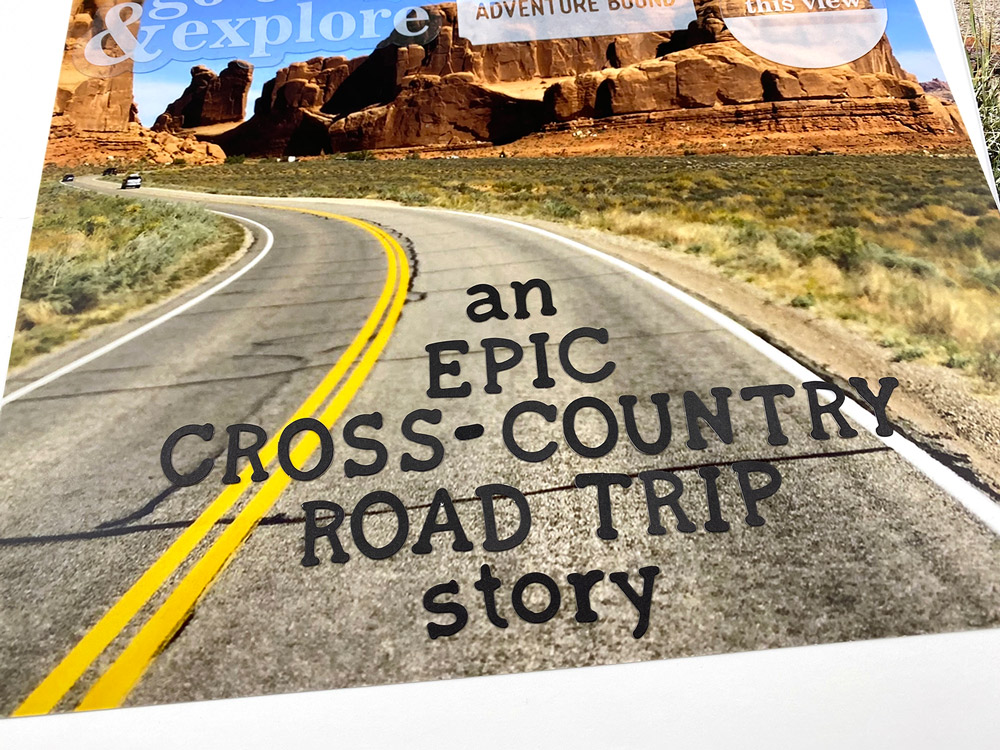
Taking all that into consideration, I felt like these opening pages needed to make a big, epic statement. Using that as my guide, I decided to print one 9” x 12” photo and use that as the base for my title page. Then, I sorted through the Go See Do Acetate Die Cuts and pulled out every piece that was travel related to see if I could add them ALL to my page. You might be able to tell, I was successful! All I have left are the stars, the numbers, and a couple of geotags, which will all be used throughout this album or on another project.
To adhere them to my page with minimal adhesive showing, I used my tiny Xyron Sticker Maker to cover the back in adhesive, then used red line tape for those pieces that were too large to fit in the sticker machine. Once I decided on the acetate shapes as my featured product, I wanted to challenge myself to see if I could achieve a maximum statement on this spread using only a few supplies.
Next, I needed a title. I figured, why not go big with my title too? But, I needed it to use minimal supplies and I wanted some of the photo to show through. The new Black Typewriter Cardstock Alphabet Stickers were perfect for creating my epic, long title because they are a good size and there are lots of letters included on the sheets (both upper and lowercase). If you’re keeping track, I am up to two products used on this project so far!
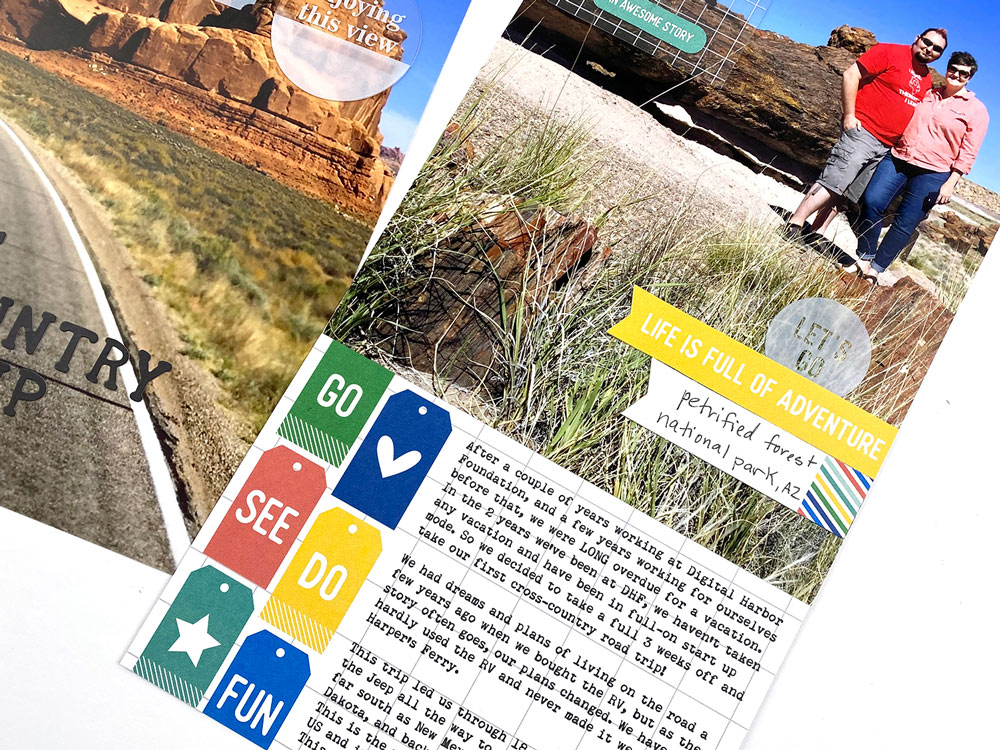
When the first page was finished, I needed to figure out what I was going to do with the accompanying page. Again, I wanted to make as much of a statement as possible, and use minimal supplies, so I went straight into the March 2020 Kit to see what I had left in there. I picked out the 4” x 6” journaling tag with the words “Go, See, Do, Fun” written down the side to include my journaling. I had a lot to say about this epic adventure, so I decided to type my journaling in Photoshop and print right on the journaling tag.
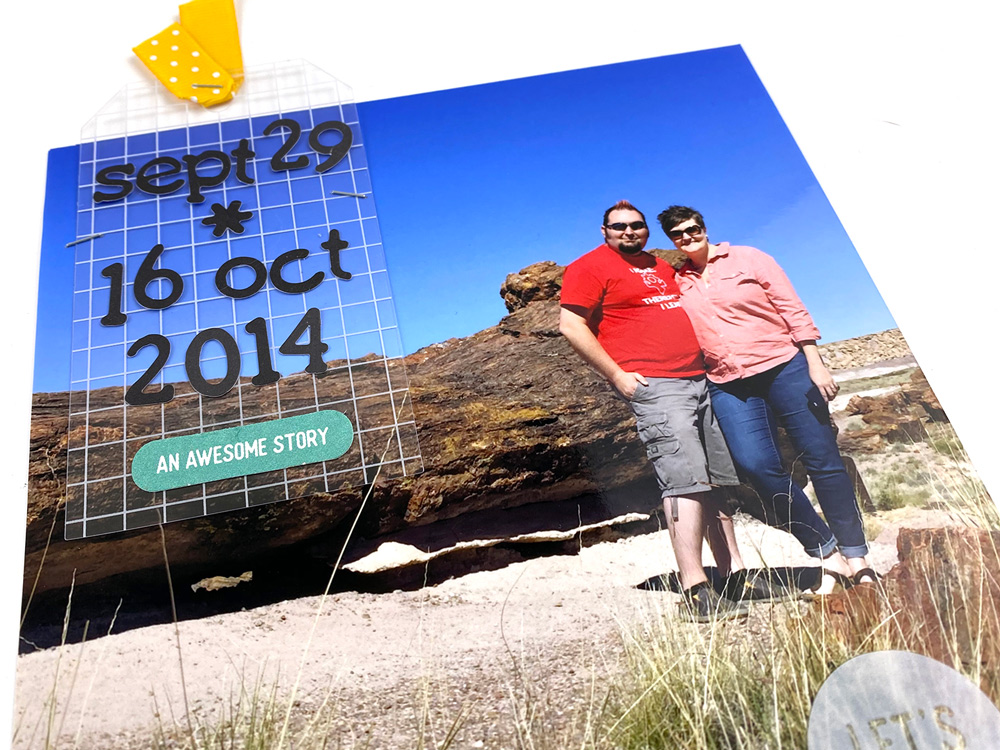
Once I had chosen the journaling tag, I decided on a 6” x 8” photo to pair with it to fill up a 6” x 12” page protector. I cut a piece of cardstock to fit the page protector and adhered my journaling card and photo to it, stacked one on top of the other. I wanted to add the dates of our travel to this second page and had the acetate tag shape left in my unused pile from the Go See Do Acetate Die Cuts, so I grabbed that and added dates using the same Black Typewriter Cardstock Alphabet Stickers. I finished off this tag with a piece of yellow ribbon from my stash and the “An Awesome Story” die cut from the March 2020 Kit.
Finally, I used the colors on the journaling tag to help me pick a few small embellishments from the die cut sheet included in the March 2020 Kit. On the striped banner flag, I added the location of this photo. I had one remaining acetate shape from the Go See Do Acetate Die Cuts that I thought could work on this project and that was the “Let’s Go” circle, so I tucked that in with the flags and banners I added in this embellishment cluster.
My final product count? THREE! I only used three total products on this project and I love how it turned out! I also loved the challenge of creating pages that make a big statement using only a couple of supplies. I think this is a great way to use the products we love, instead of burying them in our stash, and make it easier to make decisions about what to use. Once I decided that I was only going to use the main kit to find my embellishments, I didn’t have to worry about what else I have that might work. This approach worked well for me and is definitely something I’ll be repeating. I invite you to take on this challenge too and see what kinds of maximum statements you can make with minimal supplies! Please share what you make on Instagram and use the hashtag #EllesStudio , or share in our Elle’s Studio Facebook Group!
Comments Off on Maximum Statement with Minimal Supplies and Steph Grimes | Share This