We want to thank each and every one of our Elle’s Studio friends and fans who created with us during our National Scrapbook Day celebration for 2020 and entered their projects in our Elle’s Studio Facebook Group! Today we’re excited to share the winners of our five challenges, plus our bonus challenge!
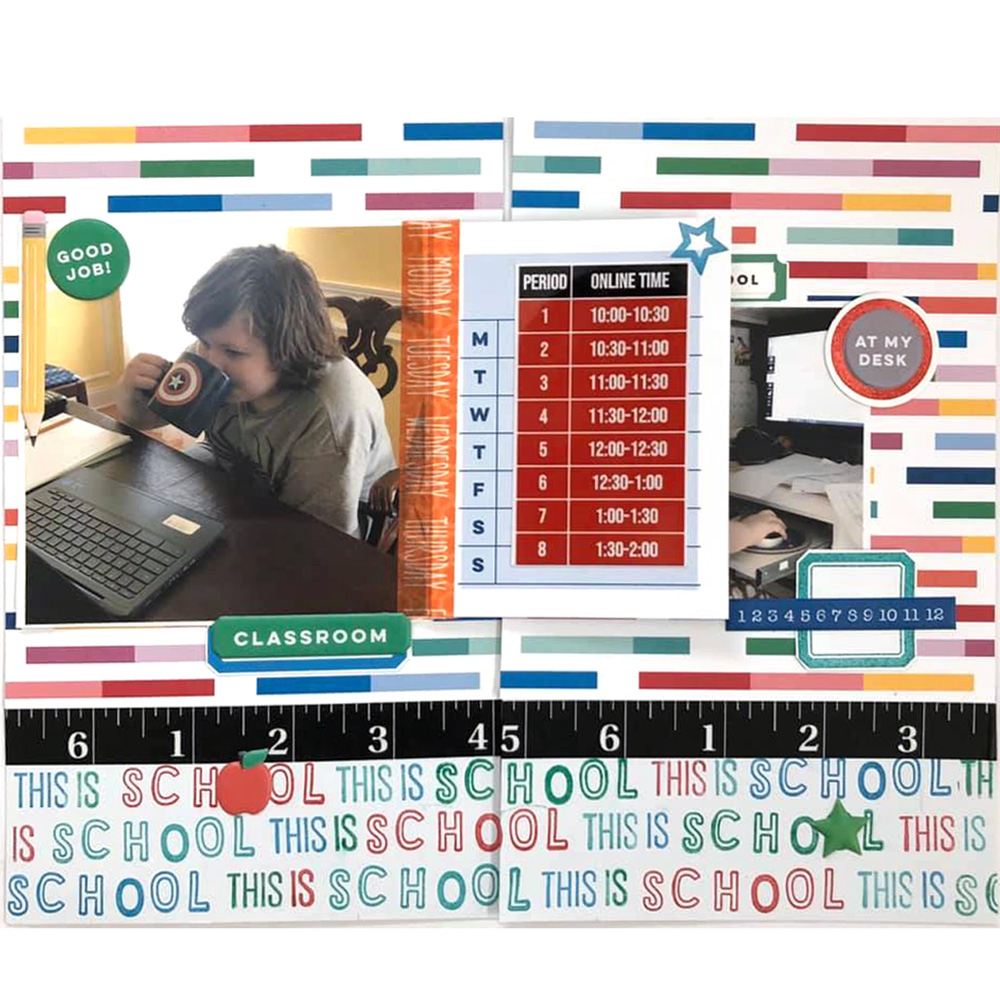
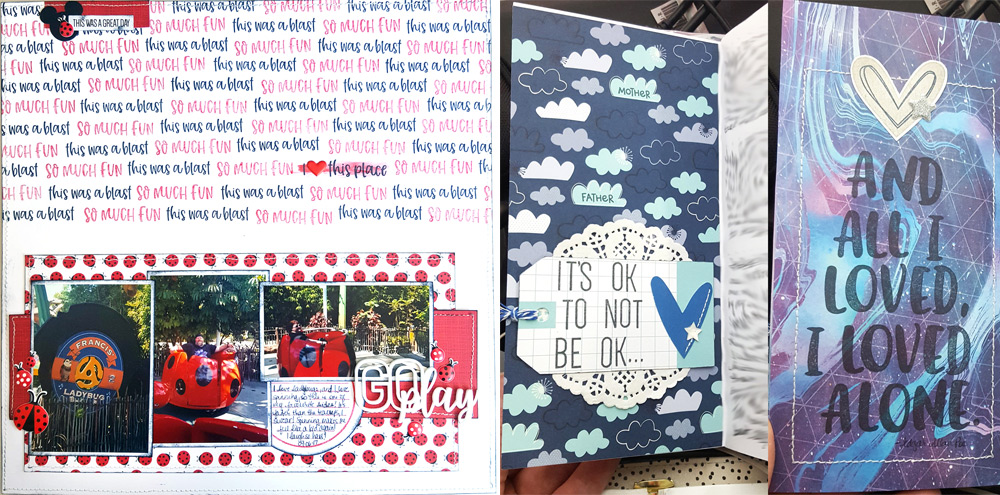
Challenge #3 | Stamp a repeated design on all or part of your background! This wonderful traveler’s notebook spread, inspired by a TN project created by Meghann Andrew, features our Title Builder Vol. 2 Stamp, Stanley Jr. Alphabet Stamp, and past monthly kits and add-ons! We just love this project!
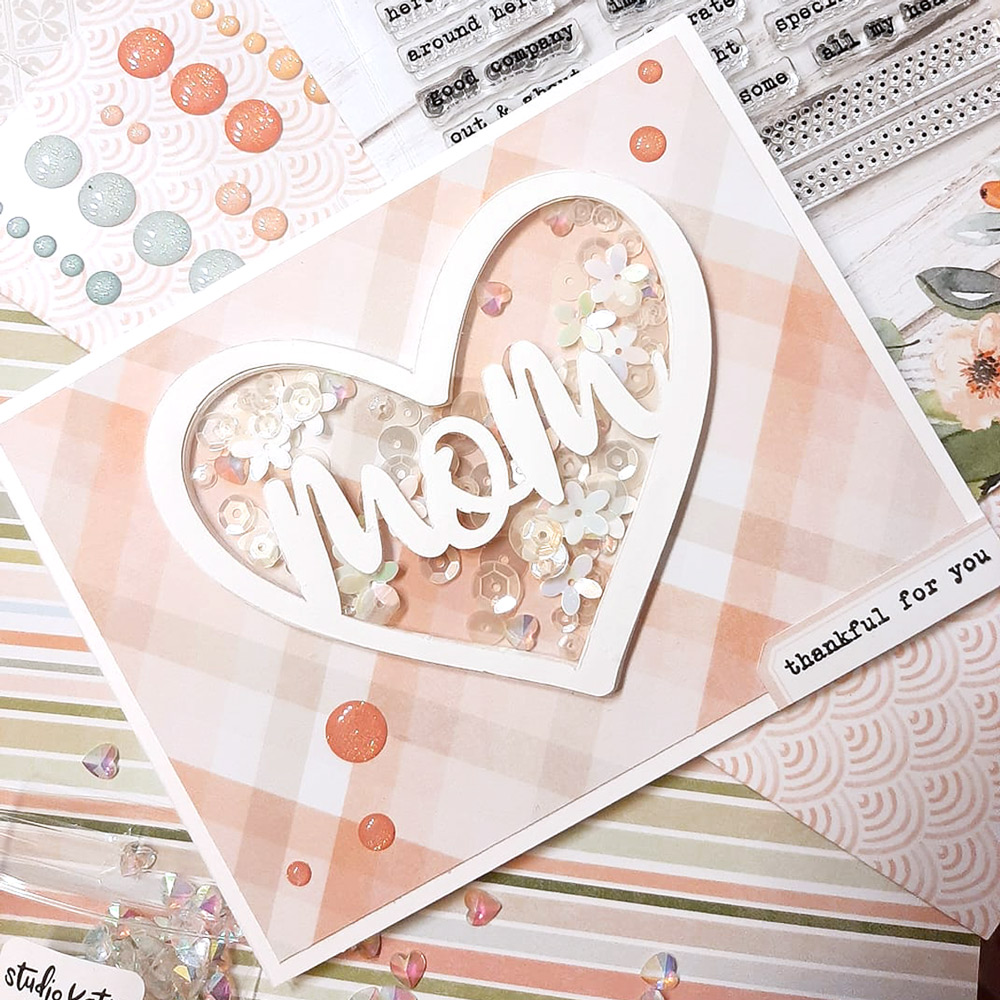
Challenge #4 | Make a cut file the focal point. This beautiful, soft and sweet card created by She-Wen Tham must have made her mom so happy on Mother’s Day! WE love the ay that she used our April 2019 Digital Cut File and Everyday Tabs Stamp to make this shaker card extra special!
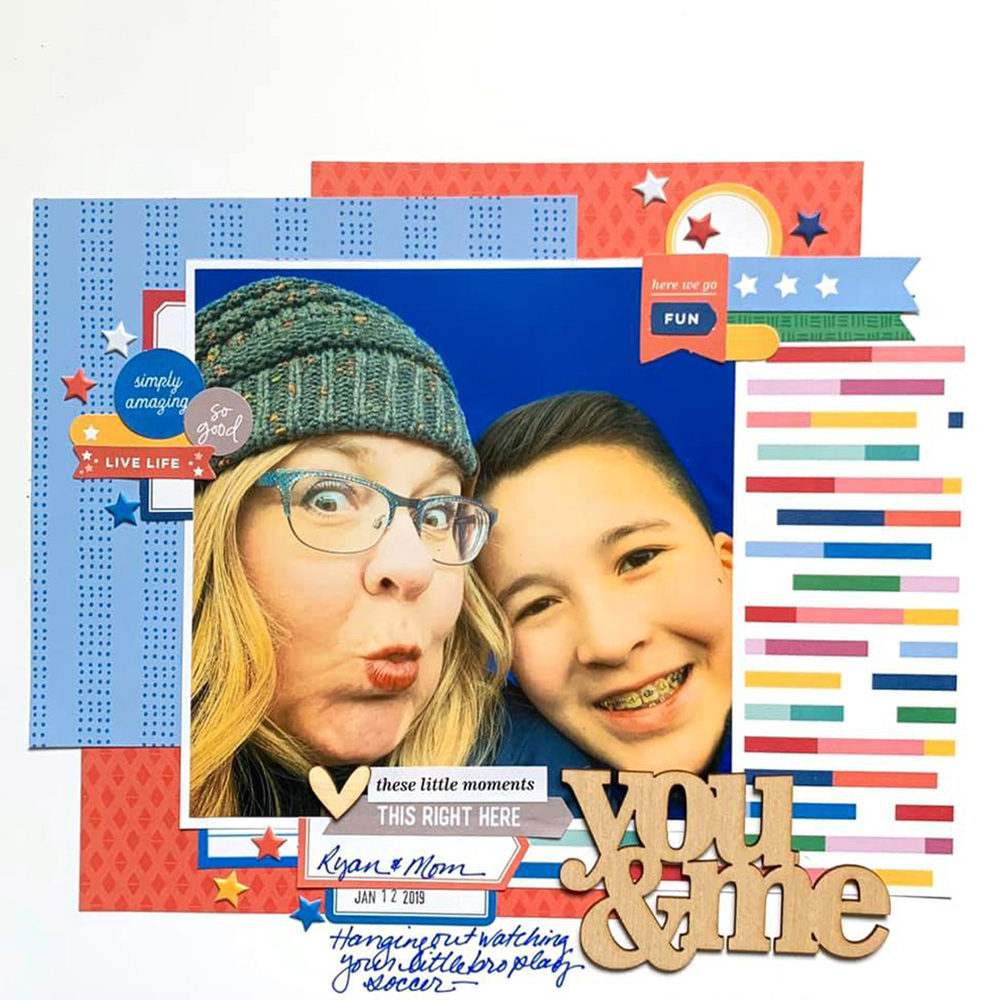
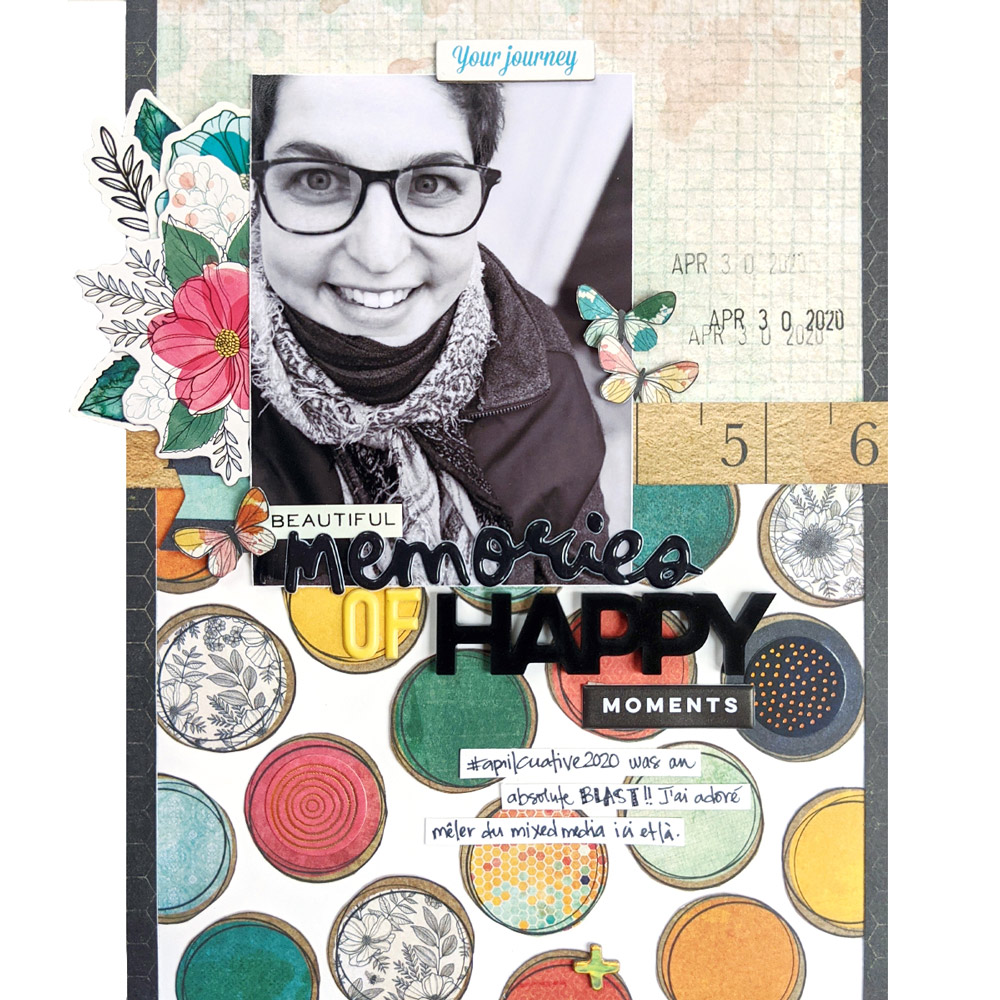
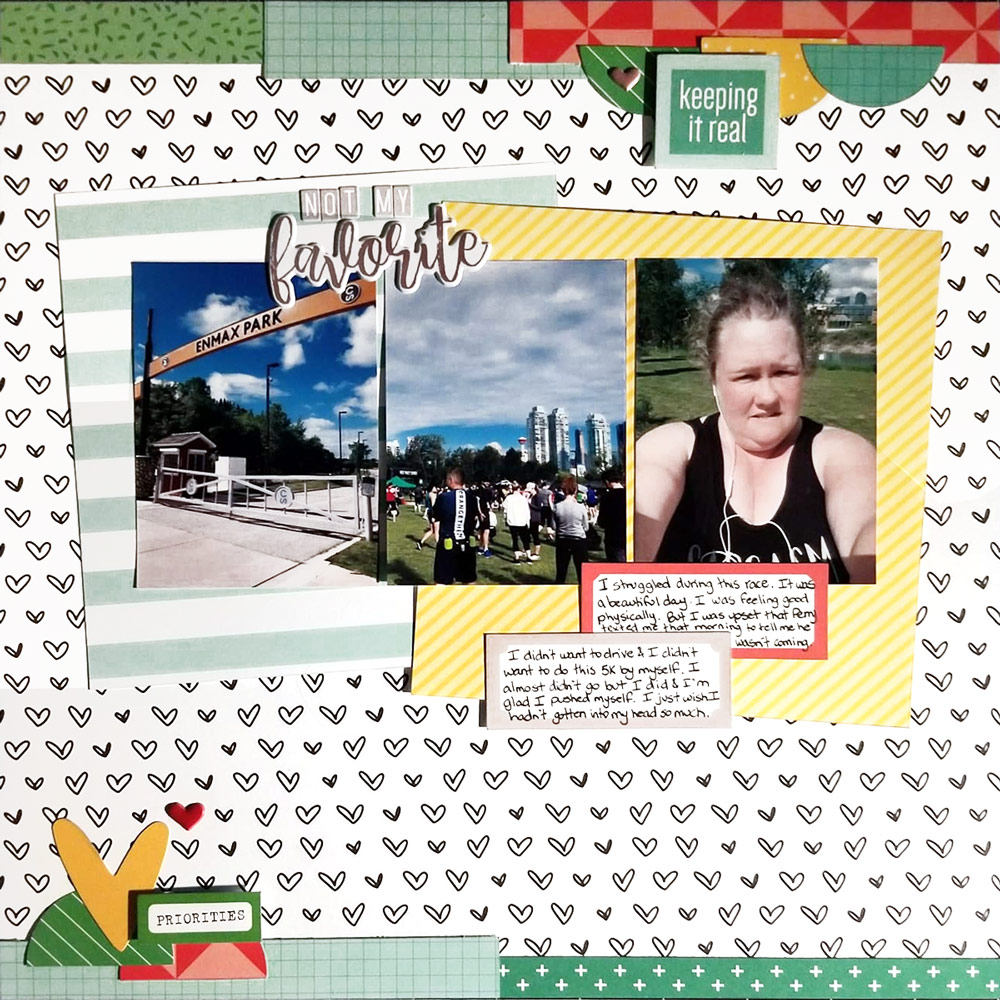
Challenge #5 | Make it all about YOU! Sacha Rowe documented a real-life moment using one of our past collections to record a page all about herself. We love the colors and energy on this page, not to mention her great title!
We also had a bonus challenge for those who really wanted to create on NSD! Tanya Fears took us up on this challenge and created a project for all 5 separate challenges! Let’s take a look at the amazing projects she made:
What amazing creations, Tonya!
Thank you to everyone who created and inspired us with their NSD projects in our Elle’s Studio Facebook Group! We had such a great NSD this year, and can’t wait until next year’s celebration!
Comments Off on National Scrapbook Day Challenge Winners! | Share This
Today we have a special “Teach Me” tutorial from design team member Jess Forster. She’s not sharing a technique-heavy new project, but how she builds a bold monochromatic color scheme—perfect for any project that you would want to create! Let’s find out her tips on how to do this successfully!
Hi friends! I am so excited to be back on Elle’s Studio blog today to talk all about monochromatic colour schemes. I love creating bright, bold layouts that focuses on using one pop of colour. Curious how to create this type of page? Read on to learn about my process!
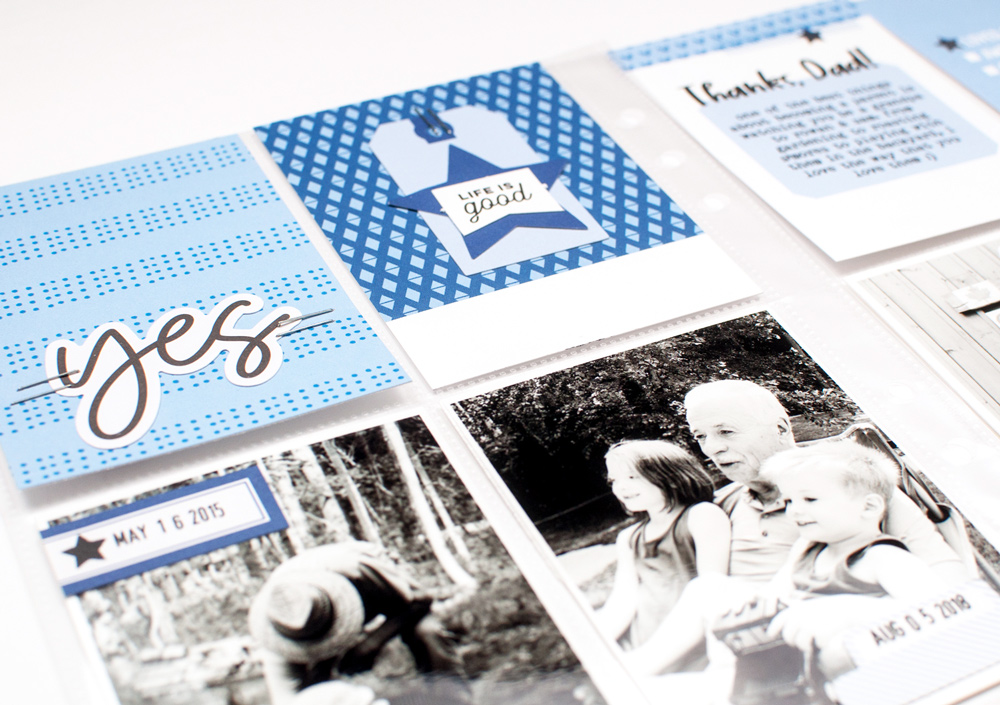
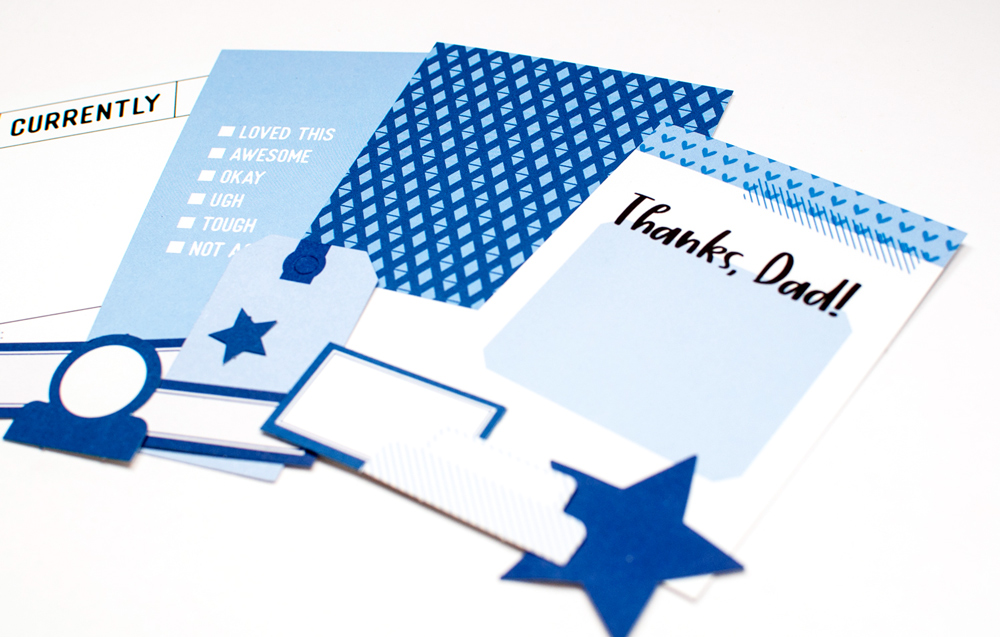
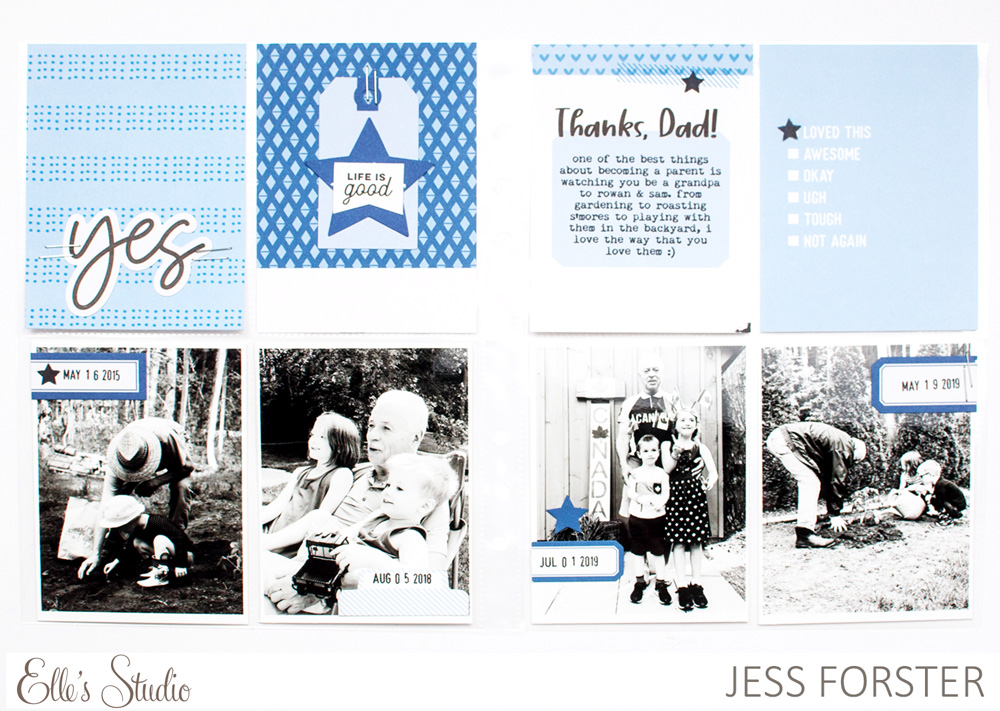
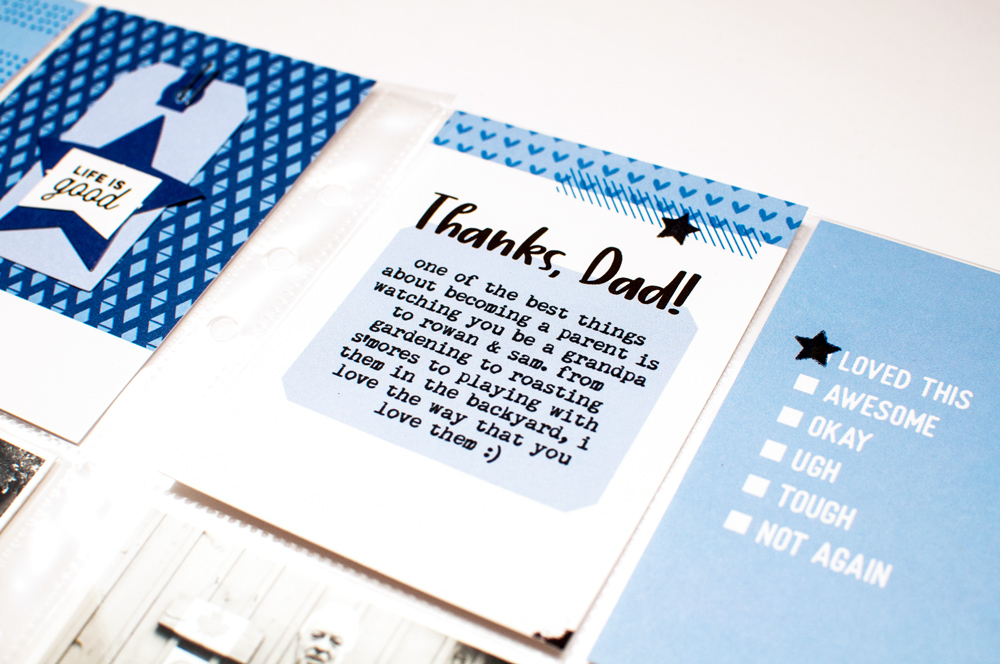
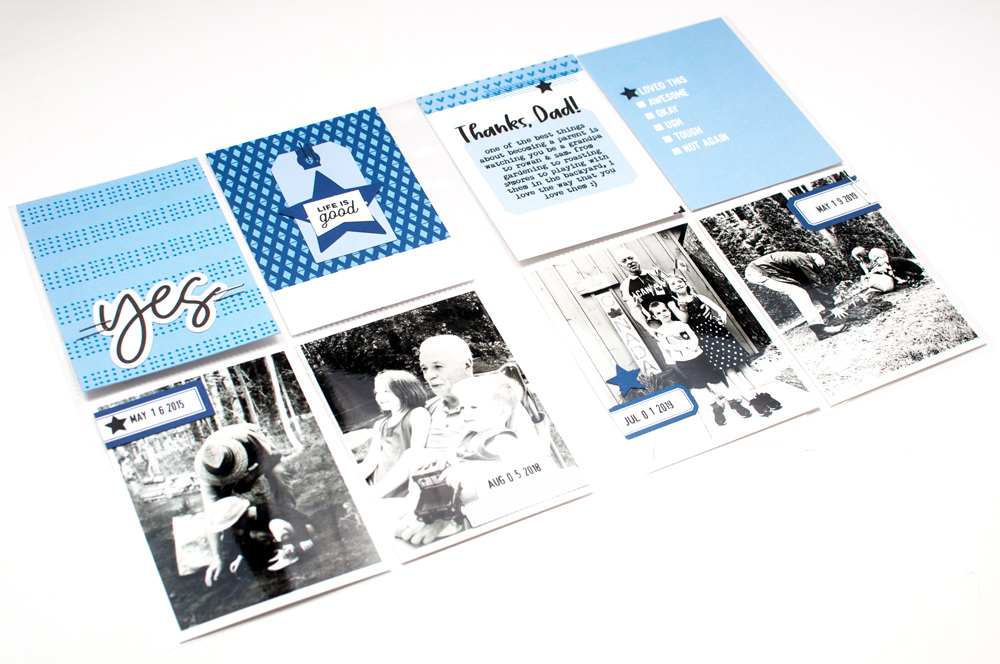
The first step in making a monochromatic layout for me is finding a colour in a product that you love. I was inspired by the 3″ x 4″ “Thanks Dad” journaling tag from the May 2020 Kit. I enjoyed the simple line of blue hearts near the top of the card. The deep blue colour combined with the prompt, guided me to create this 6″ x 8″ double page layout which documents my dad’s special relationship with my kids.
Using blue as the main hue of the page, I choose matching 3″ x 4″ tags from the May 2020 Kit. In this layout you can see that the black and white colours in the journaling tags and stamps are used as neutrals.
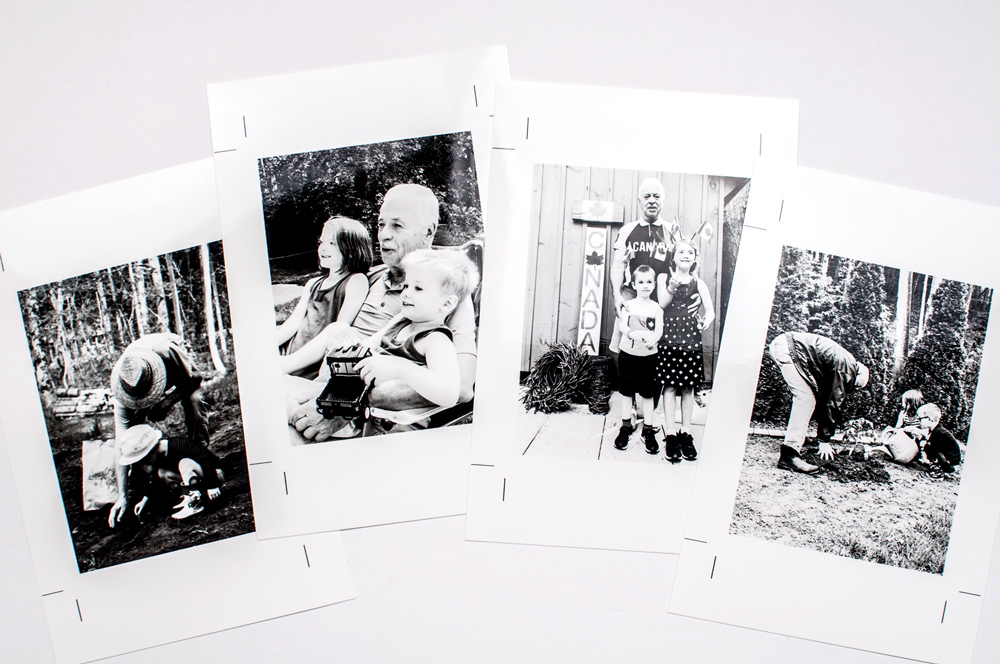
Next, I used the Colour Story App to batch edited the photos for my page. Specifically, I adjusted the curves, brightness and contrast; then use the black and white filter, “Audrey” at 75% to get the same look across each of the photos.
Lastly, I selected blue tags and stars as embellishments, and used black ink the Currently Icon star stamp, and placed in a visual triangle to add interest and dimension around page.
Simple and chic, monochromatic colour schemes are great way to document relationships as they give a timeless feel, especially when you switch your photos to black and white and let the product, like the May monthly kit and extras journaling tags and puffy heart stickers pop off the page. The black and white photos also allow you to tell a deeper story with pictures from multiple time periods and events!
Thanks for reading and good luck creating your own monochromatic pages!
Share your monochromatic pages using our products in our Elle’s Studio Facebook Group and on Instagram using the hashtag #EllesStudio!
Comments Off on “Teach Me” Tutorial: Monochromatic Colour Scheme with Jess Forster | Share This
Every month is different—even with our habits and schedules, different seasons and events make our lives look different from week to week, so why not record them in a monthly format? That’s what design team member Nathalie Leonelli is doing with 9″ x 12″ pocket pages, and she has her latest one to share with us today, created using the May monthly kit and extras. Let’s take a look!
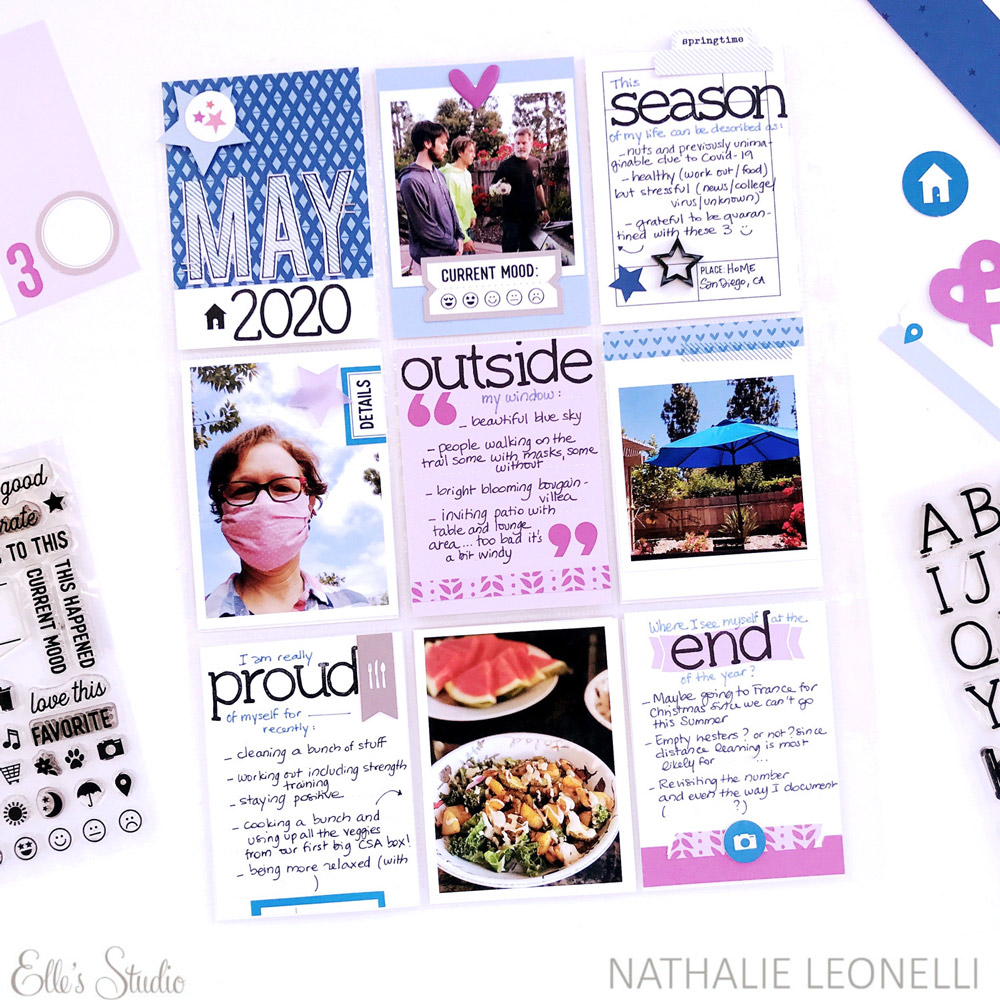
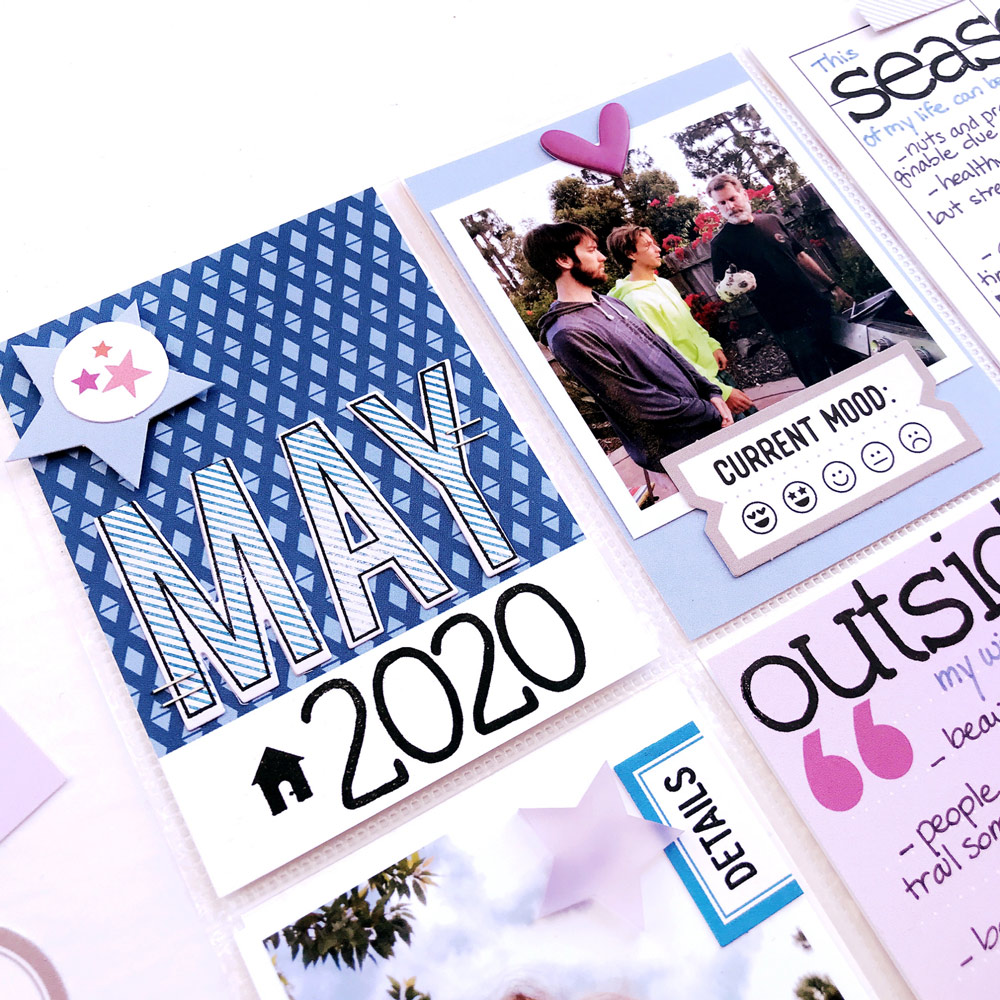
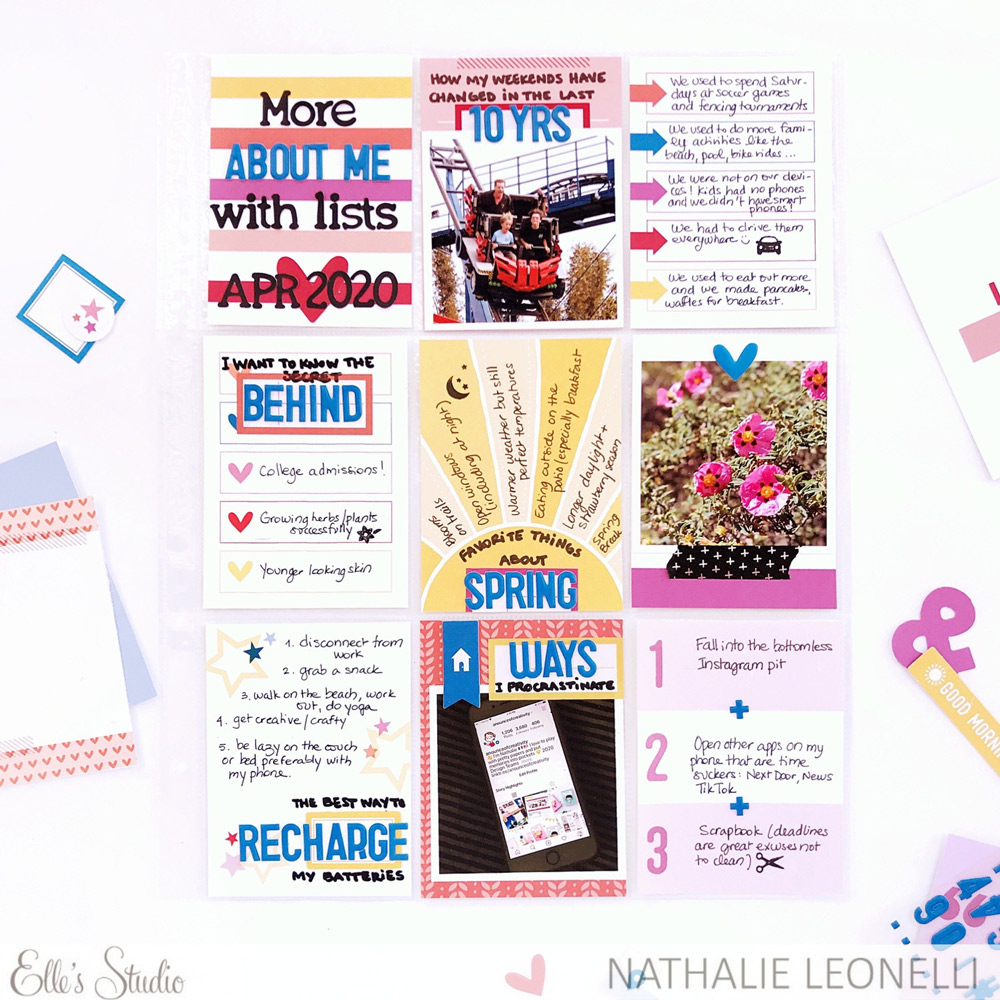
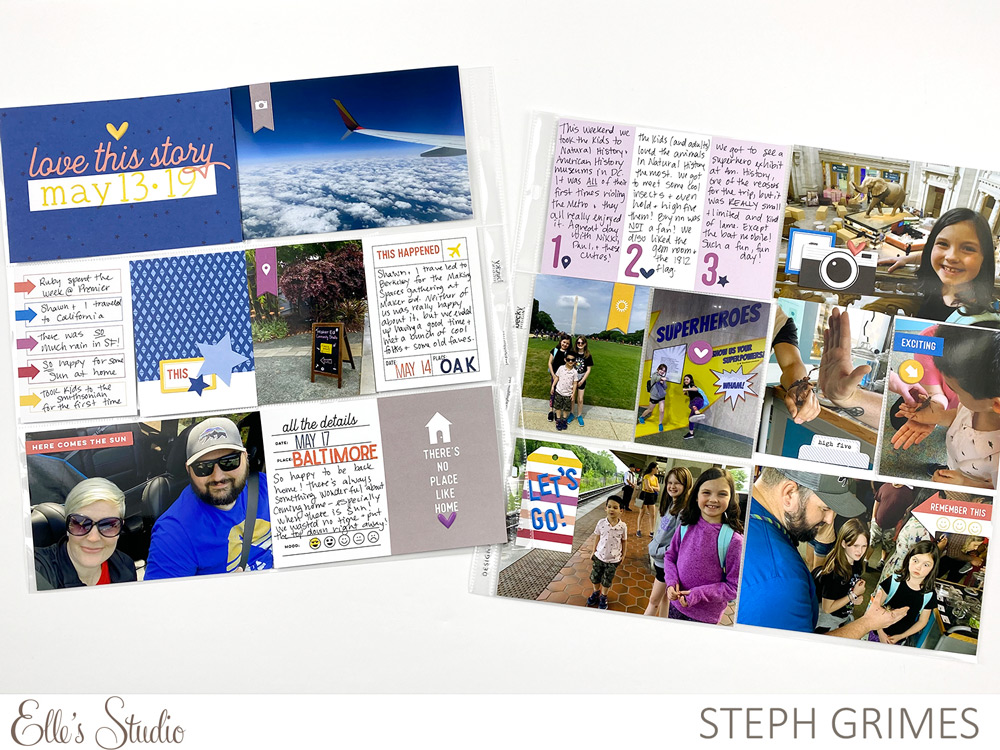
Hello, this is Nathalie and I am back today to share a new 9″ x 12″ pocket page created with the fabulous May 2020 Kit, several stamp sets and other extras!
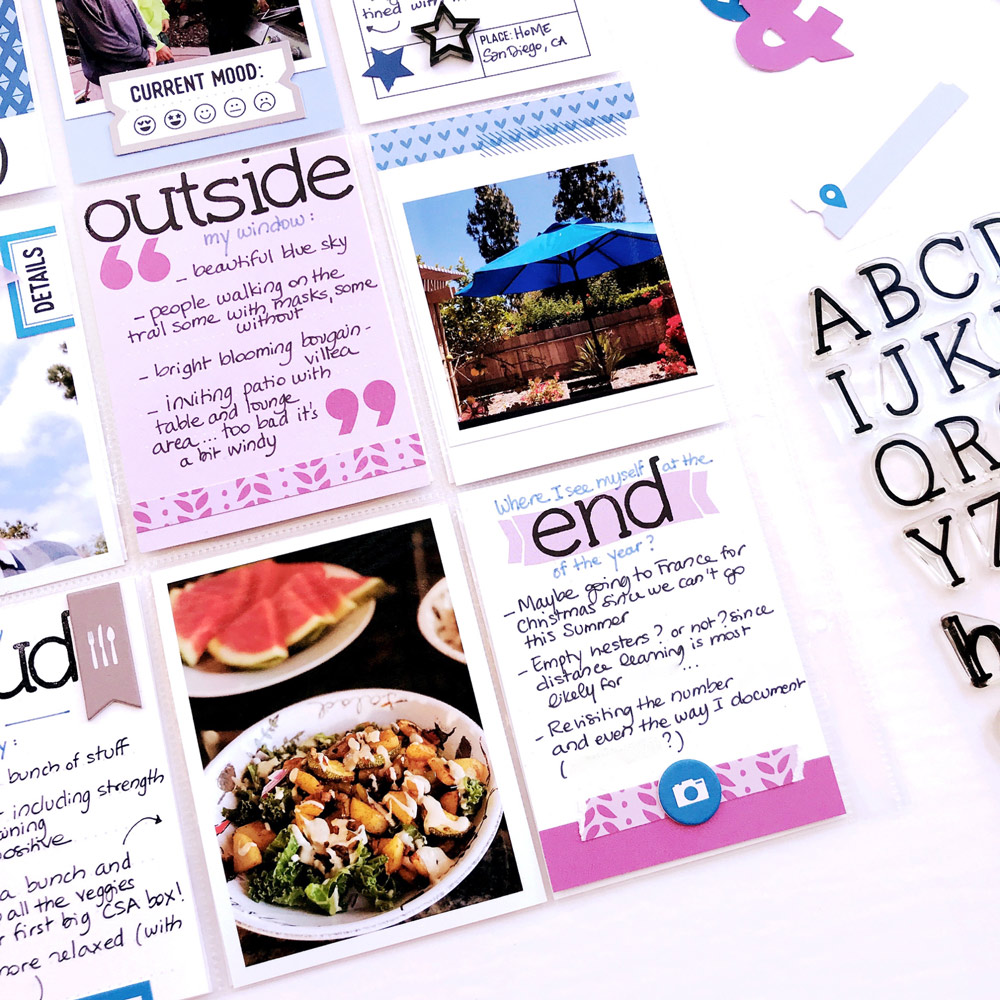
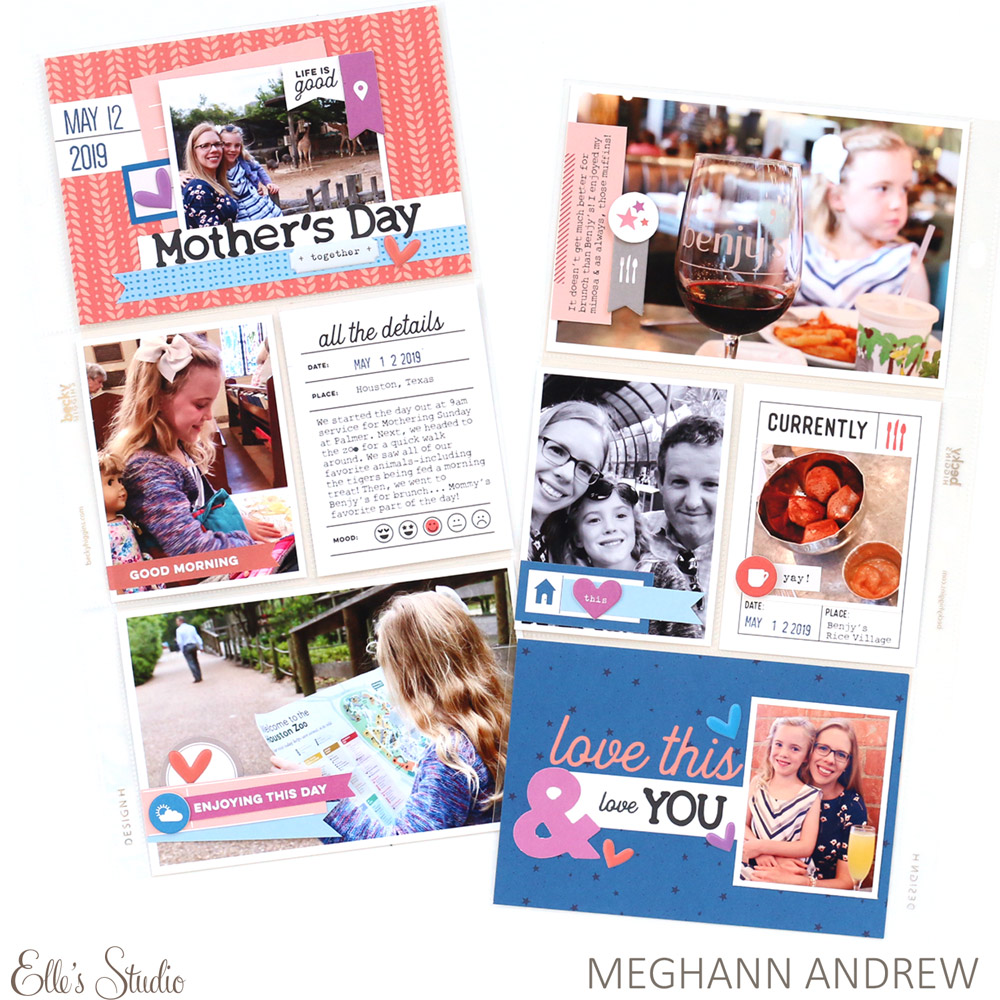
My favorite way to build a cohesive pocket page is, first, to balance journaling tags and photos, and second, to select two main colors with touches of a third one to complement. I was very attracted by all the different blues in the new release and they looked great with the fuchsia tags.
Don’t you love how the black stamping pops against them? I had a lot of fun using my stamps here, my new favorite being the Typewriter Alphabet Stamp. It is just the perfect size for pocket pages! And it goes great with the Large Jane Alphabet Stamp, as you can see on my title tag.
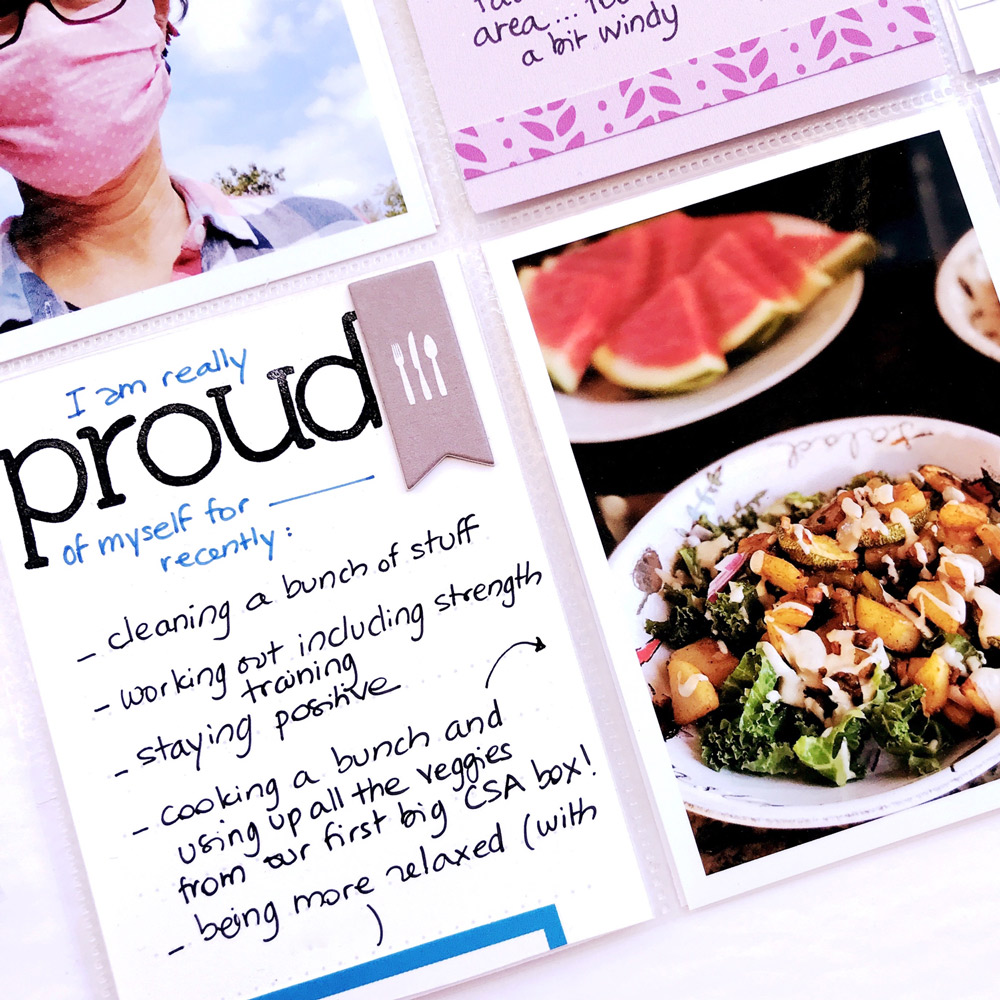
Like many of you, I am typically more of a typed journaling kind of scrapbooker, but I found that all the stamped words were better matched with handwriting. The switch felt even more natural as all the journaling was personal reflections (with prompts from the 30 Days of Lists class).
Before calling it done, and because stamping is great, but can still feel a little flat, I’d recommend thinking about dimension when adding final embellishments to your page. The new Icon Chipboard Stickers are perfect for that, as well as the Puffy Heart Stickers and Acrylic Stars.
I hope to have inspired you to have some fun with your May goodies and your collection of Elle’s Studio stamps! Make sure to come back tomorrow for an awesome tutorial by Jess Forster!
Comments Off on Currently In Pockets with Nathalie Leonelli | Share This
In today’s blog post, we’re getting a very good reminder from design team member Amanda-jayne Baldwin: don’t knock a certain type of memory-keeping until you have tried it! Amanda has recently tried a new format, pocket pages, after thinking they weren’t for her, and once you see her beautiful spread, you’ll know that she was wrong! Let’s take a look!
Hi, Elle’s Studio friends! It’s Amanda here, and today I am sharing something a bit different and out of my comfort zone: pocket pages! I have always admired pocket page documenting, but I’ve always been daunted by having to fill so many pockets with photos and text. I mean, I’m kinda minimalist when it comes to this sort of thing and if I do have lots of photos, I tend to make a one-off mini album.
Fast forward to today and the smaller format pockets and albums now available are winning my minimalist heart! Finally, I can document the everyday moments with quick and simple pockets in a matter of minutes— plus, I can still add in the occasional traditional page in the same album as well! The Elle’s Studio May monthly kit and extras are so beautifully coordinated that they make this form of memory keeping so easy! At last, I’ve found my pocket page heaven!
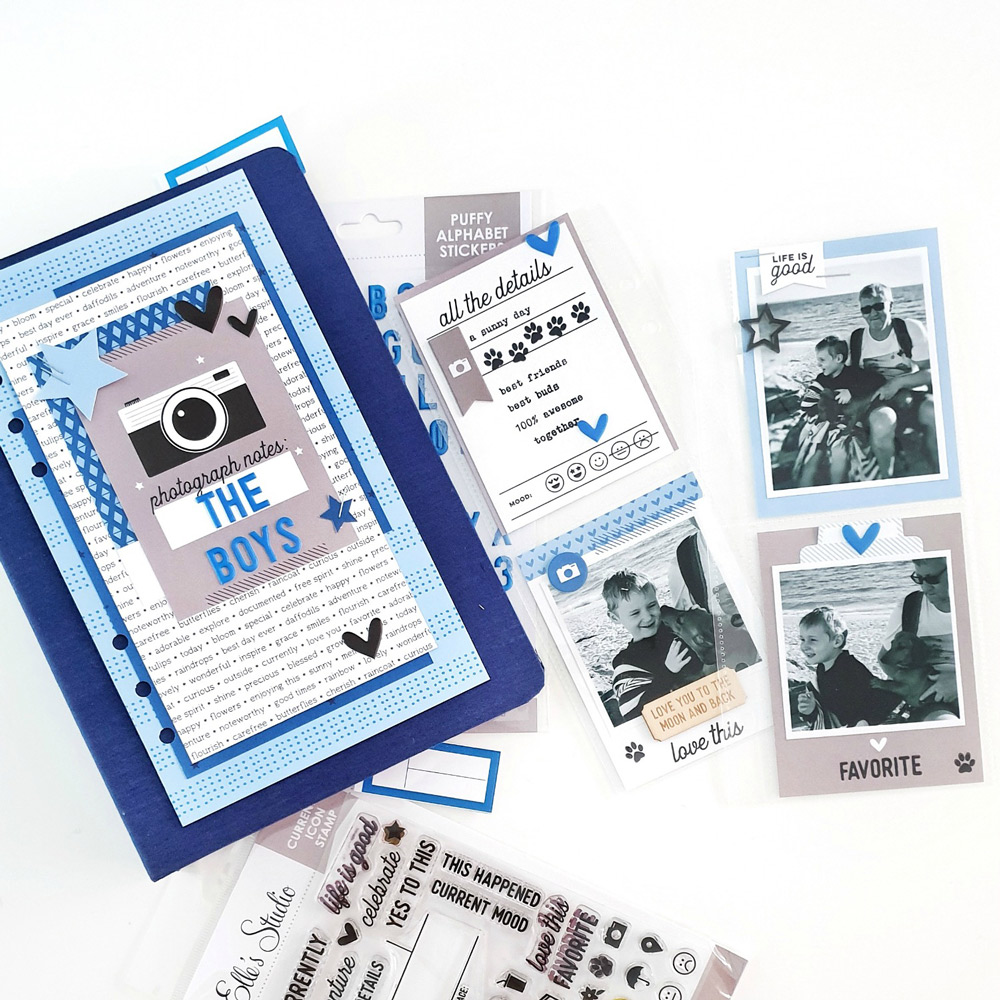
Here’s how I am documenting the special guys in my life:
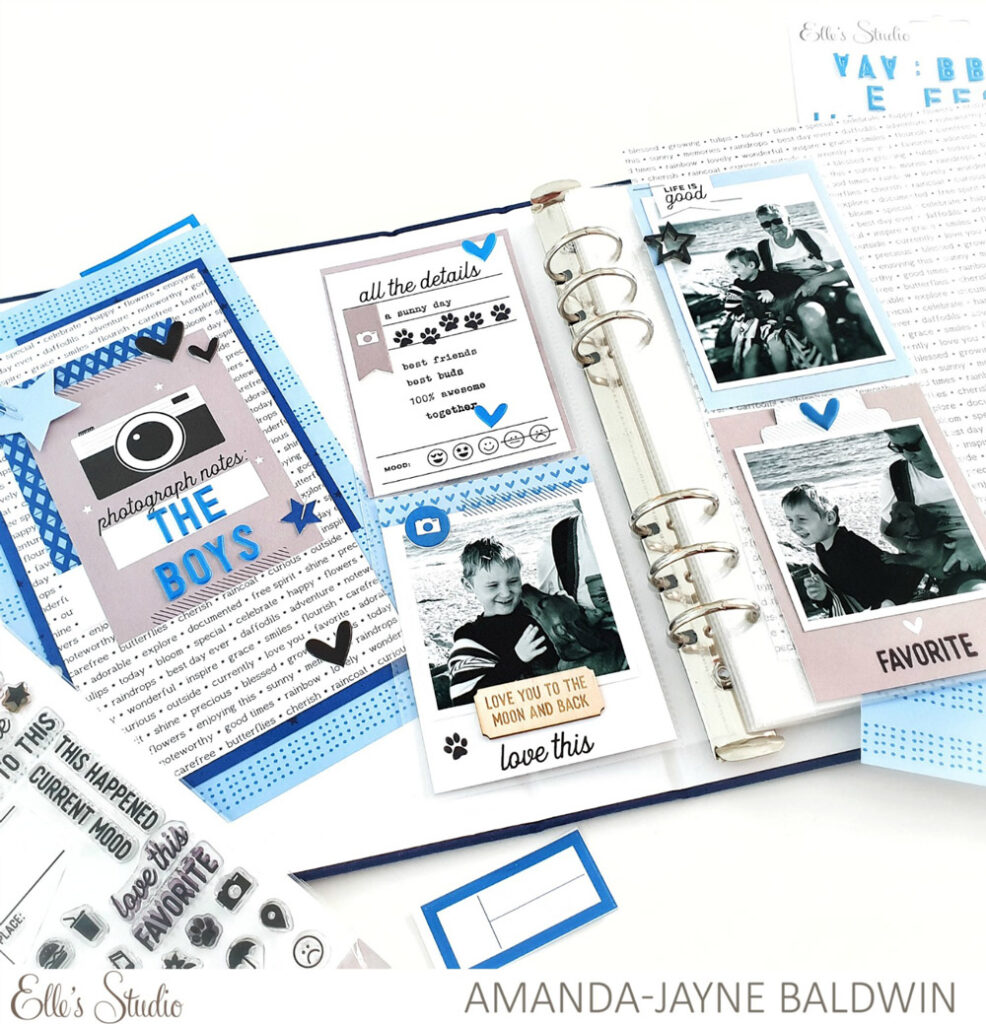
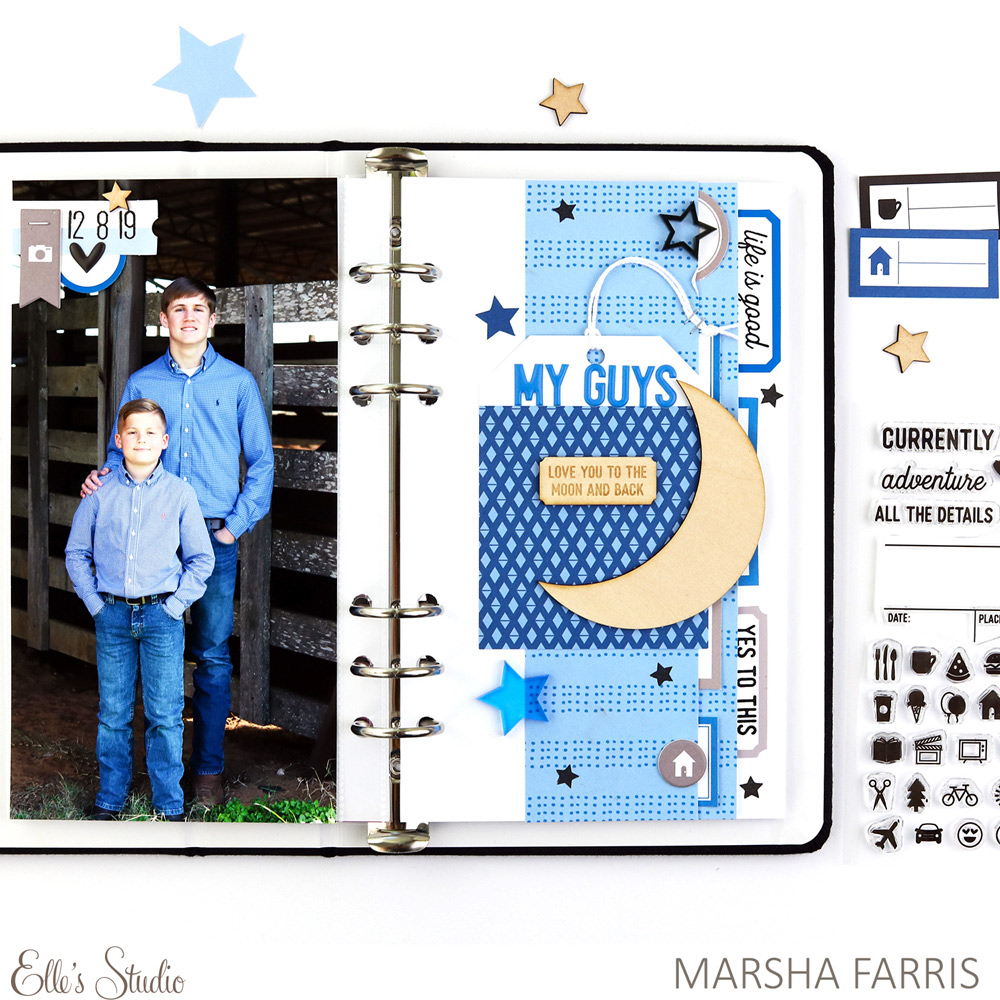
As my album is dedicated to documenting my boys’ everyday moments, I opted for a more masculine color scheme with blues, black, white & gray. To add a pop of color I also introduced yellow into the mix, but not on the opening pockets.
As a scrapbooker and mini album lover, I couldn’t resist creating a opening cover page for my album too! I used the blue patterned paper from the Flourish 6 x 8.5 Paper Stack as my base and layered it with the love this story 4″ x 6″ tag from the May 2020 Kit, followed by more Flourish papers and two of the 3″ x 4″ journaling tags. I stapled the die cut stars from the May Kit onto the grouping, and then added the black Puffy Heart Stickers and my title using the Cerulean Blue Puffy Alphabet Stickers. Cute!
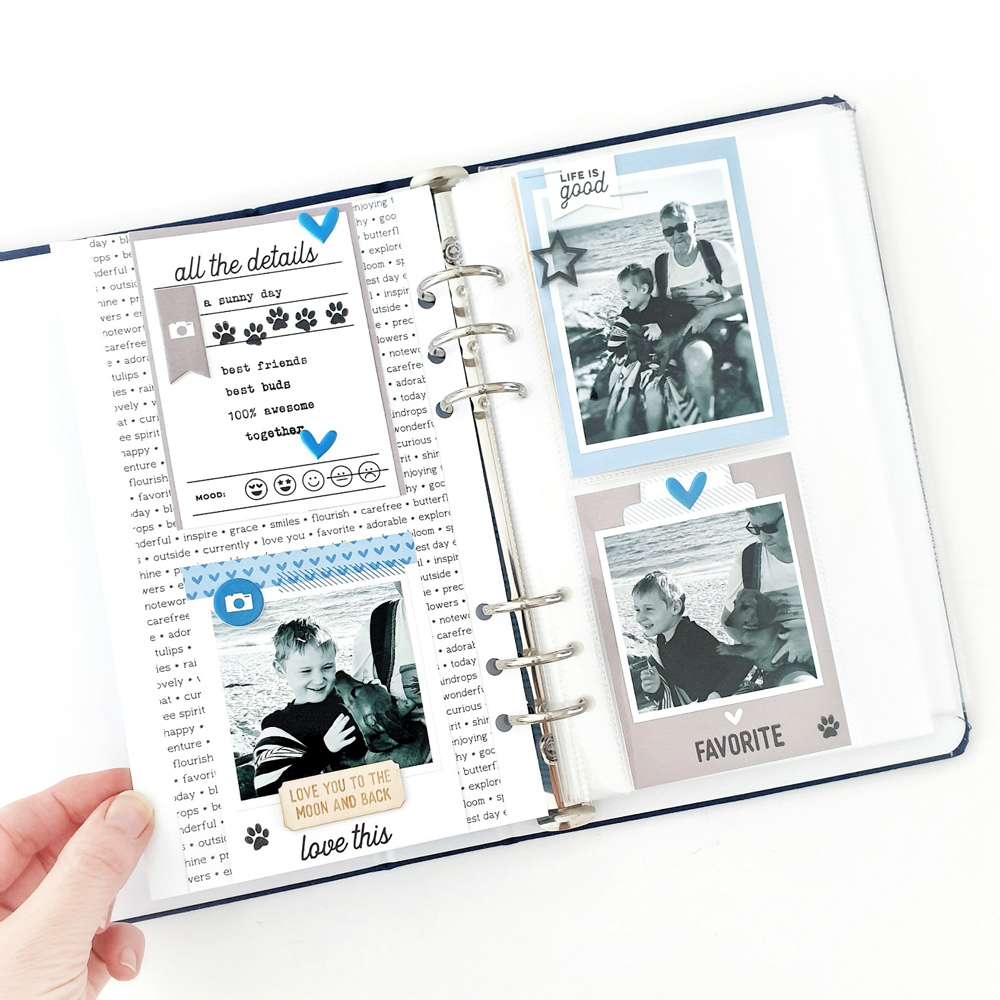
As you turn the cover page, you’ll spy that I lined the back of it with another of the Flourish Paper Stack patterns. Rather than waste this page, I ditched my intended pockets and simply adhered my 3″ x 4″ journaling tags onto it. Pocket page creating without the plastic pocket! That said, I was careful to align these tags with the actual pockets on the opposite page, so that everything looked cohesive and flowed!
To keep everything looking unified, I limited each tag to no more than two types of embellishments. I also ensured each tag had some black ink—mostly using the Currently Icon Stamp, but also with die cuts, or the printed words on the on the tags that I chose. As the photos feature our sweet doxie pup, I couldn’t resist the paw icon stamp—so sweet!
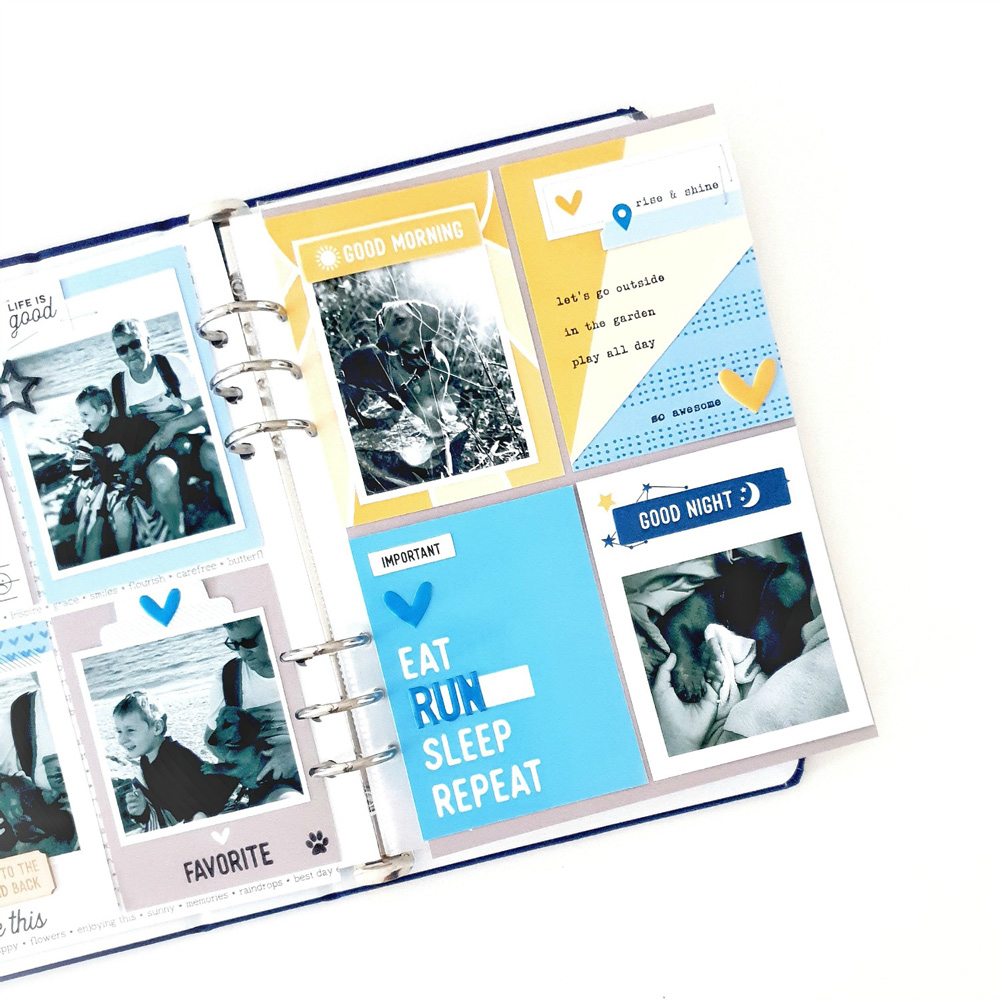
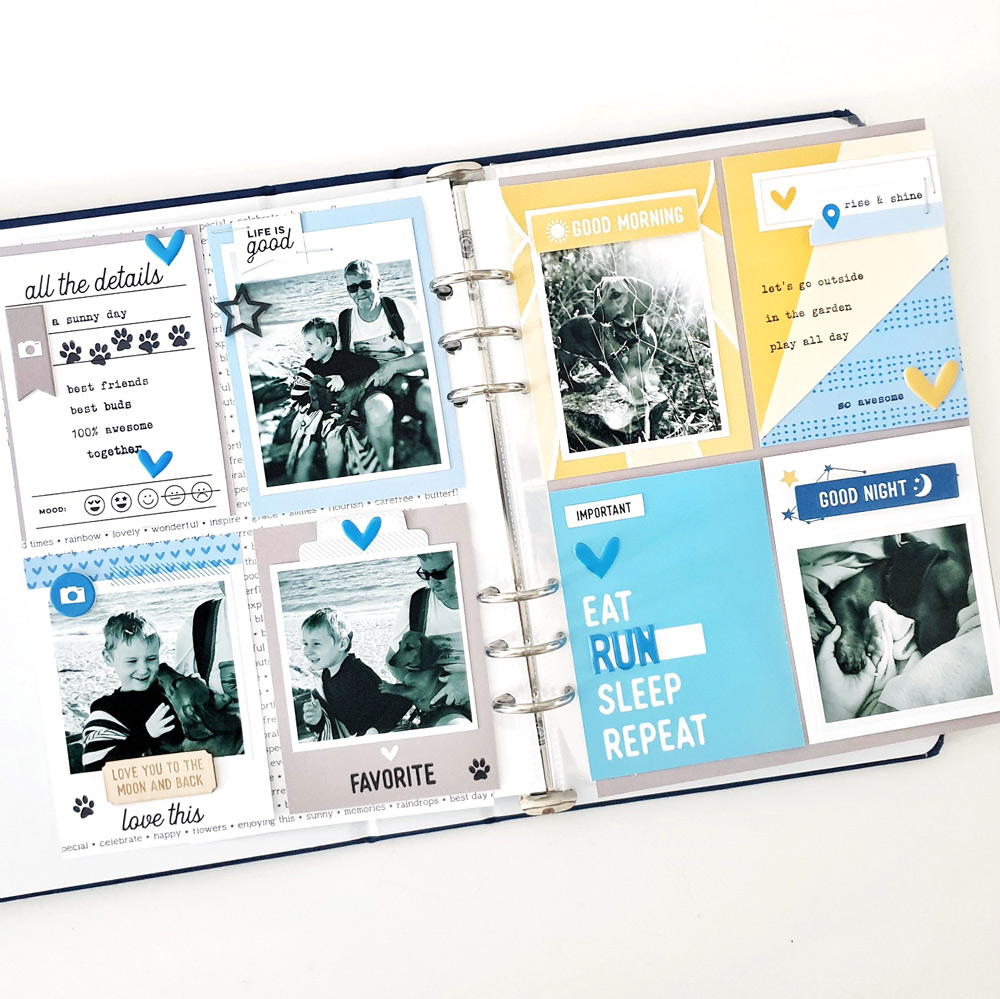
Here’s a look at the next page in my album:
Those pops of yellow are really striking! To keep everything uniform, and maintain my color scheme, you’ll notice that I cut a triangle of the blue Flourish Paper Stack pattern to cover the pink on my sun ray 3″ x 4″ journaling tag. I also made the most of the Eat Sleep Repeat Printables, too, printing out the blue journaling tag to use at the bottom of the page.
No matter your pocket page style, Elle’s Studio has got your memory keeping supplies covered! I hope my non-traditional approach has inspired you today!
Thanks so much for stopping by today!
Show us your pocket page style! Post your pocket-page designs using our products to our Elle’s Studio Facebook Group or on Instagram using the hashtag #EllesStudio!
Comments Off on Pocket Page Style with Amanda-jayne Baldwin | Share This
One of our new, favorite add-ons in the shop is our Story Acrylic, which can be used to create a beautiful title, as added embellishment on your page, and so much more! Let’s take a look at how design team member Amy Jo Vanden Brink used it on a new layout that she’s sharing with us today!
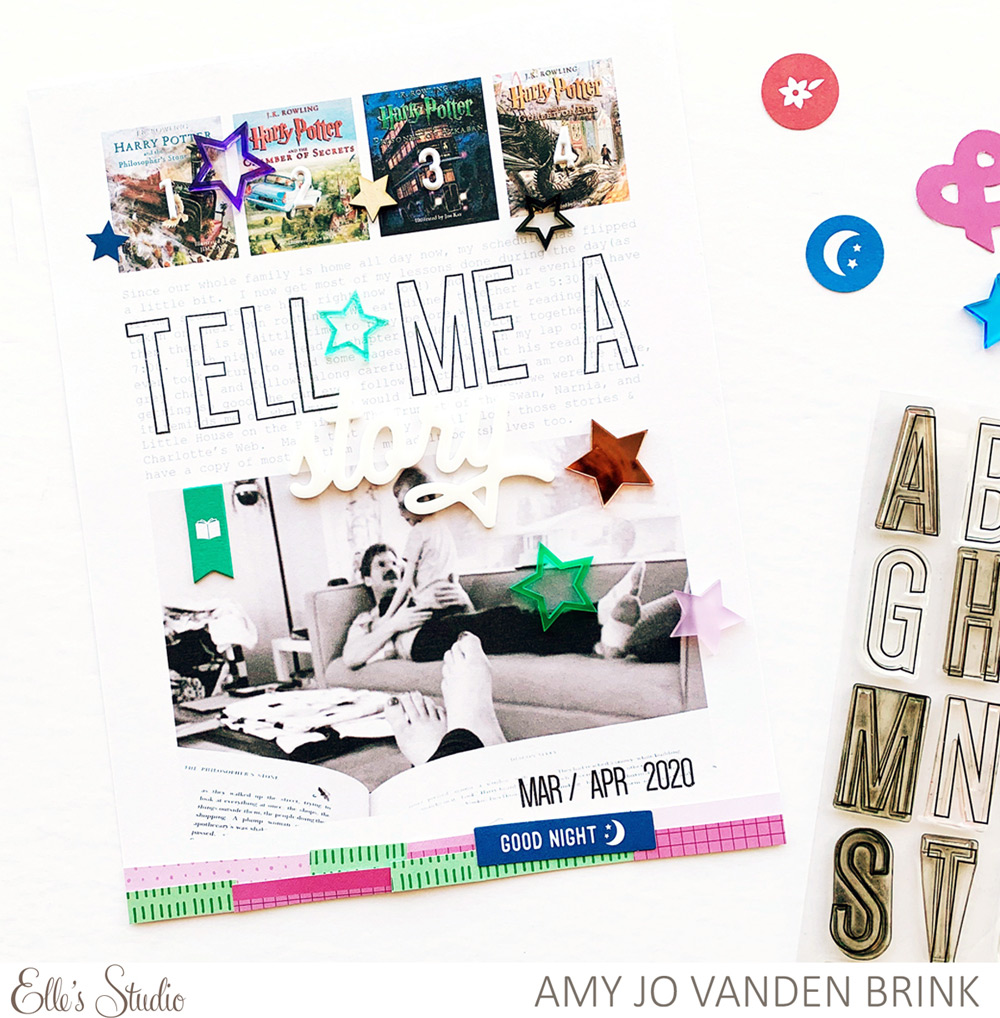
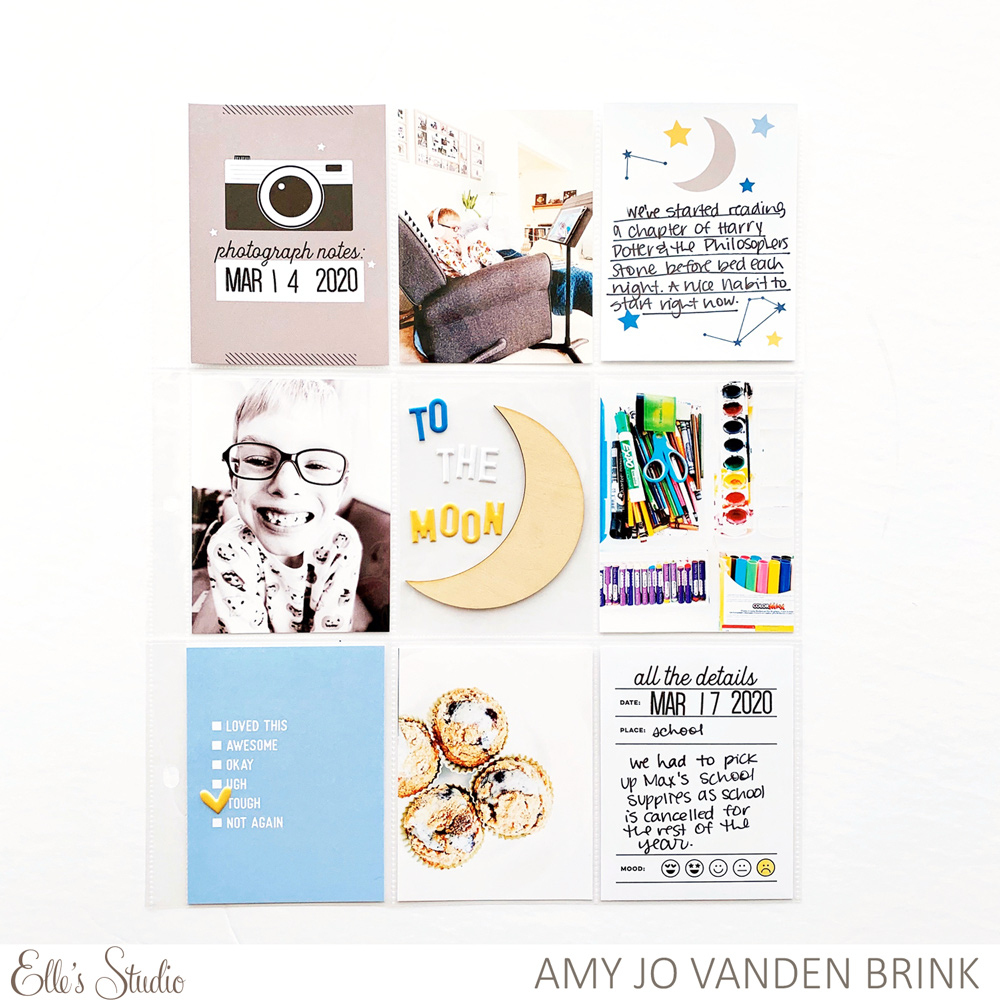
Hello everyone! It’s Amy Jo, and I’m so excited to share a project that features the versatile Story Acrylic add-on. This font is so charming, and the white acrylic will go with any style or color scheme, so let me show you how I used mine!
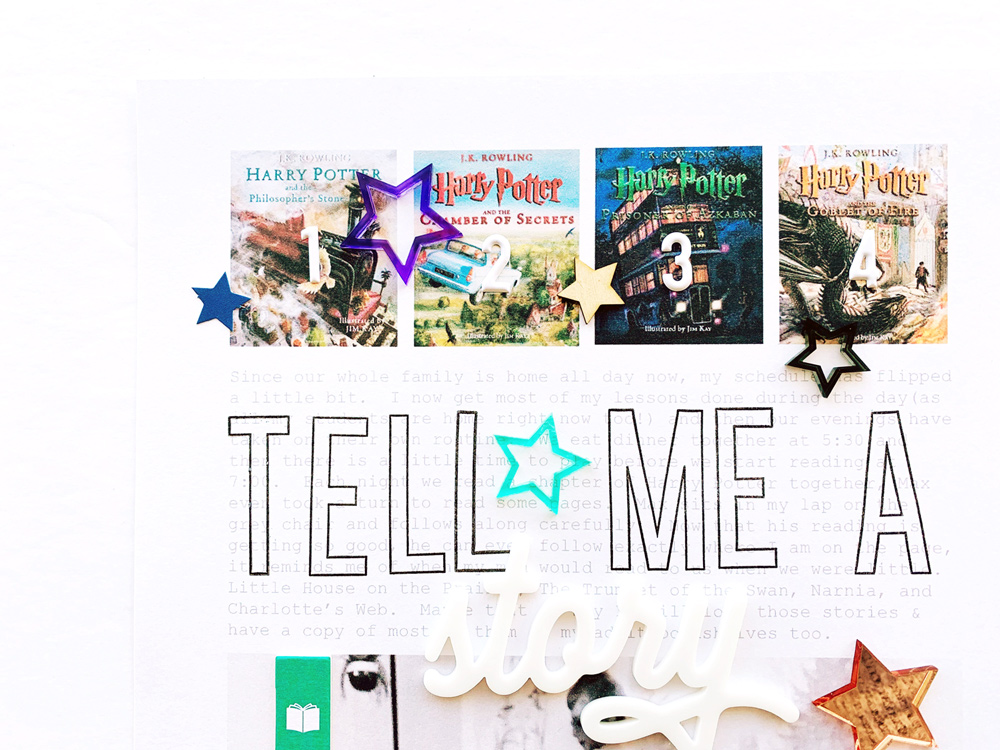
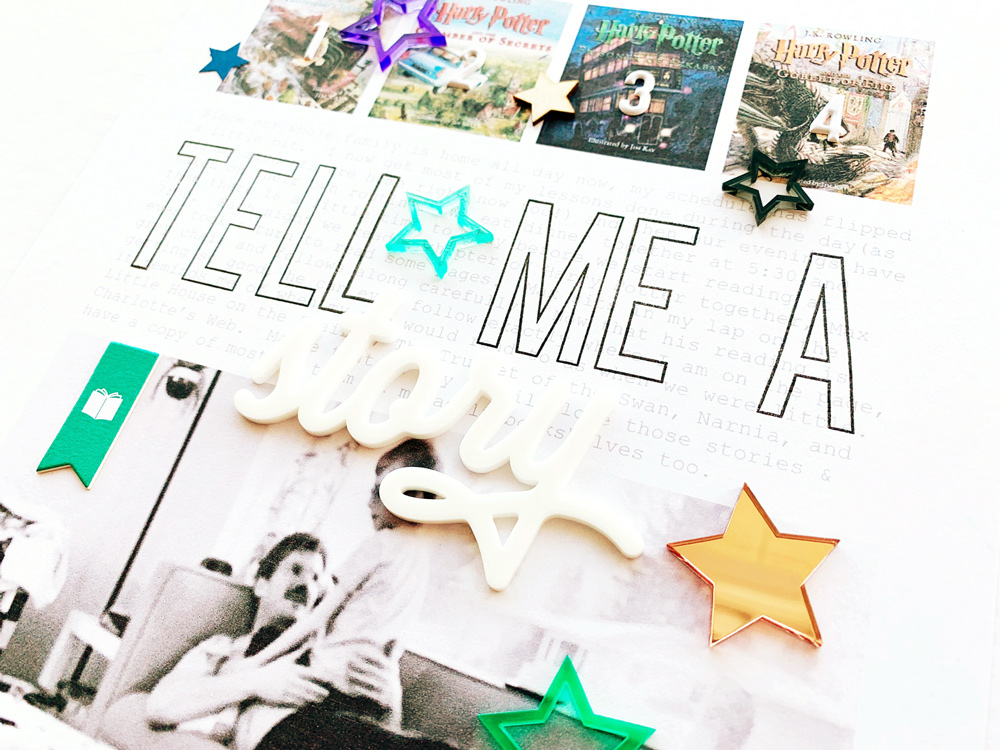
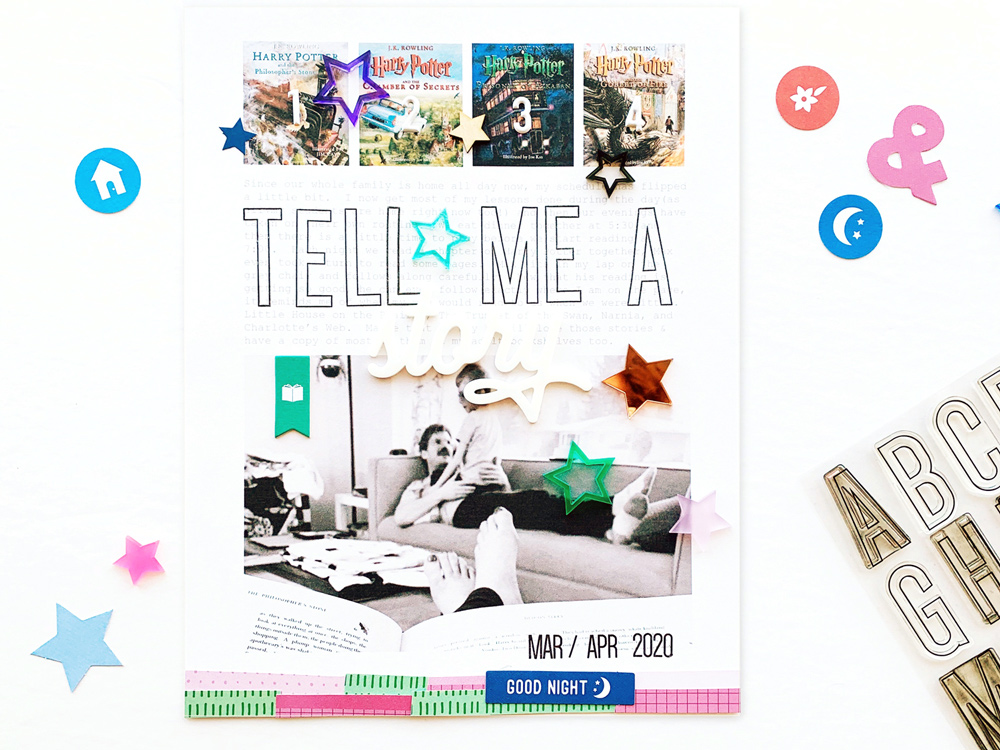
Since the stay-at-home recommendations in mid-March, we started reading a chapter of Harry Potter as a family every night and it has quickly turned into one of our favourite family activities. I typed my journaling and printed it in light grey, then used the Large Jane Alphabet Stamp to stamp on top of it. Then I adhered my acrylic piece underneath to complete the title.
We are reading from the Illustrated version, so I used Google Images to print out the covers of the four books we have, then labeled them with the White Puffy Alphabet Stickers.
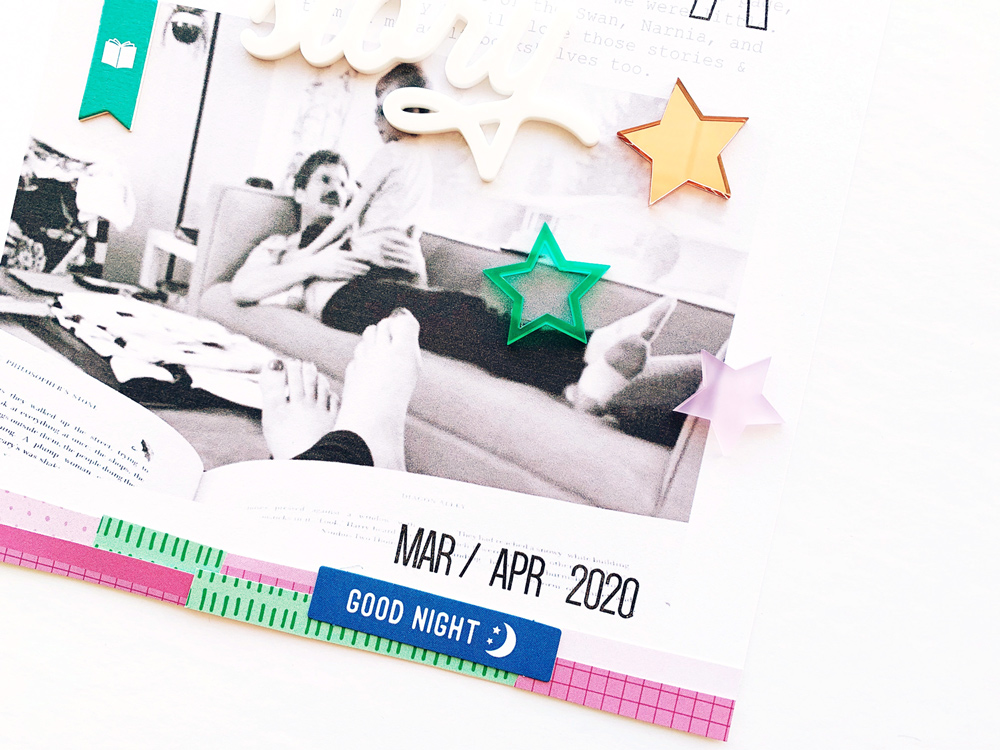
I wanted to add a little bit more magic to the spread, so I used the Acrylic Stars scattered across the page, like sparks from Harry’s wand.
To anchor the bottom of the page, I used small strips of the green and purple patterns from the Flourish 6 x 8.5 Paper Stack, and the Good Night die cut from the May 2020 Kit. Dates are always hard for me to remember later, so I added the Dated Stamp so that we would remember when this was.
Thanks for checking out my project! This is just one way to use this really great, versatile piece, I’d love to see how you use your Story Acrylic!
Comments Off on Tell Me A Story with Amy Jo Vanden Brink | Share This
We are so excited to welcome Lydia Cost, one of our amazing From Sketch to Finish Vol. 5 class contributors, to the Elle’s Studio blog today! We love seeing Lydia’s work around social media—it’s full of color, and texture, and gives us all of the happy feelings! Her creations for our new sketch class are no exception, and we know you will love not only what she made with our sketches, but her ideas and insights into techniques and tips on how to work with a sketch! Today, she’s sharing a new layout created with one of our bonus class sketches—let’s take a look and get inspired!
Hello there my lovely crafty friends! It’s Lydia with you today, and it has been an absolute pleasure getting to work with the amazing new Elle’s Studio goodies this month! I’ve been completely blown away at the all of the amazing sketches I’ve been able to work with; they are so inspiring, and I know I’ll use them a million times over!
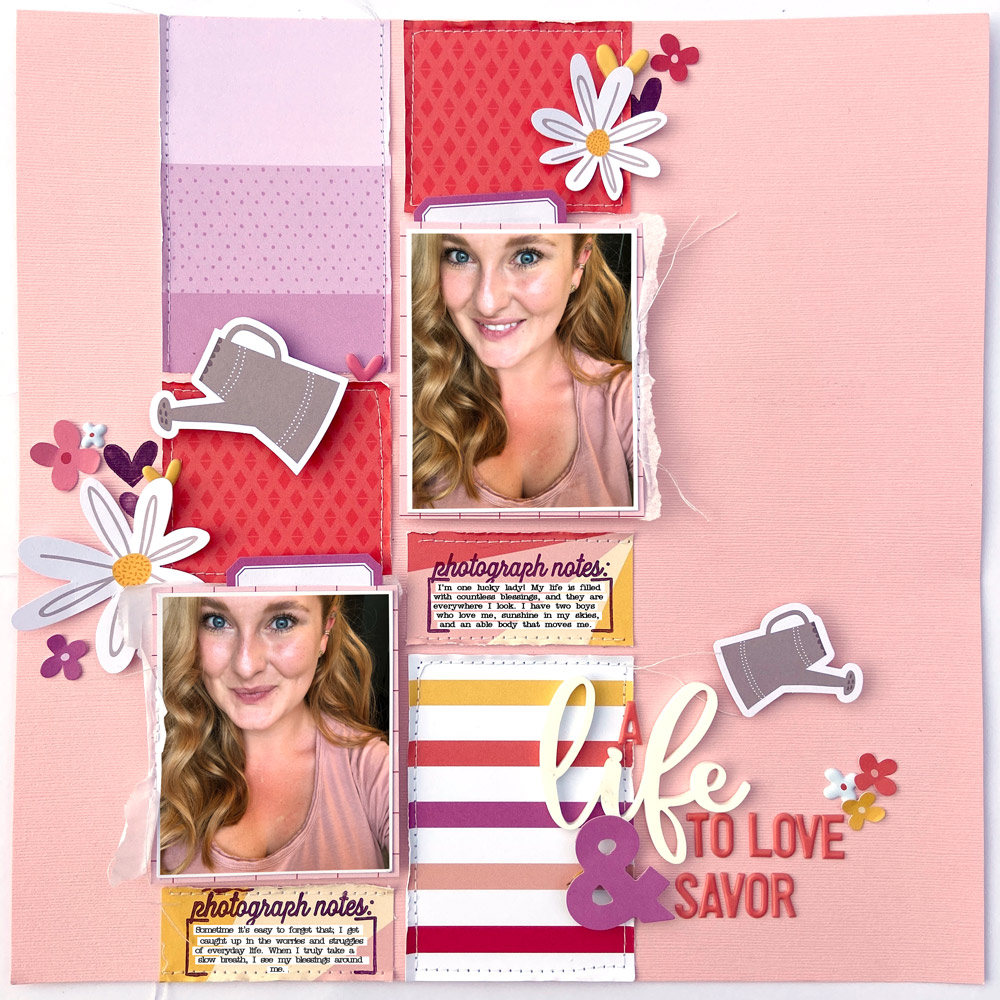
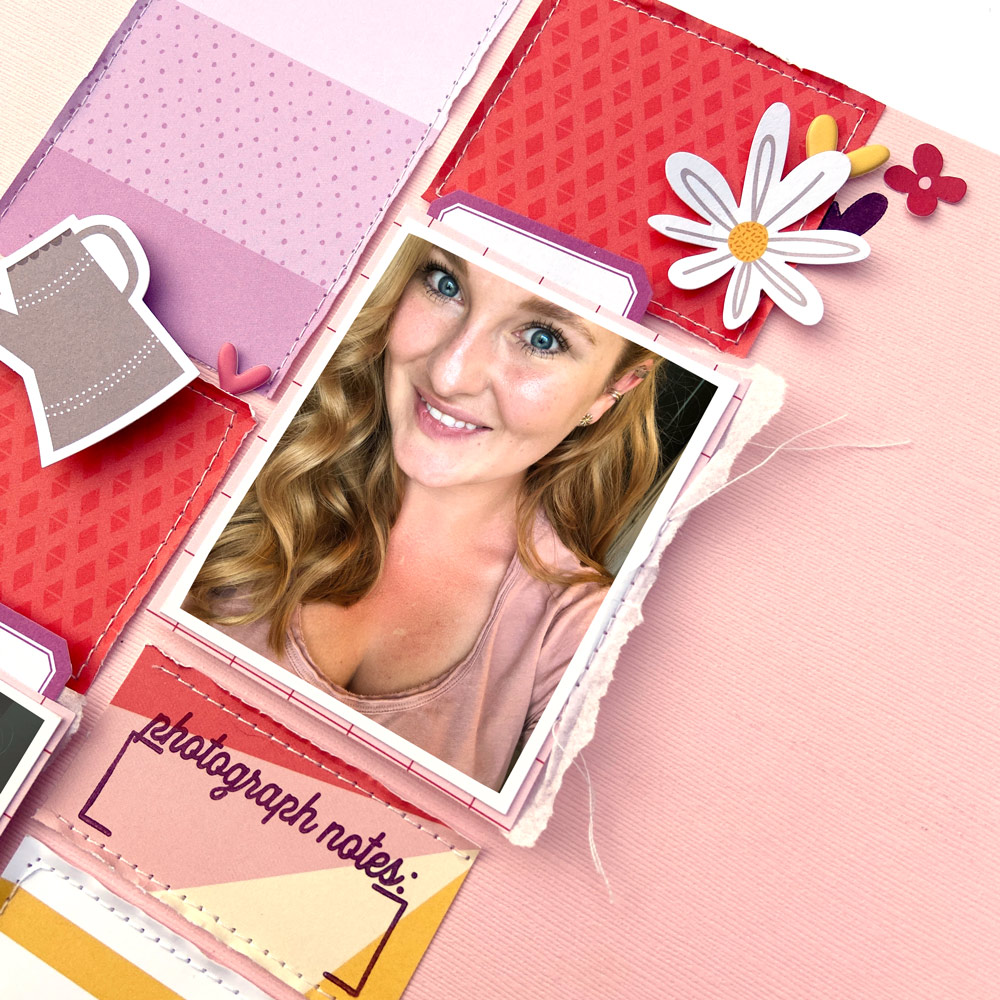
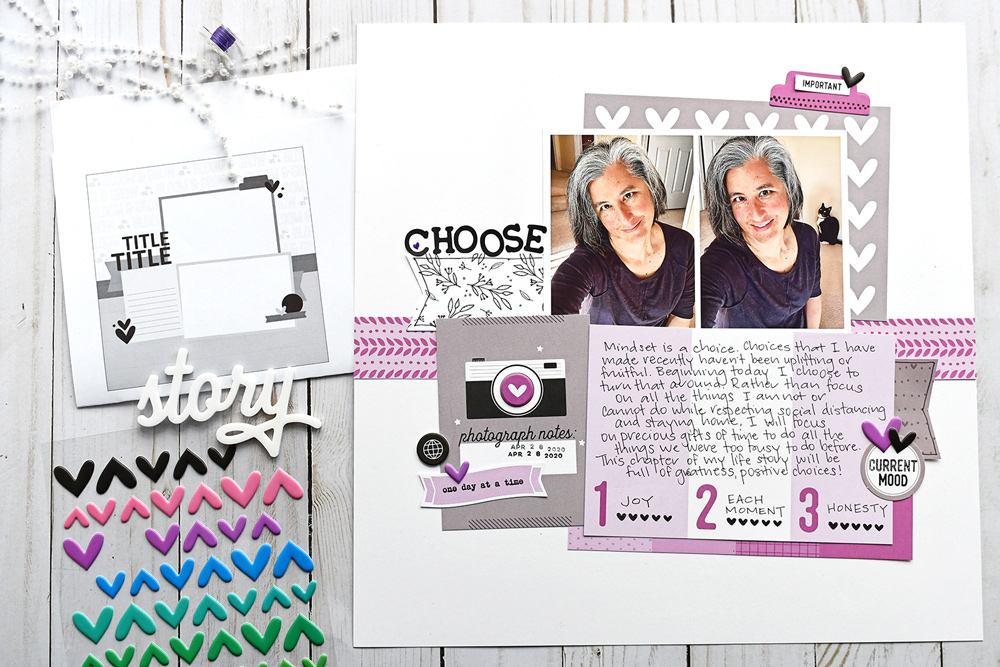
Today I’m sharing a new layout created with sketch 21, included in From Sketch to Finish Vol. 5! I feel like I hit the jackpot when I requested this sketch, because it’s just so gorgeous! I could think of lots of different ways to use it, and I quickly fell in love. Take a look at the layout:
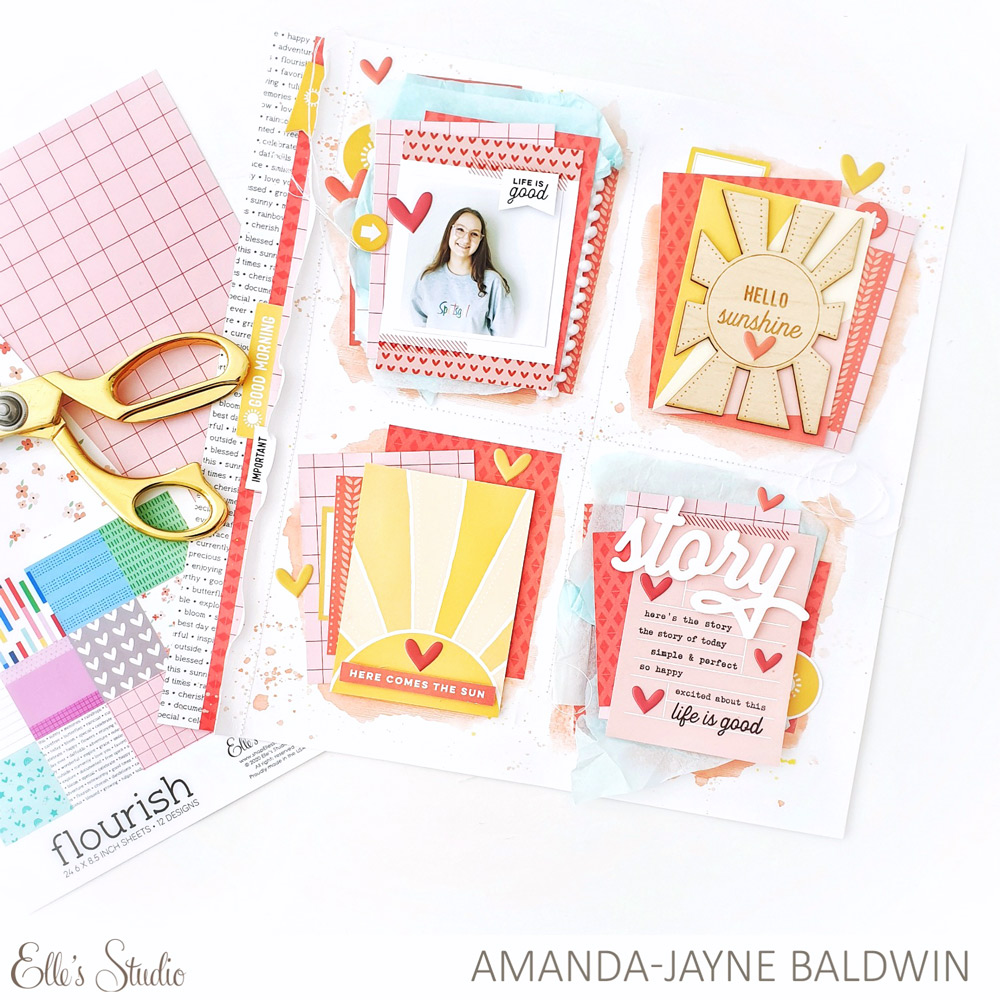
For this layout I really wanted to honor the aesthetic of the sketch pretty closely. I knew I couldn’t resist pairing some of the amazing journaling tags from the May 2020 Kit with this great pink cardstock. It acted as a nice base to tie all of my paper colors into the scheme and it helped balance out the bold purples and reds, while also letting those pops of yellow shine!
I chose two areas on the sketch to place my photos. I really love the idea of using multiple photos for this one. You could even place photos on every designated rectangle on the sketch. How fabulous would that look?! To help make my photos pop, I added some foam to the back of each one. This elevated them above the other papers, so that they would stand out to the eye.
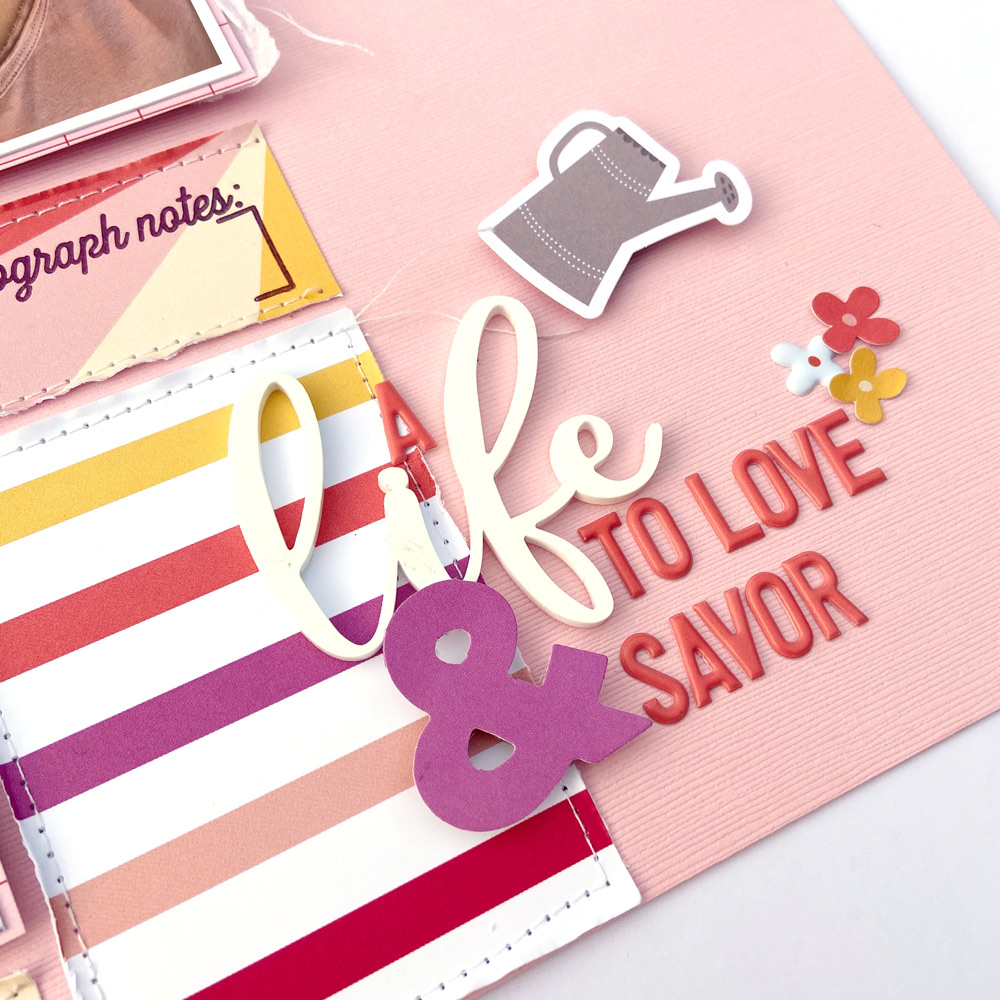
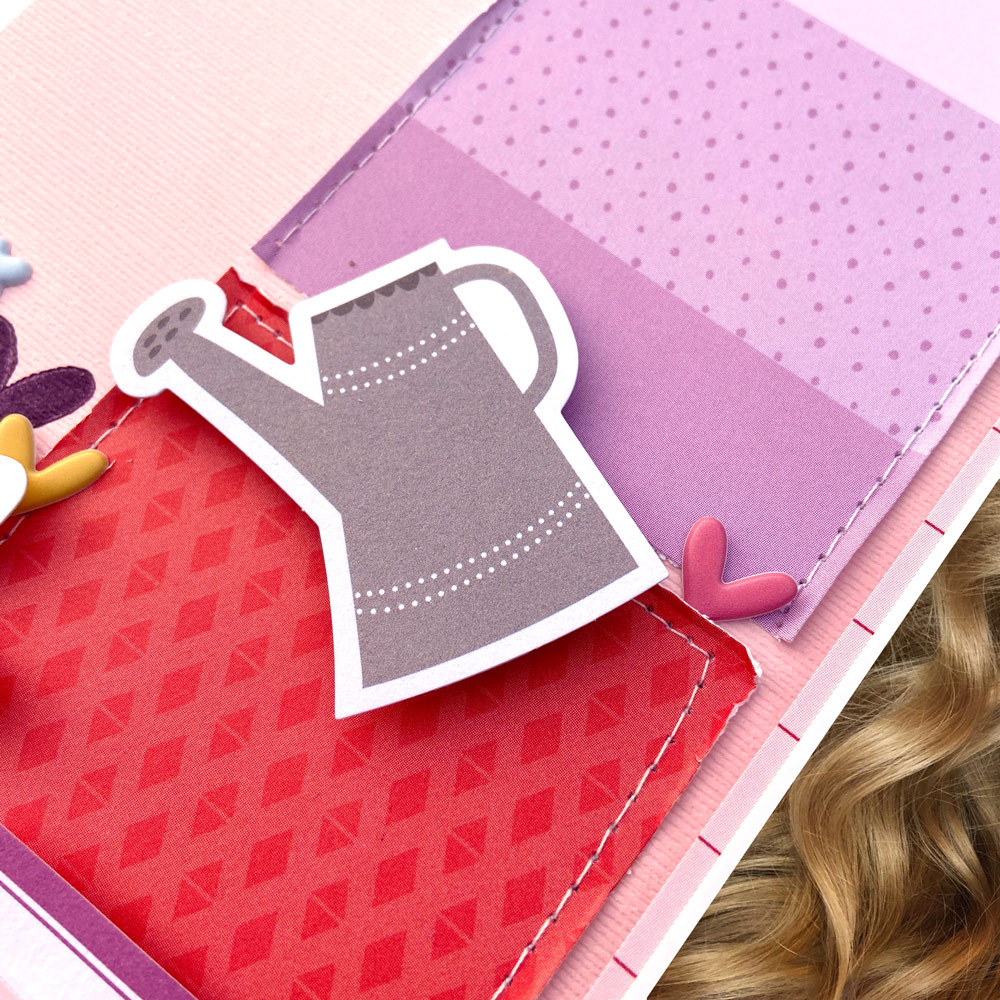
I cut down my papers to rectangles of various sizes like the sketch. I then stitched them onto my cardstock in varying ways, so that I had a pretty whimsical look and roughed up the edges to add even more character. I then got to work adding my title, like it was dictated by the sketch, pairing the amazing Life Right Now Acrylic with the Coral Puffy Alphabet Stickers to create it.
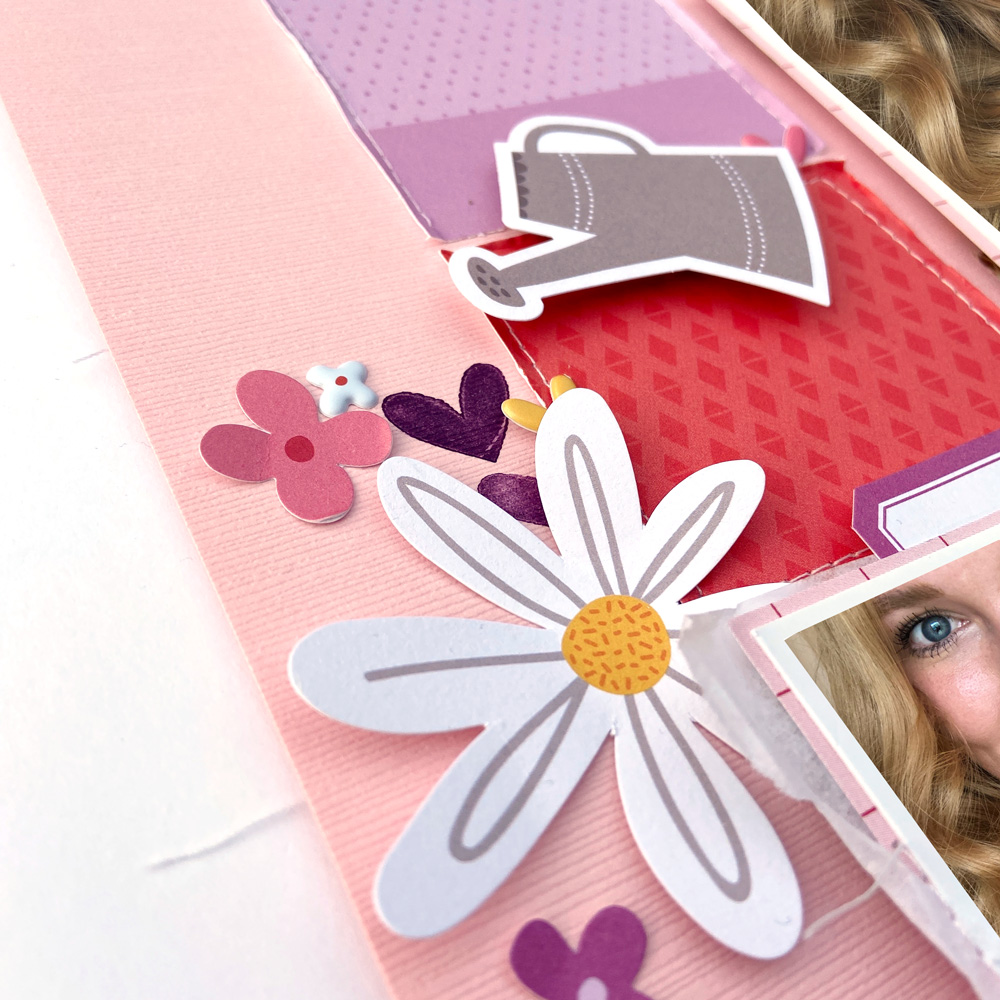
All that was left was to add in a bunch of ephemera pieces from the Beautiful Day Die Cuts and puffy accents from the Puffy Heart Stickers and Lovely Puffy Stickers. I chose to use the amazing new From Sketch to Finish Vol. 5 Stamp to highlight my journaling and I added some stamped purple hearts for more embellishment. All of these little details really make me squeal. It feels like such a feminine and fun layout, and I’m so thankful this sketch inspired me to create just that!
Thanks so much for stopping by and taking a peek at my new layout! It’s been a tremendous joy getting to share it with you, and thanks so much for having me this month!
Let’s learn a bit more about Lydia:
Residing in: Evansville, Indiana
Living with: My hubby & my tornado of an almost 5 year-old!
Scrapbooking since: I was 12; I had a love affair with cutting up photos and embellishments to paste inside spiral bound books. It’s been a life-long affair for me ever since. Shhh… don’t tell my husband!
Favorite type of memory-keeping: That’s a hard question. I’d say my favorite form of memory keeping is probably pocket page scrapbooks, because of their ease; however, my heart’s favorite is definitely anything messy with paint and layers!
Favorite technique: I love using stencils! You name it, and I’ve problem smeared it over a stencil; modeling paste, ink, paint, and just about any other mixed medium!
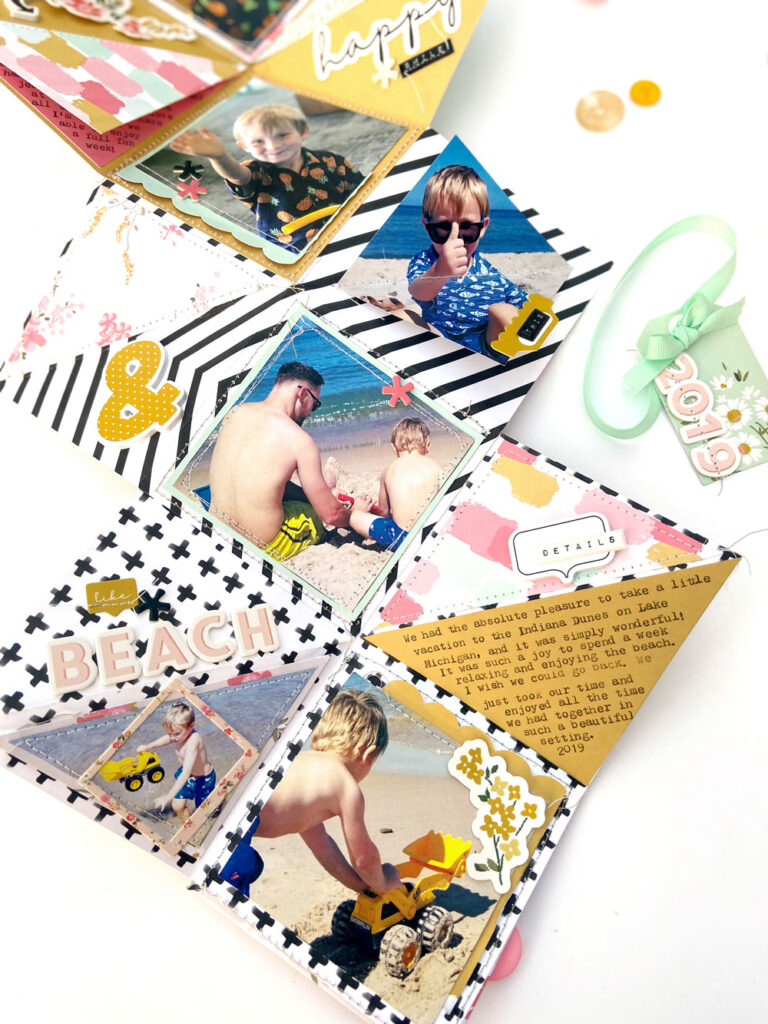
Favorite layout or project ever created: I love working on mini albums. I don’t think I can really pick just one, but I’ll share one of my favorites. It’s a lovely little caterpillar album about vacationing at Lake Michigan!
Crafty essential that you could not live without: Alpha Stickers: I’m not sure I even know how to function without them.
Be sure to find Lydia’s exclusive layouts in our new From Sketch to Finish Vol. 5 class, where you will also find sketch 21 that she worked with to create this layout today!
Comments Off on Meet From Sketch to Finish Vol. 5 Contributor Lydia Cost! | Share This
We are so excited that the May 2020 kit and extras are arriving on doorsteps and craft desks to inspire you to create and document your memories! In case you needed a few more ideas for your creative time this week, take a look at these eight new projects created by our talented design team members!
We hope that these projects keep you inspired to create using your new May goodies! Be sure to share what you are working on in our Elle’s Studio Facebook Group and on Instagram using the hashtag #EllesStudio!
With the latest volume of our popular From Sketch to Finish class series new in the shop, we have a plethora of sketches with project to inspire you to create through the months to come, and today, design team member Suzanna Lee is here to share one more with you! Let’s take a look at what she created based on our latest sketch!
Hiya, scrappy peeps! It’s Suzanna here today! Did you score a copy of the latest sketch class, From Sketch to Finish, Volume 5? Don’t you just love Elle’s Studio sketches? I know I do, and this class is PACKED with them, as well as inspiration to go along with it! While we are quarantined and staying at home, time is abundant for some of us but that doesn’t always mean that mojo is plentiful. I have found over the past few days that I need a little nudge to get me creating. The sketch that I worked with today created the perfect jumpstart for me!
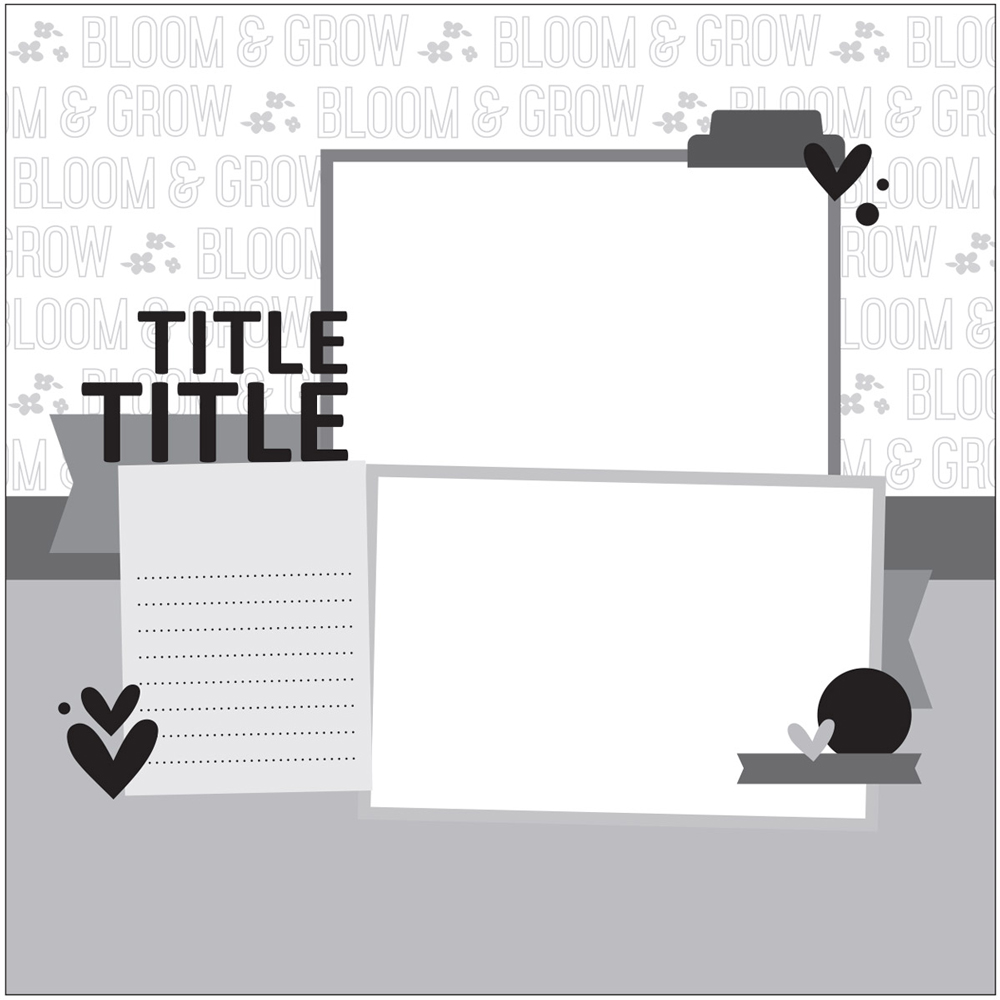
Here is the sketch:
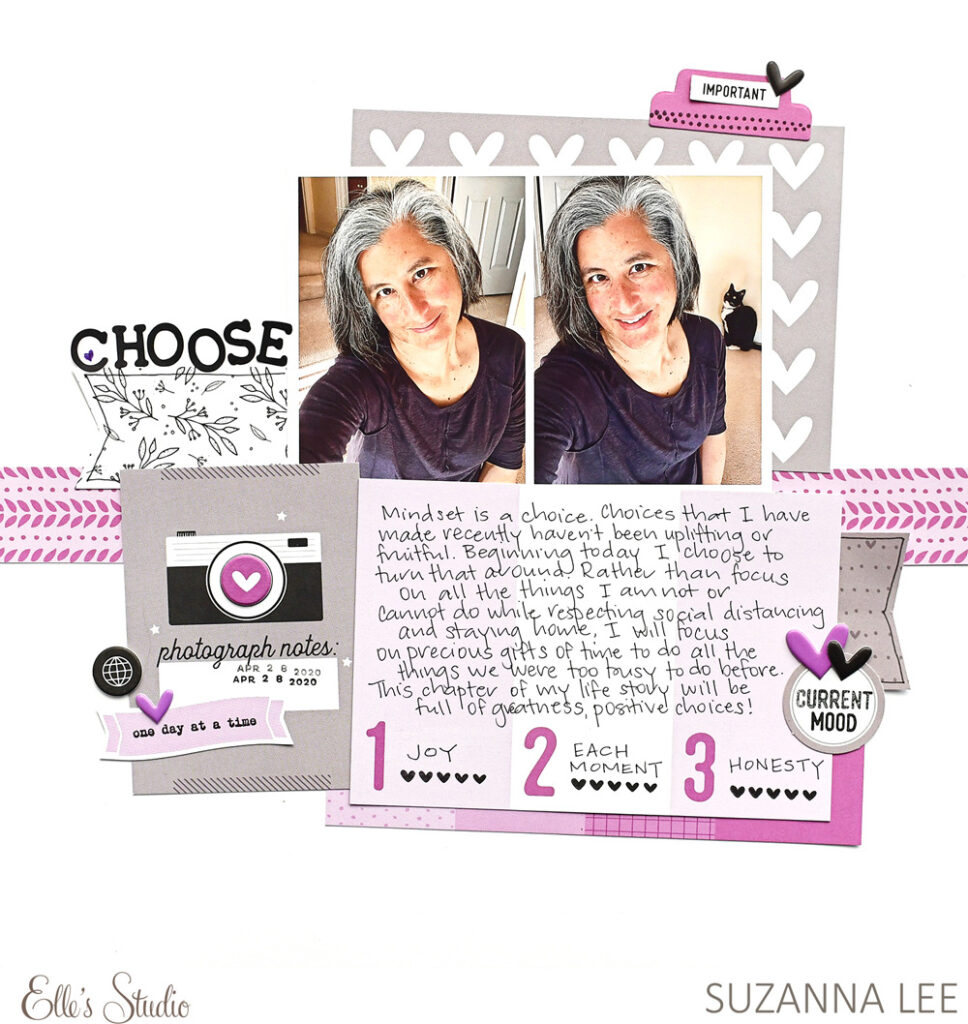
And here is the layout that I created based on that sketch using the May kit and some add on goodies:
There are a number of similarities and a number of differences. And that’s the beauty of a sketch: take what you want, leave what you want!
The first obvious difference is the lack of background pattern above and below the strip running horizontally across the middle. I toyed with the idea of stamping a background for the upper portion, but decided it was going to be too busy for the design ideas I had in mind. I tend to lean towards “more is less” with a penchant for white backgrounds and decided to stay true what works for me.
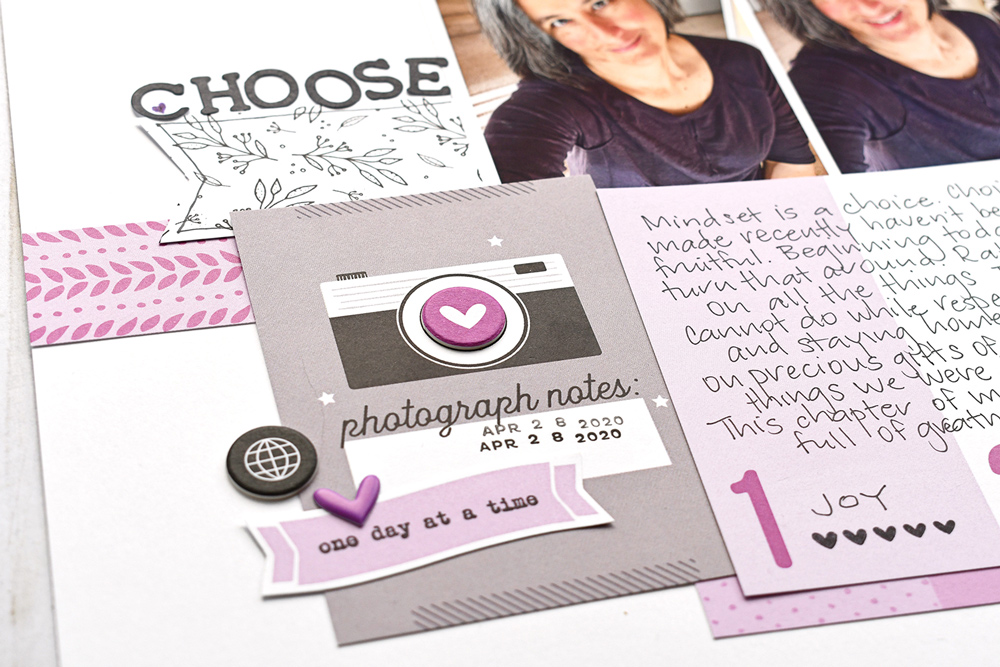
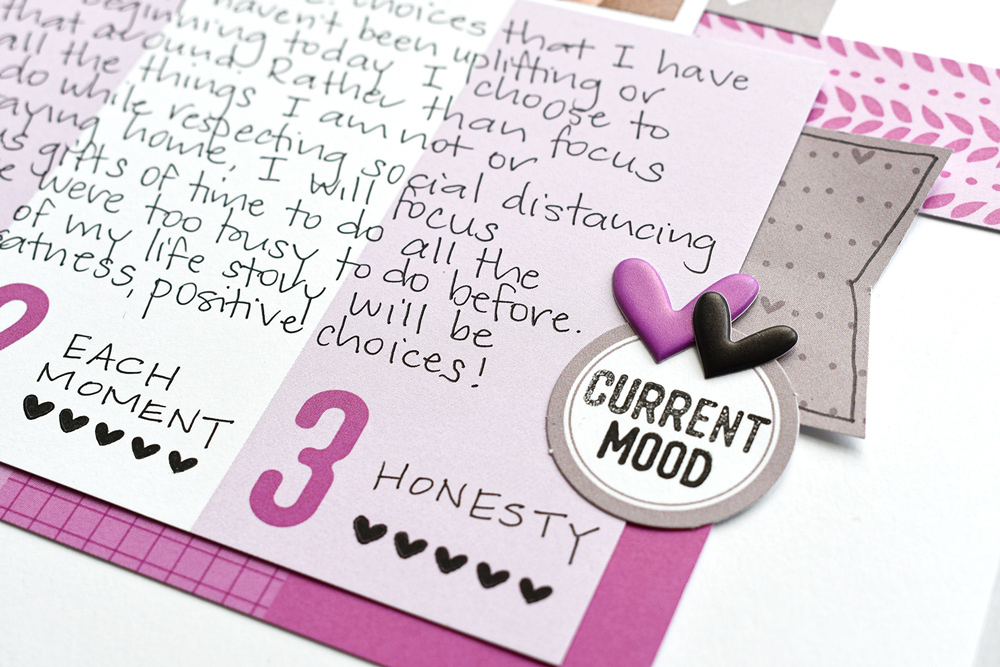
Next, you will see that I amended my “usage” of the main elements of the sketch. While there are still two horizontal 4″ x 6″ and a single 3″ x 4″ elements, I switched them up to suit what I had to work with. There continues to be two photos, both incorporated into a 4″ x 6″ collage and backed with an offset larger patterned border from the Flourish 6 x 8.5 Paper Stack. My story is told on the second 4″ x 6″ tag from the May Kit, while the 3″ x 4″ tag, also from the May Kit is decorative and contains “support” information. Do you, do what works for you and amend the sketch!
The Puffy Heart Stickers this month are classic Elle’s Studio and are the perfect embellishments scattered throughout the layout. I had to get over my own black heart fear and use them—the color scheme called for it!
Next time you find yourself stuck for design ideas, be sure to thumb through your digital copies of the 5 volumes of the From Sketch to Finish class and see how inspired you become! If you use today’s sketch (or any Elle’s Studio sketch for that matter) be sure to post on social media with the hashtag #EllesStudio, or in our Elle’s Studio Facebook Group so that we can “ooh and aah!”
Thanks for stopping in today!
Comments Off on Sketch Day with Suzanna Lee | Share This
Do you ever take the time to record the things that make you most happy? Whether in your traditional album, on a pocket page or in a mini album, these little bits of joy can be fun to document, and bring you joy just looking at them! Let’s take a look at how design team member Kristina Proffitt is doing just that in a traveler’s notebook spread, created using our May kit and extras!
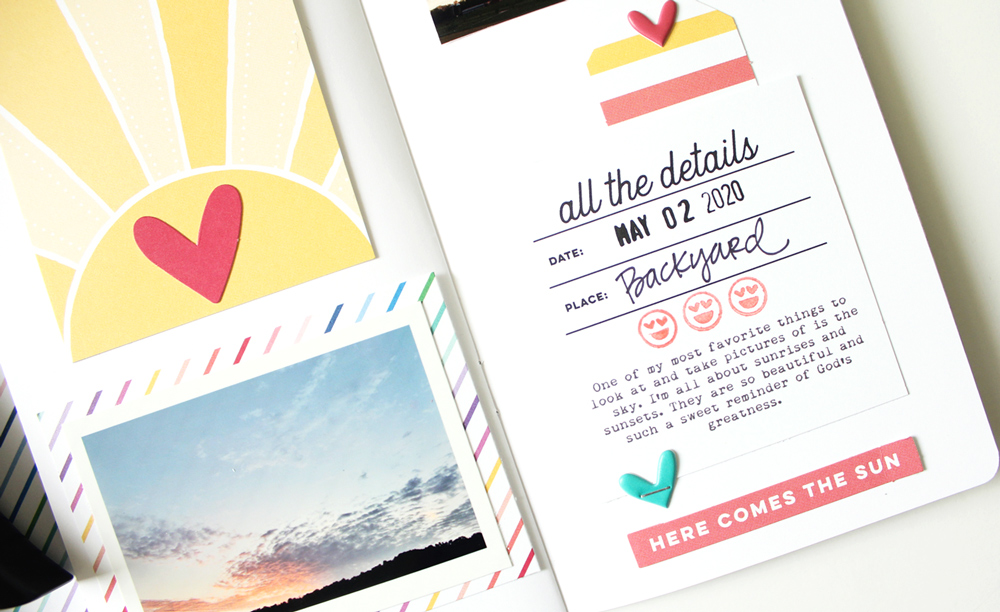
Hey friends! It’s Kristina here and today I’m giving you a look inside of my traveler’s notebook, where I include things that I love. Today I’m using the May kit and extras to create a little spread about my love of taking pictures of the sky.
Anyone else a sky lover out there? I find myself so many times in a day (and night) looking at up at the sky, the clouds, the moon and the stars (I don’t look at the sun before well, that might hurt, ha!) I also love to take photos of sunrises and sunsets, storms rolling in and bright blue skies.
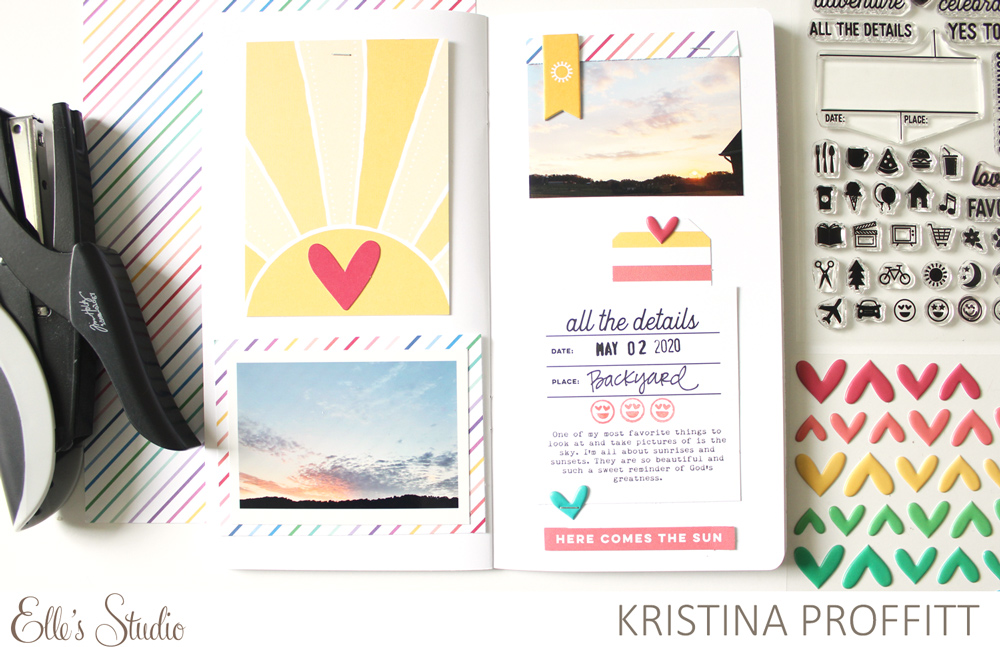
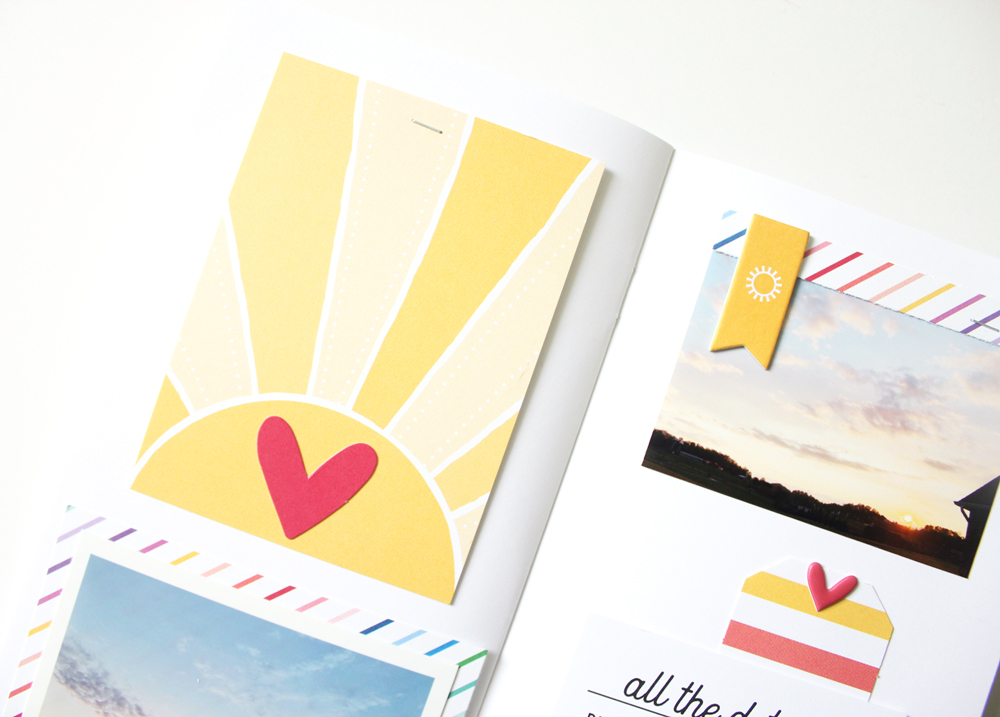
The May Kit has so many great elements, perfect for telling the story of my photos and journaling. I knew that I had to use the really cute sun journaling tag in the kit and I punched out the heart die cut from the kit as well and adhered it onto the journaling card.
I used some of the striped rainbow paper from the Love Is 6.5 x 8 Inch Paper Stack and made it a mat around my first photo. Then I cut a strip of it and placed it along the top of the photo on the next page. I adhered one of the Icon Chipboard Stickers on top and stapled the patterned paper strip with my tiny attacher.
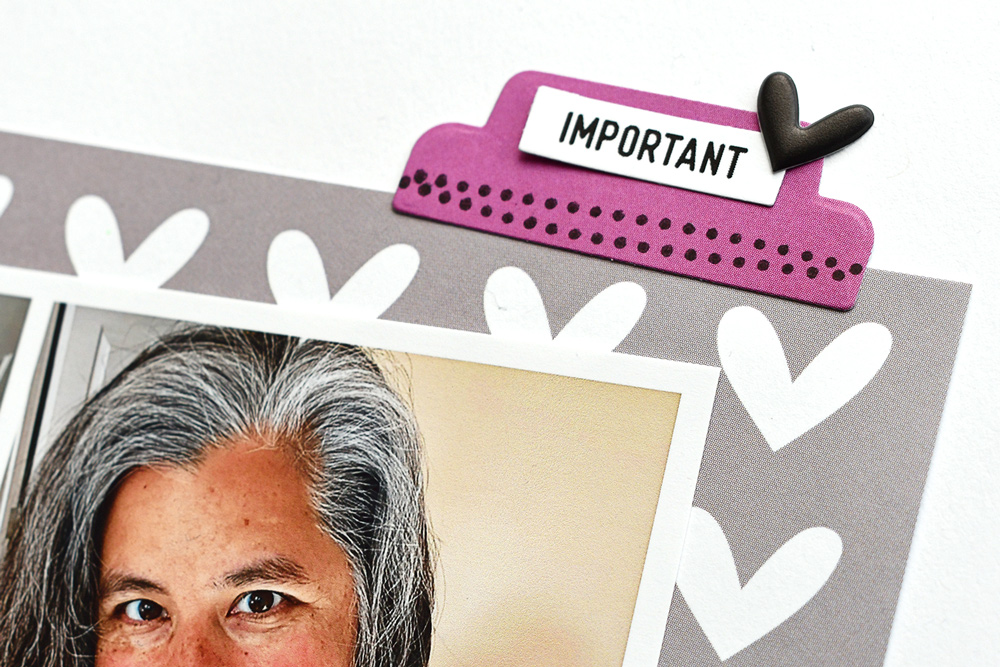
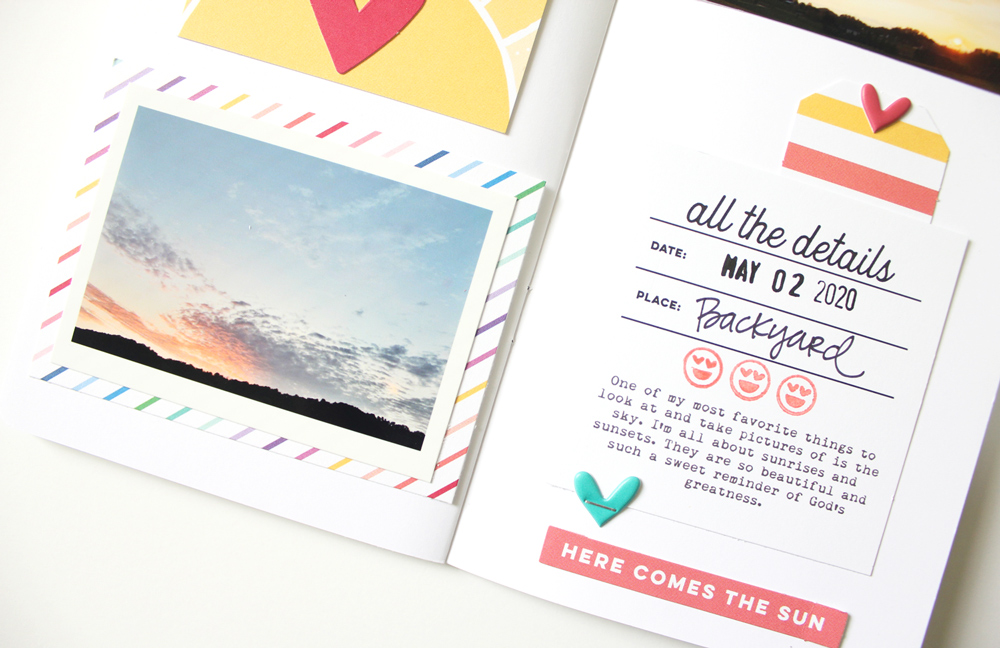
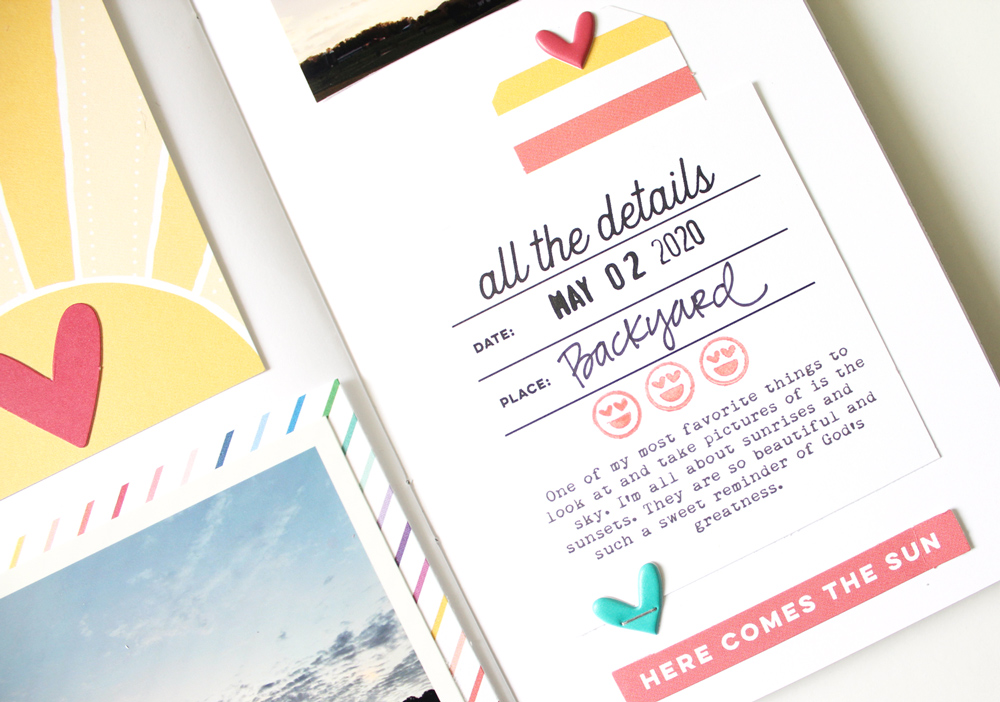
I then used the “all the details” journaling tag from the May Kit to include my journaling and stamped some really happy heart eye emoji icons from the Currently Icon Stamp. I trimmed the card to shorten it a bit and it worked out because I accidently got a big ol’ smudge of ink on the bottom of the card, too. It happens! I stamped the date on it, handwrote the location and then adhered a Puffy Heart Stickers to the bottom and put a little staple through that as well.
Lastly, I took the striped tag die cut from the May Kit and tucked it behind the journaling tag. I put a little Puffy Heart Sticker on top and put the “here comes the sun” die cut on the bottom of the page.
I love how simple this turned out, but yet how bright and joyful it is, too—just exactly the way the sky makes me feel!
I hope this inspires you to pull out your May kit and extras and start a mini album, layout, pocket page or traveler’s notebook about the things that you love! You’ll be glad that you did. Ok, I’m off to go snap a photo of the sky to add to my collection! It’s SO pretty here today! See ya!
Show us how you record your favorite things using our products! Post your project in our Elle’s Studio Facebook Group, or on Instagram using the hashtag #EllesStudio!
Comments Off on For the Love of the Sky with Kristina Proffitt | Share This
Each of our monthly kits and add-ons come with versatile tags, die cuts and embellishments to help you document your memories, or make someone else’s day! Today, design team member Daniela is with us to share two greeting cards that she created to do just that! Let’s take a look at her lovely creations!
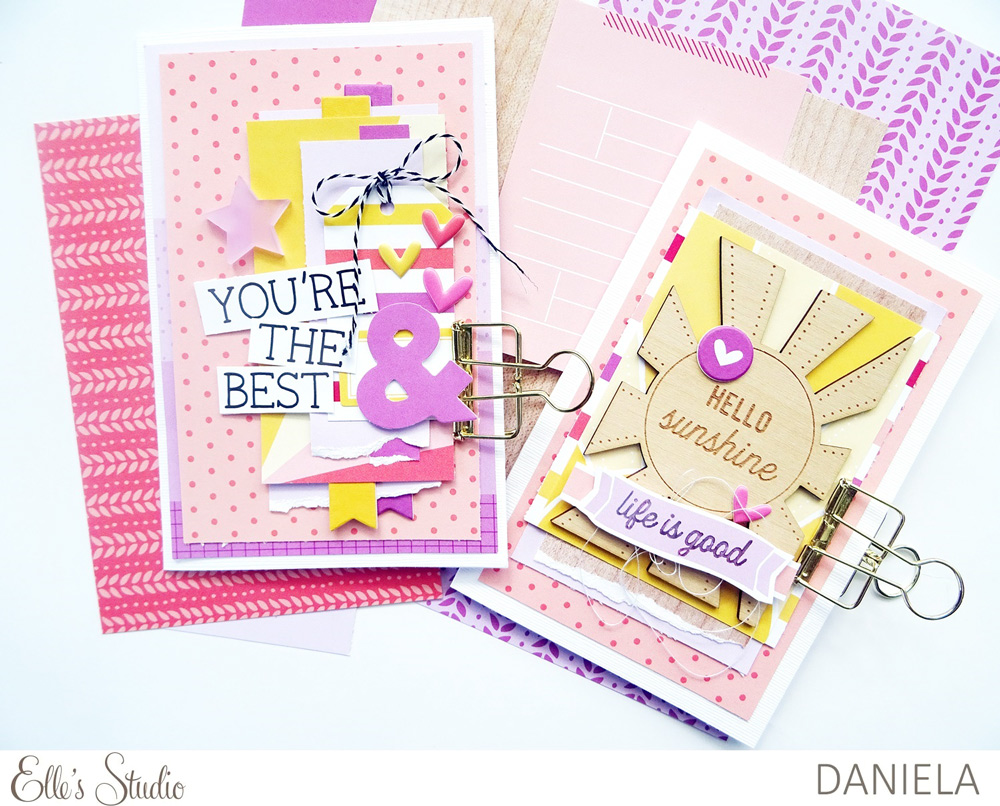
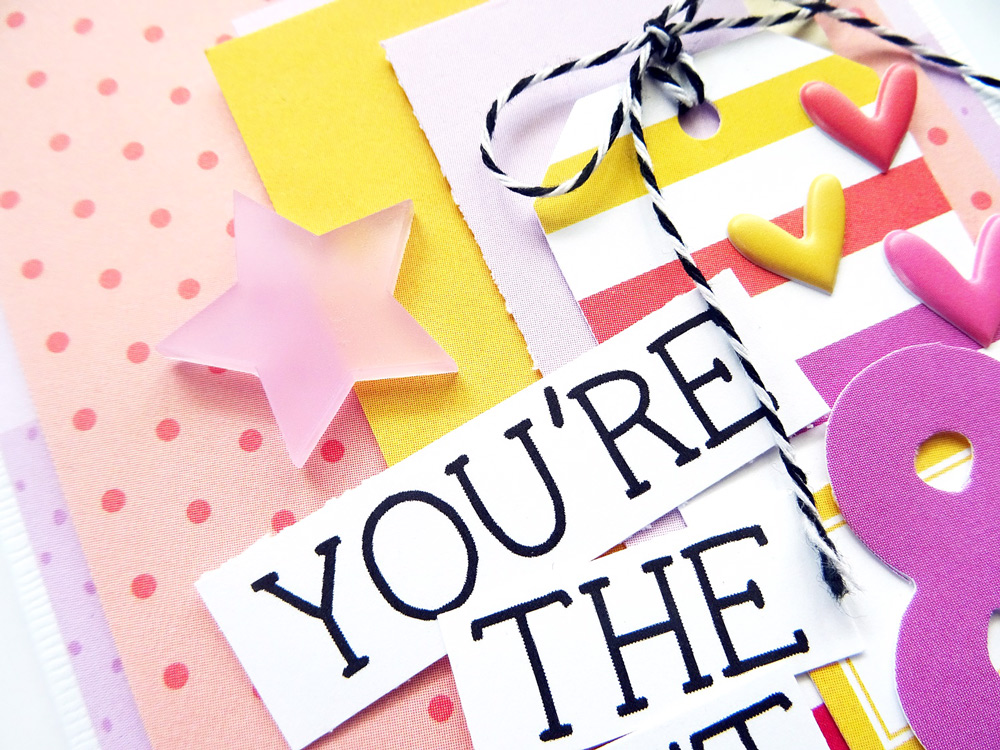
Hi, friends! It’s Daniela here, and I’m sharing two new cards that can brighten the day in everyday life with you today, created using the May kit and extras. Especially in these hard times, we can’t do this often enough. I love giving little gifts to friends and colleagues without a special occasion. Who doesn’t have to smile when there’s a little surprise in the mail or on the working desk? Here are my cards that are meant to spend a little ray of light to two nice people:
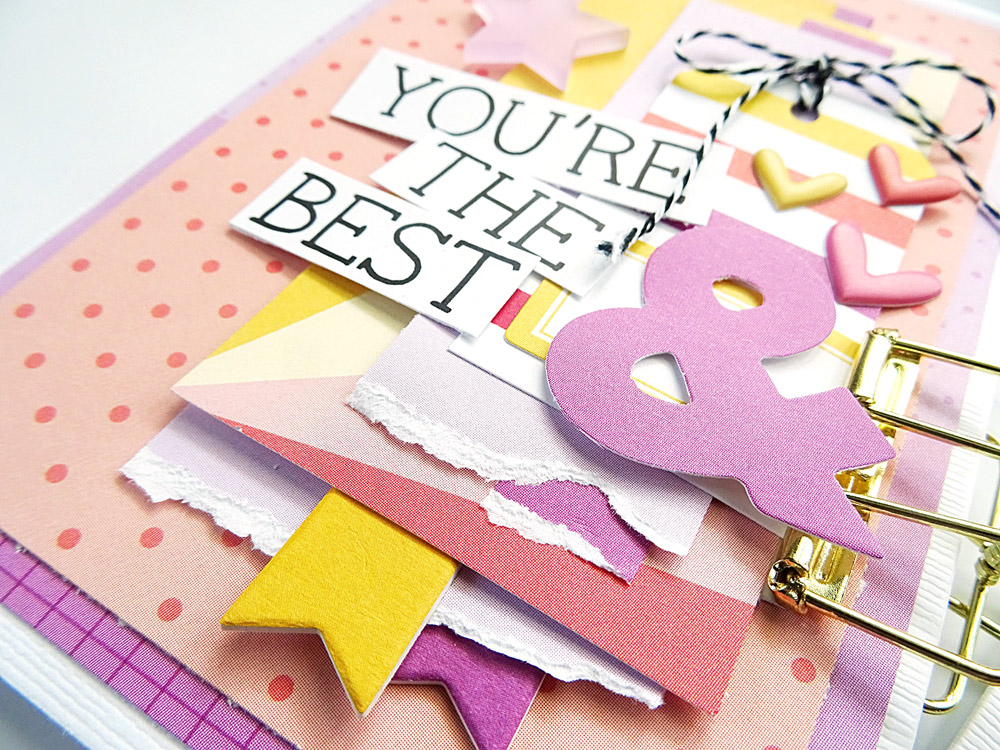
I used the same color scheme for both of my cards: a warm orange, yellow, purple and a tiny touch of pink. I really like the warm feeling these colors convey. For the first card, I cut apart one card from the May 2020 Kit because I felt that the phrase “You’re the Best“ made a great sentiment! You can use it as a thank you card or just to tell someone how much you care. I layered several papers and placed the die-cut striped tag on top of it. Then I added the sentiment strips on top.
The mixture of embellishments add lots of different textures, creating a playful style. The Acrylic Star is something special on a card and the Puffy Heart Stickers compliment the sentiment perfectly. The bakers twine is a nice extra and also adds another texture!
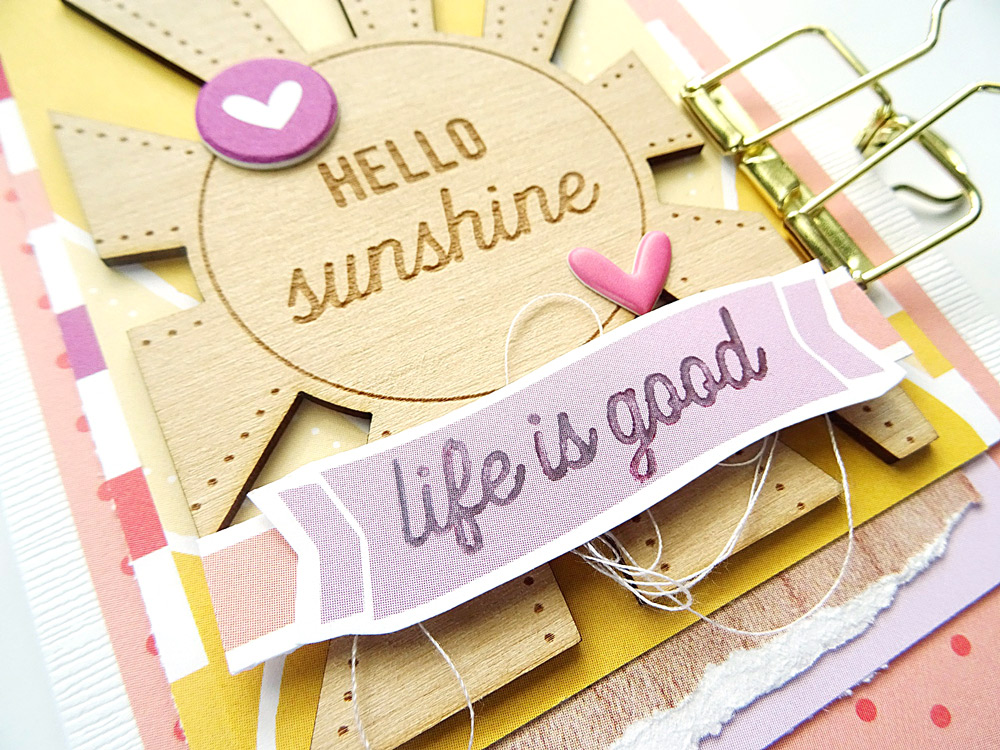
The biggest element on my second card is the Hello Sunshine Wood Veneer, and this card also comes along with lots of different layers! To add extra texture, I placed thread under the stamped sentiment. The ripped edges of the woodgrain paper is just a little detail, but also adds texture and adds up to the playful style. I think this card is perfect to cheer someone up or just to let a dear friend know that you’re thinking of him or her.
I already know who I’m giving these cards to! I hope you like how I used the May kit and extras, and maybe you even feel inspired to create some cards, too! When you do, don’t forget to share your work on social media using the hashstag #ellesstudio or in our Elle’s Studio Facebook Group!
Keep up the good vibes and stay safe!
Comments Off on Sunshine Greetings with Daniela | Share This