Egg and Bunny Extras with Jody Compton

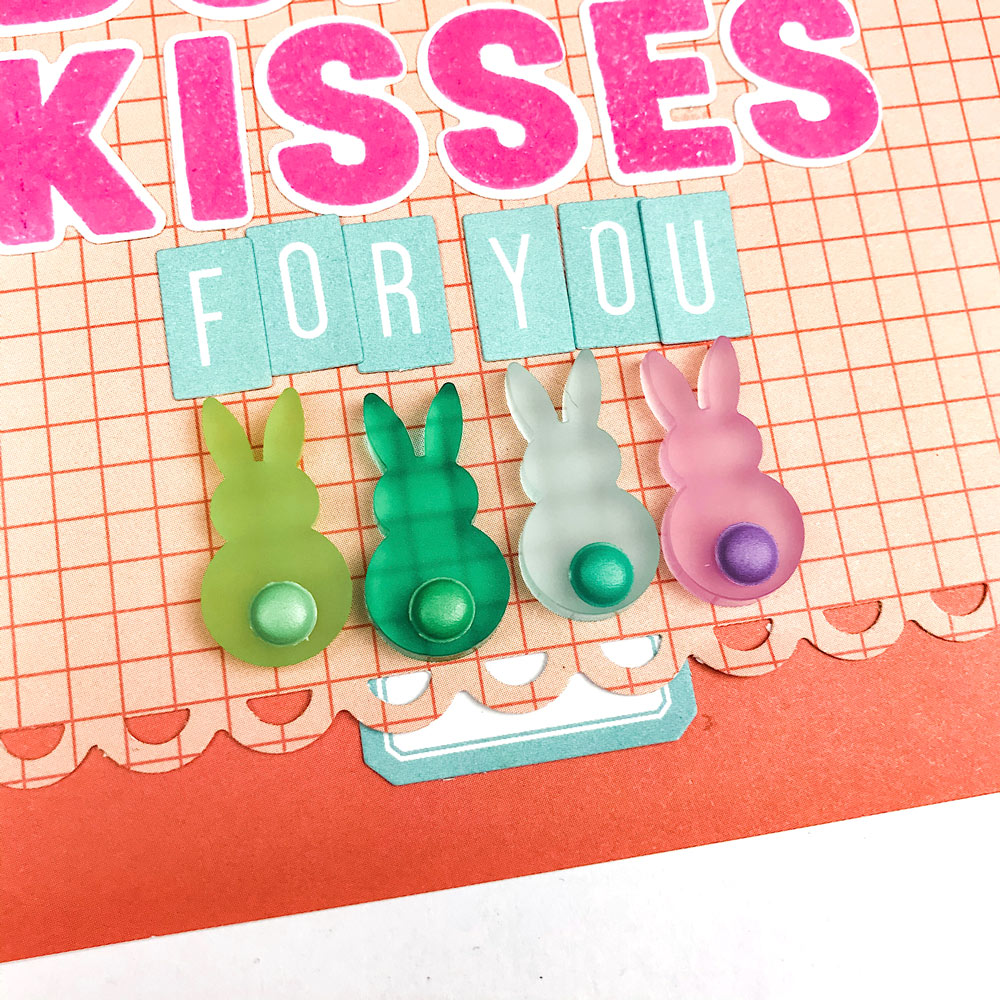
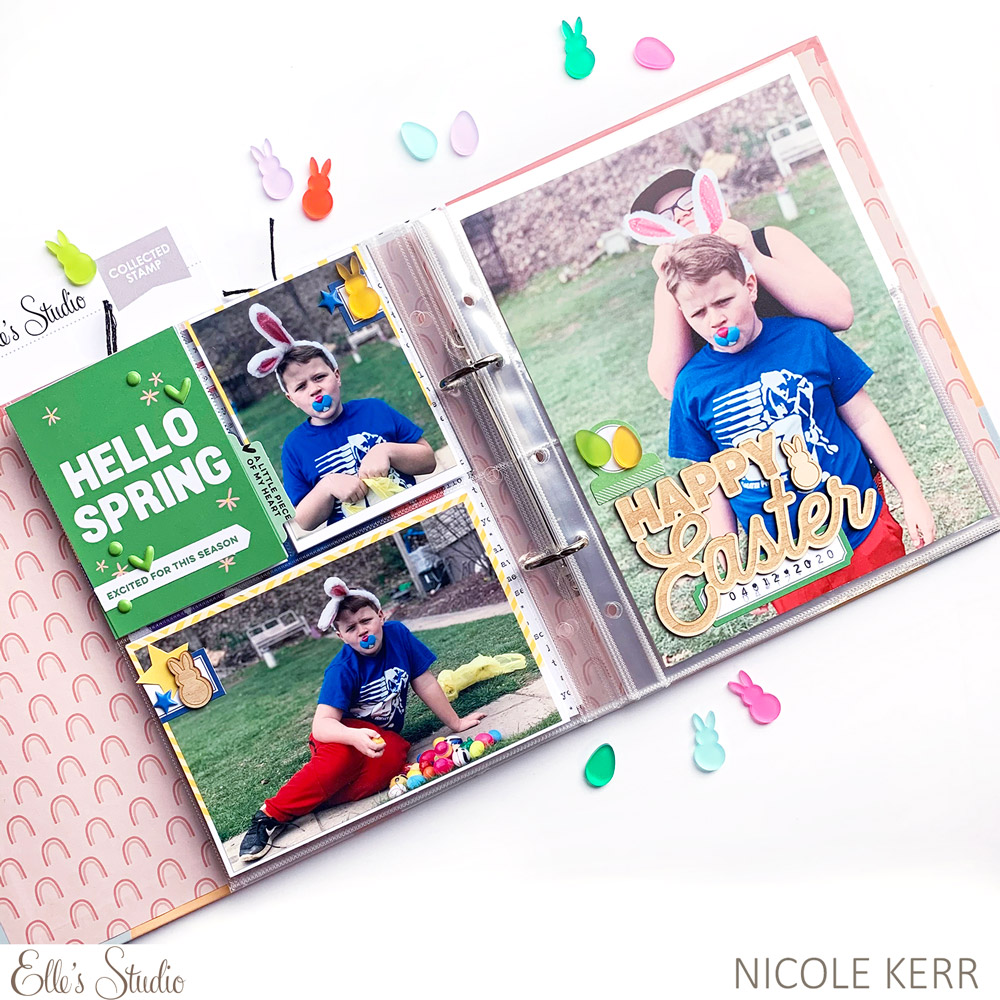
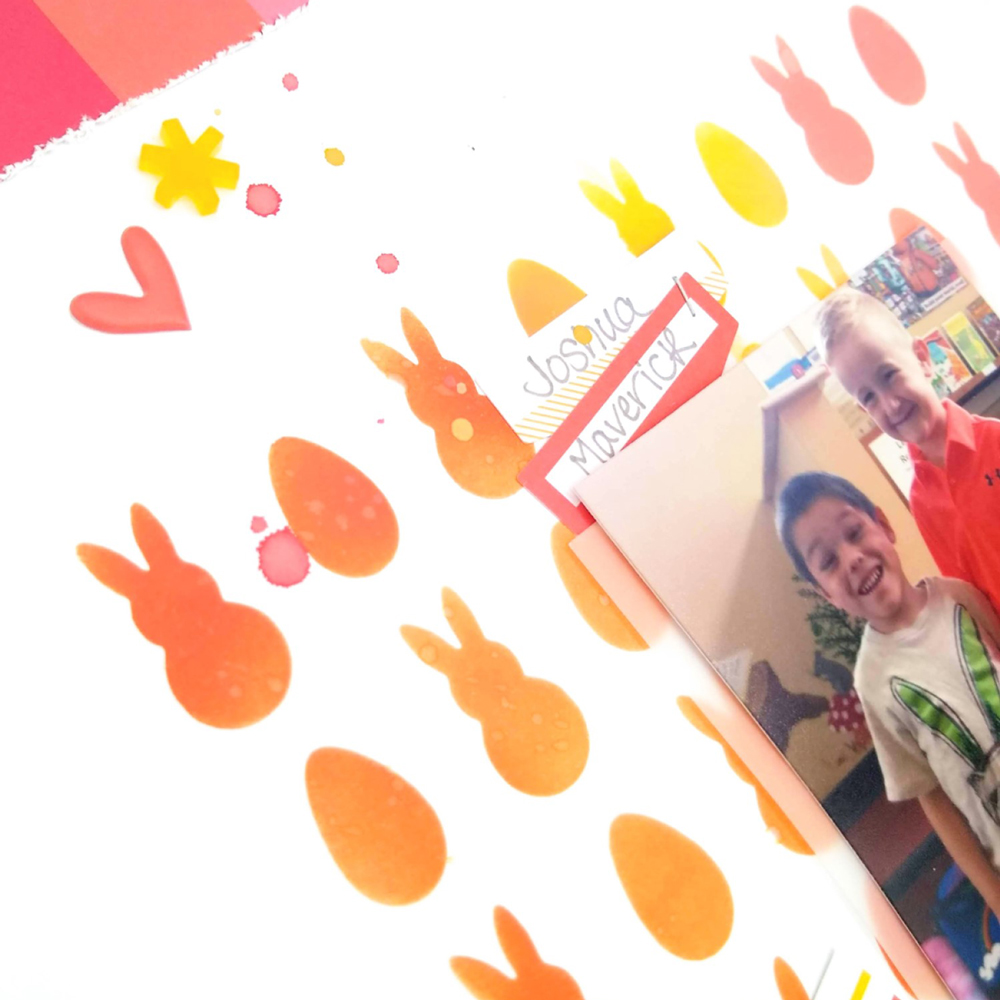
Hello Elle’s Studio, friends! It’s Jody here today and I have a new layout to share that focuses on the March digital cut files; specifically, the 3″ x 4″ bunny and egg tag! I took this digital tag and created a stencil from it, using fun colors through the stencil to create my own background.  The colorful bunnies and eggs are definitely a highlight of my new layout:
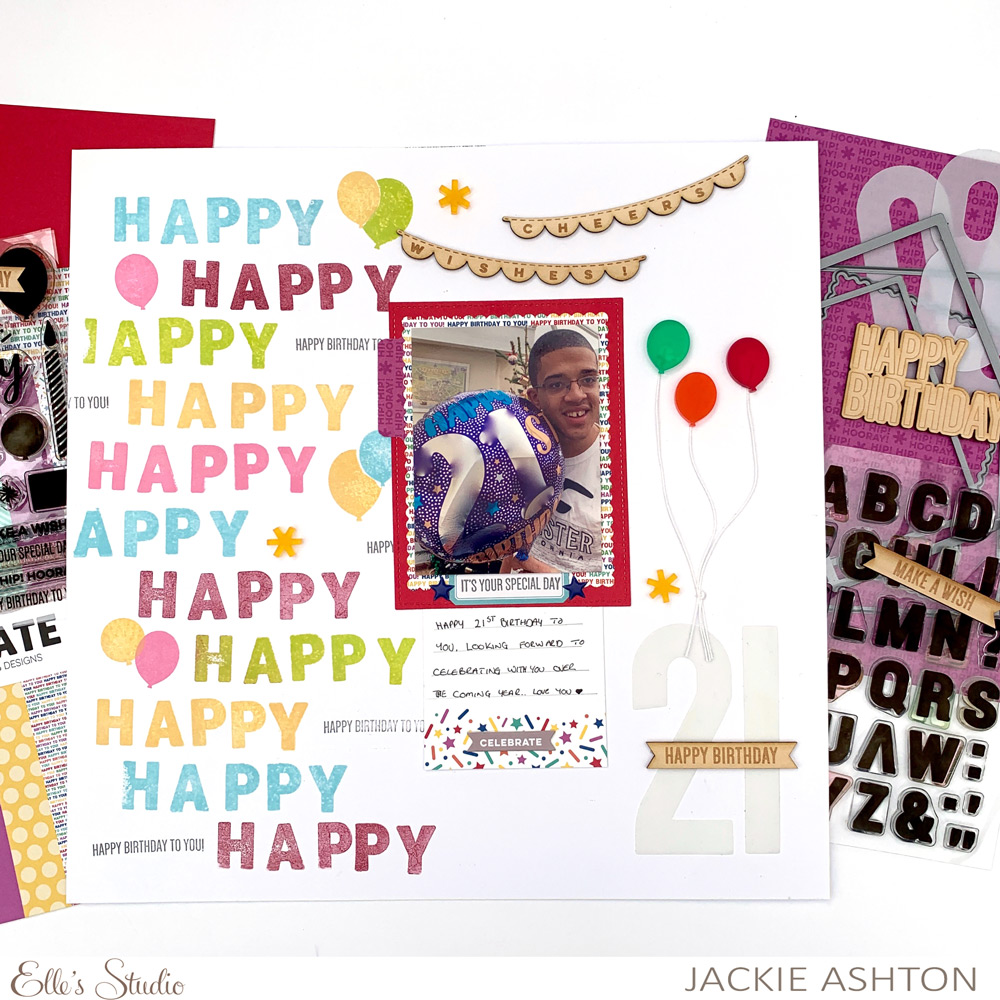
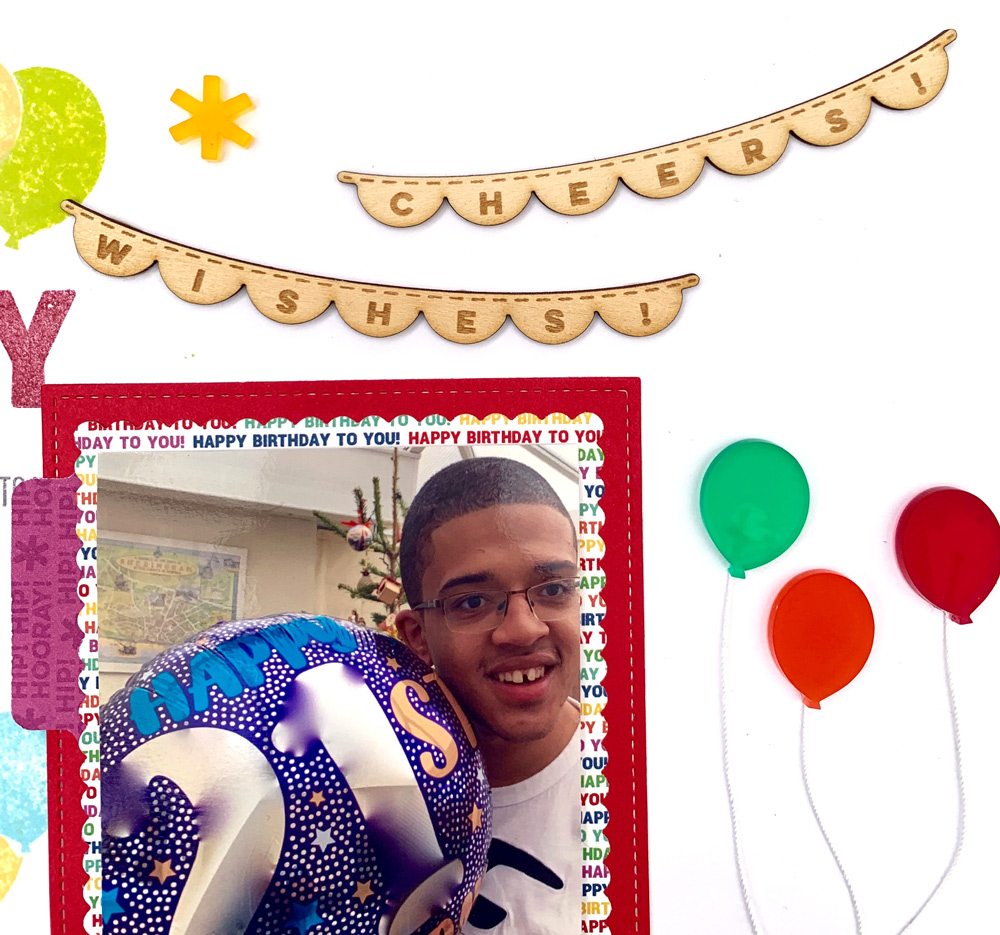
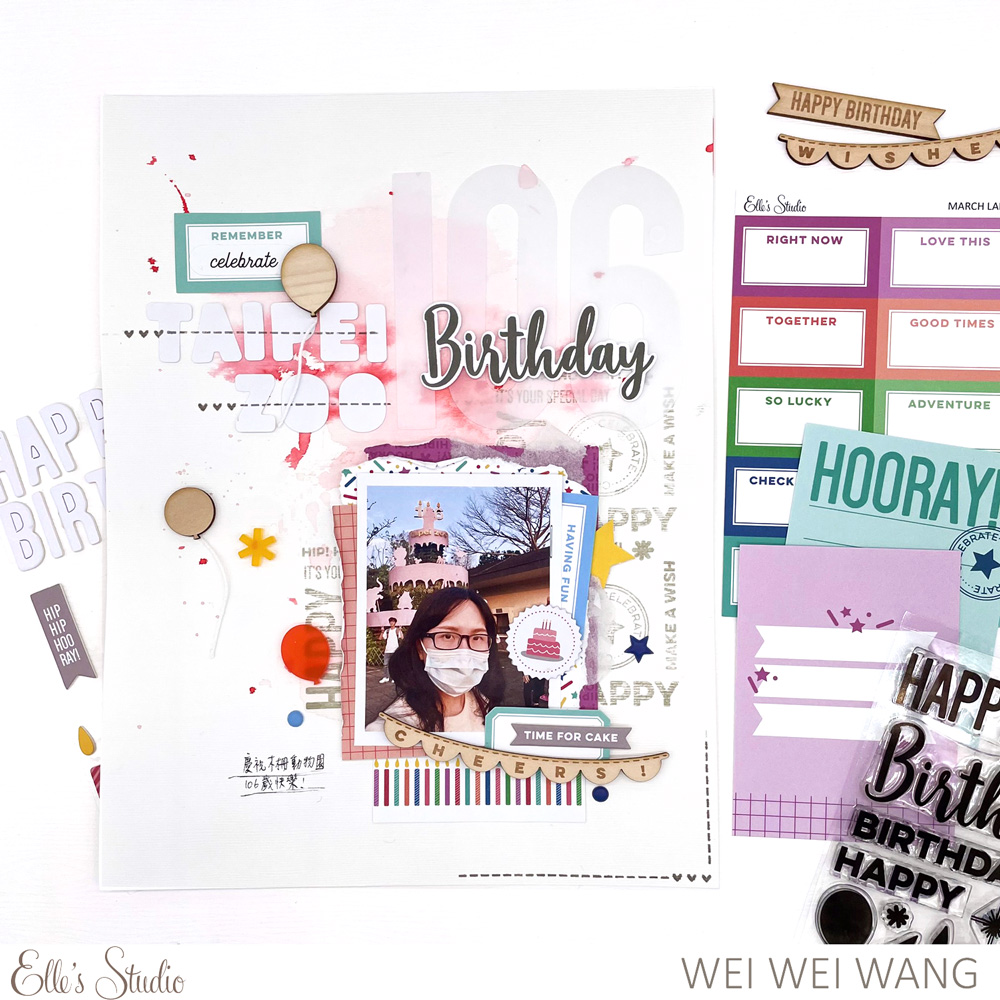
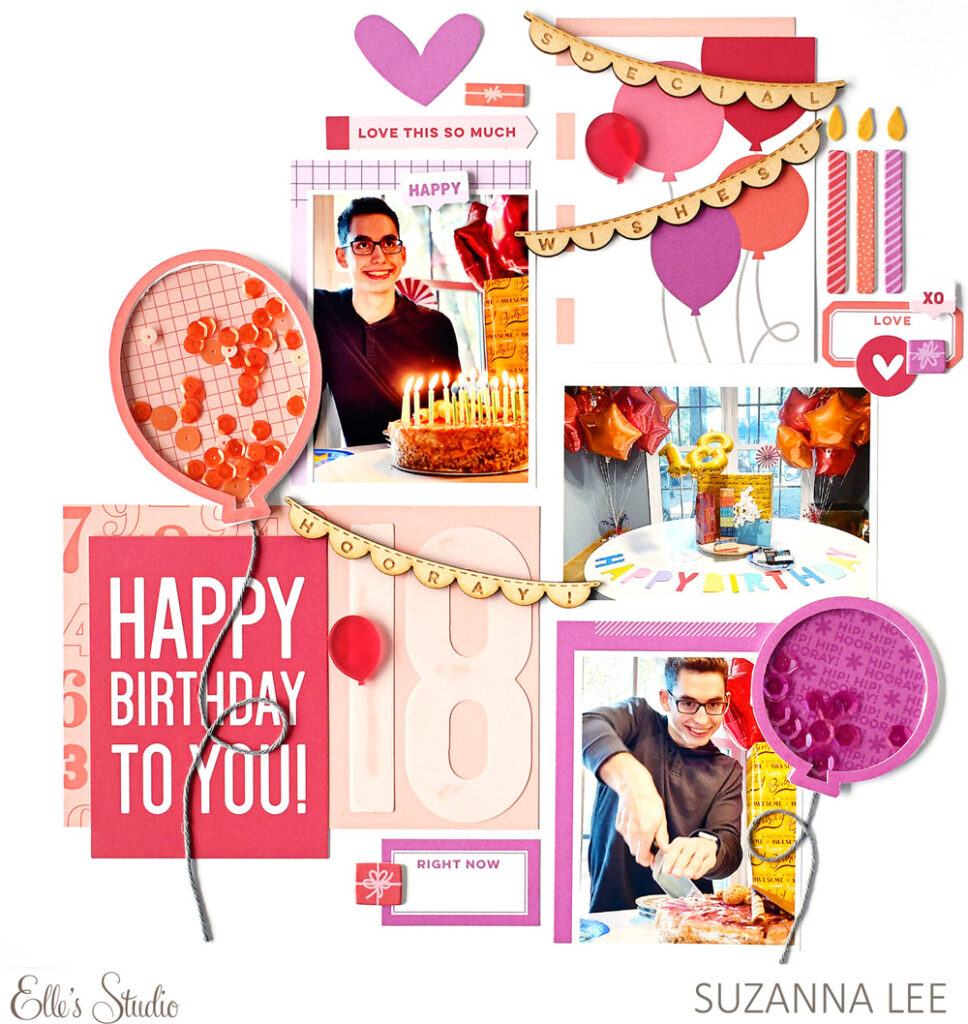
Supplies | March 2021 KitMarch 2021 Cut Files, March 2021 Labels, Puffy Heart Stickers, Acrylic Balloons and Presents, Celebrate 6 x 8.5 inch Paper Stack, Parker Alphabet Stamp, Mini Dated StampParker Alphabet Metal Die

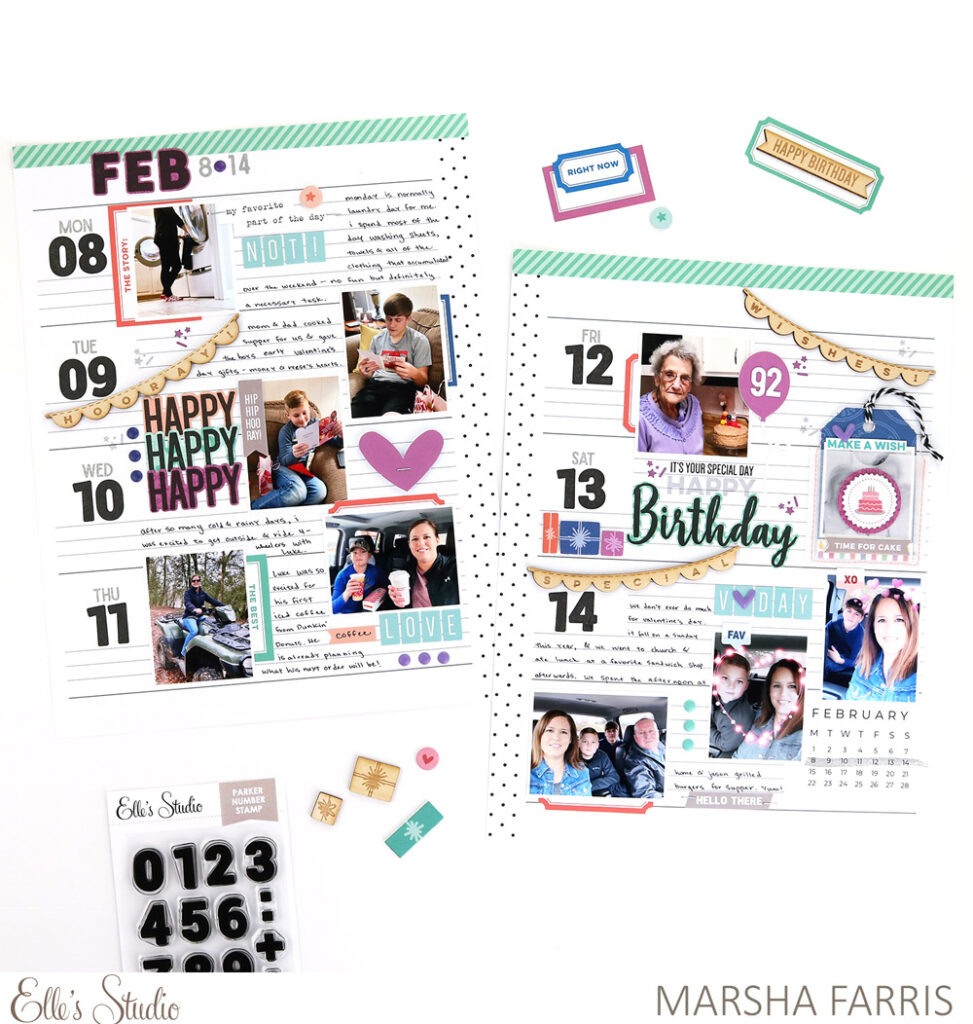
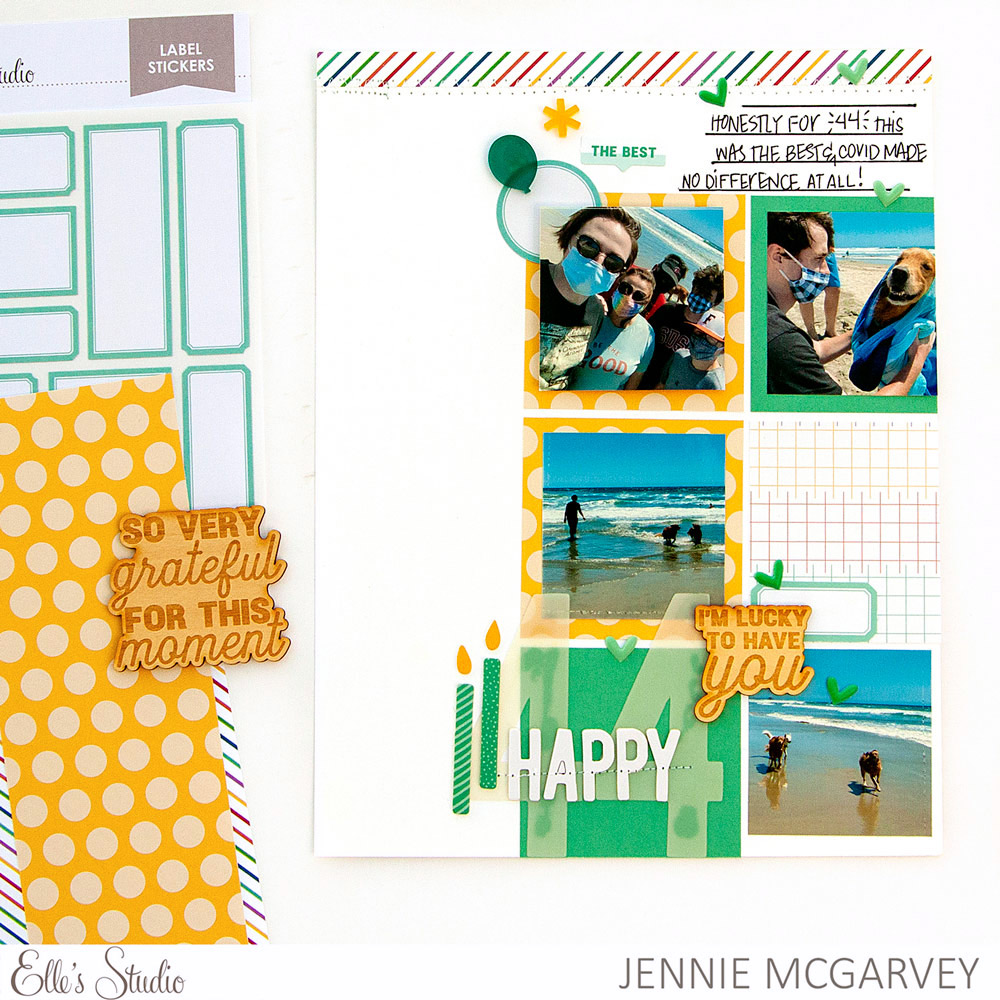
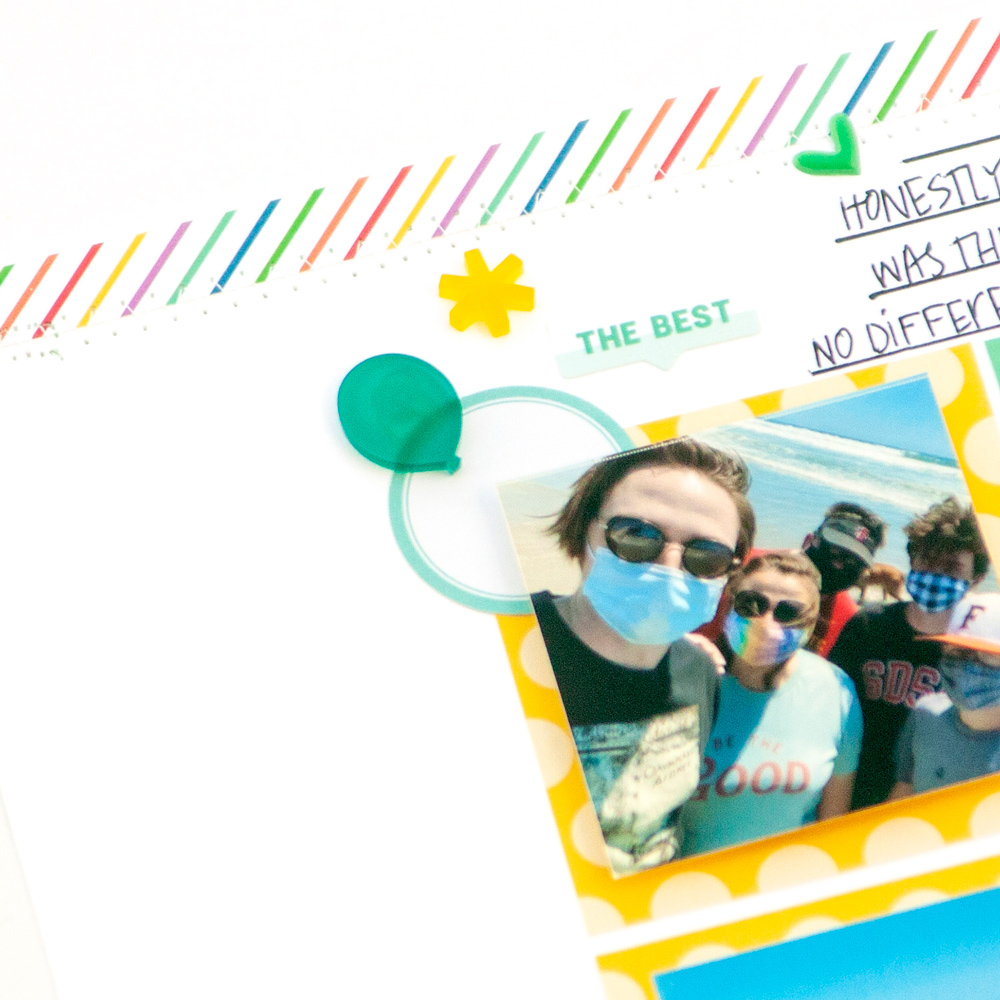
To add more color I took two strips of the rainbow paper from the Celebrate Paper Stack and added one to the top center and the other to the bottom center. For texture, I ran my distressing tool around the edges.

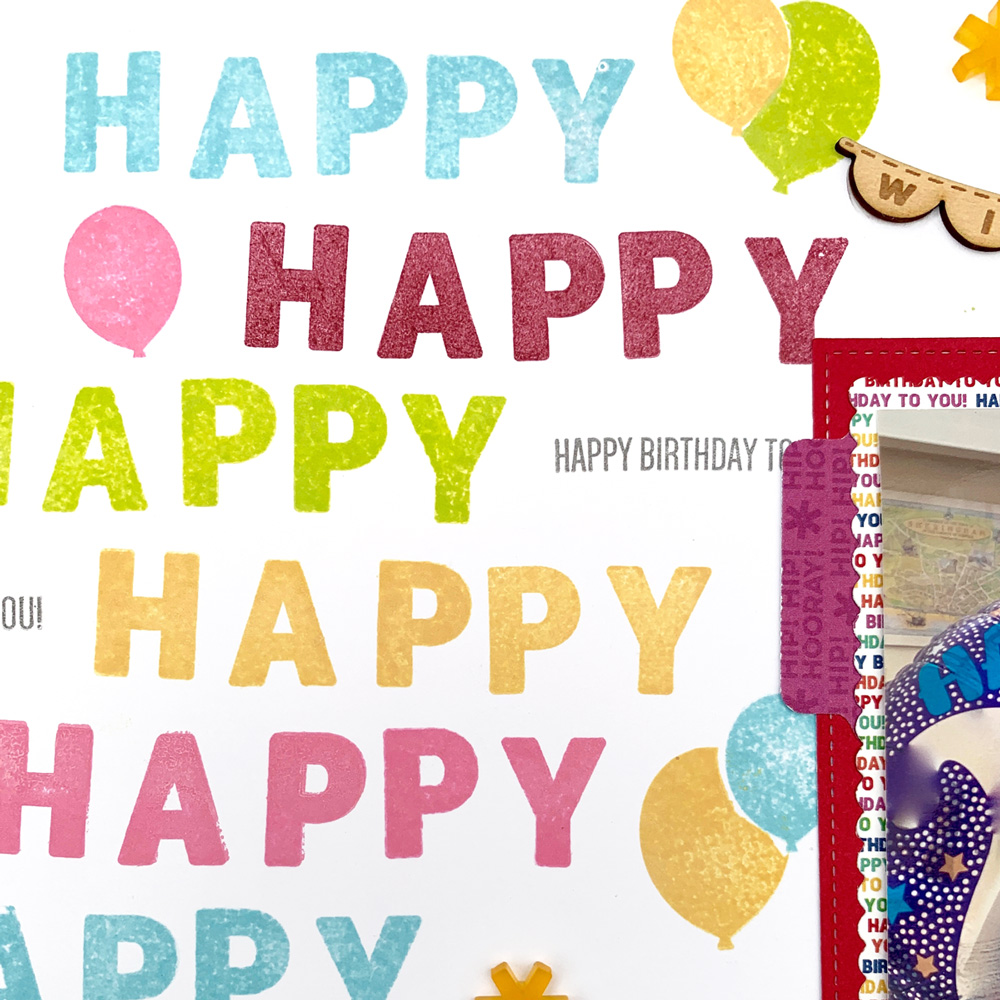
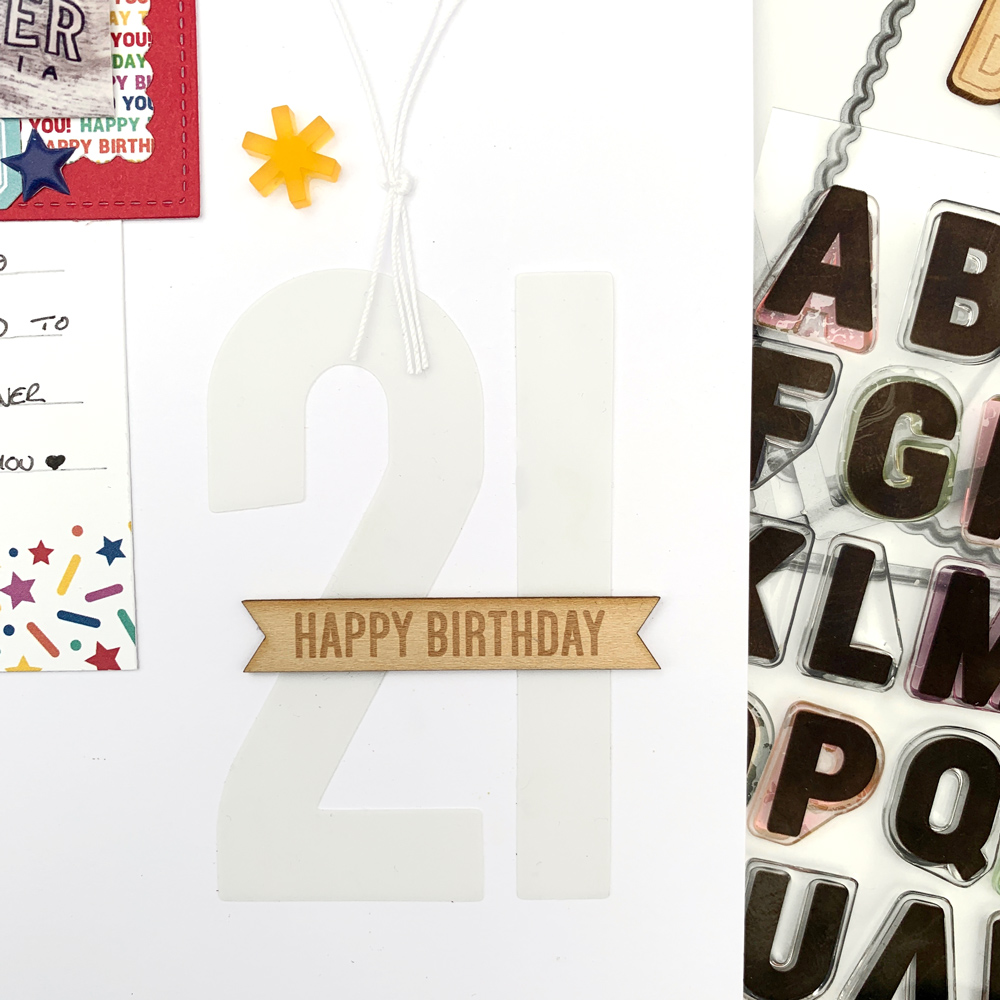
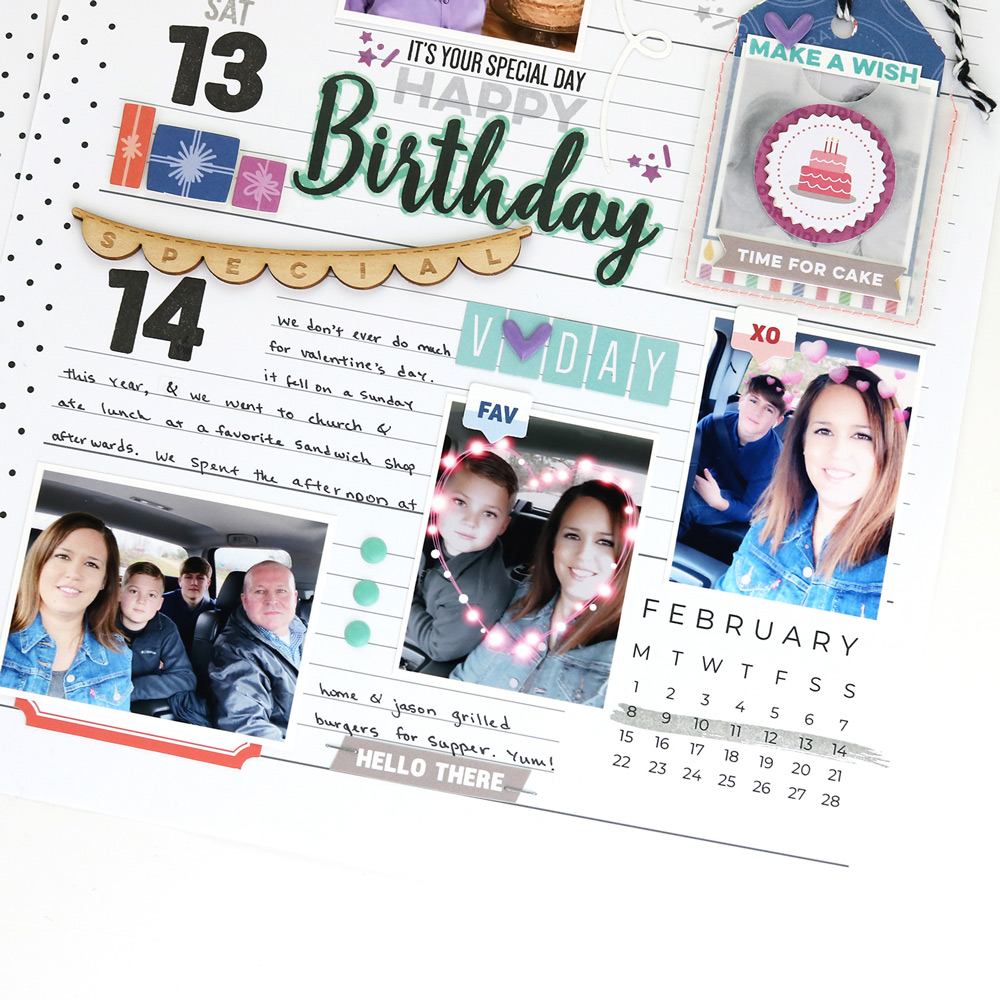
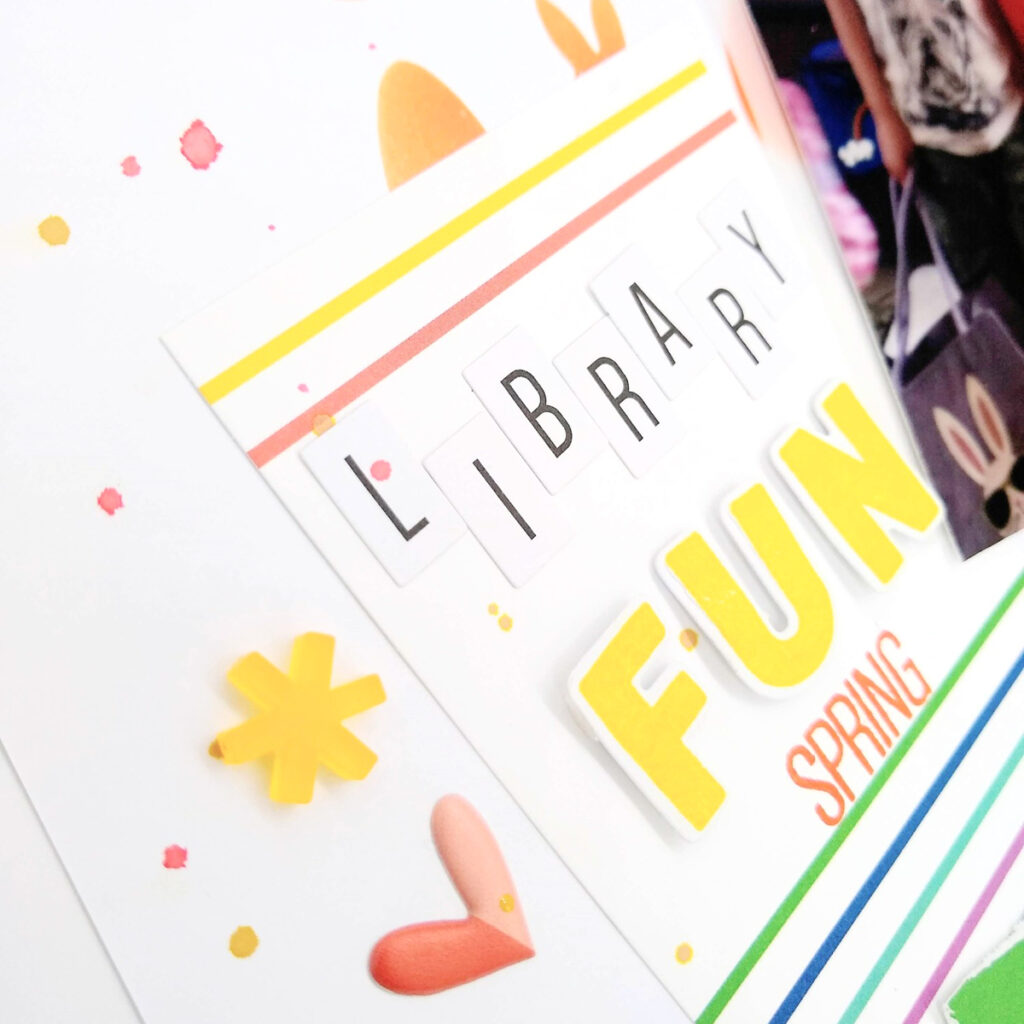
Looking through the 3″ x 4″ tags from the March 2021 Kit, I spotted that sweet, striped card begging for a title and I knew the Parker Alphabet Stamp would work perfectly. They are bold, but not too big! I stamped out “fun” and used the Parker Alphabet Metal Die to cut each letter out. I popped them up with foam adhesive squares to add dimension.  

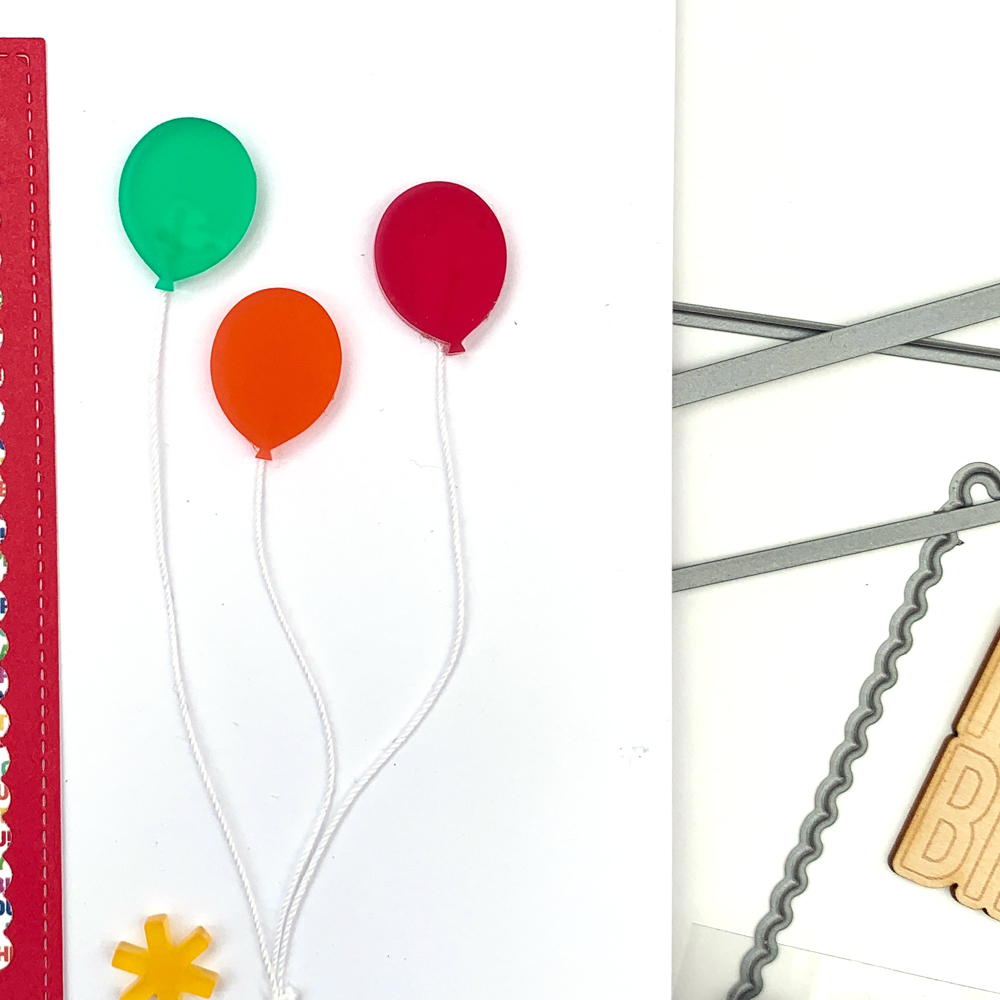
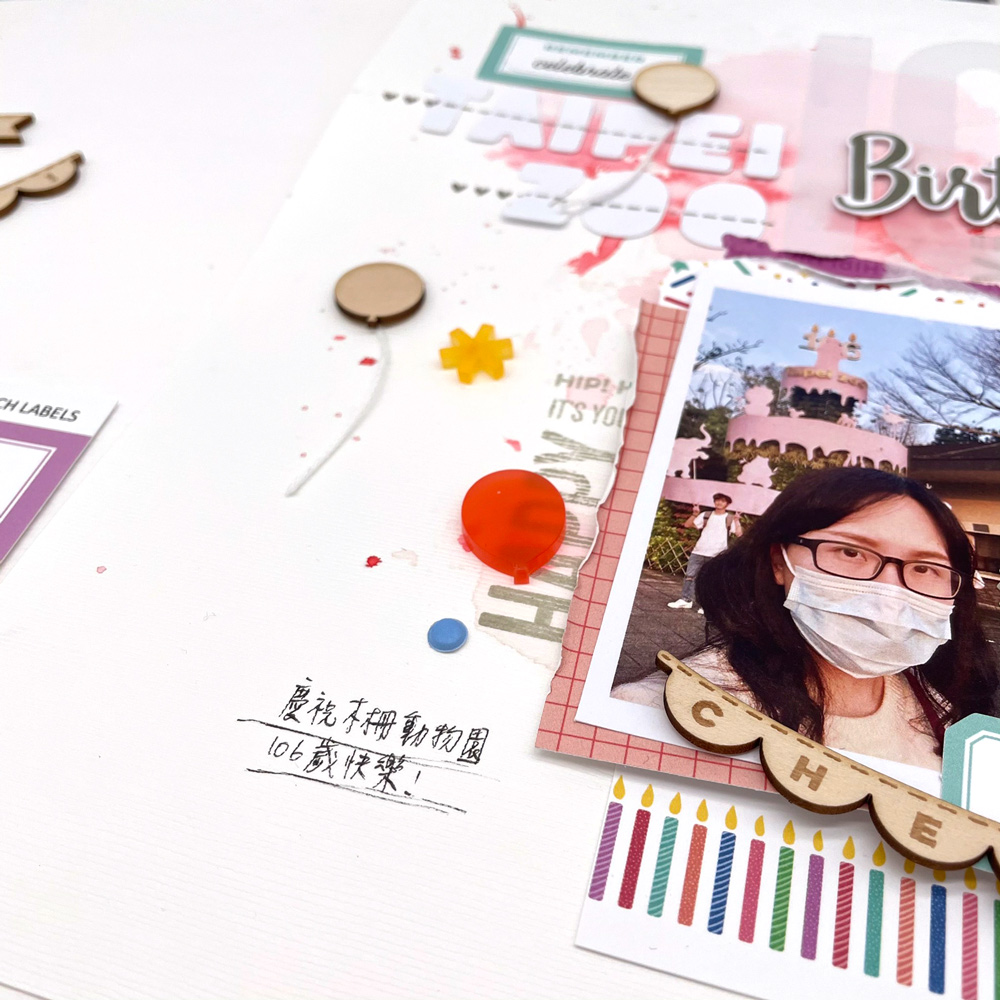
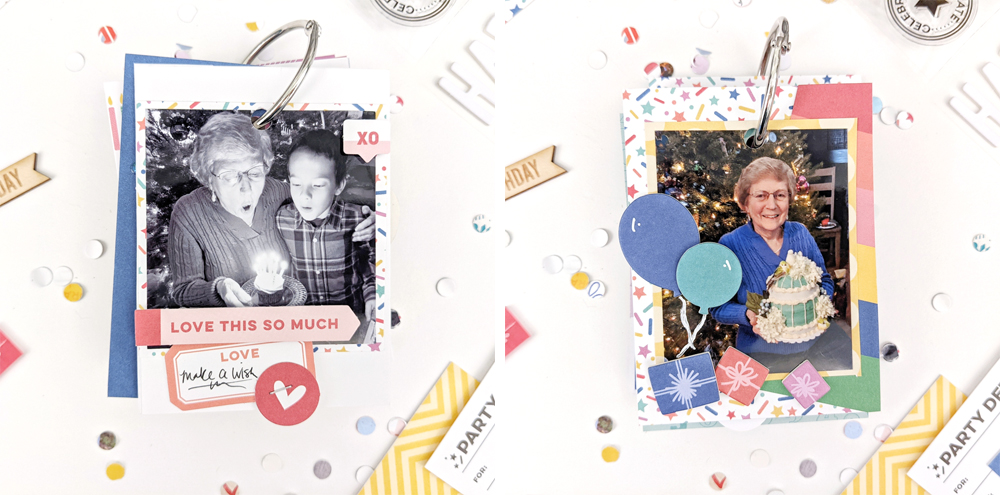
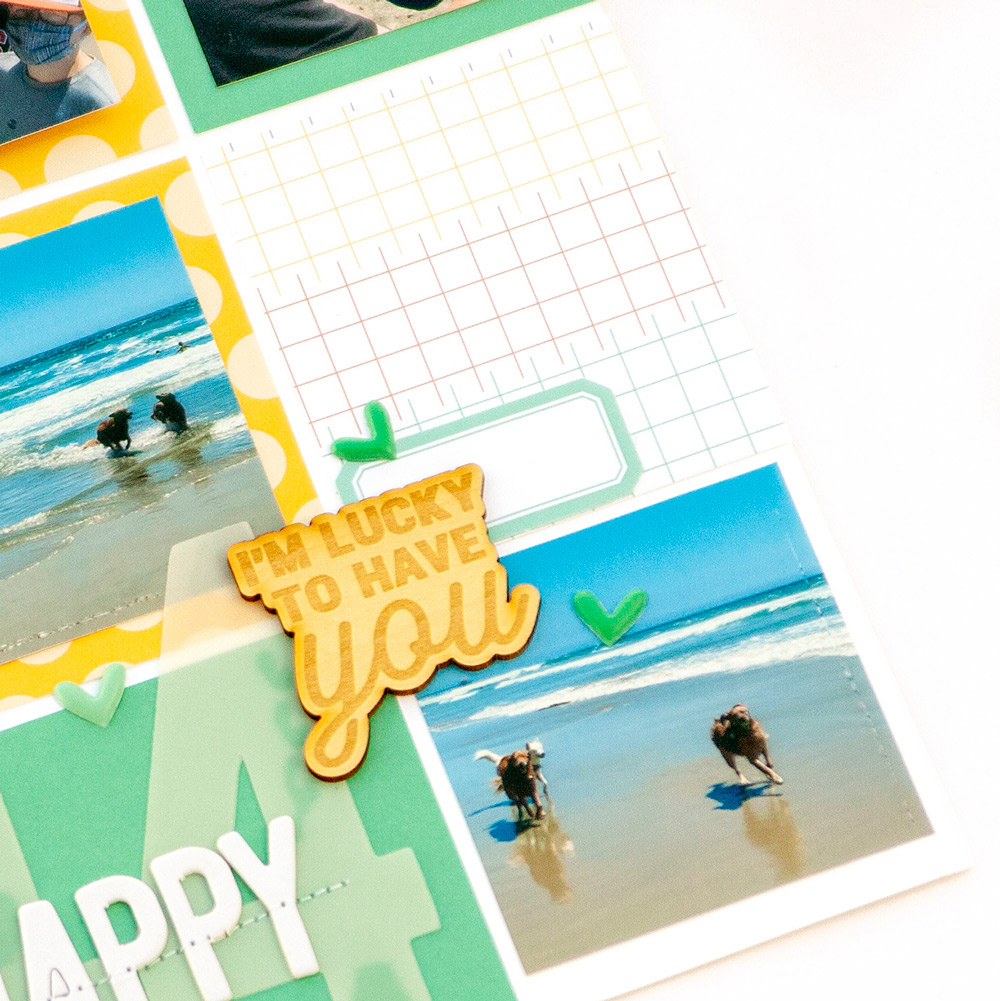
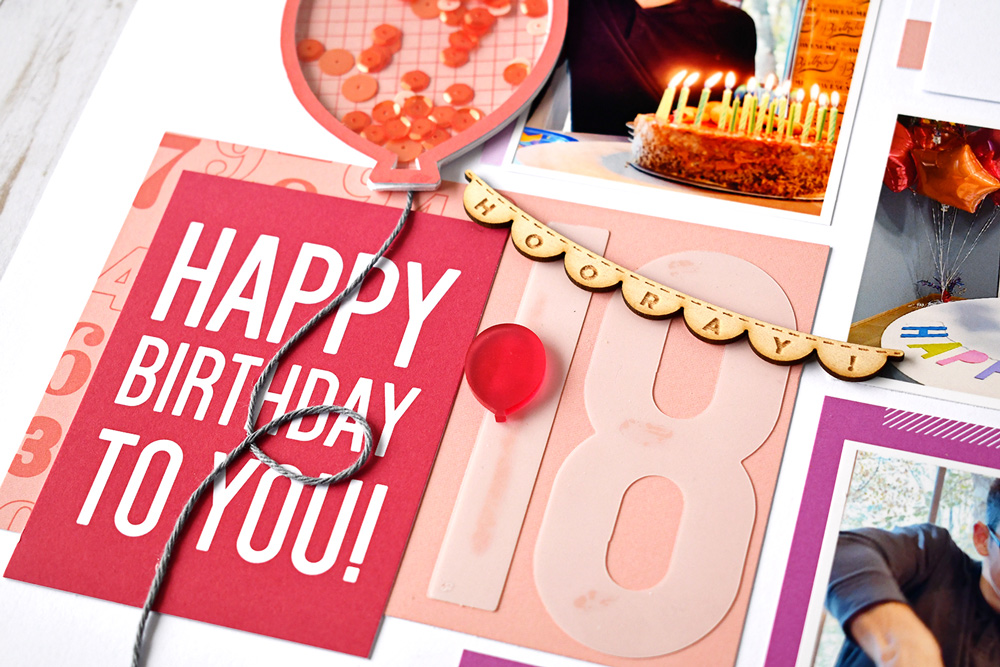
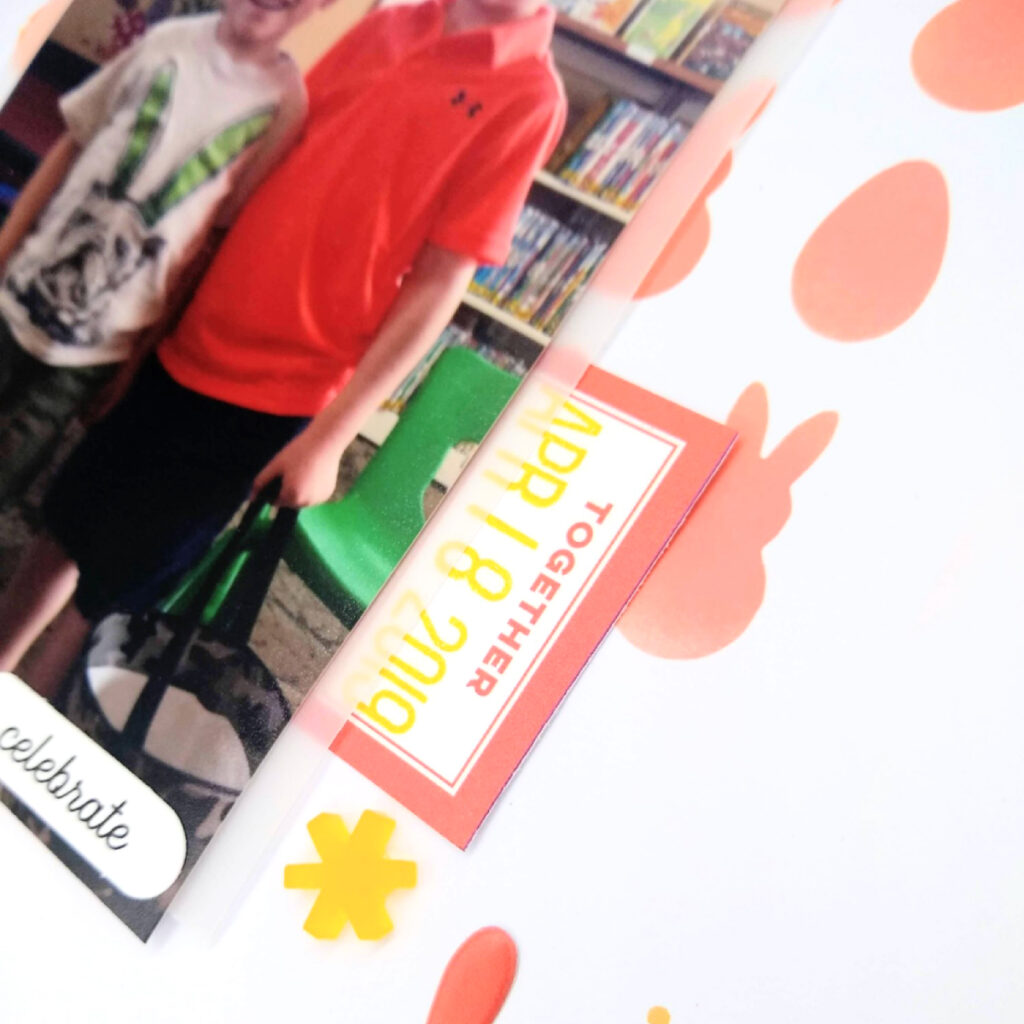
I added the date using the Mini Dated Stamp on a March 2021 Label. For another sprinkle of color, I scattered a few pieces from the Acrylic Balloons and Presents on the page, along with a few Puffy Heart Stickers

To complete my layout, I added a few splatters of ink to each of my embellishment clusters.  I also added one line of typed journaling to the bottom.

Thanks for stopping by the blog today! I this layout has inspired you to try using an Elle’s Studio cut file as a stencil on your next project!

A sneak peek of our April 10th reveal!

Our April kit + coordinating add-ons reveal is almost here and we can’t wait to share with you all the new and exclusive products that will be available soon! Our reveal will be full of the perfect products to document your April stories and take you right into the month of May! This month, our April kit will include 3 – 4 x 6 inch tags, 18 – 3 x 4 inch tags, and 25 die cuts!

Not a subscriber? You can pre-order our April kit now and lock in our $9.99 kit price by starting a subscription today! You’ll want to choose our SUBSCRIBE & SAVE option to get signed up and start your subscription with our April kit. We will then hold your kit and you’ll be ready to bundle and save at our April 10th reveal! Details on how to bundle with your subscription order will be emailed to you once you have purchased this product.

Kit subscribers, don’t forget! Along with being able to bundle any products from our shop that will ship for FREE with your kit during our 24-hour bundling period, starting on the 10th at 8:00 am Pacific each month, our subscribers will also have access to special discounts on select items! These discounted items can be found in our SALE section during our 24-hour bundling period, and you must be logged into your kit subscriber account to see them. Quick note: Our kits and add-ons are available without a subscription each month, too.

We are so excited to share all of these new products with you and see how you use them on your projects! Make sure you set your alarm and mark your calendar for Saturday, April 10th at 8:00 am Pacific! We hope to see you there!

Easter Greetings with Junell Kruzel

Hello friends! Happy spring! It’s Junell here, and today I’m sharing three last-minute Easter cards I made using the March 2021 kit and all the extras! If you have these products on hand, you should be able to craft these designs easily to make someone’s Easter!

Supplies | March 2021 Kit, Jane Tile Alphabet Cardstock Stickers – Light Teal, Light Teal Cardstock Label Stickers, Tiny Shapes and Dots Puffy Stickers – Cool TonesHappy Easter Wood Veneers, Tiny Acrylic Eggs and BunniesCelebrate 6 x 8.5 inch Paper Stack, Make a Wish StampParker Alphabet Stamp, Parker Alphabet Metal Die, Layered Card Metal Die

For the first card I used the Layered Card Metal Die to create a background that was large enough to hold my sentiment and adhered it to my white card base.

I used Ranger’s Distress Oxide in the color Speckled Egg and the Parker Alphabet Stamp to stamp out “Don’t Worry, Be Happy” and then used the Parker Alphabet Metal Die to cut the letters out. I replaced the two letter O’s with eggs from the Tiny Acrylic Eggs and Bunnies embellishment pack and also the letter “A” with a bunny from the same pack of embellishments. Easter whimsy, right? I adhered the letters and acrylic pieces all down with a tape runner.

For this card, I cut my card base out of a pattern from the Celebrate Paper Stack, then layered another patterned paper from the same collection on top. I used a scalloped punch along the edge for some interest. I created the sentiment the same way as the first card using the Parker Alphabet Stamp and Parker Alphabet Metal Die. I also used the light teal Jane Tile Alphabet Cardstock Stickers to add the words “for you”.

My absolute favorite part of this card is the row of bunnies with the cute little tails! I used the Tiny Acrylic Eggs and Bunnies embellishment pack and then added the dots in coordinating colors for the tails from the Tiny Shapes and Dots Puffy Stickers! So adorable! I might keep this card for myself! 

For the last card, I stamped the word “happy” from the Make a Wish Stamp three times onto a 3″ x 4″ card from the March 2021 Kit. I added the word “Easter” using the Jane Tile Alphabet Cardstock Stickers. I layered the card onto paper that I cut using the scalloped Layered Card Metal Die and attached that to a base I made from a sheet of patterned paper from the Celebrate Paper Stack

The cute wood veneer bunny from the Happy Easter Wood Veneers was begging to be used, so I added that to the top along with a label from the Light Teal Cardstock Label Stickers. I cut it in half to use on both the top and bottom of the card.

Thank you so much for reading! I hope this inspires you to make some cards of your own!

Show us the cards that you’re handing out for Easter created with our March kit and add-ons! Post in our Elle’s Studio Facebook Group, or on Instagram using the hashtag #EllesStudio!

Stamping Happy with the Parker Alphabet Stamp and Jackie Ashton

Hi all! It’s Jackie here to share how I used the lovely Parker Alphabet Stamp this month! I just love this bold alphabet stamp, which is a great font and size and ideal for any project, whether you use them on a layout, travelers notebook or card!

Supplies | March 2021 Kit, Tiny Shapes and Dots Puffy Stickers – Cool Tones, Large Acetate Numbers, Happy Birthday Wood VeneersHooray Wood Veneer Banners, Acrylic Balloons and PresentsCelebrate 6 x 8.5 inch Paper StackMake a Wish StampParker Alphabet StampParker Alphabet Metal Die, Layered Card Metal Die

I knew I wanted to use the Parker Alphabet Stamp as a background element on my layout, so decided to stamp the word ‘happy’ down one side and make this my main focus.

As the stamp are solid, I wanted to use a lighter ink pad, so grabbed four of my oxide distress ink pads to use. I stamped the word happy down half of my cardstock, stamping the words in two parts, ‘HAP’ then ‘PY’ with the letters being clear it was so easy to line the words up, but I wasn’t too precise as I wanted the words to look slightly uneven on the page and even had a few letters not fully stamped and also off the end of the page. 

In between some of the blank spaces, I stamped balloons from Make a Wish Stamp using the same inks, and also included a stamped phase word from the same set.

To add extra details to the layers behind my photograph, I die cut patterned paper from the Celebrate Paper Stack, using the Layered Card Metal Die

After adding my photograph to the layout, it was time to add embellishments using a selection of the March 2021 add-ons.

Starting at the top of my page, I added two Hooray Wood Veneer Banners.

I just love these lovely Acrylic Balloons and Presents and wanted to add the balloons to the side of my photograph. Instead of sticking the string down, I left them loose to give them a floating appearance.

To finish my layout I added ’21’ from the Large Acetate Numbers with the “happy birthday” banner from the Happy Birthday Wood Veneers over the top.

I’ve loved working with the Parker Alphabet Stamp and knowing that they are now in my stamp collection I will be using them more and more on future projects! We hope you share what you create using Parker with us, too, in our Elle’s Studio Facebook Group or on Instagram using the hashtag #EllesStudio!

Memory Planner Moments with Marsha Farris

Hey, Elle’s Studio friends!  This is Marsha, and I’m excited to be here sharing a layout in my memory planner.  For my project today, I documented a week of celebrations, and the March kit and add-ons were perfect for it! 

Supplies | March 2021 KitMarch 2021 Print and Cut LabelsMarch 2021 Labels, Jane Tile Alphabet Cardstock Stickers – Light Teal, Happy Birthday Chipboard Stickers, White Puffy Alphabet Stickers, Tiny Shapes and Dots Puffy Stickers – Cool TonesHooray Wood Veneer Banners, Celebrate 6 x 8.5 inch Paper StackMake a Wish StampParker Alphabet Stamp, Parker Number Stamp, Make a Wish Metal Die, Parker Alphabet Metal Die

I began my memory planner layout by printing an undated weekly 8.5″ x 11″ template I purchased from Etsy. I prefer an undated planners so that I can customize the dates with different stamps and ink colors. For this week in February, I stamped the month and dates using the Parker Alphabet Stamp and Parker Number Stamp and cut out the month using the Parker Alphabet Metal Die. I love the bold font of these new stamps! I stamped the days of the week using the Monthly & Daily Tab Stamp, a subscriber exclusive in January, and light gray ink. A trimmed diagonal-striped patterned paper from the Celebrate Paper Stack added to the edge of both pages, framed the spread and added a bit of color to the top of the pages. Then, I printed my photos and arranged them according to the dates they were taken.  

Next came the fun part: the embellishing!  I added the Hooray Wood Veneer Banners and Happy Birthday Chipboard Stickers to a few areas of the spread. Labels are one of my most used embellishments, and I added a variety of them from the March KitMarch Print and Cut Labels, and March 2021 Labels. The new light teal Jane Tile Alphabet Cardstock Stickers were perfect for highlighting a few words on the pages.   

I stamped the small confetti from the Make a Wish Stamp directly on the pages and onto a few of the patterned papers from the Celebrate Paper Stack. I also used the Make a Wish Metal Die to cut out some of the stamped words.  

For documenting my grandmother’s birthday, I created a vellum stitched pocket to hold a little tag album. I created the tags by trimming a variety of patterned papers from the Celebrate Paper Stack into tag shapes. Then, I embellished them with die cuts from the March Kit and stamping using the Make a Wish Stamp. I used a piece of black and white baker’s twine from my stash to hold the tags together. I love that I was able to include so many photos from the day in this little tag album!  

One of the last steps in my memory planning is filling in each day with my journaling. I try to make sure I include the little details I will enjoy looking back on in years to come. As a final finishing touch, I added the Tiny Shapes and Dots Puffy Stickers to several areas on the spread. I love how my layout turned out using these awesome Elle’s Studio products!   

I hope I have given you some ideas using the March kit and extras in your memory planner!  I can’t wait to see what you create!  

Do you love to record memories in a planner, along with your to-do lists? Share how you use our products in your planner by posting it in our Elle’s Studio Facebook Group, or in an Instagram post using the hashtag #EllesStudio!

Easter Moments Recorded with Nicole Kerr

Hello scrappy friends! It’s Nicole here, and today I’m showing you how versatile the March kit and add-ons are and how you can use them to create an Easter themed layout!

For seasonal projects, I love using large photos. I like to find one that summarizes the moment or event taking place for my boys’ album, one that has both of them included. On today’s project, I’m looking back on Easter 2020 and the story of my youngest son and his love for this bunny nose lollipop!

Supplies | March 2021 Kit, Tiny Shapes and Dots Puffy Stickers – Cool Tones, Happy Easter Wood Veneers, Tiny Acrylic Eggs and Bunnies, Bright Die Cut Tabs, Collected Stamp

I created this spread a little backwards by beginning with the right page first. I started with my largest photo. This one in particular went on the right side of my spread, because my boys are looking left. This is a personal preference of mine and I feel that it helps with the movement of the eye around the spread, towards the left page. When using large photos, I enjoy using large embellishments as well! The large “Happy Easter” piece from the Happy Easter Wood Veneers was perfect for this! It was the perfect title! A large label from the March Kit and a few eggs from the Tiny Acrylic Eggs and Bunnies made this title complete!

For the left side of my spread, I used the green Hello Spring tag and a few yellow tags from the March Kit to add layers behind my photos and tie the two sides together. I continued adding wood and acrylic embellishments from the same sets to keep the spread cohesive. I also added a few puffy stickers from the Tiny Shapes and Dots Puffy Stickers. I love the tone-on-tone green! 

Because my spread was very photo heavy, I added a flip up element. Using a tab from the March Kit and the “a little piece of my heart” sentiment from the Collected Stamp, I created the “open” element. Underneath, I added another photo of my oldest son and journaling about the memory of this bunny nose.

There are many ways that the March kit and add-ons can be incorporated into documenting spring and Easter memories! How are you using your kit to document these moments? Share your projects with us in our Elle’s Studio Facebook Group! We would love to see what you’re creating!

Celebrations with the March Kit and Add-Ons with Wei Wei Wang

Hello crafty friends! It’s Wei Wei with you today to share a bit of inspiration. I visited Taipei ZOO last month and had a photo with the big cake celebrating Taipei ZOO’s 106th! The March kit and add-ons were perfect for recording this exciting moment! 

Supplies | March 2021 KitMarch 2021 LabelsHappy Birthday Journaling Tags, Happy Birthday Chipboard StickersTiny Shapes and Dots Puffy Stickers – Cool TonesHappy Birthday Wood Veneers, Hooray Wood Veneer Banners, Large Acetate Numbers, Acrylic Balloons and PresentsCelebrate 6 x 8.5 inch Paper StackMake a Wish Stamp, Happy Birthday Metal Die, Parker Alphabet Metal Die, Hugs and Kisses Stamp

I started by adding a bit of pink watercolor to the background—just a soft application to two areas in the page. I really love the Make a Wish Stamp, so I used words and patterns to fill part of the background to add more texture.

I positioned my photo on the bottom right corner and layered it using the Happy Birthday Journaling Tags. I knew I needed more layers and embellishments because my background is soft and white. I tore patterns from the from Celebrate Paper Stack and wrinkled them to give more texture. I also tucked a piece of tissue paper between the papers to soften the layers.

I embellished with journaling tags from the March 2021 KitHappy Birthday Chipboard Stickers and March 2021 Labels.

The “cheers” banner from Hooray Wood Veneer Banners is super cute and perfect for decorating a birthday layout! I also added the dark blue Tiny Shapes and Dots Puffy Stickers for more interest.

My favorite part about creating this layout was building my title. There are not enough words to describe just how much I love the alpha products from Elle’s Studio! And I have to say that the Large Acetate Numbers and the Parker Alphabet Metal Die are AWESOME! I used them to create my title and I got the stitched look by using the Hugs and Kisses Stamp. It helps my title stand out on the background and gives it a little contrast and depth. I just love how it turned out.

The “Happy Birthday” is from the Make a Wish Stamp and Happy Birthday Metal Die.

For finishing touches, I added some of the cute Acrylic Balloons and Presents pieces and Happy Birthday Wood Veneer balloons.

I really had a lot of fun with the March kit and add-ons and I think the possibilities for the kit are endless! I hope this projects has inspired you to use the kit to create a project of your own. Happy creating!

Show us what celebrations you’re recording using our March kit and add-ons! Post your project on an Instagram post using the hashtag #EllesStudio, or in our Elle’s Studio Facebook Group!

A Birthday Tag Mini Album with Nicole Martel

We are so excited to welcome Nicole Martel back to the blog to share her second project with us this month. If you need a simple and sweet way to record a big celebration with a lot of photos, look no further than a mini album, and the one that Nicole is sharing with us today just shows that they don’t have to be complicated to be wonderful! Let’s take a look!

Good morning! I have a fun birthday mini album to share with you today using pictures from my grandmother’s surprise birthday party to celebrate the BIG 80, which I plan on gifting to her. My family loves it when I create mini albums for them and it’s been a while since I’ve made one!  

Supplies | March 2021 Kit, Happy Birthday Journaling TagsMarch 2021 LabelsHappy Birthday Chipboard Stickers, Tiny Shapes and Dots Puffy Stickers – Cool Tones, Happy Birthday Wood VeneersAcrylic Balloons and Presents, Large Acetate Numbers, Make a Wish Stamp, Parker Number Stamp

The March kit and add-ons are so much fun, and it was hard not to use every single embellishment. I had to refrain myself, because I LOVE embellishments. To begin, I stapled the Large Acetate Numbers onto a journaling tag from the March Kit and then added a few of the Happy Birthday Chipboard Stickers, my favorite embellishment this month! They have such a nice finish to them!

I cut around this photo to use for the album. I just love the simplicity of this page. I didn’t have to do much!

I used journaling tags from the March Kit and Happy Birthday Journaling Tags and adhered them back to back to create this mini. I used the Parker Number Stamp to add “80” within the balloon and then added a few Tiny Shapes and Dots Puffy Stickers and the Happy Birthday Wood Veneer “your special day,” in which I blended some purple ink onto to add a bit of color. 

Here I stapled a Tiny Shapes and Dots Puffy Sticker above the sentiment and then stamped the “celebrate” circle from the Make a Wish Stamp at the corners using purple ink. On the page featured on the right, I embellished with March 2021 Labels, the Make a Wish Stamp, Acrylic Balloons and Happy Birthday Chipboard Stickers.

Here are a few other pages from my mini. This album came together so fast because of the beautiful March kit and add-ons, which also made it super quick and easy to create.

Thank you, Elle’s Studio, for allowing my to guest design for you this month. It was my absolute pleasure! 

Hello! My name is Nicole Martel and I live in Crownsville, Maryland with my 10-year old son, a husband, and Toby (my cat). During the day, I work as an Assistant Branch Manager for a credit union. At night, you can find me binge watching my favorite series on Netflix, scrapbooking, playing with my son, or reading a good thriller. I’ve been scrapbooking for over 20 years and I honestly love this hobby. It brings me great joy to create scrapbooking layouts, cards, mini albums, and even wood crafts. I do a little of everything. I’m so excited to be guest designing for Elle’s Studio! 

Find more of Nicole’s creations at these links, and be sure to leave her a comment letting her know what inspired you this month!

Instagram | Facebook | YouTube

Sketch Day with Jennie McGarvey

Hello, friends! It’s Jennie and I’m sharing my take on a sketch with you. Sketches are never easy for me for some reason, but I love the way they inspire me to create something different than what I would typically make. I love to challenge myself, so I am always happy to try a sketch even if I’m not sure how to see it through, and I was so glad to have created with this new sketch:

When I saw the sketch, I wanted to pull the grid to one side, making the boxes sit flush with the bottom and right sides of the page. I also wanted to use teal and yellow as the basis for this layout, with the striped paper framing it on the top. Here’s how it turned out:

Supplies | March 2021 Kit, Light Teal Cardstock Label Stickers, Happy Birthday Chipboard Stickers, Tiny Shapes and Dots Puffy Stickers – Cool Tones, Grateful Wood Veneers, Large Acetate Numbers, Acrylic Balloons and Presents, Celebrate 6 x 8.5 inch Paper Stack

The photos are all matted nicely on the Celebrate Paper Stack patterned papers, except one I wanted to NOT be matted. This will draw attention to this particular photo AND shake up the page to make it more visually appealing. (At least to me!) Don’t worry, there’s still a lot of beautiful, cheerful patterned paper to make the page special.

Because the title is so involved with lots of embellishing, I wanted to keep the other clusters fairly simple. I also wanted those embellishments to be varied: stickers, die cuts and acrylic pieces!

The same is true with the journaling I included. Simple, yet cute is the way I finished this piece up! Those three puffy hearts from the Tiny Shapes and Dots Puffy Stickers were put in a triangle formation and are the perfect accent to the few words that were needed here.

The title, created with the Happy Birthday Chipboard Stickers and the Large Acetate Numbers is the part that I really wanted to shine. Can you believe I thought about leaving the acetate “44” plain? No, seriously! I was going to leave off the wood veneer and stickers, but I couldn’t do it in the end. I wanted to build it up into a proper title, including the stickers, wood veneer and puffy hearts!


I’m still not sure I’m a sketch convert, but I love the page that I created by pushing myself outside of my comfort zone! How about you?  Do you love sketches?  Do they challenge you? Play along with us and share your take on this sketch by posting your layout or other project in our Elle’s Studio Facebook Group or on Instagram using the hashtag #EllesStudio!

Throwback Thursday Two Ways with Nathalie Leonelli and Suzanna Lee

Hello, it’s Nathalie here for a new Throwback Thursday! The Elle’s Studio blog is a gold mine of inspiration and I recently went back to the March 2020 Design Team Inspiration posts to find my spark! While planning a traveler’s notebook multi-photo spread, I fell upon this wonderful Easter layout by my teammate Suzanna Lee:

This layout caught my eye because its design is centered along a vertical split. I could visualize it as a traveler’s notebook spread and hand-drew a quick sketch based on it. Despite the adaptation to a different size and to double pages, it is easy to recognize the placement of Suzanna’s big elements on my pages.

Supplies | March 2021 KitMarch 2021 Labels, February 2021 Labels, Happy Birthday Chipboard Stickers, White Typewriter Cardstock Alphabet Stickers, Tiny Shapes and Dots Puffy Stickers – Cool Tones, Celebrate 6 x 8.5 inch Paper Stack, Make a Wish Stamp, Parker Alphabet Stamp, Mini Dated Extras Stamp, Make a Wish Metal Die, Parker Alphabet Metal Die

I trimmed two sheets from the new Celebrate Paper Stack for the background and created my title combining the Parker Alphabet Stamp and Metal Die with the White Typewriter Cardstock Alphabet Stickers. I also used the little hat from the Make a Wish Stamp to create a banner.

Now for a fun surprise, Suzanna decided to join me and used her own layout as inspiration. Let’s see how she reinterpreted her first design!

Hiya, scrappy peeps! It’s Suzanna, here! I got the pleasure of scrap lifting myself, though, while comparing the two layouts, you may or not see the resemblance. I kept the basic format of the layout featuring three vertical elements and two horizontal elements, but changed up the “nature” of those elements; using fewer photos and more 3×4 and and 4×6 pocket tags from the kit. 

Supplies | March 2021 Kit, Birthday Cut Files, Happy Birthday Journaling Tags, March 2021 Labels, Happy Birthday Chipboard Stickers, Hooray Wood Veneer Banners, Large Acetate Numbers, Acrylic Balloons and Presents, Celebrate 6 x 8.5 inch Paper Stack

I then upgraded the new version by adding a few more embellishments; the wood veneer swags and shaker balloons. After all, what is a birthday celebration without balloons and streamers, the Hooray Wood Veneer Banners? And, a big birthday such as one’s 18th deserves BIG attention too—aren’t those acetate numbers fantastic? Be sure to swing by my YouTube channel for a video tutorial on how to create the shaker balloons.

We hope this sparks an idea for you to create with using your March kit and add-ons! Head to our Design Team Inspiration posts, find a project that speaks to you and give yourself the opportunity to make the design all your own!

If you’ve been inspire by one of our design team projects featured here on the blog, share your project with us! Join our Elle’s Studio Facebook Group, a place where ES fans can share and inspire, or post your project on Instagram and use the hashtag #EllesStudio!